#🔀┃art-asset-workflow
1 messages · Page 24 of 1
has anyone succesfully used FBX exporter to get FBX files out of Unity? I bought an animation package in the asset store but I need to use them in Blender, etc
I tried using Unity FBX Exporter package and it creates an FBX with no animations in it
hiya! im working on a game asset, but when i created the material and assigned the textures, i get this:

i see diagonal lines going across the texture and moire effect on the face im not directly looking at
is this a new scene? is there any post-processing? are you familiar with the Filtering settings for the Textures? is this an asset you made, or someone elses?
i mean, it looks almost like you have a CRT post process effect going (to mimic older computer screens)
this is an asset i made in a fresh project (samplescene)... am i supposed to do something differnet?
how big is the cube supposed to be? no, using the sample scene is fine. when you imported the textures, they have import settings. what does the inspector of that look like?

the cube is just 1x1
texture sizes are 512x512
it may be high frequency noise. go ahead and enable Generate MipMaps
hm interesting thats what i was thinking but no difference

change mipmap filtering, perhaps
i fear it did not change anything
is it the Unity cube, or one from blender (or something)
unity cube
well, crap.
its using a shader that is applied to the material
show the shader inspector


oh, ok. i am not familiar with that custom shader. are you using that intentionally, or out of .. not understanding?
sorry i dont seem to be getting you? its a shader i created
Ok, and what happens if you just use the built in unlit shader with only one texture, to test?
sure lemme try that
yeah seems to work now 👍
only problem is its only one texture 😅
Ok, at this point, i'd suggest you talk to the guys in #archived-shaders . you are out of my realm now 🙂
why in my .aseprite my art has blue eyes and when i import to unity it has grey eyes?
The video shows MC.png in unity(its suposed to hav the white dot near the eyes, then IdleMC.aseprite in unity(grey eyes) and finally the IdleMC.aseprite, inside the aseprite(white dot near the eye and the eye with his genuine color, blue).
and how can i put the animation like ground lvl, im saying it bc the 3rd frame it has 1 pixel higher than other and in aseprite it has not
Is there a setting somewhere in unity to keep it from prematurely culling geometry?
My shader has pushed this tree/bush's poly faces outward, but now because its larger than it 'really' is, unity culls it too soon

Pretty sure you need to modify the bounds of the mesh renderer
https://docs.unity3d.com/6000.2/Documentation/ScriptReference/Renderer-bounds.html
Assuming you are using mesh renderers
Heh Fortnite bush
add a frame or a deep vignette as UI 🤣 problem solved 🩹
Helloo
Im currently running into an issue regarding generic/humanoid animations
So I'm currently trying out BR200 project from photon fusion
And the model of the character they are using is set to generic. So when I'm using humanoid animations, it ofcourse doesn't work. But when I'm marking the animations as generic and then trying them , it's still not working
But if I do it the other way around (mark both the model and the animations as humanoid) then it's working.
What can I do to fix this and use the animations as generic?
The whole point of the humanoid system is to let you use any humanoid animation with any humanoid character. Generic animations will only work for hierarchies that exactly match the one they were made for and include no retargeting.
i was wondering if anyone could share their workflow relating to adding grunge and other similar details to modular assets? at first i commited to using decals solely, but quickly realised that this method was pretty bad for large grunge (as well as having to use some pretty jank rendering layer tweaking for my tiles). in other (smaller) projects where I haven't used modular environmental tiles, i've simply baked out the texture of a model and then added layers of grunge, grime, rust, etc. in Krita, but obviously for a modular tile kit that'd look pretty bad. any ideas?
why my tire looks fine in blender but after i import it to unity it looks like this


normals issue i think?
yeah ok i look it up
guys im trying to use these assets for my game but their quality is really eurgh inside unity. Is the file quality naturally low or I'm doing smth wrong?

Try changing the compression in the texture's import settings
And if you want "sharp" pixels, set Filter Mode to Point
the filter mode thing worked, tysm

That gameobject is added as a local override to a prefab hierarchy
Which means it's not a part of the original prefab unless you apply the override
Hello, this is a repost from #🛠️┃probuilder cause it’s been 3 days since I posted and haven’t gotten a response. I was recommended to move the question here.
i'm having some issues with probuilder - whenever i press probuilderize, the model's textures seem to bug out (notice the stripes here and there). Anyone know what's going on?


is the numberlock look good?


is the door look good?
the enviroment is dusty-old
i will love an honest feedbeck
Whenever i parent the Button to ButtonPanel the mesh transforms itself in an unexpected way. How can i circumvent this? In the photo, the objects on the left are not parented and transform is ideal where in the right I parented the objects and transforms oddly


Nvm i just remember i can just parent them both to an empty object and will work fine
Hi!, i dont know if this belongs here, but i am trying to create a font out of a pixelart PNG, but when using TMP Font creator, it fails all the time.


ok Solved it my self, The Converter i was using spits out faulty ttf files but otf worked
I just wanna paint with the tile inside the square, but some of the stuff on the side is sticking with it T-T, I sliced the tiles correctly and the other tiles are working as usual, but some of the tiles are doing this

I see a lot of tutorials on creating an UI inside Unity, but I barely see anything about drawing your own UI outside of Unity to put inside Unity. I can draw, but I have no idea about dimensions or what to watch out for. ANyone got more experience with this?
^?
Why do you need to "probuilderize" it?
It doesn't look like a mesh that you could practically edit with probuilder
I didn’t make it myself and it’s actually 2 objects in the same mesh and pro builder seemed like the easiest way to separate them cause I don’t have any 3d modeling software
On a limb I'd say you'd be better off doing that in blender
Assuming you have to select and separate geometry based on some parameter, I doubt probuilder has tools for that
It does I was really easily able to separate I just highlighted the other model and deleted it, only issue is the texture gets screwed up as soon as I probuilderize
If the models are separate to begin with, shouldn't they appear (and be usable as) as distinct meshes inside the imported mesh asset in Project window?
Let me send a ss of the model

when i select one it selects both and in the assets menu u can see they're connected
No way around it then
So is it like a pro builder bug?
Probably, but could be anything
The UV data seems to get fully reset for the other triangle forming the affected quad face
A clue but maybe not a useful one
I'd rather do it in blender than hunt for bugs
Worth learning it in the long run since it's quite a multitool
off topic but it looks like plants vs zombies chomper haha
Im trying to get the exact same effect as this one inside of Unity

But this is the result

I created the above texture in substance painter
How can I get the same effect in Unity URP?
Looks like you baked the texture at a too low resolution (honestly you could do with a smaller tiled texture instead)
Then you possibly didn't export or assign the PBR maps
Additionally the lighting appears different between the two, so reflections naturally will be different as well

"Made" it wrong how?
Not spontaneously I'd assume
There were situations, when wood textures were horisontal in Bledner, but in Unity they were vertical
So, at the moment of exporting it from blender
Not necessarily something that happened on unity side
But, still, I see in URP shader I am not able to rotate the UVs.
Can I edit the URP shader? But for one project only.
Blender's material nodes can't be exported, so if you have some specific Texture Coordinates or Mapping, they will be ignored
When modeling you'd rather rotate the mesh UVs rather than texture coordinates
In unity you can make a Lit material with a negative Tiling property to flip it on either axis
But not rotate without making a custom shader
Preferably you'd likely be editing the mesh instead
You could also edit the UVs by script.
How to bring blender's geometry nodes to unity
You don't

Google gives this https://github.com/unity3d-jp/MeshSync but don't expect full functionality

GitHub
A package for synchronizing meshes/models editing in DCC tools into Unity in real time. - unity3d-jp/MeshSync
I don't think there's any plugin out there that does that fully, and very few that do it partially
It'd be a monumental task to create a conversion for every node, for a given render pipeline, and maintain it on both unity and blender side
And even then there's incompatible nodes because the rendering engines are different
houdini has a plugin for unity
Houdini is a toolset focused on simulation and procedural geometry, as far as I know it doesn't have a shader editor like Blender does so its exporter only needs to worry about one shader
Not an arbitrary number of shaders made of potentially dozens of nodes
A node to node converter is possible, with nodes that aren't fully incompatible anyhow, but that's a lot more work
Some have attempted
https://discussions.unity.com/t/beta-blender-nodes-in-unity/873995
But considering Houdini costs hundreds or thousands, has a much simpler rendering engine and no shader editor as far as I can tell, it's not a big mystery why Blender plugins for the analoguous task are not beyond the proof of concept level
Houdini non commercial is free
Doesn't change the fact the company has more resources
Compared to blender
Yes
how can I make a dismemberment system for rigged meshes? Like how dead space and ninja gaiden 2 has the enemies play differently without a limb and the player can freely dismember any another limb.
Here is how I'm thinking of doing it from blender. Stop me if there are issues with the process:
Make a whole body mesh called "MasterModel." then set vertex groups for each limb. Duplicate the MasterModel and call it the body part for each one (I'll just refer to one of the many parts as "RightArmModel.").
Give the RightArmModel a mask modifier which removes all the body parts except for the right arm. Then at the MasterModel, mask away all the limbs except for the core torso. Then pair the Right arm model and the masterModel to the bone rig.
That way, Unity can have at least 5-6 meshes to work with (the torso the 4 limbs, and the head). What's left is to set rigidbody for the mesh of fallen parts.
Hi I'm not sure where this goes but I am looking for tools that will take a small texture and turn it into a bigger, less repetitive image. e.g. I have some wood samples but they are not of a large enough area. The alternative is I just use a tool to generate wood textures close enough to the samples (I have filter forge, a lesser known useful generation tool).
You're looking for "texture synthesis"
First result from google:
https://github.com/EmbarkStudios/texture-synthesis
This particular tool looks good, though when I used texture synthesis tools some years ago it wasn't automatically better than doing the process by hand
Only because algorithms can't detect what patterns we perceive as repetitive, even if the result was seamless
Ah thank you I knew I had seen some technique - these days its wall to wall AI tools which are hard to wade through!
has Gimp -plugins...
Many of the AI generators aim to accomplish this task as well, but their main disadvantage is that they rely on their training data so when they have to improvise patterns the distinct AI generated look can worm its way into the image
yes I am sure there is overlap but they are too do-all with random issues!
Because your parent object is not uniform scale.
anyobdy know why the crate mesh only appears in specific camera angles?
Your mesh normals are facing the wrong way, fix it my inverting th eface normals
hi, could anyone help me with a probably very easy animation problem?

If it's animation specific then use #🏃┃animation and don't ask to ask, ask the full question.
bruh it was you who first told me to go here
Only you know the question, and you keep asking to ask.
So if it's about animation, provide all the relevant screenshots about the problem and ask in full what the problem is
What do you mean?
alr fixed it


is grass with alpha map and face count of maybe 4 compared to a grass without alpha with maybe 16 faces more expensive in system?
Either could be, impossible to say outright
Hey all, I'm sure this question probably gets asked a bunch but was just wondering what the issue is with the pixel art here? Left side is what I imported and how its viewed in the editor, right side is the game mode. As you can see there's some issues with the overall layout of the pixels.
Also here are the settings on my inspector, cheers!


Hmm, seems like a pixel perfect camera component was all that was needed
Hey in my game i am working on, the main character would look like a blob which would act how ferrofluid acts when it's near a magnet while moving. I'm not sure if I'm clear with the request. Could someone pin some resources I could read to achieve this? I have no idea where to start
does anyone know why exporting a .fbx from blender to unity absolutely messes up the UVs?
first picture is blender, second one is unity


Also how can i fix it?
Do you actually have correct UVs assigned?
If it is strictly visual, you can probably manage it with #archived-shaders pretty easily. Probably could make a suitable pattern using a technique similar to how you'd generate a halftoned pattern, but running a noise through it.
Not sure, how do i even do that?
I'm not really a blender user so not sure how you'd do it there.
nevermind i fixed it, some sort of mapping issue it seems
looks like this in unity now

Anyone know what could be causing this issue with my skinned mesh renderer? Nearly half of the polygons dont want to render. It only happens sometimes and turning the game object och skinned mesh renderer off/on seems to solve the issue
What it looks like vs what its supposed to look like


It only happens for 2 of my meshes as well, the rest dont seem to be affected
And when I say sometimes, maybe once every 100 times this mesh spawns into the game. But once one of them get this bug, others follow.
Hmm.. How many vertices do those meshes have?
This is a screenshot of a texture in Substance painter

This is the screenshot of the same texture with the same maps in Unity URP. How do I get the same effect as above inside Unity?

Not sure what I'm looking at here, like what is part of the lighting/model and what is part of the texturing
Make sure your non-color maps (roughness/metallic/AO) are not marked as sRGB in the texture import settings
Select the texture and look at the inspector
In unity
Found it. Unchecked the sRGB box, yet no change

I still can't tell if the smoothness/roughness is scaled incorrectly here or what
In any case the lighting is going to make a huge difference here, especially with shiny surfaces
Your firsts two screenshots look pretty similiar, just different lighting.
The first one is from Substance painter
I know
I chose the Unity URP metallic standard preset while exporting the textures to Unity
Should I choose a different preset?
I don't know about URP, but use whatever matches your shader/material on the unity side
Show the unity material?
Its a standard URP lit shader

Oh you don't have a smoothness map at all
Adjust the smoothness down a bit, should make it match your substance painter screenshot a bit better
Lowering the smoothness will make it less shiny
It's lit here by a strong light
You also need one in Unity
Can't see it in the screenshot here but substance usually uses an hdri for lighting
Then I don't know what you want if it's not that or lighting.
@timid sentinel #1180170818983051344
i've heard that this doesnt actually change anything, or does it?
why is the asset turning pink the moment i enter play mode?


It changes the texture from gamma to linear color space, which is what you want for these non-color textures
A 0.5 gray in linear would be like 0.75 in gamma
The only case where it would not matter is if you have a full black (0) or white (1) texture
interesting, that's good to know
what can cause this kind of shimmering on a white texture?
Lack of mip maps perhaps?
Anti aliasing might help too
Point filtering is another possibility. Or some combo of each.
Do someone know if its possible to get cubeworld character assets?
it is because I want to make a game with those kind of graphics but I will make the assets in the end
discussing ripping assets from another game is not allowed here
14250 (i know its a lot, im no 3d artist and havent optimized it unless i have to 😛 ). Do we think this could be the cause of the issue?
Nah thats not an issue then, was just a thought
Pretty difficult to debug sadly since its such a rare occurance
Check the warning messages in the mesh renderer; it seems that you have extra materials, some of which might not be properly set up.
Im working on a game where I need good resolution for my art. I made a car in 1080 * 1080 and I added it to Unity as a 2d sprite.
somehow the art becomes pixelated whenever I rotate the object its attatched to.
Is the camera the problem? Im not to familiar with this.
It shouldnt be pixel art, I want solid smooth art.
is there any way to use 2d assets but make it look like 3d if we lock the camera at a certain angle? is it possible or will it look too unreal
it has been done in games before but it depends what kind of look you're going for
What are your import settings?
If you plan to scale or rotate you probably want filtering and mips enabled, and a max size large enough.
is there some way to export keyframed animation of geometry nodes from blender to unity?
i am able to export geometry but not the animation of geometry nodes parameters
Keyframed, no. You could probably do a pointcache or vat animation though.
And how do I do that

GitHub
Vertex Animation Texture Tool. Contribute to liamlangli/vat development by creating an account on GitHub.
does anyone know what pixel x pixel the celeste characte ris
anybody have a clue on why this is appearing here in Unity, but not in blender?


Because that is a degenerate/nonplanar quad
Triangulate it properly before export
I create texture on substance also the specular map to have reflections.
When I import in a Unity Scene I notice the skybox flat every reflection I did in the specular, the result I want to achieve is the view I have in the Unlit Draw Mode (picture attached)
I'm building for Meta Quest and for performance I dont want use directional light, there is a way to achieve the result I obtain with Unlit Draw Mode and build it?


Pretty sure "unlit" mode is just a directional light that rotates with the camera
If you want no lighting you can use unlit shaders. If you want cheaper lighting you could use legacy shaders like diffuse. But using the default PBR shaders without a light is kinda silly.

#archived-lighting Looks like "light bleeding"
You can apply a bit of shadow bias to fix that IIRC.
im haviung trouble making this tilemap work

specifically the 4th item is supposed to apply
when it's right under the top layer
since it's shadowed, but I can't figure out how to get it
and then the rest will be the last one
which is my general fill
Don't crosspost please, this belongs in #🖼️┃2d-tools
hm ok ill ask there 🤞
tried that and it fixed it, imma read up on it now so it actually makes sense to me 👌
Hi guys should I use Cycles or Eevee render engine for my game assets in blender?
doesn't matter unless you're actually rendering out the images for some reason
Oh so evee is enough for game assets
its more like it's not something to worry about at all because your assets will inevitably look different in engine
using eevee is basically pointless
it'll look different even my asset rendered with cycle or eevee?
rendering just produces the 2d image. It does not represent how your asset will look in Unity
i get it now, i can export instead of rendering stuff
Hello everyone! Happy easter! I'm done with the inventory part of my UI (see here: https://www.youtube.com/watch?v=reW17EALIwg) but now I want to implement my character (current in the video is placeholder) along with equipment swapping.
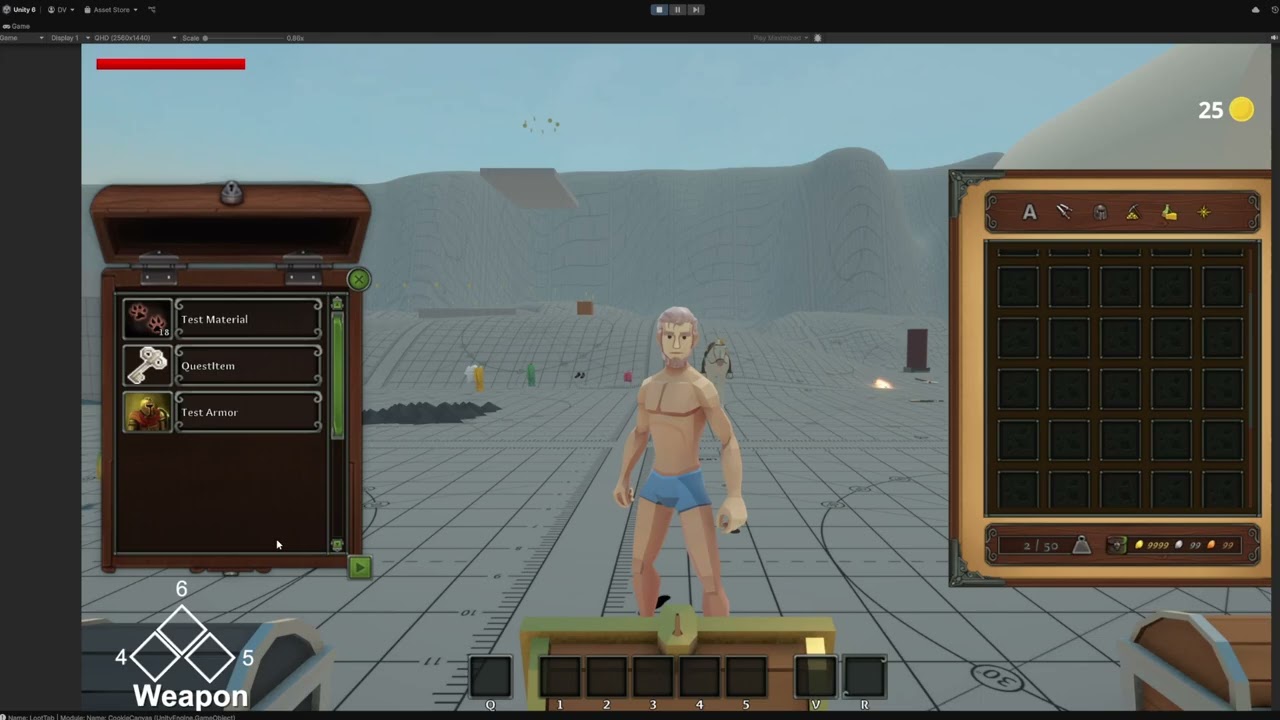
And I'm kind of wondering how to go about it, what's considered the best way to do so. I know there's ways to do it with seperate fbx files attaching to the character, or just put all armor, hairstyles, etc. in one .fbx file and enable/disable it with scriptable objects.
Was hoping you guys would know.
The reference photo is in the back. Im never touching blender again. This is a war crime  💀
💀


hi everyone, sorry if this is the wrong place to ask this, but im trying to import a sketchup skp file into unity, but i think unity only supports sketchup files up to 2017(?). does anyone here have sketchup and would be willing to export an fbx version of my file? 😭 i bought the model but dont have sketchup >.< (apologies again if this is a bad place to ask this)
have been trying to use these for hours but none of them seem to support 100mb+ sized files 
Sounds a bit unlikely to me that a 100mb sketchup mesh will be usable in any game engine even after converting
How's that even possible
somewhere along my blender to unity export my models got this wierd greying thing. Any ideas what it can be caused by?

What do you refer to by "greying"?
The grainy noise, or something else
Screen space ambient occlusion
hmm... do i need to dig somewhere in unity settings and turn that off for now? btw how can i make it ssao friendly if i want that in the future?
In URP it's in your URP asset for the active quality level
Reference to the asset can be found in Project Settings > Quality
Export the mesh without the text, replace with Unity's text
Yes
How "perfect" would it have to be
You can use the same font, same positioning and match the size
Well, do you need dynamic text?
You could of course write a script to match a textmeshpro object to the bounds of the mesh from blender.
Is there a way to preserve pivot points in the fbx export from blender?
I am aware I can just export the cannon and wheels separately but it feels like a workaround, not a solution.


please @ me
Upper left corner of the viewport, switch from 'center' to 'pivot.'
Of course, that is only if you set pivots in the file.
Thanks, I thought it was the dropdown next to that 🤦♂️
I had the worst character in mind to make, i still end up with something even worse than that lol.

I can't actually tell whether it is good or bad because I have no idea what it is.
Potato pirate, obviously
Hi! Does anyone have experience in rendering a photorealistic scene in Build-in ? It's an assignment I have and I kinda struggle to make my scene look great (with all the package choice and stuff), if someone is willing to help me with that I will be eternally grateful!! Thank you so much in advance!!
To make a scene look "photorealistic" you'll need assets that are photorealistic to begin with, or as close to it as possible with correct PBR materials
Then you need a type of lighting that is real world accurate, like a HDRi and probes for ambient light and baked lightmapping for realistic light bouncing
BiRP's quadratic light falloff is not "realistic" but I think it's possible to change it to inverse square
Thirdly you must have colors and post processing set up right, mainly linear color space, HDR rendering and a tonemapping profile
Controlling exposure, adjusting colors and some effects like DoF or SSR may also be important there
Thank you so much!! I will look into all of that!! If I have a specific question about something listed here, can I send you a private message? No worries if not I completely understand!!
No, you can ask on this server
Okay noted!! Thank you so much again!!
Hey guys, it's my first time drawing my own assets for my game, how do you know what canvas size to go for ?
IS there a good way to decimate models polygon count without affecting the UV inside Unity?
Decimate 'without affecting UVs inside unity' or 'decimate within Unity' without affecting UVs?
Both.
So I can increase performance.
Big enough that you won't see the pixels of the image when it's viewed at maximum possible size by a user with a 4K screen (or as big as you care about)
It always mainly depends on how much space the image will take on the screen
Source images can always be bigger than needed, so you can decide later which resolutions of the asset you ship with the application
Unity doesn't have a LOD generator or other ways to decimate built in but there are third party assets for it I'm sure
UVs are vertex data so it's not technically possible to remove any vertex without affecting the UVs
Blender's decimate modifier interpolates vertex data of the remaining geometry so UVs are as preserved as they can be
If you have the source mesh with quad topology it's also possible to dissolve edge loops (which aren't UV seams) to keep UV islands totally intact, if needed for some reason (but what you can do with it is usually limited)
Anyone here got experience with setting up modular characters / meshes and modular character equipment?
I am just wondering if the best practice is to set up seperate .fbx files for each piece of clothing, hairstyle, etc. or if I should combine everything into one single mesh and unload seperate mesh pieces depending on what equipment is worn or hair is chosen by the player.
I remember in UnrealEngine 4 I used seperate meshes. But I don't know if Unity has some kind of limitation in that regard.
I wish there was a best practice
But there are many, and combinations of them, each with significant tradeoffs
The way you implement worn items determines what items they can be, and what items you have will determine how they have to be implemented
So it can be hard to even decide on what to commit to
Thanks! I guess I will go for seperate ones, and do it like I did with the game I was modding in UE4
Are bone sliders a thing in Unity? For example, if I want to make the arms bigger / muscled, to use that bone to increase the mesh size? I'd rather not use shape keys from Blender, simply because it'd require me to do it for every single armor piece.
why do the book not fall? even though i add a rigid body to it?

It's marked static. And don't cross-post
You can make a system to scale bones
Just note that Humanoid Avatars don't support bone scaling afaik
Ow. Damn 😦 I use humanoid because I use the Malbers Animal Controller asset for my humanoid characters
Shape keys will be horrible, since making modular characters I'd need to do it for every single armor piece lol
Just picked up substance painter, never touched it before now. Is it easy enough to set seams and UV unwrap or should I do all that in blender first?
Also would you do SP as a final stage after rigging, while it’s still high poly?
Sorry if this isnt the right place to post this but I am having trouble with my tilemaps. As you can see my tilemap is behind another and I'm sure it has something to do with their position or even layer but I'm not sure what to do to get the Islands tilemap visible to both my scene and game. Sometimes I appears but when I press play it disappears all over again

SP has capable automatic unwrapping, at least better than Blender
Though a proficient by hand unwrap is always better if it needs to be done in a specific way
SP materials can be applied to high poly meshes and baked to low-poly, once the models are complete
Rigging is an unrelated process
Tilemaps like other 2D renderers use 2D sorting
https://docs.unity3d.com/Manual/2d-renderer-sorting.html
If they swap randomly, that indicates they have the exact same sorting priority
thx
does SP have built in baking features or would it be better to make the texture maps in SP and then ship back to blender to use SimpleBake?
and seaming too, i'm used to doing my seams in blender so idk what SP adds there too
It has baking, that's how SP materials are converted into a form usable by other engines
It only has automatic unwrap, I believe, no tools for manual seams
tyyy
my models head came in like this when it is supposed to be a full block like the torso. any help?

you have inverted faces
I got this character. And it has two different UV maps, one for a color map, which has every different colored bit of the mesh seperated in pieces..
On top of that, I have another UV map which is unwrapped as more of a traditional game character UV unwrap.
Since I want to add sliders for eye color, skin color, lip color, etc. I thought it best to use the traditional game char uv unwrap.. so I tried baking the character as you see it into the into the character UV unwrap so I am no longer depnding on this 64bit colormap.
But this baking isn't working. Anbody else got any advice on how I could potentially handle this?


Yo guys ive been trying to fix this from yesterday but to no avail

When i export to fbx with the fbx exporter is turns into a jumbled mess
Hi all. This is heavily related to blender. Is there a workflow/tips to make a unity side importer to interpret blender stuff in unity?
So the blender asset as prefab can maintain the connection, and the importer can also find certain objects/bounds defined in blender, and unity side will add or refer certain components accordingly?
I read that blender's collections don't transfer to unity whatsoever. Is there really no way to define some kind of hierarchy in blender that unity can understand?
I'm looking to define the level, gameplay collider shape, shapes of buildings and its location, defining some spawnpoint and maybe some object spawners etc
Currently i can only think of using naming conventions in blender. Is there any other things in blender (like tag or some metadata) that unity can see/use?
Brand new to unity. I'm trying to import a texture pack onto a VRChat model. But I have no idea how to do it
this might be interesting reading for you: https://unity.com/blog/games/rapid-design-iteration-in-breachers-using-assetpostprocessor-and-blender I just tried custom properties in Blender and they aren't picked up automatically like the article implies so there might need to be some more work done there, like parsing fbx node data, if that isn't some kind of bug on Blender's part. I have a need for something similar in the future, too
One of the problems with any solution in unity's end us that blender immediately seems to update and break stuff.
That's why they moved to using fbx as the preferred transfer method.
Who's "they"?
Unity, when they depreciated support for using blender files directly.
Ok so the importer unity has for .blend, is actually turning it into fbx?
But this default importer unity has, doesn't import the custom properties?
I did find this
https://github.com/mrven/Blender-Asset-Creation-Toolset/issues/31
Which i haven't tried

GitHub
Blender can store many variables into an FBX via it's Custom Properties, theses can be later picked up in-engine after being imported with the AssetPostprocessor. This feature would greatly str...
I guess this is just a batch exporter from blender to fbx. But does this imply that a normal default blender export fbx does not export custom prop?
it should, and the data exists in the file with export custom props checked. I tried with Unity (6000.0.39f1) and Blender 4.4.0. Tried custom postprocessor https://docs.unity3d.com/6000.0/Documentation/ScriptReference/AssetPostprocessor.OnPostprocessGameObjectWithUserProperties.html
Some fbx's do have this info, and the docs mention 3dsmax/maya specifically so it might be Unity not importing it correctly or Blender not exporting it in the expected way (and so maybe something like your link would fix it)
here's the commit that added the functionality your github link mentioned so I'm hopeful that might work: https://github.com/mrven/Blender-Asset-Creation-Toolset/commit/b002776e2394d170b368e52db62b8be4cb06ca3e
Yes i just tried OnPostprocessGameObjectWithUserProperties and it can find my custom prop, in my blend file (no need to export as fbx)
I was exporting as fbx from Blender directly so now I have to go test your way :)
still does not work for me. Can I ask Unity and Blender version?
This is good stuff im glad it works directly on .blend file
Unity 2022.3
Blender 4.2.8
I'm trying to figure out how to... replace or instantiate prefab and parent to the gameobject being processed. But how should i refer to the prefab from this postprocess phase?
Please note that the GameObjects and Meshes only exist during the import and will be destroyed immediately afterwards. This function is called before the final Prefab is created and before it is written to disk, thus you have full control over the generated game objects and components. Any references to game objects or meshes will become invalid after the import has been completed. Thus it is not possible to create a new Prefab in a different file from OnPostprocessGameObjectWithUserProperties that references meshes in the imported fbx file.
I'm also trying to understand this
I guess with AssetDatabase and pass in path?
Cool works
Ok so it works, but if i wanna do some assigning references between multiple objects inside the fbx prefab hierarchy, i can't do it within OnPostprocessGameObjectWithUserProperties bcoz this thing only processes 1 GO at a time
Is there a step where i have access to the fbx parent, so i can do find child all and manage references on this step?
If i'm defining the ref links by what's defined in blender custom prop, then i'll have to store this temporarily during OnPostprocessGameObjectWithUserProperties, for the next step to read again for the ref linking step
OnPostprocessModel
Any leads or terminologies to look at on how to fix these? The trees are becoming dark when baking


"Overlapping UVs" are a clue potentially
The UVs are good

If you look at what lighting is drawn on that UV island it's just blocks
So that could indicate overlap, or maybe texel invalidity though less likely
It's best to enable Generate Lightmap UVs for every mesh in import settings
If that's not enabled and the geometry re-uses UV space across different leaves, they are overlapping
Wait, I'll try something, I kinda remember something from what u said
I'm trying to avoid it, but I might do it just on the leaves
It's also possible that they're now reflecting the ground rather than the sky since looks like you baked a reflection probe, but not reflecting it correctly
But it could be a separate issue
If a shader is "two sided" it does not ensure correct normals, it just renders the other side too with negative normal value that messes up the ambient light calculation
Why avoid it?
Sometimes it's not optimized, so I'd rather place them manually
Sometimes manual is better, but you have to be very particular about the process so it works right
Maybe my workflow is not working on this one. I put the leaves inside Unity using modular leaves. I probably should've built it inside the 3D software so they would share the same sphere normal data
It depends on the shader (or mesh) how it handles two-sidedness
Unity's default way in my experience is flawed since it doesn't flip the normal
A custom shader could flip it based on viewing angle, but at the same time it may be even more practical to duplicate and flip the geometry itself while using a one sided shader
Assuming that is related to the issue we're seeing, I'd do some simple tests, just assigning the material to a quad and spinning it around to see if the lighting is not the same on both sides
If you're sure you are better off using your own provided lightmap UVs, you have to follow all the steps: https://docs.unity3d.com/Manual/LightingGiUvs-GeneratingLightmappingUVs.html
Usually the inefficiency of auto-generated UVs is a small tradeoff for guaranteeing they work right, regardless of bake resolution
Even after I use auto-generate, the shadow is still there, so I'm testing it from scratch to fix it. I'm using Built-in RP right now before I'm using URP and I didn't encounter this problem.
Thanks for the explanation!
Whenever in doubt I find it always helps to try to reproduce the issue in a new scene
Sometimes even in a new project but this looks like we may have some issues from shaders and/or some from meshes but just can't clearly see which
Or something more baking related, possibly
question: how to go about animating a "skidding to a stop" movement? any technical aspects down the road to keep in mind with implementing it

i have a video player with the render mode set to material override, and i have that applied to a plane, im wondering how i can crop the video so only parts of it display on the plane

I'm a little stuck. Anyone have any idea how to make a lightmap for a low poly chacter that uses a 64 by 64 color map? Image shows the example.
I need to make a lightmap and albedo map for my toonshader

Hey folks. I need a bit of feedback please!
I try to upgrade my art asset i'm selling in the Unity Asset Store (https://assetstore.unity.com/packages/3d/vehicles/sea/galleon-style-sailing-ship-295495) with colliders!
But i actually have never done it on this level of complexity, and i'm quite unsure if i did it right or can even improve it.
Basically, it's a convex collider setup, to make it work with Rigidbody. It consists of mostly of capsules and boxes, but the main hull is made from 10 convex mesh colliders to provide the curvature of the ship.
Collision is not 100% accurate, stairs are represented as ramps and the bars of the crow's nest are one big collider. Generally, i tried to use as little colliders as possible, and primitives over mesh colliders whenever possible.
The goal was to enable players to import the ship, shoot at it and get the shots registered, walk around on it or let Unity's Physics Engine take care of swimming on water via Rigidbody.


Elevate your workflow with the Galleon-Style Sailing Ship asset from Lix3D. Find this & other Sea options on the Unity Asset Store.
Yeah that's usually the best compromise you can do
But there's no one right answer
Whether it's more efficient to use more primitives, or convexes for a specific shape depends on the shape
How much detail vs performance you need to have is also very subjective
Ah, okay. Thank you very much for the feedback! 😀
I just got back from vacation and finally understand what I did wrong, I baked the 1st one instead of the huge circle on B


I also reduced the normal strength
Is it possible to make an object which won’t be visible but still will cast shadows?
Cast Shadows option on the mesh renderer
Thanks
I used a fbx to png converter before so that I can use models as png for the ui but I can't find it anymore the ones I find convert without color. Does someone know what can I do to have a png with color of a fbx?
Obviously images and 3D models are not interchangeable. You can render images from 3D models but you cannot just press a button and expect this "conversion" to happen correctly. What angle should the image be captured from? What type of lighting should be applied? What camera settings (field of view, projection type etc.)? I personally use Blender to work with my 3D models, Blender like many other 3D softwares include rendering engines you can use to render the models however you like with highly customizable setup. There sure might be some online tool that can do the renderings very easily, but I have not used one so can't really help you with that
I want to add water plane to my game scene should I use one big plane or multiple smaller planes?, i've had experiences high cpu usage while having one big plane even it is not visible.
depends on the scales we're talking and how far u can see.. best way imo is using mutliple planes / infinite floor using a radius from the center.. (you can recycle pieces in a pooling system) and have it worked out in a ratio that fits ur material/tiling or w/e
then u just track the player/camera for the position
Good idea, thank you 🙂
there are several tools, and even tutorials to write you own in this quick search
https://www.google.com/search?client=firefox-b-1-d&q=unity+3d+models+to+icons
Is there a way to set the light color with Kelvins?
tannerhelland.com
While working on a “Color Temperature” tool for PhotoDemon, I spent an evening trying to track down a simple, straightforward algorithm for converting between temperature (in Kelvin) and RGB values. This seemed like an easy algorithm to find, since many photo editors provide tools for correcting an image’s color temperature in post-product...
URP and HDRP have color temp irrc
Hey all! I created a few fantasy themed melee weapons for a mobile game I am working on. The avg poly count for each of those weapons is anywhere between 6k to 12k & texture maps are all in 2k. Is that an optimal poly count for a mobile asset?
That depends on how many textures and meshes of those sizes you are storing/loading/rendering at once
You have to pick a minimum spec device for your game and test the performance on that
It's a single player game with only the player using those weapons.
Regardless of what kind of game it is you have to test and optimize the performance
How do i make this panel in the middle not reflect sunlight

Kinda depends how you want it to "not reflect" it
You can disable "specular highlights" from the material properties, for one

Preset manager lets you define default presets for assets of any type
https://docs.unity3d.com/Manual/class-PresetManager.html
pretty sure preset manager doesnt take material presets unless im wrong

Ah indeed native assets cannot have default presets via the preset manager
Might be possible some way, but I don't know how
Maybe doing it by folder or in some involved way with scripts
@safe birch Why do you need to have offset values for every material though?
small textures
tile way too much
so tilling was the first thing that came to mind for me
In what kind of situation?
the textures are 96x96 iirc and when i drop them on a object they tile a lot to a point where you can barely see the texture
What kind of object
Ordinarily it's the mesh that determines how much the texture should tile via its UV map
If you have many materials that need specific tiling or offset properties, you can also multi-select them to edit them all at once
Hi everyone! I'm hoping someone can help me... 😭 Sorry if this is a very novice problem to have, but I haven't been able to find a solution so far. Why does my trash basket's wire not come off as convincingly as it does in substance painter? The mesh has to material groups, one is set to being transparent with the opacity map + normal map.


Many things can contribute to it
If the texture is not imported with "alpha is transparency", it's possible color values leak from the transparent space and cause some shimmering
If the material has "preserve specular" enabled, it will reflect even on transparent areas, though it's a bit hard to see from this far away
Also, it looks like the wire texture itself might be semi-transparent
Ensuring it's correctly 0% alpha on the gaps and 100% alpha on the wires might improve it
But instead of that it could be better to just use an opaque material with alpha clipping
Opaque material will pre-emptively fix the transparency sorting problems you would get if you make a transparent concave object's material two-sided (or duplicate and flip its geometry to ensure two-sidedness)
Lastly your lighting in that part of the room doesn't look entirely right
The environment reflections seem too bright, maybe ambient light as well
If it's an interior, it should have its own reflection probe, and ideally baked lighting with light probes to ensure correct ambient light
But that's assuming your environment is static enough to allow for static lighting
anyone know how to properly export fbx files to unity? cuz blender ain’t doing it properly
Thank you!! I actually managed to fix it and now it looks way better. Yeah the ambient fog effect in the room was messing it up a bit so I removed it. It still has a bit of that sheen on the sides, but if I take it away the metal will have no not reflect anymore.

How did you "take it away" that time
I see the sheen in the transparent areas
That should be fixed by disabling "preserve specular lighting"
That's a different setting from toggling "specular highlights" entirely
There is a depth sorting problem, the far side of the bin is visible over the near side
But if you don't notice it, it's not a big concern
I meant the environment lighting, you mentioned it in your original reply.
I disabled preserve specular lighting and it took away the sheen effect
The far side is still visible through the near side although I'm not sure what can be done about that... But its a prop that cant be seen from close up so it shouldnt matter much either way

You can switch from transparent to opaque and enable alpha clipping
Whether to use transparent or opaque alpha clipped materials is situational
With no semitransparent areas the result can be very similar, except opaques depth sort better, but might not appear as smooth
Oh yeah, you're absolutely right. Opaque and alpha clipping resolves the issue. And the detail for the wire does not have to be that high at all, pretty much the goal is just to have it be see through without any of the strange effects.
Thank you so much, your help has been wonderful! 🙏

How do people create modular characters and first person animations for different weapons equipped
if I want to enable read / write on a mesh can I do it to a submesh in a .fbx?
I have one fbx with many meshes but I can only change the settings of the fbx not any submeshes
Image

I have a bunch of meshes as part of one big model and i cant really change the export settings for a specific mesh only everything

These are not submeshes technically, but they still share import settings because they're imported as one file
Import meshes separately if you want to change their import settings
Why the sprite on editor has no border whatsoever, but while actually rendering it in game has that ugly white saw teeth around it?


just finished my first group of building blocks 
I liked the way using blender because i could only model with scripts because im not too good at modelling XD
If someone has any tipps or good guides to improve? - beacause if i move on to roudn shapes it wont be that easy...


Press F. You're probably very far from it.
ok
The crossed out eye icons in your hierarchy are buttons to temporarily hide/unhide objects in your scene view
I want to take a render of an asset I made for Unity inside of Maya. The issue is that I don't know how to correctly map the MetallicSmoothness map to the respective & metallic & roughness channels of the aistandard surface shader. Does anyone have a solution?
hey guys i need your help. im trying to add a new meterial to a object but it wont let me
Hello Guys !!! I have more than a thousand models in a blender scene and I want to export them into unity in fbx format, each 1 individually. And doing it manually is a PAIN . Do any 1 know how can I do that ? I tried asking GPT for a script for blender to do this but didnt work, objects are getting exported individually but their scale and rotation isnt set to 1 and 0. I also tried using a plugin but encountered the same issue.
Any suggestions would be highly appreciated !
T H A N K Y O U !!!
P E A C E !!!
!blender
A supportive community for Blender artists of all levels. Share your work, ask for help, and learn from others! https://discord.com/invite/blender
Definitely possible to automate this
Do u have any possible solution??
Ask in the Blender server, they'll know.
Ok thank you
Hello! I have a problem with probably very easy solution
I want an 3d object to be part of the canvas
but it remains in world space even after i drag it here
There are some solutions but not any very easy ones
Try asking in #📲┃ui-ux
Hello! I was wondering if anyone might be able to help me troubleshoot this issue.
I’m skinning a mesh to an existing skeleton in Maya, and everything looks fine when I test the deformation there. But when I bring the mesh into Unity and run a skinning test, the chest area blows up every time the upper body bends backward.
I’ve painted clean skin weights, and I don’t see the same issue in Maya — the deformation looks normal there. I’m also using a Mesh Baker tool in Unity, in case that’s helpful context.
Here’s a screenshot of the issue:

One common cause is that by default Unity limits the maximum bone weights in quality settings for performance reasons, whereas modeling programs do not
i have a rigged character in blender which i import using fbx export in blender to unity. i made some logic to control the animation in blender. now i have decided i have to add some more animations. how do i do that
how do i reimport it with the existing animator controller and animation logic without without the hassle of setting it up each time i make a change in blender
Also is it supposed to be so complicated importing characters from blender?
where is everyone gone
Animator controller is a separate thing, it remains unchanged even if you change the imported mesh
But if you change around the animation clips in the mesh, you have to ensure the animation list in import settings is updated manually to reflect the changes so the animator can find them still
Or you have had to duplicate the clips out of the imported mesh asset into their individual assets
It may be important to know what "logic to control" means exactly
"Supposed" is relative
Animator.play("walk");
Sorry for not using the coding format I forgot about it
Ded chat
In blender?
In that case also the states in the animator reference animation assets or animations imported inside a mesh
Like I said the reference is maintained in mesh import settings' animation tab, or by separating animation clips into assets
Hey I have a texture thats supposed to repeat itself. I set Wrap mode to repeat in the import settings and applied it as Sprite to an image. It doesnt repeat over the image but rather stretches itself along, what am I missing here?
heres my settings


With the image component the Image Type property determines that
can someone help me fix this broken shop model idk what im doing


Check "inverted normals" in pinnes messages
The material should not be transparent
You may have import warnings about self-intersecting polygons so if you have those or any weird n-gons you'll have to at least triangulate them before exporting
One unrelated question is that a cat on your pfp ?
You don't have to be a cat to post here, but it helps!
Hi, I didn't know where to ask a question about creating a skybox/panoramic texture, so if anyone here can check it up in #🥽┃virtual-reality 🙏
Hiii!!
Thanks to everyone that helped here (especially Spazi), I've made great progress on my scene ! I just have one last small question : I'm using Build In and I've put a post procress v2 with a SMAA Anti-Aliasing in High Quality, it help but it's still not perfect. Does anyone know a good asset for Anti-Aliasing for Build-In ? I can pay for it I don't mind !
Thank you so much in advance!

Supposedly there's TAA in the official post processing package
I've tried it but it actually make things worst for me
Strange. That is the most common high-end solution (barring MLAA by using DLSS at 100% resolution)
Oh it's because it works only on play mode contriary to the others, it's indeed better, thank you so much!!!
It uses multiple frames to converge so I can imagine built-in doesn't have support for it in the scene view.
does it make sense to do a high->low normal bake for plain old LOD models? or is that just a trick for reducing poly count and keeping close up details?
in this case, i have a 28k tri (4k texture) model, a 6k tri (2k) and a 2k (1k), just for different camera distance. i can't get the high poly detail to bake and i suspect it's because i'm just not supposed to use it that way
I guess you can but normally no, all LODs would use the same textures even if they don't perfectly match the reduced poly mesh
The idea is that since they're being viewed from further away it'd make less of a difference
If you have sets of PBR maps with mip maps for every lod level that's a bonkers amount of textures
just for the player characters in this case. they're the only models that have variable perspective views. so i'm making 4k, 2k, and 1k versions. its just the same model with lots of edges dissolved and then baked from 4k textures per component down toa 2k or 1k atlas
the enemy models are at 512 lol
If you think it's necessary, but I'd expect little to no gain for the cost
how would you go about it?
Adjust lod bias for high priority characters if needed
i dont need different poly count models to do that?
You do
You can control precisely how quickly the lod models are swapped to (or crossfaded to if you use that)
With good lods the player should not be able to notice the change
Since the change happens over distance details will become less relevant quickly
How long does it usually take you to make a reasonably detailed high/low poly character?
Including texturing, rigging animation, basically from scratch to when it’s what your considered “done” - in Unity and ready to go (excluding revisions)
That really varies by the requirements of the task, by like orders of magnitude
Looking for assistance for getting the mesh replaced onto the rig 🙏🏾

Can you be more specific?
I would like to get the mesh I imported on the right to stand and function as normal as the one on the left
The body is there but it’s sideways on the rig
Just so I understand what you did, did you replace the mesh in unity, or in the model file itself?
The model file it’s self with UBAE
Exported mesh from Unity (Built a new asset file)
Then replaced original raw and dump
Server's not for modding
Aaah sorry
I kinda wanted to know the answer to that as well. I know the servers not for modding but essentially it’s not a modding question. It’s essentially a rig and bone inquiry. And I didn’t see it being against TOS , but if I’m wrong please let me know 😂 i don’t want to be “that guy”
Vertex groups of the mesh must match the armature's bone names
Has anyone tried rendering isometric tilesets from something like 3d objects from blender for a 2d game? Asking if theres an angle to this so I can get them to line up (I'm new to handling tiles/etc). I rendered them at the angles above, pulled them in, but they don't seem to line up in the tile palette. I'm rendering a bunch of other 3d objects so thought I would give this a go as an easy way to make tiles... just need a little help or push in the direction of understanding haha.


Rendered at 512 resolution.. the sprite settings were unchanged on pulling it into the tile palette. I played with it a few times but consistently get overlap issues
Thank you!
trying to export this into Blender as an FBX but it looks like this?


"The source object contains a reference to a texture file. As a consequence, the exported FBX will contain an absolute reference to this texture file" is the only warning.... and that is only shown for like one texture I think?

What's the "this"?
If you believe it's a texture issue, import your texture, make a material that uses it and assign it to your mesh in scene
It is a modding question inasmuch as there may be totally unexpected issues due to it being modding and not just a stock unity scene where the variables are more controlled.
hi guys, Im trying to setup a PBR material in Unity 6 URP.
so far I'm able to wire up correctly base (albedo), normal and AO maps.
what about height map? which texture should I use from my PBR textures? I have Displacement for example, but when I put it, it behaves weird
what is the standard way to setup this?
this is how the displacement texture looks

Hi guys! I'm looking for some help regarding if there is a more efficient way to make prefabs (I don't entirely know if this is the right term) in my world.
My problem is fairly simple, I have a bunch of assets, I want to use a select number of specific assets to build something, that in the end I'll make into a prefab, and I'll be able to place that thing down multiple times, fairly simple, however right now the way I go about this is that I put down the things manually somewhere in the world, since I want to be pixel perfect making things pixel perfect gets very annoying when the coordinates are in the numbers such as [4252, 0, 1783], its just annoying to make the fine adjustments, is there a way for me to easily get into some new space, and be able to build whatever I want basically in a vacuum that doesn't affect my main scene or world? Or any tricks that you don't mind sharing with me regarding how you work with assets that you would have loved to know when you started out andd you think everyone should be using that. (This last part is just knowledge farming from my pov, sorry)
I believe displacement maps are for displacement when you're tessellating a mesh, and wouldn't work as height/parallax maps
Or they might but parallax mapping is situational at best so you rarely need anything in the height map slot
I created this clearcoat material in Substance Painter which I want to bring into Unity URP. How can I do that? I can't see an option to export a clearcoat map

Even if there's no export template, you can still export maps manually
The urp complex lit shader is otherwise the same as lit but it also takes a red/green mask map for clearcoat
Does Unity work well theses days with substance 3D? Teaching myself substance 3D now and my plan is procedural textures created in substance designer, applied in substance painted on stuff I model from blender. Heard mixed things about using the substance plug in with Unity
The old plugin was shit. There’s a new one I haven’t tried yet
You could always just export as PNG though
My gut just tells me to avoid it even though the idea of it is nice, I’ll probably just go the PNG route
The only nice thing about the plugin is that you can generate variations within the Unity editor
There’s no difference at runtime
That does sound nice
guys can someone tell me the reason of this pixlated look on the model as i changed the material and still this effect appear on the model
SSAO
Tweak the settings of the renderer feature until it looks better
Smaller radius may help
Hey guys, I've been trying to get better at 3D modelling (i'm a software dev 😅 ), Does anyone know why my tree model looks bad? What can I do to make a better tree next time?

(other than the leaves transparency issue, not sure how to fix that)
"Preserve Specular Lighting" next to transparency settings in the material
TY mr Spazi for the help , I'm Grateful to you


Thank you! I’ll look into this
Guys, how do you change multiple sprite pivots at once? I imported hundreds into Unity and can not find it for the life of me.
I have a simple object, created in Blender and exported as a .fbx file that I intend to use as a mesh for a particle effect. But for some reason the particle system won't accept this object as a mesh. Can someone explain why?

Sounds like a job for a script!
Are you dragging in the prefab or the actual mesh from inside it? (You can expand a prefab with the little arrow button on the side)
Oh wow. I didn't know that arrow did anything. Thanks!
Is that really not something that a lot of people need during development? I realize that when you draw your own art - you can maintain consistent ones where you need them, but the Unity Asset Store exists for a reason.
There are lots of useful features that unity doesn't have, but which can be added with scripting.
Hey everyone,
I’m really stuck with creating a tilemap or tileset. Like i know how to work with the tools but I bought some assets and they feel way off.
Is there someone who is willing to help me with this? I really need some live help where I can share my screen and get some guidance through that.
Maybe I’m doing something wrong or idk…
Please dm me if you can help me
You can't change the pivot of a mesh. To do what you want, use an empty transform as a parent of the cube and rotate that
im trying to use a cube as the pivot but its not working
wait what?
i need a parent of a parent to do it?
So the castle is a child of the cube, and you want to rotate the castle, but with the pivot at the cube's origin?
yes!
Yeah it's what I would do at least
Cube
CastlePivot (with position 0,0,0)
CastleMesh (With the offset you want)
Then you rotate the pivot object
i must be confused cause its not working. cube is at the position i want, then empty with 0,0,0, then the castle is positioned so its at the middle of the cube so it can nicely rotate around it. but the pivot is still at the castles origin.
Did you make an empty object between them in the hierarchy?

And you rotate the pivot object?
yea, its at the castles origin instead of the cubes, and im pretty sure we want it to be at the cubes.
okay that sentence was worded like an idiot
No, it should be at the cube origin. So you can rotate it with the same pivot as the cube but without the cube rotating
yea thats what we want
i dont know why all objects go to the bottom childs origin.
i could fix the origin in blender but i really dont want to have to constantly import and export back and forth to hit the perfect point
What's not working with the hierarchy approach?
both the pivot and the cube use the origin of the castle
if the castle moves the parents origins move with it somehow?

Well it should be pivot, not center
Are there any tools to convert sprite to masktextured sprite?


Hello,
I have been creating some 3D Models for University using Photogrammetry. The goal is to create game-ready photorealistic asset workflow. Right now I am looking for industry professional feedback on these models, to see what could be improved or changed in the workflow. The end of the Form also contains the full workflow I created and used. I would be very greatful if you could check out the models and give me honest feedback.


Google Docs
Hello!
As a part of a university project I have created three photorealistic 3D models using photogrammetry and have tried my best to optimize them for use in Unity HDRP. I'm looking for feedback from industry professionals on the game readines of these assets. Your feedback and comments are greatly appreciated.
All the models and textures wil...
How do you reccomend making meshes & textures for level geometry?
In most cases, you just draw the masks...

Did you really need a different material and set of textures for each LOD?
That's one of the feedback i got from someone else too and it's good feedback to have! So thanks, I will have to look into that more! 🙂
(If there is any chance you could fill in the entire form I would mega appreciate it, but if not all good)
I'll not be able to right now, since I'm on mobile and can't actually inspect the objects.
Are there colliders?
No colliders, right now i'm just looking at the modeling part of the process, trying to figure out what I need to change in this workflow. After I have the modeling part down I will look into colliders.
Those poly counts serm pretty extreme, though on my tiny phone I can't really see if the detail justifies it.
i made a flat plane model in blender and exported it as fbx. importing it into unity made it a prefab but when i double click the prefab it opens the windows paint 3d app. how can i fix this?
Yap, they are likely too extreme and it's something i have to look into in the future. Do you have any good suggestions on how to judge the appropriate poly count, or is it just a skill you get the more you make the models?
nvm i fixed it by manually making a prefab instead of using the prefab that was made when i imported the model
A good rule if thumb is to look at the silhouette: any point that can be removed without changing the silhouette visibly at the intended on-screen resolution is useless. (Unless it is there as a uv seam or something, of course. )
If your lod0 and lod3 produce the same pixels in game, you are too high.
If course higher point counts might be useful if you are doing vertex animation or something, but that is rare.
I noticed that you left out the mask and normal generation from your workflow?
Is it just a bake off the high poly in painter?
You seem to be using entirely automatic decimation? A decimation tool that takes curvature into account might help.
Yap, more or less... I clean up the high-poly a tiny bit and just bake all the textures in substance painter.
I do notice that you have so much unused space in your lod0 texture that you could probably pack the lod1-3 textures in the unused space
And then just use a single material/texture set
One thing I immediately notice on opening up the package is that it just dumps the files into a models/ folder in my main project assets instead of having a proper root directory.
I also can't help but think that the scale is slightly off. (banana for scale)

The normals on the banana could use a lot of work, and the surface in general
(Also, you misspell banana in the asset. Not the worst thing, but for a school project best to be polished in stuff like that.)
Hi
Anyone have tips with working with Unity, managing 3d model/materials etc asset, using Blender asset browser?
Can blender asset browser point to a relative path, to the unity project folder?
that looks sick m8
I'm a big sw fan so you got me right in the bias

Hey, can anyone venture a guess whether manually vertex painting in your 3d software is better than vertex painting in unity itself? Does unity's solution take up more space or something?
Hello! I was wondering if anyone could give me the best Blender course tutorial to full utilize and learn all of Blender.
It should result in identical data in the build, because imported meshes are converted to the same format.
!blender
A supportive community for Blender artists of all levels. Share your work, ask for help, and learn from others! https://discord.com/invite/blender
HELP! Just starting a Unity project after not using Unity for a few years and I'm downloading a few asset packs. Even though the asset packs say they're good for version 6+, all the assets show up pink. I've tried two different packs so far. Normally I'd say it's because it can't find the textures/materials, but they seem to be loading (mostly) fine. What am I missing or doing wrong? Thanks.

You want to make sure they're compatible with the render pipeline youre using, built in/URP/HDRP
It says it is.
I'm getting this error, don't know if it's related...
"Lighting data asset ‘LightingData’ is incompatible with the current Unity version because the scene it was baked for was not serialized. Please use Generate Lighting to rebuild the lighting data, or assign the target scene to the Lighting Data Asset in the inspector."
Still having this issue if anyone can shed some light on it.
Which render pipeline are you using and what asset is it
Hi. What's the proper way to parent objects in blender, so that it gets parented in unity too?
Just parenting ordinarily
SOrry yes. Something else was the problem
URP and it's a couple of the Nature Manufacture asset packs. The Dynamic Nature Mountain Tree pack is the one I've got loaded right now.
The assets for URP are contained as a .unitypackage within the asset, it's not automatically compatible
The lighting warning is not related, and not serious
So what do I need to do to get it to work? If the asset pack lists that it's compatible, should it not be automatically compatible?


Seems like a very weird process. But it looks like its working now. Thanks.
How can I do lighting similar to this?

There’s no lighting there, just gradients
So, do I just remove any lights in the scene?
Yes and use unlit shaders
Ah, so unlit shaders are the key, understood
Other half of it is to basically draw the shadowing into the textures of the models
Is there a way I can pull one of these tree assets out of Unity to edit in Blender while keeping the textures intact?
Loading assets, the textures seem to be loading fine and being assigned correctly, yet the material an object are still rendering pink. This one doesn't have a nice handy little URP updater scene so what else can I do to make this render properly?

that's the standard built in material, you'll have to replace it with the URP equivalent, which I think is URP/Lit
Ah! I see! Thanks!
Anyone have a good workflow for creating a motion vector map for a flipbook? I've never made one before. I have access to all Adobe tools if that's helpful.
JangaFX have good tools; they used to have VectorayGen which made it super simple but it got deprecated (though it's still on the asset store).
Currently doing some tutorials, and suddenly the objects in the Scene look like this, is there any way to fix it, and do you know why it happened?

Referring to what problem specifically
The pixelated edges?
Yeah
First I'd try restarting the editor
What'd you do when it happened?
Even in Game view I have the same issue, but when I changed it from Free Aspect to Full HD, the problem goes away. Is there any way to do the same in the Scene view? Does it need more performance or something? Btw, I didn’t do anything, like, the problem just showed up one day when I turned on the PC, It’s been like that for a few days now
Does it occur in a newly created project of the same version? On other projects with different versions?
Yeah, it's the same version and same project
That's not what I asked exactly
I mean, I have no clue, this is the only project I have 
Then I'd make a new one to test
At this point you could go poking around your project settings, turning off and on post processing, rendering features and resident drawer (if applicable)
But ultimately you need to determine whether the issue seems to be contained in your project's assets, project's temporary files, the editor itself, or more than one project with more than one editor version
Not as daunting as it sounds
If a new project with the same version doesn't have the same issue, you know it's something in this project and nowhere else
I’ll see what helps, thanks
guys what can I do for my game if I have 0 talent for drawing (pixel art)? I have a lot of stuff done to my game mainly at coding and like 80% of the stuff I need to finish it is drawing the assets and similar stuff, but I just cant. What u guys suggest me to do? (considering I cant pay for someone to do everything needed)
You use free assets online and accept they won't match or make your game look professional. Or you change your art style to something you can do or find more assets for.
There is no solution here where you end up with a nice, cohesive, unique looking, game.
The thing is you don't need talent for art, only hard work
You pick up the (drawing tool) and draw
Start small like you did when coding and build yourself up from there
You can get something quite decent and unique in a short time if you put the work into it
pretty sure it won't matter @delicate granite . i will screenshot some rotations in my armature in a rest pose, from blender to Unity


as you can see, the rotations are all over the place, but the armature is in rest position. i animate this all day long with no issues at all
wow okay, I guess maybe something else is causing my issue.
Because this 1 problem is part of a bigger problem im having. I have 2 horses
1 old prefab asset and 1 new fbx asset,
I copied the components from the old prefab asset using a script over to the new fbx asset but the colliders are incredibly small even though the scales and everything are 1:1 for both models.
when I update the collider size values the collider re-draws and then becomes visible.
old asset - new asset


I was thinking this was possibly due to import error but maybe I was wrong in that assumption
colliders are visible sometimes, in Scene view, depending on settings.. if they are visible in Game View, that can also be a setting. if they are visible in a Build, that is a problem
above view was scene view
so far, this just all sounds like new user confusion, not issues. have you done the Pathways on the !learning site?
:teacher: Unity Learn ↗
Over 750 hours of free live and on-demand learning content for all levels of experience!
it is also possible that i am not grasping the issue
yes I have done some, though its also been some time. I dont see how this could be due to user confusion.
the objects are essentially the same, all im doing is copying components from one to another using a script, but when I paste those components using the script the collider is incredibly small/non-existent even though it uses the same values the previous collider used.
the scale on the imported FBX does not match the original. this is what i have seen in my many experiments. but, what is the issue? resize the colliders and be done, or is there something else?
the issue is theres like 20 colliders here,
I dont want to have to re-size them again when they already match quite well
scales on both of my objects are 1 : 1 and the dimensions arent different at all.
the horse in the back has the same collider components on it, but the colliders on the horse in the back are incredibly small even though they use the same collider size values for the one in the front.

back horse transform

front horse transform

show the root object of both


ok, show the Hierarchy of both
oh, it is showing.. ok
in the Project, when you click the Imported FBX, and select Model, what does it show?

convert units is on

does it change when you turn it off?
yes itll scale really large I believe, let me try again
nvm nope convert units has no effect
ok, now what is the Scale under the Armature of horse2?
I am screaming


that is what i meant with the scale issue on import
you're so right and I apologize, I swear I had everything imported properly
i got so frustrated with it all that i ended up buying (better FBX Importer)
thank you!
THIS, THIS was litterally my next step lol
no worries, it is not you.. it is a strange issue
what FBX importer do you use?
i totally recommend it
if there is something better than this I will highly consider it, if it doesnt cost an arm n leg.
i just use that "Better FBX Importer/Exporter" on Blender side, but i just use the Unity standard Importer on Unity sde
it is still a bit tricky, but with 'better fbx' you can tell it to ignore armature node, and get it to work. it took me a while to figure out the flow, and i just got finished moving, so i have not done it for a while (can't recite it) but it is possible
I am going to have a look into this, it seems very helpful!
https://www.youtube.com/watch?v=O5s1pW6SVIU
I saw someone mentioning there could be a trojan in Better FBX, but that was a reddit user so take that as you will.
https://www.reddit.com/r/blender/comments/1dzsjfi/is_there_a_trojan_in_the_better_fbx_importer/

Better FBX Importer & Exporter for Blender v5.0 can export game friendly 3d models for Rigify Auto-Rigging System, including humanoid, quadrupled, and any user-defined armatures.
https://www.mesh-online.net/

Reddit
Explore this post and more from the blender community
i will run it through VirusTotal.com, but i am pretty sure if they say anything, it was a false positive
curious what your results are 🙂
Im still going to do some research on whether It will speed up my workflow, if it will then i'll look into implementing it further.
4 out of 71 found similar code to a trojan. those statistics suggest false positive
Thankfully I only use magnums
aww dang no gifs
well anyways thank you again @gritty raft!
Howdy! Made my first model in blender and attempting to drag the FBX into unity gives me this


your normals need direction fixing. use blender for this.
you need to copy the textures over too. if your material is complex, you will need to remake the graph in Unity
but how do I know which normals to fix if it looks fine in blender lol
Just followed a tutorial and the guy is 'fixing' the clearly broken normals in blender when my model looks fine
google how to show face direction in blender. where it is red, reverse it. it is almost automatic in most cases in blender
Oh yeah wow the whole thing is red
besides the handle
When I flip the normals it still shows red oddly
did you flip or 'recalculate outside?
So this is 'showing face direction'

Then I do
mesh > normals > flip

And is still red
i stated the term to utilize..

if that does not work, you'll need to talk to the !blender server
A supportive community for Blender artists of all levels. Share your work, ask for help, and learn from others! https://discord.com/invite/blender
or perhaps figure out how to select certain faces, and manually do it
you might also have double geometry. the blender server should know
Turns out if you dont select the faces you're an idiot like me

i honestly think 99.9% of us did that at least once in the early days
Yeah it's all fixed now

Dont suppose you know how I would export the textures I need?

It's just the black material and the image
It's exported cupmaterial but it's gray not black

So my friend did this earlier and he sent me an FBX and it just worked so what is he doing that I didnt lol

during the Export, he either Copied and sent them, or Embedded them
He must have embedded, I tried doing the whole extract textures in unity but that doesnt work with blender made mats/textures
ok, there are 1000 tutorials on this, so you should be able to google one pretty quickly
Embedding brings up tutorials on the kinda thing I just tried to do. pack them into the fbx
Am i looking for like baking textures?

Yeah following that exactly
He drops the shield into unity and its textured
I get to that point and mine isnt
then the textures are not being copied over. perhaps manually copy them into a /Textures folder, under the folder the Model is in (in Unity)
If you cannot find the textures, that is a big part of the issue. you need to save them as files, instead of just being embedded in a Blender file.
if that particular tutorial is not working for you, do another. Imphenzia probably covers it
how can i improve my unlit shader for map ?

Anyone that can DM me to quickly explain some concepts of Tile Manager ?
No, but you can ask whatever questions you have here and people might answer if they know the answers.
I remember there was a website where you could create your own 2d icons from presets then change the colors, thickness etc. and download it, but I have forgotten the name.
Anyone here knows about the website or a similar one?
Can I set a model to have a double sided faces in Unity? When I export from Blender and bring into Unity the faces are all flipped.
In URP(and probably hdrp), you can make the blackface render, but the face would still only have 1 normal. You can configure that in a shader. So it would only look decent for unlit objects probably.
What about just flipping the faces?
Yes, you can do that. In fact, if you don't need the backfaces, flipping the normals is the most correct approach. You'll need to do it in your 3d editing software through.
But they're already correct in Blender. As far as I can tell.
Figured it out.
Can someone tell me why materials wont get applied to the wall on the right? It only accepts the main color. Model was made in SketchUp. Applying materials worked in unreal when i tried it there.

Looks like it has no valid UVs on those faces
If sketchup can do UV unwrapping you should do that in the application
If not you can also use blender or probuilder
Or use a triplanar projection shader that does not require any UVs
I'll look into it thanks
Why is exporting from Blender to Unity/Unreal not a super sweet and smooth process these days? They've all had like 20 years to figure this out.
Didn't really feel up to it
File formats progress slower than the modeling programs and engines do so it's easy to get left in the dust, especially when formats have to remain compatible
From what I've read is the problem is mostly who owns the formats and how they're managed
Mainly that FBX is not developed and requires licensing to even use afaik
But the solution you're looking for is potentially .USD
It's becoming viable on both game engine and modeling program sides of importing/exporting right about now apparently
I would think that would make it easier to develop an easy and mostly seamless process. Fewer changes to keep up with.
.usd might work for me at the moment. I'll try it out.
On one hand yes but also it makes it seem like inefficient and potentially soon obsolete work to put into it
Especially when they've been putting work and planning into the newer format for years by then already
Unity doesn't seem to like the .usd format. Does it need an addon or something?
Hm, no multiple UV sets and no blend shapes yet apparently
Ah, so .fbx still...or glTF?
I'm not familiar with glTF to know of practical advantages or disadvantages
Except runtime import/export feature
Which really won't work good with fbx due to its destructive nature
Fbx is good enough if you can deal with the axis orientation mixup, and accept that it's a one way process
Scripts and plugins for modeling software usually can make the exporting part pretty smooth
I dunno. I've gone through a dozen YouTube videos covering this and none of them are working for what seems to be a super basic need. I have this crappy branch with a leaf. I got the UVs unwrapped nicely. Baked a few nice textures. Everything looks good in Blender. But once in Unity only the leaf is good. I can't figure out how to get the branch part of the texture to work...

"Work"?
yeah, in Unity the branch part is just black.
Did you assign a material with the texture onto it?
Which nodes are you using in blender for the branch material?

Everything looks allright here
There should be nothing to it
If the branch mesh has a material with the same branch texture in unity as it does in blender it should map to the same UVs and everything
Unless the branch is using some other than the first UV channel
Hmmm....There does seem to be a second one somehow...
Indeed the UV texture coordinate input uses whichever you've selected as active UV
The UVs are exported but Unity's shaders only use the first one for the base texture
Okay! that's got me some progress! Thanks. Still some weirdness and all the material controls are greyed out, but it's progress...
Embedded materials cannot be modified because they're stored in the file format itself
Which is why you want to create and assign new ones
Makes sense!
hello is this where I would ask for help with building asset bundle... i think i got the right code but nothing is happening.
i have looked at the manual and tried to look up help online but nothing is helping.
It's not the right place
This is for asset creation
Asset bundles are a code thing I believe, or a general topic for unity-talk
@misty lantern oh ty
For others to be able to help you'll have to provide useful information like background of what and how you're precisely trying to do, and where are you stuck if you're following specific instructions
im super new to all of this and its super confusing but im trying to create an asset bundle to import into table top sim for a dnd campaign
Then you may have better luck asking in a community that's for the tabletop simulator
well its dealing with coding for the unity side
Really hard to help someone use unity who doesn't know the basics of unity, to make something for a game's systems we're not familiar with

oh
For a question I mean
Like I said they need to know what you're working with and where you got stuck with the instructions
from my understanding it should have been simple since this is just to make a button to then do the asset bundle process.
ok well thank you
Maybe it is that simple
I don't really know
same lol
so i've been struggling with this issue where i get a sort of "bleed" of sorts that comes through when im importing assets that are perfectly aligned in aseprite into unity. (see 2nd and 3rd image, 2nd unity 3rd aseprite). i've also included my settings for importing this tilesheet. i've been at this for 2 days already and im at my limit with this lol


Problem is they're too perfectly aligned
Because the sampling is inaccurate at precise edges between two pixels there should be one pixel of padding/dilation
Probably the best way to introduce it is to add your sprites to unity's sprite atlas, which has the option to apply padding
Could do it in an external program as well, but sprite atlas is automatic and non-destructive
i've tried the atlas before but i'll give it another go and i'll let you know how it goes! thank you very much my friend
i gave it a shot with the best settings i could look up, it's still happening, i linked my settings for everything.. any ideas?


It's blurry, which suggests the max size is not enough and it's being shrunk which causes pixels to smear across tiles
you are a god
thank you SO much friend
hi, not sure if this is the right channel, but i can't find anything more appropriate...
i have this grid-like texture, and it looks fine up close, but as it gets farther away the grid line gets "stretched" in this weird way. how can i make it look thin?

same thing happens in the editor 🤔

ok just had to change the import settings to include filtering
I have some layered transparent images I need to export to PNG in photoshop. How do I make them... actually look correct?
Can you be more specific
Does anyone know how to create an animated cone? Like you see on the video, when I scan it shows a nice scanning beam coming out and I want something similar to that, but I can't find any tutorials.
Or something similar to this beam/projection effect coming out of this watch

That first video is a mesh that is turned on with a custom shader on it scrolling a texture and rotating the mesh, probably mixed with some particles.
Is anyone around who can help me get post processing working in URP? I've gone through a few videos but either they're old and things have changed, or they aren't doing things in a way that I'm set up for...Everything I've tried on my own hasn't worked either.
#💥┃post-processing and actually post the details of your issue
heyyo, i'm coming from unreal and wanna learn some basics. In unreal i would double click the asset to give the object a material so i can drag and drop from the browser and have it already use the correct material in the viewport. But i see unity is different. I have a texture and material using that texture that has to be applied to each of the 3 meshes making up this object. How can i do that?

Applying Mat and Textures....
Your Object Have them all organized in one place....
If you open the right arrow you can see the mats.
for extracting mats you can duplicate the mat you want using Ctrl+D
or simply click on object and in inspector click external material and extract them in place you want like alongside the file
Hey all, anyone around who could potentially help me with a little Blender->Unity material issue? I have this dead tree branch asset I'm working on and everything looks good-ish in Blender (it's a crap asset, I admit, still new and learning), but when I bring it into Unity. the texture is all stretched out. When I made the model I did do the step of Applying all Transforms. I'm not sure how else to possibly fix this issue.


Make sure you don't have multiple UV maps on the object in blender, that might be it
hey guys im trying to find some help in adding image texture to a plain. i imported a fbx file and was able to add the new material. how ever they are planks and i want them to face side ways not vertical is anyone able to help?
im trying to get the planks to face side on not vertical

nm i got it
Oh! Thanks. I'll check that!
That was it! Thanks!
I'm working on a racing game and I'm trying to sync the my wheels rotation with the rotation of the wheel collider. It's rotation is spinning on the x turns on the y but my model is importing differently with having x be the spin y be the turn but needs to be 90 for straight and z needs to be 90 which is breaking the system how can I fix the rotation in blender to match with unity
So i got some assets from unity store, i have this ground asset, i want to paint on my terrain, how do i do that?

can someone please make me a new player skin, this one was just a placeholder, and i'm not very good at aseprite, if you could, that would be much appreciated


does any of u know a plug in, or a way to rotate my thumbnail preview in the project folder ?
the preview is top down, and it's a bit (much) of an annoyance

Hello i got this spider but the tip of the bone in unity is not being imported and i also got a massive bone just hanging around any idea what's going on


Bones are just a transform, the connective bits need two transforms to be drawn between.
i made this UI, pretty much finished! does it looks usable? any suggestions, like things that developers use a lot with UI?

Fast forward (double arrow)
A stop (square) might be good too.
oh yeah good idea
An undo button perhaps (circle tailed arrow pointing back)
hi guys can someone help me in making a plane into terain?
Need help.
I downloaded these house models from the internet but cannot see them in unity. What should I do?

What do you mean you can't see them
Invisible in the scene view?
Or they appear in scene view but not in project?
NVM, FIXED IT.
Those texures didn't get imported.
Help with the blackface!
When I made it in blender, it didn't had this!

not gonna pretend i understood what you said lol but thank you i appreciate your response is there a rigging tutorial i can follow from blender to unity for best practices and for everything to work as intended it would be better if it was for spider like rigs thanks again
Bones in blender are lines, bones in unity are dots. The bone renderer in unity draws between two bones, but since there is no bone at the tip of the leg there is no line drawn there.
ah now i understand what you mean i see
You can add an empty transform to the tips and add those to the bone renderer if you want.
Hey guys. I modeled a full house for our game in blender but I’m not sure exactly how to export the pieces for Unity. Mainly because of snapping. Where should the origin point be, and what snapping options (if any) are available in Unity? Blender has snap to face, edge, vertice, grid, and so many others so it’s easy getting things in place perfectly. Idk what Unity has
I made each wall and door separately. I already put a door in each doorway just for visual sake in blender but I know in unity I would just export one and he would place them all. But I’m not sure how exactly he can place them all perfectly
Is there a way to add an array modifier like in Blender in Unity 6?
I don't think there is such feature built in. What exactly would you need that for?
To array objects inside unity, like cup stacks
So I won't have to make them as separated meshes
Plus light baking shouldn't suffer.
You would either have to apply the modifier in blender or use multiple meshes to achieve the same effect
Huh, but wont it affect negativley on the performance?
How so? Any equivalent feature to array modifier would obviously affect performance too, you cannot render more objects and expect it to take the same time
The most lightweight way would likely be to render them via GPU instancing (though wouldn't be very helpful with relatively small amount of copies) but I assume that would not work well together with light baking
Do small objects like that need baking? Just use probes.
I dont know where to post this so ill do it here, I have a greyscale texture that is around 70 kilobytes, when I import into unity it jumps to 1.3 megabytes, what settings do I use to minimize file size while preserving quality

Its important to note this texture is greyscale so no color data is needed
So you can set it to a grayscale+alpha format using the 'format' dropdown. You also are creating mipmaps, which will increase file size. So if you don't need those that can be disabled as well. (and if you do need them, you just need to eat that size cost)
does anyone have any good resources for ai asset generation, specificly textures, sprites?
Unity 6.2 Beta has Ai built in. it is free during this Beta period
They said a GOOD resource.
why might my animations not be importing? they're very clearly on the armature


huh. i guess it really doesn't like having multiple armatures in one file
nvm solved. separated it out into a different file since it had different bones but similar animations
does anyone know why there's noise showing up on my game? I got the model from sketchup if that helps narrow things down

Try disabling SSAO renderer feature first
It looks like inverted SSAO as the corners are less shadowed when they should be more
So you may have inverted normals
When a material does not cull backfaces, it does not have front facing normals so light calculations can get messed up
It's in the material preview too
Even though these do look like ray tracing fireflies 
Raytracing noise or raymarching noise
Not sure what else it could be
Yeah but it's here too

And the weird dithering in the transition. What is this shader?
SSAO does show up in the preview window, though this is really excessive
The dithered transition looks just like an APV, though pretty weird that it shows up in the preview too
anyone know how to get objects made with blender geometry nodes to work in unity?
As long as apply modifiers is enabled they can be exported like any mesh
alright so i that was the issue i guess
but the problem now is applying the nodes seems to remove some meshes or change some of the variables in the node because certain parts of the object disappear
i think it's the instances
With instances normally you need Make Instances Real operation
Geometry nodes might've had a node for that, or the same operation could work, but I don't recall exactly
it was 'realize instances'
hey team, do you guys know a good way to convert a unity package's meshes, .meta, .asset, etc, into a .fbx file? I hear that there is an fbx converter in the unity package manager, but I don't know how to find/use it. How do I use it/ work around my problem
What is your problem exactly? An FBX file would not contain those types of assets
right, how do i convert the .meta/.asset to the fbx?
You don't
So what is it that you believe you need to do that for?
I'm trying to take a mesh that I downloaded from a .unitypackage and i'd like to be able to put it into blender
is there no way to download some part of the mesh and convert it into a file that I can run in blender?
Normally packages should have FBX files to begin with
Only editor-generated or decompiled assets use the .asset format in my experience
Unity's FBX Exporter package may be able to convert those to FBX
Meta files are just for the editor and wouldn't be included in an FBX anyway
how do I use the fbx exporter? its in the package manager right?
Yes
And it has documentation
Day 135: Daily Art Practice

You can show off Unity work in #1180170818983051344
Not the place to just promote your art
Unity discord needs a separate channel to just show off random smaller stuff tbh
Why can't I hide wireframe on terrain? It makes it hard to edit.
Yes, it's in shaded mode and yea, I tried ctrl+h. Is this just a bug?

It's the collider
If you disable all gizmos it should also be gone
Or you can temporarily disable the component, or toggle gizmo visibility just for mesh colliders
Ah, of course
Stupido
Forgot it's the collider because it follows the wireframe, because of course it does lol
Does terrain use mesh colliders internally? I thought it was a heightfield collider
I use a mesh for terrain in any case
Ah

maybe because of the shader?
it was because my ambient lighting was way to strong!
it was like a daylight kind of thing but that was to much here
made it more greyish
hey, i have this image on a plane and its transparent and has alpha so the background is indeed transparent, however there is still a slight light distortion and i want it to be fully invisible, how do i do that in unity?

nevermind i found the alpha clipping option
So I am wondering if anyone can help me with a certain issue.
I am importing some blockbench models converted to a OBJ into unity, the textures for these models inclube some transparent parts, however upon importing the texture as a material to the model in Unity, the areas that should be tranparent appear black, is there an easy way to make these parts of the model transparent? I search up the issue but all I get is info on making the entire model transparent.

It is a rather big problem for me as several of my models I want to import have large parts invisible
but will show up like this
How can I import the object into the scene so it will be put right on the desk.

hey, did you check the UV map? maybe it has screwed up when converting to FBX? thats why my model didnt have any texture at all, though i am very unfamiliar with modelling and texturing
could someone please help me understand the difference between these two files? the Copy one cannot be read by unitys import, but the first one can. the 2 are perfect copys of one another when using a diff / compare
ImportFBX Errors:
Couldn't read file C:/Users/first/PluginDevEnviroment/Assets/pluginDev/boat_2Copy.fbx.
None of the registered readers can process the file
how can they be perfect diff copies when their sizes are different?
your right, that is super wierd. a diff editor says they are the same file, but my copy takes up more space. could be difference between '\r' and '\n', or something im not thinking of
figured it out. Used UTF8 Encoding, rather then ASCII encoding for the output. UTF8 is backwards compatible, but my code must have inserted a UTF8 only character somewhere in my code
I think when I import the texture file into unity all the empty space is replaced by black
thats... odd, where did you make this texture?
this is it in unity, but the file from bb here has no black (that is just viewer background)


I am making the models and textures in blockbench
and then exporting the blockbench as an obj
I have to manually add the texture back in unity
mhmm
interesting... double check if obj supports alpha transparency?
maybe its like jpeg where it cant hold alpha values or at least doesnt see them as transparent
would I be able to manually re apply those alpha tranparencies to the parts that need them?
I am quite new to unity. All I have been doing is using it to mod repo (hence the model imports from bb)
The option you're looking for is "preserve specular" if you're using a transparent material
Alpha clipping should instead be used with opaque materials
Unity's inspector shows the texture without alpha even if it has it
Unity's materials will not use alpha unless you've enabled transparency or alpha clipping in material properties
You can enable "alpha is transparency" in import settings that will make the inspector's preview display the alpha, but it will not affect how the alpha channel is used in any other context, rather it just replaces the black you have behind the alpha with dilated colors
So if I change that import setting it should work? Or would there be further steps?
And the material properties
Mainly the material properties
How it shows up in the inspector preview is not that important
Ah alright
Thankyou for the help, it would just be when I select material in the options on the right?
ah the cutout mode seems to have worked
I dont actually see the specific settings you named though?

is the mode the equivalent
Since this is the built-in render pipeline, "cutout" means opaque with alpha clipping, "fade" is transparent for semi-transparency
Iirc "transparent" in that shader would mean "transparent with preserve specular"
my particle system panel (for playing, restarting, etc) has disappeared and I don't know how to get it back
@manic prawn #1180170818983051344
my bad bro
I deleted that project and opened a fresh one and same problem. WTF
Reset layout, top right corner.
doesn't work
as I said, I started a NEW project and it started without the particle system player
Make sure you didn't drag it away somewhere
yes yes but resetting the layout and certainly deleting and starting a new project would fix that
no
how no
Pretty sure it uses last used layout for the new project.
Did you actually try resetting layout?
yes, of course
and tried all the "default" layout presets
Here's after clicking on reset all layouts and then on the particle system

Now check out the last part of my video and locate the bar on your panel.
Oh god, thank you
I paused right before you did that
I have this grassblade from blender but as soon as I use it as a mesh detail for terrain the size gets all messed up does anyone have any idea why


You have scaled the object in blender, not the mesh
Unless applied into the mesh, object scales will be reverted
I'm new to blender but another guy just told me to apply scale and rotation that should fix the mesh right?