
#💥┃post-processing
1 messages · Page 19 of 1
motion blur?
it's pretty cool but it won't work in URP
isn't that old shader code?
that's pretty cool, going to bookmark that for any future projects that might need it. thx
Np
hello, im using post processing stack v2 ( free unity post processing ) may i ask how can i make the grain more visible because you can barely see it even on max
it's not very visible
could you help me with the texture
and also it doesnt support a texture

lemme see
the thing is that i have a night scene
like you can barely see it

lemme see

where can i change the grain texture
still in package manager?
oh so not in unity?
i have to do this in folders
@buoyant olive
where can i find the post processing folder
oh i found the library folder
but post processing is not there
ah ok
There's a setup guide pinned to this channel

Is there any reason why some Post Processing Stack V2 effects aren’t working properly (2D)?
I have a volume setup and a post-processing layer on the camera. It’s all set to a Post-Processing layer. SOME effects work (like bloom and grain) but others (such as chromatic aberration and lens distortion) don’t seem to work at all.
Using Standard Render Pipeline
How do I do post processing?
I've been trying whatever I can do but still it won't let me add post processing
Instructions in the pinned messages
You need to know what render pipeline your project is using to know which post processing system to use
I'm using the URP render pipeline
So, look at the URP post processing guide
I am but it's not doing anything still
So, what's next?
I've enabled post processing on my camera and made a post processing volume according to the guide and made it global but no effect is happening
Have you enabled post processing in the Universal Renderer Data asset?
Are you testing it with effects like vignette that starts visible right away when added?
yeah so well
It works with one camera but not with another...
oh wait it seems to be working now
Didnt before but dont know what i changed but it seems to work now
But only global works
Not local
Local post processing applies only to cameras inside the volume's collider
yeah and its inside
I got everything to work! Thanks @mighty stump !
why cant fog be a post-processing effecttttttt
It can (and it was on older unity versions iirc) but it requires depth texture atleast. You can surely find fog pp effects from asset store
I think they decided to change to per shader fog to give more control of the fog per object
true it'd just be nice to be able to control fog using post-processing volumes
set the post process volume jn a specific layer
then add a pp layer in cam and set the pplayer to the layer you specified to the volume
its should work
Hey guys! i have a problem with Post Processing
Im using URP, i configured the post processing volume and added the post processing layer to the main camera for the test, i also assigned the post process volume layer to the post processing layer component in the main camera and it doesn't work either

the post process volume layer is also assigned to the post process volume gameobject, which you all can see is named PP-Volume
anyone?
Can you show the post processing layer on the camera?
Has anyone else had this problem with Bloom before? I've tried searching here, but haven't found anything similar. It just flashes through the walls. I have no emissive material as can be seen at the end of the video, just a regular spotlight and bloom turned on.
how can i make a glow effect with PP?
Turn on bloom
PP works fine in editor, but nothing done after built. What should I do? I'm using PP in built-in project.
It's frustrating 😦 I'd appreciate it if anbody could help.
I'm using Cinemachine PP too, is this can be a problem? Tested in a new project, it worked well.
Just found out that Bloom works, but Color Grading doesn't.

Unity Forum
Case 1396736
After upgrading from Unity 2020.3.26f1 (LTS) to 2021.2.8f1 - Color Grading effect stopped working in the build but works perfectly in the...
Hey, so I have a problem that my post processing volume is not using HDR when color grading. This problem is with both exposure and tonemapping but exposure is much more noticeable.


As you see in the top GIF as the exposure lowers there is no extra detail revealed, even though the actual HDR light map has much more detail
Same happens with bloom. In some extremely bright areas where bloom should be blowing out the image bloom is barely visable
@rose magnet Have you enabled HDR in quality settings?
yes, both in quality and in post processing sections
Which render pipeline is it?
URP
Are you doubly sure that you're editing the quality settings asset that's currently being in use?
yes and I have only 1
and i know its not a shader graph issue because built in shaders have the same issue
another thing I found is that the float info is there in the shader
I made a test shader with a slider that subtracts from baked Gi and I see the detail appearing
If I disable HDR from my quality settings asset I get the exact same effect with exposure
Don't have much guesses what else it could be
oh
just found by playing around that hdr works on a new camera
but never in scene view
ill play around camera stacking now and hope that it will work
(allowing me to fix the issue on the main project)
thx for the help
yup ok
so scene view is the only thing wrong
so it overwrites most URP asset settings
(Render scale, anti aliasing and HDR)
the more you know
Everything's working as expected then, I suppose!
Scene view has its own toggle for post processing
AA would be a nice to have as an option but I don't think it is
Hello, is it normal Depth of field is pretty ugly on unity ? ^^'
And impossible to setup with physical camera ^^'
it's not ugly, it just needs ALOT of configuration
Hello, any idea why increasing the intensity of HDR color is not increasing the bloom intensity?
I'm using URP


The result I expect is that the bloom should get stronger around the object, but the object just turns bright white (which is ok), but the bloom stays the same
Your project/pipeline settings may not be configured to be in HDR
It is
if it weren't the bloom would not be working at all afaik
I checked it anyway and yes it is enabled. Although toggling it on / off doesn't seem to be doing anything.
It would, just that emission brightness would be capped, just like what we're seeing suggests
HDR has settings in a few places, including the camera
I've tried looking at the camera and indeed there is HDR setting. Although it is only visible when I set my Inspector to Debug mode.
Which render pipeline is it?
That fixed the issue. Thank you 
URP
There's this setting at least
There's always the chance of accidentally editing a quality settings asset which isn't the one in use

Oh I see it now. It was under the last section which I've missed.
But it's weird that it was turned off
Hello, I've been trying to enable Post Processing with URP for a full day now including a lot of article reading and banging my head against my desk with no avail. So please if anyone could help it would mean a lot!


Make sure that the post processing is enabled in the rendering features
To reach to the rendering feature go to the quality settings then double click the current one
From there, inside the RenderingTab(First one) select the first one and you will find the settings in the screenshot below.

I have it enabled :/

Is it working now? or there are still other issues?
I already had it enabled
oh .-.
What URP version are you on?
In the Package Manager it says 11.0.0
how do i even enable post-processing?
was watching the latest brackeys tutorial on it and didn't find anything that I could do
Look at the pinned messages here
ok
Thanks, but what Spazi suggested was indeed the issue. It's fixed now
👋 got assigned to make the unity Tanks game and add my own stuff on top and i'm making a main menu right now however the depth of field post processing is affecting the text aswell (obviously since its a screenspace - Camera canvas which wouldn't be a problem if it wasn't for unity thinking the text is at the position of whatever's behind it, causing text that's above the sky to get blurred into hell
Wondering if there's some setting to change or hack i can do to avoid this or if i have to just throw out the depth of field
I'm on URP 10.4.0 in unity 2020.3.7f1

Is it possible to change the order of Post Processing layers?
For instance, say I wanted to have the color grading be first in the list. Or do I have a gross misunderstanding of how these layers are applied and order doesn't actually matter?

I believe the order is hardcoded into the effects/post processing itself, though I'm not entirely sure if that's true for all render pipelines
By that you mean regardless of how I order them in the list, they will still execute in the same order on the back-end?
I think so yes
I can't see my post process working even though I set everything up according to the tutorials on youtube
this is the camera

this is the game object with overrides which is in the same layer

The barely visible "universal additional camera data" component suggests to me that you're using URP, whereas that post processing package is for built-in RP
There are instructions in the pinned messages how to set up post processing for reach render pipeline
I have lightweight render pipeline
I'll check it out thanks
I forgot to mention I use 2019.4
If you actually have LWRP then I don't think there are instructions for that in the pinned messages considering how old it is
Some versions of it did use the PPv2 package
:D
I would check which version of it the project is using and try to find the post processing documentation for that version specifically
How can I recreate an infinite-mirror effect like this? (2D)

Probably render texture
The effect in the image seems very simple because it has absolutely black background but is that the case for you?
Or do you have everything you want to mirror rendered using separate camera?
In any case you have to somehow make difference between the objects you want to ”mirror” like that and the ones you dont want (like the background)
So first of all, its good to notice that all of these lines seems to go towards the middle of the screen. So what you could do for every pixel is to make loop of length amount of repetition you want. In the loop you start with the current pixels coordinate and sample the image at that point. Every iteration you move the point towards the center and sample at that point. When you first hit something (meaning the sampled color isnt completely transparent/black whatever it is in you case) you can break out of the loop and draw the pixel. You can use the current iteration index to fade towards black/transparent to make that nice fade that makes the later iterations more subtle. If you havent hit anything after all the iterations, that means the pixel should be set as completely black/transparent. On some parts of the image theres something odd going on but I think this method should give very similiar results. Hope this helps

But as I said, you first need a way to separate pixels of the image that are part of the ”mirrored” foreground and unmirrored background
Btw im suggesting you to write your own post processing shader, I dont know any assets/built in ways to achieve this 🙄
Using a render target textured quad as the background which is a tiny bit bigger than the screen area would achieve that effect, even if it'd be kinda wasteful perhaps
That wouldnt also give as much control over the mirrored image chain spacing
well my background is black/transparent yes
don't they go away from the center of the screen?
well actually it's quite strange
the one on the bottom right goes towards the screen
Actually, it is bit counter intuitive
really? to me it seemed that the icon on the bottom right goes a different direction to some of the others
Yeah, i realised that but id just make it so everything goes away from the center (which means you have to move the points towards the center which is the counter intuitive part i was referring to)
yeah
makes sence
also i might just not be looking correctly, but i feel like the images have a bit of a blur to them as well
Idk seems like theres bloom added on top after the ”mirroring”
For me there doesnt seem to be any more blur on the further iterations
hm i guess
talking about bloom, can you apply bloom to a render texture?
because i think if i added bloom to the camera it'd bloom infinitely
Why is that
Towards or away, line doesnt necessarily have a direction like that. I wanted to make the arrows to clarify that you have to sample towards the center to make the mirrored images go away from the *center. So if you want the mirrored images to go towards the left up corner, you have to sample the points towards right down corner in order to reach the actual image eventually

Using a render target texture would also add a cumulative blur as the after images lose detail every time they're rendered again
Few problems with that approach would be 1) things closer to center would have shorter trail after them, its obviously up to you if you want that or not. obviously you can do the same with the pp approach 2) the fasing towards black/transparent would be hard to do 3) performance, id imagine pp effect would be faster
Wait, actually I may be misunderstanding what you mean by the render target thing…
It would have the drawbacks you mention
But it'd be definitely easy to make
Wouldnt that make the trail always go beyond the screen area? (Infinite long)
If the quad's material mixes a bit of black to the render texture, that'll work cumulatively and make cause it to fade over distance
Yeah, true. The trail would also have bit of delay (1 frame per iteration) but that depends on the game how much that affects the result
Another problem with using a render texture, is as the circle would go off-screen, the circles not completely off screen would get cut off
Unless the RT camera and quad are larger than the main camera view, I suppose
It does get hacky, though
A post processing effect wouldn't be restricted to building up the effect over time
Are the trails in the example image updated instantly or accumulated?

#Star4th #Black_And_White #기믹
Map by Star4th
ELEPS - Black And White
기믹 ㄹㅇ 미쳤네
The effect looks a lot like post processing effect but this stuff indeed seems like some sort of render texture

1:34 is also a good look at it
I guess the result can look the same with both approaches
Definitely cumulative though
Yeah, seems to be delayed a bit. Render texture is definitely used in some way but hard to tell how its done exactly
Do post processing shaders have an option to "not clear buffer" to let pixels trail from previous frames?
I think its about the cameras clear flags whether/how the buffers are cleared
A trailing RT is very straightforward since it does that by itself when you point the camera at the render textured surface
But you still need to modify the texture / geometry with shaders to create more interesting effects, and you'll be somewhat at the whims of the geometry
It needs some extra work to adapt to different resolutions for example

Yeah, probably combination of both shader (of some sort) and render texture/not clearing the color buffer would give the best results
i made something similar already using a render texture, only problem is, is that the mirrored images don't go to the center of the screen, but to the origin of the object

The object origins shouldn't be relevant, only where the RT plane is in relation to main camera and the RT camera
Actually why didn't I think of zooming the RT camera instead of resizing the RT plane
how can i make the rt plane the size of the camera
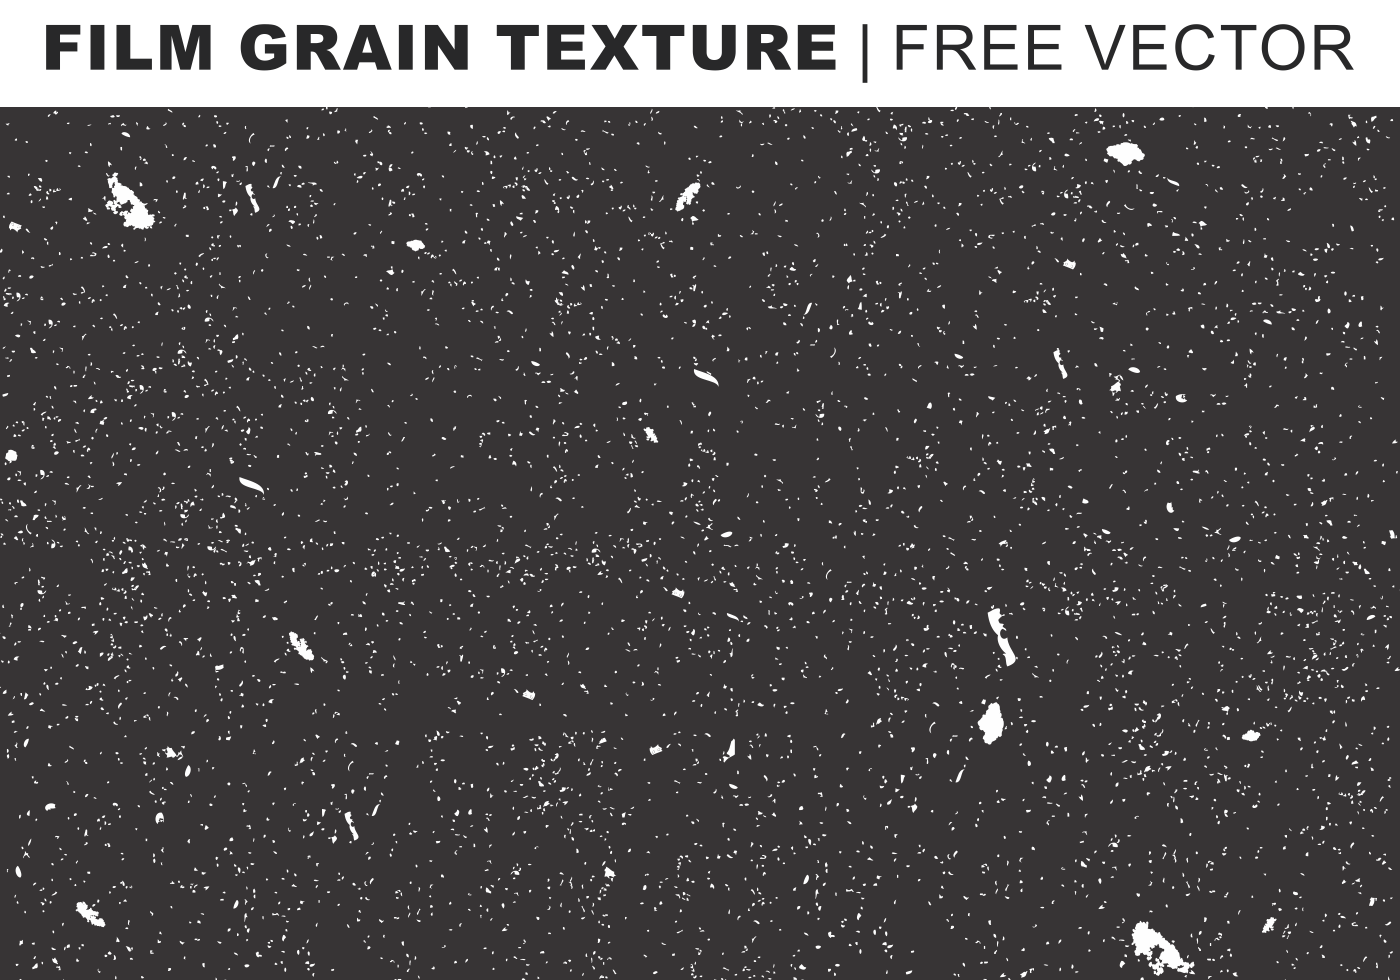
Folks, can anybody give me an example of a custom film grain texture? Or tips or directions of research in order to achieve this https://www.youtube.com/watch?v=CHL3l34O9nU with the PostProcess FilmGrain tools in URP?

Subscribe for daily updates!
HUGE collection of FREE video assets, green screen animation, backgrounds and more!
High quality 4K footage and animation
I resized it by hand until it was good enough ™️
But you could also calculate and set it in script by camera size if orthographic, or by FoV and distance if perspective
well, until you had it good enough, does that mean you have the effect working or not yet
Anybody know offhand if there would be a noticible performance hit for animating the grain texture on a Post Processing Film Grain component?
doubtful
it's literally just a texture getting moved around

get a random square from the jpg every few frames
Thanks @hexed nova ! Secondly... any chance I could put up a couple layers of film grain? I've got a nice scratches texture now, but I'd like to get some vertical lines and maybe add a little cigarette burns and even some film sprocket holes...
Ultimately I could do this with the UGUI, but I imagine there's ways to do this with the post processing. I'm just starting to learn this stuff... =/
best to look at examples of other shaders to learn
most effects are pretty simple if you break them down
Oh, the post-process stuff can be edited? Splendid! I'm new into URP here, tbh. Don't suppose you know where the shaders are kept offhand? I'll find it myself, but if you happen to know right away...!
oh no, urp post process is locked down
you gotta use render features
it's still pretty simple, unity provides a blit render feature in one of their examples
you just have to set it to run before or after your post process
You see, I'm glad I asked you that. =)
I'll google the term. So you can't stack post-processes? I'm using PP on Cinemachine and it'd be handy to have some effects work globally and then have specific cameras override the effects.
Well, say, I'm currently using Cinemachine Volume Settings. Say I want to have a global ColorCurves setting, but do different depth of field per cameras. I couldn't just have a pp volume for ColorCurves and then do a Cinemachine Volume Settings using a profile with only depth of field per cam? And then override the global Color Curves by using a profile that has a Colour Curve on a specific camera?

ah I haven't messed with cinemachine volume settings
No probs. I'm honestly having a whale of a time here and you've been very helpful already. =D
you could set up a oncameralive event to mess with URP's global settings, idk if that's what you're looking for tho
This is so much fun. =P
Mm, seems unlikely the CM boys would have missed this trick, they've been ridiculously on-point up until now.
I'll keep playing with it. Thanks muchly!
np
@hexed nova In case you're interested, the currently active Cinemachine Camera will override a global volume profile if it has it's own settings...!
oh that's neat
Iiiits super cool. =D
i need help
so
I'm making a game
and when i press play the post processing disables in the next scene
what do I do
and then the sun changes too
I highly doubt this has anything to do with post processing. have you tried googling "unity scene gets darker on load", id imagine you're having the same issue
this is how it looks in editor

this is how it looks when changing scenes

surely post processing (alone) can't do that, did you try to google what I said? most likely it's issue with ambient probe not being baked (you have to generate lighting in order to bake it. if no object is set as static no actual lightmap will be generated)
i fixed it by deleting the camera and creating a new one
oh, interesting. then it was probably just a bug
Hey, sorry if this isn't the right channel. I'm trying to find a Unity tutorial on making 2d plane to 3d image raycasting. Like the stuff they used to make Wolfenstein. Say making a 2d image project to a 3d image like in this video: https://youtu.be/M1c5TcdITVs?t=19 Does anyone know a tutorial for it?
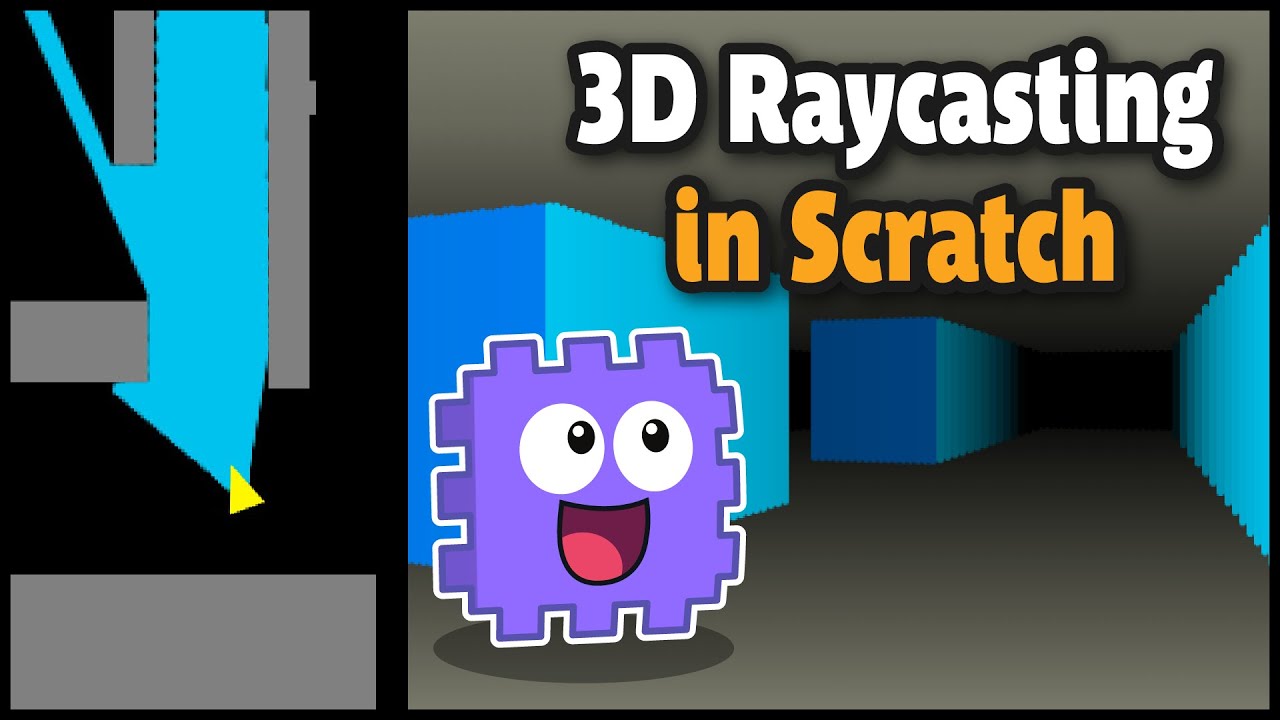
How to make a simple 3d game (Raycaster) in Scratch. This is part 1 of a short series where we build a level arena/maze and learn how to code player movement including arrow keys and WASD for strafing. Wall collisions are also handled, and we dig a big deeper in to how to best handle getting snagged on a wall. Awesome!
My tutorials are for all ...
Im having hard times trying to figure out why one would like to fake 3d inside a 3d game engine… just add few actual 3d cubes and youre done 🤔
Surely they had to make something like that in 1981 but its 2022 now, the whole reason why game engines like unity exists is that you dont need to make 3d graphics from scratch using dirty hacks. You can just throw 3d models in the engine and youre ready to go. Is this xy btw? 😅
I'm trying to make some retro games with something similar to the original methods used to make them. Just a personal project.
I find it interesting how stuff like the original 3d games were put together.
I highly doubt such tutorials exists because its pretty much reinventing a wheel.
I think I linked to a video of that though in my first comment. I'm just looking for an equivalent for Unity.
check out shadertoy
I meant faking 3d in scratch is valid and only way to make 3d but unity is already a 3d game engine with all tools available to render 3d graphics, i dont think theres such video for unity. Atleast I couldnt find one
yeah just use a small render resoultion
the algorithms doom uses is pretty close to real 3d
only purists would see the difference
I myself tried to use the SNES Mode 7 fake 3d but I realized if I just place meshes the right way it looks identical
Thanks for the help.
I don't know of any tutorial specifically for this and I'm not familiar with the extrusion/rendering part, but you should be able to find bits here and there to achieve the same thing. First part looks like shadow casting, which is not an unusual thing to have even in Unity. The Physics/Physics2D classes in the UnityEngine namespace should have all the necessary methods for performing the actual raycasts. It might be okay in this case, but I wouldn't recommend shooting tons of rays around in general, however. Raycasts are expensive, and there's ways to approximate the shape of your "light" with some clever tricks. Though again, it's probably fine in this case, so if you're not too confident about approaching it differently, just use the same thing as the Scratch tutorial. As for rendering, your option for accuracy might be to draw to a render texture that will always be attached to your main camera, since the "3D" view is the one you'll want to see.
An alternative for a lookalike that would work better with the native rendering pipeline would be to use an actual 3D scene and resort to shaders for the distance-based gradients and stuff. It might require more work to get this to look as accurate as an emulated raycast renderer though. I'm not well versed in the subject, so I can't dive down in the specifics. Hopefully these pointers are of any help.
Thanks, this is really helpful!
If I had to make that, id use compute shader to shoot the rays against the 2d texture. Then another shader would turn the raycast results into the final image. That would be really efficient way i think
This video seems to explain the math required to shoot the rays against a 2d texture https://youtu.be/eOCQfxRQ2pY
Aren't compute shaders dissociated from the rest of the pipeline? I haven't looked much into them, but I'm assuming you'd have to get a texture back from the GPU (from the compute shader) to either use it as a render texture or to send it back to a fragment shader.
Is performance critical, also? Otherwise using Unity would probably be a bottleneck in itself, but I doubt that was the purpose.
Took a look at a shadow caster I'd made for a project to make it a bit fresher in my mind. I'd used a pretty popular approach of casting against vector geometry, so basically doing raycasts on each vertex of a mesh. If your mesh is simple enough, it should make a rough shape of the light at a smaller cost versus brute-forcing raycasts everywhere.
Though I had also implemented some optimizations that allowed to bring the raycasts from 3 for one vertex down to a single one per vertex using dot/cross products and mesh collider normals.
That made the process twice as fast in my memories, though it's still not a thing you'd be able to scale to 10000 shadow casters as is.
Well, I was gonna write an essay on how it works, but I'm realizing it essentially goes back to classical 3D rendering in the case of a first person camera (with unnecessary computations, but still useful for top down though). So I guess either use shaders to emulate the effect or do it the old way entirely through raycasts and software rasterization. 🤷♂️
Physics.Raycast(), some manual drawing and render textures should do the trick if you want to go for the latter. For the shader, if you do it from nothing, the vertex shader would just set the positions in the right clip space, and the fragment shader just shifts the pixel color down with distance from the camera. Use normals for the wall shadows as well.
Thank you. I think this might be what I was looking for.
@hybrid spear sorry it's a bit late where I am. Thank you for taking the time to respond in detail. I'll write back when it's daytime for me.
Is it possible to add ambient occlusion, fog, bloom etc to the normal 3d pipeline?
you mean Built-In Pipeline? You can use PPv3
Yeah
Aight thx
Also i can make shaders in it by just importing shader graph right
Or do i need the whole urp thing
shader graph u need URP
try using occlusion culling, only through the profiler you can see what's causing lag
if you need shader graph and want built in, you can buy Amplify shader engine, which has a graph and in my opinion 'i like it better' than shadergraph @wise topaz
i need a bit of help
i already tried to use hdrp for post processing
or urp
but nothing happened
i still couldn't use post processing
all of them just made my materials pink(i tried fixing it but it still had a little bit of pink on them)
Sounds like you're mixing up your render pipelines
Pink materials mean the shader is not compatible with the active render pipeline
Each render pipeline has its own post processing system
by that you mean something like rain drops on cars windshield right?
if I'm understanding this correctly, the roadmap page seems to suggest to use pp stack v2 for custom effects https://portal.productboard.com/8ufdwj59ehtmsvxenjumxo82/c/37-post-processing-custom-effects?utm_medium=social&utm_source=portal_share
have you tried this? https://www.febucci.com/2022/05/custom-post-processing-in-urp/
Hey guys, so I came across this trailer, https://www.youtube.com/watch?v=a92jc66ZRx8, and I feel like the pixel art in the game is not quite pixel-y? Not too sure how to describe it, it feels like there's some post-processing involved, by any chance you would know some tricks to mock this graphics? Thankssss

🎁Wishlist on Steam: https://store.steampowered.com/app/1252100/COSMOS/
COSMOS is a difficult action-platformer where you fight through fast-paced vertical levels with the use of wall running!
COSMOS will be releasing on Steam, July 22nd for PC!
is it because it render the resolution down so it feels like when the character moves, it's moving pixel by pixel?
more precisely, when I put my pixel art into unity, it looks like very clear cut which pixel is where, as opposed to this kinda blurry?
I have two cameras. One rendering the skybox (Camera B) and the other rendering the game world (Camera A). The Camera A is on top of the Camera B. When I apply post processing on the Camera A (game world camera), the post processing also gets applied on skybox.
When I do the vice versa, the post processing applies on skybox but not on game world.
I want the post processing to apply ONLY on game world.

Even when the camera is set to Depth only? (I assume you are using the standard pipeline - not SRP)
The clearing set to depth only? yes its that.
and Yea the standard pipeline, default one.
I will try it on my end real quick and let you know
Thanks :)
I was able to achieve it with a simple custom shader and a render texture
Want to hop in a voice call to explain what I did?

Basically, the camera that renders the world renders it with a solid color of black
The skybox camera renders it to a render texture
Later in the shader, we add the sky box in the black areas of the world
The only downside is that if you have any black textures, it would be considered part of the skybox
The shader is a simple image effect with another texture (Render texture of the skybox cam)
And here we just take the solid black color and use it for the skybox

The material is simple with just the render texture passed to it

A script on the camera that takes what the camera already see and use the material (custom shader we created)

that's it I think. Let me know if you have any questions
Sorry I'm back now.
Is that the entire shader code?
I'm not familiar with shaders, thats why lol
Hey, sorry for the late reply, I was planning to reply yesterday but got lost with other things.
Here is the package exported from "Unity 2021.3.3" but it should work in other versions as well. Make sure to have the PostProcessing package from the package manager
Also make sure to add the layers 6 and 7 where 6 is the skybox and 7 is the world respectively

I am using Post Processing v2 w/ no render pipeline
I have two cameras
One for post processing
One for everything else
They each cull different gameobject layers and then combine
They each have different depths
The one with the higher depth gets priority, the cameras gameobjects are shown over the other cameras gameobjects
The higher has no clear flags, the lower has a solid background
Problems with each depth combination:
Post > Postless or Post == Postless:
All gameobjects get affected by post processing no matter which camera is culling them
Postless > Post:
All post processing objects are behind postless ones, this is the opposite of what I want
Anyone know of any solutions to any of these problems?
Heres whats happening with the first one I suppose
Postless camera displays image without post
Post camera displays image on top of postless
Post camera adds post to entire image (Including postless layer)
How could I make the post camera only affect its own layer?
And with the second one:
Post camera displays image and adds post
Postless camera displays over post layer
Can no longer see post layer
How could I make the two layers go by order in layer or something similar?
How do I spread it into multiple tasks? Im not using any render pipeline btw
Im looking to have specific game objects have bloom and others not
Ill look into it
Whats the threshold based on? Can I set a specific number for each gameobject or something?
Can I set emission using a material?
Doesnt seem to be working
Emission changes the color of my sprite, adds a background to it and doesnt seem to change bloom in any way
Would it be bad to add URP mostly just for this?
yooo .. check the answer above this message .. I guess it's the same concept
Hard to say because the bluriness could come from the youtube video compression
It's definitely hard to tell, but my guess is that it's got bloom that's pixelated along with everything else by upscaling render texture, and some particles with soft sprites which end up looking blurry with the pixelation
does like
lens distortion just not work for you guys?
all the other PP effects work except for lens distortion. is there something else I have to config?
because I'm seeing people just turn it on in tutorials and it seems to work. just not for me.
show a screenshot of ur lens distortion

did you mean to have it on local instead of global Mode?
yes
they don't work either way
nor the settings I put them on. they don't affect the camera at all
where are the other effects
there are no other effects. I made a new volume with only lens distortion
that means I tested the other effects to make sure the camera was working.
the other effects worked, which is why I don't understand why lens distortion isnt
@crisp kiln How to ask questions. #854851968446365696
The effect works. However, there is no "Black color check".
It simply overlays the skybox onto everything depending on how dark it is. The darker, the clearer the skybox can be seen.
So everything appears transparent.
I don't know how shaders work, but you are simply multiplying the skybox texture's color value to the color value of the main world texture. How can that be fixed?
You can try this in line 53 in the shader frag return
return saturate(col + col_skybox);
Heyo, I've a question about the HDPR Bloom and post-processing transparency.
I've got a Unity 2021.3.3f1 project, and I can do transparent capture just fine with it, but it seems like the bloom post-processing effect doesn't get an alpha channel in the output. I think I've set up everything correctly (Buffer format should be R16G16B16A16, see screenshot), but the glow of the halo just isn't captured 😦
Is it possible, and/or what do I need to do to make it possible? I've got a couple ideas for "clever" workarounds, but they're a bit mediocre


So the wings (which are just a transparent texture on a plane) get correct transparency, but the bloom obviously doesn't
So, just for the record, I solved it in a mildly janky way! I've added a post-processing effect that takes the image, shrinks the rgb values to the left side, and puts the alpha values in the rgb to the right side. I'm also stretching the camera matrix so the effective aspect ration remains the same.
And then, in OBS, I'm compositing it all together using obs-shaderfilter-plus where I yoink the image and the mask

The post-processing in unity does a bunch of things, and I'm pretty sure there's a better way to do them, but it:
- estimates the alpha of the pixels by looking at the rgb values. If a pixel has a very low alpha channel, but does have a slightly bright color, it must be from the bloom
- fixes the color for transparent pixels by upping their luminance, so the halo doesn't go black towards the edges
- does the separation thing i mentioned earlier
- ...
It's still fast enough for my case, and it does look exactly how I want it to look 🙂
the only disadvantage is now some slight color fringing around the hair, where the color of the bloom bleeds into the texture, which I need to look into
Ok thats much better.
Though, I have another script that adds custom fog on top of the camera. Now it doesn't appear. Maybe its because your script running after fog script? Can it be fixed?
Also at this point, doesnt it make more sense to just get away with how it was before?
you can try adding the fog only to the world camera .. not the skybox camera.
What do you mean by get away with how was it before? which state?
yooo that's so cool! didn't know you can type HLSL in OBS .. great job 🙌
It's a plugin https://github.com/Limeth/obs-shaderfilter-plus
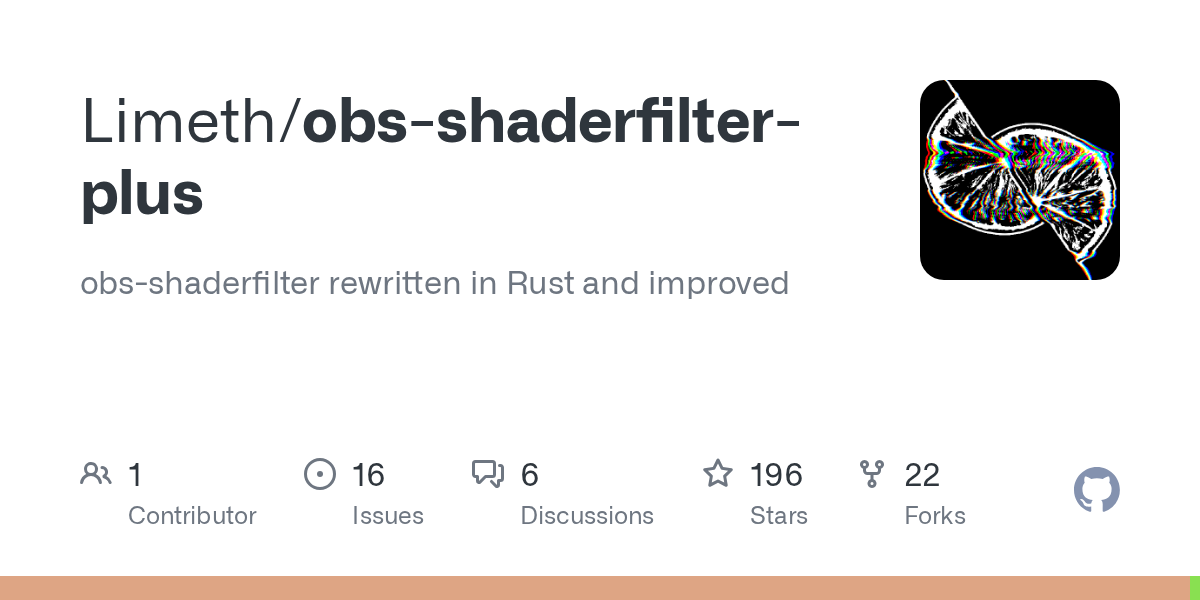
GitHub
obs-shaderfilter rewritten in Rust and improved. Contribute to Limeth/obs-shaderfilter-plus development by creating an account on GitHub.
And thanks for the compliment 🙂
no problem, you earned it 🙌
The fog is already only on the world camera (the one with your script attached).
And get away with how it was in the first place. With the post processing applied on both cameras.
<@&502884371011731486>
https://i.imgur.com/DL8m7qp.jpeg would there be a reason why the slightest bloom value causes these lights to get over-bloomed?


Few things I see here: 1) your lights intensity is quite high 2) youre using scatter of 1, i dont think thats good on most cases 3) youre skipping quite much iterations, I have heard thats usually not great idea 4) 1 isnt really slight intensity for bloom. Id not skip iterations, put scatter to about 0.7 and adjust the intensity value until the bloom looks good. Thats all I can suggest
try changing the order of execution of the fog script and the new script
also try adding the fog below the transform directly so that it's executed first. I don't have any idea how this fog works so I can't help
How? I'm not the creator of the script, I downloaded it with an asset, so I don't know how it work either.
Changing the order of execution should fix it, but how to do it?
Is there any way to make the scene darker without affecting bloom?
Color Adjustment basically removes all bloom
Color Filter of the Color Adjustments override is applied after bloom, in URP anyway*
Is there a graph or something I can look at to see the full order of all effects?
I don't know, let me know if you find one
Hey guys! im using HDRP in Unity, i applied HDRP Post Processing into a empty volume gameobject and set the Mode to global & added some override effects and also set priority to 1 but when i enter the game my player camera doesn't show the processing effects
how can i fix it?
it shows those Post Processing Effects in the editor scene view but not in the game view
of camera
Send a picture of your global volume
inspector
alright wait a minute
@tall spruce

it does not affect the player camera
but the scene viewport camera
@tall spruce ??
anyonee?
increase the priority to 10
maybe the default global post process settings that come with HDRP are overriding it
also try using more noticeable settings like vignette at max intensity so you can tell if it's working or not
if it still doesn't work, try deleting your camera and creating a new one
and try going into play mode
it doesn't let me
already did many times
no luck
Hey, really basic question but I'd like to use a LUT for color grading on a project, however I can't find where I'm supposed to get the base LUT (on which I'm supposed to add effects in an image treatment program), is there a default one I can get inside Unity? (I'm in 2020.1 standard RP)
oh great, thanks a lot!
I'm trying to mess around with the different post processing effects available in the builtin renderer, and for some reason the Screen Space Reflections don't seem to be doing anything? The other effects seem to work fine, is there something extra I have to do in order to make this one work?

Nevermind, figured it out- the camera has to use the deferred rendering path. Hopefully that change doesn't mess anything up in the future
Deferred rendering may not be optimal for your project. If you are making mobile game, deferred rendering is not a good idea. Maybe DepthTextureMode.DepthNormal could do the same
how can i get this bloom reference in a script


wrong Bloom
you're using the one from PostProcessing stack V2
you need the one from URP
how can I set my cam 1 to render with PP a certain volume and cam 2 render with a different PP volume?
to clarify it I have global volume with Ultra bloom to have dreaming effect when much light bounces from the ground and I want a very low bloom effect for UI on a another volume which my UI only camera will render
how cam I tell camera which PP to use?
damn guys I cannot believe nobody else here never faced such a problem
Pretty sure you can use layers to filter volumes
layers let cameras decide what to render and I need to let them decide what Volume to use
yes I use layers for rendering UI and GOs separately as long as I have 2 cameras
oh wait
what IF I put volumes game objects themselves onto corresponding to cameras layers
oh no here is the menu exactly for this

Yep, i think thats it
Note that its meant to mask volumes, not game objects to be affected by post processing
Yeah, should be obvious but ones who dont know how pp works tends to think its meant to mask objects as it would be convenient
Whats is the correlation between Threshold in Bloom and color assigned to an object. I am testing with an unlit material and the setting in the screen shot. The material is assigned to a plane, and its in a scene with no lights or skybox. Color is set to Red (1,0,0). But for some reason the plane still shows a bloom around. Can someone explain how does the color values correlate to the threshold?

is the stacked post processing asset still around? i can't find it on the asset store
how can I have post processing effects and a render texture at once?
Help, I accidentally did something and my level went pink

Hello, I enabled HDR on the quality for Universal Render but my light saber still won´t glow. Anyone know why?


Do you have bloom added to your post processing volume?

What version of URP is this?
URP doesn't use Post-process Volumes any more, post processing is built-in with the Volume component
where can I check that? And if its outdated, how and where can I upgrade it?
I have been using this one

can´t find another one
Yeah, you'll need to switch to the correct post processing stack https://docs.unity3d.com/Packages/com.unity.render-pipelines.universal@10.5/manual/integration-with-post-processing.html
The link to my website above takes you through what you need to do
What's the emission level on your material like? I need to set mine to about 100 before the glow effect appears.
Have in mind if you have post processing value of glow effect differs. For example mine with value of 3 is already shining....
100? Thats quite high
Hi, I have a question (sorry if this isn't the correct channel)
I've been struggling to create this motion blur/laggy trail effect for a game I'm working on. It can be seen in this video at about 9:15 - 9:23:
https://www.youtube.com/watch?v=ZryjvHz7uVk&ab_channel=GamerSault
I'm not sure what this trail effect is called, but I'd love to know it's name, how to create it with Post Processing or Scripting.
(It's not the slow mo effect in the YouTube video either, it's in the actual video game)
Thank you 🙂

Night shift & stay out of the house story explained. night shift abductor or the butcher strikes again in the stay out of the house, where he torments his victims.
Sub to gamersault/ gamer sault for more horror game related content.
Night shift explained
night shift story
stay out of the house story
stay out of the house explained
puppet combo...
True. I am using it for static lighting though, so it is meant to be quite high.
I don't know if it has a name, this is what "motion blur" used to refer to in the old days when computers couldn't practically render a real blur at runtime
It works by blending each frame partially with the previous frame
Probably included in one of the post processing effect packs that every indie horror game seems to use, though it's not really advertised much anywhere
Every render pipeline has a "better" motion blur included by default so it's kind of a niche product
Hey! Does anyone know how to enable post processing in quest with passthrough? For me after enabling post processing, passthrough doesn't work.
Can anyone explain why the following happens? Working in URP. When I enable post-processing on my camera, the image instantly gets a bit darker. Looks like saturation and contrast are also slightly increased. Except that I don't have any PP effects activated. Are there other settings that have an impact on PP rendering, other than PP volumes?

No effects on any volume? Not even Tonemapping?
it happens even when all volumes are entirely disabled
So I found out it has to to with Renderer Features. Specifically, I'm using Kronnect Beautify, which somehow affects the output in the way I described, even if all PP is disabled.
Does anyone know why PP wouldn't be working in an Oculus build?
Anybody know how to get render textures to capture post processes? I have a bloom that would be great to have in a stream of render textures, but no go on urp. I've tried a couple different RT formats and nothing seems to work ( strangely, I got it working... once while fiddling with settings at runtime, on only one of the cams.. and never been able to recreate it.
Couple forum threads sent me to try a few different formats, but either did absolutely nothing, or crashed unity.
Can anyone help me at getting an underwater effect
I have done the box collider
added pp volume to it
added pp layer to my camera
and the correct layer
but does not trigger
Can you provide some screenshots of your setup. It sounds like you're using LWRP, which I don't know much about as I use HDRP mostly, but I might be able to see something a miss if we can see your setup.
I am using URP
Oh, ok. So you've added a Volume and added some post-processing overrides, then on the Camera, under Rendering, you've ticked the 'Post processing' checkbox?
so on camera the rendering pp is ticked
I added a volume to the underwater effect I want
want pics?
this is the cam

and this is the effect underwater

the underwater plane thing looks like this

which pipeline are you using?

You didn't follow the instructions. Again the guides are pinned here top right.
I did it wrong oof
You are using default pipeline component
you can remove postprocessing from packages as well so you won't use it by mistake. URP has built-in components

If you load the SampleScene that comes with URP you can see how the new Volume postprocessing system works. On the SampleScene the volume is set to Global, but you can change it to Local, add a Box Collider and adjust the size of it. When you hit play you can fly in and out of the Volume and see the postprocessing take effect.
Thanks I will check that
@hushed ivy Just managed to check it
I will keep it open
so I can reference it
I deleted everything that I did not need
so it is less confusing for me
on the sample
new to this so thanks for the help
IT WORKS
thank you for all the help
Thanks Fogsight
and Brianer
I used the sample scene and looked at that to help me
changed the URP to default instead of that URP Hifidelity
this isn't exactly post-processing, but is it possible to nativley render at a lower resolution and then resize the output to the display instead of rendering to a low res rendertexture and pointing a camera at a plane?
i want to make my game look low res to look like a ps1 game
but using the rendertexture method seems to use a weirdly high processing power for whats being outputted, and it messes up the affine texture mapping shaders i'm using
if u use a render feature it might be more performance
Hi, I wanted to use a simple image like this for a skybox, I would like to know what are the steps to achieve this?

That's quite overkill
URP has a render scale setting with nearest neighbor filtering, so no need to pixelate an already rendered image

Hi, a little help, please. The Post Processing glows in everything else except the custom mouse cursor that is seen in the full screenshot. I've experimented with everything I could with Post Processing, but no results.
Any fix for this?


The cursor layer needs to be included in the Layers of the post-process layer
You probably shouldn't have duplicates of the same global post-process volume in the scene
Hi, there. Thanks for the reply.
Anyhow, I did that already but it still doesn't work.
Could it be due to the cursor texture being selected via the "Mouse Cursor" Script, not as a regular object in the scene?


I don't know what the script does so it's hard to say
Sorry, my previous advice was mistaken; the layer is for volumes cameras, not objects
This is all in the script.
It's to allow me to add a custom Arrow.
Yea I think it practically replaces the system cursor which is rendered separately from everything
I see, so that must be why.
The cursor should be a sprite or an image to be affected by PP
Yeah, that's the thing. Is a way to use a custom Arrow without the script?
Sprite or image set to cursor position with script
Alright, thanks.
does anyone know how to disable LOD only in the editor view
Do you guys typically have a different global volume / post processing / lighting setup per scene? Or do you use the same across all scenes? (new to post processing)
That depends on the game, but yeah, I have several different profiles that I can slot into volumes when needed.
the post processing doesnt show up on my render texture

Does your RT camera have post processing enabled as well?

@mighty stump