Hi, I'm working on a short python workshop series (3 2-hour long sessions) for middle school-ish 4-H members. I really want it to be interactive, so I really liked the Pybadge (as a teenager myself, kids like buttons lol) + circuitpython; I was kind of thinking along the lines of a really basic game thing. However, the Pybadge is sold out everywhere I look. I have no experience with circuitpython (only normal Python and Arduino), so I was wondering if you all had any suggestions for Pybadge alternatives?
#classroom
1 messages · Page 1 of 1 (latest)
 main shadow
 quartz sun
main shadow
Hi, I'm working on a short python workshop series (3 2-hour long sessions) for m...
quartz sun
main shadow
Hi, I'm working on a short python workshop series (3 2-hour long sessions) for m...
Maybe the Adafruit CLUE: https://www.adafruit.com/product/4500
Do you feel like you just don't have a CLUE? Well, we can help with that - get a CLUE here at Adafruit by picking up this sensor-packed development board. We wanted to build some ...
Oh, the Circuit Playground Bluefruit and Express are in stock: https://www.adafruit.com/product/4333

Circuit Playground Bluefruit is our third board in the Circuit Playground series, another step towards a perfect introduction to electronics and programming. We've taken the popular ...
I would really recommend those, there are some great tutorials on learn.adafruit.com that might help you too.
main shadow
Thank you very much!
quartz sun
main shadow
Thank you very much!
You mentioned you know Python but are new to CircuitPython - maybe check out Professor Gallaugher for your students, too: https://www.youtube.com/playlist?list=PL9VJ9OpT-IPSsQUWqQcNrVJqy4LhBjPX2 Handy video series and have some CircuitPlayground Bluefruit videos too

YouTube
or inspiration for projects
main shadow
Thanks!! will do
 gleaming helm
Im trying to build sunglasses that take a signal from my phone and project it onto the lense so i can read lyrics secretly to sing along. My budget is very low so I was thinking I can use the lcd panel on a laptop or old phone and connect it to micro usb, micro hdmi, or usb c connecter and connect it to my phone. Can I cut the lcd panel carefully to make it an adequate size and what other connectors do I need to connect the panel to my iphone?
 copper basin
gleaming helm
Im trying to build sunglasses that take a signal from my phone and project it on...
copper basin
gleaming helm
Im trying to build sunglasses that take a signal from my phone and project it on...
No, it's not possible to cut an LCD panel down to a smaller size and still drive it... it's a complicated bit of microelectronics, so it would be kind of like expecting to cut a dog down to the size of a mouse and still have it be alive.
While what you want to do is possible to build, it's a pretty advanced project, so you might want to reconsider if you're more on the beginner side of things.
gleaming helm
copper basin
While what you want to do is possible to build, it's a pretty advanced project, ...
ok thank you. do you think I could use a bit of a small projector and chop it down to size and attach it to the arms of the glasses or have any other solutions?
copper basin
gleaming helm
ok thank you. do you think I could use a bit of a small projector and chop it do...
Yeah, again you generally can't just take a complicated device and chop it in half to make a smaller one... It has to be designed to be that small in the first place.
gleaming helm
copper basin
Yeah, again you generally can't just take a complicated device and chop it in ha...
oh yeah ofc i was just talking abt taking the bulk off of the projector like the plastic casing and extra lenses/dials yk
 shut snow
gleaming helm
Im trying to build sunglasses that take a signal from my phone and project it on...
shut snow
gleaming helm
Im trying to build sunglasses that take a signal from my phone and project it on...
The absolute cheapest way to create a HUD (heads up display) is to reflect a tiny display from the side of your head to the front.
HIDs aren't generally expensive due to the screens (though small displays are somewhat expensive) but instead due to the complexity of the optics needed to make a close display look far enough away to focus on.
The lowest cost model that isn't see-through I know of is about 200$, while the lowest see-through model is around 500$.
copper basin
shut snow
The lowest cost model that isn't see-through I know of is about 200$, while the ...
Amusingly there used to be a super-cheap HUD marketed as a kid's spy toy, but it's long off the market. https://jakehildebrandt.com/2007/09/30/25-head-mounted-display/

So it’s 2007: shouldn’t there be more cyborgs? Well, for a mere $25.00 (or less), you can be one big step closer to being one yourself. How so, you ask? Click the following link to to f…
shut snow
This setup, basically placing a screen at the end of a reflected tube, does work fairly well if you don't mind the large form factor. https://www.youtube.com/watch?v=pkB1Nahi-X0
shut snow
copper basin
Amusingly there used to be a super-cheap HUD marketed as a kid's spy toy, but it...
Yeah. Adafruit actually used to sell one too.
I definitely think the best low-budget method these days is a 1" oled with a reflector, it just isn't very pretty.
Also, FartJartz, be careful of fake videos around this topic. There are hundreds of "easy" DIY HIDs or smart glasses that are just complete fakery. The smallest you'll see something made of everyday components is something like https://www.youtube.com/watch?v=cLiGWNM21XY . Anything using a "projector" or similar is probably fake, same with transparent OLED screens. Eyes just don't worth that way sadly.

High quality PCB prototypes: https://www.pcbway.com
3D & CNC service: https://www.pcbway.com/rapid-prototyping/
🔥In this video I build a smart glasses multimeter that receives data with Bluetooth and measure voltage, resistance, current, inductance and capacidtance. Then it display taht data on a tiny OLEd screen inside the glasses with 3D prin...
Also the thumbnails are pretty much always fake or edited. Just the nature of HIDs.
copper basin
A projector can actually work if you focus it at infinity, since that'll also be at an infinite focus from the eye's perspective.
shut snow
True, I just meant that it won't worth without complex optics. I think there are a few products in the $200+ range that used micro-projectors focused onto holographic lenses to redirect light properly, but I've never seen one available in a DIY form factor or price.
copper basin
Ah, I just meant hanging a picoprojector out in front of your face, heh heh.
shut snow
Ahh... that certainly could work in the right situation... maybe not too practical 😁
On that front, a DIY teleprompter is pretty easy and might work here if the goal is reading lyrics while looking into the camera.
 pale wedge
are usb signals (differential pairs) technically FM signals?
 storm lodge
pale wedge
are usb signals (differential pairs) technically FM signals?
storm lodge
pale wedge
are usb signals (differential pairs) technically FM signals?
not by most reasonable definitions. nothing about using a differential pair makes a signal inherently FM. why are you asking in this channel specifically?
 steep panther
hello! I'm trying to get started with the adafruit circuit playground classic but feel completey lost. If anyone has suggestions for starting out, please let me know!
 quasi flame
steep panther
hello! I'm trying to get started with the adafruit circuit playground classic bu...
quasi flame
steep panther
hello! I'm trying to get started with the adafruit circuit playground classic bu...
 steel plume
if it is being overwhelmed at all the geegaws, just pick one to blink or beep at first, maybe save the microphone for dead last
quasi flame
steep panther
hello! I'm trying to get started with the adafruit circuit playground classic bu...
If you can get it, the Circuit Playground Express might be easier because it supports CircuitPython and MakeCode.
steel plume
also just more capable, ignoring the inconspicuously absent IR
steep panther
thank youu!!
 distant sierra
Does anybody know how to use this board I'm kind of a dunce I can't figure out if I'm supposed to be using Arduino or if I just have to learn circuit Python. https://www.adafruit.com/product/5800

There's a few things everyone loves: ice cream, kittens, and honkin' large TFT screens. We're no strangers to small TFT's - from our itsy 1.14" color display that graces ...
I keep finding example sketches in Arduino code and can't figure out how to get them to work in circuit Python because the comments are different with the hashtags and stuff where are the circuit Python examples for a screen with some buttons where the touch works
I really just want it to display the HTML page off of an IP address and let me navigate the maps widget
It would be awesome if it could just be the Ethernet web server and the screen that reads its own page.
 spice rose
distant sierra
Does anybody know how to use this board I'm kind of a dunce I can't figure out i...
spice rose
distant sierra
Does anybody know how to use this board I'm kind of a dunce I can't figure out i...
https://learn.adafruit.com/adafruit-qualia-esp32-s3-for-rgb666-displays/circuitpython-display-setup
You should have the option of using either, though circuitpython might not have as many examples around. There is a paint demo in the guide above, but you will have to find and adapt other examples for other devices for your use case.

Adafruit Learning System
Use the new Qualia ESP32-S3 to add a higher resolution Dot Clock RGB-666 Display to your next project
distant sierra
spice rose
https://learn.adafruit.com/adafruit-qualia-esp32-s3-for-rgb666-displays/circuitp...
Yeah I've gotten the paint sketch example to work in circuit Python but I haven't been able to get a single Arduino sketch to upload with circuit Python on the board. They don't seem like compatible example tests it's either one or the other right?
spice rose
distant sierra
Yeah I've gotten the paint sketch example to work in circuit Python but I haven'...
It is possible to switch between the two, but you have to put the board into bootloader mode in order to upload an Arduino sketch.
distant sierra
Thanks I will try that.. In the end what I'm really trying to does have the ESP 32 log into my network then display the HTML page from an IP address on the screen
spice rose
distant sierra
Thanks I will try that.. In the end what I'm really trying to does have the ESP...
An html page is likely to be difficult. Ironically the ESP32 is pretty good at hosting webpages, but displaying a webpage is fairly complex. What is your end goal? Maybe parsing JSON or displaying an image that’s rendered on another server might work better?
distant sierra
spice rose
An html page is likely to be difficult. Ironically the ESP32 is pretty good at h...
The easiest way to have the screen just be the Google Maps widget where the pin is being refreshed on its own.
I already have the page up and running so if the ESP 32 could just log into the network and display the IP address would be best but if it needs to host the server, I could use it instead of the M0 bord I would just have to connect the Lo-Ra to the ESP 32.
It would have been easier to get a Raspberry Pi 3 and a screen hat with Linux
distant sierra
The Adafruit Qualia ESP32-S3 looks like it looks like it wants to be something that can share the projection of the screen to multiple monitors through Bluetooth or Wi-Fi what is something like this typically used for if not reading information from a network and putting it on the screen.
 forest plinth
# physical constants
Volts = 1
Amps = 1
Ohms = Ω = 1
KΩ = 1000 * Ω

# example usage
R4 = 20 * KΩ
Vcc = 12 * Volts
print(f"Current is {Vcc/R4/1000} milliamps."
Adapting the standard trail rating system to software development, specifically for bug fixes and enhancements in the context of CircuitPython and community participation, could be done by creating a rating system that indicates the difficulty and skill required to address different types of issues and enhancements.
Here's a suggestion for adapting the rating system:
-
Green Circle: These issues or enhancements are considered beginner-friendly and suitable for newcomers to the CircuitPython community. They typically involve simple fixes, require basic programming knowledge, and don't require deep understanding of the core interpreter or libraries. These can include tasks like documentation updates, adding basic examples, or fixing minor aesthetic issues.
-
Blue Square: These issues or enhancements are at an intermediate level of difficulty. They require a moderate understanding of the CircuitPython interpreter and libraries. Blue square tasks can involve fixing moderate bugs, improving existing features, or adding new features to the libraries. They may require some debugging, knowledge of the codebase, and familiarity with software development practices.
-
Black Diamond: These issues or enhancements are at an advanced level of difficulty. They require strong programming skills, deep knowledge of the CircuitPython interpreter, and proficiency in C and/or Rust (for core features) and Python (for library features). Black diamond tasks can involve fixing complex bugs, optimizing code, or implementing advanced features. They may require diving deep into the core interpreter or libraries and making modifications to low-level code.
- Double Black Diamond: These issues or enhancements are extremely challenging and are meant for expert developers within the CircuitPython community. They require exceptional programming skills, expertise in low-level languages (such as C or Rust), and an intimate understanding of the core interpreter and libraries. Double black diamond tasks can involve solving critical and intricate bugs, implementing highly complex features, or optimizing performance at a deep system level.
🔷 🔷
 dawn hornet
forest plinth
```python
# physical constants
Volts = 1
Amps = 1
Ohms = Ω = 1
KΩ = 1000 * Ω
# ...
dawn hornet
forest plinth
```python
# physical constants
Volts = 1
Amps = 1
Ohms = Ω = 1
KΩ = 1000 * Ω
# ...
I just found this channel.
V/R=C (in Amps) so 12 / 20000 = 0.0006 Amps
I think the print statement has an error. The “/1000” should be “*1000” to give milliamps.
forest plinth
Yes that is correct.
 warm dagger
Is there a tutorial summary page that lists the differences between all the AdaFruit microcontrollers? I’m lost in the different “lines”, like Trinket vs Feather vs Wippersnapper vs Gemma. So many words that I can’’t find on the net… and need to be defined somewhere. Perhaps in a glossary page?
forest plinth
Search https://learn.adafruit.com/ for "Introducing Trinket" or "Introducing Feather".
warm dagger
Thanks, Dexter! I also figured out that to get a list of all the lines, I can search for just “introducing” and the articles will list the lines, although quite verbosely. I still think they need a single page like a glossary of adafruit-specific terms, but this will work for now.
 oak gazelle
warm dagger
Thanks, Dexter! I also figured out that to get a list of all the lines, I can s...
oak gazelle
warm dagger
Thanks, Dexter! I also figured out that to get a list of all the lines, I can s...
https://cdn-learn.adafruit.com/downloads/pdf/choose-your-circuitpython-board.pdf This goes throught most of adafruit products except circuitpython flavored which you can ignore
Can't find the learn page from where it was linked, but it's something like choosing the right adafruit microcontroller for your project
just trinket and feather miss plenty of products like the qtpy, pyportals and the flagship/high-end grand central m4
dawn hornet
@bold path - (moves my comment here since it's not CircuitPython dev related) ...
For the CircuitPython workshop series I am putting together, there was one big reason for choosing Thony over MU:
I encountered a couple bugs in MU - the show stopper being issues with the serial terminal. The issues have been around for almost 2 years, known solutions, and no action.
Initially I was not a fan of Thony until I internalized how and why it works the way it does.
CircuitPython is designed for the developer to write their code incode.pyand save it to the hardware, at which point the hardware automatically restarts with the new code.
Thonny can do this but it can also do something quite different - it can "stream" code into REPL and run it "in memory" without it being saved to the hardware.
Users who have followed lots of Adafruit learning guides can be confused by their code running from Thony and then not running when the hardware is restarted. It is not obvious that running code from within Thony does not require the code to be stored on hardware.
However, once a user is told how (and why) Thony behaves, the workflow becomes obvious and easy.
Further, the fact that Thony can stream CircuitPython code from the computer to the hardware and run it is actually easier for development, debugging, and teaching.
Not only is the code.py not touched on the hardware, but also the Thony "streaming to REPL" makes it very easy to have lots of sample code and lesson code on the computer and the participants can switch between them instantly without having to rename and copy them to hardware.
 bold path
dawn hornet
<@1152454697614069811> - _(moves my comment here since it's not CircuitPython de...
bold path
dawn hornet
<@1152454697614069811> - _(moves my comment here since it's not CircuitPython de...
Yeah, for a classroom setting that's great. And then you can have all your common routines in libraries and all your examples are super simple and clear.
 vital coral
dawn hornet
<@1152454697614069811> - _(moves my comment here since it's not CircuitPython de...
vital coral
dawn hornet
<@1152454697614069811> - _(moves my comment here since it's not CircuitPython de...
that is helpful. I'm running Mu editor on a mac and I feel like ti is painfully slow to update to the pico. I have often click save more than once and also open and close the terminal to see any action happening. How long should it be taking? I run a quick demo on a pc and it updated much faster.
storm lodge
vital coral
that is helpful. I'm running Mu editor on a mac and I feel like ti is painfully ...
known problem with macOS Sonoma writing to small USB drives, i think
 rapid hill
vital coral
that is helpful. I'm running Mu editor on a mac and I feel like ti is painfully ...
rapid hill
vital coral
that is helpful. I'm running Mu editor on a mac and I feel like ti is painfully ...
Yes, it appears to be about 40 times slower than it should be: https://github.com/adafruit/circuitpython/issues/8918. Sonoma had even worse problems, but this is not a great improvement. We encourage you to file a Feedback item to Apple to get their attention on this. The more reports the better.
 bold path
Is there ever a good time?
 iron portal
No.
 stray sinew
Ohai, I volunteer with a code teaching non profit in my area, and I'd like to pitch a Python on Hardware workshop to them. Since that would require the purchase of a 15 x CPX edu pack ( https://www.adafruit.com/product/3399 ), I wanted to send a presentation video of the CPX board, to be more convincing.
I cannot find an Adafruit presentation video for Circuit Playground Express tho! 😲 There are a couple for the original Playground (that only show coding in Arduino and MakeCode), and one for Bluefruit (that focuses on the Bluetooth side), but none exclusively for CPX...
I was sure I saw all the videos Adafruit ever made (😅 ) , but maybe I'm missing something?
Does anyone know of a good CPX video?
rapid hill
stray sinew
Ohai, I volunteer with a code teaching non profit in my area, and I'd like to pi...
I made this intro video about 3 years ago:https://www.youtube.com/watch?v=1rkM0Ow8Pkc

there's some intro material, and the actual demo starts around 6 minutes in
it's not slick, it was slightly planned but unrehearsed
stray sinew
rapid hill
I made this intro video about 3 years ago:https://www.youtube.com/watch?v=1rkM0O...
Awesome, thank you, I can definitely use parts of this in my pitch. Hopefully it works too! 🤞
forest plinth
Connecting the NeoPixel Stick to the Pi Pico:
https://adafruit-playground.com/u/dexter_starboard/pages/neopixel-stick-and-pi-pico
 formal field
@wispy marsh I saw your livestream a while ago highlighting Adafruit’s TRRS Trinkey. Also in the stream you mentioned HID Remapper. I started playing with it and think it can work for my school. Only issue is teachers writing macros for string input. So I wrote some Python to do that. Any interest in checking my script out? I’m not a programmer, but it works. https://github.com/MGlaab/HID-Remapper-Macros-Writer

GitHub
Contribute to MGlaab/HID-Remapper-Macros-Writer development by creating an account on GitHub.
 wispy marsh
Well @formal field , I think its awesome that you've got a tool that makes HID-Remapper usable for your scenario! Nice job!
As for feedback, it looks like your code is primarily regex driven (which I use a ton)... so, I do have a suggestion or two:
1: Do you know Javascript? If so, this exact same code would be much more accessible if it were running with in a web interface. Nothing fancy on the hosting side, just some fields where the user entered their string and parameters and a textarea where the JSON was output so they could copy/paste it into HID-Remapper
2: If you did #1, it would be pretty straightforward to fork the web-interface for HID-Remapper and integrate that into their UI... remember, the UI doesn't run on the device, it's all in the browser hosted from a separate server... so you could host a version that both does the string work & updates the device.
3: This seems super useful - have you approached the HID-Remapper team to see if it could be added to their UI? They have been super welcoming to me & my requests.
Let ms know how you plan to move forward - I'm more reachable on email at bill at at makers dot org.
 acoustic stump
I know @primal river asked about CircuitPython code challenges. For anyone teaching #CircuitPython, I have an open Google Drive w/my weekly challenges & solutions at Gallaugher.com (under Physical Computing course). Keynote slides include video but there are pdfs for non Macs. There are lots of fun ideas for your lessons. More added each week. I need to record the better ones (forgot the “talking Groots” everyone built w 3D printed Groot heads, laser cut bases, succulents with cap touch thread woven between leaves) but here is a simple example of another lesson. There is a short vid and photos here. https://www.threads.net/@john.gallaugher/post/DAYV5slRg_Z/?xmt=AQGzi3U344V_cx8Zdxj3VzDAg63JxEQZyDIZc_0VyZedTw

Threads
For anyone teaching #CircuitPython, I have an open Google Drive w/my weekly challenges & solutions at Gallaugher.com (under Physical Computing course). Keynote slides include video but there are pdfs for non Macs. There are lots of fun ideas for your lessons. I need to record the better ones (forgot the “talking Groots” everyone built w 3D print...
 gilded path
First of a series of three lectures on differential amplifier transistor pairs for my ECE3400: Analog Electronics class at Georgia Tech: https://youtu.be/Sj81rWekdZ0

Support this channel via a special purpose donation to the Georgia Tech Foundation (GTF210000920), earmarked for my work: https://youtu.be/VBu-LST1p9c
0:00 Introduction
1:29 Matching
2:34 Output coupling
3:11 Emitter resistors
3:36 Current source
5:03 Bias currents
6:04 Bias voltages
7:58 Small-signal circuit
9:33 Emitter currents
11:13 Collect...
gilded path
Second lecture in this series on differential amplifiers. (Incidentally, that's my wife in her Elizabeth cyborg costume, the Lizborg.) https://youtu.be/ro3EmJ8SCIw

Marshall Leach's notes on the BJT Differential Amplifier: https://leachlegacy.ece.gatech.edu/ece3050/notes/bjt/BJTDiffAmpSu10.pdf
Support this channel via a special purpose donation to the Georgia Tech Foundation (GTF210000920), earmarked for my work: https://youtu.be/VBu-LST1p9c
0:00 Introduction
1:00 Bias calculation setup
3:11 Bias currents...
gilded path
This is the last of this trilogy on differential amplifiers, covering the idea of Common Mode Rejection Ratios (CMRRs). https://youtu.be/dK3juo2dL_s
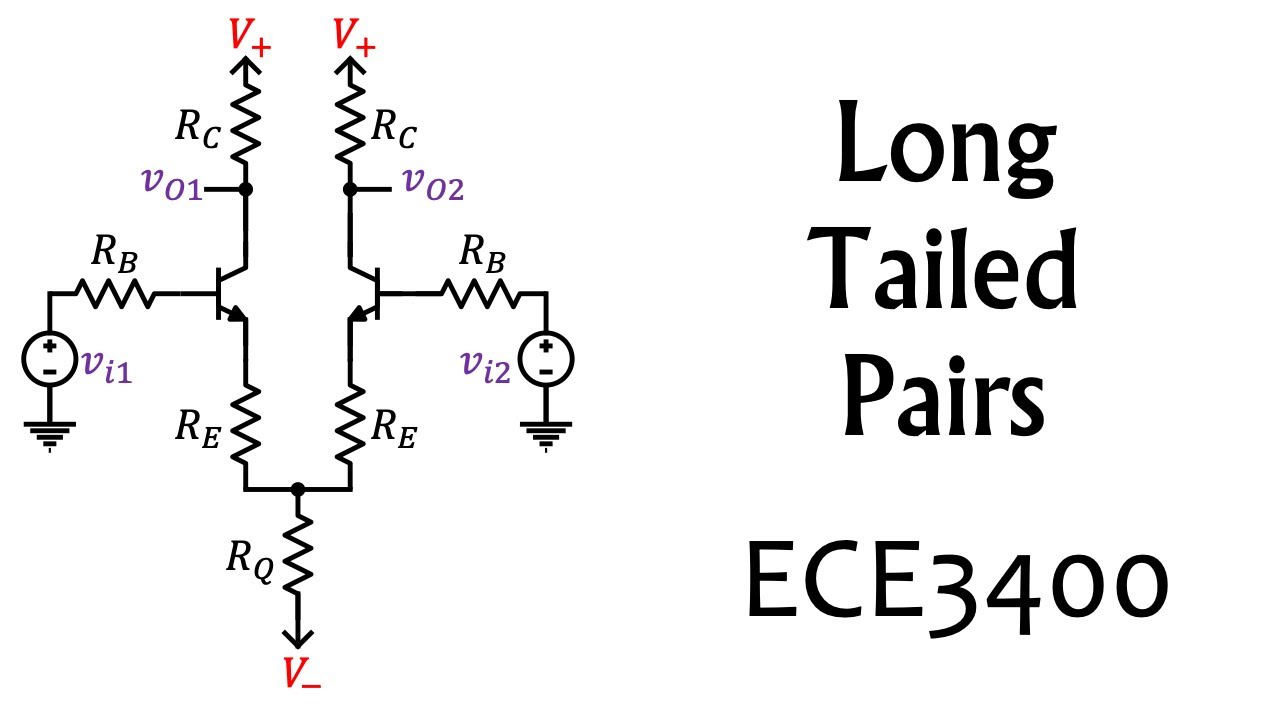
Marshall Leach's notes on the BJT Differential Amplifier: https://leachlegacy.ece.gatech.edu/ece3050/notes/bjt/BJTDiffAmpSu10.pdf
Support this channel via a special purpose donation to the Georgia Tech Foundation (GTF210000920), earmarked for my work: https://youtu.be/VBu-LST1p9c
0:00 Introduction
1:37 Small-signal circuit
2:14 Differential mo...
gilded path
This is my lecture on Widlar current mirrors and sources. (Bob Widlar was a rather interesting character!) https://youtu.be/5yfavpZPyUQ
 fast valley
The best part about 400-level circuits courses is being a month behind syllabus because the professor won't stop talking about Bob Widlar
 kindred pilot
i am a mime
trapped in a box
 vague pewter
If you are looking for a noob course on python, MIT open courseware has a nice one.
Not that old with good programming basics. Excellent professor and its free.
26+ hours of lectures
https://www.youtube.com/playlist?list=PLUl4u3cNGP62A-ynp6v6-LGBCzeH3VAQB

YouTube
Instructor: Ana Bell View the complete course: https://ocw.mit.edu/courses/6-100l-introduction-to-cs-and-programming-using-python-fall-2022/ *Note: Lectures ...
 candid ice
These people aware they're being recorded? Looks questionable, if not illegal. YTF is this even posted here?
 worthy ridge
candid ice
These people aware they're being recorded? Looks questionable, if not illegal. ...
worthy ridge
candid ice
These people aware they're being recorded? Looks questionable, if not illegal. ...
Agreed. Removed
acoustic stump
Unsure if this is the right place to offer this, but I'd love to see a CircuitPlayground board update: I have had great success starting my PhysicalComputing course with the CircuitPlayground Bluefruit & migrating to the Raspberry Pi Pico 2W. It's been great seeing the Raspberry Pi folks upgrade their microcontrollers. If appropriate - I'd love to suggest that Adafruit create a "next gen" CircuitPlayground (the Bluefruit is showing its age). Not sure how it'd impact parts costs, but if it fit within the $25 base for the full sensor CircuitPlaygrounds, my wish list would include WiFi and (perhaps a stretch) an ESP32 capable of running WLED. More RAM / better power mangaement (e.g. for things like NeoPixel strands) would also be on the list, and of course STEMMA-QT. While I don't use MakeCode, a board that could support MakeCode through Pythonic IoT/WiFi would be a great board for so many in K-12 to University. Hope that's not to bold of me to suggest. I'm certain there are a ton of additional cost and manufacteuring considerations for this, but I'd love to see Adafruit take the lead on the next gen go-to electronics coding platform. Thanks all for your hard work!
I'm thinking extra about this as I take parts inventory the week before school starts. Here's the cart I have in one of the Boston College MakerSpace closets showing just some of the parts we use in the course. Anything I'm missing that others are using & have had great results with? I've also been thinking about this as I update CircuitPython School videos and hopefully this smester will finally launch an online quiz tool for students to assess learning from each vidoe + a low-cost companion text.


 gilded inlet
acoustic stump
Unsure if this is the right place to offer this, but I'd love to see a CircuitPl...
gilded inlet
acoustic stump
Unsure if this is the right place to offer this, but I'd love to see a CircuitPl...
I know this isn't relevant to your comment, but if you're the same Prof Gallaugher who makes excellent electronics educational content on youtube: thank you!
acoustic stump
gilded inlet
I know this isn't relevant to your comment, but if you're the same Prof Gallaugh...
Ha! That's me. Thanks, funky one. I really appreciate the kind words. Hack on!
rapid hill
acoustic stump
Unsure if this is the right place to offer this, but I'd love to see a CircuitPl...
This is always the kind of thing you can send to support@adafruit.com as a product suggestion.
MakeCode was developed by Microsoft. The lower-level code for various boards was co-developed with, I think, Lancaster University. We were not involved in the development, though we love the project.
 tacit meadow
acoustic stump
I'm thinking extra about this as I take parts inventory the week before school s...
tacit meadow
acoustic stump
I'm thinking extra about this as I take parts inventory the week before school s...
I have the students (pervasive computing - inherited an IoT focused approach) get a parts kit comprising the Bluefruit and some alligator clipped wires, and encourage them to use our makerspace for 3D printing things. I'd love to add things like the Crickit onto our list but I want to keep the price point as low as possible for what we do.
But I agree, I'd love a new iteration of the bluefruit. Very approachable for students that are not necessarily CS-focused.
 steel yacht
acoustic stump
Unsure if this is the right place to offer this, but I'd love to see a CircuitPl...
steel yacht
acoustic stump
Unsure if this is the right place to offer this, but I'd love to see a CircuitPl...
You could combine your existing Raspberry Pi Pico 2 W(H) boards with something like the PicoBricks Main Board, to result in something similar to the Adafruit Circuit Playground Bluefruit. An equivalent of that, but with a slot for an Adafruit ItsyBitsy or Arduino Pro Micro form-factor dev board, might be able to be made pinout and form-factor compatible, with existing Adafruit Circuit Playground boards.
steel yacht
acoustic stump
I'm thinking extra about this as I take parts inventory the week before school s...
If there's enough students within a single semester, you might be able to stagger the lessons that use particular Stemma QT breakout boards, such that each student accesses less than half of all the board types available, at any given time. Obviously, this wouldn't apply to the microcontroller boards themselves, cables, nor https://learn.adafruit.com/swirly-grid (assuming the latter's even applicable).

Quick-mount your boards with this swirly grid!
acoustic stump
steel yacht
You could combine your existing Raspberry Pi Pico 2 W(H) boards with something l...
Thx. This is a great add-on, unfortunately it's also a bit of a budget buster basec on what we already own. Appreciate the rec.
Want to alpha test a quiz platform to accompany my YouTube videos? This prelim platform can be accessed at https://johngallaugher.com. It was created by Theo Utomo, one of the TAs for my Swift course (although not written in Swift). Quizzes for the first few lessons of the updated playlist bit.ly/circuitpython-school videos are online & I'll be adding more. There is a feedback link on these pages where you can send a note to Theo re: any suggestions or issues you've found with the experience. I'm sure he'd also appreicate a kind word of encouragement, too. I plan to keep this updated & to incorporate these quizzes into a low-cost textbook I'm writing. The questions mimic questions that my students are assigned via the Canvas Learning Managment System that are hidden behind the university's firewall. Quizes like this can be a strong add for "flipped class" work to help students assess if they're learning, and prompt them to "focus more" if they can't answer questions after completing lessons (a frequent critique of poorly-implemented flipped class courses). Students are allowed to re-take the quizzes repeatedly to help strengthen understanding. On Canvas my students also submit their circuitpython code work to be graded. In class we have a series of challenges based on the quizzes & I post challenges / solutions as slides to the open Google drive for the course at gallaugher.com, but I'll be creating challenge/solution videos going forward, as well. Apologies for the vanity URLs. I hope you find this helpful & thanks for sharing word with colleagues! It's great to see the content used more widely (although the channel is still far beyond the 10k subscribers of the older SwiftUI channel).
Examples

 tacit meadow
acoustic stump
Want to alpha test a quiz platform to accompany my YouTube videos? This prelim p...
tacit meadow
acoustic stump
Want to alpha test a quiz platform to accompany my YouTube videos? This prelim p...
Sounds interesting - might be good supplemental material for my students as well :D.
Although....

ah nvm, just took a while to load
i like the formatting, very nice @acoustic stump. also, phew:
 acoustic stump
Fun lesson - Build a raspberry pi pico DJ board while learning to use the $8 Adalogger Cowbell to expand file storage to 32GB, & add a STEMMA-QT port with no wiring! My students built this in the MakerSpace last class & it was a blast! https://youtu.be/yZdR7oGbTX8?si=HQveNpNpnvKJrTJK

Expand the file storage of a Raspberry Pi Pico board by up to 32 GB! Great for storing lots of large audio and image files.
We'll learn to do this by using the Adafruit Adalogger Cowbell, a $8 add-on that gives us a STEMMA-QT port, a microSD card reader, and requires no additional wiring.
And we'll demonstrate how to set up I2C on the board, and...
 rough trout
I did I vibe coding exploration where I asked Claude Code to keep a version of the software more approachable (accessible?) to a middle/high-school Python programmer. The full feature code is in the 'pro' directory and learning/hacking friendly code in the 'hs' directory.
It is a camera mirroring app/photo-booth using an AdaFruit MatrixPortal (m4, should be compatible with an s3?), but it is not required as the application has a preview window.
I have NOT generated any supporting curriculum text.
Tested on MacOS and a raspberry pi 4.
Code here: https://github.com/deangoodmanson/MatrixPortalDemos
Feedback appreciated here, or github.

GitHub
Exploration of MatrixPortal code and demos. Contribute to deangoodmanson/MatrixPortalDemos development by creating an account on GitHub.
rough trout
I was quite impressed today that with some informative prompting, product and github url's, Claude on my phone generated macro files for the AdaFruit MacroPad that dropped in and didn't need any further edits!
0.2.0 is out here with demo mode and better READMEs: https://github.com/deangoodmanson/MatrixPortalDemos

GitHub
Exploration of MatrixPortal code and demos. Contribute to deangoodmanson/MatrixPortalDemos development by creating an account on GitHub.
quartz sun
rough trout
I was quite impressed today that with some informative prompting, product and gi...
That whole project looks really cool - I'm going to give it a try. Nice work! (You should think about posting in #show-and-tell too, more people might see it!)
rough trout
Thank you!, still a lot of rough edges and wet paint, so will s&t with more confidence. So glad to be using the Adaboxes!
 hidden carbon
Welcome to the #classroom channel! This is where people with the Educator role will discuss how to teach electronics in a classroom setting!
worthy ridge
@hidden carbon thats not what I was thinking. I was thinking this is where educators can discuss how to teach electronics in a classroom setting
 glass spruce
then it would be the teachers lounge
hidden carbon
@worthy ridge done
 compact swallow
Going to be teaching classes at local shop soon.. might be interested on others ideas
 blissful kayak
I ran some workshops a few years ago with esp8266 and micropython
the materials are here: http://micropython-on-wemos-d1-mini.readthedocs.io
 opal parrot
great channel idea, looking fwd. to reading it
 echo ginkgo
i'd be interested in knowing potential pitfalls when teaching Scratch to a group of 7-9 yr olds
i'd imagine that the topics would have to be in bite size format
and you'd have to ensure no one gets snagged on a technicality
my experience so far (i have an 8 yr old) is that it's easy to get side tracked by picking the perfect sprite and when the code doesnt do what they expect it can 1. be hard to figure out why (read: explain why) and 2. help them keep their ideas simple to begin with...can't recreate Minecraft in a day, but you can easily make a sprite zoom across the screen.
compact swallow
Thinking in the near future of using tinkercad to teach scratch with arduino and neopixels
Keeps the cost of the class cheap and no worrying about boards breaking
 nova hamlet
One problem I've run into with just my two kids (7 and 10), is that some of this stuff really does require 1:1 help. They do much better when I can work with just one at a time. When I try and do projects with both of them at the same time I find I have to show one, then the other. They're not so good at watching me do something and then reproducing it. So you may find you need a lot more helpers if dealing with a larger group of kids.
 spare rock
I'm not an educator, though I play one on TV!
All kidding aside, for most of my personal life and career, I've been in the role of an educator in a non-official capacity. Teaching peers in lunch-and-learns, helping other instructors as an assistant in 4H, one-on-one mentoring/shadowing, even teaching topics to freshmen in college as an RA...
I've learned that when it comes to complex, specialized topics like technology where the average person may not have had exposure, and where one minor stumble or roadblock can easily derail the entire process -- it's essential to have as many competent, trained assistants as possible.
And when you have a good student who truly -gets- the material, encourage them to step up and fill in the role of an assistant. It helps reinforce their own understanding of the material while providing a much needed service.
compact swallow
From the limited exposure I've had to teaching, class sizes of 4-6 are acceptable for an older audience 18+. Kids at least need to be entertained which takes a fair bit more time
spare rock
@compact swallow I agree -- depending on their skill set, prior experience, and ability to handle failure. Sometimes you can up that to 8-10, or even reduce it down to 3-4.
compact swallow
I've definitely taken the average, so far its been working out
spare rock
I feel some days, even when dealing with adult students in non-classroom settings, I might need more background in education theory.
compact swallow
You know that doesn't sound like a bad idea, why did I never think of that
spare rock
I mean, most of my "techniques" stem from two things: how would I want to be treated/trained, and what were successful techniques I remember from trainers I respected (which let's face it, I wasn't paying attention to teaching techniques in college, I was trying to absorb the material).
compact swallow
Back in university that was a common rant of, why can't the professors teach? Don't we have an entire college dedicated to teaching on campus, go for a few courses
spare rock
I'm not an engineer by trade (I'm an IT guy) -- but I build things. I'm not an educator by trade, but I feel like a large part of my day is spent teaching people. For engineering projects, I dive into professional resources. Why shouldn't I be doing that for teaching techniques?
I mean, I say this now as it's something easy -- but making a lesson plan, adjusting the material to fit those ideas -- then seeing if they work....it's much harder than it looks.
I guess that's why I'm here...to see what I can start doing to build a better foundation for a non-educator to help teach technology-focused material to adults.
compact swallow
The very first class I taught on electronics was a basic electronics course. I took the idea of get a reference page and go through it, look at a few IC's and then build a prefab'd circuit.
Was not a smooth class
spare rock
Train wreck huh? I remember the first 30 minute class I taught for Student Government in high school. I think I had root canals be less painful.
I also had no mentorship in designing the material.
compact swallow
Likewise, building the electronic area and designing the course with out much advice was very frustrating.
It'd be neat as part of this chat if we can develop curriculum for instructors to grab and share
Currently attempting at building a "Water Example" of Capacitors, kind of like a Pythagoras Cup Idea to show the idea
spare rock
One of the things I've been asked to do, but hasn't happened yet, is to help teach a Linux class for coworkers, as it pertains to maintaining and installing our products.
We had someone try it before...no sense of how to teach in a classroom setting, and they spent 2-3 hours on zipping and unzipping files. Seriously.
compact swallow
Linux is something thats best 1 on 1 for like 20 minutes and most people get it
I'm a programmer, most of my friends are engineers and trying to teach them better coding practises is a nightmare in a group
Or trying to get them to use version control is something else
spare rock
That's pretty much what I do in the field...one on one, show them basic practices, then give them a "cheat sheet" with all the more complex product-specific commands and commonly used arguments.
....until they forgot all the basic practices, relied on the cheatsheet verbatim as a procedure, and bricked a box because they did something really bad.
compact swallow
Started using VMware and hyper-V boxes for clients. Makes it really to save their work and revert to a working copy if I save the disk to a back up once a week
spare rock
Can't ever argue with virtualization
compact swallow
Its kinda why I want to try a class with tinkercad
compact swallow
Not overly though. Now I've set up my framework it takes 5 minutes to set up a full windows 10 box or 3 for linux
blissful kayak
but then the students can't do it for themselves
compact swallow
The only area thats not nice is GPU intensive applicaitons
spare rock
Yeah, depends on the scenario of course -- but usually the effort needed beforehand pays out dividends down the road
compact swallow
^
blissful kayak
the whole point of teaching something is so that they can later use it without the teacher's help
and not just on the single computer that has been prepared
that's why the micro:bit works so well — you can take it home
compact swallow
I think we had a misunderstanding, I use VM at work for people to use, and I can recover the back ups. Not in the class room
blissful kayak
ah, sorry, the name of the channel misled me
compact swallow
Tinkercad is online so you have your full project in a browser
We got side tracked sorry
blissful kayak
I usually keep everything I make in a code repository for that reason
it also has the side effect of forcing you to make small, single-purpose changes
spare rock
For my usage of VMware, it makes a great test/dev environment -- create a borked build of a desktop program that really muddles up your OS? Roll it back to a pre-install snapshot. Redeploy. No need to reinstall another OS to get back to a clean state.
MakeCode and such are great for learning programming for microcontrollers 😃
*borked and *muddled aren't words I'd actually be saying when things go upside down, but since this is a family-rated chat 😃 😃 😃
compact swallow
"did you mean netbeans?"
Netbeans has wrecked so many environments I only run it in VM boxes now
 ivory sentinel
A classroom can become a place where willing interested students (pre-qualified as such) have access to materials, tools, test equipment and expertise, and work in small teams, helping one another.
Just the tool crib is a powerful advantage. Think Maker-Space.
 olive grove
@echo ginkgo it's really useful to verbalise your thinking when helping them debug, e.g. ask what isn't working and what it is supposed to do, and then what part of the code it might be. It keeps kids more engaged than mumbling to yourself and then suddenly having the answer.
@hidden carbon we introduced Tinkercad a while back at our code club - I sort of wished that the kids had run through the basic tutorials first, as most of the questions were answered there. I'd really like to get a full project going with it though, where the kids actually augment coding on devices with 3d-printed components that they design.
@compact swallow Interestingly, a couple of years ago, I discovered that virtualbox is actually part of the standard image that education uses over here...
compact swallow
@ivory sentinel ideally that is how a classroom would work. But gathering eager students can sometimes be the challenge, especially in the tech sector finding a group willing to talk to each other ... in person
ivory sentinel
When I was a kid it was unusual to be on the phone much. Generally to make quick plans to meet somewhere, but that was rare -- more usual to leave the home and go out looking for one's friends, on foot.
compact swallow
Not so much even phones, as finding an ice breaker to get them talking
ivory sentinel
That's probably universal. ;) Sports was an obvious tool in that regard -- requires at least a "pass me the basketball" remark to be made verbally, to express one's desire as to how to participate.
I do remember specifically sending morse code on the ham radio during a free period in school, while at the same time conversing in the room. I was probably not the person starting those conversations. ;)
compact swallow
hmmm maybe making a telegraph would be a good group project....
ivory sentinel
I was always self-motivated. It was pretty rare for someone to influence what I did. My parents bought me science-oriented presents at Christmas time, but did not do so for any of my other siblings, so they get credit for recognizing my interest set and meeting some basic needs there.
When I was 9 years old they got me a "50 in 1 Experimenter's Kit" (in electronics) from a company called Radio Shack (who had local retail stores). That was it for me - -solid hobby right then and there.
1969. ;)
I had a few friends also into electronics (they were difficult to discover) but the high school (age 14+) radio club and electronics classes in high school were the main means of connecting with other young people with regard to electronics.
I was also asked to give a talk to much younger students in my brother's school, by his teacher, so I did that (on ham radio).
My feeling on this is a maker-space type of place would be best -- a 'hobby shop' as they were called when I was a child. The one hobby shop I knew about focused on racing electric cars on an indoor track. They also had small gasoline powered model airplanes (tethered, no radio control) and other stuff like model trains, I think (I was very young so I don't know just what they had; I was focused on the racing cars, and the door-bell-switch operated train set, that you could activate from outside the building, even when they were closed on Sundays).
compact swallow
RIP Radioshack. Loved that store
I actually still use my kit as a prototype base, nice having the breadboard, switches, power supply transformers all there.
although young naive me burnt out all the LED's, and speakers
ivory sentinel
Haha the good old "try a 9 volt battery directly across the speaker terminals to make it click" trick. ;)
compact swallow
what happens when you put thing called an amplifier into it iirc 😛
hidden carbon
@olive grove I didn't know there were totorials! I'm a kid and I think it's really useful!
olive grove
@ivory sentinel nice! I used to design control-line planes, and also had slot cars...I still have a gakken kit, and got into electronics outside of school, when an older friend showed me an amp and fm bug he made...
@hidden carbon yeah I think there's 11 or something...just the basics, but quite handy
we also used to connect stuff into the phones...so we could play and record into the phone lines...
 terse echo
Hello! I am no educator for electronics (although I help people out a lot) but I am currently enrolled in a course titled "Robotic Design". The method my professor took in teaching us was by 'baby steps' I guess. The course began following a pattern: he gave us lectures via powerpoint and whiteboard, and we'd do homework via TinkerCad and Python. Eventually he split us up into groups of 8-10 students. The objective for the midterm was to use all the simulation and schematics we've practiced and make a robotic vehicle to traverse certain obstacles and have certain functionality. By the end of the semester it needs to be autonomous and drive itself.
So far me and my 8 strangers were able to scrap together a bunch of materials we found and put money together to come up with this functional mess. I was just able to get an IR TV remote to work with it. (Excuse the talking in the background)
These are the obstacles we have to overcome, he did not show us the maze we have to get through.
My robot (we borrowed bigger wheels) was luckily able to overcome all the obstacles. It may be slow but the motors are strong.
 alpine fiber
One more New Channel
 blazing canyon
Slopes are a pretty common design for RC racing lol
We used door hinges
that way
Fold 'em up
all portable
terse echo
oh I see that, I love it
 quaint cape
thats pretty awesome
quaint cape
this might work as a class room resource if anyone wants to use it. Looks valid until 3/19

Humble Bundle
Pay what you want for awesome ebooks and support charity!
compact swallow
This is the lesson plan I've been following (more or less) for a entry level class, Should I add or take out anything?
Electronics 101:

1) The Math Stuff
    - What is an Amp, Volt, Watt, and Ohm?
    - Ohms Law
    - Kerchoff's Law
2) Circuit notation
3) Passive Components
    - Resistors
    - Capacitors
    - Transistors
    - Diodes
3) IC's
    - OP Amps
4) DC/AC
5) Signals
    - PWM
    - Analog vs digital
6) Soldering
@compact swallow kirchoff's law is a bit complicated for an intro, as are op amp ICs
compact swallow
Kirchoffs in its simplicity that is, everything going into a node comes out?
Op amps are only included just cuz the circuit kit has a DIP on it
opal parrot
Which kit are you looking at @compact swallow ?
Also if you're simplifying kirchoff that much, its ok. I thought you were doing KVL/KCL maths
compact swallow
Yea Trying to have the only * major * math as V=IR P=IV

KELVIN® Educational
They gave me an educational discount. It keeps things entertaining for a while afterwards to 😛
And I've been black boxing the LED driver
ivory sentinel
It's good to have a talk about how much electricity costs to deliver. In USA that's expressed in kilowatt-Hours (that's a billable unit and has a monetary value that is very specific).
A mention of RMS is important so that they know measurement isn't quite as intuitive when moving onto powered AC circuits.
I'd use 'voltage divider' as the bullet point rather than Kirchoff's voltage law.
Relays and switches are good. And fuses!
Coupling, and bias.
Electromotive Force.
Test equipment. Function generator, volt-ohm-milliammeter, oscilloscope. Modern digital VOM's have several functions that are somewhat arbitrarily included (temperature, frequency and PWM measurement, for example).
Explain why it's not a VOA (volt-ohm-ammeter) haha.
Current sinking vs current sourcing.
Shop practices including clean-up, project storage, coiling cables correctly, keeping assembled projects clean and free of dust, parts storage and inventory.
 gaunt stream
Does anyone want to have a old ebook (high school level) of a electronics lesson book
It’s for ms-dos
I don’t but if you have a emulator for ms-dos then I can post em
compact swallow
I mean I'm always interested in odd formats
gaunt stream
Normal windows won’t run it
But if you have a windows 7 virtual machine and you get me dos it is possible to read it
I got it from a old floppy disk
 zenith latch
Which software skills should a electronics student have?
compact swallow
Excel-lent ones! 😛
in reality Excel is a really good resource, general linux never hurts either. Matlab is used a ton here but thats mostly hardware design.
spare rock
Very nice @compact swallow, love that pun 😃
compact swallow
That was very well written, is it possible that this channel allows pins? I feel like this is one of those useful ones for people to refer back to
worthy ridge
@spare rock mind wrapping it into one post and I'll pin it?
spare rock
@worthy ridge Not a problem, would later tonight or tomorrow be allright?
worthy ridge
@spare rock Thanks! Totally at your leisure. Just ping me when I should pin it!
spare rock
Question asked by @zenith latch: Which software skills should a electronics student have?
My personal answer (@spare rock):
I'm someone who works in IT and dabbles in electronics... Here are my thoughts!
There are usually multiple programs that can accomplish the same task. I've mentioned the popular industry standards, but don't feel limited by them. In addition to GUI software, you may be able to use command line to accomplish the same goal. Learn both, and do what is most comfortable and most efficient for you.
Finally - any one of these topics could be an entire career's worth of effort to perfect. Don't feel intimidated by the below...a passing familiarity will help you recognize things in the field. It'll guide you to ask the right questions, and you'll be a better, well-rounded engineer in the long run!
Excel: Understand data manipulation, visual organization, charts/graphs (gantt charts especially). Using VBA code within Excel can give you even more control and options.
General Operating Systems - especially Linux: We all have our preferences, but we should understand the basic functionality and structure of Windows, MacOS, and Linux. Learn how to script simple actions within the OS you're using (Bash, PowerShell, AppleScript/Automator, Python).
Linux is very prevalent (RaspberryPi, etc). Debian and Ubuntu are two major, common flavors of Linux to use.
Be comfortable with things like navigating the file system, basic commands ("man" is awesome, man!), permissions, bash shell, etc. Tools like more/less, grep, and regular expressions are excellent for viewing and manipulating data. Understand command redirection and piping.
Generally, books on Linux System Administration are good places to start, as they focus on practical usage. https://debian-handbook.info/ and http://www.admin.com/ are two excellent options.

Home page for the book UNIX and Linux System Administration Handbook by Nemeth, Snyder, Hein, Whaley, and Mackin
Photography Skills: Know how to take a good photo (lighting, focus, depth of field, exposure), and how to manipulate & edit photos. You should be comfortable using tools like Photoshop & Lightroom to color correct, adjust brightness/contrast, crop, and perform batch editing.
Web Development Code: (I'm not a web developer, I personally avoid it! I use turnkey solutions whenever possible). To that end, one should have a familiarity with HTML, CSS, JavaScript, and PHP. Be comfortable editing a script to suit -your- needs.
@compact swallow Recommends simple HTTP servers, as they're handy with IoT and remote low data applications!
General Tools: Be familiar with tools such as FTP, SSH, SCP clients. Common ones are FileZilla, Putty, WinSCP.
Code Versioning: If you work with code, you'll need to know code versioning systems. GitHub is very common.
Drive Images: Know how to reformat and reimage USB drives & SD cards. Common programs are Rufus, Etcher, SDCardFormatter, and various command line tools.
Notetaking: Know how to take good project notes, step by step instructions, draw diagrams, take useful photos, etc. Microsoft OneNote is an amazing program to keep that all organized. It's cross-platform too (Win, Mac, Android, iOS).
Email: Strangely enough, knowing how to use email is a "soft" software skill that can make or break you. If you neglect this in a busy job, you will quickly get buried. Things to learn: how to automatically filter messages, flag messages from important senders, out of office replies, folder structure vs metatags. Know when to use email vs a todo list vs a calendar client.
Password Management Software: There are many free, paid, personal, and commercial offerings. Popular options are 1Password, Keepass, and Lastpass.
Programming Documentation: Know where to find your programming language's documentation (docsets). There are third party tools that can gather, search, and organize these for offline use (such as DASH for MacOS).
Shortcut keys: Knowing your OS and application shortcut keys can save you hours over the span of a year. In some applications, such as vi, they are essential. Print out a cheatsheet and tape it on the wall!
IT Infrastructure
If you're going to be working with computer hardware, will help to understand the following concepts and software. This is not a comprehensive list, but it's a good place to start!
Server/Storage/Networking Infrastructure: Understand the usage and basics of a server (compute) vs a NAS (storage) vs networking (transport) hardware. Know how to connect to a file share within different operating systems.
RAID (drive protection): concepts of parity vs mirroring.
Practical Networking: IP notation, subnetting, gateway, DNS, NTP. OSI model - practical usage of routers vs. switches. This is a very comprehensive resource: http://www.tcpipguide.com/
Wireshark: An excellent networking packet capture and analysis tool.
Virtualization: It's becoming very common to "spin up a VM (virtual machine)" for testing, diagnostic software, etc. There are free virtualization clients such as VirtualBox, but the industry standard is VMWare.
@worthy ridge The above 3 posts cover what I originally wrote, plus a little bit more. Had to split them due to length limits.
spare rock
@worthy ridge Thanks 😃
worthy ridge
thank you @spare rock
compact swallow
Well put. @spare rock certainly covered pretty much all of it. The web dev stuff, I would amend that to include the simple http servers, they come in handy for IoT, or any remote low data application.
spare rock
@compact swallow I fully agree, and I've updated it 😃
ivory sentinel
Be prepared to spend real money. Get an oscilloscope and a multimeter and plenty of test leads. Use optical aids to see better, and use good lighting. Get a real chair to sit in. Use a hand mirror when you can't see something on the back panel, and a flashlight.
CLEAN THE FLOOR so that when you drop a tiny fastener, you'll find it again because the floor was so clean.
spare rock
A dirty floor is playing life on Hard Mode.
compact swallow
Heres one that could be answered, and pinned what equipment should a A) Classroom B) Good Electrical Engineer C) Hobbyist have on hand?
ivory sentinel
Everyone needs to push the limits of electrical current just enough to understand that they exist. We did it without supervision when the teacher (at our ages 14 and 15) wasn't present in the room.
compact swallow
Apologies somethings messing up with my discord and copying text in random places
but yes everyone needs to release some black/purple/blue smoke at least once
One more amendment, Password software, know how they secure your password and the history of how many times they've been hacked. LastPass has had a few incidents, if I'm not mistaken
spare rock
Buyer beware 😃
ivory sentinel
I avoid places that demand passwords. ;)
easiest way to manage nuisance passwords that protect nothing of real value (money) is to use the domain as the salt (see below) and a fixed password for all such domains (and accounts held) and run those concatenated through a crypographic hash function such as md5sum:
 $ echo -n "elrond" "doofus.org" | md5sum
35017db46bea62c4a04f6199cf63a8e9  -
 $ echo -n "elrond" "daafus.org" | md5sum
e500ab70e5beaf29e61cb760430b3a18  -
 $ echo -n "elrond" "dingus.org" | md5sum
b436f0bf3f3299a42cf1949fcce7c3ad  -
In the above, you only need remember elrond which is your seekrit passphrase, and the method employed here. The domain names provide the crypto salt, so that no two rendered passphrases are alike.
Remember a second fixed phrase such as ".489k" to append when you need a variant password on the same web site that wants you to establish an account with them. It's rare to have to resort to a third password, so this second fixed phrase will cover most additional requirements, per domain.
email yourself as soon as you establish an account with any website with enough information to prompt you, months later, when all details have been forgotten.
Since domain names are rather short, this places a new burden to have the seekrit passphrase be much longer/complex than usual (to avoid the risks associated with short salt).
 rocky echo
Hey hope you all can help me
For TFT Display ST7735, is it possible to recieve data in real time and save the data on the sD card?
 somber idol
@rigid jacinth this channel is geared towards educator discussion. #help-with-projects would be a better place for your question.
 tough berry
https://youtu.be/BvyniDJiFrk I made a video on how to make a counter!

4542 4510 How to make a 7 segment hex display counter. Uses circuitmaker student version 1998 ish - 2000
compact swallow
Just finished a class (That I was taking), and it made me want to redefine how I teach my classes. A small portion of the class was actually learning content, the majority of it though was "playing" with different techniques. When the exam came around we started panicking that we haven't learned anything until we started writing and realized that "playing" taught us more then we realized. I am going to redesign my classes to add in some more "playing" now. Honestly thinking just grabbing some bread boards and passive components and let them plug in different guided ways
spare rock
I always like to design lessons around controlled failure -- (i say this in the SAFEST way possible)....blow something up intentionally. Pop an LED.
Failure driven learning means you just learned a bunch of ways why it wouldn't work.
Also, it helps to teach and reinforce that "failure is not only OK, but encouraged as it's a learning opportunity."
 granite current
so hey does anyone have a tutorial on how to controll some servos using a PI and the adafruit hat servo?
compact swallow
@granite current https://learn.adafruit.com/adafruit-16-channel-pwm-servo-hat-for-raspberry-pi?view=all

16 channels of servo-bustin' power for your Pi
granite current
yeah i read trough that one, i got that hat, just hooked it up
now just need to create the actuall program to do things with..
and thats where iam stuck at
compact swallow
@spare rock I kinda like that idea. And maybe the odd shock from a small capacitor just to realize they aren't a good idea to play with
Ah I see you've been helped in project help!
compact swallow
Ah I wish I would've started on this idea earlier, I'd like to get some Gemma M0's so I have a simple way to make simple wave gen's for everybody, and have it be the same. Might need to Ad-Hoc this with different arduinos though
Might have enough Uno's to accomplish this...
ivory sentinel
Learning around vacuum tubes helped a lot to respect high voltages and spark gaps. ;)
The 6146-B's of my 5-band CW transmitter (DX-60 from Heathkit) were in a ventillated cage, inside an already all-metal enclosure. Made me stop to pause and wonder why, exactly. ;)
You could actually hear a change that was a bit scary when you had a large mismatch in impedance between the Pi network output and the antenna.
Like a loud hum of a different timbre or something. Probably the power transformer laminations vibrating.
Big air-gap capacitors for loading and tuning that circuit. You learned to quickly adjust them for resonance while key-down (transmitting).
I think the way it worked was you dipped the plate current then peaked the grid current, throwing a panel switch to go from the one measurement to the other.
There was a meter on the face of the transmitter, just for this purpose.
It had to be done every time you moved the VFO (frequency-determining component: Variable Frequency Oscillator) as little as 20 KHz from your current frequency.


If you turned the wrong knob (of the two big knobs) you would know it, immediately (and they all worked this way, not just this model from this manufacturer).
Surprisingly, nobody was frying these, which would happen, oh, about seven seconds after a radically de-tuned circuit was energized in key-down mode.
compact swallow
Attempted getting the student's to let out some blue smoke last night, but they ended up actually really interested in all the math of electronics. I'm never going to figure out what to expect from students.
ivory sentinel
That's what Ry Cooder said (in Buena Vista Social Club).
"You never know what the public's gonna go for."
1/R_total = 1/R_1 + 1/R_2 + 1/R_3 ...
L = 468 / f
Never once used ELI the ICE man
ivory sentinel
4/4 6/6 8/8 10/10 and 12/12 (April 4th, June 6th, August 8th, October 10th and December 12th) all fall on the same day of the week in any given year.
"March zeroth" (last day of February) also falls on this same day.
As does 7/11 and 11/7, as well as 5/9 and 9/5. ;)
I always list the day of the week along with the date, as a kind of checksum.
compact swallow
I've actually used the Parrallel resistor law a fair bit, makes it easy for VDR
ivory sentinel
There's something about that formula that doesn't sit well with me.
Reminds me a bit of the three-body problem in physics (gravitation).
So I usually just evaluate two resistors in parallel.
That pair of resistors becomes a single equivalent resistance, to be evaluated against the third resistor. And so on, forever. ;)
(I don't remember if this yeilds a correct answer or not, however)
L-pads and H-pads (balanced T pads) are good to know about, along with the simple voltage divider (as in an unregulated fractional power supply, as it were).
They used to sell a very large potentiometer/rheostat, marketed as an L-pad -- was meant to provide after-the-fact audio volume control to a speaker installation.
The idea is to present a constant load to the output of the audio amp feeding a loudspeaker, while varying the loudness experienced.
I'm also a big fan of the R-2R ladder net:
 south pilot
olive grove
south pilot
olive grove
the other day, at Code Club, we had some kid snap the microUSB socket off a micro:bit...
olive grove
hope that kid doesn't have pets
alpine fiber
OMG LOL
ivory sentinel
It's more important how they felt about the error (always helps to have ownership - a stake in the outcome of actions).
olive grove
@ivory sentinel good point - I am friends with the guy that was teaching them, I think he just turned his back for a second and then the kid came up and showed him. I tend to find it disappointing when kids sometimes will put the blame on the device rather than owning it themselves and trying to prevent it happening in the future.
ivory sentinel
jafine: It would be nice to see adults in their 30's own what they do, but often they do not. ;)
I've broken my share of things and had people go off on me for it, so it's understandable why people try to duck out. I just figure I'm already busted, so let's formalize it so we can move forward again.
I once got a sock stuck in a vinyl vacuum cleaner hose (due to lame strategy -- saw the sock but went for it anyway -- under the bed).
In hindsight I think I could have fished it out, but at the time I was a bit brainless in some ways, so instead, I decided to cut the hose with a utility knife (box cutter type of knife) and get the sock out that way.
So I do that, then tape up the cut with gaffer's tape - and put the whole thing back where it was stored (in a closet).
The brainless part was some supposition that this'd pass without hue and cry.
I heard about it for about the next twelve years.
. . .
The way I got off the hook for that set of tendencies was when the same fellow, many years later, has a problem with his computer mouse not working.
After about an hour of trial and error, diagnosing it (over the telephone) -- I finally deduce that the mouse must be stuck mechanically.
So I says "Dad .. give it three sharp raps on the table top" (of course this works immediately, and he's back in business).
That impressed him more than everything else I'd done before, combined. ;)
. . .
I took a lot of things apart when I was still in short pants that I didn't know how to put back together again.
I didn't own several of them, and ownership didn't especially figure in my thinking, as a concept.
If there were secrets inside things made by others, sometimes I just had to know (and kind of immediately, too).
Taking them apart usually satisfied several questions I had about their insides, so it made sense (to me) to continue in this way, from time to time.
 torpid lichen
It's sometimes easy to break the micro-USB socket off a microprocessor board. I've done it twice, once with an Arduino Micro, once with a Pro-Micro.
I've since become very, very careful with that connection.
 uneven badger
I was gifted a micro:bit missing it's USB connector "maybe you can fix it..." that said. 😃
 long pier
There is another Python humble bundle going on supporting the Python software foundation..
https://www.humblebundle.com/software/python-dev-kit-bundle

Humble Bundle
Pay what you want for a bundle of Python resources and support charity!
ivory sentinel
This minimizes the number of connects/disconnects to the target board.
ivory sentinel
https://www.adafruit.com/product/3299
(difficult to see) The M2.5 nylon standoffs (stacked end to end) provide a pushbutton actuator affixed to the clear polycarbonate lid of the weatherproof enclosure.
The gasket of the enclosure is thick rubber, and provides enough give to offer the pushbutton actuator enough travel to either depress, or fully release, the (permanently mounted) RESET pushbutton of the CPX -- without opening the enclosure!
The Sharpie (marking pen) acts as a gnomon to point along a particular axis of the accelerometer, and is temporarily affixed to the enclosure with rubber bands.
The extra holes in the case lid are for other projects that require a remote actuator for their RESET switches (minimizing permanent damage to a series of case lids; the one lid is transplanted as required, to another case).
I usually adjust tension on the (giant!) philips head plastic screws so that the case lid is slightly sloped, and has considerable travel (up to about 1/16" or so) on the higher end.
If all four screws are tightened down fast, that's generally too much pressure on the switch to allow a release.
This is very easy to calibrate.
The length of the stack of M2.5 standoffs is difficult to get right, or to make consistent from one project to the next, so it's not all that trival to try to quickly switch lids.
I usually use a flashlight to illuminate my face (and one iris/pupil) for precise alignment of the hole (the case lid is reflective and acts like a mirror for this purpose). As with reading an old-school meter movement, I use parallax to get the drilled hole pretty closely aligned to the RESET pb switch.
 steep trench
How long does shipment get if I am located in california ?
ivory sentinel
Stuff is shipped to you from New York City. Generally if you get your order in by 11 in the morning, it can be on your doorstep the following afternoon (but no sooner) if you live within 100 miles of the point of origin (NYC).
Since you do not, it'll take longer.
 light remnant
@ivory sentinel Oh great, now you've shown me even more stuff to get intrigued by. Great techniques, thanks for sharing.
ivory sentinel
@light remnant Yeah I got hooked on those weather-
proof enclosures -- the same as when I used to buy a
lot of those black bakelite enclosures (with the alumi-
num flush-mount lids) at Radio Shack, back in the day.
Working plastic is a lot easier than metal.
BTW the small wxprufe encl. is too small for a stan-
dard Arduino circuit board -- no real way to get that USB
pigtail (panel mount extension) to fit.
The one I did uses a horrid kludge -- I bend the USB
cable (sharply) back on itself, and stick that 'elbow' out
'the window' (a big hole in the small weatherproof en-
closure, near the USB jack on the Arduino).
That allows the Arduino board to fit inside this (too-
small for this application) enclosure.
The large wxprufe plastic enclosure is much roomier -- a
bit too much for basic circuit board protection (which is
why I do all this -- same as you might put a Raspberry Pi
into a form-fitting case: to protect it a bit from abuse).
The case/enclosure and panel mount cables certainly
add to the cost of working with a target board, if you do it
my way.
This is my time in life to enjoy some luxuries, so that's
part of why I do it.
Also -- I break things! This is meant to help with that.
http://duhvoodooman.com/miscimages/musical/RS_Fuzz_fitup_gut.jpg
This (see below) is a slightly nicer box but has the same
construction geometry as the black bakelite Radio Shack
'project enclosure' had.
Image: from
http://www.thefret.net/showthread.php/8466-Radio-Shack-Fuzz

That finish was common on manufactured gear. I've for-
gotten its name. Like a stippled finish.
ivory sentinel
This is the Rabbit Sketch.
The reason I mention it is that the gnomon I mentioned
(above) tells you which way the rabbit is oriented.
In this photo (taken with an optical camera by aiming
the lens at an LCD displaying the Rabbit sketch, and my
human hand in front of that LCD, holding the Circuit
Playground Express -- which is running the Rabbit Sketch).
'Processing' is the program running on the host PC that
the CPX is tethered to (via USB).
I didn't have the BNO055 sensor (at the time) so I
substituted the CPX, which has its own accelerometer.
 tranquil wasp
Having some (~100) 14-15yr old students struggle with makecode, just getting over that hurdle to get them trying to program their own thing and try new blocks.
Any suggestions on approach, or stories about what has worked well?
worthy ridge
@tranquil wasp What do you think is holding them up?
Are they sharing the CircuitPlaygrounds?
tranquil wasp
@worthy ridge They've gone through the initial tutorials on the makecode page no problem, then right now the material is "read through this, and these two examples, and try making your own program to do $verysimilartosecondexample"
All simple enough that even though they've got a CPX each, the simulator works well for demoing the thing.
 serene ether
@tranquil wasp Might I suggest you consider the STEAM approach to STEM - integrate a little bit of art to help motivate the kids with a tangible object to code. I've had so many ideas sprout from just trying to use the neopixels as a visual indicator for something. https://www.instructables.com/id/Custom-Light-Up-Monsters/

Instructables.com
Well, it's super cold out and you need to be prepared with a snow day activity. What better time to stoke the imagination to design and build your own light up...
tranquil wasp
interesting idea caitlinsdad. 😃 They're pretty engaged with "Ooh look at the colours we can make it go",
There's a big thing the CPXs are going to be attached to later, but lots of fabrication required before then.
worthy ridge
@tranquil wasp sorry for not replying. I was busy at PyCon. @serene ether had a great idea. Let me know if that helps!
tranquil wasp
So far I've converted the examples from informational "read this" sections into imperative "do this, then this, then etc" sections.
Seems to help - by the time students get to the "figure this out by yourself" section they have a better understanding than before.
serene ether
@tranquil wasp another idea is to have a competition for the most inventive monster build - individual or team effort. It would push them to explore or show them one running the neopixel demo strandtest and let them ask how to replicate the effects and make it beep or other tone effects.
opal parrot
@serene ether never saw that approach before, thank you for sharing. @tranquil wasp so converting to steps, from a "wall of text" is helping them? I tried to do that with the explorers guide with expanding the "make it better" section, but I'm interested in your feedback on this topic
compact swallow
Well, this is my first no show class. 3 people paid and registered, but an hour in no one showed up.
ivory sentinel
That's when you teach the janitor how to program. ;)
(could be Will Hunting for all you know ;)
compact swallow
^ we haven't expanded quite that far yet, trying to convince my manager to learn code/electronics but no success... yet
 untold summit
Hello all, I'm new here and I need help for arduino SOMO modul
 civic needle
I taught an intro to programming class to 9-12 year old girls using Micro:Bit. One of the students started with "computers hate me", but by the end of the class, she was crowing "I could do this all night!"
opal parrot
@civic needle that's great!
tranquil wasp
@opal parrot before it was "here's some theory, and here's the program" using the embed feature of Makecode.
Students weren't really learning as much, so it's now more like "we'll make a program! step one; we'll need to do this - so drag this block into your program. step two; and now this block, etc," and putting the theoretical stuff inline with the instructions.
I have the embed at the end under the title "are you lost, here:" but I might remove it - some people figured they could just scroll straight to the end and use that instead of reading.
opal parrot
that's a good title. I used "confused?" on some of what I was doing to mirror how ARDX was doing it initially.
I like the idea of putting the theory inline with instructions.
tranquil wasp
I'd love a wordpress shortcode plugin that generated the makecode block svgs instead of screencapping.
 nimble jacinth
@tranquil wasp we have plugins for that

Microsoft MakeCode
MakeCode provides a lightweight blocks rendering engine that renders code snippets into SVG images.
Someone needs to do the Wordpress version though 😃
tranquil wasp
@nimble jacinth thanks for the tip!
The docs there are a little hazy - it looks (looking in the debug window) like it's got to load heaps of makecode files into the window first, then do some rendering.
I'll maybe see if it can render on saving the content instead, to not have that runtime requirement.
nimble jacinth
We load an iframe where we render snippets on the fly
You could pre render in a headless browser but we don’t support that
Our documentation do something different since we load the PXT runtime in the page itself (which typically clonflicts with other JS/CSS in 3rd party pages)
nimble jacinth
@tranquil wasp we've added a green screen feature in beta, tell us what you think
tranquil wasp
@nimble jacinth thank you. Err, what? Where? (Not really sure what that is)
nimble jacinth
Chroma-key like blending of webcam and editor
tranquil wasp
Oh right, for making instructional videos?
Run into an issue trying to make a custom library; Creating a function that takes a handler.
The function is eg export function onSomethingHappened(handler: Action) { ... }
with a //% block prefacing it.
It appears fine in the javascript view, but in the blocks view it has an extra argument
Like this
Which the editor then complains about
Cliq.onBumpBoth(null, function () {})
Because it's inserted an extra arg for some reason.
Augh.... need to refresh the editor between loads
nimble jacinth
Add block=“on bump both”
It looks like our automatic signature generator does not handle well handlers
tranquil wasp
@nimble jacinth In this case, it was also that the editor does not seem to regenerate the blocks until the page is refreshed.
nimble jacinth
Are you using the custom.ts file?
tranquil wasp
Yes I am
While I'm griping, is there any way to have the CPX in MakeCode read IR signals from a remote control?
IR receive works fine in Arduino, but I get nothing in MakeCode.
tranquil wasp
and a question about block layout - can I make a block with five colour fields in a row, without them going to a new line each?
MrTrick glares at developer who mixed color / colour spellings liberally throughout this code. (pxt/pxtblocks/fields/field_colour.ts)
also I think the default color picker is broken - in my browser there's only 3 columns, not four, and the black colour isn't visible. (making a copy under another name and using that as the picker, actually does work properly in that is shows all the colours)
opal parrot
@tranquil wasp please ask that to @nimble jacinth in #help-with-makecode.
tranquil wasp
@opal parrot thanks! 😃 We wandered a little offtopic, yes.
nimble jacinth
@tranquil wasp blockly has been using colour while we use color in PXT - those worlds clash sometimes.
@tranquil wasp we’d love to have IR remote control support. We do take PRs if you have cycles to help with this adventure.
tranquil wasp
I'm willing to help, sure.
I've run into issues with the codebase previously (trying to get servo support on other pins) where it just runs down a rabbit hole I can't pursue any further.
So I'm not sure if it's something I can find, let alone fix
nimble jacinth
@tranquil wasp yes you can force keep blocks horizontal , add this comment:
//% inlineInputMode=inline
tranquil wasp
nifty, thank you
nimble jacinth
About the colo(u)r picker, can you share a sample?
Yes there are issues down to the mbed and clock configurations around PWM/IR. We’ve restricted PWM our to A1/A2 to avoid locking the device.
tranquil wasp
ah right
 orchid hare
I am an old guy who finds my self in a new career; teaching physics and engineering in a private liberal arts college. I normally don't participate in discussions online, but I wanted to let you folks know I find these discussions useful. I will watch for a while; perhaps I will have something to add, later.
 paper fable
@orchid hare That's great! You're always welcome to join in.
orchid hare
I am not very good at using these discussion sites; but, I figure this is where my students are; or should be. So, ... I had better learn.
paper fable
We have a Discord "role" for educators. Your name would be a different color and would show up in the "Educators" list on the right side of Discord which would help other educators identify you if they wanted to collaborate or ask questions. No obligation for anything comes with it, it's simply to make educators visible to each other. If you'd like, I can add your name to that role. If you're not ready for that, the offer stands for whenever you are.
I find the best way to learn is to simply use it. I am fluent in many discussion platforms, but every time I join a new one it's a learning curve.
orchid hare
Thank you, my background is in physics and I am a "tinkerer" ham radio operator. My recent interests have been based on the courses I have been teaching in electronics and the availability of reasonably priced items from adafruit. I have much to learn; teaching is an education.
paper fable
That's a brilliant way to look at it
orchid hare
I am in the process of returning to advanced studies based on my reading and teaching. This interest is in the role of liberal arts schools in creating the quality engineers we need. For me, quality means a strong knowledge background mixed with healthy skepticism and creativity. I am a strong STEAM advocate.
paper fable
Excellent!
orchid hare
Thank you for the conversation and I look forward to many more. I am working on classes for this fall. I will be teaching two segments of physics (calculus based and non-calculus based), electronics and statistics. My electronics course is listed as a lecture course, but I plan to make building something a part of it. Many ideas I have read here are quite useful.
paper fable
You're welcome! Good luck with your classes 😃
paper fable
@orchid hare Please feel free to let us know if you ever want to be added to the Educators' role on Discord. Again, good luck with your classes!
orchid hare
Thanks, I will participate for a while; then, I may take you up on that.
 rich arch
@orchid hare feel free to check out the #help-with-radio channel
DE KM4HPK
orchid hare
I spent a little time there. Enjoyed conversations on SDR (I have a HackRF One). I plan to incorporate this into my courses. I do plan to spend time there as well. This channel seemed like a good place to start. So many interesting folks in the channels I have visited. Thanks for the invite, see you there.WA6AAI
rich arch
I posted my senior college project to the radio channel. You might find it interesting
orchid hare
Now I remember where I saw you; I watched that, very good. I am working with our students to start thinking about their projects early. I am even considering using the ARRL handbook as a text for my electronics course this fall. I will use other material to supplement the theory. I find my students far more interested when we have hands-on projects. It looks as though you liked that as well.
That works; what is the little radio under my previous post?
rich arch
You can edit your comments. There is 3 dots to the right of the comment you want to edit if you are on the computer, left click it and then click edit.
I have a power point to go along with it. That was the link following the youtube video
orchid hare
I think I found your project before I found "Discord"
somber idol
up arrow will also get you to edit mode on your last message
orchid hare
thanks, I see.
I think it was the ARRL related collegiate group on facebook. I have been "surfing" quite a bit to find ways to intrigue my students.
rich arch
I am not part of that one. I will have to check it out
Could you pm me a link to that fb group?
orchid hare
Thank you all for the conversations and help. I look forward to conversations on the evolution of engineering and science education based on the ideas I am seeing (and now discussing) here.
compact swallow
One that I find as a really interesting resource was a post made by @spare rock that's pinned in this channel. It covers a lot of area we all suggested for getting people into electronics and engineering
orchid hare
Thanks, remember this is all rather new to me. How do I find a "pinned post"?
Ok, I found it, cleverly disguised as pinned posts up there.
somber idol
its the thumbtack near the top of the chat windo.... nevermind. 😄
orchid hare
I also saw that as I was scrolling through old posting; yes very good observations and suggestions.
Thank you for reminding me of that series of comments.
spare rock
Thank you @compact swallow and @orchid hare -- I'm glad my rambling was useful for someone 😃
 coral bone
Any recommendations for tutorials teaching Arduino?
coral bone
I tried following a course on YouTube but it progressively got worse as the series went on.
Still pretty new to electronics/Arduino and would love to learn 😃
compact swallow
Attendance seems to be un heard of for summer electronics classes, any suggestions for getting people out?
serene ether
@compact swallow Are the classes for adults or younger school ages? Summer is vacay time and maybe other commitments. Are the projects you building summer themed - Beat the heat with a fan project! Underwater or Kite photography, etc....
compact swallow
Oo i like those ideas. Its more targeted to adults but a few kids come out
 thorn vortex
Hey all, I start teaching "Electronics and Robotics" in the fall with a colleague. We're working at the high school level so 14-17 year olds. Any educators have any suggested resources for basic electronics. Most of what the school has is 30+ years old
It's not that much has changed, but the practical application examples are pretty dated ("one day, electronic keyboards" and all that)
 tame raft
hrm...where i go if i'm a complete newbie to programming and want to learn how to use circuitpython for the featherboard M0 express and motor featherwing?
ivory sentinel
What do you have right now?
 soft mist
@tame raft Have you looked at this guide? https://learn.adafruit.com/adafruit-stepper-dc-motor-featherwing?view=all#adafruit-circuitpython-module-install

Make your feather motorized
tame raft
that what i have
soft mist
@tame raft the guide tells you how to use it with Circuitpython -- if you have Circuitpython questions, it is best to ask them in the #circuitpython-dev channel
tame raft
just need to figue out how to use some switches for on/off, stop/fwd/rev and potentiometer for speed with the digital and analog inputs
soft mist
If you are completely new to CircuitPython and the Feather M0 express, you may want to start here : https://learn.adafruit.com/adafruit-feather-m0-express-designed-for-circuit-python-circuitpython?view=all

Get running faster than ever with the first Adafruit Express board
Take a look at the "CircuitPyhton Essentials" section of the guide in the previous message.
Sorry for jumping in @ivory sentinel -- I was looking that up when you posted.
ivory sentinel
It's completely fine, @soft mist I feel confused today anyway. Been that way all day long. ;)
soft mist
some days are like that ....
ivory sentinel
Well I saw Elon Musk is going to tunnel in Chicago so that made my night worth it last night.
I'm stunned they're letting him do it. ;) /yeehaw
 dapper jackal
For anyone interested, I'm off to Ghana next week to join some friends https://twitter.com/glblcd/status/1012961104258043905 and do some Python and Raspberry Pi teaching with https://globalcode.org.uk/ - I'm borrowing some Circuit Playground Express boards from friends for more variety in final week.

SIX #GlobalCode instructors 👩🏫👨🏫 arriving ✈️ in #ghana today!! We’re teaching a 3wk #SoftEng course at #CapeGoast #UGLegon #KorofiduaTech on #raspberrypi 💪💪

 Twitter

 serene coral
@coral bone This is a channel mostly for educators, but if you post in #general-tech or #help-with-projects with what you are trying to do, you may get more help.
 frail belfry
Hi, not sure if this is the right place to ask but, does Circuit python support complex numbers? I have a trinket and wanted to play with some algorithms.
soft mist
@frail belfry best to ask this in #circuitpython-dev
frail belfry
@soft mist I will do that, thank you!
orchid hare
I am now listed as an educator; allow me to introduce myself. I teach physics and engineering courses (and statistics) at a private liberal arts university. My goal here is to learn more of what my students might be thinking by listening to these channels. I will encourage my students to check this out and "hang out" with "makers". I believe making things is the best way to learn things. Stan WA6AAI
olive grove
@orchid hare I remember when I found out that electronics was part of physics at school - it was great that something I'd become interested in outside school was relevant
orchid hare
@olive grove good for you, the classroom should provide the environment for you to learn; your interest is crucial. A “sage on the stage” in front of students with little interest is painful. Thanks for the comment.
olive grove
@orchid hare interesting now I help run a code club for kids 😃
orchid hare
@olive grove are you still in school? I am encouraging my students to become involved in a robotics club for kids. I think it would help their studies; what do you think?
olive grove
@orchid hare no but most of our volunteers are students now - we just saw our first one off into a part time job
@orchid hare it would be great to see more uni students volunteering - I know a lot do for private schools in Australia, but apparently it's more on a per project basis than ongoing
orchid hare
@olive grove I plan to encourage my students to become involved in conversations here so they can meet folks like you and see the projects on the other channels.
@olive grove most of the work I see here is digital and I need to work analog systems as well. This is a great resource. I need to get back to lesson plans, school starts in less than a month. I look forward to more conversations and exchanging project information on other channels.
orchid hare
I am interested in constructing a small tracker/monitoring device to investigage behaviors of small critters(e.g. squirrels). The range is less than 5 miles in urban or small park type environments. Has anyone worked on applying technologies found here to this use? I am interested in my engineering students undertaking the design an implementation of such a device.
serene ether
@orchid hare I've never heard of squirrels being darted and tracking collars attached like they do larger animals. But, if you could miniaturize this https://learn.adafruit.com/gps-logging-dog-harness/overview Maybe talking to a park ranger or wildlife conservation experts to see what they do and what kind of data is pertinent.

Get yer log on
orchid hare
I am working with the biology professor to define the requirements; the miniaturization is the question. I am seeing the various components become smaller and smaller. The literature I have seen discusses tracking larger mammals and birds. Thanks for the reference, this is a good example and reference. My goal, is to toss 'tidbits' to my students to encourage them to try 'things'.
orchid hare

Send your message really really far and wide
serene ether
@orchid hare You might want to ask around in #help-with-radio There are a few amateur radio operators there that might be familiar with tracking systems. I dunno, RFID tag all the acorns that fall off the trees and see where they accumulate. Good luck.
somber idol
A "trail camera" system comes to mind as an option. Using a thermal camera, might allow you to narrow results to a particular range using the detected area/shape/etc. Placement is definitely going to be somewhat educated guess, but could be dialed in with good ol human observation. I would post a product link, but my phone dislikes the Adafruit website (older phone... updates are scant).
somber idol
back-at-home-update: https://www.adafruit.com/product/3538
Add heat-vision to your project and with an Adafruit AMG8833 Grid-EYE Breakout! This sensor from Panasonic is an 8x8 array of IR thermal sensors. When connected to your microcontroller (or ...
orchid hare
Good ideas all; thank you. I am encouraging my students to engage in a thought process like this. Many of them are unaware of possible options, so listening to these ideas helps me nudge the conversation. Although, often I just want to go build it myself! de WA6AAI/0. 😊
compact swallow
The students I had last night were amazing, first class I've had where everyone was super interested, ask 100's of questions, and seemed to learn a ton. One lady was even a teacher who's about to start a makerspace in a small town highschool so they could teach robotics and scratch. It was super exciting
orchid hare
Congratulations, sounds great. What age group are you teaching? What is the class?
compact swallow
@orchid hare I almost missed this, I teach at a local maker space, the class is open to all ages typically 10-14year olds and 40-50 yo. Its an entry level electronics class for getting people up to speed on electronics before getting into robots and arduinos
 fair spear
Who could I talk to about Adafruit gear/swag to hand out at Hackathons?
My company sponsors and attends Hackathons, and have several coming up (HackPrinceton, McHacks, and more).
We’re also a member of Particles ‘For Good’ program and should have some of their swag to hand out.
We want to show Adafruit some love too though.
We have used our Adafruit Educational discount to purchase hardware (for lending and prizes), but any extra hardware, pins, stickers, etc would be awesome to hand out!
Thanks in advance for any help!
Anyone else here doing Hackathons is also welcome to contact me!
We’re always looking for new events to sponsor and attend!
simon@ark.io
compact swallow
@fair spear I can't speak for them but if I'm not mistaken support@adafruit.com will get to them or <@&327289013561982976> might be able to better direct you
worthy ridge
yup, support@adafruit.com is the best place to ask
spare rock
I'd strongly suggest emailing support@adafruit.com as @compact swallow said, they'd be better able to help you with that 😄
 round monolith
yep. @fair spear agree with above, email support@adafruit.com
compact swallow
(apologies for @ing you guys)
spare rock
@compact swallow Not a problem, that's what we're here for 
fair spear
Thank you, @compact swallow @worthy ridge @spare rock & @round monolith
I emailed them.
They just told me they don't offer sponsorships,
and that I can tune-in to the weekly show for discounts. lol
To be fair, it's at least a nice way of saying no 😂
fair spear
Anyways. Offer still stands if you’re running a Hackathon.
We typically do college-level,
but are developing educational workshops with MLH (Major League Hacking) that we should be able to provide to High School-level and public Hackathons.
Thanks again, everyone ✌️
ivory sentinel
We used to have bake sales. In the Boy Scouts, once a year, we'd get a huge crate of peanuts in the shell, ready to eat, and bag them in brown paper bags, stapled closed.
Then sell them door to door.
The Smith College women went door to door selling pecans. ;)
In 4-H we sold something door to door (I don't remember now what it was; probably tickets to a fair).
We gave them a sticker to display in the window of a regular house door, with the window (so you can see who's knocking).
Next year, the sticker'd still be there when we came back to sell them that year's foo (tickets, probably).
A lot of people gave money and refused whatever it was we were hawking (which is what I do if people come looking like that).
The Girl Scouts in our town, today, set up a table outside the largest grocery store, and sell the cookies that way. I just give them a ten spot and tell them I don't want the cookies.
civic needle
The Girl Scouts accept donations for cookies, the cookies themselves are then offered to service personnel.
ivory sentinel
Finding information can be difficult for the novice in a variety of ways. Chances are better than even the school library (and librarians) are not equipped to facilitate as they are not engineers or similar.
I would think that generation of detailed web pages (hand-coded HTML basically) would be very useful to the classroom, and that the instructor staff would be involved in curation there.
I know how to search for what I do not know about, by first discovering the vocabulary customarily used to describe the given problem.
This wasn't really taught in any school. I developed my own methods.
Google (and AltaVista, which predated it) became a lot more useful when I learned how to leverage the strengths of these search engines (which at the time I thought were somewhat non-obvious).
Also I believe every effort should be made to encourage students to learn how to keep their eyes on the computer's display, and not on their hands, as they work with the computer.
Full computer literacy is a huge mind-amplifier (as it were).
ivory sentinel
SERCOM SAMD21
There are as many as four pads per SERCOM on the SAMD chips.
PA08, PA09 .. yadda yadda. They're pins.
credit: Atmel Start http://start.atmel.com/
civic needle
Depending on the package, they could be pads, pins, balls, contacts, or leads.
ivory sentinel
Port pin was what I had in mind!
compact swallow
As @gusty cradle just asked. This question is coming up more and more, whats a great entry point into electronics? My personal start point was a 300 in 1 lab kit from radio shack, but I feel like a list of entry level projects to go off of might also be a good idea to pin somewhere
ivory sentinel
Well I mean you can breadboard and parts pal and a volt ohm milliammeter. ;)

LEDs and passives and transistors and switches and op-amps oh my! The Adafruit Parts Pal is the ultimate companion for an entry-level maker learning electronics. This kit is your friend ...
compact swallow
I mean now I can:P 20 years ago I would've been lost without a guide of some kind
... that makes me feel old being able to say that.
ivory sentinel
I did have a 50:1 Experimenter's Kit from Radio Shack in .. 1969 or so.
Before that I think I figured out how a flashlight works.
Maybe a Cub Scouts oriented book told me what a closed circuit was.
They had very large 1.5 V dry cells with two binding posts on top.
Brass strips were used for switches.
 compact swallow
hmm this is a neat site: https://www.allaboutcircuits.com/textbook/
 civic needle
My start in really understanding how electronics work was with Lectron, a kit with magnetic blocks containing components, with the schematic symbol on top. By assembling the blocks to match a schematic, you had built that circuit.
I did trashpick one of those spring clip kits, but it was old (had a vacuum tube), and I didn't have the manual for it.
ivory sentinel
I kept a huge pile of manuals for everything I owned that came with a manual.
Back when they still printed them in small booklet form.
I had a Hayes 300 bps modem that had a manual that told you how to use it for packet radio!
I visit the 621.384 shelf every time I go to a public library.
Applied Physics starts at 621.0.
We built a 3 tube AM radio transmitter kit in Industrial Arts class (8th grade, age 13) which eventually led me to the 621.384 shelf in the library, to see what else was possible. Then I found out there was a ham radio club at my school.
I eventually became its President. ;)
ivory sentinel
🔹
The pullup resistors are controlled by the same registers (internal chip memory locations) that control whether a pin is HIGH or LOW. Consequently, a pin that is configured to have pullup resistors turned on when the pin is an INPUT, will have the pin configured as HIGH if the pin is then switched to an OUTPUT with pinMode(). This works in the other direction as well, and an output pin that is left in a HIGH state will have the pullup resistors set if switched to an input with pinMode().
It's a good article, but lacks any diagram.
civic needle
That's the old model, nowadays, there's another choice available for the pinMode() call: INPUT_PULLUP to set a pin as an input with a pullup. https://www.arduino.cc/reference/en/language/functions/digital-io/pinmode/
I suspect this change was made both for clarity, and to better support other hardware which might have different GPIO behavior.
 urban quiver
@marsh gorge have you seen circuit playground express? They’re < $50 and fits the criteria. The boards come with neopixels, a speaker and other sensors and are great for beginners
Adafruit also sells a classroom pack with bonus savings and goodies. Also easy to start with make code and you can explore further later on with alternate programming methods like arduino or circuitpython on these boards
civic needle
Agreed on the Circuit Playground Express. It can be programmed with the Arduino IDE or CircuitPython, and has a bunch of fun/useful things built in that can be controlled. Last time I taught such a class, we ended up using the Micro:bit and Mu to program in Python, but that class had a smaller budget.
urban quiver
@marsh gorge anytime! feel free to ask any additional questions you may have
rapid hill
@marsh gorge also the CPX can be programmed in MakeCode, a "blocks"-style drag-and-drop programming environment. Good as an introduction to its capabilities, can move on to CircuitPython.
nova hamlet
Finally managed to bring a CPX in to help with a 3rd grade classroom's programming day. 😃 Kids loved it!
somber idol
@nova hamlet pure awesomeness!!!
 lilac gulch
@marsh gorge Also, CPX has lots of things built in, like LEDs, speaker, tilt sensor, buttons, so there's lots of sensory-engaging activities to do out of the box.
And when you want to hook up something external, the pads are nice and big so you can use alligator clips.
@marsh gorge Eventually, this would be good to have on hand:
https://www.adafruit.com/product/3093

Sometimes we wonder if robotics engineers ever watch movies. If they did, they'd know that making robots into slaves always ends up in a robot rebellion. Why even go down that path? Here ...
In the Learn section, I'd search for MakeCode. Also, there are a whole bunch of projects that use cut cardboard, paper, popsicle sticks, which add a nice way to bring in learners from a craft interest.
 compact jacinth
I work at an inner city Library and am working on trying to get teens interested in coding. Whenever we do activities to get them interested, all they want to do it play Roblox. Does anyone have any ideas on how to incorporate coding into Roblox in some way? We have money to spend on hardware, we just don't have any ideas on what to do with it. Any ideas are appreciated!!
 tulip wyvern
Hi @compact jacinth - How about making a controller for the games? I've never heard of Roblox before, but it looks like a site for in-the-browser games? I've seen a lot of people making controllers for gaming systems such as the xbox. I've often thought about how you could adapt controllers for browser based games. I'm sure it's possible, I just don't know how to do it. Here's an example of someone making controllers with the xbox adaptive controller.. https://www.youtube.com/watch?v=K0qsG68z3BU

At ATMakers, we've been hard at work making customized controllers for the new Microsoft XBox Adaptive Controller. This video (while a bit long!) goes throug...
compact jacinth
@tulip wyvern I bought a neotrellis with this in mind and am hoping this works. We have a game night coming up that I will try this with one person since they are kind of expensive. Not that they are expensive, but $70 x ~20 teens multiplies quickly.
 hoary bough
@compact jacinth , you might try Arcade MakeCode. At our library project (and another after school program) our kids 8-13 love Arcade. The game can be built entirely by the student, works on Chromebooks also, works off line, free coding program MakeCode, played on a simulator-computer and new consoles being built now : BrainPad Arcade. Tutorials are installed on the homepage. https://arcade.makecode.com/
MakeCode Arcade
compact jacinth
@hoary bough This looks very promising. Thanks for the suggestion. I will try it.
hoary bough
Our kids playing Arcade, MakeCode by Microsoft at a library project.
@compact jacinth
 rich hornet

The first 200 people to sign up at https://brilliant.org/stevemould/ will get 20% off an annual subscription that gives you access to the full archive of Dai...
hoary bough
Manic MakeCode Monday in Missouri. Our students coding with Microsoft MakeCode and Adafruit Circuit Playground Express in a library program.
We also use a course by Core Electronics, Stephen is the instructor, MakeCode and CPX: https://core-electronics.com.au/tutorials/circuit-playground-express-workshop-for-beginners-and-educators.html
Core Electronics
Welcome to the Circuit Playground Express Workshop! This workshop is geared toward educators and coding beginners, who want to get started programming with this easy to use platform. We will go over everything you need to know to get you started programming your Circuit Playg...
hoary bough
Wondering about Code.org with Adafruit Circuit Playground Express; and MakeCode? https://code.org/circuitplayground ; "App Lab" is an environment that we are not familiar with and we hesitate to start with something new after such an investment of time and training in MakeCode. We see the CS training using Micro:Bit and wonder if there is a corresponding platform for CPX and MakeCode that focuses on basic computer science : CSTA K-12 Computer Science Standards like this one: https://makecode.microbit.org/courses/csintro . Or do we need to make it up for ourselves ?

Code.org
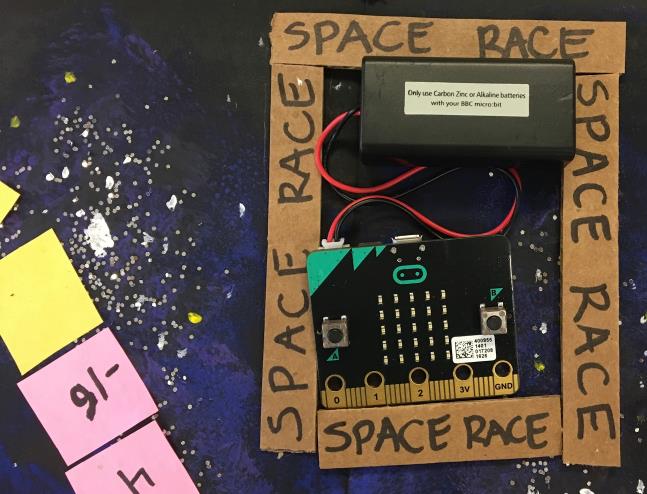
Microsoft MakeCode
This course is targeted to middle school grades 6-8 (ages 11-14 years). It is also written for teachers who may not have a Computer Science background, or who may be teaching an “Intro to Computer Science” course for the first time.
wispy marsh
Saw this at Barnes and noble today. Would love to see a PCB that pulled out the CPX connectors to snaps with enough room to pop on snap connectors. Just a thought.
civic needle
You might be able to do that with flywires and these https://www.adafruit.com/product/1126
wispy marsh
Perhaps
serene ether
@wispy marsh was it @sharp quartz had his cpx "biscuit" tombstone style breakout board that fits the bill or was it a crickit adapter of some sort.
 sharp quartz
@wispy marsh @serene ether Yes,I did a CPX breadboard adapter. No snaps, though.
serene ether
It should be a snap to add. I think there are pop rivet style snaps out there that you could install in a proper sized thru hole on the pad.
@wispy marsh also recall that @quick summit or @shell badger might have milled out some kind of breakout/extender board for the CPX?
wispy marsh
I think it might be worth looking into what size snaps those toys use
wispy marsh
Looks like they are 12mm (.5 in) snaps - I've got some on order 😃
 forest sleet
Good question. I believe the intention was to discuss Electronics and Programming as it relates to teaching students in a classroom.
hoary bough
Another MakeCode Monday in Missouri; word of the day is "Arcade". Library venue (trying not to show kids' faces so much is cropped) . We are using both Adafruit Circuit Playground Express and the Micro:Bit to demonstrate block coding and physical computing. Parents like to see the code in JavaScript too ; assuring that students will see text programming also. A growing cohort are kids being homeschooled ; STEM ed. is now easier with MakeCode including off-line and with Chromebooks too. We hope to have some maker faire projects this summer to show.
 craggy ibex
Hi folks. Greetings from Germany. I'm currently working on a german language tutorial, borrowing from learn.adafruit and here is it: https://de.serlo.org/informatik/baustelle/internet-dinge/circuitpython-anfaenger-kurs/los-geht-s/rot-gruen-blau

I'll post picture once I tried it with my pupils.
hoary bough
$25 Adafruit Metro M0 (not M4) Express, plus analog moisture sensor and LCD display. We now have a Maker MakeCode project for soil moisture to start our gardening project. With "servo" extension we can move a valve or tip a straw to add water to soil. Problem with this code: text string changes as it should to read "dry" , 'wet' or 'ok' but number reading stays the same regardless. Ideas? Thx. https://makecode.com/_2y8h0pci1307
Made with ❤️ in MakeCode Maker - Blocks / Javascript editor.
soft mist
@hoary bough it looks like you only set the AnalogMoisture value once at the start, not in the loop when it is reread
hoary bough
thx, will correct and try that
soft mist
Or just show the analog pin read value instead or else you have to update it every time you read.
In your example you really don’t need the AnalogMoisture variable.
On second thought - you should use the variable AnalogMoisture. Just set it at each read the use it for both settings.
hoary bough
Thanks @soft mist . I think I created the variable because I couldn't figure any other way to get "analog read" into the code. Anyway, your suggestion works this way, and there are probably better ways; but, NOOB here. https://makecode.com/_cw405sbA732d
Made with ❤️ in MakeCode Maker - Blocks / Javascript editor.
soft mist
That way you are using the same reading for the decision and the display.
You’ll get away with what you have, but it really is only updating the AnalogMoister once but it is then using several different readings for each “decision “ but still displaying the first reading of the loop. You would be better it set it as you do then use the AnalogMoisture variable value for all the “tests”. — only allow it to change once per loop.
So replace all but the first “analog read pin A0 “with AnalogMoisture
Since the value likely does not change to rapidly, it may not matter.
I’m not very familiar with Makecode — can you replace the “analog read pin A0” with the Variable AnalogMoisture in the if statement?
hoary bough
Yes @soft mist , this seems to work best, if it is what you meant; and I'm trying to understand what the processor is looking at and thinking: https://makecode.com/_LTC1zWffwVT3
Made with ❤️ in MakeCode Maker - Blocks / Javascript editor.
soft mist
That is what I meant— I think it is clearer — I assume the “orphaned” analog read pin A0” don’t actually do anything.
This way all tests are based on the same reading.
Oh — but you don’t need the pause(10000) in each section — just once at the end
Actually that does not matter- leave then there.
hoary bough
ok on the pause, I thought that was needed for each decision; not obviously now. yes the un-highlighted blocks just float out there until I trash them, to help me remember what changes i just made. Thanks again. @soft mist
soft mist
Yup — looks good — glad to help — good luck with the project!
hoary bough
Servo is next
soft mist
hoary bough
I don't see "help with Microbit" ; not so interested in joining yet another Micro:bit support forum so I'll ask here. This code is giving me zeros as an output for the CCS811 CO2/TVOC readings. I've changed the 'set address' to both addresses offered and checked my wiring. Is there maybe something wrong with the extension that it won't work with Micro:Bit? Any ideas? Thx. https://makecode.microbit.org/_FK8X2CWAw6Yw (if you get errors you might need to install this URL extension; the author's test.ts does not show an address declaration and I tried the program that way too but same result: https://github.com/ElectronicCats/pxt-airQuality)
paper fable
@hoary bough #help-with-projects is meant for general assistance. This channel was intended for discussing education related things. You might bet better off asking in the projects channel as more people frequent it.
hoary bough
On the DISCUSSION tab on my YouTube Channel there is a parts list, sample code (MakeCode Block/JavaScript) and I will post wiring and more information on this Springtime project. It's about $38 for parts when bought from the links listed. Adafruit may sell the parts so you'll get them faster if shipped to US or Canadian addresses. The parts are , to some extent, code system specific. The only board that I have found which works with this code and parts is the Adafruit Metro M0 Express (NOT the M4) ; this is because , I am told, the MakeCode analog to digital converter does not work , as yet for SAMD 51 chips (M4) so you'll not get a good readout with that board from the moisture sensor. I do not know enough about digital moisture sensors, if there are any, which might work with M4 or other SAMD 51's so I am staying with the $25 Metro M0 Express. Other M0 board would work but don't have enough pinouts to run the LCD or I just have not tried them as yet. Video is just a photo of the set up. More vids and discussion to come:
New project: "electronic gardening", moisture sensors, output to display screen and automatic watering: educational for students 10 year old and up, about $38 for parts. They use block code for practical electronics. Follow along on my YouTube channel under :DISCUSSION. https://youtu.be/2bju-7shw0E

This is the first photo showing our "electronic gardening" project. Go to "Discussion" on this channel to see the details, parts and where to get them. Also ...
Micro:Bit may work for this, have not tried it as yet. Also, BrainPad ?
hoary bough
MakeCode Bug Bot with Micro:Bit to entertain cat: https://youtu.be/DfBJfjycDqw
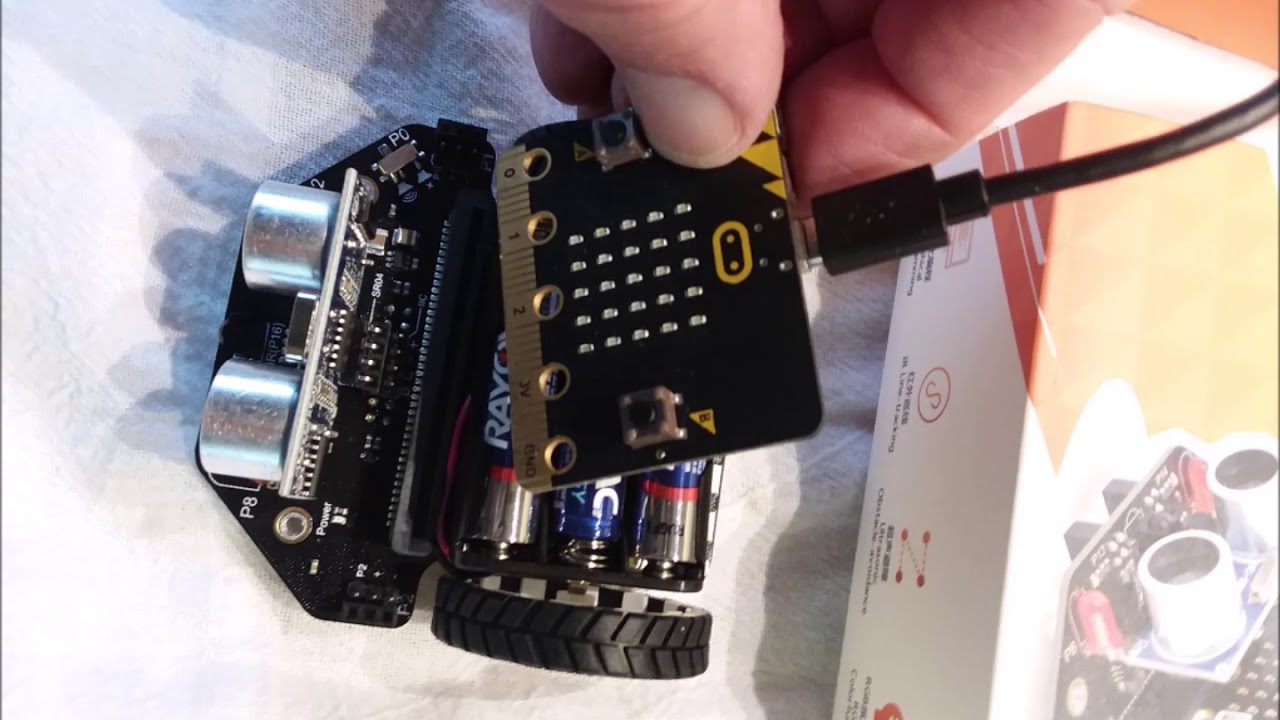
Full unboxing vid tomorrow. This is an after-market bug bot using the Micro:Bit (not included in the kit) . See links at Educ8tv.on YouTube. It's about $15 f...
about $15 for Micro:Bit and $22 for bug bot kit. Many programming options for kids' education. Block coding with JavaScript editor.
hoary bough
Now full unboxing of MakeCode based Micro:Bit bug-bot; block coding and JavaScript educational for kids. Code, purchase, extension links included in video description. : Hope to develop it to be IR controlled also: https://www.youtube.com/watch?v=fTWfUJoD0MQ&feature=youtu.be
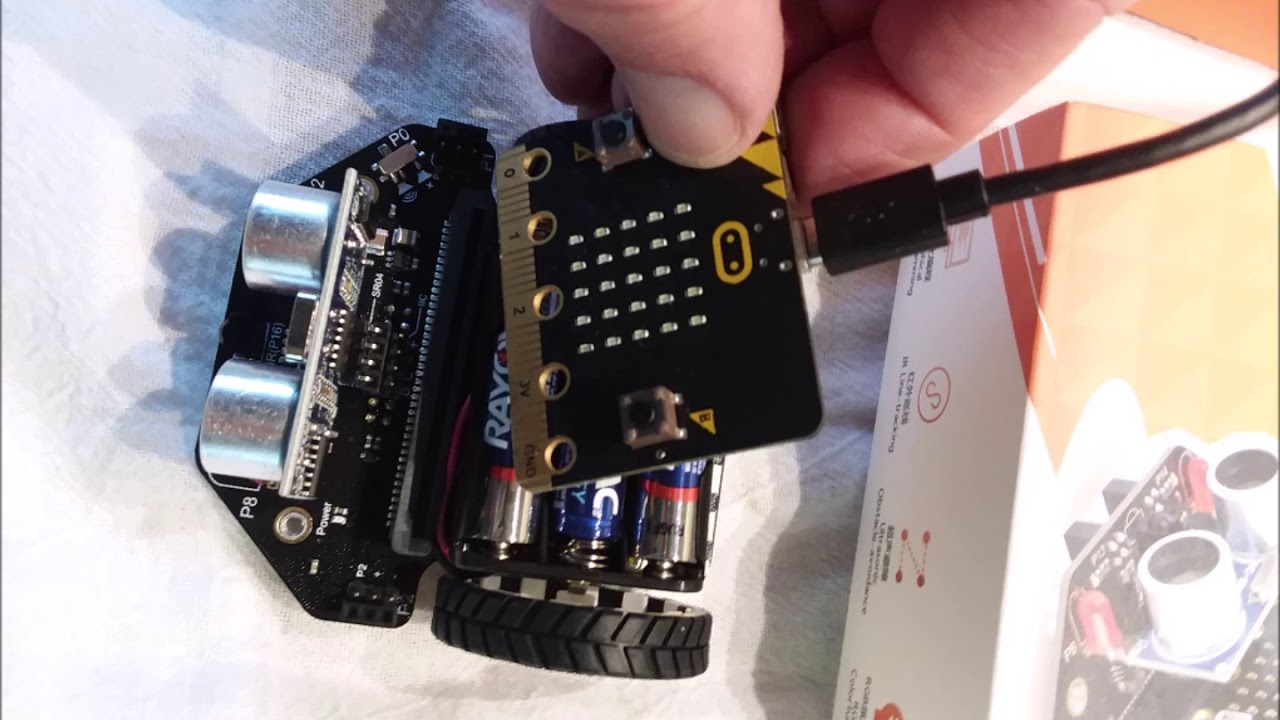
This is an after-market bug bot using the Micro:Bit (not included in the kit) . See links at Educ8tv.on YouTube. It's about $15 for the Micro:Bit and $22 for...
hoary bough
Educational, in MakeCode we use blocks to write our program. but there is also a JavaScript tab which helps us to translate a foreign word block after installing an extension from a different country. Here's how: https://youtu.be/9-c7QXOdeog

索引 This word means “index” in English So when creating a variable for the Micro MaQueen by DF Robot be sure to make a variable of index in English along with...
hoary bough
Girls at our library coding program are interested in electronic fashion; wearable Gemma M0 with Neopixels on a Velcro strip coded with Maker MakeCode; block /JavaScript ,conductive thread https://youtu.be/HtZx71HT404

This is an electronic fashion project using Adafruit Gemma M0, 4 Neopixels; 3 are the Adafruit "Flora" type which have (click:SHOW MORE) sewable/conductive r...
hoary bough
This is a super easy way to show your students how to program strings of text to be displayed on a matrix. Microsoft MakeCode and Micro:Bit- $15 from Adafruit. Video shows wiring and code link in description: https://youtu.be/TLk1jfdulSw

 hexed fox
Hey gang! (Specefically the female types) I am looking into volunteering for teaching STEM in my local area... as my daughter is going into jr. high, I'm thinking about girls-only as an intro and have a couple of ideas on things to build and the skills needed to build those types of projects. My question for the group => What kinds of projects do the girls want to make? I can make weather stations and things that blink and beep all day long but if it doesn't pique the interest of my audience, I'm not sure how successful I'd be. What say you?
hoary bough
I have found "music" and "wearable, electronic fashion" @hexed fox . Although I'm not of the female persuasion, I have found many gals teaching these areas of electronics and coding . Erin St.Blane, Becky Stern and others on YouTube have vids with good info. See my vids on MakeCode and Hardware also for the Barbie mannequin electronic jewelry. Also, Kitty Yeung takes it to a whole 'nother level working with Microsoft at the Garage, for your advanced students: https://www.youtube.com/channel/UCGv20IB98PX74q-MW-Au8-A
 hexed fox
@hoary bough Thanks! Those are all great suggestions and some new references I haven't seen before. The 10k foot question I'm looking for insight is more related to making a battle bot, painting it pink, and calling it Girl's STEM (especially if the girls didn't want to build a battle bot) or build wearable electronics for prom dresses when they wanted a pink battle bot... I know there is a middle ground. I know the things I like to do and would like to know what the others like
civic needle
I'm no authority, but things I remember some students liking were pet feeders, LED array animations, and music. One kid made an LED illuminated diorama that was nifty.
serene ether
@hexed fox Look into contacting Instructables on seeing what they have for educators(free memberships -they are part of Autodesk -Tinkercad, Fusion360). Also browse through the instuctables for inspiration on what to make( ahem, I've got a lot posted there that may be of interest). LittleBits is big in having their "girl-empowered" STEM program using their products. Also try reaching out to Tanya Fish - she has presented at Maker Faire and does programs STEM programs( for Pimoroni or independently? in the UK and has twitter). And also drop a note to Adafruit(contact form on the website) to let them know what you are doing and seeing if they can help. Ask away if you have any questions. Good luck.
 shadow dawn
@hexed fox My daughter (11) got very interested in playing with the micro:bit when I showed her the NeoPixel LED strip and how she could let the colors rotate and swirl: https://www.adafruit.com/product/3812 + micro:bit
Adding glowy color to your projects has never been easier: no more soldering or stripping wires, clip 'em on and glow! This Adafruit NeoPixel LED Strip with Alligator Clips has 30 total ...
shadow dawn
I also think the reaction time game that Microsoft made as a demo for the MakeCode and Micro:bit is brlilliant for teaching
you can teach a little electronics with it, its a fun competition game and you get to explore lots of programming concepts in a very simple game
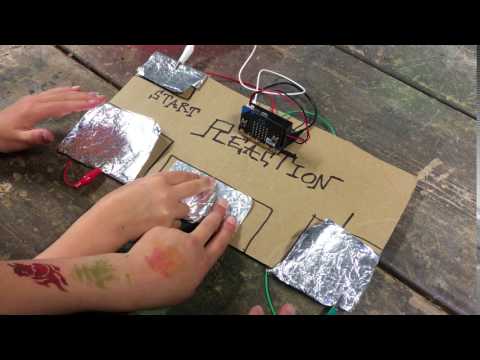 hoary bough
MakeCode: Now looking into WebUSB. It is touted as a single click way of uploading a program to Micro:Bit and Adafruit CPX. by "pairing" the hardware. Not enough benefit for me to jump through hoops and limitations to install it, but this: we can now use it, at least with Micro:bit (haven't tried WebUSB for CPX as yet) to output data to our computer screens in real time. Yesterday I installed 3 extensions for Micro:Bit sensors (temp/humidity, light intensity sensor and RTC (real time clock) and read the outputs of the first two in real time on the computer monitor console in consistent, believable data and graphs. OLED display works with some MakeCode enabled boards and 2X16 LCDs too but not with all microprocessors. WebUSB might be another way to retrieve data from some sensors . I'll do videos on what I have found that works and how.
The lower purple circled oval: "show console device". is the key. If you don't have that on your screen then the WebUSB is not installed or your Micro:Bit is not updated or your Micro:Bit s not plugged in and ready for upload.
I don't see "help with WebUSB listed on left column here on Discord Adafruit. I understand that this is still in Beta or quasi-Beta. https://learn.adafruit.com/makecode/webusb
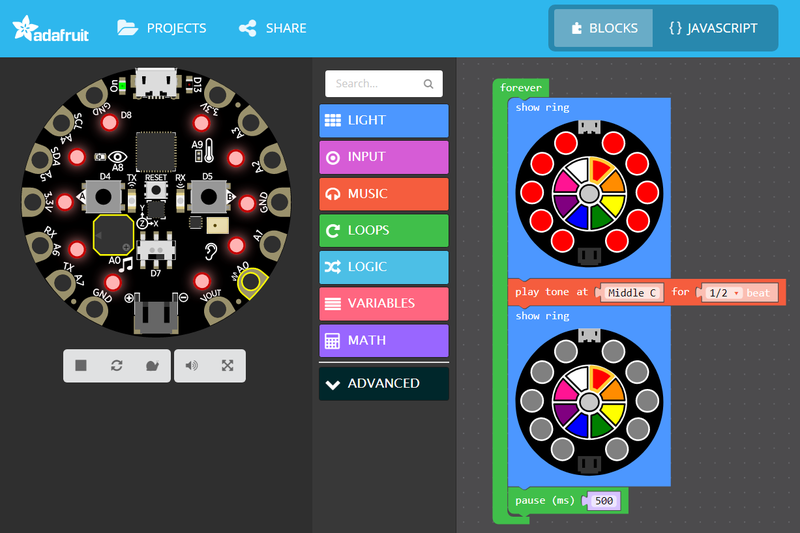
All you need to know to get coding with Microsoft MakeCode
hoary bough
What I'm talking about, display sensor data in real-time using MakeCode, WebUSB, Micro:Bit and variable resistor. Video. I have requests in to Adafruit forum and r/MakeCode on Reddit as to why I cannot get CPX to pair with WebUSB. When I get answers I will begin using CPX as well. Your students can see that changing the resistance does output on the computer screen. https://youtu.be/aHnBHD0msmY
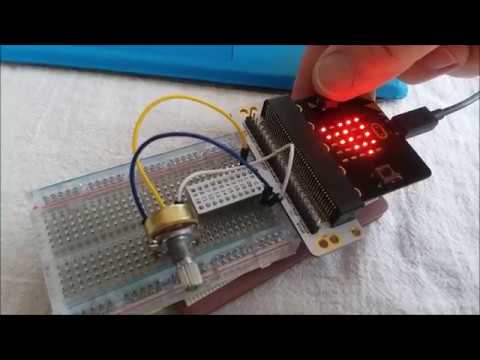
WebUSB with MakeCode is supposed to be a big deal because it allows only one click to upload code from computer to microprocessor. What I have not seen many ...
hoary bough
Just discovered this: a notepad data output which is recorded automatically while the analog sensor (moisture, capacitive) is sensing and sending to the Microbit: sensor is stuck in dirt to retrieve moisture data, 1023 would be highest value output I think: https://drive.google.com/open?id=1rHP-iiim9vXj5Wvt-mbjO5tDM_z3WW3i9cmDkneOBLs, this is WebUSB and Micro:Bit with soil moisture sensor.
hoary bough
I think this pertains to MakeCode on the Adafruit forum so hope this is in the right place to post the link. If you are trying to use Adafruit Circuit Playground Express (CPX) and MakeCode with the BETA WebUSB, sometimes called Windows 10 app., then you might have troubles if your CPX does not have current bootloader. There are instructions on the Adafruit web site on how to use WebUSB with CPX, and they include a note about uploading a new bootloader to CPX if necessary. A hint that you need to do this might be that the system does not work for you no matter what you try and so you try to find the new, updated bootloader, it's as easy as copying and pasting a .uf2 file into your CPX in upload mode . But...the link to get the bootloader .uf2 file is a page on Github with, like 30 or so files; so , which to choose? My answer is that I found the correct .uf2 file and stored it on my Google Drive page so you don't have to go to GitHub and sort through all the other various bootload files. Here it is, you should click on the link, then you have to save it to a known folder, then go to that folder and identify that file, (DO NOT OPEN IT) , but copy it and paste it into your CPX drive file to upload when plugging the CPX via USB into your computer just as you would to upload a new program. This installs the bootloader which as of today (April, 7th, 2019) is the latest. Here's the link to my Google Drive repository for CPX most recent bootloader: https://drive.google.com/open?id=1BprRVxQVNZsKN63McA2irjLkBRBlPs30
 devout herald
Maybe it is easier to use their new website? https://circuitpython.org/board/circuitplayground_express/
I did not check webusb for now
The Circuit Playground Express is Adafruit’s flagship educational board designed for CircuitPython.It brings the “batteries included” approach of Python to h...
 weak dew
Thanks @hoary bough I can not see the video link
hoary bough
https://www.youtube.com/watch?v=fbLdaKOr09c MeowMeow board with MakeCode
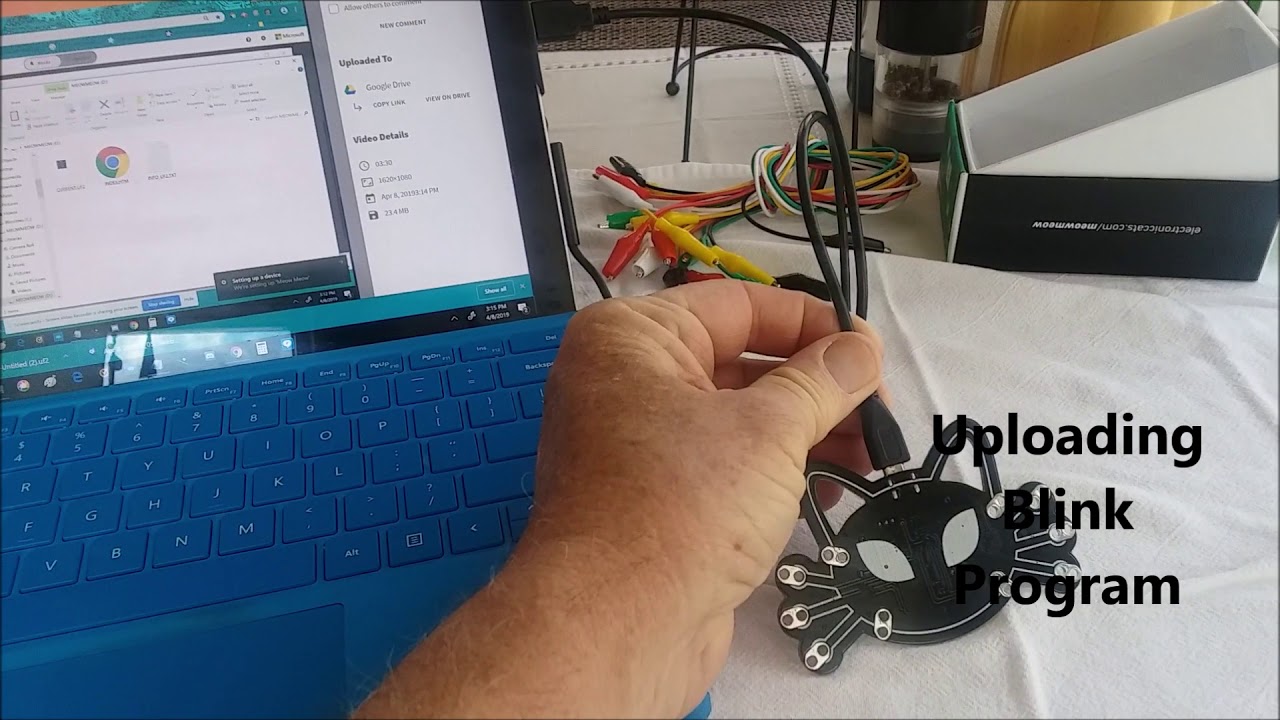
Unboxing the MeowMeow for MakeCode. This is larger than the Adafruit Circuit Playground Express. See links below for info and purchase... https://makecode.co...
This should work @weak dew
hoary bough
The reason I am posting this video link on classroom is because I think the MeowMeow by @weak dew and friends will be very useful to us, teaching our students about coding and electronics. I am just now working with this MM board. The video is not "public" but is seen only by people who see the shared link here. It may very well be my misunderstanding as to why the music does NOT play unless the ground wire is removed from the speaker ! ! Also, with this code, the 16 neopixel array does not play as it does without the speaker and without music. Help, suggestions would be appreciated. https://youtu.be/Y30OWvNpMY0
YouTube
MakeCode and Hardware
Weird behavior of LEDs and Speaker with MeowMeow, MakeCode

This is an unlisted video showing the below code and the observed wiring of the MeowMeow circuit board enabled for MicroBit with 4X4 neopixel array and small...
weak dew
my error DAC is PA02
hoary bough
ok will try it and remove video
weak dew
@hoary bough I'm reviewing
hoary bough
OK, PA02 = pin A2 ?
hoary bough
https://www.youtube.com/watch?v=nCSUrjtJAo8 For education of our students, the MeowMeow board with MakeCode/Javascript editor. It is wearable with flat battery pack and Velcro. Wiring and code shown in video.

This is one way to make the MeowMeow board portable and wire the VCC and GND wires around to the front of the board. (click SHOW MORE) The pin pads are only ...
hoary bough
I'm still not having any luck with my Adafruit CPX and Windows 10 app. (WebUSB) ; trying to output data to "console device". I cannot get that oval to show up below the "simulated console" on the computer screen. So far, no response from anyone when I ask for help. It works for me with MicroBit. Tried 2 different CPX, 3 different computers. Any suggestions would be appreciated.
civic needle
I don't know what oval you're talking about.
rapid hill
@hoary bough I never got console output to work in MakeCode. I don't think it's functional. Did you ask in #help-with-makecode ?
hoary bough
@rapid hill , I wouldn't have mentioned this, thinking it was not working as yet , but @oreo said that they got it to work. I never thought to ask for a screen grab of the output to computer monitor . @civic needle , the oval is an elongated bubble below the simulated CPX Like shown here, but below the one "Show Console Simulator" which would say (and does say in Micro:Bit) "Show console Device " as demonstrated in my YouTube Video on the MicroBit and WebUSB (Win 10 app.) In fact, this code is said by @oreo to produce that output; but I can't make it work. https://makecode.com/_Utc5hJUT9XcR
https://www.youtube.com/watch?v=aHnBHD0msmY ; with MicroBit, it works.
WebUSB with MakeCode is supposed to be a big deal because it allows only one click to upload code from computer to microprocessor. What I have not seen many ...
hoary bough
But, just to be clear: The Science Fair Project code would have to be loaded into this web page, not the one which comes up when you click on the link that I gave you. Yes, that sounds quirky but true. The "webusb editor" web site is the one you paste the JavaScript code into - remember that you cannot right click and paste, you have to use key strokes Ctrl+v in order to paste into JS. and furthermore, you have to have the CPX plugged into the computer in order to see the blue oval with the option to Show console Device; at least that was true with the Micro:Bit. If MicroBit not plugged in, then the program does not show device display on your computer screen as in YT vid. https://makecode.adafruit.com/beta?webusb=1#editor
Adafruit Circuit Playground Express - Blocks / Javascript editor
A Blocks / JavaScript code editor for the Adafruit Circuit Playground Express.
hoary bough
https://youtu.be/Gz-d-_esVGM @weak dew, MeowMeow maker board for kids' education about coding and electronics. Capacitive touch on A1 works quite consistently to activate 3 neopixel displays. Note wiring to make it breadboard compatible. Code is included in "description" on YouTube.

Here's the code: https://makecode.com/_iriMFJUJ4Fzk This plays by touching lower right pin pad: A1 as noted in "input" on long touch of A1. This is quite con...
hoary bough
We had fun with A. Sabas' Meow Meow board today at our library educational program about MakeCode and electronics. We used 5 neopixel displays and used Velcro to make it all wearable ! Here's the video of the MeowMeow and links to code and John Park's music: https://youtu.be/LoYLs00XfQg, https://johnpark.bandcamp.com/track/dip-tripping . @weak dew , @livid anchor

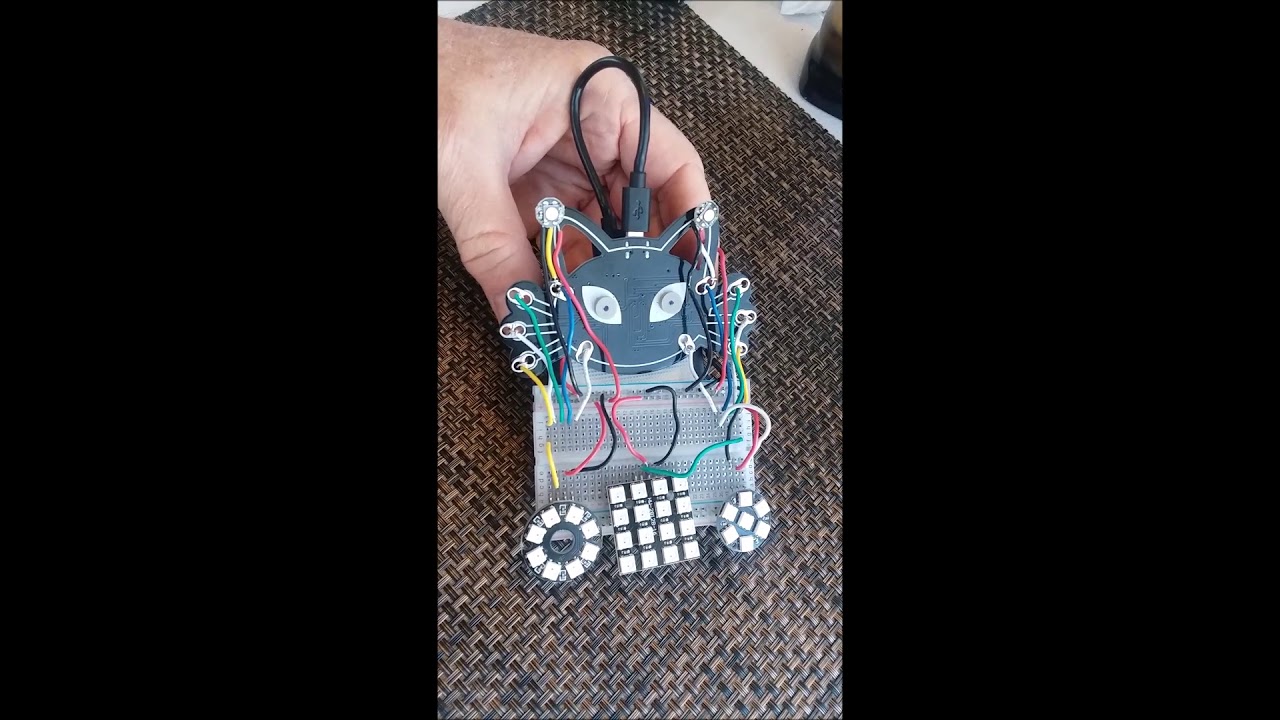
https://makecode.com/_X4y5kRiRuLfY code for this program for MeowMeow board. buy MeowMeow: https://electroniccats.com/producto/meowmeow/ Look at video closel...
hoary bough
Arcade is a cool new retro game using MakeCode blocks and JavaScript. Our kids built their own games yesterday at the local library ; now they will have a gameboard in real hardware, not just on the computer screen: https://www.youtube.com/watch?v=cCDAnWoR_cM
Buy Meowbit: https://www.ebay.com/i/293047923834?chn=ps&var=591867325209 Code for the game: https://makecode.com/_VsXK2DUhTf5L John Park music: https://johnp...
hoary bough
Unboxing video of Meowbit board for use with Microsoft Makecode Arcade. This is an educational programming system (MakeCode) using blocks with JavaScript as the base. The Arcade game can be downloaded and/or all new games written by the student . The Meowbit is easy to use, you can quickly load a sample game into it and write or re-write games with the block coding. Meowbit looks to be durable and protected by sturdy plastic case; the buttons are built in. There is an SD card slot; we hope to discover how to use this functionality. There appears to be a speaker (now I see it is a buzzer) and possibly a head phones jack, there is a JST battery plug input on the back. https://youtu.be/bQ8ysgREcQg
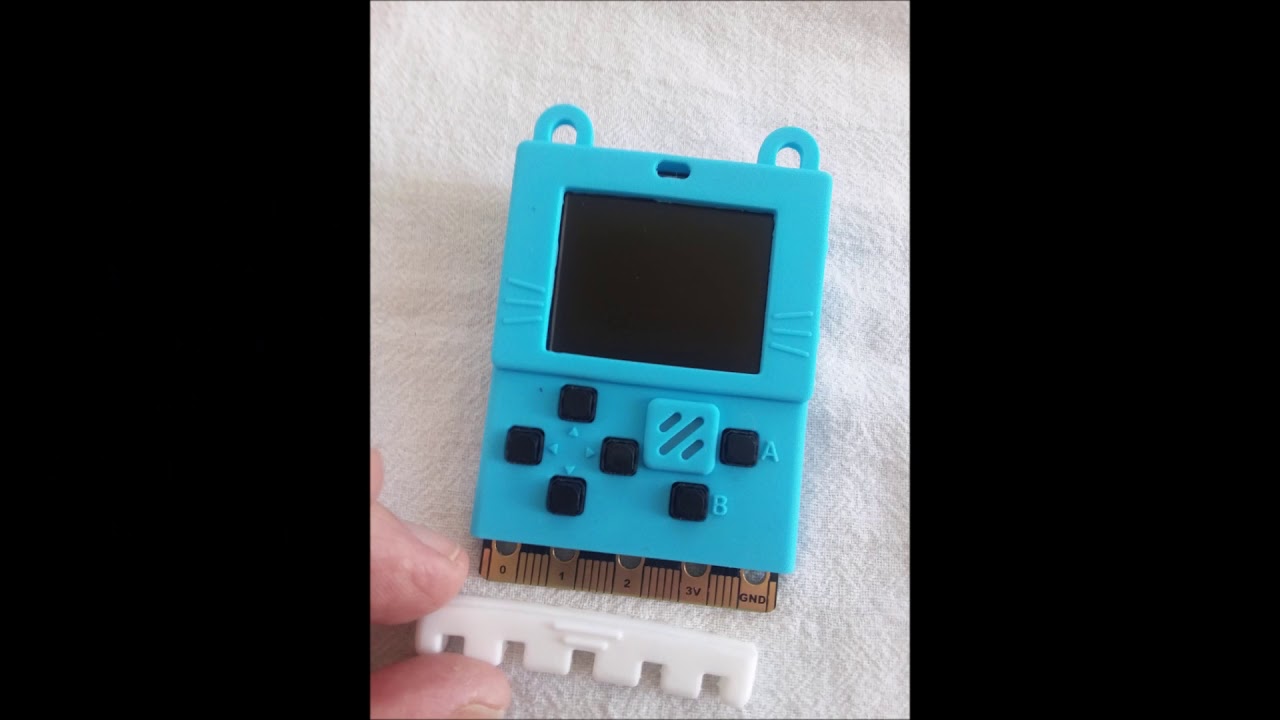
This is the Meowbit board by Kittenbot which works with the new Arcade game and Microsoft MakeCode. I got this from Alibaba but now find it cheaper from Ebay...
 stoic finch
That's rad!
hoary bough
Just now started reading the Computer Science lessons for students and teachers at the Microsoft Makecode for Arcade web site. There appear to be 3 CS chapters which introduce us to some basic concepts. Here is an example of editing in JavaScript from chapter #3 "functions". If you backspace your cursor on the URL from this link to get to /courses/ then you will have the entire CS course page: https://arcade.makecode.com/courses/csintro3/functions/intro

Microsoft MakeCode
In Blocks, ||functions:functions|| served as a powerful tool in making
complex games easier to read, as well as reducing redundancy within the games.
hoary bough
ColorBit ! for Micro:Bit, 25 RGB LED display, (contact me if you have a Micro:Bit and want one of these....https://youtu.be/TQn86_ATD2U

Here's the code: https://makecode.microbit.org/_WmiAp34kRD5d First, buy the ColorBit (or contact me) and then install the extension for 51 bit ColorBit (http...
hoary bough
9 year old programs MakeCode Arcade game and uploads it to new Meowbit console: https://youtu.be/N1HZmOtk9No

Retro game called Arcade for MakeCode programmed by 9 year old Xandria and then uploaded to game console: MeowBit. This board is available on Ebay and other ...
hoary bough
Another new Arcade game with MakeCode: see more at "Forum MakeCode" : https://www.youtube.com/watch?v=sn1KKNobsX4

This is a great new game just now invented by Stu Lowe for Arcade MakeCode. Microsoft Arcade retro games: here's the code for it: https://makecode.com/_R4JF4...
hoary bough
When your students get these Arcade MakeCode consoles (hardware game board), here's a video showing how to paste a shared program URL into a browser (they could also just click on the URL share link) and then the steps to first DOWNLOAD the game program to their computer and then upload that onto the console. Besides this Meowbit by Kittenbot we also have the BrainPad with .96 inch OLED screen, and also the kit where you can solder up your own Arcade console using Adafruit parts and will soon have the new BrainPad Arcade which will have the larger 1.77 inch TFT display. Here's the video showing how: https://www.youtube.com/watch?v=KDNiK34zNhM

Space Slalom by Greg Norris. I'm demonstrating how to get this game as a "shared" program and paste the URL link into your browser. From there we can see the...
hoary bough
Seems strange to me: With Circuit Playground Express and capacitive moisture sensor (not resistor) the data output goes DOWN with more moisture . If 1023 is the max. reading then I would think wetter would be higher. Totally wet would be 1023. Not with this MakeCode program: More capacitance = lower number: https://makecode.com/_L99RksfeYiLU
Made with ❤️ in Adafruit Circuit Playground Express - Blocks / Javascript editor.
hoary bough
Fashion Statement ! New retro game board by GHI, the BrainPad Arcade which we programmed with MakeCode Arcade. This board will be for sale soon. I will do an unboxing of it and review soon. One video up already on my MakeCode and Arcade Youtube channel.
hoary bough
Your students can write their own retro game code using MakeCode Arcade and upload the game program to the new MeowBit game console by KittenBot. Block coding (JavaScript) is so easy for beginners: Video: https://youtu.be/ARgyyycU9YI

Here are some boys at our library meet-up coding the retro Arcade by Microsoft 2D game. They right the program using block code (Javascript) and then upload ...
hoary bough
Unboxing MakeCode BrainPad Arcade console. Your students can learn about coding and hardware with this new game board by GHI Electronics.: https://youtu.be/DQ88aoNF8f0

Here's an unboxing of the BrainPad by GHI Electronics which works with MakeCode Arcade. It's a cool , brand new, retro game board. You can make your own game...
Waiting for Adafruit PyBadge to play with MakeCode Arcade. I have a request in for it when it ships.
hoary bough
I'll do a proper video about jacdac connections with a cable and 2 Arcade boards: here it is showing one board controlling the sprites on another console : https://youtu.be/iofADeGRXTA

https://forum.makecode.com/t/hardware-multiplayer-game/132 posted on the forum.MakeCode by riknoll to demonstrate how jacdac with single cable connecting con...
hoary bough
How your students can play Arcade together with two consoles: https://youtu.be/YKshfoeGtbM

A retro game of Arcade by Microsoft MakeCode using consoles: both are F401 chipsets ; BrainPad Arcade and MewoBit by Kittenbot. These are connected via a 3.5...
hoary bough
2 students playing MakeCode Arcade with "Multiplayer" function and a single cable connecting the consoles. We are working with the code to alter it and make our own Arcade game:https://youtu.be/EGk2m39w_h0
MakeCode Arcade Multiplayer : using 2 consoles (GHI BrainPad Arcade and Kittenbot Meowbit) connected by 3.5mm male to male 3ft cable and jacdac system. This ...
hoary bough
Adding sounds to your Arcade game (MakeCode) for multiplayer. Your students can add just a few lines of code to make tunes play when the game begins. They will have to work in JavaScript for now until block coding is enabled for multiplayer with jacdac wire. Code for this program is in the "description" of the video: https://www.youtube.com/watch?v=eELMApYyuxc

https://makecode.com/_i44b0gipW3ze, program with "music" added to multiplayer Arcade game : 2 consoles connected and tones play upon connection via single ca...
 unreal steppe
I’m looking for some help from anyone who is available - I’m having issues with my new #pybadge LC and loading @MSMakeCode arcade games - following John park’s post from a few weeks ago online, but not getting bootloader mode to appear, and pybadge screen says “code done running. Waiting for reload”. Any ideas?
hoary bough
Joey Wunderlich has written a great extension for Arcade MakeCode game using multiple button presses to score points. Here 's a link to the video showing your students the game on a console and a link to the program. https://youtu.be/Vw3eiL0-YUs.
hoary bough
We are still trying to figure out how these Arcade boards act with a cable connecting them. Here the boys play two games , neither of which is programmed for multiplayer nor jacdac. You can see that today the consoles show the game. Yesterday only the 'receiving' or slave console showed the game, the master did not show any game images. The boys at our Missouri library project (both being home-schooled) re-wrote the two games to suit themselves and sometimes the code worked as expected. Adding a second propeller to the helicopter in Helicopter Rescue works some times but not consistently. The point is that with non-multiplayer your students can see the game in blocks and change it up to suit themselves. Multiplayer does not show blocks as yet. Video: https://youtu.be/wZwz58cNB-s Both consoles are connected with a single stereo audio cable: male to male.

Here the boys have re-written code for "Jewel Raider" and "Helicopter Rescue" games. Neither of them is multiplayer with jacdac coding and yet they test how ...
Thanks for the music @livid anchor .
hoary bough
Met today with homeschool moms about STEM project using MakeCode and also with local library employee about (maybe) buying LEGO Mindstorms EV3 kit #45455 for robotics education with MakeCode. Thank you all for your hard work on this environment ; we hope to do fun things after school introducing students to their new smart world.
hoary bough
I have not yet tried connecting a 1.8 in. TFT screen to my Microbit. I will try to find the extension and see if we can make it work. https://blog.csdn.net/yangzhenping/article/details/80776121
hoary bough
https://www.youtube.com/watch?v=Y44A5_DmxYU&t=15s Here's the beginning of a new instructional series by Aaron Maurer on YouTube discussing getting started with LEGO Mindstorms EV3 system. The micro controller "brick" is the command and control system (like a CPX or BrainPad or Micro:bit) and the brick can be programmed with MakeCode or other environments. Aaron shows us the setup and firmware installation to get this brick up and running in Video #1. He says he'll do a series which we are looking forward to. Our library meetup for MakeCode is looking at the kit #45544 "core" for LEGO robotics for purchase maybe as a summer project.
This video will walk you through how to connect LEGO EV3 with MakeCode. It also covers two ways in how I upgrade the Firmware to be able to connect with Make...
hoary bough
Great turnout this morning at our local library meetup. More kids than ever are showing up to learn MakeCode. We used 2 game consoles and Arcade along with Microbitand Colorbit. Thanks @livid anchor for the music and @jagged island for the MakeCode stickers; the kids love them. https://youtu.be/KmINqDVNAZM

We met today in Galena, Missouri to learn more about MakeCode. We used the Arcade game with two consoles: BrainPad Arcade and MeowBit for Arcade. We also use...
hoary bough
Video and link to TinkerSpark on-line course using Microbit and MakeCode: Saral Tayal teaches it. He's on YouTube also. This would be a good course for introduction to Makecode coding; he says it is Microsoft approved lesson plans. https://youtu.be/Dt5TsVDP9IY
Saral Tayal teaches introduction to computer programming and physical coding using BBC MicroBit and MakeCode. Here is his course, it is well worth the small ...
hoary bough
https://youtu.be/z4uBxLBjH8U Using Colorbit 5x5 LED array with Microbit for a kind of a "game" that kids can demonstrate "loops" in the MakeCode code. Includes music and score counter.
This is the MicroBit with a ColorBit attached by 3 wires. The MicroBit keeps score of button presses and shows the leader as you play. When either scorer get...
hoary bough
Using WebUSB to transmit data generated by Micro:Bit and outputting the data to your students' computer screens in real time. You have to have the USB cable plugged into your MicroBit and computer for this to work. In the video I'm showing that the Micro:Bit senses the light level and also outputs that to the on-board LED screen when button A is pressed. There is a gear icon with a dropdown menu which you can see "Pair device" and click that to allow Micro:Bit to feed data back to your computer in real time. "Datalogger" is another (not real time) option to record data and I think I have a video on that, maybe with Adafruit CPX on this channel: https://youtu.be/jDjJVni_t_w

To get this data output to your monitor in real time you have to enable WebUSB by clicking on the "gear" icon on the upper right of the screen and choose "pa...
hoary bough
New simulator look for MeowMeow using MakeCode: If you click on this link it should show you a new simulator look for MeowMeow. (I know, the sound is annoying). Once you click below then you will have to click on "edit" upper right of page to see the simulator. Then click on A1 on the MeowMeow to get the program to play.
Made with ❤️ in MakeCode Maker - Blocks / Javascript editor.
hoary bough
Watch for this: Air:Bit, Microbit drone: https://www.makekit.no/airbit
makekit-real
hoary bough
Air:bit, the world´s first micro:bit drone. Register at airbit.no
hoary bough
You can hook up a 5X5 Colorbit LED display to a bug bot ; McQueen and show various images with only 3 wires. See video: I have extra Colorbits for your Microbit if you want one.https://youtu.be/PB3DVcOXHmI

51Bit Colorbit that works with Microbit is attached to McQueen bug bot and connected via the ouput pads on the bot. This is to show that the Colrobit can be ...
hoary bough
You can control the MaQueen bug bot using Infrared and the MicroBit with the Colorbit on board. I am just starting the programming for this. Our kids at the library meet up have begun programming the MicroBit and this project will carry on from their first coding: https://youtu.be/kVkrwjAiWAY

This video begins showing IR control of the MaQueen bug bot with MakeCode programming (link to code below) and the ColorBit attached to the bot. The ColorBit...
hoary bough
Follow along as we convert and test: Old solar yard LED lights changed over from AA to AAA recharge for batteries which run the Micro Maqueen BugBot which runs on MicroBit and can be controlled with IR radio remote (or TV remote). We will post videos of 'how to' on the YouTube channel : MakeCode and Hardware. Great summer project: simple bot and solar power.
hoary bough
Thanks for the help with this @devout herald . We worked more on it at library meet up. The Colorbit is an add-on to the Microbit and bot . We are told that we need NiCad batteries to recharge using old solar yard lights not the NiMH ones common at Walmart for recharging so ordered some of those for the solar project: https://youtu.be/iZq_SaSnLZI

We worked on this program today at our library meet-up for coding in Galena, Missouri. You can use any IR remote if it works ! We did not get one with the Ma...
devout herald
So now you have identified remotes and their buttons? It looks to be working, congratulations!
hoary bough
Yes, @devout herald , our student found 2 remotes, one Canon for camera and one generic which do work. He then sorted the numbers for each remote button . We do not have IR to control the line following program yet. The numerical buttons do not work on remotes, directional ones do work on the remote. Also, I did not realized that the Microbit has to be plugged into the Maqueen bot in order to get the corresponding control numbers, Microbit cannot be connected to computer but must be on bot and bot turned on for this. Now to add sonar so that bot won't crash. Thanks for your help.
devout herald
I think your issue with the IR not working with USB is just that the Maqueen bot has a circuit that only works on the batteries system. USB through micro:bit was not a stable a high enough solution
hoary bough
Can you help me find the correct JST batteries with plugs, @devout herald ? This Yahboom bug bot was shipped to me without the battery. I tried USB but does not work. So I bought jst batt. online, FAIL. Wrong connector, too small. The correct size is this large one which also connects motor. I have no idea what the sizes are. Any help? Thanks
civic needle
AdaFruit uses the JST PH size for battery connectors.
hoary bough
This is not Adafruit, it is Yahboom bot.
devout herald
I'm going to work now, but I'll have a look.
As said @civic needle we usually have Jst PH size but there are several others.
I'll dig in my drawer to see what I have
devout herald
@hoary bough ideally, use a caliper to mesure pin to pin pitch and compare with https://en.wikipedia.org/wiki/JST_connector
or maybe there is some reference in the Yahboom documentation

JST connectors are electrical connectors manufactured to the design standards originally developed by J.S.T. Mfg. Co. (Japan Solderless Terminal). JST manufactures numerous series (families) and pitches (pin-to-pin distance) of connectors.JST connectors are used in many type...
hoary bough
@devout herald, After you get off work, could you look at this? The Yahboom code does not work. The IR tools give error but does not say how to fix....mbit IR. Here's the failed code: https://makecode.microbit.org/_JRsHEaDdY6m3 thanks for looking at it, i asked on another forum but have no answer as yet.
 devout herald
The error that briefly appears is about a missing piece in the simulator to represent the mbitIR part
(that may be good to have this error somewhere permanently, to read it quietly)
browser developper tools says: "warning: Program Error: pxsim.Mbit_IR is undefined"
needs to be asked to makecode/pxt team
hoary bough
@devout herald I think part of my problem is that unlike the Maqueen Microbit bot which has power by 3 AAA batteries, the Yahboom bot needs LiPo batt. or some kind. I have none to power it. So, I cannot test code on Yahboom with Microbit inserted. In the case of Maqueen you need to have microbit plugged in to it and powered on so you can press buttons on IR remote and read corresponding 2 digit numbers; now use those #s in code. With no batt. power for Yahboom, I cannot test anything and simulator does not work with 3rd party hardware.
hoary bough
@devout herald I assume the guy who wrote this main code did it in Java Script and when viewed in blocks I cannot change nor add my IR for the Maqueen bot. So I switch to javascript and copy some IR code from another program and insert it as text in JS. Now I get error. Have changed many , many texts but still error. Any idea to get rid of error? I just want to say if one button pressed on IR remote then do this....(turn left or right or stop). https://makecode.microbit.org/_H4HAwCVMcXbj thanks
civic needle
A fully charged LiPo is 4.2V and 3 AAA cells is 4.5V, most circuitry doesn't mind a difference that small.
You could probably use 3 AAA NiMH or NiCD cells if you had them, which would be 3.6V, close to the 3.7 "nominal" voltage of a LiPo cell.
devout herald
@brave apex your first if statement is not closed and the forever loops has no }) in the end
@brave apex I added } line 30 and }) line 40
but please double check that I did not mess what you intended but at least there are no more syntax errors
hoary bough
Yes, thankyou for that @devout herald , Since I have not done text programming, only blocks, I did not know syntax. I installed your code and then changed it so that whenever I press the Start/Stop button on my IR remote (Canon camera remote) the bug bot stops. Now we can move forward with combination of sonar and IR . The Microbit also gives feedback to the computer when connected via USB cable of sonar data in cm. using "show console device" when the bot is powered on. Since we can upload data to Microbit via bluetooth, do you think we could transmit that sonar data back to computer via bluetooth? I think show console device data is serial via USB so maybe not transmit that data via Bluetooth. But I think Microbits can "talk" to eachother so maybe in some way talk back to computer wirelessly? Also, I am making progress on my recharging AAA batts. via cast-off solar yard light module. But strange behavior with the units. Will post pix and vids with questions. https://makecode.microbit.org/_byJc2cUgzEYw thanks again.
devout herald
the only wireless usage of microbit I had done was through radio, between 2 boards. no BT experience with it
hoary bough
Thank you for your comment @civic needle , in fact I am working on a recharging project using old solar yard lights and since batteries are a mystery to me I have had to learn some of what you say. I bought a set of rechargeable AAA at Walmart only to find that they don't "solar recharge". NiMH. But was told that NiCD would work; so ordered some of those, 8 X $41.00 via Walmart on-line seller and 8 X $10 on Amazon. They are 1.2 V. Testing my old solar yard chargers now. If this works then we can drive Maqueen bug bot with rechargeables "off the grid". Now I just need the correct jst sized plug for Yahboom bot, not PH size but larger.
OK @devout herald maybe i mis-understood how data downloads to Microbit wirelesssly. I will send you a Colorbit for your microbit for free if you want one, email me your address and see my YT channel MakeCode and Hardware for video of it in use. Maker in China sent me 10 of them free.
hoary bough
@devout herald , @civic needle I got an answer from Yahboom on their jst plug size for the bot . XH2.54 , now I have to find it in Lipo, I think.
May work. If I connect to 3xAAA battery holder and put atop Yahboom bug bot. If not then I lose $4. Calif. seller.
ivory sentinel
is the MITtx electronics course on edx any good? what's the difference with their mit opencourseware one?
 fleet skiff
I liked Embedded Systems: Shape the World on EdX
not as much fundamental electronics
more practical stuff
depends what you're into
I haven't looked at the MIT one but I assume it's got all the theory in it
ivory sentinel
Yeah I like to learn the theory first so I can understand "why" when I do something. Or in other words, the level of abstraction right under the one I'm currently using (arduino/pi)
fleet skiff
I'm not into hard maths lol
hoary bough
As far as education of the kids with MicroBit and MakeCode with Maqueen bug bot. It's best to have some kind of stabilizer for a camera for our YouTube videos and mine was out of battery power with a lost USB to 3.5 mm power plug so I bought a generic replacement , not the DJI Osmo mobile official charger cable. Guess what, they're not all the same ! Beware, Difficult to see without magnification, when I found my original cable (white one) the charger works. See the slight metal collar on the black plug? It prevents full engagement of the plug--not correct contact = no power to recharge. Upside down cast off yard solar collector with yellow AAA NiCD rechargeable battery which we have proven does charge in sunlight, 3 of these AAA run the Maqueen bug bot and the GHI MakeCode enabled BrainPad Arcade game console . Rechargeable AAA Ni MH batts. from Walmart do NOT work with this yard light recharger. Code for Microbit/Maqueen bug bot using Sonar and IR remote(not complete as yet but getting there-thanks @devout herald for the help). https://makecode.microbit.org/_C6pMrf7rfXPj
8 X AAA NiCD batteries for $10 off Ebay.
Solar charger with LED bulb and AA mod. for AAA with aluminum foil; running the battery down for 48 hours , testing remaining power and putting back in sunlight right side up, to recharge and test again...works.
hoary bough
A kit I'm designing for kids' education about MakeCode and electronics hardware...ie physical coding. Based on BBC Micro:bit with rechargeable power pack, and various inputs and outputs. I will post details of the cost of each item soon. Using the Colorbit shows how to find and install an extension from Github. The 'gator connectors and also jumper wires for the electronics parts show how connections to Microbit vary and kids learn about breadboarding electronics without soldering Finally, teaching 'sonar' with the SR04 rangefinder , this is important to prepare kids for robotics when our next kit is LEGO based with Micro:bit controller. Sonar is an extension for MakeCode Micro:bit but is not an input on the Micro:bit itself at this time. I think I can afford to give these kits to kids before moving to the next level of Micro Maqueen bot or Yahboom bot and Yahboom Arm:bit with LEGO.
@devout herald
hoary bough
I calculate that it comes out to about $36 , not including shipping and tax.The Microbit includes a AAA battery pack with batteries and a data cable so you could delete the $5.88 recharge battery pack. : 1. Microbit is $19 off Ebay.
2. Mounted on a piece of plastic:you could find something similar at a hardware store: 50 cents
3. 5 volt recharge power pack, including the USB to Micro USB data and power cable: Walmart or 5Below, $5.88.
4. Micro:bit break out adapter ; T shaped, for breadboard: $5.99 Ebay or Amazon
6. Solid 22 gauge colored wire, less than 10 cents for all of it.
7. Gator clips with wire soldered on: clips from Walmart, 10 cents each.
8. Velcro strips to hold everything together, 5 cents.
9. Sonar SR04 sensor: 75 cents, Ebay
10. Color:bit, free, from Maker in China: Jumping Yang. contact me for a free one.
11. 8 x neopixel ring: $2.17, WS 2812B , works with "light" tool
12. 400 tie hole bread board $1.11
13 piezo buzzer: 5 for $2.00
14. potentiometer variable resistor 5 cents
15. LEDs and resistors, 5 cents
$36.00
hoary bough
@devout herald What do you suppose "call show" means? Is there some other block required?
devout herald
When does this message appear?
hoary bough
Only when I drag "Strip" Neopixels rotate by 2 into the program and then hover my mouse pointer over that block. The block appears to add nothing to the action of the neopixel output. I would like to get some kind of LED random or progressive pixel lighting rather than just total same color flashing.
@devout herald
devout herald
@hoary bough what URL do you use? maker.makecode.com ? I can't have microbit on this one...
hoary bough
https://makecode.microbit.org/_JEyhCiJyz1WU @devout herald I had changed the Strip rotate by 2 from the rotate by 1 shown in your picture, then hover over that block and see the call show message. Sorry for the late reply, working with kids in our Libary project MakeCode this morning. I am in standard Microsoft Microbit MakeCode editor when doing the project and breadboard shows up for me because I declared "Pin" output tool to designate a pin connection.
Made with ❤️ in Microsoft MakeCode for micro:bit.
Maybe you didn't hit 'edit' to see breadboard?
devout herald
I did not use microbit editor for hardware project as of now. I learnt something useful
devout herald
maybe just add the "Strip show" block ?
hoary bough
ok will try , @devout herald
hoary bough
Nope, @devout herald Not getting Neopixel to work at all now but will continue trying . It has to do with my incorrectly declaring "Neopixel" on some pin. But this is supposed to be lesson 3 of the new Microbit breadboarding lab. that I made up . So it will work someway. Thanks so far.
hoary bough
Our boys coding the Microbit to drive the Maqueen bug bot today at a library meet up. https://youtu.be/PUPsM0LkFLw

Microsoft MakeCode programming the BBC MicroBit to run the Micro Maqueen robot car. These boys are learning how to do simple block coding for their "smart fu...
hoary bough
@devout herald Like you said, https://makecode.microbit.org/_Evv9AD7VVLuC , https://youtu.be/E_0xIMoFlPw
Made with ❤️ in Microsoft MakeCode for micro:bit.
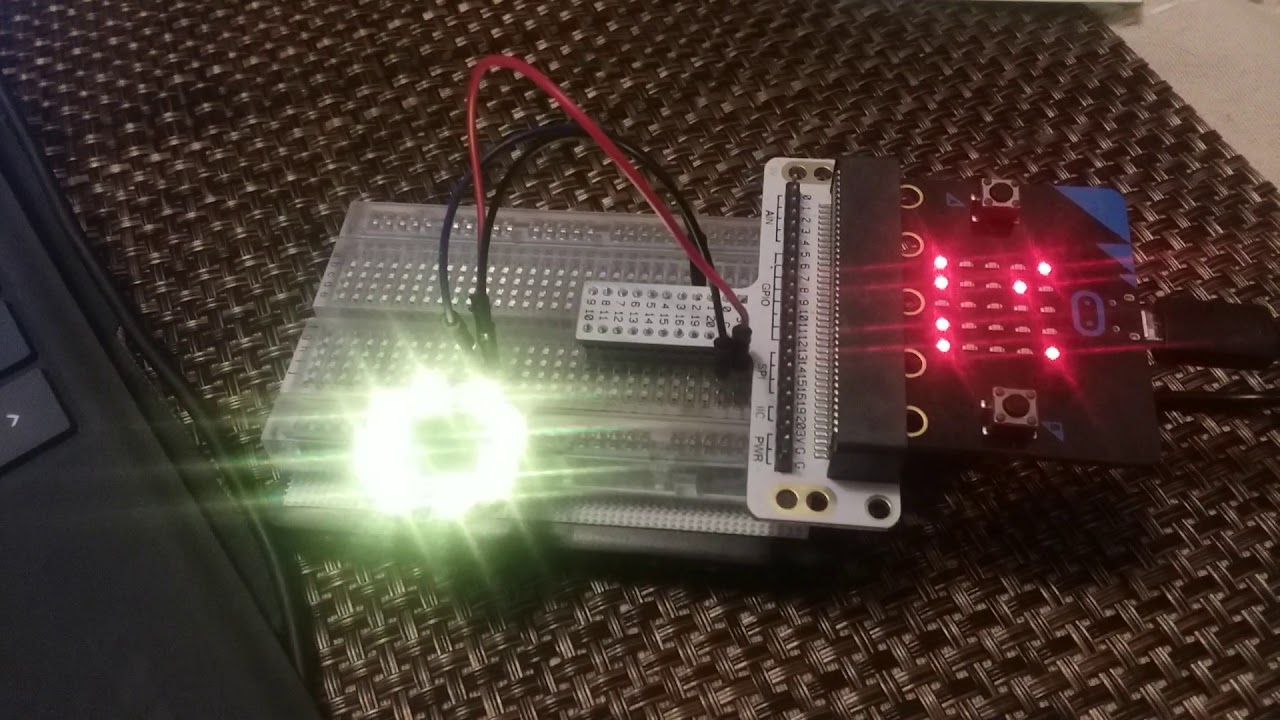
The LEDs of the ring are proceeding around index fashion. You have to use the block "strip show" after each index. Code for it: https://makecode.microbit.org...
hoary bough
Here are the correct codes for your students who may be using the Micro Maqueen robot car with Mcirobit and MakeCode. We figured out which wheel turns the bot left and right and reduced the speed so we have time during turns to control it. Another company, Yahboom makes a similar car and also a robotic LEGO arm all controlled with Microbit. They have bluetooth and radio with another Microbit to control some bots and Infra red for control of some: https://www.youtube.com/watch?v=4c93QEhoZ-I

This is the second step of controlling the Micro Maqueen bot which we will next drive with obstacle avoidance and line follower. Step one is to pair the Micr...
hoary bough
Lesson #3 in our preparation for robotics with Microbit. This is just introductory coding, after blink a light and then 2 lights with wiring now we have 3 pins and learn to hook up a signal wire with Neopixel. I am giving away simple electronics kits with Microbit and several peripherals and power supply. This we will use for our Yahboom robot arm with Microbit when it arrives. In the mean time we will do analog with trimmer pot and digital with piezo buzzer and learn the MakeCode environment including extensions: https://www.youtube.com/watch?v=1M4P-wX8kBk

This is the 3rd lesson for the Microbit with MakeCode getting ready for our robot projects. Neopixel requires 8 wires (blink LED only needs 2 wires). One wir...
hoary bough
Through the classroom door. This might be useful to some people if you are working with Minecraft: http://www.throughtheclassroomdoor.com/wp-content/uploads/2019/06/Coding-with-Minecraft.pdf
hoary bough
Sharing code URL with students to be used for bluetooth download MakeCode and Microbit. Today we worked with writing code in MakeCode and paring an iPhone to the Microbit then downloading the program via bluetooth. This works (have not had any luck with Android phone as yet). So now, how to share programs? One way without using social media nor e-mail is to publish the link to a URL that has been "published and shared" by posting that URL in the description of a video on YouTube. This video need not pertain to the subject of the code, nor need it be long or interesting, all you need is , say 30 seconds of photo with links to code in description below video. Now we can use that video to post all our code URL links with the name of each program. There is also no need to have a GMail account to see the description (you do need an account to make a comment or ask a question.) We have tried this and the linked URL does carry a person via mobile device to the MakeCode program which then ; if you click EDIT will reveal DOWNLOAD and then after pairing, can be downloaded into the Microbit. No laptop or PC is needed to share these programs. This is only one of many cloud storage and sharing methods but is quite simple . https://youtu.be/xmikHEKHpXA

Right Click on any .hex file below and select "open with Microbit" : Maqueen Sonar and IR code : https://makecode.microbit.org/_Hxf5tsDDo8Dx
hoary bough
We made a paper and tape line track for our Microbit and Maqueen robot car. The code is "line follower" which with the Maqueen extension added to MakeCode has the "patrol" function that senses black tape versus white paper and stays on the line. The paper background is copy paper taped with clear packing tape, the black line is electrical tape. Follows pretty well ! https://www.youtube.com/watch?v=AYET9TgXnIU

Here's a way to make a track of black line over white background for Line Follower and the robot of Micro Maqueen and the code below. We used copy paper with...
devout herald
Nice work! This little robot behaves very well even when paper is not flat or in the sun
hoary bough
Same bot again with new Maqueen game controller this time. We need to figure out the communication system for this and change the code to work with line follower and game controller too. https://youtu.be/9pPD_SG1GrU

Here is Xandria with the Micro Maqueen bug bot programmed with Microsoft MakeCode . We already used an IR remote (any radio remote might work, you have to tr...
hoary bough
Our library meet-up for MakeCode today featured 3 Arcade consoles, 2 Microbit bot cars and Adafruit CPX . Our 7 year old coder was teaching a 5 and 4 year old how to change sprites in Arcade and change prizes. A 6 year old girl had donuts eating ice creme cones to score her points. Will hope to start a LEGO robot arm next Monday controlled with IR remote, game console or iPhone all in MakeCode.
hoary bough
https://www.youtube.com/watch?v=UIcW-wQ7T0k Jacqueline over at Microsoft , video for educators on the use of teams assignments environment.

Demonstration of MakeCode assignments within Microsoft Teams
devout herald
video unavailable, hopes it is temporary
hoary bough
@devout herald I did not know it, when I posted the above video link but this seems to be a Microsoft system for teachers called "Team" and works with Office 365 Education? or something like that. So it is not for us...not if we have not met their purchase or other requirements. This looks to be very useful for making teacher based educational system but in our case, we are not a school. We work outside of public school classroom so do not qualify, I guess. Maybe the video was published by accident but then made private for Team people: https://www.microsoft.com/en-us/education/products/teams

Microsoft
Microsoft Teams is a digital hub that brings conversations, content, and apps together in one place all from a single experience in Office 365 Education.
Try again: https://youtu.be/oBarPukXXXQ
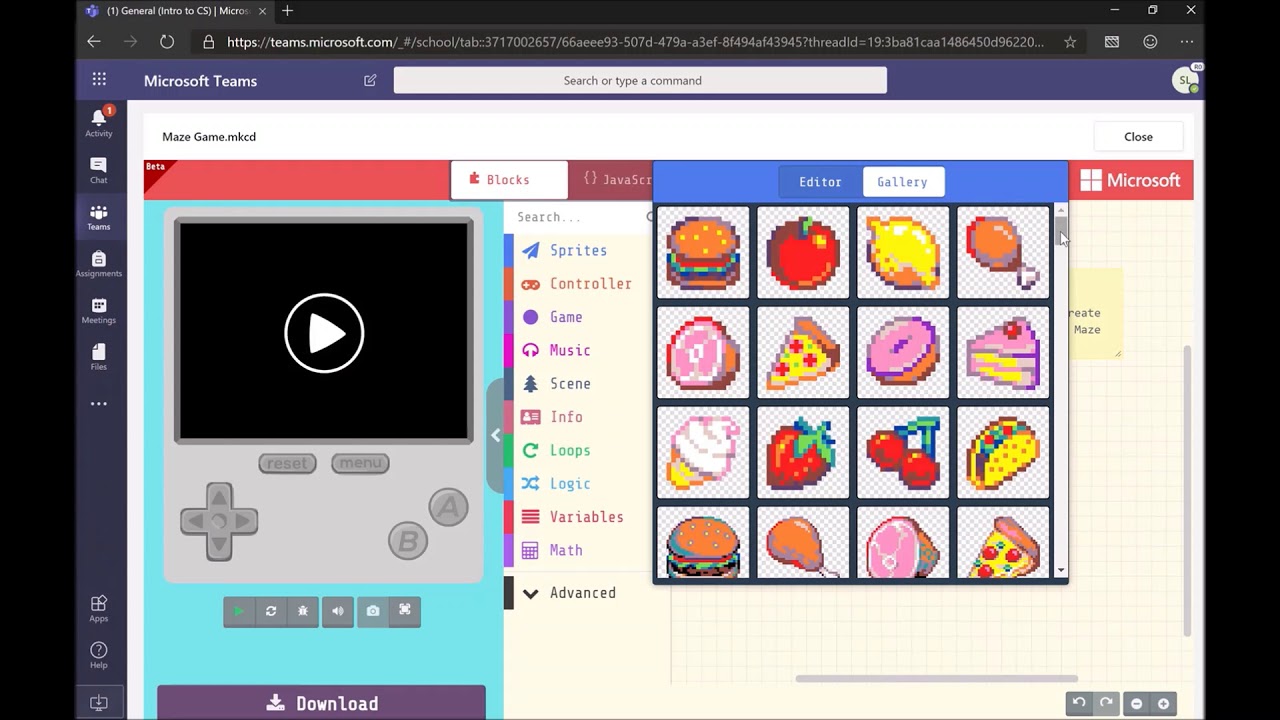
Demonstration of MakeCode assignments within Microsoft Teams
devout herald
This one is viewable
Microsoft has made very good progress on open source, but some educational resources are still very closed
hoary bough
Working with my 96 year old uncle, Hartland Smith of Birmingham, Michigan, to learn MakeCode. He has decided to learn programming of the Maqueen bug bot which I sent to him as a gift. Here he programs it to follow a black line on white paper which I also sent him. He will be 97 in November of this year. https://youtu.be/Jpe1d8u-Vy8

Microchip Controlled MAQUEEN programmed to follow a black line.
hoary bough
At the other end of the spectrum...Sandra tells us how to write a story program using Microsoft MakeCode and BrainPad. She's 8 years old, Video: https://www.youtube.com/watch?v=wlcLqHjkZgo

Sandra, our resident 8 year old programmer teaches you how to program the BrainPad and tell a story. www.BrainPad.com
hoary bough
New video for assembly of Yahboom Micro:bit supported wifi camera. It is said to have video feed enabled to broadcast live stream to Android (and iPhone???) smart phone from the camera. I took the still .png images and put them into a quick video for student instruction: https://www.youtube.com/watch?v=kPPJ7azPuP0

This is a video of the assembly pictures from Yahboom company for their Micro:bit camera platform which is said to be wifi supported and includes a free cell...
 midnight ocean
Does anyone know if/how we can submit articles to learn.adafruit?
I am thinking of writing up a few tutorials which are missing for my students but thought the community might benefit.
worthy ridge
@midnight ocean we recommend authoring them outside of learn first (blog or doc) and then linking us to them.
echo ginkgo
anyone have experience with 3d print management and tracking user filament usage? i am quite familiar with octoprint, but there doesn't seem to be any plugins that quite fit.
hoary bough
We are now seeing a good many students using smart phones to code. Especially in MakeCode on browser, and downloading programs to Micro:bit via bluetooth. We now have Android phones working along with long established iPhone bluetooth download to Microbit. Kids seem to migrate away from keyboard coding to more comfortable thumb typing on touch screen cell phones. Methods of copying, pasting and sharing seem to be what we need to teach with smart phones; searching for extensions and pasting them into MakeCode when on a cell phone is key to this environment. It may be that programmers of the future will not use computers as we know them.
hoary bough
New play list of lessons using Gemma M0 by Adafruit with a 400 tie hole breadboard and 5volt battery pack. This will be a series designed for little Annabelle who is 7 and needs to go beyond coding for MakeCode Arcade. We are trying to discover how to get bright girls this age into electronics. My series will use LEDs and various sensors with the ultra cheap Gemma M0 and MakeCode. We can then go into electronic fashion and maybe music if we can find an amplifier to work with Gemma and an 8 ohm speaker. https://www.youtube.com/playlist?list=PLKn-WSZodoIRxoBitGJI7pd2apBAVOAoC

YouTube
hoary bough
@undone cipher , as you can see above , we are using Gemma M0 as an intro. dev. board (I know there are better options but I have so many Gemma M0's and need to use them for now) . Your data sheet says this: "On a Gemma M0, the GPIO are 3.3V output level, and should not be used with 5V inputs. In general, most 5V devices are OK with 3.3V output though." So does that mean that we are wrong to use the 5volt flat power pack as demonstrated above? Thx.
civic needle
Should be fine: the Gemma M0 has an on-board regulator that regulates down either the battery or USB input to 3.3V.
hoary bough
thanks @civic needle , we'll carry on.
rapid hill
Teachers: we're thinking about how you would use a bunch of Bluetooth-enabled Adafruit CircuitPython boards in a classroom or similar situation. Each board would be paired with a student's tablet or phone. The tablet/phone would be used to edit programs and talk to the Python REPL on the board. Device-specific pairing has to happen so that the the right boards get paired with the right tablets/phones. The pairing would be remembered (like your phone remembers your Bluetooth headphones or keyboard).
Have you had to do similar things with other Bluetooth devices, such as keyboards, or have you avoided it because it's difficult to match them up? We could have the Adafruit board have a PIN number displayed as LED flashes or using the 10 NeoPixels on a Bluetooth-enabled CPX. Or perhaps it could have a fixed preset PIN for the board, but that might involve you doing some setup work in advance and, say, writing a number on the board. Or perhaps you could enter a PIN shown on the tablet into the CPX via button presses.
Comments, clever ideas, and uh-oh's welcome.
 long basin
Given 10 neopixels, could one hold up the board in front of a webcam and have a program read which pixels were lit, and use that to know who to pair with? Basically a much lower resolution version of how some (Apple?) devices pair by capturing a dot pattern on screen?
rapid hill
@long basin That's good! I had a vague idea about something like that, and appreciate the confirmation. We might or might not be able to use color too. It's CPX-specific, but that may be good enough, since no other board is likely to be used in quantity
hoary bough
And QR code generators make a new image for each unique URL . Could each CP board have its own assigned URL linked to the QR code image? Perhaps that would require too much internet connection to be practical ? I do have problems trying to download new programs to several different Micro:bits via bluetooth as some interference which seems to be overcome only with "forget" or "un-pair" the wrong device. We have a lot of kids coding now with parents' disused old smart phones in MakeCode (don't know about Circuit Python).
 vernal cobalt
isn't there a standard for storing bluetooth pairing info in a QRcode? You'd have to put a unique sticker on each board, but then the students can the code to pair the right one.
rapid hill
a QR code doesn't have to be a URL, though it's mostly used that way. But labeling each board uniquely is a significant step in manufacturing and test, so we'd have to think about that. Lighting the NeoPixels based on something (a random number or the unique ID stored in the chip) is just software, though we'd have to think about when to do that (in bootloader, or when CPy boots).
And the sticker could get defaced.
instead of a QR code it might simply be a 6-digit or so number
long basin
If you can pair in the bootloader, seems simpler. Don't know if that means 'double-tap reset to enter bootloader, triple-tap reset to pair'. Maybe it's 'double-tap reset to enter bootloader, and hold down reset in bootloader to redo pairing'.
hoary bough
On Fridays we have a meet up with kids at the local coffee shop; we do coding and electronics. This week we will try to control the Yahboom Micro:bit Bot with an iPhone, did it today with my Samsung Android: https://www.youtube.com/watch?v=x6dAYkVvIz0

Yahboom BitBot works with Micro:bit programmable processor but does not come with it in this kit link. Click on Show More below: https://category.yahboom.net...
rapid hill
More on pairing: @worthy ridge had the good idea of displaying a picture of the of the CPX. You'd just touch the NeoPixels on the picture that were illimunated.
We can't really pair in the bootloader, because we're not running a particular BLE service at that time. But the bootloader could display the (fixed) PIN. After thinking about it, though, there are other times we can display the PIN easily. The PIN could also be read/written to a CIRCUITPY file, though you have to have USB access to do that. Otherwise it's a chicken/egg problem, since we'd want BLE filesystem access to use pairing/bonding.
long basin
Yep, definitely gets the webcam out of the loop.
Reserve 1 neopixel pad for a "cancel, I want to start over"? Would still have 9 bits of identification.
worthy ridge
@long basin we could use one of the buttons for it
long basin
True.
hoary bough
At the table top level, we are seeing more kids, as this morning in the "coffee shop classroom" using their smart phones to code and download (esp. block coding). The dexterity and smooth human interface impresses me that students are more comfortable with tapping-swiping a small touch screen than keyboard/computer. Very simple example but as long as we have bluetooth enabled hardware, kids will choose that over USB data transfer. Adafruit: you're on the right track...we will buy and try anything that uses MakeCode and bluetooth downloads. (ps-we tried bluetooth control of Yahboom bot car with iPhone, it works. However, one boy could not get QR app. on old Android to install on his phone and that was necessary to find and download the driver app . via bluetooth for the bot car.) https://www.youtube.com/watch?v=cK1_aRcTQvQ

Example of block coding on iPhone using Microsoft MakeCode and Micro:bit then pairing two devices and downloading code via bluetooth from iPhone to Micro:bit...
hoary bough
New BrainPad extension for Microsoft MakeCode on the MicroBit. This video shows self driving the Maqueen bot car using : Line Follower program, ColorBit Program and 5x5 LED Colorbit array, and BrainPad for MakeCode Micro:bit. We will work more on this tomorrow at our summer library meet-up to make the LED display more exciting : https://www.youtube.com/watch?v=5gLqMvcj3rw
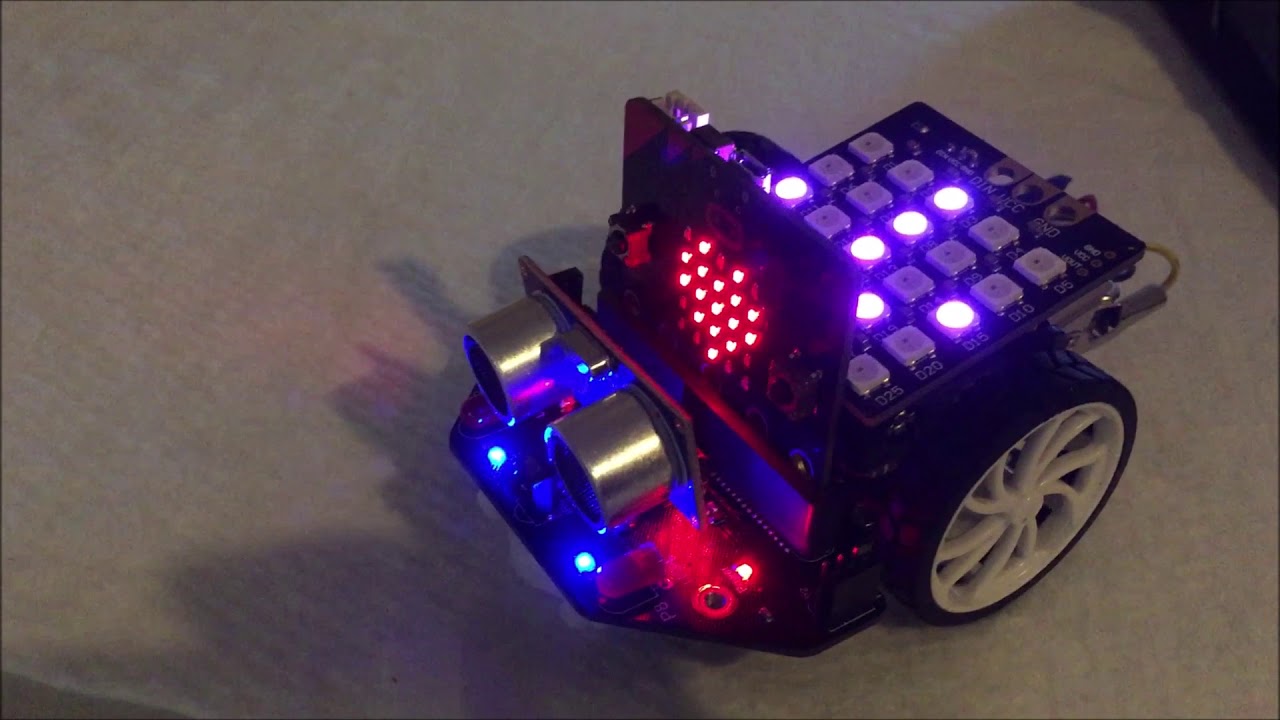
This is using the Micro:Bit on the DFRobot Maqueen bot car which (click SHOW MORE) has been programmed with the new BrainPad for Microbit extension and the 5...
hoary bough
Infrared control of MicroBit supported bot car with tutorial for soldering and attaching the Color:bit onto it. The Color:bit is available from me outside of China. I have a few left and am giving them away. They work with Micro:bit only as far as I know, made by Jumping Yang in China and can be bought there on-line. Video: https://youtu.be/H2a6nNIm0jw

This video shows how to wire a DFRobot Maqueen bot car with a Color:bit 5x5 LED display on its back. The bot car is programmed with MakeCode and a Mciro:bit....
hoary bough
Universal coding blocks: an Extension for MakeCode and robot cars that works with various products: you don't need a different extension for each manufacturer, from GHI Electronics: https://www.brainpad.com/2019/07/19/universal-robot-extension/

Ever noticed how most beginner robots have the same purpose? Why not make a standard for blocks.
hoary bough
Our summer robotics project, Yahboom Arm:bit. MakeCode programming, video: https://www.youtube.com/watch?v=AGITipmpmcA
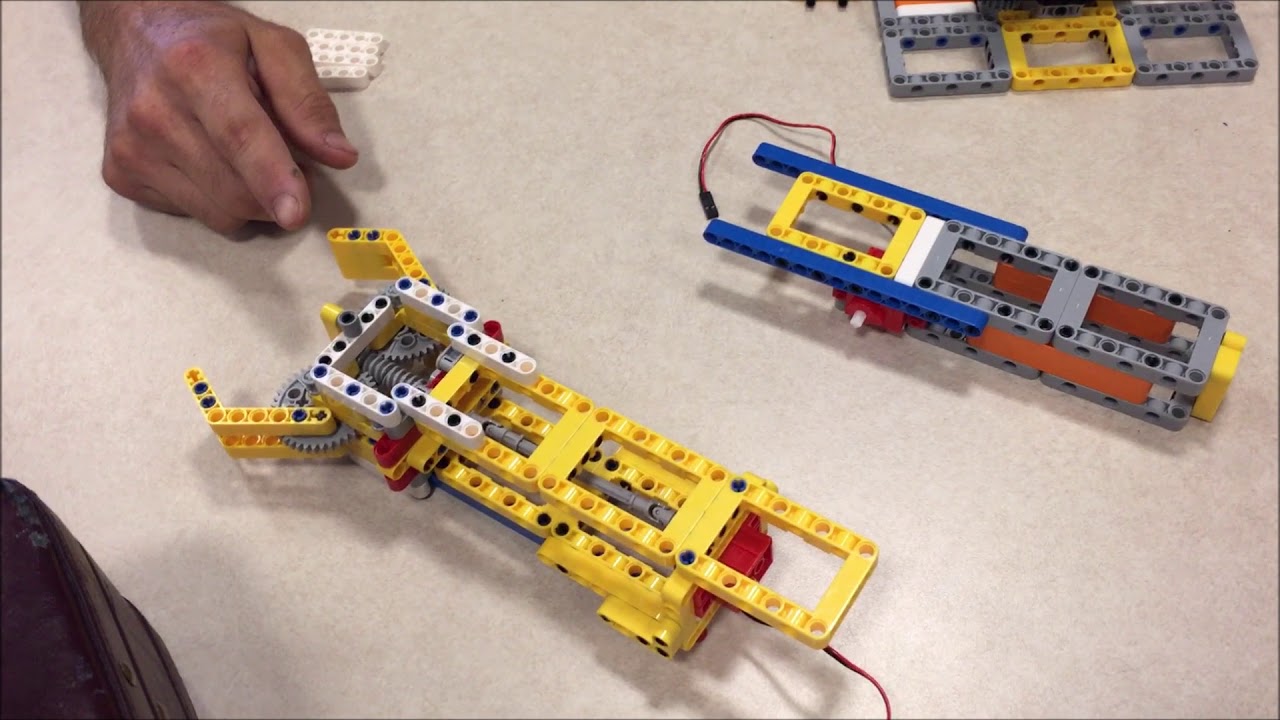
Here are the early steps of assembly of the Yahboom Arm:bit programmable robot arm by Jonathan at the Stone County Library in Galena, Missouri. It is a "LEGO...
hoary bough
Today at coffee shop: https://youtu.be/gSJf1z-efhA

Here is a video of our kids learning and playing with MakeCode Arcade, July 27th , 2019 at K's Koffee in Branson West Missouri (thanks Steve for letting the ...
olive grove
@rapid hill I remember at shmoocon several years ago, someone used a flashing LED to emulate a barcode for their badge and send a number. That would be an easy way to identify a board from a mobile device with a camera that can read barcodes
although I guess it wouldn't be a good solution because the onboard neopixels don't use DMA to get enough speed... 😦
olive grove
@hoary bough nice - we just introduced the kids at our code club to arcade.makecode.com today..any reason why you chose to power the meowbits via USB rather than the rechargeable lipos?
hoary bough
Just today got our Yahboom Arm:bit robotic arm finished assembly and programmed with game controller. Kids love this. It is not a toy but a programmable arm with Micro:bit and MakeCode: https://www.youtube.com/watch?v=2m4YtPq-Qlk

These kids are super excited to have their new robotic arm by Yahboom. We got it programmed and running today: (click SHOW MORE): https://category.yahboom.ne...
hoary bough
@olive grove Much to be said about different power supply to these MakeCode devices. I will keep it short and give only short pros and cons. Others , please forgive me if I offend with my opinions: Recharge USB is: a flat power platform which holds, with velcro, a 70 or 400 tie hole breadboard for a mobile "dev. lab", charges with no special recharger device, costs $5.88 at Walmart, comes with a 6 inch DATA and power cable, has a sturdy connector to the microprocessor(micro usb not flimsy JST), can be ordered on-line : 5-below or Walmart, and no hassle from shipping LiPo , comes in colors help kids keep track of theirs, can be used as a mobile platform for wearable (on backpack or belt) game holder or dev. board, has a poly acrylic tray inside the box which is a storage box , can be used to charge your cell phone too. If you find LiPos that do the same, please let me know. Downside: these sometimes turn themselves off after several seconds, they have a power button but we found that we can connect another microUSB into the battery and connect it to power to spoof the battery always on. They are 2500 mAhours so you compare to LiPos in volume of charge.
olive grove
@hoary bough yes, the JST can be an issue - as it was a bit painful to connect, and given that the device charges the LiPo, I'm inclined to leave it connected so students don't have to deal with it at all
 brave apex
@olive grove and i am now recommending our students leave the short 6 inch data usb cable plugged into the microbit or other so as not to break the micro usb port on hardware. Only unplug USB cable from computer.
@olive grove , where i use JST battery we attach it with sticky back Velcro to device.
olive grove
@brave apex yes - we had some kid tell us "this came off" re: the micro:bit microUSB port....
we're a bit wary of the external USB battery packs as some have a bit too much power for the micro:bit through that connection
hoary bough
@olive grove I lost 3 "pro micros" in one hour while using Arduino kits that I made up for afterschool program. Love MakeCode and simulator so hardware does not take such a beating. I have not yet seen a usb power pack greater than 5 volts..maybe the microprocessor board did not have a regulator? Best wishes on your work. If you have a YouTube channel to show off, I'd like to see it. Mine are: MakeCode and Hardware, MakeCode and Arcade.
olive grove
@hoary bough just a blog at https://jafine.github.io
The friend that had issues with the USB battery packs said it was a 'turbo' mode
But I've also been cautioned by some of the microbit folk about them
hoary bough
Zach Allen discusses terms for robotics education, for our kids and adults too. This is the first video in a series of interviews with a robotic manufacturer (Slate Robotics, Springfield Missouri) ; it will be the basis of further education for our kids; the world of robots in which they will live. Smart workplace and home is their future. https://www.youtube.com/watch?v=TICOCnj6PtQ

This video is the beginning of a conversation with Zach Allen in Springfield, Missouri about his TR2 robot and the terms used in the world of robotics. What ...
midnight ocean
I'm after a bit of advice.
We got our students Adafruit NRF52840 Feathers, now i just need to decide on how to program them. I love the USB Mass Storage aspect of Circuit Python, however, python doesn't seem great for micro controllers.
I worry that getting data off and image/sound files onto the board with Arduino will be too complicated but the lack of interrupts and teaching resources for Circuit Python is limiting too.
Anyone have any opinions or experience to share?
fleet skiff
adafruit is bringing the usb filesystem to arduino
hoary bough
Girls coding EV3 and MakeCode at our library meet-up today. 2 of the 3 girls were just new to MakeCode and LEGO Mindstorms but within minutes understood how the simulator worked on their computers and learned downloading and how to run motors and inputs. Because the local public school has a 4 day week, Mondays are very busy at the library where kids can get into robotics. https://youtu.be/sjxtWacg6cs
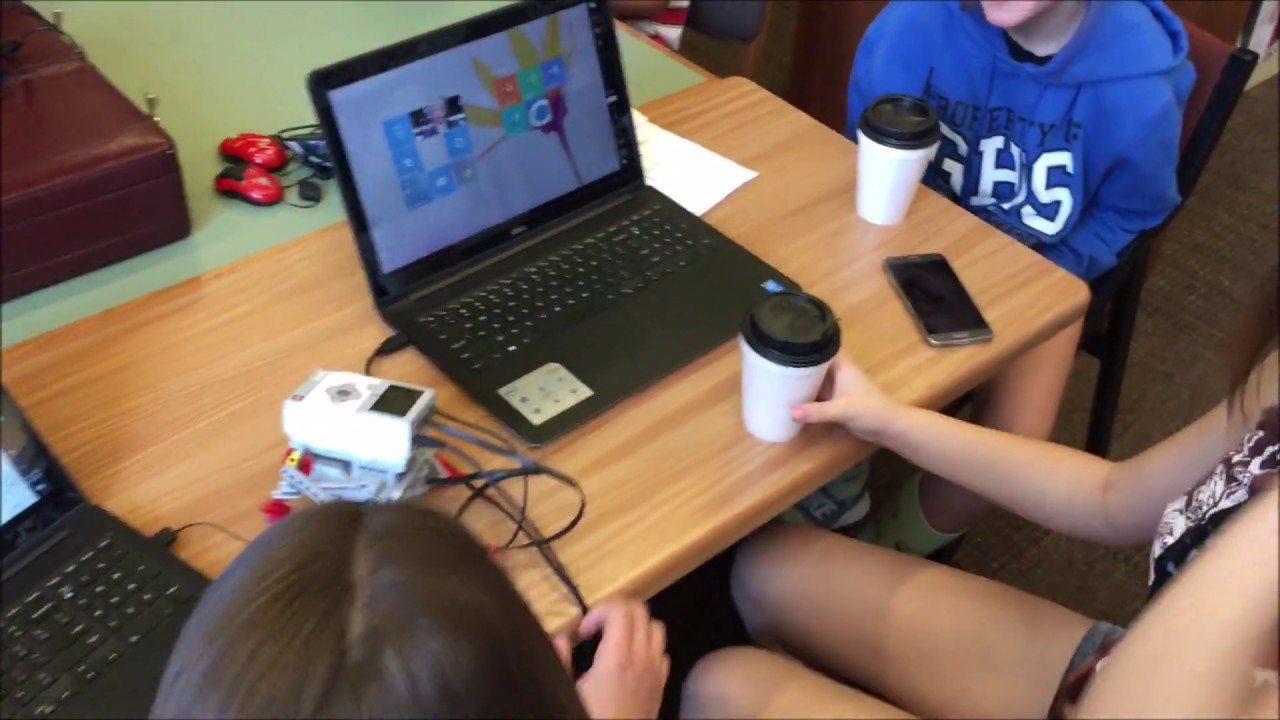
This video is about the fun that girls have coding a LEGO robot which we just now beginning with. Stone County 4H loaned the EV3 kit to us. MakeCode allows b...
olive grove
@hoary bough I've had success with 3d printing some of the additional Lego parts e.g. the 'H' section, which are quite useful
hoary bough

The Way We Roll: This is a continuation of the LittleArm Original robotic arm from Idaho, USA being controlled with Micro:bit and MakeCode atop a Yahboom Omn...
hoary bough
A lower level coding demo. of MakeCode and Omni-tread 4 DC motor "transporter" . We do not use Omni:bit extension in this video but the basic Super:bit library for that expansion board and so must declare motors by name and direction and speed thus learning the vector sums needed for desired direction of Omni-bit car. We hope this can be applied to larger motors: https://youtu.be/3c4wqB2KWsc

This video demonstrates the way we roll with a lower level of motor programming , first attempt. The MakeCode environment has "extensions" which are like lib...
See video "description" on YouTube of Omni Transporter.
hoary bough
Our classroom Arm:bot by Slant LittleArm running on Arduino Nano and 3D printed "Big"; from Idaho, USA: https://www.youtube.com/watch?v=SXhVxC57pj8

This is not an easy upload of Arduino to the Nano to operate the 3D printed LittleArm Big robotic arm. As you can see I used "old Bootloader" , the offered b...
hoary bough
10 year old Havala programs Omni-tread transporter, Lesson One, using JavaScript text (not blocks) and using Super:bit extension, not Omni-bit pre-written code. https://youtu.be/VHn4jDhZJEs

We met today at K's Koffee in southern Missouri, Branson West. Havala wrote some text code for our 4 motor transporter. This is the most basic code to make t...
thorn vortex
I'm teaching electronics and robotics for the first time (turning my hobby into my job) and I'm looking for resources on teaching python, specifically teaching python on RPi, using the GPIO pins to their potential.
My kids are currently working with the Arduino Starter Kit so have the basics of breadboarding but I want to soup up their microcontroller of choice to an RPi.
Any high school friendly resources for python and/or Linux out there that are recommended?
dapper jackal
@thorn vortex I don't have an answer for you but I'd be interested to know if people use them much in schools. I've used them with slightly older students but only doing a very basic example in class. Ensuring everything is 3.3V, absence of analogue, no labels on the pins and contending with a general o/s the students may be unfamiliar with all present small hurdles. Worth rummaging through https://forums.adafruit.com/viewforum.php?f=48 to see if this has come up previously (and recently).
I use the Scratch material from Code Club with much younger children. I mention this because I've seen they have Pi projects for education too but I've never looked at these. https://projects.raspberrypi.org/en/codeclub - they appear to have "just Pi" material + Sense Hat + Sonic Pi. To my surprise the Sense Hat parts can run in browser using trinket.io
There's the physical Sense Hat: https://www.adafruit.com/product/2738 - I've used a few Pimoroni things in the past on the Pi. They have some interesting "pHATS"
Control the same hardware as used in space...build your very own Astro Pi with the new Raspberry Pi Sense HAT! The Raspberry Pi Sense HAT is attached on top of the Raspberry Pi via the 40 ...
olive grove
trinket.io is something we have used a lot of in code club - it simplifies things and gets rid of the dependency on someone to install things on computers before you start
 next wraith
Guys can you help me?I want to build a wifi iot lamp based on esp8266, but i don’t know how to turn pins on/off via wifi(I want to make a web interface to turn on/off colors).
Could you recommend me some tutorials pls or just describe how to do it? Thanks!
civic needle
Turning pins on and off is fairly easy, you just use digitalWrite() (or the equivalent if you're using another language). Via WiFi is a little vague, as WiFi is just a transport mechanism. You could use HTTP to control it with a web browser, Blynk to control it with a phone, MQTT to send messages to it, or any of several other mechanisms. You might first want to decide what you want to control it with, then work from there.
next wraith
Hmmm🤔
Maybe I’ll use a web browser
So than I could make http requests from other esp8266/esp32 and also from my phone.
And sorry, I didn’t tell you that I use Arduino language
civic needle
There's some handy code for running a simple web server as well as turning an LED on and off here https://tttapa.github.io/ESP8266/Chap10 - Simple Web Server.html
Here's another example https://randomnerdtutorials.com/esp8266-web-server-with-arduino-ide/
next wraith
Ok thanks
 proud hollow
I made a webpage (just html and javascript) that connects to an mqtt broker over websockets. If your ESP8266 can subscribe to the MQTT topic, and it has some logic that says "set pin x high" if "ON" is received to the topic and "set pin x low" if "OFF" is received, etc... that should be good.

GitHub
Controls for Serial Industrial Light Towers using MQTT and Python - xenophod/MQTT-Light-Tower
You'll have to figure out the ESP8266 code, but the webpage stuff is there
proud hollow
I also have a python "bridge" script that forwards anything received from an AIO feed into the MQTT topic. That way, I can do things like, have IFTTT connect to Google Assistant, which sends data to AIO, the bridge script forwards it to a local/remote mosquitto MQTT broker where your devices are subscribed. Does that make sense? You could just do everything with AIO too. My pool pump just uses AIO.
echo ginkgo
hey @next wraith I made exactly what you described - the models are on thingiverse and it has a link to the code on github
hoary bough
Regarding MakeCode downloading to Micro:bit whether in Chrome or Bing we find that sometimes "pair device " is offered and sometimes not. Then we find that sometimes the download cycles endlessly and never does download to the Micro:bit. If you have not saved your latest version of the program then it will be difficult to get out of MakeCode so as to stop the endless download and then get back to your desired code; we find that if we save it to the clipboard in JavaScript before exiting MakeCode, then the text is deleted from the clipboard upon return to MakeCode system and cannot then be pasted into JS. We find the solution is to always attempt to "save" before downloading. If you forget to do this and download hangs up then go to JS, highlight and copy the text, paste it into a text doc. , exit MakeCode, re-enter MakeCode and paste from the text doc. So far, this has worked for us.
 arctic ridge
Does anyone have any project ideas the use CR2032 batteries for kids. I did a project with some that didn't have as many people show up as I hoped so I have around 800 of the CR2032 batteries left and no ideas on how to use them.
fleet skiff
there's lots of little led badges and soldering kits on tindie and the like that use those batteries https://www.tindie.com/search/?q=cr2032

Tindie
Tindie is a marketplace for maker made products. From Raspberry Pi to Arduino to drones, Tindie's goal is to bring innovation to the masses faster than ever before.
arctic ridge
@fleet skiff Thanks! I will check those out.
@ivory sentinel that’s why I have so many of the batteries. I work at a library and the city we are located in did a big light festival so we stood outside our building to let people make an LED throwie and throw it on a metal sheet by our building. We were expecting around 1000 people but it rained so we got around 400.
This is the board from the first night.
civic needle
Stack up 170 of them and you'll have enough voltage to run the old battery operated xenon flashes. Probably enough to light up a CRT as well. All 800 of them might be able to light some neon tubing.
hoary bough
MakeCode and Micro:bit, controlling 2 Omni-directional bot cars with one game handle, this mornings coffee shop meet-up: 6-14 year olds: https://youtu.be/Gxwxu0FQ9j4

Code for the Yahboom controller; called the gamePad or Handle: https://makecode.microbit.org/_Msx11XApd9i7 Code for the Yahboom bot cars: https://makecode.mi...
hoary bough
Sea-Change in education. We are now seeing local public schools go to a 4 day school week ; for myriad reasons ( teacher retention and cost savings, and more) . This opens up non-traditional education such as YouTube, Web pages and various meet-ups; such as coffee shops and libraries when the kids are not in class. Locally it is Monday which is a non-school day, we have moved into that time slot for coding using Adafruit products and MakeCode; and others. Watch for this to gain traction in your community; when one local school goes to 4 day week (teachers might love it), the dominoes will fall.
hoary bough
The Arcade console in this video driving a two wheel bot car, with MakeCode may be a useful transition from game to electronics/robots. The hardware at this time is about: $32 for the Meowbit by Kittenbot and $24 for the DFRobot micro Maqueen bot car. The code with extensions included is in the description of the video: Programming in Arcade Beta, https://youtu.be/NHgBfdAAB4A . @vocal cairn

Maybe I could have changed this Arcade Tumbling Cube but my Russian is poor. The guys who wrote the code are in Belarus , I think. Here's the code: https://makecode.com/_E3K1kYUVT7C2
I got the bot car (Micro Maqueen) to run with both motors forward and back and the game conso...
echo ginkgo
Any teachers/instructors out there familiar with NitroType or other online typing platforms that can be used to practice touch typing?
Looking for some recommendations...
dapper jackal
@echo ginkgo I've been surprised by how fast children type nowadays, the only gap I've seen is they tend not to know where the punctuation symbols are. I don't have any recommendations but I was surprised to see a UK company runs commercial courses for children on typing. I thought they would be short, dull and unsellable! I think they are using their own software developed with the aim of making typing more fun. Course: https://funtechsummercamps.com/course-descriptions/funtyper-touch-typing, Software: https://funtyper.com/pages/about

Learning at FunTech is exhilarating and challenging; your child will benefit from passionate teachers, small classes and a dynamic style of teaching.
FunTyper is an online touch typing system that enables children of all ages, abilities and educational requirements to successfully touch type.
I did notice about 5-8 years ago that the staid corporate world has indirectly adopted training practises in some areas based on "gamification". I don't think they are particularly enlightened, it's just some types of short training are now being sold in that form, e.g. fancy cartoon graphics, scores and high score tables.
civic needle
Apparently Mavis Beacon is still popular, so I guess they did something right. Unlike the arithmetic game where if you got the right answer, the man would safely swim across the river, but a wrong answer had him eaten by an alligator. The kids, of course, preferred the alligator.
hoary bough
As we move ahead in the new year with our "GameBot" project we are videoing kids using Arcade in MakeCode mode running a self-driving 4 motor bot car. We hope to interest companies to build a complete kit. I have posted parts links and a doc. link with rationale for this teaching system: Game plus building electronics kit. Video, https://www.youtube.com/watch?v=_F5JSxQzVAw

https://makecode.com/_d6c1rpMJmDzX This is one example of the code which will work , if installed in Arcade to drive the GameBot car. There are 2 un-necessary extensions: both of them Maqueen, which do not seem to be a problem but are not needed; the Robotbit is the necessar...
fleet skiff
I learned proper typing with gtypist I think
some weird linux-y thing, I think that one
they taught us in school much earlier, but I always cheated XD
I was faster at poke-typing than proper typing as a child, so I just did that
it wasn't until I got seriously into linux and coding it became a problem
once a cli guy, always a cli guy
hoary bough
MakeCode Arcade drives stepper motor. We are finding that the Meow;bit works quite well as a micro-controller in Arcade for electronics...sometimes. Still investigating all possibilities. Anyone who has a Meow:bit and wants to work in MakeCode we are seeking partners in research. Video: https://youtu.be/HVPplHUMqTk

Test of "stepper" tool in the Kittenbot Robot:bit extension with Arcade Meow:bit (code: https://makecode.com/_RKcYw6AtraXw) as the controller to show that stepper does work with 3.7 v. recharge battery. There are two sets of stepper pins. These are the same pins used for mot...
hoary bough
We now have MakeCode Arcade driving a servo motor using Meow:bit game console and the Robot:bit powered expansion board: Video:
https://www.youtube.com/watch?v=KMuIVNa4hvk&feature=youtu.be

Here's the code: https://makecode.com/_gfaXk4ba9K1V Servo motors are one type of motor and they can be used to open and close valves and other functions. You could make a garden program where a servo could open or close a water valve. Here we are using our Arcade game con...
rapid hill


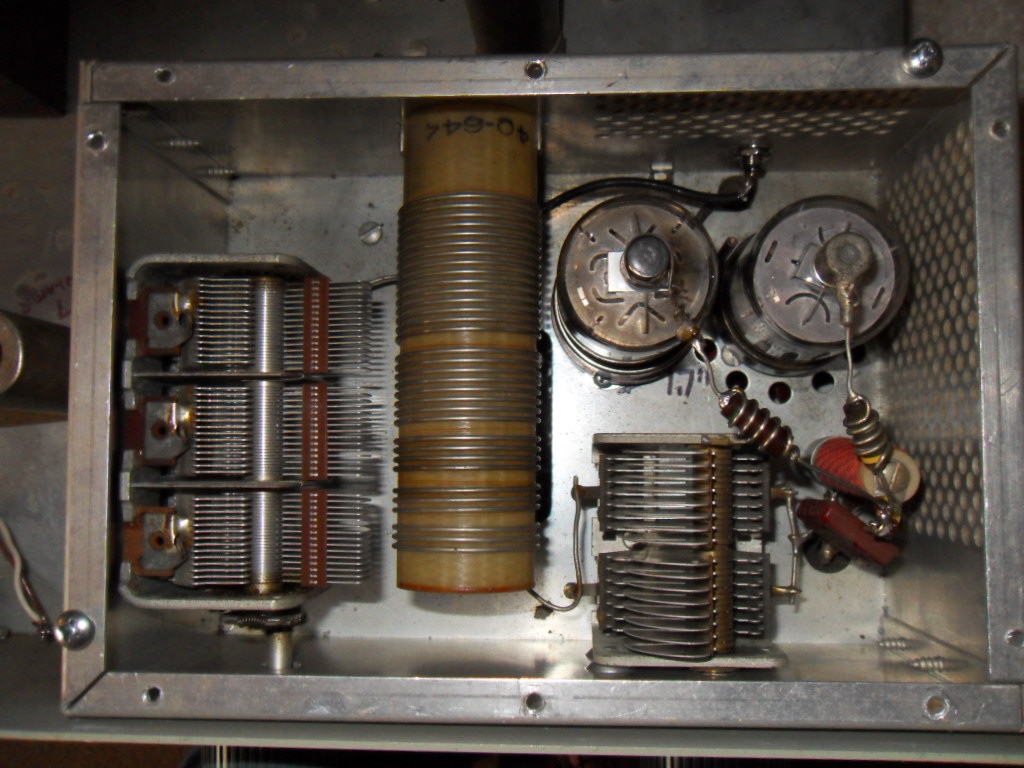
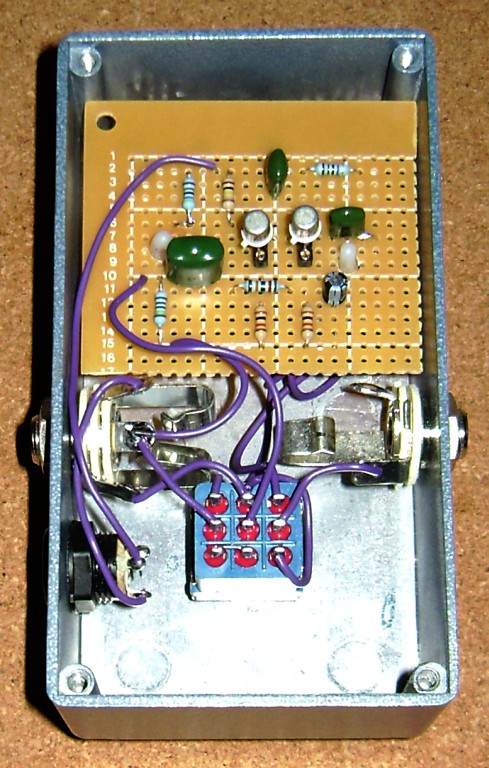

If it's useful for anyone needing to teach remotely, here is video content, slides, online learning material I've used for my Intro Programming Swift/Apps course + CircuitPython and MakeCode in my core course for non-programmers. You're welcome to share! https://t.co/rwETsr...
Twitter
 dapper oracle
Dont know if this is the right place to put it, but in this podcast I talked to our very own @civic needle about some of his life experiences #shamelessplug
https://anchor.fm/jay-s5/episodes/V0-9-Story-Time-with-Madbodger-ec651v

V0.9 Story Time with Madbodger by DIY JAYNKY to the MAX
Madbodger shares his incredible stories of the tech world. Everything from Nuclear Triggers to meeting Ariana Grande.
Jamcraft April 10
Join our Discord Server
 lunar inlet
https://tryhackme.com/room/zthlinux# not sure if anyone interested but this was shared with me to help learn linux functions

Natas
Natas teaches the basics of serverside web-security.
 plush river
For anyone interested in space, satellites, or anything related to it, now is a good time to tune in to our weekly podcast!
https://www.youtube.com/watch?v=O3S6ZWEELs4&t=51s

Lets talk about maneuvering satellites in this episode of To The Max!
Join Jaynky DIY: https://discord.gg/qGxFe6d
 drifting zenith
For anyone interested in space, satellites, or anything related to it, now is a good time to tune in to our weekly podcast!
https://www.youtube.com/watch?v=O3S6ZWEELs4&t=51s
@plush river I am really into rocket design, I wil llisten to your podcast, can I find it in mp3?
Lets talk about maneuvering satellites in this episode of To The Max!
Join Jaynky DIY: https://discord.gg/qGxFe6d
plush river
@drifting zenith You can definitely use a Video to Audio converter program like aTube catcher to rip it off youtube, we don't mind.
 mystic sluice
does anyone of a youtube playlist or an online course about designing a circuit board/pcb buying the parts and then making the final project? @ me
civic needle
@mystic sluice Here's one possibility https://learn.sparkfun.com/tutorials/tags/eagle?sort_by=title
More good stuff here https://learn.adafruit.com/search?q=eagle
mystic sluice
Thank you!
rapid hill
@mystic sluice Also check out https://www.youtube.com/user/adafruit/search?query=maker+to+market for a Ladyada series from a few years ago about how products are developed, and https://www.youtube.com/user/adafruit/search?query=eagle for more videos on using Eagle. Also see many of the "Desk of Ladyada" videos.
mystic sluice
Ty
 shut dagger
Perhaps a bit late for the conversation, but when I work on PCB prototyping, I sometimes find programs like "Fritzing" to be helpful in a number of ways. I first copy whatever I have on breadboard as-is, then can move parts around to make it more space efficient. Then can use it for generating schematics more cleanly than drawing it myself, as well as to use an image to go by for etching a board.
ivory sentinel
hello
 sour phoenix
HI
 rapid forge
HeLlO
ivory sentinel
hi
ivory sentinel
ah what the heck. Hi!
 glossy ginkgo
How is your remote setup to teach projects and hands on learning with students this upcoming year? Trying to design a setup to allow kids to follow and engage in remote teaching sessions.
 grim storm
Hi @glossy ginkgo . I teach a circuitpython class here in Costa Rica. We have been using a commercial zoom account with moodle. The students get their own Circuit Playground Express (maybe a Clue in the future).
This is a nice thing as they use the drive on the circuitplayground express to keep files and examples, so when they plug the board again is fast to get the code from last week, and also the circuitplayground workflow is quite fast.
Oh yeah, we also use Jupyter Notebooks for the class content, so they can copy+paste to mu-editor, or run in jupyter under python3, locally or in google colab or other simple jupyter hosting.
 stiff cairn
Does anyone know if it's possible to use an iPad to program the Circuit Playground Express with MakeCode? I don't have the right adapter on hand to try it, and I haven't found any evidence online of someone doing this successfully, but wondering if anyone here has tried it. (I am working with a teacher whose students all have iPads, not laptops, while they are doing distance learning.)
paper fable
@stiff cairn I seem to remember thinking there was an issue with iOS and the file system. That may have been fixed since I last looked into it. I have both an iPad and the proper adapter here. Do you have a suggestion for an editor? I can try it tomorrow.
stiff cairn
@paper fable oh that would be awesome, thanks so much kattni!
@paper fable (sorry, editor?)
paper fable
Oh I didn't read your message properly. You're asking about MakeCode.
stiff cairn
Ah! gotcha
paper fable
I'll take a look tomorrow
stiff cairn
After posting my question earlier, I did find this post from someone but there is no follow up from them on whether they got it working https://stackoverflow.com/questions/62766748/trying-to-use-circuit-playground-express-with-ipad-cplayboot-usb-partition-dis

Stack Overflow
I'm trying to connect my Circuit Playground Express (CPE) to my iPad using a Lightning to USB converter. The converter works fine with a standard USB flash drive. When I plug in the CPE the systme
(so maybe that answers my question, lol)
paper fable
Yeah like I said, I think there's an issue with the file system recognition. But I'll give it a go.
stiff cairn
cool, totally no rush, thanks so much 😄
paper fable
Should be able to figure it out quickly. I was thinking you were asking about CircuitPython which I think has a better chance than MakeCode because it's not relying on a browser. You're welcome! I'll let you know what I find.
stiff cairn
Yes! I am doing a few one-on-one workshops with this teacher and trying to get him to the beginning stages of CircuitPython by the end, but his students are used to working with Scratch so they'll probably be using MakeCode for the school program.
paper fable
@stiff cairn So I gave it a try. My results were that with chrome, downloading the uf2 downloaded it as "document" and nothing more. Safari downloaded "circuitplayground_projectname.uf2.txt" even though in the file browser it shows up as a .uf2 file. Regardless, the bootloader only stays available in the file browser for about 10 seconds. Which was enough time, if I was on top of it, to drag the .uf2.txt file, and it failed to open. I think it's not viable. I imagine if you downloaded a more complicated file browser you could rename it to a .uf2 somehow, and try it that way, but you still run into having to re-enter the bootloader repeatedly if you miss it, and so on. I'm not sure it would make for a good experience.
stiff cairn
@paper fable Copy that, thanks so much for testing it out! I will pass your assessment back to the teacher, and let him know your findings. Thanks!!!
paper fable
@stiff cairn No problem! I tried it different ways for about 15 minutes, and while there may be massive workarounds that could make it work, I don't think that would make for a good beginner experience. Like trying to teach someone a new concept, except you have them try to use Linux for the first time to learn the new concept.
stiff cairn
Agree, the point of makecode and circuit playground express is that they remove a lot of the boundaries to getting things working, and it would be a shame to complicate that experience with a lot of workarounds. One barrier you just can't get around is that a computer is required. I think normally it wouldn't be as much of a challenge, but unfortunately distance learning takes shared equipment out of the equation.
paper fable
Yeah for sure.
There are many situations where kids have or are given their own laptops, but there are plenty of situations where they are not. Or are given tablets.
stiff cairn
It's a good eye-opening moment for me, to realize that just making something available online doesn't necessarily mean it's completely accessible to everyone, and I'll be thinking about that going forward when I design projects for tutorials/sharing 😀 Sometimes I think "oh i'll build this in MakeCode that way anyone can do it" and that's not always true
paper fable
Truth!
stiff cairn
Thanks again! See ya wednesday for show night!
paper fable
@stiff cairn You're entirely welcome! See you then!
paper fable
@stiff cairn We got an email that stated someone was easily using their CPX with MakeCode from their mobile phone using one of Adafruit's USB-C to Micro-B cables - they did not state what kind of mobile they had. They said they tried a bunch of other cables and nothing worked. So it's possible that it might work on iPad but my adapter isn't of the proper ilk? I wanted to let you know since this did not mirror my experience. Also could have been Android, which has a vastly different level of file access. I've never tried it on my Android mobile, but it might work there. Which would not resolve your issue.
forest sleet
@stiff cairn @paper fable, if the email you're referring to is the same posted in #hug-reports, it says they were using a Pixel 2XL.
paper fable
Oh fail. I read that and then promptly forgot. Apologies!
forest sleet
no worries
stiff cairn
Ahh thanks so much for this info! @paper fable & @forest sleet
shut snow
Anyone have recommendations for projects to show quickly at the beginning of an intro to arduino lesson? I'll share the presentation and resources I create back here in a while (I'm of course going to open-source a presentation on Arduino).
Audience is high-school and college age students with little to no background in electronics and arduino.
civic needle
Blinky LEDs, sound, motion (servos or motors), sensors (temperature, light, etc.) might be worth looking at for something that shows well and isn't much effort.
shut snow
Yup. Have a few of those along with some more outlandish projects like Look Mum No Computer's Firby organ and Will Cogney's automatronic eyes.
Still developing the session too, but I should be ready to share it for review in a few days. Heavily based on some of the Make: Getting Started intro code and another presentation I give at the library. General pace so far is:
Arduino Meaning: Making, Tinkering, Open-development
Arduino Anatomy: Pins, Ports, and Indicators
Breadboard Use: Wires, Busses, Conventions
Arduino IDE: Boards, Ports, Sketches
Blink: digitalWrite()
Different Blinks: delay() exploration
Definitions and Variables: Types -> Using an external LED
Button Control: digitalRead() to digitalWrite()
Fast Dalays: analogWrite()
Potentiometer Input: analogRead() to analogWrite() [wrong map]
Serial Monitor: Serial.println() -> Analog to Serial
LED Dimmer: analogRead() to analogWrite() [right map]```I like to include a brief "Why Arduino" section and explain that dealing with microcontrollers used to require getting a custom programmer, building a twitchy toolchain that only ran in a couple of specific environments, learning about oscillator design, configuration fuses, etc.
Then explain how Arduino lowered the barrier to entry by using a bootloader and onboard USB-serial converter so no extra hardware was required, a cross-platform IDE that was easy to install and dealt with the low-level details including uploading the code, and the Wiring language that abstracted the hardware details to things like digitalWrite(). That trio of technology suddenly made it much easier to go from a standing start to blinking an LED.
shut snow
Definitely.
 viral oasis
I'd be really interested in that as well. If you make it please let me know :)
 dull burrow
Then explain how Arduino lowered the barrier to entry by using a bootloader and onboard USB-serial converter so no extra hardware was required, a cross-platform IDE that was easy to install and dealt with the low-level details including uploading the code, and the Wiring language that abstracted the hardware details to things like digitalWrite(). That trio of technology suddenly made it much easier to go from a standing start to blinking an LED.
@civic needle and then they open sourced their hardware so anyone could learn how to make their own hardware microcontrollers.
shut snow
Continuing work on the Arduino setup. Upload, serial, and power are linked underneath with a battery. Screen shows the serial monitor of the Arduino without using other pins or code.
shut snow
I'll be adding more later I'm sure, but here's a set of intro Arduino lessons I just finished. Should be able to be completed in 1-2 class sessions in Highschool. https://github.com/SyberxSpace/Teaching_Arduino/tree/master/Intro

GitHub
Code and activities for teaching Arduino to new and rising makers. - SyberxSpace/Teaching_Arduino
 tawny comet
Dude, that is awesome! I just started teaching on Outschool and I'm putting together similar plans for micro:bit and circuit playground. I'm trying to come up with parts lists or find kits that don't break the bank for robotics classes too.
shut snow
@tawny comet I can share what I know. micro:bit is awesome (I would have used it myself if I wasn't trying to teach C++ and Arduino specifically) and way easier to use for beginners.
Adafruit's CRICKIT for micro:bit might be the most powerful attachment I've found. You can use it for ton of basic robots and projects. Not the cheapest sadly, but compared to most of the robot kits it's pretty good.
If you have some ideas I would love to try and design you some stuff. I've been considering designing a micro:bit robot arm or movement platform myself (3D printed).
 wanton escarp
I have the crickit from the adabox, but have yet to try it out
 toxic sun
Ready for the classroom (especially micro:bit and Circuit Playground Express, Bluefruit version, or Clue) -- MicroBlocks 1.0 (beta) released today! http://microblocks.fun
MicroBlocks is a dynamic, blocks-based language that runs right inside microcontrollers
I'm hoping to see a help-with-microblocks channel soon... 😉
 dawn dragon
I hope its a lot better than microsofts block based programming thing
Though I just pulled the source for it, does seem like a wildly better implementation
toxic sun
Try it. 100% money back guarantee. 💯
shut snow
I don't mind MakeCode but it definitely needs work. Is MicroBlocks an open source or closed source ecosystem?
Well, that isn't a great sign... the terminal runs but your app loads half the GUI and crashes on my PC (Win 10 64)
toxic sun
@shut snow really? Can you take a screen shot or provide more about the error on Win 10? It's free and open source software. Project under SFC.
shut snow
The console does auto-minimize, but the window itself is just white and goes immediately into Not Responding state.
The very first time it started it did load the GUI for a moment but then stopped responding. Even after a re-install it still won't show a GUI now.
toxic sun
did you use the zip (and extract) or run the installer? just curious since I'm not sure what the difference might be except that I'm told the zip don't need admin privs
shut snow
Installer.
Let me try re-running the installer after an uninstall and forcing admin permissions...
toxic sun
Worth a shot. I don't have Windows but someone had tested it...
shut snow
Same result. I'll try the zip version.
Hmm... standalone also does the same thing.
Do you have it saving a log anywhere?
toxic sun
I've reported your results. Let me see if I can get any hints...
shut snow
Not sure if you would know. I'm checking the normal areas.
toxic sun
From John: "Hmmm. No error messages in the console window -- and no 'Welcome to GP' message either. Looks like it failed right at startup time. This problem could be the result of an incompatibility between the SDL2 graphics library and their particular display hardware.
This could happen with an older PC. It could also be the result of a corrupted or incomplete file download. Rebooting and starting MicroBlocks before starting any other apps might help if it is running out of some resource such as graphics memory."
There is a browser version you can run if you'd like to try it. Only works with Chrome or Edge in order to use Web Serial to talk to the board. And you need to enable the "Experimental Web Platform features" in chrome://flags.
toxic sun
And if you don't mind helping us figure this out: "It could be nice to know the kind of graphics card (make and model) and amount of video memory it has, mostly so we'll know if we run into this with a similar graphics card in the future. The brand and model of the PC hardware could also be helpful. It would also be useful to know which version of Windows they are running."