#show-and-tell
1 messages · Page 20 of 1
 warped violet
That looks really gait!
 desert iron
warped violet
That looks really gait!
desert iron
warped violet
That looks really gait!
I see the pun that you inserted there!  😆
😆
desert iron
 night bronze
How do you have it powered?
night bronze
How do you have it powered?
Right now I use just a 10A 6V power supply, it's pretty scary so I'm very careful... because the maximum current draw of one cheap mg996r servo is maybe 2.5A  🔥 🔥
🔥 🔥
 short ether
This is my UV meter with a reptile light using the Adafruit Guva s12sd breakout and a pico. The LEDs come on at 1.0 and 2.0 respectively. I almost gave up on this - the first sensor I got apparently was busted and always read 0.2.
 vivid tulip
If anyone else has a BloomSky Weather station, I created a CP Library for accessing the API.
https://github.com/askpatrickw/CircuitPython_BloomSky
I am planning to make a magtag-based clock\display\something... which I'll share in the examples whenever I finish that as well.
Anyway, they're cool weather stations hope someone else finds the library useful.
 tranquil kraken
https://cdn.discordapp.com/attachments/624406071783587854/805251903444615258/IMG_20210130_174302.jpg

turning crappy lorex cams with terrible software into motioneyeos cameras using the pi zero!
One of them uses battery power fed through gpio, while the other uses micro usb threaded through a hole I drilled into the plastic
 stoic mauve
I hope a video is ok👍 I got my hands on a Kickstarter early that's based on the Adafruit Itsybitsy M0 express and did a demo/review of it.
A beginners kit for making a mechanical macropad

We're building a DIY 6-key mechanical keyboard / macro keypad from Kickstarter!
Kickstarter Link (ref): https://bit.ly/2YAdcQT
The "BYO (Build Your Own) Mechanical Keyboard" my painlessprototyping.com is a $35 (via Kickstarter) kit that comes with everything a beginner needs to build and program their own macro keypad. In the kit you will find...
 polar eagle
oh lol you go here too eh?
stoic mauve
Of course!
 west zinc
Added a bitmap copy function with scaling and rotation, oh and clipping too:

Gist
A bitmap copy function with rotation, scaling and clipping of source or destination bitmaps. - bitmap_scale_rotate.py
 raw magnet
 naive path
I've been having a lot of fun with (my modded versions of) WLED lately making different colored lamps and such to beautify my life.
I started making a PCB (using CircuitMaker) just before Christmas but didn't follow through.
My modded Skylite died (because of soldering stranded directly to protoboard, I've already learned what a bad idea this is) while at the same time I decided I'm done wiring this same circuit yet again, so this week I created PCBs for both ESP8266 D1 Mini and ESP32 Devkits to support WLED and my mods. I used EasyEDA for the design.
PCBs ordered. I'm excited to see if I thoroughly checked them before ordering.
EasyEDA was easy and I had no major issues. I need to go back to compare again with Circuit Maker and look more at and Fritzing and Eagle, but overall EasyEDA worked fine for me for my simple PCBs.
I nearly ordered the PCBs without realizing the ESP8266 and ESP32 have a "keep out" zone where my copper grand plane I guess would have been a problem. I pushed the antennas as far off the board as feasible and reduced the size of my ground plane. It's been a really fun learning project.
View of my bedroom ceiling from my Blisslights SkyLight modded with a an Adafruit Neopixel Jewel (7 RGBW neopixels) running WLED on an ESP32 board with my Usermods (controlling motor and laser, too, although the laser is off). None of the original circuit in use. https://www.youtube.com/watch?v=nZFVONCO2qI -- more vivid IRL.

Sample colored light output from my BlissLights SkyLite that I modded with color, added wifi support, etc. The laser is available but currently disabled.
 coral mica
west zinc
Added a bitmap copy function with scaling and rotation, oh and clipping too:
coral mica
west zinc
Added a bitmap copy function with scaling and rotation, oh and clipping too:
This is very cool! I've been needing this functionality for a project of mine but didn't have the skills. Do you have plans to integrate it with the the Dsplayio_Layout library?
west zinc
That is a good option to put it in a library (especially since my initial reason was for making widgets). I'm also wondering aloud whether it could replace of the current Bitmap.blit function in the core, but that would need the core CircuitPython folks to decide if it's worth the additional space required.
coral mica
Would implementing it in the core provide performance benefits? Wondering aloud as my project uses fairly large bmps.
Though it would be very useful even in the form of a library.
Nice, just tested and it worked first time wth Blinka. I'll play a bit more, thanks again!
west zinc
I suspect the performance would be improved, but I haven't verified it yet. I've got it on my list of things I want to try out, but am distracted by widgets at the moment. If you know how to build CircuitPython you could give it a try to replace the current .blit function.
coral mica
Never tried building CP, may be a bit involved for me for now. I'll see how it behaves running as a library and maybe take it to the core if it becomes too unwieldy. Really appreciate the start you've made.
west zinc
Cool. Let me know if you find any bugs.
west zinc
A dial gauge indicator widget: in progress video.
coral mica
a quick question @west zinc , should your scale rotation function work with on disk bitmaps? I recall they may be treated differently
west zinc
No idea. Haven’t tried it.
 lucid bloom
Updated my VT220 setup. originally i had a headless pi 3B with a serial hat/ir remote. I have switched to a pi 4 8gb, added a monitor, touchscreen, keyboard, mouse. I am having fun with it, got cava working on the VT220/Monitor simultaneously with bt-speaker. I am adding terminal programs like mps-youtube and then using the touchscreen to display the video. The ir remote does volume and playback control. if anyone knows of any fun terminal programs please let me know and I will try to get it setup with the VT220.
https://github.com/karlstav/cava
https://github.com/lukasjapan/bt-speaker
https://github.com/mps-youtube/mps-youtube

GitHub
Console-based Audio Visualizer for Alsa. Contribute to karlstav/cava development by creating an account on GitHub.
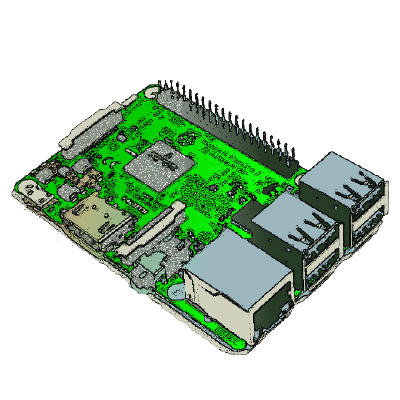
GitHub
A simple Bluetooth Speaker Daemon for the Raspberry Pi 3 - lukasjapan/bt-speaker

GitHub
Terminal based YouTube player and downloader. Contribute to mps-youtube/mps-youtube development by creating an account on GitHub.
 marble snow
simply switched out the CovidTracker Magtag project with my Solar interface json queries and now I can keep an eye on my solar panels more easily.
https://www.heatherclassen.com/solar-panel-tracker-with-adafruit-magtag/

Heather Classen
As a subscriber of the Adafruit ADABOX, I knew when I saw the low power E-Ink “MagTag” display that it would be a great way to keep track of how our solar panels are performing. In 2019 our solar panels lost a month or so of contributing to our electric supply because of a faulty […]
night bronze
That's so cool @marble snow. Great way to keep an eye on your system at a glance!
marble snow
night bronze
That's so cool <@!389872287836536845>. Great way to keep an eye on your system a...
exactly! thank you. Yeah SolarEdge has a mobile app, but I don't remember to open and check it much.
night bronze
marble snow
exactly! thank you. Yeah SolarEdge has a mobile app, but I don't remember to ope...
As simple as that "remember to open [the app] and check it", I've found it's a HUGE barrier to usage. Your solution requires zero action from the user after its setup. Talk about barrierless!
 craggy parrot
@marble snow Thank you !! I was not aware of the solaredge API -- Just connected to mine with your code!
marble snow
craggy parrot
<@!389872287836536845> Thank you !! I was not aware of the solaredge API -- Just...
nice! glad someone else can use it. 🙂
craggy parrot
Next will pass it along to AIO
 devout verge
I was inspired by Pierre Carles’s Co2 display project on show and tell a few weeks ago, and Carter Nelson’s similar project with the Matrix Portal, and wanted to try to make my own version. I wanted it to be super small and cheap (it came out to be about $30). I used the QT Py, as well as the SGP30 for Co2 sensing, and an AHT20 to get the humidity to calibrate it. The neopixel on the QT Py is used to display the Co2 level, with green being good, down to red being really bad.
 brisk sundial
Updated video on the hoverboard plow
tranquil kraken
https://cdn.discordapp.com/attachments/760633914917257236/807500733762895892/IMG_20210205_223607.jpg

https://cdn.discordapp.com/attachments/760633914917257236/807500745489252373/IMG_20210205_223625.jpg

I got an old dual xeon server running again
tranquil kraken
 solar yew
<@!334797740959596545> `1990`
solar yew
<@!334797740959596545> `1990`
I think the bios date that it shows after replacing the battery is the manufacturing date
solar yew
@tranquil kraken It's going to be the date the ROM was burned (BIOS setup stuff) and will be (usually) slightly prior of the date of manufacture of the complete unit.
As the years ago by, you can usually take the two dates to be roughly equivalent.
It's a good simple way to estimate the age of the machine, if you have no other reference point.
tranquil kraken
I mean, it's a dual xeon machine
tranquil kraken
I had to search on amazon to find an old video card that would work with it
It's a rage xl 8 megabyte card
With old pci
solar yew
I had a sweet ATI Mach 8 card when new (paid retail, too) and I haven't seen in in forever .. Must have gifted it away. ;)
I need some video cards from vintage era for stuff like plan9 and Oberon.
(Those usually only support a very small subset of possible video boards)
 lavish warren
@solar yew I purchased a collection of multicolored pin headers, then cut and sanded. Lined them up on the breadboard to solder.
solar yew
@lavish warren That's really nice work.
coral mica
your bmp rotate function is working great @west zinc ! I'm adding it to my eink moon phase display project to include the slight rotation of the moon between phases. This example uses Blinka but will hopefully work on my itsbitsy m4 too.
west zinc
@coral mica that’s really cool. Can you share how you captured the cool video of your project?
 remote sigil
Hey folks - I made a little guide on how to build a Raspberry Pi Pico Soil Moisture Indicator using CircuitPython: https://andywarburton.co.uk/raspberry-pi-pico-soil-moisture-sensor/

Make Andy Make
Hey folks, today I'm going to show you how to make an awesome little soil moisture indicator for your indoor house plants using The Raspberry Pi Pico and CircuitPython so you never forget to give your ferns a little drink. I've also written a sweet little bit of code that
coral mica
Sure, I’m using foamyguy’s Blinka_Displayio_PyGameDisplay to test my code. I set the code to create the bitmap and display it in a pygame window, then used pygame.image.save() to export the frame as a jpeg. The code cycled daily through each moon phase in February resulting in 28 frames (just short of a lunar month). I turned these into an animated gif using GIMP.
Of course it’ll never run that fast on any microcontroller I have but I only need it to update one frame per day to an eink!
I still need to work on the code but I’ll clean it up and publish as soon as I can here:
 scarlet galleon
 remote sigil
Oh that is sliiiick. Is that a render or real?
 coral isle
i made a pyportal app that shows what's playing on my favorite public radio station – WBGO 88.3 FM. you can also update it to show other NPR station playlists. code, readme, and a couple action shots are on github: https://github.com/jefforulez/pyportal-npr

GitHub
:notes: :trumpet: Use an Adafruit PyPortal to show what’s currently playing on WBGO, or other NPR stations. - jefforulez/pyportal-npr
 scenic siren
@coral isle Very cool! If you use Twitter, please post and tag @anne_engineer in the message, or email anneb@adafruit.com with the link to your project to have it added to the Python for Microcontrollers newsletter we put out every week.
coral isle
scenic siren
<@!661619170852732940> Very cool! If you use Twitter, please post and tag @anne_...
will do – thanks!
 heavy panther
Turned my MagTag into a spellbook for D&D
heavy panther
heavy panther
Turned my MagTag into a spellbook for D&D
 ancient skiff
2nd circuit sculpture...
 half pier
From a builders perspective it’s not all that impressive. Solder 2 headers, slap on a hat, flash a card, and configure the correct settings, but from a utility standpoint it’s quite amazing. It will run more than a day on a small battery pack and using the internet hotspot from my phone and a compatible handheld radio I can talk anywhere in the world. #hamradio #pistar #mmdvm #show-and-tell
 lapis jasper
Trackball/Keyboard setup: https://twitter.com/tannewt/status/1359937799173021699

 night bronze
I spot a Model01!
 slim finch
I am loving the voice bonnet: https://twitter.com/keithTheEE/status/1359609629068718083?s=20


Making slow but steady progress on Sonny--it's now able to do a few things! Like turn on and off the lights https://t.co/RIShOcsl5c
 Twitter
·
Twitter
·
 cobalt badge
👋 hi! We are building affordable bioreactors on top of RaspberryPis: Pioreactors! Check us out at https://pioreactor.com/ and our open source software at https://github.com/pioreactor
 hallow trail

Instructables
RGB Desk Lamp and Change Colors by Phone: The RGB Desk lamp brings forth a revolution when it comes to interactivity with lights are concerned. This RGB Desk lamp is Wi-Fi enabled thus making it wirelessly accessible and one of the better choices for a grand piece in your Desk or Bedroom .…
Check out my project on instructables
 deft bloom
Just finished making an I2C XOR offset board with two different busses and a pass through (uses the LTC4316 chip). Can set/change the offset with the small resistor boards easily
 valid sluice
Valentine's Day project - hooked up my electromechanical kinetic paper heart to a Circuit Playground Express so that it beats in sync with the pulse of blood in my thumb
https://mobile.twitter.com/Bornach1/status/1360991941996007425


My heart beats in sync with the pulse in my left thumb, read using light sensor of an
@adafruit
Circuit Playground Express running a Circuit Python script
Pulse oximeter on my right hand serves as verification that it is triggering on the correct pulse signal
#ValentinesDay https://t.co/Bm4ZrXncpJ
Twitter
·
west zinc
More GUI widgets in progress.
night bronze
Very slick @west zinc ! I love how you ramp up the changes - start slow and then increase speed. Quick question though - were you aiming for Oct 26th, 2015? 😉
west zinc
Now with scrolling.
night bronze
Wow, that's a great visual @west zinc. Particularly helpful if the data is updated remotely, you can see if the value increased or decreased
remote sigil
Sure I’m not the first and definitely not doing anything useful with it yet but this is the first step towards greatness! 😂
ancient skiff
Ooh adafruit blogged a remix of one of my designs https://blog.adafruit.com/2021/02/18/cardboard-screw-compatible-with-makedo-screw-3dthursday-3dprinting/

Adafruit Industries - Makers, hackers, artists, designers and engineers!
mraczka shares: allows you to connect two pieces of normal box cardboard with ease, it won’t protrude too much and will not lose the grip. L size is good for big joints or some multi layer ju…
 burnt wyvern

Yesterday, during the 2/17/21 Nintendo Direct, Nintendo announced the third installment to the Splatoon series! This keychain is a quick remake of the logo shown in the Direct and has a 6mm hole to put a keyring in, so you can put it on your backpack, purse, keys, you name it!
I've even included the F3D file, so you can remix it all you want in ...
 idle ermine
Hello, I would like to start making an environmental sensor array. Would you be willing to help? Nice work doing your own. On my list to buy are 1) The Plantower PM sensor Adafruit Breakout, (2) BME680 Bosch Sensor. I have not selected the "brain" yet. I would like to start with two and build up. I would need some assistance in buying components that I can expand into. Thanks
 drifting crater
idle ermine
Hello, I would like to start making an environmental sensor array. Would you be ...
drifting crater
idle ermine
Hello, I would like to start making an environmental sensor array. Would you be ...
Hi there, you may want to ask this question in #general-tech - #show-and-tell may not be the best place to ask...
idle ermine
This is my first day on Discord. I appreciate the guidance. Thanks
night bronze
idle ermine
This is my first day on Discord. I appreciate the guidance. Thanks
In that case, welcome! 🙂
idle ermine
Thanks
lucid bloom
Just installed this today at the food pantry I volunteer at. Color changing led to reflect the status of the fridge. It uploads temp every 60 seconds. If temp gets to low or high for 15 minutes and it will send text messages. It's a remix of the freezer alarms I made a couple years ago.
https://github.com/matt-desmarais/freezeralarm
The food pantry currently has 8 raspberry pis soon to be 12. 6 are pi zero ws and the next 4 will be as well.
GitHub
pi zero w based freezer alarm with sms. Contribute to matt-desmarais/freezeralarm development by creating an account on GitHub.

 solar yew
@lucid bloom In our soup kitchen a client unplugged a freezer out in the public area to charge their cell phone .. then walked away without plugging the freezer back in.
lucid bloom
wow thats bad. the fridge I just alarmed had its computer die 1 month out of warranty and we lost a lot of produce so they asked me to do something so if anything happens we know asap.
solar yew
They've lost more than one freezer full of meats that I'm aware of (aside from that unplugging incident which I don't remember the upshot of).
I think at least once they closed down or went on some other regime for what to serve because of it.
lucid bloom
I've stopped 3 incidents in the last 2-3 years. 2 door left open and 1 temperature alarm
solar yew
They're really pricey events so good on ya'.
I know some pretty nice people living in the forest. Including couples.
lucid bloom
I wouldn't last long in the forest unless I had some source of electricity and internet
solar yew
lol I've asked them but you know I didn't press for details. "What do you do when a bear comes around" and they'll have an instant answer because it had already happened and they know what they in fact did do. ;)
It's a planetary surface, so this isn't the first time hominids have lived in forests. ;)
lucid bloom
a lot of nonprofits dont know the free tech services that are avaiable. I have Salesforce for nonprofits (20k/year for free), google g suite for nonprofits (about $6/user/month for free) and we order a lot of our hardware from techsoup.
even if they dont offer free services a lot of companies offer a decent nonprofit discount
night bronze
That's a very cool and handy project @lucid bloom. From other stories, sounds like a battery backup with a "Main power lost" type notice would be good too, for power failures of various sources
lucid bloom
I have a pi 3b setup with pijuice and a 2g modem to alert me when the pantry loses power and every 15 minutes until it's back or the battery dies.
Pijuice has a nice api that lets you see battery status/charging status
solar yew
There may be a safe contactless sensor that could 'tell' when the freezer compressor circuit hasn't engaged after a suitable timeout.
For my window A/C I just TMP-36 it on the cold air vent. ;)
To test it I set the entire unit on my fridge and run the TMP-36 into the freezer compartment with the wires shut in the door for a few minutes (freezer compartment is just below top of fridge unit).
I use a PWM to modulate an analog D'Arsonval meter movement, to simulate a reading in a old school format.
lucid bloom
I've come to realize the importance of sensors for the 1% of time things go wrong 😅
solar yew
And when it hits max or min (very warm or very cool) a singleton red LED blinks every few seconds to indicate overrange/underrange.
I use a bank of NeoPixels (8x) to record thermal history. Each LED stands for 3 minutes of runtime.
lucid bloom
That would be fancier than my single led 😜
solar yew
So after 24 minutes it's FIFO .. oldest temp disappears and is replaced by newest reading. ;)
Probably this, but it's been a while since I've peeked at it:
night bronze
lucid bloom
I've come to realize the importance of sensors for the 1% of time things go wron...
Planning normal use cases and scenarios is "easy". Planning for the unexpected however... yeeesh
lucid bloom
Yea some issues don't become apparent until after you have already deployed the system. Stable patterns of data is reassuring
craggy parrot
I always require advanced notice of all unexpected events 😉
solar yew
I use the onboard RGB as 'master pixel' in realtime.
lucid bloom
Sometimes I would get a random really high or really low temp so I made it have to get 2 readings within 10 degrees of each other or it throws it out and gets new reading.
solar yew
The 8-counter is here:
Charley Shattuck invented a 'round' stack that wraps around on itself (neat invention based on his work at GreenArrays) so that's what I used.
Yeah I didn't throw out any analog noise.
No validation of inbound data on the analog pin used at all. ;)
This is the wrap-around mechanism in the upstream version:
https://github.com/CharleyShattuck/Feather-M0-interpreter/blob/master/Interpreter.ino#L34
lucid bloom
You gave me an idea 💡 I have some neopixel rings maybe I make a clock type display with the last hour
solar yew
When the high bit is set the logical AND removes it (masks it).
so it counts (say for 8 bits) 253, 254, 255, 0, 1, 2.
always progressing as if 256 was reached and crossed.
Runs backwards too. :)
If you have a need for a stack that is not an exact power of two you can just ignore the 'stations' that are not used.
(say to wrap at 100 decimal, have a stack that runs to 128 positions - and just skip over the ones you don't need above 100).
Easier to just think in terms of powers of two, though.
lucid bloom
I have to build 3 more double door freezer alarms and then a 3 door freezer that has glass doors so I 3d printed things to hold the door sensors near each other. Rather than recode I'm running the 2 door alarm and 1 door alarm programs in parallel.
 upbeat geyser
ItsyBitsy M4 driving a 1952 vintage oscilloscope I just restored

 split comet
So, after help and advice from @dusk zinc and @west zinc I got this working. (Many, Many, Thanks!!) It's an addition to MatrixPortal. 'crawl_text' will move the text from left to right (only texted on a 16x32 pixel board at this point) by using a font that I flipped upside-down, and entering the text backwards (next step is to reverse it using the code) I created a scrolling sign that changes message when it is flipped over.
Links to a video, and the code... ttps://photos.app.goo.gl/oStxDV74apKnagK87 https://www.dropbox.com/s/tppa9e2vbxua36k/matrixportal.py?dl=0
 west zinc
Looks really cool! Glad you were able to get it working. Now I understand better what you were trying to achieve. In thinking about it maybe it would be easier if you could somehow change the “orientation” of the display rather than rewrite the text scrolling code. At a quick glance I don’t see an available option in the matrix portal library but it might be a useful feature. @sterile lodge do you have any suggestions to achieve the different text orientations that @split comet is trying to achieve on the matrix portal?
split comet
west zinc
Looks really cool! Glad you were able to get it working. Now I understand bett...
2 uses came to mind, this was the first. The other was for scrolling languages that are read Left to Right.
 sterile lodge
west zinc
Looks really cool! Glad you were able to get it working. Now I understand bett...
sterile lodge
west zinc
Looks really cool! Glad you were able to get it working. Now I understand bett...
It might be possible. According to https://circuitpython.readthedocs.io/en/latest/shared-bindings/framebufferio/index.html, framebufferio has a rotation property that we're are not taking advantage of in the MatrixPortal library. That would need some experimentation done to see if my hypothesis is correct.
solar yew
@upbeat geyser That's really nice .. sweet oscope.
upbeat geyser
I've been keeping myself occupied lately by restoring old scopes from the pile

 fringe narwhal
A shocking development.
 marble mantle
@upbeat geyser at first glance it looked like a cozy old-fashioned wood stove...
upbeat geyser
It's a compact portable scope stuffed full of tubes, it does emit a fair amount of heat
 cedar dew
Busy finishing off a light cycle project and though I’d make a variation that uses light... because it makes sense right

 tacit delta
very nice print
wonder if you could rip off led scatter panels and make it more even?
wonder if can buy those though if dont have dead panels
cedar dew
Scatter panels? The silicone sleeve?
tacit delta
no, lcd montiors have sheets to spread light out for nice even lighting
but im not sure what its called so cant google for it
cedar dew
Ah right. The video is different to how it actually looks as well. I’m make three with the tails and will see what I need to do to spread the light more. This is where the silicone bead strips might be better
cedar dew
Thanks @tacit delta
tacit delta
welcome
 candid crescent
tacit delta
but im not sure what its called so cant google for it
candid crescent
tacit delta
but im not sure what its called so cant google for it
"Diffuser" is the usual keyword, I think.
tacit delta
ahh nice thanks
Pmma Prismatic Light Diffuser Film / Led Light Diffuser Sheet - Buy Diffusing Acrylic Sheet,Acrylic Diffuser Sheet,Led Diffuser Sheet Product on Alibaba.com
lol good for next 100 lifetimes
 cedar dew
Ty
tacit delta
welcome
 valid imp
since my cats mauled my poor TFT, I decided to abstract my code a bit more to support multiple devices and christened it by adding a way to interact with it on my PC over serial so I don't have to wait for a replacement to arrive! I think I'm going to go for a 3.5" this time to see how portable I can make this (and so I can store the FB entirely in the teensy's RAM for proper scissor rects!  ) -- i think i want to make a smart home interface with this definitely not inspired by anything else theme
 tacit delta
fancy
valid imp
its really satisfying to watch windows move on both my pc and the screen haha
sadly the RA8875 isn't the fastest thing in the universe (and is lacking in the RAM department  ) so I hope it vrooms even faster once I order the other TFT
solar yew
My first ever PCB design. A circuit to rectify and regulate 12v using the LM317.

 exotic sierra
Nice
candid crescent
Some of the clearances, like under C3, look a little tight, so you might want to scoot traces back in a couple of places. But yes, nice use of a single layer. 👍
valid imp
hooray, SDIO on the teensy4 is fast. i need to get a 3d printer and a new screen already so I can put this into an enclosure

wish that keyboard featherwing was in stock, kinda want to make an SPI/I2C debug tool with this UI. I have a bunch of 6502s, could also run programs off of that, would be neat
 lean elbow
As a recent weekend project, I built an Adalight using a QT Py and 80 Neopixels, driven by Adafruit's DMA Neopixel library. Since I wanted this for my work desk, where I frequently switch between my work laptop and my personal laptop, I also wanted the ability for it to be a mood lamp of sorts, without even needing a computer to drive the pixels.
As a reference I started out with the Adalight-FastLED project (https://www.partsnotincluded.com/adalight-fastled) and reworked it for the QT Py and NeoPixels, and then wrote all the custom code related to the non-Adalight mood lamp functionality.
To accomplish this I added a rotary control, giving me an input system with a single button and a forward/reverse control, as well as a Schottky diode so I can power the QT Py from the same power source as the Neopixels without even needing a computer to be connected to the USB port. Using the rotary control, I added some basic brightness/hue/visualizer mode controls, and I plan on adding more visualizer modes in the near future.
For the Adalight functionality, I'm using Prismatik with a 230400 baud rate, yielding about ~70 fps! It might be possible for the QT Py to push this higher, but I haven't tried, because tbh I don't really need a higher framerate than that. This has been one of my favorite projects so far, and I'm really excited to share the results 😄


I've reworked the Adalight code to use FastLED. It should work with any FastLED supported chipset (including WS2812B aka Adafruit NeoPixels).


 exotic sierra
Wow, this is impressive
lean elbow
Thank you! 😳
valid imp
I'm always an avid appreciator of pretty colors
lean elbow
Me too 
 abstract aspen
Cool project!
 summer gazelle


I figured this circuit out for my Pi Zero project I'm working on.
It is an OTG switching circuit.
When an OTG cable (micro USB to full-size USB) is plugged into the port, by industry standard the ID pin is pulled to GND
and that switches the port from sending power to the Powerboost, to reciving power from the pi Zero.
summer gazelle
Took me 3 days to figure that circuit out...
 native ingot
built a USB handbrake controller for simracing and playing a rally racing game on my PC

as the racing chair I use folds up with all the controls attached to it, I made the handbrake handle fold down as well:
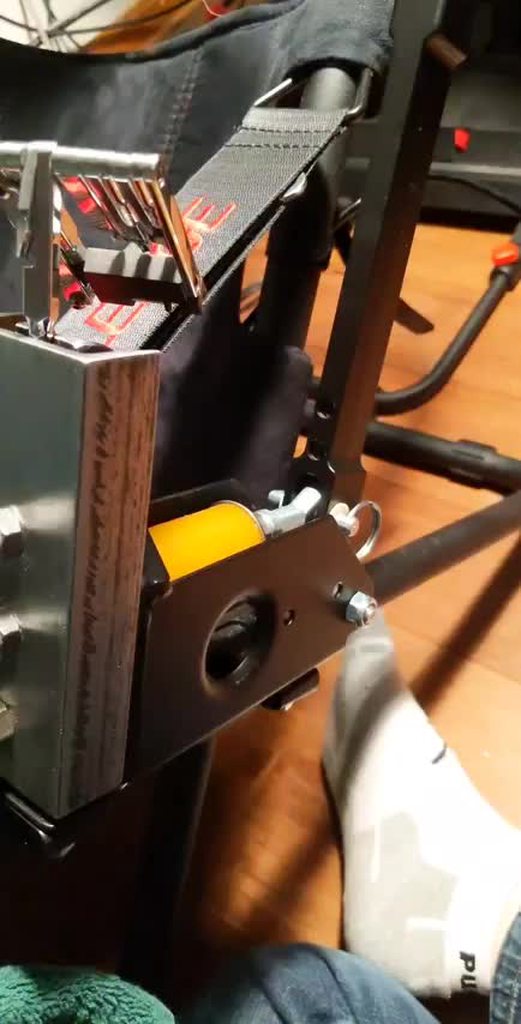
Trinket M0 is the brains, and an I2C load cell is the sensor
AMA I guess, @ me for more info
solar yew
Second ever PCB design, started working on this one before the LM317. Arcs are really not needed but should not cause any problems.
 west zinc
The beginnings of a text scroll box.
night bronze
west zinc
The beginnings of a text scroll box.
Next is the bouncing DVD image!
 languid nebula
Lets do Banners !!!
 latent fog
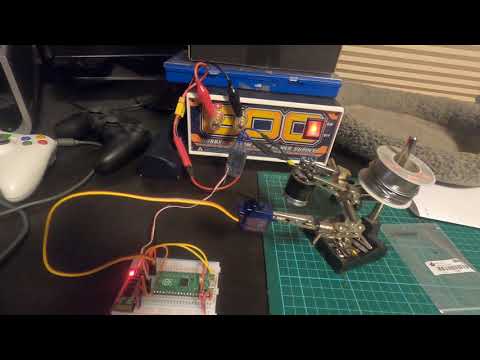
quick uart test on the latest circuit python uf2 for communicating wirelessly with the rpi pico via a bluetooth uart dongle paired with my phone.
night bronze
Good stuff @latent fog !
west zinc
Scrolling text box with some smoother animation “easing”.
night bronze
Looking great @west zinc! But, I see what you not-so-subtly did there, with the A&M logo 😉
west zinc
👋 Howdy and 👍 Gig 'em! (That's for my daughter).
night bronze
lol, that's awesome. I only know because I'm surrounded by Aggies, Longhorns, from from Tech (dunno their nickname) as well as "Go green" folks from UNT. It's a hodge-podge!
We also have a decent amount of Cowboys (OU). It sure makes made it interesting during college football season when they face off, and folks are allowed in the office
 cobalt dove
I have created what is objectively the best keyboard accessory possible: https://gfycat.com/fewcomplicatedhuia

 tranquil kraken
Yeah
Wouldn't recommend it, kindle uses a really locked down linux
Nook would be a better option but I had the kindle lying around
tacit delta
theres kindle screen controller boards out now i think
tranquil kraken
Yeah but they have a ton of wires
tacit delta
yeah
tranquil kraken
This is just a kindle with the screensaver hack jailbreak
Nook runs on an android skin and can easily be rooted with android apps
Though for the best e reader experience if you want to use it for it's intended purpose would probably
be kobo
tranquil kraken
tacit delta
i use kindle too
I personally prefer kobo and use one as my daily driver, it's much better in terms of books and software support and freedom imo. This kindle was just the cheapest e ink device I could find on ebay
tacit delta
nice. why I got mine is that i can use very strong case with it
waterproof, and more importantly, dustproof
and resistant to impacts due to my job
tranquil kraken
mm interesting
tranquil kraken
Sounds like something that could cause shorts
tacit delta
yeah. it randomly restarts
i tried to clean it out, losing the screw lol
but it dont work well, it lasts maybe a day
even if not used
valid imp
embedding lua, eats half my tightly coupled RAM but probably worth it?
 cobalt dove
I invented a new kind of open source, contactless hall effect rotary encoder for my keyboard too: https://gfycat.com/unlinedfirstalabamamapturtle

I don't think I'm part of any other discord where the users would appreciate how much it took to make a reliable, nice-feeling, smooth rotary encoder from scratch where there exists no open source implementations either in PCB design or software/firmware. It was exceptionally challenging.
I have plans to make a stand-alone reference implementation that you can use with any MCU but until I do that everyone here can feel free to talk to me about how to make one and I'll help you out 👍
You just need two 49e analog hall effect sensors (yes, it's analog and thus, adjustable resolution!) and some magnets!
west zinc
cobalt dove
I don't think I'm part of any other discord where the users would appreciate how...
This is both super cool and also making me hungry.👍
BTW Why do you need two sensors to do the trick?
cobalt dove
west zinc
BTW Why do you need two sensors to do the trick?
Rotary encoders work on a square wave--or in my (analog) case a sine wave--you need to be able to see the state of two sensors in order to detect the direction of the turn
If it was just one sensor it'd go down and back up again as you turned it. But if you stopped and turned it the opposite direction it would just... Go down and back up again 😄
You wouldn't be able to tell if the user changed directions with just one sensor
You need two waves to be generated--one slightly offset from the other. Preferably a 50% offset but any amount of offset is--in theory--good enough (if you have enough resolution)
Imagine an optical rotary encoder but instead of black/white segments you have gradients that go from 100% black to 100% white and you have the optical equivalent of my hall effect rotary encoder: https://upload.wikimedia.org/wikipedia/commons/thumb/1/1e/Incremental_directional_encoder.gif/220px-Incremental_directional_encoder.gif

See how each circle of black segments is just slightly off from the other one? It's the same deal with my hall effect encoder: When the magnet is 100% over one of the hall effect sensors the opposite-pole magnet is going to be about 50% over the other sensor.
Here's a better animation I just found: https://lastminuteengineers.com/wp-content/uploads/arduino/rotary-encoder-working-animation.gif

That one works more like how my encoder works
Except instead of on/off (square wave) it's a sine wave. So you can adjust the resolution as you see fit (you can just pick how many divisions between the low and high points of the sine wave as actuations)
Ooh I just had a good idea: I should add a mode to the keyboard that shows you the rotary encoder sine wave output 👍
west zinc
Awesome, thanks for the explanation.
tacit delta
lol nice
drifting crater
I played a video on a microcontroller! (Well, not really. It's just a simple binary file containing a WAV and a GIF file but it counts)
Sorry for the horrible camera quality - my phone's camera is horrible. And the video is also pretty quiet itself
night bronze
Oh wow, that's a great concise explanation of how it works @cobalt dove. Much appreciated! Got my "learned at least 1 new thing today" for the day! 🙂
marble mantle
@cobalt dove really nice - would be good to have a standalone implementation
there are plenty of encoder libraries on the software side, but hardware is a different story...
native ingot
@cobalt dove @night bronze the TL;DR is that one sensor is sine and the other is cosine
cobalt dove
@native ingot Yeah basically
native ingot
So by reading the data from each sensor and taking arctan(sin/cos) you get the absolute angle
west zinc
Today I learned how to take CircuitPython screenshots and make a moving GIF. Thanks @coral mica for the hints on this library:
https://learn.adafruit.com/saving-bitmap-screenshots-in-circuitpython/overview


Adafruit Learning System
Whether for debugging or documentation, being able to take screenshots can be very useful.
 heavy ember
Hi, I want to have a tactile pushbutton, when pressed 3 seconds, turn On/Off Arduino + Lipo. How would you do that?
 rain dome
heavy ember
Hi, I want to have a tactile pushbutton, when pressed 3 seconds, turn On/Off Ard...
rain dome
heavy ember
Hi, I want to have a tactile pushbutton, when pressed 3 seconds, turn On/Off Ard...
I'd ask in #help-with-arduino 🙂
heavy ember
thanks
cobalt dove
Virtcon 2021 is over so now I can start posting regular updates again! I thought I'd kick that off with a sound test showing off the new hardware/switches/filament: https://youtu.be/xeCjrPNfyo8

Now that Virtcon 2021 is over I can start posting updates again! I thought I'd kick things off again with quick sound test.
cobalt dove
Ever seen a keyboard with a built-in IR receiver? It's awesome! https://youtu.be/mX1jJfRtEPc
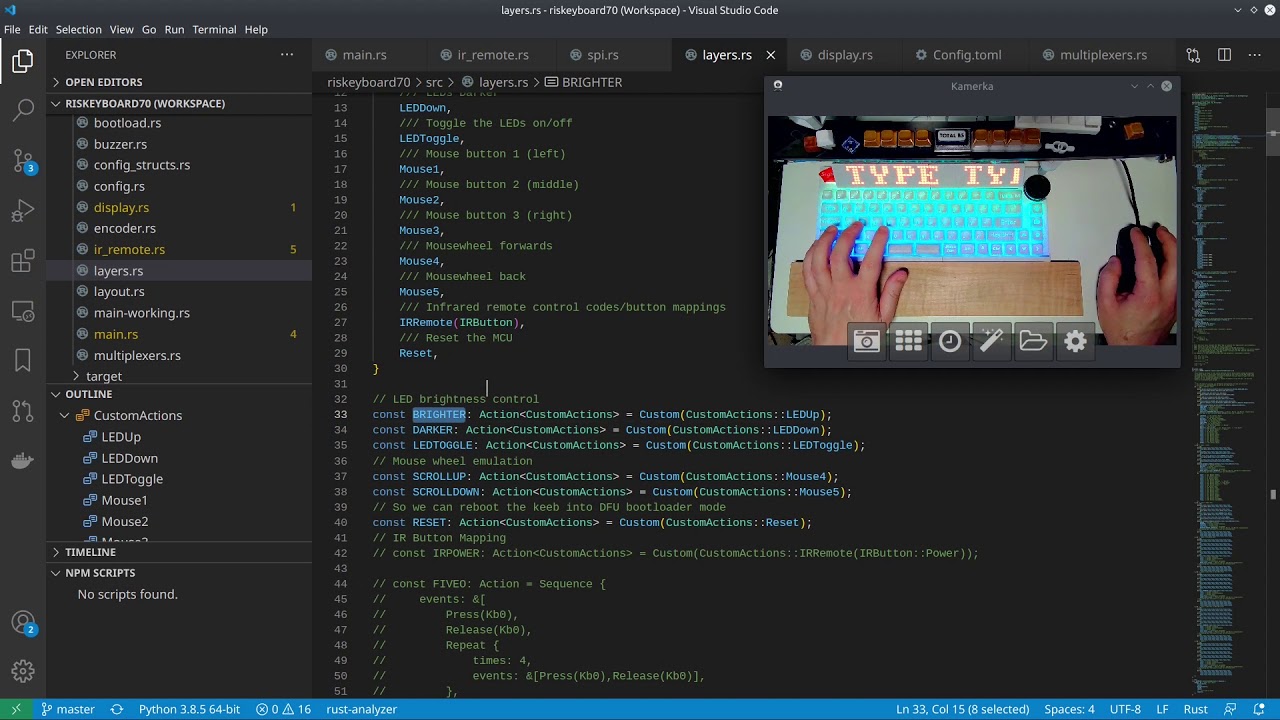
I took some time tonight to go over one of the coolest features of my Riskeyboard 70: The infrared receiver that allows you to control it using just about any remote control!
Background music in this video:
Oblivion - The Fat Rat
Against the Wall - Boxcat Games
Inspiration - Boxcat Games
Eat my Chips - Azureflux
A few seconds of: Never Gon...
 patent spire
I made a prototype setup of a soft robotics project, for easier programming. It runs in CircuitPython on a pico, the PIO functionality is excellent for soft robotics since it lets you offload control of the air pumps so its non blocking which will be super useful. Would it be possible to demo this on show and tell today or is that only upon invitation?? Anyway hope people enjoy the pictures of my soft robotic adventure.
 scenic siren
@patent spire Everyone is welcome on Show and Tell! We'd love to see your demo. Hang out in the #live-broadcast-chat channel around 7:30pmET, and a StreamYard link will be posted. Click on it to join. If it says it's full, keep trying, folx will drop off as they finish to allow more to join.
@patent spire As well, have you posted about this anywhere? I'd love to see it added to the weekly Python for Microcontrollers newsletter. A tweet or blog post would be great.
night bronze
Wow @patent spire, that looks awesome! Certainly hope to see you show it during Show & Tell!
patent spire
@scenic siren No I haven't posted it anywhere yet. It was part of a bigger "art" installation for a small local festival. I don't really have social media or a blog yet, but I can write something on my hackaday.io page this week. I'll give you a heads-up once I have written something.
scenic siren
@patent spire That is also perfect! Please send an email to cpnews(at)adafruit.com with the link when it's ready. That's the best way to get it to us so we can add it to the newsletter.
patent spire
TY 😄
 unkempt viper
I'm playing with UV LEDs and glow in the dark paint. The end goal is to have a fake flower garden - servos will make the flowers bloom at night. The petals will be painted with glow paint and little UV LED fireflies will pulse occasionally. Still trying to figure out how safe these UV LEDs are to directly view or if I need to diffuse them...
Oh I guess ya'll have to listen to a clip of Drawfee in that first vid 😅

 leaden jetty
I finished a Maytag app which is a GrubHub timer for my daughter in NYC.
It starts at 30 minutes from when app is started. Two buttons adjust the timer up or down.
When the timer runs out it flashes the lights and beeps at 1200 Hz on & off at 1/5 of a second.
All buttons cause a beep when pressed. button A stops the timer. Button B increments 1 minute
Button C decrements 1 minute. Button D returns to the boot app.
The main loop is non blocking so the buttons work quickly.
The default 30 minutes and the name of the timer is read from secrets with a settings app which allows changing all values in secrets.
 night bronze
Very cool project @leaden jetty!
 polar delta
Dazzelite is an easy to build project that uses a low-cost FPGA board to displays multi colored patterns of light, on a ring of 24 LEDs. One can use the default display patterns or, create your own, no software or FPGA knowledge required. Take a look at the video https://vimeo.com/516437596 or dive right into the project https://github.com/ggrummer/Dazzelite

Vimeo
Dazzelite uses a tri-color LED ring to produce different light displays. Dazzelite is programmable, so the displays are only limited by your imagination.

GitHub
Ring of tri-color LED lights controlled via an FPGA using a few simple instructions - ggrummer/Dazzelite
solar yew
Hiya folks. Long time listener, first time caller. Made this stock tracker with the MagTag, and thought I would share it!
 night bronze
Even managed to get a sneaky Arduino sticker in there! 😉
solar yew
It's all in the details 🙂
night bronze
Looks really nice. I love the little up/down indicator in the top left
solar yew
Thanks! Here it is trending up!
 rain dome
stonks!
leaden jetty
I finished a Maytag app which is a GrubHub timer for my daughter in NYC.
It starts at 30 minutes from when app is started. Two buttons adjust the timer up or down.
When the timer runs out it flashes the lights and beeps at 1200 Hz on & off at 1/5 of a second.
All buttons cause a beep when pressed. The main loop is non blocking so the buttons work quickly.
The default 30 minutes and the name of the timer is read from secrets with a settings app which allows changing all values in secrets.

@solar yew so YOU got the extra mag tags in Adafruit stock. At Adafruit, ya need a way to give stuff back so you don't feel bad when ya buy out their stock! I don't want to send mine away to my daughter when they are so much fun learning to program.
rain dome
It took me months to get one! I should have bought 2
leaden jetty
Exactly @rain dome I should have bought 4 for gift and testing.
rain dome
Best product on the site IMO
solar yew
leaden jetty
<@456226577798135808> so YOU got the extra mag tags in Adafruit stock. At Adafr...
That was me, yes. Last two. My apologies 😆
leaden jetty
Ok, I made it much simpler. Up/down buttons increment or decrement the countdown timer. A pause/resume button stops the countdown. I'm working on Alexa integration.
 ancient skiff
working on a 3d printed jig for my next circuit sculpture project

 sharp comet
I found a tweak to make inside of TileGrid and managed to get a clean render from a Tiled map

 quartz timber
made a nodemcu v3 connect to wifi, monitor dht11 temp/humidity, send data to OLED display AND send data to raspi4 running docker with influxdb --- then display temp humidity on my grafana (in docker)

humidity is high here in hawaii
night bronze
sharp comet
I found a tweak to make inside of TileGrid and managed to get a clean render fro...
Is that the bug you were digging into earlier on stream?
sharp comet
night bronze
Is that the bug you were digging into earlier on stream?
Yep! adding the right, and bottom values into the alpha_composit() call inside tilegrid seems to fix it.
Just created a PR for it here: https://github.com/adafruit/Adafruit_Blinka_Displayio/pull/51 I'm interested to see if there is some other solution that could go inside of my library though.
night bronze
sharp comet
Yep! adding the right, and bottom values into the alpha_composit() call inside t...
Nice! I wonder if the blinka version was computing it or implying it somehow from the tile size?
Nice to know you were heading down the right track during your stream
languid nebula
sharp comet
I found a tweak to make inside of TileGrid and managed to get a clean render fro...
Very nice, gladly you found it
 snow mango
@leaden jetty @solar yew Sorry for the ping, but what are yall using to display the GUI?
solar yew
For me is just regular text on top of a very simple background I created on Aseprite. Code is here is you wanna take a look: https://github.com/verystealthy/magtag_stock_tracker

GitHub
Stock Tracker with Adafruit's MagTag Display. Contribute to verystealthy/magtag_stock_tracker development by creating an account on GitHub.
leaden jetty
@snow mango I have a Magtag e-ink display and I use the Magtag() class and addText to display a font at a position and a tile grid to display icons out of a bitmap. I created the bitmap usng GIMP. The Graphics class handles adding these things to a display and showing them at most every 8 seconds or so.
 scarlet pelican
Working on fitting a Raspberry Pi 3A+ and an Adafruit 2.4" PiTFT display into a Nintento Game Boy case; it depends on the secondary set of pins on the side providing access to the RPi header signals that the 2.4" version offers.
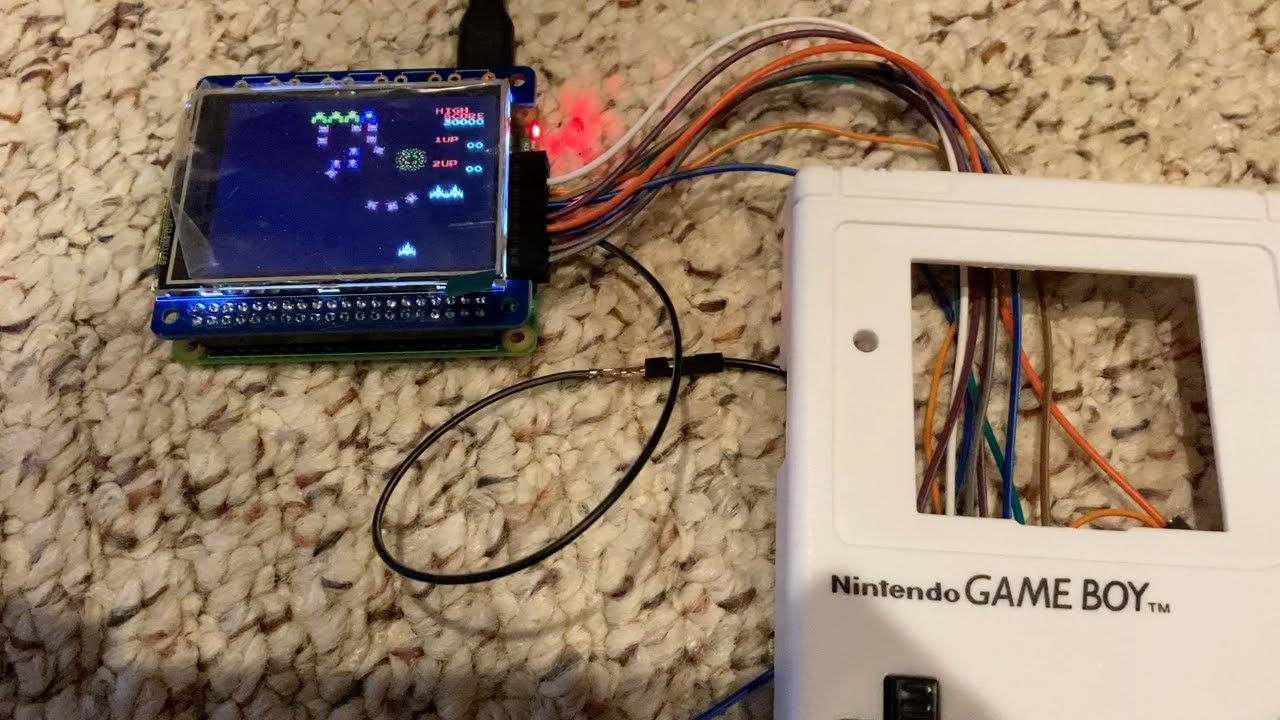
Part of our "Retrofuturistic Hardware: Music, Gaming, and Computing" Vertically Integrated Project work at Georgia Tech. This is less polished than my lecture videos; I mostly taped this as a set of reminders to myself and as documentation for my students.
 gusty shard
Cool project. Gameboy is a tight fit.
drifting crater
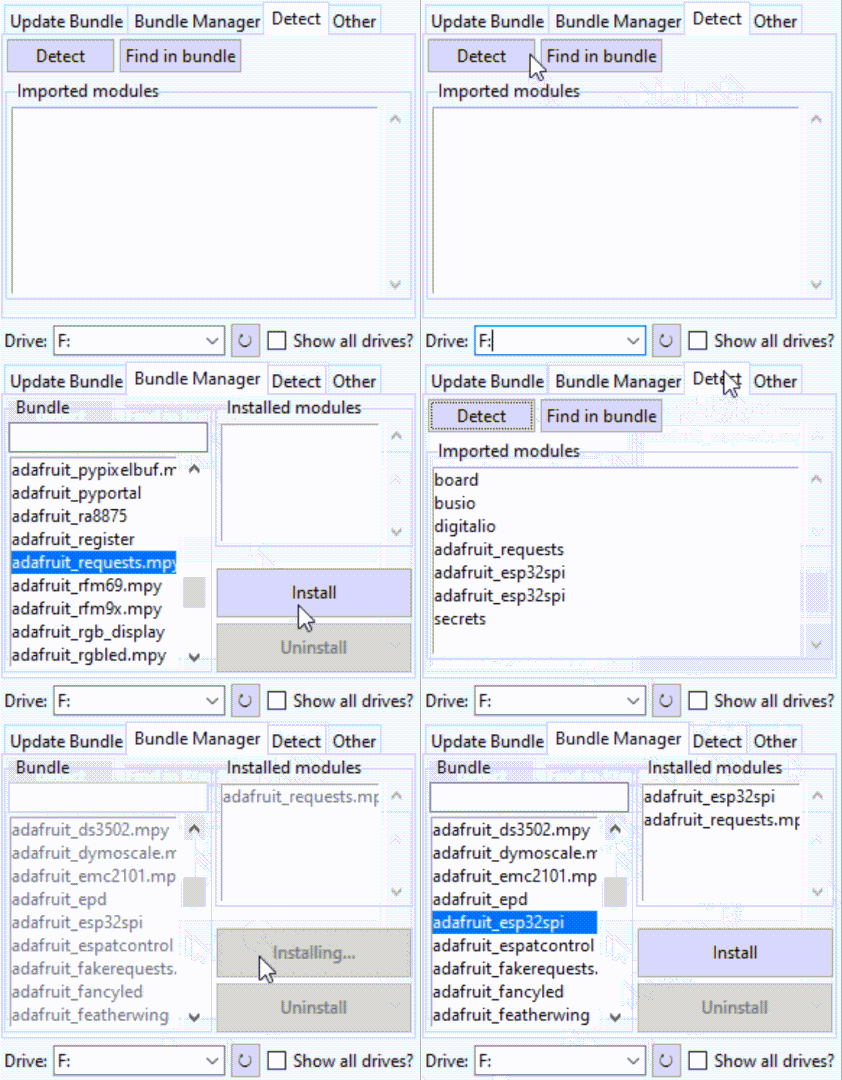
Hey I just released v1.1 of the CircuitPython Bundle Manager which can detect dependencies, which can save those precious mouse clicks!
Demo: (It's a bit big so it might take a sec to load)
https://user-images.githubusercontent.com/38868705/110877681-c4553580-82a7-11eb-927f-39b4502db98e.gif
Release:
https://github.com/UnsignedArduino/CircuitPython-Bundle-Manager/releases/tag/v1.1.0

GitHub
Changes:
Added new Detect tab to automatically detect dependencies, saving a couple clicks!
Demo:
solar yew
drifting crater
Hey I just released v1.1 of the CircuitPython Bundle Manager which can detect de...
Fantastic! Awesome job, Ckyiu!
vivid tulip
drifting crater
Hey I just released v1.1 of the CircuitPython Bundle Manager which can detect de...
Pretty cool !
 dull ice


Thread:
When you start out writing a little code, then two evenings later, you've written a full #CircuitPython library for the @pimoroni Keybow 2040, 2,750 words of documentation, and 8 example programs, including a 3-layer HID keyboard with media controls. 😂
Twitter
·
night bronze
 night bronze
dull ice
https://twitter.com/sandyjmacdonald/status/1370459658608074758
night bronze
dull ice
https://twitter.com/sandyjmacdonald/status/1370459658608074758
Great job @dull ice! That's so incredible!!!
gusty shard
Please don't step on the mome raths: https://gist.github.com/rsbohn/d432d9b6b54faa07c21ef93aa49230dd
 wet wren


Made a motion activated sound alarm. Wired a trinket m0 to a personal keychain alarm from amazon
Light switch as the big on/off on the top
 quartz latch
nice form factor with the light switch, neat!
 surreal wagon
Just finished my 8x8 matrix word clock thanks to Adafruit tutorial

no laser cutting or complex stuff, just printing the word mask on glossy photo paper to fit the matrix led spacing, and sandwiching it under a square of perspex.
 steel zinc
I'm working on a in home dashboard with Grafana. This is the first room. Using Adafruits CCS811 and SHT31 sensor.
 night bronze
That's looking incredible @steel zinc. Feels like you're building the nerve center of the house!
steel zinc
Thanks!, just need to figure out why some of my temp sensors have a offset of 1-2 degrees celcius
 meager beacon
I made a simple ducky script interpreter with circuitpython if someone finds it useful https://github.com/ShayBox/CircuitPython-DuckyScript
dull ice

Da da da da! A 4-track, 8-step MIDI sequencer on the forthcoming @pimoroni Keybow 2040, powered by the @Raspberry_Pi RP2040, running on my #CircuitPython library.
It's sending MIDI notes on four channels to Ableton, with some chopped Casio VL-1 samples on each channel.
Twitter
·
solar yew
meager beacon
I made a simple ducky script interpreter with circuitpython if someone finds it ...
So, a USB Rubber Ducky, sans USB Rubber Ducky? I love it! Well done, @meager beacon 👍
solar yew
dull ice
https://twitter.com/sandyjmacdonald/status/1371179585153425412
Anything that is "sending MIDI notes on four channels to Ableton" grabs my attention, as my growing Ableton-related debt would prove. Awesome job, @dull ice!
solar yew
steel zinc
I'm working on a in home dashboard with Grafana. This is the first room. Using A...
Looking better than my Home Assistant! Great work!!
steel zinc
solar yew
Looking better than my Home Assistant! Great work!!
Since I only want metrics I decided not to go with Home Assistant. Using MQTT, telegraf and grafana. I can make it as I please. 🙂
 indigo charm
Twinkle Twinkle Little Star on a QT Py. Working on class project ideas for some kids. https://twitter.com/Estranged/status/1371610263477121028


Twinkle Twinkle Little Star on an @adafruit QT Py. Working on class project ideas for some kids. #STEM #education https://t.co/zdUXJd22gI
Twitter
·
west zinc
This specially signed board arrived alongside a QTPy. Less than five minutes later I was measuring the strength of magnets.
 night bronze
It didn't get thrown off by your magnetic personality? 😄
I'm here all week, try the fish!
 lyric sun
Still working on the github page but I made a touchscreen with a pimoroni tiny2040 https://github.com/ArielWolle/PI-Pico-Touchscreen/blob/master/README.md

GitHub
Contribute to ArielWolle/PI-Pico-Touchscreen development by creating an account on GitHub.
thanks for all the amazing help @glad roost
 reef flax
Just finished first pass of the uograde of my 20th centry bushbike into a 21st centry e bike. I've had the bike for 25 years and it has been used and abused. After damaging the rear wheel it was time fora full rebuild. I've had to replace all the bearings on the bike along with the cables. Full strip down and clean. New cogs and chain. Now ready for another 25 years! Hoep you like the 3D printed brackets I created for a clean install. :0) https://www.thingiverse.com/thing:4796608

Here are all the bits for attaching one of them eBay ebike conversion kits. A lot cleaner than using their supplied bag and a stronger hold.
https://www.tinkercad.com/things/lD5EPo9rijc

Built in Tinkercad https://www.tinkercad.com/things/lD5EPo9rijc

Tinkercad
3D design E Bike Controller and Battery Box Mount created by richard.e.c with Tinkercad
scenic siren
lyric sun
Still working on the github page but I made a touchscreen with a pimoroni tiny20...
Nice! If we haven't already featured it, I'm going to include it in next week's Python on Hardware newsletter.
lyric sun
wow thanks
lyric sun
scenic siren
Nice! If we haven't already featured it, I'm going to include it in next week's ...
I will upload a nicer image/video to the github if you want
scenic siren
lyric sun
I will upload a nicer image/video to the github if you want
If you'd like to, you're entirely welcome to! I'll definitely be including an image.
solar yew
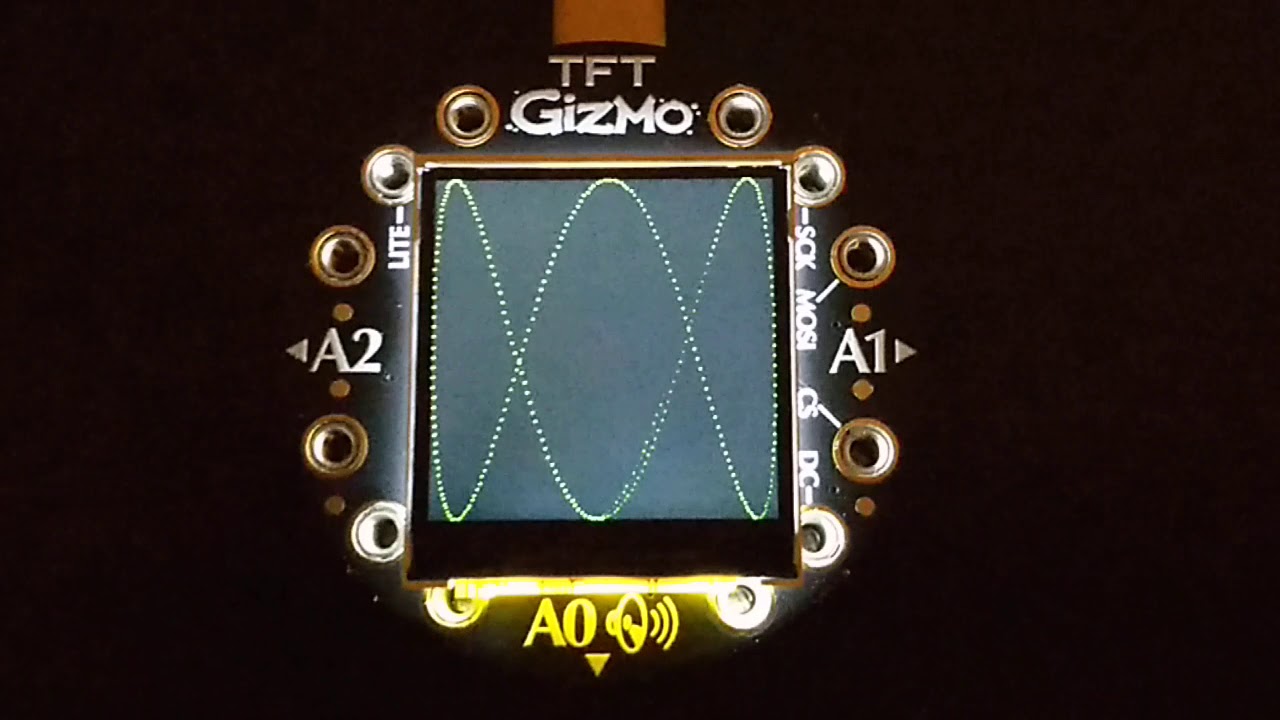
As a kid I was fascinated by those lissajous-animations shown in movies when they wanted something to look futuristic. I didn't know, however, how to program such things in Turbo Pascal and there was no Wikipedia to look up formulas etc. And there was no Circuit Playground... But....things have changend 🙂 This is the TFT-Gizmo-edition of lissajous-curves: https://www.youtube.com/watch?v=VJgXl2IkNtI I would very much like to provide a tutorial whith code and instructions to the Circuit Playground-crowd. How would that be possible? (please excuse, I am no native speaker as you may have noticed...)
 reef flax
I've had a scratch that I have needed to itch for sometime. This morning I have finished. If it's of any use to anyone, well. Up to you. 🙂 As a coding exercise I've written a json parser in a single header file. The file is just under 700 lines, with lots of comments. It passes all the tests that the industry standard library rapidjson does. Mine only reads files. rapidjson does so much more. And so despite sharing my little toy I would say use rapijson instead if you need a json parser for work. But if you want a single file solution or want to see how json parsing can be done, please, have a look. Thanks. 🙂 https://github.com/HamAndEggs/TinyJson

GitHub
Single header file to read a JSON file into a structure of c++ containers for easy access. - HamAndEggs/TinyJson
To read a value you can do something like this... root["Level1"]["Level2"]["Level3Number"].GetInt()
west zinc
Swirly palette animations with displayio.OnDiskBitmap


 scenic siren
@lyric sun Cheers! Added both.
dull ice

Can anyone guess how I’m changing the colour of the @pimoroni Keybow 2040 through the browser over USB? 🤪 https://t.co/LhVHBiLaOa
Twitter
·
gusty shard
Crazy idea No. 210321: Handheld punchcard emulator. Go way oldschool and write your program on a virtual deck of punchcards. Submit your deck to a processing unit via wifi.
 left inlet
Hi. I now have 4 games running on my Arcade Retro Clock. 64x32 LED matrix. https://www.youtube.com/watch?v=Z9uW0MQYcrE&t=19s
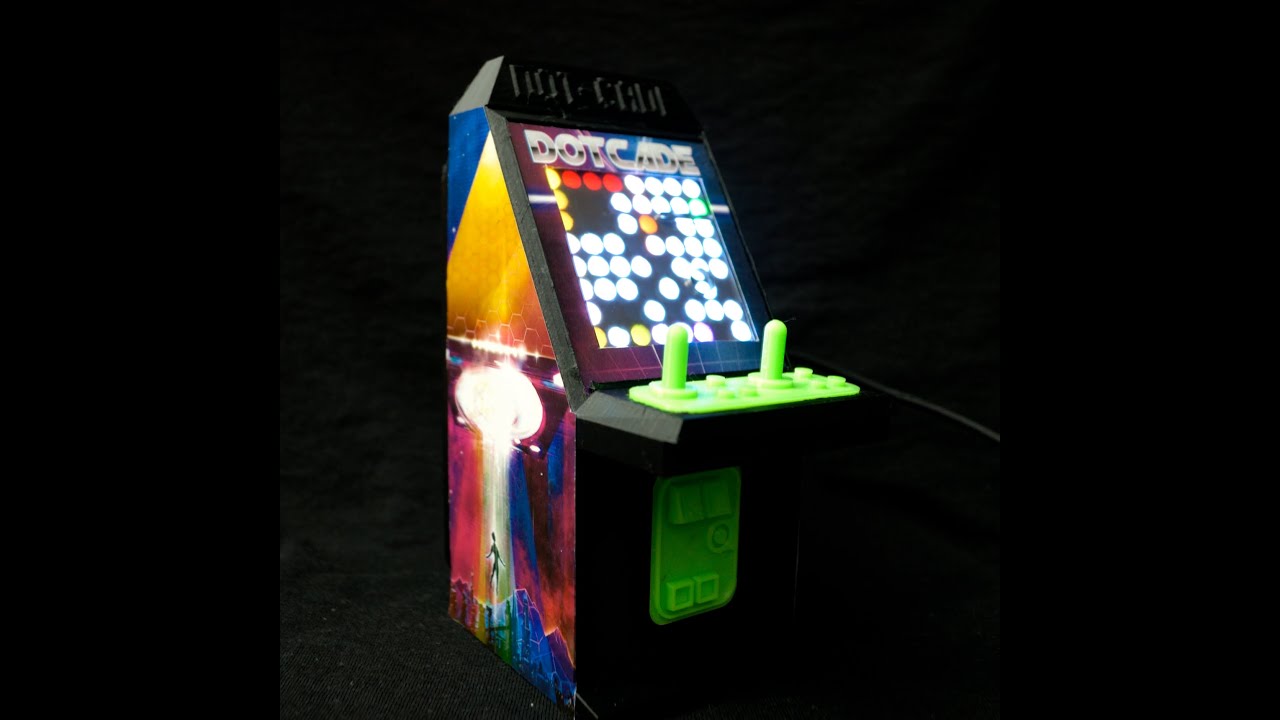
The photo is from an old 8x8 matrix that runs the same software.
 queen veldt
Just finished designing and 3D printing the housing for one of the rugged buttons. It’s part of a bigger project I’ll share with you guys


 dawn acorn
Been playing with sound from a Raspberry Pi Pico. Thanks to several people on here, managed to get it working! https://www.recantha.co.uk/blog/?p=20950

As you probably know by now, I’m not a microcontroller expert. However, with the advent of microcontrollers that use MicroPython and CircuitPython, I am a lot more comfortable using them now than I used to be! However, because the Raspberry…Read more →
Also used an AMG8833 thermal cam sensor and an Adafruit 2.8" screen to do a mini project part of a larger project. https://www.recantha.co.uk/blog/?p=20959

As part of an ongoing Raspberry Pi Pico-based project, I wanted to create a thermal camera. To do this, I first of all went shopping to find what I needed. Here are the two components for this mini project: Adafruit…Read more →
ancient skiff
random python project: who hasn't written a password generator? Here's one I coded up for fun. https://gist.github.com/e21576b9caa1689a0ab2f9b0b79a1016 ```$ python3 password-generator.py --count 3
Approximate password entropy (bits): 39.2
FemaleFatherPowder801
CutMountainPoint808
LittleKeyAcross489
$ python3 password-generator.py --words 8 --digits 2
Approximate password entropy (bits): 84.5
NeedleNearWinterButBandMedicalLeafWheel37
*raises hand* I haven't, but yours is pretty neat, and quite compact (not counting the dictionary part).
ancient skiff
I was inspired both by xkcd https://xkcd.com/936/ and by the style of password on some netgear wireless equipment ("WordWordWord123")

To anyone who understands information theory and security and is in an infuriating argument with someone who does not (possibly involving mixed case), I sincerely apologize.
 willow rain
ancient skiff
random python project: who hasn't written a password generator? Here's one I co...
willow rain
ancient skiff
random python project: who hasn't written a password generator? Here's one I co...
a small "improvement": on linux, you can just read the /usr/share/dict/words file (there is also http://www.math.sjsu.edu/~foster/dictionary.txt)
night bronze
I'm partial to having word separators, probably because that's how my brain works. But that's a minor addition
willow rain
it does look super simple to implement
ancient skiff
OK you've made me complicate it. I hope you're happy. https://gist.github.com/jepler/98c8cc946ca9e6503e67a478d4a2344d
$ python3 password-generator.py --dictionary /usr/share/dict/american-english-insane  --separator='/'
# 428319 words, 18.7 bits/word entropy
# Approximate password entropy (bits): 66.1
Semimetallic/Broadmouth/Triphibious/044
$ python3 password-generator.py --dictionary /usr/share/dict/american-english-small  --separator='::'
# 40067 words, 15.3 bits/word entropy
# Approximate password entropy (bits): 55.8
Upholstery::Pokers::Deficits::388
$ python3 password-generator.py --dictionary /usr/share/dict/french  --separator='+'
# 200353 words, 17.6 bits/word entropy
# Approximate password entropy (bits): 62.8
Insolubilisassions+Cycliste+Paraferiez+434
😀
willow rain
it still looks quite simple for a password generator
i can read it and i barely know python
ancient skiff
I particularly like this "click" library for making commandline utilities!
willow rain
it does seem to simplify a lot of stuff
if you goof, does it autogenerate some help?
 solar wadi
willow rain
solar wadi
willow rain
that's pretty awesome
ancient skiff
I've seen use of one called "Typer" which also adds the ability to add "completions" to your favorite shells .. https://typer.tiangolo.com/ ```$ cascadetoml --help
Usage: cascadetoml [OPTIONS] COMMAND [ARGS]...
Options:
--install-completion [bash|zsh|fish|powershell|pwsh]
Install completion for the specified shell.
Typer, build great CLIs. Easy to code. Based on Python type hints.
OK it bugged me that non-ASCII letters couldn't be used. https://gist.github.com/e5ee9a891b9e138d21f64b9dcff2a633 ```$ python3 password-generator.py --dictionary /usr/share/dict/ukrainian --separator='+'
1444577 words, 20.5 bits/word entropy
Approximate password entropy (bits): 71.4
Обкачувався+Чернівчанкою+Розрядитесь+745
 The SCOWL is a collection of word lists organized by word popularity,
 language, word class, and other factors.  These lists can be
 combined in various ways (or used individually) for spell checking
 and similar purposes.
``` also just saw this in Debian, interesting!Added a little silliness to the MagTag Stock Tracker. NeoPixels turn red if stock is down, green if it's up. Also added a Market Open / Close indicator to the bottom left corner!
 willow rain
that's actually pretty cool
solar yew
Unfortunately I haven't seen the green NeoPixels today... 😆
solar yew
TODO: Wait for the market to turn, so I can test my NeoPixels
night bronze
With my luck, I could save a few dollars (or pennies) and skip the green LEDs. 😄
Alternate for a PyPortal or other such display - Stock down == money flying out the window. Stock up = dump truck full of dollar/current being brought in by a dump truck!
solar yew
There's a PyPortal here waiting for some new code... you might be onto something, @night bronze 😄
night bronze
I have decent ideas at times - just not about investing! lol
solar yew
Investing is just an excuse to tinker with some displays 🙂
languid nebula
Maybe invest in some displays for the people here in the chat. Pyportal should be fine with me
 vast drum
i've been doing little electronics projects for awhile and usually they end up in a drawer or shelf forgotten about... this year I decided I would make it a goal to make projects that I could give & sell to other people. So my show'n'tell for today is my new moniker (@electronvillage on the tweets) and new freshly-approved first Tindie product 🥳 I don't expect big sales numbers or anything, but would be fun to share things I make with folks around the world 🙂 https://www.tindie.com/products/electronvillage/ohm-parade-programmable-resistor

Tindie
Cutest little 10Ω - 2.56KΩ breadboard-friendly adjustable resistance.
solar yew
That's pretty neat, @vast drum!
vast drum
solar yew
That's pretty neat, <@!151485455622340608>!
😊 thanks! sweet and simple idea.
solar yew
Got meself one! This will definitely come in handy 🙂
vast drum
FREE with your purchase: my eternal gratitude for being my first customer 🙏 thanks!
lyric sun
vast drum
i've been doing little electronics projects for awhile and usually they end up i...
usually use this but yours looks way more satisfying https://www.sparkfun.com/products/10613

Potentiometers are incredibly useful, whether you're controlling the volume on your stereo or the 'mood lighting' in your room. The problem with traditiona
marble mantle
I've seen decade resistor boxes, but i like the idea of using binary to represent different vqlues
lyric sun
i love anything with those switches 🙂
vast drum
i know i love DIP switches too 🙂 i wish i could find ones that were more satisfyingly clicky/good contacts but still cheap
solar yew
vast drum
FREE with your purchase: my eternal gratitude for being my first customer 🙏 th...
Oh, man! I'm honored 🙂
Ohm-pa-pah
Give me an Ohm where the buffalo roam..
vast drum
someday i'll do one with capacitors and call it Farad Parade 🙂
ancient skiff
it rolls off the tongue
devout verge
Added a logging function to my carbon dioxide sensor and ran it all day at school. It went up a bit during my Latin class, I wonder if that room has bad ventilation

 craggy wolf
No. Latin is just stuffy.
exotic sierra
Printed this and used a slice of neopixel strip I had laying around
 west zinc
LEDs are cool and all but paper sack spiders are something else entirely.
Nice work on both!
exotic sierra
My son is the mastermind behind the paper octopus puppet 🙂
Also admire the pile of dog toys lol
night bronze
Very nice! But looks like you're running out of real estate, with all those decorative elements. I can help you out by taking that Switch off your hands, and all you need to do is cover postage! 😉
exotic sierra
You’ll have to convince my wife to give it up 🙂
night bronze
exotic sierra
You’ll have to convince my wife to give it up 🙂
It reduces clutter, and cables all over the house?
 lofty ruin
not sure if this is the channel to share 🙂 made this little tool because I'm starting with the Pico and got curious about UF2 files. maybe it is helpful to someone else https://github.com/hexpwn/readuf2

GitHub
A simple tool to get a quick understanding of what a UF2 file is carrying. - hexpwn/readuf2
still WIP
languid nebula
lofty ruin
not sure if this is the channel to share 🙂 made this little tool because I'm st...
Interesting!,, no CRT, eh?
night bronze
That's a cool tool @lofty ruin. And clearly living up to your moniker! 🙂
But, I like the CRT look! Can you fax me one? Please?
 night bronze
gusty shard
Maybe the Feather S2 is overkill.
night bronze
gusty shard
Maybe the Feather S2 is overkill.
Overkill is like over-engineering - a myth! 😄
devout verge
Wifi controlled flashlight? Why not?
ancient skiff
@gusty shard I just needed that -- had to swap out some light switches in the dim light of evening.
💡
gusty shard
Doing some battery testing and it just froze. The neopixels are still on but the code that makes it 'twinkle' stopped running.
Vbatt is down to 2.68.
ancient skiff
That may be the "brown out detector"
tries to stop the cpu from running if the power supply is low or unstable, but won't shut off the LEDs
gusty shard
I think it ran about four hours on the 400mAh battery. It ran a few more cycles just now, then stopped again.
ancient skiff
https://docs.espressif.com/projects/esp-idf/en/latest/esp32s2/api-reference/kconfig.html#config-esp32s2-brownout-det It can be set from 2.44 to 3.30v apparently, but you have to go pretty low-level to set it to different than whatever your environment (arduino, circuitpython, etc) wants to give you
gusty shard
I'm not running the neopixels hot, (24,8,0) but the red is random 0..24. Guess I should recharge the battery now.
ancient skiff
100mA doesn't sound unreasonable for running 32 pixels and the Feather S2's processor too
if a maxxed out pixel is 60mA, but you're running 32 of them with on average at (12+8)/256 = 8% of full brightness that's 60mA×32×8% or around 150mA
 hexed pelican

This is the prototype for the mobile church camera, shown here without the plexiglass walls (I still have to cut them). The electronics are fully working, which includes a quality drone-camera (Run Cam Eagle 2 Pro) and a 1000 mwatt transmitter using 5.8 GHz and a lolipop antenna for very long range.
An Adafruit Feather M0 WiFi microcontroller ...
I love Adafruit. 🙂
snow mango
My first circuit! Might not be much but it’s something :) My diode has a built in resistor, but since I don’t have any male to male lying around i used a 220R resistor. Thanks to camDP and nis for helping me out!

 cold tangle
Hey if you can turn an LED on and off, you can basically do anything 😄
snow mango
Yeah, I am going to start programming a socket now (which I am more of an expert in) and use my 7 inch rpi screen to turn it on n off :)
solar yew
;)
left inlet
"outbreak" is a game inspired by The Game of Life.


GitHub
Arcade Retro Clock converted to run on RGB Matrix (64x32) - datagod/ArcadeRetroClockRGB
I am converting my Arcade Retro Clock from 16x16 Ubercorn (Pimoroni) to Adafruit 63x32. I am so happy I made the switch. The performance is incredible, and the extra large playfield really lets the games shine.
The red portion of the screen is cheese, and the viruses are eating and replicating. You can see the clock, the date, even a current crypto balance (ETH).

 solar marlin
I got some Pixelblaze V3 controllers, playing with them now: https://www.youtube.com/watch?v=0DsEKLWe8Uo

I just got some Pixelblaze V3 hardware today, figured I'd try out the Pixelblaze V3 Pico really quick.
devout verge
Made a light-up egg carton using through-hole Neopixels, some plastic eggs, and a Circuit Playground (programmed in CircuitPython). They are changing color if you look closely.

 sudden panther
3d printed Tic Tac solder spool holder to fit with the portability of the tiny TS80P soldering iron. From https://www.thingiverse.com/thing:3354779

This is for the American 29g size Tic Tac box, big big thanks to the user Rccajack https://www.thingiverse.com/Rccajack/about for providing the internal dimensions and printing a couple of test prints to make sure this version fits properly.
The photo of the finished print in the Orange Tic Tac box is Rccajack's print of this verison as we only ...

Note: not my design, just too handy not to share. 😁
 ember pendant
Printed this off.

 dire meadow
@exotic sierra how thick is your diffuser?
exotic sierra
I think it’s like.. 2mm thick?
lean elbow
Repurposed a couple of QT Pys that I accidentally toasted into fridge magnets, inspired by the way JP soldered a rotary control directly onto the QT Py for the chromakey device (and also inspired by the rotary NeoTrinkey)
 solar yew
@vast drum look who's here!!
 vast drum
🎉 🥳 🎉 hooray! thanks again!
make sure to install the DIP switches "upside down" @solar yew - mentioned this on the instructions but i should really highlight it yellow or something heh
solar yew
Heh! Will do!!
solar yew
The photo on Tindie shows it upside down.
I'd be all like "Do I install it upside down?" since the photo shows it that way. ;)
devout verge
Made an egg tree for my neopixel eggs
 night bronze
devout verge
Made an egg tree for my neopixel eggs
night bronze
devout verge
Made an egg tree for my neopixel eggs
Looks a lot better and much less messy than the Easter trees we made when I was a kid!
reef flax
Finished my mini desk for my monitors and stuff. For a few hours printing, scrap wood and a bit of paint I am very pleased with the results. Could be the best thing I have made to date. 😄 https://www.tinkercad.com/things/30sby7MUSt2

Tinkercad
3D design desk shelf stands created by richard.e.c with Tinkercad

FYI The two small monitors are connected to a PI zero and Pi 3 for development and info displays. The little black box under the left monitor is my pc. An Asus P50 4800u (8 core 16 thread) 64GB 2TB dev station. 🙂 Very nice bit of kit.
night bronze
reef flax
FYI The two small monitors are connected to a PI zero and Pi 3 for development a...
That's a really nice setup! The dev station as well as the two smaller displays for your Pi devices. Very clever!
lean elbow
No idea what I'm going to do with this little button box yet but I sure do love making things with pretty lights
dawn acorn
What's the microcontroller for that one, @lean elbow ?
lean elbow
@dawn acorn It's a QT Py 😄
dawn acorn
Ah! 🙂 So small I couldn't see it 🙂
lean elbow
Indeed! It's hiding behind those chunky jumper headers lol
reef flax
@night bronze Thanks mate. I'm really pleased with how well the wood came out with a monkey like me slapping on some random wood paint. A pro would have been crying in their tea. Now I'm thinking neo pixel under lighting. 😄 OMG it's becoming an obsession. 🤣
solar yew
lean elbow
No idea what I'm going to do with this little button box yet but I sure do love ...
All button boxes have a special place in my heart! Looks fantastic!!
lean elbow
Thanks @solar yew 🙂
 rose phoenix
CircuitPython keyboards and macropads oh my!

Wait there's more I forgot. Top one uses an itsybitsy nrf52840 with an oled, rotary encoder, and a gesture sensor as rudimentary nav control. Others are variations on that theme
Two green ones use a Pico as does the black and white keyboard with the oled in the middle.
night bronze
There's so this one from a community member, coming soon!
https://www.kickstarter.com/projects/painlessprototyping/byo-build-your-own-mechanical-keyboard?ref=user_menu
rose phoenix
night bronze
There's so this one from a community member, coming soon!
https://www.kickstarte...
Nice
scenic siren
rose phoenix
CircuitPython keyboards and macropads oh my!
I don't suppose you've posted this to Twitter or some other media platform?
rose phoenix
Wait there's a few more I forgot

Bottom two use QT Py and the Pro Micro RP2040. Bottom left uses MCP23017 as IO expansion so you can have full 16 keys plus rotary plus i2c for gesture sensor
scenic siren
I'd love to include this in our Python for Microcontrollers weekly newsletter, but I need somewhere to link to like Twitter or a blog or whatnot.
rose phoenix
And stemma qt / qwiic ports!
rose phoenix
scenic siren
I'd love to include this in our Python for Microcontrollers weekly newsletter, b...
Neat. I haven't posted these on Twitter or whatnot but I'm on Reddit as Southpawengineer
scenic siren
rose phoenix
Neat. I haven't posted these on Twitter or whatnot but I'm on Reddit as Southpaw...
Reddit works!
rose phoenix
I could post this on the circuitpython subreddit I suppose.
scenic siren
That would be brilliant!
I sent myself a link to remind me to check on Friday when I'm in newsletter land.
rose phoenix
scenic siren
That would be brilliant!
Well that's cool! I love experimenting making these HID devices with CircuitPython because you can iterate and play with stuff so quickly. Some of the other mechanical keyboard stuff we love requires a dev setup and compiling and all that jazz. CP is great because you can edit a text file and boom, new keymap in a snap.
scenic siren
rose phoenix
Well that's cool! I love experimenting making these HID devices with CircuitPyth...
That was our goal 🙂
rose phoenix

reddit
0 votes and 1 comment so far on Reddit
There! I made a mini write-up on them
scenic siren
Excellent!
Emailing it to cpnews@adafruit.com - which you can also do in the future if you ever want another CircuitPython/Python on hardware item featured in the newsletter!
dire meadow
Today I had my first ever livestream on YouTube! It was about building a 3D printer. The printer isn’t ready yet, but it means that there will be at least two streams more.
 lapis jasper
awesome @rose phoenix! I was hoping to see you make the designs available. I'm interested in modular macro pad things
rose phoenix
lapis jasper
awesome <@!534083698765594624>! I was hoping to see you make the designs availab...
Thanks! Always enjoy your streams.
You mean the green Pico pads? I was thinking of doing another rev to make the modular bit keyed. I don't mind it the way it is but if I released it along with a few modules would probably want to change that
lapis jasper
rose phoenix
Thanks! Always enjoy your streams.
You mean the green Pico pads? I was thinking ...
I don't remember which design it was. I've been brainstorming how to connect multiple input devices together via i2c. (I want my keyboard and trackball to coordinate.)
rose phoenix
lapis jasper
I don't remember which design it was. I've been brainstorming how to connect mul...
I don't know if Adafruit has something like this yet, but I've seen a few cases from our friends in Colorado where an ATTiny84 is used as an intermediary with a joystick. Pimoroni does something similar with a blackberry style trackball and some strange Nuvoton 8051 micro.
lapis jasper
Ya, I have the arcade button from sparkfun
rose phoenix
I have thought about ways to integrate pointing devices in an easy to use and compact way, but there aren't a lot of simple ways to do it.
lapis jasper
I was actually thinking about inverting the i2c way of working
where most devices can control the bus to write to a single device that aggregates all of their state
that way you only talk on the bus when things change
rose phoenix
lapis jasper
where most devices can control the bus to write to a single device that aggregat...
I like it. State coordinator
lapis jasper
it also means you don't really need worry about address allocation
rose phoenix
lapis jasper
it also means you don't *really* need worry about address allocation
That's nice. I don't run into it too often but when you do it's a pain
lapis jasper
ya, I may be optimizing for the wrong thing
rose phoenix
Also made this gamepad/one handed keyboard thing. Not CircuitPython yet but the controller is socketed so it might be fun to try when I get my own boards with RP2040's in. I wish a pleb like me could get them in hand

Last time I talked to Limor before the RP2040 Feather was released she said she had like 8 of the chips 😄 patiently waiting for the Itsybitsy RP2040
 sleek pebble
just finished with my first perfboard thingy
 lapis jasper
I know the qtpy and itsys got a bit hung up getting smaller flash chips
I think we had a bunch of rp2040s
didn't sparkfun have pro micro rp2040s in stock?
sleek pebble
I got 2 from the adafruit store when I saw they were actually in stock and that was like last week
might have to wait a bit more to get a new batch
rose phoenix
I got a handful of pro micro rp2040s - I did the PR to put them into circuitpython lol. It seems to work swimmingly thus far
Funny thing is the Pro Micro pinout became somewhat of a de facto standard in diy keyboards largely due to the cheap clones
vast drum
Got the raspberry pi timelapse camera I built last year running again in time to catch my neighbors' irises blooming 🙂 https://twitter.com/ElectronVillage/status/1377322106120151042


Iris season has officially begun!🌹🌹🌹
#timelapse #ShotOnRaspberryPi @Raspberry_Pi https://t.co/PdkNF38inf
Twitter
·
 wide musk
Hello all! I'm new here on Discord but not new to Adafruit. Just curious how to get on Show and Tell. I built a TOS Tricorder with a PyPortal and Clue. Thanks!
vast drum
👋 welcome @wide musk - if you go to the #live-broadcast-chat channel a few minutes before Show and Tell starts today, they will post a youtube link and a StreamYard link - click the Streamyard link to be a SnT guest 🙂 You gotta be a fast clicker because lots of people usually jump in when the link is posted. But if it says "room full" keep refreshing throughout the show because more spots open up after people present
wide musk
Thanks Dan! I forgot it was this evening... I will hold off until next week, when I get some details completed. Very cool!
 solar yew
gusty shard
solar yew
gusty shard
I've had good results using Chemcast Black LED Acrylic with my MatrixPortal projects!
 idle jacinth
Pretty new to this stuff, but I've been tinkering with my Experimenter's Guide to Metro.
sleek pebble
very nice!
languid nebula
@west zinc Thanks for the useful code!
 west zinc
Cool LED demo with the slider! Awesome Widget.
languid nebula
I just reuse 95% of your code 🙂
west zinc
Glad that you can build even cooler things on top of the Widget and Control libraries. Awesome that it’s useful and can’t wait to see what other awesome gizmos you and everyone will come up with!
 tepid adder
It's amazing what ~140 lines of CircuitPython and ~300 lines of Javascript can do... Getting ready for summer, trying to implement remote steering for a boat via BLE 😆
devout verge
I could never figure out how to do WebBLE, can you post your code somewhere?
tepid adder
This is not pretty, as it's a vvvvvery fast hack, but here it goes: https://paste.ubuntu.com/p/FmdY3CVKNC/
so essentially it just connects to the device, tries to get Nordic UART service and then it's just writing to the RX characteristic
once I get the whole system cleaned up a bit, it'll be coming to github
scenic siren
@tepid adder If end up posting about this anywhere like Twitter, Reddit or a personal blog etc., please email a link to cpnews@adafruit.com and I'll feature it in the Python for Microcontrollers newsletter we do each week. We love to have projects like this! (But I need something to link to. 🙂 )
tepid adder
@scenic siren will do, especially if and when I get this setup in the boat 😄
scenic siren
Excellent.
dawn acorn
I've today soldered up this fabulous Pico carrier board from a friend of mine.

I say today... I mean yesterday... Gosh waking up at 4.30am sucks.
vast drum
Looks great! I love round PCBs 🙂
drifting crater
I'm addicted to writing desktop software and GUIs now 👀
https://github.com/UnsignedArduino/CircuitPython-Project-Manager
Sadly no binaries yet and still very much in BETA so please don't use it for your most precious projects just yet! It's also compatible with my CircuitPython Bundle Manager! More details can be found in the project's README
Sadly I don't have a recording because whatever I do it won't fit under the 8mb limit without looking like trash. But if you scroll down in the README then there are many pictures of them.
GitHub
A Python program that makes it easy to use a VCS with CircuitPython and eliminate the risk of losing code to a corrupt filesystem! - UnsignedArduino/CircuitPython-Project-Manager
drifting crater
dawn acorn
Reminds me of a Circuit Playground 😂 but overpowered
 broken rain
I made this: https://www.thingiverse.com/thing:4813812

This is a fan case for the sourcekit compute module 4 carrier board.
https://sourcekit.cc/
The fan used is the Noctua 40mm 5V fan:
https://noctua.at/en/products/fan/nf-a4x10-5v
The fan mount is a remix of the following with holes added for M2 screws to hold the fan in place:
https://www.thingiverse.com/thing:4694134
To connect the fan, the origi...
 subtle turret
Prototype of a cosplay prop (Pandoria's core crystal)


...yes, I broke the gray piece, shush. I'm still tweaking hte model so I haven't molded and cast it in resin yet
also I had to move the board all the way out to get even light dispersion, which interferes with my battery placement plans, so I need to tinker with LEDs with different viewing angles
gusty shard
hey that's cool
subtle turret
I have to glue it to my skin, so I have some clever (?) plans involving silicone and magnets. It also has some glowy flat pieces that stick out to the sides, so I may pot some more LEDs into the silicone pad
the other half of this cosplay involves extremely inadvisable uses of very high power LEDs... working on this little dude is cute and relaxing by comparison
I know I'm not going to accidentally give myself third-degree burns, for example...

I didn't heatsink them, and they melted their own solder

whoops
exotic sierra
Not my hand doing this artwork but it’s one my eldest brother did. He’s serving time in prison and has been working the last two years or so to develop skills for the outside world.
 night bronze
That's a remarkably beautiful piece! Your brother is quite talented
dawn acorn
Nice pic. What's the media/material?
dawn acorn
I've been working all of March and this week on the new iteration of my Picorder project, this time using a Raspberry Pi Pico and CircuitPython: https://www.youtube.com/watch?v=NGL9rmXOsYM

Here is my first fully-fledged Picorder using a Raspberry Pi Pico as the brains. I'm using CircuitPython, which doesn't have interrupt functionality, so the controls are a little sluggish. Lots of Adafruit components, a piece of stripboard and a load of jumper cables!
Current work-in-progress code is here: https://github.com/recantha/picopicorder/
lean elbow
@dawn acorn this is awesome! I'm a sucker for the LCARS interface 😁
dawn acorn
:-D
exotic sierra
dawn acorn
Nice pic. What's the media/material?
Watercolor on cold press paper
hexed pelican
My church camera project is complete at a hardware level, code is 80% there (but enough to test it). Features Adafruit products as much as possible. 🙂 https://www.youtube.com/watch?v=f6ABa6cxs0I

This is the completed alpha-version of the camera control system I built for our church, NorthWestminster Presbyterian Church of Lansing Michigan. The concept is to provide our pastor, Timothy Chon, with more than camera options than just his laptop camera can provide for streaming via Zoom. With this system Timothy or someone with access via th...
subtle turret
is this the right place to be hyped about a super clever electronics idea I came up with last week that I'm gonna be trying out today? because I am Hype
(you can show and tell ideas... right...??)
reef flax
@subtle turret I'm about too, just as soon as I taken a picture of some old printers. 🙂
My first 3D printer, a K8200 (in the UK) from a long time ago and one I designed, printed myself, again many years ago. And as you can see from the sticker was shown on show and tell a long time go. 🙂 Both worked, the K8200 has a very large foot print for a small print volume. The other worked but constantly needed re-calibration. It was an experiment to see how much of a printer could be printed. I have ordered a 300mm x 300m bed and will combine both of these into something that should have a smaller foot print but larger print volume. And I am also considering throwing in an RPi Pico into the mix. I have a Pursa mk3 that is excellent but need a larger print volume for some big brackets I want to print. So this will be Aprils project. 🙂
 gusty shard
Packing foam as a diffuser.
 reef flax
Nice and simple
dawn acorn
I've got to first-prototype stage on my PicoPicorder project. Written up everything thus far: https://www.recantha.co.uk/blog/?page_id=20924 Plenty of Adafruit and Pimoroni products brought together in one Star Trek-influenced package. 🙂

If you’ve been reading this blog for a long time, you’ll know that my first Raspberry Pi project was a version of a Star Trek Tricorder. The first version was made out of LEGO and used a Pi in combination…Read more →
languid nebula
dawn acorn
I've got to first-prototype stage on my PicoPicorder project. Written up everyth...
Nice project, Two things: after reading your blog post, maybe you could tray instead of using label use bitmap_label in the same library, maybe you could have an improvement on the speed and memory, in the same path, if you do not need all the characters you could stip the okuda font to only have tyhe charactes you need or if you want an improvement on speed convert your font to pcf https://learn.adafruit.com/circuitpython-display_text-library/convert-to-pcf Also, regarding the touchscreen, take a look in recent development in here https://circuitpython.readthedocs.io/projects/displayio-layout/en/latest/api.html#icon-widget, it will take of the control part of the widget.
dawn acorn
Thanks @languid nebula 🙂
Will take a look at those things.
I think I might still need to rewrite in MicroPython, though, to get interrupts.
languid nebula
dawn acorn
Thanks <@!607375730610798634> 🙂
No problem 🙂
lapis jasper
dawn acorn
I think I might still need to rewrite in MicroPython, though, to get interrupts.
why do you need interrupts?
dawn acorn
@lapis jasper To pick up on button presses or touch screen presses that happen when something else is happening
dawn acorn
Didn't know about gamepad. Ta. :-)
lapis jasper
👍
 inner leaf
Per the rather recent ferment in quadrature rotary encoders in the Where's The Part series here is my current take on a rotary encoder breakout which offloads a lot of bit-banging, plus there is an optional closed-loop variable-speed cooling fan control which just measures the temp, or can drive a pwm output directly. The up/down count is maintained in the MSB of the SPI register, while the current temp is in the LSB. To reduce noise by 12dB the two low bits of the count MSB are unused, leaving a total resolution of 6 bits for the counters. There is also an active switch debounce section for the push-switch variant encoder. My intention for that is for an oscilloscope type fine adjust control switchable by pressing the knob. The article link is here:
The breakout schematic is here.

Timing waveforms are, respectively, Up count, Down Count, and register read:


The count waveforms are here unlabled but for identification they are, from top to bottom, (N/A, Quad_A, Quad_B, Out_Step, Out_Dir).
Here are some Gerbers for the breakout:
 azure salmon
i have a lame hobby.
most people try build a light sabre or cosplay item or try get a task or process automated.
i code first person shooters on micro's
candid crescent
Heh heh, awesome. What's the lowest-end one that you've gotten to run at a decent FPS?
azure salmon
the lowest was a pic 16c84 with a array of plexed led's
Then i did one on a ardiuno with a lcd and got 5 fps
then i did one on the teensy 3
and now i'm doing one on the esp32
and it has multiplayer and a amazing 1.5MB of textures arranged ala NES style
drifting crater
😄 so cool! I've always wanted to do something like that! (Can you post pics???)
gusty shard
# chargen.py
import board
import neopixel
from random import randrange
import time
import displayio
import framebufferio
import terminalio
from adafruit_display_text.label import Label
from adafruit_pixel_framebuf import PixelFramebuffer

FRAME_ROWS=4
FRAME_COLS=8
PIXELS=FRAME_ROWS*FRAME_COLS
# NeoPixel FeatherWing  https://www.adafruit.com/product/2945
# on FeatherS2          https://www.adafruit.com/product/4769
np = neopixel.NeoPixel(board.IO38, PIXELS, brightness=0.1)
frame=PixelFramebuffer(np, 8, 4, alternating=False)

V0 = 0x001111
V1 = 0xFF3300
def update_frame(bits, offset):
    global frame
    for row in range(FRAME_ROWS):
        here  = (offset + row) % len(bits)
        for col in range(FRAME_COLS):
            v = V0
            if not 0 == bits[here] & 2 ** col:
                v = V1
            frame.pixel(FRAME_COLS-col-1, row, v)

bitmap = [
    0x00, 0x18, 0x24, 0x42, 0x7E, 0x42, 0x42, 0x42, #A
    0x00, 0x7C, 0x42, 0x42, 0x7C, 0x42, 0x42, 0x7C, #B
    0x00, 0x3C, 0x42, 0x40, 0x40, 0x40, 0x42, 0x3C, #C
    0x00, 0x7C, 0x42, 0x42, 0x42, 0x42, 0x42, 0x7C, #D
    0x00, 0x7E, 0x40, 0x40, 0x7C, 0x40, 0x40, 0x7E, #E
    0x00, 0x7E, 0x40, 0x40, 0x7C, 0x40, 0x40, 0x40, #F
    0x00, 0x3C, 0x42, 0x40, 0x4E, 0x42, 0x42, 0x3C, #G
    0x00, 0x42, 0x42, 0x42, 0x7E, 0x42, 0x42, 0x42, #H
    ]

#bitmap = range(8)

while True:
    for offset in range(len(bitmap)):
        update_frame(bitmap, offset)
        frame.display()
        time.sleep(0.1)


 azure salmon
i'm actually busy with another one where i'm bit banging a shader model 1.4 gpu on a kendryte 210
but i have very little to show yet
azure salmon
But so far i have enjoyed scratching out everybit of cpu power and memory i can from the esp32
i'm just working on the new tile set so i can finish the gameplay
azure salmon
i found that you can capture the frame from the esp32
gona try get some screenshots
west zinc
Who needs AfterEffects for animations when you have CircuitPython?
scenic siren
@west zinc Love it. Email cpnews@adafruit.com if you post that to social media or a blog or some such so I can feature it in the newsletter next week. 🙂
languid nebula
west zinc
Who needs AfterEffects for animations when you have CircuitPython?
Kattni has a great idea, we were wondering how to do some advertising of the new features in the DisplayIO library for people to know, maybe we can include some graphics and present on widget every week. what do you think @scenic siren ?
west zinc
Widget of the Week. Can’t wait to hear the catchy jingle for it.
languid nebula
jejeje, ok, I could prepare the Animation 🙂 if Kattni accepts!!
 outer cliff
A very WIP sand table that I'm building using a SCARA arm and a Raspberry Pi. Once I create a board for the drivers/peripherals it'll go into a coffee table I'm building
night bronze
west zinc
Widget of the Week. Can’t wait to hear the catchy jingle for it.
I'm hearing a spin on "wiki wiki wild wild west", but with "weekly" and "widget"

 azure salmon
btw my code was bad.
uint16_t RGB888toRGB565(const char *rgb32_str_)
{
long rgb32=strtoul(rgb32_str_, 0, 16);
return (rgb32>>8&0xf800)|(rgb32>>5&0x07e0)|(rgb32>>3&0x001f);
}
//32 to 16 bit rgb converter
This works
azure salmon
 scenic siren
languid nebula
Kattni has a great idea, we were wondering how to do some advertising of the new...
scenic siren
languid nebula
Kattni has a great idea, we were wondering how to do some advertising of the new...
I don't know about having it as as separate section in the newsletter, but I would absolutely welcome it to be included in News from Around the Web. The graphics need to be 550 pixels wide, and I need something to link to, presumably the library would work. If you want to submit a PR to the newsletter each week with that, it would be greatly appreciated. Otherwise, if you email everything to cpnews@adafruit.com, I can add it when I'm working on it.
Part of it is that I don't want to force you to have to come up with something every week, and I don't know how long that's sustainable. So a separate section might not make sense. I can bring it up though.
languid nebula
scenic siren
I don't know about having it as as separate section in the newsletter, but I wou...
Agreed, No sustainable for sure, I will submit a PR for the newsletter, easier I host it in my Repo and include the code to it. if not we would need to create a PR to include it as an example (can be done in parallel) in the original library. And last thing, we would only include the ones that are already available to the public.
scenic siren
languid nebula
Agreed, No sustainable for sure, I will submit a PR for the newsletter, easier I...
That all sounds good. I would say let's include any examples in the Adafruit hosted library repo and link to that. That way you're not responsible for any of it long term.
languid nebula
scenic siren
That all sounds good. I would say let's include any examples in the Adafruit hos...
Will do, thanks.
azure salmon
my program to grab the palette and convert textures to the palette map.

Results

 west zinc
Who needs AfterEffects for animations when you have CircuitPython?
west zinc
west zinc
Who needs AfterEffects for animations when you have CircuitPython?
I’m calling this done. Here’s the link to the CircuitPython_DisplayIO_Animation library and the simple test example: https://github.com/kmatch98/CircuitPython_DisplayIO_Animation
languid nebula
west zinc
I’m calling this done. Here’s the link to the CircuitPython_DisplayIO_Animation ...
Weekdget :)
azure salmon
cool
inner leaf
Since we have been on a tad of a widget jag this is my (now sadly passed) hack-muse Miss Widget. She liked to help me out by touching the correct keys for me. Till I had her I didn't know that Manx came in a short hair tuxedo flavor.

 jagged parrot
Fun little evening project: https://www.youtube.com/watch?v=NDB_BjCuV2c
 azure salmon
now that my textures import seamlessly and memory is under control time to add sound to the esp 32
looking around i found many ways to play midi and wav audio.
eventually i tested a few samples and thought.. my word this sounds so terrible is there supposed to be this much noise
after swapping out the cheap speaker for a amplified speaker with a broader audio range i fell on my back.
it sounds too good
west zinc
jagged parrot
Fun little evening project: https://www.youtube.com/watch?v=NDB_BjCuV2c
Nice. Your color scheme evokes this cool button game I’ve always wanted to see in person: https://www.wethrowswitches.com/flux
We Throw Switches
FLUX is an alt.arcade reaction game, where players compete against one another to hit 5 buttons in the right order as quickly as possible. Created as a love letter to foosball and table tennis, we designed FLUX to be bright, beautiful and to exist primarily in social, public spaces. The game is inte
azure salmon
change of plan

Hex hates me... so converting to RGB565 nearly gave me a heart failure.
decided having my palette in 8 bit RGB just made less trouble
warped violet
azure salmon
Hex hates me... so converting to RGB565 nearly gave me a heart failure.
It doesn't hate you, it just put a hex on you. But, yeah, 8 bit RGB is much easier.
lyric sun
just "finished" (mechanism and code works need to pretty it up) a painting plotter for people with disabilities https://drive.google.com/file/d/17IzHxxTIbPMZS8hHn07XxPMWCfZh87_D/view?usp=sharing
Google Drive
using a pi pico, l298 drivers and circuitpython, i will send a nice video of it painting on a real canvas tomorrow
gusty shard
lyric sun
lyric sun
using a pi pico, l298 drivers and circuitpython, i will send a nice video of it ...
Here is the video
azure salmon
 azure salmon
it's a psp joystick
 reef pasture

GitHub
Contribute to wifijt/Funhouse_home_asistant_light_control development by creating an account on GitHub.
My first project with the funhouse board

The primary guide isn't out yet and the board doesn't ship with a booloader image - I flashed the magtag bootloader image and then used the UF2 image from circuitpython
lyric sun
lyric sun
Here is the video
Last thing ill post about this project but we made a funny pitch video for it https://drive.google.com/file/d/1dHgOHrwBAX949tUFuzA0DuVJNcDItJU7/view?usp=sharing
Google Drive
scenic siren
@lyric sun Other than the video links, did you write up this project anywhere? Is the code posted to GitHub? I'd like to include it in the Python for Microcontrollers newsletter but I need more than a Discord message to link to. 🙂
@reef pasture Nicely done! I'm going to include this in the Python for Microcontrollers newsletter.
reef pasture
scenic siren
<@!451574670118879233> Nicely done! I'm going to include this in the Python for ...
Thanks!
lyric sun
scenic siren
<@!249268359793868800> Other than the video links, did you write up this project...
yah i have a github but its currently just code cad and a wiring diagram, ill update it to have some images and videos for you https://github.com/ArielWolle/McMaster_Project_4
GitHub
ENG1P13 Project 4. Contribute to ArielWolle/McMaster_Project_4 development by creating an account on GitHub.
scenic siren
@lyric sun Alright, can you do me a huge favor? Please email that link to cpnews@adafruit.com when you get it updated? I'll include it next week. This week is already pretty big!
lyric sun
sounds great
scenic siren
Thanks so much!


 torn elbow

 snow roost
MagTag put to good use as a Game Boy Camera photo frame. Perfect for those tiny 4-shade photos.
With deep sleep this thing seems to run forever.
 night bronze
snow roost
MagTag put to good use as a Game Boy Camera photo frame. Perfect for those tiny ...
night bronze
snow roost
MagTag put to good use as a Game Boy Camera photo frame. Perfect for those tiny ...
Wow, that looks really good! Especially with the black case you have and on the light coloured surface. Is the case something you 3D printed youself?
snow roost
Thanks the stand is from the Ruiz Brothers. I did design a basic front cover though to hide the screen bezels.
night bronze
snow roost
Thanks the stand is from the Ruiz Brothers. I did design a basic front cover tho...
Ah yeah, those Ruiz brothers sure know their 3d printing! The front cover is what I was thinking of. It looks really good. Great job!
wide musk
Good afternoon! I know I'm a bit early, but I would like to do a show and tell on my TOS Tricorder build using an Adafruit Clue and PyPortal Pynt. Thanks!
lapis jasper
@wide musk I think the streamyard link is usually posted to #live-broadcast-chat right before it goes live
wide musk
Thank you, sir! BTW, thank you for the help on getting the PyPortal to connect to the internet! Awesome!
lapis jasper
np!
wide musk
@lapis jasper, I'm new to Discord... is it appropriate to upload on the channel, a little video I did?
lapis jasper
yup!
 hollow cedar

i learned what the heck charlieplexing is last night and i tested it out with two LEDs
next step is 6 LEDs
wide musk
Here's my TOS Tricorder build... Fun project!
scenic siren
@wide musk Neat project! For future reference, please avoid cross-posting (posting the same thing in more than one channel). Folks will see it wherever you post it! 🙂
wide musk
Sorry... thanks!
scenic siren
No worries! Thanks for showing off your project!
indigo charm
Finally got into Home Assistant and ESPHome fun with a Feather ESP32: https://vimeo.com/537021338

This is "Feather ESP32 With ESPHome and Home Assistant" by Mark F on Vimeo, the home for high quality videos and the people who love them.
 supple mortar

A box for the eink / epaper / epd wing and Adafruit feather board. The eink wing fits fairly snug in the main box but needs a small amount of glue to secure it. The is an opening for the usb power and/or slide switch. The back is a friction fit pop in and can also be secured with a small amount of glue.
IMPORTANT : You must clip the mounting ...
 whole brook
Old project but still fun: GM328 transistortester kits 🙂 Had fun relearning AVR programming and playing with a classic open source design to upgrade resistors/vref and flash the latest firmware.
Last pic is the “stock” unit I built first. The second one upgraded with 0.1% Vishay metal film resistors, a 0.1% 2.5 vRef and a 20MHz is in build now tho. Just gotta remember how to set a ATMega328p lfuse for a 20MHz external clock now... 😂
Bonus TIL: When you flash an lfuse setting for an external clock on a ATMega328p out-of-circuit your next flash will fail without that external clock. 🤦♂️ In-circuit for the win!


 half reef
first step in my quest to build an OISC is complete: monostable timer!

i cut and stripped every wire in this myself; it took a really long time!
solar yew
half reef
first step in my quest to build an OISC is complete: monostable timer!
That is tidy! Unlike the mangled messes I usually produce. I'm assuming that's the clock, correct?
night bronze
solar yew
That is tidy! Unlike the mangled messes I usually produce. I'm assuming that's t...
I was about to say! That's Ben Eater Breadboard Computer tidiness. Great job @half reef!
solar yew
I hope to achieve this level of tidiness one day 😄
 warped violet
My breadboards are about as miswired as my brain
night bronze
And with a name like wirehead... I'm not sure which side of the line that falls onto!
vast drum
I showed this Mars rover badge on show'n'tell live a few weeks back and a few people asked me about it.... they're now available on my tindie! burned through half a roll of solder this week assembling them 😅 https://www.tindie.com/products/electronvillage/mars-perseverance-rover-badge-assembled/

Tindie
Glowing PCB art badge/fridge magnet with anatomically accurate Mars rover artwork
 frigid sundial
Cover for the Stemma Soil Moisture Sensor:
https://www.prusaprinters.org/prints/63833-adafruit-stemma-capacitive-soil-sensor-cover
Code to link it up to Adafruit.io:
https://github.com/mperino/GardenSensor
Resulting Dashboard:
https://io.adafruit.com/ewr2san/dashboards/home-garden
A nice spring project for your Garden or Home Plants.
 night bronze
vast drum
I showed this Mars rover badge on show'n'tell live a few weeks back and a few pe...
night bronze
vast drum
I showed this Mars rover badge on show'n'tell live a few weeks back and a few pe...
LOL, anatomically accurate! Love that!
marble mantle
@vast drum how did you do the red martian dust at the lower part of the badge?
I can see how you used white silkscreen and gold ENIG finish for most of your art, but where does the red dust come from?
vast drum
marble mantle
<@!151485455622340608> how did you do the red martian dust at the lower part of ...
It’s a copper pour on the reverse side of the board seen through the FR4 🙂 the board side of the copper doesn’t get ENIG finish so it’s the actual reddish color of copper!
marble mantle
@vast drum clever!
vast drum
Thanks - honestly came out way better than expected, I thought it would be barely visible but it's pretty prominent, especially w/ thinner 1.2mm PCB (original was 1.6)
lyric sun
scenic siren
<@!249268359793868800> Alright, can you do me a huge favor? Please email that li...
Sorry for taking a while, had some big exams but the link is emailed!
scenic siren
lyric sun
Sorry for taking a while, had some big exams but the link is emailed!
Thank you!
scenic siren
lyric sun
Sorry for taking a while, had some big exams but the link is emailed!
We're already pretty full up for this week - I will be including it next week! Wanted to let you know I received the email and it wasn't missed.
vast drum
last shameless plug for awhile - my Mars Helicopter badge is now up on my Tindie also, if anyone is interested. Was so exciting seeing the first pics today 😍 🥳 https://www.tindie.com/products/electronvillage/ingenuity-mars-helicopter-badge-assembled/

Tindie
Mars Helicopter artwork on a mini PCB badge with blinky LED
lyric sun
scenic siren
We're already pretty full up for this week - I will be including it next week! W...
Idk if its too much but could you possibly link the video in the newsletter https://www.youtube.com/watch?v=c9EO0ap5n0Y

This was my final engineering project I worked on during my first year at McMaster's engineering program. This project was completed in about 6 weeks with a total of 4 group members.
Link to the project:
https://github.com/ArielWolle/McMaster_Project_4
Link to my Github:
https://github.com/ArielWolle
scenic siren
@lyric sun That was the plan! I intend to link to GitHub as well but the primary link will be the video.
whole brook
Grabbed a laptop from a recycling pile. Power on password makes it a brick. Bus Pirate and some googling turns brick back into a laptop. 🎉
 azure salmon

upgrade complete swapped out the temic P-80c31-12 for a ATMEL 80c31x2-UM i salvaged.
i'm adding a icp next.
i'm rebuilding the keyboard my friend broke her badly
but i doubt i will find a ps2 keyboard soon.
so i'm looking into a usb host chip.
and for the gpu i need to still decide if i'm building something from logic or cheating and adding another mcu.
the storage is a AT28C256 256k eeprom
Ram is 64KB of Chiplus cs18lv00645pcr70
i think the rom upgrade is the best.
NM27C256Q90 datasheet, NM27C256Q90 datasheets, NM27C256Q90 pdf, NM27C256Q90 circuit : FAIRCHILD - 262,144-Bit (32K x 8) High Performance CMOS EPROM ,alldatasheet, datasheet, Datasheet search site for Electronic Components and Semiconductors, integrated circuits, diodes, triacs, and other semiconductors.

😂
languid nebula
@west zinc Still very Blue, but using the Dial library only
 west zinc
Super cool clock. I think @normal vale was asking how to do this.
languid nebula
oohh nothing fancy I've just used brute force, duplicating Functions, not even creating the two needle objects, for that I think it would be better create a different class.
night bronze
languid nebula
<@!366059101203202052> Still very Blue, but using the Dial library only
That's looking awesome!
languid nebula
night bronze
That's looking awesome!
Thank you Hugo 🙂
That is @west zinc Dial library. I just modified a little
night bronze
Community contributions!
languid nebula
Indeed
 sleek anvil
Im my recent project i used Arduino uno and 59% of its sram to run a simple video game with VGA VIDEO OUTPUT! Also no libraries were used.
https://youtu.be/up2sRJ1ovYU

In this project I have generated a VGA video signal using only Arduino and without using any Libraries. It tricks the monitor to think its in 640x480 @60Hz mode and outputs a 40x30 video.
project: https://www.hackster.io/dhruvw221/arduino-video-game-with-vga-video-output-789f9f
GitHub: https://github.com/dhruv221/arduino-vga-driver-and-game
...
sharp comet
Finally knocked out a "meta" project that I've had in the back of my head for a while. A web page that makes it easy to create required library list screenshots for Learn guide authors.

 patent bison
I made a pool temperature monitor using an ESP32, which sends data to Adafruit IO. Then I created a display using the MagTag to view the temperature which updates every 2 hours.

Here is the display
 sharp comet
patent bison
Here is the display
sharp comet
patent bison
Here is the display
That's a great looking display for a cool project! Do you have it written up or code published anywhere online?
patent bison
@sharp comet I have the project on hackaday IO but have not published the code yet.

Every year around spring time my kids are asking when my parents in-ground pool is ready for swimming. Commercial pool temperature sensors are either local with a screen or expensive when you include wifi. The wifi versions are also likely a closed platform and reviews show they often fail from the elements. One of the main features I wanted ...
sharp comet
patent bison
https://hackaday.io/project/178540-pool-temperature-monitor
awesome! thanks for the link
scenic siren
sharp comet
Finally knocked out a "meta" project that I've had in the back of my head for a ...
Interesting! We like to include the entire CIRCUITPY drive structure. Would it be difficult to add a static code.py , boot.txt and the three . files as though it was of the actual drive?
With the libs in a "lib" folder.
sharp comet
scenic siren
Interesting! We like to include the entire CIRCUITPY drive structure. Would it b...
Nope, that should be pretty easy! I'll work on those tweaks next later on tonight.
scenic siren
sharp comet
Nope, that should be pretty easy! I'll work on those tweaks next later on tonigh...
Great! Let me know what you come up with. It looks super convenient. I feel like it could be used for folks manually loading libraries as well (since we have the Project Bundle now, we're moving away from that) but it would help find dependencies without dealing with cascade failures.
sharp comet
Theoretically it might be possible to re-use some of the infrastructure that makes the Project Bundle work to automate the generation of the images
scenic siren
As a side note, we haven't decided yet on the canonical way in guides we're going to handle the Project Bundle. I think we may still want a screenshot of what CIRCUITPY looks like, so this might still be helpful.
I have how I think it should look but we haven't really settled on it yet.
sharp comet
we can control the look and feel as well. If we do end up wanting to use them but there is a preference for it to be light themed or just different from what I have now styling it differently should be fairly straight forward.
scenic siren
My whole machine is dark themed, so all my screenshots are.
I don't know that we have a preference there. Lighter themed would match Learn better, but I don't think it matters.
languid nebula
patent bison
<@!382939733107408897> I have the project on hackaday IO but have not published ...
A DS18B20 ... Interested in seeing the code..🤔
 worldly ore
hello all. i wanted a project to get me out into the garage more. so, i'm building an electric go kart! https://hackaday.io/project/179303-vintage-electric-go-kart

As a kid I was into all things motorized. Go karts, scooters, mopeds, minibikes. I loved working on small engines as a hobby. Off-roading on a large property or speeding around the neighborhood always brought a smile to my face.
Fast-forward 20 years and we're now driving electric vehicles! Our energy sources are becoming more clean and efficie...
exotic sierra
worldly ore
hello all. i wanted a project to get me out into the garage more. so, i'm buildi...
This is sweet! I’ve always wanted to build an electric go kart
 shut rain
"Java not cool" Young man is wise beyond his years!
broken rain
Here is the code from my keyboard tonight: https://github.com/bdsvac/Adafruit_Pico_Airlift_NeoKeyboard and here is the thingiverse link https://www.thingiverse.com/thing:4835788

GitHub
A NeoKey keyboard with a raspberry pi pico and adafruit airlift - bdsvac/Adafruit_Pico_Airlift_NeoKeyboard

This is a custom keyboard with lcd screen using a raspberry pi pico and adafruit esp32 airlift.
For code, please check github:https://github.com/bdsvac/Adafruit_Pico_Airlift_NeoKeyboard
The following products were used:
Perma-proto full sized boardhttps://www.adafruit.com/product/1606
raspberry pi picohttps://www.adafruit.com/product/4864
airlif...
night bronze
broken rain
Here is the code from my keyboard tonight: https://github.com/bdsvac/Adafruit_Pi...
That's so cool, thanks for sharing your code and project!
If you haven't already, you should share it for the Python on Microcontrollers weekly newsletter!
broken rain
Who do you talk to for that @night bronze ?
night bronze
broken rain
Who do you talk to for that <@!361158808501747735> ?
You can either a) submit a pull-request to the newsletter's GitHub repo (https://github.com/adafruit/circuitpython-weekly-newsletter) with the instructions from the README, or b) send an email to cpnews@adafruit.com with a link and some details
GitHub
Community newsletter for Python on Microcontrollers. Please feel free to put your current news, projects, etc. as a PR or Issue. - adafruit/circuitpython-weekly-newsletter
night bronze
broken rain
Who do you talk to for that <@!361158808501747735> ?
By the way, just looking over more of the code in your repo, I've got to complement you on the simplicity and clarity. It's a breeze to follow along!
broken rain
night bronze
By the way, just looking over more of the code in your repo, I've got to complem...
Thanks
azure salmon
You know whats horrid.
recently worked for a man here in SA.
He was a installer for security and honestly with work being as hard as it is to find i figured why not.
After a few weeks i showed him my programming stuff and electronics.
I then proceeded to build him a app for his business and I built a esp32 unit we can use to flash updates and reprogram panels for alarm systems.
During this time i did my job everyday with a smile.
2 days before the 3 month probation he fires me.
Locks the workshop, keeps everything we made.
And the laptop he gave me wipes itself.
azure salmon
He paid me nothing for 2 months
obsessive control freak, that hides spy camera's in your house.
everything he did was breaking the law.
and to be honest he was a script monkey.
he had no electronics skill
real emperor palpitine
tacit delta
you have to sue if you are not paid
azure salmon
if i sue. i'm taking his business
not worthy
he lies to his customers so he doesn't look dumb.
he solders like a 3 year old.
he talks about company morals and why i cant buy a customers old guitar, but has no problem digging in their trash to steal a broken poe injector cuz it's his idea.. not mine.
people treat your staff with respect and growth
please
tacit delta
poe injector?
if you feel its not worth fighting then forget that guy, businesses dont usually last if badly managed like that
azure salmon
Power Over Ethernet
tacit delta
ahh yes duh lol
azure salmon
honestly i job searched for 3 years.
finally got a position.
and the guys a nut job.
explaining why he works alone
tacit delta
i wonder how many workers he ripped off
azure salmon
apparently his last wife and tech that worked for him screwed him over.. but the true story was he made her nearly take her own life by giving her no attention.
And his last tech got frustrated after 6 months then sued.
and i don't blame them.
he drips hot solder on people and then claims it was a accident.
and i was very grateful and told him if we work together we can make good business.
nope..
tacit delta
jezz just not nice guy
azure salmon
Then he was nice enough to keep most of my tools.
and our cops here are easily bribed
nothing will happen to him


 grand rose
cool, does it workout showing something ?
 topaz citrus
Main control board

breakoutboard

micropump

Hey all, wanted to share a kinda cool project I made for work recently. I had to figure out a way to drive upto 64 12v micropumps and monitor their speed. Their speed is set via a 5v pwm signal which I use 4x PCA9685 chips to do, then each pump also emits a 5v pulse 2x per revolusion so reading these pulses can get give you RPM, for that i use 4x TCA9548a's(Altough fyi right now they are among the many chips you can't find anywhere) multiplexer to direct which pulse gets fed back to the itsybitsy m4 to count. The board is as big as it is mainly because it's only a 2 layer board, but also the ribbon cable connectors i'm using to connect to the daughter boards(each drive/read 8 pumps) are fairly large. To do it again i'd pick another connector type something to also include the 12v power input to the pumps in the same cable as it is i take in 12v on the left side of the board and then breakout bare +12v and gnd wires to the various breakout boards. Blacked out boxes are just name of my company/customer.
leaden jetty


4 panel array RGB matrix with event scheduler. Built in feed servers, weather station, climate clock, clock, countdown timer, Bluetooth controlled.
exotic sierra
That’s pretty cool
 rancid kestrel
Working on an ESP32-S2 robot controller w/motor driver. Hope to have it on CP.org by the end of the month!
 marble mantle
@rancid kestrel would you tell more about it? What features have you planned?
rancid kestrel
marble mantle
<@525432105224765494> would you tell more about it? What features have you plann...
Glad to see there is interest! I intend for it to have terminal block input at up to 20v, a bunch of exposed IO, Stemma QT, USB-C, dual-channel 4.5A motor driving, and of course, it can run CircuitPython!
I've ordered the boards and I have one mostly assembled. I've built CP and am just waiting on the USB-C jacks
Then I can get some testing done and make some PRs
marble mantle
Nice
I personally would like also to see encoder input and built in PID speed control for motors
rancid kestrel
This is the kind of board that goes inside the robot, so there isn't really a need for physical on-board controls. That's a pretty good idea with the encoders though and I'm already planning a companion board for controlling it. Speed control is possible with the motor chip I chose, but not simple enough to implement in alpha. I do plan to add it though 🙂
gusty shard
Thump Drone on "E": https://gist.github.com/rsbohn/3705da8ca1a145ea0b2340ab0ec9e0b8
Feather M0, PWM Tones (pin D12), touchio (pin A5), debounce.
devout verge
Getting my cousin a Circuit Playground for his birthday, wrote this little demo program for him in CircuitPython.
 crimson egret
I've made a Pyportal for weblate, in preparation for @lapis jasper's micropython merge.

 rough dew
This is incredibly janky & unsafe-- I don't recommend ANYONE recreate this project due to the obvious risk of blindness
but it was a heck of a fun time to design & make :)
night bronze
Not sure what makes it seem most ominous - the long-press of a button to start it, the sound, or the sense that the only refrain happening inside is "targeting... targeting... targeting...". So cool though! Makes me thing that the power button should be behind a flip safety switch... or three!
 marble mantle
it would be a nice project to embed an actual dev boards like qt py inside such a switch.
warped violet
It would be a real change.
candid crescent
You mean a major switch? 😉
azure salmon
i once shoved a attiny into The Most Useless Switch Ever
turns out it was more handy than expected
night bronze
azure salmon
turns out it was more handy than expected
Self-deceptive advertizing? 😄
azure salmon
no idea what that is but it sounds evil.
 half night
Two points to the Adafruit development team for the Neo Trinkey! I've made a password safe application for it at https://github.com/william-stearns/trinkeypass . I think it counts as the world's smallest keyboard macro and password safe!
leaden jetty
@half night This looks like fun to think about.
What about a separate rpi 0 configured with no network to "set" the trinkey key up. That would leave all the clear text access to the drive unviewable by all. The RPI0 could be wiped each time.
half night
You could plug the trinkey into a pi (with a USB adapter for the zero), yes. Thanks to @solar wadi 's help I was able to build a firmware file that doesn't have Mass Storage Device support - by using that firmware the keyboard feature still works but the files aren't presented to the host system. (One can switch back and forth between firmwares without wiping the code.py and password files).
leaden jetty
@half night I'm thinking about routines to tell you/it which key to send by talking to the key. Very interesting...
half night
From the pi0? Actually, the pi0 can do HID/keyboard itself! I was originally going to do this project on a pi0 because it can do the same keyboard injection. The problem is there's no input built into the zero, so I'd have to connect a keyboard.
Next generation - running this on a magtag. 4 buttons and an e-ink display for a full menu system with descriptions of the keys so you don't have to remember which slot holds which password.
Just waiting for them to come back in stock. 🙂
leaden jetty
I was speaking of when you use the password. Yes, the magtag is the brilliant solution as all keys indexes can be listed on the panel. But, that little trinkey is your answer. It is so usable.
I like it.
half night
They did a nice job on the design.
leaden jetty
I'm going to build a couple and see if I can remember indexes for 100 passwords...
half night
Niiice! Please let us know how you end up doing it.
leaden jetty
Ha they are out of stock... I should mail you a Magtag for a key! (but I wont. I'm still playing with them.)
half night
🙂
leaden jetty
@half night For paranoid people: A nice piece of information would be the key updating a file stating how many times it has been used, the indexes used (encrypted/obscured). A really paranoid individual could use that to determine there is something amiss. This is not the same as "everything is OK."
So, when I use a key I expect it to increment. I also expect any other user can just reset the key and access it n-1 times so it appears ok.
It's like Rockford leaving a hair glued to the door and the door frame. If tampered with, pay attention. The door has been opened.
change can to can't.
half night
Oooh, I like that! Maybe have a "last used date" as well. Hair on the door - I think that was used in Dr. No as well, though I don't know which showed up first.
leaden jetty
Dr No is before Rockford.
half night
Got it. Hmmm - I wonder if a Trinkey can get the date at all.
leaden jetty
I expect not...
half night
Agreed.
cobalt badge
👋 I've been working on building a bioreactor🦠 on top of RaspberryPis. It's involved lots of fun software and hardware problems, and I got to use my data-engineering background, too. Here's our first article on how we built our system: https://pioreactor.com/blogs/pioreactor-blog/how-we-built-a-bioreactor-on-top-of-a-raspberry-pi
 sterile zodiac
Thanks to the help I got on discord here, I was able to get part of my project done (learning Python from scratch) https://www.youtube.com/watch?v=O9jsNZSSAzg

I learned some python and got a boot screen working!
More details and the code I wrote at The Replica Prop Forum thread below:
https://www.therpf.com/forums/threads/functional-pip-boy-3000-mk-iv-from-fallout-4.245034/page-31#post-5191911
night bronze
Good stuff @sterile zodiac! And that's with learning Python from scratch? Great job!!!
jagged parrot
https://www.thingiverse.com/thing:4843252 little Funhouse stand I designed. First time out with fusion 360. 😊
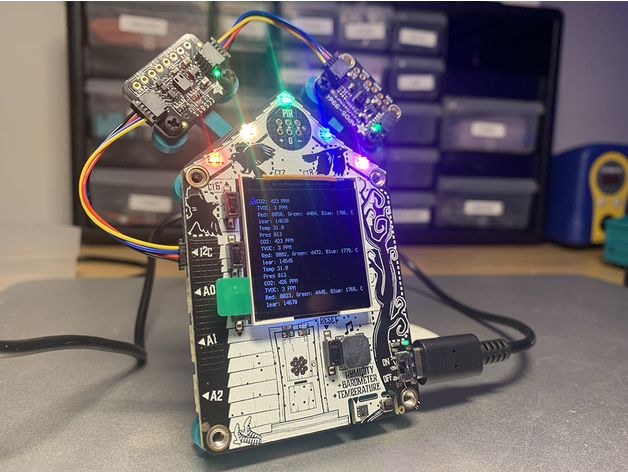
Nice little stand for the Adafruit Funhouse. It features two sensor mounts to float more input over the house.
4 M3 screws for the Funhouse.
4 M2.5 screws for the sensors.
Enjoy!
burnt wyvern
Small Metro Mini powered Neopixel lamp im making for my mom for Mother’s Day, it currently doesn’t light up due to the board being the 3V version and not the 5V version, I’ll post more when it actually turns on
 west zinc
Finally getting I2C signals into sigrok's PulseView. Have to save a file from sigrok-cli and then load into PulseView to visualize. This is an ItsyBitsyM4 TinyLogicFriend measuring a 100kHz I2C signal to an SSD1306 OLED display. Baby steps!
 languid nebula
west zinc
Finally getting I2C signals into sigrok's PulseView. Have to save a file from s...
languid nebula
west zinc
Finally getting I2C signals into sigrok's PulseView. Have to save a file from s...
Oh this is cool, I have many things for you to troubleshoot 😋
dire meadow
burnt wyvern
Small Metro Mini powered Neopixel lamp im making for my mom for Mother’s Day, it...
Cool! Can’t wait to see that complete!
lucid bloom
I got my home assistant computer museum demo ready for install. The 5 outlets are the same and simple, the pi controlled computers are unique to that computer. An amazon dash button at each computer will turn it on a play a text to speech message about it. I'll be doing the setup/demo on Saturday and then I'll be taking pics and some videos. There are still quite a few more computers to control.
 rough dew
1 arduino mega is handling intaking all the data, parsing it, and piping it out to the laser control DACs
 desert timber
Very nice! (Just hope no one opens the door unexpectedly 🙂 )
rough dew

Designing & printing the laser mount+ enclosure, the DAC circuitry, the Aduino code, the python host code, and even the video processing was all done by me!
Getting an Arduino Mega (same speed as an arduino, just more ram/progmem/pins) to read its serial buffer, parse the contents, and push them out to the DAC fast enough for 20fps video... *th...
And the conclusion!
tacit delta
you use galvos right? for laser direction
rough dew
Yup ^^
rough dew
I got mine, and their drivers, on ebay for about $150
tacit delta
bit cheaper not bad but still too much for just farting around with
azure salmon
i still have a sony drive and a few disks.
now i'm intersted.
GitHub
Library for using an Arduino UNO as a double density floppy disk controller - dhansel/ArduinoFDC
 vestal crow
I split my project into 2 PCBs and look at how adorable the MCU board is, https://i.imgur.com/ml0xXRQ.png
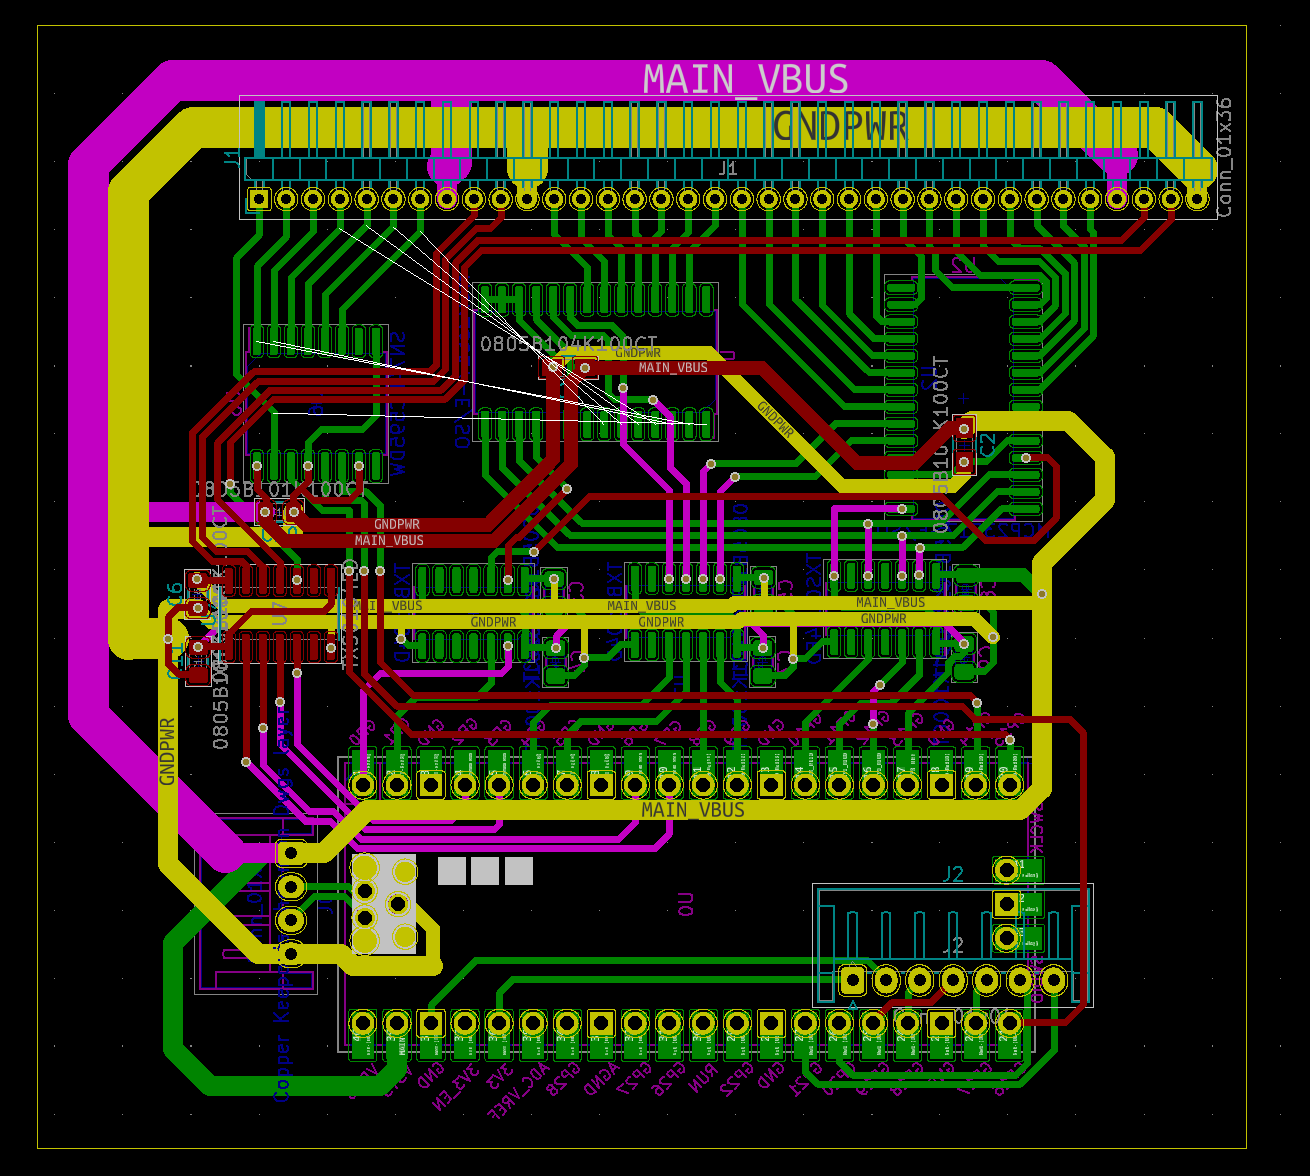 vestal crow
The mainboard, https://i.imgur.com/5tKyvIo.png
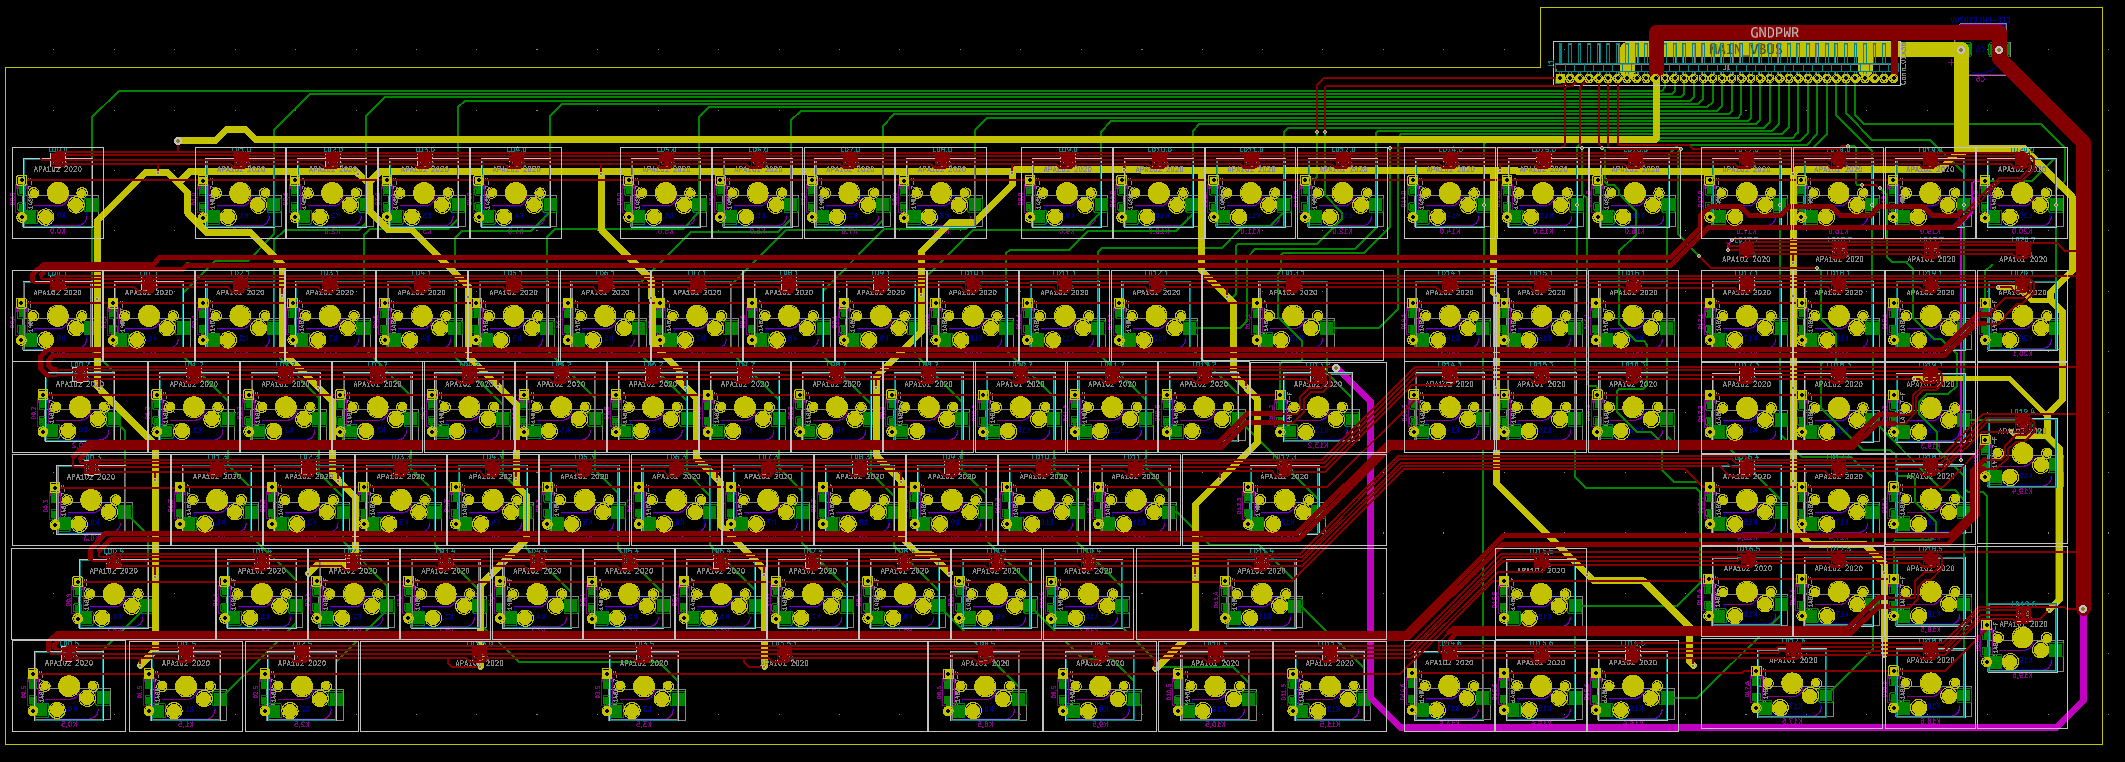 azure salmon
i think my reflow station just gave up.
power keeps tripping if i pick up the iron
 wise lake
azure salmon
i think my reflow station just gave up.
power keeps tripping if i pick up the ir...
wise lake
azure salmon
i think my reflow station just gave up.
power keeps tripping if i pick up the ir...
Cable worn?
azure salmon
not really
willow rain
my bet goes to it shorting somewhere
languid nebula
@night bronze Now you do the rest ... Guess what the led is saying..

 sacred timber
languid nebula
<@!361158808501747735> Now you do the rest ... Guess what the led is saying..
sacred timber
languid nebula
<@!361158808501747735> Now you do the rest ... Guess what the led is saying..
My Morse code is a bit rusty.
languid nebula
sacred timber
My Morse code is a bit rusty.
I will load the "code" to my repo if interested..
sacred timber
languid nebula
is the Paris Protocol
Well, it was a guess. Any time someone tells me there is information in a blinking light or repeating beep it's likely Morse. Of course it could be a different code or nothing at all...
languid nebula
I see, yep you are right
night bronze
languid nebula
<@!361158808501747735> Now you do the rest ... Guess what the led is saying..
I don't know Morse code, so I will guess is says "Jose rocks!"?
sacred timber
dah dit dah dit. di dah. dah dit dah dit. dit dah. The problem with "j" and "a" is you definitely need to leave some time between letters. Part of reading Morse is getting into the context of what's being said so you can kinda guess what's coming, as we do in all languages.
languid nebula
yes, kind of confusing when you need space for the letters and then for the words
sacred timber
International Morse is better than American Morse in this regard.
languid nebula
let me see what I have
sacred timber
 tacit delta
...---... ...---... ...---... ...---...
languid nebula

GitHub
CircuitPython Morse Code. Contribute to jposada202020/CircuitPython_morse_code development by creating an account on GitHub.
 wary atlas
- --- -.. .- -.-- .. .-.. . .- .-. -. -.. - .... . .-. . .- .-. . -- ..- .-.. . - -.-- .--. . ... --- ..-. -- --- .-. ... .
 coarse edge
Whee!
 night bronze
languid nebula
https://github.com/jposada202020/CircuitPython_morse_code <@!361158808501747735>
night bronze
languid nebula
https://github.com/jposada202020/CircuitPython_morse_code <@!361158808501747735>
That's awesome, thanks! 🙂
languid nebula
You are welcome 🙂
dire meadow
coarse edge
Whee!
When your MacBook is old enough to have a USB A port lol
coarse edge
mid-2011 MacBook air
night bronze
coarse edge
mid-2011 MacBook air
Yep! Got an early 2011 here, still going. SSDs and a few replacement batteries help tho
wary atlas
I got one of those recently, lol. Not bad for a 10 year old laptop. Swapped the battery and it's golden!
cold tangle
I'm using a 2010 MacBook Pro for my Arduino stuff. It no longer has a battery but is still fine otherwise.
wary atlas
No battery is a good way to keep it from puffing up, lol
cold tangle
That's how I ended up with no battery 😉
wary atlas
XD if you use it like a desktop... who needs a battery?
cold tangle
Well, the battery helps it to remember what day it is haha.
wary atlas
lol, that is helpful
cold tangle
I noticed that the web doesn't work unless I set the clock to the proper day by hand, because otherwise it's too far in the past and none of the https certificates are valid.
wary atlas
Yeah, that can be a pain. Worst thing is if the time happens to match current time but the year is off, you might not even notice that! I've had it happen to me before
dire meadow
I’ve got a 2012 MBP 13’ non-retina. My original battery died, but the replacement seems to be not so good
wary atlas
oof... Thankfully my Air's replacement seems OK
night bronze
My plan is to make it at least dual boot with a Linux distro once I'm moved over to my new main computer. Fairly certain a Ubuntu/Debian distro would work well, and try Arch since it's so highly spoken of around here.
wary atlas
I'm going to switch my Air to Linux since this MacOS version is so out of date.... but debating if I want to do Ubuntu or Pop!_OS -- I have an older MacBook, one of the ones that came in glossy white or matte black, and WiFi doesn't work on Ubuntu, but the Air is much more portable so I want to make sure it has good hardware support
I'd consider Windows if it had more than 4GB of RAM....
night bronze
wary atlas
I'm going to switch my Air to Linux since this MacOS version is *so* out of date...
You can ask FoamyGuy from here (or on stream later this morning - check the #live-broadcast-chat channel around 10am Eastern America time - about 1 hour 40 from now).
They're currently running Pop_OS! on a System76 computer, and I think previously used Ubuntu, but I could be remembering wrong (I've blinked since).
wary atlas
Remembering is hard XD I should be able to join the stream, work is pretty quiet


 exotic sierra


Prototyping a unicorn wall light
Need to redo the overall shape a little to make it more unicorn like
desert timber
much better than I could do but I was gonna say "nice horse"
desert timber
with some cool light controller of your own design no doubt?
exotic sierra
I’m making it use a LiPo power pack I designed, a small protoboard with a button for mode selection, small neopixel strip, and probably a microcontroller I designed
Might need to order a bigger battery next paycheck
desert timber
more power! lol
what do you use for the light sensor, CdS, phototransistor...?
exotic sierra
Probably won’t use a light sensor, just a simple switch
wary atlas
Tap on, tap off!
exotic sierra
I’ll probably use a touch controller 🙂
warped violet
Seems like a bright idea.
 hard oriole

My introduction to potentiometers. Two potentiometers. One controls the high boundary [red], and one the low boundary [yellow]. Fill the middle blue. Clean up the top and bottom with black, and decide what happens when the low boundary is greater than the high one [fill magenta].
lucid bloom
These are the machines at the museum that are setup with homeassistant. 4 of them are just outlets, the gateway is pi controlled. There is an amazon dash button at each computer that will turn it on and talk about it. Everything can be controlled with the app/web interface, google assistant on a phone or nest mini and the dash buttons. I'm gonna have to hack some of the older machines with an Arduino pretending to be a ps2 keyboard.


 wary atlas
So you can turn them on and off remotely? That's so cool!
lucid bloom
Yup and make a decent tts voice talk about them
wary atlas
Ohhh, nice
lucid bloom
The goal is to be able to give multiple levels of tours with the tour guide being involved or present or absent.
wary atlas
Automation and remote control of old systems is awesome. Are visitors allowed to play with the systems?
lucid bloom
They will be with a short list of commands they can run at each computer. We are still trying to get everything setup and ready.
wary atlas
Nice. Glad to see a good collection getting love!
lucid bloom
I'm not the computer guy, I know next to nothing about the hardware, my job is the raspberry pi stuff and the automation. My friend acquired all of the computers in the museum for free over a long period of time.
I think there are 12-15 computers ranging from the late 70s til around the year 2000
wary atlas
Heh, I might have some things to donate... Where's the museum?
lucid bloom
It's in massachusetts.
wary atlas
Ah, that's a bit of a hike from here... But maybe I'll come take a look and bring some goodies some day!
wary atlas
Happened to go down the basement... Good reason to share this!
 hard oriole
@wary atlas Tandy 1000, my first work machine. I got paid to illustrate with 16 fixed colors 320x240.
wary atlas
Nice! I love this thing, but a lot of my 5" disks don't love to play nice anymore...