#show-and-tell
1 messages · Page 19 of 1
 ancient skiff
 coral mica
Work in progress RPi 4 cyberdeck!
 exotic sierra
Playing around with shift registers and seven segments
Nevermind the rats nest of wires 😂
Guess that’s not an acceptable word. I did it without external libraries for the fun of it
exotic sierra
I'm thinking about making as big of a board as I can using 74HC595 to see how much memory I can make lol
 stray marsh
This is the Rick Flash, it's an SSD that Rick Rolls you over a piezo buzzer when you turn on your computer and also creates a WiFi hotspot called Free WiFi! When connected it redirects you to a captive portal with a gif of rick Astley. You can also trigger the song to play from your phone in the WiFi captive portal. https://youtu.be/qJRm4iVWZss. If you want to build your own Rick Flash, it's programmed with the Arduino IDE and all the code and schematics can be found on my Github page here: https://github.com/rectifiedtech/Rick-Flash
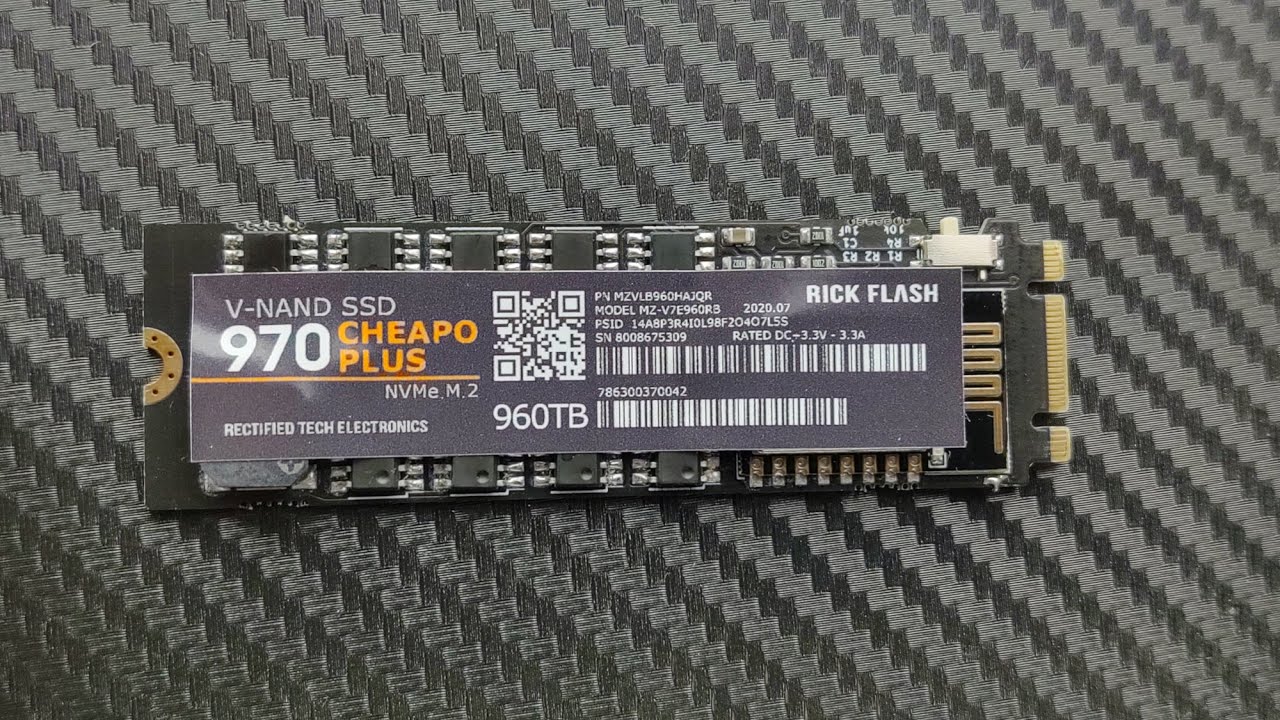
This is the Rick Flash, an SSD that Rick Rolls you when you turn on your computer or connect to Free WiFi! It also can be remotely triggered from your phone or laptop by connecting to the Free WiFi access point and clicking on the trigger hyperlink. All the hardware is open so...

GitHub
An SSD that Rick Roll's you. Contribute to rectifiedtech/Rick-Flash development by creating an account on GitHub.
 warped violet
Well, that's a flashy project to share.
 warped cobalt
@coral mica Looks similar to laptop project I'm building. What keyboard you using?
 cobalt dove
Haven't finished wiring everything yet but the lighting works! https://youtu.be/zjonRU0lp2k

Just something to show before I go to bed tonight. The point was to see how well 5050 (ws2812b) LEDs shine through the center of the switch. Works fantastic if I do say so myself 😁. BTW: The brightness is set to 100 (of 255) on those LEDs!
coral mica
@warped cobalt I'm using a kbd67 rev2 from kbdfans with xda keycaps. Bit of a pricey way to go but I like the clicky keys!
warped cobalt
Ah, well, a discipline from cftkb ain't much cheaper, lol
 sharp comet
@normal vale I really like your balloon pressure example that is in the newsletter this week. That is such a great hands on way to illustrate the usage of the pressure sensor!
 normal vale
@sharp comet Except for the fight to inflate the balloon and "close" it, it was really easy to do. My plan now is to use the balloon as an input device where you would shake to activate, squeeze to change the volume or whatever. I also tried with the two CR2032 battery pack from Adafruit, it is almost the same size as the Feather. So it was totally wireless. The problem with balloon like the one I use is that they loose tightness and the air somehow escape. But if I had something more durable where an Feather Sense could be embeded and remotly charged... that would be really great fun.
 upbeat geyser
Then use a big balloon and fill it with helium, and add a ballast pump...
normal vale
@upbeat geyser With a big balloon, then you can fit a CLUE inside...
@scenic siren your pinned message link to the old version of the guide on how to join show and tell. That page link to the new method to join S&T.
 scenic siren
Here's a link on how to participate in the Show and Tell livestream: https://learn.adafruit.com/show-and-tell/joining-show-and-tell

Adafruit Learning System
Show us what you are working on weekly on Adafruit's Show and Tell broadcast
scenic siren
scenic siren
Here's a link on how to participate in the Show and Tell livestream: https://lea...
@normal vale Thank you for the heads up. I think it was from when it was still accurate.
 whole horizon

Sorry for the audio quality, this is just the best recording I can get of myself at the moment.
Instagram: @modernalchemist2
Duke of Dummies:
DeviantArt Page 1- https://www.deviantart.com/dukeofdummies/journal/How-the-Black-Mage-s-eyes-work-792217503
DeviantArt Page 2-htt...
Not sure this goes here, but I made a LED array for a costume. I control it with a Wii Nunchuck controller in my left hand.
 desert timber
It does belong here, nice!
 heavy ice
@whole horizon great tutorial!
cobalt dove
@whole horizon That is fantastic
 glad sable
 west zinc
3D printed a custom shaped mould and deckle for paper making with an added watermark feature glued on.
 runic sorrel
usbanana.. magic smoke prevention device! Banana jacks on one side, usb on the other.. can use the current-limit of my power supply to avoid blowing up new projects when I first plug them in
 solar yew
Beginning of the homelab
 broken jay
I built myself a hybrid between a programmer, prototyping board, and a bread board using two Atmel DIP-28 sockets. Compatible with the Atmega8A and the Atmega328A, both of which I found for cheap at a local electronics store. The LEDs (by default arranged for use in the ArduinoISP sketch) are all capable of being jumpered in/out, as are the trimpots and the capacitor that's connected between Reset and GND (when the center chip programs the left chip). The top row is a do whatever area to connect breadboard friendly modules to. The i2c pins and the Vcc/Gnd pins are both extended out to connect more devices. There's three rows of connected headers meant for use in whatever experiments need multiple things connected to one thing. Built the basic skeleton a week ago and then gradually added more stuff while I had to monkey with some Atmega8As and I found the Uno to be a rather poor learning platform (because I wanted things at 3.3v and using the internal oscillator).
I'm rather proud of the fact that I was spectacularly rubbish at soldering when I started venturing out into electronics a few months ago but I've gotten pretty good at tight connections now 😁
Here's one that ended up having to be junked because I tried to do all the soldering UNDERNEATH. I melt more plastic than solder and destroyed my tip in the process.
upbeat geyser
Lotta controls, I like it
exotic sierra
As I mentioned wednesday I was inspired to start selling some of my simple designs as a push to make me better. So I launched my first product today! 🙂
Oak Dev Tech
Easily transform your project into a lower power project with the Oak Development Technologies breakout of the Texas Instruments TPS22917 load driver power switch.
broken jay
@upbeat geyser I had to trash that build because the connections near the muxes got insane.
Going to do a PCB version of it eventually. But now doing it as a backwards C shape thing.
With room for a Raspberry Pi Zero in the middle.
And a slave Atmega328A to do the IO.
Hand-soldering is h.e.l.l. I wish PCB assembly was as commonplace where I live as getting a printout.
BTW, why is the word h311 triggering an auto-delete from some bot?
Typed the message a few different times and thought it's some weird Firefox Discord bug again.
 tacit delta
curse filter is heavy here. please dont bypass it
broken jay
Is that word offensive to americans or something?
broken jay
fascinating!
and not just americans im pretty sure
@tacit delta
Where else is it offensive? I've only heard of people fearing connections to religious danger places in medieval europe. Didn't know people are afraid of these words even in 2020!
I suppose I should move this to #general-chat
 marble mantle
more to the point, what is so bad about hand-soldering?
upbeat geyser
Hand soldering itself isn't bad, but some circuit configurations are particularly difficult to hand solder.
broken jay
....and the smell is awful
exotic sierra
Rework soldering is pretty fun and effective
I try to keep iron use to soldering headers lol
broken jay
Fun is subjective. And effective is contextual. My hands are VERY effective in the kitchen. They're below average on the guitar and the keyboard. They're pathetic at staying steady with the soldering iron.
tacit delta
im sorry to say that you will never be surgeon. 😉
broken jay
I think I need to try some cross-discipline upskilling to steady my hands. Some years ago, I took tango lessons to help me better balance while squatting. Maybe drawing lessons would help me solder lol
exotic sierra
Maybe lol
broken jay
....And perhaps stitch my own wounds during a zombie apocalypse
im sorry to say that you will never be surgeon. 😉
@tacit delta
I do have a doctor's handwriting though. Here's a USBasp Helper thingy I tried to label a few hours ago.
tacit delta
lol
broken jay
I legit took up computer programming years ago because it seemed like the best way to avoid having to write. This was back when most professions (where I lived) still used pen and paper.
And yes, look at the absolutely graceful way I used a hacksaw on my PCB 😄
marble mantle
....and the smell is awful
@broken jay I love the smell of rosin...
tacit delta
you managed to be slightly worse than me on handwrting heh
 civic vale
@broken jay as to getting steadier hands... After my stroke, I had a severe shake in my right hand. I found doing Tai Chi helped me a lot in controlling that. The movement is slow and continuous, and that helps you gain better control of the fine motor control. The shaking hands are actually the feed back part of the fine motor control doing a "hunting" mode.
broken jay
@civic vale interesting. I should try that! Any online tai chi videos you recommend?
tacit delta
interesting
civic vale
Well it was an open class at a local support group, so what I got most was the in person feedback and the group of about a dozen students all doing it slightly differently. The instructor did mention an on-line series he recommended, I wrote it down and now can't find the note.🤦
ancient skiff
Today's project
I occasionally have problems with my whole computer locking up while debugging low level circuitpython problems
I'm going to connect the circuitpython board to a pi zero so I don't curse quite as loud if it locks up due to a misbehaving USB device
since I use Linux on my desktop as well, I can share files and the serial terminal over the network (sshfs and screen)
dunno how well it's going to work out in practice yet, but the setup & scripting are done!
(the garbled pygamer screen is related to a problem I was debugging recently)
sharp comet
Nice! I was just thinking about the idea of setting up a dedicated pi as a Circuit Python building machine so I can stop using a VM since I haven't made the jump to Linux yet. I really like the way you added a little screen and interface for controlling it.
ancient skiff
My plan is still to build CircuitPython on my Linux desktop, I suspect it would be quite a bit slower particularly on the pi zero.
but jerryn I think has done it on the raspbery pi. There's some difficulty getting the matching compiler installed, you should ask him.
sharp comet
He has graciously shared the compiler with me already 🙂. It does take a few minutes to build on the pi. I picked up a Pi 4 but haven't done much with it yet I may give it a try on there to see if it's any faster. It's not much slower than building inside the VM though, and I'll be happy to free up some of the resources it's taking on this PC.
west zinc
I received custody back from my daughter of this PyPortal. So instead of having a breadboard of wonky wires and a display on the desk I can have it up here above my monitor out of the way.
Since I plan to use this for a lot of debugging, I added an easy to feel and press reset button.
sharp comet
That is cool! I'd be happy to get mine mounted up on the monitor like that to reclaim some desk space. The easy to use blind side reset button is a very nice touch.
I recently created this multi-functional timer application for use with MiniTFT Featherwing: https://youtu.be/4jgLDn4JhIM

The code for this project is stored here: https://github.com/FoamyGuy/CircuitPython_Minitft_Featherwing_Timer_Gadget
west zinc
Cool. I like your UI with the joystick rather than just an plain ole menu.
Uploaded the Fusion360 file and STL files to Thingiverse: https://www.thingiverse.com/thing:4588984

This is a bracket to mount an Adafruit PyPortal to the top of a 2015 iMac. It places it conveniently out of the way so you can use your desk for other work.
Also, I added a RESET button extension to make it easier to reset just based on touch. I printed the RESET button with...
desert timber
those are very short videos 🙂
 lusty siren
Yes. They are. Haven't done any long run anythings yet.
Also recording the screen of a wear-on-your-face receiver via cell phone is not exactly the best way to record the POV.
I have a USB video adapter but that'd require plugging it in.
lusty siren
A shortish video of it outside. And some more pictures of it outside as well, further in the thread.
https://twitter.com/AndonRT/status/1302766632440389634?s=19


Captured some video from the receiver! There's a buzz of some sort, but it recorded pretty well. https://t.co/9LdldrKlzX
 Twitter
 vale wasp
Oh I didnt see this, super cool @lusty siren !
exotic sierra
I'll get to this point soon lol
for now, my goal is to get myself comfortable enough to build an electric go kart
high torque. enough to ruin someone's driveway
vale wasp
Well in that case electric is the way to go 😜
ancient skiff
Circuitpython calculator running with a version of the arbitrary precision "decimal" module
Here I've approximated pi by selecting radians mode and entering: 1 ATAN 4 * (which is 4 * atan(1) in traditional notation)
To fit the screen size, numbers can have 15 significant digits and have exponents from e-99 to e+99.
normal CircuitPython is limited in precision, so it can only calculate 4 * atan(1) = 3.14159 (6 digits)
exotic sierra
Hmm
solar yew
golly you make such interesting things.
 craggy parrot
That is not an approximation for pi! It’s exact.
The calc may be appropriate...
Very nice calculator!
desert timber
Certainly more accurate than the "value by fiat" attempt in 1897 https://en.wikipedia.org/wiki/Indiana_Pi_Bill
 wary shore
made my first arduino video, it's about directly interfacing to a seven segment display.

Tired of obsolete solutions to drive your old school seven segment display?
Here's a cheap and simple way to do it, even if it's a massive waste of computing power.
 distant arrow
Muahahaha... though honestly the display's currently driven by Python on my laptop and the MCP2221A board
 delicate basalt
Published a new project write up, though this wireless charger was more about making the enclosure for the ebay qi coils http://ryantwalton.com/projects/wireless-charger

RyanTWalton.com
One of the things that I have regretted as I've gotten older is not taking more time to learn from my dad by working through projects. He is a man of many talents and much knowledge and I would be lucky to learn even a little from him. Knowing I had a
delicate basalt
though it does feature a micro USB panel mount extension from Adafruit
 west wasp
Here's the Bubble Machine we shared on last night's show and tell...
https://browndoggadgets.dozuki.com/Guide/Bubble+Machine/237
 marble mantle
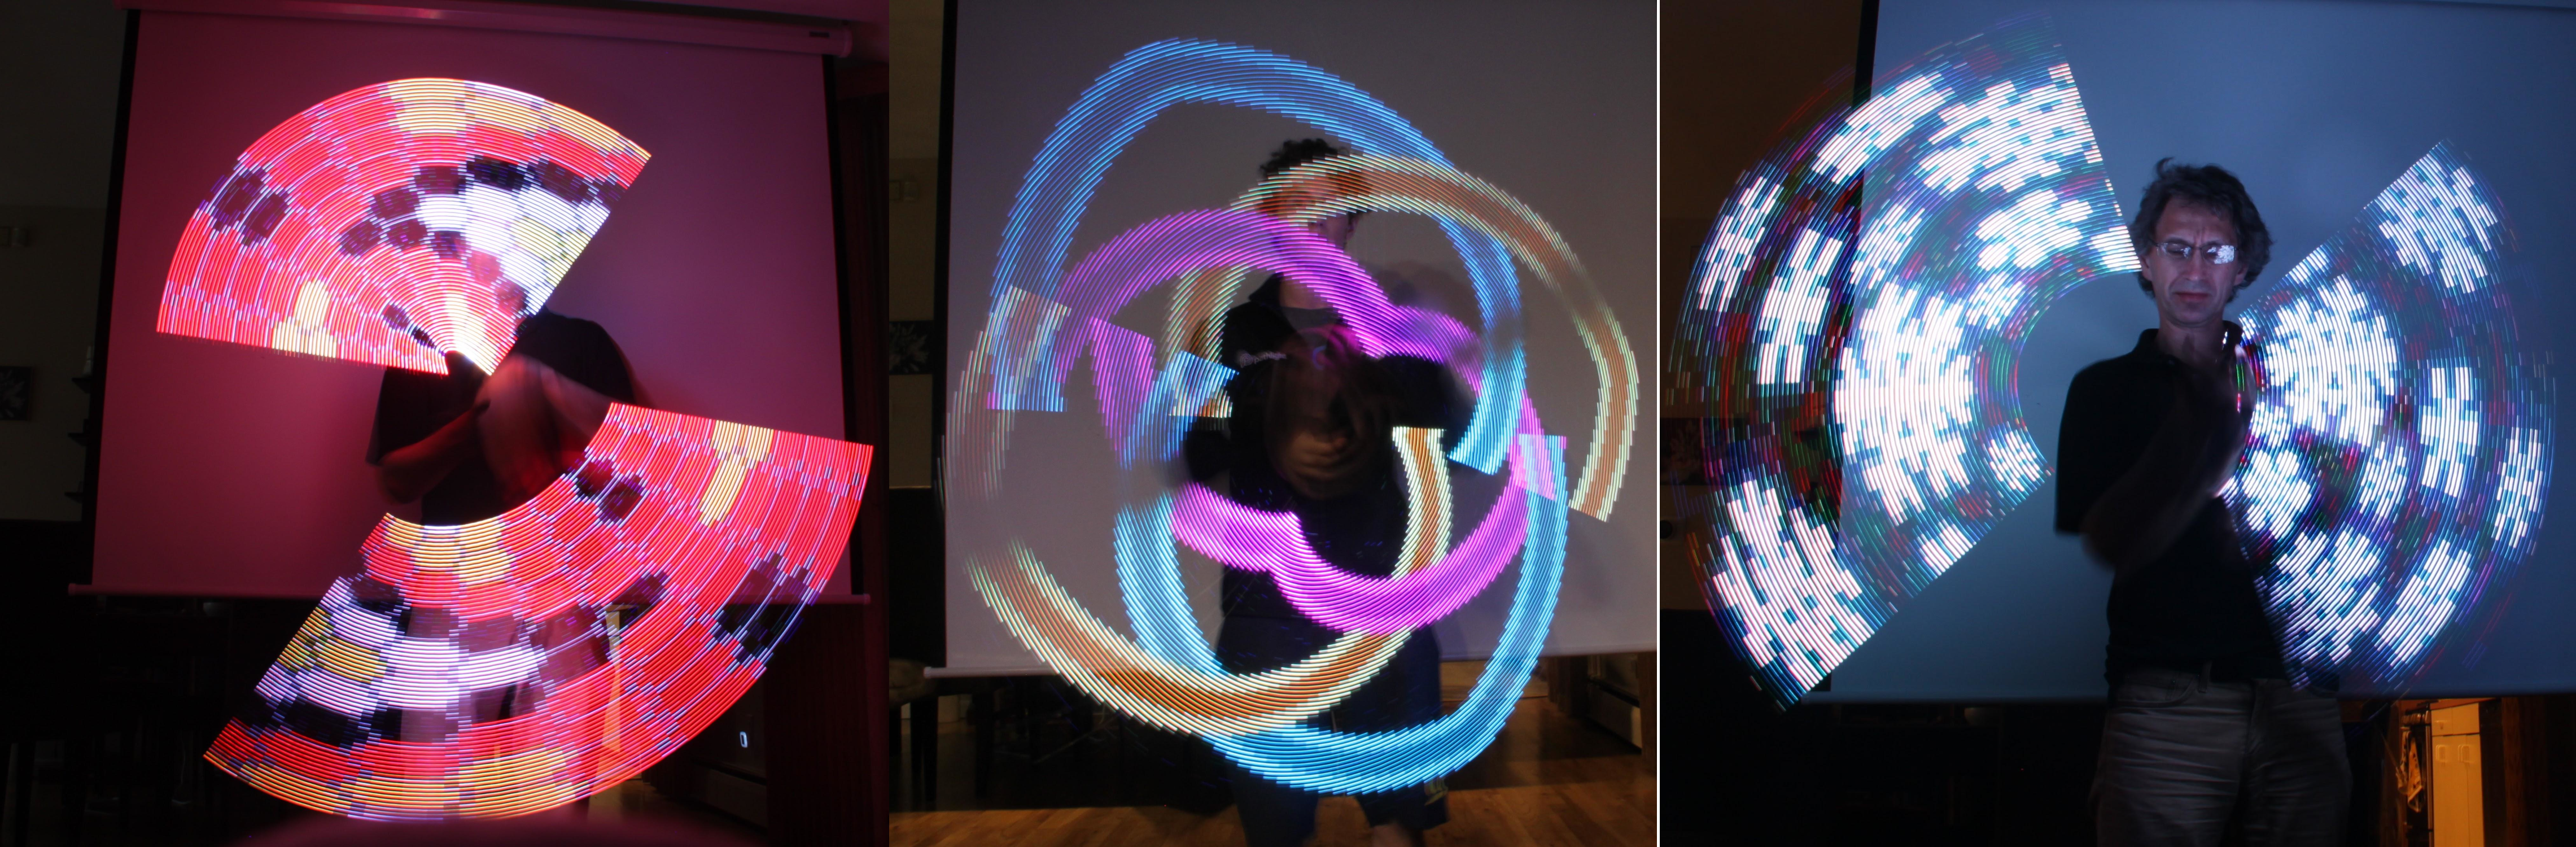
persistence of vision project - next milestone: everything connected and inside the clear plastic tube....
 untold birch
My battery bank with a BLE beacon (iTag) for remote battery percentage reading, link-loss and find-my-batterybank alerts. Conceptually very simple, I'm surprised no commercial options exist.
 hollow cedar
oo that seems really neat
 hallow trail
Fun project 😜
 lucid bloom
I think I've had too much time on my hands, made a new version of my airsoft computer scope. It's got a 5 hour battery life and weighs half a pound. The opencv crosshair doesn't show up in the recorded video, the picam text annotation stuff does.
This is what I call my 21st century food pantry project. A contactless number dispenser that also does sms. If a client has a smartphone they can place their own order otherwise they get a paper number and a volunteer fills it out. Led number sign to show now serving number, if they have a phone they get a txt back when it's their number. Orders get displayed in the packing room where I help pack the orders. Been using it for 3 weeks so far, hoping to find time to demo it on show and tell. Basically I took our existing process and made it as paperless as possible. One of the nice things that will come out of this system is I will be able to quantify everything we give out.
The food pantry now has a total of 3 pi 3bs and 5 pi zero ws 😅
solar yew
;)
To get a blood test at the V.A. they have a ticket machine that spits out paper tickets, numbered sequentially (pretty sure they're custom printed per event, but I don't remember).
Similar to deli tickets.
There's a voice annunciator (a machine) that announces the next number as it becomes current.
Over a PA system.
lucid bloom
Sounds pretty similar, before covid we would have people wait inside but now they have to be outside/in the parking lot, there are no more than 2 clients in the building at a time now.
We have extra gloves and masks just in case
solar yew
Yeah there's a service oriented place near me and they're doing what they can outdoors. I wonder how they'll manage when it turns quite cold outside.
Local soup kitchen had modified their means of delivery to handed-out-the-window style (like a drive-thru window, but the clients are on foot).
Used to be indoor dining and a cafeteria style line.
I don't know if they're still doing that, but if they are, I'd expect it to continue through the winter.
lucid bloom
We were doing drive throughs that I was running off of Salesforce on mobile. The people in charge wanted to get the volunteers/food items back inside so I came up with a way to do that.
solar yew
A lot of people were convinced everything would be back to normal, more than a month ago. ;)
Mine's a three-year plan and expectation. ;)
lucid bloom
That's part of the problem is false expectations
solar yew
I don't have a lot of skin in the game either way; I'm okay with the news I'm getting. what's interesting is Connecticut has a chance to remain low infection rate, indefinitely.
Which means a lot of behavior change. ;)
exotic sierra
Which means a lot of behavior change. ;)
@solar yew everyone knows it’s because of lime disease 😉
solar yew
oh okay I missed it. ;)
exotic sierra
It’s great because they say corona is better with limes so everyone knew Connecticut wouldn’t get it bad
So many bad jokes
solar yew
We have a rational governor. That's really all it is. ;)
lucid bloom
I'm in massachusetts and we seem to be doing ok, still in the 400ish cases per day. In my county we very few cases and no one currently hospitalized for covid.
solar yew
I didn't realize Massachusetts was doing that well! That's good to hear (we were from there; moved to CT in 1966).
exotic sierra
Current for North Carolina where I am currently
A nice decline. Hopefully it keeps going down
lucid bloom
It's scary what exponential growth can do to any downward trend
solar yew
Yeah, I did the math daily, when Connecticut had its very first case.
It took sooo long to gain momentum.
If you have 5 seed cases and double every 5.5 days, just repeat the calculation.
Takes a pretty long time for that to get into larger numbers.
Eventually, it does. ;)
It probably works out quite a bit differently when it's no longer your very first 1,000 cases, but your 20th set of 1,000 cases.
(More undetected cases spreading in the wild)
lucid bloom
I'm just pleased that I keep finding ways to entertain myself at home 😅
sharp comet
Beginning stages of development on an InputText widget for CircuitPython displayio.
sharp comet
With an actual keyboard in the mix now, and kinda-sorta supporting backspace. ⌨️
 long vine
I'd like to share a python program I made for KiCad. It re-annotates schematic files in a more hand-solder friendly way by grouping same footprint+value+type together numerically.
This means if you go in ascending order you can just attach components to the board by "is the reference less than this nr?" instead of having to cross reference every individual component to a list.
I hope someone can find use in this.
https://github.com/Jasdoge/Kicad-Annotator

GitHub
Python based annotator for Kicad sch files, which groups components by label/type/footprint - Jasdoge/Kicad-Annotator
 lapis jasper
good idea @long vine !
 proper fog
Hey all, new to the discord channel. My nephews all play D&D and are dice fanatics, I thought i would surprise them with a twist on dice, it uses a circuit playground inside. But essentially it has a selector for number of sides (with options for d2,4,6,8,10,12,20,100) and a selector for number of dice to roll (1-20) and then randomly rolls the dice and displays the output. I present the Dice Box 5000
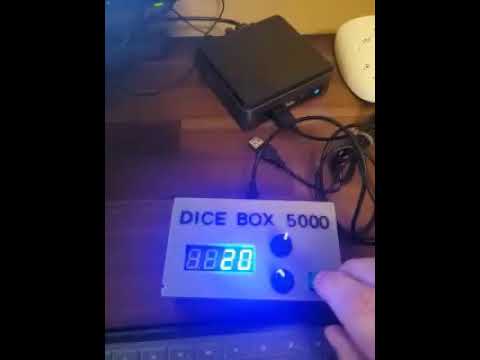
 cursive jasper
Retro Wood case with Echo Show 5 + BT Boombox inside
solar yew
CP2104 Friend staked to Perma-Proto (no-solder technique).
solar yew
 gusty shard
About to solder a StemmaQT cable to my Feather M0 wish me luck.
marble mantle
good luck!
 split moth
The prototype of a pot tester device I put together quickly for my company. It is using an itsybitsy m4 and the code is in circuitpython. There is a switch that changes the shown value from percentage to voltage. A few more things need to be added and then I can begin putting it in a nice enclosure. Btw, I am getting more stable readings from the mcp3008 as opposed to the onboard adc.
upbeat geyser
That's nice! I suppose it makes sense that a dedicated ADC might perform better than one that's built in to a multipurpose chip.
split moth
Yeah I guess. This pot also has direction contacts integrated (2xNO contacts, one closes at about 45% and the other at 55%). I used to yellow 3mm LEDs for them. Also a 5mm Dual color LED makes it easier to understand when a pot is correctly calibrated. (The red turns green when the pot value is 49-51%)
@upbeat geyser thanks again for the tip (10MΩ pulldown on the analog)
 vestal sapphire
Had fun building two prototypes of a new LiFePO4wered/Pi+ revision that has a synchronous buck converter charge controller for higher efficiency:
Paste was pretty clean for me, not Greg Daville level, but pretty good. 😆 Only had a couple shorts to sort out after reflow.
 thorn crane
I made a visual way of exploring Bloom filters, a probabalistic data structure, using a Pi, Adafruit case and Pimoroni Unicorn hat... video embedded in my article https://simonprickett.dev/visual-bloom-filter-with-raspberry-pi/

simonprickett.dev
Bloom filters are a probabalistic data structure that I’ve wanted to learn more about for a while. When I started reading up on them, I found a lot of the material to be quite dry and theoretical, so I thought I’d try and implement one in hardware somehow and make my own visua...
warped violet
I thought it ought to be possible to make a QMK keyboard with a Atmega32u4 and flash it without actually ripping out a programmer cable, so I built a board based on some tutorials and then figured out how to get it working as a keyboard in QMK: https://www.wirewd.com/make/blog/qmk_keyboard_missing_bits
At some point, I was linked to Ruiqi Mao's guide on how to make a keyboard PCB in KiCad and kinda filed in the back of my head the idea of doing that. Because, honestly, PCB design is kinda fun. Eventually, I decided there were enough interesting reasons all coupled to maki...
 true zodiac
With the recent California wild fires, I made a small status display for our apartment to let us know how the air quality is outside. It checks a local PurpleAir sensor and uses a Adafruit Jewel 7 and Feather M0 Wifi to power the display. Put in a recyled soup can with a diffuser made from parchement paper. Vey nice quiet status display that lets us know when to open and close the windows. Wrote up the instructions on instructables, code on github. https://www.instructables.com/id/PurpleAir-Air-Quality-Status-LED-Display/

Instructables
PurpleAir Air Quality Status LED Display: With the recent wildfires in California the air quality in San Francisco has been greatly impacted. We found ourselves checking the PurpleAir map over and over again on our phones or laptops trying to see when the air was safe enough t...
 slender sky
Thanks to @lapis jasper for the S2 CPy live-streams and the uploading assist from @manic timber I got CircuitPython working on my ESP32-S2 Module Clip Programmer Board. Staying up late to try and get it on #show-and-tell 1am UK time
 late hornet
i set up a nas with my raspberry pi. it has 64gb of storage. i will upgrade it eventually
wait
it only has 28gb
gotta fix something
its all going downhill
gotta reinstall raspbian
should work after this
 grizzled talon
Hi everyone! I'm new here so hopefully I'm doing everything correctly 👍. I've been working on a crazy personal project for about a year now. It's a custom Arduino smartwatch. I just finished version two and here's some photos of it as well as a comparison to version 1. Version 2 is powered by a Adafruit Feather sense (one with built in bluetooth). I was able to make v.2 alot thinner because I ditched the use of a RTC and instead went for a Bluetooth LE CTS approach. Because of that, battery life increased from 4-6 hours all the way up to 30-36 hours roughly. Now the one problem I faced with that was that I don't use an iPhone (I have an iPad to sync time), so I coded it so it would keep track of time even when disconnected from Bluetooth. I also created a port so anyone with an Adafruit Clue can test it out using the Arduino IDE. Here's a link to the Clue code: https://tinyurl.com/y5aawc3x

GitHub
Contribute to MichaelLacock/ML-Watch development by creating an account on GitHub.
The watches were 3D Printed using a PRUSA mk3s (PLA filament) that my university has. It was designed using TinkerCad. Also, any 22mm watch band would be compatible 👍 The 16 NeoPixel LED Ring emulates the hands on a real watch (red is hour and light blue is minute).
exotic sierra
Very well done 👏👏👏
grizzled talon
Thanks! 😊
normal vale
@grizzled talon Nice project, I am interested in the CLUE side of your project. I have hardware with only BLE and other with RTC and BLE or AirLift and BLE. Interested in code/idea to share the current time to the lower capable device.
grizzled talon
@normal vale The code is available at the end of my original post. If you are planning on porting the code to other hardware, make sure to keep in mind you may need to adjust the "tick" variable. For the clue it's set to delay 465 milliseconds for a "half second". This is to counter-act the processing delays caused by the nature of the hardware. This is so it can try to keep time just a bit more accurate when it's off the bluetooth connection. Hope this helps!
 opal cipher
I made a box! It's a little speaker box containing a raspberry pi zero, an Adafruit Speaker Bonnet, and a custom battery charge/boost bonnet (which is just a Adafruit PowerBoost 1000C integrated into the Pi Zero form factor). I need to find or make a knob handle for the lid, then it will be done. https://cdn.discordapp.com/attachments/548213229206372362/758685183376490498/IMG_20200923_220611.jpg https://cdn.discordapp.com/attachments/548213229206372362/758685182441685003/IMG_20200923_221522.jpg https://cdn.discordapp.com/attachments/548213229206372362/758685181946232852/IMG_20200923_223127.jpg https://cdn.discordapp.com/attachments/548213229206372362/758685181460086824/IMG_20200923_223134.jpg https://cdn.discordapp.com/attachments/548213229206372362/758685180520169502/IMG_20200923_223138.jpg


Eagle CAD sources and gerbers are available for the custom PowerBoost bonnet, if anyone is interested (and if personal github links are allowed/welcome here).
 median spoke
@opal cipher personal githubs are posted often, lots of people here like to share and see what others work on
opal cipher
Here's the CAD files for the powerboost bonnet that I used in this build: https://github.com/jdimpson/PowerBoard

GitHub
This repo contains the Eagle CAD schema and board data for the PowerBoard, an adaptation of AdaFruit;s PowerBoost 1000C to the Raspberry Pi Zero form factor. - jdimpson/PowerBoard
And here's the same for a similar board that includes clips to hold the 18650 onto the board: https://github.com/jdimpson/PowerHolder
GitHub
This repo contains the Eagle CAD schema and board data for the PowerHolder, an adaptation of AdaFruit;s PowerBoost 1000C to the Raspberry Pi Zero form factor. - jdimpson/PowerHolder
The second one has the added advantage that you don't have to reflow your SMD components onto the board. Instead you have the option of just soldering an authentic Powerboost onto the board. Either way the board will then patch +5VDC, GND, and the LBO signal into the RPi header for you, plus give you a programmable tactile button and LED, and a SPST slider switch attached to the ENable signal.
solar yew
https://github.com/CrazyblocksTechnologies/memdesmaker Python program for making descriptions for computer memory modules. This is my first Python project. Just needs tkinter so it should work on MacOS, Linux, Windows and FreeBSD.

GitHub
Python app for making descriptions of computer memory modules - CrazyblocksTechnologies/memdesmaker
 glad solstice
About to use an arduino nano to replace all the MIDI functionality on this.
Goal is to have the nano send pitch bend commands when sliding up and down the fretboard when a note is held.
For some reason Casio has it to where when sliding to another fret, it sends note ons, which is annoying.
Also, while I'm at it, I'm gonna have the two volume knobs send CC messages.
warped violet
Well, get to it. Don't go all stringing us along!
glad solstice
Ayyyy. Finger guns
I will say in addition to modifying it, I replaced the old battery system with this.
A USB-charging 9 volt battery.
So much better than 6 D Batteries. Lol
glad solstice
Oh, and the final thing related to the MIDI, is that the notes are all the same velocity, no matter how hard or soft you play, so I'm gonna add that as well.
warped violet
Yeah, that sounds like a fun project.
glad solstice
Sure will be!
split moth
And here is my potentiometer testing device so far. Also added support for Analog Joysticks with Hall sensor. The screen needs to be replaced by a bigger one. I also want to reduce the lag even though it’s not too bad.
vale wasp
Very nice, love the joystick 👍 you should be able to reduce that lag quite a bit
split moth
Thnx! Any ideas on the lag matter? Of course without seeing the code it’s hard to tell
vale wasp
@split moth multiple, you can feel free to make a pastebin and myself or others could give some ideas, I am about to be working but I can sit down with it when I have a chance'
split moth
Cool thnx! 🙂 btw the joystick is a prototype from the company I work for. 🙂
vale wasp
Neato, whenever you get a chance just make a pastebin, and @ me linking to it
split moth
Because the code is pretty big can I post a GitHub link?
vale wasp
Thats the point of pastebin but if you have it on github you can just link that sure
split moth
@vale wasp Here is the code of the potentiometer test device. I tried to tidy it up a bit but I am sure there are many improvements to be made. Be easy on me 🙂
Pastebin
Pastebin.com is the number one paste tool since 2002. Pastebin is a website where you can store text online for a set period of time.
vale wasp
Oh jeez, circuit python... If this were C I could give you constant optimization recommendations... Are the display and the MCP on the same bus @split moth?
split moth
Yep, both SPI
Haha sorry I forgot to mention the language
I could try using the itsybitsy analog ins instead of the mcp, just to see if it plays a role. Although I am getting much more stable values with the mcp
vale wasp
Are they on the same bus? And this setup is fine
Im confused why the values from the SAMD were not stable but the MCP works fine
split moth
They were fluctuating by about +-1% more than the mcp. And they are on the same bus yes.
Btw, the changes that are reducing the lag are those that make the display change less pixels / frame. For example if I scale the labels less, or make the progressbar thinner, I will get a boost.
vale wasp
So the MCP is actually really fast, it just needs two or three SPI clock cycles between each read, could you take some time measurements for me?
Instead of a delay, lets just use the display draw, but I also think you might want to split rendering and reading loops
split moth
At the moment unfortunately not because The whole project is at work and I am already home 😆
vale wasp
Ah alright, and I need to be working, so how about you hit me up next time you're next to it?
I would like to give a solid recommendation and I just need a few numbers to be sure of myself
vale wasp
Np, after my recommendations you could also poke your head into #help-with-circuitpython I bet they'll have some tips for you. And also I think we're flooding this channel so next time you ping me meet me in #help-with-projects
upbeat geyser
Oops, I let out the smoke 
tacit delta
no, not the magic smoke!
exotic sierra
all our secrets!
warped violet
I got curious about what the observable tolerances of 3d printing on random Treatstock printing places was.
So I made up a test piece. The biggest is 1/4" and the smallest is M2.5 and all of them were fairly tight screws to thread in.
long vine
Instead of getting actual work done, I spent almost 4 hours making a potato based LED cascade. Still worth it.
the TinyAVR series has a 1.8V minimum operation voltage and 5uA current draw at 1mhz, so I wanted to see if it was possible to power it through a few potatoes
warped violet
The nice thing about potato powered computer is that it's really easy to get root on them.
marble mantle
and hack them to pieces, turning your project into french fries
warped violet
What does draining the electrolytes from a potato by using it as a battery do to the nutritional content? Inquiring minds want to know!
 pastel star
What does draining the electrolytes from a potato by using it as a battery do to the nutritional content? Inquiring minds want to know!
@warped violet i do want to know that too, if you happen to find any academical pappers about it please share, i'll do the same if i find it 🙂
 torn elbow
Successfully cloned and 3d printed a piece from my mec 101 class robotics kit
And made a little bot while bored in class this morning
sharp comet
My weekend project is a BLE "smart" USB phone charger. Using Itsy Bitsy nrf52840 and @exotic sierra 's load switch breakout.
 empty crag
My project for the day was to use a QT Py to build a USB Adapter for an original NES Controller (written in C, using Keyboard library). Started with a Nano on my “MCU Lab” board ...
Might try it out in CircuitPython as a learning experience, haven’t written anything in CP yet.
empty crag
The NES gun would require a different setup, this only works with the standard controller.
Old light guns used a trick with crt’s ... don’t believe there’s any way to make them work with modern displays.
tacit delta
i know
I was wondering if there could be camera and arudino would calculate if it hit a target then send proper signal
empty crag
I believe that’s what the Sinden gun does
 mental arrow
Have you ever been presenting in an important meeting and had someone walk in? Have you ever wished that there was some better way to tell your family not to come in than a large slab of wooden door in their way? Now you can with a Cisco Webex Status Screen!

Display your status to all with a status screen powered by an Adafruit Pyportal and Cisco Webex APIs.
tacit delta
very safe
solar yew
indeed
extra duct tape to make sure nothing shorts out
also the lipo battery is acting as insulation between the pi and the gps module
slightly terrifying, but it works I guess
man I really need to make a case for this thing
tacit delta
thats where 3d print is nice on
 rare shale
sorry for the bad video quality.
You can start with zero drives attached. I had the SD card attached for the sake of convenience.
https://youtu.be/uVvINASFREg
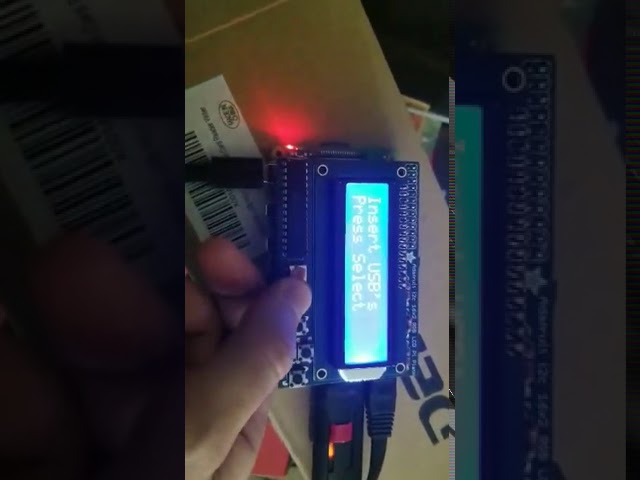
This program will perform diff timestamp backups of one drive to another. The main purpose is for photographers and videographers who are out in the field. It's cumbersome to have to bring your laptop with you. This tool will do it automatically for you.
 untold birch
I implemented firmware update (over Bluetooth Low Energy) support in open-source Gadgetbridge, for the open-source PineTime smartwatch.
Eager to see where people take this interesting hardware platform to.
vale wasp
Very nice! I wanted to grab a pinetime last week but no longer sold!
untold birch
The devkit seems to be in stock atm.
vale wasp
Oh sweet, I was on this page, must have just been out of stock, wonder why they didnt just say that
 latent terrace
I created a project I call a “microcontroller trainer” that carries an arduino nano, an esp32, an esp01, and a pi zero. https://wiki.bluesmokemonster.com/index.php?title=Microcontroller_Trainer_Rev_2
Would love feedback
 covert silo
@latent terrace looks pretty good especially for a lab setting. Users would have so much options and flexibility in terms of prototyping IoT devices. They could do both, device and server on this board. I dont see any sensors though. I think a few on-board sensors would be a good addition like temp, hum, imu. And the rest can be added on the bread board. Maybe some battery option as well so that they can make it portable if need be to test the device. A newer Bluetooth module would be nice. (BLE 5) And some solid documentation with example projects is key to a product like this. Although you might not be looking to sell in which case makers can figure it out relatively easily themselves.
latent terrace
I’m working on the next rev right now and it includes a lipo 🙂
I’ve tested with the AT-09 BLE module and it’s pin compatible with the HC05, although I haven’t put it through it’s paces yet
I’m also including an expansion socket to allow adding new microcontrollers (such as a feather) with ease, while not taking up breadboard space
Also some banana jacks and BNC connectors for test and measurement interfacing
covert silo
Awesome. Will you be looking to sell these? I can think of a few people who would be interested in something like this.
latent terrace
There on tindie now
Full kits and bare pcbs
There are 20-30 in the wild currently
covert silo
I havnt really dove into the tindie scene but that is awesome. Will check it out.
 hallow imp
We recently updated our #circuitpython-dev I2C, UART and SPI support for Evo M51. So, I figured it was time for a demo. On an unrelated note, if anyone wants to hire me as a DJ - or perhaps a hand model - just hit me up on DM. 😀

Since nearly all of the I/O on Evo M51 are routed through the FPGA, we need to manage signal muxing and direction for all the standard I/O normally accessed on the SAMD microcontroller from both Arduino and CircuitPython code.
We recently updated how we handle I2C, UART, and ...
delicate basalt
I have nothing to do with this project, but saw this video and thought someone else might enjoy it https://youtu.be/wxL4ElboiuA

Link to my website: https://www.daliborfarny.com
Our newsletter: http://www.daliborfarny.com/newsletter/
The nixie tube is a vintage display device which had been used until 70s when it was replaced with LED displays. The complex knowledge of manufacture of nixie tubes liter...
upbeat geyser
Dalibor is a great guy. I had him make me this variant with a mesh anode all around, so you can see clear through the tube.
delicate basalt
he had another video that I really liked, but the front lens cracked so didn't get to see it working
latent terrace
That’s gorgeous!
 zinc jolt
Made a pair of Star Wars Rebels punk jackets with animated lighting effects. Mine runs on a Nano, hers on a Flora.
I overhauled the Fire2012 flame code to work with these, wrote additional code for my lightsaber and her (not shown) blaster, and added a "super bright" momentary button that ramps up brightness to max for 10 seconds after press.
Both are powered by pocket-sized USB power banks, and since they're at nominal-brightness most of the time, one small power bank will last many hours.
 median violet
Hi, is there restrictions on the hardware used to show a project on showandtell? Like a minimum amount of Adafruit products or something?
solar yew
@median violet I think it's a pretty loose policy.
You get about 60 seconds, one way or the other, on average. ;)
median violet
nice thank you
torn elbow
Nothing spectacular (yet) but its thanks to a lot of help from some people here so I thought I'd share, finally got a voltage divider working and my ESP32 is successfully sensing battery voltage, so now I can trust it to not overdischarge my batteries and now I can continue working the rest of the bot while on battery power (Couldn't do it on PSU because PSU is only 2A)
Still some tinkering to do because the contrast changes as the battery voltage drops (oops 😅 )
 rancid kestrel
My very first CircuitPython library! https://github.com/2231puppy/CircuitPython_DiscordBot

GitHub
Contribute to 2231puppy/CircuitPython_DiscordBot development by creating an account on GitHub.
solar yew
;)
 unreal token
First try soldering since I screwed up an electric guitar in 1998. I'm calling that a success
solar yew
👍
sharp comet
@rancid kestrel Hooray! I saw your Discord bot got merged into the community bundle. Thank you for that. I really appreciate you putting in the effort to create this and share it with the community!
 clear matrix
@rancid kestrel and I'm putting it in the Python on Microcontrollers newsletter for tomorrow - nice work!!
rancid kestrel
Thanks! I'm continuing to work on my library and push the changes to my GitHub repo. Does the community bundle update automatically, or do I have to fork it again?
sharp comet
@rancid kestrel That is a good question. I'm not 100% certain, but I think it's set up to get the changes automatically if you push them into your own repo.
rancid kestrel
Ok, thanks!
 silk glacier
Hey Guys!
I'm working on this programmable DIY home automation/environmental sensor. It has a battery life of up to 5 years and can measure 8 different data points. Its compatible with Arduino, ESP-IDF and home assistant. 😎 🤓
Check out the sensor here and subscribe for updates!! -> https://kubosensor.editorx.io/kubo
Kubo
 clear dove
Just updated KMK to work with fully wireless split keyboards. Still in a WIP branch but heading to master soon ™️
https://github.com/KMKfw/kmk_firmware/tree/topic-splits
GitHub
Clackety Keyboards Powered by Python. Contribute to KMKfw/kmk_firmware development by creating an account on GitHub.
 short aurora
Not sure if I shared this before, but I started with this Game of Life code [https://learn.adafruit.com/rgb-led-matrices-matrix-panels-with-circuitpython/example-conways-game-of-life] threw in ulab arrays and made a multi-mode Game of Life that did 1) the usual GoL; 2) one with two populations overlapping; 3) a Contagion mode where one population infects the other; 4) and competition mode, where one population obliterates the other. The GIFS below.
Usual
Both
Contagion
Competition
But last week I returned to this project to make a more topical one: The Rose Garden Massacre
The Massacre video
[not sure why my GIF of the massacre isn't working]
Enjoy

I added a few modes to the traditional Game of Life, inspired by the Great Pandemic of 2020 and Black Lives Matter

Adding yet another topic to my multimode game of life.
 leaden laurel
how do you get into show and tell?
exotic sierra
wait for the StreamYard link in the #live-broadcast-chat channel 🙂
it's sometimes hare to get in
leaden laurel
ok, thanks
 cold bridge
Among Us Game electrical panel task in real life. WIP working on game logic...
sharp comet
Monster M4sk helper library for CircuitPython is coming along nicely.
The code is pushed now as well: https://github.com/FoamyGuy/Adafruit_CircuitPython_MonsterM4sk
sharp comet
Couldn't help but take a little bit of avian inspiration from @fair vessel
 subtle copper
HI! I'm building a CiruitPython IDE that's browser-based and designed especially for use on Chromebooks. Even though it's easy to write code in a text-editor and drop the file on the a plugged in-module, there are still steps in involved in that can be tricky to follow correctly and slow especially when you are iterating your code a lot. The IDE I made loads code temporarily right through the REPL, so as long as the device is "tethered", you can just keep loading/iterating. It also makes it really easy to load in any of Adafruit's example code.
I'd love some help beta testing it and seeing how people use it.
You can try it out at https://slappy.io/
sharp comet
@subtle copper Neat! I like the way that you can load examples inside of it. Would love an option for side-by-side instead of above-and-below.
subtle copper
okay, thanks for the feedback, I'll add it to the list
I also plan to add graphing as well as the console
 bitter hazel
sharp comet
bitter hazel
sharp comet
@subtle copper Trying this out on a few devices today I am not seeing my devices get listed in the list when I click the connect icon.
Mu and putty can both see devices connected to my PC (though they weren't open at the time I tried slappy.io) I've never messed with web usb serial before. Not sure if there is some other setup needed for using this with devices?
sharp comet
I like the way these "Elton John" star eyes turned out.
subtle copper
@sharp comet What device, computer, and browser? Do you get a box asking to connect but no devices show in the list, or does nothing show at all when you try to click connect?
sharp comet
I tried with PyPortal, and Monster M4sk. Win 7, Chrome browser. It opens a list but the circuit python device isn't in the list.
The only think listed is an unrelated Intel hardware built-in to my PC.
subtle copper
one thing to try, although I don't think this will fix it, is in chrome, type chrome://flags into the address bar and turn on experimental web features (it will require restarting chrome), and see if they connect after that. I'll do a bit of research and see if I can figure out why they aren't showing up and try to get back to you
@sharp comet I think I found out why - It appears that WebUSB is only supported in windows 8 or higher. Slappy.io uses WebSerial, which is built on the same foundation as WebUSB - I'm learning that if it doesn't work for WebUSB it probably won't work for WebSerial, either, but it's so new there isn't a lot of troubleshooting info out there. I'm so sorry 😦
sharp comet
@subtle copper No worries. Thanks for looking into it. This is definitely a reality I've grown used to for a Win7 user these days. Making the jump soon to Linux
subtle copper
@sharp comet When you make the jump to Linux, I'd love to know if it works for you there. Keep me posted!
lucid bloom
I made a keyboard shortcut device for my niece for remote learning using the trinket m0. It's setup for google meet on a chromebook to mute video, mute audio, mute both and bring up the help menu. Total cost is $15ish.
sharp comet
Neat! I like the enclosure you used.
lucid bloom
I designed that with openscad
That flat rectangle slides in under membrane keys inside the middle part to give it a hard surface behind the keys.
lucid bloom
I designed it with an eye towards making more, only tool required is a soldering iron to put the pins on the m0. Assembly is easy, the case slides together. If I had all the parts I could make one in about 5 minutes. The case takes about 3 hours to print.
sharp comet
Nice, I am a fan of OpenScad as well. It's really nice to be able to put programming knowledge and experience to work on other things like CAD modeling. I like the way your enclosure is clean looking and sturdy but doesn't require any fasteners or other hardware to hold it together.
lucid bloom
I used this tutorial
https://learn.adafruit.com/dht-humidity-sensing-on-raspberry-pi-with-gdocs-logging/connecting-to-googles-docs-python3
And this case
https://www.thingiverse.com/thing:3265279
To make a pi zero w temp humidity sensor for our beach house to monitor things over the winter.

Adafruit Learning System
Humidity and Temperature Logging From Your Pi or Beaglebone Black to the Cloud!

This is case for a raspberry pi zero and a dht11 sensor. It's designed to be used on a raspberry pi zero without a display, so only the power connection is provided.
exotic sierra
Very nice!
marble mantle
turned out it is very hard to take videos of POV
photos with long exposure are easiest
exotic sierra
Indeed. Looks good though
marble mantle
yeah, just a tiny bit too stretched
but this is one parameer to fine-tune
exotic sierra
It does make me pretty excited seeing these kinds of projects. Ensures me that I’m doing the right thing 🙂
Growing my skills to do similar projects
 restive sentinel
trying to learn the fundamental controls and layers needed to make a PCB, so i did a quick keychain
 candid crescent
Awesome idea, and cool design!
warped violet
@marble mantle Awesome! If you want to get yourself visible in the frame with the POV, you can always add a flash.
sharp comet
Monster M4sk-O-Lantern 1.0 is alive
marble mantle
@warped violet thanks!
it was actually my son there - I was the one with camera and let him twirl the staff :)
But we will try the flash one, too
warped violet
I guess this means that.... you've got a staff staff
warped violet
I have some new POV-ish lighting toys but I haven't been super-strongly motivated to set up things with the folks I know to make use of them because pandemic.
marble mantle
I have some friends who enjoy playing with this kind of things
and do occasional show, too, at Burning Man or similar places
so I will give it to them
 gleaming sluice
Custom Holocron that is 3D printed and painted. Now has a the Adafruit Mini Lpio charger.
desert timber
Looks good! The thought is to have it change behavior in some way depending on what the RFID reads?
gleaming sluice
Yup! Both my Jedi and Sith one will have that ability in the future (I hope). Disney has custom "Kyber crystals" (just resin based crystal with an RFID tag inside) that I would like my Holocron to be able to read and change color based on the crystal that is inserted into the device.
desert timber
Should be doable with a minimum of components. You are using a LiPo battery so it has no cord?
gleaming sluice
using this setup (picture from Adafruit's site). Plan to include a Micro USB (assuming I get the proper certifications to sell it). Either way it will be a nice personal project to complete, even if I never bring it to market.
desert timber
One suggestion - there are "protected" usb chargers out there (this is an example) https://www.addicore.com/TP4056-Charger-and-Protection-Module-p/ad310.htm

www.addicore.com
This module uses the TP4056 / TC4056A Li-Ion charge controller IC and a separate protection IC for safely charging and discharging lithium-ion batteries.
these have FETs to prevent battery damage in addition to the charger chip (TP4056)
gleaming sluice
Oh , fantastic, and they are reasonably priced as well. Thank you for the advice!
desert timber
they are all over, the two extra components near the output are the thing to look for
Good luck with it, my suggestion is to build one, or 10 for friends. If it looks like it might take off - then call the lawyer 🙂
gleaming sluice
Thank you! The basic ones I have constructed seemed to be liked by those around me (just basic LEDs and a battery). Have constructed about 50 of them thus far. Glad I stumbled on the FCC guidelines when looking into RFID readers (as well as this discord)
desert timber
I can't disagree with the sound advice given earlier, but practically, until you are making them in vast quantities I doubt an RFID reader will cause trouble, especially if you find one you know is certified.
gleaming sluice
Agreed, I need to do more research as well as find an RFID reader that is certified.
marble mantle
OK.... I think I am ready!
Here comes full description of my Persistence of Vision project:
https://www.instructables.com/Persistence-of-Vision-LED-Staff/

Instructables
Persistence of Vision LED Staff: It is well known that even after a light has been turned off, human eye keeps "seeing" it for a fraction of second. This is known as Persistence of Vision, or POV, and it allows one to "paint" pictures by quickly moving a strip of LEDs, drawing...
it is based on work of Erin St Blaine and Phil Burges @hot ivy , but I made quite a few changes. Most importantly, you can now add images to the staff simply by connecting it to computer where it appears as USB storage, so you can add bitmap images by drag-and-drop - no more python conversion scripts
thanks to TinyUSB library
cold bridge
Among Us Fix Wiring Task with Timer
exotic sierra
Very cool 😎
cold bridge
Thanks! Now to figure out which task next to make IRL
solar yew
I have no idea what that is after watching for 20 seconds. ;)
I like the scale of it compared with human hands.
cold bridge
There's a task in the 'somewhat popular' game Among Us called Fix Wiring. I decided to replicate the task in real life...just because.
 vagrant mica
That looks pretty cool!
I just finished my first diy project this week
A guitar fx pedal
Its a mess but it works
The connections on the battery terminal are not great but I'm too lazy to fix that right now
marble mantle
Ok... sorry for spamming this channel, but I just couldn't resist
I promise it is the last one
desert timber
Lol, it is a cool project (and a well done instructable), you can post a few more 🙂
marble mantle
@desert timber thanks
sharp comet
Those are awesome. Definitely a really neat project, thanks for sharing.
opal cipher
Circuit Python on a gemma M0 and a string of 50 neopixels
https://youtu.be/V-JGW72lj_w inside

adafruit gemma m0 driving string of 50 neopixels
https://youtu.be/lZgAN0Uz-4Q outside

adafruit gemma m0 and string of 50 neopixels
Sorry about the potato vision
torn elbow
Robot dog coming along- added some ears with LEDs that indicate battery percentage and current mode, cleaned up some electronics, onto inverse kinematics..
sharp comet
@marble mantle your PoV staff was featured on Hackaday  https://hackaday.com/2020/10/25/pov-led-staff-takes-art-for-a-spin/
The human body does plenty of cool tricks, but one of the easiest to take advantage of is persistence of vision (POV). Our eyes continue to see light for a fraction of a second after the light goes…
 delicate tulip
Ds cart holder 3D printed
 wary canopy
A sonic screwdriver I printed, painting, and wired up for my son for Halloween.

Printed from a design online and did the electronics myself.
solar yew
@wary canopy That's great!
wary canopy
Stls were from Thingiverse. I added a few holes and what not for the buttons and switches. The green tip was printed on a friends SLA printer. I managed to jam and Adafruit Trinket M0, Li Poly 100 ma battery, Led Light, and Piezo Buzzer inside.
marble mantle
@sharp comet thanks! Haven't seen it yet.
solar yew
Hey, just wanted to say thank you for your support! I found here some awesome help for a cosplay project I built and wanted to share the final result with you! The electronics are 451 LEDs controlled with a Feather M4 and use the motion sensor as well as the speaker conncetion of the PropMaker FeatherWing. I also built in a mini fog machine and programmed in a color changing and sound effect! 🙂
 cobalt flint
tacit delta
cobalt flint
tacit delta
fancy
heavy ice
That's amazing!
What did you make the shape out of?
upbeat geyser
That is an excellent looking prop, well done!
marble mantle
how do you power it? with 452 LEDs, it takes considerable current..
solar yew
@marble mantle It’s actually only s 4400 mAh lipoly. The animation it was written in a very power saving way, so it works fine. However I didn’t test how long the battery actually last
@heavy ice It’s all just foam actually! Here is a full making of video: https://youtu.be/iloCsCRPBnY

Learn how to make costumes: https://www.kamuicosplay.com/books
Like our videos? Support us: https://www.patreon.com/kamuicosplay
Being a huge WoW fan, Bolvar's Hammer is a weapon I instantly fell in love with and just HAD to build. It lights up, can switch between different c...
upbeat geyser
You documented it, that's awesome!
solar yew
@upbeat geyser Always try to record as much as possible! I think, the final making of video of a project is actually the best part of it! 🙂
 random cradle
https://www.youtube.com/watch?v=WZLMSX3sBgA Please read the description of the video.
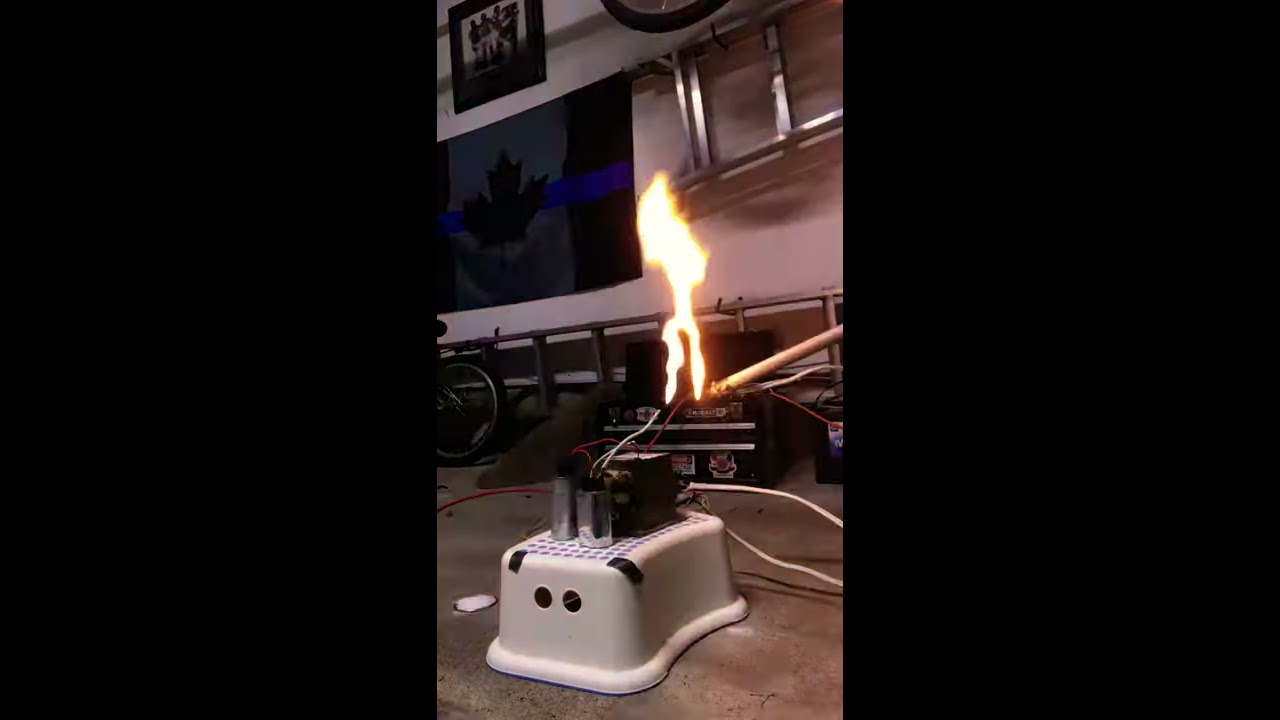
Do not attempt what you see on this video if you are not experienced with high voltage. This voltage and current will kill you if you touch it. Not only will you die, but it will hurt the whole time you are dying.
upbeat geyser
That's nifty (but I don't think it's resonant)
ancient skiff
A person at my local makerspace put this together: https://makemeazombie.com/#
Turn Yourself Into A Zombie with Neural Networks
random cradle
It is. If you put the 2 capacitors in parallel with each other. Then connect them in series with one side of the outputs on the transformer it resonates.
 feral magnet
I've finished my Maz-Trix with a demo mode and color themes ! https://github.com/Marius-450/Maz-trix

GitHub
A little maze game for MatrixPortal M4 with a 64x32 RGB matrix, driven by the accelerometer. - Marius-450/Maz-trix
 subtle turret
...wait kamui cosplay is on this discord?! AWESOME @solar yew
I've got some projects in the works to improve my prop game
west zinc
3D printed spectacles as a model in planning/preparation for a wood lamination project.
desert timber
belongs in pet-photos as well 🙂
subtle turret

 obtuse root
Oh boy it turned the vid
Playing with matrix Porta and gifs, I thought this relavant
 pliant island
GameTime Timer with the Matrix Portal. Mario keeps track of the kiddos daily screen time, automatically resets the next day. Super fun learning CircuitPython! https://github.com/jay0lee/matrix-portal-projects

GitHub
Projects to run on the Adafruit Matrix Portal / CircuitPython - jay0lee/matrix-portal-projects
feral magnet
nice !
that give me the idea to make a chess clock ... accelerometer can sense taps ...
long vine
Made a non contact candy dispenser for Halloween this year instead of my usual game for kids doing trick or treating, due to obvious reasons. https://www.youtube.com/watch?v=d4wAjiF_Gns

Due to a certain event of 2020 I thought I'd make a contact-free candy dispenser! Here's how it works.
subtle copper
@sharp comet I gave https://slappy.io a side-by-side option for the panel layout. That and a few other settings, which are all now "sticky" can be accessed from the gear icon at the top of the screen.
 modern pendant
@terse totem Hi FrankenPark, Thanks for the amazing laugher I got out of Adabox 16 unboxing. As thanks Let me Make You a Sprite!. Here is my iOS shortcuts plus tiny bit of python that lets you make Memoji BMP Sprite Strips for the Adabox 16 Matrix Portal without any special animation software. I wasn't sure a better channel for this . There are two shortcuts. Vertical/Horizontal. then you run the result through the python.
@terse totem
iOS Memoji to BMP Sprite Strip - Horizontal
Note: Results with strip for Adabox Matrix Portal with power on right side
- Photos - Select Photos (Include Videos, Select Multiple OFF)
- Media - Trim Photos
- Music - Get Duration form Trimmed Media
- Math - Duration / 20
- Scripting - If Calculation Result is less than 0.1 then Number 0.1: End If
- Media - Make Gif from Trimmed Media (Seconds per photo If Result, Auto Size on)
- Media - Get frames from GIF
- Media - Crop Frames from Image (Position: Center, Width: 384, Height: 320)
- Media - Combine Cropped Image Vertically (Spacing: 0)
- Media - Convert Combined Image to BMP
- Photos - Save Converted Image to Recents
@terse totem
iOS Memoji to BMP Sprite Strip - Vertical
Note: Results with strip for Adabox Matrix Portal with power on bottom
- Photos - Select Photos (Include Videos, Select Multiple OFF)
- Media - Trim Photos
- Music - Get Duration form Trimmed Media
- Math - Duration / 20
- Scripting - If Calculation Result is less than 0.1 then Number 0.1: End If
- Media - Make Gif from Trimmed Media (Seconds per photo If Result, Auto Size on)
- Media - Get frames from GIF
- Media - Crop Frames from Image (Position: Center, Width: 320, Height: 384)
- Media - Flip Cropped Image Vertically
- Media - Rotate Flipped Image by 90 degrees
- Media - Combine Cropped Image Vertically (Spacing: 0)
- Media - Convert Combined Image to BMP
- Photos - Save Converted Image to Recents
@terse totem
Python BMP Adjuster
Note: For some reason the BMP files made by iOS crash PyPortal or Matrix Portal. This redoes the file to be usable
import sys
from PIL import Image
if len(sys.argv) != 3:
print("Provide arguments: <infile> <outfile>")
sys.exit(1)
inFile = sys.argv[1]
outFile = sys.argv[2]
try:
img = Image.open(inFile)
origSize = img.size
except Exception as e:
print("{}".format(e))
raise (e)
imgChannels = len(img.split())
print("Channels:{}".format(imgChannels))
print("Size:{}".format(img.size))
sizeX, sizeY = img.size
newSizeX = 64
newSizeY = sizeY/10
newSize = (newSizeX, newSizeY)
r, g, b = img.split()
imgOut = Image.merge("RGB", (r, g, b))
imgOut = imgOut.resize(newSize)
imgOut.save(outFile)
sharp comet
Experimenting with outputting Blinka_Displayio to PyGame. Turned out to be pretty easy to adapt the work that Melissa has done to get this going:
solar yew
Happy Halloween! My costume:. I'm wearing my heart on my sleeve - I'm hooked up to a pulse sensor and it displays my heartbeat in lights. Doubled down on the dad joke, because I've also got a chip (arduino) on my shoulder! All adafruit sourced!
sharp comet
It passes the party parrot test.
cobalt dove
Check out what I got in the mail today! haha so worth $7 😄
I wish I could get full color PCBs made 😦
 dire meadow
Lol
feral magnet
Maz-Trix updated : a new color theme added, and demo mode is activated by inactivity and deactivated by movement.
GitHub
A little maze game for MatrixPortal M4 with a 64x32 RGB matrix, driven by the accelerometer. - Marius-450/Maz-trix
ancient skiff
my test jig is done -- now I can test a featherwing without soldering headers to it. sometimes I'm just not ready to make a big commitment like that.
sharp comet
@ancient skiff That is neat! I definitely understand that mindset. Peeling screen protectors is another leap I have trouble making some times. How do the connections work on the wing that is being tested? Leads that are a bit bigger than the pin holes are underneath that it gets pressed down onto?
lusty siren
Pogo pins? I see an extra pcb layer underneath, which is usually what holds the pogos in place
marble mantle
most likely pogo pins
Adafruit and sparkfun both have nice tutorials on building such jigs using pogo pins:
https://learn.adafruit.com/how-to-make-a-pogo-pin-test-jig
 sharp comet
Ooh nice, thank you!
marble mantle
here is sparkfun's one: https://www.sparkfun.com/tutorials/138
bitter hazel

My son wanted us to build an automated Nerf blaster targeting mechanism that will detect humans in motion and shoot them. Now that’s what I call a succinct user requirement 😂. So began a saga…
cobalt dove
My Riskeypad numpad that uses my 3D printed hall effect magnetic separation + levitation switches, my 3D printed stabilizers, my 3D printed keycaps (designed using my Keycap Playground), 3D printed case, custom-designed PCB, and custom-written (in Rust) keyboard firmware is now fully assembled and working! https://youtu.be/mz8VvTcYFVc

Not loving the colors of the keycaps but they still feel great. I think I'm going to re-print them in old school grey, black, and white in order to get that 8-bit gaming/80s look.
solar yew
that looks really cool
solar yew
10x nice
feral magnet
https://www.youtube.com/watch?v=5NWonUOjqoQ I have made a little demo video of my new lib 🙂

4 rectangles with various parameters animated with 10 different animations each.
anisha lib repo : https://github.com/Marius-450/anisha
#Adafruit #Adabox016
 craggy lagoon
this was a a bit ago but i used a vacuum pick-up,, arm kit, legos and an uno to make a robot to pick up a single card. I've got an app on my phone called "Delver lens" that uses OCR to identify cards!
sharp comet
@craggy lagoon that is awesome! do you have the arm documented online anywhere? I'm curious to learn more about how it picks up the cards.
 novel charm
In electronics class, I designed an ambient crystal-resembling rgb thing
So its not an arduino, its just self colour changing rgbs. And they are not in sync and each do their own thing which make it even cooler.
craggy lagoon
@craggy lagoon that is awesome! do you have the arm documented online anywhere? I'm curious to learn more about how it picks up the cards.
@sharp comet Unfortnately no, but its very simple, the vacuum pickup has two "buttons" on either side and when you press them it expels the air in its chamber and when you release it creates the vacuum.
 open osprey
Prototype of a throttle, mixture and elevator trim for Flight Simulator 2020. Uses CircuitPython on Trinket M0 to convert 2 pots and 1 rotary encoder to x,y and z axis on a gamepad. Works great in game.
Panel designed in F360 and 3d printed
 main jetty
Hello Friends - I wanted to share my halloween costume build, made possible by @rustic stag! I recreated Lady Gaga's costume and LED matrix mask with Sine wave from the 2020 VMA's. I used 9 Dot Star Matrixes, an ItsyBitsy M4 Express, and a MEMS Microphone - all from Adafruit. I've received so many compliments on the display and heard from tons of people who want to make LED matrix masks now! 😄 I was excited learn how to use the Adafruit GFX library - it was easier than I thought and I can't wait to do more with it. 😄
Me testing the LED matrix mask
I also used the mask to share on instagram and remind everyone to VOTE!
Here's the real costume, for reference.
😄
warped violet
@main jetty That's pretty darn amazing.
main jetty
@warped violet thanks!!
main jetty
@rain dome haha yeah! My boyfriend did go as the brain piano, so it was a bit of an entourage
 rain dome
woot! v cool
 junior agate
@main jetty That's as good as the OG one made by smooth technology! maybe better!
main jetty
@junior agate Thanks! It was fun to emulate it!
junior agate
@main jetty the person who made the original one is ex-adafruit employee 🙂
main jetty
@junior agateu Oh that's so cool!
lucid bloom
The beach house home assistant project progress. The 5 hvac units can be controlled individually or by floor. I am working on automations to make sure the house never goes below a certain temperature.
solar yew
Hey! I installed CP like two hours ago for a first time, and I started playing with it. I am using stuff from the 16th Adabox 🙂 This is what I did. I know it is super basic, but I am so happy that it works 😄 My goal is to display here the message from another device triggered by a sensor, but you know... baby steps 😉

There is no sound.
 dusk zinc
For no particular reason, other than "because it's there" https://twitter.com/anecdat/status/1327472474624323585

Need MORE connections on your #CircuitPython device...
@UnexpectedMaker FeatherS2 with @EspressifSystem ESP32-S2 + @adafruit Airlift & Ethernet FeatherWings
Ethernet IP: 192.168.1.224
ESP32SPI IP : 192.168.1.225
ESP32-S2 IP: 192.168.1.226
"If you can read this, its working...
 Twitter
·
solar yew
Twitter
·
solar yew
First step of building my iPod replacement. 7" capacitive touchscreen connected to Banana Pi M64 board. Finally got Android to run on it.
sharp comet
@dusk zinc that is a glorious sandwhich of network connectivity!
dusk zinc
or get DDoS'd by three different networks
feral magnet
I just added the ellipse and circle shapes to my lib ! (after adding polygons, triangles and lines a few days ago)
GitHub
Circuitpython lib to create a shape behaving like a neopixel object to be used with adafruit_led_animation - Marius-450/anisha
the fun part was for drawing the ellipses at any angle.

sharp comet
Working on Mag Tag support for PyBadger library.
 bitter sorrel
Building a raspi cluster! https://www.twitch.tv/bizhat
 feral magnet
@solar yew: related to your last question 🙂
solar yew
Thanks @feral magnet
 plush jetty
I made my first CircuitPython project earlier this year. My blog post is poorly written, but it includes a demo video and the source code: https://curtmerrill.com/posts/2020/busy-box-v1/ I’m trying to decide what to build next — I’m thinking about a NeoPixel based adjustable lamp
curtmerrill.com
 hard oriole
Here's a parallax test running on the CLUE. This is something I originally made with circuitpython displayio. I had it running on a Feather M4, displayed on a TFT [with half the resolution], and triggered by momentary buttons. Here I'm using the accelerometer on the CLUE instead for the cursor's X,Y, and moving display layers [opposite direction] based on their supposed depth. The display rate on the Feather M4 and the CLUE were similar until I scaled up the layers to accommodate the resolution difference. I culled out some of the sprites I had playing on my original test, and tried not to use scale on the display layers, but increase the resolution of the images instead. That seem to help some, but it is still a little slow. https://www.youtube.com/watch?v=u2Afm136B7A

This is a parallaxing test I made for the Adafruit CLUE. I'm using the built in accelerometer on the CLUE board to animate layered display groups, creating a parallax effect.
This Is a port of a
Here's the original one from the Feather M4 https://www.youtube.com/watch?v=0K62C0gJl6U

This is a 1" square LCD display run by a micro controller.
I'm using a circuitpython display library to create an infinitely scrolling scene that parallaxes in x and y. The cursor controlled by momentary buttons.
hardware:
Adafruit 1.44" Color TFT LCD Display
Adafruit Feather M4
lapis jasper
@hard oriole are you manually controlling the refresh rate?
hard oriole
@lapis jasper no, nothing that sophisticated. By display rate I meant perceived ability to update to current state, without things such as [the cursor] jumping position, tearing, or disappearing. In the Feather demo I was using addition to make layers move in x,y +1 or +2, etc. pixels with button press depending on that layers depth. On this Clue version I'm using the same idea of the Spirit Level Demo, multiplying the x,y of the accelerometer by different values based on their supposed depth. I am jumping a greater number of pixels on the CLUE, which is probably causing some of the stuttering.
lapis jasper
@hard oriole if you are moving multiple elements, then it'll likely improve performance if you switch to manual refresh. that will ensure only one screen update per frame
hard oriole
@lapis jasper Oh, thX! I will give that a go.
feral magnet
(I have put the curve plotting code for the ellipse in a helper function. so now I have 2 very simple subclasses to draw eggs and hearts)
solar yew
Hey! I do not know if anybody would be interested in something like that, but I made a code to display inscriptions on LED matrices without necessity to connect with internet.
https://gist.github.com/a1cha/d4cf15beda69a56b227baf4cc17f64de
It is just a modification of a 'random quote board' project.
My darken_color() function is not perfect, but it works 😄 Somebody advised me to change a bit depth on Matrix Portal, but I do not know how to do it yet - I need to dive into documentation. But this works as it is now!

Gist
dusk zinc
matrixportal = MatrixPortal(status_neopixel=board.NEOPIXEL, debug=True, bit_depth=2) (make it more than 2)
solar yew
Oh, cool, so simple, thanks!
And here is a code for simple standalone testing this function program in "normal" python: https://gist.github.com/a1cha/5423adecac7bd6de18d3c746b4462b68
I thought that I would have to change something directly in the library... I suspect that all of it is simpler than I expect, and I put myself in trouble by looking for more complicated solutions that they can be...
feral magnet
shapes can be rotated, or made like a polygon 🙂
 plush gorge
 somber rock
Just flew first flught of Thrust vector controlled rocket! It was powered by teensy 3.2 and BMI088 gyro! For more updates, pics and info check out my project instagram: https://www.instagram.com/p/CHrRHK8hBBE/?utm_source=ig_web_copy_link
solar yew
And I am happy when leds light in a color I want 😄 Cool thing! Really cool!
 gentle socket
Using the Adafruit CLUE and playing around with this fun little OLED: https://www.sparkfun.com/products/17153 using CircuitPython and the displayio_ssd1306_simpletest.py on CircuitPython 6, connected using QWIIC. Pretty hype!

The SparkFun Qwiic OLED Display can display up to three lines of text and features 128x32 pixels in a small 0.91” (diagonal) frame.
torn elbow
Not very impressive but I converted a power bank from micro usb to type C, to practice for doing the same conversion to some old handheld consoles.
solar yew
looks well done
 rough patio
Tomorrow at 9:30 UK 10:30 Europe - so arguably breakfast for some and middle of the night for others 😅 Join us while we walk you through building a simple prototype poly synth with Faust DSP, Arduino, Teensy 4.0 and Modular. We are live streaming our talk for the Programmable Audio Workshop PAW 2020 for GRAME Lyon. So watch us gleefully fumble our way through all the neccessary components, and hang out with us in chat while we guide you through our code. ❤️
Code will be on our github if you want to try it after the fact.
solar yew
@torn elbow is there a circuit that steps down 20v to 5v for laptop chargers?
marble mantle
@somber rock quite impressive
upbeat geyser
There are such circuits.
somber rock
Thanks
torn elbow
solar yew
<@!320634828594741249> is there a circuit that steps down 20v to 5v for laptop c...
No, literally just replaced the micro port with USB C port. Is that a problem though? Don't those chargers start at standard USB voltage and then ramp up to 20V after talking to the device? That's what I always assumed. Nonetheless i've never dared to plug in a potentially higher voltage charger to a lower voltage device.
candid crescent
Yes, USB-C starts at 5V and only ramps up if the device requests it via the PD protocol.
vale wasp
@torn elbow There is a product called the EZ-PD from cypress that is used to replace old barrel jack products into USB-C PD inputs. With resistors you can select you need 20V and at what amperage. Or you could start at 5V and tell it to change over i2c.
For me it just makes a really nice PD controller compared to other offerings
lusty siren
pew
 fresh jetty
it was made with maker.makecode
torn elbow
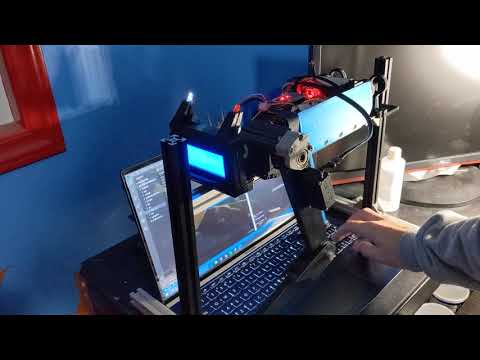
Completely wireless control, dog is powered by batteries, controlled over bluetooth via puTTY on laptop connected to ESP32
Quick and dirty testing of leg movement with bluetooth communication 🙂 one step closer.. many more to go
Quite noisy at just two servos, can't wait to hear all twelve...
 dusty prawn
A wireless Attack detector done with the M4 Skull and a RPI Zero

A first approach to a small wireless attack detection system.
Elements:
- M4 Skull from Adafuit
- Raspberry pi Zero v 1.3
- Panda Wireless USB adapter
exotic sierra
Check Amazon for deals on Hatchbox or SUNLU pla
But avoid PLA+ as it can be a pain to get the settings just right
 rain escarp
@exotic sierra Thanks -- and for some reason, that was in entirely the wrong channel. I have no idea, since S&T wasn't even close to help-with-3dprinting. I'll be reposting it in the right place -- thanks for the suggestion. 🙂
exotic sierra
👍🏻
 terse totem
very cool @fresh jetty !
exotic sierra
I've been on a few times 🙂 i'll be on tomorrow to show off the new boards 🙂
fresh jetty
Thanks @terse totem
solar yew
A trashtier ram display
First time i dabbled with my pi and arduino talking to each other so that was fun
gets the information from my desktop running a node webserver that sends ram stats to the pi, that then sends it to the arduino over usb
split moth
And here I present you my potentiometer/Hall Sensor/Joystick testing device. It’s the prototype that’s why it looks ugly. Based on the different adapters that are plugged in, it changes automatically to the corresponding program. The brain is an itsybitsy M4, programmed in circuitpython
rough patio
Making Faust run on Teensy 4.0 - https://www.youtube.com/watch?v=EhgaFutFbQg&ab_channel=MakingSoundMachines

Join us while we walk you through building a simple prototype poly synth with #Faust DSP, Arduino, #Teensy 4.0 and Modular. We are live streaming our talk for the Programmable Audio Workshop PAW 2020 for GRAME Lyon. So watch us gleefully fumble our way through all the neccessary components, and hang out with us in chat while we guide you through...
Join us while we walk you through building a simple prototype poly synth with Faust DSP, Arduino, Teensy 4.0 and Modular. This is a recorded video of us streaming our talk for the Programmable Audio Workshop PAW 2020 for GRAME Lyon. Watch us gleefully fumble our way through all the neccessary components, and hang out with us in chat while we guide you through our code.
Code is open source and on Github: https://github.com/makingsoundmachines/Faust-on-Teensy
GitHub
Resources for our Talk 'Making Faust run on Hardware' at Grame - makingsoundmachines/Faust-on-Teensy
This is aimed at beginners so we hope you will be able to make this run with basic knowledge in Teensy and programming in general. If you are interested in, but new to Faust, check out this 101 course https://faustdoc.grame.fr/workshops/2020-04-10-faust-101/
I hope we explain everything well enough that you'll be able to adapt others of the brilliant examples even if they are not explicitly aimed at Teensy: https://faustdoc.grame.fr/examples/bela/
If you build something cool, let us know here, or in the YouTube comments. Reach out if you get stuck too.
Links to everything you need in the Video description, including links to lots of Adafruit products 🦄
Everyone stay well, healthy and safe and sane ❤️
 ember pendant
I threw this together because i needed to trace somethingonto a map im drawing. This is a dimmable lightbox
warped violet
Seems like a bright idea
ember pendant
Lol. It was. Drew a pretty good ruin in a live and wanted to put it on the actual map so i just grabbed some stuff and surprised my viewers by cranking it out
Worked pretty well too
ancient skiff
"twinkle twinkle little scarf"
ancient skiff
 exotic sierra
Hey all! I’m running some deals on my store for Black Friday! 🙂 there are also some codes too for those interested! Happy Black Friday :)
Oak Dev Tech
Explore all the electronics components, breakouts, and kits offered by Oak Development Technologies.
ancient skiff
I have a couple of those battery boards for qtpy but haven't used them yet--ended up putting an itsybitsy with backpack in the scarf project ^^^ instead 🙂
exotic sierra
😅
sharp comet
Turns out the weblate api is super easy to integrate with 
exotic sierra
Wow nice
feral magnet
A rainbow chase on a sin wave 😄
 pseudo olive
I made some 64x32 bmps to covert the Halloween Counter from Adabox016 to a xmas one. Enjoy 🙂
lapis jasper
sharp comet
Turns out the weblate api is super easy to integrate with <:blinkacomputer:55335...
I'm sure @manic timber would love this for the swedish translation
 manic timber
I would like that, yes. But maybe in a less intrusive way, like a LED showing red or green. 🙂
sharp comet
I did look into the API for different languages. I think it should be easy to integrate as well. Maybe cycling through them when you press one of the buttons or something.
manic timber
I don't use the LED's on my MagTag for anything. Might use them for weblate status?
If WiFi on the MagTag is stable that is... 🙂
 inland vale
Hey, I've been working on a new firmware for AirLift-based products, like that MatrixPortal M4. Basically you can convert it into a "game console" by adding gamepad support. E.g: create simple games like this one:

Showcasing the Bluepad32 firmware for Adafruit MatrixPortal M4.
You can use any modern Bluetooth gamepad to connect to any Adafruit AirLift product like the MatrixPortal M4.
The game is an example that shows how to use the gamepads. More info, source code, example, etc. here:
https://gitlab.com/ricardoquesada/bluepad32
#esp32 #circuitpython #g...
The source code of the game + firmware + docs + et. al, is here: https://gitlab.com/ricardoquesada/bluepad32

GitLab
Connect any Bluetooth gamepad to your ESP32. Sort of "gamepad-host" for ESP32
in particular, the AirLift docs, are here: https://gitlab.com/ricardoquesada/bluepad32/-/blob/master/docs/plat_airlift.md
GitLab
Connect any Bluetooth gamepad to your ESP32. Sort of "gamepad-host" for ESP32
lucid bloom
I doubled the size of the number sign at the food pantry today. I had to 3d print some clips to hold the signs together and play around with
https://github.com/hzeller/rpi-rgb-led-matrix
It's part of an ordering system I started working on in June and we started using at the end of August, it's been about 13 weeks using it with only minor issues. It's a couple raspberry pis, receipt printer, Adafruit RGB Matrix HAT, 2 led matrices and some web services including twilio, zapier, gsuite, formstack and pushover.

GitHub
Controlling up to three chains of 64x64, 32x32, 16x32 or similar RGB LED displays using Raspberry Pi GPIO - hzeller/rpi-rgb-led-matrix
 verbal pebble
Yay, new mass order
 floral parcel
 lucid bloom
I had a couple people ask me for the led sign clips, I used 1ft by 6 inch screens I am unsure if the size of the clip will need to be change with other size screens so I included the .scad file
https://www.thingiverse.com/thing:4672020
This is a clip to hold 2 led screens together. I used one on each side.https://www.amazon.com/gp/product/B07SDMWX9R
The first screw will go in straight but the second one will be at about a 30 degree angle until it is screwed all the way in. I used plyers to rotate the screws when it got tough by hand.
cobalt dove
@lucid bloom If your sign is too bright (up close) I made a parametric light diffuser generator for HUB75 displays. You can print it in multiple parts that just slide right over the panel(s). It also works great if you use clear PETG with regular ol rectlinear infill (100% or just set loads of top/bottom layers). The faster you print clear PETG the more frosted/diffusion you'll get!
Here's what it looks like: Left half has the diffuser. Right half doesn't. I believe I used white PLA for this one because this particular panel is ridiculously bright (it's an outdoor model).
I recommend printing out little squares of different filaments and just hold them up in front of your panel to see how well they diffuse the light. You can test for thickness pretty quickly that way.
Check out these super cute 160x80mm HUB75 displays I got the other day! The plan is to turn them into a keyboard wrist rest but I also want to make them into dual touch pads (left controls text cursor, right controls mouse or vice versa for lefties like the now-ancient Fingerworks Touchstream LP). I have to figure out how to lay out a capacitive touch grid over the LEDs without messing with their light diffusion though. The ultimate plan is to cover the whole thing with thin veneer so it looks like normal wood 👍
lucid bloom
Thanks @cobalt dove
cobalt dove
@lucid bloom No problem! If you do end up printing out a diffuser post a pic and @ me so I can see! 😄
opal cipher
My Charlie Brown style Christmas Tree has received an important update: animated neopixels https://youtu.be/Q5UqZo1Wv-Q

I managed to run a single colorwheel over several "worms" of chase lights.
 proper valley
My LED Christmas tree https://youtu.be/JLvVBkwkP8U

LED Christmas tree I built. 8' tall with 2400 WS2812B LEDs controlled by a Raspberry PI and Adafruit Feather M4 Express with NEOPXL8.
Canon and Variation by Twin Musicom is licensed under a Creative Commons Attribution 4.0 license. https://creativecommons.org/licenses/by/4.0/
Artist: http://www.twinmusicom.org/
feral magnet
smells like Christmas time ! I uploaded a new demo for anisha lib :
https://www.youtube.com/watch?v=EQBeo9Za4Iw

Christmas demo of anisha lib with a star, arcs, points and a polygon.
See anisha repository for more details : https://github.com/Marius-450/anisha
the code is in the example directory in the repository https://github.com/Marius-450/anisha
 dreamy cave
3D printed star with an LED strip driven by Arduino nano
lucid bloom
A few years ago my parents got a balsam hill artificial tree. When I found out the remote was 315mhz I got a transmitter and receiver, put them on a pi zero w and made our "Christmas tree controller". it has a web interface, alexa controls and an automatic schedule with crontab. I just dug it out from the basement and set it up again.
 short yacht
Arduino semi-prosthetic i’m working on, this is a small prototype so far, i’m planning on using an arduino mini pro, making it plug into ear buds, and use an actual glove instead of my 100% totally perfectly hand sewed one.
Its for people with impaired sight, the closer you are to an object, the faster the beep goes
exotic sierra
Nice work
short yacht
Thanks
solar yew
Hey! I made my BL412 PIR sensor work! This is a 'stage 0' of my dog detector project. The major issue I had with that was to find out that it is very important to switch 'USB Stack' to TinyUSB in Arduino IDE.
https://www.youtube.com/watch?v=oVZko6LsER4
 solar yew
short yacht
Arduino semi-prosthetic i’m working on, this is a small prototype so far, i’m pl...
solar yew
short yacht
Arduino semi-prosthetic i’m working on, this is a small prototype so far, i’m pl...
Really cool!
feral magnet
(possibly works on zombies, not guaranteed). I love the descriptions on adafruit website sometimes.
hallow trail
exotic sierra
Watcha milling?
 slender jewel
learning to code in assembly for the GameBoy
maybe someday i'll learn how to plug it to an arduino with the link port
hallow trail
@exotic sierra yes full upgrade now
 mighty steeple
The Trellis M4 Hellauntz lives! Now to make it do something else besides flash all the neopixels
I've been fascinated with the HellaUntz since saw the kit on the website but I wanted neopixels and a fast processor. I also really like the "sandwich" style of the Trellis M4 enclosure kit instead of the thicker one built for a separate Arduio board. Thanks to @glad roost for answering questions and @solar yew for the library to make CP see the Trellis M4 as two NeoTrellis boards so the Multitrellis library works with no changes
Here's the enclosure files if someone else wants to try the build
 glad roost
@mighty steeple would you like to show this off on the Show & Tell video show tonight? 7:30pm Eastern time
mighty steeple
sorry @glad roost just saw this sure I could share but it doesn't do much yet its just more squishy buttons
kind of a blank canvas atm
but maybe that's a good state, get it out there and see what we all come up with idk. what do you think?
scenic siren
We love watching projects from the start. Show it off! 🙂
mighty steeple
what do I need to do for the show and tell webcast?
scenic siren
Hang out in the #live-broadcast-chat channel, and wait for a StreamYard link to be posted. Click to join. You'll need a mic and a webcam to be able to participate fully.
Link is usually posted either a few minutes before or right at 7:30pm Eastern Time. So... 4 hours from now I think.
mighty steeple
ok I'll see what I can come up with in the next 4 hours to make all those buttons glow.
scenic siren
Excellent! Looking forward to it!
junior agate
inland vale
https://www.youtube.com/watch?v=V0AGUe-CrEY
this is really neat
 polar eagle
If there's time I'd love to share my journey in designing a mechanical keyboard
 void vapor
Hi everyone ! Just wanted to share a little Christmas project 😊
It's laser cut corrugated cardboard (I used a 15w diode laser)
 craggy wolf
@void vapor That's cool. Got a design file? I'm 3d printing Christmas stuff for the lady of the house.
void vapor
I'm soon going to post it on thingiverse. It was actually inspired by a 3d model I found on thingiverse so you can use the original file to 3d print but this time I wanted to try laser cutting
If you want to be kept posted I have everything on my Instagram : @elliot_projets
It has a link to my thingiverse
@craggy wolf Original design is from Natalie Cheesmond
craggy wolf
@void vapor I think this is it:https://www.myminifactory.com/object/3d-print-christmas-bauble-display-tree-141924

Christmas bauble display stand.
UPDATE - I have redesigned the tree and base so that they slot together better
Easy and quick to print with no supports
Pictured with a 6cm bauble but can easily be scaled up or down.
Let me know in the comments if you want a different size?
See all my other designs including the bauble in the pic here: https://ww...
I'll print one today!
void vapor
That's it 👍 @craggy wolf
My thingiverse username is elliot_projets you can follow me to see my models if you want to @craggy wolf
craggy wolf
Thank you.
hallow trail
Dust Collector for CNC .... Fully 3D printed 😀
tacit delta
nice
ancient skiff
darnit, I made a pi project with custom 3d printed case but packaged it up as a gift before I took any photos. trust me, it's super. Network Time Protocol server synchronized to GPS signal, and a little display to show the status.
 flint viper
Made a quick script to add an isomorphic keyboard layout to the NeoTrellis M4. This is only for the 4x8 matrix but the same idea can be applied to bigger matrices. https://github.com/janbro/isomorphic-keyboard-neotrellis-m4

GitHub
Contribute to janbro/isomorphic-keyboard-neotrellis-m4 development by creating an account on GitHub.
inland vale
I kept working on adding new features to the MatrixPortal M4. This time I added "chiptune" music support: https://retro.moe/2020/12/13/designing-a-modern-retro-console-for-my-kids-adding-chiptune-music/
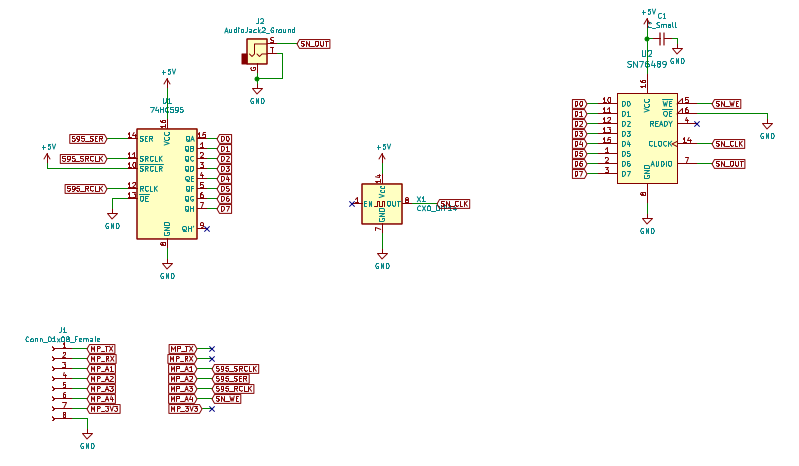
The ideal modern-retro video game console My goal is to build a video game console for (my) kids. I want to teach them programming in a fun way: fun for them… and also fun for me. The video-g…
 upper kayak
hallow trail
Dust Collector for CNC .... Fully 3D printed 😀
upper kayak
hallow trail
Dust Collector for CNC .... Fully 3D printed 😀
🤩 fully 3d printed including the bristles!?
 rain heron
I created a framework to automatically publish data from a Google Form to Adafruit IO. The specific use case was so students could send quotes to the Matrix Portal set up in our classroom, but I designed it in a way that it could easily be used as middleware for any project as a connection between a public form and a private feed. The Python script checks for updates to the form, validates any new data (in this case, ensures a valid color and profanity-free text), and publishes it to an Adafruit IO feed. Figured this could be useful to others, so I went ahead and posted it. Let me know what you think or if you have any feedback!
https://github.com/mjdargen/gform2adafruitIO

GitHub
Python script to automatically publish data from Google Form to Adafruit IO - mjdargen/gform2adafruitIO
 remote sigil
Fun little afternoon maker project with my kid. We made a Rubik’s cube timer mat like they use in competitions using a QTPY and a 7-segment display.
I need to work on the presentation a little bit but it’s up and running!
Great opportunity to teach my kid about tracking state in loops
solar yew
@remote sigil Did you glue on a blue solderless breadboard to a display board from Adafruit? It doesn't seem familiar, as configured. ;)
remote sigil
Yes exactly!
remote sigil
(Well, it had a sticky back so no glue needed)
lucid bloom
Timelapse of the snow and rain on cape cod in ma, it snowed about 6 inches then switched to rain overnight.
broken jay
Here's an guitar audio project platform that's almost finished. The aluminium pick guard is so I can mount 15cm long perfboards easily via screws. The pickups currently don't connect to anything (it's hard-wired for just the bridge p'up) because I'd like to explore a bunch of switching options and maybe try to include a built-in boost/overdrive circuit. There is space for a 9V battery in a cavity that's behind the gap between the two pickups.
It looks quite a bit paler IRL. I painted it gold hoping that it'll look slightly different each time due to stage lighting.
One of the ideas I'm keen to try is to stick a joystick in there and use it to actuate a "digital" whammy bar.
 drifting crater
Just finished my new project - called the CircuitPython Bundle Manager. Just select the CIRCUITPY drive, click on the module you want to install in the list, and press that big Install button! You can also uninstall modules and update the bundle that is used to install the modules. I still need to work out a couple kinks and probably add more protections so you don't break your system...
drifting crater
Thanks :)
Dang, I love PyCharm sometimes. It pushed everything to GitHub for me.
Here is the repo: https://github.com/UnsignedArduino/CircuitPython-Bundle-Manager

GitHub
A Python program that makes it easy to manage modules on a CircuitPython device! - UnsignedArduino/CircuitPython-Bundle-Manager
 marble tapir
Control the christmas lights in my yard! 😄 https://lights.swo.pe/ Powered by a Feather M0 WiFi
 vestal hedge
marble tapir
Control the christmas lights in my yard! 😄 https://lights.swo.pe/ Powered by a ...
vestal hedge
marble tapir
Control the christmas lights in my yard! 😄 https://lights.swo.pe/ Powered by a ...
nice! looks like a ~5-10s delay from here, not bad a'tall
marble tapir
That's Twitch's delay. 😄 It's realtime in person.
vestal hedge
marble tapir
That's Twitch's delay. 😄 It's realtime in person.
yeah, just a rough estimate of i-clicked-to-i-see, in case that's useful
marble tapir
Hah, thanks
 sleek quarry
remote sigil
Fun little afternoon maker project with my kid. We made a Rubik’s cube timer mat...
sleek quarry
remote sigil
Fun little afternoon maker project with my kid. We made a Rubik’s cube timer mat...
I need to make this. My daughter is always asking someone to time her. Though she may just like the fact that someone else sees how fast she is. 😁
remote sigil
I'll stick the code on a gist if you give me a sec
remote sigil
sleek quarry
I need to make this. My daughter is always asking someone to time her. Though sh...
You can find my code here: https://gist.github.com/andywarburton/14f4737b6699a114c9ca90efcb0eb52c (if anyone is a better developer than me and has suggestions for improving the code, I would love to hear!)
feral magnet
@remote sigil : I would have done it another way. when you change status to "counter", I would have called time.monotonic() and stored it in a var, and call it again, substracted from the variable, when you want ( when updating the display and when switching status to "finished"). This is more accurate, imho.
remote sigil
I'm not familiar with time.monotonic() I'll have to take a look into that!
This is just a toy, doesn't need to be super reliable. We're not going to be recording any records with it 😄
But I appreciate the feedback, I always love to learn something new
feral magnet
When I made a quizz buzzer for the CPB, I used time.monotonic_ns() to be the more precise possible 😄
but it was more a "logic" problem to me than a "precision" one. To mesure time, you take a timestamp and compare it when you need... for example, printing to the serial take time, updating the display too... It's a nice toy btw, good job 🙂
remote sigil
Cheers 🙂
sleek quarry
remote sigil
You can find my code here: https://gist.github.com/andywarburton/14f4737b6699a11...
Thanks! Hopefully after the holidays I can try this!
 loud sky
Not much but I'm making a minimal library for the HM-18 BLE devices (AT-based) that does nothing but:
- initialise (on tx/rx or desired pins)
- set BLE device name
- allow command/handler assignments via a 'dict'
- listens for said incoming commands (pairs of N command chars + N value chars, eg with
length=4arg: AB12 would be - command: AB, value: 12, so 50/50 split and can be customised. short strings to keep data requirements low but still allow lots of variation) - calls appropriate handler for commands that exist, else if it's a matching length but does not exist, notifies user - otherwise fails/ignores completely.
Here's a little video of it...
I did say it was not much 😂 I just wanted to use BLE with the FeatherS2 for lightweight control/automation and had a bunch of HM-18s lying around.
thank you for watching a GG production ™️ 🎅
 lyric drift
Using the MagTag from my Adabox 017 I followed the project for Cat Fed Clock, but I created my own bitmap background to replace the Cat icons with "pills" icon, so I can remember if I took my daily meds each day. https://learn.adafruit.com/magtag-cat-feeder-clock
 lapis jasper
nice job @lyric drift !
marble tapir
marble tapir
Control the christmas lights in my yard! 😄 https://lights.swo.pe/ Powered by a ...
For anyone who is interested, I've added a lot more options for messing with the lights.
hard oriole
@marble tapir love the custom settings! great fun!
marble tapir
Thanks!
 night bronze
Very nice @lyric drift! When I saw the pill sorters, they're so bright and lively that I mistook them for neopixels for a split second! But then I thought - might be a nice add-on to light up the colour of the day's pills to take
cobalt dove
I was crafty tonight! Had to use the force to get that fishing line through the ping pong ball!
sleek quarry
marble tapir
For anyone who is interested, I've added a lot more options for messing with the...
Nice, I’ll have to play with this tonight. But who keeps taking it off rainbow???? 😡😆
marble tapir
sleek quarry
Nice, I’ll have to play with this tonight. But who keeps taking it off rainbow??...
Haha, my wife keeps asking me the same question.
feral magnet
@marble tapir good job ! tested it a few times yesterday night, it's amazing !
marble tapir
Thanks!
 pulsar mortar
I finished my bread proofing box! At the moment I have dough sitting in it.
https://cdn.discordapp.com/attachments/791062372550705203/792735469661847582/20201226_153734.jpg
https://cdn.discordapp.com/attachments/791062372550705203/792735501642891294/20201226_153747.jpg


About it: Its literally a PID controlled lightbulb using a PIC micro (Yea, Im an odd duck). I wrote the code using Great Cow Basic. I made it so I can have control over the proofing temperature for my bread dough or sour dough. I made it somewhat universal in case I wanted to port it over to become a dehydrator.
pulsar mortar
and the money shot lol
https://cdn.discordapp.com/attachments/791062372550705203/792742068119666758/20201227_081253.jpg
 vestal hedge
brr's first diy mechanical keyboard: 2-switch morse to HID converter, both keyboard and mouse, with LEDs to display morse sequences in progress, running on a terrible travesty of CircuitPython on a beleaguered QTpy. still working on case, and hoping to whip the software into a shape that won't require freezing HID into the build at the expense of ... everything else. <.<
build deets:
-USB_MIDI/PULSEIO/PWMIO/TOUCHIO/ROTARYIO
+native:Pixelbuf/Gamepad
+frozen:HID
                   vvvvvvvvvvvv O.O
188156 bytes used, 4 bytes free in flash firmware space out of 188160 bytes (183.75kB).
9320 bytes used, 23448 bytes free in ram for stack and heap out of 32768 bytes (32.0kB).
 unkempt nymph
Something I have been working on over the holidays.
polar eagle
@pulsar mortar - I read the first sentence "I finished my bread proofing box!" and was wondering how one takes a breadboard and bread proofs it. Then I realized in the next sentence you were talking about 🍞 . 🤦♂️
pulsar mortar
Lol
night bronze
Glad I wasn't alone there @polar eagle!
 ruby ledge
I just added support for Adafruit nRF52 devices to my BLE Thermal Printer library
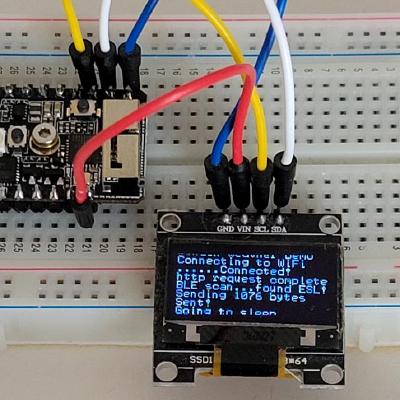
GitHub
Arduino library to draw text and graphics on BLE thermal printers - bitbank2/Thermal_Printer
exotic sierra
nice!
ruby ledge
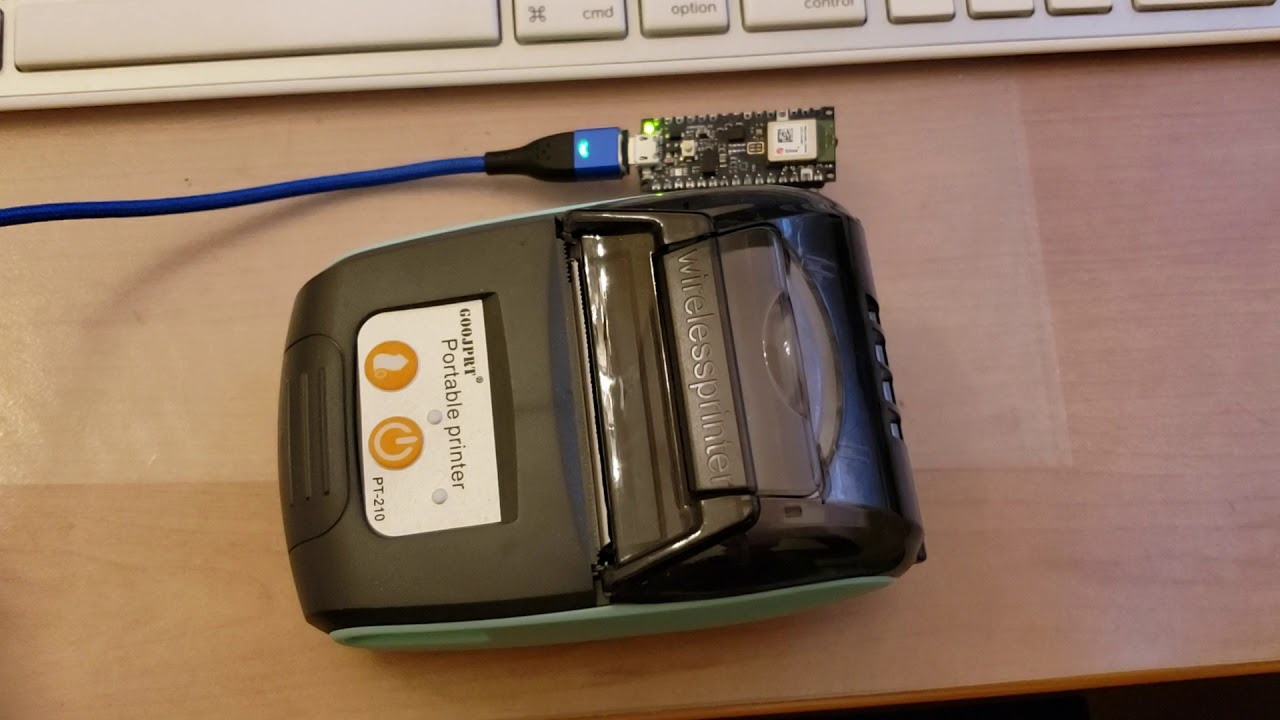
The demo sketch using my Arduino thermal printer library on the Nano 33 BLE. Code is available here: https://github.com/bitbank2/Thermal_Printer
shown is a Nano33, but the nrf52 bluefruit devices work the same
exotic sierra
cool cool! bring it to show and tell tomorrow?
ruby ledge
when/where is that?
exotic sierra
Tomorrow at 7:30pm EST
just check out the #live-broadcast-chat channel for the Streamyard link
🙂
ruby ledge
I would think people would be more interested in my BLE remote display library
I'm trying to guage support for it - it will take many hours to complete, but it's in a good "demo" stage

The iPad is acting as a display "server" being driven by the Nano33. There are 3 virtual buttons on the top of the display which are polled by the Arduino to choose the menu items
exotic sierra
you can share whichever project you like, it's up to you 🙂
 tranquil kraken
I couldn't have finished this without my adafruit people
desert timber
looks sharp!
 lean elbow
When you're tired of banana clips and also you wanna shift your NeoPixels (or whatever) signal to 5V
ancient skiff
I'm enchanted by this technique to 3d print on fabric (tulle).
You actually place the fabric after 2 or 3 layers so the plastic envelops it
warped violet
I can tulle that would be handy.
vale wasp
ancient skiff
I'm enchanted by this technique to 3d print on fabric (tulle).
Very nice, the cosplay body armor ppl are making with that technique is super cool
 broken rain

GitHub
Adafruit Titano Weather port of MagTag Weather. Contribute to bdsvac/adafruit_titano_weather development by creating an account on GitHub.
This was my weather display on show and tell tonight.
desert timber
Nice display layout!
rain dome
reminds me of the pip-boy, very cool
dire meadow
@broken rain Cyberpunk 2077
tranquil kraken
Ender 3 + Arduino nano + neopixels = visibility
It looks so good when the main light is off, and octoprint automatically turns the light on and off
coral mica
Experimenting with the pitft 3.5in and Blinka. NASA image of the day example works great, thanks @sterile lodge !
 snow mango
Looks like a thing someone would launch a rocket with
 nocturne pumice
Embedded GRBL controller and standalone G-Code sender. Powered by a Teensy 4.1.
Needs back cover.
Short demo.
Longer demos:
https://www.youtube.com/watch?v=HVsqZHhviag
https://www.youtube.com/watch?v=aRfksGpZmzs

This is part 2. This time the relationship between the jog wheel and the stepper motor motions has been tuned a bit further. The slow speed dynamic control is still jumpier than I would like it to be but overall it is pretty smooth.
Next steps are to develop the other controls and implement them. The code is on GitHub for reference. It is a wor...

In this episode we see the controller dynamic jog motion work better than last time. New functionality provided by adding the button matrix that had been sitting at the bottom of the discard pile for a few years. Also a demonstration of the Man In The Middle mode that allows the controller to work alongside a separate G code sender.
In this vi...
long vine
450 neopixels and the automatic countdown worked! Happy new year from central europe!
https://cdn.discordapp.com/attachments/273831475689029632/794342134395961394/fireworks_2020.mp4
snow mango
3D printed rpi server rack, planning on cutting out a hole for a fitft for server status, bandwidth etc
 devout verge
I managed to port Isaac Wellish’s PyPortal word of the day display to the MagTag. Quite easy as they are both based off of portalbase
solar yew
Checking out that Adafruit keypad library on the Uno R3. Making a calculator out of it.
of course it does not embed
polar eagle
Made a fun little time lapse of assembling my new mechanical keyboard: https://www.youtube.com/watch?v=c2Xr0iZCU7Y
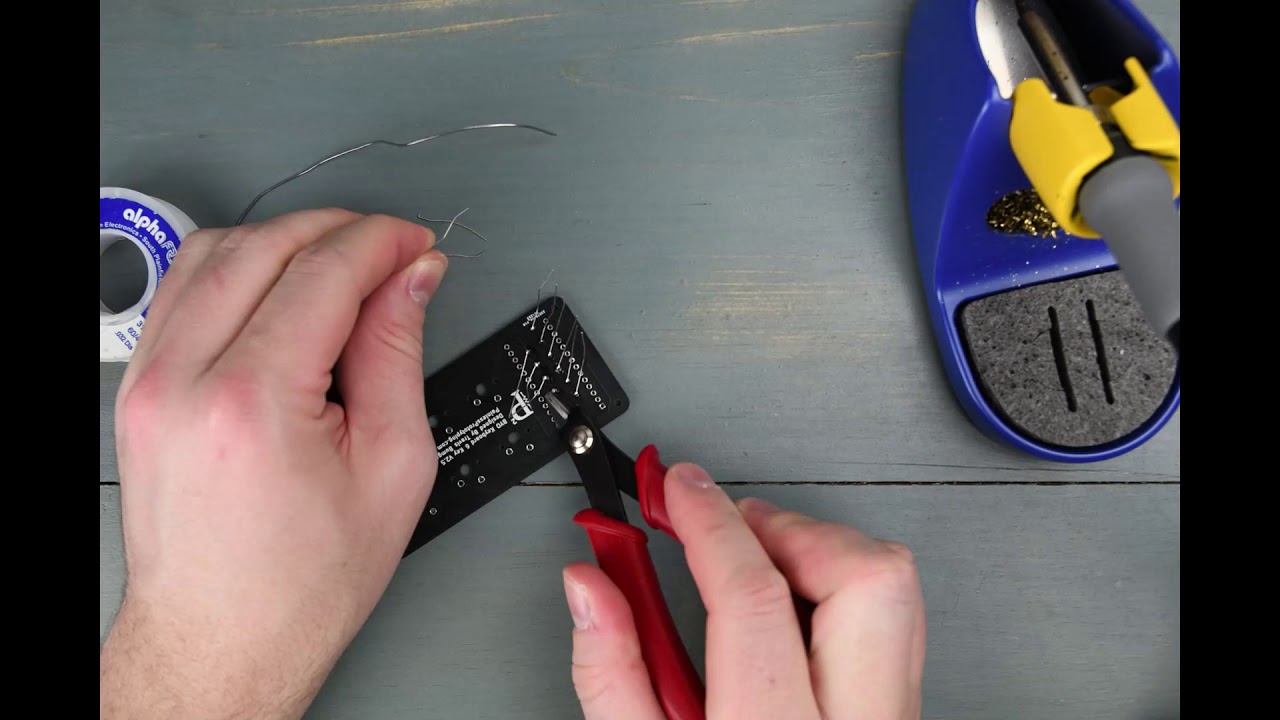
Check out https://painlessprototyping.com/ to learn more.
solar yew
Nice.
polar eagle
Thanks!
 brisk geyser
My Twitch Follower panel with Matrix Portal M4
brisk geyser
and my Twitch Channel Point interaction Panel
night bronze
Very nice @brisk geyser !
brisk geyser
night bronze
Very nice <@!143418720939671552> !
thank you
tranquil kraken
My security cameras have ancient, terrible software, so I'm giving them a pi upgrade. I can power the pi zero through gpio from the camera's giant battery
Then, I'm planning to get a noir camera and use it with the camera's built in night sensing ir lights
tranquil kraken
IT LIVES
sharp comet
I recently bought a game art pack and while exploring the assets ran across these grey-scale pattern tiles and envisioned a random "patchwork" generator running on the MagTag. Been sitting here mesmerized resetting it for several minutes.
night bronze
Very cool looking stuff @sharp comet! I find it so interesting that the pattern effect "feels" different from the small preview photo form than full-size. And I can barely tell you're trying to hypnotize us! 😉
sharp comet
Agree'd! There is a similar effect IRL by looking at further and closer distances
solar yew
When I first found a good Mandelbrot Set ('fractals') viewer for the desktop PC I explored it for many hours.
It's turtles, all the way down. /back quiet
(Hawking's first book for the General Public)
sharp comet
These ones "fit together" nicely:
marble mantle
one should try and make Escher type patterns for MaTag...
craggy parrot
Why not 3-D print them? 😉
marble mantle
@craggy parrot I had done lasercut Escher patterns as jigsaw puzzles... but you can't update a lasercut puzzle with a press of a button 🙂
brisk geyser
new update from my Twitch Channel Points Interactive Panel
 tepid otter
that seems super fun, seipekm! Are you planning on having it mounted somehow behind you as you stream?
brisk geyser
yes of course
have also Twitch Follower Counter behind
also with MatrixPortal and Circuitpython
scenic siren
@brisk geyser Hey! Nice project! If it's using CircuitPython (or Python in general), consider submitting it to the Python for Microcontrollers newsletter. You can post to Twitter and tag (at)anne_engineer or email anneb (at) adafruit.com with a link, images or video clip, and she'll get it sorted. This week's newsletter is already finalised, but it would be an excellent addition to next week's!
brisk geyser
I will gladly write you an email @scenic siren
scenic siren
You'll be sending it to Anne 🙂 Thanks!
 terse slate
I crammed every possible environmental sensor I could find into this.
VOC, pressure, humidity, temperature, acceleration, magnetometer, NO2, CO, CO2, CH2OH, Ozone, PM2.5/PM10 and waiting on a I2C Geiger counter from Russia
tranquil kraken
I had a terrible security camera with a big battery, so I replaced its insides with a pi zero and installed motioneyeos on it. The camera has infared lights and I used the NOIR cam so I can get glow in the dark.
The battery is able to support the camera's big control board for a month, so I'm sure it won't have trouble with the pi zero
Usually, motioneyeos does all the processing onboard, but because I wanted to save on power, it only streams video to another motioneyeos on my server pi in my house, which processes the motion detection
upbeat geyser
3D printed most of a precision laser aligner
tranquil kraken
sparky
 foggy notch
I am excited that I got the Magtag covid tracker project working today!
I had started working on this last year but ran into problems. Had to step away because life got busy. Today I finished it.
Thank you for the help community members and especially the mods.
:ruby: :adafruit: :blinka:
cobalt dove
My hall effect keyboard with 3D printed switches is working!!! I just recorded a quick sound test: https://youtu.be/Rfu4iImuVwQ

I got some keycaps on there so I thought I'd record a test of what it sounds like.
sharp comet
@cobalt dove neat! do you have this project documented online anywhere?
sharp comet
Ah, yep just noticed a few other videos there. Awesome thank you
cobalt dove
I'll even send you stl files if you want to test things out!
I'll be posting files when it's done which will be soon™
The plan is to make everything open source though so I share whatever if asked 👍
 scarlet galleon
I've had so mcuh fun making my own electronics and cases for stuff I figured id share
created with the knowledge that has been made available because adafruit
cobalt dove
Just finished printing some black keycaps with transparent legends for my hall effect keyboard: https://gfycat.com/shadypotablebass
 polar eagle
Ooh cool. How much prototyping/tinkering did you have to do to get them to print nicely and attach to the switches well?
gusty shard
2.9" grayscale EPD meets UM Feather S2.
 spring elm
cobalt dove
spring elm
cobalt dove
@polar eagle Nearly all the prototyping has been done over the past six months or so trying out different switch designs. For the actual keyboard case... This is only the second prototype. First one was fine, really. I just made some minor improvements
@spring elm Yeah it's all FDM. I've had a friend print the switches on his resin printer though and that works fine too
Honestly though FDM is better for this sort of thing. Resin gets brittle over time and is likely to break off inside your expensive keycap getting stuck there forever 🤷♂️ . With PETG that isn't likely to happen (it bends before it breaks)
PLA+ or PLA Pro works fine though. I tried that out. Once lubed it's about the same as PETG on PETG
 mortal crystal
Having fun developping a Laser tag game with a friend.
esp32 based with Offline & online playing modes .
this picture shows inprovements between version0 and version 3!
Quick demo
https://youtu.be/pPUcVsKcaYE
 polar eagle
That's awesome 😄
cobalt dove
It's done! I did a proper sound test of the Riskeyboard 70 hall effect keyboard with screen recording and my phone recording my hands typing and everything (never done that before!): https://youtu.be/YUOlrnZGuzo

The Riskeyboard 70 uses my 3D printed magnetic separation switch design along with my magnetically-stabilized stabilizers. The keycaps are also a custom design of mine that I made using my Keycap Playground. They're multi-material PETG with 1.35mm wall thickness.
The Riskeyboard 70 also uses my own custom firmware design and the RGB LEDs you...
tranquil kraken
I took the adafruit on air twitch sign model and made it turn on when I'm in a meeting instead https://cdn.discordapp.com/attachments/760633914917257236/798210440475705374/IMG_20210111_072300.jpg

Since there is barely any webhook support from zoom, I make it sync to my calendar for meeting instead
 lime seal
Lol can I just show off the corgi shaped arduino I made
marble mantle
looks really cute 🙂
lime seal
Thanks!
marble mantle
My Logic Gate Demonstration kit - born of my math circle were I was explaining to the kids how one constructs flip-flop from NAND gates. Now I can show it to them in hardware, not just simulation:
https://www.instructables.com/Logic-Gates-Demonstration-Kit/

Instructables
Logic Gates Demonstration Kit: When teaching a Math Circle, I was discussing with the students various logic operations and logic gates. We went from basic AND and OR gates to constructing flip-flop circuit and full adder - using software simulation. I wanted to show them real el…
Here is the flip-flop on my fridge door:
upbeat geyser
I take it they're electromagnets, and when the gate's output is low, they fall off?
marble mantle
That would be interesting. Especially when setting/resetting flip-flop 🙂
But alas, reality is more boring - the magnets are usual ceramic ones.
civic vale
@marble mantle Looks pretty cool. One suggestion (partly extrapolation from a friend who has a similar group) you have a number of participants who'll just "wow" and go on, but a hardcore group will want more. The later group stays on longer and you teach the advanced skill of actually assembling circuits by having them build additional circuits (you need to have the parts ready to go when they hit this) and they get to keep 1/2 of what they make and in exchange for the parts in those, they donate the other half to next years students. In this way you eventually build a larger supply so you can build more things.
And one thing I noticed you don't have is "fan out". This could be a really simple (i.e. almost no circuit, maybe just the LED indicators) board, or just a spliced wire. But more than the simplest circuits will need this, so you might want to mention it.
marble mantle
@civic vale thanks! Just waiting until coronavirus vaccine makes it all possible.
As for fanouts, there is in fact a fanout in each board - each board provides two connected outputs, which should suffice for most purposes
torn elbow
https://www.youtube.com/watch?v=nd0JAmX_AN0 My dog can stand up now, I was worried that the servos would be underpowered but it seems promising
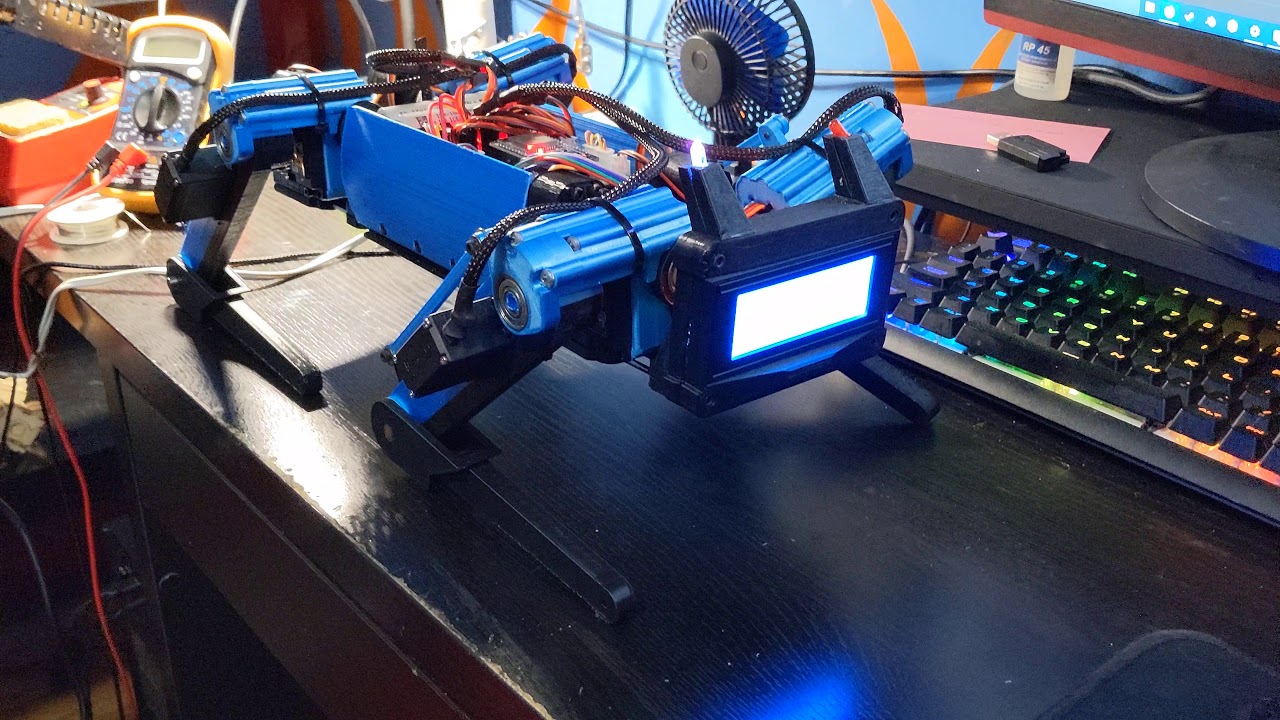
 mystic turtle
Setup an inspirational quote MagTag to help the girls at the office get through the next few months (this is a tax office).
I also put up the magnetic whiteboard and markers from the Adabox
night bronze
That's totally awesome of you @mystic turtle! You're the type of coworker that makes a bad place to work good, and a good place to work better
cobalt dove
Real-time RGB LED animations are now working! Woot! https://gfycat.com/slimdirectantelopegroundsquirrel
(that's 64 of 255 brightness too haha)

 void spoke
Board and neopixels ran off of a usb outlet in my foyer closet and hooked to a wall switch at my foyer entry.
cobalt dove
People have been asking me, "How bright is it at full brightness?" https://gfycat.com/dismalsevereemu
 cobalt dove
If your Riskeyboard doesn't have enough LEDs it has another cool feature: An RGB LED output port! Check this out: https://gfycat.com/dirtydismalgoitered

 chrome elm
My path to becoming a software developer was a somewhat unconventional route. It started out by building a robot quarterback from a used football machine. Much of the education I used to build this robot came from written tutorials on Adafruit as well as some of the sensors and micro-controllers.
https://www.youtube.com/watch?v=KTNbTD9Vv2Y

I became a software developer by taking a somewhat unconventional route. It started out by building a robot quarterback from a used football machine. It led to new opportunities and a career that I enjoy more than I could have imagined. Hear the complete story in the next video. Subsribe and Enjoy!
00:00 - Intro
00:11 - ClipShow
00:31 - Video ...
cobalt dove
Type the correct sequence to open the keeb portal: https://gfycat.com/hairyornerybergerpicard (Adafruit Neopixel ring!)
 tacit delta
lol way too much lights for me. cool however
cobalt dove
@tacit delta Even if you don't like the lighting it's still a contactless hall effect keyboard with 3D printed switches and stabilizers!
tacit delta
dang. properly done, contactless means essentally infinity life (only wear being contact between finger and button)
upbeat geyser
Where do you get the custom keycaps?
polar eagle
They don't exist yet 😛
If my kickstarter campaign goes well I'll be getting them manufactured.
tacit delta
that small keyboard thing?
polar eagle
https://www.solutionsinplastic.com/ is the manfacturer if you're curious
@tacit delta Sorry I don't quite understand
tacit delta
im curious what you are kickstarting heh
 supple mortar
My first thingiverse upload https://www.thingiverse.com/thing:4724723
Print in TPU for a soft case or PLA for hard case. Print at 0.2mm layer thickness to get exactly two layers of material for the diffuser screen. The small knobs on the diffuser screen might need a bit of cleanup after the print.
If the knobs don't secure the diffuser securely enough print the cap diffuser and it fit around the outside of the b...
night bronze
WASD keyboards also makes custom keycaps that are CherryMX compatible.
tacit delta
nice dub
polar eagle
Here's a preview of the Kickstarter: https://www.kickstarter.com/projects/painlessprototyping/1543363100?ref=98lopj&token=f615d6ae
You buy a kit of components and learn how to solder and code them together.
I have a WASD Keyboard that I'm typing on now. The issue is - the only way you can order from them is if you get a full keyboard worth of keys.
tacit delta
not bad
night bronze
Very nice @polar eagle! I'll be watching here for when you campaign goes live! 🙂
cobalt dove
I need to figure out this crowfuding thing so I can get people to subsidize my keyboard-making hobby 😄
polar eagle
Thanks @night bronze !
night bronze
Out of curiosity, is that bare-metal/"real" C++? Not Arduino?
polar eagle
(If anyone's curious - there's a link on this page to be notified when it goes live: https://painlessprototyping.com/shop/byo-keyboard/)
@hugo No bare-metal c++ here 😛
My target audience is beginner makers
plush gorge
Hope I have the right place to show the progress of my passion project. The OSPoC.
De-proprietarying (lol, yes I make up my own words :-P ) the chair. :-)
upbeat geyser
Excellent, I approve!
tacit delta
nice indeed
polar eagle
Hey all! The Kickstarter I shared on Adafruit's Show and Tell is live! If you're curious about mechanical keyboards, programming, soldering, and/or electronics check it out! -> https://pp2.dev/byoks
night bronze
polar eagle
Hey all! The Kickstarter I shared on Adafruit's Show and Tell is live! If you're...
Congrats on going live! OMW to back it, as soon as I get Frontier on the phone and internet sorted out.
 brisk sundial
Hey guys....I've been working on this hoverboard motor plow.....it's pretty nuts....it's been roughly 3 months...and it's working today!
night bronze
Very cool @brisk sundial! Even the doggos are excited for you! 🙂
 deft roost
I built this Midi-shield Arduino system to be be able to signal which camera is on for live streaming multi-camera events using the Roland V-1HD switcher. https://vimeo.com/479378015

This project was developed for livestreaming so the talent can tell which camera is active. In broadcast TV these were called Tally Lights. Here an Arduino-powered…
brisk sundial
@night bronze Yes they are! XD Hoping to get it outside and running around by the end of this week
 void briar
Hi, I am excited to share my first original project creation after pushing myself to go beyond tutorials and try to create something novel!
I call it WindowSense, and its like a thermostat for when to open your windows, with Nest and OpenWeatherMap integrations.
https://www.youtube.com/watch?v=c8vSSSKU0A4&feature=youtu.be
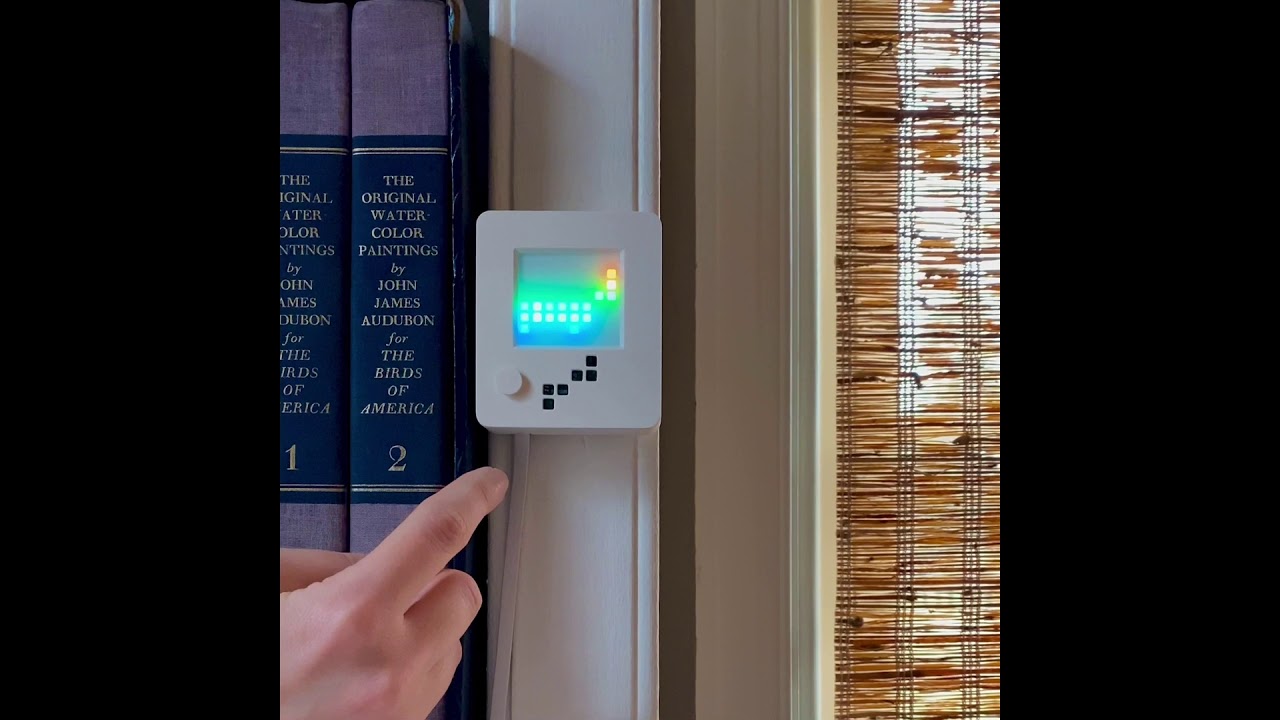
WindowSense tells you when to open your windows by integrating with my Nest thermostat and getting local weather forecasts. Runs as a Python script on a Raspberry Pi Zero + Sense HAT in a custom 3D-printed case.
reddit
23 votes and 3 comments so far on Reddit
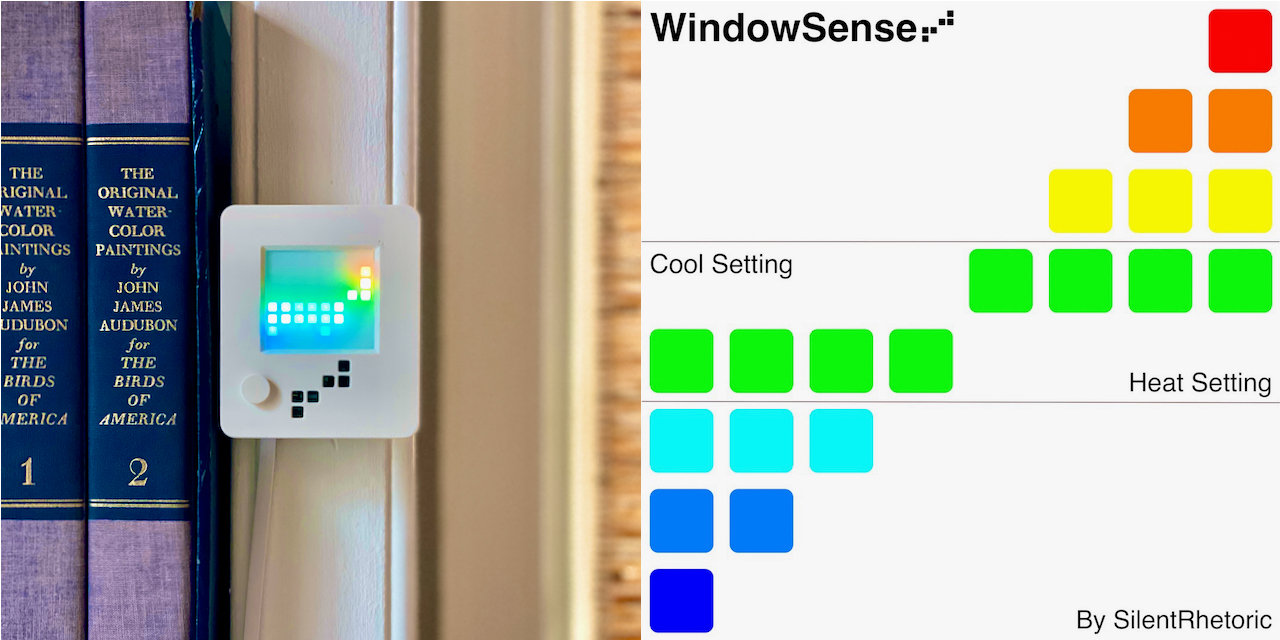
GitHub
WindowSense tells you when to open your windows by integrating with your Nest thermostat and getting local weather forecasts. Runs on Raspberry Pi + Sense HAT. - SilentRhetoric/WindowSense
gusty shard
Gist
SparkFun Red-V LED 4-bit binary counter. GitHub Gist: instantly share code, notes, and snippets.
devout verge
Sorry John Park, but I think my version of Minesweeper is a tiny bit better than yours
https://youtu.be/IyIrOie5nBk
https://maker.makecode.com/00545-77673-68324-96987

Programmed by me using Makecode
I did this on a Circuit Playground Bluefruit, but it should also work on a CPX.
junior agate
void briar
Hi, I am excited to share my first original project creation after pushing mysel...
This is a really nice project - congrats on your first original project! Could I include this in the Adafruit IOT Monthly newsletter?
void briar
junior agate
This is a really nice project - congrats on your first original project! Could I...
Thank you! Certainly! I’m working on an improved explainer graphic, and I’ll update the repo and Reddit posts once I’m done.
junior agate
@void briar could you tag me when it's ready?
void briar
junior agate
<@!214210582008561664> could you tag me when it's ready?
Yes! Doing it now 🙂
solar yew
Hi there. Could anyone tell me what the link is if I want to take part in tonight's Show and Tell ?
Darn, still unable to find the info about the connexion to S&T !
scenic siren
@solar yew Hang out in the #live-broadcast-chat channel, and a StreamYard link will be posted. If it says it's full, keep trying, folks will drop off as they finish.
void briar
@junior agate The GitHub repo is updated with a better graphic now! Reddit, of course, won't let me edit the original post there, unfortunately. Let me know what else I can do to help 🙂
 sudden sable
 indigo charm
First magtag project is a success! So easy with the tutorials and examples. Hardest part was figuring out how to parse the XML data source in CircuitPython.
devout verge
Yeah xml is annoying - json is so much better
indigo charm
yep! but the state of Arizona publishes the data in the format it publishes it in... which is XML... sad panda
 dapper yacht
indigo charm
First magtag project is a success! So easy with the tutorials and examples. Hard...
dapper yacht
indigo charm
First magtag project is a success! So easy with the tutorials and examples. Hard...
Hi Mark, did you have to update the magtag with a .bin or .uf2? I'm having trouble with mine and CP 6.1.0.
indigo charm
dapper yacht
Hi Mark, did you have to update the magtag with a .bin or .uf2? I'm having troub...
Yes, I had to install the bootloader first using esptool.py, then install CP 6.1. https://learn.adafruit.com/adafruit-magtag/rom-bootloader
sharp comet
@dapper yacht and @indigo charm if you have Chrome browser you can use this web serial ESPTool. You do have to enable a setting inside chrome. But I found it much easier than the esptool.py process. you can use this to load the UF2 version so that moving forward you'll be able to update more "normally" like the other Circuit Python devices. https://learn.adafruit.com/adafruit-magtag/web-serial-esptool
indigo charm
sharp comet
<@!233453822914199552> and <@!211512266787389440> if you have Chrome browser you...
Neat! I didn't find the esptool.py method that bad, but I'm already pretty comfortable with python and installing stuff like that. I will definitely try the browser method and see how that works. Always good to know multiple ways when trying to explain things to others.
drifting crater
drifting crater
Just finished my new project - called the CircuitPython Bundle Manager. Just sel...
If anyone was wondering, I've added several new features (like a search bar - much faster than the find function in Explorer!) and made some binaries for the CircuitPython Bundle Manager! You can check out the releases here: https://github.com/UnsignedArduino/CircuitPython-Bundle-Manager/releases

GitHub
A Python program that makes it easy to manage modules on a CircuitPython device! - UnsignedArduino/CircuitPython-Bundle-Manager
devout verge
That looks cool! Too bad I'm on a mac, so I can't try it out
cobalt dove
New feature! Heated keycaps! https://youtu.be/Vl7B9sfjA0Y

Haha This burn-in testing is turning out great!
 random hull
Getting close to finishing a project I'm using as a demo for a binary operations talk for one of my local meetup groups. I'm messaging byte arrays via websockets to two physical LED matrices and a web version: https://vimeo.com/504411875

Last night I got the basic communication relay for the final version of the server code working. Now I can send up byte arrays to the server and have them relay…
I got a bunch of troubleshooting help on the circuit from @desert timber which was ultra helpful/edifying/appreciated 😄
gusty shard
Metro ESP32-S2 arrived today! I guess all the cool kids are using PI Pico.
lapis jasper
S2 is still very cool too 🙂
gusty shard
Also got the 1.8" TFT shield. That's gonna be fun.
indigo charm
Testing out servos on a pyportal...
ancient skiff
I've been moving some of my more popular 3d printed designs over to PrusaPrinters.org. Also making sure I have back-ups for myself https://www.prusaprinters.org/social/5779-jepler/prints
I'm especially proud of the first 3D print I designed in FreeCAD https://www.prusaprinters.org/prints/54028-cuisinart-14-cup-food-processor-blade-holder
 vague spruce
I've been building an environmental sensor suite for fun using Adafruit sensors and an ESP32 running esphome
I had to write custom components for the PMSA003i and LTR390 which I've put on github
https://github.com/sjtrny/pmsa003i
https://github.com/sjtrny/ltr390
I hope it's ok that I've used the Adafruit product photos. They are the only good ones that I could find!
 keen temple
I am trying to replicate Alexey Chekurkov's Graviflyer: https://www.youtube.com/watch?v=Tz8nKu4ya2Y&t=214s&ab_channel=AlexeyChekurkov This is my thirteenth attempt (I like this attempt because the motor melted the ABS frame; well back to the drawing board) https://www.youtube.com/watch?v=vi5aVioazQk&ab_channel=CharlesCrawfordIII

Доказательство о сущестования гравитации

Yeah, that burning smell was the bottom motor melting the ABS plastic frame. This design was far enough apart for the bottom motor to spin, but the resistance of the magnets near the aluminum plate caused the bottom motor to heat up. This design uses only three arms to hold all the disks in place unlike the four arm design I had before. This des...
exotic sierra
I wanted a simple way for people to see if I’m busy or not.
Custom Arduino Nano I made
Left over Neopixel strip
Tactile switch
A little Arduino code
gusty shard
Work in progress.
gusty shard
RP Pico with LIS3DH.
exotic sierra
Nice!
 jovial pilot
A NWS weather radar viewer using a Raspberry Pi Zero and blinka! https://hackaday.io/project/176547-weather-pi-dar
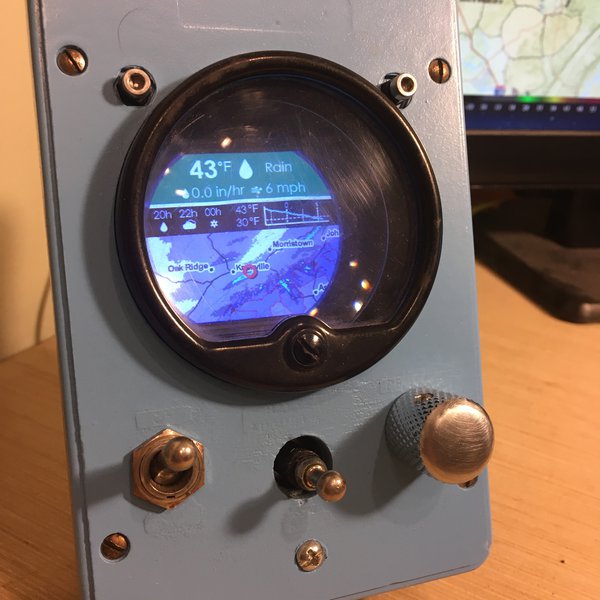
Merging National Weather Service radar images, Stamen Toner maps, and OpenWeather data, the Weather Pi-Dar! is a Raspberry Pi and Blinka powered weather radar viewer… housed in a funky analogue meter case I found in the shed.
night bronze
Very nice project @jovial pilot, and love the enclosure!
jovial pilot
Thank you! I knew I'd one day find a good use for it!
 summer shoal


 night bronze
That is admittedly a very cute gargoyle!
We all make what calls out to us, and what we enjoy 🙂
 raw magnet
Just finished my new project
Gonna try and show it off next show and tell
I've been grinding on it for weeks
Feels so dang good
night bronze
Congrats @raw magnet! Can't wait to see it
west zinc
Demo of sliding switch widget with color morphing and optional 0/1 label.
lapis jasper
west zinc
Demo of sliding switch widget with color morphing and optional 0/1 label.
Looks great!!!
 desert iron
I made a hexapod robot app that controls a physical robot with pca9685 and adafruit metro mini 😄 https://github.com/mithi/hexapod-irl
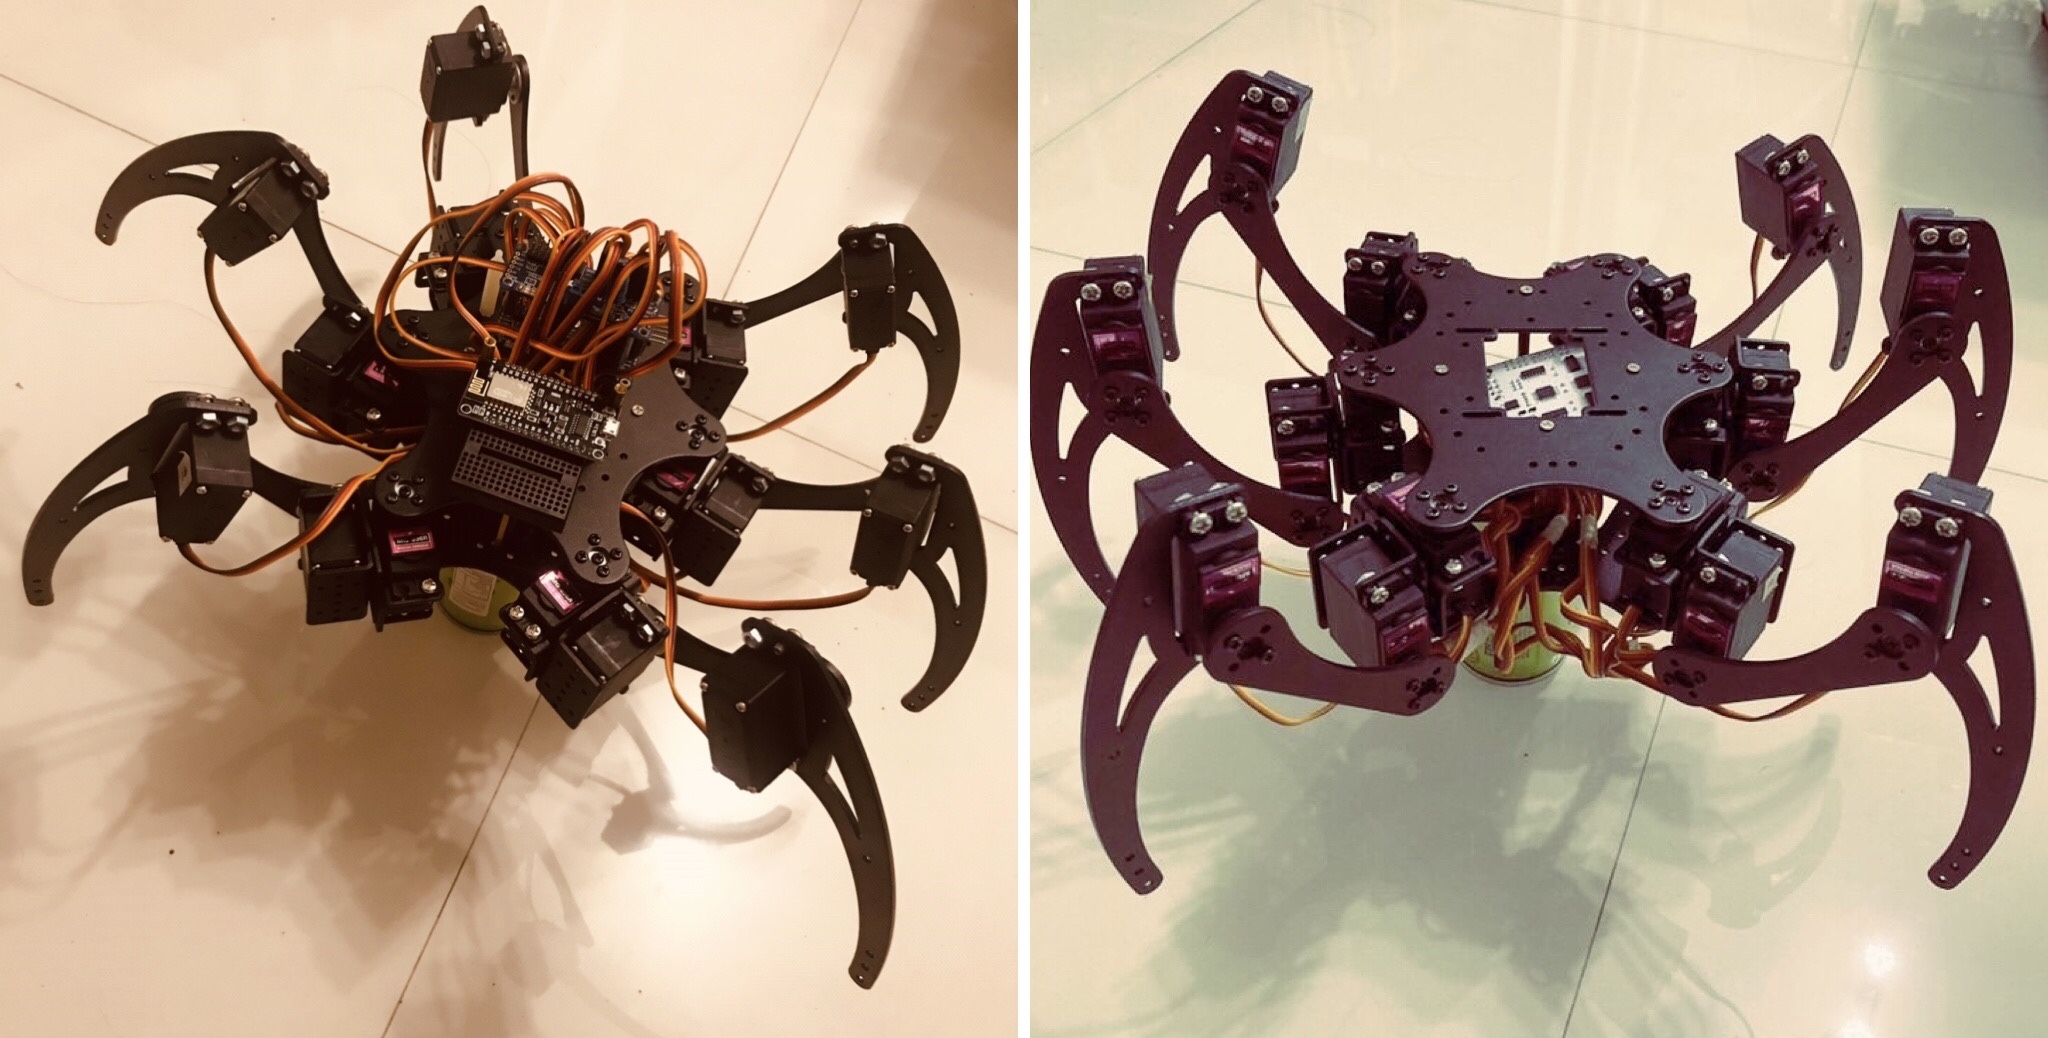
GitHub
A "fork" of Bare-Minimum Hexapod Robot Simulator 2 modified to be able to control a real physical hexapod robot. - mithi/hexapod-irl
marble mantle
nice
how many servos are you using altogether?
desert iron
marble mantle
nice
how many servos are you using altogether?
Eighteen 😋
night bronze
Wow, that looks incredible @desert iron! The motion definitely gives me the willies of a real spider! Well done
desert iron
night bronze
Wow, that looks incredible <@!504569000211120130>! The motion definitely gives m...
Thanks! Glad you like it!!!🕷️ 🕸️ 🕷️ 🕸️