
#3d-modeling
1 messages · Page 107 of 1
 modest shell
 unkempt torrent
What do the normals look like?
 quaint jasper
@modest shell Can you show the model in edit mode
modest shell
you mean in blender ?
can i dm you as its not a SFW model at the current moment.
@quaint jasper
well i guess not so ill just drop it here showing as little as i can
 quaint jasper
are there no doubles ?
Feels like some edges are marked sharp
You tried with another shader in Unity too ?
unkempt torrent
Ruuubick, any idea what might be causing my model's eyes to squeeze into nothingness when I rotate their bones instead of just rotating? I haven't encountered this behavior before. I think their vertex group weights are a uniform 0.5
quaint jasper
it means they're weighted to something else
they need to be 1 weight on their bone
unkempt torrent
When I tried that yesterday it didn't solve the problem, and I failed to find another vertex group they were in, but I will check again in a minute
quaint jasper
You need to check in edit mode, with the item side panel
 leaden ice
So flat edges are caused by a few things, flat shading in blender change when in object mode, flat faces/edges/vertices in edit mode, select all "A" twice and make all smooth, another is in the object properties the cube tab on the right side uncheck "Auto-Smooth" and finally make sure your using the right import settings, if i recall, legacy blendshapes, the VRC SDK can auto fix those
unkempt torrent
You were right Ruuubick, in the state I'd saved the model yesterday (I asked the same question last evening) Eye_L and Eye_R were already rotating the eyes properly, I have no idea why I was unable to ascertain it then. I must have done something wrong when testing.
unkempt torrent
Welp, no, I was wrong, still smooshing the eyes after I create the lefteye and righteye bones with the cats plugin. Even though now everything's at 1.0 weight and not present in any other vertex groups, triple checked. No modifiers either other than armature
quaint jasper
delete the previous bones
unkempt torrent
I had already done so yesterday; they were not in the saved .blend I opened today
The vertex groups were, though
Let me try deleting those and redoing everything
(was about to do so but also making dinner at the same time)
After the cats plugin runs, are eye_l and eye_r supposed to have no weight on the eyes anymore?
unkempt torrent
Yup
They were not being cleared
After clearing the weights on those bones, the bones created by the cats plugin function properly (at first glance)
Exporting for unity now
 naive helm
Can I have help with this (I'm still at it after weeks lol)

Ugh idk why the gif came out like that wtf
but ignore the colors, the import is what I need help with
I saved it as it is there and it comes out missing everything body related
unkempt torrent
Ruuubick: Thanks for the guidance, I think it's fine now. I think the bones were broken to begin with and I just never noticed at the old scale, so I had to tweak all the fields in the avatar descriptor but otherwise no more issues after that.
naive helm
@quaint jasper I have to import the mesh to use cats?
 quaint jasper
Is your avatar weight painted and parented ?
naive helm
no- I'm not really sure what that means
and the origin is messed up in sculpt mode

but its fine normally
 naive helm
quaint jasper
Is your avatar weight painted and parented ?
naive helm
quaint jasper
Is your avatar weight painted and parented ?
I was waiting to get the armature in before weight painting
quaint jasper
Ok, in that case i'm not sure what you're even trying to export for
Your mesh needs to be parented to the armature
quaint jasper
are you watching any tutorial ?
naive helm
no- theres no tutorial to fix this issue
and its not like I can redo the entire model
The addon I used to make the head costs money now
Like I'm willing to pay money to get help with this
quaint jasper
Merge your meshes, fill the wholes and throw it in Mixamo
naive helm
@quaint jasper I merged everything, but I cant fix the holes here

Thats what it looks like after importing
naive helm
quaint jasper
Merge your meshes, fill the wholes and throw it in Mixamo
And in mixamo it looks like this

I'm going to scream
quaint jasper
Yeah that's probably too difficult to fix for a newcomer, you should reach out to people who do basic avatar commissions, maybe even on fiverr
naive helm
🥺
naive helm
quaint jasper
Yeah that's probably too difficult to fix for a newcomer, you should reach out t...
Should I give up then? I've been working on it for about a month now
quaint jasper
I mean, you can keep trying, but if you don't know what you're doing or trying to do, it'll be too difficult yeah
naive helm
I wish i new that when I started
I see so many people doing amazing things and I feel like I can never get to that point
unkempt torrent
Would anyone like to glance at "my" wrists and try to hazard a guess at what's going wrong? It's an issue I have left over from last week. In Blender the normals are fine, the lighting is smooth across them (despite minor texturing discontinuities) but they look like ass inside vrchat. Here they are in Blender:

And vrchat:

Could this be entirely inputable to the texture?
quaint jasper
Could depend on the shader yeah
unkempt torrent
I don't understand why the shader would create such a pronounced discontinuity at the base of the hand; they're part of the same mesh. But I guess it could have any reason
Think I figured it out and yeah, this was a question for #shaders . I thought it might be another weird mesh attribute I didn't know of
 white moth
unkempt torrent
I don't understand why the shader would create such a pronounced discontinuity a...
white moth
unkempt torrent
I don't understand why the shader would create such a pronounced discontinuity a...
There is a lot of data that can cause a shading difference. Vertex color, normal direction, and UV discontinuity are the main ones.
Also, edges marked as sharp.. but that falls under normals
It’s also entirely possible that any given shader can opt to completely disregard some of the models data otherwise saying to make it smooth
To a Shader, model data is just a suggestion
naive helm
Why wont my addon appear when i open a different blender project?
white moth
Add the addon to your start up project and then save the start up project
naive helm
How?
white moth
In the default empty blender file you get when opening blender, File -> Defaults -> Save Startup File
Anything you do to that file will be how blender starts when opened
white moth
Those files don’t have the add-on
naive helm
(sorry if im sounding rude i've been on the verge of a breakdown all day)
How do I get the file to have the addon, sorry if im missing something
white moth
You’ll have to add it the same way you add it yourself
 white moth
Not familiar with that add on
naive helm

its not there in this file
when I make a new file

Its there
wait it just appeared wtf
unkempt torrent
white moth
There is a lot of data that can cause a shading difference. Vertex color, normal...
None of the above. It was occlusion!
 trail relic
Does anyone know why this avatar appears to be dark whenever I go into UV edit it
 quaint jasper
Which settings do you have enabled for that shading mode ?
 valid sun
Anyone know if there's a shortcut to separate a mesh into multiple meshes by shape key?
Google just sort of gives generic results :/
OR even better, I need to be able to retain shape keys when converting a mesh to a curve. (it deletes them all -_-)
 low pulsar
anyone have a youtuber or someone that can help me learn blender?
 devout scroll
valid sun
OR even better, I need to be able to retain shape keys when converting a mesh to...
devout scroll
valid sun
OR even better, I need to be able to retain shape keys when converting a mesh to...
won't be able to keep them when converting since curves and meshes are different things
what are you trying to do
valid sun
I created mesh eyelashes by duplicating a string of edges just inside an avatar's eyelid, converting them to a curve and then assigning a "profile" mesh to the result. The duped edge carries it's shape keys with it, so this let me quickly control the shape and contour of the lashes without having to tweak them for each viseme.
I was able to do the hard part by hand. I separated the duped edge into multiple meshes with each shape key as the basis then converted them to curves and joined the result.
Back then I was wondering if there was a shortcut to do that...but I suppose I'll be the one to write a script for it sometime.
 torpid jolt
need help accessing CATS

 kind dew
torpid jolt
need help accessing CATS
kind dew
torpid jolt
need help accessing CATS
CATS plugin is compatible with 2.90 and 2.91. Notes found in 0.18 changelog. Try installing one of those versions if it works.
torpid jolt
It worked, Is there a way to move the CATS Tab to the left side?
Because I saw tutorials online showing CATS on the left side of the screen
 thin shadow
i dont know but it doesnt interfere with workflow, cats on the tutorial video is the same as cats on your blender
 left lantern
for some reason I want to reupload my two private avatars and it keeps saying error upload BUT I ALREADY UPLOADED IT how is that possible...
 neat viper
Have you updated them to the newest SDK version? o:
also, would probably be better suited for #avatar-help if it's an SDK3 project, or #avatars-2-general for SDK2
left lantern
neat viper
Have you updated them to the newest SDK version? o:
well this avatar is not sdk 3 compatible
but i do know this is the latest version...
 neat viper
odd o:
would recommend asking in #avatars-2-general though - also note that avatars aren't strictly compatible/not compatible with either SDK, unless you mean SDK2 gesture/animation systems (which are made much more flexible in SDK3 anyhow)
left lantern
neat viper
odd o:
would recommend asking in <#361742235525709825> though - also note that a...
ok somebody already answered but not sure but also possibility of connection importing it
modest shell
I merged armatures to create a new model and the material turns grey in blender ... i can't get it to show properly. any idea why?

 rigid kindle
I have question. If I have two models that have all the same verticies, but one of them I adjusted a lot. Is there any way I can copy the verticie information from the edited model, to a copy of the original?
Basically I have a model where I edited it the way I like, but the shape keys got screwed up at a critical juncture.
 tough plover
rigid kindle
I have question. If I have two models that have all the same verticies, but one ...
tough plover
rigid kindle
I have question. If I have two models that have all the same verticies, but one ...
yes, "Join as shape"
rigid kindle
ah this should be perfect
rigid kindle
Okay so I tried it and maybe I did something wrong, but it reverts back when I switch to edit mode.
so in edit mode. the original has conformed to the shape of my edit.

but in edit mode it returns to its original shape
 tough plover
@rigid kindle uh.... is your edited one the one on the left?
if so, you fucked up
you should not just move the vertices if you're changing proportions
you should be scaling the bones in Pose mode
use the CATS plugin to start pose mode, then do your changes, then do "Apply as rest pose"
 rigid kindle
Thankyou.
tough plover
@rigid kindle don't forget that S is the key to scale, and that you can hit X Y or Z to lock the scaling to an axis
G is the key to move stuff
same axis shortcuts apply
rigid kindle
I did a bit more to the model than just make it shorter, but I'll keep the bone thing in mind for next time. when I'm handling parts related to height or the distance betwen bones.
naive helm
is there a google docs with images to help with my idiot-self on avatar creation? like armature and unity setup
 onyx juniper

reddit
6,543 votes and 89 comments so far on Reddit
 civic harness
Hey, I've looked everywhere for this but I'm trying to figure out how to atlas certain objects, while leaving the objects that have normal maps. I want to optimize but the avatar I'm using looks horrible without the normals, any advice? All I've ever read on texture atlasing assumes you're trying to combine all materials into one.
neat viper
Could try making two atlasses? i.e make a duplicate of the .blend and atlas just the base color, and then atlas it again but set the normal maps as the base color
not sure if that'd work lol, but if it did you'd have a color atlas and a normal atlas
civic harness
See this is why I wished I knew more about modeling. I've done tons of mmd models and I've texture atlas loads, but I still have little understanding of how the process works or how to change it. I'm gonna be honest here and say I have no idea how to set the normal maps as the base color, just specifically selecting them as the image textures under my diffuse bsdf? Also, I come back and blender has a big update so I'm almost as lost trying to re-learn blender lol
atlasing seems a billion times more complicated with 2.8+
neat viper
Just setting the normal's image texture as your base color should work for what I'm saying yeah, though I don't know if what I'm saying will work lmao
 mighty bramble
guy here familiar with basic 3d modeling but not with unity or probuilder. Is there a simple way to delete this quarter section and leave the rest of the object? I tried to extrude backwards (?) but it just leaves this mess of meshes
 neat viper
civic harness
atlasing seems a billion times more complicated with 2.8+
neat viper
civic harness
atlasing seems a billion times more complicated with 2.8+
also, def use CATS blender plugin if you're not already o:
neat viper
mighty bramble
guy here familiar with basic 3d modeling but not with unity or probuilder. Is th...
That'd likely be something done in Blender rather than Unity o:
mighty bramble
oof I hope not, probuilder seems perfect for what I'm trying to do, I just learned about it the other day dont really know how to use it yet
civic harness
Well thats the issue, I'm using a model format that cats doesnt work with. Specifically a .glb model from "ready player me"
I've done everything manually up to this point, and I even got my un-atlased avatar into vrchat and it works fine, I'm just hoping I can optimize it, though technically it comes out with 7 materials putting me at medium while I see tonnes of poorly optimized avatars around
neat viper
Model format shouldn't strictly matter to CATS once it's in blender - could try exporting it as .FBX and re-importing it if it does matter, somehow o:
civic harness
Ah, I wouldn't know, I was strictly just going by the supported files listed on the plugin. It has allowed me to merge meshes and set up eye tracking and such, automatic atlasing failed horribly though lmao
neat viper
ah lmao - not really sure with how Ready Player Me exports it's files but make sure that the textures are in the same directory as the model file? o:
civic harness
Well to explain that one gotta say I downloaded the full model file in glb format. The "vrchat creator" exports a super low res horrible looking avatar compared to their creator program, so I figured I would just take their full export and try to fix it up for import, and it worked, i just can't figure out how to optimize it. At this point though I'm not sure it's worth the effort. I'm still at medium is seas of poor avatars most of the time.
And the files are self-contained the glb file as I understand it, I had to individually download them from blender to use them in unity
or, save rather than download, you get what I mean.
and for reference, the normal ready player me avatar export is 19k tris, while the vrchat export is less than 4k tris. Its kinda sad
neat viper
bit low lol, but p good for optimization - I'll mess with a RPM avatar for a bit and see if I can find something maybe o:
civic harness
You're good man, no need to put time into this issue, it was more for optimization and being considerate, but most people dont even worry about that in game, and its not like im rocking 10+ materials. It runs fine so far on other people's sessions so I may leave it as is until I learn more about the process
neat viper
it's fine lol!
also real quick, unpacking the texture files seems to make the atlas progress a bit better - click the dropdown to the left of the image texture and hit unpack, which is to the immediate left of the X button in my image

will be a different icon than my image though
civic harness
cool, 'preciate the help
neat viper
The arm UVs for whatever reason are tiny and so might have a weird hole in the arm - either select the arm UVs in the UV editor and scale them down, or set the image texture's interpolation from Linear to Closest (probably not preferable in this instance though, as it will make everything look pixelated)
civic harness
While you're here, mind if I ask if you know of any shaders or settings that work for a less toony avatar? The one im working with looses all detail with toon shaders and is way too dark with normal unity shaders
 neat viper
civic harness
While you're here, mind if I ask if you know of any shaders or settings that wor...
neat viper
civic harness
While you're here, mind if I ask if you know of any shaders or settings that wor...
Poiyomi's toon shader has some different lighting options that may help, some of which are a bit less toony o:
civic harness
ah, yeah that would be a good idea, thanks
@neat viper Yeah I found the basic emission setting in poiyomi and it seems to be what im looking for, thanks again.
neat viper
yw! c:
civic harness
actually, it still seems to be flattening out my normals
neat viper
odd - if you unpack the normals the same way you unpack the base color texture, then put the normal texture into the base color texture's slot, does it make an atlas of just the normals? o:
If so, do that and save the image it makes, then atlas it normally - you should have a base color atlas and a normal atlas if that works
civic harness
@neat viper Oh no, my bad, I was talking about the shaders in unity. I think it may be a lighting issue, as the hair becomes completely flat with directional lightning with poiyomis shader, but when using a spot light it shows more detail

 neat viper
ah - yus, Poiyomi flattens out some stuff, though that def might be tweakable in it's settings
haven't looked at Poiyomi's settings in a while though, sorry o:
civic harness
@neat viper Yeah I ended up going with standard unity shaders with emission, which seems to show the normals much butter than poiyomi with emission, hopefully it helps with dark areas.
 spiral sigil
does anyone know of a good oversized hoodie or where i can find one
i keep searching for 3d models but cant find any
 native wharf
I also need a head for a human! I've tried Deviantart, but it always shows me everything -except- what I am looking for. If anyone knows of anything that doesn't look like an anime character (or even someone I could commission for a highly specific injury to said character), please let me know.
I don't know what channel to ask in for this, but my other message got deleted without any indication
spiral sigil
need a furry husky head
 thorny ivy
native wharf
I also need a head for a human! I've tried Deviantart, but it always shows me ev...
thorny ivy
native wharf
I also need a head for a human! I've tried Deviantart, but it always shows me ev...
https://sketchfab.com, there's a downloadable filter you can also use.
thorny ivy
spiral sigil
need a furry husky head
Same thing I just said to Wubwub but if you're looking for something more specific/ready-to-use, might have to commission someone or use a pre-existing base.
spiral sigil
I making my own
thorny ivy
Anyways, I popped in here once more to ask for some tips regardin' how to smooth round cheeks for an avatar I'm makin'.
 spiral sigil
watch her
thorny ivy
The model itself isn't low-poly or anything but due to "inflating" the cheeks, they don't look very smooth at some angles.

 graceful herald
If I wanted to start making models, where would I start?
spiral sigil
You first need to be a users on vrchat and beable to upload avators
graceful herald
Is that available to all users?
neat viper
graceful herald
Is that available to all users?
All VRChat accounts can create avatars, yup! You need to be New User rank ingame at a minimum - you'll need Unity 2018.4.20f1 and the most recent version of the VRChat SDK (preferably SDK3, though the older and more dilapidated SDK2 will work as well) along with some modelling software of some kind, likely Blender c:
I'd also recommend getting CATS Blender plugin, as it can help automate some stuff (like shapekey making, atlassing, decimation, etc)
native wharf
thorny ivy
https://sketchfab.com, there's a downloadable filter you can also use.
I'll give that a shot, thanks!
graceful herald
neat viper
All VRChat accounts can create avatars, yup! You need to be New User rank ingame...
I'll look all this up and get back with you. Much hugs 🤗🤗 TYSM!
neat viper
yw! If you need any further help, don't hesitate to ask in the #avatar-help channel for SDK3, or the #avatars-2-general channel for SDK2 - if you need help with modelling, this channel or #avatar-rigging (for rigging, i.e adding an armature and bones to your model) would be the places c:
graceful herald
neat viper
yw! If you need any further help, don't hesitate to ask in the <#730948173379535...
Your the best!
neat viper
awh lol, ty! c:
spiral sigil
I only know as far as the blender donut tutorial and some hours in messing with stuff, I'd like to think I made a pretty neat critter though? Rigging genuinely scares me though
 quaint jasper
very cool silhouette !
 neat viper
that's heckin cool! o:
 ashen stag
Yeah thats a very good start to keep working on or polish as is 👍
graceful herald
Ok let's bounce some ideas around. What do you think nickelodeon left out that could have made handsome squidward more handsome?
If I make a model, do I have to worry about it bugging for full body suits
neat viper
If the rig is a standard Humanoid rig, it should work with FBT - there are some considerations though (namely keep the elbows and knees ever so slightly bend, and don't hate the hip and thigh bones be too close together)
graceful herald
Which devices should the model be compatible with? PC vr or quest vr
neat viper
You can make a model compatible with either - if you make your avatar PC only, only people on PC/PCVR will be able to see it, wheras making it Quest-only will only allow standalone Quests users to see it
Uploading a Quest model on top of a PC model's blueprint ID makes it Quest Compatible, which means both can see the model
neat viper
Those are controlled by gestures and radial menu emotes - SDK3 is more flexible and complex in that regard, and SDK2 is a bit simpler, yet it's dilapidated and a bit more convoluted if that makes sense imo?
I'd recommend taking a look at the VRChat docs, too c: https://docs.vrchat.com/
graceful herald
I'm so nervous to get started
neat viper
don't be! It can def be a bit overwhelming to look at all-at-once, but it's p simple once you get the hang of it - would recommend downloading Blender on Steam, downloading CATS Blender plugin at https://github.com/GiveMeAllYourCats/cats-blender-plugin/releases/tag/0.18.0, and watching some Blender 2.9 beginner tutorials c:
graceful herald
Ah geez nervousness continues
neat viper
If you ever need or want help, the #3d-modeling and #avatar-rigging channels are always here c:
neat viper
sorry for the delay lol, going to sleep - CATS is the developer of the plugin though c:
graceful herald
Lol
 languid fog
 muted raven
Making Robo Fortune from Skull girls
muted raven
Making Robo Fortune from Skull girls
Thats really cool wtf
unkempt torrent
Experiencing a really odd issue when trying to fix the weights of the vertices in a mesh. The ones at the corner/tip of the mesh remain disproportionately affected by the bone, even though they have been set to the same weight as the adjacent ones
Weight is 0.1

Bone rotated 30 degrees (the darker yellow is the backside of the same mesh depicted in the previous picture; the corner vertex is off the top)

What might be causing this?
I checked and the adjacent bones do not seem to have any weight for these vertices
Hm, nevermind, I think I got it. A bone higher in the hierarchy was weighing less heavily on the corners, so the effect of the bone on the rest of the mesh was dampened
spiral sigil
i need a little help wen i'm changing the blendshapes in Unity all the material change they're colors to but in blender its fine can someone help me fix this please.


 knotty panther
has anyone else ever encountered this issue? whenever i export an FBX from blender into unity, the shape keys get borked and this strange pinching appears whenever a shape key is activated (you can see it most on the bridge of the nose). on the left is the normal FBX i exported yesterday, on the right is the new one i exported today. the only thing that has changed with my setup or the models is i installed the CATS addon for blender so i can atlas textures.

the issue compounds on itself and gets worse when more than one shape key is activated
 quaint jasper

 cold verge
If i want to make my own avatar for the first time, and I want it to be 3.0 where would I start or go about it? Do i start out with a free unity asset? I want to make somewhat of an anime girl with a broad range of tools and customization.
if someone could point me in the right direction to starting out it'd be much appreciated.
like some good tutorials that aren't unnecessarily overcomplicated or hard to follow at least.
cold verge
i also dont wanna do anything aside from avatar making really, like i just wanna make an avatar or two and then that's it. some rather detailed ones. ik that my first 'project' wouldnt be like top notch stuff but i wanna try to make it that and improve it as much as i can and stuff. idk
 zinc jolt
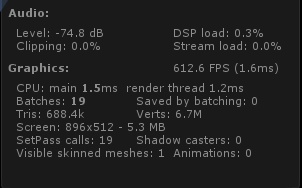
hey guys, guess how many polygons Nightmare Fredbear has

86.7 million verts apparently

here
sheesh, talk about a lot
 young vault
You have lights
Also, vert count doesn't matter (much) except in extreme cases. Tris matter more
zinc jolt
8.9 million tris tho
young vault
Lights multiply
zinc jolt
oh, fair point
 unkempt torrent
Is there any way to lock tools like push/pull along one or more specific axes?
devout scroll
what do you mean
unkempt torrent
Ah, literally just press X, Y or Z while doing the needful
devout scroll
any tool can be usually locked with mouse wheel click and drag to select axis or xyz
unkempt torrent
I had never done it before 😄
devout scroll
or shift x if you want to lock to z and y
shift y if you want xz and shift z if you want xy
 merry vault
zinc jolt
86.7 million verts apparently
merry vault
zinc jolt
86.7 million verts apparently
Is that the official model?
zinc jolt
It's a fix of the model
That looks official because well, it was designed to look like that
 wintry gale
Alright so I'm fairly new to blender and was looking for help with fitting this jacket on this model, if anyone can help that would be awesome!
 spiral sigil
@wintry gale bring the jackets armature into cats drop down menu and bring it into pose mode and pose the arms and set as rest pose
spiral sigil
you could either pose the jacket sleeves to the arms or move the arms into the sleeves ( the start pose button in the cats menu)
languid fog
 mellow cloud
i still need to get polygons down
mellow cloud
i still need to get polygons down
You can always use the decimate
Or some adon
mellow cloud
so i lost
the model with 20k
by mistake
so i will just upload my model with 10k
instand
spiral sigil
You’re crying over 20k poly’s?
neat viper
Max that's shown by default is 20k granted, but should def try to stay under that


 sturdy flare
languid fog
sturdy flare
languid fog
I already did my OC but i not going to put it on vrc
i afraid of someone steals my 1 month work
spiral sigil
languid fog
i afraid of someone steals my 1 month work
cant you just make it a private avatar?
neat viper
spiral sigil
cant you just make it a private avatar?
Avatar rippers can steal and reupload avatars regardless of their public/private state, iirc
spiral sigil
oof
spiral sigil
can someone help?
im following this tutorial rn
https://youtu.be/o34v2leOlkw?list=PLg4CwqB8Dpf0MjNPMmM4rtqV55ucsorMe&t=824
the link should take you to the point im on
when i merge it, it doesnt move the sleve with the arm

Don't feel like doing it yourself?
Hire avatar artists on Fiverr to create your own custom VRChat avatar: http://bit.ly/VRChatAvatars
Part One of a tutorial series where i'll show you how to create your very own custom avatar for VRChat and VRM use for VTubers. In the First lesson we'll be focusing on Blender.
Leave a comment if you want to se...
spiral sigil
Did you do a data transfer then fix model twice? @spiral sigil
spiral sigil
can someone help me make this model full body compatible?
 meager crag
I wonder how big can the texture file be? I started doing it in 4k size and i already made so many adjustments to it
thin shadow
8192 x 8192 px
meager crag
ok!
quaint jasper
You should never use 8k for anything
meager crag
it seems really big
spiral sigil
spiral sigil
Did you do a data transfer then fix model twice? <@456226577798135808>
yeah i did
meager crag
😂
spiral sigil
spiral sigil
yeah i did
btw im doing it all over again so dont worry abt it
anyways, can anyone give me a good top hat model?
i tried making one myself but i failed miserably. and i tried searching one but most of them have broken textures or dont work for what im trynna do
quaint jasper
how did you fail at making a top hat ?
neat viper
Make a circle and press F to make a face, extrude it upwards slightly, extrude it again without moving it and scale it down a bit, then extrude a new face and go up once again o:
spiral sigil
quaint jasper
how did you fail at making a top hat ?
i honestly dont know
spiral sigil
neat viper
Make a circle and press F to make a face, extrude it upwards slightly, extrude i...
thank you
spiral sigil
spiral sigil
i honestly dont know
i mean my middle name is failure (im not kidding)
spiral sigil
neat viper
Make a circle and press F to make a face, extrude it upwards slightly, extrude i...
... my iq is 0 just like a circle. how do i make one
neat viper
you're fine! in Object Mode, go up to the Add menu, then to Mesh and then Circle
 neat viper
Select the circle mesh and go to Edit Mode first c:
neat viper
depends on what you mean by a curve o:
If you mean something like this, that'd be called a bevel/chamfer - select the bottom edges and press CTRL P, or go up to Edge, and then Bevel Edge


 coral sorrel
Not sure if this is the right place to post but-
Hello, I’m looking for some straightforward tutorials on how to swap clothes/accessories/hair assets without stuff breaking.
A lot of tutorials I have found go on and on about stuff that I really don’t need at all, so if anyone has some short(ish) and to the point tutorials that would be a lifesaver! Feel free to Dm me or send them here(if that’s allowed)

 worn umbra
Idk
spiral sigil
@spiral sigil press A in edit mode then press U and unwrap it. Select the Principled BDSF shader, add a new image texture, name it, and make a new one. if you wanna make things easier press on the Y axis and press U and set the UV from view then go to the texture paint tab and go into edit mode on the right, press A then paint! If this didn’t help then I dunno 
spiral sigil
tnksha
edit:
thanks* (idk how fast i had to type to get that wrong)
spiral sigil
spiral sigil
<@456226577798135808> press A in edit mode then press U and unwrap it. Select th...

Uploaded at 5/4/2021, 12:47:51 AM by AJ Slashkiller
spiral sigil
languid fog
https://docs.blender.org/manual/en/2.79/editors/uv_image/uv/editing/unwrapping/s...
@spiral sigil ^^^ this is a lot easier
k
 wise kindle

 ashen sable
This is the product of boredom and insomnia
 spiral sigil
@ashen sable are you somehow hesitant to teach one nerdy guy into vrchat avatar creation?
ashen sable
No but really don't know how myself. I just know how to 3D model, uv unwrap and texture right now. The armature is given to you in blender under the plugin rigify. Idk if it'll work, but Im bored enough to learn.
meager crag
🙂

i havent made bones yet, it will be my first time too
also i will have issue with the eyes. i kind of want to animate them as a texture
meager crag
i want to add more stickers later too
ashen sable
Reminds me of frogger
meager crag
frogger is cute too
ashen sable
Until car make frogger go smoosh
meager crag
xDD
ashen sable
I dont want to add another 1-2 hours onto your model but a red phany pack would look amazing
ashen sable
Think of all the cookies you could carry in it
meager crag
:3 so cute
i was thinking earlier that as soon as im done with this, i will make alternate outfit
ashen sable
I really like how the eyes loop over the headphones
meager crag
i've mostly seen snail Oc's with eyes that are not stalks or if they're stalks, usually theyre really tiny
so maybe the eyes are so topheavy its easier to rest them :DD
before this model i had another idea, but had to scrap it due to it being too hard to model
like a giant eye monster that swaps into a mouth, hard to explain
ashen sable
My lazy butt was like.. character model?.. nah. Cylinder with limbs. Yes.
meager crag
🐌

 meager crag
i love that one
ashen sable
Imagining what that would sound like.
 exotic obsidian
Is it possible to create a 2D face rig for VRChat?
Or at least a mouth/eye rig that gives the illusion of 2D? Because I wanted to make one of my cartoon characters
devout scroll
you can do that with unity animation clips
and avatar 3.0 sdk
you have to make your own animator and handle the animation transitions however you want
meager crag
https://www.youtube.com/watch?t=65&v=-GtAFAfe5tU&feature=youtu.be does this video help at all? like, im thinking of animating my eyes this way too

There's an updated version of this video! Which you can watch here: https://youtu.be/nmzAbeUDPUQ
In this Tutorial, we cover 3 different ways to animate face textures. These methods can be used to animate any texture, and the third example can be used to animate pretty much anything! These methods don't require Rigging or Armatures, and are pret...
(lol linked to a cat video, thus edit)
 sterile sky
Where is a more updated version of this? https://docs.google.com/document/d/1W5KFa_aszCMrJaFD8mb9a-GHYO4X4S9M63GjM4UwuEw/pub
I was told this is outdated but I can't find anything that gives even half as much explenation as this that isn't a slow-ass youtuber
meager crag
this seems old
sterile sky
I been through their and it's pretty terrible. Even the mouth references are terrible with the bad lighting, and nowhere does it explain the eyes, nor does anywhere seem to explain viseme naming that works for vrchat(Like do I just name it oo? v_oo? vrc.v_oo?) and so far nowhere does it explain that. And it fails to even show tongue movement
And it only gives a half assed explenation of jaw flap
ashen stag
Blendshape naming does not matter in AV3, they can be named anything. Also its all blendshapes, so tongue movement is no different from lip movement
sterile sky
That doesn't sound like that makes sense. If they weren't needed then what is VRchat looking at to know what shapes are what?
And why does this guideline even bother with names at all?
ashen stag
You manually designate the blendshapes you want to use in the avatar descriptor, naming them something normal like vrc.v_oh probably helps it automatically find and slot in the correct viseme per slot so you dont have to. Naming was much more important in AV2, blinking needed them to be named correctly and at the top of the blendshape list. This is no longer true.
onyx juniper
@sterile sky But if your visemes are rapidly changing textures, you might want to select viseme parameter only and set up an animation layer for your lip sync instead
Oh wait, that was @exotic obsidian
 teal sierra
okay, i'm completely new to blender and i have a fbx model that opens fine in Windows 3D viewer, but when I import the fbx into blender and fix it with cats I get this, which looks like a mess. the face is not showing and these black lines everywhere do not look right. do i need to do something else to the model before importing it in blender?

for context, if i just straight up open the fbx model in Windows 3d viewer it looks fine, appears like this
 unkempt torrent
In blender what happens if you hide the armature?
 floral current
Then you can't select it.
unkempt torrent
I was talking to @teal sierra
teal sierra
Oh, all the junk went away, but it still doesn't show the face properly.
 unkempt torrent
Maybe there's a texture it didn't load or apply properly, you should select the object that contains the face and go through the materials
It's the tab with the red spherical icon
In the bottom right on the default layout
teal sierra
Is it these black textures that are the problem? How can I correct it?
 unkempt torrent
Depends on how the shading is set up
Is there a shading graph?
Which shader is the material set to use?
teal sierra
Not sure how to check that D:
 worn hawk
hello
unkempt torrent
Just below
You could click the little circle next to 'base color' and set it to an 'image texture'

 timid kernel
my partner is attempting to bake a normal map onto their model, they used a multires modifier in blender to model in a bunch of little bumps at a high resolution and they want the normal map to only consist of those bumps, but it also bakes in the actual shape of the mesh that's already present so the normal map is weird and it's like, doubling up the shadows i think?
basically, shouldn't all the rest of this be the standard purple color, and only those bumps stand out against it?

there's a "bake from multires" checkbox but when they enable it and try to bake it says "multires data baking requires multiresolution object" even though the multires object is selected
does anyone know how to actually do this?
teal sierra
unkempt torrent
You could click the little circle next to 'base color' and set it to an 'image t...
Okay, I think I got one problem fixed but another one came up. I changed all of them to the same texture and it looks somewhat better, but the eyes, eyebrows, glasses all seem to be a bit messed up now. Do you know how i might be able to fix this?
 timid kernel
nvm we figured it out, apparently we have to have levels set to 0 and disable all other modifiers
spiral sigil
can someone tell me how to add textures to my model? someone told me to something with seams but i got lost at that part and when i asked again for help no one answered
unkempt torrent
The way I know to do it, you make a UV map, which maps vertices to points on the texture, then assign a material with one or more textures or other attributes (per mesh)
Use the UV map and shading tabs; to get started on the UV map select the mesh you want to map and press U, then open your texture on the left and drag the orange projection of the mesh to the right places using the provided tools
What you do in the shading tab is largely irrelevant outside blender
It's just for preview purposes, although some formats like fbx can include the base texture bundled within
spiral sigil
sounds complicated.
spiral sigil
idk man my ass is already red enough. i dont want more pain
i made seams and i have the uv map but when i go to texture paint i get this https://horny.bonk.host/

Uploaded at 5/5/2021, 8:32:17 PM by AJ Slashkiller
unkempt torrent
I don't use texture paint. Did you assign a material to the mesh?
Do this in the materials tab, using the assign button (create a new material if necessary and set the base color to the desired texture using the little circle button)
 north mortar
What could be causing some of the polygons to be so stretched out on this UV map? those exact polygons are what i have added to an existing model but ive tried checking if they are all properly connected to neighbouring polygons and also that their normals are facing outwards, like every other polygon face on this model. If i move the model around in blender and try bending it via armature bones, it seems fine.
 quaint jasper
Edits to the mesh can do that, merging vertices usually
floral current
north mortar
What could be causing some of the polygons to be so stretched out on this UV map...
That's what happens when you change the verts on a mesh and you have it setup to not automatically update the UV map. I think an easy fix for this would be to pin all other vertices, leaving only the ones that are out of place, then regenerate the UV. They should be recalculated to fit into the space between the pinned vertices.
I do this any time I change vertices in any way and it seems to work out.
north mortar
shouldnt blender make a blank UV mesh if i select all vertices with A and tell it to unwrap UV?
or does it keep a UV file saved somewhere that it keeps pulling up?
floral current
When you pin the UVs they stay in place when you unwrap
quaint jasper
You can also select specific faces on your mesh, press U and select follow active quads i think
it should unwrap based on the geometry unwrap around
north mortar
ok i think i solved it, thanks.
floral current
floral current
That's what happens when you change the verts on a mesh and you have it setup to...
WELP, I recorded this video demonstration so I'm posting it anyway! LOL
 quaint jasper
Here's one for when an island can't move
north mortar
well it turned out that i kept opening the same old UV map and as soon as i tried unwrapping it with the new added polygons, it generated a completely different UV layout for some reason. thatswhy i thought the new polygons broke something, but seems im just dumb.
north mortar
so im back again 😄
how can i tell blender to unwrap selected mesh onto an older UV map that has pinned meshes already set in place? currently it flat out ignores the pinned islands and dumps the new mesh islands as if the old ones didnt exist.
 quaint jasper
I think this is a case where you can't manually do that. You'd be better off mirroring the other side of the mesh, and flipping the UVs to the other side
floral current
north mortar
so im back again 😄
how can i tell blender to unwrap selected mesh onto an olde...
You unwrap your selection
You have to select all verts of the mesh.
north mortar
im currently only editing this one hand to learn what the proper steps are to modifying an existing model by adding 1 more finger. the red parts are what the mesh looked like with 4 fingers, so i cant really just mirror it and call it a day at the moment.
if i select all of the vertices on this model, i end up with a gibberish UV map, unlike this one, which looks really good for some reason (original creator seems to know what he was doing)
floral current
Select all vertices and unwrap. The pinned verts will stay in place, and anything that's not pinned should conform.
north mortar
mmmm tried selecting all just now, still ignores the pinned vertices
floral current
Right, it's supposed to.
 lone forge
alright so i got a model and textures imported into blender and when i try to match textures to the model all i get is pink, is there something im doing wrong?

could i have settings wrong?
quaint jasper
what does the shading tab look like ?
lone forge
 quaint jasper
And that's pink in all shading modes ?
lone forge
so im not so used to blender, where can i find shader modes?
 lone forge
yeah stays pink through the options i choose
quaint jasper
In that case go File > External Data > Find missing files and chose your folder where the textures are
lone forge
i have and the files are in the project
I've found an fbx file with working textures buried in the model folder, thanks for the help anyway!
teal sierra
My model's eyes and eyebrows seem to be broken in blender, i have an eye texture but im unsure how to use it on the eyes. as for the eyebrows, i'm not sure why they aren't looking how they're supposed to. anyone might know how i can fix this problem?

 last kite
never 3d modeled before but im in a design class and we had to make an animal so uh yuh

blender? no, sculptgl 😻
floral current
Cute!
 austere bolt
 meager crag
@teal sierra are you sure your uv's are the right size/placed right? It looks like the eyes might have moved in the map? ( Just a guess)
teal sierra
meager crag
<@751710877702684773> are you sure your uv's are the right size/placed right? I...
How can I check this? Sorry I'm very new
devout scroll
yeah your eyes and eyebrows are using the wrong texture
or the uvs are messed up but if you don't know what that is chances are they aren't
meager crag
you need to choose the model part in the object mode, go to uv mapping and in edit mode you can resize them and move the planes
im not sure how your model works, so its hard to give much advice. i hope someone else will help you more (im a n00b too)
like, the model i made uses only one uv map rn and i have everything on it like so

(sorry, horrid topology)
devout scroll
topology looks fine
but uvs could be packed a bit tighter to squeeze some more resolution out of them 
if you're hand painting you could look into uv packing addons that will squeeze things together well
meager crag
can you recommend any?
devout scroll
i use uvpackmaster but it's paid
and a lot of the cool features are pro, which i don't have
but there was a good looking free one that I forgot the name of
generally it's good to have an understanding of uvs tho so doing it manually is good!
but if you're hand painting there isn't much reason to do it manually unless you want to practice
you will still need to know how to place seams and unwrap on your own, these addons just pack them
it's also sometimes a better idea to optimize manually (like with mirrored uvs and reuse)
meager crag
yeah
devout scroll
but what I would do in your case is just scale up the uvs that are visible the most and scale down the ones that are not really seen
try to minimize blank space, while keeping a little bit of gap around your uvs so they don't bleed into each other
also, you want to have some bleed around your uv islands
if your islands end exactly where your textured pixels do when you go further away from your models and lower mip maps are displayed for your textures, you'll see ugly lines where your seams are (that will be the color of your empty space)
meager crag
it already happens on this one kinda
devout scroll
just draw outside the lines a little with the same color
meager crag
have you used armorpaint?
devout scroll
nope, only substance painter and blender texture painting
meager crag
i have it but i cant use it much at all. I used it do draw the shapes i wanted to paint and did the rest in ps
ok
i would love substance painted but its really expensive
meager crag
ok
devout scroll
but it lacks the baking substance painter has
meager crag
i dont even know how to bake
devout scroll
you can get a free student license for painter
it's industry standard, but much like photoshop, has a really dumb price model
devout scroll
you get it for free for 1 year to use non commercially
and can renew it whenever
they don't really check the info you give them very well I think
but you can just try quixel for a start if you don't want to commit to painter
i haven't tried it myself but i'm considering
meager crag
ive seen my friend's friend use it and it looks good.
she does professional game models with it
she got it before the whole subscription model, me thinks
devout scroll
painter is the photoshop of texture painting
can't go wrong with it, but i'd prefer to not have to rely on student licenses/pirating so i'm hoping quixel can catch up
considering they're now owned by epic game so they should have enough money to develop it quickly
that said you can still buy substance painter on steam for a one time fee
but it's still expensive
devout scroll
painter excels in baking and procedural stuff
but i feel like it's a lot better for realistic stuff out of the box
teal sierra
devout scroll
yeah your eyes and eyebrows are using the wrong texture
Do you know how I can put the right texture? I have one for an eye and I think I know how to put it into blender, but I don't know how to assign the eye texture to the model's eye
devout scroll
depends
can you check the materials your object has
if there's one for the eye already then you just need to assign the texture
teal sierra
This is what it looks like normally when I import it and fix it with cats

Normally theres these black textures

I forget what I did to the other ones to make them not black, but I did something
And that made the face work, but the eyes and eyebrows still looked wonky
quaint jasper
alpha at max in material ?
devout scroll
cats fix probably does some thing that causes it
teal sierra
any work around or way to fix it then?
 covert jetty
teal sierra
any work around or way to fix it then?
covert jetty
teal sierra
any work around or way to fix it then?
play around with the shader settings in Blender
good start is what Ruuubick mentioned
devout scroll
can't really say without trouble shooting


 glacial ingot
Get rid of the normal maps
 fierce coral
I made my Avatar's eye with Plane Circle (No thickness), But when I load Avatar FBX, Eye just gone.


like this.
How can i fix this weird error?
 still wadi
Face orientation
 obsidian nova
Go into the “mesh” toolbar drop down, scroll down to “normals” & click flip normals.

 open notch
wintry gale
open notch
wintry gale
Seccsea
wintry gale
open notch
Seccsea
no u
open notch
🍉
spiral sigil
how do i fix this
 quaint jasper
You know you can just create a vertex right ?
spiral sigil
no i did not know that since i have 0 iq
quaint jasper
Always google stuff before trying 
 spiral sigil
Where do you go to post commissions?
devout scroll
check the vrc ask forum or vrc traders discord in #community-servers-old
languid fog
wintry gale
why is it doing this ):
Did you merge the armature to the mesh?
 lament pond
 zinc jolt
Found this on a Twitter of Fnaf models that are accurate

The poly count might be higher but I'm not sure
 hardy plover
need some serious help, whenever I join meshes as shapekeys to my main model, my model literally grows in size every time the shapekey is played
 final coyote
Cannot figure out how to get this associated with my right shoulder correctly - The flamingo's head does not move with the body - could someone give me a tip on this
 final coyote
 quaint jasper
weight paint it only to that bone
 scenic summit
Can wavefront (.obj) clothing items be converted in such a way that i could use them for clothing items in blender?
quaint jasper
obj doesn't have vertex groups, so you'd have to weight paint them yourself
scenic summit
is there a good reference/tutorial you or anyone recommends for weight painting in this scenario? I wonder if ill even be able to due to the position of the sleeves of the shirt i want to use


I think the sleeves are going to be a problem....the model is in an A-pose and the shirts is more relaxed..arms straight down...not sure how to get the weight painting to be on just the sleeves not not grab the torso material. Im unable to move the shirt as there is no armature for it..just a ridiculously complex mesh
quaint jasper
what's the vertex count ?
devout scroll
might want to retopologize if it's complex
scenic summit
quaint jasper
what's the vertex count ?
im a blender newbie...where is this listed
zinc jolt
quaint jasper
what's the vertex count ?
For Springtrap? I'm not sure
quaint jasper
wtf is springtrap
quaint jasper
scenic summit
im a blender newbie...where is this listed
 zinc jolt
Springtrap is a character from Five Nights at Freddy's
3 to be exact
Five Nights at Freddy's 3
zinc jolt
quaint jasper
wtf is springtrap
guy that looks like Donnie Darko
 arctic pagoda
Does anyone know why beveling the top face doesn't work but the sides of the cube works?
Please @arctic pagoda or reply if you know the answer. Thank you!
 midnight valley
hello, does anybody know why my models uv normals are all messed up around the mouth area? even when i turn off auto-smooth it is still like this
 quaint jasper
Raise auto smooth to above 60 ?
midnight valley
seems to not be doing anything 😦
quaint jasper
what does the mesh look like ?
midnight valley
nothing seems to be out of the ordinary for me on the mesh
 thorny ivy
Does anyone know how to unmirror weight paint?
For some strange reason, several weights have been mirrored. No idea when or how this happened, but it did.
midnight valley
thorny ivy
Does anyone know how to unmirror weight paint?
For some strange reason, several...
create a duplicate of the weight paint in question, then name it accordingly to the opposite side. then set your weight paint to 0 and go over the side you wish to not have weight painted
there might be a better way of doing it than this way but its always been reliable to me
quaint jasper
midnight valley
nothing seems to be out of the ordinary for me on the mesh
What if you clear custom normal split data ?
thorny ivy
I'm trying to figure out when this started but even going back a-ways, problem is still present.
So now I'm wondering if I just messed with a setting which is auto-mirroring the weight paint or something.
The strangest part is I've barely touched weight painting at all.
midnight valley
quaint jasper
What if you clear custom normal split data ?
it seemed to work but now there is a giant seem in the middle of the face. no duplicated vertices causing it either
quaint jasper
increase the normal threshold above 60 ?
midnight valley
quaint jasper
increase the normal threshold above 60 ?
that did it! thank you! ❤️
thorny ivy
Okay, does anyone have experience using the Transfer Weight tool?
I'm trying to copy the weight painting from an older (but very identical) version of the mesh but can't make heads-or-tails of how to actually use it.
thorny ivy
I think it was the fact I had the models some distance apart which was making it screwy btw so if ya'll ever have a similar issue, might be what's wrong.
austere bolt

ArtStation
Vertices : 24,307 / Edges : 44,539 / Face : 20,411 / Triangles : 35,932
Production time: 4~5 hours
arctic pagoda
quaint jasper
What happens if you rotate the cub in object/edit mode ?
Yes it's a brand new cube, when i rotate it, i can only do it horizontally, but when I do it vertically it gets weird like that. I can rotate any way 90 degrees and it'll only work on the sides.
lament pond
 quaint jasper
arctic pagoda
Yes it's a brand new cube, when i rotate it, i can only do it horizontally, but ...
quaint jasper
arctic pagoda
Yes it's a brand new cube, when i rotate it, i can only do it horizontally, but ...
I've never seen that issue, but please let me know if you figure out why ! Could it be because of symmetry or another option enabled in scene ?
devout scroll
is scale applied?

 drifting helm
Is there any way to modify [vroid] to [3ds max] additionally?
vroid -> 3ds max object make -> unity -> vr_chat
spiral sigil
scenic summit
is there a good reference/tutorial you or anyone recommends for weight painting ...
To find out how many verts there are, look at the numbers at the bottom right of the blender window. The number is the total for all object in scene. To show just that object, select it and go into edit mode (tab key) . It will change to show how many selected verts out of how many total for that object.
If it has lots of verts, you can reduce by applying decimate modifier in object mode or dyntopo detail flood fill in sculpt mode.
Far as moving the arms into the A pose, maybe start by rigging the shirt to it's own armature first, weight paint the arms to that , pose it into the same position as your body mesh, then apply that pose as the rest pose and then rig the shirt again to the body mesh's armature.
devout scroll
drifting helm
vroid -> 3ds max object make -> unity -> vr_chat
Maybe, but people here mostly use blender and the addons that convert are probably for blender too
But you can try vroid -> unity -> export fbx -> 3ds max
drifting helm
thanks
lament pond

 cobalt aurora
am having issues with weight painting some pants i put on my avatar in blender, everytime i try to transfer the weight paint from the body to the pants it does this
 ashen stag
If the auto doesn't work then just weight it manually
 bright barn

Does anyone know why this is happening
And how do it fix it?
I tried smoothing it out but nothing changed
And it looks like that in unity as well

I mean it looks cool but I don't want that rn
 ancient palm
Does the SDK3 not include the tutorial avatar anymore?
languid fog
bright barn
https://cdn.discordapp.com/attachments/770381136810737718/841712391137394718/unk...
seem like you have duplicate stuff there, try to go on edit mode, select all and do "merge by distance"
 zinc adder
Hey, does anyone know what version of Unity I should use to develop VRChat avatars on a MAC (OSX)?
languid fog
zinc adder
Hey, does anyone know what version of Unity I should use to develop VRChat avata...
bright barn
nvm i fixed it

 thorny ivy
Any tips for making psuedo-monster hands? They don't need to be gnarly or anything, just clearly non-human.
 median pike
Elongate them
spiral sigil
I'm trying to learn blenfer is there a way I can use a shape to cutout of another shape a bit like the shape builder tool from Adobe illustrator?
languid fog
spiral sigil
I'm trying to learn blenfer is there a way I can use a shape to cutout of anothe...

In this video we are going to take a look at the Boolean Modifier in Blender 2.83. This is a beginner friendly tutorial.
Instagram ►https://www.instagram.com/pinkpockettv/
Download All Project Files: https://www.patreon.com/pinkpockettv/
#Blender3D
#3D
#B3D
like that?
devout scroll
Be careful tho because it leaves ugly artifacts
You need to clean up the area if you use a boolean
 plucky vapor
Question I wanna make like a little loaf to sit on my head but I have no idea where to start is there like a good video y’all would recommend orrrrr dm or reply with answer please
devout scroll
Look for some "how to model anything in blender" videos
languid fog
plucky vapor
Question I wanna make like a little loaf to sit on my head but I have no idea wh...

CG Cookie http://bit.ly/cgc-learn-blender, Chris Bailey ( @CBaileyFilm ) takes us through the top 5 Blender beginner modelling tools you need to model ANYTHING in Blender! Start with nothing but a cube and use these tools to take your model in any direction. If you want to start 3D modelling or want to sharpen your existing skills as a CG arti...

In this 3D modeling tutorial, we show you how you can approach modeling everything in 3D. Here we're using Blender but the concepts translate to all 3D software.
Support us by checking out our merch!
https://teespring.com/stores/flippednormals
Subscribe now!
https://www.youtube.com/c/FlippedNormals?sub_confirmation=1
Website - https://flipped...
both are good
plucky vapor
Ah thank you thank you
languid fog
np
languid fog
plucky vapor
Ah thank you thank you
after that videos i recommend watching videos more detailed like this one:
🟦キャラクターモデリングの方法を解説を交えながらご紹介させて頂きます。
You can find the reference image by google search with Shirogane Kei or 白銀圭.
<目次>
■#1 下絵配置&パーツ輪郭(ベーストポロジー)作成 -Add the reference image and create outlines.
▶:https://youtu.be/BBtgjTiL1XQ
■#2 キャラクターの頭のトポロジー作成 -Creating the base topology of character's head.
▶:https://youtu.be/CwCw0QIUJ3A
■#3 キャラクターの上半身のトポロジー作...
plucky vapor
God Damb mans setting me up for life here
languid fog
trying to help
languid fog
key
arctic pagoda
Hmm, I know you can have multiple UV maps in blender, but when imported to Unity, does it keep all those UV maps? It only seems to register the first one in the UV map array.
 quaint jasper
What is the order of your UVMaps ?
arctic pagoda
Theres's 2 UV maps, first one is floor, 2nd one is rails
 quaint jasper
So you're using a shader in Unity that uses different UVs for different textures ? Is there a reason why you need a whole UVMap for the rails ?
arctic pagoda
oh, it's just when I UVMap everything at once, everything becomes crunched into one UVMap and it was too hard to work with. So i thought of doing separate UVs for each 3D part
Hmm... What if I separate each 3D part by selection, then UV each of them separately before I combine all of them back together. I wonder if that works.
quaint jasper
You'll end up with overlapping UVs if they have the same UVMap name
arctic pagoda
Oh, then I guess ill keep them as separate and upload them that way.
Arigatou Ruuubick sensei ^^
quaint jasper
If you ever want to combine stuff easily, i highly suggest getting the paid addon UVPackmaster 2
Texture baking is also an option in Blender
arctic pagoda
Thanks I'll look into it!
 unreal forge
yo are there any blender artists that would be willing to be my mentor?
i have a month 1.5 and a half in blender
 craggy lintel
Hey guys
I need some help

My mirror does this now to an object I made
(When I move it)
I need the other half to act accordingly to the right
Plz lmk if anyone can help, I’d love a ping
 uneven lion
craggy lintel
uneven lion
craggy lintel
hmm I can't see from the picture but are you by chance using this instead of a mirror modifier? If so turn that off, delete one side and use a mirror modifier instead.
 median pike
^^ the mirror "tool" works off of vertex order which can get all sorts of messed up when you modify anything about the mesh
 halcyon shell
Hi
Me and my friend was editing mine avatar thats dont have arms but it had sleeves and we have a problem. When we create arm from sleeves and start testing blendshape the left arm start using blendshapes for face and we dont know why. The right arm works corectly. Can somebody please help? Basic blendshape works corectly only others blendshapes start messing with the left arm. We create a new vertex called face (in polish twarz thats why on screenshots you have twarz) and add to all blendshapes . In blender it works but in unity it doesn't
ps: sleeves from blouse don't used blendshapes before
here are some screenshots https://imgur.com/gallery/jI0hGhF
quaint jasper
halcyon shell
Hi
Me and my friend was editing mine avatar thats dont have arms but it had slee...
In edit mode, make sure you're on the Basis shapekey, then select the whole clothing pieces with your cursor on it and pressing L, and then open F3 for the search and type Shape Propagate
spiral sigil
Hey my 3.0 animation for this gesture wont turn on and I can't figure out why
devout scroll
 twilit condor
Hello, I am currently trying to make my first avatar from blender with the help of a tutorial video. I would like to know your opinions on the hand part. Also if there is anything I should do to improve it.


 quaint jasper
you should be using 3D model references, not human ones
you're not sculpting, you're modelling
 quaint jasper
it would
 winged jewel
Or using both types. you can sculpt and retopologize and bake normal map of sculpt.
 gusty shard
Anyone use maya for 3d modelling? I have this error come up when reimporting skin weights to my model
https://cdn.discordapp.com/attachments/456134043935703051/842510305514487868/unknown.png
 craggy lintel
uneven lion
hmm I can't see from the picture but are you by chance using this instead of a m...
craggy lintel
uneven lion
hmm I can't see from the picture but are you by chance using this instead of a m...
I am
spiral sigil
ello
tough plover
@craggy lintel select everything, and do Mesh > Snap to symmetry
spiral sigil
What's a good way to texture stuff I made this which is my first time using blender
 tough plover
spiral sigil
What's a good way to texture stuff I made this which is my first time using blen...
tough plover
spiral sigil
What's a good way to texture stuff I made this which is my first time using blen...
the first thing you need to do before you can texture is do the UV unwrapping
essentially just taking the 3d model, cutting it and laying it flat
then you can either texture in an image editor, or in programs like Substance Painter or Quixel Mixer
spiral sigil
Aight I'll try do it when I get home im brand new to blender xD
craggy lintel
tough plover
<@!585235961772769312> select everything, and do Mesh > Snap to symmetry
Nope
That doesn’t work
trust me; I’ve done allllmost everything.
This is a system error (maybe)
I’ve made hundreds of assets; first time this shit happened to me
I’m going to try merging by distance now to see if that works; it’s my last resort
Okay that worked
It was definitely a system error
 little bramble
gusty shard
Anyone use maya for 3d modelling? I have this error come up when reimporting ski...
little bramble
gusty shard
Anyone use maya for 3d modelling? I have this error come up when reimporting ski...
Its telling you that your root bone doesn't have any weights assigned. Maya utilizes controllers not bones for roots.
Root bones shouldnt have weights of course.
Been working on this mad lad from helluva boss. I nor ally poly model but I've been enjoying sculpting. Not going to enjoy retopo.
 gusty shard
little bramble
Its telling you that your root bone doesn't have any weights assigned. Maya util...
gusty shard
little bramble
Its telling you that your root bone doesn't have any weights assigned. Maya util...
that's super weird! do you know how I could fix that? I believe this blue underlined is the root of the skeleton
 halcyon shell
quaint jasper
In edit mode, make sure you're on the Basis shapekey, then select the whole clot...
halcyon shell
quaint jasper
In edit mode, make sure you're on the Basis shapekey, then select the whole clot...
Yo thank you so much ❤️
craggy lintel
little bramble
Been working on this mad lad from helluva boss. I nor ally poly model but I've b...
Try putting more punch-ins on your bevel for hair with more dimension
cold verge
Since i have not received any replies at all. I'd like to make my own avatar like one of the many e-girl / anime girl avatars out there.. are there any base plates cause a lot of them look very similar and I'd like to make one myself.
devout scroll
They're usually made from mmd model parts, which you can get in places like deviant art. You're usually not really allowed to use those in vrchat but people often ignore that
thin shadow
or vroid
 unique galleon
Yeah lots of people use vroid too
zinc jolt

 bleak canyon
how are u guys so skilled holy
quaint jasper
Continuous practice and learning ?
 mild meadow
i uhh
am having a most unusual issue
so in blender, this model looks perfectly fine

but when i export as .fbx using CATS blender plugin, this... happens..

the legs.. do That
would anyone happen to know what the hell could be going on here?
mild meadow
so, turns out, i don't know why, but the FBX export i was using was being wonky
i was able to export as VRM and then convert VRM to something else, which then worked
 terse junco

mild meadow
a lot of hassle for an avatar but if the fbx doesn't work then what's a gal to do lol
 small cloud
@mild meadowpossibly messed up right with left naming
mild meadow
i double checked, everything was right there
small cloud
make screenshot with bones included from front and side views in blender (numpad5+1/3)

 small cloud
so you have couple issues I can see

i have no clue what is that bone at origin doing, you don't need it
mild meadow
all of my other avatars have that, and they always worked
small cloud
2nd, your hip bone is too low, bottom of the bone needs to be above legs

3rd, bend your knees slightly from side view

and 4th, your chest bone might be too big, so you can increase spine while decreasing chest

 small cloud
move bottom of hip slightly, slightly higher
mild meadow
?
 small cloud
yea should be good
mild meadow
alright, lemme test
that worked, thank you very much

i'm really very confused as to why it worked, because i never had to do this for my other avatars, but i am not complaining
tyvm
small cloud
hip being so low was the biggest issue
small cloud
this image sums what I've learned about vrc avis, it has everything if you want for avi to work in fullbody too, but I don't know what to say about small/high hip, as it has caused issues for me, so I'd keep the hip slightly above legs as only change https://cdn.discordapp.com/attachments/390924372782612480/843023403333845022/VRChat_avatr_Rig.png
 mild meadow
alright, thank you
modest shell
I need some help with UV mapping. i think. Im doin this shape here

but in unity the texture is getting warped at the edge between the dome and the disc

the texture doesn't flow like in the top part
 mellow violet
what is causing these dark spots? They remain even after removing the texture.
 devout scroll
Bad normals
Try turning on auto smooth and playing with the angle
Try smoothing normals or recalculating
Start marking edges as sharp where they should be
Maybe it will look better
 prime nexus
does anyone know how to change the material slot order for unity?
meager crag
modest shell
I need some help with UV mapping. i think. Im doin this shape here
have you tried adding more polys where it bends? maybe its too harsh of a bend
like, bevel it more?
 winged nest
Did dynamicbones get removed from the latest sdk 2 n 3?
neat viper
Dynamic bones were never included with the SDK, but support for them hasn't dropped no o:
some downloaded models illegally redistribute dynamic bones in their project files, though
winged nest
Ok
mild meadow
i wish i had dynamic bones
 zinc jolt
Can you handle a 100k poly count avatar?
 quaint goblet
Ya don't really need more than 70k unless you're doing some crazy animations. General rule of thumb is between 30k and 70k for a base model (not including any clothing swaps you may want, but I recommend just making a separate avatar to spare people from loading lag). For reference, Kratos - the main character and likely most detailed - from the most recent God of War was ~100k polygons and that's a single character with his weapons and clothing in a AAA game.
quaint goblet
I don't think it is lmao, people just be clinging onto whatever makes them happy and refuse to find new stuff
A lot of kids like it for whatever reason too...
 dreamy epoch
zinc jolt
Can you handle a 100k poly count avatar?
dreamy epoch
zinc jolt
Can you handle a 100k poly count avatar?
If you can handle fur shaders then you can definitely handle 100k polys.
zinc jolt
guess that works
zinc jolt
dreamy epoch
If you can handle fur shaders then you can definitely handle 100k polys.<:vrcAev...
but can you handle 580,040 polygons?
neat viper
an avatar likely shouldn't be 100k unless it's a render-quality model, i.e not to be used in a game lol
zinc jolt
I won't apologize for art
 barren meadow
neat viper
an avatar likely shouldn't be 100k unless it's a render-quality model, i.e not t...
barren meadow
neat viper
an avatar likely shouldn't be 100k unless it's a render-quality model, i.e not t...
Take that up with every model from an action rpg called Code Vein.
They have projectiles that are over 70k a piece and they render dozens of said projectiles at a time, PLUS the character models and enemies.
Not really a poly issue.
Said projectiles also explode into mesh particle projectiles on impact as well. That game has multiplayer networking and IK as well. All must be efficient. It's the whole shebang. Not any one metric.
neat viper
ik lol, but you should still aim to optimize your model as much as you can
if you don't need 100k polygons when you can get the same detail out of some good texture/normal map work, go for less polys
especially when you're making content for a game who's playerbase's hardware varies very drastically, in VR as well o:
 azure rain
also you need to run at a higher framerate on vrchat then Code Vein
thin shadow
makes a lag inducing avatar
”why is vrchat so laggy”
still wadi
problem is, not everything is polycount, ya'll are talking about polycount and then have models with 4k uncompressed textures with normal and metalic maps that weight 60mb each for each part of clothing. we're not in the age where you have to model low poly cuz textures will do the rest.
neat viper
def not talking about just polycount, uncompressed textures, materials, and drawcalls def count towards performance much more - every factor's good to keep in mind though
still wadi
and i talked about polygons as well as mentioning other factors that contribute to lag. lol 🙂 Xd
neat viper
didn't mean for my post to sound a-holey, sorry o:
onyx juniper
I disagree we can get the same detail out of good normal/texture map work as 100k polygons. When 100k becomes the standard, we'll all look back on everything that came before and see PS1 era graphics
neat viper
If you actually need 100k polygons for a model sure, but otherwise it's just needlessly using processing power that you could spend somewhere else in the scene
 dapper forge
Well, industry standard is to mesh out the details, then use that high-poly detail and bake it into the Normals/AO/etc.
neat viper
^
dapper forge
I'm sure many of us absolutely could make something that's 100K+ polys and looks amazing. But why not make something easier to view with lower-end hardware so more people can enjoy it?
mild meadow
lol my latest model is 2.7k polygons
onyx juniper
What file size is a 100k mesh without textures? under a megabyte?
 harsh apex
question
mellow violet
devout scroll
Maybe it will look better
I smoothed and recalculated the normals a shit ton, and it looks a lot better. Thanks
craggy lintel
(NOT AN ISSUE, JUST A REPORT IN CASE THIS CAN HELP SOMEONE WITH THIS BUG) In some situations whenever people edit shapekeys and successfully do so, everything breaks only after export. Everything works according in project. We did a solution by just remaking our basis key from one of the other keys in the mix, this was the solution I found to that problem. It was nothing on my side. It’s a rare issue with latest blender version and happens to only a handful of people. But I wanted to share solution in case anyone using blender on iMac with the latest OS has this issue.
If anyone goes through this and has questions pm me, I can help fix it.
Oh yea another note; I recreated the scenario a few times and sent a bug report to blender after checking if it was reported, using latest version, etc.
Hopefully they see this lol!
 opaque berry
Maybe someone knows how to solve this in blender. My 3d model (human body) has his left arm (its out of metal) extra from the rest of the body. i know how to delete the left arm. in edit mode i selected the right arm and made a mirror modifier. Looks good! Texture is also mirror in the center. I dont care. Maybe there is a easy solution. Now the big problem is that in Unity, the arm is not on the left side, were the arm should be

i dont want an arm as genital 😆
 gaunt abyss
Why not? Could be useful
craggy lintel
Did you apply all transforms
Before muring
Mirroring
And did you set origin to whereever you need to set it
I suggest 3D cursor
opaque berry
I never used Blender for this type of stuff. So yeah. i dont know which cursor 😩 😆 just made a video so you understand my steps. Also it mirror the whole body instead the selected parts

If anyone could help, that would help so so so much
craggy lintel
Thought he was just mirroring mesh
If you symmetrize make sure you name bones .L and .R for whatever side @opaque berry
quaint jasper
you can just symmetrize the armature
opaque berry
It worked, but now it kinda looks strange. And it is still looking like in the first picture. Maybe i need to change some export setting or i dont know.
 devout scroll
Recalculate normals/turn on auto smooth in mesh normals tab
 cyan blaze
Can I get some help with some basic blender stuff through a voice chat or??
i just wanna move some vertices around to at least make it believable
quaint jasper
Did you look for a tutorial first ?
cyan blaze
I've looked and theres so many I dont even know which is applicable
ill see if i can make it work
barren meadow
onyx juniper
I disagree we can get the same detail out of good normal/texture map work as 100...
problem is, not everything is polycount, ya'll are talking about polycount and then have models with 4k uncompressed textures with normal and metalic maps that weight 60mb each for each part of clothing. we're not in the age where you have to model low poly cuz textures will do the rest.
This. I'd rather use 100k polygons and skin it with flattened low-res textures for a fraction of the cost of having a low poly model that potentially needs multiple higher res textures to achieve the same look.
If we're talking about a game and its characters, they can build everything to work around everything else. We don't have the luxury.
Also pretty debatable that just because a game isn't in VR it must be less costly to run in its ideal quality.
quaint jasper
What can you do with 100k that you can't do with 70k ?
barren meadow
Robots have lowest floor with the highest ceiling. It honestly depends on the design.
Saying everything must be this is kinda silly if we're talking about creativity.
azure rain
I would point out there is ways to achieve higher detail looks that don't use super hi res textures as you can multiply textures on top of each other
barren meadow
barren meadow
Saying everything must be this is kinda silly if we're talking about creativity.
Which is VRC's official stance anyway.
azure rain
barren meadow
Saying everything must be this is kinda silly if we're talking about creativity.
we are in the realm of having real technical constraints not to make people puke
if you want to make the most highest detail robot ever you're welcome to do some renders
barren meadow
Why do you think most games have a minimum spec requirement?
Instead of just lowering it then raising it.
Like VRC does.
azure rain
yeah but you have tighter requirements to work with because not making people puke in VR Hardware
and it doesn't do you any good if nobody sees your robot because it's too heavy
barren meadow
The problem isn't the people strategically going a tad over on a metric or 2. It's the people that just don't care at all.
Or don't know.
azure rain
yeah but if you're blocking all the very poor avatars there'd probably not going to care to check to see that yours is only barely over the limit
barren meadow
You go into an instance and complain about an extra 30k or an extra 3 million? I dunno.
onyx juniper
I'm not necessarily trying to justify anything, I just didn't like the comment I (indirectly) responded to
azure rain
barren meadow
You go into an instance and complain about an extra 30k or an extra 3 million? I...
the answer is I wouldn't see either of you unless you're like a friend
barren meadow
That's your loss, and that's what you're enabled to do. That's perfectly fine.
azure rain
as it's not worth my time to go check the stats of every very poor Avatar
barren meadow
I only ever hide custom animations.
azure rain
and that's on you for not making sure your model fits the technical requirements of the game
barren meadow
I like seeing what everyone creates.
quaint jasper
My friends work within those limits, so they don't go over 
barren meadow
azure rain
and that's on you for not making sure your model fits the technical requirement...
Actually no. It's your choice to hide the model.
That's the way VRC is built currently.
azure rain
I guess I'm trying to say don't complain if everybody blocked you because you decided to not go along with the technical recommendations
barren meadow
Models going over has always existed and VRC admits that it's better for you to have a choice in what you see.
I never get blocked, so that's okay. Having a higher poly model has never had me blocked. Because I'm not doing it carelessly.
azure rain
well you wouldn't know if folks are performance blocking you automatically
barren meadow
I think 4 years and the last time I checked before VRC disabled the ability to ping the api, I was at 10 people.
Lmao no. You could see.
azure rain
okay perhaps that's something I wasn't aware of as I never run around with very poor avatars
azure rain
then again I suppose a second from a slightly different angle as I hang out with a lot of folks who sell avatars so they have to be very concerned with the performance stuff because that's no good selling a model that would be blocked by anybody disabling very poor
barren meadow
VRCTraders even sold models that were outside the VRChat official limits.
¯\_(ツ)_/¯
I got banned for pointing that out.
From VRC Traders, that is.
azure rain
then that is foolish of them
barren meadow
Gunter went in and made a statement or something. But they kept doing it.
 atomic hamlet
Well, that's the buyers decision if they want to purchase a model that very few people will actually see.
azure rain
yeah but that's bad business sense to make a model that nobody can see
atomic hamlet
People have much worse avatars for sale anyways, like ones that actually violate the community guidelines.
azure rain
yes like all those ones that mashed-up MMD models
atomic hamlet
50% of the avatars on Gumroad have nudity toggles.
I'd like to try making my own avatar from scratch one day, but i don't have VR yet.
I've got a bit of experience with Blender, and i know the Unity Editor like the back of my hand, considering I've been using Unity for 3-4 years now.
azure rain
are you looking to make like an anime human or something else
atomic hamlet
Probably something like a sci-fi'ish human wearing a suit of armor (think Samus or Master Chief in terms of design).
azure rain
yeah sounds like you would be wanting to do a decent amount of hard surface modeling
 zealous pond
There's whole communities of people that have very poor avatars for normal use (tons of 3.0 features) and then a slimmed down/optimized version for events. I very rarely run into people who performance block avatars in these communities....
atomic hamlet
My GPU isn't the best, so i kinda have to at the very least block very poor avatars. And that's just configured in my performance settings.
azure rain
zealous pond
There's whole communities of people that have very poor avatars for normal use (...
well if you're running around with a very poor Avatar you're probably not going to be inclined to Performance block
zealous pond
Yes, what sucks though is right now you can optimize every aspect of an avatar and keep a lot of those features, but if you're just a single poly over the limit you're automatically very poor. For some avatars it can be very hard to get them under that limit
azure rain
yes I guess it awkward because it basically calculates as if everything was turned on to measure worst case scenario
atomic hamlet
That's my thing, the SDK needs a better way to calculate the performance rating, so many stats that could be changed to reduce the unnecessary amount of avatars being flagged as very poor. AudioSource components mainly, we need a way to play different sounds based on parameters without having to use multiple AudioSource components.
median pike
zealous pond
Yes, what sucks though is right now you can optimize every aspect of an avatar a...
I feel like your approach to modeling is fundamentally not game friendly if that's an issue you're running in to
Take models from something like half life alyx. Most are around 50k. Barely any of them get even close to 70k and they all look better than 90% of the models in vrc
 foggy granite
Textures and baking are magical


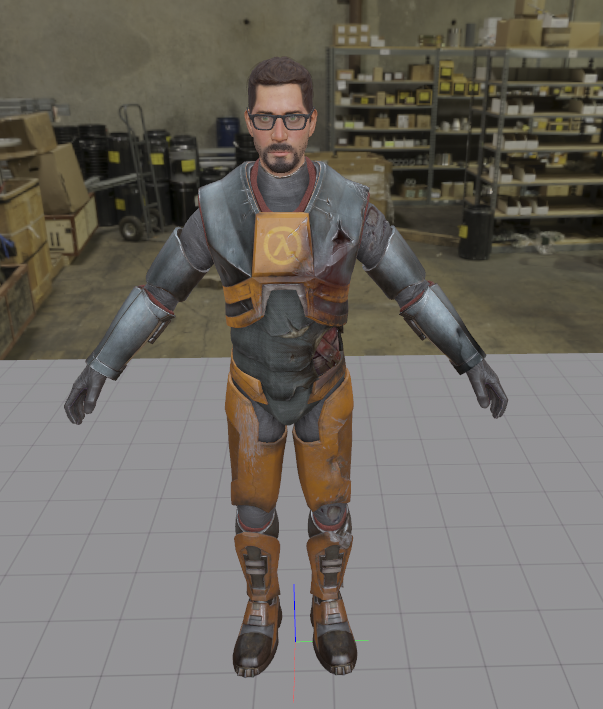 foggy granite
The face where a lot of poly goes
azure rain
Gordon Freeman would be a medium rank avatar on vrchat with a bit of texture combining
foggy granite
The soldiers should be med too
foggy granite
Can you show a pic of the wireframe


 foggy granite
Yeah that’s some nice geometry
azure rain
so yeah you can definitely make very realistic avatars with medium ranked avatars on vrchat
foggy granite
Just need a couple of years of professional experience
azure rain
and I just checked on the combine Soldier and wow that's a lot of animations
this is only about half
foggy granite
Most of them are just minor edits
Or just quick animation
Motion capture suits are another god send for animators
azure rain
yup
foggy granite
Now I’m wondering what part of vrchat avatar cost it to just ascend to new heights
azure rain
not quite sure what you mean by that
foggy granite
I want to know what part of avatar have the densest poly count besides the head
It really just an observation thing I want to do
azure rain
typically it's the head & hands
foggy granite
Im pretty sure the hair can be included onto that list
azure rain
I was counting that in the head area
foggy granite
Alright
azure rain
okay and I just checked and like LOD 2 would fit on the Quest limitations with the combine grunt with the textures properly combined and downscaled https://i.gyazo.com/96f695567248cf1c611f9db7523bdee6.png





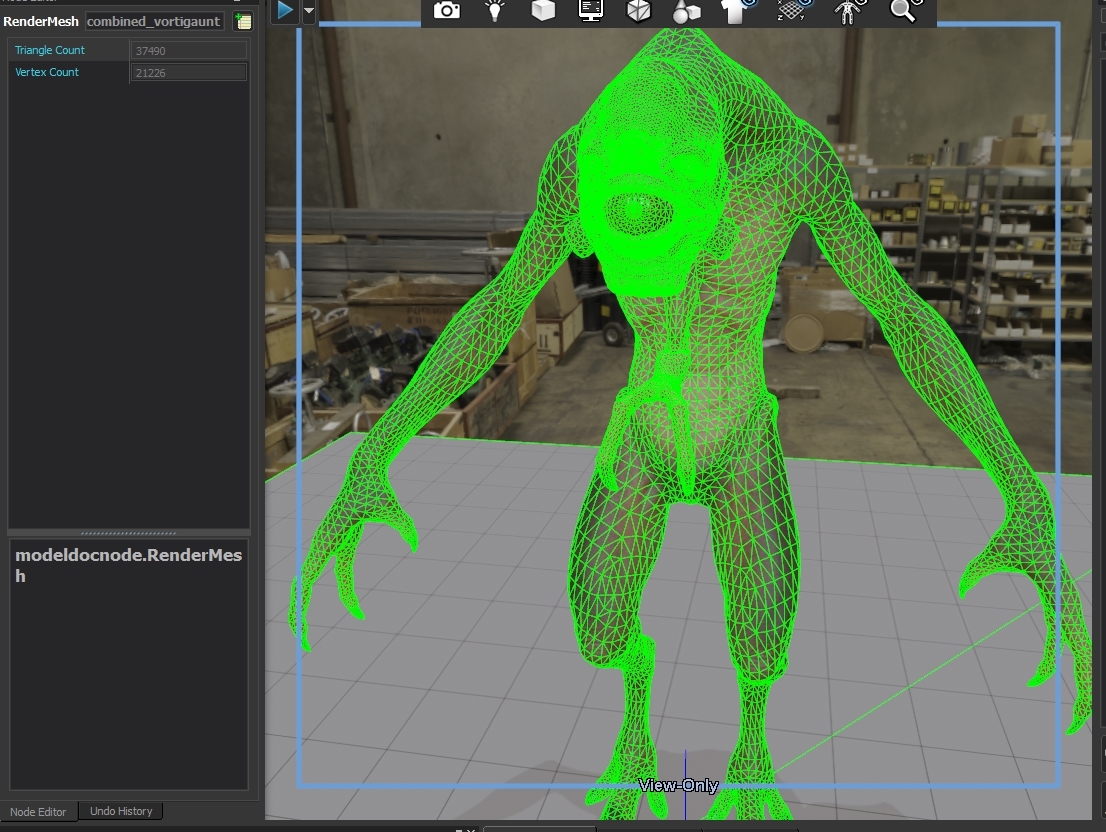
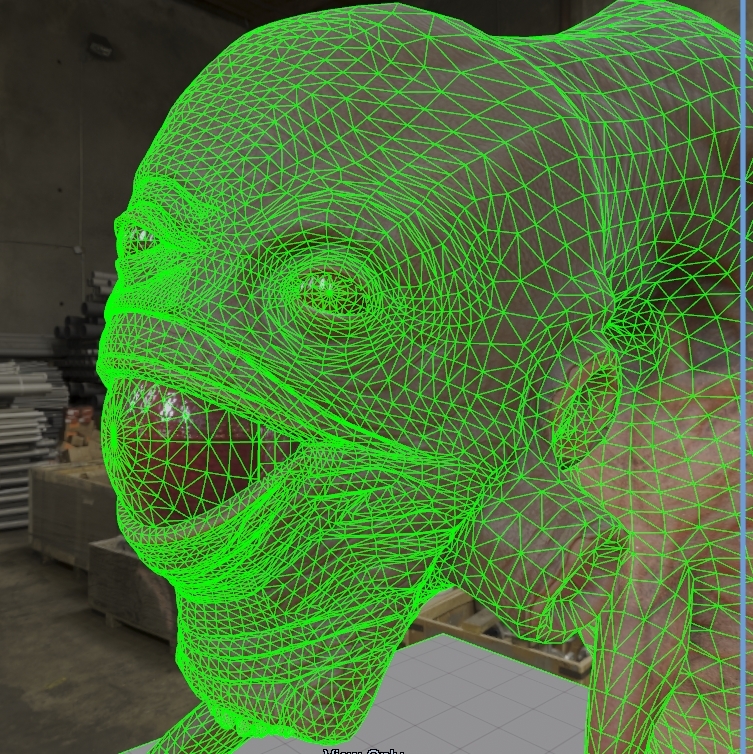
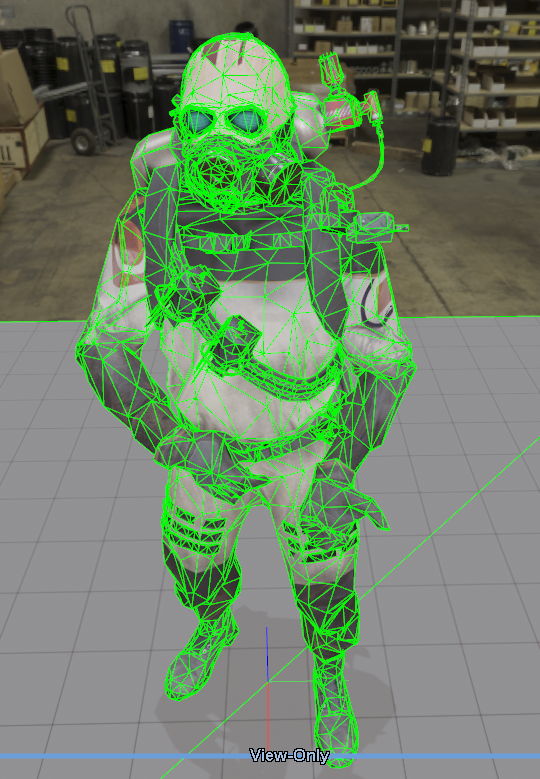
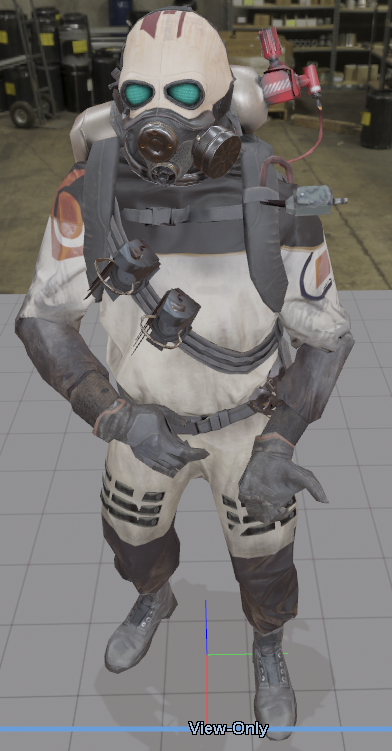
 foggy granite
I didn’t not it say tank