
#3d-modeling
1 messages · Page 6 of 1
 hushed leaf
oh very nice!
 swift jolt
thank you
just no idea what to do for the rest of the body.... so ill be looking too much at pintrest tomorow ig
 fleet orchid
Anyone know how to fix this please
 swift jolt
fleet orchid
Anyone know how to fix this please
swift jolt
fleet orchid
Anyone know how to fix this please
broken weightpaint i assume?
 fleet orchid
What it's called?
Oh weight paint
Thanks
What i do now after please @swift jolt
swift jolt
uhm.... weight paint the part thats wrong to the correct bone
fleet orchid
Okey will do tomorrow thanks

 pearl cobalt
can i get any thoughts on what in the world this is? I have tried clean up and everything
 swift jolt
stray verts id assume
 steady zealot


Made for a Client. Custom spin on the Elven Bow from Oblivion, - Even Style Bow - 3D model by Entorix
steady zealot


Made for a Client! - Mystic Door - 3D model by Entorix
 leaden jacinth
this is a nice door
 arctic obsidian
game ready fur go brrrr

 spiral sigil
Floofn
 opaque coral
do i merged my vertexs together my distanse seemed to fix the holes but now it looks all wrinkly

how i fix that the vertexes doent even look like that
there all straight

 quaint jasper
That's sadly not how not how vertex normals work
You would have to select all those edges in edge selection mode, and mark them as sharp with Ctrl + E
@opaque coral
opaque coral
quaint jasper
That's sadly not how not how vertex normals work
thank youuu
opaque coral
quaint jasper
You would have to select all those edges in edge selection mode, and mark them a...
but would that be together
thats the thing
there wernt merged
so there was holes everywhere
quaint jasper
You said you merged by distance, which means you changed their normal information
So now you have to fix them
In edge selection mode, you can open the search command and type "select sharp" and you might be able to automate most of it
opaque coral
quaint jasper
In edge selection mode, you can open the search command and type "select sharp" ...
how i do edge
??
and theres only mark sharp
and it makes it look dmb


 quaint jasper
You're only supposed to make edges between colours to be sharp, not everything
Or any sharp angle
opaque coral
what like justh the lines sharp
 magic badge
Added my custom shader to my Sans model.
Everything from scratch by me.

 quaint jasper
opaque coral
what like justh the lines sharp
quaint jasper
opaque coral
what like justh the lines sharp
All the edges that weren't connected before you merged by distance
opaque coral
quaint jasper
All the edges that weren't connected before you merged by distance
and it would conect them??/
quaint jasper
It would not no, that's why they were disconnected in the first place, unless there was a problem with that, you should probably leave them disconnected, it's easier
opaque coral
no thent thers holes and i cant have that
quaint jasper
What kind of holes ?
opaque coral
from inbetween my model
opaque coral
quaint jasper
What kind of holes ?
 opaque coral
quaint jasper
Weird
opaque coral
quaint jasper
Weird
yeah so joining the vertexes ficed it
opaque coral
quaint jasper
Might want to merge by distance and try to have auto normals fix it
and i did no difrent
opaque coral
quaint jasper
Weird
but i like the way the edge face looks so im doing that
quaint jasper
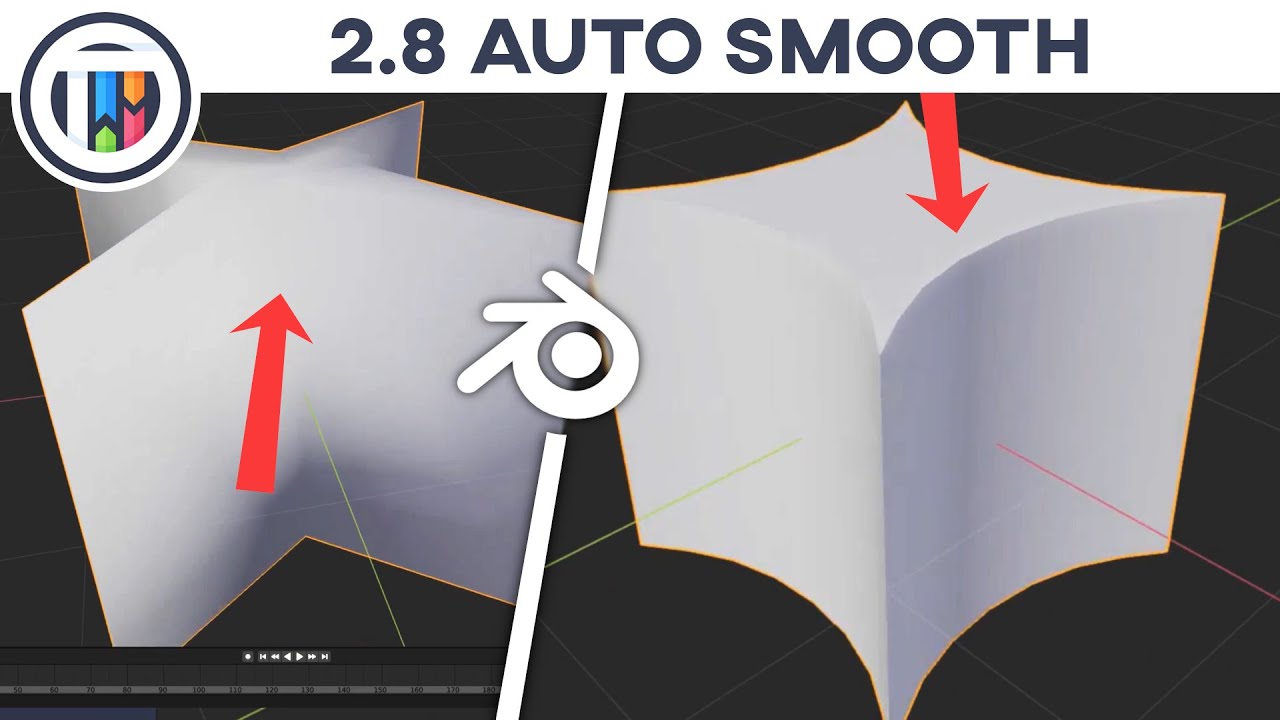
Today, we use the Auto Smooth feature in Blender 2.8, to keep our meshes edges... while keeping a nice smooth quality when using Shade Smooth - or a Subdivision Surface Subsuf Modifier!
IMPORTANT LINKS:
Blender https://www.blender.org/
SOCIAL MEDIA:
Twitter https://twitter.com/kaikaystweets
ABOUT TUTSBYKAI:
My name's Kai and I create short, s...
opaque coral
quaint jasper
https://www.youtube.com/watch?v=LXbfcFu1oPc&ab_channel=TutsByKai
thanks ill look at it
opaque coral
quaint jasper
https://www.youtube.com/watch?v=LXbfcFu1oPc&ab_channel=TutsByKai
OMG TURNING AUTO SMOOTHING OFF FIXED IT

 quaint jasper

opaque coral
THANKSSS
 indigo sun
Hello! I was wondering if someone could help me. The avatar I'm working on has fishnets on her legs that I want to toggle off, but the only way to do that is to change her skin mesh, so I decided that I was just going to change the skin mesh permanently so that she doens't have the the fishnets. Period. But when I upload her with the new skin mesh without the fishnets, she still uploads with fishnets. Am I doing something wrong?
 pure dagger
indigo sun
Hello! I was wondering if someone could help me. The avatar I'm working on has f...
pure dagger
indigo sun
Hello! I was wondering if someone could help me. The avatar I'm working on has f...
check the animations might be a material that overwrites the one you made
swift jolt
indigo sun
Hello! I was wondering if someone could help me. The avatar I'm working on has f...
Really dumb questions but
1, did you export it as the same file format? (Hopefully with thr same name)
2, did you replace the model in unity?
pure dagger
swift jolt
Really dumb questions but
1, did you export it as the same file format? (Hopef...
If all they did is change the skin mesh then its only changing the texture
arctic obsidian
Retopology go brr
 spiral sigil
magic badge
Added my custom shader to my Sans model.
Everything from scratch by me.
spiral sigil
magic badge
Added my custom shader to my Sans model.
Everything from scratch by me.
In VRChat do you manually grab and move the light when you are in a world to match up with the sun in the map?
Or wait you'd have to remake that shader logic in unity first
 wraith harbor
whenever i try to sculpt, NOTHING changes - but when i change back to edit mode, i can see the sculpting change. anyone know why this happens?
 pure dagger
wraith harbor
whenever i try to sculpt, NOTHING changes - but when i change back to edit mode,...
pure dagger
wraith harbor
whenever i try to sculpt, NOTHING changes - but when i change back to edit mode,...
Do you have any blend shapes active?
make suer your on the basis layer aswell
 bold grove
So I'm pretty dumb when it comes to all this but I need help optimizing my model for Quest. I need help with reducing the poly count, the skinned mesh renderers, and the material slots
I tried using the Cats Blender Plugin but using the "Fix Model" button just messed up the look of the model by putting the wrong textures everywhere
hushed leaf
Yeah the automated things don't work well. You could start by manually selecting and eliminating edge loops that won't overly break the topology
 harsh saddle
bold grove
So I'm pretty dumb when it comes to all this but I need help optimizing my model...
harsh saddle
bold grove
So I'm pretty dumb when it comes to all this but I need help optimizing my model...
Simplest way to reduce the poly count is to just use a decimate modifier, the results won't be great but good results take a lot more work. To join meshes, just shift-select then and ctrl + j to join. This plugin usually works alright for combining materials but the better option is manual atlasing and moving UVs https://github.com/Grim-es/material-combiner-addon
GitHub
Blender addon for material combining, uv bounds fixing - GitHub - Grim-es/material-combiner-addon: Blender addon for material combining, uv bounds fixing
bold grove
I’m getting an error saying no mesh data to join
harsh saddle
Are your meshes parented to empty game objects or something? Seems like you're probably trying to upload something that wasn't made for use in VRChat which is going to make things difficult. It might be possible but I wouldn't start there if you have limited experience with creating avatars.
bold grove
That's because the model came from SFM
Me and a friend have spent the last few days trying to get it ported into Blender and today we got to where it was able to be imported to Unity and reached the part where we just look at what it says needs work to determine from there
harsh saddle
Yeah, it's very possible the rig won't work for VRChat either and fixing that is going to take a fair amount of time and watching tutorials. I'd recommend picking a different model, maybe something off Gumroad that is designed for VRChat and work your way up to completely reworking models to get them to upload.
bold grove
I just wanted to have a way to port over my Sonic Forces avatar to VRChat but the SFM route was the only thing I could find due to having trouble finding tutorials on ripping the models from the game
Anything about ripping the models says the rigs aren't available so I'm pretty much screwed either way
But in theory if I rerigged it, I could make it work right?
harsh saddle
bold grove
But in theory if I rerigged it, I could make it work right?
If you rerigged it then you would also have to fix up the weight painting to make it move well but then you'd just have to fix all the other problems and yeah, in theory.
bold grove
Well, time to binge tutorials and spend a lot of time messing around with every possible option to fix the issue until something works
harsh saddle
Good luck, I'm sure you'll learn a lot but I'd still switch my focus to a model that didn't have so many problems so you can get a successful upload under your belt but you might be able to get this one working with enough tweaking. I don't know if you're on PC or Quest but PC has far fewer limitations when it comes to number of mesh renderers and materials. It's still better to optimize but you can get away with a lot more on PC.
bold grove
I decided that even if the model isn't working right to put it in Unity to see how it turned out and sure enough, putting any texture on it covers the whole model
Checking the VRC stuff just to see how this version of the model is doing
harsh saddle
bold grove
I decided that even if the model isn't working right to put it in Unity to see h...
Seems like you somehow ended up with only 1 material slot.


 thin zenith
 fallow osprey
 past drum
If you mean the yellow dot, click on Object in the top menu and locate Set Origin. You can then decide to set it to the 3D Cursor
You cannot be in edit mode for this
 devout orchid
how do i store poses other than rest, switch between them and where to get t/a/relaxed poses or how to rip them from unity to blender. i'm on 3.2
 elder flame
⛓️🪚


 small sky
does anyone knows how cats work?
explaining my problem:
Im trying to use CATS on Blender and it wont save me the Atlas i dont know whats the problem but it just give me that:
Im also following a specific video tutorial which is 1 year old because i dont know how to do anything at all and because its the only video with the specific avatar type i want

 winter vale
Love and PEAAACE


 trail spruce
I've been having issues with blender and importing models
I take a model from unity, import to blender, and export back into unity without changing anything, overwriting the fbx and unity spits this shit out. I haven't had issues doing it this way before, idk what changed

(The reason without changes, is because I wanted to see if adding blendshapes was causing this, because I'm wanting to add MMD blendshapes)
(I also uncheck add leaf bones when exporting)
 chilly talon
Dose anyone know how i can do split hair textures? Im trying to make like orange streaks on this hair

 dull sun
heya please could anyone help? i used the separate by loose parts thing in the cats blender plugin and it made my mesh all spotty and weird. This affects the texture and makes it all spotty too and I don't know what to do 🙏 I tried to CTRL Z but I'd already done too much for it to go back that far and I've done so much work on this mesh, please, does anyone know how to fix this?
 quaint jasper
dull sun
heya please could anyone help? i used the separate by loose parts thing in the c...
quaint jasper
dull sun
heya please could anyone help? i used the separate by loose parts thing in the c...
Might just be a matter of resetting normal vectors with Alt + N in edit mode ?
dull sun
quaint jasper
Might just be a matter of resetting normal vectors with Alt + N in edit mode ?
ill try that real quick, thank you for the reply 🙏
dull sun
quaint jasper
Might just be a matter of resetting normal vectors with Alt + N in edit mode ?
thank you so, so much, it worked 🥲
quaint jasper

pure dagger
@quaint jasper saving the day once again
past drum
getrting through the learning curve, slowly but surely, my progress after 3-4 days of practice
 trail spruce
I've been having issues with blender and importing models
I take a model from u...
trail spruce
trail spruce
I've been having issues with blender and importing models
I take a model from u...
anyone know a solution to this?
 storm wren
anyone know how to fix this?

 arctic valve
I'm trying to get a quarter of pipes following a corridor interior, but when I apply the curve modifier to gets... a little messed up size and shape-wise. Am I missing something?


 azure harness
storm wren
anyone know how to fix this?
azure harness
storm wren
anyone know how to fix this?
Are you trying to bake from a detailed mesh onto an optimized mesh?
Usually it has to do with the ray distance set under "selected to active". Try lowering it.
 quaint jasper
Shift + S
past drum
which one do i select
quaint jasper
Cursor to Origin
past drum
oh my lord ty been looking on google b ut couldnt find an answer
devout orchid
@storm wren theres extrusion parameter when baking normal maps, it should be equal to max height difference between high and lowpoly.
pure dagger
past drum
oh my lord ty been looking on google b ut couldnt find an answer
" HOW TO RESET WHITE AND RED CIRCLE IN BLENDER" I can already hear the frustration
storm wren
azure harness
Are you trying to bake from a detailed mesh onto an optimized mesh?
Usually it ...
Thanks ill try it when i get the chance
storm wren
devout orchid
<@371779008704282636> theres extrusion parameter when baking normal maps, it sho...
Ill check it out with i get the chance^^
past drum
pure dagger
" HOW TO RESET WHITE AND RED CIRCLE IN BLENDER" I can already hear the frustrati...
oh you dont know, i was even typing in "how to reset origin point" and was getting answers but non answers
harsh saddle
past drum
oh you dont know, i was even typing in "how to reset origin point" and was getti...
That's called the 3D Cursor, for future reference. The origin has a couple different meanings, either the object's origin or the point 0,0,0 on the grid.
 keen delta
I'm just trying to remove some parts of the mesh of the avatar but importing the fbx messes up everything else https://i.gyazo.com/3f95f2da72e0762abd57b413974dccc3.png
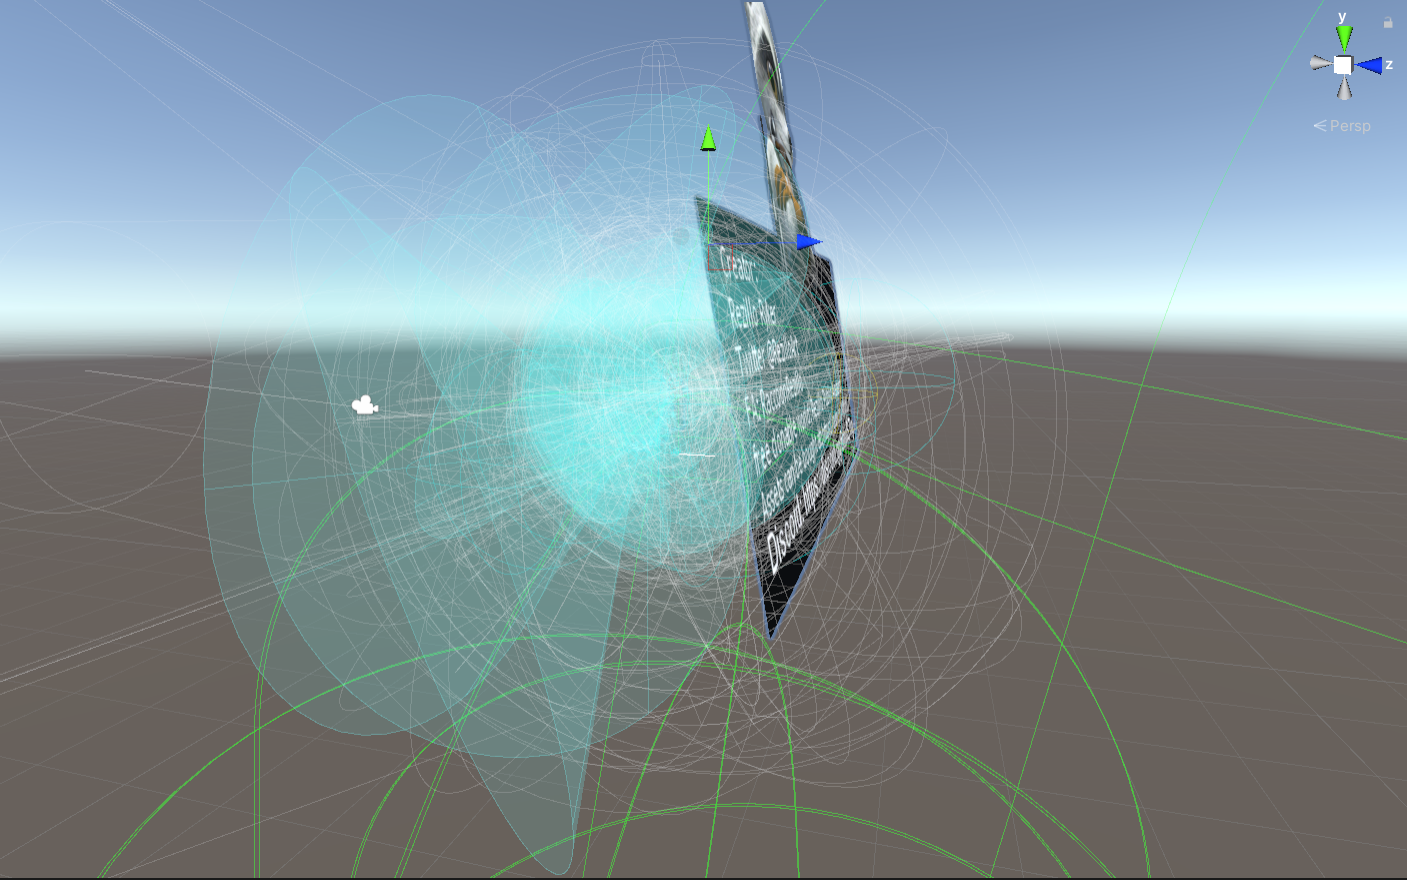
In fact, if I just import and export the fbx without editing anything, it breaks. How do I even correctly export an fbx?
 tight quartz
Greetings,
Not being able to do edge loops on a surface is caused by what? And how do I fix it?
 harsh saddle
tight quartz
Greetings,
Not being able to do edge loops on a surface is caused by what? And ...
harsh saddle
tight quartz
Greetings,
Not being able to do edge loops on a surface is caused by what? And ...
It's caused by the face not being a quad and that's how you fix it, make it into quads. Otherwise, you can do it like you have it there on the other side and then connect the verts using the knife tool
tight quartz
harsh saddle
It's caused by the face not being a quad and that's how you fix it, make it into...
Thanks, how do I make them quads.
harsh saddle
You would have to slice up the face so that it only had 4 edges. One option would be to collapse all the verts at each of the beveled edges and the connect the verts of that center line using the knife tool but then that would undo your bevel essentially. Or you could connect the verts of the bevel going across the face. There are a lot of ways to do it but since that flat ngon (what we call a face with >4 vertices) I would just make the edge loops like you have on the left side and then use the knife tool to connect them.
Ngons should generally be avoided but they don't cause problems if they're completely flat. Unity will triangulate any faces regardless of how they're imported.
 stable garden
Helloo, does anyone know how to make clothes? im really confused
harsh saddle
stable garden
Helloo, does anyone know how to make clothes? im really confused
There are about as many ways to model clothes as there are anything depending on what sort of clothes we're talking about. You'll often want to start by duplicating the body (or parts of the body like the torso, legs, etc.) and then building on top of that but it's the same modeling workflow as anything, moving, rotating and scaling verts, edge loops, insetting, extruding, etc.
past drum
Amy videos yal could suggest on shaping the base? I have a basic understanding of blender
swift jolt
stable garden
Helloo, does anyone know how to make clothes? im really confused
I usualy just stay confused, zone out, zone back in after 4h and looking at a model i dont understand how i made
swift jolt
past drum
Amy videos yal could suggest on shaping the base? I have a basic understanding o...
thought that was basic understanding of blender but you could either brab the verticies or sculpt it i guese. Just remember to make sure the weightpaints are allright after
past drum
yeah, i just need to watch videos so i can understand it better
this is as far as i have gotten
 quaint jasper
If you're not following Rainhet's tutorial, you should !
pure dagger
Texture time, :)
 past drum
stuck here, at 7:20, how did they get the cut tool to make that indent? i cant figure it out for the life of me after trial and error

Starting a new series! I'm going to be creating a VRChat Dragonling avatar from scratch using blender! The entire process will be streamed on Twitch and uploaded to YouTube.
Come watch me stream!:
https://www.twitch.tv/cocoamilka
Dragonlings:
https://twitter.com/dragonlings
#3dmodeling #blender #vrchatavatar
--
Song: Ship Wrek, Zookeepers &...
 thin shadow
K for knife tool
past drum
thats it? im talking about tthe indent/bevel they were able to do using it, mine doesent do that or does my face need to be at a specific angle?
also ty, trying my absolute best with learning
thin shadow
That's because the 4 vertices themselves are not equilateral themselves. So the cut makes it looks like indented.
past drum
AHH ok, thats what i thought ty, so pretty much need to move my vertices around then
thin shadow
Your mileage may vary
past drum
just glad i can at least manipulate this fuckin cube
trying to find some decent tutroials that arent out of date, any anyone would reccomend?
thin shadow
Rainhet chaneru
past drum
ooh ok ill take a look ty
stable garden
harsh saddle
There are about as many ways to model clothes as there are anything depending on...
Ohh okk I’ll try thank youu
spiral sigil
Hello im trying to find a free female base model but i cant find it, if anyone knows a a weebside that haves pls dm me the page
 golden turtle
Hey Im trynna download blender for modeling stuff, Is any version of it okay?
I heard 2.9 needed for characters for CATS plugin but I guess it doesn't matter for worlds since itll just depend on if I can export it as fbx right
harsh saddle
golden turtle
I heard 2.9 needed for characters for CATS plugin but I guess it doesn't matter ...
Yeah, CATS shouldn't be relevant for worlds and you can always have multiple versions if you need it. There also aren't that many new things in recent versions that you'll likely need unless you want to get into geometry nodes so you'd probably be fine with 2.9 for everything.
golden turtle
👍 tyty
 thorn gulch

 hardy marsh
High Quality 3D Model Riggers/Artist
~Sculpts High Quality Model at least 50 people would want.
~Rigs High Quality Model for animation at least 100+ people would now want.
~Guess ill Just take a couple pictures of it and then never think touch or look at it again forget it on my hard drive for years until it eventually lost forever.
~stays poor
 formal rain
thorn gulch
https://alexkendall9.artstation.com/projects/4XA532
formal rain
thorn gulch
https://alexkendall9.artstation.com/projects/4XA532
That’s fricken wild, good job it looks spectacular!
thorn gulch
formal rain
That’s fricken wild, good job it looks spectacular!
Thank you!
hushed leaf
golden turtle
I heard 2.9 needed for characters for CATS plugin but I guess it doesn't matter ...
The development version of CATS supports Blender 3.x, I'm using 3.4.1 with it. There's really little reason to use anything old.
spiral sigil
Cuuute!
 waxen dune
can some make or teach me how to turn a bunch of pictures of things into a model
if you were to make one then pls be free
im not paying for anything
formal rain
waxen dune
can some make or teach me how to turn a bunch of pictures of things into a model
There are a multitude of videos to help you out on YouTube, but this is also a journey, it’s not something you just instantly go, “oh that’s how to do it,” and then you make exactly what you are envisioning. That being said I’m totally rooting for you if you decide to try learning 3D modeling and rigging! Anyone got some good starting places and tutorials for Clamzy?
waxen dune
i just wamt to make a model of a plushie i have to put in my world
formal rain
I don’t really know a good tutorial to point to, sorry. Tho if it’s a plushie for a world and not an avatar that makes it a lot easier to make so ya got that going for ya!
 velvet oyster
x-caliber complete
 quaint jasper
waxen dune
i just wamt to make a model of a plushie i have to put in my world
quaint jasper
waxen dune
i just wamt to make a model of a plushie i have to put in my world
Follow Rainhet's tutorial to learn all the basics, and then you can do what you described
 tender kestrel
keen delta
I'm just trying to remove some parts of the mesh of the avatar but importing the...
tender kestrel
keen delta
I'm just trying to remove some parts of the mesh of the avatar but importing the...
Looks like it might have been exported with a different scaling setting.
Generally for Unity, you want to use FBX Units Scale or FBX All.
All Local will result in the avatar being 0.01 times its size (in Unity), and automatically get scaled to 100 in the scene.
If the thing in the scene was FBX All and you export with All Local (default setting), or vice versa, stuff will be messed up.

oh yea, you probably want to disable leaf bones in the armature tab there as well, otherwise the FBX file will have a bunch of unnecessary bones added.
waxen dune
formal rain
I don’t really know a good tutorial to point to, sorry. Tho if it’s a plushie fo...
Yeah
trail spruce
tender kestrel
oh yea, you probably want to disable leaf bones in the armature tab there as wel...
Super cringe that's on by default, like wtf
tender kestrel
trail spruce
Super cringe that's on by default, like wtf
probably useful for certain industry workflows. 🤷♂️
One default setting I'm very happy for though:
Unity defaulting textures to max 2048x2048.
Something Neos did not do. xD
Imagine the amount of 4K/8K textures on avatars where the creator just uploaded without changing settings.
trail spruce
tender kestrel
Imagine the amount of 4K/8K textures on avatars where the creator just uploaded ...
I typically do 4k for very detailed normal maps with 80% compression and 2k albedo with 70% compression
My avatars rarely exceed 30mb download & 100mb vram
tender kestrel
I consider 100MB a bit high, but it's not too bad.
In a club world with 80 people though, 80 instances of that avatar would exceed my VRAM capacity (excluding shader and mesh memory usage).
trail spruce
tender kestrel
I consider 100MB a bit high, but it's not too bad.
In a club world with 80 peop...
That's why you enable avatar culling to prevent downloading unnecessary avatars, and limit performance to Poor or better before entering a world like that 👍🏻
tender kestrel
Yeah, but there's no perf rank for texture memory. xD
I've limited download size to 55MB at least.
trail spruce
tender kestrel
Yeah, but there's no perf rank for texture memory. xD
There is for avatar download size and performance which helps more than not having it enabled
tender kestrel
Gotta love photographing people with brush fallbacks. (and FBT)
I have a collection.
Makes up for not seeing VeryPoor avatars. xD
trail spruce
tonosama one is funnier imo -- especially when doing the eye bulging expression.
My fallback is cute uwu
(Ending conversation here before a mod slaps our wrist)
 tender kestrel
ah, same base as Slade. 🤌
see ya. xD
trail spruce
https://booth.pm/ja/items/1417205 free on booth :3 -- there's a feline one called Puddle if that's more taste
waxen dune
formal rain
I don’t really know a good tutorial to point to, sorry. Tho if it’s a plushie fo...
I found an app that can turn images into 3d models
harsh saddle
That's what photogrammetry is but it tends to require a lot of good quality images to get a good result and then the resulting model is often not-well optimized so you might want to watch a video or two on working with photogrammetry and how to do things like decimate the model and bake the normals to retain some of that lost detail
 azure rain
and the topology photogrammetry outputs is not really suitable for character rigging in the slightest
harsh saddle
Oh yeah, if it needs to be an avatar, then you're going to need to retopologize manually.
leaden jacinth
at that point you might as well just do it from scratch 💀
 cedar socket
anyone know any tutorials or guides where i can learn how to create vrc avatars only using unity?
hushed leaf
cedar socket
anyone know any tutorials or guides where i can learn how to create vrc avatars ...
Do you have a model? Because Unity isn't a 3D modelling program, you'll need something else if you're starting from scratch
hushed leaf
Oh, then that's totally possible
harsh saddle
If you just want to do a recolor, you can tint the material in the material settings but using the RGB picker next to the base color but if you want to do anything else, you'll at least need Photoshop/GIMP
waxen dune
azure rain
and the topology photogrammetry outputs is not really suitable for character rig...
guys i just need a model for a world not an avatar😭
azure rain
waxen dune
guys i just need a model for a world not an avatar😭
then you'll probably be fine then thanks for clarifying
waxen dune
np
harsh saddle
After decimating and reprojecting the high resolution details as a normal map, anyway.
azure rain

How to Bake Normals in 1 minute Blender Tutorial. For a longer video, please check out.
For a detailed explanation on baking textures in Blender, please check out https://youtu.be/Yx9TvvnxCAM
Affiliate Links
++++++++++++++++++++++++++
Blender Market
https://blendermarket.com/?ref=100
Reallusion
https://linktr.ee/markom3d
Markom3D Kitbash S...
harsh saddle
waxen dune
idk how to do that
You can get a model without it but it'll probably be way denser than it'll need to be which is going to tank your performance. https://www.youtube.com/watch?v=HhW5wLXDVVY
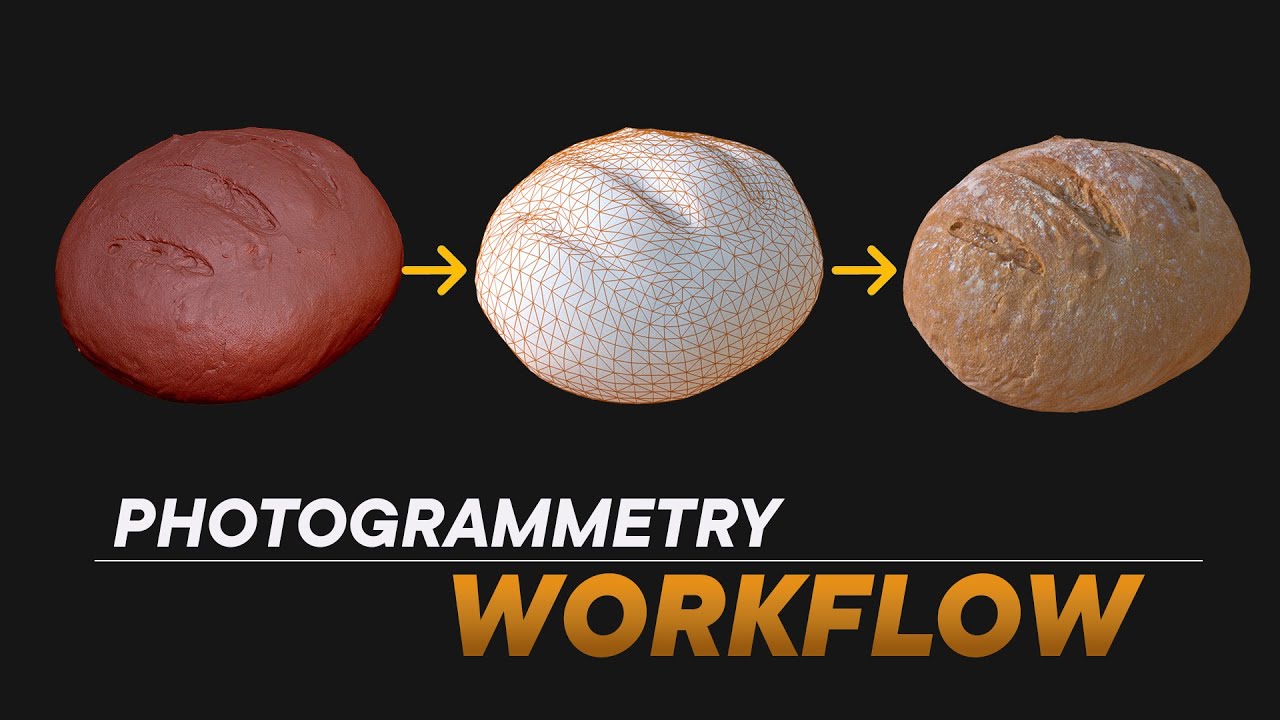
The steps after scanning are not covered as much, so with this video I wanted to demystify the whole workflow: Retopologising the mesh, creating the UVs and the final texture maps. There's many different ways to approach this, but after many tests I've settled on this workflow that fits my needs and delivers good results. If you don't own all of...
formal rain
When you finally figure out and make this stuffed bear, you should put a little sign next to it saying, “this took more effort then you might first think to make”
harsh saddle
I guess the one I posted uses Zbrush so you might want to use the one Rainwolf posted. Blender also has a remesher but it takes a bit more tweaking.
This tool is probably a better option for remeshing than Blender but it can also require a bit of experimentation. https://www.youtube.com/watch?v=ISgdREmFO7w
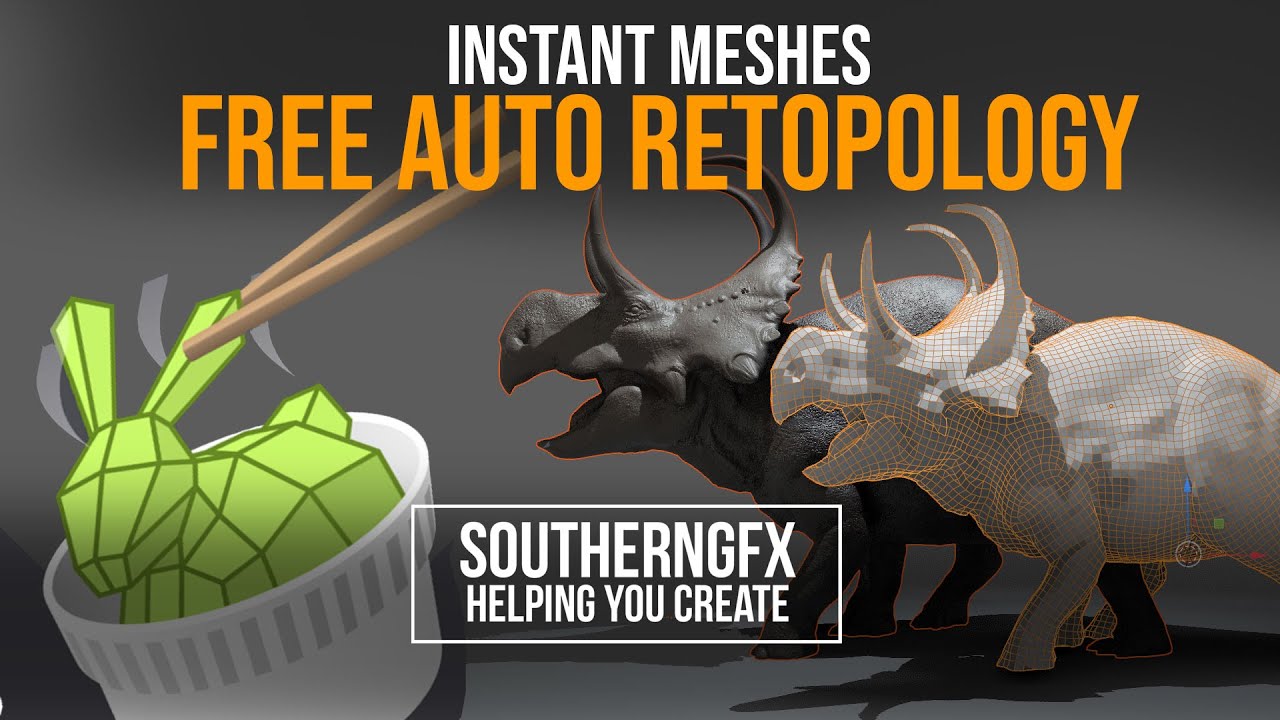
Whether you are using an iPad to sculpt with programs like Nomad Sculpt or Forger App or a desk-bound solution like Blender, there comes a time where you need a good, clean mesh with flowing edge loops. If you want to pose your mesh it really helps to have clean topology and at the end when you want to UV unwrap it, it is essential to have a lo...
This one uses just Blender https://www.youtube.com/watch?v=dKo0rWXVAlc

Your support is appreciated!
https://www.patreon.com/peterfrance
Instant Meshes:
https://www.blendernation.com/2015/11/16/instant-meshes-a-free-qaud-based-autoretopology-program/
Oh wait, it uses Instant Meshes too
 tiny shard
Not sure where the right avenue or channel is but can someone please assist me why my models legs don't bend or move with auto footsteps. I had been working to replace a blender mesh with my current pants mesh and I made sure to keep all the same bones and everything. From what I can see they are all hooked up. But when I go into vr chat my legs just float around while moving and don't walk.
Any help is appreciated but I am at work at the moment and can't take screenshots but I can later. 😁
hushed leaf
tiny shard
Not sure where the right avenue or channel is but can someone please assist me w...
Assuming it's rigged fine in Blender, probably #avatar-help, it's more likely a rig setup problem in Unity
tiny shard
Thanks
 vital drift

 lean hemlock
hey there, i got a problem with substance painter, when i try to symmetry paint, the other side is painting with different Alignment for some reason

 hushed leaf
lean hemlock
hey there, i got a problem with substance painter, when i try to symmetry paint,...
hushed leaf
lean hemlock
hey there, i got a problem with substance painter, when i try to symmetry paint,...
UVs inconsistent?
lean hemlock
hushed leaf
UVs inconsistent?
 hushed leaf
that's a texture, are the actual UVs correctly mapped to that?
lean hemlock
hushed leaf
that's a texture, are the actual UVs correctly mapped to that?
oh sorry i just started using it today and got stuck, where can i see the UV?
hushed leaf
lean hemlock
oh sorry i just started using it today and got stuck, where can i see the UV?
I know nothing about Substance, but you could check in something like Blender
lean hemlock
hushed leaf
I know nothing about Substance, but you could check in something like Blender
ye it looks good to me
 hushed leaf
yeah that does - ok then I'm not sure 🙂
Usually that kind of thing is due to weird UVs
lean hemlock
the symmetry paints on the top mesh for some reason
spiral sigil
lean hemlock
the symmetry paints on the top mesh for some reason
Bake mesh maps and see if it still does it.
lean hemlock
spiral sigil
Bake mesh maps and see if it still does it.
i decided to just accept it and repaint the eye after, im mostly done now, im modelling the details currently
 spiral sigil
👍
Baking mesh maps also bakes a location map so it knows where in world space things actually are.
Glad it worked out well
lean hemlock
ty
devout orchid
Once again what i have/What I want. Simple repeatative object,I want to snap every fragment on top of each other. Second ss will work as of now, but it loops only if I have separate material for it, it impossible to include it into other texture as a single square UV.

 pure dagger
@devout orchid add seams around the top middle should give you what you desire
devout orchid
@pure dagger 'around the top middle' - what
i tried to add seams on every loop but it unwraps to some abominations
 devout orchid
and ill get first image, what
pure dagger
What the entire model look like
devout orchid
its a loop
pure dagger
Then yea you just need the one seam
devout orchid
how on earth it would help me to overlap my uvs?
pure dagger
Oh I'm sorry I thought you was trying to unwrap it differently
Just delete half of the verts and use a mirror modifier
 spare kiln


 velvet oyster
my own version of the demon slayer sword from black clover.

 sudden jackal
How do I mirror this to the other side

I want to copy one side and then mirror it to the other side
quaint jasper
sudden jackal
How do I mirror this to the other side
use the symmetrize function in edit mode
sudden jackal
quaint jasper
use the symmetrize function in edit mode
Where's that at?
quaint jasper
you just type symmetrize in the search bar
sudden jackal
quaint jasper
you just type symmetrize in the search bar
 quaint jasper
No, the search bar that you bring up by pressing F3 or space
sudden jackal
quaint jasper
No, the search bar that you bring up by pressing F3 or space
Both space and F3 don't bring up. Search bar TwT
quaint jasper
You might have to google it then, maybe F2 or F1 ?
sudden jackal
quaint jasper
You might have to google it then, maybe F2 or F1 ?
Do I have to download something???
quaint jasper
No, it's the most basic feature of blender 
sudden jackal
quaint jasper
No, it's the most basic feature of blender <:sweat:668314662059638784>
I'm still not finding it
quaint jasper

Thanks for watching! In this Blender tutorial I cover: How to use both Blender's Mirror Modifier & Symmetrize tool to model both halfs of a symmetrical object at the same time!
Video Timecode Chapter Links:
- 0:00 - Video Intro
- 0:08 - Tutorial Overview
- 0:28 - Me & Call to Action!
- 0:44 - What these tools are for & setting up my scene.
- 1:...
sudden jackal
See I tried everything YwY
quaint jasper
Unsure how you're not finding it
sudden jackal
I'm in edit mode TwT
quaint jasper
Get used to google things otherwise you'll be stuck quite fast
sudden jackal
I press f3
quaint jasper
Look at the video
sudden jackal
And nothing YwY
 steel niche
sudden jackal
And nothing YwY
steel niche
sudden jackal
And nothing YwY
Blender does have fully editable keybindings, if you're still having trouble you can go into the preferences and search "search" in the keymap tab to see what it's set to or change it to something else


There's a chance that you might have set the spacebar action to "play" (as in play animation) while you were setting up blender, in which case you can just change that setting here. Not sure what to tell you about the F3 key if it's not working though

You might also want to enable the auto mirror addon, it's one of the many useful addons that comes with blender and I find it to be more intuitive than symmetrize for most things. It cuts the mesh basically down the middle and puts a mirror modifier on it so you can see how your edits affect both sides in real time. You can't put it on just one part of an object, but you can select the part you want to mirror, press P and separate by selection, then mirror the new object. When you want to join it back with the main mesh, just apply the mirror modifier, select both objects in object mode, then ctrl+J to make them one object again

I like to have my mesh mirrored when I first start working on it because it provides a solid base to work off of, I can tweak and add details to the individual sides later on


 prime obsidian
is there a way to mirror the knife tool so the verticies could also appear on the other side?
if not then is there a way to mirror those mouth verticies i made?

just screwing around and making my first test model
prime obsidian
aight i found a workaround, duplicated the verticies and separated em
aight nvm i'm having a trouble connecting them back properly so maybe not
 kindred turtle

hello, I need some tips on how to make good fur, I feel like it doesn't look very good
I want something like this
 steel niche
prime obsidian
aight i found a workaround, duplicated the verticies and separated em
steel niche
prime obsidian
aight i found a workaround, duplicated the verticies and separated em
https://docs.blender.org/manual/en/latest/modeling/meshes/editing/mesh/knife_project.html Use the duplicated verts and do this
 jagged bronze
how can i remove all those vertices/faces? its feathers or something and its like 70% of the polygons on the model, i have been trying different stuff for like 2 hours now, im new to blender and would love to get some help

 hushed leaf
oh wow
first guess is box-selecting them and just deleting them, and recreating the topology, but that's not great 🙂
jagged bronze
yee i tried that like 5 times, it turned out full on wonky
i also tried sculpting but that just messed stuff up more
hushed leaf
ugh yeah
 cerulean shoal
hide the bits you dont wanna remove and then select all those feathery bits and delete
jagged bronze
can ya explain how, or do you know a vid/article on it?
cerulean shoal
you can select everything connected to that mesh bit by pressing ctrl + L
jagged bronze
well 1 more issue is that the feathers are all mixed up with the bottom of the tail, like some of them are inside the bottom
hushed leaf
I'd consider just re-modeling using the existing tail as a guide
jagged bronze
yee, but its also in the groin, between the legs, and im not good at modeling at all and it just turned into a full on wonky low poly weird model
why cant i select anything now? i took and undid all i did by restarting without saving, and now i cant select anything
hushed leaf
are you in object mode or editing a different object?


 hushed leaf
Just because I had one answer doesn't mean I have them all 🙂
I can't tell at all what you're doing from the image, sorry
jagged bronze
yee, i just wanted to send it lmao
ohh that pic
well im in the modeling tab
i can only select the bones
hushed leaf
seems like you're editing the armature then
go back to object mode and select the object you want to edit, then go into edit mode
 steel niche
jagged bronze
how can i remove all those vertices/faces? its feathers or something and its lik...
steel niche
jagged bronze
how can i remove all those vertices/faces? its feathers or something and its lik...
You don't need to delete it. Select all of the fluffy bits in edit mode, make a new vertex group, and press "assign." Then make a new decimation modifier and select the vertex group you just made. Now you can decimate just the fluffy bits.

 steel niche
Those are for the weight data to make the mesh follow the bones. You need to make a new vertex group for just selecting the fluffy parts. You don't want to use one of the existing vertex groups because you'll need to delete the one you use for decimating later
jagged bronze
ok
but i still cant select anything, idk why
and 1 more issue is that the fluffy bits are merged into the bottom as well, so i will also end up deleting the bottom of the tail
 steel niche
jagged bronze
and 1 more issue is that the fluffy bits are merged into the bottom as well, so ...
steel niche
jagged bronze
and 1 more issue is that the fluffy bits are merged into the bottom as well, so ...
It looks like the fluff is separate from the body actually, so that will make it easier to get rid of actually than what I was suggesting. I'm not really sure why you're not able to select things. Could you show a screenshot of your full blender window?
jagged bronze
 steel niche
Oh, the other person was right, you're in edit mode on the armature not the avatar. Go into object mode and right click on the penguin to select it, then go back into edit mode
jagged bronze
ohh
ok i can select stuff now
what next?
this is how all the fluff looks from the inside btw
 steel niche
jagged bronze
what next?
steel niche
jagged bronze
what next?
Press L with your mouse over the main body of the penguin to select all of it, then press H to hide it (this is temporary and only makes it invisible in edit mode,) keep doing that on the parts of the penguin that aren't hidden until all that's left is the fluff. When you only have fluff left, press A to select everything, then X to delete. You can press alt+H to unhide everything you had hidden earlier.
jagged bronze
hazah, it worked!! thank you!!
steel niche
You're welcome!
jagged bronze
also, how can i check how many polygons there are?
hushed leaf
You can enable that display on the status bar, one sec
preferences -> interface -> status bar -> check "scene statistics"
Then it's in the bottom right corner
 steel niche
Yes, that's it
hushed leaf
I'm not sure that's going to match perfectly with Unity but if not it'll be pretty close, yeah
steel niche
Tris is the part you need to look at, that's what Unity checks
jagged bronze
ok
im gonna try and lower it to 7k, so it can be excellent on quest and be used as mah fallback
hushed leaf
ooh, good luck, that's a ton of work 🙂
jagged bronze
isent it just decimating?
hushed leaf
decimating isn't always the best path to not looking awful
edge-loop dissolving is a good one too
jagged bronze
thats what i did on the first version i made, it did look awful yes, had some cracks
steel niche
I think a lot of the remaining triangles are in the beak, so that's the part I'd suggest focusing on. You could do what I was suggesting earlier with the vertex group and decimate modifier, just selecting the beak. It's still not the cleanest solution, but it'll probably be better than decimating the whole body
 hushed leaf
yeah you can probably simplify both a lot
The beak ought to be pretty rigid too, so you don't need anywhere near that many polys
jagged bronze
why cant i decimate it? i put the modifier in, lowered the ratio and it did nothing
steel niche
Go into object mode, I'm pretty sure you can't see it in edit mode
 steel niche
Huh, that's strange
jagged bronze
ok i managed to decimate it even when i couldent see it
it still looks good, i dont think theres any cracks either
 steel niche
Yep, doesn't look like there's any cracks. It might've been messing up before because of the fluff
jagged bronze
yeee
steel niche
Good job!
jagged bronze
:D
i havent been this motivated to do something in years tbh
thanks for all the help
umh, ik this isent the right place but what

 empty fox
jagged bronze
umh, ik this isent the right place but what
empty fox
jagged bronze
umh, ik this isent the right place but what
Read/write isn't turned on, will be a auto fix above.
jagged bronze
ohhh
empty fox
It just assumes worst case scenario if it cannot read how many polygons actually exist.
pure dagger
jagged bronze
umh, ik this isent the right place but what
mm my cpu can cook steak
 mental temple
yeah, um, a need a quick summary on how to create an avatar
<- not good at modeling
harsh saddle
mental temple
yeah, um, a need a quick summary on how to create an avatar
If you want to create an avatar from scratch, you kind of have to get good at modeling, also rigging, weight painting, texturing, and shape keys. There aren't really any shortcuts unless you're fine with using an existing model and then customizing it, then you only need to know as much as is required for your edits.
 harsh saddle
That would be relatively simple to make as avatars go but you're looking at probably ~$200 on the low end to commission an avatar creator to make that or you will have to learn some stuff.
pure dagger
mental temple
all for this:
If you plan on getting a commission id recommend joining vrc traders in #community-servers-old
mental temple
harsh saddle
That would be relatively simple to make as avatars go but you're looking at prob...
which I why I wanna learn
tryna save for college
pure dagger
mental temple
which I why I wanna learn
Youtube is a really good way to learn!
kindred turtle
kindred turtle
hello, I need some tips on how to make good fur, I feel like it doesn't look ver...
any tips...?
harsh saddle
kindred turtle
any tips...?
Depends on the type of fur. Some can be sculpted, some works best with hair cards and some should be modeled separately and combined with custom normals. Any examples of what you're trying to do?
kindred turtle
kindred turtle
I want something like this
yeah like this
harsh saddle
mental temple
which I why I wanna learn
Not everyone is a fan but I think the donut series is a good overview to start with, just look it up on Youtube
harsh saddle
kindred turtle
yeah like this
That could either be sculpted directly with the sculpt tools (move, snake hook, inflate) or using fur objects with custom normals https://youtu.be/jgVEdS6sZsk

A super quick tutorial on how to blend your fur, feathers or other sticky out bits into a mesh without spending hours blending your topology. This has pained me for a while now so I hope this offers you the help it did for me!
kindred turtle
yeah thats what ive been doing but thx for the vieo!
 spice harness
so some people take parts of a mesh and put in on another mesh, like taking an arm off of something and putting it on something else. how do I do that?
harsh saddle
spice harness
so some people take parts of a mesh and put in on another mesh, like taking an a...
You can either just line it up and leave it unattached if you don't mind seams or you can make sure where it's connecting has the same number of vertices on both sides and merge the vertices to make it one model
spice harness
how do i cut it from the mesh though?
harsh saddle
spice harness
how do i cut it from the mesh though?
You can select the faces and press P to separate it to a new object
spice harness
oh ok thanks
 loud pivot

 prime obsidian
god he looks AMAZINGGGG
 exotic wagon
idk where else to ask this, but is there, somewhere out there, a 3D model of this legendary hat?
 pure dagger
exotic wagon
idk where else to ask this, but is there, somewhere out there, a 3D model of thi...
pure dagger
exotic wagon
idk where else to ask this, but is there, somewhere out there, a 3D model of thi...
I got a hat that you can pretty easily texture this on lmao
exotic wagon
pure dagger
I got a hat that you can pretty easily texture this on lmao
Where 👀
ah I see your gumroad
pure dagger
its not on my gumroad, i made it for a com ill look for it
pure dagger

 warm mulch
Mmm with the new iterations of blender, is it not possible to "xray" to see both sides of the wireframe when weight-painting? (Not referring to painting both sides)
azure rain
well you have bowls for eyes not eyeballs I'm guessing that Avatar was more intended for toon shading
steel niche
Have you checked to see if the normals are flipped?
 old island
i figured it out and idk what kind of shading i want yet but ill probably put like celshading
my first furry model lol ive only ever practiced making people
cuz furries are hard to make
i put it off for so long\
lol
jagged bronze
ok so, after decimating my model i got these small cracks/holes, mostly around the penguin's beak, i tried the fill holes in clean up tab but it dident do anything, im not good at modeling, i did try and patch em up myself but yee that go well, is there any way to easily fill them?

ik its not that noticeable but me being autistic i easily get annoyed by it lmao
quaint jasper
Did you merge everything by distance in edit mode ? If not, give it a try
jagged bronze
hm?
old island
@jagged bronze this might help
if you select 2 vertices and press m
you can cvonnect the
jagged bronze
yee ik, but theres alot of them and their super small
old island
it could patch up holes in your model
jagged bronze
like 100 of em, all small and very hard to find
i did try to do that at first but after like 20min i gave up lmao
old island
how much did you decimate it lol
quaint jasper
The point of merge by distance is that it's automatic if you select your entire model in edit mode
jagged bronze
ok
 nova saddle
does anyone know the dimensions of VRCBillards in meters?
just making a world and need the dimension of it to scale correctly
 jagged moat
nova saddle
does anyone know the dimensions of VRCBillards in meters?
jagged moat
nova saddle
does anyone know the dimensions of VRCBillards in meters?
Probably just as easy to import the model from the package
 pure dagger
nova saddle
just making a world and need the dimension of it to scale correctly
pure dagger
nova saddle
just making a world and need the dimension of it to scale correctly
Yea just copy the fbx in the unity package
nova saddle
pure dagger
Yea just copy the fbx in the unity package
running it on a mac rn because im at uni
so i dont have the unity or anything on here but i found a pool table model with a blender file just having the same problem with axe throwing now
hushed leaf
@golden lynx So you want to use the DataTransfer modifier - for each part, make a vertex group that contains just the edge you want to make seamless. add a DataTransfer modifier to each object, where the source is the other mesh, and the Vertex Group is the edge. Check Face Corner Data and under that, enable Custom Normals and Mapping should be Nearest Face Interpolated. That ought to do it.
original question, in case anyone else is wondering: #avatar-general message
 golden lynx
Ok! i'll try thx
hushed leaf
you're welcome! This one bugged me for a while too 🙂
 river kelp
I rigged it n then i realized that the hair was on the same layer(idk what its called im rlly new to blender) so i merged it but now the face is the only part of the head that moves, any ideas on how to fix it?
 hushed leaf
weight painting surely
 sick marten
does anyone know the hotkey to zoom back in to the object? im trying to uv unwrap bnut for some reason im 100000 miles away and when i zoom in I cant get my camera into the building or rotate without it swinging the view another 10000 miles xD help

I've been trying to fix it for 30 mins
azure rain
" / " key will have it seem into focus on a singular object
river kelp
no dice with weight painting, there was only painted areas on the feet everything else all blue
spiral sigil
why is that sometimes, even when my model has seems when I try to select an island it selects verts from an adjacent island?

how do I not select the other island
mental temple
harsh saddle
Not everyone is a fan but I think the donut series is a good overview to start w...
got it, thanks!
harsh saddle
spiral sigil
why is that sometimes, even when my model has seems when I try to select an isla...
Are you in face select mode or vertex mode? If you're selecting verts and those verts are on the border between islands, they're going to get selected on both islands.
spiral sigil
ooooh
harsh saddle
That's a very broad question. Anyone with any 3D modeling experience can probably fix some things and I'm not sure any of us can fix everything so it would really depend on what needs fixing.
It would be hard to say what they needed without doing the work and I'm not sure if you're going to find someone willing to do that for free. We can give you advice if you run into issues optimizing them but that's probably about as much as you'll get without paying.
harsh saddle
You might find someone that can do that but I've got my own projects to focus on and there's no telling how much work might be required. Your best bet is to just ask questions here but I guess it doesn't hurt to try to find someone to walk you through the entire process.
nova saddle
does anyone have any idea if theres an asset pack for the drinks and stuff used in the black cat? Thank You!
sick marten
azure rain
" / " key will have it seem into focus on a singular object
thank you so much, that fixed it ❤️
spiral sigil
Not many people will do this for free
It's very tedious
what specifically is wrong with the models?
spiral sigil
Oh well
 merry trench
does anyone know if there is an asset pack of all the tf2 unusual effects?
 oak hatch
Robodoggo
 tiny shard
Can anyone please help me out. I'm trying to figure out why this keeps happening to my shoulders. Any advice is appreciated as I'm still new to blender.


 lilac escarp
just decided to play around with a model i downloaded from a game i play and for some reason the character's wings dont show up in the material preview but they do in the solid mode anyone know whats going on

 thin shadow
perhaps it's a one sided mesh. check the face orientation.
prime obsidian
first time making my own model from scratch, any advice on connecting the hair strands together? rn it's all deparate meshes

i'll be weight painting it later so if yall have any tips that could make stuff easier for me lemme know lmao
would be good to lower the amount of polys in them as well (made them from cones) but idk there's a quick way anymore to do it for only vertical edges
 harsh saddle
prime obsidian
harsh saddle
prime obsidian
You can select one of the vertical edge loops, then go to select -> select loops -> select rings to select all of the vertical edge loops, then checker deselect to deselect every other one and dissolve, that's probably the best way. Actually merging all of that cleanly would be a nightmare so your best best is to look into custom normals to help it blend better. Luckily, it's hair so you're probably just going to want to weight it all to the head so you can just select it all and assign it to the head vertex group once you've added the rig. https://www.youtube.com/watch?v=jgVEdS6sZsk
A super quick tutorial on how to blend your fur, feathers or other sticky out bits into a mesh without spending hours blending your topology. This has pained me for a while now so I hope this offers you the help it did for me!
prime obsidian
the vertical edge loops was exactly what i was lookin for thank u
i'll try it out in a sec
and yeah it defo would be hell to combine them, i will have them just assigned to the head but wouldn't that mean that they'd stay as separate meshes?
i want to make the model vrchat compatible so having the hair strands be 16 different meshes would be terrible for it
unless i can combine them after i'm done weight painting
harsh saddle
prime obsidian
and yeah it defo would be hell to combine them, i will have them just assigned t...
You can join the meshes without welding all the vertices, just select all of them and Ctrl + J
It won't change the geometry but it will make them all a single mesh as far as Blender and Unity are concerned.
prime obsidian
yeah but it will be extremely hard to make any edits to them afterwards
is there anything i can do about that or do i just deal with it
harsh saddle
I would recommend waiting until you've made all of the necessary edits to do that, yeah. You can weight paint and do all of that and then join later if you like. You can also weight paint and then separate out certain points and join them back if you like, it won't ruin anything so long as you aren't on a shape key with either model when you do it, keep it on the basis shape key and ideally have all of this done before you start adding shape keys
prime obsidian
alrighty gotcha
devout orchid
prime obsidian
yeah but it will be extremely hard to make any edits to them afterwards
no it wont, just select one vertex, press L and only this strand will be selected. Then P if you want to separate it to own object
harsh saddle
You can just hover over any unconnected part of the mesh and press L to just select that part of the mesh but sometimes it can be helpful to separate if you want to be able to do box or circle selections without impacting other parts of the mesh.
prime obsidian
harsh saddle
You can select one of the vertical edge loops, then go to select -> select loops...
nvm the select thing is not working out for me
whenever i do checker deselect it doesn't deselect properly
idk what's up with the verticies at the top but they don't get selected together when i do loop ring

do when i do checker deselect it's not doing what it should
 glad fiber
how looks ? 70k vertices (to high i know but.. ) xD
 steel niche
glad fiber
how looks ? 70k vertices (to high i know but.. ) xD
steel niche
glad fiber
how looks ? 70k vertices (to high i know but.. ) xD
Looks good! You can always lower the polycount later, so it being 70k isn't too bad for now
mental temple
glad fiber
how looks ? 70k vertices (to high i know but.. ) xD
I mean wow
Nice job
glad fiber
someone know why this weird line appears ?
 devout orchid
@glad fiber cause mirror. when you apply it should dissapear.
glad fiber
i try it but not dissapear
devout orchid
recalc normals?
glad fiber
but now i fix it , just deleting actual mirror and create another one
don't know why , but new mirror solve this D: i'm confused
harsh saddle
Probably because your merge distance is set to 0 so it isn't welding the vertices in the middle but the new mirror modifier came in with default settings so it did merge them
devout orchid
@glad fiber oh, yeah, if you look as first screenshot its not perfectly centered along origin point. so better check if you havent deformed anything with new mirror
glad fiber
harsh saddle
Probably because your merge distance is set to 0 so it isn't welding the vertice...
true its is , 😮 dont maybe i do missclick on merge distance , thanks
steel niche
glad fiber
someone know why this weird line appears ?
The mirror modifier should be before the subdivision modifier
You can move it up in the stack by clicking and dragging on the :::: in the top right corner of the modifier

You might have also been having some issues from having set something in the "mirror object" field, there's only a few uncommon cases where you would need to use that
glad fiber
Yes, I did know this, but the problem was another, the partner above had the solution that specific line came out because it had the merge at 0 instead of 0.0001
thanks for everything people, the problem is solved
quaint jasper
Are your transforms applied ? Could also be flipped normals
Oh, thanks Discord for not scrolling 
tiny shard
Can anyone help me out with my blender issue?
pure dagger
tiny shard
Can anyone help me out with my blender issue?
What's the issue
tiny shard
tiny shard
Can anyone please help me out. I'm trying to figure out why this keeps happening...
This.
 glacial cradle

 olive burrow
spare kiln
olive burrow
spare kiln
that shoe has more polys then my whole avatar xD
azure rain
hopefully it's just the high poly for normal map baking
spiral sigil
Does anyone do comissions
harsh saddle
spiral sigil
Does anyone do comissions
If you google VRC Traders, you can find the commissions server
lilac escarp
can someone help so im trying to 3d print a model from one of the games i play but its completely hollow inside. The software i use for my printer doesn't even pick up the model when slicing it before printing. Ive tried using the solidify modifier but no matter what thickness i put it at it just turns into a giant blob. anyone have any other ideas how i can fill in the inside

 quaint jasper
lilac escarp
can someone help so im trying to 3d print a model from one of the games i play b...
quaint jasper
lilac escarp
can someone help so im trying to 3d print a model from one of the games i play b...
You're not supposed to fill the inside, you're supposed to close any holes in the mesh
spare kiln
olive burrow
that shoe has more polys then my whole avatar xD
lol, yes it will be baked onto low poly
 solar fossil
lilac escarp
can someone help so im trying to 3d print a model from one of the games i play b...
solar fossil
lilac escarp
can someone help so im trying to 3d print a model from one of the games i play b...
I think there was a addon for blender to tell you when a model is manifold or not, and show what edges are causing the issue
quaint jasper
You can type "select non-manifold" in the search command bar in edit mode too
lilac escarp
quaint jasper
You can type "select non-manifold" in the search command bar in edit mode too
i typed that in (Select > Select All by Trait > Non Manifold) and it seems all but a few are selected what do i do in this case
 quaint jasper
Did you ever merge by distance ? Seems like there are quite a few disconnected pieces
lilac escarp
ill try that real quick
just tried it and it really only seems to make the sword wavy (included before to show what i mean)

 quaint jasper
It lost its normals, which is expected
This file clearly wasn't meant for printing, so if I were you I'd look up a tutorial on what the steps are to make it print ready
It's a bit involved
 ionic current
not sure if right place to ask but, does anyone have any experience using https://armorpaint.org/ for texture work? what are your thoughts?
i want to look into texturing avatars but i just cannot afford substance painter nor do i want to give adobe any of my money

ArmorPaint is a software designed for physically-based texture painting.
quaint jasper
ionic current
not sure if right place to ask but, does anyone have any experience using https:...
You can give Marmoset Toolbag a try
ionic current
ill check it out! willing to look at any and all alternatives to substance painter
 toxic iron
The character I'm modeling, his 3D model is literally built with his arm clipping into his back shell
Should I try and modify it or leave it as is?
I downloaded a ripped reference model to make sure I was looking at it right, and it's still that way
 acoustic parrot
Whenever i do something with normals like using the "Smoothing" option in Blender, it doesnt apply to the blendshape normals in Unity
Almost like its not being exported, but i think i have everything set up properly.
if i just do normals via like edges and stuff and letting blender auto it, those export fine
 thorn mango
how do i import stuff to blender?
harsh saddle
thorn mango
how do i import stuff to blender?
File -> import -> pick the file type
thorn mango
tysm!
 edgy shore
Two different angles
Does anyone know what and why the mesh has these weird shadings/highlights near the vertices? I'm newish to Blender and I've been having a hard time trying to find information about what causes this and how to fix it? Was editing the geometry a bit adding/removing faces and I guess I did something wrong along the way?


Could just be a dumb question, sorry if it is
harsh saddle
The topology in general is pretty rough, you might have a vertex that isn't welded in that spot on the breast. The one closer to the neck probably looks bad because it's an n-gon, a polygon with more than 4 sides. Unity will triangulate those (make them into triangles) but not always in the way you might want and they look bad in Blender so it's best to avoid them unless they're on a completely flat surface.
I would use the knife tool to cut the ngon into quads and for the other spot, try moving the vertices around and see if any spots are disconnected, otherwise it could be the normals so you might want to try turning on backface culling to see if any faces are flipped. https://docs.blender.org/manual/en/latest/render/workbench/options.html
pure dagger
Finished my Bovine legs
 acoustic parrot
edgy shore
Two different angles
Does anyone know what and why the mesh has these weird shad...
acoustic parrot
edgy shore
Two different angles
Does anyone know what and why the mesh has these weird shad...
Those are called Normals, and the dark spots are usually caused by overlaping faces
 placid hinge
quaint jasper
You can give Marmoset Toolbag a try <:thumbsup:700823916322619422>
placid hinge
quaint jasper
You can give Marmoset Toolbag a try <:thumbsup:700823916322619422>
It looks like a good model software
I'm a Warhammer avatar maker but this blender model coloring is hard

 peak ermine
I have this weapon here with animation the essentially is just it extending, how would import it into unity properly retaining the animation? Im very new to blender, and got this model off sketchfab

 pure dagger
peak ermine
I have this weapon here with animation the essentially is just it extending, how...
pure dagger
peak ermine
I have this weapon here with animation the essentially is just it extending, how...
Export it as an fbx with animations
Id recommend however just creating a blendshape for it expanding
peak ermine
Alrighty
pure dagger
peak ermine
Alrighty
lmk if you need any help
peak ermine
pure dagger
lmk if you need any help
I probably will at some point lmaoo
pure dagger
Dms are open
 clear geyser
Is it for sale?
pure dagger
What game is this from
Wheres the base model from then? It looks very familiar is all
clear geyser
Unfortunate, another fiverr scammer. Here is the avatar for anyone who wants to buy it from the actual creator https://www.cgtrader.com/3d-models/character/man/3d-game-model-low-poly

CGTrader
Model available for download in Autodesk FBX format. Visit CGTrader and browse more than 1 million 3D models, including 3D print and real-time assets
cerulean shoal
i don't want to assume but im not sure that is the original creator either
just because the name is so generic
 hushed gyro
Anyone know of a way to get rid of these lines? I'm trying not to add more polys and a weighted-normal modifier is on. (548 tri)


 glossy lily
hushed gyro
Anyone know of a way to get rid of these lines? I'm trying not to add more polys...
glossy lily
hushed gyro
Anyone know of a way to get rid of these lines? I'm trying not to add more polys...
Retopologize so your mesh looks something like this. Lines like that usually happen when you aren't properly using edge loops and edge rings

Start with the shape with sharp edges. Then select the edges you need to be rounded, and use the bevel tool in edit mode.
@hushed gyro
 grizzled cradle
So im tryna add this lil circle thing to the leg so that its not just open but the circle isnt moving w the leg properly?

I tried weight painting it differently but i cant get it to work
hushed gyro
Just needed some manual tweaking, Thanks for the help!

The artifacts happened after I bent the original beveled cube with a lattice
glossy lily
Bevels can be a pain sometimes. It's usually my last step, once I'm happy with everything else
glossy lily
grizzled cradle
So im tryna add this lil circle thing to the leg so that its not just open but t...
As in you're trying to cover the hole in the leg as if it's been amputated, so you can texture on it?
grizzled cradle
glossy lily
As in you're trying to cover the hole in the leg as if it's been amputated, so y...
mhm :>
glossy lily
Select all the vertices around that edge where the hole is, and press F. It should create a new face from the existing vertices and you won't need to weight paint anything.
It might mess with textures though, so for the sake of not having to redo textures, you might want to duplicate the vertices and then press F on the new vertices. It should copy the weight paint data. Then UV unwrap the new circle so it can be properly textured
grizzled cradle
ok bare with me rq im pretty bad at blender ':>
glossy lily
Hang on I'm making another video
To select multiple edges like that, use ctrl+left click. It will take the shortest path from the active vertex/edge to the one click on. To duplicate vertices, press ctrl+D. Immediately after pressing ctrl+D, press F and it will make a face with the new vertices. Swap to UV editing mode, select your new circular face, and press unwrap. Then move the vertices to somewhere on your UV map where they don't overlap with existing vertices.
grizzled cradle
ah gotcha! tysm!
glossy lily
I just realized I cut off the edges of the screen and you can't see what I'm clicking on. Sorry I usually just show the work space for commission updates I can send another one if you need it
@grizzled cradle Here's another one showing the edges. Also I forgot after pressing ctrl+D, press enter, then press F.
grizzled cradle
Sorry im a bit stupid. I tryed that, did the uv unwrapping and assigned it to another spot where other vertices arent using but this is still happening

 glossy lily
grizzled cradle
Sorry im a bit stupid. I tryed that, did the uv unwrapping and assigned it to an...
glossy lily
grizzled cradle
Sorry im a bit stupid. I tryed that, did the uv unwrapping and assigned it to an...
What's still happening? Sorry it's hard to tell from the pictures
harsh saddle
grizzled cradle
Sorry im a bit stupid. I tryed that, did the uv unwrapping and assigned it to an...
Do the textures in these areas not correspond to where the faces are in the UV space? The bottom one looks like it's using an empty part of the UV space but the top one looks like it's covering essentially the whole map. How do they look in UV edit mode?
glossy lily
glossy lily
What's still happening? Sorry it's hard to tell from the pictures
If that's the case you'll need to go to mesh, then normals, then flip in this menu

Though it looks like your UV map is still overlapping a bunch of other textures
 boreal anchor
Any idea why my avatar is doing this when I import from fbx to unity?

The mesh appears shrunk down across all the bones.
spiral sigil
I’ve made a model sheet of my book’s main character, Alex Swordhandle.
I don’t know why, because I don’t have any idea how to 3D model in blender, Or have the money to pay someone to do it LMAO-
It was good art practice tho-
 river kelp
OK so I redid my other thing and have gotten to the unity section. New issue! The model is listed as low of a height that can be uploaded, .2, but in-game it's listed as 2.75m in height. Which is Way too fucking big. Scaling it down in blender doesn't seem to work either.
quaint jasper
spiral sigil
I’ve made a model sheet of my book’s main character, Alex Swordhandle.
I don’t k...

Want to make your own Anime style avatar? For Things like VRChat, Vtubing/streaming and game creation? Stick around, I'm going to let you in on all my secrets to making something simple, optimised, looks good and works well.
I've been using blender for over a year now, I put a lot of effort into researching useful things related to Avatar creat...
Get started and you'll be there faster than you think, especially since you're a good 2D artist, it'll come naturally to you
spiral sigil
Why thank you, ruuubick. Ill attempt!
…next week-
devout orchid
 pure dagger
boreal anchor
Any idea why my avatar is doing this when I import from fbx to unity?
pure dagger
boreal anchor
Any idea why my avatar is doing this when I import from fbx to unity?
Yea your not exporting it from blender correctly, Id recommend using this plugin https://github.com/EdyJ/blender-to-unity-fbx-exporter

GitHub
FBX exporter addon for Blender compatible with Unity's coordinate and scaling system. - GitHub - EdyJ/blender-to-unity-fbx-exporter: FBX exporter addon for Blender compatible with Unity&...
 jade raven
Making MurderDrones N model (My 2nd ever model) Rly proud so far 
 hushed gyro
Widescreen or 1:1? I'm having trouble deciding.

 hushed gyro
jade raven
Making MurderDrones N model (My 2nd ever model) Rly proud so far <:vrcCatSquint:...
hushed gyro
jade raven
Making MurderDrones N model (My 2nd ever model) Rly proud so far <:vrcCatSquint:...
LookN good so far
harsh saddle
hushed gyro
Widescreen or 1:1? I'm having trouble deciding.
That's the same picture? And it would depend on the application, you're not giving us much to work with.
hushed gyro
The bezel to the left and right of the screen is thicker on the second image. I'm asking which one is more aesthetically pleasing.
harsh saddle
I see, that's a subtle difference. I guess the top one, slightly.
 desert crown
Does anyone know why Bones like this happens? Parent bones are unaccessible or unable to select even though in the scene, it shows that its connected?
 quaint jasper
desert crown
Does anyone know why Bones like this happens? Parent bones are unaccessible or u...
quaint jasper
desert crown
Does anyone know why Bones like this happens? Parent bones are unaccessible or u...
You can't parent the original bone of an armature, since it's at the top
desert crown
quaint jasper
You can't parent the original bone of an armature, since it's at the top
hm..but doesn't this look correct?

i just find it odd that i can't parent it, but knowing that its already parented in the scene....i can accept that if it works correctly in unity.
quaint jasper
You can't give a parent to the top most parent in the armature hierarchy yes, because there is no bone above
spiral sigil
desert crown
Does anyone know why Bones like this happens? Parent bones are unaccessible or u...
In this case, you have to connect the child bone to the parent, not the contrary
desert crown
spiral sigil
In this case, you have to connect the child bone to the parent, not the contrary
oh okay i think i just realize it. Spine is the child, so hips being blank as it is, is correct the entire time. I was chasing after nothing. Thank you fair and ruuubick~
solar fossil
Little animation of a character im working on
Bonus points if you know where its from
 spare mauve
solar fossil
Bonus points if you know where its from
spare mauve
solar fossil
Bonus points if you know where its from
Girls last tour 🥹


 red glade
spare kiln
red glade
spare kiln
back at it again gj
placid hinge
solar fossil
Little animation of a character im working on
I love that
 pearl quiver
So im looking at Gumroad on some assets
and some of them have prefab what does that mean?
harsh saddle
pearl quiver
and some of them have prefab what does that mean?
A prefab is like a package of a bunch of different assets so it might include models, materials, textures, scripts, particle effects, etc. It makes it easier to drag a single object into your scene and have it include everything you need.
pearl quiver
harsh saddle
A prefab is like a package of a bunch of different assets so it might include mo...
Oh okay i see thank you
 proven plinth
Adding fishes to the new Torinyan's avatar, Runa 🐠
 spiral sigil
proven plinth
Adding fishes to the new Torinyan's avatar, Runa 🐠
spiral sigil
proven plinth
Adding fishes to the new Torinyan's avatar, Runa 🐠
Thats some actual good tier shit right there
proven plinth
I have a full render, but discord thinks it's explicit lol
tight quartz
proven plinth
Adding fishes to the new Torinyan's avatar, Runa 🐠
That's amazing, how long did it take and any videos that can explain this? lol
proven plinth
tight quartz
That's amazing, how long did it take and any videos that can explain this? lol
Thank ya! took me about 9 hours on and off. I jumped between texturing and modeling plus I just have a super slow workflow. There's tooons of videos regarding rendering and model editing.
tight quartz
Yikes. Also thought it was a shader.
proven plinth
Nahh, all Blender Nodes and emission maps
I used poiyomi for the final avatar though
 arctic obsidian
New model 🙌


 spiral sigil
Can any1 send me akalis helmet model with visemes if you have it kinda like this one?

 woven bramble
Too lazy to retype it all lol but can someone help me on this? This my first time 3dmodeing so ya
 quaint jasper
woven bramble
Too lazy to retype it all lol but can someone help me on this? This my first tim...
quaint jasper
woven bramble
Too lazy to retype it all lol but can someone help me on this? This my first tim...
Blender does not save textures made within the program through Alt + S or the regular save function, it requires Alt + Shift + S iirc, or using the pack all into blend option
woven bramble
quaint jasper
Blender does not save textures made within the program through Alt + S or the re...
Aw man ty for letting me know
devout orchid
and it warns you when youre trying to close it with unsaved images. at least latest versions
proven plinth
Lol that would be neat, I’ve already dabbled in animation a bit to make them swim. Took me longer than I’d admit  so trying to trigger an event would take me ages. Unity logic goes right over my head
 dim tiger
If anyone wants, I made a free black history pin for avatars! https://clubluckyvr.booth.pm/items/4528847

pin to support black history month, fbx and unity file
jagged moat
Ya'll ever just ignore triangle count and make shit?

WIP of the Corsair HS60s
coming up on 1mil tris
harsh saddle
Looks cool. You could probably bake those normals to a 2k tri mesh and then use a transparent texture for the mesh grate but like you said, it's not always about the triangles.
jagged moat
tempted to bake it to lower poly just to get a bit more use in substance tbf
 trail python
thatd be nice but it would probably create more mistakes like vcc
 rigid coral
Does anyone here know about making vrm's in unity? I'm having a problem and this is the closet I can find to a active vrm discord server 😭
azure rain

Hey Guys! hope this helps some of you to get your OC's into VRChat so we can make it an even more amazing and fun place!
a few caveats -
- I am assuming you already have a vroid model but if not I have attatched a tutorial below
- Please ensure you have an email from VRchat stating that you are able to upload avatars to the platform, if not y...
rigid coral
My problem is kind a specific. I can take my model and make it into a VRoid, but when i "export", It just changes some edges from smooth to sharp

But is a VRM problem, so idk if anyone here can help. was just hoping there was some overlap in Vtube artists and Avatar artists
quaint jasper
I'd bring it back in Blender and smooth those normals if I were you
rigid coral
Its seems like .vrm files might enforce their own auto smoothing or something(maybe forcing UV seams to be sharp edges?). Do you think I could fake the smooth edges with a normal map?
quaint jasper
I still think it'll be visible
rigid coral
Yeah I think it just something with this vrm exporter, it doesn't understand unity's fbx import setting. I'm not getting payed for this so its w/e
red glade
I feel like something is off about the eyes. Any tips for them? They don't really feel... Correct it still feels very uncanny
 red glade
Adding some makeup on the side and moving the outer eye corners in more works already.
 harsh saddle
The structure of a real eye is quite complex, you've got the cavity of the pupil which forms a sort of torus/donut shape with the surrounding dilator muscles and that's behind the clear reflective cornea which balloons out in an oval bump on top of the iris and pupil which come together to create those characteristic reflections around the pupil and iris that this character is missing along with the pinkish hues that form along the sides and back of the sclera. So it's quite a technical challenge to create truly realistic eyes that many movies don't even get right but your character isn't all that realistic to begin with so I'm not sure how far you want to go with that or if you're trying to target Quest which is going to limit your ability to be able to build up that reflective layer that will give the eyes a more natural look.
red glade
harsh saddle
The structure of a real eye is quite complex, you've got the cavity of the pupil...
Well generally Im not aiming it to be super realistic. as you mentioned
But it still feels just. Off
 harsh saddle
It's hard to account for stylization, there's no right or wrong unless you're going for realism but the texture of the iris is quite realistic until you get to the edges and then it suddenly gets super dark and the transition from the iris to the sclera is much harder than it would be in reality so you can try playing around with those factors and see if it feels better.
Though it's often the reflections that really bring an eye to life, hence why many anime and manga styles go ham on reflections but you're not going to get realistic eye reflections by just jacking up the smoothness of the material, you really need an eye shape that concentrates the reflections in the right areas to make those look convincing.
red glade
harsh saddle
It's hard to account for stylization, there's no right or wrong unless you're go...
Hm good point. I tried doing a more stylized eye texture but it felt... worse

Besides it being warped. It looks better
harsh saddle
The reflection spots definitely help. In reality, they wouldn't completely be locked to the irises like that but it's a good compromise without getting a lot more complex.
 devout orchid
check overwatch eyes for ref, stylized but with quite realistic irises
harsh saddle
Another thing you'll see done a lot is darkening the upper part of the iris and then creating a U shape under the pupil that's brighter to give the iris more depth. Might be worth trying.

 grand plank
Hey, I'm setting up a new FBX to replace one I've been using (same FBX just with some edits made). The original FBX was using cm for the units but when I brought the new one into Unity it's being measured in meters. How can I fix this so that the new one is also in cm?
I'm assuming it's something I need to do in Blender
harsh saddle
Scale it down by 100? Unity only has one unit system, meters, so you either have to export to the right scale for Unity or do it inside of Unity.
grand plank
devout orchid
<@152182663808024577> fbx units on export
Is it "Scale"?
devout orchid
@grand plank probly, csnt check
theres like local units, fbx units all options etc. when exporting fbx in blender
apply scslings -> fbx units scale
googled some screenshots lol
grand plank
Hmmm, I may not be doing this right x.x It's still using meters
devout orchid
then try local
i believe local is cm and it ends up with avatars being scaled 100 in unity, fbx - proper one with meters
grand plank
Ah! I figured it out! It was actually in two places. I had to change the Scene Properties > Units > Length to Centimeters and also had to change Overlays > Scale to 0.01
Oh, and had to change Scene Properties > Units > Unit Scale to 0.01
harsh saddle
Seems like a lot more work than just S .01
red glade
devout orchid
check overwatch eyes for ref, stylized but with quite realistic irises
Good call!
The shape of my eyes is a bit off i think

Maybe thats whats messing with me.
 drifting depot
yo. Anyone have tips for sculpting floofy fur?
drifting depot
found something.
 left lantern
Hello! I would like to ask for help for someone to do a favor for me and fit a clothing into my avatar via blender..
 gentle cradle
anyone know some really good character tutorials cuz I've had to start over so many times
velvet oyster
Spear of the valentines complete
 oak hatch
Robodoggo
 swift jolt

 languid fossil
I’m looking for some help making this in 3D since this is the only good image I have. Any tips?
 harsh saddle
If you can draw, you might consider trying to draw some more traditional angles and use those as reference but otherwise, just do it. I like to sculpt so I would take a cube, subdivide it, and then model this using the sculpting tools but you could also use a more traditional polygon modeling workflow. Not sure how much specific advice I can give unless you have specific questions.
spiral sigil
I made this in 2 days. Ik its not good i made it in maya but is there a way to make this into as a vrchat world? Im just curious if i export this as a fbx for unity 👀😓
 azure rain
yes exporting it as a fbx would allow you to import it into Unity
spiral sigil
Oh nice thnks 👍
azure rain

EDIT: I now wholeheartedly recommend using World Creator Assistant to set up your VRChat world projects! It's now the way I set up all of mine!
https://youtu.be/F1Tr3Nc9Rxs
https://ask.vrchat.com/t/world-creator-assistant-automate-vrchat-world-project-management/7571
https://github.com/Varneon/WorldCreatorAssistant
Download Unity - https://docs...
harsh saddle
Though the hundreds of sticks might add up in terms of geometry. Might be better to duplicate 1 stick to make use of instancing.
spiral sigil
harsh saddle
Though the hundreds of sticks might add up in terms of geometry. Might be better...
Really? i just used Xgen so i didnt know how much it can affect it
azure rain
and maybe set up some level of distance so it's not trying to render far away grass
basically it has to store the geometry data for every single blade of grass but instancing would only store the data for the grass once
spiral sigil
Hopefully I’ll remember that 🤣
 harsh saddle
I think you'd be better off with a layer of realistic grass that just faded into green or using Unity terrain for the built-in LOD. I didn't initially recognize that as grass, looks more like thousands of twigs whereas with LOD you can get high quality grass close to the player that simplifies farther away and ultimately disappears
spiral sigil
harsh saddle
I think you'd be better off with a layer of realistic grass that just faded into...
Well 1 is because the reference i used had brown field grass and 2 the last time i try to change the color of the grass to green it wouldnt show it green when i render it 🤷♀️ so idk if it was just me and missed up or something around the maya programming that somehow didn’t render the color
harsh saddle
Using Unity terrain, you can edit the textures in a program like GIMP or Photoshop so you can just take the grass texture and change the hue and saturation to make it brown.
spiral sigil
Like i even tried to to change the color for that to be lighter but ended staying as a default color 🤷♀️
azure rain
Unity terrain would also be more efficient as it's not static geometry so we can reduce the triangle count on distance geometry
spiral sigil
So would i delete the xgen grass and then import it to unity and then just add grass there?
azure rain
basically it would just bring over the metal structure and have the background be made in unity
spiral sigil
Ah ok
harsh saddle
Yeah, there are ways to convert geometry to Unity terrain but I've never used them, I'd just redo it in Unity.
spiral sigil
Thnks for the help guys 😄
azure rain
glad to be of help if you have anymore questions feel free to ask

Let's learn some basics of new terrain system in Unity 2020.1. You will also learn how to use New Terrain Tools and Sample Assets for quick terrain creation.
👉Note :- Terrain Tools are only available for Unity 2019.1 and later.
👉No Preview Packages(Unity 2020)? Solution - https://youtu.be/sJIfWbrnahI?t=72
👉A,S,D Shortcut not working.Try this h...
albeit the video is for unity2020 but would still apply to 2019 for learning how the Terrain system works @spiral sigil
spiral sigil
azure rain
albeit the video is for unity2020 but would still apply to 2019 for learning how...
Thnks!
oak hatch
swift jolt
https://cdn.discordapp.com/attachments/992472096250794144/1073247869831745596/im...
As a person who does occasionally smoke a pipe, I can tell you I would have difficulties with that huge boyo.
swift jolt
oak hatch
As a person who does occasionally smoke a pipe, I can tell you I would have diff...
tbh the pipe is wack, a real design from the 1920s....
spiral sigil
does one desire to throw up
harsh saddle
It looks pretty but its an awfully small bowl for a pipe with that much heft but I guess it would be good for heat insulation
swift jolt
oak hatch
As a person who does occasionally smoke a pipe, I can tell you I would have diff...
just perfecly fits my robotclaw
 oak hatch
swift jolt
just perfecly fits my robotclaw
oak hatch
swift jolt
just perfecly fits my robotclaw
noice. Also yeah, the 1920's are a wacky time for design.
 spark phoenix
what is a good modeling service for making avatars? i read the first part of the blender manual but my brain is too small for that... any easyer alternitives? for starters like myself of course
quaint jasper
spark phoenix
what is a good modeling service for making avatars? i read the first part of the...
Depends what kind of avatars you want to make, VRoid might be a good alternative.
harsh saddle
spark phoenix
quaint jasper
Depends what kind of avatars you want to make, VRoid might be a good alternative...
well, somewhat like a simple avatar, one that can do animations and custimizations. (sorry for ping btw)
spark phoenix
harsh saddle
Yeah, <https://vroid.com/en/studio> or <https://readyplayer.me/>
i kind of want a software where it has more creativity and not chosen presets (sorry for ping again)
harsh saddle
spark phoenix
i kind of want a software where it has more creativity and not chosen presets (s...
There are programs like Daz Studio and Character Creator but they tend to be pretty costly when it comes to buying lots of costumes and customization options and they often aren't well-optimized for game engines, especially given VRChat's avatar limits for Quest.
spark phoenix
harsh saddle
There are programs like Daz Studio and Character Creator but they tend to be pre...
oh, i see. i had a friend mention a modeling software i dont know how to spell it but it was like "blendo"
quaint jasper
spark phoenix
i kind of want a software where it has more creativity and not chosen presets (s...
VRoid is the most creative one you'll find, aside from that, it's all from scratch
Blender is the software
spark phoenix
oh i get it now
still somewhat confusing but i guess i will look into it tomorrow if i remember at least
gn
harsh saddle
Blendo was a successful early Battlebot but that's probably not what you had in mind
swift jolt
spark phoenix
still somewhat confusing but i guess i will look into it tomorrow if i remember ...
Yea blender is not that hard of a program to use…. It just has a little learning CURB when starting out…. Do donut tutorial and you get a rough grip on the program atleast
red glade
harsh saddle
Another thing you'll see done a lot is darkening the upper part of the iris and ...
I moved the eyes down a bit and changed the shape up a bit. Looks better already
 red glade
- Eye lids that fixes allot of the issues i had
 devout orchid
up to you, but i dont really like those eyebrows, too thin (density, not size wise)/realistic
quaint jasper
I think they might look ok if they were placed lower, right now it looks like they're raised by default
 serene tree
My model's looks keep getting messed up in blender when I choose the fix model option
I also can't use the export option
harsh saddle
serene tree
My model's looks keep getting messed up in blender when I choose the fix model o...
I'm not sure it ever worked completely perfectly but CATS is known to not support anything past Blender 2.9 well.
serene tree
That's what I'm using, CATS and blender
harsh saddle
Are you using 2.9, though?
harsh saddle
Well, unless you specifically went into the download archive to get 2.9 or earlier, it's newer
Yeah, that's not going to work well.
serene tree
Ok
 obsidian nova
red glade
+ Eye lids that fixes allot of the issues i had
obsidian nova
red glade
+ Eye lids that fixes allot of the issues i had

This is a poor example, but a little bit of AO along the forehead can help to make the hairline feel more natural.
My avatar is pretty similar.
serene tree
Is blender 2.9 and 2.90 the same?
obsidian nova
Yes.
serene tree
Ok
harsh saddle
It's also the same as 2.900 and 2.9000
harsh saddle
Trailing zeroes don't change the value of a thing generally
Now 2.91, that's different.
serene tree
Which one
harsh saddle
2.900000
 harsh saddle
2.9.0.0.0.0
serene tree
Which download, windows, mac, or linux
harsh saddle
You don't know what operating system you have?
hushed leaf
FYI, The development version of CATS runs fine with Blender 3.4: https://github.com/absolute-quantum/cats-blender-plugin/archive/refs/heads/development.zip
serene tree
harsh saddle
You don't know what operating system you have?
Nope
red glade
obsidian nova
Oo good call thanks! Will do
red glade
quaint jasper
I think they might look ok if they were placed lower, right now it looks like th...
Good point. Probally because i moved the eye’s lower
I feel like if i look at something too long it starts to become uhm… like i cant see the problems with it. Thanks for the assists everyone!
red glade
Big swag.
 quaint jasper
Much better
red glade
quaint jasper
Much better <:thumbsup:700823916322619422>
Thanks I agree!
Now the forehead feels a bit off but. The biggest part has been fixed.
I wanna replicate this hairstyle. which is what i have IRL. Once i have the time to go for it

I think i can take good reference from hanzo from OW2 I think

 queen elbow
 swift jolt
Big ear
thorn gulch
 pure dagger


 lucid drift
can anyone help me and tell me what addons i need for blender
harsh saddle
lucid drift
can anyone help me and tell me what addons i need for blender
To do what? You don't really need any add-ons.
lucid drift
harsh saddle
To do what? You don't really need any add-ons.
like to edit an avatar and stuff like- add like maybe lets say cat ears or a tail.
my friend told me i needed some addons to be able to do that.
harsh saddle
Not really. CATS can be useful but you don't need it. The release version on works with Blender up to 2.9 but apparently there's a development version that works with 3.4. I make avatars and I've never used it but it has some useful tools.
lucid drift
harsh saddle
Not really. CATS can be useful but you don't need it. The release version on wor...
ty c:
lucid drift
can anyone help be put clothes on the avatar- lmao
harsh saddle
lucid drift
can anyone help be put clothes on the avatar- lmao
Look up transfer weights on Youtube. If you can line up the clothing and transfer the weights, that should generally work okay
azure rain
Never waste your time re-painting a new character ever again. In the next 60 seconds, you'll learn everything you need to transfer your Rig's weight painting from one character to another under a minute!!! Hope it helps :)
Free Female Base Rig Download:
https://www.youtube.com/watch?v=_XfvLpLyulI
Sayuri Artsy Weight Paint Transfer Video:
http...
lucid drift
azure rain
https://www.youtube.com/watch?v=bR_Vke__voU
thank you
lucid drift
harsh saddle
Look up transfer weights on Youtube. If you can line up the clothing and transfe...
i think ima need actual help...
I FAILED 4 TIMES ALREADY MY BRAIN CANT HANDLE IT NO MO
trail python
have you ever used blender before?
lucid drift
trail python
have you ever used blender before?
nope
thats why i was asking in the first place
T>T
harsh saddle
You might want to watch some beginner blender videos before moving to character rigging. The donut tutorial is a good start.
lucid drift
harsh saddle
You might want to watch some beginner blender videos before moving to character ...
ok ty c:
trail python
Blender tutorial series showing you how to use the most common features, like modelling, lighting, materials, geometry nodes and rendering - whilst making a donut.
Download the Blender Shortcut Hotkey PDF: https://www.dropbox.com/s/jg4fs4i8zw5bxt7/Blender 3.0 Shortcuts v1.2.pdf?dl=0
Google Doc version: https://docs.google.com/document/d/1...
 pure dagger
lucid drift
ok ty c:
pure dagger
lucid drift
ok ty c:
if your willing to pay id recommend checking out the vrc traders discord, They have a whole bunch of people who can take commissions and have been authorized via their mod team to know what they are doing and not be scammers
pure dagger
jagged moat
before modifiers, this is a cube
after modifiers it is church
jagged moat
xd
I bet someone more talented than I am could make a cube into a BlenderDonut™️ with just modifiers
harsh saddle
If we're including geometry nodes, you could probably make an entire scene from a cube or nothing at all with enough cleverness.
jagged moat
True, I guess the only major hurdle would be finding somebody who would stay sane long enough to do it
harsh saddle
I think I know a guy https://youtu.be/Xp9i2RSwaP0

patreon https://www.patreon.com/cg_matter
get it https://cgmatter.gumroad.com/l/nodevemberday8
my website https://www.cgmatter.com
#blender #nodevember #geometrynodes
arctic obsidian
new model!

 arctic obsidian
Yep, rigged
leaden jacinth

queen elbow


 small canyon
That's amazing :00
quaint jasper
queen elbow
Great outline work ! Topo/weight paint could probably use a pass at the crease areas though ! Also Blender has a "stabilize stroke" feature that would help avoid the shaky lines on the chest!
 atomic hamlet
queen elbow
atomic hamlet
queen elbow
I love seeing highly expressive furry avatars, nice work!
 daring rose
When I go to upload a avatar I keep getting the 3d unity prefab error idk how to fix
 digital jolt
^w^ my clients fursona is soo cute

 visual steeple
anybody here proficient at Blender who can lend me a small hand?
azure rain
it would help if you describe the nature of your problem
visual steeple
im trying to put these leg warms on this avatar. i was given a tutorial a few years back but 90% of that tutorial is out the window now

i was taught stuff about edit and sculpt mode? but i dont remember anything about it
azure rain
Never waste your time re-painting a new character ever again. In the next 60 seconds, you'll learn everything you need to transfer your Rig's weight painting from one character to another under a minute!!! Hope it helps :)
Free Female Base Rig Download:
https://www.youtube.com/watch?v=_XfvLpLyulI
Sayuri Artsy Weight Paint Transfer Video:
http...
visual steeple
appreciated
wait apologies, i only have 3 options? object mode, edit mode, and pose mode
harsh saddle
visual steeple
wait apologies, i only have 3 options? object mode, edit mode, and pose mode
You have the armature selected, you need to select the mesh.
visual steeple
ah, appreciated
im a complete newbie to blender
i just know it's better than putting clothes on an avatar in unity lol
azure rain
visual steeple
i just know it's better than putting clothes on an avatar in unity lol
yes definitely better as the ways to do it with just Unity only results and some pretty unoptimized stuff as a lot of time people go with basically having two skeletons and using rotate constraints to make them behave like one skeleton
visual steeple
im just tryna make a cute and simple avatar for myself, one that wont crash people but also useable for quest n' stuff
any guides on optimization?
harsh saddle
visual steeple
any guides on optimization?
How many triangles does the mesh have? Do you know?
visual steeple
how does one check that?
azure rain

Did this video help you? Consider sending me a tip on Ko-fi! https://ko-fi.com/sippbox
Making optimized Quest models is hard. But it doesn't have to be! With recently updated polygon limits and fallback avatars, it's a better time than ever to create something that represents you to Quest users! Hopefully this tutorial will help you out!
0:00 ...
visual steeple
ah, thank you!
azure rain
 visual steeple
is this gonna cause issues? i simply imported it, the bones were like this

apologies this is after i did fix model with cats
spiral sigil
someone pls make a boywithuke avatar pls pls pls
 atomic edge
I am trying to close the gap between head's chin and neck. Also I want to somewhat "close" the head backside. I am struggling with different kinds of "extrude" - maybe someone can point me into the correct direction, naming the different steps I need to do in order to achieve that. Most of my Blender skills I got from Youtube videos, but currently I am even missing the correct search terms ... is "extrude" even correct for "adding the missing parts of the head"?
 harsh saddle
atomic edge
I am trying to close the gap between head's chin and neck. Also I want to somewh...
harsh saddle
atomic edge
I am trying to close the gap between head's chin and neck. Also I want to somewh...
There's not really one straightforward method for combining meshes. Extrusion can be part of it but you'll ultimately need to merge the vertices on the edges of the two meshes you're trying to connect which requires the part of the meshes you're trying to connect having the same number of vertices if you want to connect them cleanly. I found this kind of basic tutorial for what you're trying to do that uses a much simpler mesh but the same techniques apply. It's generally better to do this before subdividing and triangulating the mesh so you have fewer vertices that need to be connected.

When I was making a 3d Model I found it easier to make the hands, feet and head separate from the body and then connect them after. This video tutorial is how I connected two separate low poly meshes together.
Source Code: https://github.com/omarvision/connecting-two-meshes/find/main
go to http://www.omarvision.com to:
- browse/search my en...
atomic edge
harsh saddle
There's not really one straightforward method for combining meshes. Extrusion ca...
Hm, thanks a lot - but I guess I explained it the wrong way, sorry for that.
What I really want to do is not combining both meshes but adding vertices to the head (face) mesh in order to make a full head out of it which then also "visually" closes the gap to the neck when using a common armature.
So my intention is to add vertices to the current face/head in order to close the mesh like a "ball". After closing I could easily use "sculpt" tool.
harsh saddle
atomic edge
Hm, thanks a lot - but I guess I explained it the wrong way, sorry for that.
Wh...
So you basically want to have a full head that intersects with the neck rather than making the vertices of the neck connect with the head? It's basically the same thing, you just don't merge the vertices. Some of it can be done with extrusion but you're ultimately going to get to a point where everything needs to connect in the middle so you'll need to make sure you figure out how to connect the faces in a way that makes sense for how many edges you have. There will probably be some extrusion, probably bridging some edge loops, maybe some cuts to get the number of edges where it needs to be to connect everything, there's not really a straightforward workflow to this task.
devout orchid
@atomic edge create ball, edge loop it till you have right amount of verticies in loop (two loops, face-ball, abd ball-neck), shape it so loops located in the right place and then use bridge gap
atomic edge
devout orchid
<@172341305236652033> create ball, edge loop it till you have right amount of ve...
Do I understand this correctly? I can create a ball and use a part of it to close my existing mesh?
harsh saddle
You can do that but you're still going to need to shape the ball and then delete part of it unless you want a close ball inside of the head and then you need to make sure the number of vertices around the edge you're trying to connect is appropriate and are generally lined up well.
devout orchid
@atomic edge you use ball as a base because extruding verticies by hand is pain. then you cut holes in it and stitch it to the face/neck, now you can just sculpt it while having somewhat decent topo. Not an expert tho, did it once
harsh saddle
You could in theory use a boolean but then the topology will be really messy so I would avoid that unless that area will be hidden in which case you could just leave it open and not close it at all
atomic edge
harsh saddle
You can do that but you're still going to need to shape the ball and then delete...
Sounds complicated ... but at least I have learned that sometimes there is no easy way of solving this. I wonder why creators offer "open" heads when it's so hard to close them. 😉
devout orchid
its probably vrm based so you can try and grab default bald vroid
atomic edge
I guess I will stick to some extrusion in order to add a few vertices until everything is hidden under the hair and that's it.
Maybe completely closing the head is just too complicated - at least for me being still a beginner.
Thanks to you guys! 💜
harsh saddle
Topology is a tricky thing, you need to do a lot of planning ahead of time if you want the edges to flow cleanly and all line up well. You might want to watch some topology or retopology videos to get a sense for the general workflow but it's always going to be kind of slow and tedious.
atomic edge
Being a noob I will put Topology on my list of things to learn next - thankies! 💜
trail python
heads often come without the backside bc its covered by hair or clothing/accessories
no point in having extra polys when its going to be covered by another mesh
same reason why like.. boss models from uhh elden ring i guess for example, don't have a body mesh underneath armor
edit* its a poor example but the reason is squeezing optimizing anywhere someone can and laziness (since it gets covered usually anyways)
devout orchid
theres chin missing, beard placeholder? 🥲 and id rather have full head to separate it into hair base. especially since it's bases, not complete avatars, so a bit early for final cleanups
trail python
yeah if its a full head its easier to work with, facial hair seems exempt to the "hair = hole in head/body" thing
 urban flint
Is there way to turn bones into a mesh? I wanted to use this as a fallback for vrchat, thought it'd be interesting

 manic spade
urban flint
Is there way to turn bones into a mesh? I wanted to use this as a fallback for v...
manic spade
urban flint
Is there way to turn bones into a mesh? I wanted to use this as a fallback for v...
not that im aware of but it wouldnt be too difficult to model over it because the shapes are pretty simple
trying to make some frayed shorts in marvelous/other stuff

with a noisier gradient

 marble stratus
Sculpt tools only show impact in soild mode and not material mod, any idea how to fix this?
spiral sigil
Got a weird issue with blender. Trying to edit some vertices in edit mode and the changes get recorded on all existing shapekeys. Any fix?
spiral sigil
Wow those pants actually look good
harsh saddle
spiral sigil
Got a weird issue with blender. Trying to edit some vertices in edit mode and th...
Are you trying to edit the basis when the mesh already has shape keys? That doesn't tend to work well which is why you want to save shape keys to the end. What you can do if you've got something like a viseme is assign the viseme to a specific vertex group (like the face) so it doesn't influence anything else, set that shape key to 100, then do a "new shape from mix" which should keep the new shape key from influencing anything outside of the vertex group without having a vertex group set on the shape key itself which Unity won't recognize.
spiral sigil
I will try that thanks.
arctic obsidian
new model 🙌


 fickle tusk
yoo nice work!
Making a base, hoping to get some FBT compatibility feedback (or just roast my proportions feel free lmao). does this look good?


wrists line up with crotch when arms are alongside body
harsh saddle
I'm not gonna second guess Loomis when it comes to body proportions and it looks like yours lines up pretty well.
fickle tusk
harsh saddle
I'm not gonna second guess Loomis when it comes to body proportions and it looks...
I made him more buff 
Loomis is king for sure
 dark gazelle
arctic obsidian
new model 🙌
dark gazelle
arctic obsidian
new model 🙌
soooo cute
 dusty heron
arctic obsidian
new model 🙌
dusty heron
arctic obsidian
new model 🙌
That looks sick!
 void temple
how do I adjust the UV of a model after deleting edge loops?
 cedar shuttle
started work on lamp posts

 toxic grotto
is there like a vrchat avatar rig base or like... that skeleton lookin thing?
spiral sigil
cedar shuttle
started work on lamp posts
Lovely lampage
harsh saddle
void temple
how do I adjust the UV of a model after deleting edge loops?
You adjust the UVs by selecting them in edit mode and moving them in the UV editor assuming we're talking about Blender but deleting edge loops shouldn't really do much to your UVs.
void temple
harsh saddle
You adjust the UVs by selecting them in edit mode and moving them in the UV edi...
it does make a noticeable difference with my experience, sometimes deleting edge loops messes with the UV
harsh saddle
It can in some instances if the island tapers or something in that area or if it's on the edge of an island but yeah, you just select the points and move them in the UV editor
cedar shuttle
spiral sigil
Lovely lampage
All pro builder no blender still working on it
trail python
toxic grotto
is there like a vrchat avatar rig base or like... that skeleton lookin thing?
4 hours later, but hopefully this is what you were looking for lmfao
 exotic parrot
Anyone tell me why cats baking doesnt work
toxic grotto
trail python
4 hours later, but hopefully this is what you were looking for lmfao
uh... how do i open it on blender.
trail python
file > import > fbx
toxic grotto
thanks
spiral sigil
So, I got some spare time to work on side assets, now the question is, is it possible to use dynamic bones on the packages to imitate real physics?
 harsh saddle
spiral sigil
So, I got some spare time to work on side assets, now the question is, is it pos...
harsh saddle
spiral sigil
So, I got some spare time to work on side assets, now the question is, is it pos...
Yeah, you can use dynamic bone in worlds. Not sure how you're planning on using that for a coffee maker but if you can figure out a way that makes sense.
 rotund eagle
Hello, I need some help, I'm a complete newbie to 3D and blender and I'm just following tutorials to try to get an MMD avatar to vrchat. I just found out that one of (if not multiple) texture is missing and I have no idea as to where to go in blender to get it back. I didn't touch anything in the files nor the textures, and when looking inside the texture folder in the files, I can still see the face textures, could you help me ? If it's something too complicated and I would need a better understanding of blender let me know.

also maybe I'm not using the most appropriate channel for this, let me know if it's the case
visual steeple
is there an easy way to convert an a-pose to a t-pose in blender? or do i have to guesstimate with pose mode with cats plugin
trail python
thats usually how people do it anyways ive noticed
or they model it into a t pose to start with but i dont think A pose is hugely problematic
quaint jasper
visual steeple
is there an easy way to convert an a-pose to a t-pose in blender? or do i have t...
It's not an exact science, as long as the upper, lower and hand bone are horizontal it's fine 
visual steeple
hmm, alright. cuz im a newbie with blender and im suffering
quaint jasper
It gets easier fast
visual steeple
heres to hoping
is there anybody who can help me put this hoodie on this avatar? no matter what tutorial im using, im still absolutely suffering
or if anybody has any good, updated tutorials?
 pure dagger
visual steeple
or if anybody has any good, updated tutorials?
pure dagger
visual steeple
or if anybody has any good, updated tutorials?
Put the hoodie in a tpose using cats and set it as default. Then make sure the bones in the hoodie and body are the same then merge via cats with the only thing checked being merge all bones
 severe frigate
https://twitter.com/UniverseAcid/status/1626403001232392192?s=20 I just wanted to share this guy

okay so I am back, and my commissions are open!
Here are some of my works!
for more info & works: https://t.co/ghgUpGX0I6
#blender #Blender3d #RobloxDev
(Baby and lil pinky Designs by @/Snartles
Sun and moon design by a deleted account
Rabbit Lady is a design i found in 2021)
Likes
132

 Twitter
·
Twitter
·



 arctic obsidian
You can try the first modifier (ttansfer mesh data, if I remember correctly)
Transfer mesh data - vertex group - generate data - choose body object - apply
arctic obsidian
visual steeple
anybody know how to fix this?
 visual steeple
sorry, im a huge newbie to Blender, learning as i click random things and small youtube tutorials. any specific guide you can give?
arctic obsidian
You can give me the file, I will record a video tutorial on how to fix this problem. It's not hard for me 🙌
 solemn elk
my partner merged layers and now their main model is purple when it states it’s not, we tried closing n reopening it but that hasn’t done much. anyone know why??
this is on blender.

also, it’s only in sculpt. everything else is the same
arctic obsidian
try turning it off

Although it can be a color in the viewport (if there are several materials and one of them had a purple color, and the other did not. Although this is unlikely for a sculpt)
 waxen ivy
I have a blender question, Here I am extruding an edge, is there a shortcut or good method for me to easily match this edge selected with the edge in front of it?
 harsh saddle
waxen ivy
I have a blender question, Here I am extruding an edge, is there a shortcut or g...
harsh saddle
waxen ivy
I have a blender question, Here I am extruding an edge, is there a shortcut or g...
I tend to just zoom in real close and eyeball it but this might help https://www.youtube.com/watch?v=0p06F1LzTjQ

In this video, I wanted to talk about some of the snap functions contained inside of Blender to help you make precise movements and align objects!
Timestamps
0:00 - Video Intro
0:29 - Intro to Snapping
1:08 - Location of Snapping Settings
1:37 - Enabling Snapping
1:47 - Snapping to Increments
2:50 - Absolute Grid Snapping
3:14 - Adjust Snap Po...
spiral sigil
My friend applied a subdiv modifier to their model and all of a sudden the textures started doing this

There's no duplicated faces or anything, i checked
spiral sigil
spiral sigil
My friend applied a subdiv modifier to their model and all of a sudden the textu...
Found the issue, somehow the wireframe got duplicated (no mesh, just the vertecies)
marble stratus
does someone know why is my shapekey reseting in the render?
trying to make an avatar render, and make face expressions using shape keys, but it goes back to basis in the final render
 pseudo pewter
im debating if i should take a college class for 3D modeling, would it be worth it? for background info, ive already learned quite a bit on my own but that motivation has kinda dried out. im hoping a class would force me to learn + i could learn good habits and unlearn bad habits and such
harsh saddle
pseudo pewter
im debating if i should take a college class for 3D modeling, would it be worth ...
If it's financially viable then it's probably not a bad option. You can probably learn anything you can in a class online but like you said, a classroom can be more conducive to structured learning and you can get help from your classmates and the instructor if you run into issues.
pseudo pewter
harsh saddle
If it's financially viable then it's probably not a bad option. You can probably...
ahh ok, thank you. unfortunately im reading reviews about the professor that teaches the course and they look a little dismal :(
harsh saddle
Rate My Professor can be a bit harsh since you don't normally bother unless the professor is really bad or really good and I think fewer people rate the really good ones. That being said, while I've never taken a modeling course, some of my worst professors were programming/computer science people.
pseudo pewter
ohhh true i forgot about that bias... can confirm tho ive had a lot of horrible cs professors. ill think about it still though!
spiral sigil
Anyone know where the "curve from mesh/text" tool is, for making hair? I tried looking it up, but I think the shortcut "alt + C" is outdated since it didn't work when I tried :/
quaint jasper
You want to use the "Apply shapekey as Basis" option, I can't recall if that's part of the Cats addon though
 quasi plover
when texture painting, is there an easier way of painting between fingers without permanently moving a bone?
 thin shadow
paint using the uv layout
 jovial seal
Is there a base rig I have to follow when modelling something new for vrchat?
devout orchid
@jovial seal #3d-modeling message not strictly tho
but at least in terms of hierarchy
jovial seal
Alrighty thanks man
 hardy turret
any good tutorials out there for hair modelling and texturing?
swift jolt
quasi plover
when texture painting, is there an easier way of painting between fingers withou...
Either paint the uv layout…. Or seperate the finger from the rest of the mesh and hide the body. And then remerge it to the body when painted…. But you will need to merge the seam it creates aswell….
Doing it on the uv layout is the easiest
quasi plover
swift jolt
Either paint the uv layout…. Or seperate the finger from the rest of the mesh an...
couldn't find it in uv, managed to get through it though
swift jolt
quasi plover
couldn't find it in uv, managed to get through it though
Its on the texture paint tab at the top
quasi plover
swift jolt
Its on the texture paint tab at the top
I had the uv layout next to the texture paint, could see both at once