#visual-fx
1 messages · Page 43 of 1
For the life of me i can't figure out how to make this work.
My texture is bascailly ping ponging back and forth, i just want it to somehow go to 0-1 and then start at 0-1 again, over and over?
I can't seem to find a w ay to have a linear curve i guess?
Sine will ping pong.
Time is a linear curve
Frac it and it will reset as you describe

Correct
Drop the sine, plug the frac in between the mult and the add
That worked! ty partikel
How do I make the texture look smooth like in the window and not the thumbnail? It was extracted as quick png from photoshop

Hey all, random shot in the dark question here.. Is there a known way to change the material of an instance primitive within an instanced static mesh comp??


The thumbnail doesn't matter, as it doesn't use the alpha channel.
But if I use the texture on the mesh, it looks like the one on the thumbnail
The key here is the alpha channel.
Oh so I was wonder if there's anything else to tick for it to show up on a mesh
Do you know your way around the material editor?
Started learning unreal a month ago, material editor 2 weeks ago :^)
But thats a nice hint though as coming from unity I assumed that I dont need to touch the graph


how do you make a scene capture camera ignore outside post processing?
fixed it
I changed the blend priority inside the post process material
Hey Guys! Is there a way to apply a decal just to one object and not everything it intersects with in its volume?
Why do I still see "PREVIEW" on shadows even if I enabled "Force No Precomputed Light" and even rebuilt all the light?
I'm trying to make a gradient that will 'pan' from left to right on the mesh. I've created the gradient, i can't for the life of me figure out a way to make this pan now? Does anyone have any ideas?
I'm trying to do this with out using a texture gradient.

sort of on the right track. You've isolated the gradient, but the Panner is what effects the UVs of a texture. The Time of a panner is what you want to control with your cosine so that the time fluctuates back and forth. The Speed is how fast. That's the Panner anyways, but im not sure how you are going to use it to affect the U of the TexCoord. 😛
Hi all, a post-processing quesiton if I may...
I have created an Options screen where the player can change various quality settings, screen mode, screen resolution etc... one of the options is the game's brightness. I'm affecting this by changing the Post Process Volume's Exposure Compensation values. Seems to work well enough "in-game"... but I was hoping to affect the UI also, which isn't affected by this change.
I've used Fortnite as a bit of a reference, when you change the brightness values in that game, the UI also gets darker or lighter. I'm curious as to whether it simply just an image layer with the opacity being set to give the illusion that the setting is changing everything (in the same way), when in reality it isn't.
I can't seem to find anything else online about changing the UI brightness, any thoughts are welcomed 🙂
i have a question, say someone wanted a collapsed/collapsing building in an Unreal game, would they likely do that collapsing part in Unreal or another program and bring it in?
Unless you want interactive destructions, you can bake the destruction elsewhere and export it as alembic cache to be played back on cue.
Also #legacy-physics if you want to ask about realtime destructions.
ohh ok! thanks
Remove the panner, and just add time after the mask. It’s already a gradient so add/subtracting here will slide the cos left and right . You can control the speed by multiplying time before you add it.

Like so? I don't really understand why this is working, it is working though...
I'm not sure how i control the speed of the time now?
would i add a paramater and multiply it with the t ime maybe?
Yes


how i do dis
use depth fade, but only to the ball that is intersecting the mesh?
i dont want depth fade to respond to everything else this invisible mesh is close to
i dont get what you're trying to do - all I read was "depth fade" but for a specific thing - and from that, I would think a custom material that ignores depth, or probably better, a ppm applied to your camera that will process only objects in custom depth pass (unless you need more than one, then stencils, and thats a bit different)
hi @desert comet thanks for the help
there's a cube mesh there that is invisible. We can see where the sphere and the keyboard actors are overlapping with it though
i would like that effect of "lighting up" to only happen when the invisible cube mesh is overlapping with the sphere, not other things
i hope this explanation is better than my first 😄

Lol i dont follow
😄
maybe i should just say in gameplay terms what is happennig
the game is like volleyball/football - the left and right side of the keyboard are goals

so when the ball falls off the right or left side of the keyboard, i'd like it to "turn white" like it is passing through a holographic goal/wall
Use overlap events?
thanks
does anyone have any good tutorials/resources for water/fluid simulation?
Fluid sim is not an easy subject, but there's few paid, ready to use, 2D fluid sim solutions on marketplace
this is for a university assignment so i can't pay for assets :/ thanks anyway though
i managed to get a reaction diffusion sim working in unity and i've been trying to transfer that over using render targets, but no luck getting the system working yet
You might get some luck with HLSL and compute shaders, but it's rather complex to learn your way through the render graph (RDG), I don't think you can make it in time.
i've managed (i think) to translate my shader code into the node graph, but now i have multiple different materials i don't know how to apply them to render targets in a functioning way
i think it might be an issue with reading to and writing from a render target at the same time
Hi! Wondering if someone could help me with making a dust system that is low to the ground. Like in a desert enviroment
Similar to this: https://www.youtube.com/watch?v=O9ebflFNaZQ&ab_channel=VFX4Game

This package provides a good variety of Dust and Smoke particle effects in the Unreal Engine.
please for more information check the link below :
https://www.unrealengine.com/marketplace/slug/57ef614f42374aa29862dfbbb4daa6ab
@patent heartlook at the valley of ancient demo it has great desert dust system
IS anyone aware of why exponential fog is being emissive even if my emissiveness is totally 0 ?
This?

cause I've already enabled it since ever
oh well, that did the trick. Thanks mate 🙂
do I need to be using unreal 5 to copy the dust system to my project?
Hello guys, I'm pretty new to unreal.
May I ask you for a help? being know nobody to ask.
I want to recreate this fx in the water system of unreal. (https://youtu.be/MGo-wX09iK0)
I think the only thing I need to add is an emissive in the foam material, yet don't know where to navigate being the plugin is very complex.
May someone help me? thank you for you time 😄
@patent hearthow else are you gonna copy, also if the niagra system they use in ue5 is more advanced it may not work on your project(depending on its version)
Has anyone else had an issue where GPU Sprites emitter doesn't show in front of mesh data emitter and you can only see the GPU Sprites emitter from a side view?
hey guys I have a problem with a ribbon emitter behind my vehicle. As the speed increase, the ribbon starts to flicker at the spawn point, why is this happening? Spawning more particle doesn't seem the right solution... hope someone can help
Hey how can I get my guy to squirt a stream of blood from his eyes?
@celest birch blood often isn't blood, but rather transparent spritesheets + rendering tricks
Alright, and what about making it in the shape of a stream?
Not sure what you mean by stream, mock it up in paint real quick?
Basically just think of when you're peeing
It goes in a straight line
Sometimes arcs if you point it upwards
But runs out after a bit
You know
Only here it's blood coming out the eyes
There a way to simulate that in Niagra?
Is this a visual effect or a gameplay one too?
Niagara is crazy powerful, more a matter of how quickly you can get familiar and productive with it really
Both
My guy is supposed to squirt blood at enemies to disorient them or to fill up canisters
Things like collisions are typically ignored with visual effects, as doing so lets you keep them on the GPU only and gain performance.
If you have to check collisions, then it needs to be have physics/gravity, and it's a projectile essentially.
I see
AFAIK you can do it with Niagara pretty sure, but look up how people typically do things like arrows or grenades, and that may well be a tidier solution here too.
Alright
Has anyone successfully combined a skeletal mesh with a custom ray-marching shader? I want to prototype a monster that melts into walls but I have only had luck raymarching simple stuff like spheres 😬
@native pollenTheere is no correlation between skeletal mesh and raymarching
Anyone know how I would create a particle material that is glossy with the appearance or reflections even if they are fake? I am trying to make something that looks like water or blood in space, which but have been unable to get the desired effect.
Hey guys, does anyone know how to stack and play multiple particle systems? Or do I need to look into blueprints for that
in niagara you can stack emitters in system
in cascade you only can migrate the contents in to another emitter, or use BPs
Oo, understandable. Do you know any videos showing how should I plug an input that triggers the emmiter?

there are 2 options activate with reset, or use particle event

don't forget to disable destruction on completion
@analog onyx Thank you sir, Camera offset did the trick

Question I am assuming that Cutout texture File Assets for the Sub UV module are compiled and not accounted for at runtime? Wanted to understand the system how that works. Assuming the texture sample is used for generating the clip geometry that is stored to be as an optimization for the particle cards..

I generally use very small basic shaped textures for this. you'll pay a little for the additional verts and iirc it does load the texture, but that cost pales compared to the gain you get from not having as much overdraw.
Use the same texture as you render and you have already paid for it
Agreed the reduction of overdraw is a hugh gain... the verts in our case is essentially free for our target platform. In our case the source texture sample for our subuv animations are using all the channels....we have glow, emissive and albedo separate from our opacity channels so was considering of using a separate simplified texture for the cutout masks similar to your suggestion.
if you can (like Glad pointed out) def use the texture already used, as you can tell which channel of the texture will be used for the cutout. if you cant, a tiny 32x32 or so texture can do the job. no need for mipmaps either.
Ah i was not aware you can designate which channel uses the cutout function.
Hey everyone I have an issue with exposure. I want the exposure to adapt to the sundisk so that when the player is looking at the sun, the stars are not visible. But it seems that the sundisk is getting ignored. In the image you can see that when the sun is in sight but the ground isn't the stars are still visible.


@celest birch look up beams for what you want thats usually how that is done, a beam from front to back, spawn FX, Impact FX, and FX for going down the beam
Thanks
Hi guys, assuming I don't need to change parameters at runtime is it better performance to write a shader, or pre-bake it into animated texture?
i think there's some slight gain by hardcoding it since it wont change
How do you read the height on a terrain in a material?
Sorry I think wrong channel
Or is it
Hey everyone its a few days that i have been stuck on this problem and i really dont know how to do it, i basically want to create a sphere that has a "negative color" effect in it. Im trying to use PostProcesVolume to do this but the only problem is that the camera also has to be inside the volume to make it work. I also cant use "unbound" because then it would add the postprocess effect to everything not just whats inside the sphere. is there any way to postprocess only whats inside the sphere and making it visible even if the camera isn't inside the volume?
You can try working the pp woth custom depth then enable that on the specific objects. This allows you to "assign" the pp effect since it will only show up on objects with custom depth on.
i already googled for help and found something that said something similar, i already activated "Render CustomDepth Pass" on the object but where can i activate it on the pp?
You get the scene texture and change it to custom deoth
do you mean this

Thats not what i was referring to but it might also help. Thats specifically for translucent models and not ppm
the problem is im not using a meterial for the pp im only using a color grading LUT there isn't any custom depth setting there
or maybe im doing something compleately wrong, its the first time for me working with this
i basically just have this

Well im referring to a node not a checkbox
I believe its called scene texture or maybe you can find it by searching for post process
Think it would need some kind of ppm setup though since its for a specific object to have the effect
i have no idea how to do that like i said its my first time using pp or textures in general
but basically with custom depth i can apply this "negative effect" to everything that is inside the sphere and see it even if the camera isn't inside the pp?
Hey, this might be the wrong place but I was wondering if someone knew how to disable a particle system that was launched by a "Play Particle Effect" notify from an animation montage. Stopping the montage instance doesnt seem to do it (only for timed particle effects), and I dont see an obvious way to get a reference to particle effects spawned by "Play Particle Effect" even if I have a reference to the animation montage instance
What's the Cascade equivalent of Niagara's Spawn System Attached?
I think the nodes for cascade are emitter or else particle system
So the new water system... I cannot get foam to work on ocean water
I wanted a gradient with the blackness ending on the top and bottom. This is how i achieved that, Now, i need to pan this gradient up and down?


I tried a sine, and it does move the gradient up and down except once the gradient is out of the 0,1 uv space, it goes completely black. I'm basically trying to keep this 'gradient' tiling and just just it up 'pan' i have no idea how to just 'pan' this though?
add time to the tex-coord, frac it afterwards.

That worked. TY luos, Could you explain what the frac is doing and why add the time where you said to? I'd like to know what these changes are doing so i can learn for the future.
sorry, was having dinner @vast fractal
adding time to UV is like panning, you are slowly adding 0-X to the gradient of U and V, which results in panning.
the Frac only outputs the fractions of a value, so 1.11 = 0.11, 4.23 - 0.23, so in this case it will loop from 0.00 up to 0.999 and then repeats itself.
I've imported a motion tracked camera from After Effects> Blender> UE5----is there a way to view the original video clip in the Unreal viewport as a background video?
So I can move objects around as needed using the video as a reference?
How you can orientate a particle mesh to the direction it is moving?
I've tried setting PSA to velocity but that doesn't seem to work
the particle still remains orientated in world space to a certain direction and never changes
Maybe a simple question, but what's the proper way to model (or UV) a disk/ squashed sphere to avoid this:

Unwrap the UV along the horizontal hemisphere, not the vertical hemisphere.
roger, will try
Though admittedly I forgot the correct words for circular math 😵💫
Ty, @unreal thorn got it working
also did some additional hidding by masking the center with a gradient hahahahaha
How can I fake a black-fade with camera post process settings? :o
simpler to fake a fade with a fullscreen image widget
Nah I've found a setting that does exactly that :o
Global color gradient gain to be exact
How can I make the gradient in my material rotate on the y axis? Rn it looks like this

I want it to look like this

I cannot for the life of me get it to rotate correctly
depends on uv no?
I think so?
im asking
does your setup depend on uv?
and maybe a picture of the material nodes setup

This is what I have right now, I've tried rotating it but nothing has worked
In blender, this works just fine

what do you mean you tried rotating? the mesh? Or did you swap the mask from R to G?
With the custom rotator node
I'm new to Unreal's material system so I'm kind of lost on some parts
well try making your mask G then lol

you shouldnt need a rotator at all
texCoord is two gradients, one that's horizontal and another thats vertical
R = horz, G = vert


It works on a plane just fine, but I'm using a cone
tis why i asked about uvs
one should work based on cone uvs i assum
or else you need to revise your Cone's uvs
Yep this was it

Thanks so much man
I appreciate it
Hey, how would I go about making a small Atmosphere . Is there like a volume for a sphere or something?
Sky Atmosphere, but reduce the planet size down.
Does anyone know how to make super obvious light shafts that stop on walls
Like cartoonishly so
Hello, i'm trying to create a Air Bubble you when you are underwater. I followed some examples, but they all have this Seam in them that just doesnt look right. Any ideas how to fix this?


Why not fake it with sprites?
Would it be advisable to use lights from Blender for an object or should I just import the object and use lights from UE4?
I don't think you can bring lights from Blender through FBX anyway 🤔
OH, well that solves that conundrum. xD Thank you! :)
for the scene it has to interact with an object
I can't see how it's still can't be faked with sprites, as IRL air bubble bursts as fast as a blink of the eye.
well its not bursting
but i will look into sprites, havent learned about that yet
but tbh im more interested in fixing this problem because i would be able to use it in other projects
@celest birch if your sphere is unwrapped properly it should work, but only if the texture tiles at the begin and end. so multiplying by a value of 0.1 wont work, 1, 2, 3, etc will work.
else forego uv's and find other ways to apply gradients to the mesh and use said gradients as uv's.
Thanks that was it!
I replaced the noise texture and normal map i think they were maybe not tileable before, and set the value to 1 now it looks a lot better.

hi there, How can i scale my mesh by distance in world position offset?
Here, i made a spiral deformation and a latteral offset but i can't find a way to scale the mesh by distance to camera.
Any Idea?


hello, does anybody know how to project a normal map in world space? I would like to have a pbr material projected down z axis, and so far im using r & g of world position for uvs but when I do that the normals break. edit: solved. used the transform vector node with source set to world space and destination to tangent space for anyone else wondering
Can anyone point me to a decent guide on the proper way to deal with preloading my vfx so when my character activates his abilities the initial activation doesn't cause that little lag Spike that happens while it loads
work with soft references (or put the particle somewhere in the level lol)
I thought about just making an actor that hidden that just fires off all the effects on level load just to have them in cache...but that cant really be the way this is handled...
it can but it sounds hacky right? ive seen it in some games though
good example is Sonic Boom - they didn't even make them invisible, just put them under the terrain
Yeah ild rather have a second more on my load screen if it means smooth gameplay
what do you think would be the way of achieving this effect? right now in motion it doesn't really look good

this is just a normal particle effect on the head socket
but when moving it takes a bit to follow, I'd like it to be 'stuck' to the head
so always moving with it
Make the particle movement in local space
(I forgot the setting in Cascade tho)
literally love you right now
tysm ❤️
Whenever I use soft references my game hitches when it loads it
hi everyone, For LOD 0 i set 0 distance and i don't know why the smoke completely disappears when I'm closer
it should be the other way around

would I come to this channel for help with lighitng?
Hello guys, is it possible to create this kind of effect for the player camera/viewport using post process materials?

desaturating? sure, that should be simple
Half de saturated half not, that's what I want to achieve
you can mask using the uvs
get the U coordinates, subtract by -0.5, now you have a -0.5 to 0.5 mask, ceil and you have a 0 on the left and 1 on the right half of the screen
I will try to create it, thanks for the initiation
sorry for the disturbing, is there any tutorial or article where they do this type of things?
hm.. i guess check on what uvs are https://www.youtube.com/watch?v=sR0xV0TDvS8
but if you just want the results:

hey
can someone help me break down a vfx im trying to recreate
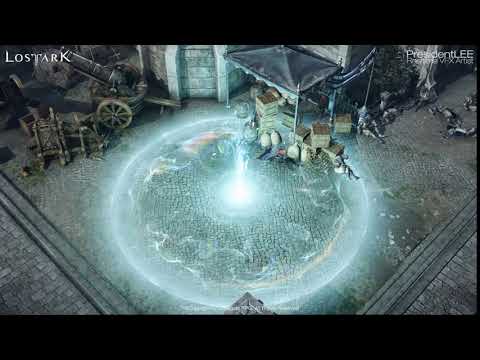
I organized my portfolio while leaving the company.
I made all the effects except the character and background.
Working on this project, I enjoyed and grew a lot/
Thank you.
™&Copyright ⓒ Smilegate RPG. All Rights Reserved.

what creates these extremely fluid noise patterns?


it seems that they repeat, so likely a noise texture
but where do i even look to create one like it?

I'd like to recreate conways game of life as an unreal shader
What would be the best approach to draw to neighboring pixels by a simple ruleset like that?
Im not even sure where to start haha
Compute shaders, in HLSL/C++
Seems like a simple plane w/ translucency to me.
Niagara
yeah that much is obvious, its the natural look of the wave formations that seem difficult to get right
it has a sharp edge then a soft edge towards the outside
and the scrolling effect is pretty spectacular
Hello everyone, so I achieved this effect thanks to @lone wing

using this post process material

my question is it possible to use different materials for the same actor in each half ?
Does anyone know how to fix these artifacts?
look up chromatic aberation, looks like they're panning a noise texture and gradient texture to control its spawn and break up the look
Hello guys. Does anyone knows the use of the small screen showing on the plane in the image? It’s the camera view but what’s its use.
Image is from the following video :

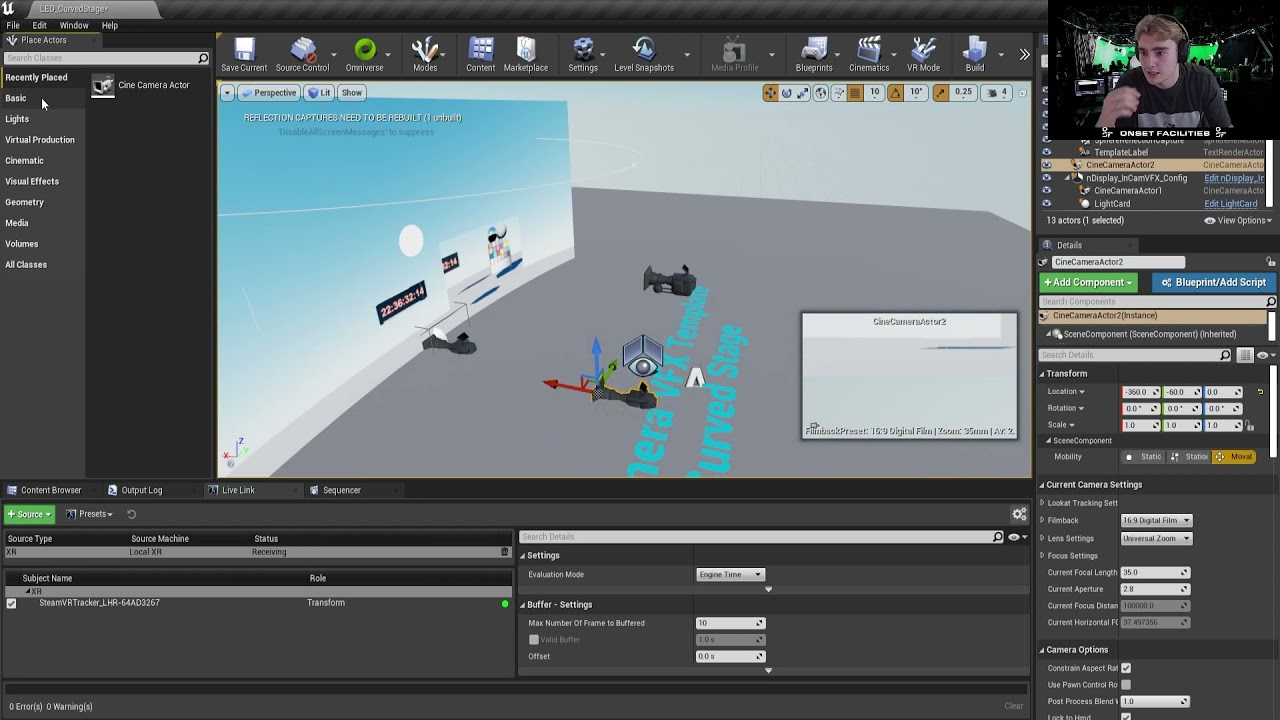
Vive Tracker Set-up in Unreal Engine 4.27 for nDisplay, real-time compositing and AR.
See the article below for a full XR plugin breakdown: https://onsetfacilities.com/vive-livelink-plugin-unreal-engine-4-27/#more-7773
It’s a part of incamera vfx
What is masked translucency? I google it but don't really come up with the right thing. I just get results talking about the blend mode on materials?

Masked "translucency" = either visible or completely invisible.
Dither Temporal AA attempts to fake partial transparency by making it noisy on screen space, and let temporal antialiasing smear the noises
ohh okay I think I get it! Thanks! I'll try to play around with it or find some examples
Examples would be simple enough, like cutout part on cloth or dithered transparency on hairs. Masked translucency is binary visibility, so it can retain PBR properties, unlike the blended translucency
most opaque stuff uses masked, grass, leaves, rocks, etc.
Also keep in mind that blend translucency is more expensive to render than masked transparency
Hello. I'm making a projectile trail. Basically a smoke trail that spawns long meshes. I'd like the meshes to be oriented towards the direction the projectile is moving. But in cascade I can't seem to get that to work. The only thing that makes the meshes rotate towards a direction is PSA velocity. But there is no real velocity inside the particle as the particle is on the projectile which is flying through the air and obviously has a velocity, but the particle doesn't know of this. How Can I make it so the particle uses the projectile's direction of travel as direction? Or simpler yet, when placing the particle in the world there is a green arrow that indicates it's direction. How can I align the mesh inside the particle with that green arrow?
Sounds incredibly straight forward yet seemingly impossible to achieve in cascade 😅

I can set the particle emitter to local space and that works, but then my smoke doesn't linger as the smoke is then glued to the projectile which is of course not what I want either 😦
I'm not sure whether I am in the right channel, but... I feel the white is way too white-y/saturated/vibrant - any ideas how to improve it?

https://www.youtube.com/watch?v=JeMjX1nwUAY&ab_channel=МариянФилипов
sorry for the poor video quality, but can anyone point me in the right direction for recreating this effect? a cubemap/skybox using what looks like screenspace uvs or something?
i've been searching for hours, but not knowing exactly what to search has me coming up empty

Question: I have a VR menu, I wish to see the menu even through objects. Done, no prob, however now I can't see my hands. I tried doing a stencil or depth pass but still can't see my hands when I wave them over the menu. Any resources or tips?
Has anybody had any luck using dynamic lighting in an open world but with darker interiors? Like dark enough to need a flashlight but come outside to a sunny day kind of thing...
No baked lighting
Yeh thats what I was worried about. Bit of an issue when looking back outside to see no skylight though. UE5 has Lumen which seems to handle it properly but no options for UE4 I suppose
Yeh, not always possible though. Too much of a limitation
Yeh I tried the raytracing option and yep, performance suffers so I'll pass XD. I'll try that 0 bounces thing. Yeh UE5 Is my only way I guess. I hope it has something stable real soon
Hope so! Thanks for the help
can someone help, how do I break the shapes on my FX, my fire looks like a cylinder. How do I break shapes? using niagara

add more slightly rotated cylinders maybe instead of one? (Not an expert here)
use velocity aligned sprites with an offset of 0 in the uv instead of the standard .5, spawn those in a cylinder with a flipbook material
or dont generate in a cylinder, but then again i usually use cascade where you just spawn a bunch of planes with velocity
you'd still spawn the sprites using a cylinder shape to make a ring of fire...
Guys I have this one material function node that plugs straight into world pos offset and i want it to affect many different materials, what is the easiest way to apply this to the materials (like 50)?
I need to size Niagara emitters to match the sizes of various meshes. Is it possible? The meshes are actually VAT RBD chunks, so I could create a texture that includes some size information, but I'm not a Niagara person so I don't know if Niagara can read texture files, maybe it can use the UV of the spawn point on the hit geo?
Anyone handy with particle ribbons? I need to find a way to stop it thinning to nothing when the wheel skidding is moving horozontal

Only thing i could think of is to swap to decals at a certain point and then back again
I'd use decals, just less headaches. if you need to use ribbons though their should be a way to orient the ribbon to always face the y axis and thus always be flat
anyone know how to get a reference to a Niagara system which is spawned in with a anim_notify BP? I have sword and at the end of the attack a lighting system is spawned but I can't get a reference to it, to change its variables.
Ok guys is there a way to run shadow calculations AFTER world position offset? In my game it looks like it is doing it the other way around and it looks weird since the shadows are wrong for the displaced geometry.
Noob question, I'm trying to understand why cel shading tutorials say this gives lighting. Why is it division instead of subtraction, is light not additive? And what does the diffuse map actually show, 100% diffusive reflection at some pre-set light constant?

cel shading tutorials say this gives lighting. @worn gorge I doubt that tutorials say that.
https://www.raywenderlich.com/146-unreal-engine-4-cel-shading-tutorial calls it the lighting buffer, a youtube tutorial calls it the luminosity map

raywenderlich.com
In this Unreal Engine 4 tutorial, you will learn how to use post process materials to create a cel shader.
Heh gotta give Tommy a slap for calling it that way.
If you want to phrase it correctly, difference between lit scene and diffuse color gives somewhat good representation of total lighting value.
"Difference between" still sounds like subtraction to me, i guess both are valid but division is more useful for cel shading
But what does DiffuseColor actually show, a 100% diffuse reflection for some preset light source value? I don't think it's the maximum brightness
Don't try to give what is shown in tutorial more meaning than it has.
It was just artistic path of getting there.
Yeah i just wanna understand the techniques for educational purposes, so i know how to use the components myself
treat it as "dividing greyscale lit scene by greyscale diffuse color in some cases can give something that looks like lighting". No science behind it.
Okay
Actually now that i remember it, the youtube tutorial that started my path down this confusion called the "true luminosity map" which sounded important lol
@drowsy lynx hey bud, this kinda stuff kinda goes in #released
also, great work, im really amazed and humbled by the result :)
@fossil swan thank you for the hint, i moved it. thank you! ❤️
I was just randomly scrolling the channel. This tutorial is gold. Thank you for sharing.
Np
Would flickering lights be done with level sequencer?
This should be really easy, but I don't know what I am missing. I want to spawn a single particle through blueprint, using cascade, but no particle spawns. The location vector parameter works if I let the PS spawn particles constantly, so why doesn't the actual spawn scalar parameter work?

I have an interesting issue. I have a simple Laser particle effect. I'm using a user defined variable for the "Beam End", that I manipulate with blueprints. So for the particle effect without the blueprint, the default value for Beam End is 0. This works fine, when I play the game the laser gets redrawn and it works. The problem is in the editor, the laser gets drawn from the Blueprint location, to world position 0,0,0 and make my editor really messy


So in the Editor I get this mess
which just makes it hard to see. I can of course hide this actor's visibility in the editor, but that's not a long term solution for me
I should have worked more before asking
I did this:

I think that should work
Can be done in BP randomly.
Just set the intensity with random float in range every tick
Ah thank you! :)
I'll freely admit to being a novice in this region, but what is generally the preferred method of doing a post process material you want to use/have available to affect the game near constantly. I have 2-3 marketplace assets I'm hoping to merge but they have 3 different ways of doing post process materials:
- Everything all in one material with different parameters
- Every effect as separate materials
- A series of material functions controlled by a material parameter collection and applied to various materials as needed
3 seems to be the smartest, but I don't want to let perfect be the enemy of good or overcomplicate matters needlessly pursuing "optimization"
Feel free to @ me
Depends on the effects in question and how different they are to each other, but I personally go with #2, as it's not cluttered with unnecessary shader instructions
anyone got a lead on how to create cloud trails?

hey guys, could I ask, I noticed there is a Unreal LensFlare editor in UE3 and I was wondering if something similar exists in ue4? because I like the lens flares in ue4, yeah sure, but I want the sun to be more cinematic with like sun rings and stuff you know
oh, I can do stuff with sun in niagara?
You can place a niagara system there and that gives you a full editor to work with
well Idk actually how should I do this
I never worked with niagara xd
I'm an old school cascade guy 😄
I created a smoke material and when I put the material in a particle, it flashes or gets brighter during the lifetime of the particle. In the preview for the material there is no flashing. I'm confused why it's doing that. How can I fix that?
If I wanted to have a weapon leave a continuous mark everywhere it hits, what's the best way to do it?
I found fix - rotate the particle system components according to the angular velocity of yaw
hey guys, I would like to make a volume in which nothing is rendered. could you point me in the right direction? could I use something like the SphereMask?
I would like to make it so that the volume doesn't need to know about the position of other objects, it just hides everything in it
Hey Team,
How can prevent transparent items from rendering on top of volumetric clouds. Can't see to figure out any way for the stars to be behind the clouds

How do you even render the stars?
Pretty sure the material has to be checked as sky or skydome so that fog/transparency ignores it - if you got that already then i dunno
If the stars are actually post process effect, then it might be the reason why
Hey all just woke up.
Stars are on a sphere, material is translucent. Enabling IsSky does not change anything , cloud density does not change it either .
I'm not sure what you are referring to about cloud fogging and render target mode. Are these options on the main material tab?
Cloud fogging didn't help sadly. Trying to look into RT
I'm a beginner, how to make the texture not transparent at all? i am doing the decal


I want 0 transparent but when I do it, instead of showing the icon itself, it shows also the background
thanks 😄
@grim briar Increasing the density does make the clouds appear "darker" against the sky but still transparent.
Tried making a new super simple, opaque, IsSky material and still having the same issue.


No the material is a large sphere. The white ball is the "moon" , sky atmosphere index 1
And that's just a transparent, unlit material applied to a sphere or are you setting up your stars in a different way ?
Really appreciate your help
Where?
in the particle system (cascade right?) should be in required
hey guys, this is the first time this happened to me, the sun BP seems to have some kind of blue circle and if you go under it, the sun looks normal but when you go above it, it looks so weird

and under

maybe I messed up something
and also the sun is blinking and it's hillarious
Hey, so I hope I’m in the right place. But I have this scene where I have multiple televisions with different video clips on each one. I set up Event BeginPlay and used a sequence node linked to Open Source nodes referencing the videos. I can still only play one video at a time and I have no clue how to fix it. Any ideas?
Has anyone found a work around for the Volumetric Clouds VR issue? (clouds only being rendered corrupted in one eye)
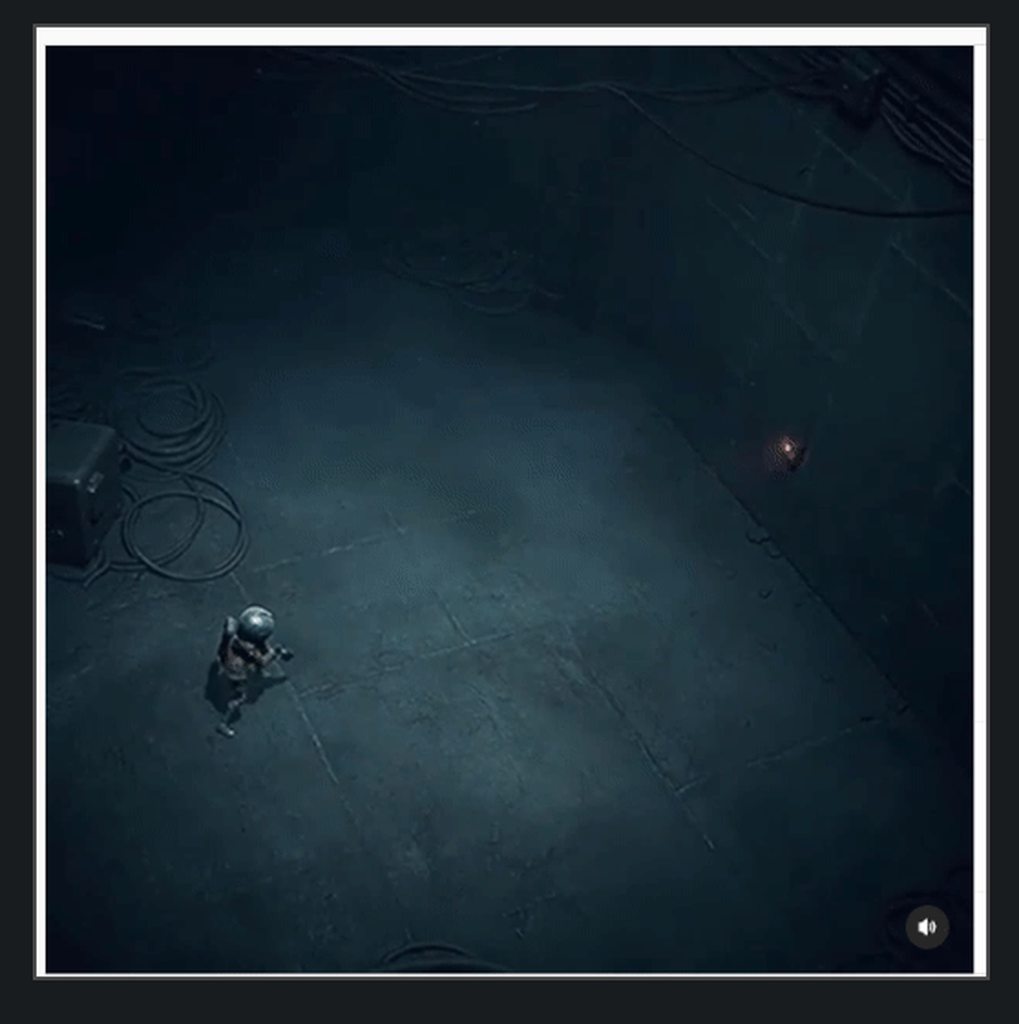
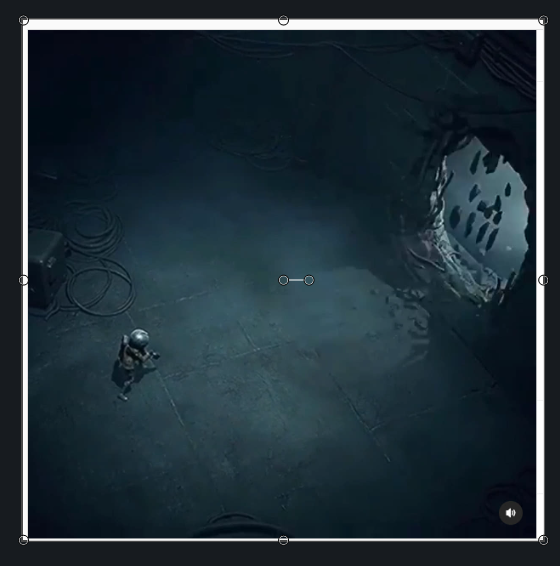
https://www.instagram.com/p/CIX-bPXDPUX/
Curious to hear what people think how this was done.
UE4.
Slow Mo:
https://i.imgur.com/BaaN5IE.gif
Frame by frame
https://i.imgur.com/UYGGoHU.png
https://i.imgur.com/F5i0dbz.png
https://i.imgur.com/hDm0u9g.png
https://i.imgur.com/hi8ijTH.png
https://i.imgur.com/4OA5qaI.png
https://i.imgur.com/PrNMuHC.png
I guess RT masking to remove wall planes, and then to close sides by spawning new models to cover up those sides (I think I saw similar stuff in Rainbow Six Siege).
Some pieces spawning in the middle + debris particles, etc.
Not sure if there is some VAT animation there.
Explosives are useful for finding new paths. Footage from a new scifi action adventure we are working on.
Likes
1690
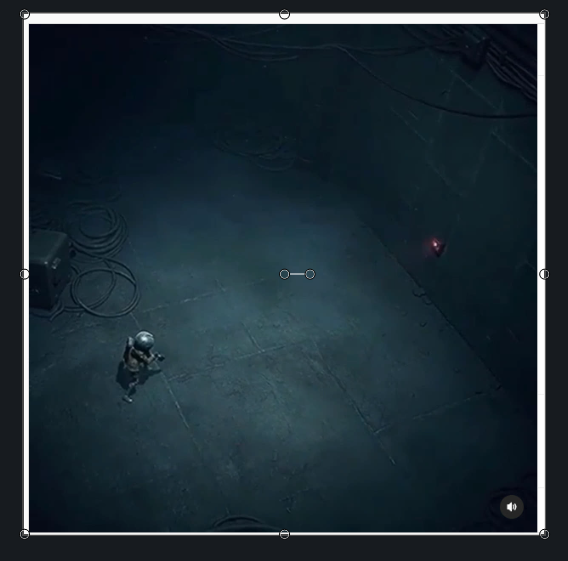
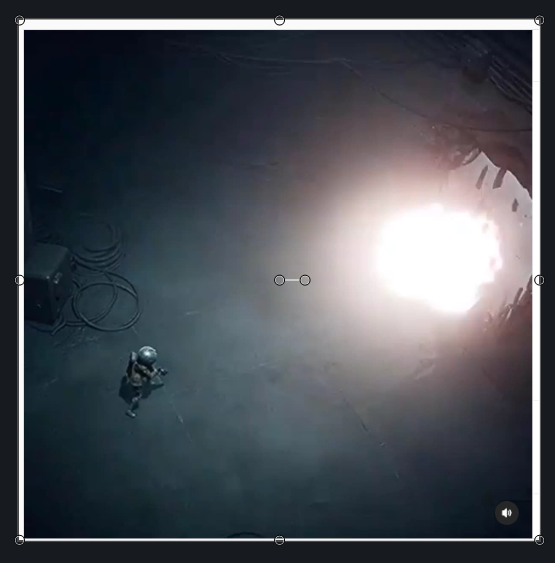
One frame meshswap and like 10 particles spawned.
Your mind is adding things that's not there.
Or are you saying the game allows you to do these holes wherever?
So you are saying, lets say, he placed the bomb in the middle of 4x4 wall. And then after explosion that 4x4 wall module was swapped with the one with the hole?
I am assuming this because I didnt notice character placing it on a preset location. I saw the bomb 1st snapping it to floor, and then to a wall. So by that logic it seems like there are locations on the wall where you can place it, like it would snap every 4 meters?
Have you seen more than just this clip?
In this clip, a character runs up to a preset location, and it gets swapped out.
Where are you getting the snapping idea from?
https://www.instagram.com/p/CIX-bPXDPUX/
Not more than this.
Explosives are useful for finding new paths. Footage from a new scifi action adventure we are working on.
Likes
1691
Then you are expanding the idea way beyond what is shown
So, what would happen if I run to the wall like he does here, BUT, I move my character a bit to the right.
What do you think?
It won't let you place an explosive
Yes, that is one possibility.
The reason I asked this is because I am doing something similar, but I want to remove walls more dynamically.
That's not similar 😛
Well, similar, as in, blow a hole in a wall that looks similar to this, visually 😛 .
If you are trying to get it into a game, simplify, fake and cheat.
I say that as someone who has worked with a bit too much destruction.
Yes, yes. I am looking at all tricks how to fake it 😄 .
That is the basics really 😄 .
Ah, ok. Ok cool. Theeeen... Let me ask you this. Maybe you can give me some suggestion/pointers;
Lets say I have a projectile, top down shooter like camera (3D), projectile ricochets, and when it hits the wall, it blows the wall in that area.
There are few ways I am thinking of doing it that I can share,
but first I'd like to hear if you got some suggestion. I'd appreciate it 🙂 .
Precut everything, find the x nearest parts, spawn dust on all of them and remove the part when hidden.
spawn some rbds if you feel really fancy
Precut everything
Can you elaborate on this one? I am not sure what you mean by this.
Don't try to dynamically create meshes.
Make a wall for example from a bunch of small segments
The tricky part is placing the edge meshes around the outside hole
Sorry, not used to that word.
spawn dust on all of them and remove the **part **when hidden.
Ok, now define word "part" .
And we are thinking similarly now. Go on.
👍
Thanks for the help anyways!
Hi everyone!
I hope this is the right place for my question...
The problem I ran into is that as soon as i switch the UV coordinates to screenposition the shadow from the alpha of the video disappears.
Am I doing something wrong or it's just not possible to get shadows with screenposition UVs?
Thanks in advance!
hey guys, how could I set up a material or particle system that way that if I stop looking to the center of the particle system, the emitter is going to dissapear
Give it fixed bounds and make them small
I feel like I'm likely setting myself up for failure by continuing without addressing this issue....

Didn't intend on using lightmaps, don't even know what that is really tbh.
lightmaps are textures which are created when you build lighting. this way they are stored as fixed data than being calculated realtime. If you dont plan to use baked lighting, then change your lights from being static. Models need uniquely laid out UVs to receive the lighting information. The error is stating that your models have UVs that take up the same place, so calculating lighting and writing the data to texture won't turn out correctly.
but if I don't particularly care if the lighting is accurate or not can I just ignore this and the game will run fine or is it something I should do something about?
Realtime lighting can be more intense because all lighting is calculated as the game runs. This matters if you use a lot of lights everywhere and is what baking helps to solve. If you are doing outside lighting where you just need sunlight (a directional light) then thats fine. One realtime directional light is fairly cheap.
Ah, okay, my game's entirely indoors so I better look into getting some lightmaps lol. Thank you!
Lol yes! That sounds ideal. Unreal can auto generate lightmap uv btw.
https://gamefx.co.kr/bbs/page.php?hid=rinbanClass https://www.youtube.com/watch?v=5T3Sw37vMdI
Anyone know where I can find tuts like this in english?

이펙트아카데미-게임이펙트
[2021년 2월시작] 강의문의ㆍ상담 카카오1:1상담 :https://open.kakao.com/me/rinban 카카오톡 ID : Rinban 강의 난이도 : ★★★☆☆ 중급~ 고급 “언리얼 숙련도가 있어야 강의를 진행할수 있어요!” 이 강의는 “경력자의 언리얼이펙트 이직준비” “언리얼 이펙터의 스킬 …

Rinban GameVFX(FX) Class - Unreal Engine4 [언리얼4 - UE4]
Link : https://gamefx.co.kr/bbs/page.php?hid=rinbanClass
KakaoTalk 상담/문의 : https://open.kakao.com/me/rinban
KakaoTalk ID : Rinban
이펙트 전용 단톡방
https://open.kakao.com/o/gp6z6Is
참여코드받는곳(댓글신청)
https://cafe.naver.com/unrealfx/13510
네이버 게임이펙트정보 카페링크
https://cafe.naver.com/unrealfx
게임이펙트정보 커뮤니티...
Hey there, just wondering if anyone else has experienced this issue that I'm having with crepuscular/god rays. They're appearing in the viewports before lighting is built, but once lighting is built the volumetric fog that I've got in the scene to make the crepuscular/god rays appear, doesn't work and just shows the fog without any of the rays appearing. So I was wondering if there's a reason for this happening?
Dark Souls III has this interesting "ember shader" that applies to the character after defeating a boss and is camera angle dependent (also quite dynamic). I assume it is a kind of ember effect combined with fresnel? How is this done and does anyone know how to get an effect like this in Unreal Engine 4? https://3.bp.blogspot.com/-XnTS-N5WAlA/W9qEm43jP4I/AAAAAAAAB8E/VEeIis05xHo0CITB-T3Csn_fHZu_9zTgQCLcBGAs/s1600/ds%2B6.png

@faint crownJust a mask with emissive ?
i might be wrong but it doesn't quite look like its driven by fresnel
in terms of color it is just emission yeah
Surprisingly hard to find a good animated example 🙂
if it doesn't animate, the mask for the emission could just be made by an artist, or some kind of noise(?)
oh, you said it's camera angle dependent, maybe you are right about fresnel
You're right, it's probably only animated, maybe I just imagined the camera angle dependency... 🤔

might have distortion in the material to make it look animated
Alright, I'll see if I can pull that off 🙂 I would also like to know if I can combine a material layer on my characters with a fresnel effect or if there are any tutorials on things like this 🤔
Houdini sim renders VS Embergen sim renders (Fire/Gas/etc). Does anyone have experience with both systems? Embergen seems like it's easy to create flipbooks and everything built in. Just wondering if anyone knew the pros/cons of both? Houdini is great but I find it super complex to use just to get renders out, but I think it might be better quality?
I have only positive impressions from trying Embergen. @ornate python
More lightweight, intuitive, faster iterations.
Depends what you try to do.
I use both
Embergen is super quick and give good results.
It's however very limited when it comes to generating looping content.
Houdini can push a lot more detail if you need it.
Embergen is my main sim package these days.
Cool, yeah I used Houdini in the past for flipbooks but this Embergen seems simple and easy to get the textures I need
I can loop it using After Effects so that shouldn't be an issue... okay will give Embergen a go
I like the VectorayGen they got as well, seems like another simplified tool
Never found a use for vectorraygen
But the looping issues are more when it comes to counteranimation, following masking and turbulence.
Not really solveable in AE
I usually do a long render of sims, and after couple tries I can find a section where it loops well
it's not perfect loop of course
<old
So am I, but I pick up new tricks 😄
I don't use vectorraygen
do you use Vectors at all?
Not for 5 years or so
icic
But then I used Houdini.
I like how certain games use it when they do it well
creative ways to use GPUs rather than just sparks and big pops
I usually find it too expensive and static for what it does.
Now that there are Distance Fields, there are so many things that you used to use VFs for that can be built by simple math.
interesting, so you can plug that into particle system to do what vf can do?
Depends what you are trying to do. But it can easily direct flow, follow surfaces and so on.
Stuff like VFs were used to before (except noise)
do you have a video link where they explain this and show it?
I come from a proprietary engine and now switching to Unreal, pretty nuts how many things it can do differently.

This week we'll learn how to recreate several advanced effects from the Unreal Engine 5 demo. We'll walk you through the techniques and design theories behind the bats, insect swarms, and our recent position-based dynamics-driven popcorn sim: "The Kernel." This deep dive will cover spatial hashes, boid simulators, constraints, procedural generat...
Here's an example of DF avoidance
My effect system is making my assigned material which was a sphere into a square
anyone knows anything about this ?

I want to convert VFX from Niagara to Cascade , how do I do that?
I'm sure there's a built in plugin for Cascade to Niagara convertor (YMMV)
sorry. I mean from niagara to cascade
No.
Niagara have stuff that Cascade don't.
Does anyone know how to get my Sparks particles to show properly in Orthographic View? I can only see it when I change the camera to Perspective.
I even tried increasing the size to see if it would show
I noticed it's only when I Screen Alignment to PSA Velocity
When using an alpha channel, is anyone able to get an unpremiltiplied image?
If so, how?
most image editors should have the ability to premult/unpremult an image. I use houdini for this stuff and theres a node in there for it for example.
i'm trying to disable auto-exposure entirely, but it's still active. what have i missed?

Anyone active that can help me with the UE particle system?
I just want to know how to make a snow go through the whole scene
Just curious, I am modularly making levels, and the lighting is getting screwed up. Should I just do place holder lights for now and worry about the lighting later?
Hello All...so...I got a fire particle animation on the marketplace...but its really small in my scene. I tried scaling it in the scene of course and the relationship of the animation breaks, I tried scaling pre-particle, also breaks the animation relative scale, and I cannot find anywhere else where I can scale the overall particle scale. Anyone know how to change while keeping everything intact?
Heya! I'm looking to project particles onto a landscape. I was hoping to use a virtual height to sample the height to offset the particles vertically at birth but it seems like there's no way to sample a rvt yet in Niagara? Or is there? Then I found the LandscapeSample and the GetHeight function but I'm having a hard time figuring how it works. My niagara system is attached to my pawn and so is moving. It seems the landscape is picked up at first but as soon as I move it gets weird. Not sure what coordinates space is used to sample the landscape, or if it just broken. Any advices? Ty!
nvm! I was using an offset technique with the GetHeight but it actually returns the correct vertical position of the particle and you can just plug that in the Z position. Works great!
Yeah, for others: It didn't work with RVT in 4.26 but that was fixed in 4.27/5
bump 🙂
You can't scale particle systems.
You'll have to edit the individual parameters in it.
sigh that was my fear...Been trying to find a tutorial that can help with that...even when scaling individual emitters, I still am loosing the look of the animation, like its just scaling the particles, not the animation. I am obviously doing it wrong.
If anyone has any suggestions I would be very open! 😄
cascade or niagara?
cascade
anything velocity/speed/force needs to be scaled as well
so if there is i.e. a sphere location, and it has velocity scale, that needs to be rescaled.
initial velocity, velocity over life, etc
ok thank you! I will give it a shot 😄
I once had to do it for over 350 particle systems. filled to the brim with settings that needed rescaling.
at some point I just put it up on the job board as I rather spend my time elsewhere XD
dont remember the user, but think he ended up writing a script for it XD
Hey guys, do you know any good portal effect tutorial?
Hi all
Does someone have any tutorial for AOE attacks (like shockwave for example) please ?
Should I use a Mesh that I scale (like a ring) or only particles ? Or maybe Mesh renderer in particles ? I don't know where to start please ^^
Well, for starters, you can use meshes in a particle.
okay great thanks Makoto ^^
I usually use a ring mesh that grows outward radially, then a standard explosion in the center and then you can use wispy smokes as velocity aligned sprites that shoot out along the ground to help fill the area up without killing yourself with overdraw
Anyone know how I can grab volumetric clouds in a render pass to use in post-processing? Or write them to custom depth? Got a custom depth-based outline, but it renders on top of them. And I haven't been able to isolate the volumetrics at all, they don't show up in any passes
Hey ! Does anyone know if there is a setting for the physix rigid body solver globally ? Or is it only on the individual actors/objects ?
volume clouds are a ray marcher material, so they only exist at render time. You can find the material in plugin content, but to get them to blend with geo you will likely have to write some hlsl in there.
Hi everyone, I have a problem with flickering virtual textures in 4.27 . In 4.25 everything was fine. I tried to go multiple times through this tutorial but my snow 'dips' are still flickering. Any idea what could go wrong? https://www.youtube.com/watch?v=YwNJUTz2L-U&ab_channel=MarvelMaster
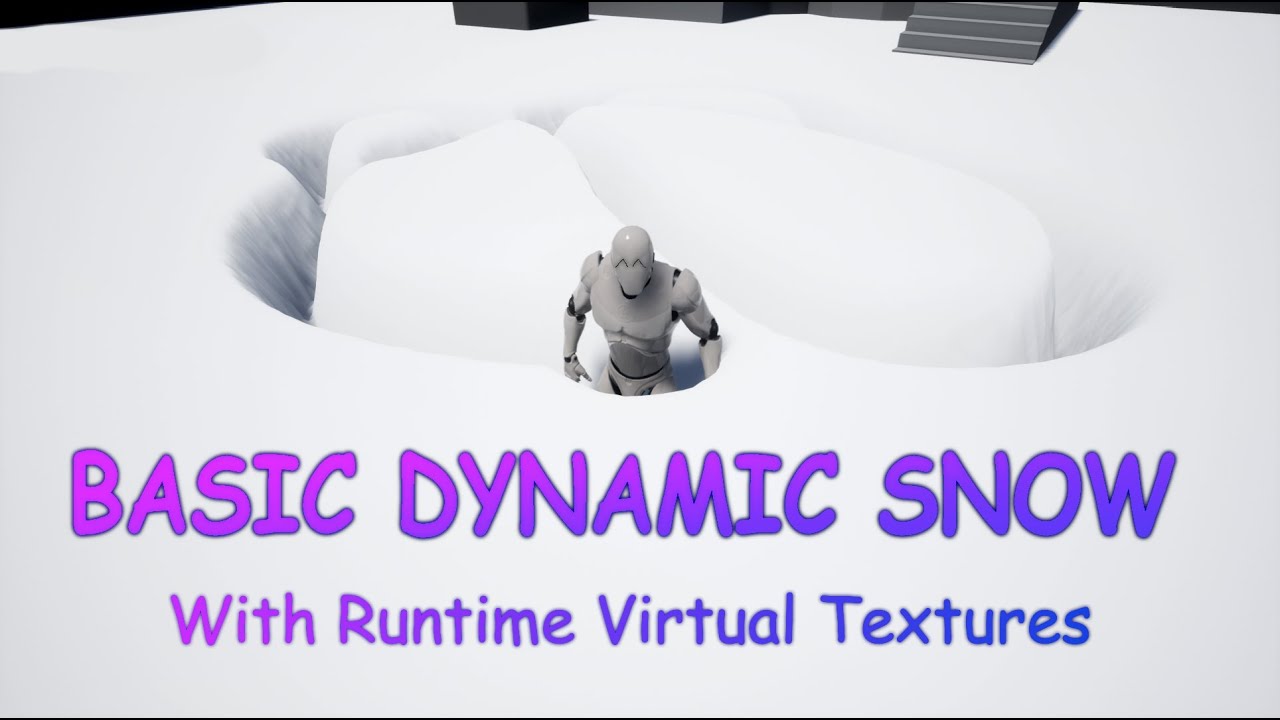
In this video I describe how to use runtimer virtual textures in UE4 to creaty a dynamic snow effect.
The Basic idea is by RP Monkey:
https://www.youtube.com/watch?v=jdi_37r1zcE
I wanted to make this Video 5 minutes long, but I decited to explain what I am doing so thats why it turned out a little longer :\
For Questions or suggerstions Just...
Hey all,
My apologies, I am not a shader guy at all, and I have a question.
I have a post process material that outlines occluded meshes if 'Render CustomDepth Pass' is checked off. This effect works great, but I want it to be applied to only select meshes - not every single mesh that uses 'render custom depth pass' (for example, I want one team to have their team mates highlighted using this effect, but not members of the opposite team. The meshes are included in other post process effects, which is why they already use the 'render custom depth pass').
Can anyone give me any direction on how this could be achieved?
Thank you!
@vale basin Check out this page, https://www.tomlooman.com/the-many-uses-of-custom-depth-in-unreal-4/ Tom has a bunch of tutorials for handling multiple outline categories. Check out his "Multi color outlines" example. In your case you could mask based on the different colors.

Unreal Engine 4 introduced a new depth buffer along with their PBR rendering system. It’s called “Custom Depth” and can be used for effects like the selection outline that is built-in the Editor, rendering of...
Oh amazing, thank you very much!
Yeah I messed with the material a bit but didn't get anywhere (can't write the info to any relevant buffer or render pass). In the end I got it working, but the only thing that worked was to recreate the cloud functions and settings in the post process material and project them to pixel world position - this creates the mask I was looking for
awesome! Looks cool, great work!
Thanks! here is how I'm using it - occluding the custom depth outline
if you haven't seen it, ryan bruck has a blog about exactly this:
https://shaderbits.com/blog/creating-volumetric-ray-marcher
If you look at the hlsl of the volumetric cloud material, it's basically the code in this blog. He shows how to integrate it with geometry.

Yeah I've read this! It's very nice and the cloud materials in UE all use similar techniques. But the problem I was facing is that there is no way to get a representation of the clouds in any PP render pass, so it is pretty impossible to have them represented in custom depth/scene depth in the traditional way
Opaque geometry is supported out of the box with clouds in UE now (with the correct setting)
It's actually really frustrating because these mats can ABSOLUTELY write to custom depth - but I can't find a simple way to actually enable the custom depth pass on the volumetric cloud component itself...
using a similar material on a geo that has custom depth turned on

Multi sphere trace at the location where it's spawning, with the same radius as the emitter's sphere location has. You can use those hits to adjust the location too if you want to push it out of the collisions rather than stop it spawning.
ah right I understand
in that case you should probably just use collision and either kill them or make them bounce off, or whatever
and to kill them to begin with, you can either predefine or dynamically create a volume and use an inverted 'kill inside volume'
should work on spawn too with interpolated spawning, but i havent tried so don't quote me on it.
thats what the 'kill inside volume ' (inverted) is for - if they are going to be outside the volume, then it kills them on spawn. You would need to set the volume size and location at spawn based on the room it's in (when you create the system in BP), which you could get in many ways. For instance linetrace in a few directions to generate the xyz min and max bounds, and center. Or predefine a bounds actor and check if the system is overlapping it. Then use the results you get as the volume shape, invert it and all particles outside the shape will be killed.
no problem! Good luck with it
Yeah I was describing the solution for niagara specifically
Does anyone know how to layer multiple textures in a Material Blueprint? I'm trying to layer different parts of camflouge so I can have control over every individual layer color. I tried but it doesn't look so good.

Lerp is usually pretty helpful
It works perfectly, thank you!

Would you happen to know how to offset the position of the textures so the pattern is less repetitious?
This is usually how i do it

you can also use a "panner" if you want it to move by itself
You're a saint. I'll try it out after work, thank you
is depth fade expensive in terms of shader complexity/performance?
As in oldskool fog? Not that expensive.
when i do this the normals rotate with the mesh,but at one point it seems to gimble lock and reset,is it something i did incorectly with the pivot painting or this

or is it cause the exported axis is incorrect
cause it's x and this is z
I’m not sure if this goes here or not, but I’m trying to find a way to make a collider , or something, that makes something transparent when inside or passing through ?
I am trying to create a smoke particle that expands out from center in all direction so it forms a circle of smoke particles in radial radius how can this be done?
Cascade or Niagara?
so basically one shouldn't put the pivot of the object,when you are rotating normals,cause they're -1,1
#facepalm
man i hate when i'm sleepy
Hello, I have a quick question about materials.
Do distance fields work on mobile these days? If not, is there a common solution anyone here knows for showing foam around objects floating in water?
Any advice would be appreciated. Cheers.
Is this the place to ask about Cascade issues?
They work on Quest 2 which is Android so a good chance they work on mobile.
Thanks TechnicalArtist.
is it possible to pass a projection matrix to a shader?
as four vectors would be a crude way
So, I created this little pattern using some math on the texcoord node. How would one go about "tiling" this pattern like a normal texture?

A workaround I found is baking the pattern out as a texture. But it would be nice to know if there was a simple math based solution
Tried a sine before the breakout?
is ue4 water sim plugin expensive for shader complexity/performance?
It's unstable (along with Landmass), and that's the real concern with it
yeah you have to rebuild a plugin manually to add simulated foam too
Hello. I have a question about distance fields.
For effects like sea foam around the edges of floating objects, is it possible to use distance fields via the DistanceToNearestSurface node? My material is rendering as pure white and I'm wondering if that's the problem. Maybe you can't use distance field effects for static meshes spawned during play?
Any insight into this would be appreciated. Cheers.

SARAMALACARA X EVAR X DAYVAN - GPRMX_170BPMA2 (Video oficial)
#SARAMALACARA #EVAR #USBIDOL
Escucha USB IDOL
https://bfan.link/usb-idol
Follow Saramalacara
https://www.instagram.com/badfacesara/
https://twitter.com/saramalacara_
Prod by Dayvan
https://www.instagram.com/dayvan1999/
& Evar
https://www.instagram.com/prodevar/
Video x J...
what kind of program is used to make vfx like this
Please do not crosspost without prior redirect.
what
It's the same question as that in #ue4-general, right?
no thanks for reading

scroll up a little in same menu.
Is it process Spawn rate?

yes, set the distribution of the rate to something different (depending on needs)
then play with the rate to spawn more/faster.

WTF is.. Cascade.
A short tutorial/explanation-esque series where I explain Cascade's modules.
Even though Cascade might be old news in a few months due to Niagara.. These vids might still come in handy :)
Thank you
Hi, is there a way of changing an object's color depending on the object's speed? For example: If an object is not moving it stays black, but if it start to move change's to grey, then if it's moving as fast as it can go it's white.
Like a gradient ramp depending on an object's speed.
put the speed into a material parameter collection, bring it into your material as a collection parameter, remap it from (min speed to max speed) to (0 to 1) then use the remapped value in a lerp to change the colour from A to B
Thank you
Hey fam when I render a prores sequence in render queue, all fx, procedural texure anims, and particles GO FAST like playing in FASTFORWARD MOTION in the final video. Normal animation is fine, just FX. Any idea what's wrong?
guys how can i write a material which is able to apply same visual scale even if two object's uvs are different
look into tri-planar material functions.
framerate of render does not match framerate of game?
many ways but if you mean texel density you can adjust uv coords base on object scale (multiply UVs by (scale of object divided by scale of reference object) in the material or in Maya/Blender/whatever.
Hey I am running into this issue where as whenever I add a new material to my animtrail emitter (cascade) it renders as black https://gyazo.com/d10f93938b4461f6d8b48708f0ca0573

(If I swap the material to another one I already use in Cascade this doesn't happen)
Is there something I need to hit to make it "render" or "bake" the material?
Note this happens with every new material, it's 100% not related to the material itself.
did you hook up the opacity properly?
I did, although your comment made me go and double check some things which eventually led me to stumble upon a random internet comment saying to try enabling "Used with beam trail" and voila, suddenly it worked!
Hello everyone. Anyone have any experience with RVT implementation? I have an issue with some initial set up.
Does anyone know the proper way to remove the smeared effect from decals when they are on walls?
This is what I have been using on UE5 EA2 and it works. I don't know why it works, but it works.
However I just upgraded to UE5 Preview1 and I noticed this part does not work anymore, or rather the opacity is turned way up so the material is barely visible

Here is the mask details

Does anyone know of any resources that would help me learn how to warp a mesh into looking like water through the material editor?
I thinking of world position offset but I'm just not sure how to make it warp like a fluid using that.
Hello everyone! Im running into a pickle with creating a volumetric material in 4.26
Im getting this error.
[SM5] /Engine/Private/VolumetricCloud.usf(118,33-53): error X3018: invalid subscript 'VertexId'
has anyone run into this?
Hi there someone here uses Houdini ? Got a question about exported files to the actual engine plugins
Can I provide different LOD to an effect depending on what pawn the player is in?
like at ground level when the player sees my fire effect its great with the landscape and smoke environment, when they are flying in the chopper I'd like them to be able to see the particle effect from a little further out
I achieved some of that by following this tutorial:
https://www.youtube.com/watch?v=OFmWEIb_Z70
I did mess up some values, can't remember what excactly but had to do that you couldn't use half values, if that make sany sense. I'll try to find the thread.
edit:
Here is the link to the thread, it should also have a matrial bp layout for you to copy and try out:
Hey all. I have a situation where I have scene elements hovering over some terrain and I want those elements to always render on top because the terrain will likely have places that will intersect due to height. There seems to be no simple way that I can find anywhere. I've experimented with a post process material using the CustomSceneDepth like everyone does online, and I'm able to isolate to parts that are intersected. The only problem is that it only seems possible to fill that in with a solid color because the SceneDepth passes only contain grayscale data. Is there a way to get the color data of the occluded object underneath so I can output that rather than the solid color?
This is the material right now.

This is what it does. That widget is intersecting with the terrain and isolating the white part inside. I want the white part to have the original color of the widget, so it would have the effect of always being on top.

Ignore the white glowing border. That's separate. Just the solid white part on the left is what's important.
Not sure where to ask a camera question but it is visual related. anyone know how I can stop the camera from moving beyond the edge of a terrain?
Thanks man.
Hello,
Sorry if I'm posting in the wrong room
I would like to make this appearance effect (the actor is invisible then his outline is drawn and these colors appear).
But I have no idea how to do it. A simple idea would be to play with the materials of the mesh but it would become redundant to modify all the materials one by one.
Do you have an idea how I can achieve this effect?

Check out NadirFX's Character Appearance and Dissolve on the Marketplace, I'm not sure if it is still free to grab.
https://www.youtube.com/watch?v=j62sXuhaQCw

Otherwise you can try out Matty's Material Sphere Mask Tutorial, that one is free to follow.
https://www.youtube.com/watch?v=xRxkcFOhNrc

What is the Material: Sphere Mask Node in Unreal Engine 4
Source Files: https://github.com/MWadstein/wtf-hdi-files
If I don't have a free solution, I think I take this
I'm thinking about it but it implies that I modify all the materials used?
Best bet for Camera questions is in #cinematics
Regarding your question i dont really understand what you mean?
Check out the video, Mathew explains it well. If i'm correct it's a volume in wich objects can "dissapear"
Here another one for refrence, this is a Volume that acts as a dissolver: https://www.youtube.com/watch?v=_YTw-pFuWig
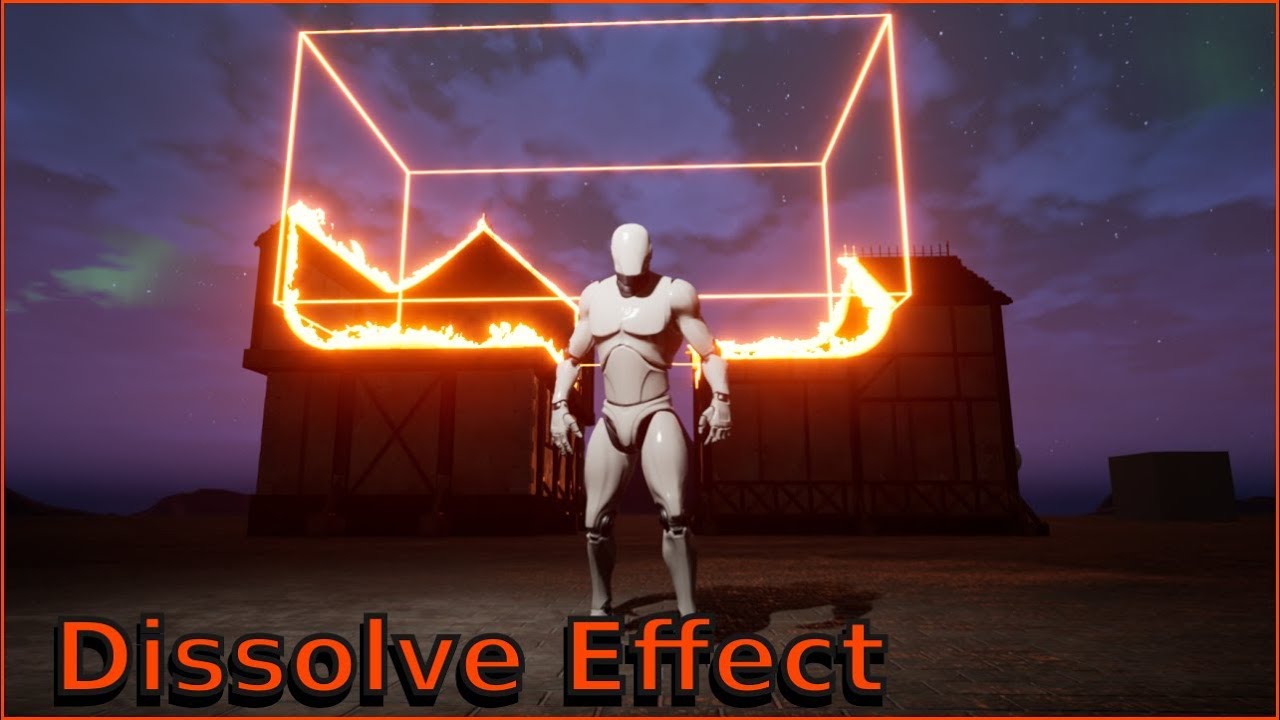
Project files : https://www.patreon.com/posts/29023822
In this tutorial, I will show you how to make a custom dissolve effect in unreal engine 4. this is an advanced material effect for ue4. In this, you can use a cube shape, a sphere shape and cylinder shape to dissolve objects.
We will be using nodes such and boxmask-3d, sphere mask and dra...
Ho I see. thanks you !
Guys ive tried a ridiculous amount of ways to get this right, but have come up short - im making burnouts/vehicle skids, which is easy enough for a singular surface type/emitter ribbon, but having them join (eg concrete skid emitter material to dirt skid emitter material with no gap in between), and fade at the correct rate when the emitters turn on and off depending on the surface type is proving tough. Can you get a cascade OR niagara ribbon to fade on demand? Im using emitter ribbons because the system is a drag and drop component setup. Setting the lifetme to 0 seems to be the only thing that works, but then you dont get trails that persist for a little while which is desired
Yes. No way around it.
If you want them connected, don't change the emitter. Just pass a variable to the material so it switches texture etc for the new particles.
Really? I was doing that by setting the template, and as soon as you swapped template, the old trail disappeared. Unless i was doing something wrong there
If its as simple as a material swap, ill try that then
Not swap.
Send a parameter that just changes what texture etc you use.
Like an atlas.
Have you got an example i could look at?
Im also trying to do this in c++ - wont be hard if i have a rough idea of what to do
@cold sorrel?
Doing it via c++?
You are on your own then 😛
In niagara it's a simple dynamic parameter.
Good luck!
Haha no worries - but thanks @cold sorrel 👍
Question here is possible from a world align to get only one value ?

like on the rgb ?
nevermind
Hey, can anyone help me with a very quick question. When making assets (in Max, Maya, whatever), do I need geometry on both sides of the assets to block any lighting I do in engine?
if its a painting on a wall, no.
if its the wall, preferably yes. unless you use another mesh to block the lighting.
@cold sorrel hey man im messing with that texture idea, but even on tick, when the car does a hard skid, the emitter just cant spawn the texture fast enough

I need this but without the gaps and to have tthe correct tyre mark per surface

Thats with cascade ribbon, and top is niagara sprite renderer with 1 spawn per frame
Any tips guys?
why not use niagara ribbons?
@heavy nova honestly, if i had a tutorial to follow, or an example to go off, id love to - are you able to point me in a direction?
Im new to the emitter scene
im pretty sure there's an example niagara system for ribbons, but i might be wrong.
It's pretty simple and similar enough to cascade. Just create an emitter and add the ribbon renderer. There are lots of tuts if you search, here's one i pulled off yt: https://www.youtube.com/watch?v=aUzbKnXN5N8

This Video:
In this video, we create a ribbon trail effect. This could be used for things like bullet trails/projectile trails, light trails and more.
Niagara Particles:
This playlist is dedicated to the Niagara particle system acting as an introduction to some of the basic concepts of creating emitters and systems.
Consider supporting the ch...
Ok thanks man 🙂 ill have a look - making a ribbon in niagara isnt the issue, its making it use a texture, and being able to change texture mid-ribbon to have two tyre marks join up. Atm i have a system of spawning new emitters per surface change, which works but the new trail always starts to fade too quick in the tail and the system overlap disappears leaving the gaps
- Idk if its possible but im hoping -
Normally the texture on a ribbon moves with the tip (Lead Particle) of the ribbon and is stretched. I show how to make the texture tile, stay static (not moving with the tip) and how to fade the whole ribbon based on the age of the lead particle.
Note: The generated UVs are NOT distance based. If the ribbon has two points far from eachother an...
you can sample gbuffers in niagara with particles, check the content examples. So you could use custom stencil or some other gbuffer to pass that info
Idk what that means - but - sounds like another lead to follow - thanks @heavy nova
np good luck
Someone pointed out something weird in UE documentation tor me. The link bellow claims that UV origin (0,0) coords are at the ** bottom** left, where all my tests, experience and DirectX documentation says its the top left. Is this a mistake in UE documentation or is there something I dont understand?
https://docs.unrealengine.com/4.26/en-US/WorkingWithContent/Types/StaticMeshes/HowTo/UVChannels/


The role of UV Channels for rendering Static Meshes, and how you can work with them in the Unreal Editor.
Hello, I have a question about reflections.
Is it possible to only render a static mesh in reflections? I'd like to use a cubemap not necessarily to light a scene but to have it appear in reflections.
Any advice would be appreciated.
Cheers.
Thanks for your response. To be clear, I'm not capturing anything in the scene (in fact, the game is procedurally spawned so there's nothing to capture in the editor at least).
I essentially want to use one HDRI to light the scene, and another HDRI to not contribute light but be visible in the the metallic reflections of materials.
I tried making two skylights and setting the intensity on the second one to zero but no dice. Now I'm playing around with having an inverted sphere around the scene but I can't seem to make it only appear in reflections.
Hello ther! first time writting 😅 Do any of you have an idea on how to send a parameter to another niagara emmiter, all within the same system?
Example:
Particle from system A collides, you get a collision normal thanks to the collission module and generate a collission event.
you recieve that collision event in another emmitter within the same system which spawns a particle from system B
I´d like to make that Particle from system B Be oriented to the resultant collision normal generated from System A
hello, I just started using bridge in unreal engine. I have a noobish question, how can ı prevent my atlases to look like this? Its a wooden door but It's kinda transparent

anyone got an example of splitting colors byte values into two nibbles for compositing in shaders? I feel like I did this before but cant remember how I did it.
Bitmask?
yea, cant remember how to do it in a material however.
welll, not a bitmask actually, a bitshift is what I need.
@astral iris you mean default one bitmask or custom?
It will be better if you explain what you have and what you want to get
I made several different implementations, they all have pros and cons.
it was more of an issue trying to shift in more values into the color then just one byte, i figured out a solution thats acceptable.
Owner no see?
I can always worry about lighting later, right?
Can anyone tell me if OnSystemFinished is called when a cascade ribbon completes and fades?
I need a way to destroy it only when its detached and the ribbon fades out
Mainly because a few are laid out one after the other and i need them to fade and destroy in a smooth continuous line.
hey everyone - was wondering if there's a way to offset a sine/time in a material, i have flashing lights and i'd like to avoid them flashing simultaneously (think police led light bar) - i have one material for the first flash and a second for the other - not sure how to offset them so to speak. any suggestions? cheers 😄
https://i.gyazo.com/638b04ca36d24b7062ea780ac7877b39.gif this is what i have at the moment


Add a PerInstanceRandom
sorry for stupid q - but where, i replaced the time node, but it just throws an error?
I'd just use a point light in your bp if it's a police car. Use a flip flop on a timer to turn it on and off. I'd do that because then you will get light affecting the surrounding areas
I'm looking to distort and procedurally texture shadows cast by objects in a way similar to this material (in UE). One approach I'm thinking is to somehow project the silhouette of the model and then distort that with some noise. Any suggestions? (can't find much online about procedural shadow styling)

Looks like noise normals.
Attempting to replicate this (from Unity) in UE
Texturing the sphere and ground is trivial. Warping the sphere's outline can be achieved through a post-processing effect. But I'm stumped when it comes to the shadows. I would like to add perlin noise and use a ramp on the cast shadows.

Still look like noise normals to me
How so? I'm having trouble visualizing the suggestion
Basically make a normal map from a noise heightmap, and get yourself the noisy shadows.
I think I see what you're saying: noise >> normal map >> material; let me play around with that a little then
I feel like I'm still missing something. Noisy normals will effect the entire surface rather than the shadows only.
Anyone have some knowledge with Light Function Materials?
Does anyone know why this happens? The lava starts flickering also when I play and look towards it from a certain distance. Close by everything looks good.
Not sure if this is the right channel for something like this. If its not, im sorry 😉
newb question: I have two play sound modules, I am trying to get one sound to play on spawn and then one sound to play when each particle dies but it seems like I can only have one of the play sound modules enabled at a time, if I enable both of them at the same time I only hear the sound on spawn, not the sound on particle death. What is going on here?


How could I get the "shadow attenuation" at a specific point in unreal engine?
Any reason why some User parameters would not able to update in realtime via blueprints and drive a niagara system?
Prob have to make your own shading model by modifying source unfortunately - attenuation is calculated during the light accumulator: https://medium.com/@lordned/unreal-engine-4-rendering-part-4-the-deferred-shading-pipeline-389fc0175789
You could also force expose a shadow pass gbuffer to be accessible from a PP mat but that's a bit obtuse to do

Medium
Looking at the deferred shading base pass shaders
For this if you are using something like a stepped cel shader post process, you can noise up the screen UVs (and project to world space if needed). And create a mask in the shadow transition area.
https://yamato3d.gumroad.com/l/oWwfT Have a look at this mat, you should be able to get some ideas.

Gumroad
Simple Hatching Postprocess MaterialA hatch post process material with a simple mechanism (with world positions and Noise nodes).Please also check the site and video.https://3dnchu.com/archives/simple-hatching-pp-ue4-free/https://youtu.be/N1MwUIwdU7Q !!!Does not include environmental assets that appear in the video !!!The outline drawing uses Al...
What I actually want to do is sample from the shadowmap given an absolute world position.
Ideally, I could apply a noise to the absolute world position before shadow sampling, which would create a warped shadow effect.
It’s a trivial task in Unity, but I can’t seem to figure out how to replicate it in Unreal Engine without potentially writing my own independent shadowmap system.
In unity are you only getting the shadow map info from directional lighting?
** directional
you can access the primary light direction in a material in unreal but unfortunately thats basically it
Yes, I’m using a directional light.
you'd have to calculate the light inside the mat then and do it yourself. Use an unlit material and NoL etc
you can noise up stuff then
would only work for a single directional light source tho
This is the Unity-based HLSL:
float4 shadowCoord = TransformWorldToShadowCoord(WorldPos);
    ShadowSamplingData shadowSamplingData = GetMainLightShadowSamplingData();
    float shadowStrength = GetMainLightShadowStrength();
    ShadowAtten = SampleShadowmap(shadowCoord, TEXTURE2D_ARGS(_MainLightShadowmapTexture, sampler_MainLightShadowmapTexture), shadowSamplingData, shadowStrength, false);
All it does is sample from the shadow map of the main (directional) light and return the attenuation.
you wont be able to get that info in unreal without messing with source.
What I described is doing similar but with the limitation of a single dir light. It's just defining the lighting yourself
https://www.youtube.com/watch?v=3CcWus6d_B8
Anyone know if the spline portion of this video is translatable to unreal?
Water Attack VFX in Unity Engine. Tutorial was made using Shader Graph and C# scripts. It covers 3 water effects, Water Ball, Water Bend, and Water Tube.
The effects can be used in games, and are all made using the Universal Render Pipeline
Download the project: https://github.com/abitofgamedev/water_vfx
Support me on Patreon: https://www.patre...
I'm wanting to do something similar. Originally I was trying to animate it all in maya and then export it, but I'm not liking that route very much.
we have splines in UE, and yea that should be fairly transferable to UE
I've thought about ribbons too, but I didn't know they allowed for shape stuffs
Thank you, cuties ♥
if i wanted to simulate being in a lift, would it be a good idea to do this with some kind of post-processing volume box with a shaking effect (if that's possible)?
*by lift i meant elevator.
@uncut mulch there is a camera shake bp class you can use
Here's a link to the docs on it
https://docs.unrealengine.com/4.27/en-US/AnimatingObjects/Sequencer/Cameras/CameraShakes/

Create camera shake effects in Unreal Engine.
Hi guys. Do any of you know ways to optimize particles?
Does lowering the spawn decrease the cost, also what does fixed vs. Real time do. I've been trying to look it up with no clue
Optimise particles? Hmm....
Only do CPU particles when it's necessary, make use of Scalability feature, use LODs if needed.
I have a scene with about 8 particles that emmit one after another in a small space of time. I've increased lod bias on the textures, made materials opaque when I could (had to keep some translucent because it is fire particles), decreased the spawn, but it drops the fps from 120 to about 48 when they all are on
Ah! Thanks a lot! :D
Hey everyone, how would i go about fadding the edges of a box?
im trying to make a wall of light kind of thing
where the top of a cube fades and is "replaced" by some light rays

kinda like the image on the left
How do i add subemitters in niagara?
What's a submitter?
apologies. I'm seeing now that Niagara doesn't have subemitters. In unity's particle system you can give a particle what's called a subemitter so that as it does whatever it does that particle emit more particles from itself. I finally found some google links that are saying the wya this is done in Niagara is with user variables. But how does that work?
I have a system that is launching particle meshes in a cone and I want the individual particles to leave behind smaller particles as they travel. How do I do this?
You can spawn particles from another emitter, just search for it in emitter spawn I think
hello, I want to add a underwater post process to my level. and i like the "water system" post process settig but i want to use that setting in my custom water area (not made by water system). so I mean, is it possible to use that post process profile in my custom areas?
Totally possible, just use a post process volume, make that cover your water area, and you just have to worry about the colour grading, depth of field, and post process material to fade depth.
yes , the logic part is easy, I mean I want to use that set up. because Unreal wate r system has perfect underwater effect
Is anybody who wants to use the Unreal Water System Postprocess here is the location; just create a postprocess volume and assign this material

Would anyone happen to know of a method of reducing the resolution of screen space reflections, or achieving a result of that type via some other method? I have a basic implementation of a pp ssr input mat which just "pixelizes" the UVs, but it produces this type of extremely distracting flickering effect - I tried using a gaussian blur material pass on it, which helped a bit, but not sure if it's the look I'd like it to have (and it still flickers)
hey everyone - was wondering if anyone could shed some insight on how i could use a timeline within a bp to have a group of objects (a scene comp) for example turn on and off - can't seem to get it working.
I have a few lights and some very small bits of mesh in there that i want to toggle on, flash until i toggle off
Anybody understand how this works?
https://www.youtube.com/watch?v=LJjKEE3nTnc
Made a thing to visualize radial line of sight for top-down projects
Nvm, found the guide.
https://hippowombat.medium.com/tutorial-line-of-sight-visualizer-for-unreal-engine-f32113b1f6f3

I'm fairly sure I've heard about this effect being possible to implement without having to do linetraces... but I wouldn't have any idea how to go about it :)
Good thing line traces aren't that expensive if you handle the hit correctly.
Hey there, I have a rather complicated thing to ask but I don't know how to set it up. I'm attempting to make a cross over by scene capture 2d by either post process or widget and fading away. I want a character out of the scene capture by a blueprint structure instead of the details cause this will include many other characters than just one. The character out of the scene capture must be in front of the capture like a buffer some sorts but I can't seem to figure that out. I've made structure attempts but I don't know how to use them. Please can somebody help me out a bit? I may need image structures to know what to do.

um so I was working on the lighting in my main menu when it did this

I dont know what happened or how to fix it
I repeat this question, does anybody have an idea using scene capture for either post process or widget while buff out a character without the details panel because this will happen to any of the characters who trigger it?

I'm trying to use vertex animations, that work great on SMs, on ISMs/HISMs (https://docs.unrealengine.com/4.27/en-US/AnimatingObjects/SkeletalMeshAnimation/Tools/VertexAnimationTool/VAT_TL_Meshes/). Although with the Blender version of the script (https://forums.unrealengine.com/t/vertex-animation-script-for-blender-3d-users/85580/83).
There is an odd issue, where as soon as the ISM/HISM gets rotated, it skews:
https://www.youtube.com/watch?v=cz8nuNHp0WI
Since everything works fine on the static mesh (selected in the video), I'm wondering if somebody knows something about this. Is it a not well known limitation of ISMs/HISMs?

Just to make it clear, with a 0,0,0 rotation the ISMs/HISMs look fine as well.
Hey guys. Quick question. This is not my thing but I am looking for it, but I dont have the correct word for it, then I am not finding it. so... what I want to do:
I want to spawn or activated a particle/niagara from my my character like water... and this water must hit the floor and stop and make a puddle. I think I need to make a trace to know the distance and then I will set the size of this particle to know the ground and then I spawn another one at the floor. But this is the way, this is it or there is a automatic way lets say on particle/niagara where it recognise the floor and do other stuff etc?
You can add a collision to the particle. Then spawn a decal or sprite or mesh at the location it collides
all this through the particle system stuff that weird and with lot stuff screen?
Can somebody help me understand how I can get some sort of collision in the shape of my camera frustum?
@woven turretCollision of what with what ?
sorry i'm confused as to what that means
Can someone plz help me create a soft reference to a door in another level? It is a portal door just meant for visual effect and not teleporting
I need a soft reference, because if I drag the portal from the other level into my new level to get a hard reference it removes the portal vision from old level and replaces it with the portal in the new level.
Hard to explain a bit. But plz help me create the soft reference. I’ve tried to create the soft reference but my actor doesn’t appear
@noble estuary when creating the variable in your blueprint, after selecting the class you can choose the type of variable - object ref, soft object ref, class ref, or soft class ref
just pick soft object ref there.

then you'll be able to assign objects in other sublevels.
buut... this question might be better off in #blueprint
Thanks. When I select soft object, it doesn’t let me select my door from another project. I’ll ask in blueprint
Hey all, does anybody know how I could pull editable/dynamic parameters from a particle system? For context i'm trying to create a widget that can display particle parameters from an emitter without knowing which emitter it will be linked to in advance. I've tried getting Instance Parameters from the particle component as per the image included but it always seems to be an empty array.

Someone knows if there is a way to get directly the captured cubemap from the local area in the material ?
without make a forward shaded thing
There is an old forum thread on using that for fake translucency
Similar to this, can't find the older thread: https://old.reddit.com/r/unrealengine/comments/r5ws2d/cubemap_translucency_idea/

seems like a complete new shader model, but there is no info
Hey guys im trying to make a mesh particle fade but its turning black
im pretty sure im doing something wrong in the material but i have no idea what

Hey all, does anyone know if Houdini Engine supports UE5 Preview yet? Still could not find any download
Would anyone know if it's possible to create a "fake" shadow decal? I have a 2.5d project with a jungle environment in the background, and instead of every tree casting shadows I'd like to just use one (or a few) big shadow decals, giving it that dark 'shadowy' jungle canopy feeling in the background...
Hello i have a question about Particle System i bought on the Marketplace.
In the following images you see from 1 angle the tornado is visible but from an other angle only the part above the lava is visible. Why is that and how can i fix it?
Unreal Forum tells me to "uncheck/check" the "Use fixed Relative Bounding Box" option but that didn't help me. is there maybe something else that makes that problem like this?


set the translucency priority
Thanks a lot that worked!
uh


Why is the texture appearing on the top also?
is the problem with blender, photoshop or unreal?

seems like its starting in the wrong place

or something
forget everything I said I had the unreal engine cylinder rather than my cylinder
😔
been there XD
Can anybody point me in a direction where I can create my own modular planet shader?
I assume I’d be using certain noise functions and Lerps?
The start camera fade to a colour really impacts the performance of my game. It goes from 120 fps to 60fps. Is there a cheaper option?

New to UE shaders and they seem very cool, but it’s hard to know where to start. Could you use a shader to do grass or groundcover, essentially to create instanced meshes over an area? Or would that be best through a different system?
that would be a different system, Foliage. you could potentially do it with Niagara too, which would be more flexible but probably less performant
what are some good resources to learn textures, materials and shaders?
Yes
https://realtimevfx.fandom.com/wiki/RealtimeVFX_Wiki
(It's a little bit shame it's hosted on Fandom, and I had a gripe with that site lol)
Is this the right place to ask about decals?
I have a grenade explosion decal that I create by raycasting in 6 directions from the explosion.
Problem is that when the decal is projected with a 90degree angle on the ground (from the wall) it looks bad. How can I avoid this? Im thinking there has to be some kind of material/shader function that solves this issue. Thank you all
anyone know how to convert this tutorial to ue4. ive been stuck on trying to combine a radial blur and simple blur https://twitter.com/Raph_iuk/status/1490762063722995718

🧵
Here is a small breakdown of the impact frame effect I used in my previous tweet (The effect is inspired by @__grit 's hand drawn impact effect). It's post process based.
#VFX #RealtimeVFX #shader #madewithunity #gamedev
Likes
2482
Retweets
408
Anyone familiar with Chaos Cloth that can give me some tips on what's preventing me from getting started?
#ue5-general message
I can't seem to create clothing data from my mesh.
How would I draw an orbit path for the individual planets in a solar system?
record orbit location per second or some other interval of time and draw a debug shape at each recorded location
Thats what ive been doing but it looks horrible
what shape have you been using?
line
try a sphere or cube
okay
Working in unreal- does anyone know how to make a material for waves like this? No limit in computational expense. I’m guessing a tessellated material with panning height map and normal, but I could be wrong

The waves will be much smaller- think choppy bay instead of ocean storm. Going for a slightly stylized look
anyone know, if a rtx 3060 12gb oc 192 ghz will be enough for ue5 lumen and rattracing ( not sure about lumen I hear its not performant at all ) ? TY anyone 😉
1660 super
It can raytrace but just barely. What were you thinking?
not sure what you are asking
if you mean about your question I'm not advanced enough yet to answer Idon't think
Oh I thought you had a solution to my problem that was somehow related to my card
You haven't presented a problem.
To answer your question though, your card will be more than fine
Yes, I know how to make that.
Yes your suggested solution sounds fine.
What's the problem?
Problem solved I guess
I am thinking about the rtx card, but ya your card HM would prob . be stressed by a certain project.
Just wanted to fact check myself
@whole kettle ok ty
As for the hardware, not relevant to the channel. But it could be fine, it could be terrible. It depends on what you do.
Yes Lumen is expensive.
But your question is How long is a piece of string?
what channel is then used for hardware questions ?
I looked and didn't see one that fit other than here really
Yeah, but at least not irrelevant 😛
heh
hello, is there a way to have a cascade vfx that emits lights that cast shadows?
you can enable high quality lighting when adding a light module, but its super expensive, as in.. I'd never suggest to use it.
Its prolly better to spawn such a light trough blueprint.
how to select particles from blueprint? I have a UParticleSystemComponent but it shows empty
nvm: apparently I had a wrong component instead of niagara

I have effects in my project but I can't seem to select them

Hi everyone, I've done a simple Niagara Emitter for some smoke.
The sprites are facing the camera, the texture is an atlas and it uses subuv.
When I put the System into the level, even in the editor ( not only in play ) anytime I turn to look them against the light, the color of the smoke turns black. The alpha still remain good though.
I can really see as I move the view the smoke turning from his original color to black.
In my scene there is a SkySphere with a DirectionalLight. The project doesn't use raytracing. UE 4.26.2
I just can't find a way to make it work.


does anybody know how to change RandomImageTime on a cascade fx?
i cant seem to find it
Hello, why is screen percentage not here anymore in the post process ? Even the console command doesn't work
Are you using ue5 preview 2 ?
Very strange, for me the console command is indeed "working" (at least it's here and doesn't give any error) but has no effect on the scene.
Yep i tested with 1 to really see but no result
Maybe is it because i'm using a cine camera instead of a standard camera ? (In previous versions it worked with it but we never know)
I just retested with regular camera in a new project and an old one converted in UE5 and still doesn't work.
You are using r.screenpercentage = whatever value, right ?
So for some reason it doesn't work for me anymore ...
temporal super sampling
Nop, nowhere
i used it in ue4 and ue4 preview 1 but since the preview 2 it's like the command has no effect
Nop, the one i'm actually on was created 2 days ago directly from the preview 2
Is it your video you linked ? If so can I use it as a reference to post on the forum please ?
Thank you !
Any shader wizards aware of what effect adding 0 to a vector has on upstream sin/cos?
there's some materials where epic intentionally adds 0

and the generated code also reflects the addition of 0
for... reasons?
it also breaks without adding 0
extremely perplexing
this is RotateAboutWorldAxis_cheap in the material graph for reference
@ocean shardLong before dawn of ages, there was no reroute node in material editor
and even when one has appeared, people still continued habits of using regular material expression to arrange and tidy up their material graphs
question on the decimals - is it possible to change some setting to use 0,5 as opposed to 0.5 for floats in the node values???
how can I smooth this out in photoshop

Anyone know how to share a dynamic material instance with a particle system?
The Material and Dynamic elements of the particle system seem to do nothing as far as I can tell
There must be a better way, but if someone else is looking for the same thing, this is what I found: You can assign 3 colors like this in the material

Set your material in Cascade, then refresh the "Dynamic" module
Then you can add your RGB in blueprints like this

Ideally I'd like 2 colors, but that doesn't seem possible as far as I can tell
Better view

does anyone know why when I press the play button most of the lights will go off?
I sure hope this is the correct channel for a question like this.
I am currently trying to make a simle Inverted hull on my meshes, to make a cheap cell shader look.
I am following a video where everything he does works perfectly(as they usually do), but the end result on my end has some issues(as they usually do 😄 )
Following will be a screenshot of a very simple mesh on which i have performed this inverse hull method, and the blueprint applied on the duplicate mesh which is creating the boarder around the original mesh.
As you can see, there are gaps where there should not be. It almost looks like a series of black planes have been extruded from the original mesh, but it is not.


His character with the working method. And my character(The viking) with my scuffed, non-working method.
I hope someone can help me, been searching for a while and cant seem to figure this one out.


This is a common issue when trying to do this effect on hard edges. The normals are split, so the vertex 'rips apart' trying to expand along the normals.
I'm not aware of a solution, I'm sorry.
This is what you mean or ?

Right, the shader is trying to expand the mesh along the normals, but the vertices on the hard edges act like they're duplicated, and each one has a normal going in different directions. So like the cube shows, they pop apart.
Maybe you could achieve your outline effect via post-processing instead?
Possibly yeah. Been told it is quite costly though. I will try it out though.
FWIW if you're not using vanilla post process effects, you can just use outline post process material.
Also the character being that low poly should give post process more leeway.
And if you're in doubt with the performance, always, always profile it.
To be franc, never even heard/thought about profiling. But read about it after your mention, and thank you a lot. Definitely an important part of our production.
Any way to fade out a character that died in blueprint with the Set visible nod ?
I wonder if you couldnt do opacity on the character mesh? And when opacity reaches 0, or near 0. Destroy the actor.
But, thats the approach id attempt.
I didn't see any opacity node?
I was thinking the alpha value on the material added to the model. I may be talking about something i dont know anything about 😅 but that is what i meant when i mentioned opacity.
No
You'd have to set it up with something like a dither and masked material and then control a MID.
But set visibility does not have any fade capabilities.
Can I input the position of a specific object into a shader? I want to control the position of a SphereMask with an empty object in the scene, so it's easier to animate than manually typing in coordinates.
With blueprint, sure
hello, what do you think about volumetric fog? what is the best performance saver aproach to create volumetric ( static or not ) fog?
This is a pretty simple question but I’m struggling to find an answer. I have a “dizzy” Niagara effect above the player, and when they are hit and knocked back, it should play. However, the effect isn’t tracking to the players position, but remaining still - in the position where it was first activated
Spawn system attached and make sure the emitters are all localspace
Has anyone experience with using a low FOV (in the range of 20) to create some kind of fake isometric view? This leads to needing to put the camera far away from the actor which causes performance costs as the shadow quality has to be increased to compensate for the far distance of the camera. Is there anything I am missing?
Sorry, how would I go about doing that?
Tick local space on the emitter.
@upbeat shell may I direct you to the #rules as posting the same question in multiple channels is frowned upon.
Sorry about that, I didn't know.
Hey all, does anyone know how to make fx animation states. I have a shield and I love the default base state but I want to have it animate in and out but I'm not sure the best way to go about that
Does anyone have any good tutorials for something like that?
https://www.youtube.com/watch?v=LbIlZ491wIA
Here's what I found incase anyone else has this problem.
Shield mesh used in the video: https://drive.google.com/open?id=1XEk0dD1Qqc63PG5h1Gz0c5h3g4U0sOSW
In this episode I create a quick aura effect around the character and then make a shield bubble effect. Next episode I will work on shooting blasts (projectiles)
My patreon: https://www.patreon...
In Niagara, does anyone know how to pass a second color value into a particle material? I can set R, G, and B independently through Dynamic Material Parameters, but that's kind of a nightmare, as I want to be able to let the artist just choose colors without having to do it per-channel.
So, we have a bunch of facades and a fake interior cubemap material, but when glass UVs are rotated in UVs space, interior is rotated also. Does anybody know how to make cubemap always look up in world space? Mesh can be rotated also but we need cubemap to stay in place
Hey guys is it possible to make decent looking smoke that doesn't use translucency? Overdraw is killing fps by having smoke instances bunched together. It's for a vehicle burnouts sysem
DitherTemporalAA on Masked Opacity, but that depends a lot on TAA
Materials aren't my strong point, but thankyou for that - I'll look into it
Any chance you have an example?
Nah, I still use translucent material, but with Render After DOF disabled so it doesn't go to a separate pass
Ok no worries man 🙂 Does that option you disable make a fair bit of difference?
It does! Because I rely a lot on cinematic DOF in special ability shots/cutscenes, the translucent material is not getting its own render pass.
It may potentially save some performance as well, though I didn't assess for any comparative metric lol. I just disable it because I want it to work with DOF
Considering contemporary anime shows incorporate cinematic camera effect nowadays
Oooh well I'll give it a try and see if it helps me too
Ill try anything atm lol.. been in ue4 for 6yrs and haven't bothered to learn materials until now which is biting me in the ass
With the Niagara System, how can I add a Mesh reference to have multiple mesh using the same NS without duplicating it?
How would one get rotation of a particle in material?
The only thing I found was Particle Direction, but that does not include rotation along local Z axis. (Which is the only one I care about)
Send it via dynamic parameter
@cold sorrel Thank you for the suggestion. Yeah, that seem to be the only way, but it feels weird since mat know the rotation of the mesh to display it.
folks, any idea how to make this effect https://youtu.be/7YJ_zK7giQc?t=91

While Eve Valkyrie is getting much of the attention it's not the only Eve related VR title developed by CCP. Eve Gunjack was originally targeted for the Gear VR system and subsequently upgraded for Steam VR, adding support for Vive and Oculus.
("opening" the shield)
What's the best way to create visual effects for realistic spells (basically magic effects like fireballs etc), is it niagara? I don't have any experience with that, so i wonder what should i learn, and is there any good tutorials?
well, niagara is for vfx in general. the #niagara channel has some getting started tutorials.
as for how realistic you want it, that can depend on the quality of textures you use, but you can also use software that simulates realistic fire, smoke, etc. like embergen, or if you want dive deeper, create simulations (heavy on perf) in unreal/niagara itself.
generally, the more realistic you want it, the more knowledge you need and the deeper you need to dive, or see if you can find pre-made rendered out sims/flipbooks.
okay, i will look into niagara, i dont need anything crazy realistic, so i guess high quality textures is the key
@fossil swan , that naming convention is atrocious.
Redundancy, missing prefix and a full word suffix...
:p
hey, my parents made me, not much I can do about how they handled the naming convention
but I agree
Don't blame the parent instance for user error! I mean, if it's propagated all the way to the Master, fine. But then we need to have words with the TAD.
I have been cleaning a project for weeks. _inst makes me twitch at this point.
ikr
one project had material_namehere_randomnumbersgeneratedbyimporting
hundreds of em
example: Material_book_456475675
-.-

I've heard that asset quality is directly proportional to number of underscores in its name.
lol
I dunno. Cleaned out a few lambert1 that looked preeetty good
Lambert thinks you look pretty good too

Hey i followed a tutorial on creating beam particles and for some reason i can't color my particle (i'm using particle color in the material and the material is unlit)
ignore me i was being silly, had the color wire in the opacity input on the material
Hello
I'm recently having an annoying problem with a Cascade explosion particle effect, everytime I spawn or activate it, it takes around 1 second to show the effect, while i want it to show up immediately
Any solutions?
I had a similar problem, you should try this one, it worked for me...

this setting is in editor preferences
Hi, i'm trying to create kind of cutoff mask effect material. With static meshes it's working good, but it can't be done for skeletal meshes coz i'm using distance to nearest surface node which get values from distance fields.


Cutoff func
So how can i get info about intersection of skeletal mesh and static to create dynamic mask?
SK doesn't work with distance fields
If you have some ideas it will be great to find out how it should work ^^
Skelmeshes cannot have distance fields, period.
Your better bet would be to make use of scene depth information
But it works only with translucent? So i have to create two meshes one with opaque background mat and other with translucent depth mask to create that effect
uh
Will try, thanks for advice
Thanks but sadly it doesn't work for me. The only way to control screen percentage is to launch a standalone game.