#animation
1 messages · Page 168 of 1
I had a hunch this could be unit scaling issue.
That's my FBX setup

for animation only
(armature)
Unit scaling is on 0.01 on blender
What very strange is the bones slowly slide between the keyframes (like interpolations I never wanted)
@ashen junco thank you for your quick reactions in any case (but I'm still stuck with that, I should try with a very simple skeleton...)
Yeah, no idea about it either. In my case, it's always just works.
Mine was VRoid model re-rigged with Auto Rig Pro.
@ashen junco Good to know! (I'm just terribly frustated to not have a working import for that complex rig)
does anybody know how to store multiple animations in one fbx file? (I'm using blender)
Just export them? FBX can have multiple anims.
I mean, how do I start making a new animation without losing the other one?
@glacial pelican By creating actions
what do you mean
can you tell me what I need to look up on google to learn this?
Are you using blender?
yes
Let me see find a good one
thank you

How to use Actions in Blender! I wanted to know how to use previous animations and keyframes in new / future Blender projects, so I looked into how to use Actions to do just that. Actions in Blender not only allow you to animate in a totally new way, but you can import actions (essentially saved keyframes/animation) into new Blender projects!
...
This one looks right
oh thank you

a technique I have seen in the past is to split up the timeline, dedicating a length of time for each animation - such as walk cycles 1-200, run cycles 201-400, fast attack 401-500, strong attack 501-600. The entire section is not animated so there is a lot of empty time, but it keeps them cleanly organized.
interesting
you want the extra time in case you change the animation timing (safer to have more) and chopping it up in engine is easy because the number are simply enough to type in
alright
@ashen junco Auto-Rig Pro looks great, did you import animations from blender to UE4 with it? Is it working perfectly?
So far it just works.
Not as deterring as Rigify, I give em that
any idea on why the hair is streching?

Heh, probably just physics system oopsie, though I don't think Arcsys used realtime physics.
@hollow thistle modifiers dont export to UE
so constraints that show in blender wont work in unreal
@bronze osprey I resolve my problem after a long night to search^^' It was in my FBX parameter... I feel like a noob...
What were your settings, and what did you change to get it to work?
@vestal summit To be honest, I'm not very sure, (I haven't done all the tests yet because I don't understand these options) I don't have my problem when I uncheck Force Start/End Keying and put Simplify to 0 (I do my test by reexport the model with animation too, I'm not sure it's okey with only the animation) I could be more precise later

Is it possible to have an anim BP update in editor?

hiii
i dont know how to fix this been doing this for 4 houre straight, is there any help who can help me with this control rig issue ?
i want to learn to animate but i dont know where to start, i animated in blender for a while but now i want to learn in ue4
Hello. I have some issues with importing a skeletal mesh from Blender.
After i import, the meshes are not in good position (they are not connected) and are listed as bones (the underlined things are meshes, not bones).

hi look up and you see my screenshot 😄
Do you have the right unit scaling in Blender?
Start with, well, animating in Blender. In most part animation in UE4 is in the technical side.
this is from a free pack of epic called polygon fantasy character used wih the rigged plugin
Item A => thigh bone
Item B => leg bone
Effector => ankle/foot bone
i do it now

can it be the calf ?
thigh -> calf -> foot

this is when the seondary axis is changed 0 to 1 and rest to 0

Is there a hotkey to grab an object?
this propogate to children off

like in blender, i press G to grab an object
Both the axis has to be not 0 in one of the vector.
ow
No hotkey. Just select an actor in the map, and drag the transform gizmo.
darn
also how do i import blender models to ue4
i tried but everytime i do it it comes out either in parts or its all glitched with a bunch of errors
Export it into FBX, and import it to UE4.
There's quite a few of things to consider in Blender side to make it work with UE4, though.
For one thing, unit scaling.
i do know how to turn the model into an fbx model and scaling it
i watched a few tutorials and i still get it wrong
I mean, setting the unit scaling in Blender before doing anything.
almost here

This is what you should looking for, not in the export settings.

should i set the unit scale to 0.01?
Yes, it's a must - new normal for Blender to UE workflow.
what do you mean by "new normal for Blender to UE workflow."
New normal = new default
or does that mean that i have to scale it to 0.001 units
Basically the new "new Blender file", with most of the stuff pre-adjusted for UE4 by yours truly, without any plugins.
so i just turn the model into the fbx and thats it?
using the blender file that u gave me of course
Yeah, use the Blender file as the new startup file, and Blender to UE should be a second nature.
let me try
This goes without saying that it's not going to affect existing .blend file, but the new startup file would save you the hassle from getting the point of reference right with the adjusted unit scaling moving forward.
dammit it still didnt work
i think im doing something wrong
i mean im still learning ue4
This is the settings that i changed from following a tutorial

then i export it as the fbx
then i go to ue4
and i go to the import files and i click on the fbx file and the i see this

and as you can see theres the settings that i put up
can you tell me if im doing something wrong?
Why isn't my animation blueprint not playing? Hopefully you can see in the image I have set the anim class.

aw in the blueprint the cast to character is failing

The cast always fails in animBP preview.
so that's not the issue then?
Nope.
I changed the blueprint to the thirdperson blueprint that comes with Unreal and it's still not playing anything
Have you tried compiling the BP?
yeah it's compiled now
okay I got a question cus I'm not sure how to go about this
I basically wanted to use the Mjolnir Gen 3 Mark VI armour from Halo for the game I'm making, and found a website ||https://www.thingiverse.com/thing:4399536/makes|| that I could use the 3D model for free. However, the file types come up as .stl which seem to be a 3D object file type (I've never used it though) and I'm not sure how to combine them into 1 and then give it animations
You'd have to process it in your DCC tool of choice, then export it as FBX.
.stl is mainly for 3D printing, and Thingiverse is mostly about it. It's not a file specific to one software.
what software would you reccomend
I know Blender can import it.
oooh bet then, I didn't really know if I wanted to mess around with something I dunno lmao
I don't know if Maya can import it, but if you use Maya, not hurt to give it a try.
I've got both blender and maya, so I'll import with blender for now, thank you very much
I don't think Microsoft is that strict when it comes to fanworks, but if his game is about to commercialised, it'd be a dumb decision.
If it's going to be that strict, Red vs Blue would've ceased to exist by now.
I mean, it's just my final year project lmao, it's not gonna be commercialised in anyway
If you're using specifically Nintendo properties, then getting clapped hard would be expected.
yeah I'm not going anywhere near their stuff
but uuuh, I'm now in another problem, I gotta put together these parts

Hey guys, how can I do a check in Anim BP to check the state of my enumerator?
I guess I could set my rotation value based on the enumerator and then reference THAT variable to set my bones' 🤔
bro is there a way to turn a blender model into an .fbx file without it completely destorying the rigging? Dunno why it's even doing that in the first place.

Ahoy. Not sure if you are aware of the FBX Content Pipeline, but currently exporting Control Rigs is supported in the FBX file format as you well know, however importing Control Rigs into UE via FBX is not supported. You have to setup your rig in UE using Armature or whatever its called, or import your animations.
a animation stuff newbie question, how does one show bones in the control rig viewport or skeleton viewport, seen some people have it but cannot figure out which option in the editor is it
figured it out 😛

I have: -
1.) Default UE Mesh and UE Mesh's animation
2.) Mesh B and Mesh B's animation. (Mesh B skeleton has extra VB and sockets)
I can retarget the UE Mesh to Mesh B skeleton and use Mesh B anim.
But how do i use UE Mesh's original anim after retarget to Mesh B skeleton?
You can't.
Hey folks - is there anywhere to get some extra animations free of charge other than the monthly Epic giveaway?
People would suggest Mixamo, but the quality is rather mixed bag. Though I guess it's being the cost of free.
Thanks for answering.
Is it not possible for me to "retarget" the Animation too? (Not just the mesh/skeleton retarget, anim retarget too)
I want to make animations play two different animation with same normalized time. Basically, I have a horse and a rider. Now while riding both rider's animation and mine should play in sync. In order to do that. What should I do?
@ashen junco Thanks 🙂
I Downloaded all of the Mixamo Library is there a way to retarget all of the animations at once or not really?
okay, then what do you suggest I do? If I make it an fbx, it doesn't have a skeleton and I don't know what other file type to use
Wrong. FBX can have skeleton.
and yet whenever I put in mine, it never has one

I can only guess your armature is not selected, and you have selected object only enabled in export settings.
That, or somehow Armature modifier is not present.
could I at least send you the fbx file so I know that's not the problem?
or the link
Would someone be able to maybe help me try diagnose why my char is not going to the jog animation? Im using the Animation Starter Pack
But i changed some variable names etc
Cant get anything other than idle to work
Oh nvm i did it
For some reason its failing this

Works when i bypass it
Hy!
I have a 6axis Robot Arm in Blender, when i import in Unreal Engine, i see the static meshes as a bones in Bone Hiearachy. What can be the problem?

Where do you set character ref?
hey, i've been trying to make my character's mouth open once unreal receives microphone input, i was thinking of something super simple like animal crossing like mouth movement like, just changing the texture, does anyone know how to do that? im really just a beginner so i dont know that much about unreal yet -w-
if you create an AnimBP, you'll have access to a state machine in the AnimGraph
you can set up states as animations and use a boolean to determine this

Anyone know of a good way to configure the camera in the animation editor view so I can preview some first person animations accurately?
Is it possible to retarget animations too? Rather than just retarget mesh to skeleton. I would like to retarget the original mesh's animation (before retargetted into new skeleton)
Yes! Right click the animation and choose the retarget option for it
Does the UE4 default mannequin have bones for an item in it's hand? It seems it
No.
(There is "IK" bones, but most practical cases just use the hand bones directly for actual IK, and not the "IK" bones.)
You could make a virtual bone, but practically you'd want to modify the Manny skeleton externally for animating purposes.
if the point of this extra bone is simply to attach a weapon into it, consider sockets instead
Yeah, I was but then I prefer to animate the bones the items attach to in Blender, for reasons.
gotcha, need bone for animation
Yeah. I use it for different things too, like say I want him to hold a rifle in one hand, and a grenade in the other it works well for that.
IMO anyways
Or, I can do this one mechanic I came up with a while ago I'm proud of where they hold two guns at once, with a catch for balance and other reasons
Is there a way to have a master blueprint anim that sole purpose is for storing shared variables that i can share with all the other anim blueprints from the AI in my game?
If you're talking about anim BP for all skeleton, no.
no
say that I want to share a death variable amongst all my AI that changes states in every AI. And when the variable is set to true it goes into a death stat that is availabe in all child anim blueprints so I dont have to cast to a specific class in order to set the variable in every single AI
the skeleton is just a place holder in the master anim bp
AI states*
That's something that anim BP should not entirely up to decide.
You should get the var values from the owner pawn BP.
Ok maybe this is a better question. When i want my AI to die I have found changing states is the best way to handle death. Montages cause issues on death because after the montage plays it goes back to the state it was in, so.....
And i don't want to destroy the actor right away so.....
this occurs even if you unposses the AI
hmmm i think i found a solution....well maybe
what ive done in the past, and for the life of me it seemed so mysterious to get working, was have the animbp setup with variables that i'd like then make children animbps that had different skeletons. Its possible, but i dont recall how or the source i found that did it
recently no, been a long time
@rustic plume So what do you do for multiple AI now?
Not meant to interrupt, but in similar note, I'd have the death state in form of a simple bool stored in the pawn BP, and let the skelmesh's anim BP read the bool value to open transition of the death anim state chain.
So you do a cast to the anim bp? @ashen junco
Anim BP cast to owner pawn BP to fetch the values
yeah thats what i meant. Sorry backwards lol
only issue is that cast is on a tick no?
The cast was done once on init, resulting reference promoted into variable.
It's similar to how third person template's animBP did it
So Event Blueprint Initalize animation?
I am wondering what cost more... A cast from the character to the animation bp or a cast from the Anim Bp to the AI class?
uh, no, what i mean is i have not recently done this. when i did it in the past, it was done, i forgot what it was exactly since i already got it made. i have this now, but i dont remember how i did it
yeah would be nice to use that instead of having to cast for variables when i can just set them
@rustic plume thanks again for the help
I don't have what i need to test this properly, so if you want to guinea pig yourself try this: right-click the anim bp and make child anim bp, go to class settings (of child) and change the target skeleton << this part seems too obvious that I don't remember if this is right
is it possible to combine 2 animations in a locomotion state machine, and more specifically, inside an actual state in the state machine?
The animation starter pack does not have a shooting rifle while walking, and I need it, and I assume they didn't add it because you can combine animations, which would add more flexibility
edit: I just don't know what to do, I searched it, and there's a combine blend space or something, but they used that in the animation graph to combine state machines, and not states
Yes, that's what slots are for.

^ Pretty common "HalfBody" setup
If you are new to UE4 anims, it'll take a while to understand
There should be lots of tutorials about it though
yea, thats what the video I watched looked like he was adding stuff out there, I am also a beginner, I have used blueprints for a while, never animations though, I am currently learning C++ in unreal, and I just wanted some animations on my custom model so it wasn't bland.

The key is the Layer blend per bone
It gets setup so the half body plays on the upper half of the body, and the locomotion plays on the lower half
Just watch lots of tutorials and follow along. It's a pretty complicated system to grasp at first if you haven't dealt with animations before.
yea it seems like it goes in a lot of depth, so that basically splits the body in half sorta?
Yeah. It sets the animations to blend from the pelvis up
makes sense, so yea that accomplishes exactly what I am trying to do, get the idle gun shooting to play while running.
The bools behind it are so the full animation plays if the player isn't moving
You can ignore the "FullBody" bool. That's something I added for animation curves
The key is to make sure you setup the "animation slot"
And set your montages to play on that slot
By default you will just have the default slot
You have to create half body
If you have fullbody animations you can create that slot as well

The "FullBody" slot on this overrides everything in front
Classic tutorial: https://www.youtube.com/watch?v=6aZbnldZjeM
alright, thanks, I will lookup that layered blend per bone, and reroute some of my stuff (I have very few animations, so it will be easy), at least now I have a better idea of where to start
that is also a different tutorial I hadn't seen yet, so that will prbably be more helpful as well, thanks guys
by very few animations I am using a total of 4 (with this problematic one included) just so my c++ practice project can have some animations on my character so it isn't so bland
What is the Method/Process for switch weapons. I need to learn how to do this https://www.youtube.com/watch?v=rhOT_TnxrTw I know part of it is animation montage, just not sure what the physical change portion is.

Showcase video showing all the trick weapon transformation animations and all the firearms available in FromSoftware's 2015 game: Bloodborne, including all DLC weapons.
Soundtrack playlist: https://www.youtube.com/playlist?list=PL9Anh-5isvPJLldSPhoZudYh06c-zt9Hq
------ TRICK WEAPONS ------
00:00 INTRO
00:13 Saw Cleaver
00:29 Saw Spear
00:42 Be...
Hey, just getting into animations- I was wondering will Control Rig replace AnimOffset and Animation Blueprints in UE5 or is Control Rig more of an additional tool to add another layer of polish in animations?
Control Rig is meant to be supplementing anim BP, regardless of the version.
thanks! Some hoodie guy said i can't use back the original animation. Glad i asked again.
Guess I misunderstood your question 🤔
I was implying that you're asking whether it's possible to use original anims as is, with the new skeleton.
Probably lost in translation, but eh.
I see. I thought you were trolling. Especially when i asked you on 2nd time. My bad, sorry.
Hey guys, don't let anyone tell you animation isn't art. You can do cool things like this one day:
Yes, it's an 8 directional dodge montage :))))

Oh and for when I inevitably go into the list of prettiest blueprint makers ever, I'd like this quote on there please:
"I believe the goal of everything in life, is to do it so well it becomes an art" - sk0g sk0gsson
Hey I've been dabbling in unreal as an internship project and one of my clients asked if I could put a dancing zebra or something similar in the background. There are a bunch of cool dancing animations I've found on Mixamo, but it doesn't seem I can just put it on any random animal model. Essentially, I'm not sure how to make animals dance and was wondering if you guys would know how.
It's a 3d environment concert for a small dj to give more context
I've read about animation retargeting but I don't believe the animal assets I use have the same skeleton asset as the human ones in mixamo
Does it really have to be animated? Could just have a transparent PNG playing potentially?
Retargeting is mostly a thing for humanoids, at least if you're going off YouTube. There's a standard Epic Skeleton most animations are targeted to, and it's got, understandably, 2 arms and legs.
If it has to be animated, I'd look into Control Rig, might well be the easiest way to get it done.
Yeah it's going to be a live virtual production with panning camera's and all, so it'll have to be animated for real sadly haha
But thanks a lot! I'll be looking into control rigs! 😁
All good, and I hope it fits the bill!
Hello, i have been trying to set up a control rig for TwinBlast. But for the life of me I cannot find the "Rig Hierarchy Ref" variable. I right-click, compile, save, restart. Control rig plugin is enabled. The only thing I can think of is that they changed the variables and haven't updated the documentation. Any help is very much appreciated. Thank you

Hi ive been trying to make my character walk backwards but something wrong with the animation. pls help?
Hi. for fps games, what is the advantage of using the IK_gun or r/l bones or even using virtual bones instead of a socket from a the hand_r/l. I am doing a lot of procedural stuff for weapon sway, aim offset using transform bones but using the hand_r/l bone. Thank you
Hi!
I have a problem exporting animation from Blender to UE.
The first video shows the animation of rest. On it, the character's hands rise and fall strictly along the Z axis.
The second video shows the same animation after exporting to UE. It can be seen that the left hand makes an extra movement to the side. In fact, both hands began to twitch. What could be the reason for this?
The picture shows the export options.

:no_entry_sign: D3ku#9532 was banned.
if you are familiar enough with animation, this has to do with the mismatch when exporting to fbx from blender. The best workaround that i know of is to bake the simulation, meaning that all bones are keyframed for each frame, before exporting. This itself does not solve the problem, but exposes what the fbx file has within it when checking Bake Animation. Baking the sim in Blender should show the exact same result as unreal for this reason. As for why this happens, my guess is due to the differences between control rigs and bone animations. However, by baking the simulation, you can then correct each frame precisely. Its possible there are other reasons, but with the majority of animations ive had this sort of problem with, this was the solution. I will save a separate scene specifically for fixing the bake sim issues. If someone knows more clearly as to why and how to solve this, I would greatly appreciate it! Hope the info helps you..
Thanks for the advice! However, I already tried to bake the animation and this did not solve the problem :с
And this is strange ...
you baked it within blender?
Yes
and is it still just as clean? or does it move a little it, the baked version?
The baked version in the blender is exactly the same as the unbaked version.
He has no twitching
dang, maybe the engine just cant be that accurate or perhaps its the fbx... have you tried importing the fbx into a new scene to see the quality?
Into a new scene? No...
How is this supposed to help?
for me, it would be to see if it is being exported with inaccuracy or if it engine specific
i figure there would be something to correct if it was the fbx, but if it's engine side.....
Hmm hmm alright
I'll try to export to a new scene and see what happens.
Thanks again for the advice!
hope it helps
hey there 🙂
I'm facing a weird crash when trying to dynamically link an animation instance, and I have trouble interpreting the message
Assertion failed: (AdditivePoses.Num() > 0) || (NonAdditivePoses.Num() > 0) [File:D:/build/++UE5/Sync/Engine/Source/Runtime/Engine/Private/Animation/AnimInstanceProxy.cpp] [Line: 1728]
Mammals all share similar skeletons (with different bone proportions). So it’s not a completely outlandish idea, although the "wrist" of a zebra is more visually where the elbow is on a human. Also the zebra rig itself may not have the same kind of bones and hierarchy as a mixamo rig.
And depending on the dance, the zebra’s will likely deform in undesirable ways especially around the chest.
I Have a question for anyone who uses blender to animate.
I found some tutorials but I'm missing something somewhere. I have a gun model that has parts that will translate and rotate into a melee weapon. I've made the vertex groupings However when I go to rig it and move the bones the object parts won't move at all in pose mode.
Hello,
Anyone here knows about any good resources on control rig, what are the best practices for creating skeletal meshes for use with control rig, etc.
Thank you
@fossil socket Did you bind the mesh to the skeleton or did you only made vertex groups for the bones?
this about my question?
yes
later not the former
i kinda worked my way around it, though i dont understand why it works now i can repeat the solution, but again dont know why it works
then select the mesh first, Shift select the skeleton and press Ctrl + P and select Armature deform option
gonna open a template for that

I'm sliding the timeline backwards and instead of getting the middle image I'm getting the last one, this is of course after setting keyframes for the first image. What am I missing?


What does “EBoneTranslationRetargetingMode::AnimationRelative” do?
Or what does it allow me to do with a skeleton?
Obscure question but:
Why do the UE4 mannequin and meta human rigs face the Y+ axis when in UE4 the X+ axis is forward?
Can someone help me out with why my jog back is all glitchy
oh shoot wrong vid format
So basically, whenever I lock on to an enemy and move backwards, my character starts glitching wierd
Not sure what I did wrong
I doubt the problem could be with the locking logic because the player doesnt change direction that eratically
I had a hunch that it's coming from your wonky lock on, because of two "control rotations" fighting.
What is the smartest way to set up like 30 animation (a couple for basic movement like 3 for jump and sprint each for example...) and then the rest for diffrent kind of attacks which just should fire off once and then return to something like jump/sprint loop or walk or another attack?
For base locomotion, that goes to state machine/anim graph. For the attacks and one shot anims, that goes to anim montages.
do i have to blend from walk to run to sprint to jump or can it look good without?
You should blend them in the transition. Anim graph has all the stuff you need for that.
Look up the third person template, and see how the anim BP is built.
Doesn't matter much IMO
You can still learn stuff from it.
Especially in the case where you want full body first person, and not oldskool floating arms first person.
Even then you still could learn it to be applied to the enemies.
how to replace that Jump Asset when i have a custom jump function (it didnt worked so i just created my own, and actually want to keep it now :))

that Screenshot is from the 3rd Person template State Machine, from JumpOut to Idle again
Any tips for using additive layers for multiple animation sequences? ex: moving hand_r in a certain rotation in the first frame of an animation.
What setting would allow my character to walk backwards when the back key is pressed, instead of rotating in the direction of the key?
I think you're right, but im not sure what to do
"UseControllerRotation' under movement component I believe.
I spent more than half a year on bb anims, and i found out at first that the weapons are made in two forms seperately, but theyre equipped at once. When transformed, a "model mask" switches and the weapon is transformed - but how they keep the blood decals on etc is beyond me
It's basically switching models as soon as you hit the button, and plays its animation. Player and weapon anims are in seperate files but they're triggered at once when an action is prompted
Also, retarget work for these are quite troublesome and i couldnt succeed on that. If one day you manage to do it, i'd be happy if you told me 😄
Exporting a rigged character from Maya to Unreal as Alembic cache
Works except some face parts (eyes, teeth) are NOT animated and remain at origin. I believe this is due to constraints not being recognized.
Does anyone know of a workaround?
@warm vessel OOH TY. That certainly helps I'll start researching that. I also started looking at weapon morphs but stopped because I wanted a mechanical change, so I went and rigged the weapon and animated it , haven't been able to import it to unreal yet. I'll remember to share the secret to retargeting or alternate solution if I ever find it. Again ty
Why is my animation crippled ?

Imported from blender
I deleted some parts of the mesh to have it easier to animate, is that the problem?

The bones and IK are still there, just hidden
yo im kinda trying to do the same thing but the weapon itselfs morphs into a diffrent weapon
Question.
would anyone happen to be aware of any videos that explain "Why should we use Aim-Offset in 3rd person shooters?"
Context.
I'm trying to explain to a programmer who doesnt know anatomy well, why using bone rotation is inferior to an animator creating custom aim-offsets. He sees no value in it.
this is more of a philosophy thing and not a tutorial thing. I have found a ton of tutorials and dont need those. Does this question make sense?
Im trying to import a mixamo animation, but I don't have the option to create a new skeleton...what gives?

I follow every youtube tutorial and they all can create a new skeleton
@pine cliff Hate to bother you man, but again, I follow each tutorial and they simply download the animation and just drag it into the content browser and they get the option to create a skeleton. I understand I am importing an animation, but why is mine different?
I know this is a FBX anim, that thinks it wants a pre-established skel mesh. But still, it should work just like any other tutorial
If this is Mixamo I believe there is an option to export the skeleton with the animation
Double check that because it has been a long time since I have used it
That's the issue, I kept downloading and trying without skin. Skin = mesh
Gotcha, thanks man! Just needed some rubber ducking
Dude, my anim is SUPER small haha

@thorn tendoni believe using an import scale of 100 will fix it
are there any horror animation packs? I need something simple, like character leaning out of corner with his head and hand but I guess you need to make custom one for that hand motion
something out of chucky movie
was looking for a rolling reference and i found this https://youtu.be/eMC-1_q8zg0

Learn the basic parkour roll and advance to be able to jump from height, prevent tripping and dive roll over obstacles. This is a companion video to my blog tutorial, so be sure to watch the video and read my blog to get the most out of your training. http://ronnieshalvis.blogspot.com/2012/09/ac-parkour-tutorial-break-fallsthe-roll.html
Want to...
hello everyone, I have a question about ControlRig and export from blender. Problem is when I export char from blender - its looks fine in UE but when I put it in ControlRig with retargeting controls whole character get twisted. I tried all types of export fbx from blender but all the time something is wrong when I put it into controlRig. Bones names are the same, chain length of the bone is the same (simply is 1:1 manequinn skeleton). After I export manequin from unreal, when I import it into unreal again its working fine, when I put it into blender, export fbx and import this one it getting twisted. I even put manqeuin through 3ds max - and there export is fine, when I put my character and export from 3ds - again it get twisted. Tried send2UE -> twisted as well. Anyone had similar problem with ControlRig and blender? Maybe someone here know how to make it work?
Can anyone help me with my character movement, every time I follow a video tutorial I get the same outcome…. Thank you in advance
Which window is it in as I have the blueprint open but I can't find that window?
I can not find the components menu

oh right
in the third person character blue print?
oh found it
That did not fix it, it still does the same thing apart from the character does not turn
thank you though
Was anyone able to figure out what i was doing wrong?
I do work with Blender and Control Rig.
So the secret sauce to working Control Riggies from Blender is to adjust both primary and secondary axis for the CR nodes. That is if you use Blender's bone orientation.
Probably that cached pose from LowerBody for UpperBody is redundant.
Does anyone know how to fix my left hand? I have watched many video's, read websites but yet still no success. The closest I got is using the FABRIX node but it causes more problems in the long run Preview Gif: https://gyazo.com/1141334c51ceb203488cbbdce8676666

I think just Two Bone IK (or Basic IK, if you use Contol Rig) is what you're looking for
Fixed it ^^
If you have an animation sequnce that articulates the bottom and top half of the mesh, but you only want to use the top half of the mesh,
For Example:
You have sword swing that you want to happen while the character is running, but the sword swing anim has a lower half segment in it.
Is there a way to trim that? Or How would you blend it in? Ive been struggling with this for months off and on trying to finger it out without creating a whole new animation.
Thanks in advance!
Look up slots - it'll allow you to assign just portion of the body to be affected by the animation.
Yes. It's was exactly one of the examples shown in this presentation.
https://www.youtube.com/watch?v=Z8eqaFG7lZQ

The Full Body Inverse Kinematic (FBIK) feature in Unreal Engine 5 allows you to construct IK in Control Rig with a high degree of control and flexibility. In this feature video, we show you how to create a 100% procedural animated character with a highly modular setup.
Though you could also mix it with anim dynamics in the anim BP.
Considering that Control Rig can be called in anim graph.
just google "UE4 anim slots" ?
Thanks for the reply btw. I haven't known what words to search lol. I use Houdini or used license just ran out. But not use to doing much animation stuff that is very complicated or beyound basic state machine and logic but I am having to start working on the anim area of my project. Thank you for any and all feedback!
how to replace that Jump Asset when i have a custom jump function (it didnt worked so i just created my own, and actually want to keep it now :))
that Screenshot is from the 3rd Person template State Machine, from JumpOut to Idle again
like what does this function

does anyone know how to attach multiple animations in 1 file on fbx format in maya?
You have different animations in separate scenes?
i'm an amateur so i'm not familiar with the terminology
what you're saying is "create different animations in separate scenes" right?
Thats what im asking
that should be enough clues for me to search on how to do it then, ty 🙂
Is that what you did?
nope, I didn't know i had to make new scenes
You dont have to....
oh? what's an easier way?
So what are you trying to do...?
Well sometimes i import models from others thatbhave like 10 animations attached to 1 fbx
I can dob1 animation at a time, import it, clear it and startva new one. As you can see, pretty bad workflow but i dont know any better.
When i googled i get articles on how to make movies which is not what i want
Ah darn typos had to switch to phone
All good im o. Phone too :p
Well heres some info for you, since its maya
You are bringing in these multiple anim fbxs just to split them up it sounds. The engine can actually do that
So in one regard all animation work can exist in one scene
has anyone been able to stop the Skeleton Tree auto scrolling to the top when creating or deleting Virtual Bones? it is a paint in the butt trying to make new bones and it defaults back to the top every time you delete or rename something
If you like having one anim to one scene then i think you are doing it right
But how do others manage to put in 10 separate anims into 1 fbx?
When you mentioned scene i am guessing they have multiple scenes?
They use the timeline? Just one after another
They could but i usually just animate it all in one or two scenes per character
Timeline? How would you delimit which animation is which? Like walk and jump
So i might do all locomotion in one scene, i will do walk, run, strafe, jump, etc. And for each one i designate a frame. Soo starting at 1 for walk, then hop to 50 for run, hop to 100 for strafe, etc. This does mean i have a lot of unused frames because its easier to remember these incrementa than to cram one after another. It also means if i find the walk anim too fast i can add more frames and i dont have to shift everything else around.
These increments also make it easy when i splice it up in engine
I export it as locomotions, import once, duplicate the anim as many times as there are animations and cut them down
You can do that?? Cool! Didnt know!
Reimporting will remember the frames unless something changes, which is rather common, but the import setting on the animation would be set to that specific range
Theoretically it will always pull that anim range, but its messed up sometimes and brought the whole thing in, so i just splice it again
Probaly me forgetting to set the time range
I will give it a shot! Thanks for the tips!
😁
@winged rover still trying to solve it? Got it solved?
Hmmm in fact I'm trying to debug it but I can't find the solution. So I have an equip/unequip anim montage, but its played twice
So for now I'm just playing one ani montage, for unequip, but this anim is playing the entire unequip and equi animation (because I split it to 2 anim monatges)
So equip and unequip are two different montages... somewhere you call what and it plays what?
Inside my ABP, I have a condition who is set to true when a press a switching key. And here I'm calling montage play and reset the switching bool to false

Alright. And you said it playes twice? So it doesnt loop forever, just once after?
Yes sorry only twice
Okay, no worries. So this is in ur abp, what event drives it?
the first branch is called on Event blueprint Update Animation, just after I'm casting to my Base character class and check if is valid. Then I have a sequence for dispatching stuff like variables setter and this function in the end
So this is firing on a tick essentially?
yea
but also in the anim graph I use the blend poses function to split the upperbody animations and just set the switching animation on the upperbody. For now I'm just testing with 2 weapons

Gimme a few minute gotta drive home
gl 
made it home. Not sure if blendspaces matter here since the anim montage will override whatever current animation is happening and then resume the normal animation, as I assume you are doing with cached poses at the root of the graph
im not a fan of delays, not to say its a problem, but it could cause one, hence why im not a fan.
The way I handle one-off animations is to call the montage when necessary rather than with an updating check. To me it would be: player presses reload button, do logic stuff, and call the montage for it - this delay method may work to set the boolean correctly, but I don't trust this too much. I prefer to use an anim notify event in the montage for when it the reload "finishes" which means it doesn't have to be the last frame. This event in the anim bp would set that boolean. The input logic would be in the controller/character - wherever you tend to put that kind of logic
is there a proper way to get 2 actors to do a montage set, actor 1 choke hold actor 2 being choked. can sequencer be used for this? i dont want outside actor interrupting my choke holds on enemies. rather sometimes hit reactions desync them the way im currently doing it, which looks aweful.
I have an animated cube that’s an FBX animation, there is a way I can turn that into a CameraAnim asset or sequencer?
Like use the transforms from it
i would think there should not be a way for outside actors to interrupt the montages in the first place
I want to sync animation A with animation B in similar. In order to achieve that, what should I do?
exactly, i wonder if theres just some check mark i can put somewhere that makes it so a montage MUST fully complete before allowing the skeleton to do another animation. also would be nice if i couldnt be moved from a spot that a montage started in by outside forces
you just tell both the montages to play off each other, off the "on notify begin" exec pin of the leader animation drag off make a branch node and play the enemy montage off true. then in the leader montage itself, use the "montage notify"(the one that was already there in the engine, you dont need to create another) and give the notify a name...then back at the place thats activating the leader montage, just compare the name is equal to the name you gave the montage notify ..if its equal, play the enemy montage hook that to that branch you made off the "on notify begin"....
there are issues doing it that way, like outside sources can desync the 2 animations tho...atleast in my case where i have hitstop on hits..also if you are using detour ai, another ai can accidently push the receiving enemy around and out of line
Did part of it already. I use a curve to check the sync. Problem is I'm not finding the fuction to play at specific normalized time
Let's say time is normalized from 0 to 1
A and B animation got different time length
That normalized time will both play/display animation at specific time
Hope you are understanding my point @bronze turtle
yeah, trust me i get it...thats what i meant by hitstop desyncing me 😛 because the custom time dilation on actor A is no longer the same as when it first started animating
making his animation 90% longer for half a sec really throws off the animation set completely
so in a way im looking for the same thing you are looking for....a way to make sure they both stay synced up no matter what happens outside of them
maybe ill take a look into animation sequencer actor component...see if it can solve my issue
Probably first thing I got stuck on Unreal about animation. Seems like Unity has a solution for it unlike Unreal. Or there is something else that I don't know of... animation in UE is fairly big
i dont even feel bad about it....with the complete lack of decent info on how to do some of the most common industry standard animation tech like syncing up 2 actors in 2 different montages (nearly every single game ever does this)...we are left with trial and error and trial and error until we accidently figure out the way its supposed to be done
thats true with so much of unreal...
like try finding a half decent guide on correctly using linear/angular motors with curves to drive physics based animation....
the most youll find is a gdc talk on "the last of us 2" discussing how they did it
Do any of you guys work with alembic as format for animations? I am having trouble importing the actual animation. I tried importing it as skeletal mesh as well as geometry chache. Both get imported, but no animation comes with it. I am using blender. Have tried different export/import settings but it just won't import the actual animation... Any had similar trouble and was able to solve it?
Have you tried the "Alembic File Importer"? Might be a plugin you have to enable
I'm trying to do a maxed blend between animations that can run on top of movement (sheathing/ unsheathing in this case), and ones that can't (dodge, attack, etc).
Is there any way to check if there is an animation playing on a specific slot?

Yup, just checked, both plugins are enabled... I'll do some more experimenting
not using sequencer yet, trying to figure how to do it with sequencer now....i was just playing the 2 montages off each other...
theres not very many guides on how to do 2 actor hit/react type animation so im hitting a brick wall here now
Hi everybody .. i have some problem regarding my animBp s layered blend per bone nodes. I went crazy on it and used like five of those nodes in a chain... as base pose i use the same anim sequence.. My problem is that each time the animation passes trough a new layered blend per bone node it doubles the speed of the animation....i wonder if anybody else from here had the same problem is there a quick solution for this ... i am thinking maybe i just need to reset the play rate at the end of the anim graph... but i couldnt find a node for that ..
Alright I did some further test and it appears to be the fact I'm doing rigid body simulations rather than cloth or something. If I animate a cloth simulation and export/import it into unreal as alembic, it works fine. As soon as rigid body comes into play, the animation won't import no matter what... Is this a know limitation?
Has anyone started working with live link face in ue4? I’m trying to get an animation to play on the body mesh while I use Mocap for the face.
Ah alright me stupid. It would have been better to bake the animation... 😒
I got around this issue in a way - the playing any montage check is now playing any montage AND NOT blendable montage playing. Weird and wacky maybe, but it works for now lol

I have hit stop implemented, which changes the custom time dilation on actors. if the 2 animations are started and actor A gets hit, now the animation between A and B are playing at different rates for .3 of a sec...which throws it off by equally that much length from each other, if both animations are only 1.7 long...you can see just how grossly off sync a .3 delay would make it...
it gets even more complicated than that, its also a multiplayer game and im using GAS for abilities...
so a lot of the tricks i can use to keep them synced cant be done in my setting
anyone know how to bring VR hands in from blender?
this is work stopping for me.
I am having trouble exporting from Blender and importing the FBX into UE4 as a skeleton mesh.
Exporting out of UE4, then back in Works, so I know the skel is good.
Then Just importing into Blender, then out of Blender as FBX, kills the rig.
I change the model name to 'armature' and remove the leaf bones, but it still does not understand the weights on the back of the hands.
I change nothing in blender. Just bring it in, then export.
then it looks like this. with the weights all messed up

Hey has anyone done root motion with AI? I have it moving forward with the animation but I'm not sure how to make it follow the player or turn. If anyone is willing to tutor me I can compensate for time.
Thank you @misty dagger I am still pretty new to Unreal and I don't have familiarity with this stuff yet. I think it's necessary for my game though because the main premise is there's a giant monster walking through the forest trying to step on you .... since it's so big, need the walking to be realistic and also the feet/legs need to have individual colliders
If you are available to pair with me on it I'd appreciate it
its not doing the anim but the string does fire what is missing :)?
for the O example

got the anim slot set?
default slot...also check that it is for the skeleton that called it
ive made the mistake before of setting the wrong skeletal montage
@terse violet
i tried other stuff by now and this is working, but it wont return to idle/run´jump the anim stops then

will this be fixed when i do it with montages or do i have to reactivate it
montages are a bit more reliable and offer more control. if your game is fine with just playing the animation you should be fine, but i would recommend using montages personally
Yeah, per mentioned, I would avoid root motion for basic locomotion. There's many ways to (convincingly) eliminate foot sliding, even without root motion.
@ashen junco @misty dagger In my game there is a titan-size enemy, so it will be extremely obvious if the movement doesn't match the animation. Also the legs/feet are going to have their own colliders. I'm not really understanding your suggestions.
Looking for a technical animator to join me on the Mikoverse team with @thecodemiko. Your job would be to work magic and work extensively with live mocap anim inside @UnrealEngine to achieve arbitrarily complex goals. Fully remote available. Send emails to jobs@mikoverse.com
In my suggestion, I'd have slow character movement component, and use something like distance matching to keep the foot in place, thus foot locking.
But I can see how some would find CMC less desirable for huge characters.
Didn't know Allar worked on CodeMiko 👀
ok i think ill switch back once i understood why they are not working xD
What is the best way to avoid this? I'm working on getting a horse walking realistically and I've gone down the root motion path due to the feet sliding issue, but it's causing me a lot of issues.
I'm solving it with IKs and distance matching. Lots of resources on the IK setup.
Hello good people, I am wondering if there is a good tutorial I can follow, or article explaining how I can change an animation as I pull on a controllers trigger, I am getting ready to animate a revolver and I want to see the firing hammer and trigger of the revolver rotate according to how hard I press the trigger, Can someone help? I'd really appreciate some insight and a link to a good tutorial.
Do I want to do an animation blend space?
Does anyone know if I have to leave the 1st frame (aka frame 0) empty for the tpose? I'm seeing conflicting info on it - At the moment I export the mesh/skel seperate from maya with no animations on it then I export animations, but I do start from 1st frame (frame 0) on these animations.
There's practically no different, at least from Blender.
ok thanks
Hi. Since I am not a developer, but only use unreal to create cinematics - your help is needed. I have a modular character and animation package. Both use Unreal skeleton. But when I add a BP character to the sequencer, it still does not have access to the animations from the package. I would be extremely grateful if you could tell me how to fix this.
Seems like you have to (hard) retarget the animations for the character skeleton. Usually anim packs uses Mannequin skeleton.
i did
Is there a way to play animation montage in reverse?
The play rate only takes input greater than 0 and aftr putting negative value, it won't play
hmm i looked around and cant find what u could mean
and what is better Play Anim Montage or Play Montage?
not directly unreal related but
I'm trying to transfer root motion animation for UE4 mannequin to Metahuman, using MotionBuilder
I have pretty much everything working except root motion
on the original (Ue4 mannequin) the root motion is working correctly (the root bone is moving on scene),
but on Metahuman root motion is transfered to pelvis..
any ideas ?
ok if anyone wonders, i think that was what he meant

how do you put an item in characters hand and make it go along with animation?
u need to set a parent socket

if u cant set one there too then hit me up again, there are many ways 🙂
How to Loop Anim Montages?
thanks, will try. The item will stay in it's hand all the time right? Like get glued to certain position with hand, like it becomes part of character's appearance

Hey there DevSquad, today we cover how you can introduce characters into your sequences and use premade animations to bring them to life. We also show you how to utilise movement tracks at the same time to mimic movement.
► DevSquad Clothing: http://www.devsquadmerch.com
♥ Subscribe for new episodes weekly! http://bit.ly/1RWCVIN
♥ Join the Vi...
im going to use this method to move character and mix it with having item in his hand
just doing cinematics for now
You probably want something more like directly setting an animation/montage's TIME from the trigger input
I have a 0 frame animation, a single frame from an idle animation for my character. I made 2 duplicates and edited the pose so one is looking left and one is looking right. I then created a 1d blendspace to blend between left/idle/right. However, when previewing the blendspace, no blending occurs - character does not turn his head. I confirmed the left/right poses are correct (closed/opened the animation and confirmed it still looked right), not sure why the blendspace doesn't work. Thoughts?

I believe something is wrong with my look left/right animations. I rotated the neck, added a keyframe for the neck and saved it.
Question.
would anyone happen to be aware of any videos that explain "Why should we use Aim-Offset in 3rd person shooters?"
Context.
I'm trying to explain to a programmer who doesnt know anatomy well, why using bone rotation is inferior to an animator creating custom aim-offsets. He sees no value in it.
this is more of a philosophy thing and not a tutorial thing. I have found a ton of tutorials and dont need those. Does this question make sense?
I can't select parent socket, it won't allow to search
nvm somehow it worked lol
Does anyone have experience rigging tank treads? All the info I can find is based on a repeating instanced mesh (which I have here) however I need to add specific details that do not repeat

I would do it in material level. Hacky, but should work.
Ah sorry, I meant geo. It has giant spikes that need to attach to the parented treads
I can separate the materials but they need to be rigged
If you want a huge amount of bones, then by all means.
I mean that's why I'm asking
It's going to be vertex animated but I simply need to rig it in blender to animate it first
This will try to set the rule automatically, based on most relevant player node's remaining time and the Crossfade Duration of the transition, ignoring the internal time.```
Does anyone know the details of this?Is there a performance difference between animating in ue4 control rig maybe also using fullbody ik and animating in blender/maya? to a beginner like me it seems that ue4 would create faster animations, but is there any performance drawback?
None.
If anything, the drawback is in making constraints.
I'm sure ue4 animation has way more constraints than blender/maya animation, but right now i'm working towards a prototype, so having something a bit worse is better than trying to waste way more time animating in maya/blender
So performance wise, everything is good?
lol no
I've been working with Control Rig anim tools for a long while, there's no constraint features, so making anims like holding object is not as easy as in DCC tools.
really?
what do you mean by making constraints?
Basically adjusting bone to follow certain movement rules.
Most prominent uses of constraints is holding objects.
https://www.youtube.com/watch?v=U8JXO39aAqY
https://www.youtube.com/watch?v=aZt07wyasnU
https://www.youtube.com/watch?v=jXCq8CncEeA
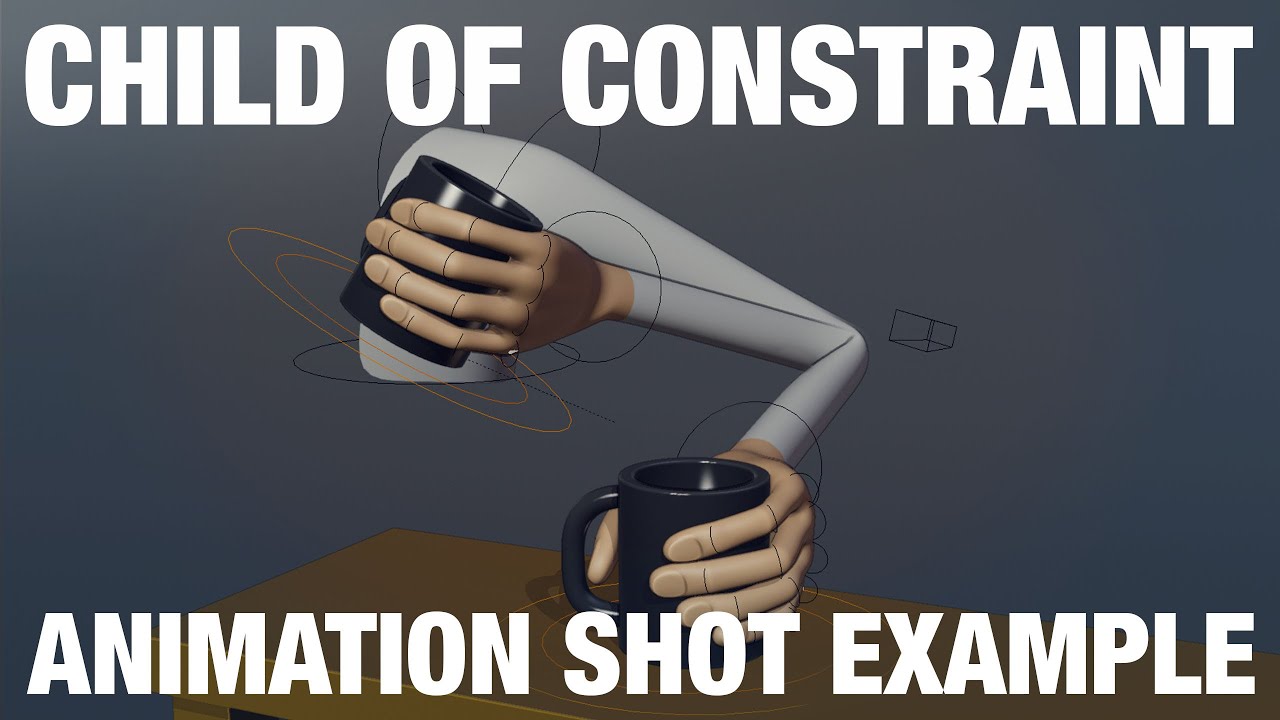
This example reviews how to use the Child Of Constraint in a simple shot.
Download these files here: https://gum.co/pZtWA
This example is something that is fairly common in shots, picking something up and putting it back down.
There are other ways to do this, this example is simply showing how to achieve this with the child of constraint.
...
so the drawback with constraints is in ue4?
There's no easy way to do the same in CR animating tool that you could achieve in DCC tools in almost no time.
so wait, DCC is actually faster in the end?
I tried making first person animations just using CR animating, it was painful, to say the least, getting the weapon position right, every, single, frame. Constraints would've save me a crap load of time doing the same thing.
Workflow wise, yes, actually.
Though it's good if you want to make anim prototypes or making animations on the spot, as long as it doesn't involve holding objects.
where can I find some good tutorials for DCC constraints with weapons for example? Mostly will be RPG like, swords/shields, so yeah, a lot of constraints
and what's the best software for this? maya or blender?
Those three links above should be enough to get started with constraints.
The answer is one that's the most comfortable for you.
tbh i'm most comfortable in 3dsmax, but that's because I'm coming from archviz
and that's not nearly as potent as blender/maya
animation-wise
Is there a replacement for the "wheel controller" anim node in UE5?
Thanks
Hy can anyone help me i am trying to make a Ai animation in that my ai should Get up first then to Idel and then it should Run how can i do that in anim BP Can anyone help me and share some idea or any tutorial for that
That sounds like a simple little animation state. Jsut look at using animation state machine, and transition from one state to the other as the animation completes. 🙂
I am new to unreal and i tried it but i am not getting the transition from getting up and idel
If you provide a bit more detail, it will enable us to assist you. "not getting the transition" is not exactly enough for me to help 😆
Use the guides from the documentation, or just lookup a video tutorial if that works better for you.
https://docs.unrealengine.com/4.27/en-US/AnimatingObjects/SkeletalMeshAnimation/StateMachines/CreatingStateMachines/
Maybe post some screenshot of your transition that is "not getting" and lets take it from there
hey everyone im running into a bit of an issue with my animation. and hope someone here is able to help
I currently have a wheeled vehicle with a driver. This driver can steer left and right with animation and i thought using a blendspace for it was the best thing since the timeline allowed me to set steering based on a float (if you use a dpad and steer half it gives 0.5 etc and only sends that part of the animation etc)
I currently have it setup as followed
-1 0 1
Steer left Idle SteerRight
This works but my issue is that because it's a blend space it interpolates between the idle and steerleft/right i don't want this because the hands will clip with the steeringwheel. is there a solution for this or a alternative method to do so?
@minor terrace #released please
use IK
and just rotate the whel
hands will follow the wheel
Asked yesterday but got no response, thought I'd try once more since it seems so simple. I have a 1-frame idle animation for my character, just standing still. I want to make a blendspace or aim offset for looking left/right. I attempted to duplicate the idle animation, rotate the neck and save a keyframe for both left and right and use those in a blendspace (blendspace is fine since this character won't be doing anything other than looking left/right) but when implemented the left/right animations simply do not play. I plugged other animations into the blendspace and confirmed THEY play just fine, so I'm guessing I'm creating the left/right animations badly. Any thoughts?
Those turn animations are all additive right?
I made them additive when i tried to use an aim offset
Are the turns single-frame animations themselves?
Yes, literally just rotated a bone by 15 and saved a keyframe
But they shouldn't have to be additive for a blendspace right?
Hm, no, I must have been thinking of something else
When I was trying an aim offset I edited the animations, set the Additive Anim Type to Mesh Space, Base Pose Type to selected animation frame and put the base pose animation to the idle animation
And you put an Apply Additive node in your anim bp?
Anyone know how to mark frames in an animation sequence? I need to know e.g. what time the foot hits the ground before playing the animation, so I don't think I can use a notify (unless there's some way to get all notifies from an animation without playing it).
It doesn't even work when I try to preview it
Quick video of my attempt
I'm thinking I'm screwing it up either by removing frames of the animation or by keying incorrectly
Hm, is a keyframe necessary? Not sure why that would be the problem but I'm doing a similar blend in my project with single-frame animations and my animator didn't use keyframes in them
It doesn't save the rotation if I don't keyframe it ..
Also I have no idea why the remove frame options are so weird. If I right click at frame 0, there's no option to remove frames from 0 to the end. It lets me remove from 0 to 54 then from 54 to 251 (the end). It's weird.
I exported my animation, imported in blender, cut the keyframes there and made my left/right poses. Re-imported to ue4 and created a blendspace, seems to be working now
Maybe the weird frame deletion was putting it in a bad state or something
Glad you got it working at least!
I made a const thread-safe function to use that in anim graph. but I have got a warning for the fast path. Am I missing something in my function?

:no_entry_sign: blxxd#9207 was banned.
So I am following this video https://youtu.be/QBGGeAPWgug?t=502
Its about creating a character model in blender for UR4
I was able to make the mesh then I built the armiture (bones) then paired them to the root bone (torso) But
The Head/leggs/arms work fine and they follow the root bone but the torso part of the mesh does not follow the rootbone
This is what it looks like https://gyazo.com/e5ceda76ed7fb483ada72637cb4cb88e
Anyone know why this is?
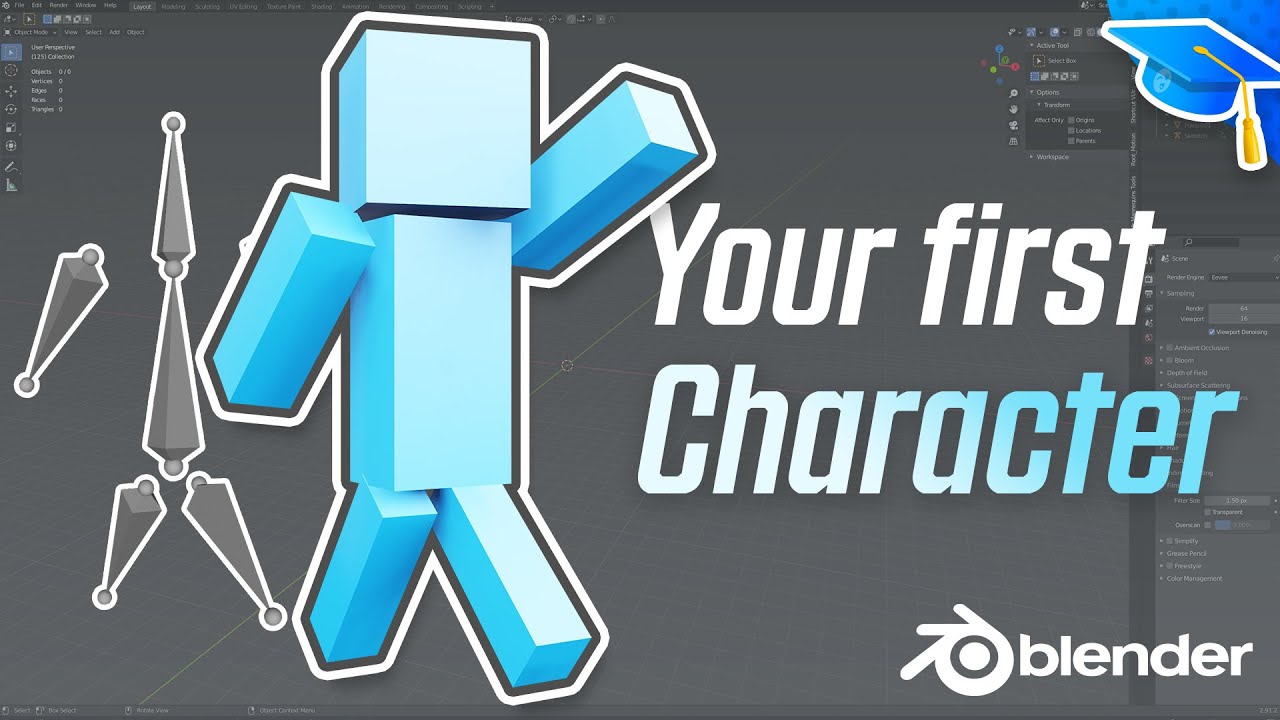
In this video you will learn how to make a full fledged character in Blender from start to finish.
This includes creating the mesh, rigging the mesh by adding an armature, creating a walking and an idle animation, and in the end I'll show you the correct export settings so you can import and use your character in Unreal Engine 4.
#Blender #cha...

The maniquin in the back is used for scale
Looks like a simple weighting issue.
What's the different btw Event blueprint Update Animation and Post Evaluate Animation?
how do I make a montage loop?
Quick question, My blendspace animation nodes aren't white anymore, they are yellow. Does anybody know what that may mean? Cuz im having issues with it always being in the sprinting part of the animation even if the speed is the correct value to be using walking and the jogging animations instead.
Is it good for performance, or it will evaluate all animations at the same time?

Can anyone help me? I want to move 15 actors at once to make an animation from it. I want to move the transform center - left-center ( LOOP) ,but i don't want to move them one by one.

I tried to do it with level sequence. I select them all ,but it's not setting the current position for all just for one of them.
a montage is a specific short animation. You'd be better off with an animation state you loop into like a blendspace.
have you tried web searching?
I figured out how to loop a montage, it's easier for me to use montages
Hi, I'm facing an issue with importing Alembic animated cache. When I try to set Frame Start option in Import Options, the geo goes haywire, else it is fine when it is 0. Has anyone faced this issue?
How do I copy the frames at the start of an animation sequence at the end?
I adjusted an animation inside UE (w/o control rig, by hand). It's ok, but since it's a looping animation, i need to add a key before the end with the values at the start so it loops properly - any idea on how to do it?
rn it snaps - obviously - back when it loops and I suck at everything animation in ue 😐
hi everyone! had a question about anim montages and the animation graph. i have two animations that i play together for an attack sequence: a getting-into-position animation, and then a looping attack animation. i created a montage that does this. since this is the attack animation, i wanted to use it in the state machine on the animation blueprint, which, according to ue docs (https://docs.unrealengine.com/4.27/en-US/AnimatingObjects/SkeletalMeshAnimation/AnimMontage/UserGuide/), says i can like this

however, when i drag my montage in, i get this:

fwiw i'm in ue5, but i figured it wouldn't be that big of a change
familiar with normal bp's but have been trying to expand into learning more stuff about animation, so sorry if this is a dumb question
Whew, those are quite a lot of questions to catch up...
I don't think you can just drag the montage asset into the anim graph. You should have a Play node (forgot what it's called, I'll crosscheck later) and then define the montage it has to play in the Details panel.
Just duplicate the first keyframes and move it to the end.
@ashen juncoPrecisely... How? 😅
Well, just that. It's that simple. No magic/hidden buttons. Just copy the very first keyframes and paste it in the end. It goes with any animating tools.
The node is just what he got there: slot. That corresponds to the "Slot" mentioned in the montage.
o.O but .... I did ctrl+c/ctrl+v & nothing happened...Lemme try again 😕
@ashen juncoSry man, I just... Don't get it 😣 Thre's no way for me to select or "get" something to copy-paste

@ashen juncoOh, ok, found it - append at the end - thanks! 😄
does anyone know how to Basic IK a mixamo character? on my character, the foot is pushed upwards

Try tweaking the Secondary Axis as well.
Also make sure the control is properly aligned with the effector bone.
Wow thanks. I found out that my skeleton is scaled at 70pct. fixed it by using a 100pct scaled skeleton. Regarding the alignment, that is how mixamo aligned the foot so when the transform is copied to control, the control is also tilted. 😩
Sorry, what's "pct" unit?
percent
Hello, I'm really new to animations and animBP's
I've made myself a gun, and made some animations for it. I wasn't using an animBP, I was just using PlayAnimation wherever I needed to call it from and calling it on the gun mesh. The gun is a revolver, and I need to add a transform to the cylinder bone, so in all the animations the cylinder will be in the right place depending on it's rotation. The issue I'm facing is the play animation completely overwrites anything I do in the newly created AnimBP (also I'm aware this is probably really really wrong...)
AnimBP:

I added the Default Slot thing in the hopes of changing Play Animation to this and having it work... it didn't
Example of how I'm trying to call the animations:

The method of play animation isn't set in stone, anything that works
Also I'm away that a state machine would probably fix this but I feel that a state machine would be wonky to code with something that just uses 1 off animations
Nevermind... above works just fine aha, the blend in and blend out time combined where longer than the actual animation 
Now I have another issue, when using play animation the gun would stay on the last frame of the animation, perfect. Using this dynamic one, once it finishes the animation, it goes back to how it was... Is there anyway around this? Or am I going to have to use a state machine with loop animations n stuffs :/
Hi folks, I'm trying to stop my characters feet from sliding while running, and it doesn't have root motion, so I don't have a way to determine how far each step should be. Does anyone know of a way I could determine how much distance my character should cover with each step in the run animation without doing the guess and check method?
What's the difference between these two?


Notice there are 3 lines in the connection for the first one, which is from Echo's animBp
I recreated the same and it's the only difference between them. This is the state where Echo orients to rotation for some reason( She has orient to rotation turned off)
If I create a same state and connect the same node, she wont orient to rotation for some reason
This is the job for distance matching*, which basically calculating the animation playback position based on the past and predicted distance. It was originally used for Paragon (possibly Fortnite as well), though documentation on this is pretty sparse.
https://youtu.be/YlKA22Hzerk (WARNING: choppy audio, headphones not recommended)
I can't give a definitive answer on that topic, as well as some foot locking. I still have to dissect more out of ALS.
*There is a plugin named Anim Distance Matching Plugin, however, it is absolutely nothing. Was supposed to be lifted from Paragon, but doesn't come into fruition.
4.27?
5.0
still the logic for orienting her to rotation has to be there, right? (Orient to rotation is off on her)
Ah, should've known. It would be too good to be true if the anim setup is also in 4.27 as well.
It is there for 4.27 as well

Thanks for the response. I tried using a pre-existing play mode, but I was only able to select Animation Sequences and Animation Composites. I haven't played with composites yet, so I created a new one and was able to piece the two animations together, but I don't see an option to loop the second animation. I'm guessing this is where composites differ from montages. So I'm still stuck trying to figure out how to play one animation once, and then the following loop, and trigger that in a state machine.
Got it. :] Found out that the ThirdPersonChracter anim bp does this for jumping and has two different states (3 actually, but i only need 2), a begin jump and jump loop done with checking to see how much time is remaining on the animation in the transition rule.

Out of curiosity. Has anyone seen/heard of sign language being created/animated within unreal?
does anyone know why this could happen? i try to retarget an animation to an animal with the same skeleton (just a bigger mesh)

i have done this with humans and i have no issues lol
I imported another character to my game(fbx) and accidentaly used the same skeleton as my main character. Now when I look down (first person) I see my character T posing, when the anim bp is fine? I deleted the other character. My model is still shaking as if it was doing my run animation though.
@vivid harbor cute doggo, Samoyed?!
I'm wondering what people do with their anim packs. Do you retarget them to the standard Epic skeleton that came with starter content?
Just have a few characters, a few anim packs, and at this point retargeting is a bit of a pain.
Biggest issue though is when we dumped an anim pack in in an unexpected location, which broke the local skeleton reference... Had to get the matrix editor thing out to that
white shepherd, ty! .
I didn't retarget to epic skeleton, it's not a human, it's an animal .
thanks for your answer!
Oh this is a seperate Q haha, sorry.
oh ok HAHA
I'm trying to get an animation sequence inside my animbp to replicate. The variable that controls it is replicated and it works on the server but not a client. I'm pretty new to dealing with animation in general, so any help would be appreciated.

wait...do i need to multicast the var change? i bet i do
that worked, great job team!
Hey guys, I'm really new to UE4 and I'm currently trying to make an FPS. I'm trying to setup my left hand IK so it follows my gun. The problem is that when I apply IK to the left hand it doesn't match the base pose original position. I know i could simply add a socket to the gun, attach the hand to the socket and then manually position the hand, however I really don't like this approach. Essentially what i need to do is match the IK effector with left hand's original position, then parent the effector to the gun, however I can't seem to do this. Is there another way i could do it?
This is my problem.

Hi please can you help me with animation notifies? I have an actor which blendig multiple blendspaces together and i have problem with multiple triggers beeing called. I know about Highest weighted animation option in blendspaces, but it doesnt seem to work with multiple blendspaces. THX

I have slight problems making blendspaces with some animations.
somehow, i can only add one animation to the blendspace, and it will ignore more.
i can put them all in, but only one at a time, so if i delete the one that is in, and put in another, it will add it.
but if i have one in, it ignores my addition
it's the superhero flight animation project.
i wanted to put them into a plugin of another project and retarget everything.
in the original project everything works fine, but in the plugin it doesn't
with other animations i have, everything worked as expected, but these don't like to be migrated to plugin somehow...
I'm making a short film, and I am just trying to figure out how on Earth I can have a walking animation of my MetaHuman follow the slope of the mesh it's on? I'm just wondering if someone in here can point me in the right direction. I am using 4.27. Thanks 😆
I can see the animations disappearing in the blend samples animation selection after one is selected...
if all are empty, i can see and choose the animations, after one is selected, all others of the flight animations have been disappeared...
help
...
all other animations are fine...
If it's a game, I would've say do it with IK stuff.
But it's a short film case, so if you're using MetaHuman, chances are you're animating with control rig. Also considering that typically game-y animations aren't suitable for non-machinima short films.
I have taken the third person mannequin and set up my aim-offset animation with the iron sights anmiations, moved the camera to a first person position and it seems to work well. My issue is the projectiles, using linetracebychannel to shoot to centered crosshairs, appear to shoot at an angle (which they are). What is the recommended way to make the gun barrel appear to aim more to the crosshairs?
Not exactly sure if this is the right channel, but anybody have any idea why this is happening?

it also happens during every animation
Are you processing the model in Blender?
Maybe this is a better place for my question:
I want a character to play an animation montage while affected by an impulse, but my blend space state is taking over and playing the walk animation due to my speed being greater than 0. How can I get it to not hit that anim state?
Hi. I am making several zombie ais, I do have several animations like for walking or running. However, I want them to feel varied in terms of movement when walking, running or even attacking. Can anyone give tips adjusting or adding randomness to such animations?
I was roughly thinking of making animation offsets on the start or delay on such animations as a start. I was also thinking of directly influencing the bones by using transform (modify) bones in the anim BP like for the arms or legs and plugging in a random value for the transform and rotation just to generate randomness. Thank you
it would be enough to have several variant animations (walk1, walk2, etc.) and playing montages or animations can also have a different play rate, so this can be randomized. It mostly sounds like you want variation in the motion of arms swinging and such, which you could try adding a subtle amount of physics (on the upper body for example) with a stronger influence for different zombies (like if they have heavy gashes on their left arm)
why can't you apply animations to character?
animations and character are seperated
seems like you need to choose which skeleton they are for
when you move mouse over it, it shows skeleton of it
the animations I need to add have different skeleton
how to apply them properly?
animations are recorded skeletal transform data - characters are meshes which get bound to the skeleton, they are separate so that the same skeleton can be used on whatever meshes with the skin data for it
animation retargetting is used to match animations with differing skeletons
i have pack with animations and character that comes with default animations
somehow I managed to put animations from the pack on character, but I don't remember how lol
tried to change name to match or copy into folder
Thank you. Yeah I tried it now I made a random float range and multiplied it to the speed variable so that when I add multiple AIs it sets different speed per animation. Indeed, I am looking also on physical animations as well so that some body parts will be affected by gravity and when it bumps to something.
i'm pretty sure someone in the past did the retargeting of all the mixamo animations and posted somewhere to download. was i dreaming or did you see this somewhere?
How can I blend two animations? I have a couple different animations for holding a swords and a single animation for slashing the sword.
I want the character to slash the sword while still playing the holding animation on the fingers. Currently when I blend the two poses, if the fingers have a different pose in the holding animation, they get messed up trying to blend to the slashing animation
Can you guys explain how it works and link any tutorials you know, or at least tell me what I should search for to find a solution
Isn't typically the animation sequence itself have the character holding the sword while slashing it?
I can't picture how your setup looked like, but I have the character holding the sword while she's swinging it around, and it's in the animation sequence itself.
Not only slashing but with sway too
I want to have different holding animations for items and weapons
And I want the arm to have sway while moving without disturbing the finger poses
Should I play a different sway for each item?
Well, different weapon type should have different kind of sway, at least to break monotony caused by it.
I mean, it won't make sense if your character swings mega sword or a spear like swinging a pocket knife.
Though to answer your question, because I know it could be useful for other scenario, you can have more than one animations going on with slots, e.g. having one anim of holding weapon in the right arm slot, and another of throwing bomb in the left arm slot.
found a really nice quick tutorial on youtube and 😍 😍😍
Is this what you're talking about?

So Slot "Upperbody" is basically filtering the animation to only include upperbody
And it's blending only those bones with the base pose
Yup, that's what I'm talking about.
Great, thank you
Hi, I was wondering is anyone could help me. I imported a character into my game and accidentally used my main characters skeleton. The model I imported was much more detailed. Now when I try use my main character, all the animations stop working. The camera is socketed to the head, and it still shakes as if the animations are playing, but they aren't?
A recording of what I was talking about
Consider remuxing the video to MP4 with low enough bitrate. That 61 MB .mov is threatening.
sorry :/
it just made the file bigger...
hiii
i can finaly fly 😄

only i dont know how to toggle between this hoverfly thing
Does anyone know what my problem is?
I'm very hesitant to download large file of video, of someone's issue, just to be viewed once and deleted, so until someone bothered to remux it to compact MP4, I'm out, even though I'm frequent in this channel. 🤷♂️

Oh wait, you used Mac... Isn't OBS also on Mac?
But anyway
i just used the default screen recording tool on mac :/
I think the skeleton may have been messed up when I imported my other character.
🤔
Can anyone point me towards a good learning resource for animation curves? I'm trying to do a set up where I can have a talk animation and modify facial curves for happy/sad/angry faces on the same animation
but so far I can't get it to show up on the preview
Check the anim sequences if they're still working.
Sometimes save all resolves the issue with new skels.
I've just noticed that the player is moving very slightly whilst in the T-Pose position. The arms are swaying like the animation should be playing
Weighting issue?
I fixed it 🥳
verry nice lookin game
its a little bit of everything put toge
ther, its kinda eqsy
hey guys

I just reopening my projet and I got this error
idk what to do
Looks like you're missing the animation that node used to be playing.
I have auto save on but I closed without saving by accident
when I reopnned I got this
now I cant even change anything but it says its on read only
Check the animation file and see if it's there/valid.
even if they are missing how is that enough to completly break my projet
Because they're missing.
And they're used by your BPs.
Hi is it possible to get the first person character exported to blender with its rig ? or even better an already made rig for it ready ?
Yes, it's possible. Just export the mesh as FBX.
Thanks alot
Though you may find the bone orientation funky in Blender, due to it being different.
Yeah but its okay i just want to do a small test and then ill bring my own character
have some custom skeletons and animations ready
I just added back the animation but Im still in a T-pose
How's your animBP going?

Then zoom in.
PROTIP: Ctrl + Mouse Wheel to zoom past 1:1

Hi everyone, first time here, 🙂
So I have a character with an idle, run and a basic attack already implemented.
My question is, in the same way we can do a blendspace between an idle and the run how can I do to blend the run and the attack, because right now when im running and press the attack button there is no blend between animations, it stops suddenly
the same thing can be applied for when im running and stop running.
I know nothing about blueprints, i've been following a couple tutorials, i found the "layered blend per bone" and I thought it was the solution but when applied nothing changed.
I've someone could point me in the right direction
I put the video showing exactly the issue, and my blueprints.

Does anyone know how this problem is called or how i could resolve it

Could someone help me with this? When my character goes to get up she spins into position and then gets up. Is this something I need to do in Unreal? or do I need to go back and rotate the animation to be facing the right direction?
@flint idol are you trying to make your character spin around? If so wouldn't you want to use the Z axis and not the Y axis?
I'm not super familiar with C++ so maybe I'm not understanding what's going on
No, sorry, discord won't let me upload a file bigger than 8mb
https://www.reddit.com/r/unrealengine/comments/r8z9p8/animation_rotating_towards_the_ground_on_specific/

Ah I see now, it's doing it when you change character clothes then...or are you changing character models?
when i change the model
I see, Yeah I've seen this issue before. Trying to remember where
i retargeted the mesh to the base skeleton that unreal has, every animation works except the 2d blendspace
Yeah that's rough, I'm not real sure what would cause that to be honest. I've seen it once but I can't seem to remember where I seen it.
If you remember tag me or send me a message, thanks 🙂
I'm assuming your just changing out the mesh itself, have you tried possesing it instead?
I'm wondering if it would do the same thing
well, it s a basic actor with only a mesh that changes the character mesh from the player character
And they are using the same skeleton?
yes
I think I seen an Unreal Live video on their YouTube page were they setup a system exactly like that
They were using the Paragon Assets
Not sure if they actually showed the whole setup process though
this is the changing mesh set up

the things is that only happens on the 2nd mesh and never on the first one or default one
Hmm, you've double checked that mesh then?
Made sure everything got setup correctly on it
If it's only doing it on that specific mesh, your sure it's not doing it in a specific order? If it's the later it could be caused by something other then the mesh itself
Does the knight skelmesh have UE mannequin compliant skeleton?
it has 3 bones extra but i don't think that's the problem as the other animations work
If you play those same animations with that specific mesh does it still do it? Say if you put that skeleton in a BP and have it playing only that specific animation and drop it into the world?
The anims were hard retarget, right? I assume there's something wrong with the skeleton retarget settings
I don't think so, he's sharing the same skeleton
I don't think he retargetted anything for those meshes
That may be the problem
it has extra bones and your using another skeleton
Sharing skeletons is tricky, they have to be the same size and composition and all of that
i ge the same thing

Yeah it's the mesh then man, I think it may be related to the fact that it was made for a different skeleton
Have you done retargetting before this?
wich is weird because on other animations it works

i always just clicked retargeting button from unreal, i m not an animation guy so i get my animations and meshes from the marketplace
Yeah, if I had to guess and I can't be sure because I don't know what those extra bones were for...then I would say that only specific animations that target those areas are causing it to go nutz like that
Then I could think you're missing some steps before retargetting the anims 🤔
Does anyone know best way to transform a bone on a separate skeleton from player mouse input?
they were for clothing only
I would try to get more advice by other's with more experience using one skeleton for multiple meshes...I'm just basing this on what it seems
Maybe try asking on AnswerHub
see what hits you get on it
I have done it several times.
(mainly for modular characters and such)
Well then @ashen junco may be able to help more then I can
do you mind if i send you a private message so we don't flood this chat for everyone else that has other questions @ashen junco
I've tried doing it once with the ALS system and got funny results when things were only slightly off
Sorry, but better ask it here.

I don't think you can set bone transforms in BP, but I might miss a node to do that...
you can

I mean in actor BP, not in animBP.
AnimBP is so obvious that it can do transform per bone.
I'm very inclined to think that your final step here is to fetch the location info from the actor BP (owner) to the anim BP.
yeah
And?
I was asking for the best way to do it, but don't think you know either, that's ok i was just asking
Try me, what would be the best way according to you.
I just told you/showed you
Well, okay, my bad for thinking that you want to do it all in actor BP. Guess I just have to dismiss "separate skeleton" part of the question. Sorry.
No its Ok I would like to do in all in actor but i didnt see a way to transform a bone in BP thats why you have to do it in ANimBP
are you trying to just rotate a door?
its a skeleton wardrobe
Hi Guys. I want to have my "spine_01" rotating where i aim at, very simple. I know it could be done much easyer having the character in 2 seperated meshes ( Like a tank turret ) but i think it can be done in the AnimGraph itself. Any ideas ?

Hey guys! We are working on this flail thingy and everything looked fine, but since I updated it to a newer version, the physics constraints are stretching?? The Linear Limits are all locked, so I don't know what's causing the stretching. Does someone know a fix?
That's some funny chibi manny 👀
I think there's a functionality for aiming/look at in anim BP.
If it's physics and it's UE5, then probably Chaos is to blame there.
aaah really, how come?
Did you tried to do it in UE4 before, and work as expected?
oh yeah it worked in version 4.25, then we switched over to 4.27 chaos and there was some weird stretching happening already and today I wanted to test it in UE5 and problem still persists
Yep, definitely Chaos problems.
but we both want flail chains and chaos physics at the same time, how would we do that?
As you see, Chaos is not production ready, so you have to not rely on it until whenever Chaos is fully stable.
Aaaah good to know! Still a bummer
do you know other physics systems in EU that kinda work the same?
as in, easily breakable objects
refraining from Europa Universalis joke
PhysX can certainly do that, and it's what been used in UE4 for the physics.
But that's a topic for #legacy-physics
Hahahaha alright, thank you, will look into that!
Is root motion driving your movement speed like walking to running better then lets say have a speed that drives the blendspace? It seems logical and realistic that the actual animation determines the speed of the character. Thank you
for locomotion, that's dependent on player input, hence the blendspace. An attack animation, such as a jump kick could propel the character forward and too motion could be used to show this, which means it moves the character instead of the player
Does anyone know if there's a way to rotate just a leaf joint of an armature in blender?
I want to animate the rotation of an object in my character's hand, and I added a bone that i'll attach it to in unreal, but I'd like to do the animation in blender
Yes, you should be able to animate it per usual.
What I need to do is rotate the tail of the bone though, which I can't seem to do..
I can rotate the head, but then the object swivels

I'd like to attach the handle to that joint in UE, but the problem is that I can't rotate just the joint. I can only rotate the whole bone. Maybe there's some other way to do this
this is what sockets in UE are for
Yes but I want to add animation to this joint, not just an attach point
uhm, maybe you could change the pivot of the weapon in hand
Don't connect the bone with the parent.
Also protip: use constraints for animating characters holding objects.
Is there a way to do this such that it will still only be 1 additional joint in UE?
Not sure what you mean, because you can have weightless bones in UE 🤔
It's been kind of a while, but I seem to remember being able to animate leaf joints in Maya, so you could control the rotation of attached objects by just rotating the joint.
So my thought was I could attach the sword to the tail of this bone, and animate the tail of that bone
I'm pretty new to blender, I don't know how the floating bones work
I never use Maya at all, so I don't know how things would work there.
But as far as UE and Blender concerned, bone tails don't really matter, it's all about the bone head.
Yes this is all I needed to do, thank you
Thanks, yes, I always though of using root motion for certain attacks to propel the character. But currently my character gets the forward velocity from get velocity then this "speed" as forward velocity for the blendspace. There are times the character locomotion animations isn't par with the actual speed so I need to really mix and max match the appropriate speed to the animation. So I was thinking of doing the root motion for locomotion so that it matches appropriately unless I change or multiply the input values.
Is there a program that lets you blend 2 animations together?
Unreal can blend them together in runtime.
Yeah I know but I wanna export it as a new Animation
What am I suppose to use instead of a less than to optimize this?

nothing
ya true, I just deleted it all and set it to auto rule
Valley environment

ArtStation
Made with Unreal Engine 5, Quixel Megascans, HitFilm Express and Soundly
Please post it on #released instead (or #work-in-progress if it's part of WIP), thank you for your understanding.
Alright, got it
I need help, why is this happening, the character is in place in the sequence, but when playing the anim in the bp it moves forward.
if i want to make walking up stairs animation how do i add stairs to scene to make sure animation fit perfectly ?
I won't give you the exact setup, but you can solve it by doing foot locking on every stair steps.
no i meant add stairs model beside character

that does not exist to add model to animation. you need to use your scene for that
in Cinematics ?
nvm, found it
hi guys, how can i interpolate vector/rot/float with overshooting?
i want to get a bouncy effect
like this

is there a way to use curve with finterp/vinterp/rinterp?
Hi, does anyone know why I have a anim notify is played twice ? It print 2 Hello for the first notify, then 2 hello for the second


Enable "force rootlock" on the animation asset
where is this option?
In the animation asset

ayy i will do this in a bit thank you 🙂
I have a problem with the (( Enable Root Motion )) it never responds
Doesn't look like your root is animated, looks like everything's on the hips bone
need advise anyone here?

i need to know how to import and export an animation from blender to ue 4 or 5 . i made my own version of this and would like to film a scene in unreal https://www.youtube.com/watch?v=NGV5GDMz6oA&t=83s
• Try Wondershare #DemoCreator for Free: https://bit.ly/3xGwxiX
• Get Best Discounts here: https://bit.ly/3gODNn9
#RecordTutorialwithDemoCreator, #FacialRecognition
As one of the best screen recording and video editing software, DemoCreator helps you capture screen,
make fancy editing, add advanced effects and share your knowlege/skills with e...
is there anyone worthy of this challenge!! ? every yt video ive watched so far doesnt seem to cover anything as complex
Looks like something that can be done with shaders 🤔
Probably close to something worthy of a demoscene effect
im not too concerned about keeping shaders , just the animation and object itself , then create a scene in ue5 . . yes it does , i really like the idea , im going to try this on armour
anyone know how to export the above animation to unreal engine? will it still work if i do ect?
I mean shaders in UE4.
Seems like something that can be done with at least WPO tricks.
im new , i have no idea what that means lol. ive already put shaders on and ue5 is practically the same for creating textures and shaders . but id like to import my finished model with animation if anyone can help please?
If lack of real interactivity does not concern you, try exporting the vertex animation as alembic, and import it to UE4.
it does concern me , will i not be able to change this once in unreal?
would i have to take it back to blender to adjust animation ect?
Alembic vertex anims can't be interactive (aside from trigger based playback)
If you don't want to write shaders in UE4, then yeah.
shaders are fine , i mean the animation , speed it rotates , shapes morphing ect?
Playback speed, probably, but not the way it going to morph.
thankyou for advise
Not sure if this is strictly animation, but it's skeletal mesh related.
I have a poseable mesh component, which is essentially just a rope, two bones, one either end. Is there any way for me to attach one of these two bones to another component, without setting the bone's transform to match that of the target component?
The video shows the current setup, where the rope's bones get updated every tick to not only move the 'End' bone to match the location of the 'Target' scene component, but also rotates the bones to look towards the opposite bone to correct any bending.
Similar I suppose, to the cable component, where you can 'attach end' to another component, only in my case, it's a much simpler skeletal mesh without 'simulation'
anyone have any experience baking animation sequences from control rig animations?
I've created an additive breathing animation, but when I bake as anim sequence the z axis translation movement of the chest isn't captured. The arms move, but it's like it doesn't recognized the chest movement
anyone know how to fix the port 28888 error for quixel bridge to blender . fyi , the youtube vids saying copy from older version dont work
Anyone familiar with FBIK? I'm trying to set up a control rig for procedurally animating a 4-legged robot. The leg is supposed to only have 3 single-axis joints (z->x->x) but it seems like the solver is just ignoring my bone constraints and refusing to turn the base in the z axis


how do you prevent an animation montage from teleporting the character back to its location at the start of the animation?
i dont know if that will fix your issue, but fixed mine
it fixes that but then it causes another issue 😦 the animations in question are being used for during code that moves the player to an objects location. I enable root motion the character doesn't move as far as he should do. I disable root motion the character moves to where he should be but then moves back to the start. With what you suggested the player now just stays in the same position while playing the animation and doesn't move at all unfortunately 😦
Apologies, beginner question. Can someone steer me in the right direction if there is an easy way to combine 3x Megahuman meshes so I can assign a full body as preview mesh to the base skeleton, will assist with animation previews.

so you're wanting to combine 3 separate assets into 1?
Yes exactly, so the combined asset can be used as preview mesh.
Ok hopefully this might work, drag all the assets you want to combine into your scene and select them all, then go Window > Developer Tools > Merge Actors
this wont work with meta humans.
Yeah get an insufficient mesh components message

ahhh was worth a try 😦
you can do it in blender
BUT
the main issue is the meta skel wont work you have to use ue4.
Agreed thanks 👍
if you have anymore meta problems post in #metahumans
np bud good luck
thanks , would it work simply as a preview mesh ?
just wondering if this BasicIK node really works in world space, because I feed it Relative/Local transforms, and it works


but I'd like it to feed it world space coordinates, but as soon as I do, everything blows up.
Not sure how your setup really like, but you might adding something to world space locrot
that's not the issue, I can feed it world coordinates, with GetWorldTransform. BasicIK seems to work with local coordinates, and can't figure it out how to switch it to local space.
I'd like to something like this with Basic IK, in the ControlRig

i after opinions ... where is the best place to learn unreal engine for beginners, the schools near me have nothing like this in courses, what do i do to gain employment , as in , where do i begin and set ther ball rolling so to speak? answers will be greatly appreciated
and or blender too. looking for a solid detailed education
Just a genuine question why do animations without root motion just return to their start location at the end of the animation? Surely there's no practical use for that?
Does anyone know about control rigs?
Im trying to use it and one of my pieces is being shot like -500 Z away and idk why


Do you make the skel mesh in blender
Yeh using a base armature
How's the scene unit scaling in Blender?

I mean the scene's Unit Scale

And that's the problem
Because the bone transforms put into account the unit scaling.

Still messing up

Is this just because I scalled it up in blender
Cus it keeps being unusably tiny when I bring it in
Oh right, you should also scale everything up 100 times.

In Blender.
No, the unit scale should be 0.01, and everything else scaled 100x to compensate for the new unit scale
when I attach a component to a socket that exists on the skeleton, but not on the mesh, the component just sits at the origin, is there a way around this? e.g. I'm using a body mesh that doesn't use the head bone, but the head is animated and I want to attach the camera socket to the head bone
how are you attaching it?
SetupAttachment(Mesh, "Socket")
i dont cpp, but the bp equivalent has settings for how it attaches. I assume you'd want to specific that it should Snap to Target
yeah the snapping is not the problem, it works fine if I pick a mesh that has this Head bone, but if I pick one that does not the animation etc seems to just ignore it (even though it exists on the skeleton, anim etc.)
wondering if there is a way to force like "use all bones" or something?
attachment should be all you need, should inherit from bone
I'm thinking this is the issue

the dots are all sockets?
the dots are bones without weights in the mesh
How do you change characters pose in unreal? Like move hands and head into different position. I open mesh, move the parts, save but it doesn't save. It's T pose all the time.
Hello all, i'm new on this discord and hope i will find help haha, i'm pretty new on unreal and i'm using it for somes animation. I'm doing a scene with people shooting with rifles but i need to attach two both hand on weapon or it do some strange stuff. Is it possible ?
If you're animating with Control Rig, you might going to have a hard time doing it, as it lacks proper constraints that ease your holding animation making.
Is it possible to not use the capsule for collision? And use just the character model for collision?
https://docs.unrealengine.com/4.27/en-US/WorkingWithContent/Importing/FBX/HowTo/ImportingSkeletalLODs/#:~:text=Skeletal Mesh LODs can be,animation editing toolset within UE4.&text=In the Mesh Details panel,click the LOD Import option copy and pasted documentation from when "persona" was a thing 🤦♂️
Learn how to import Skeletal Mesh LODs.

Still struggling with thse weird super long bones

Ive fixed my metrics and am scalling elsewhere

Anyone know whats happening
Apply scale.
wdym
You're using Blender, right? Applying transform is like one of the basics, 101.
I didnt know there was an apply button
Just changing it through the scale
You mean apply visual transform?
Hello. I have loads of animation assets in UE 4.26.2 (assigned to mannequin skeleton already), what is the fastest way to preview the animations on the mannequin? I've been clicking them one by one but it's a little exhausting because there are thousands of them.

