#❓ask-a-question
1 messages · Page 151 of 1
Gave +1 Creative Carma to @pseudo frigate (current: #114 - 16)
I gave you the link to the adobe forum. I don't try to deflect, just that your concerns are valid, but there is a specific section (usually) in the forums for features requests (and also bug reports). Because the Adobe forums are monitored by Adobe employees, this is the best - and official - way to report issues.
The naming baffled me a bit and I said as such when we were invited to an official presentation.. I guess it's not easy to follow for the average user as well

no problem at all. im also thinking since this is quite new problems are everywhere
Yes, I think it's a sort of hybrid app, and maybe they try to do everything all at once with it. As I said, I'm not really into that kind of things (The idea of designing/retouching anything on my phone is a bit alien to me: Some people call it Presbyopia 😂)
I could suggest you try Photoshop on the web? I think it's a better candidate for desktop use...

You can find it in the CC App as well as using this link
https://photoshop.adobe.com

Best-in-class editing and design tools to create, modify, refine, and remix images into content you'll love. Straight from your browser.
Oh gods have they hired the branding guy from Microsoft ?
Adobe Express Photos Classic!
Adobe Express Photos Enterprise Edition!
😂
i really want to pull this off but im doubting my ability currently
am i about to learn blender just for 1 design?
😞
Do it with Generative Fill + Gemini
I'll give you the prompt if you want it
yes
X-ray Prompt for Gemini 3 Pro:
Use the attached image as a strict reference for pose, angle, and perspective. Recreate the same screaming human head in the exact same three-quarter angled view, but rendered as a realistic medical X-ray style image. This is not a flat side profile: the head must retain its 3D volume, perspective, and depth, with the skull rotated slightly toward the camera just like the source photo. The jaw is fully open in a scream, showing the skull structure, teeth, jaw hinge, and cervical vertebrae. The soft tissue is mostly transparent, revealing the skull, teeth, and upper spine inside, with subtle ghosted hints of remaining flesh. The X-ray look should be cinematic and high-resolution, with realistic radiographic lighting, and clear internal bone detail. The background should be clean and dark neutral to emphasize the glowing X-ray subject. The result should look like a dramatic, hyper-real medical scan of a screaming head frozen in motion, preserving the exact camera angle, perspective, and expression from the original image, but transformed into a three-dimensional X-ray visualization.
Set up your reference image like I did in the video. Then Gen Fill, paste the prompt and run it. Might want to do it a few times. It will change slightly in style.
Then tweak with Adjustment Layers or convert to Smart Object and add an Adobe Camera Raw filter to push the dynamic range.
Good luck! 💀
can we use the pen tool to draw to get some fine line work?
The Pen Tool is for drawing vector shapes. It's not really for "freeform" drawing.
It's more for when you want to draw vector objects that remain editable. As opposed to pixel-based layers that are only editable by other pixel operations. Repainting, erasing, smudging, etc.
If you just want fine line work, make the Brush smaller in diameter. If you want specific look and feel, you can design the brush in Brush Settings.
truth be told the human screaming asset is ai generated too. i just wanted to feel like i was creating art instead of cheating hence why i didnt go for the whole thing
Whatever floats your boat. Its a solution. Use it if you want. Disregard it if you don't.
thank you tho. i am using your advice
Gave +1 Creative Carma to @ripe quest (current: #2 - 3222)
<@&548221840750018590> image spam
I was faster than Valdair this time. Wow. :D
I need someone to edit a document for me
Hello I am extremely bad at photo shop and I would like to know if it was possible for someone to make me a very simple photo montage
Please avoid posting the same questions in multiple channels. If someone is interested in the post you made in #💬chat-general , they will DM you
The proper channel for that kind of request is in #💬chat-general
Same as above, please post in #💬chat-general
any good way to give a photo a early 2000's cam corder look?
this is the photo in question

Do you have a reference of that kind of look?
Sounds like a forgery

The world in a 13year old camcorder.
Bought this baby on IG. Analog era is lit 🔥
this is pretty much exactly
So I would say: More blur, colours washed out but increased highlights.
This is something I would do in Adobe Camera Raw (either as a stand alone through Bridge, or as a Photoshop filter: Filter-> Camera Raw Filter)
That's the kind of thing you can save as a preset (there may even already available presets you can load) so you can use it on a series of images in one go.
hmm ok
im on ps any adjustment layers or filters that could help you think?
i normally have a routine for my other renders so this is a little different going out of routine
Otherwise in photoshop: Filter: Blur > Gaussian (you can also try a bit of pixelisation)
Then a curves adjustment layer where you will boost the highlights (The white bits), lower the contrast elsewhere, and a hue saturation adjustment layer to lower the saturation of selected colours (I'd lower sat on reds, keep it as is on greens,)
You can access the Camera Raw filter directly in Photoshop: It's a grading tool.
can i mask the blur i looks a little weird with it all blured
One good thing to do is source an image that looks like the effect you want and position colour samples at strategic points of the references (highlights, shadows, "neutral greys" that will help identify if there's a colour shift etc)
Once you got the numbers (They'll be displayed in the info panel), it will be easier to reproduce.

what i really want mostly on the effect is the really big glairs from the lights
Yes, you can either create a duplicate of the layer with the blur on and mask this new blurred layer, or use a smart layer, where you will apply the blur filter (it will become a "parametric" layer as a result) and mask that filter only
So, you need to push the highlights with a curves layer
i see

I highly recommend the smart filter method, as you can tweak both filter and mask after the fact.
You can stack filters on the same smart layers (the same way you can stack nodes ), but remember in that case, the mask will apply to all filters
how would i do osmething like this?

this is another good example of what i want to try
ah ok
because i want it to only tweak someparts of the scene on the exposure so its like that glowing
Increasing the shadows contrast might help in that latter case. You are seeing a lack of details in the shadows there, that's your clue
You can create selections - that can become masks - based on the luminosity: You can search online for "luminosity masks" or do that with colour range in the "select menu": You have access to selections by colours, but also based on the luminosity
Once you get a selection of all the light/white bits (the higglights), you can push the contrast, or the luminosity there
ACR does that selection bit automatically

Photo courtesy of Eliott Erwiit By the way!
well thank you eliott
You can't beat the almost Napoleonic confidence of that tiny kitten!
It's our new master!
the kitty is getting more sleep than me lmao

any way i can change the WHITE part of this?
It applies to us all! 😉
The selection tools I gave you above (colour range)
ive tried changing the highlights and the lights inthe curvbes
it changes the rest of the sky
and i love the sky how it is now
could i do a curve that makes it darker then mask it and use a brush to invert the mask and paint it?
Then you can paint over the mask to mask the ares you don't want the effect to apply. the automated selections can be a starting point to eventually a complete custom mask
Paint in black with the brush to block the effect from showing: On the mask

Absolutely. That's the correct way of operating
Yes, a typical grading session - if done only within Photoshop, might contains lots of adjustment layers with different maks on
oh it does lmao
i do this all from blender stright to photoshop so ive had to learn a lot to do tiny little things i wouldnt even belive were possible on photoshop
See an example from client work (this one is not particularly complex thoough)

lordy lmao
Here you can see an example with smart layers and the Camera raw filter as a smart filter

Different instances of the camera raw filter are applied on separate smart layers, each masked
The automatic selection have become very good, like select> subject. Of course you will probably still have to tweak them a bit with the brush tool
A graphic tablet helps to get accurate brush work as well
is it a little better?

There are still instances where you have to create selections by hand (I like a mixture of the pen tool, if the edges are hard, or pen+brush when the edges are softer)
fair point
Seems in line with what you wanted. Maybe a touch too red/magenta, your references were slightly more neutral. But you are also allowed to deviate from references 🙂
But the shadow/highlight combo works well here
i did some wacky think in the raw filters
I will leave you to it; Test and fail, then test and succeed That's the only way
i turned down the contrast pretty much near 0 and shadows all the way up and it made the sky a much deeper color and the foreground a more vibrant shade
Work awaits me, I need to leave!
have fun thank you so much!
No problem" YOU have fun! Glad I managed to lure you into the darkest realm of the Camera Raw filter.
It's the bit like "THE BOX" in Dune. It can be painful, but when you are able to overcome the pain, you unlock great powers
Now that's a bit dramatic!
how do i make it look normal

Hit F key
===========================================================111111111
?
Is it ok now?
sorry my cat stepped onto my keyboard and then proceeded to shut down my laptop
but yes its normal
Hopefully your cat 🐱 hasn't emptied your bank account as well...
😅
How can I export a PS file saved as PDF in the paid Adobe Acrobat to have around 2MBS? original file size is around 9MB, I select "highest compression - estimated 2.5mb" and the TOOL MAKES IT 200KB ? So im just asking for help out here.
Export a Ps file saved as a PDF... If its a PDF, its not a Photoshop file so feel free to clarify what it is that your goals are.
TBH I don't think you can aim a particular file size....Is your goal to get the highest quality with a relativly light file size? Are you still working on your CV things?
To clarify: My goal is to get a high-quality PDF around 2MB with selectable text (not flattened).
My original Photoshop file is 9MB. When I export it as a PDF from PS, it stays around 7MB even with compression. When I try using the paid Adobe Acrobat 'Compress PDF' tool, I select the 'Highest Compression' which estimates a 2.5MB output, but the tool actually crushes it down to 200KB, which ruins the quality. I can't seem to hit that 'sweet spot' around 2MB without losing all the detail or having a file that's too large to email.
Ok... I don't know the "Adobe Acrobat Compress pdf tool" but on my end I used one of my PSD files and added Text to it saved it as PSD file => 17.3Mb
If I simply use Save As.../ Photoshop PDF / uncheck "Layers" and keep the Image Quality option to "Maximum" I get a 1.9 Mb PDF file with " selectable "text...
Your 9Mb file should give you a lower file size for a maximum quality (And the text should still selectable)...

PS if I let the "layers" option checked => the pdf file is 15Mb...
Thanks, will try!
Gave +1 Creative Carma to @viral palm (current: #7 - 1050)

U can do this - the "Glow" (The Orton Effect) to create that hazy, glowing glare on the flowers, Just duplicate your layer, so you aren’t messing with the original
Go to Filter > Blur > Gaussian Blur, then give it a radius of about 15–30 pixels. It should look like a total mess, then change that layer’s Blending Mode to Screen, also lower the Opacity of this layer to somewhere between lets say 15% and 30%.
To Make the Yellows Pop
target the colors directly so the whole pic doesn't look weird. Just add a Selective Color adjustment layer and pick Yellows from the list. Slide the Cyan all the way left (so its more of a golden hour look) and bump the Yellow slider up. If its still not enough, throw on a Vibrance layer and crank it to like +40, it wont turn ur skin orange like Saturation does yk.
Then That "Light Bleed" Edge
Make a new blank layer and grab a Soft Round Brush with a low Flow (maybe 5-10%). Alt+Click to grab a yellow from the flowers then paint over the edges where light hits. Change the mode to Linear Dodge (Add) and lower the opacity so it looks like a natural glre.
Final steps would be the Filter (Camera Raw)
Press Ctrl+Alt+Shift+E to merge everything into one top layer. Go to Filter > Camera Raw Filter, boost exposure a tiny bit and kick the Whites up. Also, hit the Texture slider so the flowers dont look like a yellow blob, u want them to have some crunch while still lookin dreamy yk, and that would be it!
Thank you so
Much
Gave +1 Creative Carma to @worldly spoke (current: #660 - 2)
hey guys 😄 when using artboards, is there a way to apply art across all 3 boards in a continuous way without having to copy and paste the same image? in this case im designing 3 banners to have a continuous graphic, but theyre all gunna share the same gradient image but have different info on each banner. this is what my file and layers look like, but im wondering if theres a way i can achieve this effect without pasting over and over. alternatively, if theres an easier way to do this without art boards, let me know 👍 ty always


The only thing that's draining my bank account is adobe✌️
What is each banner dimension?
Since I'm old school I would go with 1 large canvas without artboards (3x banners width) make each banner design then use slice tool and the good old Export/Save for web...
There are lot of work around that come to my mind since I hate working with artboards...
theyre pretty huge honestly lol, 33 x 81"
i was thinking this as well though, but im also kinda learning the pain of working with artboards haha
Particularly with this huge size...
what's the size in pixel?
150 ppi
You can create a New document 66"x81" at 150ppi.
Create a 3 columns guide layout, select each column and CTRL+J to create a copy of each.
Align the 3 copies, Hide the original gradient background and go to Image/Trim to trim transparent areas => You have one layer for each Banner...Make each designs and export them
You can use layer comps to export each banner quickly...
this is awesome franck thanks so much for recording this!! i gotta get used to using layer comps more lol, always forget they exist
Gave +1 Creative Carma to @viral palm (current: #7 - 1051)
No problem... If you want to be sure banner designs match you can bring back the exported files in the big original file align them and make a final check. Good luck!
Hi, the filer might start on that setting, but you do need to apply it on the image to make a change. Or do you mean that you had already applied the filter with that setting?
Your original image has an octogenarian rather than a circle, is that what you meant? Notice the guides to hop with the placement of the text layers.
There is a used old GPU mode setting in prefs/tech preview, or performance, also a multithreaded one. Only change one, restart. Also you can change your status bar to GPU mode, on the lower left side of the UI.
Hence why I avoid artboards as much as possible
There’s a plugin for that: https://exchange.adobe.com/apps/cc/8509f755/arranger-for-ps
Got the latest update and now when I try to open photoshop, it closes
The first thing I will try is to restart the pc.
but is it showing any kind of error or warning?
hello, i want to emulate the effect magazines have where the pages content is kinda clipped together in the middle just because of how its stapled together, i tried a gradient and displacement map but it didnt produce the effect i wanted, any ideas?
The first thing that came to my mind was to just copy/paste the layer and offset it by a few pixels. Do you have any examples of what you want it to look like? I can give you better advice if I can see how it’s supposed to look.
its wierdly hard to find a perfect example but do you see how the image is displaced and cut off in the middle?

i tried what you suggested but im a real bad perfectionist and i wanna emulate the curved displacement of the page
Ooooh yeah ok I think what you’re looking for is the liquify filter, but what’s really going to make it look realistic is the dark line in the middle that fades as it goes outward. You can do a gradient, or you can do a line with “external shadow” blending option.
awesome, thank you 👍 👍
Nope, it's just closes as soon as it opens
Hold down Shift Ctrl Alt and start Photoshop. Hold it down until you see a message box. Delete the Settings file when asked. Then see if it starts up.
Nothing is happening when I do shift ctrl alt
and photoshop still closes
a friend said the veins look like they were imposed onto the original image rather than natural forming
Did you recently installed other software that may conflict with photoshop?
Your gpu driver upto date?
What's your pc config?
Hi! Are you on Mac? Then substitute CMD for Ctrl

Im still able to open PSD files I've worked but they close upon opening them
Check if Photoshop still running in background by going - task manager. If yes stop it.
it could be a gpu driver issue too. Try to update or clean install. Then restart. Make sure other app or plugins not conflicting with photoshop. If nothing works I would just downgrade to a stable version.
How do I downgrade?
go to creative cloud > apps. Find Photoshop. Click to 3 dot. There you'll find the option.

A quick tutorial on how to run both current and old versions of Adobe apps side-by-side.
yea it's working now
thank you very much
How can I quickly change the deformation so it's rectangular? Just not manually.

Thanks for the tips! I'll try and watch out for those. Can you please explain what you mean yb the GPU mode status bar though? I can't seem to find it. A screenshot would be great!
Gave +1 Creative Carma to @hushed niche (current: #12 - 362)
Could you state which version you had, and which one works now?
Am traveling without laptop.
Look at the bottom left, there is a zoom percentage and on its right, a field with image sizes, IIRC. Click on the triangle, there will be a GPU entry.
It’s visible on this page: https://www.photoshopessentials.com/basics/getting-know-photoshop-interface/

Learn all about the Photoshop interface and its features. Topics include the Document window, the Toolbar, the Options Bar, Menu Bar, panels and workspaces.
I'm afraid it will have to be manual, with the free transform menu (Or CTRL+T)
You'll have to align all 4 corners of your artwork, to the corners of your target shape. It may look ugly, as you have a big discrepency between the original shape and the intended one
After CTRL+T - on the highlighted - red thing layer, release CTRL+T first and then hold CTRL while you drag the angles to be able to place the corners accurately. You can also toggle the smart snapping on, so the positioning will be even easier...
That might be a job for edit>perspective warp?
Edit: Sandrine’s method might be more accurate
Could absolutely be one good candidate as well!
That's what @hushed niche meant!

The layer count entry only serves as a bragging proof to your mates! (and sometimes as an explanation when things starts to get slow on a particular document)
Thanks! And the first link I gave you will explain what you should see: D3D12, IIRC. If you see software or cpu it means that the GPU driver failed.
Gave +1 Creative Carma to @vapid flume (current: #6 - 1125)
Why does this other image i add come out blurry. I found out I can scale it to normal but when you apply it it still is blurry
It's probably a question of the new image you are importing being significantly different in size than the one you're working on. I can see that your magnifying ratio is in the 3000% (which is crazy big)
I also noticed that you don't have the import set up as smart object, or maybe it will appear after you validate the import... The video is cut before
It could also be that the interpolation method you are using is not appropriate.
The problem is that we don't see how it looks after the import as the video doesn't show it
If you want to check your interpolation method is: go to edit>preferences and check it there
since you're doing pixel art, you don't want any sort of antialiasing, unlike me, who works with photography. Hence why I chose "bicubic automatic"

You will want to choose "nearest neighbour"

Ok thank you so much
You're welcome!
can anyone help me with really easy thing for pro users
You want help or you want someone to do the work for you?
i need help
about lasso i dont understand sometihing
could you maybe help?
Just describe what is your problem...
i only want to select this flame and copy EVERY detail but idk how to do it

the colors too
Is it a transparent png or the checkerd board is a part of the image?
transparent
Just CTRL+Click on the layer thumbnail should give your a selection.
im using photopea btw and no its not working
this is photoshop server
omg youre taking so long to reply
We don't support other apps here but CTRL+Click on the layer thumbnail works too in your app...
But your image must be transparent... Can you share your flame png image here just to be sure?

I'm pretty sure it's the same in your copy cat app...
<@&548221840750018590>
Hello everyone
I hope you are doing well I want to ask if someone knows about brushes to use in photoshop to draw anime
Do you want to get brushes that looks like the analog tools used by Manga/anime artists? (I'm guessing these are the same tools, but I'm not sure. I am more aquainted to those used by Manga artists)
Map pen, G-pen (maru), Sakura technical pens. Texture brushes to mimic screentones, calligraphy brushes etc...
You can find some for free on Adobe's own brushes downloading website, or some can be bought at reputable merchants (TrueGrit, Retro Supply, envato), and all over the web, even on Behnace!
https://www.adobe.com/uk/products/photoshop/photoshop-brushes.html
There is a Manga section if you don't want to download everything


Find the exact brush you need to elevate your digital art with customised drawing brushes or preset Photoshop brushes. Let your creativity flow today.

Behance is the world's largest creative network for showcasing and discovering creative free photoshop brushes work
Hello Sandrine thank you very much for your time the brush I want specifically are for digital art style manga
Gave +1 Creative Carma to @vapid flume (current: #6 - 1126)
those that you recommended to me can I use them for digital art style manga
Yes, of course!
As I said, it's up to you to choose the ones that suit the style you want to: Some manga artists only use maru pens and map pens like below (we call Maru Gpen in the west)

some use brushes, and you'll find those brushes in the links I shared. You just have to filter
Furetake are a firm favourite and you will be able to find digital equivalents. But don't forget screentones, and various stuff like explosions, speed lines etc, that exist as ready made brushes


This artist uses actual paper for this but does anyone know of a Photoshop style effect to get the same effect?

You could make the shapes and then texture them using Blend Modes and Clipping Masks.
Yeah I'm just asking if anyone knows of a style pack that archives this effect
Similar to the felt style pack in this video https://youtu.be/zjKF1d8-uWc?si=C4iCWMAI0tcgRbGN
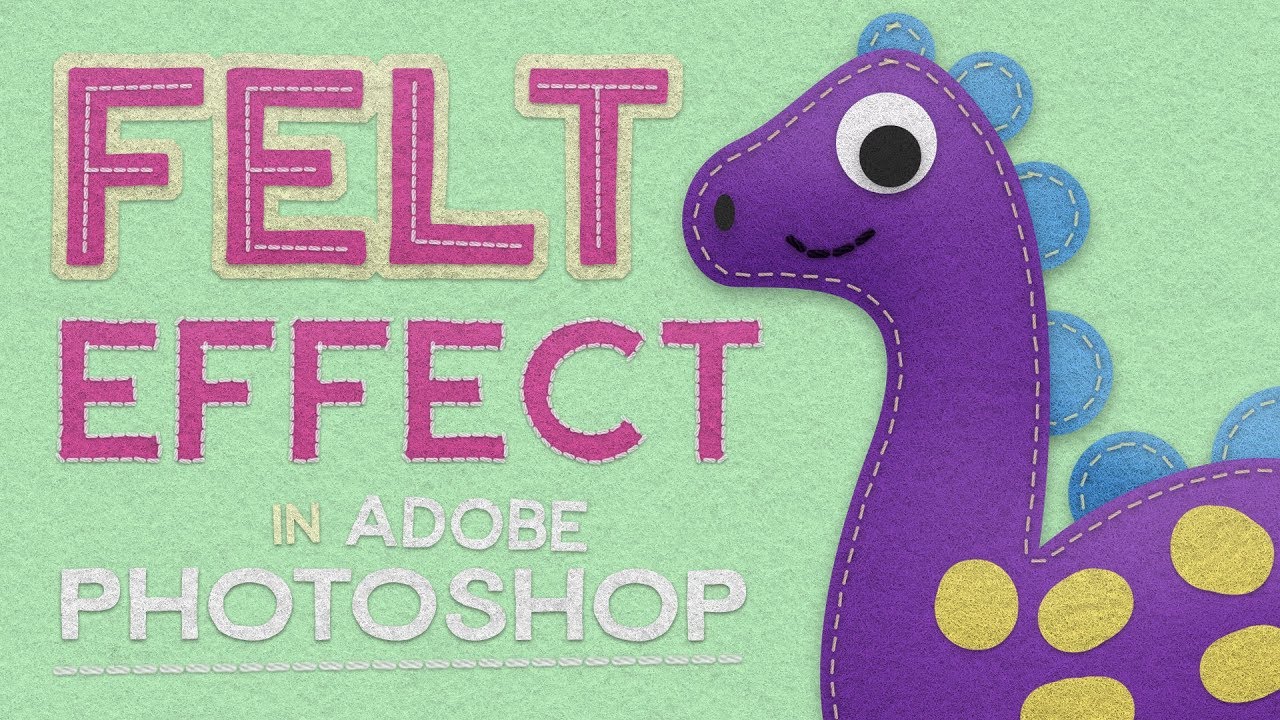
🧰 My Full Shop. One Bundle. 90% Off - https://shop.spoongraphics.co.uk/products/whole-shop-bundle
Over on my Spoon Graphics website I recently shared a free resources kit for creating felt effects within your designs, so I thought I'd use that subject for today's video and show you how to use the tools to create cute craft inspired artwork. W...
I assume you mean, premade Layer Styles that you can download. If so, I don't know of any "style packs" for this specifically. But they should be easy enough to create (and save for re-use).
Hmm I see ok thx
Hey I am doing a project for school with typography in timeline and I can't figure out something
I have the text "when you are falling" and I want the text to go crash into the side of the canvas and the dot on the "i" to fall down into another letter but I can't figure out how to separate them and how to make the affect of crashing can anyone please help?
I usually use screw but it doesn't give me the affect I look for
To manipulate individual parts of letters, you'll have to convert the text object to a Shape. Main manu: Type > Convert to Shape... Then you can get at the shapes using the Direct Selection Tools.

After, as far as making it "crash" into something, I don't know. Maybe show some motion lines and then squash it down a bit.
Thank u so so much u are a life savior
Gave +1 Creative Carma to @ripe quest (current: #2 - 3223)
I found that, if that helps
https://elements.envato.com/papercraft-photoshop-styles-NNQNETZ
This one too
https://helpx.adobe.com/photoshop/discover/free-papercut-effect-for-photoshop.html
It's from Adobe themselves, but I'm not sure how it installs, I haven't tried
The keyword here is "paper cut"
The problem with layer styles in Photoshop, is that since they are raster effects, you will need to tweak them according to the size of your document/layer content. But honestly, it's quite easy to do it yourself....
This is also something you could do in Illustrator (taking advantage of the appearance panel and its stackable effects) and save it as a graphic style (similar to layer styles, but vector, hence scalable)
Ah that's awesome thanks so much
Gave +1 Creative Carma to @vapid flume (current: #6 - 1127)
is doing this art style possible in ps

yes
It's possible, it looks like graffiti art which is about mastering the airbrush and of course, knowing how to draw.
You have a lot of airbrushes already in Photoshop, but you can download more ... Just scroll up a couple of posts, and you'll see links I shared yesterday, particularly the one from Adobe, where you can download 100s of brushes, some of them specifically for mimicking spray paint.
Thank you very much I will try them and get back to you
Gave +1 Creative Carma to @vapid flume (current: #6 - 1128)
bet
Is there a way to make a rounded square, but the rounded corners do NOT have anti-aliasing?
I need the shape to be made of pixels with either 100% or 0% opacity because the opacity being an arbitrary number on certain pixels is causing my corners to look funky in the UI I'm designing.
Since Photoshop is a pixel based app anti-aliasing is necessary to get round shapes that look smooth...
Pixels are square and we can not change this fact...Without anti-aliasing you'll get round shapes with "stair-shaped" contours...
What image format your UI app is using? png?
Yeah, PNG
If I use a different app like adobe illustrator, can I get sharper edges? Or is it a file format issue when I export it as a PNG?
Still very very new to this ui stuff
RTX5050 Low profile ki keo use koren?
etar somporke karo darona ace ki?
I don't know exactly how to describe what I'm trying to do, so bear with me (I'm still pretty intermediate with PS): is there a way to sample part of an image to use as a fill? For example, say I want to take the texture of image A and use it to fill in a portion of image B (I'm making a fantasy world map and I'd like to recycle some of the textures). I dunno if that would be a Healing Brush Tool type of solution, or if I would be better off with a mask? Again, apologies if my explanation is confusing, but any help in pointing me in the right direction would be appreciated!


The yellow landmasses are vector smart objects I pasted in from Illustrator, if that matters.
any one use RTX5050 LOW PROFILE GPU? Any Heat Issue?
i'm thinking to buy... i do gaming and rendering works...... any others issue in this gpu?
Ok I think I got it. Clone Stamp Tool is achieving what I want.

you can define anythings as a pattern or a brush preset, then you can use it multiple times
Yes, you can use the clone stamp from one image to another (it helps greatly to have them side by side! 😉)
otherwise you can create a pattern (select what you need, edit-> deine pattern) and then apply that pattern to a totally different image through a new pattern adjustment layer or even a new layer style. They can be re-sed again and again.
There are some technicalities into creating repeats,s o it's best to watch a tutorial if you can: There can be some trial and error until you find the right workflow for you.
Don't know how your file is made (one layer or each color shape on its own layer) but Pattern technique sounds the fastest one for me...
Here is a short video to show you how to create and use a pattern + The pattern used during this video and another short video to show you how to load it in Photoshop.

Are more people experiencing issues with remove background in the contextual bar? It hardly works on any images anymore for me, for example it does this, when it would have easily removed the background before

are you using photoshop?
I am, using the latest version
Also tried checking here and changing the select subject and remove background to process trough cloud, still having the same issue afterwards

My guess something is wrong, but can't seem to pinpoiunt the issue 😛

Hey, pretty specific question, I want to add a deep looking scratch on a body, using Photoshop, what is the best way to do it.
Hi guys 👋🏼 , is there a way I can add patterns to the mask layer - Procedural?
Easiest way would be to just use dlgen fill
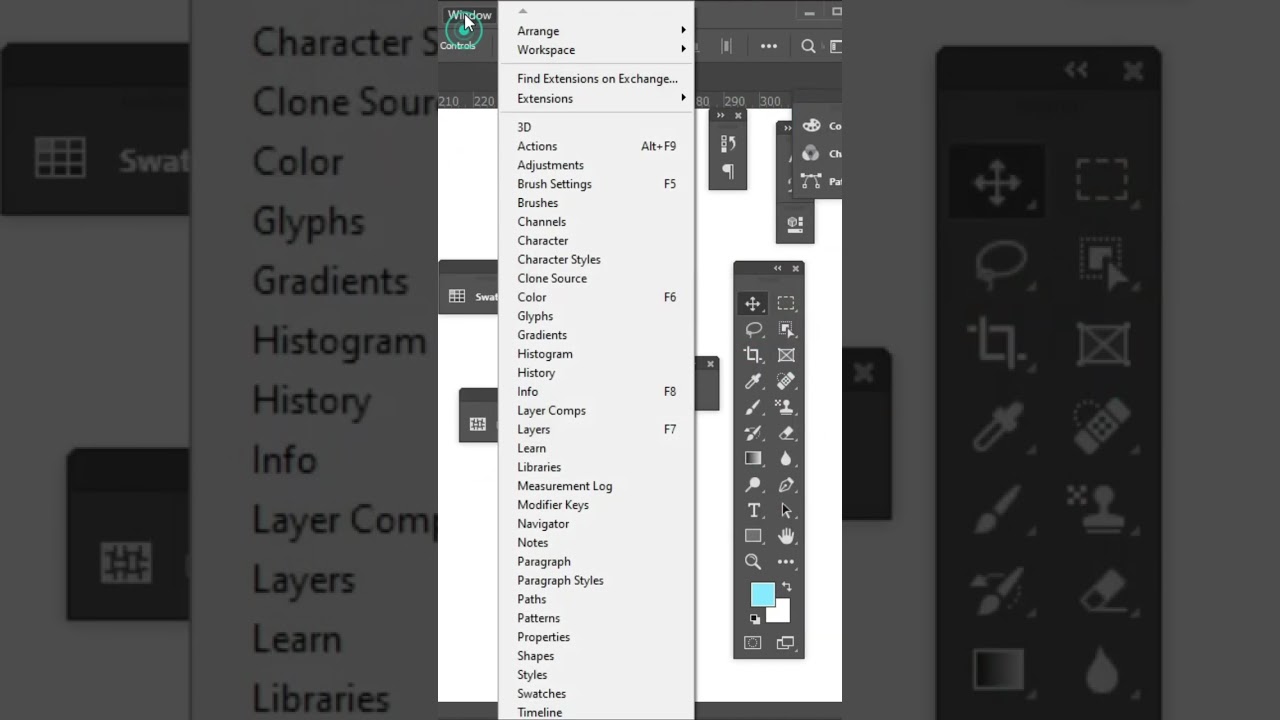
where are my layers😭

press F7
go to window
u will find it there
or press F6
@rancid beaconhttps://youtube.com/shorts/p5F0Xrg4eps?si=eq_B8QSQrFd4ot1q
Hi, Learn the Photoshop Toolbar Missing Adobe Photoshop Tutorial.
Welcome to my Youtube Channel. Today We learn How to Reset Tools and Workspace in Photoshop. Enjoy the video and let me know what you think of the video in the comments. Thanks
"If you like the Video, Don't forget to share and leave your comments"
#photoshop #adobephotoshop #adob...
watch this
I don't believe so. Not procedurally. Only by direct editing Layer Mask. Manipulate the pattern in its own layer and then paste it into the mask.
Ok thanks 🙏, I was thinking about procedural masking for a long time 
Gave +1 Creative Carma to @ripe quest (current: #2 - 3226)
It would be cool if that was a feature. For now, its just pixel editing.
Can anyone remove black pencil writing /smudges and dark patch to see text underneath
Do you mean something like that?

If so the answer is "No"
Someone wants to uncover those island files 😏
How do I replicate this effect on the 13

Looks close to any glass effect like in the video below
https://www.youtube.com/watch?v=jkWiiF9YlE8
https://www.youtube.com/watch?v=SyWRtmZrmfk
but I doubt the sample image number has been made with photoshop... I would guess the 13 comes from a 3D software with glass material then bring into photoshop to create the composition with volley-ball players...
The “window” entry of the top menu bar is where you will find all the panels.
https://www.photoshopessentials.com/basics/learning-the-photoshop-interface/

Everything you need to know about the interface in Photoshop CC! From tools and panels to document windows, workspaces, screen modes, and more!
THANK YOU!
Gave +1 Creative Carma to @hushed niche (current: #12 - 363)
I'd say if you want part of the image cut then cut the actual image in half, use vanishing point or transform each half on separate plane/page, mask out the edges that would be missing in the centre then use a line with a shadow or a gradiant to get the shading.
That's how it could look with LayerFx from the videos I shared sooner...

how can I make a gradient travel smoothly along this sharp line? not like a horizontal gradient, a gradient that follows the direction

If I understand well, I don't think what you're trying to achieve is possible with regular gradient tools in Photoshop.
You can create clipping mask and paint your gradient with soft brushes but I don't think that's what you were asking for...
Unfortunately there's no free form gradient tool or any other than the five modes (linear, radial, angle, reflected and Diamond)...
Sorry.
where can i get these kinds of brushes


Find the exact brush you need to elevate your digital art with custom drawing brushes or preset Photoshop brushes. Let your creativity flow today.
Any free brushes?
Oh wait
Those are all free. Just sign in with your Adobe Account.
Yup, got it.
Thanks!
Gave +1 Creative Carma to @ripe quest (current: #2 - 3227)
Hey people, nice to meet you all!. I just wanted to ask for some help. I am trying to distort this IMAGE of this writing it is NOT a text element; it's an image of a font that I couldn't find, so I'm trying to get a nice, perfect semi-circle curve, but I'm getting this double back curve thing. I am doing a 3d model for a texture map/net and I'm really struggling! thanks for any advice!. THe red is what I'm getting when I try warp and you can see the warp net


Here you can see it closer and I've exaggerated the curves in the warp map! Thanks again, sorry for the double text

anyone got a clue
I just spent like 6 hrs trying to curve this..... there's a preset.... I'm so mad.... but how would I do it manualy?
that's fine, thanks anyway. I've found that illustrator has something similar
Gave +1 Creative Carma to @viral palm (current: #7 - 1053)
is there any way in photoshop to blur the textures, so i can create a blend in color effect?
right now the textures are pixel art style so i was wondering if there is any way that can blend in these colors, without ruining the uv islands transitions. Because this is a 3d model, using blur ruins the uv mapping transitions, so i was wondering if there is a way to do it and keeping the smooth transitions between the uv islands


here are the textures to understand why normal blurring wont work

i basically want to blend in the colors next to each other and make them look smooth
i dont want to do manual painting though
camera raw noise reduction worked

but the sharp edge transition is still a problem
Hey, I have those three forms that form a cocktail glass, but I'd like to convert them into a .svg file and a clean one.
How do I remove those overlaps and center it correctly and create a nice .svg file with it? :)

Do you have Adobe illustrator? TBH it would be a 30sec job with it.
I only got Photoshop 😭
Ok...
Can you share a creenshot of your layers panel to see how your glass build-up looks?

First you must make sure the "Legacy Export as" is ON in your preferences.
Go to: Edit/Preferences/Export... and make sure the "Legacy Export as" box is checked.
If not, check it, save your file then close photoshop and re open it.

@uneven yarrow : Then Open your file, merge your shapes as shown in the video and the SVG option should be available in the "Export as..." menu
Wow, you are amazing! Thanks a lot!! <3
You're welcome!
What if you use Surface blur filter on a layer copy placed above, then mask it where you want to keep details?

what does surface blur do?
used it but again, because of the seperated texturing, the smooth transition breaks

how do I create this effect where the text "eats" into everything around it

If you want to do it in Photoshop (Illustrator would be a strong contender as well), The easiest way would be to create an outline/stroke the same colour as the background so the edge is invisible
and the word "club" will be in front of everything else
Thank you

hi sorry i might be being dense here
but how do i download this pack?
it says free and all but i cant find the download link it mentions
You need to click on the blue button that says "open in app" or something like that... Let me double check.
It could be that it opens in a library
That should be here.

If not, let me know and I'll report a bad link
(My photoshop is updating at the moment, I can't test it)
Are you using it this way?
If the result we get with the technique shown in the video doesn't meet what you expect, I'm not sure to understand what you're looking for...
Also, Image of the full head comes from Photoshop or is it the result of the map in your 3D app?
Does this texture map work better?

i used the texture you sent, still same issue which is natural. I talked with people in substance painter and they told me the effect i need is called 3d blur. The software must understand the uv maping transitions and smoothen them up automatically


but yeah, thats the effect i wanted, its looking good, but the transitioning is the main problem here
because due to the uv mapping, the smooth transition is not possible

hand painting it will be the fix but i want to avoid manual fix
does anyone know where can i find the brush used for this text?

I don't know the exact brush that was used. That would be difficult to pinpoint. However, you should be able to find one that comes close: https://www.adobe.com/products/photoshop/photoshop-brushes.html
Find the exact brush you need to elevate your digital art with custom drawing brushes or preset Photoshop brushes. Let your creativity flow today.
Check The Dry Media set. Maybe there.
Scale? Main menu: Edit > Free Transform (Ctrl T)
Thank you
Good contenders could be found in Kyle's brushes > Megapack > inkbox (for example Cartoonist, Guelf, animator)

thank you for the help!!!, much apreciated, i was scrambling my mind with this particular brush
There are plenty that look very similar. That's the ones I use in Fresco, so that why the feel rang a bell. My go to are Guelf, animator and Belgian comics)
Hi, I’m dealing with a file that now opens as a flattened, corrupted image. It has a dark background with red pixel artifacts, and while the file size remains the same as it was originally, it’s now essentially reduced to just one layer. This makes me believe it might still be recoverable, but I’m not able to do it myself. I’d greatly appreciate any expert advice or assistance on this.


Use "Previous Versions" (Windows Only) Windows' built-in File History can be a lifesaver. Right-click on your original .psd file and select Properties. Go to the Previous Versions tab. Select an earlier version from before the issue occurred and click Restore.
Anyone know why I dont have the option to switch my in-app language? the dropdown only gives me my native Danish ("Dansk")... kinda annoying when I know the names of all the tools in english...


Did that now... will I have to reinstall?????? - I read on the internet that you have to ....... but taht sounds f****ING ridicolous to me lol
yeah that's bit unfortunate
but that's how it works
probably if we would have to install all language packs PS would grow from 5GB to 50 😅
does adobe illustrator have real-time rasterization?
Not sure what you mean.
All graphics shown on the screen are rasterized in real-time.
So I’ve been using photoshop’s vector features to make pixel art for a video game, and I have been doing that because I was under the impression that it is not possible to se the final pixelated result in adobe illustrator, as it will automatically scale up the image. Example of what I am currently doing:

This what I need to see while working because I need to see how the vectors result in each individual pixel
Adobe Illustrator is for creating vector-based graphics. It does "rasterize" certain things, like what it would consider special effects, like blurs and things. There it would have to define a resolution and predict the falloff of a gradient, etc.
But no... the canvas is not the same as Photoshop. There is no "resolution" per se.
I see, thank you
You could definitely create graphics in Illustrator and it would keep all of the shapes editable. You would have to convert them afterwards but that would be a crap-shoot. I suppose you could always use the Export > Save for Web feature to preview what it might look like in a certain size and resolution. But you wouldn't really be able to paint a specific pixel like you can in Photoshop.
You could do the same with vector shapes to a point in Photoshop. The difference would be that Illustrator has more tools and ways to control the vector objects than Photoshop does.
I keep all my shapes editable currently, it's just that I'm at a small enough scale where I can see each pixel because photoshop rasterizes in real time
It's already rasterized in Photoshop... because even though you're building with vector shapes, the Photoshop canvas is a grid with pixels. Everything is bound to that resolution. There is no grid in Illustrator. Thus, you'd have to use Save for Web Preview to view the entire thing as raster graphics.
So, not "real-time" as you were asking.
Maybe someone else will chime in and tell me I'm wrong. But I don't think there is currently a feature in Illustrator that says: "render as 72 DPI" or whatever.
that's what I meant, it automatically converts everything to pixels because it's a software for a grid of pixels
which is good, I need that
If you want to double-check what I'm saying, you could ask in the Adobe Illustrator Discord - https://www.discord.gg/adobeillustrator
can someone help me with replacing these letters for something else? any video you can link me?

Try Gen Fill. Select All. Edit > Generative Fill. Choose Gemini and say "Change the words on the marquee to '[INSERT TEXT HERE]'; keep everything else the same"
i think YT photoshop channel had a short about replacing similar text

FLUX (partner AI model) in Photoshop Generative Fill makes changing text in an image easy and precise. Update signs, labels, menus or rewrite words in any image with a quick prompt that keeps the text style consistent and blends right into your original scene. Remember this simple prompt: Change text from ""original text"" to ""new text"".
0:00...


i tried doing that but i couldn't get it to work
ok i'll try
Change MARTY SUPREME to "PULP FICTION"; keep everything else the same.

Idk what i did ):

Make sure you're using Gemini 3 (Nano Banana Pro) and not one of the other models.
idk how to do that?
See the "G" there? Click on the icon there and change the model to Gemini. 3 (Nano Banana Pro)

ok i see it.
got it, excellect. thanks guys 🙂
i don't have any knowledge of ps so im getting used to it
I would recommend checking tutorials from Adobe
anyway i can export this raw back into lightroom?
i use lightroom more and i am planning on watching a video already 🙂
You can export it back out to a format that Lightroom accepts. JPG or whatever.

🎨 NEW Lightroom Presets: https://bit.ly/4dEpsVC
🎵 2 months of FREE music: https://bit.ly/3GshKNA
📷 Best Entry Level Cameras: https://geni.us/Beginnercameras
🎨 DIV 1 Lightroom Presets: https://bit.ly/3TDLKMx
📷 My Favorite Camera: https://geni.us/t93yc
✨ Limited Edition LUTs: https://bit.ly/4buszOy
✨ Make Money with Your Phot...
got it
Good luck with the tutorials!
this isnt related to photoshop but does anyone know why i cant see my baseline grid on indesign i had this issue before but forgot how i fixed and im loosing my mind rn
I don't use InDesign that much. Sorry. You could ask in the Adobe Illustrator Discord. There might be more Id users there. https://www.discord.gg/adobeillustrator
thank youu smm
am i asking too much if i want to remove the hand dryer and door?

Try it. Tell Gemini exactly what you want. "remove the hand dryer and door from the mirror reflection" or some such request. Might work.
it did it, i love it awesome 🙂
That's 98% of image reqs now isn't it.
I wish I could be happy with 4k 8-bit output, then I could basically outsource my dayjob to Gemini.
does anyone know how to prevent that horribly annoying thing where photoshop switches all of your shortcuts if you dare to switch from using your stylus to the mouse? 💀
if anyone knows how to like help me with this specific situtation I need to edit an engagement picture but the ring on the finger is off center and idk how to center it without it looking horrible so please DM if you konw what to do.
hello i have a favor to ask and i was wondering if anyone could photoshop a screenshot of mine from the “MyFitnessPal” app to change the numbers displayed? i have a report for it due tomorrow but i dont use the app because the screenshot is my friends and we weigh differently. if you are willing to save my grade please dm me 🙏
no we cant do it buddy
This is kind of sad but like ai did it for me PERFECTLY..
Hi, this channel is made to help users use Photoshop. Also, editing grades is not very moral.
Hi, post a screenshot of the hand, and explain which tools you used so far, show examples of the problems encountered.
Hi, which brand of tablet? Did you try updating its drivers? Did you message its manufacturer? Is switching from tablet to mouse the only case it disables KBSCs?
27 inch Cintiq- it did this on my wacom intuos pro M too + I heard Jacob Drawfee talk about this glitch too so at least one other person has experienced this  I have up to date drivers- it does this on both my work and home cintiqs
It only happens if I switch over to mouse and then back to stylus *sometimes. Like once every couple hours. Like, instead of V being move, itll open the "view" panel and play the error sound with every button you press 💀 the only way it goes away is to just ignore it until its done throwing a fuss lol
The view menu? On a pc, you must do alt+v. Is one of your buttons set to alt? It seems that it is left active. Switching to a third party mouse or a Wacom that works on the screen/tablet? (If they still exist, I had one like that ages ago)
Might you be touching the alt button set on the stylus as you lay it down?
Yes, but all I do is press V, but when i click with the mouse even 1 time, theres a possiblity of this glitch happening. Maybe it acts as if alt is always pressed? For some reson?? That'd make sense as I jsut tried pressing alt+b and thats the annoying error noise that plays when i try to press B or the brackets for brush size during this error
I dont use nor click any buttons, so itd be odd if it does that
And nah I cant be accidentally pressing alt, my keyboard is always a good distance away from me
A button on the stylus, set to alt
Ive never pressed a button on my stylus nor tablet until this very moment, and its not something I could really do accidentally, nor for an extended period of time
- itd be odd if i only happened to somehow hold down a button when switching between stylus and mouse (the effect lasts for 2-3 minutes each time, so i wouldnt be holding down a button that entire time)
Is the stylus placed away from the tablet as you do not use it, or right next to it?
it varies, but even if its right next to it, my tablet is too high up to detect anything from the stylus
Is the stylus placed in its vertical Holder?
I’m trying to remove all possible physical reasons it might throw that error. What are the side buttons set to? Lesson one of troubleshooting in the OSI model: the physical layer 🙂
I've never used nor pressed any of the side buttons tbh 😭 I had this problem on my old Intuos Pro too so im not sure if its a physical reason

Could you just check what they are set to, and if it is alt, to disable it in the Wacom control panel?
Hi, does anyone know if there is a plugin that will autosave your open file every time you make a visible change? Also with the option to save the PSD as PNG/JPG?
i think this is all thats enabled rn
To press one of the buttons on the tablet I'd need to stand up and reach around it 🤔


It would slow down your work… is Photoshop crashing often?
Im using blender/3ds max, so it would help to see live changes while Im editing textures or creating color masks in photoshop. It could have a short save delay, so it wouldn’t be noticable
If you use the cloud format, PSDC it would auto save regularly and you have version control. Saving on itself might save an error that you made. I’d consider an iterate and save: https://www.artstation.com/marketplace/p/XOdlp/save-as-today-s-date-auto-version-up-photoshop-script

ArtStation
Resources - Save As Today's Date & Auto-Version Up (Photoshop Script), USD $0.00. This is a remix of Mark David Teo's Auto Name Saver ScriptWhat this script does:
For a new document, the script will automatically...
Ok, this removes that possibility as pan is Ctrl, eraser is E or tilde…
But still, that behavior is linked to alt. Does your mouse have function buttons?
Then PSDC might not be what you want. You could setup an action that exports as png. There’s quick export, can it maybe get a KBSC?
nope, $9 mouse from amazon
When it does the view menu thing, can you try hitting ESC or Enter?
Hey there! I have a question, is there any way that I can mass export all this files giving them a 2 pixel margin on each side of the canvas? The only way I know would be to manually add 4 to canvas height and width to each one of them but that's not really something I want to do now as they are 113. Any way to apply that to all at the same time?

You could do that with an action (add x pixels on each side Image>canvas size) and then export with a batch command (you set up the export batch to apply an action before exporting)
What is the file format you want to save in?
You could use the image processor (In file -> scripts)

You can save in jpeg, tiff, and .psd, and include an action (add pixels) before exporting
the "run action" at the bottom
If you need to export as .png, then you will only have the solution to use Bridge... But you should be using bridge anyway if you are doing that kind of batch operations.
Bridge is free with any Adobe subscription

In Bridge you can set up what is called workflows, that automate a set of unrelated tasks, for example 1/ add pixels 2/ resize 3/rename 4/export as png (you can even add your copyright as an extra step)
If you're not using Bridge, I'm not even talking to you 😂 BOO!
And yes, I know I need to update! 😱
Okay thank you so much!!
No worries, if you need help with Bridge, just ask!
Hey!
I've recently been having a problem with cloud syncing between PS and LR. I will edit partially in LR, then open in PS through LR and make changes in PS. After I am done with whatever it may be, when I hit control + S to save and close the file out (or PS entirely), it tries to say it is synced but the changes are not applied back to LR. It'll stack like it usually would but neither of the stacked photos have the PS changes applied.
It may work for 1-2 times I open PS this way and then completely break again for often days at a time. (I turn my PC off everyday). Whenever it does not sync, it also will not show as a "recent" file when opening PS normally on the homepage.
Any help would be appreciated as I never used to have this problem and worked in this way forever 😅
Strange, it's not a behaviour I experienced personnally. Sometimes it can be slow to update: say 40 seconds for larger files...
Have you tried restarting it, in preferences
i'm not using classic 
Ah damn, sorry, I don't use the cloud version... I wouldn't know
Let's see if someone else has an idea...
otherwise you can still post on the dedicated Adobe forum for Lightroom cloud based...
https://community.adobe.com/lightroom-ecosystem-cloud-based-677

Get the most out of Lightroom with our community.
This server here on Discord is a bit of a "one-for-all", not really specific for Lightroom.
Figured! I just chalked it up to a PS issue. I have noticed the asterisk that indicates it hasn't saved was present too. It's within the colour profile brackets though. Not really sure how it all works tbh but assumed since it wasn't saving it couldn't sync the change.

Is the file huge?
Very often will just appear like this
shouldn't be huge no, definately worked with larger :x
it doesnt really matter which ive worked on lately though
big or small, same issues
I can confirm it just haven't saved yet. It only updates when the PSD file is saved (It's asynchronous)
Yeah thats what I thought and why I pointed it to a PS issue :/
after closing it'll create another though and stack it, just without any actual changes

Have you tried resetting the preferences in PS? Also, bear with me I can share a couple of links pertaining to performance optimisation. Maybe there is something going on... Scratch disks, GPU compatibility etc
and if I don't export it from PS with whatever changes, all the edits are completely gone lol
I would check that first
https://helpx.adobe.com/uk/photoshop/kb/optimize-photoshop-cc-performance.html
Then resetting the preferences if the above doesn't help
Edit>preferences >general > reset preferences on quit

More often than not, if something unexpected happens in Photoshop (and assuming it's not a bug... it happens), it's a GPU issue
Be sure you have your GPU driver up to date (looking at you NVidia 👀)
I've just reset prefs on launch since I haven't tried that yet
enabled the on quit too 😄
Appreciate it! Will let you know haha
I don't have that I have download the app but not open in app
But I do have it downloaded so it's odd
You downloaded the software from Creative Cloud ?
i tried but there is no file history, is theer any other way ?

I dont think there is another way
Hey I have an issue of anyone can help me, im working with timeline and I have the word crashed which I sliced in half with two masks and I want it to slowly (with the mask) go up and disappear off the page as the last letter is falling down, my issue is that when I move the word upwards for some reason the mask is not really following and I lose the transform of it and it appears at the last second how can I fix it?
That's the sentence (the t in out will fall down) and I want the rest to move upwards all together and get off the page while I zoom in the "t" but i can't understand how to do it with the mask

If it is inside parentheses it means it does not match the working profile. Outside is not saved
Difficult to answer without a fullscreen. Is the mask linked?
It is linked, I tried it unlinked as well but nothing worked i watched some tutorials on how to use masks wigh timeline but it wasn't very helpful 🫠
Show your layers panel? And the timeline?
The reinstall is very fast: only the language package
You’ll have file history only if you’ve set it up with a separate disk. In the future, try an increment and save: https://www.artstation.com/marketplace/p/XOdlp/save-as-today-s-date-auto-version-up-photoshop-script
ArtStation
Resources - Save As Today's Date & Auto-Version Up (Photoshop Script), USD $0.00. This is a remix of Mark David Teo's Auto Name Saver ScriptWhat this script does:
For a new document, the script will automatically...
It’s quite busy, reduce the size of some elements. But this belongs in #📝project-feedback
hi, im trying to replicate this glass shatter effect around the moon from this cutscene from genshin impact. So far i just have a cutout of the space sky, can i anyone help me how i replicate that best?


i mean i kinda needa distort the edges and create some floating pieces (best way to distort looking at the reference?) but how do i do like those wiggly lines

hi prolly a dumb q but is there anyway to turn a png like this into a psd file where photoshop auto recognises the text
@sweet plank - Please make project requests in #💬chat-general.
bro am i that stupid bc i can't get red dots

Nope
it's only showing red but it is making up the background as dots i want it the other way around
No. There isn't. But it's just plain text on a blue background. Should be fairly easy to replicate this.
Depends on how you're doing it. If its a mask, then you could just invert it.
nah, it's the color halftone
can you share the whole Photoshop UI (with layers panel) it could help us understand how your design is made...
I would do it like this...


This is one way...
how can i make this into a solid png of just the tag

Depends on how much of the "paint splatter" around the letters you want left behind.

If you want sharp, clean letters, then you'll probably want to convert to vector graphics, which will require you to trace the letters.
iizizz okk i already got it thanku sm!!
wwait how can i get the smear/blur effect from the left side of this image (green) on mine (yellow)


anyone?
when using elipse selcetor tool or making a circle with the shape tool why is it a 50/50 on wether or not one Axis will ALWAYS have 1 pixel of difference no matter what you do?
Not sure to understand your question... A screenshot or image of your problem might help.
There isn't in Photoshop, but there is one in iIllustrator, it's called the retype feature. Once you got it, you can copy and paste the text, in its editable form, into Photoshop.
Or use Illustrator to create the whole stuff, where Illustrator is better at.
I don't know if it's the problem you're talking about but since photoshop is a pixel based application and cannot display half pixels, your ellipse must have even dimensions (divisible by two). If one of the dimensions is odd, there will automatically be a one-pixel offset on one of the two sides....
Note: This This rule applies to both selections marquee and shapes.
how do i make it so i don't accdentally do that so i can have even dimensions?
Same thing I told you yesterday: this belongs in #📝project-feedback
You get numbers that show you the pixel dimensions. If you hold shift as you draw, it makes a perfect circle.
I would select parts with the polygonal lasso, jump them to their own layer and move them: Ctrl+J add alt to cut IIRC.
You can use filters>distort>displace to move some elements: https://www.thegoldenmean.com/technique/displace1.html
This tutorial is an in depth examination of the Photoshop Displace distortion filter.
Hi, did you try the smudge tool, the blur gallery filters, or liquify on a low opacity copy of the image?
i tried alot of the blur filters but nothings worked so far , imnot sure the smudge tool would be consistent enough 😓
ty
<@&548221840750018590>
Thanks! They're all over
lol, for a second, I thought that you had me flagged 😂
A very big brush for the smudge? Tried the path blur in the blur gallery? Remember that you can change the blending mode via edit>fade, or if you use a smart filter…
okk thank u ill try wen im home
Gave +1 Creative Carma to @hushed niche (current: #12 - 364)
I keep trying to edit as a smart object on the web version. Anyone know how to fix this? I opened a new tab.

When you double click on the smart object thumbnail you should open a new tab where you can edit it.

I think the blue popup window says your smart object is editable in a seperate tab ...
Usually this message shows up when the tab with the SmartObject alone is already open...
Do you have any other open tab in your browser? (I can't see your browser tabs on the video)
Sorry I,m not familiar with mac...
No worries but no I’m not
Guys anyone can help me to find this font name pls

Ddoes anyone know how to make a an emoji in Photoshop and then animate it in photoshop?
Hi @willow plover
Is it similar enough?

Yes yes too much
Try Arial italic
is very similar, but differs slightly in terms of microtypography. However, it is installed on almost all Windows computer systems.
Thank you so much omg really thanks so much idk what i can say im trying to find it for 2 days
Gave +1 Creative Carma to @tame cape (current: #14 - 274)
You're welcome.
how can I make these stripes

do you mean the white lines? You can just draw using pen tool. then add black stroke.
yes, how I do get it neat tho
it's already neat. if you draw with pen tool. just choose shape from the top left.

you can do something like this.
One more question. Why are almost all of my pictures blurry when I insert them into photoshop?
i dont have photoshop but i need someone who knows how to edit's help
i have no clue where else to ask someone, which is why i asked here
if you are good at telling if something is edited, please dm
Hey,dms
<@&548221840750018590>
Thank you
Gave +1 Creative Carma to @ivory trellis (current: #240 - 7)
how do i make this image hd in ps? its kinda blurry tho. i remember i saw one on youtube but idk whats the tutorial name

First u need to change resolution to 1080px depending on ur aspect ratio like ur image looks 4x4 so press ctrl+alt+I then 1080x1080
After that watch this video

An Easy Trick to Turn Low-Resolution Graphics into High-Resolution in Photoshop! Learn how to use the concept of Blur and Contrast to get smooth edges out of jagged and pixelated graphics.
thanks
Gave +1 Creative Carma to @pseudo frigate (current: #105 - 18)

You don't have the text layer so in that case you have to find the font first. If you want the same font.
Go to type > match font.
this is a picture with no layer
Yes, that's what I'm saying. You have to find the font first. If you want same font

In the latest episode of #PHOMO, Adobe evangelist Paul Trani shares some cool ways to find fonts using the Match Font feature in Photoshop. Check out this tutorial for helpful tips and tricks to end those feelings of #PHOMO when it comes to design.
Subscribe to Adobe Photoshop: https://adobe.ly/3vWtAiy
Learn More About Adobe Photoshop: https:...
I think you will find most of the font from there but if you still don't find some of them you can use this website: https://www.whatfontis.com/
Font finder that helps you to identify fonts from any image. 🔎 Upload the image and choose what the font you need. 1,100,000 fonts indexed free or commercial.
I want to add another font
my only preocupation is to change the text first...i'll see for the font later
Add a new layer and paint with black color (since your background is black) on top of the existing text using brush tool. Then replace with your new text.
Im assuming this will go as a decal into a bottle/ in 3D or that kind of things?
yup
OK, you can still create separate layers with your text and export your texts as .svg and import as curves
Or you can do the whole image as plane+shrinkwrap, but sometimes the quality leaves to be desired.
Because with that 100% black as a BG, I'm not sure you'll get something pleasing for the label (My take on it, I'm not an expert)
In any case, you will still need those text elements as separate layers
So as @fierce hornet said!
i did something here

Yes, you didn't do as you were told 🙂
CTRL+Z...
You've just cut an area and turned into its own layer
That doesn't make the text editable. What makes an editable text is to type a text with the text tool
Imagine you got MS word. Imagine you place an image in a word document. Can you replace the text in that image in MSWord? no.. Photoshop is the same
So in order to clean the background from the original text, you need to erase that text. Since your background is black, placing a black area on top of your text in a separate layer is the simplest way.
Then you take the text tool, and you type some text on top to replace the text you've lost by placing the black area
If you had a complex background instead of black, then the method would be much more complicated

That's it. but, since of course you have filled the area in black without creating a new layer, you'd better not made a mistake
Ram and drives are cheap: Use the layers, make your life simple
And there's also a typo
"Undeniable" instead of "underniable"
as in UN-deniable (that cannot be denied)
Hello, I have a question. How can I transfer text animation from another project to my own project?
Are both animations PSD files?
tysm
So this file

yeah i saw that XD
This is an After effect files, so not in Photoshop (But I assume that's OK if both files are After effects files, and you work in After effect)
Oh right my bad sory
Photoshop will accept either .mp4 and other rendered video files, but not Ae native files
Some things can be replicated in Photoshop's own animations features (which are rather limited) but if you have the opportunity to work with After Effects, then go for it. It's an immensely better software for that kind of things
Not what I wanted at all. )=
Okay, I need to replace certain colors, how can I do that?? The white color doesn't change at all with hue and saturation.

That's normal, since white has no hue by essence
It only shifts colours from one to another. If there's no colour, there's no effect
You can try the "colourise" option which toggles off the hue function

But sorry, My bad, It won't work because of the white... Silly me!
You need to use another function, one that actually applies the colour, like a gradient map
Like where, here the darker areas become orange, and the lighter areas (white) become yellow

There are other methods, but this one is easier
I don't really understand. Let's say I want to make the background color red and the white border black.
You click on the colour selector (the little yellow triangle in my screenhot) and you make it black. You do the same for the other triancle and you make it red
If you only need the background without the cloud, you will have to use a mask to only apply the black to the background, and not the cloud
If your file is layered, there some possibility that the only thing you need is to create a new black background. But I'm assuming this is a flat image, without separate layers for the different elements
You could also select the different elements (the cloud, the purple background, and the white area in the background) and apply some colours to those elements, using a solid colour adjustement layer. However, the resolution of your image is really poor, and there's risk that your selection will be a bit wonky.

I just want to selectively change colors (specific ones), without creating layers. Here's what I did using Selective Color Correction.


I can't get the colors I need there
It is not always possible to select a mask perfectly, this is only for this image and there are defects at the edges
send me the original file if u dont mind
you should use illustrator if you mostly work with vector files
No, I just need to change the colors =(( I guess I think I found a way
The problem is that Photoshop is a software that uses layers, so if you don't want to use layers (The reason is unclear) then you cut yourself from accurate workflows.
Scroll up and see the "gradient map" solution I gave to another user
What are the colors you need? You want to change Black and aqgua to which colors?
Refusing using layers sounds like a complicate way... Like screw in a screw without a screwdriver....
If you really don't want to use layers, CTRL+U => desaturate your image then CTRL+L => modifiy Black and White cursors position of the levels to get a good contrast image then go to Image/Adjustments/Gradient Map and set colors you want to "Map" to image.
Left cursor => maps the black of your image/ Right one => maps the white.

does someone know what should i do this progress line is loading for like 20 and more minutes i just wanted to save a color of text

You must be logged in your CC account to use Libraries...

ohh😭 thank youu
Gave +1 Creative Carma to @viral palm (current: #7 - 1054)
When clients have their photos edited, do they expect the final version to be the same resolution? I’ve noticed that my images get compressed when I use AI tools. Does this loss of quality matter if I want to start a side hustle as a digital retoucher?
That really depends on what the agreement is between you and the client. There are generally requirements for the job.
do you think i should get a ai upscaler?
I suppose so. If you want to upscale images.
would the res matter If i were to edit for a social media creator
the image is gonna get compressed anyways once they post it
Again... that is between you and whomever you're doing the work for. They would likely have specific requirements for the project. That determines what you produce. Not what I say in this chat. That said, you should want to produce the highest quality possible.
If you're generating imagery with AI, the lowest size/rez you'd probably want is standard HD (1920x1080). So 2K is the lowest you'd want to go. If you can produce 4K great. Higher than 4K, exceptional. The problem with most "upscalers" though is that as you produce these larger sizes, it becomes apparent in the close-up details that the image is generated (and not a photo).
Hope this helps. Good luck.
do you recommend any good ai that is capable of producing 4k images?
firefly 😏
i want to edit proffesional photographs with ai not a pony with rainbows and stuff
ive heard it produces compressed images
so realism is my top priority
One has edited images without AI for many years…
ai fixes images in one button tho
well there's tons of peoples doing professional editing with ai nowadays, heck i'm on few groups and helping peeps for free
Do you use firefly?
depends
ive heard a lot of critiques about it
Do you need like a crazy expensive subscription?
compared to gemini or flux it's still bit behind in my opinion, but it's good enough to edit photos for free
i'm using creative cloud pro
Since you're not asking/talking about purely Potoshop things I think this discussion belongs #💬chat-general
that's how it's called now 
it says Your country doesn't support this purchase
i have problem with Photoshop it starts lagging (it works in 1 fps max, there is no way to use it, even freezes ps for while) when resizing or moving shapes
specs :
rtx 4060
r7 5800x
32gb ram ddr4
and 300gb empty space
i tried almost everything in performance settings and it doesnt help
Google Gemini 3 (Nano Banana Pro)
Which you can generate in Photoshop but not in 4K (currently)
What is the pixel dimension of your canvas?
And your doc specs are?
@hardy nebula: I asked to check the size of your document, because a common mistake is to set the units to inches rather than pixels in the “Create/New” window => incredibly large file that Photoshop has trouble processing.

A Canvas that is 2000 pixels = OK. A Canvas that is 2000 inches, nah. That's like 67' feet wide. If you have enough RAM, your system might be able to create that canvas and even work with it to a certain extent. But performance will suffer.
That's the most common reason for laggy performance. If its not that, you'll have to say more about the document, the resolution, the amount of layers, etc.

That's huge. Like 32 feet in U.S. Imperial. About as long as a tractor trailer truck.
to juz trzeba komputra z NASA
Wymiary 1000 x 1000 cm przy zagęszczeniu 118,11 pikseli na centymetr (PPCM) przekładają się na obraz o następujących parametrach: Rozmiar w pikselach: 118 110 x 118 110 px. Wynik ten otrzymujemy, mnożąc długość boku (1000 cm) przez rozdzielczość (118,11 px/cm). Całkowita liczba megapikseli: Około 13 950 MP (megapikseli). Rozdzielczość w DPI: 300 DPI. Wartość 118,11 px/cm jest standardowym przelicznikiem dla profesjonalnego druku o rozdzielczości 300 punktów na cal. Zastosowanie: Tak ogromne wymiary przy tak wysokiej gęstości pikseli są rzadko spotykane w praktyce cyfrowej ze względu na gigantyczny rozmiar pliku.
this is roughly what I wanted 👍🏻

i really need help editing a particular image like super quickly ill also pay for the help
When you select your image and you go to warp transform : Edit > transform> warp, you'll see some presets at the top. One of those is cylinder warp. Play with the settings but it will probably help

Or you can go to illustrator if you have access to it, and there's a feature called "mock-up", it places images on 3D dimensional objects more or less automatically (don't ask me why this isn't in Photoshop instead 🤷♀️)
This kind of request should be made in #💬chat-general
There's no guarantee someone will be willing to help, but if they want to, they'll contact through DM
Just be sure you are aware of scammers. Anything happening in private messages are the responsability of people engaged. You're on your own.
You probably misunderstood, I want to straighten the rectangle. I don't need it through deformation and so on. I just need it to be aligned without manually cracking the corners using alt. I just select the sides, and it should be aligned
I don't know any other method than manually unfortunately. You can help with pulling guides etc
It could be done, but only for straight edges, not wavy
A question about JSX: what function should I use to change the selected layers (because I always change one, even though I select several)
I can't answer to this one, but let's see if someone else has an idea... Just wanted to point out there is a specific forum for Photoshop scripting where you can ask questions, and see resources.
Learn how to customize the way you work with Adobe apps.
You can also check in the Photoshop forum proper as scripting is also covered here
https://community.adobe.com/p/photoshop


Normally, when you export, you get exactly what you see in Photoshop in the 100% view. Provided you export at a 1:1 size.
Previews at any other zoom ratio than 100% are interpretations...as @tame cape said you must compare both image at 100% ratio...
@viral palm @tame cape there no other way to export in high quality?
Please define “high quality.”
Depending on how large you have created your image and export it 1:1, you will export exactly “the quality” you have in Photoshop.
I draw at a low resolution; how can I remove the small bits between pixels (they distract me)

aseprite

Zoom less than 500% or hide the grid, e.g., Ctrl+H
I don't know if it will work with your file but if you want to get a png or jpg file that gives you the same effect at a 100% ratio than what you see at 500% zoom in Photoshop, you can try to set the Scale at "500%" and set resample mode to "Nearest Neighbor" in the "Export as" window...
Worth a try

photoshop just release new tool "existential philosophy brush". it work only if you convert image in Lab color first, then you name layer "heidegger_1927" and apply mask with opacity 42% of cosmic anguish. result is perfect but nobody understand why. you use it or not??? 🤯
let me know
??
yeah i always use it
heya, i have the red bordered area selected - a characters arm on a blank png. Photoshop after pressing ctrl J gives me a layer cropped to the size in the blue borders. I'm looking to export the whole red box size layer. How can i do that?

PS doesn't want me to have that empty png area
How do you export? Have you tried "export" > "layers as files", there is tick box to crop it to transparency, you could use it without that tick box on


Be sure you choose "PNG" in the dropdown list
the problem before it is trying to make a layer that respects my selected area, I'm using the marquee tool
here's my selection on the right side

here's what i get pressing ctrl J

The problem is that selection tool only selects content, not transparency
yeah
But if you export without trimming it should be OK
It would also help if you could share the image with the layers panel included, maybe there's something I'm missing there
that's all

Which PS version do you have?
i just need to split the image so i have a 200 pixel wide area on the right
27.3.0
OK. I just tested just in case so mine works correctly. Might be something to check in the prefs. Bear with me
cheers
but yea in short i have a 1212x1856 image that i need to split so i have a 1012x1856 and 200x1856 images - while keeping it PNG
Is there a polssibility that you have a feather in your selection?
the character was originally edge feathered out of a backgrounded image but i dragged the result into a new blank file
I'm asking because sometimes when selections are small (in pixel) the feather makes them virtually non existent, hence cropping
I can't find anything in the preferences but it's a behaviour I've seen in older versions (That's why I asked about the version)
Would you be up to rest your preferences, just in case?
It's not normal behaviour as far as I know
yea i dont mind
Edit>preferences>general>reset on quit


If it persists and in case this is a bug, there can be a workaround while you file it as a bug report (unless someone else has a better idea!)
Now the CTRL+J layer shows different but exporting it still cuts out all the extra png part


i press export as on the layer directly
Even with the export method I've sshowed you?
Quick export only export content
You need to go into "normal" export. What you export through clicking on the layer is a "quick" export
Check your settings but as far as I know, it will always crop)

But export as, and export layers allow you to choose to crop or not
If you don't want export layers as files, hide the body layer, and use "export as"

Remember, quick export will always trim
Even the export as from the layer. Both are in effect quick exports
it didnt remove the extra png areas this time but now i need the ctrol +J to generate me only the area i've chosen with marquee that is only 200 pixels wide which it didn't do this time

i have it as such

Because it takes only the layer into account, not the whole canvas, if you want the whole canvas, you need to export through the File menu
Have you tried through the file menu?
That's how it should be
that's what i do now and it removes all the top and left png area

i just need the left area gone
yes ik but when i leave it untrimmed it includes the left empty area that i don't need
In that case you need to remove it from the canvas itself

Then you need to crop manually after export
You can't have one without the other. Photoshop doesn't predict what you want
No, Lightroom doesn't use layers, so that point is moot
You can crop with the crop tool after the export
or select, and crop, export, and ctrl+Z to go back one step


If you select first, the crop tool will take your selection into account
Excellent!
Thank you
Gave +1 Creative Carma to @vapid flume (current: #6 - 1130)
My Steam profile shall look epic soon 
is there a way to properly js mask this guy?

It depends the quality of your original image...
Can you share it here?
"Select subject" should make the job...

oh wait
would it be good like this?

also kinda takes off a bit from the guitar
Make sure your select subject mode is set to "Cloud" for a better result...
this part kinda feels unnatural tho is it fine?

Yes but with such a bad resolution and lack of contrast between hair and background it's impossible to get better result...
If you want something that looks natural you'll have to make a composite work to create well defined hair contour...

alrightyy ill see how that looks, thank u so much!
Gave +1 Creative Carma to @viral palm (current: #7 - 1055)
is there anything i could do for this to be better? or do i js leave it

That's the best I can do with this poor quality image...


If you want something better you'll need paint hair yourself or use compositing technique or AI generative solution...
Hair selection is already difficult with a high-resolution image, so with this low quality, it's even more complicated... Impossible.
ah thank u
Gave +1 Creative Carma to @viral palm (current: #7 - 1056)
how to change colors with hotkeys??🤔

right click on it and choose another color on the list
I can't see it in the list of keyboard shortcuts you can change (Edit>keyboard shortcuts)

But double check, just in case I missed it
Be sure you choose "panel menus", in the drop down list

All that's in there should be customisable. If it's not there, that means your only way to assign a hot key is either via an action (record an action of changing the colours, you will need one action for each colour) or use a keyboard, mouse or any other device where you can program buttons that can trigger menus
when you record an action, you can assign a KBSC to that action
See mine here.

It might be worth putting a feature request.
Yes!
https://community.adobe.com/feature-requests-713
I think a good feature request would be "make everything customisable with a hotkey" 🙂
Feature Requests
Why are there so few hotkeys )= . I would like Ctrl + 1, but it's not there
It's strange that there are no ways to reassign the hotkeys? -> Ctrl + 1 Not the ones on the list

<@&548221840750018590>
Image spam
<@&548221840750018590>
It is attributed to something else, it is zoom to 100% a VERY useful shortcut
Wow spammers are going wild for a Monday
Thanks for your prompt action!
Gave +1 Creative Carma to @wind narwhal (current: #3 - 2677)
Yesterday too! I banned three of them on the fly.🥸 ⚒️
this character isn't on a SINGLE layer and i cant move him
???

when i click on him it says "could not use move tool because no layers are selected"
also the tiny icon to the right of the sword has the exact same issues
You have to select/activate the layer in the Layers Panel by clicking on it.
A short video to show you what @ripe quest said.
If no layer is selected in the layer panel this mesage will pop up....
click on layer you want to move in layers panel before trying to move it,
hi can anyone help me with a thumbnail for YouTube it is driving me bonkers. I have resized the image and canvas to be 1280x720 like previous ones but for some reason the thumbnail keeps having black side borders when i try use it

any help would be greatly appreciated ❤️
Do you mean this border?

no if i upload it on to youtube it has 2 big black borders on the side
this is what shows. my previous ones were all fine I have no idea what I done wrong

I have no clue how I have tried a few times but it just wont work.
Oh
it seems to not let me stretch it its like picking it up as a background or something
I am just crap at it 😄
In my case usually stretching image bit above canvas worked
its weird if i try stretch it it wont do it
Ok I understand...
First the image you shared is not 1280x720 / 72ppi
I would try to resize your image at the right pixel resolution first...

Can you share your hi-res image?

this is I got thats the PNG I made
and ye I seen that but if I scale the image it says it is right
but then seems to just not be
Try with this one... Made during the short video below...

the png is 1080x720 at 72ppi => should work properly as YT thumbnail
really appreciate the help but no luck still 🙁

so strange
the image was originally just a screen grab from in game
I can just use it as is I have spent hours on this and my channel is just a very new and amateur one so it doesnt matter that much I guess 🤣
just realised that image is 1080 not 1280 so that is probably why it didnt work 🙁 same issue I am having
it isn't in there is the thing
What isn't? The Layer Panel? Main manu: Window > Layers... (or F7 on the keyboard)
wait that is WEIRD
so the character, icon and white cubes weren't there initiaally it was just the backgrounds, gradiant and the sword
but after closing and reopening it's there
sorry to bother
100% right... YT thumbnail size is 1280x720 (not 1080x720)...
Bottom part will be trimed if you want to keep the title at its place...

omg you legend thank you ❤️
Gave +1 Creative Carma to @viral palm (current: #7 - 1057)
how do i go from this

to logos like these

i used a premade font for the first image
but im probably gonna have to draw it all from scratch to get the right feel id imagine
anyone able to give me some advice on a logo I am making please?
You have a good start already. You could use puppet warp and liquify. Just a reminder, if you convert it to a smart object you can continuously adjust both of those things. I would puppet warp it into the general position I wanted it, then use liquify to stretch etc. Also starting out with using the tracking setting in the font properties panel to get the letters closer together if that's your goal.
For example I took your image and only used liquify to swiftly change it.

You've probably noticed that all your logos are symmetrical, so in oreder to do that I would suggest you cut yours in half, mirror it and use this as a guide to either draw or distort your existing text so it looks more symmetrical.
you can ask in #📝project-feedback (post your logo for comments)
Hey everyone I’m working in Photoshop → Camera Raw Filter, using Adaptive presets (Portrait / Blur Background) The problem I’m facing is that the AI doesn’t isolate the subject correctly, parts of the background are being treated as the subject, so they stay sharp while other background areas blur.
i tried to do the mask thing and it doesn't apply
is there a way for me to match the "5" to the logo text ? I have tried match font etc.

is your background very close to your subject in tone and colour?
sometimes it's difficult to make a difference (and the human eye is always better at this, it's the human hand that sometimes fails)
It is likely not a font, but hand-drawn text, so in that case, all you can do is redraw it. I can see how you could modify the R and the T to make a 5 from
Did you try some font identifier platforms? (what's the font, whatfontis, Font squirrrel matcherator etc)
thank you for your help I managed it in the end. I am so bad at the photo stuff. I can record and edit a video in no time but the thumbnails are taking me hours because I want to just change a number :D. Currently working on trying to remove the background on the logo. not sure it itll work.
Gave +1 Creative Carma to @vapid flume (current: #6 - 1131)
in the masking when i select the person it fits perfectly
in adaptive blur background
it selects another subjects
even the ground
Did you try just with the subject selection, or did you try with the people recognition as well?
OK, hold on, I'm seeing error messages as well.
I'll ask around if if noone know about a workaround, I'll file a bug report
i want to make a smaller inner version of this outline but it just doesnt match the curves on the 1st one, any sugestions?

@vapid flume is there a chance I could get you to take a look at something ? I'm getting a very very odd PS bug and I can't unseat it. Wanted someone to verify on a different machine.
Object selection tool is making a really odd geometric selection around a person's face and I cannot fathom why
Go home selection tool, you're drunk.

Do you mean something like this?
If so could you share a screenshot of your layers panel?

It's more an Adobe Illustrator thing but we can try to find a workaround in Photoshop...
Offset Curve isn't it
Offset path
So if you select the outer and do Select->modify->Border 16px it appears to match pretty damn well.
(Well, one edge)
If you just want a starting point for an offset path
How'd you do yours @viral palm
Select-contract?
Let me check
Do you want me to check with your image?
At first glance it gives me normal selection

But maybe there's an issue with AI selections (as per the previous post)
Select people works well, so that's not it

and select subject proper as well

Here is a short video to show you what I would do as workaround in Photoshop but the more accurate way would be to work with vector shapes in Adobe Illustrator...
yes
ohh thank you
Gave +1 Creative Carma to @viral palm (current: #7 - 1058)
if you want to keep the gap betwwen the 2 borders you also can explore parabolic contour...
You'll have less control on the width but the gap between both shape will be transparent...

you also can customize the contour curve if you want.
I used your screenshot and "select subject" works well on my end (except for the interferences of your screenshot marching ants 😉 )
The active layer is the one that contains yoursubject, isn't it?

So if I duplicate the layer I get the same weird behaviour if I create an empty layer I merge it with the problematic layer I also get the strange selection, but if I merge the layer with the original image layer from below, the problem goes away
I can provide a link to the original PSD if you'd be willing to check it
please
I generated this logo with AI, and I'd like to recreate it in photoshop without having to draw it all. Does anyone know a fontface that looks like this?
here it is without the lines, font identifiers can't find anything like it so it may not exist

yo so can someone please make this so i can use it for a single wallpaper for my 2 screenes or can help me make it, i just want the guy on thei mage to be on my left monitor and i want to make a good looking vigneette effect so it can flow to my 2nd monitor fine

for something like this you are better off using Illustrator and then you can use image trace
you can do something like this, object selection the guy out and then copy and paste him into a new layer,
make a gradient and put it under the guy layer
then copy the guy layer again and put him under, put a Outer glow effect on that layer and then layer mask it to adjust the outer glow if needed
I created a bug report here:
https://community.adobe.com/bug-reports-711/error-with-ai-based-selection-in-camera-raw-within-photoshop-1548398
Feel free to add your own take. Adobe employees are actively monitoring the threads so they might answer directly to you with possible fixes.
Running PS 27.3.1 on Win11I get error messages in the camera raw filter, in Photoshop when I try to run the AI based selection/masks on a portraitSee this for the person recognition:Then a different error message but still an error for the “select subject”And same again in the “remove” sectionOther...
hi guys, do you know how to create this star shape in photoshop, like how to add half blur effect like on figma? im beginner btw pls helpp🙏


One way is to Convert it to a Smart Object, apply the Blur Filter to the SO and then paint on the mask with black where you want to hide the Blur effect.
thankyouuu so much, very helpfull for me 🔥
btw, sorry i ask again. how to custom the color of the shape with gradient color like this ini photoshop? like you can pull the line of gradient

Hopefully, this makes sense and you can follow along with that.
Thankyou so muchh
Is anyone having issues with Generate Fill? It says "This feature is currently not available." I have full credits.
Does someone know how to make this line around the outside? I forgot how I did it and cant find it on internet

Around the outside of what?
A text, a vector shape, a rasterized shape...?
rasterized shape ment this thank you man for the video!
Gave +1 Creative Carma to @viral palm (current: #7 - 1059)
Just in case you want to hide a part of the line as shown in your sample image...
even better thanks
Gave +1 Creative Carma to @viral palm (current: #7 - 1060)
I tried it with a new layer then ctrl A and then contract 20 pixel and then stroke but can’t click stroke.
Do you mean something like that?
I'll be AFK for minutes but don't hesitate to shoot your questions anyway... Some people can help here... or me later😉
Yes but if I do this I can’t click in stroke. It doesn’t allow me
I see you posted 2 hours ago. Still having issues with this? I just tried Gen Fill and it worked for me.
You can't apply stroke (from Fx button at the bottom of layers panel) directly to an empty selection... The stroke Fx is applied to the layer itself (when empty) or elements/pixels on it. If you want to use the Stroke of Layer Fx panel you must: fill your selection, set the layer fill to 0% as shown in this video.
If you want to apply the stroke directly to your selection: make your selection then go to Edit/Stroke...
Which "stroke" you cannot click?
Difficult to understand what's happening. Photoshop just closes before launching? Is that it? Trying Holding down SHIFT CTRL ALT at the same time and start Photoshop. Keep holding the keys until you see the message box asking to delete the settings file. Say Yes. See if it opens after that.
When I start it, it crashes.
Try what I said. Delete Prefs
I did as you wrote and marked that I want to delete it, but it still crashes.
https://youtu.be/LzSc3AuwR-8
hi the tutorial of this video isnt working for me does it not work for some of yall too? is there another way to fix that?

In today’s tutorial, I’ll be showing you how turn any photo into an oil painting, sketch, crayon drawing, comic art and more in just a few clicks + stay tuned as I’ll be revealing a list of my favourite prompts for you to use.
Link to the image I've used so you can follow along:
https://www.pexels.com/photo/blue-box-type-sedan-845405/
To...
I don't know. You can try uninstalling and reinstalling the app.
How to download this
The open in Photoshop thing for me just opens Photoshop
Doesn't open the effect
Last update on Nov 14, 2023, I think the "Open in App" link doesn't exist anymore...😔
...So this article loses much of its interest😢
any way to add anti aliasing in photoshop, for pixel art uses?
like in this video
i used gimp anti alias filter but i was thinking if photoshop has a similar filter too
im looking for more intense blending than this
I uninstalled and reinstalled it, but it doesn't help.
You don't even really need this anymore if you choose the Gemini 3 (Nano Banana Pro) model. Just Select All (Ctrl A) to select all. Go to Edit > Generative Fill. Choose the Gemini 3 model. Enter your prompt and Generate.
Do you have an image and a style that you want to use/try?
Not sure what you mean by 'anti-alias' in this instance. You want to try a Surface Blur?

What about trying to install the Photoshop Beta and see if that runs?
anyone know how to decypher what color the car should be in this photo? how do i fix the colors in the background? Colorize Neural Filter?


Did you try a quick Nano Banana Pro restore?

Simple prompt:
Restore this photo with realistic details and perfect color grading; recreate the photo as if it were captured by a professional photographer using a modern DSLR camera.
You could get more detailed if need be.
How could I create a roughness map of a white monster can?
if the monster can is already in black and white?
thank you so much man. you're a lifesaver. been working on this all day pulling out my hair.