#❓ask-a-question
1 messages · Page 147 of 1
Hey, in Photoshop my brush feels choppy/laggy.
The cursor moves smoothly, but the actual paint stroke lags behind in little jumps, like it’s trying to catch up.
I have a pretty stacked PC, and my performance settings are fine. Can anyone help me please?
yoo this is maybe an bigger qeustion but could smb teach me how to creat a banner that looks cool
Do you have any value in "Smoothing" box? If so try to reduce the amount to 20% or less...

@low prairie : high smoothing value combined with low spacing can give you "laggy" brush stroke (even more so if you use a large brush).

What maniac has the layers panel on the left? 🙂
(to be fair, it kinda makes sense, since that's where the other buttons are too) 🙂
Smoothing is set to 0 and spacing set to 1%
And it does the same what ever brush you use?
Yeah
Its like slight lag that just makes it feel 'cheap'. its really difficult to explain.
Lol ... Don't renember who but I saw a lefty streamer do this and since I'm lefty too I tried and liked it... He said it saves tome for lefty but tbh I like the idea to get a full height layers panel... But you have a point! We can do the same on the right side...lefties don't think like others😉
Are you painting with mouse or graphic pen?
Just to be sure "laggy" or "jaggy" (like shaky stroke)... If it's jaggy => try to increase smoothing value 10 or 20%.
If it's laggy for real (delay between you brush cursor and the stroke display when painting), I'm sorry but I'm running out of ideas...
Maybe someone else will have an idea...🤞
What is the size in pixels of your document?
tried different sizes, 4k, 1080p, 300x300
graphics pen
I think it just is laggy
just photoshop coded badly :/
How would yall go about recoloring parts of a comic panel?

I'm trying to combine two different covers for a comic book issue
removed the logo on both and plan on placing on logo right across the two
but I'm unsure how to start recoloring the bits i've taken out
Depends on what you want to recolour
oh. the white bits?
yes

That would be insanely difficult if you were to manually do it.
But easier if you can use generative fill and some masking and chopping and replacing hands etc
Or easier still... find some guy on the internet who has 15 mins to spare 🙂
Yeah it's not perfect, but not too bad for 15 mins work
Hello! Anyone know why cant i do this? first photo is of a work i did but in the second one i cant idk why{
1 pic: i add like this lightning with the pincel but now

instead of giving me light it makes full colour

Hey, I added a stroke to one of my transparent vectors, and it seems to always create these weird white pixels

You can barely notice them, but they become visible when exporting into my game

I couldn't figure out a fix for could anyone help me out please
What is the exported format? png? If so 8 bits or 24bits?
Also, could you share a screenshot of the stroke settings? This could help us understand what is happening.
Hello, I export is as a png
Here a screenshot of the settings of the stroke:

I'm not sure wether it's 8 bits or 24, where am I able to see that?
Threw it into an online metadata viewer, seems to be 8 bit

In the "export as" window...

Oh strange, that's toggled off for me

Does the line visible only your game?
(the white one)
It is definitely more visible in game yeah, but on here you can see some slight white pixels
Maybe that's what's confusing the engine im not quite sure either
it is possible that the game will recompile your original png...
Is it possible for you to share the image of the paw without the outline here? (the png)

give me 2 mins I check if I found something...
okk :)
same paw with same stroke than you exported as png and placed over a 50% grey background.
8bit on the left 24-bit on the right.
I got no white line around but you can see 8-bit contour is more jagged (because 8-bit doesn't handle really well anti-aliasing)
The shared design (with "items" word) seems to be a wat smaller than 1024x1024 if you know the final resolution I would suggest you to export your design at this final resolution and in 8-bit and see if the white line is still visible... Pushing a 24-bit file in a program that will turn it in 8-bit can gives weird result.

Oh I see, I'm gonna try this out in the morning it's late for me
Difficult to explain in chat but 8-bit can't handle semei-transparent pixels (pointed on the screenshot).
I wouldn't be surprised if your game reinterprets these semi-transparent pixels as white pixels.

Yeah that might be what it's doing, I've tried doing research but just got hit with a dead end there
Thank you for your time and help I will try again tomorrow, hopefully it will work xD
is there a way to fix underexposed photos in bulk?
i have a lot of them because i didn't notice my camera settings were off and the photos were important
here's an example (faces cropped for privacy)

how do i make this a silouhette?
That might be your issue. Which brand? Up to date drivers? Try to update them, or to roll back…
Are they shot in raw or jpeg? In both case, I would use camera raw, and copy the develop settings in Bridge…
how can i do that?
In Bridge, select a file and hit Ctrl+R (as in Raw) in camera raw, adjust the exposure slider, hit done.
Then select the other files, right-click and select develop settings> apply last settings or something like that.
You’ll then need to re-export the files. Select them all, then go to the menu tools> Photoshop> image processor, select jpeg and a compression, maybe convert to sRGB.
The JPEGs might look correct in bridge once you’ve adjusted them, but you need to “cook in the changes, hence the export at the end.
An alternative would be to select all the files in Bridge, open them in camera raw, select them all (Ctrl+A) in camera raw, hit the auto button, and done, then, the image processor or the quick export.
This video tells you how powerful camera raw can be: https://www.youtube.com/watch?v=TFpJyMxFi_I

Michael Ninness shows us how to use camera raw for easy editing in Photoshop in this “Three Minutes Max” video. From adjusting contrast, white balance, and vibrance to fixing blemishes and artifacts, he demonstrates why camera raw should just be Photoshop’s default workspace.
Three Minutes Max comes from a fun—yet very competitive—se...
The trickiest thing for me when it comes to making thumbnails is finding the right assets / images
if I can't find something using the pen or lasoo tool etc takes far too long
any tips for finding whatever you're looking for?
I mainly make gaming / speedrun related content 💀
And this pdf tells you all the power of Bridge: http://www.photoshopforphotographers.com/CC_2013/Help_guide/PDFs/Imagemanagement.pdf
What do you mean by this? If the asset is not easily selectable, on a good background, removing said bg is difficult?
Tried remove background then harmonize?

🎬Unlimited Assets: https://1.envato.market/yq72Db
✨Editing Plugins: https://aejuice.com/?ref=SmertimbaGraphics
In this tutorial I show you how to remove background in photoshop. This video includes: remove background in photoshop, remove background photoshop, photoshop remove background, background remover photoshop, photoshop background r...
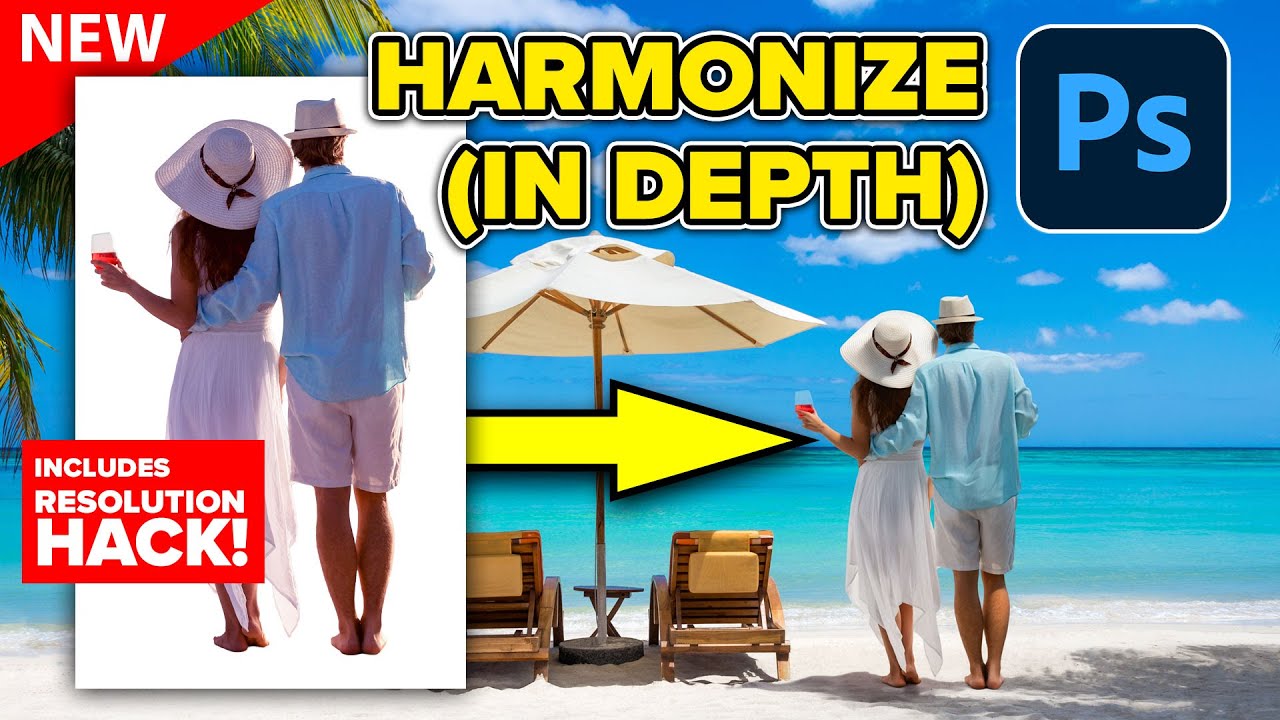
Deep dive into new Harmonize in Photoshop. How to make it work better. Colin Smith shows you how to use the latest Photoshop tools.
00:00 How to get Photoshop Beta
00:38 How to use Harmonize, auto blending, and color
02:38 How does Harmonize work in Photoshop?
03:36 The 2 problems with Harmonize, resolution
05:51 problem with flexibility and ho...
I do think, at higher resolutions, harmonise is a big win, however IDK how much it costs.
I seem to remember it's 5 credits per generation...
In real monies
I wonder what the AdobeDollar to GBP is today
Do generative credits roll over month to month?

No, generative credits do not roll over to the next month. Your generative credit balance will reset to your allocated amount on a monthly basis.
This right here... this right here makes me rage out.
Free credit rollover, sure.
But if I give them money, and it evaporates arbitrarily at the end of the month? I'm sorry but that's not on.
Also "Purchase Additional Credits" takes me here: https://www.adobe.com/products/firefly/plans.html
Compare Adobe Firefly plans for individuals, students, teachers, and teams. Get the most from Adobe Firefly by choosing the plan that’s built for you.
That's... a subscription.
I just need 30 more credits.
Pissboiling moneygrubbing foolery.
Pay as you go, so long as it's This Much, for This Long.
- Terms and conditions apply
See there's no reason beyond "Gym Membership Model" for this to be the pricing scheme, and yes I know we're all hostages, and a company can do what it wants, etc etc, but the only reason to force this on users is to collect more from the customers than the customers typically use - Otherwise they'd bill it like a Taxi, per actual km travelled.
Wrong channel for this, I apologise.
Assuming you DO want 2000 credits and you ARE willing to subscribe for a minimum of 12 months, then you're paying 0.5p per credit.
If you only use 5 of them though, that generation just cost you £120 😂
No problem: I get you about the free credits not rolling out. Although it has to be said, most subs models (includng my phone sub here in the UK) don't roll out. I think it has become a defining feature everywhere.You can still take a one month sub for credits and cancel immediately after. If you really need a lot of credits every month, IMHO it's best to get a pro sub instead of a standard...
As someone with both fragile work supply and fragile finances, the idea of paying for a thing you then lose when you don't use it terrifies me.
THat's why I have a £2/pcm minimum phone contract, etc.
Yes, I know... I must say, I don't use that much credits (Out of my 1000 credits, I might use say 150 per month) but I guess if you do video (which I don't) it really can add up
My concern would be over things like Harmonise and upscale that consume a much larger proportion
I usually just use it for fixing hairlines (Its very good at fake hair infill) but when you're throwing 5-10 a go at it you consume them at an alarming rate

<@&548221840750018590>
The paint sketch? 😄
yes
how do i make it in photoshop
im rn here , i want to make the white backrgound stick out so the shade is in background

like 3d you know
pretty pls help?
how can i reset this color table for indexed mode?

To give some depth, I see that you want a marble texture, maybe distorting it to give perspective? But I don’t get what you mean with drop shadows on both sides
How can I convert multiple NEF photos to JPG?
um i just wantet the thing to be clearly in background , not a drop shadow
Can you show an example ? , your sketch is not very telling…
uhm one sec
Select them in Bridge, then tools>Photoshop>image processor or use the export panel: https://helpx.adobe.com/bridge/using/export-panel.html
Thanks!!
so like i mean that the white is in front of the colorfull square but like not

man idk how to explain
im sry
ive dones this

Show a finished image that has this effect… do you mean Perspective, just layers? You could put a drop shadow on the crest that is blurrier on the color than the white?
looks cool but it wasnt my goal
You are welcome! I’ve added another method in my post.
huh one sec ima try
idk how to do tbh but ima find out
Square? You mean the rectangle shape with gradients?
yes
i cant find one
i do it from mind...
btw those are two assets

the shadow work wierdly bc it makes and shadow on every side
Are you adding a drop shadow layer style?
uh
what
i dont think so
i found a way to indicate what i mean
its a scetch again tho

It is more difficult to imply depth when you only have elements parallel to the view. I would simulate depth thanks to the logo, it would cast different shadows on the white and on the gradient.
Take a light, put a piece of paper under and another on top of a thick book put your hand between the light and the top paper, observe the shadows…
Hello, why can't I save in jpg format anymore?
File > Export > Export As is not working?
is there a way to have the stroke options like this without converting text to shape?


Unfortunately not in Photoshop...
Layer style is not suitable for the effect you're looking for (without converting text to shape)...
If you can use Adobe illustrator, you can in appearance panel...
What is your image mode?... Bitmap?...
Are you trying to "save as"? If this is the case, try using “Export As” instead. If that doesn't work, please provide us with more details about the file you are trying to export/save and how you are doing it.
I would like to help but I don't understand what effect you're trying to achieve... Do you have an exemple to share with us? something you have seen on th internet for exemple... It could help.
um i really just dont have any example
but i made it work out somehow
made smht different cool
Ah thank you, I have illustrator, I just make UI in photoshop
Gave +1 Creative Carma to @viral palm (current: #7 - 1014)
Hello folks, never seen this before -
Background of PS suddenly became black. Not the background color, but like the theme of the program itself.
The image also has black so it is confusing where the image begins and ends. How do I fix this?

this all looks normal??

it happens that you can inadvertedly change the canvas color
Right click in that area and you'll be given some choices

Mine is set to default, I think the lighter colour is called medium grey
It's not unusual to right click there by mistake
Thanks! I appreciate it!
You're welcome (It probably happened to everyone 🙂 )
Can someone help me reduce light glare on a photo
You might be in 16 bits, have layers… select save a copy. Or in preferences, you can set legacy save as: https://helpx.adobe.com/photoshop/desktop/save-and-export/save-files/revert-to-legacy-save-as-options.html
Do you need someone to do it for you or learn how to do it?
If the latter, post your image here and we will try to assess what needs to be done
if the former, you need to ask in #💬chat-general and if someone is interested, theywill contact you
Need someone to do it for me
If someone can do pls dm me
Post it where I told you to!
Hey dm
ok my friends family traveled to edinburch and had their picture made in front of the castle but there was a ton of people and construction going on. I was able to get ride of most the people and generated a good enough image for the sides but behind them they had construction and part of the building blocked with trailers so I removed all the people to have a clean plate underneat which looks pretty decent but not matter what I try can get a good enough image to replace the front . I even when out on the net to find similar images and tried the gen fill with reference but still got not good responses. I tried auto stacking as well. anyone have any ideas? running to a meeting but will check back later today


Why is the blend mode opposite of "Multiply" is called "Screen" and not "Divide"?
Actually, none of the modes mentioned are the opposite. You have to relate the ‘calculation types’ and the neutral colour if you want to find the “opposite” mode. In this case, white is the opposite neutral colour with an otherwise comparable calculation mode. Therefore, ‘negative multiply’ would be the most appropriate opposite blend mode.
Hey! I need some help. My yearly Adobe subscription just renewed today and I got charged around €500. I didn’t expect it at all. Since the payment happened today, does anyone know if I can cancel it and get a refund? I had bought the first year during Black Friday last year for around 200€ with the student offer and now i have to pay like 500€. Any advice would really help.
I know this is not the right place to ask this but I don't to go threw with adobe assistance etc...
Any questions concerning the subscription has to be asked to customer service since they are the only ones to have access to your account
You can go to your account and see what happens when you try to change your plan...
Manage your Adobe Account profile, password, security options, product and service subscriptions, privacy settings, and communication preferences.
if you paid £200, then it''s likely that you had a promotion and they are usually only for the first year, and it's renewed automatically, unless you cancel before. But I cannot tell you more since they will need an access to your account to tell you exactly what happened and what to do about it
Thank you for you help!
Gave +1 Creative Carma to @vapid flume (current: #6 - 1088)

You can try to negociate something with customer service: You don't try - > you don't get!
And this is the page of someone else

I dont have the green line with the refund thing
Beware that policies depend on countries, this one is from an Indian user, they may be different than yours
You absolutely need to set up a calendar reminder (ie: on your phone) when you take a sub. Everyone is bound to forget, particularly when it's a 12 month thing
Not maybe, 100% sure
For your first payment
Terms are different here in the UK already
But I dont know if those days apply for the second year of payment
Thats why I was asking here
Anyhow, you absolutely need to contact Customer Service.
It's not a new contract, so honestly I don't know...
That what I did ahahaha 🤡🤡🤡

I should have put it a day earlier
Anyway I will contact the support thx again
Good luck!
Best thing to do is cancel immediately after signing up once the payment for the month or year has been made if you can.
Yea but do we loose the access to the app?
how to create artwork like this? is thie achievable in photoshop or blender?

You can do that in both
You can't do that or that shut off access to your account since it's subscription. You have to cancel before renewal
Do they refund you for the mo the you didn't use?
Hello All !
Actually, I try to do some airplane/spaceship 3D renders and find some beautiful background of aerial skies to put behind my plane render (like in the references)
I already have a pack of aerial skies, but I don't really find exactly what I want and I need to expand my collection of images !
Do you know where I can find this type of pictures ? Or find packs too !
Thank's a lot ! 🌹


Hi all, I am trying to select a color range, but I don't see the option under "Select". I am using the web app. If this is only on the desktop app then can someone please point me to where I can download the desktop app? I cannot find it anywhere on the Adobe website. Any page I find just repeatedly asks me to purchase or do a free trial, but I'm already on the free trial.
Is there a way to keep the location of objects in the same spot of the canvas when exporting photos
Like i want it to be like this

not this

i'm trying to remove the person using content aware filling but it comes out so cooked

Have you tried with the GenAi fill?
Select the person and choose "generative fill"

It shouldn't happen (I mean it doesn't happen when I do it: It would be upsetting for me)

I did a little research (2 minutes!) and it seems to be linked to the "export as" legacy being turned off in the preferences. Check it out and see if it resolves it

Assuming you don't use the option Export> Export layers to files, where you can activily choose to trim your PNGs or not.
Hi, all. Help me figure out the contours in Photoshop layer styles. I open the graph and do not understand what the x-axis is, and what the y-axis is. for example, take the bevel and emboss graph, what the x-axis is responsible for, and what the y-axis is responsible for.
Do ytou have experience in how the curves adjustment layer works? (because the theory is the same)
In bevel and emboss you have the ligheer area and the darker area
(called highlight and shadows in the menu

Yes
This theory (of curves) works with white and black. But if you swap them (black glare and white shadow) or even take pink and blue, Photoshop gives you an absolutely incomprehensible result.
so in curves: if your line is straight, the darker areas (0 and 0 in the X andY axis) will very gradually blend the the lighter areas (255 and 255 in the respective axis)
If you take a point in the curve and push it to the same X axis but higher in the Y axis it will be abruptely lighter, if you push it at the opposite axis, it will change how harsh the transition is


There is little info about what it does for the layer styles, but you'll find lots of info for the curves adjustment layer: Just take the same information and transfer it to the layer styles
Most important, test things out by moving the points in the curves editor. It makes more sense when you see the changes live in the artwork

We Guarantee that After Watching This Video, You Will Become a Master of Curves!
🚀 Join PiXimperfect Pro - The Ultimate Photoshop Training Course: https://pix.live/pro
Whether it is stylizing your images or matching colors, the applications of Curves in Photoshop are limitless. In this tutorial, we will learn how Curves work and the fundamen...

Try to take the pink color and put it in the highlights, and the blue color in the shadows and get a slightly strange result.
And with the rest of the contours, as I understand it, the y-axis is transparency, and the x-axis is the distance from the center (0,0) to the end of the shadow.
Yes, a sort of realistic bevel/emboss will have a variation of the main colour (say blue) in the shadows (dark blue) and the highlights (Light Blue)
At a push you can use black and white, although it tends to be less realistic: Shadows and highlights have a colour.
If you put on crazy colours, you will get crazy results
I am not aware of controling the transparencies with a curve (but also I don't know them all!)
In which case do you think that applies?
I don't know in which case this applies, but I would like to understand everything, and you're right, there's not much material on these topics, and basically everyone uses ready-made contours.
I have had my own, but I made them by trial and eroor, because in those layer effects ist's just a combination of many many factors, not just the profiles so it's probably difficult to pin-point an explanation.
The problem with all those AI search summaries, is that now it's difficult to find older, more technical documentation than before. For example, just about any feature had a "white paper" published by Adobe Labs. They stopped doing it, but a while ago you could still find them. Most features weren't obsolete. Now they are just buried in the well that Google is
That's a quick summary, very limited

i made a custom photoshop brush and can't get it to not be see trough i turned off shape dynamics all my layers are normal mode 100% fill and opacity and so is my brush and im lost even with mouse it still is see trough
Was the artwork that was used to create the brush semi transparent from the start?
I mean you need it to be 100% opaque otherwise you will never get a full opacity when applying it
ehm the layers are ?
im just practising but it won't stay opace in 1 swipe

1 swipe

Did you keep the original artwork from which you created the layer? Can you screenshot it?
You can have a layer at 100% opacity but still have a semi transparent artwork
Example

Everything is at 100% opacity, but the original artwork was semi-tranparent, the original semi transparency could have been created with orther means than changing the opacity of the layer (a mask, a blend-if, or simply another brush that was already semi transparent)
im not sure what you mean but both of my art work layers with the blocks are 100 %
o i did not save and lost everything this was the thing i used to make the brush

the edges have 1 pixel feather when i use the brush though for some reason and it aint full opacity
Can you run a levels adjustment layer on that big rectangle and show me what it shows? Like that:


I have heard about it and it looks legit. I think It's more or less that the web version, but as an extention (a bit like a web app)
I'm not 100% sure
You should ask Carissa in the Slack
i want to combine these 2 pics into one

how can i do it

2 people sitting in the same frame tho
One of them will have to be placed on top of the other in the layer stack, then the top layer's background will have to be masked in order to only reveal the subject. Than place the subject where it belong, possibly paint over the mask to reveal a bit of the shadow how her bum on the stairs to make it more believable

It's day 6 of our series! Today we'll focus on mastering Layer Masks. Learn to create composite images by cutting subjects from their backgrounds, adding new elements, and creating a cohesive final image.
Sign Up for 30 Days of Photoshop (It's FREE!)
https://phlearn.com/playlist/30-days-of-photoshop-2025-edition/
You'll receive a printable ca...
https://www.adobe.com/uk/learn/photoshop/web/create-composite-with-layer-mask?learnIn=1&locale=en-GB
Access Adobe Creative Cloud apps, services, file management, and more. Sign in to start creating.
I'm sure this is really easy but I can't see the setting- I'm in Camera Raw 18.0, I have cropped one image and now want to apply that same crop to other images also open. How would I paste that crop across many images?
Another question is, is there a way to use Auto-Align Layers in a way that allows translation, and rotation? I don't want any merging of perspective, only just translation and a smidge of rotation. Don't see an obvious option. Turns out it was right under my nose as Collage, although seems to be a bit janky so I have to do it one by one
Hi, copy the develop settings in Bridge, apply it to the other images. (If they have the same orientation)
I have to use Bridge and not Photoshop's Camera Raw?
If you want to copy paste settings, yes. Bridge+ACR is a killer combo! http://www.photoshopforphotographers.com/CC_2013/Help_guide/PDFs/Imagemanagement.pdf
If they are open in ACR, You can do it from camera raw’s filmstrip : right click and select sync settings.
Ah that's the one thank you


I don't know what do you mean. What exactly isn't working?
different images, different filter, different settings
first post shows watercolor filter on bw image
second post shows stamp filter on rgb image (stamp filter does not work with white/white -> press D one time and try it again)
probably reset your foreground/background color to Black on White ( Shortcut: D) and most of your filters from Sketch group will work like two days ago...

Hi Franck
filer settings are same for both images stamp and grain
again:
… stamp filter does not work with white/white -> press D one time and try it again …
thanks it woked
Gave +1 Creative Carma to @tame cape (current: #14 - 254)
Hey! sorry I didn't read your post to the end and didn't see you've already pointed the "D" soluce...
thanks
Gave +1 Creative Carma to @viral palm (current: #7 - 1015)
is there a way to make a automatic grid position? like i have 30 layers and would like to have them side by side and below and abovbe eachother evenly
can sombody photoshop me into a photo please
Hi! The layer stack is not the same in both images. Why do you have so many filters, with only two active? And are you sure that the colors were the same? Edit: I see others mentioned it.
Hi, wrong channel for this; this area is for users asking questions how to use Photoshop, in order to help it. You might try #💬chat-general but again, would you go to a garage to ask for hitchhiking ?
Hello, A script might be of help, like https://stackoverflow.com/questions/77788763/photoshop-script-to-arrange-layers-into-grid
hey, I had photoshop for about a year, with a yearly subscription paid monthly, it used to charge around ~10€ monthly, now all of the sudden its about ~18€, I wanted to cancel the subscription, but it said that I ll have to pay 100€ as a “early” cancelation fee, I didn’t cancel anything early, I did the whole year and now I just wanted to cancel it, can anyone please help?

You probably started new year without discount
Thanks, weird it changed places before it was in save.
Gave +1 Creative Carma to @ivory rampart (current: #27 - 85)
Hi, we don’t deal with the accounts here. Contact customer service, ask to talk to a human, explain your situation…
Long time ago, if a file had things a format did not support, it was shown only in save a copy, as it should be, so that you do not lose layers, etc. Then, around cs4, Photoshop 11, they changed it, so that others formats were offered in save as.
Recently, Apple mandated the save to be only for a format that supports all features. So Adobe had to find the workaround of save a copy.
You can go to preferences and enable “legacy save as” to get jpeg even if the file has masks, layers, is 16 bits… but don’t come crying if you’ve lots hours of work because you saved your PSD as a JPEG…
Hello, please, how do I get this software to stop downloading in my native language? My Creative Cloud is in English, yet PS downloads in my language only and Preferences won't let me change
In CC desktop app => Hamburger menu icon => File =>Preferences => Language => Default install language


Don't know what is your native laguage OS but the hierarchy in panels should be the same...
Also if your photoshop is already installed on your machine with your native language you have to switch language in the app preferences...
Ah yes this option was toggled. I still had to redownload it because it wasn't giving me English in PS preferences
@zenith summit : Yes I experienced this in the past... You must install Photoshop in each language to get access to the UI languages option in Photoshop preferences... I did it a lot in the past French/English but found this tedious... Now I keep the English by default even if it's not my native language.

Yes, it’ll be a fast d/l
i've got a more general adobe question
if i want to gift someone 1 year of lightroom
how can i do this?
i see amazon sells it

Adobe Lightroom 1TB | AI-assisted photo editor | 12-Month Subscription with auto-renewal |PC/Mac | Digital Download
but its unclear if i get a code or what the deal is, and will it be tied to my amazon account somehow? - i dont want this obv
does the adobe website provide an easy way to gift someone adobe products?
if there's somewhere better i can ask lmk
also it says it renews, i also would not want that i just want to gift 1 year
Normally Adobe subs are tied to your Adobe id, an email that you choosed to associate with it. I’d contact Amazon to see if it works “normally “
@lunar belfry : also, to add what @hushed niche said, even if it's a gift the beneficiary will certainly need to enter a payment method and keep an eye on the renewal/cancellation date if they do not want their subscription to be automatically renewed/billed.
The automatic subscription renewal process has been the subject of much criticism towards Adobe... And not necessarily without reason.
If you don't want your gift to become a poisoned chalice, remind the person you are giving it to to:
1- read the terms and conditions carefully and,
2- set a reminder so they don't forget the renewal/cancellation date...
Point 2 is really important (particularly when it's a gift)...
yes
this makes things unfortunatly more complicated
i want to have it as a giveaway for a photography contest
worst case, i just do a amazon giftcard
Hiii
I have to complete an exam assignment, but it's in German.
I'm retraining as a digital and print media designer, and the assignment is very difficult for me because I've never used Photoshop before.
Could anyone help me? Maybe someone from Germany? 😢 😂
not from germany, but if you share your question here i'm sure we could help
I understand... But unfortunately most of moderators here are not Adobe employees but Photoshop users...
You can try to get more info from Amazon/Adobe...
... I think it could work but it is important that the beneficiary is informed about how their subscription works.
I've seen/heard a few people who don't really use the app complain about being automatically billed even though they don't use it...
Automatic renewal is usually clearly indicated but often overlooked by occasional users...
yes, thanks i apreciate it :)
Can i DM you? Quite big Task tbh and i need to translate it in english
i dont have time for a huge task at the moment
is there a software you are used to?
Its an Composing. I need to replace a few objects. Not more tbh.
Yea the Adobe programs
For me its big xD
I don’t get it, you do not speak German, but took a class in Germany?
Why DM? Ask here, if someone can help, they’ll help…
I do speak German but i need someone in the same language to describe the task because its hard to translate in English.
If I understand correctly, you are looking for someone who speaks German to help you via private messages.?
If so please use #💬chat-general and describe clearly what you're looking for. If anyone is interested, they will come forward.
This thread is dedicated to question about how do things in photoshop.
Part of me is thinking that if the end user is not inputing their card info on the website, their sub will end abruptly (not without warning though) without them being charged.
See screenshot: I've let my Behance Pro sub lapse, and I never had my payment info logged in.

That said, I would absolutely ask customer service for the real info. We aren't Adobe employees so you can't have a legal advice from us
yah i looked into it a bit more. this was burried at the bottom of the amazon listing

by the sounds of it
its exactly what i'm looking for
worst case, yes i will warn the recepiant of this to be mindfull if they have to enter their card details
Also: I had a giveaway from Adobe for an event I was co-running, and the person who won the stuff (from Adobe) had a a full run in of what they needed to do. I mean, they need to take a little responsability.
If it's not for a friend etc, then honestly, it's on them to be sure they take all precautions
From experience (but it may have changed) if they have a valid code, they don't need to enter their payment info
ok gotcha
yes i've also partcipated for adobe sponsored events in nyc, and recieved some adobe codes from them for volunteering, but my job pays for mine so i gave them to friends
good idea
i'll check in with them 
but i dont believe they had to enter card into
it was just a few steps to follow
and also it was not a regular code, i think there was a special link to go to specifically connected with the event, idr the details 100%
but anyway
You reminded me to check I didn't add payment method for my Behance pro too... Ouf!!!😅
Thanks Sandrine!
Gave +1 Creative Carma to @vapid flume (current: #6 - 1089)
how much should i charge for a logo?

/pedant hat on… those are not logos but special effects or maybe titles. A logo is the creation of a distinctive mark for a brand, a concept that can work in black and white, in reverse, and can be used on different supports, etc.
Ah, glad I nudged you!
Whatever, they don't have a specific name so we call them logos in my field. And that wasn't my question
Price depends on lot of points: the time you spent creating them, and how much you want to charge your time (work hour rates) and above all, most importantly the price of the market/competition...For exemple, you could be in competition with designers from other country with a way lower hour rate than yours.
Unfortunately, I don't think we can give you a clear and definite answer.
yes I know that, however time does not matter for the buyer, just the finished product. If my titles look better than somebody who charges 50$ for one, it does not matter if i make one in two minutes. Plus, time can vary dependent on what im making, and i cant vary prices much on fiverr. But you're right, i asked the wrong question. How much money would you be willing to pay for one if you needed it for your hypothetical video game?
If you can make one in 2 minutes, 50$ for one => approximately $48 margin!
That is a Freaking good price for you...as long as you find client and he doesn't know it took you 2 mins.
...Sorry, I'm not sure I can be of much help with this type of work, as I have no idea what the average market price is for this type of design...
I can just give you some advice: if you want to sell something, you can't really stray too far from the prices offered by your competitors, unless you think your products are really better and justify a higher price... Selling something better than the competition at the same market price could work, but there are no guarantees.
Be aware that some people use a different business model, selling at ridiculously low prices to generate sales and fight off the competition... You know, you're swimming with sharks.
"As much as you can get".
👋
hi, may i please know why this had happened to my photoshop?

i couldnt open my adobe illustrator too

Open the Adobe Creative Cloud Desktop App and sign in to your Adobe Account.
If you're already signed in. Sign out of the app. Reboot the computer and when it comes back up, sign in to the CC app again.
i only have these i dont have the "master" app its gone missing..?

i searched for it i couldnt find it
Hmm. What about re-installing it?
oop sorry so i found it but when i clicked on it to open it it wouldnt open
found it by trying to install a new one but it said the app already exists
What about what I said above. Sign out/log out of the Creative Cloud app. Reboot. And when the OS starts back up, open the CC app and sign in again.
#shorts
Want a deeper dive? Typography, Lettering, Sales & Marketing, Social Media and The Business of Design courses available here:
https://thefutur.com/shop
🚀 Futur Accelerator
The step-by-step blueprint and coaching program designed to get your creative business off the ground:
https://thefutur.com/accelerator
🥇 Futur Pro
The profe...
i couldnt open the app.. seems like a bug
Hi, did you restart the computer, as indicated? Try this, also https://community.adobe.com/t5/download-install-discussions/reset-the-creative-cloud-desktop-app-to-solve-login-and-licensing-issues/td-p/10573237
https://community.adobe.com
Hello, I just wanted to pass along a quick tip that I've been using to solve a number of intermittent issues that our customers have been reporting. The Creative Cloud desktop app has a key command that will relaunch and reset the application. You may want to try this first before calling support i...
I wonder if that solves it taking 90 seconds to display my two apps...
Hi
I would say it makes sense in certain situations: When you can predict what the scope of work will be. I will state an example
Say you are contracted to take over a company photo archives, with the aim of flagging the best ones to be worked on for an e-commerce website. Then you have to label them, deleting those that are blurry etc, and add metadata and copyright tags to them (That means researching who photographed them)
How do you estimate that? It's impossible, in that case you bill by the hour.
If you are charging for a set outcome based on a detailled brief, then it makes more sense to charge for the outcome (+ but not limited to: usage rights)
If people work through freelancing platforms, they can set up "projects" (names will vary) when they say "a full logo + identity + manual" -> $1500, based on a precise set of questions that will inform the brief, and then st up a system of add-ons for everything that comes on top of the base pricing.
I have never done that, because in my line of work, I found that the time spent between someone who wants a "simple" retouching versus what reality is, is really wild. So I will quote based on what I think it will take me to do it + the "price of my expertise" if it's a very complex project, and also the type of project that is (It's a complex calculation), but in a sense, the more complex the project is, the more time you'll spend on it so - even if it's not framed like that to the client - the time you spend working on it has certainly an impact on the price.
Since I'm a retoucher, I don't have royalties, nor usage rights to worry about... It's a different minefield
BTW all that Chris Do says isn't the pure truth. He talks about a completely different business model than creating logos on freelancing platform websites. He tends to grate me the wrong way as well sometimes 🙂
Hello! how do you stretch a text?
Sorry but you are sharing with the wrong guy... I have no problem with my charging fees😉 .
I think I said nothing wrong and, more or less what he says in the video (if you catched I was a bit sarcastic with margins and client reference)... By the way, if you have more good info like this I would suggest you to share them with the user who asked for help...
Generally by "transforming it" (CTRL+T), but you have other solutions like acting on the spacing and stretching in the character panel, or outline it and move points on the newly created shape.
It would help to know what exactly you want to do...
@halcyon lagoon No DMs please, just post your question publicly!
I want to make the text go downwards because I want it to look bigger but I don't want it to touch the sides of the canvas when generally sizing it!
And sorry for the dm 🙇
Can you post a screenshot of your text WITH the layers panel open? That will saves us the back and forth asking if it's an editable text etc..
No problem!
Solutions will depend on the actual way the text have been made
Hello! sorry for the late reply because I had to hide some things because it's a publication material huhu I'm really sorry

Best is to take some different advice and forge our own business model... By the way, the inital question was about how to charge for designs that will be in competition with "fiverr" things... I don't think a complex business model is really necessary in this case...
Oh nvm someone dmed me a tutorial on the stretch effect but thank you tho for the willingness to help Sandrine!!!
No worries!
Anyways you still didn't show the layers panels so...
wait really,,, 😭
Here is a screenshot with the layer panel open. In it, I can see the text is a live text layer. That means I can act on the character panel, I also know that I can outline it so I can stretch the paths with my direct selection tool.


Oooo
We will often request you posting a full screenshot of the whole interface... WHY? because there is so much we can read just by looking at stuff: For example "my filter is greyed out!". I will see that you're in 16bits just by looking at the title of your document and I will tell you to image>mode>8 bits and your filters will work
Why people are so squeamish with posting full screenshots remains a mystery to me.
I want to see all this 😁

Okii I'll take note of this when I need help next time!
Well for my case I never know if my batchmates are here and they see an unfinished publication material for school,,,, that could be a bit troublesome but oh well 😭 better safe than sorry Ig,,,
Thank you for the help Sandrine!!
No problem, it just makes life really easier for everyone; For us, because we don't have to ask questions and try to extract information from you, but also that means you can have a solution with just one answer and go back to your usual day.
There is also the issue that people (me included) sometimes don't know how to phrase things; ie, you don''t know the right jargon, workflow whatever. Try going a Google search for an element in a menu when you don't know how a menu is called!
By posting a screenshot, there is a good chance people will know what the issue is without having to explain in details...
hey guys my student account for adobe ran out. is there any way to bring over my photoshop files into a different account?
Contact Adobe Customer Care. They should be able to help with that.
I don't think it's possible if the account that contains Photoshop files is closed... but you can ask Adobe customer care:https://helpx.adobe.com/support.html
So what was the effect used to turn the cat from the first pic to the cat in the second


Hmm walls are distorted so probably distort tool
Hard to say exactly but I would say some liquify filters (forward warp, pucker and bloat tool)... The smudge tool could also be used.
I don't think there is a one click way to do this... Any of tools named above need skills and work to get this result.
Hello, do you know if there's a community for InDesign?
Unfortunately (as far as I know) there is no InDesign Discord Server.
If you have questions about InDesign you can use the Adobe InDesign Community page: https://community.adobe.com/t5/indesign/ct-p/ct-indesign
Also, Some of Adobe Illustrator users are familiar with InDesign so you can try to ask kindly on this server: https://www.discord.gg/adobeillustrator
thank you
It was in response to your "don't like the customer know it took two minutes" which I think the video is a pretty relevant response for.
If the customer gets mad or wants to pay you less because it "only took you two minutes" then they don't appreciate your skillset and they're punishing you for being good like he says in the video. The customer is paying for the fact that you can make something they like in two minutes.
You do it faster and they like it, you should get paid more. Don't see why you need to hide that from the customer. It's valuing your own skillset less.
No problem! I think we are are on the same page! 😉
Alright cool
Also for what its worth I have no idea who that guy in the video is seems as others have suggested he isn't the best. I just remember seeing that clip and found it made sense.
hey, how can I make something like this in photoshop?

Turning your text layer in a Smart object then use Liquify filter or Warp Distort option are the two ways that came to my mind...
I think it could also be done with spherize. In Filter > Distort > Spherize. Looks like the bottom of the text is mostly flat, so if you want it to look as close to that example as possible you could line up the bottom of the text with the center so it doesn't get affected as much. Obviously you can play around with it that's just a rough example.


I agree with you. Spherize filter could be an option too but since this filter is really old and never been updated it's not as friendly as "Liquify.../Bloat" to use (IMO)... but it may work too.
I don't remember exactly how because it's not something I'd do but isn't it also possible to draw a path or line and then make the text follow that?
Yea with the type tool you can click on a path and it will follow that. In this case it wouldn't really achieve the same effect as the example though. But worth knowing.

Ah I see thanks. So its not possible to do 3D paths.
Gave +1 Creative Carma to @cosmic scroll (current: #1029 - 1)
OK
and do anybody know what font is this?

Not sure but it could be similar to helvetica. Likely something with a condensed version. Or they manually squished it horizontally too before doing the bulge effect. They might have also reduced the space between the characters like with the character panel

Hard to say the exact Font but It's probably a Sans-Serif Bold and Condensed Font with a cranked up Vertical scale...
Acumin Pro Condensed, Bebas Neue Pro, Helvetica...etc.

I am looking for three full color caricature drawings of my family as a special Christmas gift.
Requirements:
- 3 caricature drawings
- Full color
- Custom background associated with each caricature - There are suggestions for each caricature.
Ideal skills and experience:
- Anyone with experience creating caricatures
- Full-color illustration proficiency
- Custom background design ability
Please provide a portfolio of similar works, expected budget, and timeline.
If you are very interesting about this project, Plz DM me.
Please don't post the same message on several chanels...
#💬chat-general is the good plce for this type of request.
how did you get this on the bottom, the design

I need help my finals are due for a photoshop assignment and i'm having an issue with this part of the photoshop


you can see there's an obvious border there
i'm trying to make it fade into the star skies but nothing is working
if anyone can help me it would help so much

gets very obvious when i activate the moonlight glow
can anyone please help? my assigment is due in 2 days and i have work tomorrow so I dont have much time to finish this
What border? The hard edge of the moon?
Over here
You can see that there’s a line between the sky near the moon
Where the noise ends?
Its really hard to tell what you're referring to in that image unless you send another screenshot with it hilighted. There are multiple issues such as the banding in the glow gradient too.

The line there
I tried blurring, masking and nothing works to make it blend well
That seems to be where the noise in the background comes to a hard stop not a solid line per se.
Personally I'd select the background above it and generate noise and try to match it or select the entire background, de-noise or apply blur and then generate new noise over top.
Because you have noise then it suddenly stops. So it's more that you're seeing the difference between the textures changing so harshly.

Also the banding here you can mitigate by setting the image colour depth to 16 bits per channel. Amd / or Or using blurring techniques

Also this is unsolicited but personally I'd make the edge of the moon softer or moon type thing. I don't know pokemon sorry.
It’s alright
My goal of my assignment is to recreate an movie poster with original images
is it moon?
No I’m recreating the detective pikachu movie poster
I made a pattern with Photoshop tools icon then use it to create an overlay that hides my taskbar in OBS.
oh nice w
I think you are right. oP could create a layer mask to soften the transition between the noisy area and the noiseless one.
I’d buy a shirt with this design in an heartbeat…
How do I remove backgrounds cleanly, I tried using the lasso, but I couldnt get the shape right, I saw people perfectly cutting out the edges, Im new to photoshop and came here for tips 
Im trying to smooth out the sides of my dogbone for my logo, How can i mask while still having smooth edges after the fact?

like its just mad bumpy and not smooth.

Why not use vectors?
It will be sharp and you can blur edges as needed
It should be easy to trace this logo
As already said, you need to redraw it using the pen tool at the very minimum.
Or perhaps if you use illustrator, with shapes you can get a more 'balanced' logo that isn't drawn freehand. - and this way you don't have to stress about using the pen tool.
Thanks Pierre-Étienne! You're too Kind!
Let me think about a business model...😉
Gave +1 Creative Carma to @hushed niche (current: #12 - 336)
If you don't have Illustrator you can redraw the dogbone shape with shapes in Photoshop too and use unite shapes/merge shapes components feature to get a smooth contour... It's a little more tedious to do in Photoshop, but it's still doable...

@slate adder - This is channel for questions about Photoshop. Please don't SPAM images here.
ur real ash
ah its all good i figured it out
Happy to hear that!
Hey all so I am working on a custom box and designing it. According to the site, the box is 22.3 in x 21.3 inches, so I set up a file in PS with those dimensions at 500 ppi. I downloaded a PSD design file at DPI 300 (2250x4000px) is there anyway to increase that image so it isn't so pixilated? or i just need to move on?
Hey, im really new to photoshop, only making decals and car liveries for assetto corsa. I was wondering if anyone knows or has a tutorial on how to do proper chrome (not chrome-effect, i want actual chrome glare and shine). Referance picture attached.

Hello everyone, do you have any tips for reproducing the texture on the upper part of the shoe? Do I need to draw them by hand or use an Illustrator pattern? Thanks in advance 🙂

Drawing that by hand would be meticulous and time-consuming. Not to mention difficult. I would probably try to make a grid and the Transform > Warp and Distort it into place. Even that would be challenging.
Hey community I need some advice please I hired a company to edit my real estate photos but they exported them with the wrong settings is there a way to fix all these edited images in my Dropbox to these specifications
JPEG quality: 90–100
Long edge: 4000–6000 px
Color space: sRGB
Sharpening: Low or Standard for Screen
No size reduction
No compression for web
Thank you!🙏
Could you clarify what you mean by "wrong settings"?
Hi, it seems to me that this was created in a 3D package then overlaid on the sketch.
Hi, working at 500 ppi on a 20”x20” design would bring most computers to a crawl. When you say box design, do you mean packaging?
In design with specialized plugins might be a better choice. Unless the totality of the design has to be painted.
For the upscale, going from 2000px to 100000px is a 50x upscaling. Even the best so upscalers might choke on it.
Hmm, perhaps I know some designers who practice those kinds of tricks, simulating fascinating drawing skills. 🤡
hey, I'm working with dithered images for laser engraving and was wondering if there is a way to blend the edges not by fading the images into gray or transparent, but actually removing the dots around the edges
This is what I can get from dissolve blending mode in the layer option but I'd love the edges be even more faded towards the outside. Choosing more pixels for feather doesn't help for this.

Will a soft brush with the image mode set to bitmap not do it ?

Compare Adobe Firefly plans for individuals, students, teachers, and teams. Get the most from Adobe Firefly by choosing the plan that’s built for you.
Run out of credits? No worries! Get more Adobe generative credits to continue using creative AI features in Adobe Firefly and Creative Cloud apps.
Sorry wrong link

That's... still a subscription.
I just have one job to finish.
And if I know Adobe, that's a 12 month minimum, so those credits are gonna cost me £120
Welp nothing we can do about it
Personally not happy about subscription but it is what it is
I wonder if we'll see a PAYG service where people with spare credits can pol their resources for people who need indicental generation.
Well it is what it is because people don't make enough noise about it, TBH
I wouldn’t say that people are not vocal about subs
Adobe socials are full of people that are not happy about it
Sadly there’s no competition, so it will be this way
Bingo
Affinity maybe will force some changes but they are still behind in many areas
I was forced to move to affinity for some time
But couldn’t get it to use it
Yes it's still lacking workflow tools I rely on in PS
Yup it’s not bad app, it just need few years to catch up with PS
Especially in gen fill area
Hello, I'm going to be without an internet connection for a while, how can I use photoshop, indesign, and acrobat, without being connected to the internet please?
Yes, you can use Adobe Creative Cloud apps (like Photoshop, Illustrator) without constant internet, as they install locally, but you need to connect online at least once every 99 days (for annual plans) for license validation; monthly plans get around 30 days, with longer offline periods requiring periodic checks, and some features like cloud storage, sync, or premium assets need connectivity. The apps work offline, but the Creative Cloud desktop app needs internet for updates and management.
@broken geyser
thank you M4gpul, do you know how to activate the 99 days?
I think you just have to login once
And then you have 99 days
At least that how it works for game pass and other subs
Is there a current bug with liquify, show all layers, in front ?
There seems to be a scaling issue and it makes the image blurry.
Every time I start an Adobe tool without being logged in, it asks for a login.
Anyone abl to quickly confirm ?
What do you want to test, and how?
With the opacity setting? Yes, it's a bit blurry, shouldn't it?
Well at that point in the process , it should be a 1:1 overlay
So there shouldn't be any blur.
I know, most of drawing is top notch anyways, but that part had underlying textures that are very regular. Looks 3D or very very skilled and patient drafter.
You need to change the falloff of the edge opacity.
where do I find that?
Are you located in the US? Which kind of subscription do you have? Yearly? Monthly? School?
If I use the slider in the blend mode oppacity, the whole image gets transparent
How did you change the edge opacity?
no, I don't live in the United States. the subscription is managed by someone else.
selected the whole image with the marquee tool, inverted the selection, deleted the edge and on the layer in the blending option I chose dissolve

“Deleted the edge” did you do a modify selection >select edge or something like this? Maybe switch to quickmask (hit Q) then run levels or curves to adjust the way the selection fades.
Is it in a company?
I would suggest to post in accounts: https://community.adobe.com/t5/account-payment-plan/ct-p/ct-account-payment-and-plan
Adobe has to scale the purchase of servers according to future generation demands. A subscription helps to estimate it, rather than instant demands.
A brush with lower opacity, set to dissolve blending mode, used on a layer mask is another solution.
Can you use a layer mask in bitmap mode?
thank you I posted a message like you said.
Gave +1 Creative Carma to @hushed niche (current: #12 - 337)
Bitmap as one or 0 only? Run threshold on it, then.
If you use the dissolve blend mode for the brush, it should be pure b&w
Will figure out how to do it this way, thanks
Gave +1 Creative Carma to @hushed niche (current: #12 - 338)
Btw, if you click, then shift click, it’ll draw a straight line between the two points. Or position your brush, hold down shift, the draw laterally, you’ll make a perfectly horizontal (or vertical) line.
I don't understand the answer to use adobe offline. is this a joke?
"The safest way is to open programs while you are logged in and then minimize them. once finished, don't close them, minimize them."
but I need to turn off the computer or the program...
if I minimize, how can I log out? It's absurd, right?
what does the response I got mean?
and what happens next is even more astonishing.
"presumably you will be using a laptop so as long as you don't do a restart the computer apps will stay open. ie, if you rarely restart your laptop, you might want to restart it before doing this."
like this to use adobe offline you had to keep the computer on... or did I misunderstand?
Yeah it has to be on
once he talks to me about a program, then he talks about an application... so those were two different things
For Creative Cloud Desktop Apps (Photoshop, Illustrator, etc.)
Initial Setup: You need an internet connection to install and activate the apps.
Offline Use: Once installed, apps can run offline for a set period (e.g., 30 days for monthly plans, up to 99 for annual) to validate your license.
Validation: The app checks in every 30 days; you'll get reminders to reconnect to the internet to keep using them.
the computer cannot be turned off between two disconnected adobe openings? it's madness.
They give me back the old Adobe which works without connection, it's shameful.
ha yes, I don't need tools (AI...) which need an internet connection to work.
If your Apps have been activated (with internet connection) you should be able to use them for at least 30days without internet connection...
Who doesn't have acces to internet for more than 30days nowdays?
you ask “who”? Wouldn’t that be more like “what”?
I'm a human, what kind of human needs to be connected to the internet?
I can connect my phone to the internet, my TV to the internet... but humans connected to the internet, excuse me, I've never seen that before.
I love sarcasm... Try to connect your computer to the internet and activate your Adobe Apps with an internet connection. Once it's done, you should be able to use them for at least 30days without internet connection (Your Desktop not you).
It doesn't work, when I disconnect my account, all Adobe tools close.
You must be looged in your account when you activate your apps with a live internet connection.
You should be able to use the Apps for at least 30 days without an internet connection but you must stay logged in your adobe CC account (even without internet connection).
If you disconnect your account (log out / sign out) adobe apps won't work.
ok thanks, it works, but why do I need to always be connected?
Gave +1 Creative Carma to @viral palm (current: #7 - 1016)
why do I need to always be connected?
Finally it is possible that my desktop will be without an internet connection for a very long time... what should I do?
Plug it to net at end of cycle otherwise you will be locked out
I'm not sure, but I guess it's to make sure the user has a valid subscription... So, if you're still logged in, as soon as you use the app with an active Internet connection, Adobe can verify that your subscription is valid and you should be able to use the app offline safely for the next 30 days (in theory, I've never tried it). Be careful not to exceed 30 days (or 99 days depending on your subscription)! If you do, you may encounter a deactivation issue.
Note: we are all volunteers and not Adobe employees here so if you need more info I would suggest to contact Adobe Customer Care: https://helpx.adobe.com/contact.html
All subscriptions that are offering offline usage require you to log in at the end of cycle
Otherwise it wont let you use itntill you log back
Personally tested with game pass
sorry I didn't want to make the volunteers work. How come Adobe needs volunteers?
Adobe don't have enough money to pay troubleshooters?
@broken geyser No problem at all... More info about "offline grace period" here: https://helpx.adobe.com/creative-cloud/kb/internet-connection-creative-cloud-apps.html
I assume they have if you go to the "helpx.adobe.com"... The main goal of this Discord server thread is to help people with "how to do things" in photoshop rather make troubleshooting... But if we can help we do...
I did not hear the same.
Some computers go to deep sleep instead of shutdown, so that they startup faster.
Your Adobe account?
sorry english is not my first langage
Because the apps check if they can run and they « ask » the CC app, which keeps a token for 30 or 99 days, according to your subscription. That said, there are entreprise licenses that even work on an airgapped machine, but it’s for very big accounts (think government)
I had an internet outage lasting 5 or 6 days last month and I can confirm you can absolutely use all desktop apps (including Fresco) without Internet
Adobe Express doesn't work though
You can't use the GenAI features and the projects feature (because it relies on a connection)
The only thing to be wary about regarding the 30/99 days grace period, When you log in again, you need to do so in a country that isn't embargoed. (US policies)
I remember the case of someone visiting Iran and who lost the ability to use the software
Don't ask me how it's enforced.. IP addresses probably?

They are for paragraph blocks. Not single line text.
Is there anyone from Europe side, and working in Advertising company / Printing Press? DM 
Does anyone know how to do this?
I'm trying to put a gif as a layer in photoshop
im following this tutorial https://www.youtube.com/watch?v=VZmKEJX3FK0
and i get stuck on the stage at 0:35.
i create a frame animation and then click the 3 lines on the right but there's no paste option like it shows in the video.


This week's tutorial, I will show you how to use Photoshop. I try to make it as simple as possible because I know how hard it is for the beginner like me to understand the steps in Photoshop.
I hope this will help you guys.
Thanks for watching!


What
I have a question for anyone who can explain this to me, albeit this is the color space, I am familiar with sRGB, AdobeRGB(1998) and ProPhoto RGB, each one representing the amount of color, the question I am trying to answer and fundamentally understand is this:
If I use ProPhoto RGB and use the 520 Green for example, bare in mind I would export as sRGB for the web, wouldn't that brightness of the 520 green convert to almost 255,255,255 where the green is almost similar?

Do you mean 0,256,0?
Hi, some fake it creating lots of duplicates: https://www.youtube.com/watch?v=J9lyExVMF7o
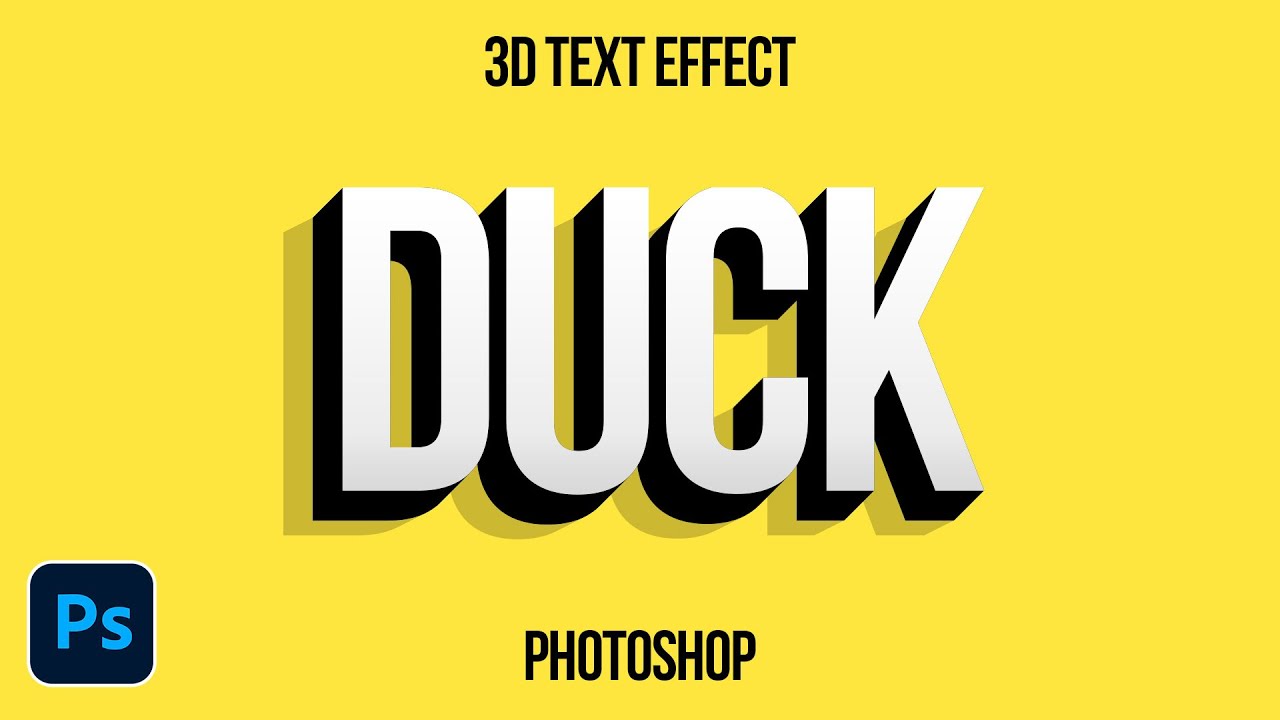
Learn how to make any title in Adobe Photoshop 3D. Creating 3D text in Photoshop is an easy task. First, type your text and then duplicate it by offsetting each layer. Creating 3D is almost an automated process that is easy. We'll also use Photoshop to create a nice shadow for our 3D Text Effect.
Here's the breakdown from this Photoshop tutoria...
Iirc, you need to select the create frames animation from the drop down, then accept it by clicking on the button.
They are pasting layers, not a gif.
Yes my mistake. I just meant on this chart.
How do I make it come out exactly as I made it on Photoshop?

Always use and control your effects etc. only in 100% view. Everything else is just interpolated views and will lead to different output results.
Is this possible to transform small text to caps?
Yes if your text is not on a rasterized layer...

Ty! Is there hotkey for this or nah?
Gave +1 Creative Carma to @viral palm (current: #7 - 1017)
Hum....I don't think so.
@neon crane : oups! There is a shortcut to quickly make text all caps in Photoshop.
Select the text and use the shortcut Ctrl + Shift + K (Windows) or Command + Shift + K (Mac).
This toggles selected text between lowercase, UPPERCASE, and Title Case.
Sorry!
Sweet
I'm trying to make a 16bit heightmap of the earth with bathymetry and topography data. When I merge the 2 layers, I get these weird artifects. Does anyone have any clue how to fix it?

Can you show the original images and explain in detail how you are merging the layers?
how do i make this effect on the chest does anyone know please

im working on something for a game and on the middle part of the hoodie how can i fix the colors not matching like i tried smudge and that didnt work like how its a dark blue going into the lighter blue and it isnt looking great like that

Im using Arial (Black) and trying to write text in the center of the canvas, what would be the optimal text size for it to be the same length from top to bottom and left to right, I tried 5.1 but its not perfectly accurate, thanks for any help!
- Do you just want to centre your text in the middle of the canvas?
- Or do you want to have (exactly) the same spacing on all sides?
You can easily do the first with the alignment buttons.
For the second, it depends on the content of the text (length of the word), the capitalisation and the dimensions of your canvas. As a rule, it will be easiest to write and format the text first and then enlarge your canvas evenly around your text.
Hi, do you see them if you look at the file at 100% ? Are the layers perfectly registered?
Hi! It looks 3D, but maybe some strands painted, with a bevel/emboss layer style?
Hi, I would look into frequency separation. https://www.adobe.com/products/photoshop/frequency-separation.html

Frequency separates color info from the other details of an image. Learn how to use frequency separation to retouch photos like a pro.
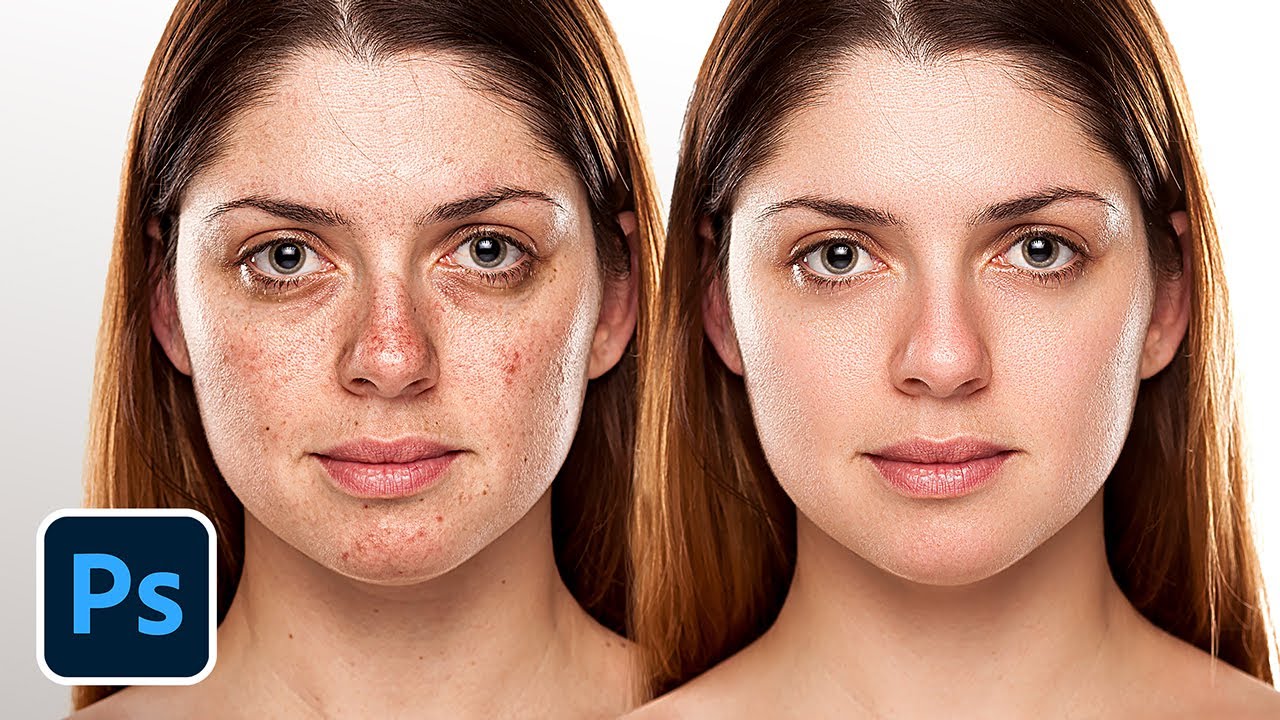
► Join PiXimperfect Pro - The Ultimate Photoshop Training Course: https://pix.live/pro
With the release of incredible new tools in Photoshop, skin retouching with Frequency Separation just got so much easier and faster! In this lesson, we will discover the Modern Method of Frequency Separation that uses the Remove Tool and takes away the labo...
Wrong place for asking.
Please, share your logo and ask in #💬chat-general. This thread is about how to do things in Photoshop (Photoshop users help).
sry, thank you for saying it nicely
Gave +1 Creative Carma to @viral palm (current: #7 - 1018)
Hi everyone! 👋
This is one of my latest photo manipulation projects 🐬✨
Would love to get your feedback on composition, lighting, and overall storytelling.
Any suggestions to make this portfolio-ready are super welcome! 🙏

Hello, Please use #📝project-feedback for feedback and suggestions on projects.
oh sorry thanks for telling
Gave +1 Creative Carma to @ripe quest (current: #2 - 3202)
what is a photoshop geneartive fill alternative
Hi there my grandfather has 4 dogs and 1 of his dogs just died . For Christmas I really want to give him a nice gift and to do that I need some of your expertise in this field of Photoshop, could you drag and paste him in it.


I'm creating a Minecraft Earth map using real elevation data (GEBCO dataset). The issue is that the North Sea and Netherlands coast are nearly the same elevation (~-94m to +50m), so in a standard 8-bit heightmap (0-255), they both appear as the same gray value and are indistinguishable. Im using 16-bit heightmaps (0-65,535 values instead of 0-255) to get much finer elevation detail
I split the data into two separate maps:
- Bathymetry (ocean depths): Normalized -11,000m (deepest ocean) → 0 (black), 0m (sea level) → 32,767 (mid-gray)
- Topography (land heights): Normalized 0m (sea level) → 32,768 (mid-gray), 8,850m (Mt. Everest) → 65,535 (white)
Need to combine them so sea level = ~32,768 across both, ocean gets darker, mountains get brighter
Ive tried GDAL processing, by using gdal_calc.py to split ocean/land data and normalize each to their respective 16-bit ranges
Combination attempt 1: Addition (A + B) - caused overflow in coastal transition zones → black artifacts
Combination attempt 2: Maximum (numpy.maximum(A, B)) - still showing black artifacts in shallow coastal areas
When I open the combined 16-bit PNG in Photoshop everything appears as the same shade of gray (around the netherlands area) (no distinction), thousands of black pixel artifacts in shallow coastal areas (Wadden Sea sandbanks, Netherlands coast, all shallow water)
The geo data is in a .tiff format, 8 chunks which can be merged in to 1 big .tiff
is there a way to mosaic freely on photoshop? instead having to rely on a circle or a square to do it?
Nobody is answering me I the forums, Can I just copy and paste the question here?
If it's about the pdf question, Open photoshop then go to : File/Open and select your pdf.
A window "Import pdf" should appear => set 300ppi and CMYK mode as ask in the document and click ok.

Happy to hear that!🎅
👋
Hi, could you check what I had asked: re viewing at 100%?
Guys is there a better way to remove the other parts of object cause sometimes when I select object and remove background there's still white stuff left
Is there a good way to fix it
Can someone here help me change a lighting of a photo of mine
Hi, do you want to use another shape to pixelate the image? It is possible to use filter>distort>displace to do an hexagonal pixelation, I had done it in this tutorial: https://mos.computerarts.co.uk/pdf/arts83_pshop.pdf if you create a custom displacement mee ar p, you should be able to create a different shape.
Hi, some use Nano Banan ze 3 from the generative functions to do it: https://www.youtube.com/watch?v=-apezPYF4q4
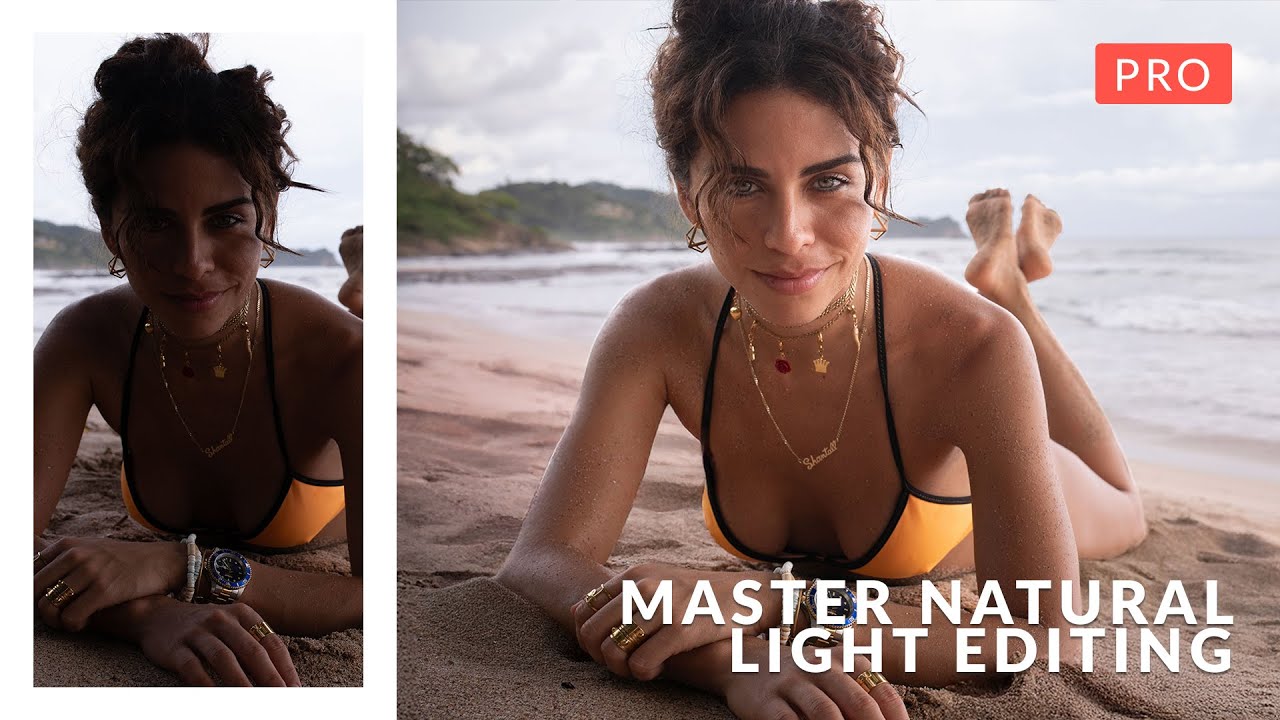
Master natural light portrait editing in Photoshop! In this new PRO tutorial, we will show you how to perfectly edit portraits shot in natural light. We cover every challenge, including backlight, dark subjects, harsh shadows, and more. We are even including RAW files and a Photoshop action so you can follow along with every step.
This course i...
But for someone else to do it, use #💬chat-general even if it is NOT the purpose of this forum. And beware of scammers if you deal in PM. Prefer A legit platform such as https://www.behance.net/hire

Hire the world’s best design talent on Behance. Discover, connect with, and hire the perfect creative freelancer to bring your ideas to life.
Oh
Hi! The filters others>minimum and maximum are made for that. Or select and mask: https://youtu.be/_PNUQDm6lrA?si=bd0cSUi4ILd8nSbh
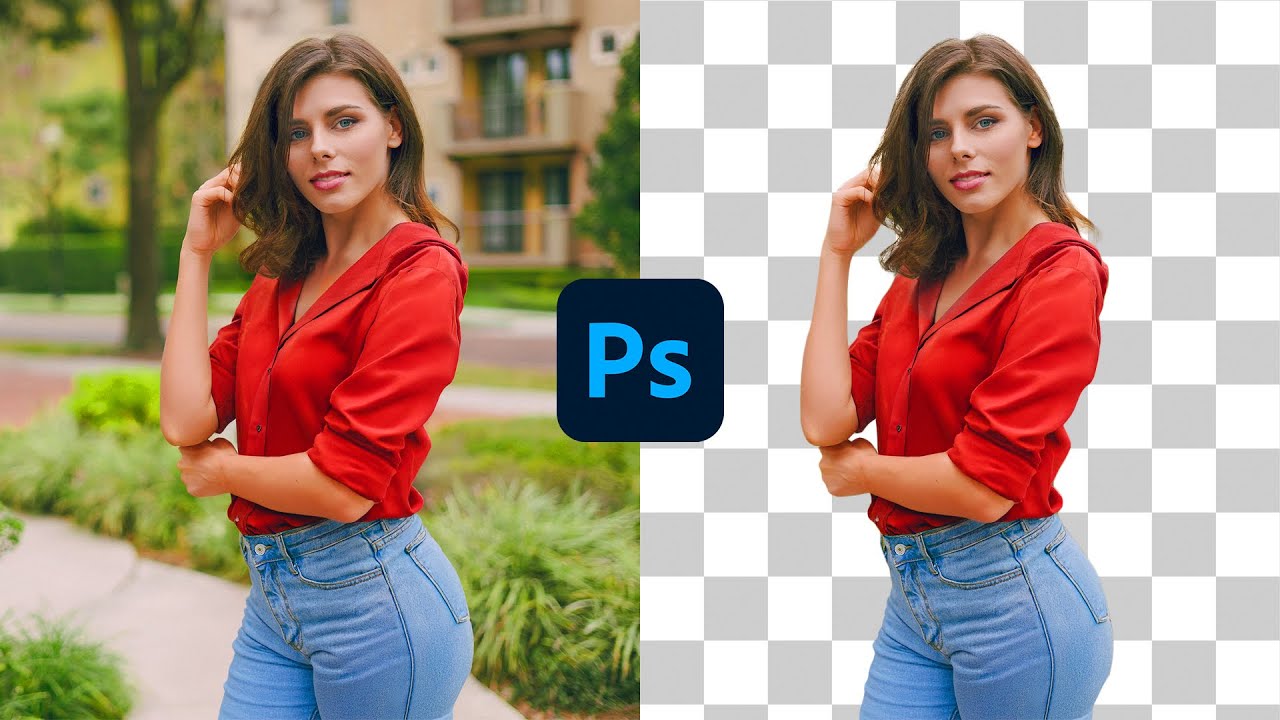
Learn how to remove backgrounds in Photoshop 2025. Clean, fast, and frustration-free!
Still getting jagged edges or leftover halos? This beginner-friendly method solves it. These are the same techniques I use when working on real movie and TV poster projects.
🛠️ In this video, you'll learn:
● Why the Remove Background button isn’t ...
oh sorry, I probably should've been more clear. I don't mean the "mosaic art" I was referring to mosaic censoring a picture instead. https://www.youtube.com/shorts/bTMH6zTB9y4 I don't want just to use a circle to pixelate image, I want to freely choose a different shape if possible.

So how can you make a simple image mosaic or in the language of Photoshop Pixelated. In this short tutorial video you will learn that.
It's very easy to pixelate any image to your preferences.
📸 - Instagram : https://www.instagram.com/graphic_sanctuary/
#photoshop #graphicdesign #graphics #tutorial #shorts #adobe
You can use/draw any shape with the lasso tool as the selection in which you’ll apply the mosaic filter…
Yes, I'm viewing at 100%
Ok, but the merge is not done in Photoshop, if I understand you.
No theres a bathymetry layer, where all the land is fully black, and a topography layer, where all the sea is completely black, merging these allows you to have the full range of height, from -11k meters (mariana trench) to +8000m (mount everest). It's supposed to be in 16 bit color as 255 shades of grey give you too little detail, but when putting the topography layer on the bathymetry layer using lighten, it creates these artifacts.
As suggested by @hushed niche, You can use lasso tool or Pen tool in path mode to make a free form selection rather the elipse marquee tool (used on your video)...
Lasso tool
Pen tool
Hi!
Could someone help me edit this photo? I’d really like to learn, so if you can do it and explain how you did it, that would be amazing! 😄
Thanks in advance 🙏


Here’s the Instagram idea I want to try.
These are the photos I have to work with.
Hi, the insta looks like a professionally shot photo , with a relatively small aperture, giving the shrubbery a blurred look.
Your image would need, a stroke on each strand of the barb wire with the remove tool, in order to get rid of it.
https://helpx.adobe.com/photoshop/using/remove-tool.html
The background would need to be replaced. Maybe use the remove background tool, then insert a fitting background (watch for matching perspective and lighting).
You might want to use the harmonize tool for perfect match.
Then maybe merge all the edits into a new layer, Ctrl+Shift+Alt+E; convert it to a smart object (right click on its name) then use filter>camera raw to color tint it with some of the integrated presets.
https://helpx.adobe.com/uk/photoshop/using/create-smart-objects.html
https://photofocus.com/software/how-to-install-and-use-presets-in-adobe-camera-raw/

You can now install your presets into Adobe Camera Raw in Photoshop just like you can in Lightroom. Here are two quick methods.
Check also https://www.youtube.com/watch?v=p_NRtWcajdw

In this stream, Jesus Ramirez from @PhotoshopTrainingChannel will reveal art principals to help you master the art of compositing in Photoshop. These principles are not just for Photoshop. They come from traditional art, and are essential for creating the illusion of reality. These principals have allowed him to create complex composites in the ...
here u go 😉
I hope u love it


how would i make this jason in the background look like its more part of the image, to me it still looks obvious its a png even with drop shadow and blur


First, Jason needs to be closer because even if the image of him was clearer, it would still be difficult to tell who it is.
I set the color temp in camera. When imported into Lightroom it gets changed about 2000k warmer. Anyone know why it doesn’t stay as I set it in camera.
How do i create this type of text effect? I dont know if the inside of the text is gradient or something else
I would suggest you to play with "Satin" options in the layer style panel...

Great answer
Would anyone be willing to do some editing for me. I have a picture of a truck, a picture of a trailer, and a picture of a car. I want the trailer hooked up to the truck and the car on the trailer. Would like it to look realistic. $$$$$ i tried doing it myself but im nowhere near good enough
wow ive never seen this before
are there any other unique effects that you can apply on text natively in ps?
You can do some pretty cool, non-destructive things with Clipping Masks in Photoshop


I can try dm
Please ask in #💬chat-general
This channel you're writing here is for Photoshop questions
There are a lot of great tutorials about Layer Fx/Layer Styles on YT... A simple search with "Layer Style Text Photoshop" should give you a huge list of tutorials... Please find below a list that could be a good starting point...
https://www.youtube.com/playlist?list=PL5mUTTN0sjNRdTI--6oy-lQAo3O-dSrnF

YouTube
How to?

great text texture.
Clip a USA flag to your Text layer then add a stroke Fx.
How to?

Which of those two effects? (It helps having a bit of explanation!)
For the text distortion you can use Filter/Distort/Spherize... (Pinch with negative value or Edit/Transform/Warp should work too)
For the glitch effect: Make a copy of your design on top, offset its position then go to blending optionsand uncheck one of the RGB box (R to get the effect of your sample)

Could any1 with photoshop please help me? I have this image, but I want the spaceship a little bit bigger... Could any1 please help me with that?

So you’re asking for someone to explain how to do it in PS? Or for someone to do it for you?
I just want to know how to do it. The thing is that it's a single picture
And I want it to look smooth
Select station and copy it to new layer(ctrl+j), choose new layer and transform (ctrl+t) go back to first layer and use inoaint or clone tool to hide old station
You can use harmonize on newly created layer
Afternoon's! 🙂
Was wondering if anyone could help me figure out how to get the HDR button active (instead of greyed out) in Adobe Photoshop Beta 27.2 when on the Camera Raw filter.
I'm specifically on the Beta version because of some new features I want to use for editing, but I noticed that in this Beta, the HDR toggle stays inactive for me.
Now, I know in Lightroom Classic and even in the cloud-based version of Lightroom, I can turn on HDR mode on a JPEG and see those brighter nit values just fine, so I’m a bit confused. I already went into Preferences > Technology Previews and enabled "Precise Color Management for HDR display," then restarted Photoshop Beta as instructed, but the HDR button in Camera Raw is still greyed out.
So I’m just looking for some guidance here: is this a known Beta limitation or a bug that anyone else has run into? Or is there another setting I might be missing to get HDR editing working properly in Photoshop Beta?
Any help would be appreciated!
Try to change your mode to 32-bit...

Quick update. I was able to figure out why the HDR toggle in Camera Raw was disabled in Photoshop Beta, and I now have it working correctly inside Camera Raw.
The fix was enabling the option in Camera Raw Preferences to always open JPEGs with Camera Raw. This forces JPEGs to open in the full Camera Raw interface instead of the Camera Raw Filter, which is disabled for HDR by default. Once enabled, the HDR toggle becomes available and works as expected in Camera Raw.
However, here is the real issue I’m facing now:
Even though the image is edited in HDR inside Camera Raw, Photoshop opens the image as if it were an SDR image. The HDR luminance and brightness are lost, and the image appears dim and flat once it opens in Photoshop.
So to be very clear:
• HDR preview and adjustments are correct in Camera Raw
• Photoshop is interpreting the opened image as SDR
I’m attaching a short video showing the HDR edit in Camera Raw and the result immediately after opening the file in Photoshop.
If anyone knows how to force Photoshop to preserve the HDR state when opening the image (or if this is a known Photoshop Beta limitation), I’d appreciate the insight.
Thanks!
Thanks 4 the help in advance folks !
Can someone help me with my adobe account? Weird request but i basically made a "team" and now I cant do anyhting without requesting access. I want to get rid of it but am not sure how.
you have to contact adobe support
should I call or send an email?
or use chat
Where do I find the chat

Ok ill go through that thank you
Hey ive got a question, is there a way to blur a texture but avoid the shifting? i need just the blur, not the texture moving

You can make a selection before applying the blur filter.
You're a life saver, tyy
How to?

why is this button not available for me on lightroom

Hi! Which Lightroom? There’s classic, and the cloud version. On which platform? What is the button supposed to do? Are you logged in to creative cloud?
How to get faster answers? Describe exactly the part of the design that you are trying to replicate… Here, all I see is a drawn image. Get the brush tool, or fill some areas with the lasso. The 8ball as maybe a shape stroked with a rough brush.
How to?

How to?

This version and it's the latest one

and I am logged into creative cloud
I’m confused as of how you have an HDR jpeg? What camera produced it? Or is it a 16 bits jpeg?
Hi, are you a user , or an AI bot trying to learn?
Layer styles> gradient fill.
Illustrator> shape builder, see: https://www.youtube.com/watch?v=J_DRxMLUTrs
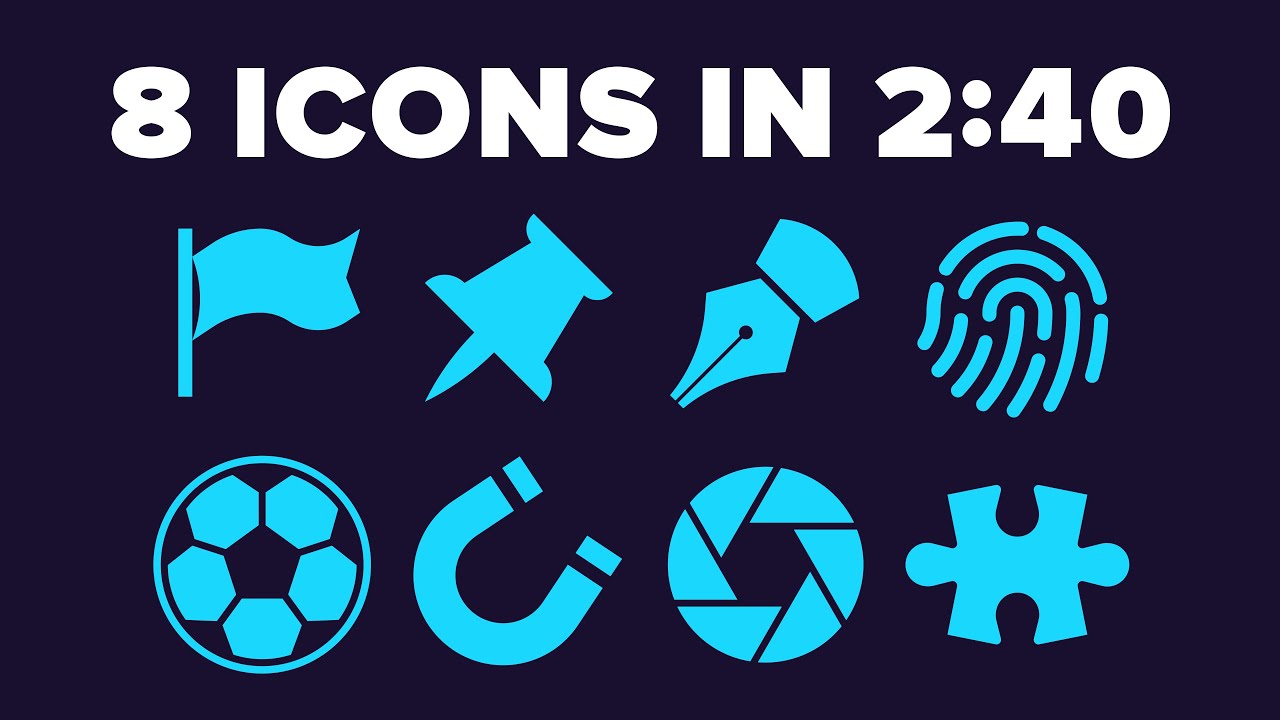
A speedrun of 8 icons in Adobe Illustrator. This is a single take, playing back at normal speed.
0:00 Intro
0:08 Icon speedrun
2:52 Outro
Detailed instructions on how to create each icon can be found here:
https://www.youtube.com/playlist?list=PLZRDXTOgbMthWhVM54mCiHYrCl_e6oZVb
I’m also on Mastodon and Twitter:
https://mastodon.social/@marc...
Ok, the pop up covers the text of the button uiu can’t activate. Can you give its name?
And can you open regular HDR files in Photoshop? (Bypassing ACR) tried posting in the beta forum? https://community.adobe.com/t5/photoshop-beta/ct-p/ct-photoshop-beta
https://community.adobe.com
How to waste people's time?
How to what?
I think they want to create this shape but can’t be bothered with asking
I've seen the same messages on other discord servers and IMHO they're just trolls
I got tricked into responding to two of your requests yesterday... Not a word of explanation, not a ty,... nothing!
I gather that if you're not a robot, your only amusement is trolling people who are here to help...?
Are you a bot?
How can I remove this checkered background while keeping the transparency of the bag?

Is it the Photoshop checkered default background or this checkered background is within the bag layer?
It looks like one of those “transparent” images on google search
There’s like two lines where someone tried to remove checkered background
@wraith torrent : If so I assume you've downloaded a png preview from internet and so you can't remove semi-transparent checkered pattern inside the bag... If you want it, I think you will definitely have to buy the png file.
Try Gemini within PS 🙂

Why not Euan... but we will loose transparency 😉
Also, I'm not a fan of using AI to circumvent the purchase of PNGs that some people have spent time creating.
Not sure how to explain it but how would I go about making the red text transparent in the star? Like I want to erase so theres no background behind that text?

You mean keep only the Black and the rest transparent?
I would try to use Red channel to isolate White and Red areas then create a selection => use this selection to create a layer mask on a Black solid color layer (if you want black on transparent only).
you'll get something like this... (don't know if it's what you're looking for)

hey yall is there an easy way to get all my gradients, brushes, styles and plugins etc from the old version of photoshop onto the new one? i tried edit>presets>migrate presets and it selects the 2024 version of PS but nothing seems to happen after i confirm the migration. thanks 😄
PC or Mac?
Do you still have the old version installed on your PC?
What is the old Version revision Vs the New One ( V27.1.0)?
im on pc! i still have a 2024 version installed with all my assets that i want to transfer to the new 2025 version, this is what im seeing for installed versions which is strange because i definitely have 2 different versions installed rn

would i just have to export everything i have in my old version to different folders to then import to the new version? or is there some folder in the old version that i might be able to just drag over to the new one?
Ok! I don't know if it works for plug-ins but for others, go to :
C:\Users*YOUR USER NAME*\AppData\Roaming\Adobe\Adobe Photoshop 2024\Adobe Photoshop 2024 Settings
You should see a bunch of psp files. Copy the Gradient.psp, Brushes.psp, Styles.psp... etc somewhere else.
Install the newest version, open it once and close it.
Then go to C:\Users*YOUR USER NAME*\AppData\Roaming\Adobe\Adobe Photoshop 2026\Adobe Photoshop 2026 Settings
Paste and replace the copied .psp files.
Open your new version you should have the same gradients,brushes and layer styles than in the previous version...
As I said earlier, for third party plug-ins you might have to re-install them.

you are legendary franck tysm!!! i will try that and report back here asap 🫡
Ok... I"ll be AFK for a few hours but feel free to post anyway.
Just to be safe make a backup of the .psp files of your new install before to replace them.
it all worked perfect! thanks again so much 😃👍
Gave +1 Creative Carma to @viral palm (current: #7 - 1021)
Happy to hear that!
Can someone please help me out? I use the latest version of photoshop on Mac (desktop version). When removing reflections in Camera Raw on JPG and/or RAW images it gives this kind of result...what do I do wrong? Thanks in advance for your help!

Hi everyone, I'm new here and have been having an issue
There has been a photo that I have been trying to fix in Photoshop. I’ve been trying to fix a photo where my eyes aren’t looking directly at the camera. I tried using Neural Filters multiple times as well as a few other editing apps outside of Photoshop, but there was no luck in fixing it. I was wondering if any of you might know a different way in Photoshop that could help adjust the direction of the irises.
If you are interested in seeing the photo and editing the photo, dm me seperately
how do I make the color consistent throughout the depth


@Helpers Need help with a technical workflow. I'm trying to create a video mockup PSD. I tracked a frame in Mocha AE and exported it as a transparent TIFF sequence into a PS Smart Object, but the track "drifts" after 1 second. How do I get a rock-solid track from AE into a Photoshop Smart Object? (Note: Footage is AI-generated.
If your logo quality is good enough magic wand tool+Layer Mask+Minimum filter on the layer Mask (if necessary) should work...
Note: I put a solid red layer under the icon to check the inside contour at the Layer Mask step... It's optional.
Sorry, no idea since I'm not really familiar with AE things... but you could also try to ask on the Adobe Video Discord channel (Première/Ae): https://discord.gg/adobepremiere
@viral palm Thanks! I've taken your advice and asked in the Adobe Video Discord. This has been a month-long struggle for me, so I really hope someone there can point me in the right direction. I appreciate your help!
Gave +1 Creative Carma to @viral palm (current: #7 - 1022)
how do i speed up a part of a video
In Photoshop? (I'm asking as few people use Photoshop for video and use dedicated software instead)
Yeah my professor is making us do a video for our raster imaging fundamentals class final
I have literally never used photoshop for video i didnt even know you could
It's something that it's not intended to do bizarely, to control the speed of a clip, it needs to be a video in the first place: What type of layer do you have?
If your layer is already a clip, then all you have to do is right click in that layer in the timeline (You'll have a speed control there)
If your layer is a standard layer, you will not have that control
If you're doing animation/editing from still images, you will not be able to control speed from the timeline. Maybe there's another solution... Let me check
Looks like it's not possible from a quick search, so you need to import your layer as a video file (and not embed it as it will become a smart layer if you do)

If you want to show me your PS window so I can see what you are working with, I can see what kind of steps you can take to ensure it works. The best bet would be to work on your video, export it as a .mp4, and then edit for speed and other editing from the video file exported (open the video file in Photoshop)
Yeah i would really appreciate that are you available to join a call?
Hi! Are you in an old version of Photoshop that had 3D features?
Sorry, I don't do VC or DMs
But you can share a screenshot here and I'll give you the steps
Voice calls are disabled here anyway as far as I know
Ok so i see that your one is blue? Mine is purple on my timeline is that important to get this feature?
A blue layer in the timeline means it's a video layer. A purple one means it's either a smart object or a normal layer
Ok
In this case you can't control the speed on a purple layer as explained above
Is there a way to turn this into a video layer?
Please explain what and how you animate.
What else do you need to do in your video except changing the speed?
You know a screenshot would speed up the process as well 🙂
Im making a cooking video and would like to speed up some of the parts of the video such as when im cutting vegetables.

Open your video in Photoshop File>open choose your video. Do it with open, not place.
Then you'll have a video layer: It will be blue
That's how you will recognise it in the layer panel

Video group and the little film icon next to it
so if you got many layers there, finish your editing > export as a .mp4 > open the .mp4, and do your speed change by splitting your layer and speed up the bits you want to
You split the layer here


Thank you
No worries!
How would i check the time of one segment of a video?

You got the number of frames written on top. I usually just compute the time with the number of frame (depending on your frame rate but 30fps means 60 frames will make two seconds).
you also got an indication of where the playhead is at the bottom of the timeline

Ok thank you
Keep in mind that Photoshop have very little video features. I am not a video editor (I hate it! 🤪)
But these days I will use mostly Adobe express where you'll get all those extra stuff without it being too hard to learn like Premiere Pro
However I understand that your task must involve PS so you will have to find compromises
Guys can somone help me with my logo I can’t fix somthing
Post the logo publicly here and we'll see how we can help!

I’m wanting it in a5 size and I’m wanting a black border same as the inside one like just as a outer bit so one big borgder and a smaller one with the name inside
Create a new document with A5 presets.(in print presets section).
Then place embeded your logo, resize it if it's necessary, and finally, with the rectangle shape tool add the thin border...

I’m saying it’s for business scared format
So like horizontal
I don’t have photoshop
what do you want to do, i can help you

Hello, I would like my frame 666 to have the same skin color as my frame 403. Is that possible?


You might have to turn off the lights, or at least the shadow casting on the sides?
Bonjour, did you try match color, or the equivalent neural filter to do the same? https://youtu.be/GNmCWEYmu_M?si=3Ybu8_fqRB7WwZzr

Today, we show you how to easily color match in Photoshop to create realistic composites. Nothing beats manual color work, but in some cases this automatic trick can make matching colors simpler than ever.
Thanks for hanging out! Download the sample images here: https://phlearn.com/tutorial/match-colors-automatic/
Learn to remove backgrounds a...
Hi! Then Wwhy are you asking in a Photoshop discord meant to learn Photoshop? If you want to hire someone go to https://www.behance.net/hire as there are lot of DM scammers here…

Hire the world’s best design talent on Behance. Discover, connect with, and hire the perfect creative freelancer to bring your ideas to life.
You can add a Hue And saturation Adjustment layer to your Frame 666 to match skin color with Frame's 403 one...
Pro=> You can match colors, Cons => since your frames are flat images all the Fx around will b e affected on frmae 666, so you'll have to mask areas you don't want the fx...


Besides, it could take a long time if I do as you say because I would have to do the same on more than 200 frames... 😭
How can I change the font and stuff on autogenerated captions since they removed essential graphics panel
I understand but if you want to change skin tone without affecting the rest of your frames you won't have the choice...😔
What do you mean? In top menu: Window/Workspace => Essential is still there...
Are you asking about Photoshop or an other software? There's no autogenerated caption feature in Photoshop (as far as I know)...
im in the wrong serve rmb
You can ask on the Adobe video Discord Channel: https://discord.gg/adobepremiere
@viral palm hi dear
i have a question not about photoshop but about the Community Expert Program where should i ask ?
More info here: https://helpx.adobe.com/community/community-experts.html
i'm already enrolled into the program
and?
Thanks for the help
Gave +1 Creative Carma to @viral palm (current: #7 - 1023)
Does anyone know how I can replicate this? I have no idea where to start lol especially with how some colours look unmatched on the grid

just draw vertical and horizontal lines with a black stroke
Thank you what about how some of the colours on the grid look mismatched? I just fill it in with solid colour?
Gave +1 Creative Carma to @raw bison (current: #495 - 3)
yeah that a good idea, i can do it for you if you don't accses to photoshop
Thanks for the offer I’m gonna attempt it in a bit and imma be back if something goes wrong 😭
Gave +1 Creative Carma to @raw bison (current: #389 - 4)
ok
Sorry found out what i was looking for, keep shining and helping the community !
No not like that like this but are you able to make the bvideo there border a little more longer vertically length so it looks more fuller and doesn’t look in proportional

Happy to hear that!
Hey guys, im mostly into game interface development and ive always used Photoshop for it. However i feel like im lacking knowledge in terms of technique, i was wondering if someone has a list of tutorials or guides that could help me
I usually play a lot with gradients btw^^
Does anyone know how to add a white outline around the triangle and rectangle on the youtube outline?

A friend of mine is working on remaking this,

This is what he's done so far, he's not that good with photoshop

How do i make this go back to normal
Does any of you know what would be the best way to complete the wall and wooden thing on the wall since it is in the background
and refer to the best texture.
Me and my friend aims to finish this today
Like it is 70% finished
Help would be very appreciated.
Use tab key
I want it to go back to original
Try: Window/Workspace/Reset Essentials...

Worked thx
Gave +1 Creative Carma to @viral palm (current: #7 - 1024)
I don't understand the question. Sorry.
There is a lot to be done in this image. You'll have to find textures to overlay onto those areas. Unfortunately, I don't have time to explain it all right now.
What would be the best way to to make the brown wood, wall stains and scratches and even the green wall more like the original so it is done.
Does the clairfication make it better?
You'll need to use image overlays and there are a lot of Layer Styles needed, Drop Shadows and Outer Glows for the neon. There are dozens of things that still need to be done.
Can you make time to explain it all later ?
I will in the meantime look around with others.
Can someone recommend me image overlays and while I won't be DMing people, my DMs are open to anyone that choose to message me.
Hi, it looks like a copy of the background with pixelation and a dithering effect (usually through an export to bitmap or gif) that’s overlaid on the regular image at low opacity. The grid perfectly matches. Difficult to tell if math or an effects combo. Or illustrator?
Move the option bar down: grab it by the leftmost area.
Your search engine is your best friend. Look for texture overlays.
Known sites are texture labs (must watch tutorials by them, btw) and true grit textures.
Clouds, noises ( https://medium.com/@stefanhrlemann/how-to-create-noisy-risograph-style-gradients-and-textures-in-photoshop-in-3-ways-394d6012a93a ) and filter combos can help. Large brushes too.
I googled around, many times before messaging here.
Will read this
I can show the layers when I get home
Someone send me a DM so I can tackle this before the deadline
I have a hard time believing that you found nothing relevant.
Do not forget that your subscription comes with Adobe stock, and that there are free ones: https://stock.adobe.com/be_fr/search?k=free+textures
I would probably use blender and render that board as this would sort texture and shadows and just add neons in PS
Hi! Does anyone know how I could replicate this logo specifically the firey outline? I should also probably add that I'm limited to photopea since I don't actually have the real photoshop, thanks in advance!

Layer styles choose glow
Oh wait that’s not not neon effect
On phone it looked like neon
Neon is good enough though I don't see a glow option in photopea
Hmm maybe rendering fire https://www.adobe.com/creativecloud/photography/hub/guides/set-photos-ablaze-fire-effect-photoshop-how-to.html

Learn how to use the fire effect in Photoshop to make your images glow.
But not sure if photopea has this function
hi all, i am new to PS, i am trying to take out facial blur on a photo but i cant seem to get it right. the rest of the photo looks ok but its just 1 face that bugging me. any advice / tips

You could try to use high pass filter to reduce blur
Learn in six easy steps how to use Adobe Photoshop’s High Pass Filter to bring out brilliant detail in your photos.
@echo basalt
thank you. i will try this now
You can make a copy of the original design apply Filter/Pixelate/Mozaic... and set blending mode to Luminosity.
Add a Grid Pattern layer over with a scale dimension that fits Mozaic cells size.
Add an other "PixelGrid" Pattern Layer and load a selection from it (with channels) to mask the Mozaic Copy...
@pulsar fable : I made 2 video to illustrate my words
And I share with you the 2 patterns used for this demo.


That’s it but can you make it a bit thicker so it matches the smaller box
Like make it same size
You can add a stroke on it
You won't be able to get clean stroke with this image and selection tools... Since it's a pretty simple logo, I would suggest you to use shape tools and play with corner roundness and stroke thickness.
Hope it will be good enough for you... I think I'm done with this.


Yes bro this is perfect thank you very much
Gave +1 Creative Carma to @viral palm (current: #7 - 1025)
hi there, is there any way to select all the brush item (red dots) on the layout like this below? I would like to make all of them into transparents

there are all made by brush
So you want to turn red dots into transparent?
If yes just select by color and remove them
Or go to red channel select all
Thanks for this! I’ll try it when I get home and tell you how it goes
Gave +1 Creative Carma to @viral palm (current: #7 - 1026)
yea
but im considering its made by brush so that can i use inverse way to make the reds into transparent
Since your image is only Red on Black I would use Blending option => Blend if (RED) like shown in this short video.
When using the restoration neural filter, it downscales the image substantially. Is there any way to avoid this?
I use restoration filter in few smaller steps and high pass filter to counter loss of detail
ebverytime i adjust the angle for inner shadow, itll also change the same value for drop shadow, how to stop it and make it only change indibvidually?
uncheck the "Use Global Light" option.

tysm
works :D
how do I MLA citation photoshop: version 26.11
Do you mean referencing Photoshop as a program in your Works Cited list?
Will look around
@umbral python : Adobe Photoshop, CC 2025, V26.11
this MLA citation seems pretty decent for me if you are referencing the program itself...
thank you
Gave +1 Creative Carma to @viral palm (current: #7 - 1028)
👋
Would it be possible to have corner styles? Having a stroke but with the corners differently. (Ignore the quality of the drawing lol)

Hi, not in an automated way, you’d have to mask them.
How so?
For instance you make a red stroke, then you might duplicate it, render layers, and select the corners, invert, then apply an adjustment layer such as color fill to render those part black. Masking and selecting are core functions of Photoshop.
Look at: https://www.youtube.com/watch?v=Ni4dJs3kthA
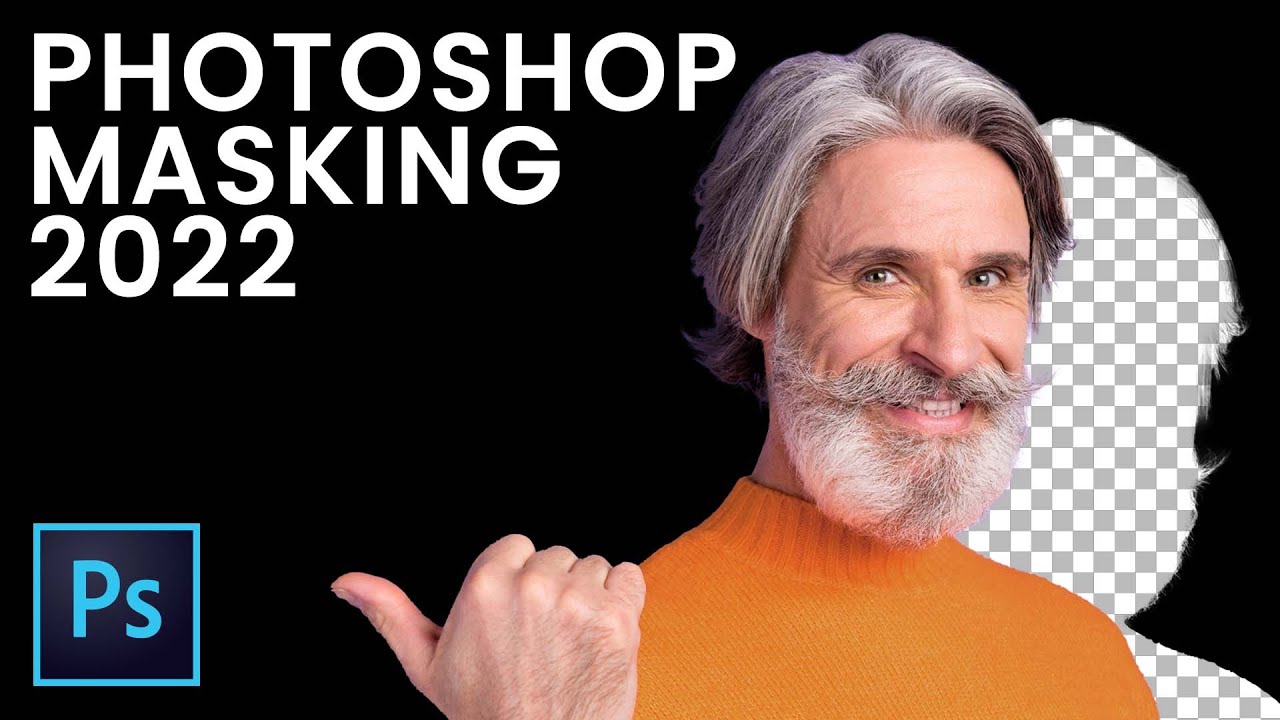
Learn all about masking and why it is such an awesome feature of Photoshop (and basically every creative app out there!) and how to create masks from scratch and from selections in Photoshop.
💰 Support the Channel and use WP Engine to host your website! → http://bit.ly/3Yoqgpu
📸INSTAGRAM → http://instagram.com/theNathanielDodson
Ado...
Another solution: create a black frame, then 4 red squares, and use a clipping mask so that they apply only to the bottom layer. https://www.youtube.com/watch?v=zTuihRIdH0o

In this short video tutorial, you'll discover how and why to use Clipping Masks in Photoshop to display a photo in text, clip a photo to a shape, and limit the effects of a nondestructive adjustment to a single layer.
Additional tips, tricks, and tutorials from Julieanne Kost can be found on her blog: https://jkost.com/blog
Facebook: https://fac...
Where can I find these things to intersect/exclude objects, etc. In coreldraw it's appear when you have 2 shapes selected
-# sorry for the bad quality, it's best I can find

Oh, I need selection
ok thanks for your tutorial i get it right now, let me try
Gave +1 Creative Carma to @viral palm (current: #7 - 1029)
Can I move 2 or more selection areas separately? It just move the whole thing
Whole thing. - But technically I suppose you could try 'saving' selections, and then work on moving one... then go back, reload selection, and then focus on moving the other.
Since CorelDraw is a vector graphics editor, I think you meant “vector shape” rather than “selection.” Am I right?
If you're working with vector shape this video should be interresting...It explains how to merge/substract different shapes...
https://www.youtube.com/watch?v=JigjZqw0nXI

Get more creative with the shape tools in Photoshop using these 5 tips!
📝 Get My FREE Photoshop Ebook 👉 https://bwillcreative.ck.page/7ae57b5bc4
👨🏫 JOIN MY ONLINE PHOTOSHOP COURSE: https://www.bwillcreative.com/21-day-photoshop-expert/
✏️ *MASTER PHOTOSHOP SELECTIONS IN THIS COURSE:*https://www.bwillcreative.com/selectio...
but if you want to use selections (which is much less convenient in my opinion), @sly hawk was absolutely right.
I have a student account. So I am blocked from using Stock
Someone send me a DM I got to hand it in 10 hours
There are lot of free texture in the Adobe stock FREE section... You should be able to get some even if you have a student account (no credit needed to download in the free section - you just have to be logged in with your Adobe ID) https://stock.adobe.com/free
Search for "Wood Texture" (for the wooden wall) and I would try "Rusty metal texture" for the green areas of your design
Adobe Stock
Stunning, diverse collection of free Adobe Stock photos, vectors and videos. Free to download, cleared for commercial-use, royalty-free, no credit card required.
You should able to add wood and metal texture to your elements and get something more realistic...

That looks nice will give a go
The link I gave you was for free textures…
Texturelabs is an online resource for free, original textures and tutorials for art and design.
Free 3D Assets Never Looked This Good! Get 2000+ PBR Materials, HDRIs and more for free under the CC0 Public Domain license.
Textures.com is a website that offers digital pictures of all sorts of materials.
Ad do not forget that your phone is a camera Adobe makes capture to help you: https://www.adobe.com/products/capture.html

Turn any photo into a color theme, Look, vector graphic, or unique brush that you can use in your creative projects with Adobe Capture.
This is a job for blend if: https://www.youtube.com/watch?v=3GKDBXrpV8s

I Guarantee I Can Teach You to Master Photoshop. Learn How: https://phlearn.com/aaronwillteachyou
How to Use Blend If Sliders in Photoshop
In today’s episode, we show you how to use the Blend If sliders in Photoshop.
The Power of Blend If
You’ll be amazed at what you can do when using the Blend If sliders. You can blend based off of i...
how do we disable ads and invasive notifications please?
Every time I turn Photoshop on or off, something unwanted appears...
What do you mean? There s no ads in Photoshop....
like this one

each time I have to close manually, and I am not offered to no longer display this message.
getting there

How would I go about doing this effect on text? Like the colors reverse once the background is another color?

you can try this
another effect you can try is Exclusion

I hate to ask too many times but I can knock it off and close to finishing it. my DMs are open. since I am talking about my school, it has to be private. Really need help on finishing this.
How can i make the bottom text on my works to look like that

nvm i found out how

instead you can copy and move the shape to exact direction holding shift+alt and mouse move.
Salut! In Ps 27: Photoshop (Mac)/edit(win)> preferences>notifications> enable quiet mode
Hi, the difference blending mode is made for that.
Did you find suitable textures? Did you try different blend modes and blend if options? As shown by Frank earlier? The results you have so far are very moderate, did you try to boost up their opacity or use stronger blend modes.
Hi! No not hesitate to share what you did, it can help others and that’s how one learns faster in forums. I guess you use the warp functions? Or transform ?
thank you very much i will try this method
by the way do you know why my method was not working
it was perfectly working yesterday idk
Gave +1 Creative Carma to @fierce hornet (current: #32 - 71)
because you did not change path operation to new layer after first draw.
here's how it works. but I prefer my method. So you can make changes any moment you like. if you use combine then it will be hard if you want to make any changes later.