#❓ask-a-question
1 messages · Page 146 of 1
I believe it's up to date, with the proper links
https://helpx.adobe.com/uk/creative-cloud/apps/manage-apps/creative-cloud-apps/adobe-discord-servers.html
wait what? we dont? I was preparing my new rules I could enforce here 🙁
My rules would be awesome, but you'll never see them 🙂
Yeah that’s what I thought, hence why i worked bit around 😅
I will definitely follow any rules you tell me

i hope i didnt break any existing rules 😆
Well, I'm in costume here, so you'll never know.
Also Donald is clearly a boy, but whatever float your boat!
You didn't break any rules, except "I'm so close to being creepy" rules 🙂
mb
Dude..
Just thank you.
Thats all I can say.
Gave +1 Creative Carma to @ripe quest (current: #2 - 3191)
Dude. No problem. Glad you got it sorted out!
hey , someone can help me with designing please , dm me
Does anyone know how to make a pile of money?
you mean something like this?

Kinda but way taller then that and it looks like a mound
you probably better with blender
or other 3d app
just model simple pack of money and use it as particles to create pile
at least that's what i would do
Ohhh Ari so this ain’t something you can do on photoshop by itself?
you could try to lasso selection and use gen fill
but not sure about results
and i don't PS atm so can't help with checking
Also does anyone know how to photoshop a suit on to someone like this?

easiest way gen fill, seen doing some magic with nano banana
Definitely what @ivory rampart said. Unless you use GenAI to generate the piles of money, your resort with photoshop is to take a stack and add them up one by one and try to recreate all the shadows by hand. It's painstaking work for a result that will be likely meh... 3D should be easier
Or find a stock photo that fits

Ohhh Ari I’ve been seeing that but the videos I’ve been seeing on it Dosent show the same type of gen fil for it
And preciate it I’m def going to use 3D
Also for the gen fil do you need a certain version of photoshop for it?
best will be latest version
as it will have latest models
i used my complimentary generations in firefly

Das def good I’ll try that one too
Ari I tried gen fill with the suits but is there a way to it look more realistic cause it’s not letting me add a picture as a reference
Ye I don’t see this option available

is that latest version of PS?
The one I have is I’m not sure what version he has though
it doesn't look like it's latest ver as there's no ai models to choose from
Ari ill see what version it is, cause if it’s not on there then there’s no point cause it just makes the suit look weird
But the money thing def worked
ai is doing a lot of manual labour of adding suit
you can try to do it by hand but it will take a lot of work
Ye that’s the thing I was doing it by hand but it didn’t look like I was actually wearing it
yeah that's quite a tedious task to add new clothing
scale, perspective
color have to fit
shadows etc
that's why we have gen fill for 😅
Hi, can someone help me delete the text?


thank you so much ❤️ 🙏
Just joined to ask how to fix CTRL + Z not working as an Undo, tried everything: resetting preferences, checking keyboard shortcuts, keyboard language, windows updates, help pls
i missed few artefacts

woow you are the best 🥹

from what i remember ps settings are stored in apps/local you could delete this folder and start app
it should wipe all settings
just tried that
still doesn't work :/
sadly i have no other solution
this is REALLY annoying
what are good things to use to make a picture more textured and detailed
Hi @cursive arrow
Please show your keyboard shortcuts. The "old behavior" might still be active. It should look like this:


ok.
and what is with Preferences -> Performance [ ] History States ?
and have you already tried to restart Photoshop and or Computer and Photoshop?
this has been happening forever
between uses i've shutdown my pc a ton
history states is on 50
its a glitch, its more prominent on the beta version, but I also experience this as my kb shortcuts stop working all of a sudden, and then they get back to normal in like 5-10 minutes
How can I create a pixel perfect circle?
Look at the brown "shadow" coming out of the circle, in one image I'm zooming in a bit, and the other is at canva size. The shadow when zoomed in looks fine, when zoom out it show a pixel off (south-east) side of the circle.
I think it's because it's not pixel perfect, giving me the semi transparent pixel.


You have to understand how bitmaps work. Define "pixel perfect" because raster images are created by assigning a color to a block (pixel) on a grid. Curved shapes aren't really curves. When you zoom in, you'll notice that they are stair-stepped and they only appear curved when zoomed out.
Use the Ellipse Tool in Shape Mode. Type in a value (an integer, no floating point numbers) and try to position it on the grid where you need it. It's probably going to be difficult to do this so there isn't any aliasing.
If "perfect" resolution-independent shapes are the goal, then I would use Adobe Illustrator.
By pixel perfect I probably meant something that isn't it, sorry.
But in the end of the day I'm trying to see how I'm supposed to do this and avoid this zoom out problem, where a pixel that was before under another, now shows in front (or was in a very low opacity and when zoomed out show in a higher and starts to be noticeable).
How did you draw it?
With the elipse tool.
Then the shadow made a retangle starting at the midle of the circle, going left, then rotate. After I just removed some part of it.
With curves there is almost always going to be aliasing that occurs. It almost has to be that way with a raster image because of the grid.

Yep. And I think this very low opacity brown there that when zoomed out starts to bother me.
I tried to go a pixel more under the circle, but turn to not look very good. idk.

If it bothers you that much, you can work in Adobe Illustrator. There is no grid. No "resolution" because everything is vector graphics. In the end, though, everything you see on a screen is rasterized because the screen is made up of pixels. It's just less noticeable in Illustrator unless you add rasterized layer effects.
In Photoshop, even when you use vector tools, you're still bound to the resolution, the pixel grid.
I mean... I think I got it here.
Adjusted it a bit and it's looking fine now.
First time I tried the same think idk why the shadow looked so much smaller.
About Illustrator... yeah, I have very high interest in using it but where I live it's ridiculous expensive to maintain Adobe apps, and as PS is my main tool and the one I have some knowledge to work I need to prioritize it.
Thanks u for the attention and insights.
I understand the cost issue. You can always work at higher resolution. The aliasing might not be as noticeable. Then export out later to lower res.
Hello, I have some xmp files from cinegram bundle. I want to use these files in Lightroom, but i couldnt find any "how to", anyone have information about it?
Typically an XMP is a sidecar metadata file for a RAW image.
If you want the settings within it to apply to an image of yours, try renaming one of the XMP files to match one of your RAW files and opening LR - from memory it should parse it.
(I've not touched LR in many years due to moving to CaptureOne, so apologies if this is no longer correct)
MyFile.XMP and MyFile.NEF or whatever.
My Ctrl + Z doesnt undo and my Ctrl + S doesn't Save, someone please help me im going insane
Have you tried setting keybinding?
yeah I changed the undo to something else, still didnt work
Does the Edit > Undo and File > Save As work?
Okay. Whst about the version? Beta?
Try using Beta if you can. It could be a bug
alright gonna try
In beta, I've sometimes encountered having to double tap to do 1 undo but that might be down to my keyboard but other than that I've had no issues with the current release
holy crap it finally works
thank you my king
You're welcome.
Since affinity turned free, will photoshop ever have the option to flip a switch and be vector?
I understand there is illustrator, but I make UI for Roblox games in Photoshop, (since roblox turns vector into raster anyways, theres not too much of a difference). I just want the luxury of zooming into my work and seeing clean lines :(
Photoshop has vector graphics tools. Pen Tool and all of the Shape Tools. It's just designed to be a bitmap editor. I has some vector graphics tools to make certain workflows easier. And, yes, if you want a dedicated vector graphics app, Illustrator is the tool.
Doubtful that the two apps would ever be "combined" - They are both large apps with too many features and essentially designed for different purposes. Which is why they are separate.
I feel like if Photoshop had the ability to flip a switch and it switched from raster to vector, there would be no reason to use Figma / Affinity.
You wouldn't need XD (even know it's discontinued), it would be the perfect UI tool.
I would use Illustrator for UI design but compared to photoshop, the way layers are is so much better / easier in photoshop.
It sounds weird, but a LOT of people use Photoshop for UI design, especially for making stuff in Roblox.
Photoshop makes raster graphics (bitmaps) which are bound to a resolution (a pixel grid). You are assigning a color to a block on a grid. This why, when you zoom 1000%, you don't see 'clean lines' but stair-stepped approximations of curves. If you understand the difference between raster and vector graphics, you understand this. If not, you should study that first.
Thus, even when you create vector shapes in Photoshop, they are still bound to that pixel grid. You can't get away from that. There is no "switch" to flip to convert a raster canvas into a resolution-independent canvas.
Illustrator has no pixel grid. Everything is a vector shape. The only rasterization that occurs is when you're trying to create continuous tone effects, like a blur or similar thing. At which point the app asks you to choose a resolution for the effect.
If you want to be effective in computer graphics work, its important to understand the difference between both types of graphics and when you would use one over the other.
Yes I understand the difference from raster and vector... lol.
My whole entire point was imagining if text and shapes were vector instead of raster, like how figma uses raster for text and shapes
If you understand the difference then you would know that you cannot just "flip a switch" and convert one to the other.
I mean it would be like when you make a new file, you can select the option for vector / raster.
If you import a raster image into Illustrator and want that graphic to be vector shapes, you have to use algorithm to trace the shapes in the image and convert them to paths with fill colors.
If you want pure vector graphics then I suggest that you work in Adobe Illustrator.
The problem with that, is there is no layer styles.
Inner glow, outer glow, inner shadow, drop shadow, etc
and the layers panel compared to photoshop is overwhelming
And text and shapes in Photoshop ARE VECTOR GRAPHICS. The problem is that the CANVAS is set to a specific resolution. A grid of a specific size. The grid is made up of pixels. The only advantage to using vector objects in Photoshop is that they are (re)scalable without having to be concerned with degradation and quality loss when they're transform, rotated or scaled.
In photoshop, is there a paste command that pastes the thing you copied in the same spot as it was copied from?
Often times I find myself copying a folder from one folder, and pasting it into another folder, and it will always paste in a random spot.
Edit > Paste Special > Paste in Place... or if you're trying to copy an entire layer, I would use the Duplicate command and choose the doc you want to duplicate to. But they have to be the same size/resolution for the layer to be duplicated to the same spot in the desired file.
ooooo thank you, I'll see if I can make this a keybind.
Gave +1 Creative Carma to @ripe quest (current: #2 - 3192)
There are no Layer Styles in Illustrator because those are all "rasterized" effects. And Illustrator does have some of those similar sorts of effects. But they are not the same because raster versus vector graphics.
I see, hm
I shall keep working in photoshop until I can't anymore tbh, can't bring myself to switch to affinity or figma for ui
Typically, for web or other GUIs, you should be building elements in SVG. So, again, Illustrator. Using Photoshop when you specifically need bitmaps. Most likely PNGs with variable, per-pixel transparency.
Good luck!
If I were to make this in figma, it would still look the same since when imported, roblox convers vector to raster.
I just hope if I were to ever work non freelance for a videogame company, that photoshop will be allowed, or affinity since it's closer to photoshop then figma is.
I have a friend who works at riot games and she does 90% of her ui work in figma, so we'll see 

They work in Figma because its easier to translate the designs from flat-graphics to code.
Ideally, Adobe should rewrite XD to "generate" GUI designs from Photoshop and Illustrator documents and convert them into clickable prototypes. However, they [Adobe] might not see that as a tangible business opportunity.
Probably not. I don't know. Probably not a big future in that. LLMs can almost do it now so...
Ahh I see
In a year, you'll chuck that whole design into Google AI Studio and it will build the whole GUI in code. Then coders will tweak and make it work.
you use vector graphics instead of raster(pixel based) graphics @torpid island
use adobe illustrator instead of photoshop, then you can make graphics, and they will not pixelate no matter how much you zoom in
Are you guys consedring adding nano banana pro to beta version?
NBP should be there as a partner model, but i dont think devs are reading this chat
It's in process. For the time being, it's available in the General Release.
D. Human Does 🔥
Hello, I am looking for some flyer inspirations. Basically, I'm making an "Idea pitching" flyer for my college, I have no clue how to proceed with it. I have the details that I need to put in the flyer, yet no design perspective.
Any inspirations/ideas help!
Check out Adobe Express: https://express.adobe.com - There are templates there. Maybe you'll find an idea or direction you can take it.
Alright, thanks a ton!
Gave +1 Creative Carma to @ripe quest (current: #2 - 3193)
Can anyone help me photoshop sth? Im desperate
Are you looking for someone to do the work for you, or do you need help with Photoshop?
Could you clarify "help me photoshop sth"?
@random dirge Do you need help with Photoshop or are you looking for someone to do the work for you? If it's the latter, please post your request here:
#💬chat-general
This thread is for questions about using Photoshop.
text me
Hey, How would I change the car color white? The one on the right, because if I use HUE and turn the sat and lightness, to make it max white, its like grainy and not good, I would like it to be smooth and clean... could anyone help pls?

I highly recommend this video, can vouch for it: https://www.youtube.com/watch?v=fRJTnH8q29k

► Join PiXimperfect Pro - The Ultimate Photoshop Training Course: https://pix.live/pro
Discover the Best Techniques to Change Any Color to Any Color in Photoshop! Whether you want to change blue to red, black to white, or white to anything you can think of, we will cover it all in this tutorial. Using the power and the right amount of Curves,...
double click the smart object icon(layer thumbnail) in the layer panel
I cant change it

.
in the layer panel where it says "edit text in the smart object", double-click the layer icon left of the text., it should open a new window
@zealous osprey
now press T on your keyboard and the try again, or double click the text
when i press T it trys to make a new text layer
double clicking is just holding the text
HSL should do the trick

can someone who knows how to edit help me?
that depends what you need help with
can we talk on dm
i don't do dms
U can share with me in dm
Looks like a Smart object within an Smart object if you double click on the smart oject thumbnail it should open an other smart object (psb file)...
Repeat till you reach the Text layer....

Next time, if you just want to find someone to do the job for you, please use #💬chat-general for your request.
This thread is for questions about using Photoshop.
it was actually 4 inception style smart objects and then the actual text file 😂
So the issue has been fixed?
yes, hopped on vc and helped them
Yeah so this does not work, its the exact problem that I was talking abt that I have, if I simply use the Hue / sat the car is grainy and noisy, can not do it like this
Right, what did u use? simple the Hue sat?
srry , I want to do a question for fix a problem of my job
they used a different software, in photoshop, HSL can be found inside of the camera raw filter, under the color mixer panel @worldly spoke
basically yes
and choose blue
just separate that blue car to separate layer otherwise you will change color of sky aswell, and yeah im using affinity in PS it's even easier to do it @worldly spoke
hey could anyone tell me if there was an easier way to warp the text along this wave other than the warp transform tool? (i just made this to practice perspectives)

Hello! Hope everyone is great!! Happy Sunday tho.
I have a question about a photo im trying to edit. I separate the text of my photo so i can put it in othr place but now how can i fill the space in white?

easiest way gen fill
ill do that, thanks. but is there a way to make it myself for the next time? Just to know
you can paint missing bits by hand
There is no way to just fill when i takle the text?
you can use inpaint but it won't give you good results
there's version without text on bottom if you need to remove it

Oh thanks hahaa
also how can i make to for example. Mine has like monsters behind the text, how can i mix that the monsters are in fronto of the text you know what i mean?
let me get home and i check it, thanks man
np
Hi, you can also select the characters you want and jump them (Ctrl+J) to their own layer, then place that on top of the text layer.
You can use Gen Fill. But you'll be using your credits but also your image may be flagged as using AI.
I'd suggest to using the spot heal or clone stamp various areas or even paint it in all on a new layer.
What's the best way to match the color cast / reflection on the top part here so it's red please?

I composited in the top piece but it needs to match the lighting. Fortunately I already have it masked out. I'm wondering the best way to get it looking right with the colour?
First you could apply a gradient map to the top metallic part (with colors picked from the bottom part -copper)
I hope the steam is on a seperate layer...

The steam is not 🫠
It's going to be a fun time trying to mask that out
Well thanks I think that works just need to dial it in. Then deal with the steam 😵💫

Gave +1 Creative Carma to @viral palm (current: #7 - 1000)
Then you can add some fire/Lave hilights with the same technique... Add a grdient map with colors picked on the reflection of the bottom part, fill the layer mask with black then use a soft and low flow brush to bring reflections back painting white with this brush on the layer mask...

Sorry it's rough but hard to to something clean with your screen shot only... Hope you'll get the idea.
wow that's really cool thank you!
Gave +1 Creative Carma to @viral palm (current: #7 - 1001)
How did you create the masks did you do them manually?
Oh or maybe you created the gradient first then painted the mask in the areas that you want it applied
Think it turned out pretty well

For some reason I couldn't get the gradient on the head looking as good
i'm sharing the file I made for the screenshots... You can see the colors settings of each gradient map.
Personnaly I would make my gradient map with a black layer mask to pick colors from the original file then I paint white on the mask to reveal parts.
I<m sharing a short video to show you how to pick colors from the original image.

That's so kind thank you! I'll learn from this for sure.
Gave +1 Creative Carma to @viral palm (current: #7 - 1002)
Salutations! I need to lower half of the upper eyelid of this character's blind eye. But I've never used Photoshop, unfortunately artificial intelligence can't help me generate it correctly. Can anyone help me?

You're asking for someone to do it for you? Or you want to know about possible methods to do it yourself?
I don't have photoshop as a program on my desktop, I guess there's no way to get it for free. Therefore, I would be happy either for advice if it can be done in the online version in a browser or if someone would be kind enough to do it for me in their program. I just need to lower half of his upper eyelid a little so that it covers half of the eye.
Ask Google Gemini to lower his right eye half way.
Yeah, that's what I was trying to do. Google Gemini is absolutely terrible in generating an image. I could manage to do this character only after a week of trying.
No matter how I ask it, it can't lower it the right way
It either doesn't do it at all, or shutting the eye completely. I need to lower it just a little

Oh! Thank you so much! But could you do it a little bit more differently? I'll show you what I mean
A little bit more differently?
Yeah hold on
Liquify and mask in PS work

I don't think they have or know how to use, Ps.
Sorry. I don't have a lot of time here.
Ok!
I meant like this

Sorry, I don't really understand what this is supposed to show me. Also, when I said to post here, I meant that this channel is more for learning how to use Photoshop and do things yourself. It isn't for making requests.
Oh, okay. Sorry 🙁
Sorry, I don't have time for back and forth iterations. I have to run. Post it in #💬chat-general and see if anyone wants to work on it with you.
<@&548221840750018590>
Image spam across the channels + everyone
Thank you
The quickest Valdair
🤠
Gave +1 Creative Carma to @wind narwhal (current: #3 - 2674)
only this image i try to upload in photoshop gets inverted


pen tool curvature
if ur using pen tool to make that
Try to open it rather than drag and dropping. Which exact version are you running? Check in help>about Photoshop.
The hard way, if the image is made of pixels and not paths (imho, get the pen tool and draw it, you’ll be able to have rounded corners) https://www.youtube.com/watch?v=VsSjXNOE7NM would be to paint away the corners then reposition red circles over it.
–
The Pen Tool is the most accurate way to make selections in Photoshop. Finally, it's yours to master! Learn how to make elegant curves, perfect angles, and accurate selections. Whether you need to cut a subject out of a photo or create a precision shape or design, the Pen Tool has you covered!
Download the sample image here:
https://phle...
what is the problem ?
hello there, i hope you all doing good
i want to know that, how to design this? is there anyone who can help me with this? [Step by step in Photoshop]


It appears to me that the second image is not made with 3D objects, but rather a 2D stamp.
I'd suggest that you closely look at your subject, and like this image, break it down in to basic shapes.
Once you have your shapes, fill in the areas with basic colors before you start adding highlights, shadows and textures. This includes the text.
Then add the highlights. A polygonal lasso tool will do the trick. Add a new layer and switch the mode the wither Screen or Lighten. Play with the fill and opacity.
I would say you'd have to clone the hand gesture (as vulgar as it displays), and warp it into the 2d stamp you've made. Put it under your highlights and shadows.
Consider this point to add your text. Use the warp feature in your text contextual task bar to bend the text and number. Same for the logo.
For anything that portrays a shadow because it is a label, consider a drop shadow. Play with the opacity and look into how light affects the shadow.
After all of that, add a background of your choice.
Any textures you find. You must give credit to the owner of such. If they allow the use.
Thankyou @pale ravine for guiding me, but let me share a link of a a short video which was uploaded by designer, she does not share any tutorial with anyone so how can we give her credits, and yeah there are few more persons on instagram doing same thing but don't teach someone that how to design this, just selling their stuff, anyway watch the video and kindly if you can give me a tutorial [ a video ] i would be very thankful to you.
KENDRICK LAMAR👇
„Damn“ is still one of my favorite Kendrick albums...every track hits different. So I figured it was time to give this iconic cover a little redesign. What do you think?
Follow me for more Graphic Designs & Artworks 🤗 #kendricklamar #whysonstudio #coverart
Go ahead
Okay so it appears that they follow a similar process.
So they use the polygonal lasso tool to get the cut outs. I'd suggest you duplicate the original image. For the most part it looks like they use a gaussian blur on each piece. I'd suggest you make another duplicate of your subject. So you've got two cut outs. At that point, clip it to the lower layer and make your newest layer a smart object. Add a gaussian blur to it. Click mask and start blurring your image. You'll notice that the eyebrows have a different highlight to the original. Since they're blurring it, a simple brush will do the trick.
They made their own version of the nose. Polygonal shape and fill. The nose piercing looks like a very low image of something representing a nose piercing. You could try to find free textures that could pass off as something like that.
They bring in different body parts. Do the same thing. Duplicate, clip, smart object, gaussian blur.
Once your image is done, they added a drop shadow, that can be found in your fx, near the new layer button and apply it to each part, I'd make a folder, put them all into it. Clearly labelled. Duplicate the folder, merge it so you've got a folder with all your files. One that is everything on one. Go to filter > Stylise > Oil Paint. Play with the settings and see what it gives you.
hey guys where is image reference button for generative ai in last photoshop (27.1.0.17)?
is it for beta only?
If there is someone else who can guide me step by step and can share a tutorial or live call, i would be thankful to him ( if someone knows how to design this )
Difficult to do a step by step. The person collected scanned textures (or maybe found them online), then drawn shapes and used -probably - masks to contain those textures into the shapes.
IMHO it requires more an artistic sensibility than pure skills, You need to have a clear vision of the kind of textures to use, I would sketch that on pen and paper initially, and then start building the shapes, and apply those texture.
https://www.instagram.com/reel/DQmpj6xCDNW/
Here is the video from designer but she just erased the original photo and in the backside which she designed, showed to us, not a complete tutorial because how will she sell her brushes and posters if she revealed 😭
KENDRICK LAMAR👇
„Damn“ is still one of my favorite Kendrick albums...every track hits different. So I figured it was time to give this iconic cover a little redesign. What do you think?
Follow me for more Graphic Designs & Artworks 🤗 #kendricklamar #whysonstudio #coverart
Yes, I didn't watch it all, but I can see her drawing shapes with the pen tool, makes sense...
The blurring of the face she probably uses the blur tool
Why don't you ask her? It's probably better to know it from the source. If they aren't jerks, they will answer!
Hahahhaha tbh they're, there are few persons only on instagram designing the same things, but when you ask tutorial in comments or in Dms, no one will answer you for this. Just because they are selling their work online on website so if they reveal how can they earn? huh
then i thought let me join Graphic Designers community so maybe some of you can know this work, and help me
i tried so many times i reached to the middle but then when it comes to the effects on the face and other details i can't do it, like i don't have any idea that what should i do next? and they are selling their brushes on 20$ too, but i don't think it will help me even if i buy it
I reset preferences. I uninstalled and reinstalled photoshop. I made sure there is 100gb space in the folder where my scratch disks are stored , I purged all my files. I gave it a few days and the problem still persists.
Photoshop still Gives me lag where it does not register the input of my keyboard. And I'm talking about the keyboard in my laptop and not an external keyboard.
Would really appreciate some help troubleshooting and finding out the issue.
Thankyousomuch.
Does illustrator have a way for this that’s much easier?
I will try going to a previous version to see if that works
What size document is it that you're working with? Usually people accidentally set the Canvas to be too large
A3 size
420x297mm
been using that size since forever So ik that my computer can handle it
Hey, I've just created a thumbnail on photoshop. the recomended size is 1280 x 720 (realized) but I've made it in 1920 x 1080. Is there a way that i can autoresize without moving layers
Can anyone please help or suggest me a work around? I've used artboards size 1920 x 1080
Yes, that's it.
In Illustrator, select the entire path with the Direct Selection tool and use the Corner Widget to round all corners at once.
😉
You could create another document of the 1280 x 720
Copy all your layers and paste it into that document and resize it to fit that.
I should get illustrator 🙄
Ok time to buy it
Ohhh yeah do they have black friday discount
I'm exploring if any other methods exist
just change the image size, so it won't affect any layers or text and its shortcut is [ ctrl + alt + i ], maybe it helps you
you can resize the artboard size.
Compare the cost of the entire Creative Cloud with the cost of two or three individual programmes. CC is usually cheaper.
is there anyone who can helps me with this ? https://www.instagram.com/reel/DQmpj6xCDNW/ here is the short video too
KENDRICK LAMAR👇
„Damn“ is still one of my favorite Kendrick albums...every track hits different. So I figured it was time to give this iconic cover a little redesign. What do you think?
Follow me for more Graphic Designs & Artworks 🤗 #kendricklamar #whysonstudio #coverart
Im already paying for photoshop, next app is illustrator only
I’m already paying $22 and adding another app is around 40
Should lwk just get creative cloud then
As I wrote: under certain circumstances, the entire CC package may be cheaper than two individual programmes.
If you want to use AI, it's worth taking a look at “CC Pro” (it includes significantly more credits as standard).
For example, in Germany until 28 November, the entire CC Pro for €38.97/month.
yes i just bought
Hey, what would be the best way to turn a chrome or other shiny metal object matte black as if it was painted matte black or powder coated? I've looked online and I see tutorials for turning things chrome or turning things black but not turning things matte black. Is gradient map something that would work here? The other thing is matte paint usually has some kind of texture that I'd need to have, and I'd need to get rid of reflections.
Any help appreciated, thank you.
Did you check this? https://helpx.adobe.com/photoshop/kb/photoshop-slow-lags.html
how exactly does the kb lag? If you type text with the text tool, or only shortcuts? Does modifier keys work ok? What is your setup exactly?
Hello! Do you generally recommend OLED screens for working in Photoshop, when most people won't be viewing your work on OLED screens?
I don't think it ever harms to have one, it really depends what you want. It can mean you get more accurate colours and shading in the work though which only seems like a plus.
And oled panels are incredible. Once you get using one you won't want to go back In general. They just look so good.
hi I checked this and my problem doesnt seem to be there.
I havent tried typing with text tool.
It is just the shortcuts where I face the issue.
Lets say I press ctrl +z and it wont perform an undo
And I have to wait for a while and press again and then it will register just that latest input. Also happens with things like Pressing "b" to select brush or pressing "e" to select eraser. But If I click on these tools through toolbar or navbar using a mouse it instantly registers that input.
My setup is a laptop with a graphic tablet and a wired mouse connected to it. I also have a wireless bluetooth keyboard connected but I use the keyboard in my laptop itself.
I removed my bluetooth keyboard and am migrated to a previous photoshop version that used to work earlier properly.
Issue still persistent.
If that kind of issue happened to me, I would reinstall/update the graphics driver with default settings + update windows then restart.
If you're using AHK or any kind of global custom shortcuts, they can sometimes cause problems. exit them from the tray.
Unplug all extra equipment, your extra keyboard and graphics tablet.
Use only one mouse and one keyboard at a time to check if they’re causing the issue.
Then unplug your first keyboard and try the 2nd one.
Will try reinstalling graphics driver (although graphics driver run nicely only for other stuff like video games)
My windows is updated.
Im using photoshop default shortcuts with just 3 shortcuts modified.
Ya I did try the hardware unplugging didnt work
before, i was able to click on a layer on the canvas, and itll instantly use transformation mode
now i have to click, and manually transform it, what did i do? i want to reverse :(
Hi @calm horizon
If I understand you correctly: Both checkboxes should be ticked. The one on the left to select the layer directly on the canvas - and the one on the right to display the transform handles.

tysm
I tried with gradient map but it just looks dark


Anyone know how this effect was done/ can be done?

Sorry if this isnt the place to ask, i am a relative begginer and i cant seem to remove the middle stitching and seam from the hat, i used the eraser tool in the line layer and it just changes color its still visible, and i tried using the stamp tool on the textures and its still there too, is there a simple way to remove it and make it seamless? thank you for your time.


can you hilight the layer that contains the stitching you want to remove?
If you find which layer contains the stitching pattern you sould be able to mask it...
I assume the mock up file size is bigger than 8Mb... If it's below that limit can you share it?
I texted u
looks like a dither/ordered dither effect, try searching this term on YT
Can someone edit something for me? It’s for a school assignment 😭
I think the point of those is you do them yourself...
Hi, you can dither the image with save for web: https://youtu.be/9XJiojbALv4?si=cFKF5MfcCCjetcpo

Join PATREON:
https://bit.ly/3FKZiBO
Watch My FREE Skillshare class on Logo Design:
https://skl.sh/46plj3K
Premium Mockups and Templates at Rawpixels - https://rawpixelltd.sjv.io/Y9aq5e
Domestika Design Online Courses - https://domestika.sjv.io/4PJR9Z
Reference Image Download:
https://rawpixelltd.sjv.io/YRDR6R
https://rawpixelltd.sjv.io...
What are some good free imagetoimage sights?
which is the best youtube channel for learning photoshop basics?
Maybe similar technique to this https://youtu.be/1Lv4_atfkqo

In this Photoshop tutorial, we'll harness the power of patterns and blending modes to create a detailed glitchy digital monitor effect. Generate a variety of looks with this setup, using different patterns (links below), scales, and color palettes!
Find the free pattern tiles OR pick up the bonus pattern set and action:
https://texturelabs.org/...
you can use different textures to change how it looks
I know you requested a youtube channel but I personally strongly believe that the in app tutorials and the Adobe Learn page is the best way to learn photoshop basics (and more) and are supremely underrated. Additionally if I were to recommend Youtube channels I would recommend: Photoshop Training Channel, Phlearn, piximperfect.
"What each tool does" I guess.
Moving beyond that depends heavily on your scope of work - retouching, GFX, illustration etc
Aren't you supposed to make your OWN school assignments?
Not yet, I'm afraid!
But I wouldn't use violence.
When I was in school (long time ago) learning photography, the ones who got the best internships with the best photographers working on national campaigns were the rich kids with the best gear and time to devote in late nights in the studio (they didn't have to work to buy food and rent), they were - by far - the less talented. (I wasn't neither TBH)
Make of that what you will, but, let's say if you can't pull your own finger out of your own proverbial and turn your own assignment, then you won't have my sympathy.
Alas the economy is making art a rich persons pursuit once again
When AI eats all the bread and butter jobs :/
Alright I'll check it out
Basics I mean what are the functions of different tool. How can I use them
Adobe's own help covers that in excruciating detail
It helps that whenever you hover over a tool, a small description comes up. The best advice I can give you is if you are serious about this is to suck it up and take the slightly more of a headache now route, to learn the keyboard shortcuts in the beginning. It can seem like a lot (because it is) but it does pay off in the long run.
ello, I'm making a very basic thumbnail and it's my first ever on photoshop and I've had photoshop for less than week, I was just wondering how do I make a light source that's surronding their hand-shake, not just the brush tool and applying white but I mean with the "light" effect everyone is used to that creates an eletricity shape I think or something akin to a a triangle shape if you get it?

See posts, photos and more on Facebook.
That's pretty cool but I didn't mean that exactly, something similar to this, light is surronding their hands but it's not in this shape exactly

I can't explain it
It's very very similar to the image
instead of a traditional light source edit like a lamp
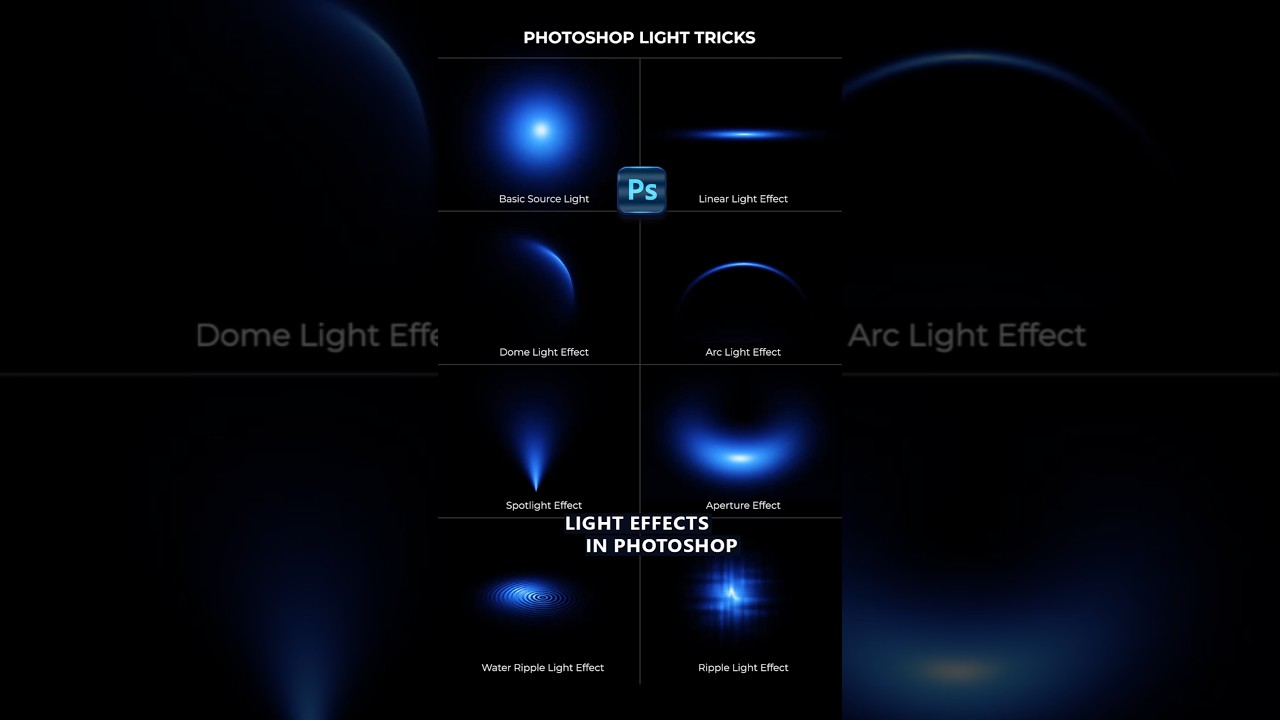
You can create light on new layer and mask hands to create effect that light is behind those people
Btw when I try the light effects, the first one has a cool white brush on top of the blue, do I have to make a new layer for the secondary or tetiary brush color if I wanted to adjust the opacity of them specifically instead of the bigger blue one, or is there a way to have them all on the same layer but I can change the opacity on whichever one I choose
You could use radial gradient and then just scale it down, or there’s probably a way to play with brushes to mix with color on canvas
Radial Gradient for the smaller circles, or the big one or just in general for all 3?
You could set up gradient with 3,4 colors and just reduce size of it to what umyou need
Or just set up last stop as transparent should work aswell
alright
If you want to change opacity and/or colors afterward I think, for a better control, you should create a layer for each... One for the white and one for each color step...
But personally, I find that tedious and would rather opt for a construction with a brush on a single layer. (Even if it means making several attempts/mistakes.)... Up to you.
fair enough, appreciate the response either way
Am I able to ask for opinion on how something looks, rather than "I need help doing this thing" because I'd like some constructive opinions on my thumbnail right now
very beginner so I don't really care how bad it looks as long as I can improve it
For context the video the thumbnail is gonna be used for is about an anime battle royale called Ultra Rumble, the video is criticsing the developers and publishers of the game for their horrible control of it and lack of security about how easy the game is. So I'm trying to make a thumbnail that illustrates that and so far this is the main thing that I got, after the help from M4

Would it look better if the game and the red X were behind the hands, or if I can somehow make both the hands and the game red X seen?
I would put game behind hands and red x in front
Also i would make game bigger as its barely visible
And there’s channel #📝project-feedback
ah perfect thank you
alright I'll try that
is there anywhere here that I can put a request? I have a picture I need edited that I'm sure someone knowledgable in ps could do in a couple minutes
*if it's allowed
#💬chat-general and put as much info you can about request
Ask in #💬chat-general
Keep in mind that you’re on your own if someone will go In Dm’s
thanks, will do
I'd make the characters , the X and the thumbnail all bigger!

Fair idea, would it not look sloppy if I made everything bigger?
No, not at all - Go big!
Hello, im having an issue in photoshop where whem i import some custom brushed, they dissapear after a couple hours or when i close the ps. Does anyone know why this is happening? and how can i stop this from happening. The file are .abr btw
Did you import your .abr file clicking the gear icon then choosing "import brushes..."?

Also, what Photoshop version are you using?
yes that is what i did @viral palm
Photoshop 2026
i highlight all of theses and import them into ps but the folders dissapear after a bit

lmk if you know what i should do
Which folder are you talking about?
if you import brushes via the "Gear icon/Import Brushes..." imported burshes should be added to the "Brushes.psp" file in the directory below.
C:\Users"YOUR USER NAME"\AppData\Roaming\Adobe\Adobe Photoshop 2026\Adobe Photoshop 2026 Settings
(if you are on Windows)
Once .abr files are loaded in Photoshop (so added to the .psp file) Photoshop won't use them it will use the .psp file.
If you have full read/write permissions on the machine the loaded brushes should stay visible and accessible in Photoshop.
this is what i mean by folder

after importing all of the brushed they become multiple folders cause all the brushes are coategorized. But after a bit or sometimes when i close the program they wont be there anymore so i will have to re imprt them.
Ok understood.
It's weird! Are you on Win or Mac? Full read/right permission on the computer?
Administrator...
No problem... Can you check the total size of all the .abr files you have loaded?
A quick search tells me the brushes.psp file has a 2GB limits...
Hello ! I have a little question about a feature I don't find
I use ibis paint x and, in photoshop, I am looking for a tool that acts like a compass to draw circles ovals etc
Does such a thing exists in photoshop ?
Elipse tool?
No no
I want something like a ruler (a circular one in this occurence) but for the paint tool
If that exists ofc
you know, when you press shhift when drawing
but instead of being a line, its circular
Oh... Unfortunately I don't think Photoshop has this type of tool...
I tried to look up further and didnt find anything
Thanks for the help though !
Do you know if its possible to mimic a brush with the elipse tool though ?
Yes you can...
@silver stag Fresco has that type of shortcut but not Photoshop. You just need to hold on to the pen and your rough circle becomes an exact circle. If you do a wobbly line, it become straight. It depends on the starting shape you're drawing
It doesn't work with a mouse as far as I can tell
okay thanks
Imma check how then this might be what I want
Select the brush you want to use then select elipse tool (set it to path rather than shape) then trace your elipse.
Right click on the path and select "Stroke path" option then "Brush".
Immma try that then thankss 
Perfect 
I'm trying to remove the background and for the last 20 times I've tried, it just says that the service does not have a connection etc etc

I did try closing it and opening it but it was working fine yesterday
Hi! I'm new here! I came to ask a question about photoshop. I have been working in photoshop for 5 years now, daily, 9-5. And the recent update has proven very bad for my computer. It is VERY slow, noticeably slow, basic things lag, when I click on a layer it takes 3 seconds for it to actually select the layer. Is anyone else having this problem or is it just me?
The problem is, I cannot downgrade my version back to version 26 which I had previously. It only lets me use version 27.
I would like to know any fixes, I have done literally EVERYTHING I can think of, changed performance settings, cleared/purged all history logs etc, uninstalled/reinstalled, changed permissions, changed priority of the app to be higher, changed RAM allocation. EVERYTHING.
I really need help :C
I've done everything here https://helpx.adobe.com/photoshop/kb/photoshop-slow-lags.html and tested all settings, I've reset preferences, literally everything I can think of. I've even reinstalled my Graphics card and tweaked settings in Nvidia Control Panel. I'm at a dead end...
It's difficult to answer this one beyond the usual and obvious
Have you also tried asking the question in the forums?
This is where the official bug report/support is
Meanwhile see if this one helps
https://helpx.adobe.com/uk/photoshop/kb/optimize-photoshop-cc-performance.html
Here is the link to the forum
https://community.adobe.com/t5/photoshop-ecosystem/ct-p/ct-photoshop?page=1&sort=latest_replies&lang=all&tabid=all
They will ask for your hardware specs, your version (the fact that you cannot roll back isn't normal (for starters)
And possibly other stuff like a screenshot of the preferences/performance window (scratch disk etc)
https://community.adobe.com
Master Photoshop with the help of our global community.
Ya I've done all this, and restarted photoshop, ticked each one seperatley, nothing works.
Sometimes, turnining off the GPU compositing in the performance section of the preference remedies this

But of course it's not a guarantee
I've tried it. One thing I will say is that photoshop works perfectly the first 10 minutes I use the app. If I restart photoshop, it works like a dream for about 10 minutes before things get slow randomly for no reason.
What happens if you turn internet off? (wild assumption there)
Because there could be a sync issue as well.
Turn it off, then open photoshop?
yes
But honestly, post things like that in the forum, a member of the team might pick it up and answer, which is probably more useful than a bunch of strangers making you press all the buttons 🙂
That didn't work :/
Was working great for about a minute
and then got super laggy for no reason
From what I've seen on the forums is that nothing really gets resolved
they ask you to post all your specs and its just like okay here's out optimization guide, have fun XD
Well it's late for everybody, maybe people will help further tomorrow. if for some reason you need help quickly, you might want to contact customer service, but I'm not sure they'll be able to help today as well.
What happens if you go to the cc app and try to go down one version?
I just actually installed my GPU as a studio driver, I had it at Game ready driver previously
Hoping this works
I dont use this PC for gaming, idk why I had that
Tried all the versions :/

I wish I could go back to v26

I think that if you install NVidia without choosing anything it will choose Game by default
In the CCapp


Yes, as you can see I only see a few versions
How do you update Photoshop? if not through the CC app?
Yes, through the CC app
Honestly, I don't know. I always had at least 5 or 6 versions back to choose from
Maybe someone else will have an idea why
I'm using Photoshop beta
maybe that's why
gonna download v 26.11 of normal Photoshop and see if it works fine
I just hate normal Photoshop
I never had a Beta installed since my computer is a production machine. Betas are Betas
idk I just like it, feels better to me
personaly preference
but since it's been laggy I'll try normal PS
It could go wrong from some reason even if it usually goes well
Beta are for you to test the software, if something is wrong, there could be an issue that will get resolved when they update the Beta.
I tried the latest version of Photoshop and the same problem persisted
But I will try a few versions back
I would tell the people in the Forum post you've made that the software you've used was the Beta version, they will probably have a workaround
Maybe the beta has a performance issue
The issue still persists on photoshop v 26.11
@_@
I'm tired
I'm going to rest and figure this back on Monday
Happy Holidays, thank you for helping
Happy holidays to you as well. Hope it gets resolved in the meantime
As a general Firefly question, what phrases would be helpful to let the model know that the image I want Id like to have room for copy space? Not as in leave totally transparent, but more in a blank generative fill way?
You can try to use composition reference to guide Firefly (make a rough sketch of your composition then load the image as composition reference)...
You also can try to add some words to your prompt to guide Firefly... For exemple at the end your design prompt add "Leave the entire right side of the image empty, clean and darker to allow space for body text paragraph." (No guarantee that it will work, but worth a try.)
I would suggest you to ask on the Firefly Discord Server...
What Bachelor is related for my skills:
- Photoshop
- Adobe After Effects
- Adobe Premire Pro?
After Effects (Insanely skilled though only have been using for less than one year)
same with other softwares
Would someone be able to stack 2 photos for me? of some Astro photography I took
Are you asking what you should study?
What do you love to do?
What's your portfolio look like?
Hi, this is a “learning Photoshop” not a “do it for me” discord channel. You might ask in #💬chat-general but be aware of scammers.
Hey so I'm editing a photo in photoshop and I went and separated every individual part into layers right? That's fine and dandy, but now for some reason after lasso tooling everything, every part of the image has an outline?

It's messing with the art and it makes me unsatisfied
How do I remove that stuff so I can just start hue changing 
Off the top of my head a lot of it could be fixed with the spot healing tool or object select and refining the selections. It would just be a lot of tidium doing it across all the different outlines since they seem to be different on the poker chips vs the chair or table/ground.
OH THAT HELPS THANK YOU
After lassoing an item, did you cut it to its own layer? If so, the outlines you are seeing may be narrow gaps. You could try copying instead.
Yeah I did cut it to its own layer
Try cutting a section and comparing it to copying a section. I think you'll see the outline difference.
You can still cut if you prefer. Just fill in the hole in the original layer if you do. Or insert a new layer inbetween and fill the gap there.
I think copy more useful atp
That's what I tend to do as well
Any ideas?
okay so update
Not more than the pop up message... If your internet is ok perhaps check your security/firewall settings..
I found out that if I let photoshop remove a background it will do it
but if I try it myself, that's when the problems occur
so I can't use the select (W) keybind
tried even making photoshop an exception to windows defender, still nothing
I was able to find a way to manually do it and that should work
the problem is
When you're using the quick selection tool right, the (+ button), marks everything right, and everything that is MARKED or within the MARKS is safe from the delete background
and everything that is OUTSIDE of the marked area is deleted right?
how come after a while of manually zooming in and fixing the areas that are marked, it doesn't let me continue to make the marker bigger?
trying to higlight the rest of the bottom of the hair so it doesn't get deleted but it's not letting me

If you are using a US keyboard you can try to use bracket keys shortcuts: Left [ to decrease the size and Right ] to increase.
Anyway you should be able to modifiy the brush size and type (+/-) in the top menu even if you've already made a selection....
oh great, thank you
by any chance besides CTRL-Z, does it have way to restore after you've deleted a specific area?
similar to davinci and other programs?
use history tab to go back to a previous state, or use masks to remove any area non-destructively
Deleted or deselect with Quick Selection tool?...
In quick selection mode if you are in selection mode (+) you can hold Alt key to turn your brush in deselection mode (-) without going in the top menu (time saver shortcut) .
Once your selection is done, create a layer mask with this active selection rather erase pixels...
I would suggest you to never delete anything. Always try to use layer mask rather delete pixels.
Doing so you'll be able to hide/show pixels painting on the layer mask (Paint black on the layer mask to hide pixels and white to reveal them).
aha
I had to replay the video a couple of times to get it
I get it now
really informative, thanks
Im doing it right now
ur a legend for this THANK U!
Gave +1 Creative Carma to @mortal valve (current: #389 - 4)
Easiest way would be to use neural filters and just transfer colors
New Color Transfer Neural Filter in Photoshop 2022 #ColorTransferPhotoshop #PhotoshopProfessor #Photoshop2022 #NewFeaturesPhotoshop #NeuralFilter
►Learn how to use the new Neural filter feature: Color Transfer in Adobe Photoshop 2022. Learn this new feature in Photoshop 2022, as I cover multiple real world case studies that are broken down in...
You’re referring to text on pink image?


what you mean by cut some parts?
to fit in 1024x576

your image vs yt banner size

ohh
it's too wide and there's not enough pixels in height

redesign your art
well if you have PSD file it would make it easier
nope lol just image
otherwise you will have to cut and mask a lot to recreate it to fit target size
mhmm
what about this

is there anyway i can remove the logos and the giantx thing and keep the name in middle?
yeah
copy it to second layer
use gen fill to remove text
and use selection and move text to place you need it
it is doable

using PS would probably give you better results
but i don't have PS atm
Not bad at all... Here is a version done with PS...

One of my PSD files got corrupted, it looks like this when I open it, anyone else has been through this? Is it possible to recover this file?

Sadly, I don’t think so. There are online tools, but I never tried them. Search for “PSD recovery”…
Thanks, yeah getting used to tools in affinity it like using time machine you have to do more things by hand
- yes
- Make edits, and photoshop masterpieces
- Mainly based on edits and professional photoshop projects made with firefly image
Hello,
Is it possible to recreate these flames with Photoshop?


Hi,
yeah you can use brushes and linear dodge mood and give it some outer glow and play with exposure
Which brush should I use because there are so many? And how do I make it create a color gradient?
for this fires

you can use this brush


and add some blur to it from filter menu
No, I'm talking about the fire around the dragon, not the particles in the background


or something like this is very bettrt


how to merge two layers?
Ctrl+E
I can't find it among my brushes, so I must not have it.
or right click on those layers and..

i think you can found it online, or i can send it to you
send it to me please
Are you looking to study to improve yourself or get a qualification that you think would help you get a job? I ask because a lot of places don't particularly care about certifications and are only interested in a strong portfolio.
Don't know if you get an answer but I made this one if you're interrested...

Go to the brushes panel’s local (hamburger ) menu and select “get more brushes”
so im trying to make my pixel art textures look smoother, almost they are hig res, without ruining the contrast when using gausian blur filters


another example of how i want it to look

as you can see the textures are pixel art, so with that method i dont want to recreate everything but high res, also the image size shall stay the same too

texture, clarity. dehaze, achieve what i want but as you can see the contrast is ruined

What if you adjusted the contrast using the “contrast” slider to compensate?
This is the "JPEG Artifacts Removal" Neural Filter

ah, where can i find it?
Filter > Neural Filters
thanks
No worries
Yeah! It definitively gives a better result than Camera Raw filter in this case!
Well thought out!
Cheers mate. I was impressed the result was as clean as it was.
How do I blend my selected masked area via pen tool into the Matrix like this? (How to do it):


is there a discord for lightroom guys?
I’m working on a small club project with about 6–7 photos. Our original shooter/editor dropped out right before the shoot, so me as the next most experienced member had to take over last-minute. We managed to get the shots done, but now I’m stuck on the color editing since I only know the basics.
i don't recall LR server
In this Photoshop tutorial, we'll harness the power of patterns and blending modes to create a detailed glitchy digital monitor effect. Generate a variety of looks with this setup, using different patterns (links below), scales, and color palettes!
Find the free pattern tiles OR pick up the bonus pattern set and action:
https://texturelabs.org/...
I mean I want to become the best and I have a large range of my projects in Photoshop. (Though im only 13 a year 9 student, though I am quite advanced in Photoshp)
Would you mind taking a look at it?
Do you mind posting your portfolio here?
You use the pen tool to target the area you want to mask/protect, then use the feather slider to make smooth transitions.
Or rather in the #📝project-feedback or the #1110544577850511401 ?
I've been having issues with photoshop on my new laptop with a Nvidia RTX 5090 card.
GPU is enabled in Performance settings, compatibility test passed, however when I move artboard or try to resize brush, it's jagged / jumpy. Sometimes tranforming layers has same glitch as well, which makes the the whole experience less smooth and less precise.
Is there anything I can do to eliminate this?
is your laptop set to use RTX gpu ?

usually it's set to let windows to decide
Are using the latest drivers? My son had a similar issue. He updated the drivers and it got better, however the RTX 50 cards seem a bit overrated my son got better performance out of his olderRTX 4090 than he does with the 5070
Where can I see this setting?
you realise that 4090 has more raw power than 5070 it's only better in games but only when using dlss with frame gen

I've just been in contact with Adobe, and ironically, all they recommended is keeping the iGPU setting set on Adobe.
graphics

And I assume it's recommended to restart the computer or no?
The thing is though, I tried having PS Preferences set on both iGPU and dGPU, and I get different experience both times, but the above glitching only happens when I have dGPU setting on
do you have latest drivers?
So this is the one I currently have installed, it's one recommended by Asus for my laptop model.
I know there's a newer version, but I had some issues with my laptop (only bought it last week), to the point where it'd have hard freezes. I had to reinstall my Windows and I now only use drivers from Asus website just in case. But as far as I recall, the issue was there with the newest driver as well, before I reinstalled the Windows.

those are bit old you could try to install newest drivers

just use DDU to perform clean uninstall
first
you can try to install studio drivers as those are focused on stability
Is checking the box 'perform clean installation' enough when installing from Nvidia app, or do I need a separate DDU software to delete the old drivers?
i use DDU as it cleans all files related to old drivers
I'll try that, thank you.
as part of my photography work for school, i need to create a few travel magazine/poster sort of thing. problem is i have zero clue on how to do any. i tested around earlier but im still unsure on how to actually make it look good and appealing. does anyone have any idea on what sort of tutorial or something i could follow?
Pretty hard to give you straight forward answer... "travel magazine/poster sort of thing" is a bit vague.
Is it Photogrpahy only or more Graphic Design (envolving layout, Photography+Text/Title, photomontage...etc)?
I would suggest you to search for inspiration (typing "travel magazine/poster" in Pinterest for exemple)...
Once you have decided what types of designs you want, we can either help you directly here or point you to tutorials.
its ones like these, i do photography as a course but i have to edit them to something along the lines of these pictures. so i guess its kind of more graphic design too?

oh the images arent great
ill redo them


hello guys, how can i transform a square into slice and make one layer for each part ?
i have tried with slice but i cant create layer for each part
You can add guides make a selection with the rectangular marquee tool then create a copy of this selection on its own layer (CTRL+J)
Or make sevaral copies ogf your image, use rectangular marquee tool to make selection then create a layer mask from this selection on each copy.
This channel is for technical help with Photoshop. Tools, techniques, etc. Please use #📝project-feedback for suggestions on design.
Ok, thanks
Gave +1 Creative Carma to @ripe quest (current: #2 - 3197)
You can watch this tutorial (pretty basic) : https://www.youtube.com/watch?v=fcGst_Ey2d0
You also can watch the two below. Not about travel but could give you clues about tools and techniques to use:
https://www.youtube.com/watch?v=ynNJjH78hrA
https://www.youtube.com/watch?v=LDqFA6JnpvM

More Design tutorials and articles : http://www.creatnprocess.net
How to create magazine cover in Photoshop | Alive
In this Episode i am gonna show you how to crate a styles magazine cover in Photoshop. We will start out my importing an image and applying color gradient. Then we will bring in the Alive logo and show you how to add perspective dr...

Join Howard Pinsky as he shows you how to set up a new document, use the basic tools of Adobe Photoshop, and create a magazine cover. Source File: https://adobe.ly/3j9L591
Join your host Howard Pinsky each morning at 9am PT to learn how to level up your Photoshop skills.
Howard Pinsky is a Senior XD Evangelist at Adobe: https://www.behance.ne...

Photoshop CS6 tutorial showing how to Design Magazine Cover.
If you have any questions please leave them below
also, don't forget to check out our website for the resource files:
http://photoshoptrainingchannel.com/design-magazine-cover-photoshop/
Subscribe + Like + Share + Comment = More Video Tutorials!
Thank you for watching!
Like Our F...
thank you
Gave +1 Creative Carma to @viral palm (current: #7 - 1004)
This channel is for technical help with Photoshop, Tools, techniques, ...etc. Please use #📝project-feedback for suggestions on designs or #1110544577850511401 if you simply want to share your work.
I was asked with someone dont be a snitch
Take a breath and keep cool please... I'm not snitching at all...
I'm just telling you you're posting at the wrong place.
ty, is there a blog where i can find written tutorials ?
Gave +1 Creative Carma to @viral palm (current: #7 - 1005)

Any particular reason for written tutorials rather video?
Nowdays there are a lot of more video tutorials than written ones.
You still can find written stuff on the web but most of content creators make videos only...
Photoshop cafe (https://photoshopcafe.com/tutorials.htm) and Photoshop Training Channel (https://photoshoptrainingchannel.com/) offer both options.
Envato Tuts+ could be nice too: https://design.tutsplus.com/compatible-with/adobe-photoshop/t/tutorials
Ok
Though the person asked me to show it here
new here. where do i go to request a photo edit?
Please use #💬chat-general ...
thanks
Hi, there is https://www.photoshopessentials.com
for basics and https://jkost.com/blog for tips and insider info.
For color management, https://www.computer-darkroom.com/blog/tutorials/
Photoshop Essentials
Hundreds of free Photoshop tutorials to help you learn Photoshop, all written with beginners in mind. From Photoshop basics to photo retouching, photo effects, text effects, and more! New tutorials added weekly!

Julieanne Kost's Blog
Indepth tutorials, training, techniques, and shortcuts for working with Adobe Photoshop and Lightroom.
Access thousands of in-depth tutorials, downloadable resources, videos, tips, and reviews to elevate your graphic design skills.
Hi, there is a script to convert slices to layers, with instructions on how to install and run a script in this thread: https://community.adobe.com/t5/photoshop-ecosystem-discussions/can-i-turn-slices-into-layers/m-p/10621881
https://community.adobe.com
Can I ask what you hope to gain from slicing your image this way? And what will the final image be used for?
I’ve been using Photoshop for 3 years and it’s still my favorite tool as a designer. I’m new to this group, so just wanted to say hello. Hope everyone is doing well.
yeah, im not native english so its more difficult to understand video. After testing both, i have a preference for written
ty, i will take a look at this
Gave +1 Creative Carma to @hushed niche (current: #12 - 327)
ty too Franck
French?
oui
You can have a look here: https://fr.tuto.com/photoshop/?ft=1
If you're looking for free tutos you can filter the content.

thanks, i will dig into those site for tutorials
Gave +1 Creative Carma to @viral palm (current: #7 - 1006)
Et aussi: https://youtube.com/playlist?list=PLtn0S95xYTIMbSzS__vEmTkUjuL1EXzY_&si=wyn8hO_Lfy4l4dkE
https://youtube.com/playlist?list=PLtn0S95xYTIMal9YxdOMxlSnbGIAN99NV&si=2gfU6UrLgVW-PZB5

YouTube

YouTube
Sorry but I don't use discord DMs at all. But if you have a question about how to use PS feel free to ask here.
okay!
is it possible if anyone havbe this specific texture that is shown on this "ON" text?
probably not, but this looks easy to recreate if you know liquify tool @calm horizon
i do not know it
anyone know how to make a snow ground in photoshop?
Can you post an example image?
I’m about to send

This one
The snow on gazibo
The ice too
@nocturne cairn
Anyone?
Hi, a super tip when you are given the name of a tool or a filter in photoshop, just hit CTRL+F (Cmd+F on a Mac) it’ll launch the discover panel, and type Liquify in this case. It’ll show you where it is located, it’ll let you launch the filter/tool and show you tutorials on the topic. You can also open your web browser, go to your search engine of choice and enter that term, to learn more about it.
In this very case, to get that kind of wavy overlay, you want to do it on a separate layer placed on top of your text, and create a clipping mask, alt+click between what you call the texture layer and your text, so that the transparency of the text limits the one of the overlaid layer. It is in this one that you’ll use liquify to bend lines that you would have painted beforehand.
Hi, could you teach me how to make a nice snow ground in photoshop, like the one in this thumbnail?

And ice
I’ve seen your question, no need to repeat. Out of time ATM, someone else might take over…
Ok, could you get someone?
is there a plugin or something I can do to have the stroke settings on the right side, like where layers / properties is?


I wonder if you image thousands of cubicles staffed by Photoshop experts next to each other, but this ain’t it. We are volunteers scattered all over the world…
Did you make a web search for “snow” in photoshop? What do you struggle with exactly?
Like the detail and ice, mainly lighting
Do you mean to have the layer effects, as seen on your second image, shown in the properties panel instead of in a floating one?
So far no, you might want to make a feature request: https://community.adobe.com/t5/photoshop-ecosystem-ideas/
Yes I did, thank you for ur time
Gave +1 Creative Carma to @hushed niche (current: #12 - 329)
Like most textures, I would try starting with noise, but this some in a layer mask, then on the layer itself, fill with white, adding tiny bevel and emboss, and having “layer mask shapes effects” toggled on, on the main blending/ layer styles tab.
Hm, thanks
Gave +1 Creative Carma to @hushed niche (current: #12 - 330)
Another option would be sampling from an image of actual snow. In your image, on the right side. As the left side of the subject rather shows ice. You could also try a brush with tiny specs, and adding a bevel/emboss with a very light grey as the shadow.
Ok, thanks that helped a lot
Gave +1 Creative Carma to @hushed niche (current: #12 - 331)
The main thing is to observe what you want to recreate, its micro texture, its shape, its color or transparency, and if you’ve played enough with the filters and styles (something that can’t be recommended enough: play with the filters, combine them, start again with inverted colors…), trying to find a combination thereof that fits the bill.
why is it doing this
so i try to rotate this shape by 90 degrees but it just does nothing, why is this? i am using the transform selection object


Doing so you are probably rotatin the selection itself not the triangle.
@vast carbon : You should just make the shape layer active then use the shortcut CTRL+T then rotate your shape.
Notes: Holding Shift while you rotate allows you to rotate by 15º increments. You also can enter the rotation value directly in top menu "angle" box.
And if the shape you want to transform is on the same rasterized layer than other shape and you want to rotate it wothout affecting the others, make a selection around your shape then CTRL+T...
Don't use "Select/Transform Selection", this feature modifies the selection itself, not its contents.
Yeah I was, thanks
Gave +1 Creative Carma to @viral palm (current: #7 - 1007)
I didn't know at first you could rotate the shape in the shape tool, I thought I'd have to use transform selection or rotate
We learn new things everyday! Glad to have been helpful!
Hey, I would like to render Latex formulas in my Adobe Illustrator/Photoshop project. How can I do this?
I'm not familiar with LaTex formulas but found this video...
https://www.youtube.com/watch?v=3jpNNlg-iMw
This may seem like a workaround, but it might help you...

This tutorial explains how to add publish quality equations in Adobe Illustrator. #illustrator #illustratortutorial
How do i fill the blank space with the gradient yellow?

You can use "Content aware fill" feature.
Hi guys , I just noticed that u can have 2 masks on the same layer but I don’t know how and why, I mean what is the point of having 2 masks on same layer, I wish someone could explain 👀
I just googled it but can’t find related information
You can have a raster mask (standard Layer Mask) and a vector mask. There is an entry in the User Guide that discusses the Vector Mask: https://helpx.adobe.com/photoshop/using/masking-layers-vector-masks.html?x-product=Helpx%2F1.0.0&x-product-location=Search%3AForums%3Alink%2F3.7.5
Ok nice I can see that article talking about vector mask which it seems like I missed, well what about having 2 or 3 raster mask on same layer, so I can adjust each mask individually, is it possible?
2 or 3? You can only have one of each as far as I know.
Ok got it, last Qs if I have time pls
Can I make mask behave like smart object , so I can apply level or curve or blur on mask with non destructive workflow
Technically, you could add the Layer to a Group and then add a Layer Mask to the Group which would operate independently from layer masks added to a layer inside the group.
Yeah I know that 👌🏽
No. There isn't a non-destructive Layer Mask that works like a Smart Object.
Well, you asked about 2 or 3 Layer Masks which is not possible. Only possible if you add a mask to a Group. Then "technically" you could have more than one Layer Mask.
Correct ✅
I did some adjustments on a mask like level but after that I just realized that I need to tweak that effect only on the mask u got it ?
Yes. I understand why you would want to do that. Alas, there isn't any non-destructive workflow for raw raster objects like the Layer Mask.
It would be useful. Sometimes I make/save copies of those layers if I think that I might want to "go back" to a previous stage where I edited a mask.
Yeah, I think we need this feature on photoshop like non destructive mask or smart mask, will be useful.
Thank u bro 😉
Gave +1 Creative Carma to @ripe quest (current: #2 - 3198)
No prob!
Definitely something to add to the #1093156942647660615 forum here or the Photoshop Community Forum on the web.
does anyone know why when i turn on rgb and alpha channel my photo turns grey?
i need it to be black
In Photoshop?

I'm not sure to understand what you want to do... Didi you try to just turn RGB channel off by clicking on RGB eyeball icon to get alpha channel (B&W)?
is there any tutorials on how to make text like this? like what type of style is this

First thing that came to my mind is Using inflate 3D feature in Adobe illustrator since 3D features have been removed from photoshop...
You could get something close with a "roundy" font using layer Fx in Photoshop but I don't think you'll get this level of material reflection.
You can search for "Photoshop inflated text effect" on YT and try with a font like "Cooper STD"...
Please show the layers panel. You do have grey in the layers, and a black mask, but hard to tell without the layers. What do you intend to do with this image?
The closest to what you want would be to use a smart object as the base of a clipping mask. Do not forget about the blend if for levels like masking, see also: the masking trilogy masterclass by @plush stirrup
1: https://www.youtube.com/watch?v=2LO4FMCk-V4
2: https://www.youtube.com/live/kiJaxqQMij0?si=wLLeC65aw2pBPITT
You're new to Photoshop and don't know where to begin? Tim will guide you through the most important features in Photoshop to get you up and running with your first edits in no time! Join the live chat to ask questions.
The Adobe Live team is streaming on Monday, Tuesday, Wednesday and Friday from 12 pm onwards and supplies you with the b...

Take the guesswork out of masking out objects and people. Here are some cool ways to use Layer Masks and more in Photoshop.-----The Adobe Live team is stream...
Tune in to this advanced Photoshop crash course to find out why you (sometimes) shouldn't be using layer masks - hosted by Tim Möbest.
The Adobe Live team is streaming on Monday, Tuesday, Wednesday and Friday from 12 pm onwards and supplies you with the best tips, secret tricks and infinite inspiration revolving around your favourite Ado...
Ok I’ll watch that for sure
Thank u so much ✌️
Gave +1 Creative Carma to @hushed niche (current: #12 - 332)
you prolly want to use a 3d Software for this i'd say 😅
You can do that kind of thing in Illustrator now
One keyword you might want to try is "inflatable text"
It's possible in Photoshop, but it would be all about recreating the effect by hand as there's no 3D capabilities in Photoshop
Project Neo is another option

Join PATREON:
https://bit.ly/3FKZiBO
Watch My FREE Skillshare class on Logo Design:
https://skl.sh/46plj3K
Premium Mockups and Templates at Rawpixels - https://rawpixelltd.sjv.io/Y9aq5e
Domestika Design Online Courses - https://domestika.sjv.io/4PJR9Z
PANTER social:
Instagram:
https://www.instagram.com/panter.vision/
Behance:
https://w...
Create Easy 3D text in Adobe Project Neo!
Blending in neo is so satisfying. You can do some cool things with that tool.
.
It’s a pretty simple interface, and for people like me who don’t have much experience in 3D, you should get up to speed in a few hours.
.
Love the fact you can import fully fleshed out illustrations from illustrator in...
Likes
3787
Both use 3D capabilities, in different ways.
@viral palm hi can i ask a question
If it's Photoshop related you can ask here.
thanks
Gave +1 Creative Carma to @vapid flume (current: #6 - 1084)
thanks
Gave +1 Creative Carma to @viral palm (current: #7 - 1009)
Hello does someone know how i can recerse this to have the rounded corners?

Hello, It is the name of the channel, don’t ask if you can ask, ask away, it might have been answered already…
Hi! I guess you meant reverse, but I struggle to see what you ask: are you trying to replicate this?
Looking for a tutorial on creating a transparent gradient in Photoshop? Learn how to fade to a solid color or to a background image.
Hello, I want to extract just the text on an image, how do I do that?

The videos i've seen online doesnt consider it being in different colours
Color selection with added steps
Okay
Also I wanted to ask yh...
So I've got a mask but i want to add another selection to the mask, how do I do it?

Dw I found a way
You're welcome!
Hi, please show your layers panel. If you do have pixels in the layer, a ne want to add a layer style, lower the fill slider to 0%
And in case you’d want for instance to keep the mask as is and add a gradient, you can put the layer in a group, then add a layer mask to that group (and you can nest groups)
is there anyway to make ones like these?


im really unsure on how to do ones like this, its what my teacher has recommended for me to do but I have no idea on how to get something like that
I don't want to jump on this instead of Franck, but try to see it with an analytical mind.
You need photos -> so, source photos, an obvious choice would be to check unspalsh (free ) or Adobe Stock (there is a free section).
Once you got photos, turn them in black and white (there is a Black and white adjustment layer in Photoshop, use the 🔍 icon top right of Photoshop's interface and type "black and white for an explanation)
You know you need colours. Build your colour scheme. You can use random colours or use https://color.adobe.com/create/color-wheel
Learn to use it to find colours that go together, or use colour schemes others have shared
i have to use my own photos, so that wouldnt be a problem. its just understanding how to apply that to the photos i have taken and ty
Nextt you'll need a suitable font: Again, search what you already got or use Adobe fonts
These images make heavy use of blending modes and opcaity. The photos are probably coloured using a duotone effect with Gradient maps
So colouring the black and white images with a gradient map, and apply colours to text and shapes and combine them with blending modes (Probably the "colour blending mode and/or a reduced opacity) to make that colour semi-transparent)
Some colours are opaque (like the yellow dot at the bottom of the 1st example) and some shapes are translucent like the blue dot bottom right in the second example
im heavily unfamiliar with gradient maps, ill have a look into it though for sure
Next play with layers to create a sense of depth with all the elements -> photos, shapes, text.
Some are behind, some are on top
Don't search for hours for tutorials, just go to the 🔍 icon in Photoshop and just type "gradient map"
right thanks
Gave +1 Creative Carma to @vapid flume (current: #6 - 1085)
appreciate it
No problem...
Regarding placing photos into shapes, the easiest would be to create vector masks in the images.
hey, im having a problem with photoshop. I made a ten seconde video mixing frame by frame and keyframe but the timeline doesnt go from 3 to 7 second
where can i find the glow brush and how to use it?
What do you mean by glow brush? Lens flare?
You can't really, the only two options are either increase the bit depth of the image (from say - 8 bits to 16 bits) or add a tiny amount of noise to "break" the banding
yes lens flare
The other thing is to examine the image at 100% and apply any effect according to what you see at 100%

You also have a specific filter - see screenshot
But these effects are pretty bad IMHO, I'd rather use Franck's suggestion

If you want to do it in batches, I would honestly explore adding some noise from the ACR (Adobe camera raw) module in Bridge. Select multiple images, right-click -> open in Camera Raw, once there, set your magnifying to 100, select all the iamges (CTRL+A) and apply some noise while focusing on the area where the noise is most visible.

THe noise is called "grain" in ACR, and I personnally find it more "realistic" than the usual noise you got in Photoshop through the noise filter.

You can open and apply those effects in ACR to a load of photos at the same time, as long as they're in the same folder.
is there a way to make these type of corners on a rectangle?

Create the shape in Illustrator and then copy it to Photoshop.
(Or take the rocky road: create a rectangle, create a circle at each corner and then subtract the four circles from the rectangle).
Good question: As far as I know, it's not possible in Photoshop (it is in Illustrator)
The corner menu doesn't have any options like there is in Illustrator


You could however use combined shapes in Photoshop, that is: create a rectangle and have 4 small circles "cut" the main shape

Great minds think alike.
#❓ask-a-question message

Sorry I missed your addendum!
We wrote at the same time. You didn't have a chance to notice.
😉
Before I could afford the full CC and only worked with Photoshop, that's the kind of things I used to do. Just don't forget to put the "path operations" back to default, it's easy to miss
yes i thought about those two options but maybe there was a secret hidden way of doing it in photoshop 😂
Path features in PS are reduced to the minimum, it's very much geared towards raster editing so, some things are missing from the full shebang
Unfortunately not.
These two possibilities.
Actually, there is a plug-in that replicates the pathfinder from illustrator to Photoshop. I know I downloded it, but never used it. It doesn't solve your corner issue, but could prove helpful if you don't have illustrator and still need to make things work.
Just found out that it un-installed itself with the last update!

I didn't really miss it 🤣
How big do you need it? With what curve radius?
dw I already solved it
There is a corner plugin but doesn't look like it does what you need! I had to check it

thanks to both of you
Hi, I want to create this effect in a render, how can I achieve the "goosebumps" effect?

Do you mean in Photoshop? (I would have thought you'd use a material if you're doing 3D)
Yeah... but I think that could be done in Photoshop too.
Something like a photomontage on the skin of the image
anyone does animation in photoshop?
You 'd have a couple solutions. I mean when I have to remove them (I'm a retoucher), one of the technique is to use what's called micro dodge and burn. That means painting little dots of white where the dark is, and tiny dots of black where the white is (the bump is made of one part dark and one part light if you observe it) It's a tedious process, but insures you don't touch the skin texture underneath. You could do the opposite and draw those tiny dots from scratch.
OR
Create a repeating pattern, but you will need to distort it for it to look like it's following the roundness of the arm
You could, if you find the right arm. You'll have to distort the shape accordingly
very rarely but if I can help...
pls
Line Animation and Line will follow(25 sec) using Straight Ahead Animation
I don't understand what you mean, sorry
can i dm you?
no, sorry, I don't do Dms
Maybe I just don't know the animation jargon.
I need a smooth line drawing animation. The line should appear as if it’s being drawn by hand from start to end, following the exact curve of my design. Resolution 1920×1080, duration 25 seconds, 12 FPS. Clean black line, no fill. The animation must start from the left and reveal the line gradually until the entire shape is complete.
If you say line, I'm figuring a line that moves in the canvas

yes pretty much 🥲
It's really more an After Effects technique. Photoshop can't handle animation like that. Whereas AE it is designed for this sort of thing.
Sorry, wrong channel then. Go and ask in #💬chat-general
Probably, wrong server as well.
If someone is interested, they will contact you
Yes, After effect is the right software for that!
its my assignment so thats why only photoshop
It's YOUR assignment? you should do it then!
If it's your assignment then I assume they're expecting that you do it.

You guys have been asking how to create Line Animation in Photoshop a lot online and everyone I see never tells their followers how to do it... soooo here I am ahahah You want to know how to create animated lines for your TikToks and Reels? This is how you do it!
Buy me Coffee :D https://ko-fi.com/tiagoaleixo
...
not this kind of line
And you don't do things like that in Photoshop unless you're going to paint every frame.
yes basically, it's painting every frame in PS
exactly i did 2 of them in 48 hours
Get a coffee and get crackin'
Nope, sorry, ask in #💬chat-general
nah man i am cooked
"all road lead to rome"
K. Well... Good luck... uncooking yourself.
Nobody is going to hand-paint that for you.
unless they get paid I assume
ik but i was here to find someone that could teach me some easy ways
There isn't always easy ways
why?
Otherwise we wouldn't be paid to do our stuff #justsaying
😂 damn
Sometimes, you have to take the long road because that's what works
Sandrine posted a tutorial for you above. Watch it.
i already did but this is not the thing
There is a bout 100s tutorials just by typing "line animation photoshop" that's what I done
I'm out. After this conversation, I'm cooked.
Thats "life"
also have a look in the "school of motion" website/youtube channel. They only do animation and sometimes have stuff about Photoshop
they are very good
thank you 😊

Learn After Effects, Photoshop, Illustrator, Cinema 4D and more from the best instructors on earth with engaging critique, community, and a bunch of new friends.
Is it possible to remove lighg glare from a photo?
But it is your assignment! Use the onion skin feature: https://www.youtube.com/watch?v=fl7okphf4KA but it should not take hours to draw a line…

An introduction video to learn how to create a simple animation in Photoshop using the video timeline option, onion skinning, as well as other tips and tricks.
Hi! Yes, but the difficulty will depend of the size and location of the flare. It is easier nowadays thanks to AI tools like the remove tool: https://www.youtube.com/watch?v=PF7LXBnBvJY

See more about the "remove reflections" tool in the full tutorial at https://gregbenzphotography.com/lightroom-acr/automatically-remove-reflections-and-lens-flare-with-acr/
===================
Get my free luminosity masking panel and tutorials at: https://gregbenzphotography.com/luminosity-masking-tutorial/
For more information on the Lumenzi...
Gave +1 Creative Carma to @blazing valve (current: #1027 - 1)
25sec at 12fps give you just 300 frames (0.08sec/frame).
If you must reveal this design, you can create a frame animation. Add a black layer mask over the design for the first frame.
Then create a new frame in the frame animation timeline, copy the first layer in the layer layer panel and paint white on the layer mask to reveal the first part of your design... Repeat this step 298 times and you'll be done...
It's up to you to choose the softness and shape of the brush used for the masking steps...
Sorry for the delay... Massive power outage in my area yesterday.
I think @vapid flume gave you some good clues...
I think this type of design could be placed in the "collage" category...
You can cut out different elements from your pictures to make a composition, turn some elements in dualtone (with gradient map adjusment for exemple), place some color shapes in the layers pile to add depth and Add text (your samples seem to use sans serif font (Futura) but depending the style of your design Serif fonts could work too... Choose wisely)...
The hardest part will be to find pictures/elements that fit well together (composition), coloring and adding shapes will be the easiest and funniest part...
I made a quick design to show you an exemple of Layer hierarchy and some effect/layer blending mode you could use... Hope it will help.
can someone tell me if there is a setting to better control how the anti aliasing is done in scaling fonts? if i'd like it to be smoother or more coarse without changing resolution?

in order to better fit surrounding, differently aliased text
thank you, seeing this visually will also help me understand things a lot better. i appreciate your help and sandrines help.
Gave +1 Creative Carma to @viral palm (current: #7 - 1010)
Main Menu: Window > Character... Set Anti-aliasing Method dropdown menu.

cheers
Hi, are you transforming the font as a font, as a vector, a smart object, or rasterized? D.Humann’s method is only for text.
As a font, but i wouldn't mind transforming it. The method given doesn't give as much control as i hoped for, since the aliasing difference is still very big even with the smoothest option
If your file size is small, you won't see much difference.... What is your font size?
yeah it's good enough when zooming out for the clients needs. i'd just like it to be "perfect" if i could you know

the fontsize is around 83 pts. i doubled the prints size in hopes of a smoother aliasing but it did little
Since Photoshop is a pixel-based application, you will always get this pixelated effect when you zoom in closely... If you want perfectly smooth letter shapes (even when you zoom in closely), you need to use a vector application (such as Adobe Illustrator)...
With Photoshop, the best way to evaluate a rendering is to inspect it at the final zoom level of 100% (or better yet, print it at the final size if it is a printed document).
No i want to imitate the pixeling
this is an existing print on the right, and i'd like to match it as close as possible
Oh? Sorry for my misunderstanding...
No worries, as said it's good enough
You also can turn your Text layer into a smart object then apply a small amount gaussian blur filter + a Filter/Pixelate/Mozaic...
Just an idea... Happy to hear you find a workaround...
That's much better, thank you
Gave +1 Creative Carma to @viral palm (current: #7 - 1011)
More colour correction to think about than "filter" perse unless you want to mimic small bubbles inside the thickness of the ice, and simulate a semi-transparence. If the ice is very smooth, smoother than the metal you have now, you can try a surface blur filter (filter> blur>surface blur), particularly if the ice has thawed and re-froze. You could add some small ripples if needed (Filter>distort>ripples - and possibly others in that list). IMHO it's too detailed to be ice, unless it's sculpted ice.
Having a reference of the kind of material would help.
ahhh i will check. thanks!
Gave +1 Creative Carma to @sly hawk (current: #5 - 1194)
what is vanishing point useful for on photoshop? because i tried using it for putting an image on a laptop screen, though for iphones i find it more realisitic to use clipping mask though i sometimtes get confused when using it
Diffuse map will only be applicable to color you probably need to use metallic/specular map for shininess
You could remove color from second map you provided and use it for metalic map
And tint your diffuse texture with blueish color to mimic being frozen
I personally use vanishing point to paint perspective
You probably can use it for more than that
Hello, How could I get the ribbon to go over my face layer?


The Vanishing Point filter in Photoshop is used to apply images, text, or graphics onto a surface while maintaining correct perspective.
Here is a link to a video that explains well how to use it ; https://www.youtube.com/watch?v=w5aMceFycN4
The Vanishing Point Filter and Perspective | Photoshop CC Tutorial | EASY
This Photoshop CC Tutorial discusses how to use the Vanishing Point Filter to add images, text and graphics to a photograph while maintaining proper perspective. This Photoshop tool allows us to create a simple grid and panels based on the perspective of your current image...
Your "ribbon" should be on this own layer and placed over the "Face layer" in the layers pile...
I think you'll have to paint it over...
Which brush would be best to redraw it?
Hi, I'm wondering if there is a workaround to this:
I have a folder full of PSDs with infographics I made that I would like to export as PNGs. I need to use “export as” (rather than Save As) to remove metadata, but also because I need to export a second version which is under 2MB (which I can only achieve by choosing the 8-bit option via export. Save As does not bring it under 2MB).
However, for some reason exporting this way is not supported by scripting or actions/automation. The process of exporting 40 times (20 graphics and two exports each) is pretty tedious. Is there no way around this and truly no way to automate exporting in this way?
Yeah. Probably
Have you installed and tried the ps plugin "Image processor Pro"?
I haven't, but looking into it that seems like another jsx script and not an actual plugin (which means it may not engage the normal export feature) but I'll try it out and see if it can resolve the issue.
But I actually found a workaround in the meantime using Export > Save for Web (Legacy) which does work with Actions/Automation. Doesn't seem to be any downside to doing it this way afaik, it's just weird this legacy feature is compatible with scripting & actions but the newer export feature isn't lol
I would be lost without Image processor pro.
I would actually have a look at using bridge and its workflows to export AND remove metadata at the same time. Maybe you will miss some features you need, but actually I think you could be covered (screenshot is of Image Processor pro)

Using metadata in Bridge
https://helpx.adobe.com/uk/bridge/using/metadata-adobe-bridge.html
Oh nice this does seem like it has quite a bit of depth to it, I'll definitely have to give it a go then. Thanks!
Gave +1 Creative Carma to @vapid flume (current: #6 - 1086)
Bridge is a goldmine waiting to be discovered!
anyone have a tutorial or is able to help me match (composite?) these 2 pictures? ive tried and i cant get the lighting and haze to really come through, my result is on the right
Things i've done are
Shadows and Highlights using Curves
Brightness/Contrast/Saturation
Small Outerglow
Drew a lighter color circle right outside the subject mask


Honnestly for this I would try to trace a shape with pen tool, crank up the feather property to match the original "ribbon" edge and pick the color from original...
have you tried the "dehaze" tool in ACR (pull the dehaze slider in negative direction)
and add some exposure maybe, or some highlights?
Exposure i know how to but how would i go about highlights?
Oh when i said shadow and highlights i just meant this feature

you can paint in some manually, using a soft brush with a small flow, and paint in different blending modes to see what works
how did you apply this purple overlay all of the image?
doing it this way, you have muted all of the existing colors into a shade of purple, which wont happen IRL if this was the lighting, you'll still see colors like in the clothing
I would suggest to try Curves technique as well explained in these tutorials
Short tutorial (2mins): https://www.youtube.com/watch?v=UrTzFExOCFA
Complete tutorial: https://youtu.be/fgB_oO4xt1A?si=gOoOLAoidtgKb9tL
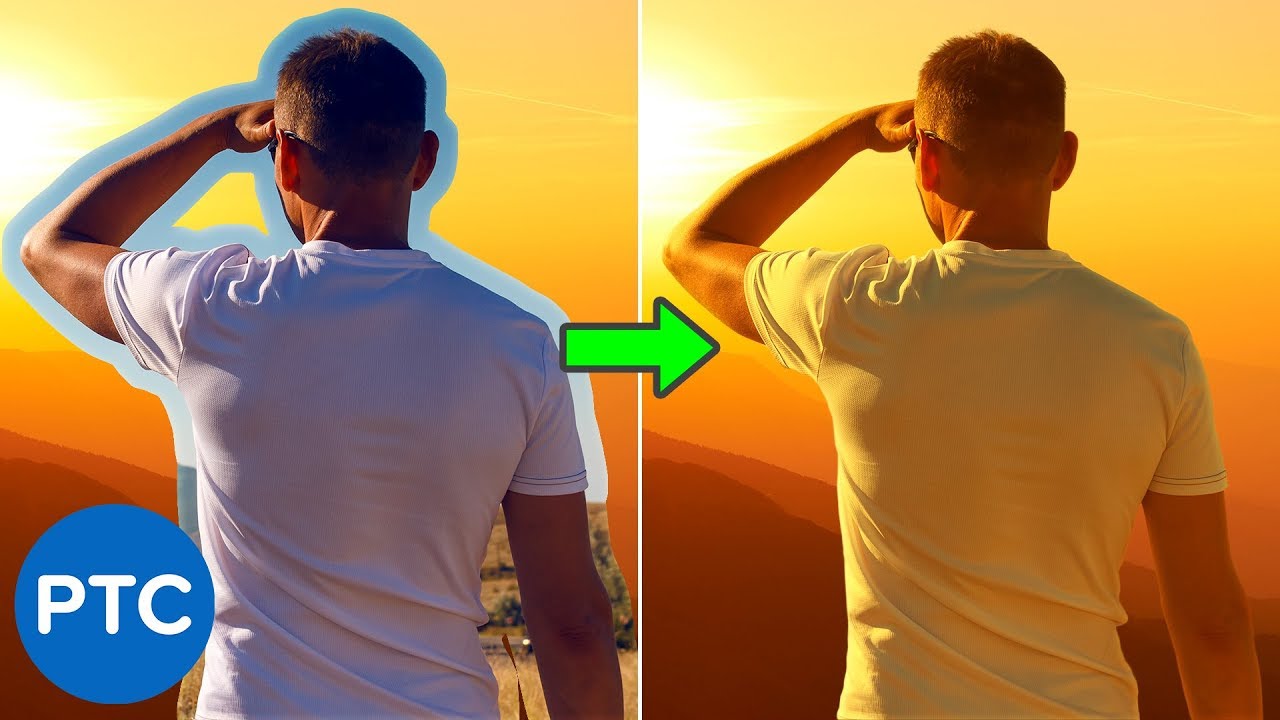
In this tutorial, you will learn how to color match images in Photoshop.
You're going to learn a powerful color matching technique using the Curves Adjustment Layer and the Auto Options.
This technique is great for composites with different tones.
LINKS - How to Color Match Images in Photoshop
Sky Replacement Technique - 90 Second Tip
► ...

In this Photoshop tutorial, you will learn how to blend images together and create realistic composites in Photoshop.
You will learn three techniques to easily match luminosity, saturation, and color.
📘 INDEX
00:00 - Introduction
02:36 - Step One: How To Match Luminosity
07:56 - Step Two: How To Match Saturations
11:19 - Step Three: How To ...
Thank you!
Gave +1 Creative Carma to @viral palm (current: #7 - 1012)
is it possible to UN mosaic tile a logo?
i cloned a ps file over from my desktop, to start on this new one, but how can i un-blur it as such
current state of affairs ;

@silk owl - Please post projects to the #1110544577850511401
There isn't anyway to add detail a back other than attempting to generate new pixels with AI (which probably won't work either.)
How do I perfectly cut out any subject?
I would like to cut out the pink shirt dude to use in a thumbnail

You can use select subject feature...
I can’t find a real solution. I just need the white removed, simple in theory, but every method I try leaves some white behind. The only thing that “works” is using Multiply blend mode, but that doesn’t actually remove the pixels. Any ideas?

hi, really simple question, when i select something and i press back space it doesnt delete it, even when i press delete it still stays, i tried ctrl+x and nothing?
am i missing something

Well, interesting. I have a very similar if not the same problem as you, tried multiple different methods (Color Range, Magic Eraser, Blend If Sliders, etc etc) and the one that worked for me was the one you tried here. Thanks.
Not a photoshop help nor was it helping me per say, but saved me a headache.
Gave +1 Creative Carma to @fervent quiver (current: #657 - 2)
Could you share the whole Photoshp UI? Hard to answer without seeing all the screen...
It could be that you are not on the right layer and there's nothing to delete on the layer that is currently highlighted.
Since we work with layers in Photoshop, it's always super helpful to include the layers panel when you post screenshots...
I would say 99.99% of issues are resolved just looking at the layers panel 🙂
In the movies, they just say “enhance” ;-).
It looks like it’s been reduced in size then scaled up using nearest neighbor… could you show the original file? Do you have a vector version of it is a logo?
You know I call it the "Deckard" filter 🙂
https://scifiinterfaces.com/2020/04/29/deckards-photo-inspector/

Back to Blade Runner. I mean, the pandemic is still pandemicking, but maybe this will be a nice distraction while you shelter in place. Because you’re smart, sheltering in place as much as you can,…
Did you try the blend if sliders?

Discover Photoshop's hidden gem—the "Blend If" feature! In just minutes, learn how to blend layers based on luminosity and color for professional-level edits that will wow your audience.
Get access to Jesús' free Blend If Photoshop practice file:
https://adobe.ly/blendif
This video is part of an 8-part Photoshop series with professional pho...
Did you try the calculations?
It's usually my go to for difficult selections
https://helpx.adobe.com/uk/photoshop/using/channel-calculations.html
And you’ve split them?
Yes.
I think "Blend if" works well if you choose to affect the Red channel rather Gray...
As said by @vapid flume , calculation could be a good way too but to be honnest it depends how hard you want to keep the "grainy greys"...
If you want to keep them I think your image will never look as Multiply blending mode does...
I think I tried something like this but I'll give it a go. Though I did find my solution on photopea lol. Thanks in advance.
Gave +1 Creative Carma to @viral palm (current: #7 - 1013)
@cunning bobcat : You also can add a level adjustment layer over to correct the light areas...
These blending features are pretty old... I'm sure the photopea copy cat has the same...
Don't ask me where I don't use it...