#❓ask-a-question
1 messages · Page 140 of 1
Hi mates! I thought I had the Ps version updated but I can't find the new Harmonized tool. May I need to download a beta?
Yes harmonize is part of beta
For great quality fonts Adobe fonts is a good place! Professional fonts, free with your adobe subscription.
Dafont (https://www.dafont.com) also offers a large choice of free fonts (they are not all great but free)...
What do you mean by "Vintage asthetic"? Worn, aged appearance or old/ancient Style?
If it's worn/aged, you also could try to find a font you like and use layer mask to give it an aged look...
cause u applied the gradient on the Mask, so it behaves like a gradient mask
Hi everyone! I need help with my Photoshop script (JSX file). I'm having an issue with image alignment when pasting images using the script
can someone help?
nvm got it
why is neural filters greyed out? 8bit and rgb

How do I get the lines off my screen?

What is the type of layer you're trying to apply the filter on? Hard to answer with this narrow screen shot...

To exit Photoshop's 3D view, go to the top menu bar, click on Window, then select Workspace, and choose Essentials or another preferred 2D workspace to return to the standard layout.

Thank you
Gave +1 Creative Carma to @viral palm (current: #8 - 934)
It looks like you are not logged in your Adobe account... I don't think the neural filter works when you're not logged in...
Oh
damn it
thanks
didnt work
neural filters only work when you have a mask applied to the layer, if you dont want to mask any parts if your layer, just create a full white mask and you will be able to use the neural filters,
still the same thing
what photosdhop version you have?
are you logged in your Creative Cloud app?
Based on your screenshots, you're not signed in to an Adobe Account. Thus, none of the cloud-based services are going to work for you. You have to be signed in and have an active subscription to use these services.
Hmmmmmmmmm
hey im a noob, how would I go about creating a "woven" effect. having a layer start on top but end underneath.

hii is there free wireframe pngs i could find?
This is just the same shape on different layers. You'll just stack the Layers in the correct order in the Layers Panel.
Free wireframe PNGs? What does this mean exactly?
theyre kinda like a distorted grid?
i think

i only find paid ones 😭
You could just make thoses. Start with a perfect grid image and then warp or liquify them.
Probably better accomplished with Adobe Illustrator though, creating them as vector art.
i thought of that but idk how to use illustrator yet 😭
Already said why... Are you logged in?
#❓ask-a-question message
CTRL+H should hide the grid if you're just worried about the grid...
I am trying to edit this together to make a youtube banner. My vision is a red and blue background where you can slightly see the constitution and the declaration meeting images "melted into" the background seemlessly, like burned into the red and blue.
Then I would put the text and channel info above that. Does anyone know how to do this task? I can't find a good video on youtube that shows this, but Ive seen this style so many times

i would change the blending mode on the red and blue rectangles and put their layers over the image layers, and then i'd feather erase one of the images, i'd also suggest putting some kind of dust filter over all of it(blending mode for the dust image should be screen or overlay i think?)

i also wonder if you might get more mileage out of a gradient instead of solid rectangles, but i dont know exactly what your vision is
and if you dont like this dust, then you could probably find a different one on your favorite texture site(mine is texturelabs, but im looking for more, if you have suggestions)
Something like this?
Blending modes and Layer masks will be your friends!

is there a download for past CS version?
✨ You can make that super easily in Photoshop  😉
😉
I actually made two ways for you:
-One if you wanna learn how to do it yourself.
-And another if you feel lazy 😅
👉 I’ve even made an Action that creates the grid and centers it automatically on the canvas.
But first, you’ll need to install the PAT file (Photoshop’s internal file for grid textures).
Here are the videos

thank u! ill try it when i work again
Gave +1 Creative Carma to @pseudo frigate (current: #211 - 8)
ok is see you fail to provide easy solutions thx
CS versions are not supported by Adobe
So you can’t download them
At least not officially
Nobody is contracted to give you easy solutions, this is a server run by volunteers, and people are kind enough to provide answers.
@ivory rampart is right, there is no way to download CS versions. Some people still continue to use old ones they bought at the time, like CS6, but if you haven't, then you need to subscribe and work with current versions.
These are the plans for the UK if you want to check the prices
https://www.adobe.com/uk/products/photoshop/plans.html
If you are elsewhere, just replace /uk/ in the URL with your country's code, like /de/ for Germany, or /at/ for Austria

Explore Photoshop Single App, the Photography plan and the Creative Cloud Pro plan with 20+ creative apps. Compare pricing and features to find the plan that’s right for you.
Great, thanks. I have downloaded the beta and it works quite well so far. But If I have an object with transparent background on a layer it doesn't allow me to harmonize that layer without erasing the background first. It's kinda strange because it has no background. 😂
Gave +1 Creative Carma to @ivory rampart (current: #31 - 67)
I found a workaround i just add mask to that layer
I think the idea behind harmonize is you want to speed up process of adding single objects to your canvas not whole picture
For that i think adobe have harmonize filter in neural filters
But it’s just my assumption
?? why do glitches occur

With the screen it's normal, this is in Photoshop, and it appears unexpectedly.
Graphic card issue... Close Photoshop , update your GPU driver then retry and see if it works.
I have already updated the processor driver and the graphics card driver.
I just can't update these drivers

Does the problem occur randomly? (if you close then reopen the file => appears exactly the same or not?)
You also can try to untick "Use Graphic Processor" option in preferences, close and restart photoshop then see if it changes something...

Okay, I'll try, but this problem can arise at any time. We need to check. (I will write if it happens again)
Fine! Let us know...
But if this happens randomly, it could instead indicate that the root cause is a hardware issue rather than a software problem.
where can i find the UXP develop resource?

Build UXP plugins and scripts for Adobe Photoshop with HTML, CSS, and JavaScript. Automate workflows, build new features, and more.
And there is a dedicated forum as well: https://forums.creativeclouddeveloper.com/c/photoshop/63

Adobe Creative Cloud Developer Forums
This is the parent category for Photoshop. There are sub-categories for each API:
Hi! Are those for an integrated GPU? See if you can disable it altogether. https://helpx.adobe.com/photoshop/kb/photoshop-cc-gpu-card-faq.html
it is so lack
there is not full for batchplay and adjustments layer
Then ask in the forum I linked to.
Please do so in the feedback forum: #📝project-feedback
@hushed niche spam
<@&548221840750018590>
Thank you
Gave +1 Creative Carma to @hushed niche (current: #12 - 293)
Should be clean now!
Sorry. Missed it. Thanks @wind narwhal!
Gave +1 Creative Carma to @wind narwhal (current: #3 - 2671)
Thank you too!
Gave +1 Creative Carma to @wind narwhal (current: #3 - 2672)
Thanks for the heads up.
Gave +1 Creative Carma to @pseudo frigate (current: #194 - 9)
I mean that is lack
I created plugin by my self and I do analysis for batchplay with recorded actions, because of lack documantation!
Please state in the developer forum the part that you are looking for
adobe team didnt make well reference for all methods and properties
My brush (just any regular default brush) doesnt work with my tablet pressure sensitivity, I checked the boxes above to use it for opacity etc, but nothing happens.
In the brush settings I see a warning icon next to pen pressure
I have a wacom tablet with windows ink turned on, and in other drawing apps pressure works fine
What's the displayed mesage when you stay over the warning icon?
this, which I have

So if I undestood well, you're sure your wacom tablet is presure sensitive and it doesn't work with photoshop...Right?
Any way to test sensitivity feature in a different software?
Did you update the graphic tablet driver? If not check for updates...
I tested in photopea, some 3D software and the wacom app and all of them work fine
Ok! Did it work in photoshop and stopped working or it's the first time you're using your graphic tablet with photoshop?
windows ink does interfere a lot when using a drawing tab with PS @light tendon, try turning windows ink off, and then just let the drivers of the tab and PS work together
it used to work fine, but its been a while since I've drawn in photoshop
I had same issue, turning winodws ink off was what worked for me, same brand tablet btw
without windows ink it doesnt even work on photopea either 🙁
Make sure your PS is up to date ... it could help!
im on photoshop 2023 since the newer versions lag like crazy for me 😭
@light tendon PS version doesnt matter since pen pressure support was added long back
Edit > Preferences > Performance > Graphics Processor Settings and see if GPU is enabled, then, go to Preferences> Tools and ensure “Enable Gestures” and “Use Windows Ink”
all were fine, though theres no use windows ink in the tools menu
okay and could you please check this setting for me? go to brush settings>shape dynamics>control and see what option it is selected there for you @light tendon


oh
that triangle means photoshop is not getting any pressure data from your pen hardware
are you sure you have correct drivers installed for the pen?
yeah, did a driver check and everything is fine
very strange
hi how do i remove text from something like this

and you already tested it with photopea, where the pressure works, right?
it does 🙁
are you using mac or windows?
w10
okay try this
close photoshop, go to your appdata folder, and delete the PSUserConfig.txt
C:\Users[your username]AppData\Roaming\Adobe\Adobe Photoshop 2025\Adobe Photoshop 2025 Settings
there should be a fine named PSUserConfig.txt
delete that, when you restart photoshop, it will create a new one
searched and there isnt even a file named like that in my entire photoshop folder
what version you have?
2023


Paint over it with the Remove Tool.

okay create a new text file, name it PSUserConfig.txt
and put this text in the file
Use WinTab
UseSystemStylus 0

like this
@light tendon
seems like its working, though very ver y very feintly
like, at the softest possible touch I do on my tablet its already 50% opacity
and that is with the tablet pen feel set to the stiffest setting possible
okay maybe now restart your PC once, and see if it starts getting full support
Hello
How can I get rid off some distortion which has been done to Smart Object please? Is it even possible?
🥴
I would assume there must be a way since the layer is smart object
What do you call distortion?
If it's a transformation you have done, you can reset it by right clicking and choose "reset tranformation"
Guys! I really need someones help with a photoshop. I need someone thats able to photoshop grills onto a person! DM!
That sort of stuff needs to be posted in #💬chat-general
Could you help? Please
Or do I have to use chat-general?
No sorry, help isn't guaranteed!
Post it there and see if someone is interested, some people will ask for money
In that case, proceed with caution to avoid scammers
Well, I need help and PS Settings forwarded me to this discord server. Also I see this channel is in 'Support and Feedback' and I need Support
Not chat. If you know what I mean
Sorry I mixed you up with the other person, my apologies
Help with Photoshop: You're in the right place
However I never used Photoshop on the web. I will try
TY!!
Gave +1 Creative Carma to @vapid flume (current: #6 - 1035)
If you need more information about this issue feel free to ask me. I don't want to waste eachother's time
So apparently (and it makes sense) you are prompted to save on the cloud, did you find your image there?
How do I access the cloud? Is it App Switcher - Photoshop - Files - Your files?
Let me check
In doubt, you can access it here
https://www.adobe.com/files/
Yep, that's right where I am
And I still do not see the exported PNG for some reason
Sorry for some reason all my screenshots appear corrupted
try to download instead of sving
top right, big blue button
Also when I press Download or Export it says "Document Exported". It does not appear on my desktop
Neither in my files from here
I just tried and it works for me (both ways)
Have you tried with any other file format than a PNG?
Just throwing ideas there
I'm learning on the job there, I never used the web version 🙂


I appreciate that
I'll try now
Nope, it does not show anywhere. But it keeps saying "Document Exported"
I checked with a mask as well just soo it looks like yours and it works as well
Probably nothing to do with it, but are you connected with the same account as your creative cloud?
or do you have several account (for example one with your school, and one personal)
It's the same account on each web. I just checked
Somehow it does not work for me
I tried with another account, it was like 1 save / export for one account I think and it downloaded it
Like a demo? account
For me it triggers the export by opening the file explorer for me to save, I assume it doesn't for you?
Maybe it's sometyhing to do with your browser? (ad blocker? something like that? even a VPN?)
check it with another browser just in case
I'll check rn
I just checked and all you have to do is copy the URL, and paste it in another browser
YEESSSS
OK, I just checked with Edge (I generally use Firefox) and it does the same as you with Edge.
I appreciate sticking all the way with me! Fast response, very helpful 11/10 ⭐ Thanks!
Gave +1 Creative Carma to @vapid flume (current: #6 - 1036)
I am not sure about Photoshop in particular, but for most of the online Adobe apps, Brave is not fully supported
check this
https://helpx.adobe.com/uk/photoshop/web/get-set-up/learn-the-basics/technical-requirements.html
Brave and Opera, I must add, are not fully supported
I see now..
Also I am not sure if Brave does not entirely work with Web PS. As I said, from a "Demo" account it worked to export a PNG. So, it is your call
can anybody help me how to blend in more the subject pls i tried so hard i dont understand


Are you creating the Rectangle in "Shape" mode?
okay so I figured it out, for some reason when I made another it popped up this time, thanks anyway though man
Gave +1 Creative Carma to @ripe quest (current: #2 - 3153)
applying it without the mask just applies it to the entire layer doe
Adding a light glow behind the player and a Dark blue to transparent gradient between the Name and the player will help (I think)...
Optional: Med contrast Curves adjustment layer on the player, Levels (for white balance correction), Color balance Adjustment layer to reduce purples on the skin tones...

You can clip the gradient to the layer...
If u want apply just the gradient color on text make gradient clip it to the text without a mask
@runic stone : you can clip a Gradient Layer or if it's too large to handle easily you also can create a shape layer with a gradient and clip it to your text layer....
ill do that then ty
Gave +1 Creative Carma to @viral palm (current: #8 - 935)


where does potoshop saves all the settings and fonts? i gonna migrate to a new computer so im preparing all my installers links and programs to move them there and i forget where i got certain fonts and some are really old like i wanna pretend you just copy paste the whole folder and move it to the potoshop of the installer in the new computer no? like get adobe cloud get potoshop version then just copy paste you files ?
also brushes
is potoshop 2020
is potoshop 2020 i was not meaning like copy paste the exe and stuf i mean just copy the wholder folder and select replace files on the new pc installed
Hey guys just wondering is windows surface pro 11th edition worth getting it since I plan on getting it for photoshop
<@&548221840750018590>
Image spam across the channels
Hello ! Sorry I struggle for a "simple" thing, I cannot find where I can download the photoshop beta to use it on windows
you can install it from creative cloud. But I also can't see the beta section. There was conversation about it where they fixed or provided alternative way to get beta version but I can't find it.
You should be able to access them here, it's your creative Cloud page, but on the web, if you can't access it through your app
https://www.adobe.com/apps/beta-apps/all-platforms
I think you can also find it here (big blue button on the right)
https://helpx.adobe.com/uk/photoshop/using/photoshop-beta-desktop-app.html
You will need to be logged in your account either way
it's working. thanks.
Gave +1 Creative Carma to @vapid flume (current: #6 - 1037)
k thx will try
Gave +1 Creative Carma to @fierce hornet (current: #33 - 62)
K I will try, and thanks for the tip for create a mask for hair or fur with the smudge tool, I can refine them like I want now (that was weeks ago)
Gave +1 Creative Carma to @vapid flume (current: #6 - 1038)
ah! Glad I could help!
This is the hair masking secret trick 🙂
I've learned it from Natalia Taffarel over a decade ago (probably more!)
https://www.youtube.com/c/NataliaTaffarel

I will add this in my favorites and watch it next time I need to refine more, thx 😄 !
Gave +1 Creative Carma to @vapid flume (current: #6 - 1039)
I don't think she's updated her YT channel, so they may be old videos. I still think the methods haven't changed much, particularly if your goal is beauty retouch.
Not beauty but I create horse portrait with a full black background

This is beauty 😉
I think it will be easy to transfer those skills into fully haired models!
The hardest part is when the "texture" and colors of their manes are matching the background
That's where you are better served with relying on your own craft rather than leave it to the automatic selection processes, they can never compete!
Sometimes it helps applying an exagerated adjustment levels or curves layer on top (that you can delete when you're done) that makes everything very light, so you can see the boundaries.
Yes haha I already know this technique I used it myself without tutorial, I was messing with adjustment layer to have a better vision of what I was doing
so whenever i use the pen tool, i only make one side, then copy and paste and mirror it so it matches the other side. but i can never make it equal, there is always a space in the middle, like a little line that remains empty. what can i do?

It could be a visualisation issue (as in not visible when exported)
Have you tried exporting it and see if it was visible?
Don't forget that in Photoshop, only what you see at 100% is accurate.
So you need to check at 100% first.
What im saying is, is there any possibility to split it down the middle more accurately?
The upper anchor point does not have the same x position as the lower one. This results in a ‘gap’ after mirroring. Before setting the first anchor point, create a guide line in the middle. This should solve the problem.
I think the best way comes that, when you build it, is to start, and finish along the same line, as in, put on a guide and use the snapping feature to snap the starting and ending point along that guide
That way you are sure both points will be on the same line.
Alright thank you

Yo, what's a good fonts to use? specifically sans-serif fonts and serif fonts
Found this poster online and really like the background. Does anyone know how to achieve something similar?

hm
Asphalt texture + some spine+ some grain + some blure
Here is how I would tackle that in 4 easy to follow steps.
very new, uhm ive been working on this for a while and now im a bit stumped what would be the best way to blur and blend the outer edges of the iris with the subtle shadow of the limbral ring on circumference I tried playing around with masks and gaussian blur but i dont think i was doing it right and just made things worse.

your best bet would be a curves adjustment layer with a mask
So iris and shadow aren't on the same layer, right?
thats all one layer
i upscaled in another program then made it a smart object and did camera raw
Ouch! Not easy when everything is on the same layer... (if Iunderstand well what you want to do)
im really new to photoshop man i did what you said but i dont understand how to effect the other edge

yeah i imported my image i figured I would need to create more layers as I edit it just not wholy sure where to start
well, if you want to add a shadow layer, pull the curve in the other direction, and then invert the mask to make it black, and then paint with white where you want a shadow blended in. share this image and I'll explain in more detail

Are you trying to do something like that?

I'm realy not sure to understand....
yes thats what i wanted to do
Convert your image to a Smart Filter, Apply a Filter/Gassian blur, Invert the smart filter then paint White on the mask with a soft brush to reveal the blur... (paint black to hide the effect)
look at this PSD @sturdy rapids

<@&548221840750018590>

Guys i need help for cutting image
are you using the ctrl+e shortcut? did you also try right click>merge layers?
its greyed out, i used to be able to do this im fairly certain its a recent issue
this isnt the first psd this has been a problem, so idk whats going on
try Ctrl+Shift+Alt+E
this gives you a merged copy of all visible layers
as a work around it works, thanks, but is there a reason i am unable to merge these in particular? I can merge other layers if i create more higher up in the layer list, but not these in particular
Gave +1 Creative Carma to @tame cape (current: #14 - 234)
first use ctrl+g to group them, and the select the group and try ctrl+e @mighty spoke
This is a content-fill layer. How did you create it? The layer probably needs to be rasterized before you can merge it.
no, I can merge smart objects and pixel layers easily, just tried
and the thumbnail of the layers is clean, means its already a raster layer
it is rasterized
so i dont understand the issue tbh
i just confirmed it is indeed an issue with the fill layer though. the underlying layer can be merged with a new layer under the fill one
i used to be able to merge content aware fills with normal layers
Yes. These types of layers usually work without problems.
(Please note that the layer name is underlined.)
can you share a bigger screenshot of the layer panel?

Please upload the file for testing
@mighty spoke
dude, you have clipping masks
i reverted the aware fill so i just threw one together again rq

thats why you cant, release the clipping masks and you would be able to merge
i did do that
and i still cant
oh wait now i can?
i tried that before
and it did not work
wtf
yea the clipping masks are the reason
i swear i tried that
nw glad it worked
im losing it lmao thanks guys
chatgpt over here trying to gaslight me into thinking i locked a layer
Does that works for you
This is one possible way (of several) to merge existing clipping mask(s).
he was just trying to merge two layers, not the entire document
yeah i can merge visible but the issue was the clipping masks which i know for a fact i unclipped and tested and it didnt work but now does
idk i blame violent video games
maybe you didnt release all clipping masks
one or two left out
Yes. That's exactly why I wrote above:
… Yes. These types of layers usually work without problems.
(Please note that the layer name is underlined.)
😉
does the underline mean clipping mask strictly? or other things
it means clipping masks

That's you. Believe in yourself.

You can't merge Background copy2 with Background copy as long as BG copy 2 has layers cliped to it.
To merged them together keeping the effect of cliped layers I would suggest you to use smart object technique...
=>You can select all cliped layers and BG copy 2 then convert them into a smart object then Select the smart object you have just created (BG copy 2 + Cliped layers) and Background Copy Then convert them to an other Smart Object...
if i turn a layer and its adjustment layers into a smart objects does it save the adjustment layers in a non destructive way
yes
you can double click the smart object layer thumbnail and see the original layer and effects
Yes... Smart object is the way to work non-destructive!
Try to use this as much as you can (rather CTRL+E)
please help idk how to disable this crosshair thing
Get the Eyedropper Tool. Hold the Alt key and hover over the it; the cursor will change to scissors. Then you should just be able to click to remove it.
holding ALT btw but still not working
I don't have Photoshop open. Hold up.
change to color sample tool first, its in the eyedropper meny
menu*
@pulsar marlin
got it
It's Shift + Alt with Eyedropper.
tysm
welcome @pulsar marlin
anybody help?
Can someone help me swap Jim’s and Dwight’s face? Like put Jim’s face in Dwight’s and Dwight’s face in Jim’s?

Would really appreciate
find a png of chain u want
put the chain on top of the text
then add layer mask to chain
cut the chain off where it touches the text with lasso tool or paintbrush IN the layer mask
this will look pretty sht unless u either find the perfect chain image or draw the chains to match the image
clone stamp tool
stamp each of their faces and slap on top of each other
do this to their facial features not the entire head or the window on right side will mess it up
Where is that?
I need help. I have this image and i want to add text in the middle that goes with the curvature and it needs to be perfect. I used the pen tool with text but that doesn't give me the result i want. Any suggestions?

Sorry I am still learning
does anyone know how to add a current layer mask on an image to another image?

then press alt+left click to copy a face
then left click to past
This is so confusing 😭
i took this beginner photography class in freshman highschool and failed 🪦
but it did teach super basic ps stuff
how long have u messed around wit the stuff?
I just need it for a poster 😭
A banner/poster
Crazy how taking I drown myself with AP in high school but gets discombobulated by this
u can obv do better if u actually take ur time
Press and hold the Alt key.
Click and hold the left mouse button on the layer mask. Hold the Alt key while dragging the mask onto the other layer.
@wheat sinew
Here's a short video. Perhaps it's easier to understand.
How could they get the liquid to look so glossy? not smudged but glossy.

Does anyone know who I reach out to about the discussion gift cards? I did one a month ago and never received anything.
<@&548221840750018590>
he just came to spam across the channels
Thanks, removed
Gave +1 Creative Carma to @tame cape (current: #14 - 235)
Hi, I do not see an answer.
Attention that you need to save the presets that you added, their location is supposed to be in the preferences file.
There is also import export presets in the edit panel, IIRC. Normally, you should save them here: https://helpx.adobe.com/photoshop/kb/preference-file-names-locations-photoshop.html
there is this page. The presets manager is not useful anymore.
Thanks for the quick response as always
Gave +1 Creative Carma to @serene coral (current: #7 - 937)
The fonts are saved in your operating system fonts directory. Adobe fonts can be synced online.
Lots of saturation and touches of highlights.
huh
Hi I have a question someone know how to change text on picture beacuse I have to make a project for my hoodie if someone know how to do it dm me I can pay!
Hello, in photoshop beta how can I zoom, in select and mask ?
(nvm found it I thought I tried ALT already)

Ctrl+ and ctrl- should work as well, no?
Hi, the place to request others to do work for you is in #💬chat-general , this very place is for those who want to learn how to do stuff in Photoshop…
What have you done so far?
It seems that this might have been done in a 3D software. Or maybe could an AI generator help in this case. An image and masks won’t give you chain links wrapping around the letters.
ive tried doing the image and masks and it didnt work well
Indeed as it will just look as if the chain is a flat piece. You’ll need a 3D software such as Blender, or maybe Adobe Dimension. https://www.adobe.com/products/dimension.html#

Adobe Dimension is a set of 2D and 3D compositing design tools with an approachable, modern interface for easy compositing of photorealistic graphics.
does anyone have experience designing fonts or typefaces?
which adobe software is best for it?
Hi, you could create the shapes in illustrator if you are more used to it, then use the fontself plugin: https://www.fontself.com

Create custom fonts in minutes with Fontself Maker, a powerful font maker easy to use and made for all creatives.
The best to create a font is still to use a dedicated software that lets you preview the fonts in context. Glyphs mini on a Mac is relatively inexpensive.
There is the free Fontforge: https://fontforge.org/archive/
or https://birdfont.org/
and for commercial products there is https://www.fontlab.com/font-editor/fontlab/#buy
Can someone help with a mistake I made (Im newer to Photoshop)
I made this thumbnail and randomly a white dote appeared and idk how to get rid of it lol idk if i accidentally erased something on accident? anyway its still there even if i move the text it just keeps showing up on the next layer.
https://gyazo.com/6fc0a41bb80e4c6cfa56f86ea3f0fe45
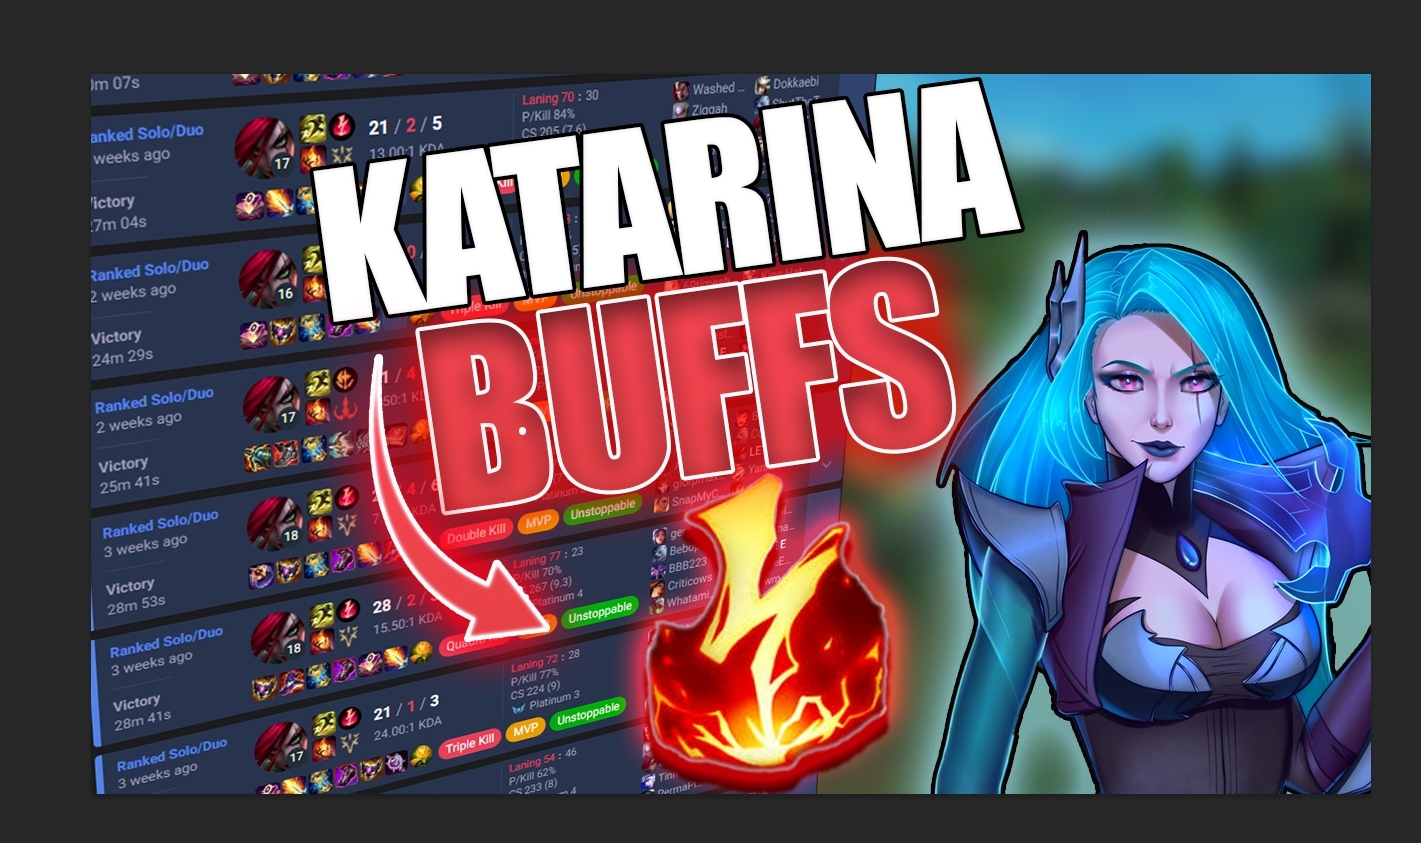
see the white dot on the "B"
Perhaps there is a tiny hole in you B... If a white stroke is applied => the white stroke will show up...
BUFFS has a Layer Fx applied on?
Please take a fullscreen screenshot with the buffs layer showingg in the layers panel.
If the Fx is applied on a Group (that contains BUFFS+the Arrow) and some other layers it could be a residual semi-transparent pixel on one on these layers...
The stroke Fx applied to the group will be applied on this pixel even if you can't see it...
As @hushed niche said, sharing your layers panel (particularly the parts with the atroke Fx applied on) could help us to figure out ...
I just figured it out a second ago I just kept clicking the eye to figure out which layer it was on. I somehow created a layer with a white dot at some point 💀 Just deleted it and done. Thank you for the help 😄
You're welcome!
i followed the steps i think it looks better now


i only i want the orangs colour and rest all the color i want i isolate


how can i accomplish this dark to light top down gradient with a filter?


use gradient adjustment
Could you clarify? Not sure anyone can understand what you're asking for...
Are you asking about how to apply a gradient over a solid layer?
yes exactly
sorry im not very good at articulating technical questions about photoshop
why is it doing this


the gen ai keeps giving me these white lines

opened a new doc and it looks like this
you can play with opacity controls if you want some transparency in the black...
ahhh ok I was changing the opacity of the layer and it looked really bad this is way better thank you
Gave +1 Creative Carma to @viral palm (current: #8 - 936)
looks really interesting now vs how it started, thanks for all the help


Gave +1 Creative Carma to @viral palm (current: #7 - 937)
Is there a way to completely remove certain red veins? I tried overall reducing their impact with selective color and mask but there some i'd like to remove all together and have the area look like blank sclera.

worked way better than i thought it would
Hey there!
Question about actions:
So, I have an action that I made a while ago, and the last step involves adding a curves adjustment layer and setting certain values. Well, those values are wrong, and I've figured out what the actual curve should be. Is there a way to replace that last step of the action with my new curves layer?
anyone know why i get this random border around everything i make

Can you share a full screeshot of the Photoshop interface? With the layers panel visible. It's easier to spot things that may happen
You can double click on that step in the action list, which will open the curves action associated with it, in which you will be able to correct the data. And it will save it (so if you need to keep the first action intact, I'd suggest to duplicate it first)
Scroll down here if you want to find the exact step by step
(it's old but still relevant)
https://www.photoshopessentials.com/basics/photoshop-actions/editing-an-action/

Learn all about how to edit an action in this fifth tutorial in our Photoshop Actions series.

maybe this was asked before, but i can't seem to find it.
but is there a way for me to open dds files in my macbook photoshop?
i understand in windows, it should be easy, just download from nvidia or intel.
any workaround for macos?
I am not a Mac user (nor a DDS files one to be honest) but there should be a plug-in available
Let me try to find that
Check this thread, in case it helps
https://community.adobe.com/t5/photoshop-ecosystem-discussions/open-edit-save-dds-files/td-p/12757780
https://community.adobe.com
Trying to open some game textures that are in DDS format to edit and save back to DDS in the game texture folder. Is there an official DDS plugin? If not is there a 3rd party plugin capable of opening and saving back to DDS when done editing? Running Windows 11. Thank You.
And someone added that in another related thread, which might help as well

Sorry I just realised that the link I shared was for Windows... My bad.
Let me ask around
Which Mac version do you have?
i would like to reduce this down to 6 colors for screen printing, but everything has so many shades, what is the best approach to this?

black , white, red, purple, pink, light purple would be my cohices
Are they vector shapes?
You know you can have more colours than the number of passes with screen print? You create the extra layers by blending them and also using halftones
Granted it's a massive hassle 🙂
The quick way would be to try the "posterise" adjustment (either a new adjustment layer or a new adjustment on a merged layer and reduce the number of colour to - say - 6
But it will give you only an estimated "look" to which you can built on your re-colour process.
The screenprinter will need to do a separation using the channels (basically export the channels as files, one by one)
There is a certain amount of shading in that image that will need to be replicated by other menas - ie: Halftones)

here is how it looks with the posterise effect, so particularly on the face, if you want to fix that, it will have to be either halftones to simulate the gradient, or a gradiated - say - purple layer, at lower opacity, so it gradually blends with the skin tone
So if relatively easy to redo them by hand, if the shapes are vector, it will be a drag if you have to recolour by hand.
I think it will be better to ask to the person who screen-prints it for you, and see if they can make it work with lowering the opacity of some bits and use the blending nature of some screenprinting inks
as in skintone+ light opacity purple will give you a darker tone in parts
Around everything or just Shapes made with shape tools
It could be dash stroke with pattern... As @vapid flume andrine said a screenshot of the whole Photoshop UI could help!

they do not blend any inks
no overprint option like that
i already asked
its maximum 5 color process
OK< what about the rest of the questions then?
Vector? Ratser?
i convert all the imagse to vector before i send usually
and i separate the layers
but they said i can send them a raster image and they could work on it
these are not ordinarily printed shrits
they are all over print shirts have many restrictions

I cannot see any other option than to recolor manually, but it should be easy with vector shapes. For the gradients, you will have to convert those bits into halftone to mimic the gradient
No, you need to create a half tone from one of the channels
how do i do that
Manually, with the mode>bitmap
what about t he effect pixelate halftone functioN?
Honestly, I would do in Illustrator, and then create the separation in Photoshop once the rest is done
or ask them to convert it on their end, that's something they might do, screenprinters usually do that
well id rather learn how to do it myself
so how do id o this mode bitmap stuff
i will practice it rn
I will try to get you a tutorial, not sure if it's still available
is it an ilustrator or ps tool?
btw the screenprinters said
if i use a halftone brush
This is in Photoshop
they would print it the same way
what they said was for the halftone dots, they make it hollow and fill it with that color
so it would be an empty hole
i have some examples sec
But the bitmap function transforms gradient into the relevant halftone gradation, if you use a brush, you will not convert the gradient, you will brush on it
absolutely not the same thing

I will need to go soon anyway, I will try to get you the tutorial
that's a continuous tone image, converted (and not painted over) as an halftone: it's a converstion


Screen Print Direct
Making halftone patterns for screen printing is a great way to add shading and texture to your designs. Preparing your artwork correctly to print is half of the battle when it comes to screen printing Halftones. Feel confident your Halftone print is ready for the press with this step by step guide on preparing the artw

In this tutorial, we'll be teaching you how to create perfect color separations in Photoshop using the Filter Gallery. By the end of this tutorial, you'll be able to create beautiful prints with perfect color separations every time! All you will need is adobe photoshop and some patience. Enjoy
Start Printing & Selling Merch Free: https://www.ap...
at the end, the screenprinter will probably need 5 PDF files from the different channels, so you need to export the channels as separate files
Of course!
the plain colours will be all white, the bloacked areas will be all black, and the shading will be with little dots
like on a newspaper
You could also use the spot removal tool on anew layer, set the tool to sample this layer and below. Then you can adjust the opacity or blend mode of said layer.
anyone else 👁️
Please show a fullscreen screenshot with selected shape and visible control bar. It could be something like this, for example:

How do they draw so well inside the vectors? my lines dont look anything close to the ones on the left. i really cant figure out what brushes to use and how or if to blend it in really

painting over vectors in photoshop in general looks quite bad and always smudged, i really dont know

how would i be able to recreate this without drawing thousands of lines?

are there shapes and effects that achieve this look?
it doesnt need to be exact, just resembleing a neural network in the brain
hey i am wanting to print some stuff onto a shirt and im wondering how to make the designs print ready and what should i do before hand so its the best quality possible
i am new to this stuff by the way i been using mostly gimp and canva
also i been doing just text based designs
printing with what
Most of design like the one you've shared were probably made in a vector based app (like Adobe Illustrator)
We (Sandrine and I) already asked for whole UI screenshot... The user probably left for the day and will come back later (or not)😉
can you help me with my halftone issue franck
Hum... I'm sorry but I'm not really experienced with printing process... I'm a 99.9% Digital user...Sorry
I’ve seen several posts but do not understand exact you are asking for…
i need to make halftones to simulate another color
they said i couldnt use a halftone brush
when screenprinters print the transparencies it doesnt relaly matter cause they separate the colors by layers
so i dont see why i would need to use something besides a halftone brush
Look for filter.>render>fibers. But I’d rather look at substance’s 3D shaders, another Adobe product (not part of the creative suite)
and i need to halftone certain sections of the image not the whole image
Wait, didn’t you ask this recently in the Illustrator Discord? It rings a bell.
You could select a part of the image and use a halftoning filter, with so so results, as Sandrine already described. But I’d use the Illustrator Phantasm plugin by Astute graphics for complete control.
is it free to use?
Yes, how will it be printed? Silkscreening? Or vinyl cut? Or inkjet then thermal print?
149$ a year 🙁
No, it is a commercial plugin. But I would go to your print shop and ask what they recommend for the color separation, it is a profession/craft by itself, that has service providers for those issues. https://t-bizcolorseps.com
Found this interresting video on how to use channel to create separation for screen printing... Perhaps it could help you (particularly if you have a number of color limitation)...🤞
https://www.youtube.com/watch?v=P7-HVhFw0Js

Learn More about ActionSeps™ - https://actionseps.com/actionseps-ad-landing-page/?el=YouTube
Download the image in this video to practice - https://actionseps.com/wp-content/uploads/2025/09/Knight-Student-Example-scaled.jpg
In this video, I cover how to separate simulated process screen print art manually, step by step in Photoshop.
Learn t...
Hi
@hushed niche the color separation isnt the issue
its only 6 colors
im trying to make halftones to simulate more colors
anyway ill just use a brush
or the halftone effect in illustrator
i think halftone effect is better then u can add some small touches w/ the brush
It'll be screen printed but I was recommended dft because I'm not planning to sell so wouldn't need a bundle of quantity but I'd like to screen print because I heard the quality is better
Screen printing but maybe dft I'm gonna have a printing service do it for me
You are on the official Adobe Photoshop server
<@&548221840750018590>

sorry...
Would you go to a bank to ask how to open their safes ?
zombie how many colors are you doing
sorry
Dft ?
how much cost it will be...
Oh mb its dtf direct transfer but I prefer screen printing but up to the shop I guess
Gonna be doing one for now
Ok, direct to film
Ohh that's what it means yeah that
I wanna make sure the image im using is basically good to be blown up
What steps do I need to do before hand n stuff
If you are a student, there are interesting rates, and your school might even have licenses, if you study design/photo
DTF one color? whats the point
yes im student... they r not providing originals
DTF is really cheap
You told us it’s text base designs, do you have an example? If it is just single color text, vinyl cut is the way to go…
A good case for piracy@adobe.com
Seems like we shouldn't have to explain why we don't allow these types of discussions. But I can clarify if need be. :)
means ?
See the rates here, you might need to change to your country.

Adobe Creative Cloud for education provides educational institutions with industry-leading creative tools and centralized software management and deployment.
here it is im gonna basically put gold foil over this so its just gold

is this print ready?
It’s not a service for creators to teach them one can steal software. Then what about the students/artist creations?
In this case, I’d work in illustrator, output vectors for vinyl cut, there is gold finishing too.
(It is an email address)
i dont think i need gold finishing because the gold foil is gonna go on irl but the text is gonna be in gold so when the foil wears off itll be gold under you know and what do you mean output vectors
i am new to this stuff by the way
i wouldnt be able to just send the printing service this image n expect the quality on the shirt to be good?
i made the resolution higher and stuff also i know i have to set it to 300 dpi probably still
This find of work should rather be done in Illustrator a vector design program, and not a pixel based one: https://helpx.adobe.com/photoshop/using/image-essentials.html
That said, contact your print shop I gave you the theory, they know how it works in practice with their machines/srtup.
Is vinyl cut something a print shop would do?
Yeah I contacted one for a quote I can just ask them some stuff also
I'm gonna use BNB printing service
Some of them, yes. The same machine can be used for t-shirts or to wrap a car, the materials differ. Nowadays they are often called cricut https://www.creativebloq.com/buying-guides/best-vinyl-cutter-machines

Creative Bloq
Discover the best vinyl cutter machines for making stickers, banners, cards, T-shirts and more.
Oh okay that's interesting
how could i snap all these smart objects to this grid in one fell swoop?
made a rookie mistake and designed it without the grid initially

but i want all of the pngs to be the size of the squares dimension wise and fit into the grid. Would I have to go in manually and align each one or is there an easier way to do what im trying to do?
You can create a selection from the first cell of your Row/Column then select all elements of this row/column with the move tool active (V) then hold CTRL+SHIFT and click on the elements you want to align.Then use the align icons to align selected elements on the selection...
Hope the short video will help you to understand what I mean...
Anyone know where I can find Free Die Cut Sticker Mockups?
what would be the best way to create catchlights like these?

Paint them.
"Mockups?"
Hi, can someone help me imitate a font style?
Yeah, which one?
Hey @vapid flume
Thanks much for the response.
Sorry just read it.
Yeah everything seems for windows.
Kinda surprising DDS files are not "common" files to be edited in macs.
adobe photoshop v26.10
i'm using the latest macos tahoe 26.0.1, if that matters.
Gave +1 Creative Carma to @vapid flume (current: #6 - 1040)
Yes! Thank you, I have not looked into that Layers menu for that Reset Transformation call 🙂 nice!
Gave +1 Creative Carma to @vapid flume (current: #6 - 1041)
I think it’s related to who developed this format as its microsoft proprietary format
Mainly used in 3d apps and game engines
Glad it helped!
I am trying to contact someone who used to build plugins for that very purpose but they haven't answered yet.
I checked on Adobe's marketplace for other plugin and no luck so far. I will try to find other things.
I will also try to ask on some 3D forums.
Alternatively, do you want to try asking the question on the Photoshop forum?
https://community.adobe.com
Master Photoshop with the help of our global community.
ohh that makes sense.
didn't know this.
yeah, dds files i want to open/save-as are from a PC game.
Probably it will be easier to ask someone to open that file on windows for you
I asked on a 3D forum I'm in
Oh wow, thanks so much for the effort!
You really didn’t have to go that far. Haha.
I was just hoping someone here might have a quick answer or already have the DDS plugin on hand for macOS. I didn’t realize DDS isn’t that common on Mac.
But that’s fine, I still have a Windows desktop with Photoshop. I mainly use my Mac for work and was just hoping I could do some DDS Photoshop work during work hours. 😄
For now, I’ll just do what I can on my Mac, then transfer the PSD file to my Windows desktop to export as DDS.
Gave +1 Creative Carma to @vapid flume (current: #6 - 1042)
I have asked around, if I hear something, I'll report back!
You probably had bonus points for asking nicely 🙂
Much appreciated! 💪🏼
I have this lion icon, i want to change the colors but my problem is between the blue and the white there are variations of blue, is there a easy way I can change all of these variations of blue to the same blue?


I cant manage to get rid of that hard edge because it has like 20 different blue tones
It's because it's been compressed as a Jpeg, from what is likely a vector object.
A real logo is always vector.
So you can try multiple ways
- try to vectorise it in Illustrator (image trace) and ask it to reduce to 2 colours (or even just one, since the white could be the paper colour)
- reduce the number of colours in photoshop to two, using image>adjustment>posterise. It could work on this image
- select only the white with the magic wand with a tolerance of 1, and invert the selection to fill the rest with the same blue.
- retrace it with the pen tool in order to get a proper, scalable, usable vector logo...
personally, I would try number 1, and if it doesn't work, try the last one.
Did you create it, was it provided by someone else? If the latter, that person should be able to give you a vector file (.ai, .eps, .svg etc...)
- I dont have illustrator right now
- tried the posterise option: did mostly a good job, it reduced the 20 different blue tones to like 5, but still not perfect unfortunately
- Magic wand way kinda doesnt work too well because the white apparently has some different tones too, so the shape of the lion gets destroyed kinda
I generated the Image with ChatGPT. Tried to get it as a vectorised image but the AI is not able to do that, always messes up something
Yes, that's why there is still a need for crafty people in the industry 🙂
Try to posterise using only 2 colours and then the magic wand workflow
Or try the posterise and then upload it to this vector converter
https://new.express.adobe.com/home/tools/convert-to-svg
Adobe Express
it's free
the thing is, with Illustrator image trace, you can reduce the number of colours but you can't on this online converter, so you need to make sure you only have two colours there first
Posterising + Magic wand worked well, thanks a lot!
Gave +1 Creative Carma to @vapid flume (current: #6 - 1043)
I see, i will give this method a try too, thank you

Glad it worked, the edges are really jagged, but the svg converter will likely smooth out a bit.
If you have the choice, try to have them downloaded as PNG, as there will not be compression and is likely to be cleaner in the output.
If one day you would decide to retrace it with the pen tool, since it's a symmetrical design, you only have to draw one half of it, and then copy, flip and position correctly. It saves a lot of time!
Yea it turned it into this:
im struggling a bit to get into photoshop in one piece but i will figure that out

I can't get the generate tool to follow the hair's style. Is there a way to generate a promp from a selection?
If not it would be awesome if somebody who can make it happen would do this. I've got to sign up for some other tool

Generally you can select first annd them input the prompt either in the contextual bar or the generation panel
That's how I have been using GenAi within Photoshop, always select first
That said, I never "create" things from scratch, just adding or removing stuff from a photo.
Usual guidelines of selecting precisely and at the same time selecting a bit more than what you need applies here.
The better the selection, the more accurate is the result.
Selecting a bit more will mean that the engine will take the surrounding area into account to generate the result.
Sometimes it's just about creating the right selection as much as the right prompt
Maybe someone with a better understanding of GenAi will give you a more detailed answer!
While perhaps you want to learn how to utilize generation, in this case it might be simpler/quicker to copy the left side of image and copy it onto the right side. My route was copying it, flipping it and using an inverted mask to paint the hair in after I lined it up. If you find it too symmetrical you could do things like warp/liquify.

If the only goal is to change the color, you also could try to use Chanels to make a clean selection=> turn it in an inverted mask on a solid color layer... Doing so you'll be able to adjust colors afterwards.
I cant create new files and idk why
I tried It with different versions and nothing
Can you explain further? Do you have an error message, can you describe the steps you are taking that leads to "I can't create new files"
Can you share relevant screenshots?
Its Just as simple as i say, i log into Photoshop i click on new files i put on the resolution that i want and stuff and them nothing happens
That video helps a lot, thank you
Gave +1 Creative Carma to @viral palm (current: #7 - 938)
I cant send u screenshots at this moment becouse im outside
Can you share a screenshot of what you see when you craete a new file (before you click to "create")

Because the solution maybe in there, but I can't answer your question without knowing more
Yes, but what kind of settings there is, that's the question.
Also always check you're on the latest version (26.11)
You can check by going to Help>about photoshop (and also in the CC app)

@vapid flume
latest version
uhm
wait i solved it
i just changed centimeters to pixels xd
hello guys
just a quick question...
why is my acrobat so laggy?
i have this .pdf file and i wanted to use the Edit a PDF "function"
but when i do it all starts to lag, everything is so slow and there is no way i can work like that
is it just for me or somebody else have this issue too?
No what happened to the pink and blue😭
Can you make the pink and blue normal please?
low resolution bro ://
It looks like you inverted whole image
So you don't have Photoshop and you're asking for someone to create this for you? Is that correct?
Yea
This channel is for people seeking help with the app. Please make project requests in the #💬chat-general channel.
If someone is interested in working on it, they might reach out to you.
Sorry didn't know that
I noticed some flakiness with Acrobat. I completely uninstalled and reinstalled it.
i did that
That's genuinely what I wanted to see 🙂
but acrobat seems to work normally only the Edit PDF seems to be really really laggy
there is like a 30sec delay maybe more with every press of my keyboard
I couldn't even edit. After reinstalling it, now it works as expected. Not sure what else to say about it.
Hmm okay thanks anyways ...
I barely use Acrobat, but when I need to edit things, I've noticed that if I cut my internet access it gets better. I have no explanation!
Maybe the AI features they put in there. Probably reaching out to the cloud to analyze the doc.
THat's what I thought, but I can't be sure
Worth trying?
I suppose if you want it to summarize a large document. Generally, I don't use the AI features in there.
Hello a I have a problem with my adobe, someone can help me ?


Can you tell me what this says in English? Is it a internet connection issue? Are you signed in to an Adobe Acccount?
Adobe Photoshop
⚠️ Are you connected to the Internet?
We can’t verify the status of your subscription.
We’re unable to reach Adobe servers. You might not be connected to the Internet. Check your Internet connection, then try again below.
If you continue to experience problems, see our connection troubleshooting guide.
Error code: 12015.
[Retry] [Quit Photoshop]
hi people! i am new to photoshop and this is a very embarrasing question to ask but how can i put artboards together so that they dont do this (overlap) ? 💀 chatgpt does not help me

The first and easiest thing to try is: open the Creative Cloud app and sign out of the Adobe Account. Then reboot the computer. When Windows comes back online, open the CC app, sign in and then try to launch Photoshop again.
Are you using a VPN or some Firewall that is blocking Adobe Creative Cloud?
If you grab the Artboard Tool (usually located under the Move Tool) you should be able to select and move the artboards around.

thank you , the thing is i want to put them super close next to each other but they overlap :-(
no vpn just windows firewall
Disable the Firewall temporarily to see if that that is what's causing this.
I would try these things in order to see if they resolve the issue.
Sign In and Out of Creative Cloud
Open the Adobe Creative Cloud application and sign out of your account. Reboot Windows. Sign back in, and then try launching Photoshop again.
Disable VPNs and Firewalls
Temporarily disable your VPN and any third-party antivirus or firewall software. Check if the issue is resolved by trying to use Photoshop while these are disabled.
Check Your Hosts File
Open Notepad as an administrator.
Go to File > Open and navigate to C:\Windows\System32\drivers\etc\hosts.
Delete any lines related to Adobe servers (e.g., 0.0.0.0 adobe.com). Save the file and restart Photoshop.
I don't know what "super close" means but you can reposition them on the Workspace. Eventually, super close will become "overlapping." Not sure what else to say about that.
Thanks u
Gave +1 Creative Carma to @ripe quest (current: #2 - 3155)
Perhaps could be an "Opera" user issue too(?)
I doubt it if Photoshop is already installed.
So true!... sorry
Do you mean that it worked?
I’d post in here for further help: https://community.adobe.com/t5/account-payment-plan/ct-p/ct-account-payment-and-plan
is there a way for me to extract just the catchlights from this image? I also wanted to find a way to afterwards have each individual light be its own movable object, not sure if that is possible.

You could select, copy and paste them. You could also just make a new layer and trace over them with white using a soft round brush. Then add a bit of blur.
first, select the entire area with catchlights, then go to select>color range>highlights, it will select all white parts, increase/decrease range as per your preferences, and you will get a selection of just the catch lights. duplicate this new layer multiple times, and use different masks for different individually movable catchlights.
@sturdy rapids
wicked
It would be easiest to just paint them. Making selections and doing all of that seems pointless.
They are essentially ellipses with soft edges.
100% agree with D.Humann I would paint them on their separate layers so you could adjust positions and opacity afterwards and independantly...
its nice to know both methods
i dont know anything about photoshop im like a child, i take notes on everything that's shared with me though
sure, but he wanted to "extract" catch lights from a given image, painting them new is not extraction, so my solution is not pointless in this particular query.
Attempting to make selections of tiny objects like that generally will not turn out well. It would be easier to spend the time adjusting your brush(es). Then you can have a brush to make them whenever you need to.
But do whatever you think is the best use of your time.
that makes since, in the future if an image has a single catchlight that i like and want to use then it would be easier then having one that is broken up.
I saw someone do that once but didnt know how to recreate the effect
Its as I said. Soft Round Brush. Simple as that.
hello guys, i use the ruller to remove a text, after that i used the stamp tool but now i have big change in the color gradiant, i there a tool to make a more smooth fade for this sky ?

maybe with fusion mask ?
just use the remove tool over the bad part
@mighty zealot
you talking abou just the red-marked part or the whole white-marked section? @mighty zealot

no, the fade in the sky. with the stamp tool the sky have like cloud of color
and i want it to be more smooth
somehting like this?

yeah its better
anyone know how to get photoshop for free?
not the right place for this question lmao
Hi everyone. I'm working on cleaning up an AI image and I'm trying to figure out how to remove some excess details. Does anyone have a good tutorial or a good method for removing excess details such as those in this glove?

yoooo
Get someone to pay for your subscription. Get a job at Adobe.
where then?
I want a job at adobe, how do I do that?
i got it for free before so that why im askin
Send Human Resources your resume/CV.
idk, not here
bet
Don't ask for pirated software where.
If you continue to discuss that topic, you'll be removed.
how do I contact HR? are they on discord?
Is there a channel here that might be better to ask my question about excess details?
No. You would go to the Adobe website. Find the careers page. Search for available opportunities in your region of the world. Locate a position that you're qualified for. Apply for the position.
This is the channel..
thanks dude
Gave +1 Creative Carma to @ripe quest (current: #2 - 3156)
Thank you 🙂
Gave +1 Creative Carma to @ripe quest (current: #2 - 3157)
However, I'm not sure what you're asking for. "Fixing" a terrible AI image requires skills in Photoshop. What is your skill level?
Intermediate
Why would you "fix" that image instead of just generating a new one?
I'm just looking for a technique that might work. I like the composition of this image, and generating a new one has subtle changes that I dont care for. Also, im not super familiar with photoshops AI so I'm not sure if I can use that to remove the details
There isn't any automatic method that is going to "remove the details" as you are putting it. Generate a new image using that one.
That image is a mess, to be perfectly honest. Its not coherent at all. What details would you remove?
The image will be on a 2 inch challenge coin so a lot of the details aren't super important.
I would try to use a different AI attempting to clarify and define the image. However, even that probably wouldn't do a good enough job without changing the image too much. Thus, I would just create a new image.
wait @paper blaze I'll show you a trick, let me record my screen
🙏 thank you
Gave +1 Creative Carma to @dire crystal (current: #490 - 3)
Oh interesting! I'm going to play around with that. I think I could fine tune that a bit and make it work. Thanks ido!
you can fine tune the values in the filter as per your liking and also play with the mask opacity
@paper blaze
make sure to make the duplicate layer a smart object so you can adjust the filter's values later
I need help, when I use brush clear mode it on something I did with the brush like just painting on something it just erased the thing I painted on like making him transparent instead of erasing things I did with the brush
make a new layer before painting with the brush, its happening because you're probably painting on the same layer
@spark glacier
o ok
It works thanks :DDD
Gave +1 Creative Carma to @dire crystal (current: #385 - 4)
Hello, how do i make a logo of a raw car photo i took? So I can have it printed out of hoodies and shirts?
Hello, I am wondering, what would be the best process to make the logo seem more at one with the picture I added it to?

take down the luminosity of the greens, looks artificial being brighter than the white color next to it
@dire crystal I been getting into car photography and was wondering should I be editing on photo shop and Adobe lightroom? Or just lightroom?
lightroom is more efficient and time saving if you dont have to make a lot of changes to the image, just the colors/adjustments etc, and some other minimal touchups, go for PS if you want to change objects, do more drastic changes etc
What do you mean by drastic changes?
like if you want to change the car, remove a lot of things, add objects from other images, basically changing the entire image
look at this
Ohh okay okay good to know!
Also how do I make logos? I want to make a logo of my brothers car to have hoodies printed out to surprise him but I'm struggling with making the car into a logo
make it in vector, use Adobe Illustrator
I was trying but I was struggling so much I don't understand it too much
I tried videos and they don't help alot
Looks much better, my first time wokring on a thing of this type as I usually do simpler graphics but still far from perfect

can someone help me please I am struggling with some safety form for work..
yep, looks a lot better. one more suggestion, try a darken/multiply blending mode on the logo on the white surface.
tell me
DM me
After multiply, also. any suggetsions for the car, it still feels off

yea the car is not at a right spot for this camera angle, try changing positon and size of the car
Im trying to save my project and this is all i get, any idea on why i cant save properly?

check if your system ram has enough space, never seen this before, but the ' * ' next to project name means the project has unsaved changes so its deffinately not saving, not even in background
or maybe just try hitting "return" when this pops up to see what happens
@opal nacelle
I think creative cloud is struggling to sync as i have lots of free space but the cloud icon in CC is just spinning
been like this for a few hours now

i guess ill have to wait until its done
how's your internet spped? library sync should not take this long
Sometimes logging off and on again helps
ill give it a try
in my office its quite slow, so imma bring my laptop somewhere better but also i havent used this specific macbook in a few months but ive used photoshop and illustrator on another one, so there is a lot to sync
There is a 3rd element in that sometimes there are maintenance slowdowns, that you can check here
https://status.adobe.com/
Adobe Status provides service availability and performance impact information for all Adobe products and services. It includes incidents and maintenances that are ongoing or in the past that affect Adobe products.
oh, but library sync just syncs your presets/brushes etc, not the project files. thats done when you open a specific project. thats why I said library sync shouldnt take this long
office internet might be the culprit here, as saving a project will need a better speed
i moved to a better spot and library is synced but its still not saving
i actually have 2 saving windows now too

and photoshop crashed :/ darn
okay quick question, what macbook youre using
M1 Pro 2021 16gb ram
2021 should be good, older than 2016 CPUs were an issue about an year ago, they were facing the same issue as you are.
Does photoshop do regular backups? so you can possibly recover a file?
yes, you should have a recovered document if you didnt change default settings
just reopen PS
Hi I got a question and cant find the answer online.
Today suddenly my photoshop starts lagging when I want to do something with the Text tool.
I didn't do anything new, no new fonds or anything since I used it last time (yesterday) and then it all just worked smoothly.
It's only for the text tool, I got 0 problems with the other tools.
Does someone have an idea how to fix it?
using CS6
could you edit an image for me? itll take like 2 mins to do I think
I cant do it myself because i have no idea how
sure, hmu
it opened blank, no file automatically recovered :/
i feel you, adobe gods have cursed you today
the autorecover folder is also empty
idk tbh but maybe 1.5 hours
Sorry it happened to you. Just a thought for next time. Auto-recoverey, as far as I rememeber, will only be triggered if the file has been saved at least once
that interesting to know, I have a habit of saving while I create the document/import an image by hitting command+J and then command+S, and then start working on it.
well it was the first save that failed :P so that was unfortunate
So you absolutely need to save your file when you open it, or just started adding a new layer.
One thing I do to help, is when I open an image, I always duplicate the background layer
-
first of all, it serves as a backup, I also usually lock it (and if it's a background layer, it's already locked) and hide it. That way, no matter how I might mess up my file, I'll always have the original secure.
-
Duplicating the layer makes the file automatically "save as", instead of "save", because only a .psd, .psb or .tiff can be saved as layered files. That will automatically ask you for a new location and new name when you will try to save, hence avoiding to overwrite an original PNG or JPEG.
-
Once saved, you will see your file changing status and name in the tab name, you will know you are working on the right version
Also check out for the star icon there (see screenshot), the star indicates the file isn't saved.
I get into the habit of saving everytime I do something important to the file....

You shouldn't be saving after 1 hour and a half of hard work. I know it's easy to say after the fact. I'm sure everybody here, even the veterans learned it the hard way. Consider it a list of mistakes you have to do, that is now hopefully ticked off the list 🙂
Even if it wasn't the software fault, stuff happens: Power outage, emergency, hardware fault... When you work on commercial stuff, you learn pretty quickly to save often. It becomes second nature, like looking in the rear mirror when you drive, you really have to hammer it down and you will soon doing it through muscle memory.
Yeah i know i tried to save a few times earlier but nothing happened and i thought it was just internet that was bad so i just kept working and moved into another part of the building with better internet, and whilst trying to troubleshoot i kept working on it so. Im a very frequent Ctrl+S'er and turn on as many backup features as i can when i find them
so i tried to save maybe 30 times lol
Did you set up the file to be saved locally or through the creative cloud?
it never got that far, every time i tried to save i just got a blank window popping up
i tried to close other programs, made sure i had enough free storage, i had internet, i was logged into creative cloud and all that
i unplugged my sd card just in case it got confused about storage spaces and everything :P
I'm asking because it would have had nothing to do with your internet connection if you tried to save locally.
Try to see if you see your file here
https://www.adobe.com/files/
It can't hurt checking
yeah i know, but i usually save on Dropbox via Finder, so i have to choose "Save On This Computer" and then choose the correct Dropbox location. which saves locally until its uploaded to dropbox, then it is only a shortcut file locally i believe. But the save window was completely blank
wasnt there either, but there were a lot of other files that i havent seen in a while lol, thanks :D
Gave +1 Creative Carma to @vapid flume (current: #6 - 1045)
Oh wow! , thanks you 🙂
Gave +1 Creative Carma to @bold galleon (current: #34 - 62)
Are these made in photoshop or ilustrator?

I would say probably with a vector based software like Adobe Illustrator (99.9% sure) ...
Even if you can achieve something similar with photoshop Illustrator is way more efficient for this type of work...
If I were making these, I would use Adobe Illustrator. Then they would be crisp, clean vector graphics that could be scaled to any size without any fear of quality loss.
Well, it could be a purchase problem due to some updates or something 😕
Like, a prob in the version u have
I feel pity for you, 1.5 hours for nothing 😕
Kind of a very basic question but If I have a thing of text on Photoshop how do I select that text to both type in it and change the font?
Hey there.
So maybe (hopefully) someone has a solution to this.
Whenever i try to open PS it freezes and crashes. I already uninstalled/reinstalled everything and it always crashes on "loading brushes". This happens already since a few weeks now. To be able to "maybe" (means if i'm lucky enough) a file i have to do a full restart of my PC. I won't be able to start PS a second time after that.

Select the text tool and click where the text is (It needs to be editable text of course!)
to change the font, select the text by draging the mouse along the letters and check at the top of the interface where you'll see the font and size for you to change
These are very basic stuff, If you're stuck with stuff like this, go to "help">"hands-on tutorial" and then choose beginner in the drop down menu, you will get a very well made intro to the basic functions
How do you tell if it's editable text?
I am concerned the text I have is not editable
There is a bug going round (that I experienced myself, the team is working on it). You need to close Photoshop, relaunch it (it should work), go to edit>preferences>performance, and in the GPU submenu, disable GPU compositing.

See the bug report here
https://community.adobe.com/t5/photoshop-ecosystem-bugs/p-photoshop-26-11-freeze-at-launch-on-reading-brushes-amp-building-color-conversion-tables/idc-p/15532062/page/3#M127505
(bug reports needs to be done in the Photoshop forum, which is read by Adobe employees, this server isn't. I just happened to have had the same issue, that why I can help)
https://community.adobe.com
I just disabled the GPU compositing for now, which did the trick. I will keep an eye on the other thread and see when I can safely put it back. Thanks for the help!
Installing and reinstalling does nothing to the problem
thx. it is really annoying. i guess it came in with an update?
if it ever let me open PS again i will see if i get there xD
Just give us a screenshot of the whole interface of Photoshop, with your document open, with the layers panel visible.
That way I can tell you if it's editable
When posting here it's always the right thing to do: Post screenshots of the whole window. Many things can be sorted, just my looking at the different information we can see.
Yes, latest update, the patch should come soon as I've heard. If you don't work with complex compositing, disabling the menu won't do any difference for you
thx for saving my sanity 👍
Gave +1 Creative Carma to @vapid flume (current: #6 - 1046)

I figured it out I am just entirely new to photoshop and my class has us doing some simple introductory assignments but I am inept in understanding editing software so I am struggling to figure out entirely the process of how to flow through with this. I get a general idea of what it is asking I just don't know every feature to emulate what it is asking of this.

hi , what is this symbol, i ve enabled whatever it is by accident, random key mash ig

Does anyone know how to highlight or label areas in a photo?
Hey y'all, hopw your day's going well?
I was following this tutorial... https://www.youtube.com/watch?v=ruRquB6eSfs&pp=ygUSTXIgQmVhc3QgdGh1bWJuYWls0gcJCfwJAYcqIYzv
And something seems to have gone wrong 😅

solved, real finicky little thing
Is there anyone I can talk to voice to voice to answer a few questions about how to plan through a few basic excercises I am trying to do? Been struggling with figuring out how to work through a few questions I am having.
Which one of these is more appealing?
Please use #📝project-feedback for this sort of thing.
ty i will
Gave +1 Creative Carma to @ripe quest (current: #2 - 3158)
You can ask specific Photoshop-related questions here. If someone knows the answer and is available to help, they will probably reply.
well that would be my supervisors fault then as its a work account 😳
i got to export so i got a pic out of it, so that's at least good
Better?... You could draw a new one... or find a better camera icon and replace it...
I would suggest you to search for reference on internet and make your own with simple shapes...
Adding round corners to your shapes could also help your icon to match with the man icon...

Can you share some context? You can’t uninstall? The sledgehammer option is the creative cloud cleaner tool. https://helpx.adobe.com/creative-cloud/apps/troubleshoot/diagnostics-repair-tools/run-creative-cloud-cleaner-tool.html
Yeah, that looks good.
Not sure if you are developing a course or trying to pass some tests. Ask your questions here, don’t ask to ask…
Hi, you can setup the shape tools with a stroke and no fill, or you can select an area, Jump it to its own layer (CTRL+J), then add an outer glow of your choice (setup a style for one click procedure)
For those wondering, it is a color sampler, alt+shift click them or get the color sampler tool and hit clear in its option bar: https://community.adobe.com/t5/photoshop-ecosystem-discussions/how-can-i-get-rid-of-these-symbols-which-came-from-color-select-eyedroppers-mac-sonoma-14-6-1/td-p/14847552


Hi, you can use any software you are used to to label the screenshot. PowerPoint, etc. but of course photoshop can be used for that. The purpose of that exercise is for you to fiddle around, and discover things by experimenting.
why cant I access filter gallery? im on RGB 8bit rasterized layer

Maybe u choose the wrong layer it’s better if u share the full screen

u want to apply the filter gallery to a part of the image or the whole image?
Anyway, if u want to apply filter gallery to the whole image, u need to select the top layer and then press CTRL+SHIFT+Alt+E
u will get a new layer, and then u can convert it to a smart layer, and then u will be able to access the filter gallery
I just wanna make that skyline image a halftone filter
convert the layer to a smart object, then try filter gallery again @stoic dew
Did u see in your image that there is something at the top called convert for smart filter? u need to apply it first, and then try to go filter gallery
Gimme Dm if you are you a American

@dire crystal @pseudo frigate i converted to smart object, smart filter, and both and nothing worked
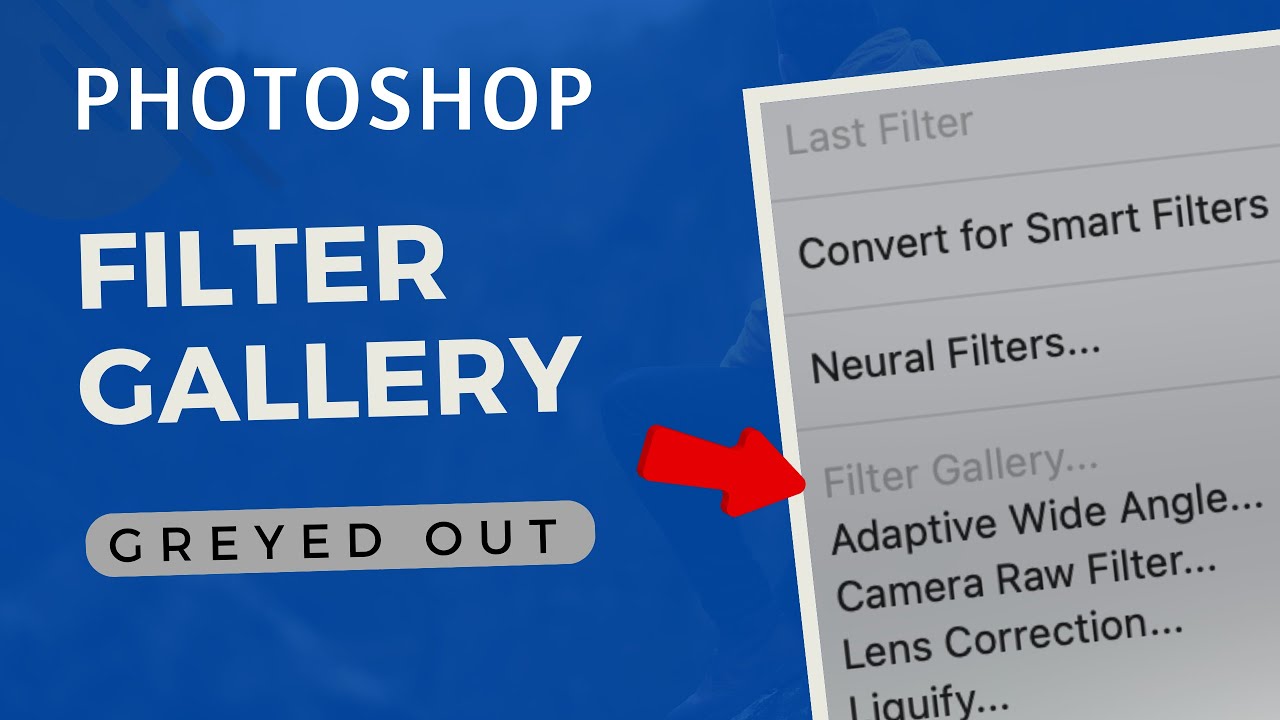
Subscribe: https://www.youtube.com/channel/UC51g2r_bWOQq-7Y-VwU9sYA?sub_confirmation=1
Hey everyone! Welcome back to the channel. Today's tutorial is all about enabling the Filter Gallery in Adobe Photoshop. Have you ever wondered why sometimes the Filter Gallery is grayed out and you can't access it? Well, in this video, I'm going to walk you...
try to switch to 16bit and then come back 8bit
Or try exporting the image and then importing it again
I know it sounds weird, but sometimes trick like this it does work for me

this is an assignment for a class im taking and the prof gave us a template
How much RAM on that computer?
32
A very large canvas size can cause the Filter Gallery to be grayed out and inaccessible in Photoshop. The software may disable the gallery to maintain optimal performance when working with extremely large document dimensions, as some legacy filters are not compatible.
Bro, that canvas size is so huge it looks like you’re prepping for a Times Square ad, not a simple design 😅
tbf its supposed to be printed on 11x14 paper as a book cover
but also if thats the case how else can I get a halftone effect cause thats all i really want
I would run the Filter Gallery on the photo, save it and then bring it into the final layout afterwards.
ur the best person ever ilysm
That canvas size is probably going to cause you grief, on performance alone. But then, yeah, some legacy functions might not work with a canvas above 30,000 pixels.
Parametric filters are such a powerful way to unlock new creativity, at least for me.
I noticed that I can import my own, but the format is SBSAR. Does anyone know more about SBSAR? For example, how can I import my settings from Substance Designer into parametric filters?
https://www.youtube.com/shorts/WDcNEvTrUGw

Non-destructive custom filters in #Photoshop (beta)? Yes, please. Build them in #Substance3DDesigner and adjust to your heart’s content using the new Parametric Filters Panel in the Photoshop beta app.
Haven't had any time to look into that.

Curious, found this on internet, but for a website, what is the strategy to create or have something like this?
I'm thinking to put this on the header, like corner left/right, but also maybe some leafs/branches running on the width
I think from last convo a PNG should be used, not SVG. I think you can technically grab anything and just get the texture right

As far as im concerned, this would be cut in half, made transparent with photoshop, and it would be ready forawebsite right
and if you were to create thisyourself from scratch, how would you go about it?
well, i just cut this in half, made it transparent, png and just put it on my site
though the quality isn't the sharpest..
Can someone cut object off i image image for free it are simple objects wil be awesome someone can do that!
If I understand your comment, I personally would create a brush based on the leaves, go in to brush properties and turn on scattering, play around with the axis and brush stroke around your canvas to replicate the garland effect and fill in any areas you want with a manual brush stroke.
Does anyone have any website suggestions to supply RAW images? Stock images sure but if RAW images are available then that's what I am after.
send it for me, i'll look at it
If you go to help>hands-on tutorial and you select "beginner" in the popup panel that appear you will see that there is a section on "get to know the interface". I guess what they ask is exactly what you will find in the mini-tutorial.
It's also the best way to kick-start your learning: Follow the mini tutorials from there
You can ask and share your images in #💬chat-general if you don't want to learn how to do it yourself...
@civic cape


GCFGlobal.org
Become more familiar with the Photoshop interface in this free lesson. It includes interactives to make you more comfortable with the program.
Hi, those are not characters from a dingbat font? You could use type on a path with them:
https://www.photoshopessentials.com/basics/type-on-a-path/
if not, convert the series of images into a brush. https://helpx.adobe.com/photoshop/using/creating-modifying-brushes.html put very large spacing so that the images do not overlap,
then draw a path and stroke it:

In this Photoshop Basics tutorial, learn how to easily add type along a path!

Fill your stockings to the brim with our Day 5 prize for 12 days of mograph – $750 to @aescripts ! Honestly, you might need a bigger stocking. #mographdays Enter here to win: https://som.bz/3XTzV7N
I think that they gave you values, but you’ve chosen the wrong units. Go back to their instructions and repeat them carefully.
Hey, im trying to make a welcome post but i just cant find the place to put the welcome/signed or something like that can someone help me with that?

yeah, can you share the steps/template?
I see. Makes sense. So the brush wouldprint different types of leafs - that's what you do in game dev right. And that way I canhave high quality leaves I can export in a pattern, and create my own pattern for this
thanks for the insight - and this would be done in photoshpo right, anything graphic like this photoshop
Gave +1 Creative Carma to @young fable (current: #1020 - 1)
Yes, so you could create a brush with the design of a leaf of your choice. A white background and a black silhouette of the leaf. You'd select a rectangular marque of the leaf. Make sure that the brush has enough detail to your liking of course.
Once you have selected the bounding box around the leaf, you go to Edit > Define Brush Preset. Name it to what you'd like. Click OK.
Once you have it saved, it should be in your brush folder. You can export the brush in the hamburger icon.
Alright, thank you very much for this. I'll save this for later and play around when I can. Probbaly a few weeks from now hopefully.
Really appriciate for tutorials like these 😄 Makes photoshop a lot less scary xd
Gave +1 Creative Carma to @young fable (current: #655 - 2)
You're welcome. There are free tutorials on how to create it as I have mentioned. Don't be afraid of asking for help.
Will need to probbaly get used to it and it'll take a whil ebefore I can do anything good with it, but suppose thats the journey.
Rome wasn't built in a day.
Yeah. Well see how it goes. I really need to learn this stuff because its super useful to have on websites. It elevates everything by a dimension if done right.
Most of this is "simple", vectors, graphics, arrows, icons - so should be able to hopefully master sooner than later
Take your time with any work you make. There is no need to rush in getting your work done because that's when problems start. Overthinking the issue just leads to unnecessary issues down the road. If I can help you with suggestions like what we spoke about, I will do my best to get back to you. Or someone else might.
Ah yeah, for sure 😄 Very limited on time as I need to find work, but well see how it goes.
Alright, really appreciate it and will ask in the future for sure! ^^
Good luck in your journey.
Trying to get things less perfect but ship - thanks! Have a good day!
PLEASE.
How do I get rid of this annoying text tooltip that always pops up in the middle of my canvas while I'm working with text?

I Googled but nothign I tried worked!
It pops up whenever you have a text layer selected.
Just a quick idea for the welcome...
TBH, I would remove the small standing player... Make the "in action" player and the club logo bigger and more involved in your design...
("less is more" often works in graphic design)
I can suggest you to make a quick search for " Welcome player post" on pinterest or google to get more inspiration...

Hide the contextual task bar...

I hate it too so I hide it and use the good old way 😉
Since I can't write in the report a bug forum, and sorry if I've missed it, any one else's Photoshop not opening up every time and crashing since the new update?
If you can't use the in-app feedback buttons you can use the community forums at https://community.adobe.com/t5/photoshop-ecosystem/ct-p/ct-photoshop?page=1&sort=latest_replies&filter=all&lang=all&tabid=bugs
https://community.adobe.com
Master Photoshop with the help of our global community.
I actually like contextual menu as it makes easier to work with display tablet
I have nothing against it and I can hear some people find it useful and convenient... But I don't.
Fortunately we can show/hide it if we want so everyone is happy 😉
That’s true
But the day they will force it to display I will be one of the first to complain😂
I mean i have a display tablet with only few keys so i find it useful as i can use those keys to my shortcuts
I mean i complain only about one thing that Adobe doesn’t have regional price for Poland which is but unfortunate, but yeah when they will start forcing me to specific workspace i will ditch PS 😂
Thanks. Seems rather complex for a simple repeat to me to make a brush lol. Is there a better software for this?
Gave +1 Creative Carma to @hushed niche (current: #12 - 296)
I also want to make a random pattern of individual svgs/symbols like this

is this easily possible in photoshop?
It would be much easier in illustrator with the pattern tool
Sure
But i want it non-repeating
like each "tile" is unique kinda so there arent tiles
Kinda like a denim tears hoodie but just more
There is a random pattern fill in Photoshop, maybe if you create more room around the tiles and run several times? https://www.youtube.com/watch?v=BFxeIJZGUSg

Discover this HIDDEN Photoshop Script that will allow you to generate a random fill from a pattern!
🎯 SUBSCRIBE to get more amazing Photoshop tutorials!
► https://www.youtube.com/user/photoshoptrainingch?sub_confirmation=1
📘 INDEX - Photoshop Random Pattern Fill
00:00 - Introduction
00:28 - Remove Background Using Adobe Sensei
00:59 -...
This tut explained what I meant with several runs, and a large scattering. There’s overlap, though. https://youtu.be/hIecbrr_V-E?si=RiO5T6vw3zgnuCE7

Random pattern fills are easy in Photoshop. You can create custom patterns from individual objects and then create random fills with a lot of adjustable parameters to achieve great effects such as textures, patterns, backgrounds and more.
This simple script that is not so obvious in Photoshop allows you to arrange various objects and individual...
can i make it so clipping text turns into one or sth so i can make sht like that

Could you explain what you mean by clipping text?
oh nvm it already works
i thought of merging overlapping text but thats already the case by default
There is this plugin: https://exchange.adobe.com/apps/cc/8a2bcc84/seamless-2
When I update Photoshop BETA, the description --for the most part-- states the same thing. Is there a way to hone in on what exactly has updated?
Amazing!!
Thanks!
Gave +1 Creative Carma to @hushed niche (current: #12 - 297)
As some users said Illustrator should be better for SVG but if you have all your symbols as individual svg you can place embeded them in a photoshop file use pattern preview place them to get the desired pattern them copy merge and select the tile => Define as pattern and you're done!