#❓ask-a-question
1 messages · Page 99 of 1
thank you SO SO SO MUCH!!!!!
Im not sure why, but pathfinder is not working the same it did in your video...
could you share what you get using yours?
It doesnt say anything..just wont do anything.
Like, i press the button and nothing happens.
Did you select the shapes you want to merge...
yes, they are both selected. I tried merging two layers and tried pathfinder..not working. I then made them into a singular layer, still no
Let me see if i can get a screen capture..
Nothing happens or you have a pop message?
Of course, the second i complain about it not working, IT WORKS. Sorry.
No problem! happy to hear you're ok now!
Thanks, @viral palm. I got side-tracked and didn't see the follow-up.
Gave +1 Creative Carma to @viral palm (current: #9 - 653)
you're welcome Daniel... You can't be everywhere 😉
I appreciate both of you! Like i said, Im brand new with adobe in general..trying to self teach and not every video tutorial shows me exactly how to do what im trying to do
Give yourself the time and space to learn. These are large apps with a lot of features. You'll get it.
So..pathfinder isnt working AGAIN! im not sure if im doing something wrong or not. I used two layers to mock up both of the shapes (the two triangle, and the rectangle), Then i copied the triangles and put them directly on the triangle layer, and not it isnt working :/
Are all the shapes selected?
Also, here is the documentation on Combining Shapes in Illustrator: https://helpx.adobe.com/illustrator/using/combining-objects.html
im trying to find out how to easily screen capture for you
Windows or Mac?
there's a free sniping tool within Windows... Type "Snip" in search bar
Could you develop the layer 1 in layer panel? I would like to see its content...
Well. My app closed and removed everything! Not sure why that happens, but it does it with PS too. Thank you for the help! Im going to go onto another project for now, but ill be back, im sure.
Gave +1 Creative Carma to @viral palm (current: #9 - 654)
im new to all this, how hard is it to merge tattoos into one piece
Merge?
Say more.
when adding 2 together one takes over cant even see the other like it wasnt even there
Well, you'd have to learn how to move things around on the canvas, reposition, scale, to make them fit,
ill see what i can do
?
Milady has a question?
If you can't be bothered to ask a sensible question - why should anyone bother to give you a sensible answer?
@fading storm
How can I mirror this citrusete like i did blender.
It has this curvy look, and warp isn't helping much.


even blender isnt that good
How would I bend sides of vertical (mirrored) products while keeping middle in its place
Tough one especially given the perspective the photo was taken in. In such situations I would try to use warping on the mirrored layer to make it look right but that's difficult to achieve
Are these elements on separate layers or all part of a single layer?
separate
i am making catalog in PS, got bored by InDesign 😄

Ouch!
🫣
That almost borders on "self-mortification".
😱
Do you already know how often the catalogue will be published? I.e. how often you need to update the catalogue ...
Can someone help me with the generative fill on the border I'm not sure how it works

It won't work on mine please help

Guys what’s the cheapest way to get photoshop on my Mac

You can get a photography Plan (Lightroom + Photoshop) for the equivalent of £10 a month. Cheaper than Nitro, a real deal
You can have the full CC (all the apps) for £17 per month if you're student
You can get all CC for free, if you're a student and your school/uni have it available.
You need to select what you want to fill. Here it looks like you're trying to fill only the square on the left. Typically here you'd want to select all your transparent pixels.
Can u guide me I'll screenshare?
Try to crop the image to get rid of those transparent pixels and use the crop tool
Because I tried everything it won't worlk
What does it says: Error message? PS stalls?
nope, it doesn't let me click i mean the generative fill won't start
just like here
Also please share the whole window, It's best if I can see the layers and the rest of it
okies VC?

No, only public answers here
okies
I shared the method with the crop tool above
just a sec mam

hey guys how can i make that effect of idk how to call it
distortion? or whatever this is
Looks like noise with some median filter on top
Or you just save it as a jpeg repeadledly at low settings and it should do
thanq

if you want to try the noise option make sure you apply it on a neutral layer (set to overlay) so you can apply the median to the neutral filter (so it applied to the noise effect and not the photo)
make sure the noise is polychromatic and not just black and white

Don't type anything in the text box
When you want to expand or fill, don't type anything
You control the ration with th crop settings on top
It's possible that PS cannot process anything because "ratio" doesn't mean anything for Photoshop here
I didn't type anything


Apart from that, it's possible that there is an issue with your account, I can't see why it doesn't work while it shouldn't (assuming that your copy is legit, of course)
it was on urs also before clicking on generatice

I'm not able to click on generative expand is the problem
OK sorry, I missed that. It's not something I use very often TBH

okies
Hello, I have this design that has a gradient color (1st image), and I was wondering how could I replicate that gradient (or at least something similiar) and put it over this text font (2nd image)?


can someone please just do it for me, I'll reinstall photoshop ig later
I needed it in a hurry 😭
Can you screenhot your options i the dropdown menu?

Have you run out of credits?

ig 

you can check it by going to your account page
Manage your Adobe Account profile, password, security options, product and service subscriptions, privacy settings, and communication preferences.
You could try with Content-aware fill if you're in a pickle. It should work on your image
not working tried
OK
Share your image here, I will have a go. It will be my Christmas good deed 😉
okies
hehe
I want it in this width and height
The white portion gives u the idea of how i want it

I gave it enough leeway for you to resize it how you want it
okies second one
see the added BG

OK, for second one
You'll likely crop the hell out of it anyway


Damn, that wasn't good!
I know right
where can i get more generative fill credits?
Did you run out then?

I'm quite new to Photoshop, how would I go about unravelling this logo, so the edge of the circle is a straight line on the bottom, without distorting the clouds

So it comes out of the circle...
so would you want the clouds to still 'billow up' either side of the rocket?
Yeah
Like this


If that's the case, then you ARE distorting the clouds. - since your image shows them way, way, way flatter
Is there a way to perfectly distort it on a straight line though?
Not 'perfectly' - but try puppet warp...
Alright, thanks
Gave +1 Creative Carma to @sly hawk (current: #5 - 1066)
@sly hawk, do you know an easy way I could add more clouds to the sides of it? My image is quite long, width wise

yeah, try generative fill.
However, this clearly isn't a 'logo'
where are the assets from? You'd be better off working with a vector
it's all blurry
It's for my discord server, I'm making an invite background and had a cool idea
brb
So it's from a logo but it's just a long image
Yeah I don't have the vector :/
Alr
I tried it, but it's not working well
I think you probably need to remake it properly to be honest
Something like this might work
I wanna change that gray icon like yellow. how can I?


trying to create film poster or something in PS :D
please reply if you know something about it. I just downloaded PS today so..
No problem
that's super easy
you just need to go to layer effect and apply a colour overlay
... provided that the new icon is on its own layer.
@mild narwhal
If James suggestion doesn't work for you - can you please show us a screenshot with a visible layer panel?
can someone please help me why is this happening?
i am trying to make a rectangle and my fill is black
Activate your rectangle tool. Check in the top left of the control bar whether Shape is really selected (and not path, which I suspect you have). @jade flare
Sent from mobile phone
hi guys im very new to photoshop. just need some help regarding here. how can i merge multiple layers? i want to merge the subject together with milk and oreo so i can move it as one.

I wouldn't merge them. Doing that might make them more difficult to edit individually. Group them instead. Select both Layers in the Layer Panel by holding Shift and clicking on the layers. With both selected, hit Ctrl G. Now they're in a group and the group can be loved around as one element.
Hello everyone,
I hope you're all doing well! I have a small favor to ask would anyone be kind enough to help me? Could someone remove the background from this photo? (I've already tried on sites like remove background but it never gives the right results) I know it only takes a couple of minutes, which is why I’m allowing myself to ask.
Thank you in advance!

i see. but when i group it. i cant move them as one. how can i move them all together?
Click ont the Group in the Layers panel. Then move the group. Move Tool. V on the keyboard
thankyou so much!!

Its a fairly low quality image to begin with....

no problem bro thank you so much I appreciate it ❤️
Gave +1 Creative Carma to @ripe quest (current: #3 - 2549)
An alternative to grouping is linking layers, if you do not want to change their place in the layers stack. https://helpx.adobe.com/photoshop/using/selecting-grouping-linking-layers.html#group-link-layers
Should be a simple color overlay
can I ask for a feedback here?
Please use the #📝project-feedback channel.
I can't share the Image there for some reason
Try it now
Thank you
Gave +1 Creative Carma to @ripe quest (current: #3 - 2551)
Yup - which is why I reset all my preferences and went for a clean slate with the settings
salut, could anyone help me figure out, why my photoshop doesn't really pick up the colors i give them? All of my colors seem very weird, and if i eyedrop a color from a picture, it doesnt really pick the exact color visually, but in the program it does...
Hi, I'm new to PS, and image editing in general. I am making a UI for a device we made as part of a bachelor project and I have to resize some buttons on the HMI. I can't for the life of me get any of the selection tools to move the blue outline here to match the new canvas size. How do I select something from from the canvas?

how would i add realistic looking light rays comin from the corner/behind of the perspective im doing

Hello guys hope you're good. I would konw if its possible to make patch like this jaguar in ps and if yes how i can do it ?

Please show me your button in its original size (100% view) as a JPEG or PNG. Then I can show you the 'How-To' more easily
does anyone know what to do with the index file? because when I change it to rgb and try to reduce it, the image becomes completely blurry and unclear

@tame cape alright, thank you. Here it is in the original export
Gave +1 Creative Carma to @tame cape (current: #20 - 104)
first create a selection like that and press Ctrl+j (creates new layer from selection)
activate the newly created layer and press V (Move tool) and drag the layer 25px to the left while holding down the Shift key


Ahhhh there we go
ativate your button layer again and create a new selection with the rectangular Marquee tool approx. 5px wide and press Ctrl+j again
activate the new created layer and press Ctrl+T (Transform)
now drag the middle left handle until the layer is approx. 30 px wide and confirm the transformation with Enter


Do I need to unlock the transform? it seems the ratio of the selection is locked
do the same one the right side
finally activate the top layer and press Ctrl+Shift+E --> this will merge all visible layers (you no longer need them)
Done


Yes.
See Control bar in screenshot no. 4 and 5
Alright sweet. This works great. I had some trouble because I have the thing open as .psd with the original layers and stuff, so when I use ctrl+j and transform it will also copy the old layers effects and it looked kinda messy. Works great on the .png though 😎
Without the layer styles it is much easier. then you can simply “paint over” it with a brush.
😉
Thanks a lot for the help. I got a whole stack of buttons to edit now. 😂
is there a way to scale a 1920x1080 photo to 3840x2160?
Yes. However, just rescaling the image to a larger dimension (2x original size in this casse) might cause a certain level of quality loss.
yeah i figured that, i switched monitors and before used stable diffusion img2img and edited my photos. not sure what else i could use that supports 3840x2160 img2img processing
for reference i used a1111 and dont know a lot about it other than from a tutorial i saw
What are you using to generate the image? What tool? Invoke, Forge, ComfyUI?
let me double check
No. Its fine. You said Automatic 1111.
So A1111 does have some upscalers. Although, I think you'd need to use a tile upscalers. I suppose it would depend on your GPU.
i found the post i think i cant post the links here?...
i have a 4090 i should be able to handle it i think
UI automatic1111:
https://github.com/AUTOMATIC1111/stable-diffusion-webui
lora:
https://civitai.com/models/110334/epicrealismhelper
model:
https://civitai.com/models/25694/epicrealism
Upscalers:
https://openmodeldb.info/models/1x-ITF-SkinDiffDetail-Lite-v1
https://openmodeldb.info/models/4x-Nickelback
Controlnet:
https://huggingface.co/webui/ControlNet-modules-safetensors/blob/main/control_canny-fp16.safetensors
Look in the Extensions Tab. Search for "Upscale"
This is somewhat beyond the scope of this server.
We're mostly here to discuss Photoshop, Lightroom, Camera Raw.
ah okay, i wonder if theres an appropriate server dedicated to the service
thank you anyways! ill definitely check out the extensions
There is a Stable Diffusion server and I'm sure there are a lot of people who can offer good suggestions.
I can DM you the link if you like.
id appreciate it, add me as a friend for it because i get too many bot messages to take it off lol
Meh. Just search for it. You'll find it. haha
ok! 
Also CIVITAI is a good resource. Check that out too.
absolutely
Gave +1 Creative Carma to @sly hawk (current: #5 - 1067)
I didn't catch you so I will just send you whole screen of photoshop :)

yes yes right I did! thanks :)
I want to make film poster like this in photoshop this is reason why I downloaded photoshop as well. Does anyone know something about it? like some movie poster essential or etc.. :)

Movie posters are nothing more than Graphic Design posters.
This quick video could give you a short overview of Movie poster design https://www.youtube.com/watch?v=L60rpgD3T_k
You can find lot of movie poster tutorials on YT but I would suggest you to:
1- start with minimalist/simple design to learn basic photoshop tools and sharpen your skills,
2- learn some basic rules of layout and composition in graphic design (this video is not bad to get started: https://www.youtube.com/watch?v=r6LPNRVhGKA but you also can search yourself with "graphic design composition rules" or "movie poster composition rules"
3-best way to learn is to get inspired by real life movie poster designs and try to replicate designs you like.
http://www.impawards.com is a good source of inspiration...
If you're new to photoshop: Be patient and don't try to jump the gun.

Love Movie Poster Design? Have you ever thought about the anatomy of a movie poster design? What should a movie poster include, and what makes a great movie poster stand out from the rest? In this video, we'll explore what makes a great movie poster, some of the basics of poster design, and more. ► Download unlimited photos, fonts, and template...

Whether you work in design, photography, or art, you need to know how to arrange elements to create harmonious designs. In this video, you’ll learn the key principles of composition and some techniques you can apply across any visual work. You'll also get tips on creating great compositions.
► Download unlimited photos, fonts, and templates with...
All the latest movie posters as well as an extensive database of older posters dating back to 1912. Annual awards, poster design agencies, artist credits, taglines, and more.
ohh thanks for your detailed explanation. but I just downloaded Free trial photoshop to make movie poster. I'm going to cancel the subscription as soon as I create one so yeah 😓
Gave +1 Creative Carma to @viral palm (current: #9 - 655)
normal for photoshop to see pixelated-ish grid when zoomed in?
i can't see the corners clearly when i try to move stuff
Yup
soo..no way to fix it
noted
Make a circle, add a gradient layer style that goes from a bright yellow to an orange and then to transparent. For the objects on top, add an outer glow layer style
Gave +1 Creative Carma to @sweet field (current: #23 - 96)
Hey how come whenever I'm selecting this image (1st image) it just always cuts off at this point? (2nd image)


Try inverting the selection

Hi, no, you can : the view menu lets you customize many things on screen. In this case view>show>pixel grid. Check the other options. The edit>preferences>appearance is another place to check for other options.
Hi, the marching ants show you what is at least 50% selected. Hit Q to see a red overlay of the selection. (And Q again to switch back to marching ants) The quick mask mode lets you paint in the selection.
Are you refrering about what we call the "marching ants"? (the blinking bits that show you a selection)
If that's the case, learn not to rely entirely on that. Marching ants will only help you visualise what is at least 50% opaque, the rest is also selected, but not shown under the marching ants visualisation
To visualise your selecion correctly, press Q, and you'll see a red overlay, that will show everything that's not selected, even the very transparent bits. It looks like how a mask looks in black and white, but with the visualisation in red, and your image as an overlay

Put some feather in the selection, and you will see the difference between quick mask selection

and normal selection. You see that the marching ants selection is incomplete

Bonus points, you can draw the selection in Quick mask with a standard brush, like you would do with a mask
?
... i dont use ps i use another app it's called pixlr if someone use it can you please teach me how to make arrows
Zeke is wrong again. You CAN hide the pixel grid.

Graphic Design Stack Exchange
I'm working on a game with lots of precise pixel artwork, and I need to be zoomed in on my work 24/7. Recently I switched to a Mac computer and this version of Photoshop automatically creates an
Surely PixlR has a forum where you can ask? This is the Photoshop server here 🙂
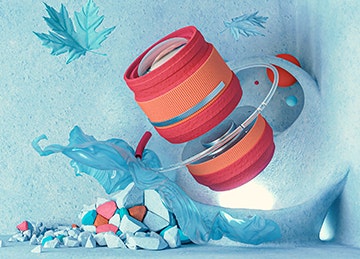
Hello everyone, I hope you're all doing well. I was wondering if it's possible to create this relief effect ( as the vuitton typo and the jaguar). If so, I would really love to learn how to do it. Thanks in advance!


another look of the effect that i would reproduce

You would typically use the "bevel and emboss" layer effect
as seen here. Note that in order to make the text "transparent" (but not the effect) you have to set the "fill" to 0% (the opacity would control both the effect and the layer contents)

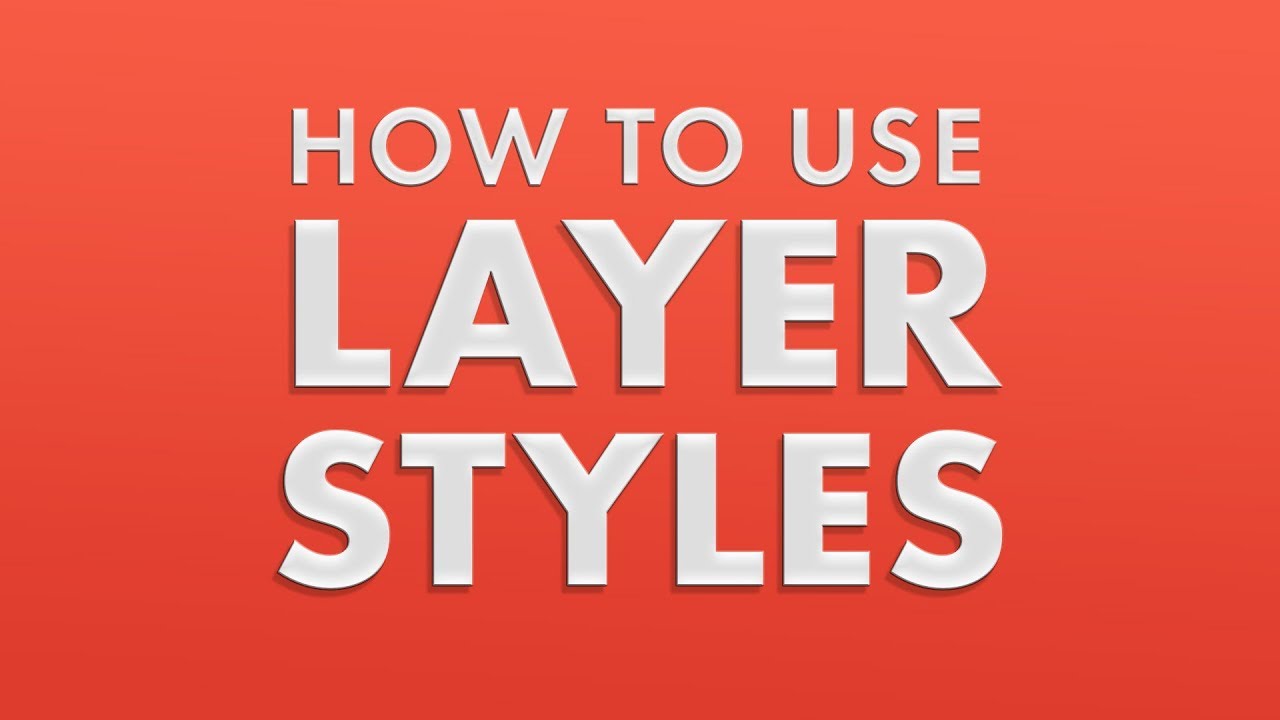
How to Use Layer Styles in Photoshop
In today's tutorial we're looking at styles in Photoshop. Chances are you've already got some experience with styles because you would have applied effects to text and to shapes in Photoshop.
Products used in this tutorial - Leather Layer Styles For Photoshop By Graphic Spirit: https://goo.gl/9X8gLQ
Find...
Now of course, there would be some tweaking on the different sliders and settings to acheive the exact look your after, so it's up to you to trial and error it
(Note: For it to work properly, the background can't be white nor pure black, that's why my background is slightly grey)
how would you go about adding such a effect & coloring to any image? i'm trying to recreate a similar style for my image(s)

would be much appreciated if someone does know and tells me, needed for a project <3
Hi, this might be the most requested question 🙂 a gradient map, in the adjustments. From light to dark blue. You can add them at the bottom of the layer panel with the half circle button, or in the adjustments panel, or again in the layers menu.
the whole effect is a gradient map? that's kinda suprising, i would've thought it has sometime to do with curves or so, i'll check it out!
okay thank you very much I tried to make a effect like this its cool 😄

Gave +1 Creative Carma to @vapid flume (current: #8 - 825)
Some add some noise to give it a risograph effect: https://medium.com/@stefanhrlemann/how-to-create-noisy-risograph-style-gradients-and-textures-in-photoshop-in-3-ways-394d6012a93a
Medium
Originally published at Stefan Hürlemann — Designer.
By moving the stops of the gradient, you can emulate some curves. But you could stack adjustments.
I'll try around a little, thanks!
Gave +1 Creative Carma to @hushed niche (current: #18 - 127)
Hi, you need to change the transform algorithm to nearest neighbor: https://2dwillneverdie.com/tutorial/resizing-your-sprites-with-nearest-neighbor/
2D Will Never Die
If you’re the type who enjoys building your sprites pixel-by-pixel straight from the ground up but find the results stiff and lifeless, consider this quicker method.
got it, quite close to what i wanted with just the gradient map, thanks !
oh thanks
Gave +1 Creative Carma to @hushed niche (current: #17 - 128)
One message removed from a suspended account.
One message removed from a suspended account.
One message removed from a suspended account.
does anyone know how i would make a glow effect similar to the one surrounding paul mccartney here?

the glow effect looks like chalk
so i'm guessing you can get the same effect if you make a black background and then use a chalk brush to draw it in
or you can gradient map it i guess
Hi, try the dissolve blend mode. Make sure to look at 100%. Or you could overlay some noise: with the link I shared earlier: https://medium.com/@stefanhrlemann/how-to-create-noisy-risograph-style-gradients-and-textures-in-photoshop-in-3-ways-394d6012a93a
remember that you can copy the glow and convert the style to pixels.
Medium
Originally published at Stefan Hürlemann — Designer.
You also can apply a drop shadow layer style: blend mode on Dissolve, distance = 0 then play with size and spread to get the effect you want... Choose a bright color if you work on a black background.

Curves adjustment layer could work...
You also could use curves presets "medium contrast" or "strong contrast" if you don't want to target a specific color

You can clip the adjustment layer to the layer you want to effect. Right click beside the layer name of your adjustment layer then choose "Create clipping mask"
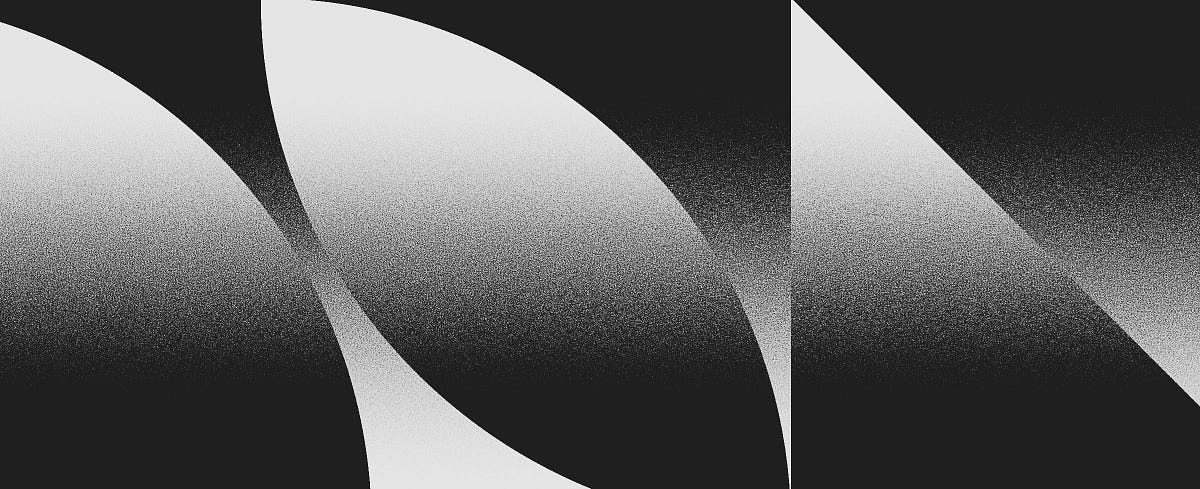
any ideas how I can create that topology/wave texture?

this is the closest I was able to get with radial gradients

oh and credits to Elvira•M, they are the publisher of the reference item
IMO… I find it easier to use illustrator to create assets like that.. do you have that?
no unfortunately..
You don't, that's just a recent files list. If you really need to remove something from there you can delete the file and then click on the list item. It should say that the file couldn't be found and remove it from the list. Of course you can also clear the whole recent files list
ty
Gave +1 Creative Carma to @serene coral (current: #6 - 919)
Hi, you can also move the file to a different folder, then click on the file on the home page.
Hi @shell sleet
Are these business cards with hot foil stamping? I find them very beautiful!
For starters, I would probably look for images of tree rings or topographical lines and then rework them to my liking and vectorize them in Illustrator.


how do i make text above an image invert its color above the image?
(black turn white when above the wheel)

You can follow @tame cape advice and use premade stock or do it by your own following this easy steps tutorial
https://www.youtube.com/watch?v=aNBBBTxBuQo

📥 Download over $5,000 worth of premium design resources: https://spoon.graphics/membership
Follow along with today's Photoshop tutorial to create a topographic map effect. I'll show you how you can quickly create a detailed pattern with a combination of Photoshop Filters, then show you how the parameters of those filters can be adjusted to cust...
Hi @tawdry spade
create a grid 21 × 9 and slice it with the slice tool
Hi @tawny sigil
In addition to @viral palm good suggestions, you could also try the Camera Raw filter. Here is an example before/after

Can someone remove the TikTok watermark off of this photo pls

Removing watermarks from photos violates this server rules.
We want to stay ethical.
Does anyone have some presets or anything for a in real life smurf editing based on a shooter game
Discord server profile
Like maybe a sniper bullet png
Or a stand with the irl smurf
Maybe soms nice backgroundd
S

🥲
Would anybody know how I can go about making those "Attack" words in red say "deadspace" without it looking abnormal and with the same font?

I know nothing about photo editing, this is just a small hiccup in a project I am working on, which this is the only photo editing it requires
Is there a way to prevent the little faded white bands from appearing?

Not enough context?
Alright, let me try again
I was re-following my favorite comic creation tutorial on YouTube and re-found that you can mess with the layer mask and modify borders in this way you see here
While adding color, I noticed the thick bands have a white fade
I just want that fade to be blue or whatever other color
Oh, and here it is, my fav video!
https://www.youtube.com/watch?v=UMffCN6mSms

Also, for some reason I can't seem to paint darker colors, only lighter. Strange
Oh, right, it must be the mask or something... fill
No?
What the heck...
Maybe it's the brush?
Was using the stock Photoshop soft round brush
soft round "(modified)"?
Mode screen
I do not remember having modified this brush...
Welp, okay, I that settles that, but the bands problem remains
Hm, I hope I didn't somehow delete or irreparably change my stock brush
Maybe it's the way I selected the stuffs
Hmmm if only there was a way to select gradients
Ok I just used apple AI
Yes.

settings:

Hi, I just came back from something
Uhh I wasn't particularly using gradients, so I'm struggling to follow
Erm, did I do it right?

So like the borders here are drawn by using the Stroke effect on 0% fill boxes. How do I apply the settings there?
hello I am now working on my project but I am an beginner can some one help me with the mask its just for 5 min in voice
please
Do you have the font that was used? If not, is it an image you have the right to edit?
🙏
Uh, I tried using Modify...

Say what you need
🙏
Meeeee, nooooo... I can read, though
I think your biggest problem is that your design is made with lot of intricated layer masks applied on lot of group...
I'm not sure to understand what you're trying to do ...The shared video is not so cimplicate...
I am trying to make a mask that fades
I want to put the png christmas hat on one of the letters like I want to make it looks like its real hat you know

Uh, I tried using Modify...
Did you possibly mean “multiply”? Did you possibly mean “multiply”? This almost always works as long as the color is black.
Like, I do Ctrl + click on the icon and this is my selection
I am trying to make the selection fade where you can see the border fading

now its just behind but I want it aline with a letter and also make it nice with hat itself

No it's just an image from google that i found
You can start by dragging the Hat layer over your text layer in Layer panel...
I don't understand how I am so non-understandable
I am just trying to make a mask
Just without this artifact

This


I'll just wait till it's my turn
According to the project you have you might not be authorized to use it…
Like this?... And then what do you want to do... Add shadows (it would be difficult since your text is black), Rotate it slightly.
I think you'll need more space on the top of you image.
hshshh oh brother this I know but well dankje for help
Is your file RGB? Can you disable the mask (shift+click) what does it look like? What is below in the layer stack?
What are you struggling with?
It's quite literally the same thing as in the video
Alllllll that I did was draw a line in the black boxes layer. Yes, my file is RGB and I think I can disable masks

Your artifact comes from all the layers below your masked group...
Could share what your layer 1 is made of?
can I call u and show it zo i can axplain
Layer 1 is just my sketch

This here is all the layers in a single Artboard
So all you want to see, I believe
The mask is disabled here, but I didn't change anything from before where the artifact was
There has to be some way to select a gradient, but I don't seem to know how despite doing cool stuff with PS before
No prob here. sorry

W-WHAT?!
Wait waitwaitwait how did you do that
Hold on let me gather my brain cells
How did you create this mask?
@tame cape
Hide group 1 so that we can see the line that’s below. It’s difficult to see what is the mask what is below. Why are you masking the group and not the layer?

Not layer 1 but group 1

What we see is the fade in your image.
Yeah, I want the mask to have a smooth transition from border to whatever I draw
You are masking the burgundy, and we see the black to grey
I see the black to grey to brown/blue/red/whatever I pain yes
I want a black to burgundy
Like in here - though I am confused as to how he achieved this
Ctrl + icon click selects an opaque border, no transition or gradient
Then your layer 5 that is I guess in difference mode or so does need to not have that gradient to white. I think you that it is what we see. The mask in group one reveals the black to white gradient that is below.
I feel like I'm misreading something, but are you telling me to just switch blending to difference?
activate the mask
make a selection
draw a gradient in the mask in the selection

How did you draw the gradient? Gradient tool?
I assume you made an inverse selection or something like that because I don't usually use that tool and it's doing this

I see a layer 5 that is full of black and an image that is mostly white, I guess there’s a blend mode involved. Are you using the inverse of layer 5 to create your mask on group1? That’s maybe why there is the white as the math does not work the way you think.
They're all normal
And I just followed the tutorial video before drawing that line between the two panels
I did nothing special or fancy, I don't think
The layer with all that black:
I just used select and the bucket tool to make boxes in an otherwise transparent layer
@tame cape I can't replicate your work
Yeah I am at a loss. I just can't seem to produce the same mask
How could something so minor be so unforgivably complicated?
At least to me. I know you're all pros and used this for decades, but I didn't go at it that long
create your group
create a mask for the group
Press D for Standard Colour
create a rectangle selection
Press G (or Shift+G) for Gradient tool
draw your gradient
?

Like... that?
I don't mea to sound rude in the least, but it doesn't seem practical for frequent work in comics
I still don't know exactly what you want to do, why and how. But this will give you the result you want.
And don't worry about it. You're not being rude. And we're already “a bit hardened”.
😉
That's great to know, but this is like the third "I don't know what you want to do" I've heard the past 72 hours and it makes me want to tear my hair out
I am trying to make a comic panel like this one I just doodled for this issue

You see how there's a gradient between the border of the "mask" and the "art"?

No whites or greys here as far as my eyes can tell (hopefully I'm not colorblind lol) but just an organic shape for a panel
And yes, it IS a thing that is done in comics, it is not uncommon or a tall order for any comic artist, including me
This is a panel
The black is the shape of the mask, and its border is smooth, it fades between mask border and the art
I just want to know how to do this with actual masks, because this doodle is just one layer
Is there anything at all that is still unclear?
I followed the video here step-by-step, diverting in absolutely no way at all
ALL I did was stop here,

and deciding to draw a line
Oh, sorry. I stopped HERE

So she can draw solid lines and adjust the mask accordingly. Can she do the same with soft brushes?
Anything still unclear???
... Anyone?
@viral palm ?

What?
What did you do this time?
Something feels off
Maybe I poorly defined my problem yet again...
Please, I don't understand what you did this time. Did you take my art and use that as a mask?
@tame cape I reiterated to avoid confusion for the fourth or fifth time
Here I made a mask using a solid brush, then I drew with a soft brush to simulate the result I want
Notice how the boundary between black and red fades? Yeah, I want that

Try NOT to recreate your own projects 1:1 according to tutorials. In most cases, all it takes is one extra step and you won't achieve the desired result.
Learn the basics. Learn to apply them. There are almost always several ways to achieve your goal. Learn to find the best way for you.
(I'll have a look at your screenshot now, but probably won't reply to it. It's now 1 o'clock. I'm going to sleep.)

*sigh*
I swear I tried the basics and following tutorials and everything, but I am just not smart enough to ask Google for the right tutorial. I am cursed to never find the answer through Google
Goodnight to you. I will wait and hope someone else responds
https://www.youtube.com/watch?v=aBbkTzkM5AM
Is there a way to selectively feather parts of a selection?

Would you like to learn how to soften the edges of a selection? In this episode of, 3, 2, 1… Photoshop! Adobe Evangelist, Julieanne Kost shares five different ways to soften the edge of a selection in Photoshop.
For more in-depth tutorials, training, techniques, and shortcuts for working with Adobe Photoshop and Lightroom, check out Julieanne...
Hi, does anybody know how to make videos like this ? https://www.youtube.com/watch?v=pCo1g5NQAqc

Perched high on your balcony, the cyberpunk metropolis sprawls beneath you, a wondrous tapestry of blurred lines and vibrant colors shrouded in tiny mystical drops of water falling from high above. As the rain gently patters an intricate rhythm on metal structures, you find solace in this retreat looking over the resting city. Each drop contribu...
or like this https://www.youtube.com/watch?v=mGXrcLnLMGc

Escape the winter chill and cozy up by the fire with our virtual fireplace and soothing snowfall. Perfect for relaxation, meditation, and ambiance. Let yourself indulge in comfort with this crackling fireplace and snowfall in the living room. 🔥❄️
💫 Welcome to My Ambience channel!
My Ambiences is for everyone who wants to escape from the real wo...
i just created a "project" on adobe creative cloud and the second i made it (moved my files to it) there is no reference to "my projects" within adobe or photoshop. Can someone point it out to me? Thank you in advance.
Yeah. Use After Effects and composite several animated layers.
Sorry. I don't understand what this means. You've created a "project" where on Creative Cloud? With what app?
really, i think creative cloud is ridiculous. I spent all day creating a chronicalogical file in the place where it takes you when you push the house icon in photoshop. All is well, till i find some button somewhere in there on on the adobe CC website where it says "create a project"...good idea, i think, i have a projecr for sure. Created a project, moved my file to it, and POOF...gone. Nowhere is "projects" to be found. Just gone.
and then...need to download an entire folder? Well, too bad. One at a time, IF you can find the "download to your computer" button.
Why is this suite so clunky??
Sorry you feel that way. Creative Cloud is a suite of apps. Its also a place to store things if you'd choose to store them remotely and not on your computer. You create projects in "apps" and those apps are generally geared towards a certain type of content.
Again. I have no idea what this means. "Clunky" is likely relative to your experience using the apps. This is professional level creative software. Some of the apps have a lot of features and it requires time to learn them.
If you'd like something easier to get started with, then I'd suggest that you try out Adobe Express. https://express.adobe.com
Build some designs, layouts, animations, or whatever you're interested in. And work your way up to the more complicated and feature-rich apps.
but what ai are these people using to generate the background?
I don't know. many of them could create those images. Pick one.
Stable Diffusion, Midjourney, Ideogram, Flux...
Also, its not one single background. They're generating several still images and layering them in After Effects (most likely). Then doing particle effects for snow and fire, etc.
I have a subscriber for years now. Given, I use photoshop and cloud exclusively, but now I am finding a stone wall when it comes to siple prcesses, such as downloading a full folder, creating a "project" and accessing it thru the normal photoshop interface (no clickable for "projects").
Now, maybe i do not know the way it is accessed, but it is so unobvious that i wonder if my precious files even exist at this point.
I think I was getting somewhere but then PS glitched and I had to close
I chose not to save to avoid any issues with the original file
Oh well... time to rest, I guess
Yep... Sometimes taking a rest can help to refresh your mind and restart with fresh eyes could help.
Sure
The possible bright side was that I WAS getting somewhere before undoing things
But please, I have to beg you to please reassure me that what I want to do is clear
TBH I have to take all your messages from the beginning to be sure I didn't miss anything... Don't worry the missunderstanding is probably on my side.
*sniff*
Alright... please take your time. Not now. I wanna rest. Do it later whenever you wish
I'm gonna... I'm gonna go take a nap
I just want to know where "My projects" are accessible within Photoshop. Any professional would find this an easy solution for a frustrated user.
The projects are where ever you saved them. Nobody would know that location but you.
If you're on Windows, open up a File Explorer and search for: *.psd
Wait for it to run completely and finish. That should find every Photoshop documet on your comptuer.
Hey y'all, sorry to bother. But I had a quick question. I'm trying to isolate all of these little node things (example circled in red) and remove the rest. Is there any easy way of doing this, other than obviously just cutting them out with that circle tool 1 by 1 

Quick selection
And then select all of them manually?
As in, quick selectioning them all 
You're trying isolate all of those white icons and remove "everything" but those? Is that correct?
Yep yep
i was just wondering if there was any way to replicate the same effect as this

another example of what i mean (it represnets a city in the video)

I dont know how, it looks like a brush but ive been unable to replicate the same result
Use a really small brush like a few pixels and go crazy on it
get some circles in there
Should be able to get the city effect
I don't know. That's going to be difficult to remove everything and keep those. At least with any sort of...quality/visual fidelity.
They appear to be like semi-transparent or something which makes it more problematic.
Yeah, they are. Even if they stay semi-transparent, and have some backdrop that could be fine....
But I just was seeking an easier way even to maybe just isolate an area around them even instead of hand selecting each of them 1 by 1
If this is the actual image that you're working with, it isn't great quality and also since they're semi-transparent, selecting them by Color Range could be difficult as well.
Yeah, it's an image from a game, so when I'm on PC it'll be much higher resolution
Yeah, it's proven quite difficult been trying independently for a week now independently, and as a new person to PS, I'm pretty angy right now
If there's no real efficient way, I think I might as well just manual select, I don't want to take too much of your time
Its difficult for an experienced Ps user.
Selecting them doesn't yield great results.
I know, the best thing I've done so far is take a small circle tool, and left a small layer of green around them.
Even selecting by Color Range is tough...

Yep, I tried that. And then using effects to slowly widdle away, but then it became distorted
Hello, I just opened PS and shockingly saw these scribbles on my amateur project. Can anyone help me help me revert this?


This was the best I could get.
But then as I said some will get cut off, ect...
And this is just using the effects, that morph the image, no selection tools
Is it on the same layer as the clipboard artwork?
Its on my screen like a stain. (the blue squiggly line)

Do you know what layer it's on?
Nope. I moved everything and it looks like it made a permanent settlement there.
As a noobie myself, try hiding each layer 1 by 1 and check the background layer. But I'd listen to Humann
Show the Layers Panel.
Any approach you take with this is probably going to be monotonous and annoying. Sorry to say.
Bwahaha! Sounds good  glad I wasn't going crazy!
How do I full screen the Layers panel ?

YOu can click and hold on the Layer Tab and drag it out of there so it becomes a floating panel.
Nevermind, figured that out.

It must be on one of those layers. Otherwise, it doesn't make a lof sense unless its just weird rendering glitch.
-# thanks for the effort by the way Humann it's appreciated
I was playing around with the anchor tool and I started spamming, then I delete the path to test If its a remnant of my previous failed attempts at enhancing that black bar, and it deleted. I guess it was a small little glitch. Thanks for your time though.
Oh. Is that a Path? Click on the Paths Tab.
Might say like "Work Path" and if so, you can delete it.
I hit ctrl z on everything and yep its there.

Works great.
Glad you got it sorted out
Thank you but I came back with another issue, Why is there a transparent line in my layer here? Is there like a fill generation thing PS has?

Gave +1 Creative Carma to @ripe quest (current: #3 - 2552)
Is there a Shape Layer or did you paint on that or I would need to understand what happened there.
Does that Layer have a Layer Mask?
thank you, D Human. So project files are not for cloud sharing?
Gave +1 Creative Carma to @ripe quest (current: #3 - 2553)
I'm still not sure what you mean by "project files." If you save something from Photoshop, you have a couple of different options. PSD (.psd) is file that will be saved locally on your computer. If you save a Photoshop Cloud file (.PSDC) that will be saved in the Creative Cloud and will be accessible via cloud-enabled apps like Photoshop Web and that sort of thing.
When you do File > Save... it will give you the option to save and the file type.
No clue. Got angry and deleted the whole thing.
Well, that's one way to solve it, I guess. :)
Photoshop is tricky when you're a new user. Its a big app with a lot of features. It can get confusing quick.
and then when i try to open any file within the project file, i get this:


You have to have something in the Project for you to do anything... This a test project I just creatd but there's nothing in it.

As far as "Photoshop Web not being supported" - What browser are you using? If you're using Opera, that's probably not going to work.
However, I can go to Photoshop on the Web in Chrome, create a new document and save it in the Creative Cloud. Then it will show up under "Files" in my Adobe Account...

Hi, in Photoshop desktop, the home page is just a shortcut to recent files (they disappear if you move and delete files), it is not a files management program. Use explorer/the finder on a Mac or Adobe Bridge yo manage files.
Still new to photoshop wondering if theres a way to mirror this or atleast make it so its identical

Hi, Photoshop might not be the best app for that, I’d use illustrator. You can add a guide at the center and use the white arrow to delete the other points, the copy the good part, alt-drag it with the move tool then use Ctrl+t and flip it, reposition, etc. then merge the paths.
I've found illustrator is useless and creates white outlines on shapes for no apparent reason and has less use cases then photoshop has. I found a convoluted solution by duplicating it, flipping it, making changes where it sticks out and merging the sides.

Yes, that’s what I meant by duplicating and flipping. How are you getting white edges in Illustrator? Do you have an outline? Is it on export? (How do you export, and are you viewing at 100%) Illustrator is a pro software, even older than Photoshop…

When I used it I removed all outlines and this still appeared it was inconsistent and buggy so I simply moved on to photoshop creation
Is it there on the final image, or is it a preview only?
Final image simply cropped as I do not feel comfortable posting my full work
(Btw, there is an AI forum: https://discord.gg/adobeillustrator ) because if you do vector work it has way more dedicated tools like a symmetry one…
But is it at 100% view?
where am i supposed to make 3d texts? the 3d tab is gone
It's been gone for quite a while now, the 3D capabilities in Photoshop has been discountinued since at least 2022
You can use Illustrator new 3D advanced options, or tried Adobe's 3D suite. called Substance.
You can try Dimension which is the simple staging software (the rest of the suite is more advanced: Modeling, photogrammetry etc)
Mattgyver
Adobe Illustrator is almost never the last step in a 3D project, but it can certainly be the first. Its new 3D tools have been redesigned to focus on simplicity and quality (and slowness 🥴) and allow designers to dip their toes into the realm of 3D compositions.


Adobe Dimension is a set of 2D and 3D compositing design tools with an approachable, modern interface for easy compositing of photorealistic graphics.
thank you man appreciate it
No problem
anyone online
Plenty of people... Why?
Hi
Can anyone help me edit a model magazine cover ? Dm
is there anyone who knows photoshop and can enter the voice pls I need help
I am beginer from Ukraine and I can not fix nicely the project
Alright, so.... I don't wanna bother the folks from a few hours ago by pinging but I've followed what I understood in steps

I did everything exactly as in the comic panel video on YouTube, no deviation from there
All I did to modify the mask was use a soft brush
And to prevent

this pesky white band
I used gradients on the mask
anyone a artist on photoshop that can help me?
It seems to work fine so long as you can orient the gradient properly
But... it just feels too tedious if I have several comic pages
Is there really no way to selectively feather a selection?
Like I don't wanna feather all THIS

Just this

Interesting...
I think I just made the feather selection in that tiny area then just added the rest of the selection
nvm
Could you be less vague? If you want someone else help it should be great to give more details...
Franck! It's so good to see you. I was just hoping you'd come read the latest messages
you need to relax
I'm 100% relax... I just wanted to give you chances to get helped...
I'm sorry if I sounded stressed... I'm not at all.
I'm sure you did but there's probably more graphic artists on here than illustration so my question was more of a open question in hopes of a reply along the lines of ''sure I'm a artist what's up?''
all good
Ah, alright
my brush stoke sometimes dont show my mark untill i realse the tip from ym tablet
Oh, I see
and its bugging me
Well uhh I am not sure how to deal with that since I haven't dealt with it
Maybe it's a setting?
not to sure its like random
Well if it is random it might be a faulty tech issue or just a thing that happens that you need to get used to... or not!
na its not that trust its so hard to explain haha it never used to do it but its all good im sure it will fix it self was just curious
Hard to explain, you say?
I may know that...
Anyway, I hope it fixes itself, because if it doesn't you might need to check out the settings on PS
Now, it is my turn to get help, I think!
@viral palm you got free time?
sorry I will be afk for 3 or 4 hours... Perhaps some of our friends will help you... If not I'll be back in 4 hours
🥲 aight
It's beyond finicky by this point but I might have made some progress in understanding
Spamming feathering selections and screwing with the mask selection yields what - to me- SEEMS like a smooth transition between panel border and color

This will be excellent if it were not so damn tedious...
Having soft borders like that helps better draw panels that aren't just boxes or circles
Sometimes the panel is just a character that pops out of the page
Remember I am avoiding this
So right is kind of a success. Left, not so much, I can see the white/grey band
Never mind, the border was solid, not soft...

Literal next best thing I did was just draw on the mask
Is that bad practice?

I MUST draw the comic ASAP, so if I won't get coherent and concise advice I will build it from sticks and stones if I damn well have to
I reset the file so if you want to see anything I already posted the layers literally right above this message
This isn't being resolved quickly, so I will say to any PS pro online or coming online this: if you have a busy schedule, even a little, do not bother with me
This is out of respect for your time and efforts. Thank you
can pros here tell me the best way to make a selection? I followed tutorials on yt but they usually use invert and stuff and that interferes with my layer mask painting
also, the quick selection isnt really effective on not-so-clear images, it usually takes some of the background with it too, and the refine edge brush deletes details if the image is not clear
That's... kind of what I'm also dealing with
Are you rewording my issue or have you coincidentally come with a similar issue?
Hi @summer violet
Just had a quick look here.
Why don't you do without the group mask? Create two layers at the top of the group.
The white rectangles at the top and your "softened" black areas underneath. By covering all the layers below, the two layers are just as good as a group mask. And your "problem" will probably no longer exist.
Sent from mobile phone
You
Oh
Without a group mask?
Two layers above the group... and then a white rectangle layer and black recangles under?
Is this strictly tied to rectangles or can I do that with any shape?
No.
The two layers mentioned are the two uppermost layers within the group instead of the group mask.
Try it
So you want me to make a selection for the black rectangles and one for the white ones?

I didn't get that last part
Two uppermost layers, covering all the layers below...
Hey, pal. I tried following your words, but I think I'm misunderstanding your instructions

Unfortunately, I'm not on a computer so I can't show you anything. But no. You have completely misunderstood me.
🥹
Try rephrasing!
I am on PS
I am very ready to end this
Please save a *.PSD only with your 'Group 1'. Upload the PSD here. Tonight I'll be back home and then I'll edit your file and upload the 'new' version. Then we have the same conditions.
I'll create a new file, smaller in size and do that
Thank you. I am finding though, that in finder, I cannot add files in the creative cloud file and have them sync?
Gave +1 Creative Carma to @hushed niche (current: #17 - 129)
ood morning. Sorry for my cantankerousness last night. Just really frustrated .
The project I showed has 32 files within in. It is only showing up on the web app.
I am using safari as my web browser
Even when im trying to move this project elsewhere, it wint give me an option; only this dropdown. Would any of these pertain to getting my files back onto the cloud drive i can access within photoshop?
When they open in PS Web, I cant move them from there because of the files not fully opening (And PS Web is the only place I can see the files. I cant see them in the cloud, within PS or within the cloud folder within Finder)
Thank you for all the help. I am so stumped.

@tame cape

adobe express also has 3d text maker?
No. You'd need Adobe Illustrator, Adobe Dimension or Adobe Substance 3D. Something that supports true 3D objects.
Otherwise you have to fake it.
which one is the most simple one since im still a rookie?
Do you have an Adobe subscription?
no
You could try to prompt 3D text with Adobe Firefly.
alright man thank you! i wanna make a 3d text that i can use in a real life picture so that it really looks like that those texts are in the sky of the picture
I'd use a 3D program. Blender, Unreal Engine. Something like that.
alright, so basically make the 3d text in blender and export it as a png or something?
Basically... yes.
i have an issue, when i paste this image https://cdn.discordapp.com/attachments/1003349026235744297/1320454841239076935/bruh.png?ex=6769a8e7&is=67685767&hm=4fa5c5fe75d6f8731ce74c62ed18580e097a77ba5e101275acdbf1adac00fb84& in photoshop, i get this error, how to violate it ?


but i dint have issues like that before
i copied the images and saved it again, and error does not happen
and i changed the format of picture manually (from webp to png i think)
Don't change the file extension. If its .webp then leave it as that. Changing the file extension doesn't change it to a PNG.
You can open it and Save As
oh, i always changed and it worked in other apps
So are people who make hasty generalizations.
thank you though
Gave +1 Creative Carma to @ripe quest (current: #3 - 2554)
I was kidding lol sorry
I wonder if it's night time where pixxxel is
It's Sunday evening at 7:30 pm. I've just arrived. But your file doesn't seem to be complete. The most important part with the 'gradients' is somehow missing. Or were you not interested in this part?
🤔

I don't understand...
I thought you wanted the PSD that had me follow the comic panel tutorial
Let me try redoing it with what I think you want
@tame cape

Heya "Potato" I've re-read all mesages and had a look at your psd and, sorry, I'm still not understanding what you're trying to achieve...
Don't worry, problem is probably on my side... Since @tame cape seems to understand what your goal is, I will let it go...and follow the chat to see and understand... Usually I'm quick to catch but you need to explain me for a long time😜 ...
Curious: do you have an exemple of what your trying to do (design made by someone else or a reference image)?
Bruhhhhhhh ☠️
Ohhh, I wanna cry now
Here is a version of the file where I used gradients, @tame cape

I wish I looked around Google prior, but no
Best thing I can do to reference it is like... you know how sometimes comic panels aren't strictly box shaped? Sometimes their borders are soft, not hard


You are not alone.
I'm looking for examples
Uhhh umm ok so this is an example of what looks like a mask, right?

It would be great... Sometimes 1 image worth' 1000 words
Its borders are solid
Imagine if the border was faded

Like this @viral palm @tame cape
Like it's made of glass or something, translucent
It's like... vignetting?
@viral palm @tame cape I used the boxes layer as a clipping mask by clicking here


Is that good enough?
So I can continue with my comic
Never mind I am dumb as hellllllll
I am so stupid
I am so sorry for wasting your time like this
I thought I "did it" but I didn't realize the lines were going through the empty space that was supposed to be empty
I think you might have to go off the step by step tutorial and explore others layer style options.
To get a vignette sort of effect you could try to apply an inner shadow to the Group (that contains your drawing)...
Here a quick exemple....
This is great, but can you make it so that you apply the fx only at specific parts of the shape?
How would i turn my image to have color variations like this

Wait let me show you what I mean, I can match images and stuff
I don't think so (but I could be wrong)...Unfortunately Layer effects have some limitations with layer masks and the effect you<re trying to achieve seems to be in these limitations...😢


Selectively applying these effects
Can you do it, @viral palm?
If I applied these effects in my panels, the whole panels would be faded, and I don't want that
You can play with distance and angle but as I said, since the effect is applied to a masked group there are some limitations...
No problem... I'm not a comic artist but the way shown in the original tutorial looks a bit tedious and quickly limited if you want to do something less "usual".
Stroke layer style to make frame is OK if you want to keep closed and solide black lines... That's not what you want if I'm right.
Please check back again later.
Um, sure, though by this point I don't think I have any more excuses to ask for help
Did you link a tutorial at the beginning? I would really like to have a look at that now. Do you have the link again, please?
.
Not sure if you'll understand what I want even after you watch it, but there you go
That could well be the case. It is extremely difficult to provide help if you only understand the problem to some extent or not at all. Or if you would build the file fundamentally differently yourself.
But I will watch the video tutorial later. Then I may be able to put myself in your shoes a little better (and understand what you want).
You definitely don't want a smooth black border that creates a white edge as soon as a color is “painted underneath”. You already saw yesterday that this is not the case with “my” files.
😉
Yeah, but in your files you specifically wanted to draw gradients for the sake of gradients. At least that's what I recall
Yes, there was a reason for that -> A gradient black to black from 100% opacity to 0% opacity ALWAYS results in an opaque black and not a gray. And that, in my opinion, is the problem with your files.
I... guess, yeah
I wanted to go from black to whatever color the art inside the panel is
@tame cape since you like gradients so much, I thought of asking for help with a new issue!

I was just trying to do a gradient from black 100% to 0% on that black box, but it doesn't change anything
I would like to know how to effectively erase parts of it based on the gradient
Or we could part ways and go to sleep! 👍
I guess he's busy with the video. That's fine
Uhh nvm I guess?
I just had to move that white dot to the left a bit?

In the meantime: here is the file (differently structured) without gradient and without disturbing white bands over your color - for testing.


hello, is there someone here who is an advanced Photoshop painter? I need help with something. I am an advanced PS user, but I am not a digital painter. If someone is good with brushes, I would like your advice. appreciate any help you can provide.
I can paint, but I'm in the middle of something now
This looks like, even from me seeing the file, you just pasted the shapes on top of one another
Like I don't see any mask being used by you
I think we should put this issue to rest as it is...
What do you need?
i use a different image generator and have a specific style I am going for. I need to match my drawings to the style I bring in photoshop , so that it look the same. Brushes and line work. I simply can not match the style that I need.
So you need practice
@tame cape I think this is the last thing I wanna ask tonight: how do you make a stroke fx for a rectangle with 3 sides?
This MUST be easier to answer, I'm hoping

I been using PS for ages, but never painting in PS. I need to know how to start with style matching; I am not bad with tablets. It's not about line work and drawing; it's about matching the style. This is something I started doing recently, and it seems very hard for me. I tried everything and it does not seem to work. I just need that initial help, someone to tell me where I am making a mistake. I am ready to pay for that help.
Matching a style requires practice
Forrrr example, but without images because that would have been way too convenient:
I can look at a game's art style, look at a character icon, and copy the look and feel in a page. I iterate until I'm satisfied
I am so far off and this is why I am asking for help here. maybe someone with painting experience can help with initial brush adjustment in the beginning. Afterwards, I know I need to practice constantly, but at least I will have an idea in which direction to go.
great. It's the hand-drawn line work that is the problem.

you can see for example her hair.
Like that?

yEAH
Yeah
I realized that stroke options are less limited with the gradient option

But I couldn't get the same result as you
How'd you do that?
That's your work or the generator's?
generator based on my initial training
I see
How scary!
I simply painted in the mask with a “soft” brush.
Damn it I just saw that LOL
So you're saying you want less shaky lines?
Well, I guess things are settled, @tame cape ?
Here, take this last version and check out how I did it

no, i want to achieve exactly the same look. For example, if I need to draw her partner next to her walking the dog I can not get it to look the same....
So it's a mix of clean and not-so-clean line work
The head is clean
The rest isn't
The dog's head is drawn cleanly, while its body isn't as clean
I guess you should keep that in mind
can you try same the line work next to it, so that I can see where I am making mistakes in settings.....Mine always looks thicker , darker, it shows it's different drawing
) I will. Would you know the initial brush settings, I been trying it alone for days. This is why I came to this forum. To ask for help ( free or paid ) from experienced painters. It takes very long even to know what to change. Once I have a good start, I will be able to take off
Brush settings?
yes, what else?
Maybe it's my sleep deprivation, but I thought you were just talking about copying styles
there are billion different combination and only one is the right one 😦
As for settings... hm, I don't know the settings here, but looks like any old pencil brush I got
That’s what I was telling you, it was a lower layer…
you mean old pencil brush settings you created or some miracle brush set that looks exactly the same?
Hello. It's been a good minute since I spoke with you, so I kinda lost my memory
Ohhh you want a brush that looks the same as the one generated?
Well if your strokes are too thick, just change the size
yes, I am trying to figure out the same brush strokes
Wait... the last message of you responding to me was this one
Were you chatting with me before??
Ahhhh nah nah I found you in an earlier message
Are you going to offer any elaboration or further help, or was that it?
I am kind of fatigued at the moment and need rest
Okay! I guess that's it for today!
I was telling you that when you were seeing black to white gradient instead of a black to burgundy, it was because you were revealing a lower layer that was black to white…
So you're just clearing up where I went wrong
Thanks
Now if you have advice for what I want to do, something that I hadn't tried before or messed up trying to try, please let me know tomorrow
hey everyone, I'm looking to recreate this second graphic using the template from the first image. I want to make the white background transparent so I can create a layer for a graphic to slip underneath the template and achieve the results of the second image, any help is appreciated and i know it's a noob question to some 😅


the 'remove background' button at the bottom didn't achieve the results I was looking for, and instead removed the dark grey border
i want text similar to the trenches how could i remake if anybody could tell me? If you need a full screenshot or image i can send

Can Someone tell me how i can wrap This image around this bus in Photoshop


Anyone here 
How do I extract stickers that are uploaded and grouped together in a single file?

You'll need to open the Gifs in a timeline in Photoshop
(You should have a dedicated workspace for video in Photoshop)
There should be frame by frame and all you need is to remove the background on each frame (It looks there isn't a massive amount)

Possibly, but you're on the Photoshop server here 🙂
ye true lol
I would expect you can do that with After effect though
Anything that can extract frames from a GIF
@vapid flume There are exactly 10 frames in the file
That's what I said, Photoshop isn't generally the best software for motion graphics, but for such a limited amount of frame it should be easy
And it's possible that the background is on its own frame, meaning that all you have to do is removing that layer/frame
Anyone can help with editing a skin of a model from boudoir photoshoot? Dm
If you need help with your projects, then go to #💬chat-general but just in case, this is not a job board, you need to go to proper freelancing websites (Particularly for boudoir photography)
I would hate being your client and having my photos taken care by a random person on a Discord channel
You can hire freelancers (and draft a contract) by using Behnace Hire
https://www.behance.net/hire#
Hire the world’s best design talent on Behance. Discover, connect with, and hire the perfect creative freelancer to bring your ideas to life.
Or use other reputable freelancing websites like PPH, or Upwork
Hi appreciate your long text
"long text" LOL
In what way? Lighten/darken it?
add/remove tattoo?
Yeah, just don't mask them out then
 ohk
ohk
any idea on i can import psd to blenders?
cause the screenshot from before is blender model of the bus i made, but couldn't adjust the material there so i though i could do it on ps
I think you might be better off adding the texture to the model IN blender.
The issue is more what does Blender accept as a file format for materials and if Photoshop can export them. This is very unlikely that it will work that way.
Sorry James, our messages crossed, so what James said 🙂
You can add an image on a mesh in Blender (I can't remember how to do it though) but I know I already done it, adding an image to a plane to create a poster
In Substance that would be called adding a decal on top of a material, so I'm sure it's possible in Blender though (typically it would be a PNG)
Maybe that will help?
https://www.youtube.com/watch?v=Y7mUVrHUR3Q

In this tutorial I show you how to add a decal or logo to any model in blender really easily. I created this method after needing a really easy way to add lots of decals to a model I was making and ended up with this and I think that it ended up working really well. (Also sorry for the re-upload somehow I uploaded the first video without sound s...
That said, any specific questions for Blender, I think you'll be better off asking on a Blender server
Yes, actually u answered pretty much all of it so thnx alot 
@sly hawk Thanks for your help too
Gave +1 Creative Carma to @sly hawk (current: #5 - 1068)
Team work makes the dream work! 🙂
Skin smoothing
This may help dramatically:
https://www.youtube.com/watch?v=89AowdLeZUA

► Join PiXimperfect Pro - The Ultimate Photoshop Training Course: https://pix.live/pro
► RECOMMENDED SOFTWARE & GEAR:
✅ My Graphic Tablet: https://pix.live/wacom
✅ Recommended Budget Tablet: https://pix.live/wacomlite
✅ Try Photoshop for Free: https://pix.live/photoshop
✅ Artificial Intelligence Photo Editor: https://pix.live/luminarai
✅ Unlimi...
I can't help too much today, since I'm working on a few proper projects for work and desperately trying to finish today so I don't have to work tomorrow 🙂
This ain't 1 minute or less
It will be in 1 min or less once u have the settings ready, so next time u can directly just switch the image
Yes, I watched it
I do wonder, though...
Why vivid lighting with high pass and low pass?
Keep wondering until somene can help idk 
Interesting reactions
Are you trying to say that you don't want me speaking?
 Stop overthinking my reactions i love emojis so ignore my over usage
Ah
Hm, alright then
They had a mathematician (plenty of them as it happens)
https://www.sciencedirect.com/topics/computer-science/frequency-separation
Holy crap
Also, you're doing again!
Posting walls of text
"Walls of text" often has negative connotation
Are you saying you want me to delete that?
Okay
It makes me want NOT to read what you are trying to say
Okay...
Don't delete, I don't mind, but you also want, for the purpose of being helped, keep your questions, or otherwise harmless chit-chat short and sweet
It's also extremely tedious to read, but already know that
Sorry, I often forget things that happen after months
Sorry for the caps lock
I only forgot. Sorry
No worries
I can assure you NOBODY like lenghy messages, it's not about me, it's about it being a Discord server, where people don't even say hello or thank you (some do). There is a ceratin "etiquette" to it, like it or hate it
And walls of texts aren't part of that etiquette
I guess that explains why I didn't see you when I was having issues with masks?
People asking questions on the community forum
https://community.adobe.com/t5/photoshop-ecosystem/ct-p/ct-photoshop?page=1&sort=latest_replies&lang=all&tabid=all
like lenghy texts, that's their thing, it's a particular etiquette on the community forums to be asked about your full system specs, your Photoshop version and whether you have any plugins installed. They also ask if your Photoshop is legit.
We don't ask that here if they're not relevant
Exactly
Huh. That's tough...
That's my choice, I don't have to be here, I am not paid to be here, I have anough work to do for my clients. If you ask nicely and shortly, I'll answer nicely and shortly
Are you offering your time right now? I can try making it short for you
Unfortunately, I am not supposed to be here 🙂
I have projects to wrap up before Chritmas time (that's the life of a freelancer, people thing you're always on call)
Fair enough
but I am not alone, lots of people are willing to help here: Use their time wisely
Yes, if you're not finding what you want, then try to commuinity forums (see the link I shared)
Good luck!
I need to go now
bye everyone (and merry Christmas to those who celebrate)
Bye, and merry Christmas
What would be a good color for the font in this scenario? What effects could I also have to make it look better..

how to resize an image, or how is it called, the place seeable that im working ?
It would be the cursor tool, selection tool, or lasso tool. Select the object, And then you can drag the 'box' to move it
uh i need like to make output image so it gon fit on a4
pink
also, yo left ear is bit too left
are you sure? They look even to me..
yes i am
anyone here able to help me identify a font? had no luck sofar sadly
looking for the font on the wall, underneath (the normal looking font) as i know the one underneath station 2 is aurebesh, that star wars font

already tried my luck with whatthefont, no luck sadly
Can somebody help me on screenshare in a vc, I'm trying to create a shirt in a 2d game using a reference photo, but the shirts lighting isnt equal so I need to blend the shirt together but idk how, smudge tool doesnt really work for mixing them together
If you mean enlarge the canvas size, In the top menu go to > Image > Canvas size...

yeah, thank you !
Gave +1 Creative Carma to @viral palm (current: #9 - 656)
Hi, so I was editing an image and applied a camera raw filter to it. This was done on a separate document, and once I was done, I pasted it to another one. When I took that same image from the original document, rasterized it, and pasted that rasterized image into the new doc, it came out very saturated. Why and how do I fix? The image on the left is unrasterized, and how I want it to look, but the second image is rasterized and came out very saturated

Are the documents in the same color mode? if one is CMYK ans the other RGB you'll have color alteration...
If not, you can desaturate with a Hue and saturation adjustment layer.
If you crop two seperate parts of a shirt in different areas, and the lighting is different in both parts, how can you blend them together
Yes, both on RGB 8-bit. In the original doc where I was editing the images, they look identical, as I hoped, but when I paste the rasterized version it comes out super saturated. The photo I attached shows how they look identical in the original document, so I'm not sure why the rasterized one comes out weird

You wont succeed whith font finding web sites because the Text has perpective...
Search for a sans serif font "Black" or "Heavy" weight...
I'm curious... Why do you rasterize? Is it a smart object before rasterrizing or several layers stacked with particular blend modes intricated?
Did you try to paste a non rasterized version of your design on the second adjustment to see if the saturation increases too?
idk there was a part of the layer that I needed to delete, and it said I needed to rasterize in order to do so
im not very experienced with photoshop, but its the only tool im able to use for the project im working on
if it changes anything, these designs are supposed to be for shirts
Possibly patch tool
is there anyway to do it in just the colour space (using curves etc.)?
Can someone please help me with this ^
Remove Tool?

I have come up with a more universal solution, I created a curves adjustment layer which clamps the highlights on top of it, and used "blend if" to blend if the brightness was more than 238, targeting the highlights

There are usually many ways to reach the desired destination. Good that you have achieved your result.
Just one question: does she know that you are publishing her picture online?
She's a celebrity, this photo is already on her own Instagram
easiest way to crop subject out/remove lines?

maybe i am having a brain fart but i cannot think of a proper way 🤔
What would be the best way of removing the lighting influence on this door image? Flat lighting is ideal

Heyo Everyone! I have a simple question -i feel like the photoshop Collage templates (in the photo section of new file generation) are MUCH easier to use and im failing to use them properly. any guidance to a tutorial page or a quick Q&A would help me a lot!
it looks like i can insert X amount of pictures and have them presented in different arrays the templates provide, but it seems like I must embed, adjust, and even clipping mask them to fit within the frames without overlapping in other frames. ¯_(ツ)_/¯

hello, my eraser is always one or two pixels bigger than the displayed cursor. ive tried changing multiple settings. im on windows and cannot get the eraser to behave as the cursor pictures it. any ideas?
Don't erase. Add a Layer Mask to the Layer and paint on the mask.
Ctrl + click on the Layer to select the pixels on the layer. With the selection active, add a Layer Mask. Then in the Properties Panel, adjust the Feather value.
Change eraser mode to Pencil...
But as @ripe quest said working with eraser is a destructive method...No other way to recover erased pixel than Ctrl+Z.
Working with layer mask is the non-destructive way to work...

Smudge tool is with the Blur tool and Sharpen tool in the tool bar.

Also didn’t work. Somehow changing my cursor thickness to thin made it a little better. And making my cursor bolder made the problem worse… seems backwards to me haha
This is why Layer Mask and painting on the mask is the best option. You can paint with whatever brush you want.
Sorry I haven't used eraser for decade... But on my end, preview size fits perfectly with erased areas when I set my eraser mode to pencil...
Are you using a particular brush or just default?
But to be honest, don't loose your time with eraser and switch to layer mask method.
No way to remove completely lines "burnt" in the skull shape but you can use levels (or masking) to remove lines around the deign then use "blend if" technique to make darks transparent... Once you have the result you want change your layer to Smart Object (and play with blend modes if you want)...
What i meant was fading the edge of the shape (reducing the opacity gradually with like a paint brush tool).

I'm trying to find the best way to seamlessly blend photos together for an Instagram carousel, what would be the best approach? I've considered just applying a gradient layer mask to each image and overlapping them but I'm curious as to whether there're any alternatives that may provide a more dynamic result
To note, I'm talking something like this, not like some sort of photo manipulation where I'm adding components of one image atop another

Guys how would i achieve this effect in photoshop? im trying to make a playable character mod.

Yes. You could do that with a Mask and feathering.
Can anyone teach me how to change the title from "BLACK SABBATH" to "TEAM SULAP" please?

The font,image, background need to be the same
In case you want the file

i just bought PS but because of my system requirments i cannot download or use the web version is there a work around?
Refund 
What does it says that makes you think you cannot delete it?
Have you tried to download it and the app won't launch? with an error code?
Have you taken advantage of the 7 days free trial?
He did it.... Solved in #💬chat-general
Chill 
OK

I'm more chill than a couple of penguins 🙂

This penguin doesn't look chill
My cracked photoshop vern2023 is not working properly
You're on the official Photoshop server here. So you'll get no sympathy. Sorry!
Where can I?
Buy a proper version and it won't happen!
(£10 per month, with Lightroom, or £16 pm when you are a student for all the CC apps)
Have some sympathy or buy Photoshop?
Buy
Let me get you a link. What country are you in? (prices can vary depending on countries)
Pakistan
Bear with me...
So, for Pakistan, you can't get through Adobe directly. That happens when some countries impose restrictions
Here is a a list:
Those resellers are Adobe vetted, and all is legit.
You'll see some aren't located in Pakistan, but are able to sell worldwide
https://adobe.my.salesforce-sites.com/PartnerSearch?lang=en
They are appplying the same kind of prices as in other countries (allowing for VAT and the like)
Found this piece from an artist I really like, I wanna ask how does one replicate the effect used in the portrait? (Not talking about the "colored" grain effect, but rather the "bichromatic render", I don't know what it's called)

I would say a threshold, which is a way to reduce the valeus into a two tone image (black and white)

What's going on y'all. I made this video to demonstrate and explain the ins and outs of the Photoshop adjustment, Threshold. This is a very powerful tool when levied correctly, and getting familiar with its inner workings can really take your designs to the next level. I tried to go over as much information as possible while still keeping it rel...
The end result greatly depend on the start image, so you'll probably need to adapt settings and other stuff to your own case
This looks like a neat solution I hadn't thought of, thank you! @vapid flume
Gave +1 Creative Carma to @vapid flume (current: #8 - 828)
I ended up doing it with the camera raw filter, as well as some overlays w/ darken but this seems so much more straightforward, lol