#❓ask-a-question
1 messages · Page 90 of 1
Gave +1 Creative Carma to @stiff trail (current: #181 - 9)
Yes! It worked. Thank you so much, man! This means a lot to me. It's been a bit of a rough ride moving from Inkscape to this. I appreciate it a lot
Just click on the mask thumbnail in the layers panel.
Any advice?
Would need to know some more info, like what level of downscaling, and if it's already downscaled are you trying to upscale? Or just export as is?
Settings depend what your’re looking for…
If you downscale your image from the export as menu you can play with resample options… (Bicubic sharper is known to be better for downscale)
Hello does anyone know how to create a layer mask that way I can have it all selected and make the smoke darker to go onto a shirt?

something like that?

Yes how did you do that?
adjustment layer with the setting shown in the screenshot

Looks like you’re in channel panel…
My adjustment layber is on the other screen sorry
Ok , so yes just crank up the black output like you did!👍
perfect, thank you @viral palm and @tame cape (:
Gave +1 Creative Carma to @viral palm (current: #9 - 603)
Thank you! @tame cape
glad we could help
Thanks! (Carma point is yours on this one)
Gave +1 Creative Carma to @tame cape (current: #30 - 69)
how can i achive this effect? i mean the man with only green

Hi - when uploading to Adobe Portfolio should I upload my images in 72 dpi or 300 dpi? When I uploaded them in 72 dpi it looked blurry
Just the green or the engraved money effect too?
If you want the whole money effect => https://www.youtube.com/watch?v=GLRDCn5UMOo

Create this strange and simple texture in Photoshop to apply an engraved Illustrated look to your photos and artwork. In this tutorial, we'll run through the basics of getting it set up, then take a look at a few techniques to give your image a more authentic dollar-bill style treatment.
BONUS: to create the Sun Rays at 07:15:
- In a square im...
What's the pixels dimension (HxW in pixels) of the image you've uploaded?
For web display dpi is not relevant.
Just to be clear... A 2000px by 2000 px picture will look the same in 72ppi or 300ppi.
But if you use Image>Image size... to change resolution from 300 to 72 and tick the Resample box photshop will resample your image and change it to 480x480 px.
Ctrl + R
CTRL+R to display Rulers then right click on one of the rulers to change units
It’s 3000 px x 2250 px
so you've uploaded a 3000px X 2250 px (300ppi) on your Adobe portfolio and it looks blurry?
No at 72 dpi it was blurry lol.
I was just wondering if anything uploaded to Adobe Portfolio needs to be higher like 150 or 300 dpi
https://help.myportfolio.com/hc/en-us/articles/360038360914-Formatting-Images#:~:text=The biggest rendition we generate,Website Container
Check this page for more info... Rendering seems to be variable depending the resolution of the screen where portfolio will be displayed
Maybe your image is too large and has been "downscaled"(?)... But as I said 72ppi or 300ppi doesn't matter in the case of online displayed image.
TBH, I've never experienced any Blurry picture with Adobe portfolio but I use the same rules than behance project so I never post images larger than 1400px wide.
And I always set my pictures to 300ppi (even if I'm sure it's not the problem here). If you can you could try to upload the same image (3000x2250) in 72ppi and 300ppi and see if there is any difference... Maybe I'm wrong (but I'm 99.9% sure I'm not)😉 . I you see any difference, please let me know.
Select the man, create a layer mask and use adjustment layer to vary the hue/saturation. make sure colorize is switched on
Anyone know how to not make this picture blurry when rendering ? Cause when i put it on the case the pic is blurry and not clean at all


If you have it selected and masked, use Gaussian blur
Sorry read it wrong way. What do you mean rendering? When you export?
yes exactly i dont know if there were certain settings that made the quality better in general
How do you plan to use it, in print or screen? Make sure resolution is high enough.
What format do they ask for? Do they have a specification for the file
Whats your image resolution?
where do i see
If you output to their dimensions it should be fine. Image menu/image size
Do they specify resolution?
wait is resolution in pixels?
It may not be as sharp as you want but you could try sharpening
ok i will do that
Usually for print it’s dpi (dots per inch)
ok thanks i will try resizing on their website
If you can get to their spec with photoshop I would do that then upload
it says to vectorize it to up the quality
That’s if you have vector artwork to start with. You could try placing into illustrator and running image trace at colour and high res setting to vectorize. Not sure how it will cope with that image
If you get ps file to the correct size and high resolution it should work. So much artwork/photographic images must surely be used by them
No upscaling. Just downscaling to decrease the size of an image as a PNG file. Looking to preserve as many details as possible. I decreased the dimensions via the Image Size tab, so resizing it. Now I'm looking to export.
Two questions! Are you trying to reduce size as in file size? If so… Does it need to be a PNG? JPGs have a higher compression rate, resulting in smaller files. But if it needs to remain a PNG, downscaling via Image Size works, you can also reduce the bit depth to reduce file size, but that might be noticeable in the export depending on the image
<@&548221840750018590>
not from an official Discord with Adobe Employees online
but thanks for letting us know
Why isn't the gradient being applied to the outline?

Maybe nothing was selected/active?
is this gradient also created in the same layer style?
thanks btw i used vectorizer and it worked

Gave +1 Creative Carma to @stark wharf (current: #225 - 7)
The flame is selected
OuterGlow, yeah

it might be worth doing that on a separate layer style (you can group the layer and apply another style to that group)
like on an empty layer?

madea a group, and that didnt work either
something like that?

this is what the old one looked like. I thought the graident meant like a linear gradient across the shape

Try to use stroke (with gradient) instead of Outer glow with gradient

Perfect, thank you so much!
Gave +1 Creative Carma to @tame cape (current: #30 - 70)
would it be possible to sharpen the edges instead of have them rounded?
Yes.
But not with an effect. Use the real stroke for your shape instead.
😉

awesome, thanks
Gave +1 Creative Carma to @tame cape (current: #30 - 71)
did you guys know how i can make "Discord" title look like a text below? i mean better quality

Apparently your picture has a very small size. Just try to use the same or a similar font.
@north stone

can you send me link to these? please
Anyone here?
Can anyone or someone who knows to make 32k resolution on a picture to help me
With this
Picture

Could find free website to high resolution on 32k
Anyone?
I mean 32k is a massive resolution, what in the world is your display set up like haha
I’d argue it’s incredibly unnecessary, you’d need 16 8K TVs to even display it
At its native resolution that is
Will you help me out?
Or can you
Make it to higher resolution
I don't want it from an free website with ai
Just standard higher resolution
I can make it to a larger resolution, I’m not at my computer right now but when I get there for sure. In the meantime there are some great open source upscaling tools online: https://github.com/nagadomi/waifu2x ignore the name, people use it to upscale old anime but it works on quite a few different types of images

GitHub
Image Super-Resolution for Anime-Style Art. Contribute to nagadomi/waifu2x development by creating an account on GitHub.
Am not on pc
Android
Can...
Hmm
You get on Pc
Pls Bro
It word make my day today if u could
Pleeease
No?
Anyyyyone
Patience my friend, I'll get to it when I'm able to momentarily
Does work on mobile?
Also just for future reference a single 32k image would likely be several gb which is a bit absurd
what's the best way to make it look like something is partially submerged in water?
I know that you can simulate water distortion just using "distort" effects or any sort of glass effect. It's hard to map out what needs to get blurred and what doesn't though.
Another key thing to note, the image you shared is only 743 × 674 which isn't the highest resolution to start with. Upscaling cannot add details that don't exist. Starting with a clearer screenshot (if you have one) would be great

This is what a 4x basic upscale looks like, turning it into 2972 × 2696

this doesn't look even a little like there's water at the bases of the trees.

There just litte blue i use from converter from free website
Like I said, normal upscaling can't add details that don't exist. That's where your AI upscalers come in and try to do some guesswork

Change your image to Smart Object and try "Super zoom" Neural filter.
Honnestly get 32K with a 700x600 original picture? You're an optimistic guy...
Each upscaling step is longer than the one before so I won't do it... But now you know how to do it.
Can you scale it up to 32k resolution?
Like he said, each step will take longer... getting to 32k would take some patience for very VERY little payoff
He said he wouldn't, but showed you the steps
@viral palm i need ur help i can't do this without you i am on Android
Wish there someone could be here for me
I don't know why I invested as much time into this as I did (I probably shouldn't), but using multiple different upscaling methods... I'm tapping out around at a 16k jpg, even though it really shouldn't have been scaled beyond 4k (with or without AI)

It has white line on the hair
Butt i tryed from free website was't good
I wanted from a Photoshop because i know they do better with no ai
Photoshop neural filters are AI...
The "neural" is from neural network, which is machine learning, which is AI
My girl says i should't ask anyone butt i going get my profile picture 32k resolution
Sorry for mine English not from Uk or Us
I think am going
Thanks for the help guys btw
You walker
Take care off you bro
I hate to say it, but your girl is right. I don't think there's a single website, application, or platform on the planet that will support a profile picture that resolution. But I wish you the best of luck 🫡
Thank You
why do my illustrator files upload as photoshop files when I save as
how to add your models in obj format and others to photoshop
YOOOO I DID IT
quick question how do you change the shape of image like in this

i am trying to make the pokemon realistic

with the pattern in the left
Is there a way to set it so I can move within the canvas by clicking the mouse wheel?
just like in most animation software, but for photoshop
ctrl r?
with mouse wheel no idea

nvm
you get what I mean now?

bro 😂 are you serious
._.
i know that, but i want it to be easier
just by clicking anywhere
but i think ive found a way
i dont know any other ways to do so
ooh
Hello Everyone! I'm new to this group so can anyone help me to participate in creative challenges of photoshop?
Hello,
And what is the possibility of making a color gradient in external glow?
Because I would like to reproduce the yellow-orange glow as in the 2nd picture


Hi @boreal charm
- Activate your layer
- Ctrl + T
- Click on the button shown in the screenshot

Hello! I have a question about my annual subscription that I started in July with a student discount; this is unrelated to Photoshop. I’ll keep the student status until December, but after that, I won’t be a student anymore. What will happen then? Will my subscription be canceled, or will I have to pay a higher rate?
Hey Rym, it’s best to contact Adobe customer care using their live chat feature on the website for this! They’ll be the best people to assist!
Hey, check out the #📣creative-challenges thread!
Try creating a mask and then inverting it
hello, I'm asking for help on this text, I would like to have this kind of text, I'm not asking what font is but how to have this effect on this text? I really like how the text is incrust in the background

You've probably chosen a file extension your OS is set to open with photoshop... Illustrator Discord server is probably the best place to ask question about Adobe Ilustrator https://www.discord.gg/adobeillustrator
For example, you can use the ‘Inner Shadow’ layer style.

thx a lot man
Gave +1 Creative Carma to @tame cape (current: #30 - 72)
Here is the link to Photoshop creative challenges page https://www.behance.net/challenge/photoshop
Don't hesitate to ask if you need more info on how to tackle these challenges
To add what @tame cape said, you also can search for "Photoshop Debossed Text effect" or "Photoshop Carved text effect" on Youtube.
They are a lot of tutorials which could help you achieve a more refined/detailed text effect like this (if you need to).
how do i add shadow in bottom part of the icon (not in the edge to outer, but edge closer to icon center)

Yes, reducing file size was the intention and PNG is preferable, since I prefer it as a lossless container. Reducing bit depth definitely degrades the image too far from what is desirable. My particular inquiry would be with Export As - what resample option is best suited for downscaling via Image Size.
Another tangential question is that I have a layer within a PSD and I resized it without any particularly noticeable detriments. What resample option is best for exporting the image after performing this also?
Thank you for your support. I would like to ask how can I tackle the challenges and how to start this challenges?
Gave +1 Creative Carma to @viral palm (current: #9 - 604)
"inner shadow"?
Not sure to understand where you want the shadow...
like this shadow from inside but buttom only

inner shadow!

Probably overkill, but here's a video
Got it, thanks really apreciated it
Gave +1 Creative Carma to @viral palm (current: #9 - 605)
Watch any video you're interrested in and follow the steps shown.
You can share your designs in #✂challenges-feedback if you want some feedbacks.
Note: there is nothing to win except your skills improvement 😉
Thank you so much I would keep that in mind ☺️
Gave +1 Creative Carma to @viral palm (current: #9 - 606)
how do i make objects high quality even when i zoom in

Use images that are larger / higher resolution.
(Or just look at the layout at 100%)
text itself is pixellated but not pixellated on ai

Photoshop is primarily a raster/pixel-based image app. It works on a finite grid of pixels. Adobe Illustrator is primarily a vector-based app. It uses shapes made of anchor points and trajectories that are assigned qualities like fills and strokes. They are not dependent on "resolution." You should become familiar with these image types and how they work.
Hi everyone,
I'm looking for someone with good knowledge of this thing that, It's kinda urgent. Would you please like to guide me that
how do I erase this background line which is visible on this sphere? I'm unable to do so in photoshop software in wacom one tab.
If you would like to help, please
ping
Thank you!

I see, thanks apreciated it
Gave +1 Creative Carma to @ripe quest (current: #3 - 2447)
I would suggest using the Remove Tool but that screenshot looks like an old version of Photoshop so you'll probably have to use the Clone Stamp or Content-Aware Fill tools.
Hello! Did you guys know how i can make "Discord" text look like text below? I mean better quality

Would u plz like to guide me step by step in detail where shall I find it? Because I'm a complete beginner. And the version which I'm using is of 2021 version
Try the Healing Brush tool...
Learn how to use those tools... Clone Stamp, Healing Brush, Spot Healing Brush. I'm sure there are tutorials on YouTube that discuss those.

You can try to change stroke position in Layer Fx panel but you won't fully sharp angles.
If you want sharp angles outline you'll need to go with illustator and "offset path" feature...(screenshot)

is there a way to except certain layers from transparency effects?
like Darken, Overlay etc etc
Hi @north stone
You probably overlooked my answer:
#❓ask-a-question message
Apparently your picture has a very small size. Just try to use the same or a similar font.

I converted the text to a shape and then did the outline that way
Hi @wary roost
- Duplicate the text.
- convert the duplicate to shape
- set the stroke as in your last question
done
😉
awesoem thanks!
Gave +1 Creative Carma to @tame cape (current: #30 - 73)
Great, you found the same answer. Really good. That's what you call applied knowledge.
hey yall, trying to figure out how to make all the areas that the text intersects with the spotlight black

im aware i could always just rastrize it and use an overlay in a dif photoshop file but i wanna know if theres an intended way to do that
but i dont have font that you can see below the "Discord" text. When im trying with another fonts, its look the same
could you clarify what you meant by this?
i think all pixxel wants you to do is download an identitical font of a higher quality
How can i remove the top handle?

i downloaded this photo from internet

so find a similar font
And when Im trying to change this text it looks like this
they showed a few possible candiates above

thats probably a result of some weird conversion stuff
even with added fonts?
maybe you want to increase the pixels per inch
should be in edit > preferances
it might be written as dpi
or dots per inch
Which setting are you using?

wait a second
sharp
try none (or similar)

is there a way to hide everything thats not intersecting with a specific layer?

Try increasing the font size

It works, but letters don't have a good distance between them

These are the problems that such pixel fonts have. Either a pixel is filled - or it remains empty.
The yellow font seems to be too big
so i cant do anything with this?
yea i changed the yellow one
but look at "y o u t u b e . c om"
but i fixed that
tysm bro
Personally, I don't like using them. Because they only work with certain (few) font sizes
so how can i do them work in every sizes?
No. you can't
Hi @wary roost
- activate the Convert Point tool from the tool bar
- (only) click (without dragging) with the Alt key held down on the anchor point deletes the leading handle
😉
thats done it, thanks
Gave +1 Creative Carma to @tame cape (current: #30 - 74)
When you place a design into illustrator into a psd mockup file, should I place it in as a PNG, JGP or AI file?
Design made into Illustrator to PSD mockup. Right?
I think there is a missing word in your question...
You can place the 3 types of files.
Oh sorry I meant a design made in Adobe illustrator lmao
But then put into photoshop when I’m making a mockup
You can still edit AI file imported by double clicking on the smart object > will open a new illustrator file (if you want to modify)
PNG is better than jpg because it alloys transparency but you can use jpeg too particularly if you don't have any transparency in or around your design.
I made my mockups by placing an AI file
So you can place the 3 types...
It's OK... YourAI file design is in RGB mode?
Ya!
OK! so no problem!
I have a really important question. Obvisously, the colors we percieve online differ from monitor to monitor, and also from program to program. I'm trying to make a logo that uses the REAL imbeded color code (Hex code) from a website. But I can never tell if what I'm picking is the actual color. Using the inspect element tool, the layout panel shows certain parts of the website, but the colors it gives are not even close to what I'm seeing on my monitor. Does anyone know how to obtain for certain what the actual color code is for elements on a website?
If you use Chrome I think there are several extensions that can scrape color codes of different elements
If I take a screenshot and bring it into photoshop, and use the eyedropper, is that the correct, genuine color code?@molten nacelle
It will like be the correct code of whatever image file the website is sourcing, screenshots on Windows operate on 32 bit color as far as I’m aware
The answer (in an ideal world) would be to have the client whose website it is, send you the source image / color codes. I know we aren’t always that lucky though
Any hex, RGB, CMYK value will technically be consistent across the world.
However, all monitors, settings, users etc will display it differently.
Just like people looking at a dog in the park.
Someone wearing sunglasses will percieve it differently to someone without glasses
If someone is that desperate for you to match the right colour, they should be able to provide it, without you needing to colourpick it in photoshop

You can inspect the code on a website to determine exact hex values used in solid colours, backgrounds and fonts etc
How do I achieve this effect? If you look closely around the corners, there is a type of haze or motion blur around the photo. I'm not sure what it's called, but does anyone know how I can achieve this?


Hey, Please someone can help me to creat a blur effect i don't want to blur a background or something i want a blured background
So I got this logo and I am using the screen overlay to create the shine and it works perfectly fine, but when I merge the logo without the background so that it becomes transparent the shine turns to a black background again.


Is there a way to fix this?
how would i create text that looks somewhat like this?

i'm talking aboout how it sorta looks 3d-ish
I would use the Extrude feature in Adobe Illustrator...

thx
hello, how do i make this better?

I assume your shine effecys are made with "Light flares" on a black Background that you've applied over your design in screen blending mode?
Blending modes work only if there is a color below (Black, White or any other color).
Quick solution would be to use flares brushes rather than flares images...You can make your own brush from the pictures you used for your design or download some from the internet.
You can find some free brushes here: https://www.brusheezy.com/free/flare

thank god
Gave +1 Creative Carma to @viral palm (current: #9 - 607)
anyone have advice for distorting something so it looks like its being viewed through a glass sphere?
like just some textures or filters i could look into
Does anyone know how I can make this type of leaves in Photoshop?

from what perspective?
Do you mean make a flat texture map that you're going to apply to a 3d model?
I mean like, how I can produce this type of leaves looking above (I believe this is orthographic view from above)... It has been something that I always wanted to know and to put on my 3D assets

if your talking about a texture usage, id assume that veers more into the realm of art, although i could of course be wrong and there might be a secret shortcut to making those in photoshop
I feel like it uses an anchor point and then rotates until it makes a star... But, there's gotta be a shortcut to achieve somewhat like the picture
I would try Adobe Firefly and feed it a rough shape as a Composition Reference...

I used that because it was quick.

Where can I find Adobe Firefly, if possible to ask

You could use Firefly to get you started. Then bring it over to Photoshop for additional editing.
how do i make the object not much pixelated when i zoom in
Any raster-based document will look pixelated when you zoom in since its made of pixels. Use Adobe Illustrator and make a vector-based object. I think I've told you this already.
can anyone help me wheneber i try to add a adjusment to one layer it wont let me it just keeps duplication it

Image > Trim... Choose Transparent Pixels... Then OK.
Thank You!
Gave +1 Creative Carma to @ripe quest (current: #3 - 2451)
What’s yall recommendation for VHS effect overlay websites
how to make this in photoshop

is there a channel where i can get ideas
It would be easier to do in 3d program
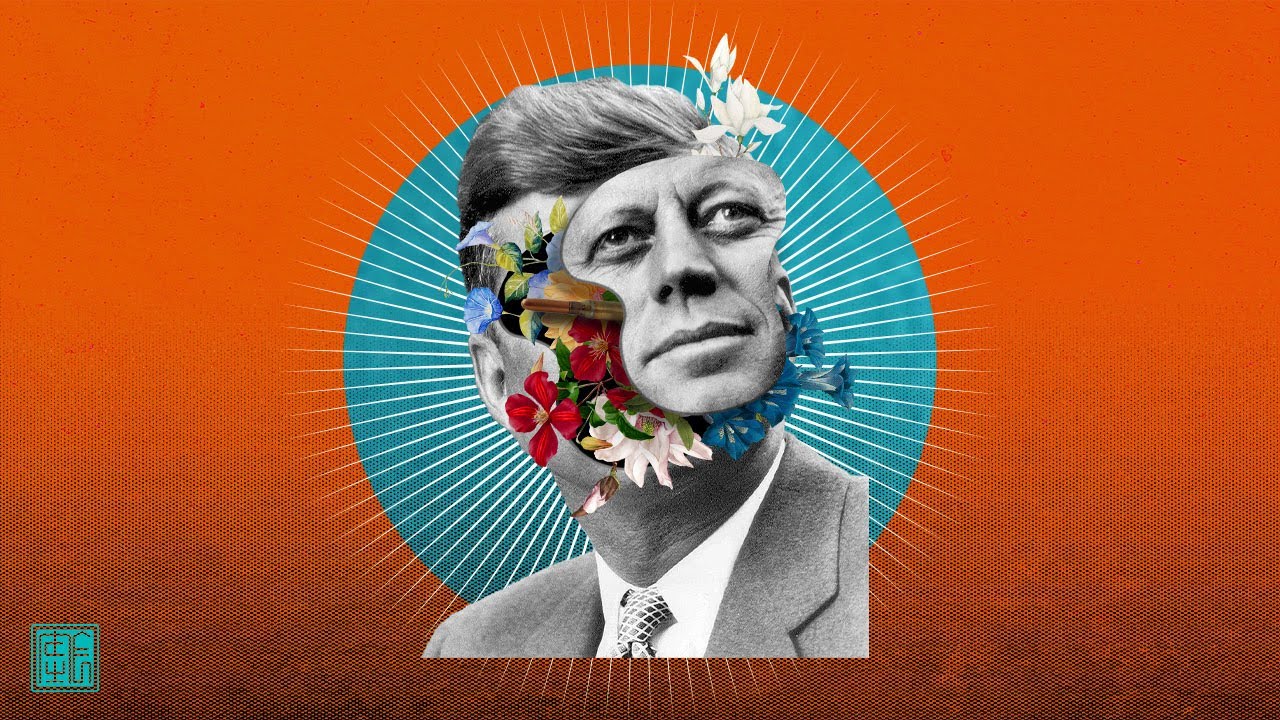
That seems to me basicaly a Collage of many different Elements. Maybe look through some Tutorials like
https://www.youtube.com/watch?v=5j9_ywshuDw
https://www.youtube.com/watch?v=dJOqUXVY7EQ
https://www.youtube.com/watch?v=OCrtAziz97s
and put some ideas together with those Editing styles.

Hey everyone, in today's video I wanted to revisit an older tutorial of mine on how to make Collages in Adobe Photoshop. I wanted to revisit this tutorial and make it a bit more beginner friendly so that even beginners know where to start when it comes to making your own vintage collages in Adobe Photoshop.
Check out my texture packs to create...

Add layers of style to any image. Photoshop makes it easy to combine images into something completely new.
Learn more about combining images: https://adobe.ly/3D2HLDf
Subscribe to Adobe Photoshop: https://adobe.ly/3vWtAiy
Learn More About Adobe Photoshop: https://adobe.ly/4bUzQbh
Try Adobe Photoshop: https://adobe.ly/3womKm8
About Adobe Ph...
People go to college to get laid, I go to college to open minds.
Welcome to my artistic interpretation of the November 22nd 1963 JFK incident where I show people how to make Surreal Collage Art via a cursed photoshop tutorial.
Follow me for more cursed art
Instagram: https://bit.ly/instoro_
Twitter: https://bit.ly/twittoro
Youtube: https://bit...
what kind of ideas? in general look out for Creatives where you like that Style or Images or Movies or whatever. Then maybe try to do you own thing with that in mind. There are many Tutorials how Creatives have done there work where you can learn from.
Hey i was wondering how u called the process of resizing an image but like corner by corner if that makes sense, where i can drag a corner without it changing the size of the whole image, just that specific corner
ty
I would say "cropping" if I understand you well
But I think I could do with a demo there 🙂
well the actual idea i have is to make a rectangular box fit this space :

That would be cropping, cropping can be made to reduce the size or increase it
It's done with the crop tool
cool ty very much
And if you need to add some elements you can draw what's missing or let the GenAI extend background do its thing

ty
Hi, I would try a perspective cropping https://www.photoshopessentials.com/basics/perspective-crop-tool-photoshop/

Crop your images and fix perspective distortions at the same time using the Perspective Crop Tool in Photoshop! For Photoshop CC and CS6.
Or if you use the transform tool, use CTRL/CMD to move the individual Corners
👍
i am have a lot of ideas but just dont know how to make them
Hello! 🙂 May I ask something? In a .psd file with many layers, I wanna change one of the images (a flag) but i can't seem to find the whole image or it's size or anything. Anyone has an idea?

show us your image and your layers panel, please

Perhaps the flag could be in layer 48?
I can see the flag in the layers but not on the image, at least not the full one, so I can change it for another, I need the size and all. :\ thanks for any advise! ❤️
lemme try dear
layer 49 is a clipping layer for layer 48
Move your mouse on the line between both layers - press Alt-key and click
can someone please help me export this stop motion from photoshop 2025? it keeps telling me that there is a memory problem but my memory is fine. its when I try to save as web legacy

idk if I can help you
How much memory does Photoshop need for this operation (bottom left corner - unfortunately cut out in your screenshot)? And how big is your image (in pixels)?
Thanks again for your hep but how do I return it so that the flag only inside the globe is viewable (now it's not).

Gave +1 Creative Carma to @tame cape (current: #29 - 75)

In which layer is the Canadian flag - in 52 or in 53? Or has it been inserted twice by mistake?
I deleted 52 now
now delete empty layer 48
53 should be above 49
Move your mouse on the line between both layers (49/53) - press Alt-key and click
THANKS A MILLION!!!!!!! =))))))

It’s 5464 x 8192
M3 pro
hmm should be able to handle, but i’ve seen inconsistencies via my own mac vs windows with GPU and much higher ram. Are you able to export as of rn, or does it just clock and load for a while?
no everytime i try to save as web legacy it says not enough memory but i definently have enough memory
ahh nvm i see ur error
It is talking about the RAM available to PS. what is your current allocation?

how can i check, sorry
no need to apologize, just go into your preferences and it should be under file handling or hardware? I’m forgetting the specific tab offhand
just make sure you have dedicated 90% to PS
ahh preferences>performance

if it still bugs on you when doing that, i can attempt to export for you on my windows which is using a 64 GB Ram with a 3070
Yes, slide that to about a 90-95-%
what are other applications that you have open that could be consuming?
Nothing actually, I have only photoshop opened
I dont think so
I don't think so either. What should the result be used for?
its a stop motion for instagram
Does Instagram perhaps have a recommended size for this?
Are you making a post or a story for instagram
if the answer is either of the two, this size is much too big to provide any benefit as IG will compress
you are attempting to compile a gif/video?
Save your document first. (You can probably delete it later).
Then resize your document according to the Insta default and save it as a psd with a new name. Then try again to save it with save for web.
If you are going for 1:1 ratio as a square, the highest i would go is 2560x2560
yea thats what im trying right now
ok lmk if that export works
it should. M3 Pro is a beast
brings me back a few years ago, when i purchased my first mac ever (m1 pro) i was so impressed at the time
I have a question. If i made an image, that for example would go on a t-shirt, has a black background, is there a way to very accurately pick up on dark and black sections and make them gradually transparent depending on how dark? I'm just not sure what tools to use to do that
hey yea sorry, i just used capcut xD. it was something time sensitive sorry. and yea the m3 pro is a beast, it holds up honestly way better then my old pc
I use generative ai to remove a piece I didn't want and it left this little outline, how do I remove it? No idea how

ok so i kinda...? figured out why. for some reason, when i try to adjust levels, it uses "gray channel" while other actions i've seen use "current channel"....... how do i change that?


converting to rgb uses "composite channel" which isn't the same thing...

Remove tool
If you don't want to use generative AI you can disable it or use content aware fill feature.
Your background is not so complicated so generative AI could not be necessary...
Sounds weird but it's your choice🙃
I added noise to my image to make it seem more old school a few days ago, but i want to get rid of it now, and i dont know how

theres no place to undo the noise you added
can someone help?
How many steps can you go back in your history panel?


Guys, sorry for offtopic, but if you know some good AI app/website where to get a gif/video from text input, lemme know ❤️
Have you saved locally or in the cloud?
Versions are stored in the cloud, even if they have the same name. If you have only saved locally and have not saved a previous version separately, there is no way back.
You made the mistake to apply noise on a rasterized layer... The noise is now fused/burnt inside your image and If you already closed the re open your file you can't reverse it with history or Ctrl+Z... I know it's hard to hear now because it's too late but you should have changes your layer to a Smart Object before applying the noise filter to be able to update or erase the applied filter.
So good to know for the future: Change your layers to smart object before applying filter as often as possible...
Alright thanks
You can try to apply filter on your noisy picture. Filter>Noise>Reduce noise... It will reduce noise but maybe it won't be enough...


I already remade the image lol

its a little blurry but theres no noise
i just rescreenshotted what i used before
A bit blurry but colors are more vibrant than my "reduce noise" version.
thats good for attracting more viewers on youtube
How to onow if particular image is A4 format or else?
Generally novices would just paint over when creating a new texture of a 3d model. Like let's say there's a texture of plant and you want to turn the petals from yellow to blue. The only method novices know is to paint it with brush or or create an empty second layer and paint it blue then lower the opacity and boom, combine both.
Is there a professional way to do it. Both novice's method look cheap and terrible.
Nice thanks for the help. Is it possible to change the color of a selected area of the texture to any color? If the whole texture contains all the texture of the 3d model like the por, stem, petals. If I want to just recolor the selected area of the te ture to any color. Is it possible or nah
might not be the most efficient way, but you can always select what you want to affect and cut and paste it to a new layer
True, thanks again.
Any help?
where do i ask for feedback? and can i ask for feedback on a yt thumbnail?
and can i ask for feedback on a yt thumbnail? i made it in photoshop
If not there, then where?
If someone wants to give feedback, then he/she will do so.
😉
yes or no i can ask for feedback on a yt thumbnail?
Why would you not?
It’s a project?
And your getting feedback?
Sure. Please post to the #📝project-feedback channel.
How do you outline an object but cut it off without encircling the entire object just the outer part to give it a glow or stroke
Try the Outer Glow Layer Style...
But is it possible to only select the outer part of something and not always encircle it?

I feel like it would be hard to outline something with the brush tool
could this be any better? The dog's mouth is a little dark and I think lighting is ok, but I think the dog's mouth needs more lighting?

this is what it looks like before I applied the harmonization filter

this is what it looks like before I used color dodge

No, it's not possible... Selection need to be closed. But if you want to select the outer part you can invert your object selection. (ctrl+shift+I)
How do I only color on one layer at a time
Select the Layer and paint on it.
ok
You would select the Brush Tool. Then click on the Layer in the Layers Panel. If its the Background Layer, then you'll have to either unlock it first or create a new layer to paint on.
Perhaps your harmonization filter strengh was a bit to high...
You might try to bring lights on the dog face (take exemple on highlights pumpkins) and don't forget to add shadows...
Shadows need to be treated with care, as they are very important in making composite images look realistic.
don't judge my shadows... Made quickly to illustrate my point 😉
Looks pretty good to me.
I agree shadows are pretty decent; I don't judge though, yeah I think the filter is a tad strong but I also think the other side of the dog is too light
You're too kind Daniel!
and I think I found a better way to make it better
Yep light can be tricky to handle in composite work... Reason why light source of stock images used is the first think to look at when you choose them. It can be a nightmare to make them fit together.
even if I had light neutral subjects, you still gotta add some lighting to it depending on the lighting situation
Have you experienced issues with the "Align to Selection" feature not functioning properly? help
After selecting the objects, I clicked on the object I wanted to align, but it didn't work.
have you updated your graphics drivers?
I’m using mac btw. And it works fine with Indesign and Ilustrator. Normally when you select the reference object it gets highlighted, but in Photoshop it doesnt
idk how to do that on mac 😦
I have for about 30 minutes tried removing the background in different ways, I have been using Photoshop for a year+ but I am always learning.
I tried making some contrast for it to be easier to remove but I still coudn't do it.
Any help is appreciated.


Image is stretched - any recommended ways to fix it?

start again, paste the original and before you do anything with it, convert the layer to a smart object then CTRL T will activate free transform, LOOK for the chain link icon click on it and it will keep it in exact ratio when you resize it 🙂
Yeah, either start again, or if you don't have a better original, just stretch it back out again
Does it have to be that image?
Taken from a travel bloggers website? - The image resolution is tiny, which makes cutting it out so, so much harder
Can someone remove someone out of a picture for me?
reverse lookup says that about a pic? 😉 that's pretty neat
I'd probably do it like this, If I insisted on using THAT image.
not as good as yours, but I was able to do this with the remove background tool and magic wand

without upscaling
Well tbh, I took the first picture I could find of that statue, don't know the name of it.
Ah...I did not edit this beforehand so I do not have the original.
Any subsequent input?
You took the image yourself?
https://www.batravelguide.com/2008/05/monuments-of-buenos-aires-spaniards.html

Get the best information about Buenos Aires and book exclusive city tours and experiences through a personalized travel planning and concierge service
Maybe they nicked your image then 🙂
It sounds like you can just chuck it into photoshop and then just pull the top UP
if it's set to stretch proportionally... just hold down SHIFT as you're dragging to STRETCH it
No I didn't take it myself I took the first that specefic picture becuse I coudn't find another one of that statue. I searched for Buenos Aires.
On google images, I think I didn't write it properly
bumping this bc it's really whacking my brain. for some of it in action... i provided a video. tbh, i only started having this problem after i updated from 2024?
Gave +1 Creative Carma to @sly hawk (current: #5 - 1022)
Any help on this?

How do I resize this to fit the canvas
with the least amount of ruining the design
Should I just resize the original design in illustrator
HELP
SANDRINE
bro it has the width right but not the height
I originally entered the correct values in illustrator but it apparently made the height shorter for some reason
Hi everyone,
I'm looking for someone with good knowledge of this thing that, It's kinda urgent. Would you please like to guide me that
how do I bring in the eyedropper tool. Even though I've clicked the eyedropper tool, As shown in the image, it's coming as a prohibited option in the reference picture in photoshop software . Idk y. I'm unable to do so in photoshop software 2021 version in wacom one tab. Because I'm a complete beginner and I need step by step guidance. I won't be able to update this software as I don't have that much space for the latest version. But earlier. I was able to use this icon. But idk y I'm not able to do so. I've checked all the youtube tutorials. It's coming as the one marked with green color in the pic. But I think google is not able to understand my query. So would you please like to help me out step by step how do I bring out this eye dropper tool option. Why is it not coming in my photoshop?
If you would like to help, please
ping
Thank you!

First, you have the "Color Sample Tool" selected and not the Eyedropper. They're slightly different.


Unless that is the old 3D Eyedropper. Even so, still not the Eyedropper Tool. You'll need to switch to the correct tool. For future questions, please take a proper screenshot in Windows rather than taking a photo with your phone. Its too difficult to see with the bad quality and screen glare.
You cannot just scale the image and expect Photoshop to compensate and move all of the objects around. You'll have to create a new layout and reposition all of the elements respectively.
any idea why I originally set a resolution on illustrator, but when I created the file it decreased the height?
Did you import this AI document into an existing Photoshop document or just open it?
I'm having a difficulty understanding what the problem is or what it is that you're trying to do here.
I opened a graphic design mock up in photoshop, went into the part where you replace the default design with your own design, and it had a specific width and height that I put into illustrator, to create my new design using the mockup as a dieline template. I entered the width and height and didnt look to see if it actually entered those numbers, boom, I finish the design and export and drag it into photoshop, and it needs more height
if im looking for someone to edit pictures, where can i put out a post or hire someone? (for pay obviously)
fiverr, upwork, behance
sorry to bump again... just an issue i've been wondering. or is this a bug?
following up on this please.
Is the part where you replace the design a Smart Object? Did you take the dimension of the smart object opened by itself(double click on it then go to image size)
When you turn a modified image into a smart object, it kinda that 'snapshot' as the base smart object.
if you brighten a shot by 50% and then make it a smart object... the smart object doesn't 'know' that it's already 50% brighter than it was originally.
Try again but make it a smart object FIRST... then play around with levels.
or.. skip the smart object bit entirely.
What do you mean by « properly » . It doesn’work at all or something is going wrong… Could you clarrify?
After selecting the objects, I clicked on the reference object I wanted them to align,. .Normally when you select the reference object it gets highlighted, but now it doesnt.
it actually still does it even when it's not a smart object
the biggest difference that i noticed is basically what i put here
I think you ‘re confusing with the Adobe Illustrator behavior
which makes me wonder why it's not using "current channel" and is instead is "gray channel" (when on grayscale, which even if the image is grayscale, the levels won't apply) and "composite channel" (it'll prompt you to input the levels manually if grayscale)
Works when I try it....
In Photoshop you can align on selcted objects or canvas but you can’t make an object as refrence (like in Illustrator)
i believe you can. it worked before.

If I run an action where I tweak the levels... the levels are 'remembered' next time I run it. - That's the whole point of an action?
Yeah, that's what Franck was saying. "you can align on selcted objects"
 what photoshop version are you using...?
yeah that Should be the case but that's not happening for me somehow
this only started happening when i updated to 2025  it was fine before
But you can’t choose which of two elements will be the reference.
Ex:If you want to align on the left photoshop will take the far left object as reference and you can’t choose an other element as reference…
Thanks ….I doubted myself for 10seconds
Gave +1 Creative Carma to @sly hawk (current: #5 - 1023)
I'm looking for a photoshop tutorial on making costumes for pets/people but I can't seem to find exactly anything that works (there's some tutorials on how to merge existing costumes with pet heads/people faces but I want to make the costume itself).
Anybody have any ideas?
I'm aware of AI tools can do some of this too
How to make this solid background more interesting in some easy ways.
I have many brushes and usually use them, but what is your process of making boring solid backgrounds making product more stand out.


hi i am new here looking for help. my aunt lost her husband today and asked me to change the color of his hat on a picture for the funeral picture but i cant get it done
You could try to add a really subtle texture (grain or other) or pattern to your solid color BG...The key is to keep it subtle.
Can you share the image?
dhumann helped me out, thanks for asking!
How can i recreate something like the ripped effect?

Why is the text like that?

When using the tool remove with the new option of removing people they remove several credits from the total instead of only one.
Finaly I found a way to align to a "reference" object...
Select all the layers you want to align (Ctrl+click on layers names in layers panel) then create a selection of the element you want to use as reference (CTRL+Click on its thumbnail in Layers Panel) . The selection is taken as "reference"
Red elipse become the reference object by making an active selection of it. In this second video you can see if you don't make any selection Photoshop align objects in the middle of the whole group of objects...
@random hornet please note all the videos were made with the align to "selection" option not "canvas".

You're probably in "None" mode for anti-aliasing => try one of the other options... It should fix your problem.

Hey guys
does anyone of you guys know how to create this specific gradient or shape ? I saw it online and it was pretty cool. They made it in illustrator however. I’d love to make it in diff colors. If anyone is willing to help, feel free to ping

Its done with Illustrator because there is a Gradient Mesh tool in there.
You could just paint this and/or manipulate it with the Warp Transform and Liquify Filters probably.
You could try using a Rectangle with a Gradient assigned to it. Then: Transform > Warp...

Might just be easier to paint on a couple of layers.
Is after effects easier to learn than photoshop? what do you guys think. I learned photoshop but i wanna work with AE too
After Effects is a massive app with a ton of features. Its an industry-standard for animation and video production. It's definitely worth learning.
Hi @short pelican
In Illustrator you could create a blend between 3 lines:

Ooooh
That’s cool
Is there a shortcut of sorts
And can I copy this into photoshop
wait a minute, lme try
You can make items in Illustrator and import them into Photoshop.
How editable they are is a different issue.
Edit ability isn’t necessarily the biggest issue for me
possible, if not too complex ( then either ‘customise’ in Illustrator or rasterise in Photoshop )

That’s fine
What’s the keybind to blend them
Is it just blend > blend options > specified steps

I'm following this video and I'm attempting to do this step and for some reason its not working for me

Can I screenshare to someone who may know what the problem is or what im doing wrong
bruh someone help quick
my mouse is like lock selected on a image
when i click into nothing the image is still selected
and when i drag anywhere the image moves with it
even when i switch to new projects and restart photoshop
im restarting my pc
bruh its still happening
someone help someones waiting on me
nvm auto select was off
hello
I was wondering what's the easiest way to change the color of this photo

tried to mask it but it keeps ending up only gray and also it seems innefficient
Add a Gradient Map Adjustment Layer and choose two colors for the Gradient Ramp...

Any assistance, just for a bit?
turned out fantastic immediately, thank you

Gave +1 Creative Carma to @ripe quest (current: #3 - 2454)
Is there a fix or reason on why, when I use a outside or center stroke I get these little black dots. They go away if I use a inside stroke but i wanted to use a outside stroke on thisimage. Any fix?

That's because there are little pixel on the layer you're applying the Stroke fx... They're probably small you can see them until you apply the stroke Fx.
Try to clean up the layer on which you want to apply your stroke (eraser or layer mask technique).
I’m working on changing the color of this machine, and I’d like to add a grainy texture effect similar to what’s in the second picture. Could anyone guide me on how to create that kind of texture in Photoshop?
Thanks so much


Step 1 create a texture as shown in this short video
Then apply the texture over your design in Overlay blend mode (you can also adjust blending with blend if technique) and mask to hide places where you don<t want the texture to be applied.
Note: To open "blend if" menu double click beside the layer name in the layer panel,
To split the "blacks" cursor hold Alt+click on the cursor.
I see thanks for help , I will try❤️
Gave +1 Creative Carma to @viral palm (current: #9 - 608)
in my friends software there are sharp tip brushes.....

but for some reason i am have non after update

everything is now smooth tip
or can anyone tell me how to make sharp tip brush ?
How to make rectangle particular ratio in Photoshop?
Scenario: I want Facebook ads that will be great for mobile, but I want ratio to fill the Facebook container on desktop as well.
Background goes 1:1 = Canvas
Rectangle (I am asking for) = 9:16 inside above canvas for important Ad details
Never mind, I can just crop to 9:16, and copy that smart object to 1:1 canvas project.
You can set up specific ratio and/or dimensions in the properties panels for the vector shapes
If you use selections this is done in the top menu


Then apply the lock and type in your dimensions in one of the fields (the other will follow the original ratio)


I assume the display changed but not the brushes themselves?
If so, try ticking those in the brush settings

When you update, make sure you tick the "transfer" presets as it's the only way to keep your preferences
what server is it? Sorry ill delete
ty
Gave +1 Creative Carma to @vapid flume (current: #8 - 772)
You don't have to delete, it's OK to ask 🙂
I've been using PS for some years now, and for some reason my brain is shorting right now.
I have forgot the keybind to preview, to showcase the project without rulers, lines etc.
Recently updated to 26.0(?), and I'm unsure if this is the reason. I was used to having the button on the left bar. Using a mac - if that helps.
Appreciate the help.
Tab Key and/or F Key are your friend
@forest kestrel
Whats best way to smooth out gradient map rim highlights (layers) using just mouse, except for playing all day long with opacities of different under gradient map layers?

Apply a mask on the gradient and use a gradient on the mask?

Or maybe I misunderstood
Yes that's what I mean. But which parts do you want to fade exactly?
See the lighting on TV, it looks more of a watercolor than actual light, I want it to be glossy, fading away on TV, and also between the colors itself, as white to yellow, you can see it is obvious.
With mouse it is hard to control pressure so I wondered if I can fake it except by blurring it.
Have you tried with a blending mode? ie: try screen and see if that works
I have tried, no rim light there by default, edge is black, so it does not help.
I meant to say, I even tried blending to object with blend if.
You could try one of the blur from the gallery, just throwing things here. For example path blur or tilt shift, where you can control the amount of blur along a path or along a distance

Will try that, thanks.
AS I said, no guarantees but it worth a try!
Also one thing, if you're using a brush with a mouse, you can find ways to mimic the pressure sensitivity with the mouse wheel. I'm really not good with a mouse, so I was never been able to make it work personally, but that doesn't means someone else can't.

I couldn't do without a tablet in Photoshop, so I never really pushed that one
Also try to tick this one (top menu)

If you're using a low opacity and low flow, you'll be able to build up the opacity over time

hey all, whenever i try to fill in a selection with a solid color with the bucket, it doesnt fully color it with that color, and it goes outside of the selection too


anti alias is off same with contiguous,
see those settings, and mostly tolerance. the bucket tool is reacting the same way as the magic wand, meaning that you can adjust the tolerance based on the similarity of tones between the area to fill and the outside. The better the difference is the better the tool will react
That said, and I know it doesn't help, but the bucket tool is really a crude tool for that kind of work, and you might consider changing the colour instead of filling with another.
Changing the tolerance hasnt done anything:(
For example you could select the writing with the magic wand, make sure you got the best selection possible and apply a Hue/Saturation layer to it, changing the colour of just the blue tones
Im trying to make a transparent png of the text with one color
That being said, the resolution and size doesn't look like it's great, for small images there is always the problem of jagged edges
its the highest res ive been able to find:(
what would be the easiest process to turn it into a transparent png?
It would be best to turn it into a mask and apply that mask to a solid colour

It will never be perfect because the size isn't big enough
without the background, it will need some correction and tweaking

it won't be a one click affair
I created the mask by using the different channels. I "substracted the blue channel from the red channel, but as you see even that is not 100% exact, you'll need to refine the mask by painting on it
Can you send the full image here?
Assuming this is Reek of Putrefaction (the band) and not Carcass' song, It will be difficult for you to find a bigger size (and potentially you'd have more luck asking the band (if they still exist)
Its actually the album by the band carcass haha, but the full artwork is considered nsfw, since its a collage of photos from surgery journals
ive been trying to find a hd one for ages
but unfortunately its nearly impossible to find
Well I found merch black and white tee shirts that would be easier for you to take from, but it would also be an IP infringement, depending on what you want to do with the artwork

That doesn't mean it will be easy, but it will be easier than with the album cover in the BG
i think i have an idea though, I might invert the selection, delete everything around it, fill with white and then delete all of the stuff inside, then fill with color
make a poster for personal use,
But again, I wouldn't encourage it, because you know... copyrights
thank you, i couldnt not find something like this anywhere 🙏
Gave +1 Creative Carma to @vapid flume (current: #8 - 773)
im pretty sure it falls into fair use to use for personal use on a poster
I typed "carcass reek of putrefaction" + logo and chose "large" in the size drop down

and you need to scroll and also know that there is more than one page 🙂
Tumblr
See a recent post on Tumblr from @labyrinth-walls-tiny-worm about reek of putrefaction. Discover more posts about reek of putrefaction.
I trust you do the right think and keep it for personal use
Also know that there are official posters available to buy. I mean that's how bands make money!
a bit embarrassed now, XDDD
No need to be. Now rest in hell my friend! 😂
yeah when i search this up it doesnt come up with the same resultst aha
unfortunately not in the shape im looking for:(
ahahaha thank you so much
Gave +1 Creative Carma to @vapid flume (current: #8 - 774)
I guess it depends on the country and if any "safe searches" have been put on Google (you can try another search engine BTW)
do you recommend any specifically? I dont have safe search on strangely enough
Which country are you in?
the UK
OK, I'm in the UK too
you can try Duck Duck Go. It works pretty well (I have it on my Ipad)
https://duckduckgo.com/
DuckDuckGo
The Internet privacy company that empowers you to seamlessly take control of your personal information online, without any tradeoffs.
You're welcome!
ill try to use that aswell in future
someone knows how to remove the bg i know its easy but bec the opacity and that the bg stays behind

I have a layer within a PSD and I resized (enlarged) it without any particularly noticeable detriments. What resample option is best for exporting the image after performing this?
What resample option is best suited for downscaling via Image Size?
@fading storm
If you don't have a layered PSD file, it's not that easy. Sorry to destroy your faith in it.
🥹
I have a layer set to darken and I want to merge it with another one, but when I do, it changes to "normal" mode and not darken and then merges, how can I merge them and use the darken too on it? 🤔
Can you post a screenshot of what you're talking about?
You have to merge all layers being affected by the Darkened layer, otherwise it will just merge the values of the layers you've selected
You need to create a stamped version of it
- only make these two layers visible
- hit the shortcut CTRL+SHIFT+ ALT+E (otherwise known as "the claw" 🙂 )
- you now get a third layer that combines all the different blending modes and is merged (you can now discard the other layers as you wish)
Thanks for the input 🙂 I tried tab/f but I don't recognize that it does what it used to. It might be some changes on my end I have to look into. Had in mind it was related to the last update.
Gave +1 Creative Carma to @tame cape (current: #29 - 76)
What is the maximum resolution of Photoshop?
30,000 x 30,000 pixels or somthin like that
thats ridiculously big btw
a bit more:
😎


me rn:
wth what r u doing with 70k x 60k pixels????
a map
of a ridiculously big area
??
a super detailed map of a semi large area
ppi??
Could you please show us a small section?
my photoshop just crashed
I was expecting it to do so for a long time
i think that might be considered electronic torture 💀

Whattt you’re not sure???
should i submit this as a bug at this point? idk why it's never applied as "current channel"....
Did you try changing the channel in the levels tab?
Hey guys I am new here, can I submit a question with a short video to illustrate it, in this channel? I'm having a little issue with the Save For Web thing on PS 2020

Yeah
yeah, gray is the only option. i didn't have this issue in 2024 and it only started after updating to 2025
Honestly in my opinion 2025 is terrible
I couldnt go 5 minutes without a bug
I think its better if you reverted back to 2024
I'm basically having this little issue where when I try to export my GIF, it's slowed, as you can see in the video, before clicking; save for web
the GIF plays normally, but once I'm in the window to export it, it slows down, even when the speed is at 100%.
I didn't have this issue before, it happened overnight and I tried restoring default settings on PS but it didn't change anything
I hope this video is enough to illustrate what I'm saying


My honest opinion?
Before I have to work with such a ‘pixel monster’, I would think about Illustrator as an alternative ...
@sharp oxide
... but you are working in grayscale mode. There are no other channels ...
tbh my issue isn't really about the grayscale mode but about this
which i'm pretty sure is why my actions fail each time
actions used to register it as "current channel" but now it's only "gray channel" or "composite channel" which is not what i want
good idea but my input data was a bitmap (png) not eps or svg
hi every one its silly question i need an help i forgot how to open new layer after camera raw effect on the photoshop
did anyone knew the short cut for it on pc ?
I made this duck in adobe illusrator and Im just not sure how to shade it ive gotten colours picked out but idk where to start

anyone knows how to use multiple textures for my 3d model? they seem to be linked or something, even renaming 1 texture renames all 3 of them. https://www.youtube.com/watch?v=UmzyppAc9WE

Which part is the problem specifically?
Would something like this help?
https://www.youtube.com/watch?v=WSQOPbf3jWg
sorry I didnt reply I was doing smth in school but It doesnt since my problem is not how to shade its where to shade how big to make it etc
Any good maskers out there able to get just this guy selected and remove the soldiers?

Theres too much detail for me to be able to manually get through everything .-.
I will try
Sure
is this what you wanted?

I used magnetic lasso to trace him
Oh yeah perfect! You even got the flames
ye also
is that little ribon apart of him

I believe so. If you want, you can use this for further context

I can get the whole dude if u want its quite easy with the magnetic lasso
Sure thx! 👍
Sending
Any assistance, please?
Does the magnetic lasso assist in removing background?
how can i get this kind of text warping? none of the warp presets seem to get the effect with it being flat on top and warped at the bottom

Have you tried arc lower preset and changing the bend value?
in photoshop it would still bend the top slightly but i managed to get it to work in illustrator
Believe me, there’s plenty of whack(er) companies than Adobe out there. Anyways, what happened?
youll figure it out eventually pal 
My job pays for it for me 
Hello! How can I create a similar effect to this?

Okay but what happened like what caused you to say this? You said the software is unusable. Why/how? Not trying to be antagonistic or anything; genuinely asking the question
hello, how can I paint this one using this image?


I really want to use clone stamp but it takes a lot of time, any ideas?
I'd say take a step back and completely redo the UVs on that model. Was this auto-unwrapped? If you show me the model, I can draw over it to show you where you need to cut
it is auto unwrapped
Yeah I can tell haha, auto-unwrap is awful. Youre gonna want custom UVs
you can send me the model too
copy paste your photos into this arrangement, slight lens or gaussian blur, BW filter or adjustment layer
can I send it thru dm?
how can I add the light dot , like the second picture ?


You can get somewhat? of a similar look by using a small splatter brush (or a normal brush and using the dissolve blend mode and lowering opacity) and a small bit of outer glow? I'm sure it can look better if you fiddle with it a bit


splatter brush if anyone wants
look very nice , I will try thanks very much
Gave +1 Creative Carma to @dusk lagoon (current: #944 - 1)
Is there a way to add the Puppet Wrap tool to the toolbar?

Did you try searching in the internet through sites that identify fonts on images?
yes i did but no luck.
im not sure what the name for that outline is called.
do you think those lines on the border is associated with the font or is it a shadow etc?
I think it's the font

oh, it really is called bubble lol
looks a bit different though
but the lines are there
yea, it is a bit different
is zbrush apart of adobe?
hey, is there a trick to divide ring into squares? like they did in this image, I created 2 circles, 70 cm and 65 cm, and I want to fill the gap between them with squares

No it's a different company. (maxon, makers of Cinema 4D)
Not in a straighforward manner as you would in Illustrator.
Depending if you want to do it in vector or raster, it could be a bit long to do in Photoshop
But basically, you need to create your different circles, create a line at 0 degrees, and divide 360 by the number of squares per each circle you need
should I use illustrator instead? I don't have any experience with it
then copy and paste in place, rotate by the amount you found in the division, and rince and repeat with the repat ttransform command
I would personally use illustrator, but if you need to learn it first it could take a bit of time. It's a bit different than Photoshop
I'll give it a shot
In photoshop, use the "transform again" to repeat the transformation multiple times

silly me transformed 40 squares yesterday by hand xD
Live and learn, there is a silver lining!
https://www.youtube.com/watch?v=pgiZtV1amXM
Use that tutorial for Illustrator

There is no limit to the number of designs you can create with Adobe Illustrator's Polar Grid Tool. In this step-by-step tutorial, Susan Rutledge teaches the basics of this handy little tool, then demonstrates how to use it to make a variety of different designs. Keyboard shortcuts for both MAC and PC users included.
Does anyone know how to make your picture look like this? with the rough edge (feels kinda comic-ky) and stuff

trying now! thank you
Gave +1 Creative Carma to @vapid flume (current: #8 - 775)
Someone once teach me in reddit to use a "gradient" map but when i tried using it, it doesnt look right
It could a be threshold command, and some filters from the filters gallery added on top
Like torn edges


Oh, alrightyy!
There are plenty of ways to create that sort of things, maybe that will help!
https://www.youtube.com/watch?v=FmM95gL6ZCc

Step by step guide on how to add the Photocopy Effect to your image in Adobe Photoshop. Easy method for all skill ability!
BLK MARKET COPY SCAN FX:
https://blkmarket.com/product/copyscan/
SOCIALS:
► https://twitter.com/ta4or
► https://www.instagram.com/taylor.ultra/
created in 1 second what took me 2 hours yesterday 😮 now I just need to understand how to fill the gap between the rings, tyvm
To add something what @vapid flume said you also can try treshold technique shown here: https://youtu.be/TcRTL4Emm54?si=Yo1h47hGwdMJ1pHO

Understanding the Threshold tool in Photoshop in 5 minutes.
⬇️JOIN THE DESIGN FAM ⬇️
➡️ https://www.patreon.com/designedbywil ⬅️
⬇️ ASSETS IN VIDEO ⬇️
⭐️ PRO TECH PACK ⭐️
https://www.designedbywil.com/shop/p/appareltechpackpro
⬇️ ALL THE ASSETS ⬇️
https://www.designedbywil.com/shop
⭐️ SHOP REVISION ⭐️
https://revisionpsd.com
⬇️ CONTACT ⬇...
Yes, there are things Photoshop is very good at and things better handled with a proper vector software. Photoshop has some serious limitations for that kind of things
If you use shape building tool you shouldn’t have any gap…
To fill the gaps try the "live paint" tool - check the help files. It will save your life 🙂 )
Or as @viral palm said, use the Shape building tool to remove those gaps
Another life saver!
oh well I'll try them both 😄
hmm the idea is to fill the gaps with squares, like tiles, shape tool seems to be more use of lines removal?
If you don't need to remove the gaps then use the Live paint tool to fill those without having to select the squares individually. It takes a bit of practice if you need to use more than one colour, changing them with the arrow keys but it's very fast once you are set
Don't forget there is an Illustrator server as well for more in-depth answers
oh I thought it's the same one, tyvm ! ill the the live paint
yo yall know how to add acid wash on a hoodie, i know some ways but they lowkey ass so if yall know how to make a good acid wash let me know please
Like this?
nah more like this not necessarily exactly like how it is in the picture but you get the idea

What's the source image you're working from?
Can I somehow scale the image like this?

Like imagine those bottom pins coming closer while other ones stay at the same place
And I know about the warp tool but it doesn't work the way I want it to
I want to scale it like this
As if scaling the bottom points only
Sorry for my poor English knowledge
And thanks in advance
Is removing the glare from this old image possible? Not having the best of luck.

Edit>transform>perspective
Then drag corner handles.
i want to make a cube shaped diorama consisting of two background sides and a floor.
i have an image which is split into background and floor
the background is good as i can fold it when printed and then have full coverage for the walls
the floor however is causing problems as i cant just shrink it or i lose connectivity if that makes sense.
i tried using perspective warp but couldnt understand where to place and how to pull.
could someone maybe help?
is that even possible or will it just result in a mess?

Im brand new to photoshop, how do I start making custom discord emojis with good quality
Can you send an image that is "readable" by Discord? I don't even know what this file format is 🙂
People tend to not download things nilly willy (and I would suggest people don't do it, as a safety measure)
I am not sure I understand it all, but just a thought.
I am not one to generally suggest another software when it can be done with photoshop, but have you considered using a 3D software (even a simpler one like Dimension), You'll be sure to have the correct perspective
Otherwise, within Photoshop, you can try the vansihing point feature
https://www.youtube.com/watch?v=w5aMceFycN4
it gives accurate perspective when used correctly
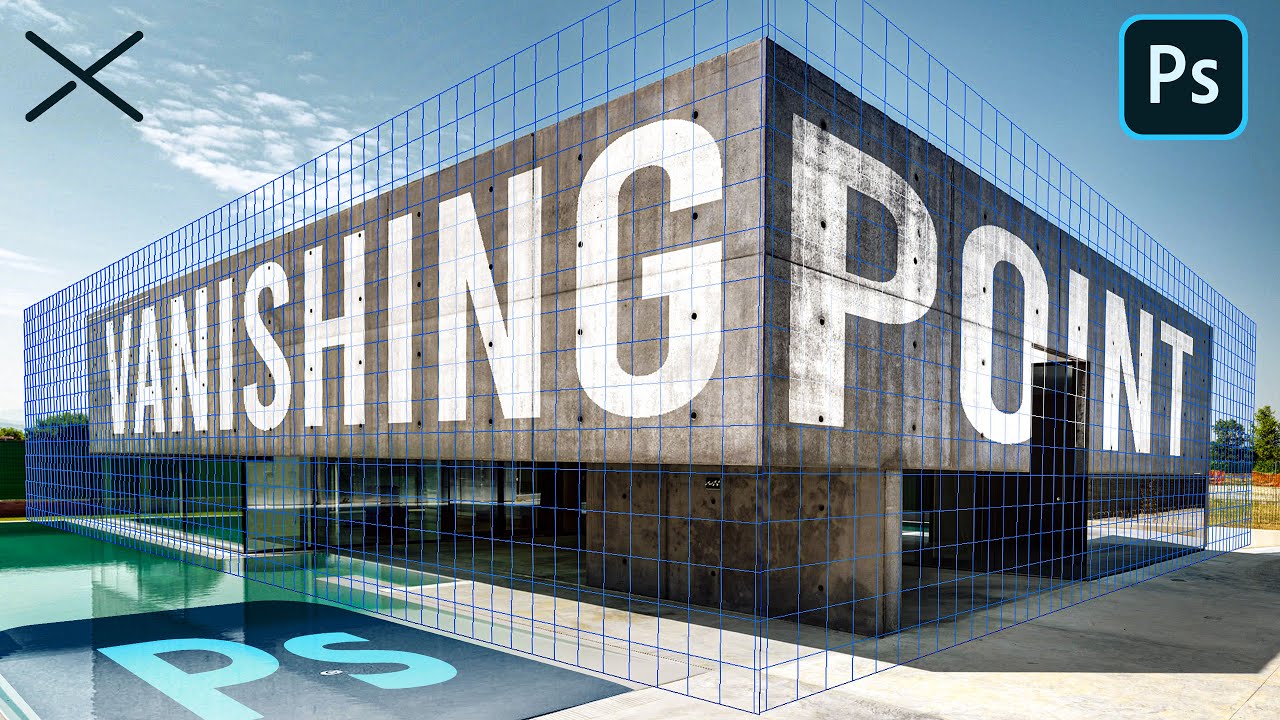
The Vanishing Point Filter and Perspective | Photoshop CC Tutorial | EASY
This Photoshop CC Tutorial discusses how to use the Vanishing Point Filter to add images, text and graphics to a photograph while maintaining proper perspective. This Photoshop tool allows us to create a simple grid and panels based on the perspective of your current image...
Is Opera your default web browser? If so change for a supported one as Chrome, Firfox, Edge or Safari.


Are you logged in your creative cloud account in Photoshop? If so, try log out then log in again…

Do you have a creative account and an active subsciption?
Is your internet connection stable?
So it works intermittenly?
Are you literally trying to PRINT the floor and walls for a diorama? - If so, you don't need worry about perspective. Print them flat 🙂
I assume I must be missing something, since that's common sense 🙂
yeah thats what i am trying
the floor is just too big?
i guess this was a bad visualization but basically
my floor (digital image) is double the size of my actual floor (diorama)
so i thought i can fold or shrink it somehow with photoshop that the two connecting sides still make sense
Can you share any visuals?
Are you running the last Photoshop version? If not try to update… I saw some post on the web where an update fixed the problem. Worth a try.
oh I think I'm getting it... It's clearly not a simple 'floorbords' type texture
yee saw that one as well, it was/is up to date however
yeah its connected to the rest

You can't simply 'bend and fold' since the floor would fold over itself...
right
that was my problem
so i thought this would be an easy process but its breaking me:)

I feel like it would be the opposite?

....no... that's not right either 🙂
How complicated is the floor texture?
not too complicated, just a dirt road
God. It's broken me! 🙂
There are overly complicated ways where you can 3D render it in blender and then "unwrap" it to a 2D view, creating a template you can print. - but that feels waaay overkill for something that feels like it should be easy!
Anyone help with this?
Any answers to this?
how do I make it so the text in a screenshot is always centered in the middle? like this

Bicubic Smoother is announced as "Best for enlargement"... But Iwould suggest you to try out the other ones and choose the one which gives you the better result. Algorithms used may give different results from those they are supposed to provide...

i think this kind of.... worked (quality is very bad but for now a step forward)
transform then distort and moved bottom part to the outside until it said roughly 45°

I don't think magnetic lasso helps... If you made a selection you loose the "Remove backgound" option in contextual task bar...
But you can change your Image processing option to "cloud" processing (Preferences>Image processing) =>This option should improve your remove background result.
Note : The results of "Remove Background" are always highly dependent on the quality of the image you are trying to process.

I'm late to this party, but I think you're overcomplicating things. Correct me if I'm wrong, but it looks like you have an image in which the floor that shows a strong perspective distortion from the camera viewpoint, and you want to remove the distortion so you can print it and have it align with the two walls. Is that a decent summary? If so, cut and paste the floor to a new document, make it a Smart Object, drag in some vertical horizontal guides, and use Free Transform to pull the corners of the image (Cmd/Ctrl+Drag) so that the floorboards (or whatever) align with the guides. You can print that, and it will work with the verticals.
If I got you completely wrong, let me know! I'll try to come up with something more useful.
i think that summary sounds good yes.
i will try this and give an update
thank you
Gave +1 Creative Carma to @molten solar (current: #363 - 4)
sorry i didnt really understand.
so i copied the floor image to a new document, made it a smart object, and then i get lost.
I am very new to photoshop or any other editing software so not familiar with the terminology.
Go to the helpx page for "Free Transform" and check out the different things you can do with it. I'm on a conference call right now, but I can pick this up in a couple of hours if you're still stuck.
Hello any1 alive
hellooo, someone can help me with me design? im trying to design a T-Shirt but im having problems with the threshold
how can i change this cyan to an another without effecting over colors

Use a Hue/Saturation Adjustment layer > Select the color you want to affect > adjust the width of the color to be affected and play with Hue/Saturation/Lightness cursors to get the color you want.
Could you describe your problem?
Where can I go to ask someone to photoshop a commission for me?
Howdy! I’m having trouble with actions. My goal is to be able to drop a graphic for a t shirt, and then have the graphic placed on multiple shirts (color ways) without me having to copy-paste, resize, move, and place the graphic. I have recorded the actions but it doesn’t always resize the images correctly or place them in the correct place when i run back through the actions. Any advice is greatly appreciated. I’m new to actions, but not new to photoshop, Been on it for 20 yrs.


Hi, out of no where I can't make any files, I can only open a few of them, and I can't change the canvas size... theres no obvious issue but does anyone know what this is/how to fix?
no disk space maybe?
i actually just found the solution right now i have to run as administrator but im still not sure what broke it
i have like 200gb free space
uhh i forgot how to delete guidelines

View > Guides > Clear Guides...
Guys, help me. I have two layers, one layer is texture, the second layer is drawing. I applied the "Multiplication overlay mode" to the drawing and the background was removed from the drawing. how can I make this effect last? as soon as I remove the texture, the overlay mode does not work. I need to save a drawing with this overlay effect.


Have you tried using clipping masks?  In the layer panel hold alt and click between the base layer and overlay layer. This should make the overlay layer apply only to the layer it is clipped to instead of the whole image. There is a keyboard shortcut too, ctrl+alt+G
How do I delete the yellow part that is outside the blue ball?

Let me send you a project and you can watch it.
Clip the yellow one to the blue one

I have already tried, combine, rasterize, transform, clipping mask
I need the drawing to be without texture. but with the preservation of the overlay effect, help bro

like this?

no
so that there is no texture, so that it is transparent

yes
Did you delete the background manually?
I used blend if to hide bright areas of the main layer. But you can use color range masking too. The point is you wanted it transparent when it really isn't

Does anyone have any idea how to recreate this

I also switched your layers places, multiplying literally multiplies so a*b=b*a and clipping texture to a base layer makes more sense than doing it the other way around
where is this image from? is it 3d?