#❓ask-a-question
1 messages · Page 88 of 1
in the older versions sure; they didn't say they were using an older version; good point.
I tend to follow whatever version I'm using which happens to be the latest (not Beta)
I couldn't figure out what to do after making the selection to make it save it as a gradient.🫠
Can you walk me through it? 😆
see

I did all that with the magic wand
your original is still preserved
can do this too

but changing the text and keeping the gradient; that's a bit more difficult
will have to ask someone who knows more how to do that, I'm sure its easy but IDK how or what I'd do
Not necessarily the text. It's a picture that has the box and no. 2 already so I don't have to get the font.
I am not sure whether you'd make a gradient out of the no.1 box and put it on the no.2 box or if it can be done with masking somehow.
you'd have to make a new gradient, but I couldn't replicate that exact gradient
Also wow I went at it the lasso tool then used the eraser tool to remove whatever extra bits and retouched with the brush tool. Made it super longer 😭
How did you get it done so quickly and easily?
as I said... magic wand tool; look at my screenshot
I did it very carefully that's how 😛
anyway I have to go sorry but I hope someone can help you further
Maybe using a different image is the key, would either of these work?


perhaps you could do a clipping mask for the text on top of that, yes you could do that
then you could have a 'gradient" from that, if that's better, I suppose
I indeed did but I was just confused as to how you removed everything else just a normal mask or is there more to it? 😅
just a normal mask, nothing fancy I did have to invert one of the masks
Awesome I'll try that
Ah I see I thought there was some other trick. Well I'll keep that in mind and use the magic wand next time instead 🙂
Masks are your best friend in Photoshop! I’m very much an evangelist for non-destructive work flows
Sorry, a small correction, I’m using the ‘save as copy’ option. To better explain the situation - I have many templates saved as PSD files that I frequently use in my projects. Let’s assume I open around 50-100 templates a day where I make small modifications and then save them to the desktop in JPEG format. All templates are located in the ‘PSD’ folder - when using ‘save as copy,’ Photoshop by default suggests saving in the same folder as the PSD.
Photoshop remembers the last file location only when the PSD file is currently open; once you close it, reopen it, and again it suggests the folder location.
In this specific case, JPEG works better, the file is lighter, the quality isn’t inferior to PNG, and it is processed much faster by ImageOptim
Photoshop 26.0.0
Sonoma 14.6.1
Hello a question, how can I reactivate so that these two options are seen simultaneously


i turn it off idk how dx
nvm
Anyone having the same problem: When opening a new project (CTRL+N) when I change the bar from pixels to centimeters and start typing in the amount of centimeters. PS just suddenly throws the setting back to pixels. This happens 2-3 times before it sticks to centimeters... After that when I press CTRL+N a different interface to create a new project pops up. What is going on??
CTRL+N is the regular shortcut to create a new document so if you hit CTRL+N it's normal to get a new porject window poping up.
Pay attention if you select blank document with presets, the units are already set.
On my end the new document window behaves normaly - When I set centimeters and change width and Height the interface stick to the selected units.(Idem for pixels and inches)... Really weird
how to stop wibble wobble?

is it a Photoshop related question? If so what do you mean by "Wibble wobble"?
the line goes wibbly wobbly
The doted line? If you want to get them straight you need to convert your anchor points with the convert anchor tool.

what if i want to delete those anchor points?
Use the "Delete Anchor Point Tool" (the pen tip with a little - beside it)

thank you sir, how do i do this in premiere pro?
Gave +1 Creative Carma to @viral palm (current: #9 - 587)
Sorry. I don't know... I'm not using Premiere Pro a lot... You should ask on the Adobe Video Discord server.
The premiere pro and after effect users are on this server. You'll have more chances to get the answer.
https://discord.gg/adobepremiere
hi
i need help
i have a text
i added a text on top of it with the divied blinding mod
it get back to normal
So forgive me if I’m not understanding your example scenario well enough, but wouldn’t setting Quick Export defaults in your preferences accomplish the same goal while letting you choose a default file destination for all projects / templates?


you see guys waht i meane ?
the second one is what i was working on
the first one is what came out as result
when i upload it
i am @wide pilot btw second account bec some times discord dose not let me send images no idea why
So layer blending modes are considered cumulative, meaning they continuously stack to blend differently on all the underlying layers. When you merge the layers, the blend becomes simplified and is no longer cumulative. Afterwards the new layer really only retains the opacity information, not the way they were blended. Not sure if I explained that in a way that makes any sense

Shape tool, rectangle, choose your fill color (disable stroke), drag it in the window roughly to size, adjust the corner radiuses in the properties window. Add a text layer over top with your desired text and tweak dimensions of the box, and scale of the text until you've got it nestled in there the way you like it, and voila!
How would I make similar cracks as the video thumbnail in the image shown?

like is there an easy way to do it? Or would I need to manually make this kind of shape?
is there a photoshop feature or plugin that adds a feature like canva's library of elements and stuff where its super easy to find images to add to stuff to make youtube thumbnails
Quickest and easiest way way, google: flat black cracks png, find on you like, bring it into Photoshop, scale it and position it the way you like it, and add a white stroke to it, and myabe a drop shadow if you're feelin like it

ah thanks man
Gave +1 Creative Carma to @molten nacelle (current: #942 - 1)
Thanks!
Gave +1 Creative Carma to @molten nacelle (current: #610 - 2)
wow, thanks for the extra help, thought I saw this exact thing but it had the stupid stock image words all over it
Yeah a lot of stock graphics sites will watermark their images, but I've found plenty of free alternatives for most things
how do you get pngs without the checkeboard background every time i try copying them into photoshop they have that background
ah well thanks again
Hi can someone please suggest how I can blend these people into the scene better?

If your images have a checkered background, that means they have no background and are therefore considered images with transparent backgrounds.
i mean like this

when i add it to photoshop it has that as a background
That's really strange, which website are you getting the images from?

Yeah, do you see how it already has the checkered marking on the background? Unless you download it as a transparent image from the page source, it will get downloaded as a png with the checkered background (when downloading directly from google) since it considers it as a single image
alright
General rule of thumb I've found out, is that if the checkerboard appears in the thumbnail of the image before you lick on it to enlarge it, it'll copy with the checkerboard. If it has a white background in the thumbnail, you click to enlarge and then the checkerboard appears. It actually has transparency
Also selecting the Tools submenu under the image search bar, selecting advanced, and then toggling to transparency in the "colors in image" section helps
If you want my opinion, take it or leave it because it looks pretty great as is! As far as wondering how to blend the characters into the scene better, really it's about setting consistent black points and hues for your darkest shadows. The least lit and most shaded parts of your subjects should match the tones and low lighting of the surrounding scene. I love how they're front lit by the fire, but the shading on them on their backs could be darker
this makes sense to me, so how do you keep the way it was blended when merged?
never seen that option when googling
I also don't recommend just using whatever image you see; some of those are copyrighted unless they are free to use by all means go for it
Ohh I meant if it’s from a stock image site and you just download from the google images page instead of directly, that’s what happens unfortunately sometimes:((
Thank you so much!
Gave +1 Creative Carma to @molten nacelle (current: #453 - 3)
Hi! Can someone help me with some work with PDFs as part of photoshop work? I know PS may not work but there’s some layer masks and other stuff to take care of. Please reach out if interested via DM. Willing to discuss about money as well.
@molten nacelle I made a few subtle changes so their faces look kinda lit by the fire, looks amazing I think! Would still like your opinion too!

Why does my pen tool auto connects from the 1st and last dot I feel like Im doing something wrong (its on path)

yeah it does, stock image sites have a weird thing that if you copy either direct or from google they slap on a banner at the bottom with the image ID along with the watermark, I've seen the watermark sure but bar at the bottom is new didn't know they could do that on the fly, pretty neat and yeah transparency is kinda iffy when copying as the clipboard doesn't usually support transparency hence why its better to save it
because auto add/delete is turned on 😉 look at the top bar
still happens😥


buh, weird idk! I don't use that tool
I figured auto add/delete was the culprit but me bad
Yess
Hello everyone, I have a question, but I'm not sure if asking it here violates any rules; if it does, please let me know gently.
When I use the lasso tool, I often can't use it with the keyboard, for instance, pressing the space bar to move or hitting Enter to create a selection. I have to switch to another window and back for it to work normally. Is there any way to fix this? Thank you, everyone. (Photoshop 2024)
Reset Preferences
Check for Updates
Graphics Driver
Disable Third-Party Plugins
Keyboard Shortcuts
Reinstall Photoshop
how do i merge texts into 1 layer??
there is no direct way to do so, you have to select all the text from one type layer and paste it into another
are you turning your path into selection?
where id envelope disort section in photoshop? i cant find it
There is an option called Warp, but no enveloppe distort like you would find in Illustrator.
What brush to use to fill the line for here chin?

One of those brushes that have a taper beginning and end (either triggered by the pressure control with a tablet or by velocity which I think doesn't need the use of a tablet)
Press F5 to see the brushes controls
You can see what I mean with their shape in the brushes selection menu. They are finer at the end points


You can transform your own brush to make it taper in the "shape dynamics" but you can also find brushes that already have the taper, like the one I shown
So for example you'd have brushes like "animator" or a regular manga brush like a Gpen, that are already set up like that

That's a standard brush, with taper, but with pen pressure to trigger the taper. I am not sure it works with a mouse to be honest

It looks like you'd have an option with the scroll wheel, but it only tapers at the end (play with the sliders, just in case)
Yeah, it doesn't word for me because I don't have a graphic tablet, so I just recreated it with the pen tool
what the heck? Just flatten image, rasterize, etc... there's definitely a direct way to do so
But not keep it editable
yeah no there's no way to keep it editable to put it all on one layer; would have to copy/paste to a single text layer but it seemed like they were asking how to put it all in one layer absent of editing or not that's how I would do it unless preserving editing which is silly that there's no way to merge them directly and keep editing
Well, let's be honest, most time there is no real reason to merge anything (although you can do that with vector shapes: Merge shape layers and keep editing them, but it's just most hassle than keeping them separate)
a text layer takes very little space on the document, I could undertsand for pixel layers and they make the bulk of the size, but vector shapes and texts, not s much
Of course we can ask for that kind of feature to be added, but I would doubt it would be priority
yeah on one of my projects I couldn't fit all of my text in a single layer, ended up having to make 3 and then exported when done
Take , for example, InDesign, which is a layout software more suitable to create text based documents (which Photoshop definitely is not) and this fonction doesn't exists there either (as far as I know of course)
iirc indesign is publishing really curious what it can make; or if its better at making digital cards and stuff
if they want to 'merge texts', I believe the point is to keep them editable. you can have multiple sizes, fonts, colors, styles etc. of text in a type layer
yeah that's what Sandrine was explaining I figured they just wanted to merge them all into one flat layer but then reminded me there's still need for editing
Typically, but not excluvely, it's best to make multipage documents. Thing a magazine, a tri-fold leaflet, a book, a multi slide presentation. It's the software that have the most advanced text options, even Illustrator doesn't come close and to do the same you would have to resort to workarounds.
It's less at ease with images, and obviously vector work as well, so it really depnds what you want to do
If you do an illustrated poster that doesn't need fancy text layout, you can stay on Illustrator (or Photoshop if it's pixel based)
Photoshop is at the bottom of the pile when it comes to text options
yeah not a ton of text options, but I guess you could export that text from id to PS perhaps
those 3 software are really interoperational. You don't even have to "export", ID read PSDs, so you can edit a placed image in Photoshop, save and it updates in InDesign (same with Illustrator files)
Someone working in creating a magazine with Photos, illustrations and text will more likely have all 3 open at the same time and switch between the 3
yeah I forgot how to do all that 😉 I have a project I saved in .ai and .psd 😦 it started as an .eps
I wanted to insert these images (logos) in one layer, but when I dragged and dropped them, all of them ended up on new separated layers

photoshop will always make a new layer for each image you drop in, you can certainly flatten it afterwards once you have the positioning you want
Yes that's the standard procedure so you can handle them separately like resizing them, positionning them etc
You can merge all the layers once you've done (but I would question the need to do that. Embrace the power of layers!)
Photoshop users never delete or merge layers unless there is no other solution (and yes, sometimes it's indispensable)
from what I understand its better to merge the copied layers then export so you preserve what you have before exporting but that don't make sense since exporting already does that... one of the other mods mentioned this to someone a few days ago
I've selected all images that have the same size in pixels (the pngs I made previously). How do I make them the same size in the canvas?

Yes, for example imagine you need to use the content aware fill, it will only work with a full layer, so in that case you merge all the layer in a new layer (without deleting the others) so you can perform your content aware on a full layer.
Go to edit> transform (or control+T) and either drag the corners to resize them manually or use the top menu to input the sizes

It can be in %, pixles, cm, whatever you choose
I see you got a shop on KoFi and everything and that you make powerpoint presentations. That's great!
Personnally I would invest a bit of my time learning the basics for Photoshop, otherwise you will struggle a lot.
You can do so in HELP> HANDS-ON TUTORIALS
Basic stuff like how to resize some artwork, pixel dimensions etc are covered there
Feel free to ask here anyway, but that's the kind of foundation best learned by doing, so it sticks!
Also I see you're making YT and TikTok Videos so I could encourage you to have a look at that app (there is a free version) called Adobe Express
https://www.adobe.com/bg/
Also if you want to learn with online tutorials and also the real help, you can go there
https://helpx.adobe.com/bg/photoshop/get-started.html?promoid=VPM4KCNL&mv=other
would anyone happen to know after i import a mp4 into photoshop, is there a way to save the exact frame im on as a still ?
I started studying Photoshop in University. This is my first year. Yesterday we practised the Pen Tool
put your playhead where you want it to be, and export your still as a JPEG or PNG. (Obviously not as a .mp4, or gif, or psd etc)
Ok, I was thinking of a way to make them all the same size no matter of their current sizes and proportions, and since they were very different when I made the selection, I decided to remove them and drag and drop them again, so they have the same size and transform them easily
Then you need to input the size in the top menu.
Imagine you want to make them all 100 pixel wide, just type "100 px" (type in the px as well) and it will resize it to the number you've set
If you select multiple layers (SHIFT + select) and type 100 px, all of them will be 100 pixels
if you don't want them to be the same ratio, unlink the two boxes (the chain link in the middle) and type in what you need
How it looks when the chain is unlinked
Generally, you'd want it linked because otherwise they might look stretched, but you have the choice
i have tied this with ctrl + alt + shift + s but it only saves the first frame of the video ( fixed it i actually have to use the file > export > quick export as png )
Did you try with file> export>export as?
yea thats whats worked for me, i wonder why save for web just does the first frame, rather then the frame you are on
save for web is a legacy way to export
It's still needed to save GIFs and SVG but otherwise should be retreated
its actually my main way of saving files when i do so because of the GUI and the easy keybind it has, would i be able to change the keybind for save for web legacy and say make it export as basically swapping the two keybinds
When it says "legacy" next to a menu, generally you tend to sweat a bit!

the newer version is better; even if the GUI is different
i dont doubt it by any means !
Replace S by W in your keybind and you'll have the regular export as. Or you can switch the Keyboard shortcuts from one to the other in edit>keyboard shortcuts
also legacy export has limitations now
awesome was looking for the shrotcuts menu thank you so much!
Gave +1 Creative Carma to @vapid flume (current: #8 - 764)
care to fill me in if you dont mind ?
got them all swapped now ( wow the export as menu is ugly ....... )

Ugly, but effective! 🙂
Hi @haughty storm
When it comes to print layouts at the latest, the following workflow should actually apply:
- create your vector drawings in Illustrator
- create/edit your images in Photoshop
- create your layout in InDesign
- insert your texts in InDesign and format them
- place the vector drawings and images in your InDesign document
- create a print PDF and check it with Acrobat
😉
cool 🙂 I saw that id can make accessible PDFs too, I have acrobat and it seems you can make PDFs from within as well but not sure if it can be made accessible.
I do all this stuff as a hobby so I'll never learn it all 😉 its a lot.. I only learn as I need it
Hey Everone! 🙂 how do you create thumbnails like these ? I'm kinda lost on where to start and which topics I need to understand in order to achieve something similar (I'm referring mainly to the background, as I know how to cut and color images). Thank you in advance!


That's looking great! I might personally lighten up on the black point a touch, and then might make some very subtle cast shadows on the ground behind the subjects. Would love to see the whole scene again, but loving the added contrast and fire light glow! I think you really did well with that!
Thanks so much!
Gave +1 Creative Carma to @molten nacelle (current: #362 - 4)
Hello everybody, maybe it's a newbie one but I have a question about rendering 3d models within PS. Do the engine render subsurface scattering as well? I'm trying to figure out if rendering in PS is the same thing as rendering in other softwares such as Blender (using cycles).
If you’re looking for rendering and 3D texture work in the Adobe Creative Suite, you’ll have much more to play with in programs like Substance 3D than Photoshop. You can create subsurface scatter textures in Photoshop, but as far as using it as a rendering tool I’d recommend using something more dedicated to that specific process
👋
I'm working on a video in photoshop to use Generative fill on specific frames. Generative Fill automatically creates a layer that goes to the end of the timeline.
Is there a way to:
Make Generative Fill only 1 Frame by default
OR
Use a shortcut key to trim the Gen Fill layer to the playhead(or to be 1 frame). For example in AE I would just hit Alt+], Ctrl+S, etc.
I know there is a button to split at the play head, but I'm moving through a ton of frames and using a shortcut would seriously cut down the total time it takes to work through the project.
EDIT:
As soon as I asked I found it in the keyboard shortcuts menu, the video specific action shortcuts are under "PANEL MENUS" and has all the tools I want to create shortcuts for
Hello, how would you go about re-creating a shape like this in photoshop

I think you might want to try that in Premiere, it has gen fill there too
I normally would, but these are very small areas I'm generative filling, and only for 1 frame at a time, of all the tools I've used I've found Photoshop's Generative Fill to be the most accurate / least visible to cover/remove the specific areas I'm working with
neato! I just learned how to make a shape 😄

Ayy how did you do that
no its not the best looking but wanted to show you
Looks exactly like the one in the image nice.
so this is what I did... I selected the subject, duplicated the layer, then made a work path, converted it to a smart object, duplicated layer then created a vector mask (I don't think that's required) then I made the custom shape; a lot of this was done using the contextual menu (right click with mouse)
I'm sorry I can't follow 😭
Oh wait I think I got it.
you'll want to use the right click context menu for most of what I did to make the shape
the first part is that you click on select subject on the small context bar for the gen AI then it will select that area for you
Then right click on the layer to duplicate
Then right click in the selection area and click on make working path then right click again to make custom shape
i'll be afk
Does anyone know the name of the setting on Photoshop that helps you view your file at the highest resolution? I remember a setting like this, some kind of view or preference (?), something that enables Photoshop to allow you to view your assets at the highest resolution
Yea
100% zoom is where you'll see your file at the best possible res
Yup thank youu, but I think it was something in the preferences?
Gave +1 Creative Carma to @haughty storm (current: #42 - 47)
Perhaps you’re talking about Preferences>Technology Previews > tick « Enable preserve details 2.0 Upscale »?
Does this automatically upscale all the images that are already in the file?
wouldn't upscaling hurt the quality?
Not necessarily, only your rasterized elements would remain the quality they were rasterized at
Thank you ! Finally made it :)

Gave +1 Creative Carma to @haughty storm (current: #41 - 48)

that's awesome! ❤️
@haughty storm Read this (below) to learn more about Technology Previews.
https://helpx.adobe.com/ca/photoshop/using/technology-previews.html
It doesn’t upscale automaticlly but try to keep (as much as possible the details) « Photoshop now features artificial intelligence-assisted upscaling to preserve important details and textures while resizing images without introducing distortions. In addition to skin tones and hair textures, this feature preserves harder-edged details like text and logos. »
But remember this (like in sound treatment) « Garbage in = Garbage out »
Photoshop can help to make pictures better but there are limits (even with AI)… If your starting resolution and/or Image quality are low => You won’t have great results
Are you using Opera as default Web Browser? If so change for a supported browser as : Chrome, Firefox, Edge, Safari.
Thank you!
Gave +1 Creative Carma to @viral palm (current: #9 - 589)
THX
Gave +1 Creative Carma to @viral palm (current: #9 - 590)
It was for this. Tried to replicate those old anime fansubs. Really love how it turned out in the end, thanks for helping.

Gave +1 Creative Carma to @haughty storm (current: #40 - 49)
Why does the yellow + red + white combination look so good

I'm tryna understand the colour theory so I can recreate it
With this thumbnail

Ty for the reply 😀 I see, as you said using it as a rendering tool is not the best but it's very helpful for my workflow since I need to mix 3d models and photos and they must have the same perspective. When I use other softwares to make a rendering and then add it to the composition perspective is always a bit off and adjusting it with transform tool is not always the best thing.
It's a pity bc a good rendering engine whithin PS would be very useful to people that have the same approach as me.
Gave +1 Creative Carma to @molten nacelle (current: #296 - 5)
Red and Yellow are primary colors and analogous and will typically stand out / read well, but if you're using a different color scheme you want to use complimentary colors for elements that you want to stand out. It never hurts to have a color chart on deck as a point of reference:

Really if you want to be using Photoshop for texture work, you should look into how to pull out UV maps in your 3D software, take those UV's into Photoshop to create the textures, then bring those textures back into 3D space as a normal maps linked to the UV's, and use Blender's built in rendering tools / engine to get your desired effects. Especially if you're looking for SSS, I know Blender has nodes for that
As for mixing regular images in with 3D models, Blender might still be a better route, having them be mapped to a flat plane and then you can reposition and scale where you need them in the camera view
Hi, if i colored soemthing than swapped to a different color, how do i select the color i was coloring with before, in my case i was coloring somehting with a specefic shade of green than switched to black to outline it, now i need to go back to that exact same shade of green to color stomething else. How do i do this?
If you've used it recently, and have the Color window activated it should show up in your recent swatches tab

thank you
Gave +1 Creative Carma to @molten nacelle (current: #264 - 6)
oh that's why blue looked good
can someone help me as to why my photoshop is doing this? i try to draw and paint, after 15 mins it just doesnt work? 
can someone help me and edit a picture for me, it's a simple task but I have no idea how to do it

I want to change the -5392.57 value to -1014.22
No because any sort of forgery breaks the server rules.
doesn't matter what its for
I won’t dwell on this subject any further… In some point of view governement can also be seen as a scam compagny… You ask for forgery and we can’t support any sort of forgery here.
Are you using graphic pen or mouse?
How can I effectively lasso the Alien out of this shot

You want to remove the ALIEN from the middle of the image?
yes
I'm currently looking into loading it into a test environment
so that screenshots would be easier to crop out
You'd either have to be good at art, to draw in what's behind, or try using Gen Fill.
so do you want the alien on it's own?
ok. Tad easier 🙂
oh lovely
Yeah easier, just time consuming 🙂
damn
He'd obviously have a bright head and dark legs?
yeah
I basically just don't wanna have to do this mess

which looks kinda tacky
I want him to be part of the scene
ok, cool. - I just need to figure out what this new selection brush is!

Can you not find a more suitable image?


Can someone fix my hand on my football photo with ai please?
Photo?
Profile photo
From football game
Nothing much i just dont like my finger sticking out haha
Can any one here recommend a good tutorial or ebook on how to effeciently work between Illustrator, Photoshop and Indesign. but I'm looking for somthing that demonstrates one or more workflows and covers a variety of projects. I can only find resourses on using CC libraries.
Did you also ask in the Illustrator Server? There might be more InDesign users there.
Try a search on youtube with "illustrator photoshop indesign workflows"
Found these https://www.youtube.com/watch?v=-xoPyC8C4Uk
https://www.youtube.com/watch?v=uZHHb--fpNs

The Adobe Live team is streaming on Monday, Tuesday, Wednesday and Friday from 12 pm onwards and supplies you with the best tips, secret tricks and infinite inspiration revolving around your favourite Adobe Creative Cloud Apps. Join us and the most talented creatives from Europe sharing their unique workflows and stories live.
Can’t get ...
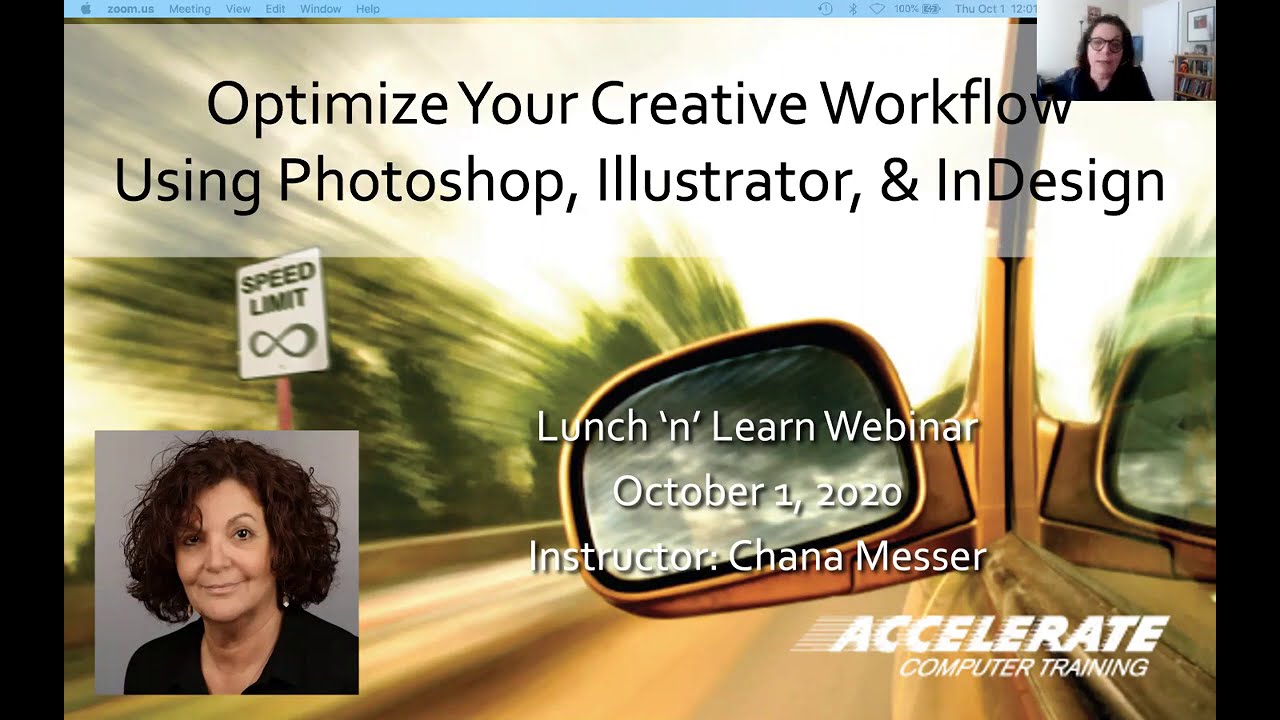
This free webinar, hosted by Accelerate Computer Training, was presented October 1, 2020 by artist, designer, Adobe Certified Instructor, and Accelerate trainer, Chana Messer. In this 60-minute presentation, Chana demonstrates her tips, tricks, and strategies on how to optimize your creative workflow. Watch as she constructs a tri-fold brochure ...
Thanks, @viral palm
Gave +1 Creative Carma to @viral palm (current: #9 - 591)
its handy! I use it sometimes
hello, im wondering how i can remove the black line from the image without ai, not really sure how to do it with the buildings and the bit under it

you talking about the tall thick (bar?) black line next to the building?

i can send a full pic if u want
ive already done a little bit of it
yeah ok that's what I thought; looks like a reflection of another building; what tool did you use?
tool for what?
i took the picture indoors and i the pole was from the window or frame i believe
@velvet vault - Please see: https://discord.com/channels/547473772727238676/1042833042378592329
Does anyone know how to fix the alignment of this selection? With it so off-centered it makes it very hard to select other pixels! Using Photoshop 2024 on desktop

Not really sure what you're asking here. "Alignment of this selection."
Not really sure the best way to describe it, when I select something with the move tool, the selection around it is misaligned with the thing selected!
There might be some extra, semi-transparent pixels in there that you can't see.
This happens after restarting photoshop, and also happens on a brand new page!
So in a brand new document with only one layer, if you make a selection and go to move it, you get this misalignment happen ?
Correct!
( Turn off GPU accel just to rule that out, you know Adobe forums will ask you to do that anyway so may as well pull that tooth now 🙂 )
Thank you, will do that now!
Update drivers is the next one, then reset preferences as the holy trinity.
I cannot reproduce this behavior.
Me either on 25.7.0
What's current master, 26.0.0 ?
I have deadlines so didn't update... 🙂
This ended up working! Thank you guys so much for the help ❤️
Well, you now need to fix the GPU issue, but you at least know where the issue is 🙂
Main Menu: Help > GPU Compatibility... see if any issues are reported there.
I ended up getting an update in my graphics card and now it works 🙂
I'm glad you got it sorted out!
guys how do i remove this logo and keep the pattern looking good?

You can barely see the pattern. It's mostly covered up. I would probably just create something new.
can barely see the pattern? I see a red plank like wall with tan-ish yellow lines in between...
You're not going to be able to remove that and end up with anything coherent. Its mostly covered by the text/logo.
What's underneath this? Do you have x-ray vision or something?

The pattern continues along the shirt
The pattern continues along the shirt
Once was good enough. :)
It's a yellow line with a red background
Its not very good quality to begin with. I'm assuming this is really zoomed in. (?)
My internet cut of so the message didn't input till now
Yes it's a part of a jersey
I guess it depends on the size of the final image to be exported. Maybe it won't matter if those pixels are small enough to not be noticeable.
You can try to use AI to "imagine" the texture but it's likely not going to be anything close to reality.
no, but we can assume that's what needs to be there once the logo is removed; obviously that's a bit of work to do

not great, but it does remove it; you can still see wehre the logo was
You really have no idea until you can see the rest of the image, the size of the image and what you can get away with at the size to be exported.
It will be noticeable but fractionally
for sure, I agree this isn't the best; not saying that this would ultimately work but when this is all you're given.. wel then..
But because ur removing the lines and the text spans alot of the width of the shirt it's going to be very noticeable
If you have really good reference materials, i.e. high quality images of the jersey from different angles, its possible that a skilled compositor could fake it.
Yea there are a whole ton of images of the jersey online
Or if its really small and the details won't matter that much you could also attempt to fake it. Based on this example image, I don't really see how anyone could do this and make it look believable.
Guys
Just a quick question
I'm using Lightroom to edit my photos, but whenever I want to zoom in there isn't a short cut to precisely zoom in like how I can in Illustrator or Photoshop, it's either zoomed in 100% or zoomed out 100%
You can't hold the Ctrl key and drag a box around the region that you want to zoom in on?
Yeah, I already tried that, but that just zoom all the way in
"All the way in..." Not on my app.
It's not like Photoshop or Illustrator where you can just press Z and drag your mouse to zoom in or out
What about Ctrl + / - ?
Also doesn't work
yeah I don't think LRc and Lr have the same keybinds the interface is definitely different, which is why I prefer LRc
😛
Yeah, no, I don't want that, I want to be able to drag my mouse to zoom in or out like how you use in and out on Illustrator or photoshop
What's the difference
Then please post to the Lr Community Forum and request that feature because Lr doesn't currently work that way.
Alright, if it doesn't work like that, then there's no need to post a forum, I will just make use of what is available
lots! actually I'll screenshot
The dev teams monitor the forums. Features are requested and get upvoted. However, they won't know that you want those features if you don't tell them.
"Please make zooming work like Photoshop." :)
Oh, that nice
I'm not sure that this server is the right server for LR but this is the last I can do for you sorry 😦

but that's LRc
I can get you the link. One moment.
Oops. "Ideas" Tab. https://community.adobe.com/t5/lightroom-ecosystem-cloud-based/ct-p/ct-lightroom?page=1&sort=latest_replies&filter=all&lang=all&tabid=ideas

https://community.adobe.com
Get the most out of Lightroom with our community.
I will do that later tho, I need to finish editing a could of photos and make a video montage for a client, it's actually my first client after trying to get one for like 4 years now, most of them would either refuse or just ghost me on the day of the appointment, but I went from 0 to 100 real quick my first photo and video shoot was on a Mercedes i class, so yeah I'm finally going somewhere :)
hey @ripe quest how can we better deal with questions; I thought this channel was for PS related questions, everything else in #💬chat-general but at the same time sometimes chat/ #❓ask-a-question moves quick and I'm not always here and I just happen to see the conversation before I even scroll up
It's ok
Oh, yeah, no, I personally don't like this old look to it
I find this better, it's cleaner

to each their own
#❓ask-a-question - is for questions about the products, and how to do things with the products. The products include: Photoshop, (Desktop, Web, iPad), Adobe Camera Raw, Lightroom, Lightroom Classic, Photoshop Express, mainly. Sometimes we will deal with ancillary workflows with other products.
Beyond that, I'm not sure what you're asking.
Anyway, thanks for the help, both of u
np 🙂
kinda difficult to remmber all that; would be great to see this channel's description updated, cuz it just says photoshop
likewise on all the other Adobe officail servers
It's all "Photoshop" products.
That should be easy enough to remember. If a staff member or Community Expert wants to take on questions about another piece of software, like InDesign, we do it as there is no dedicated InDesign Server.
But you don't have to remember anything other than we support the Photoshop-related products.
Happy Friday everyone - I was wondering if someone could help me with some of what I believe to be alpha channel issues.
I have some decals on a transparent background I made in Illustrator. When I export as a PNG in Illustrator the background transparency is fine. When I edit these PNGs in Photoshop and save them again as a PNG the edges of all my decals have a red color. The issue seems to be that the color channel for the background is being changed from black to red by Photoshop. How do I stop that from happening?
Here is what the file looks like with color channels showing straight from Illustrator and then again once edited in Photoshop


Not sure to understand what's happening and I don't recognize any Adobe UI on your screen shots... Could you share the png made with illustrator? What type of edit did you do on the png with photoshop? It could help to understand...
Of course, sorry for the clunky explanation. The UI you're seeing in the pictures is from the Nvidia Texture Tools Photoshop plugin which is the only way I could find to show that the background color is being changed.
Here are the two files. The edits I've done in Photoshop is a simple noise filter over everything + an overlay of a Clouds filter over the scratched paint stripes on the lower half of the image


NP... So if I understand well the picture on the right is the one made in illustrator before your Photoshop edit. Right?
That is correct
What was the value of your noise filter? Cloud filter was a regular black and white rendering?
Is it this line which is bothering you?

I used an Amount of 1, Uniform distribution, and Monochromatic checked for Add Noise. Clouds was a normal black & white on a separate layer with 25% opacity and set to Overlay. All parts of the Clouds layer outside of those paint stripes were deleted
Getting rid of it certainly does something.

However it now has this white border which is also an issue
Give me 2 min... and let's try something.
Okay, thank you and take your time!
Your photoshop file with filter and clouds texture applied is still open?
It is
Could you share your layers panel to let me see the layer structure... We could try something...
Sure, only two layers - the decals from Illustrator and then the clouds overlay for the scratched red and green paint

(the Decals layer also has normal blender mode and 100% opacity)
Decals layer is the file generated by illustrator and paint clouds is your photoshop edit. Ctrl+click on the two layers names in the panel to select them. Then Ctrl+G to group them.
With the rectangular marquee tool select the whole image then in the top menu go to Select>Modify>Contract and enter the value 10
With the group active hit the create mask icon
then try to save as png the red line should be gone...
Sorry for the confusion. I didn't paint white lines over the red line to get rid of it as the picture I posted implies. I deleted the red line but the the color channel for that area turned to white instead of black.

For your info the red line is already there on the illustrator file...
It is intentionally. When exporting from illustrator without an object covering the entire canvas for some reason I run into issues with the color channel for the background running into this same issue of some parts being white. This gives me a white border around my decals. You can see this happening in the PNG you just posted

Did you try to make this "square around" a no fill no stroke shape in illustrator before the export?
Does the png shared with the video solve your problem?
How would i go about removing the background i tried using refine hair but this is the most i got

I have tried with no fill and no stroke - this is the result. As you can see the color channel for the background is not completely black. I have no idea why these certain areas turn white. My solution for this was to have the red border, which worked until I edited the same image in Photoshop

Unfortunately that PNG you shared with the video has the same issue as this - the background color channel is not completely black which is giving a visible white border around the decals
Ok sorry to hear that... I don't know where you are trying to use this file but I can't do more transparent than transparent...
No worries. I'm confused by it as well. Thank you for your help though
Does this one have the same problem?

It does - although I think I figured it out how to fix this by complete accident
Grouping my layers and and then changing the Blend Mode of the group from Pass Through to Normal seems to work
No clue why but it seems to eliminate those white spots on the color channel
There is nothing more than the two layers shown before in your group? Weird... But happy for you.
Correct - no change from what I showed before besides grouping and changing the Blend Mode. I agree very weird but thank you lol
Gave +1 Creative Carma to @viral palm (current: #9 - 592)
Is there a way to print each of those sections to a new piece of paper?
Making a Grid to Print out a big image. it will nearly 2m Tall

tbf I'd break that up into several images and use something like qimage to make a really big panel poster, qimage is good with that kind of thing IDK if there's any adobe products that does it well
removing backgrounds are a PITA sometimes, especially with one like this you'll hae to keep playing with the different tools and selections to get it all out
I found a way through Slice Tool
hey just seen your message, what are some good alternative tools? I was just using a soft brush
magic wand, select brush, remove tool; you'll have to do all of those carefully
The way I'd do it is to use a fixed size selection of the size of one your rectangles, that way it ensures that the sizing is precise which is sometimes not the case when you rely on snapping to guides

then separate each selection into its own layer (Layer > New layer via cut, CTRL+SHIFT+J)
The tricky bit is that you have to go back to the main layer in between each cut.
Then you can file> export>export layers as files when you're done, so you'll get one new file per layer, in the file format of your choice that you can print individually
However I would check if your printer can do that automatically. There is a "poster" mode in some printers that actually manages that for you
For example you can check that for Epson printers
If you do not mind half toning, there is https://rasterbator.net
The Rasterbator
Wall art generator. Enlarges images to multiple pages, which you can then print and combine into huge posters.
@viral palm
He definitely doesn't use Photoshop. Maybe that's where the problem lies ...?
I used exclusively Illustrator and Photoshop for creation and editing. I took the screenshots using the Nvidia Texture Tools photoshop plugin because that's the only way I could find to show how the background color channel was being changed
Can you please upload the Illustrator file for inspection (please convert the fonts to paths first)? Unfortunately I won't be back on the computer until tonight, but maybe someone else will have a look at the file before then.
Sure, here's the file. I did already find a fix as mentioned earlier but I'd welcome any deeper insight on to why this happens
Hi everyone! I'm trying to solve an issue with managing date metadata in my photos and would really appreciate some help.
Context: I started by searching if Google Photos could change the capture date metadata to be able to download photos and mantain the order in others gallerys like samsung one. I found out that it can’t do this automatically. Google Photos only allows me to manually adjust the "creation date" in their platform, not the IPTC or XMP metadata fields where the "capture date" is stored in the photo file.
I’m now looking for a way to automate this process. Ideally, I want software that can read the date from the file name and place it in the "capture date" metadata field of each image. Does anyone have experience or advice on how to do this? Maybe a tool or script that makes it easy? I ask it here cause maybe Adobe has already a tool for that on their suit, or even photoshop could maybe do that too... One of the problem is that there are some different name-date formats, for exaple there are some images that have the date like this xx-xx-xx,some others just have it like this xxxxxx, others have them with a screenshot text before the date...
Is the problem still present in this image?
If so, I'm running out ideas...

Sadly yes - you can see it here in the discord thumbnail where a white border is visible along the darker elements of the image
Ok...😢
I don't know what's happenening... Good news is you found a way to work even if it looks weird and tedious. Sorry.
No problem at all - I really appreciate you taking the time to try and figure it out

What is your version?

version 26
Where the .abr file you're trying to use come from?
does anyone know why i cant draw in a layer without double clicking it 🧍🏻♂️
A toturial from a video
like im on layer 1 and then when i want to edit in layer 2 it shows the target channel is hidden and i need to double click the layer every time i want to switch layer
😭
Opened it in my photoshop V26 without any problem.
By the way there is nothing exceptional in this .abr file => just a soft round presure size brush with smoothing feature on.
You have the same in the by default basics brushes set.

could you share a screen shot of you photoshop UI and explain which tool you're trying to use and for what type of work/effect? It will be easier for us to find your problem.
But it should have more then a "soft brush"
It should have 6

Sorry there is just one... Maybe the file were corrupted...? Perhaps the reason why you can't open it...
is it there a lightroom discord?
Pretty drawing btw
Thank you for your help:p
Gave +1 Creative Carma to @viral palm (current: #9 - 593)
thank you 😼
Gave +1 Creative Carma to @fallow berry (current: #611 - 2)
You're in quick mask mode (your layer is hilighted in red in the Layers panel) Click on the icon shown in the screen shot to switch to normal mode.

No Lightroom Discord but you can post your question here there are Lightroom usuers here (I'm not) who can surely help you.
Oh, then, my purpose is to change some metadata dates to the photo name one withoud doing it one by one
THANK YOUUUU
Gave +1 Creative Carma to @viral palm (current: #9 - 594)
I have no idea 'cause I don't use this app a lot.
I'd suggest you to ask on the Adobe Lightroom community
https://community.adobe.com/t5/lightroom-classic/ct-p/ct-lightroom-classic?page=1&sort=latest_replies&lang=all&tabid=all
https://community.adobe.com
Connect with fellow editors in our Lr Classic community.
k, Nivida Texture Tool doesn't have a screenshot feature, but Nvidia Experience does (via shadowplay, for games) its obvious he's skirting around something
I'm literally using Windows+Shift+S to take a screenshot...??
when tabbing out of photoshop (or just unfocusing the window) I need to click once to focus the window before being able to click anything. Can I change this?
Not really sure what this means. In Windows, you have to have an app active/selected to interact with it.
Can someone help me blend
You'll have to be more specific because "blend" can mean any number of possible things.
Provide examples, screenshots, or whatever helps to demonstrate the problem or the goal.

hello world

i get this line when i zoom out
but not when i zoom in

any idea wh?
Main menu: Help > GPU Compatibility... Any errors or issues reported there?
it is going to show in the final resolt
if not then i do not care
one sec to see

Seems like some sort of rendering glitch if it only shows at certain zoom levels. You can try saving your work and restarting Photoshop.
Thanks will do. You can leave out the "love" part.
Gave +1 Creative Carma to @wanton tartan (current: #195 - 8)
Gave +1 Creative Carma to @ripe quest (current: #3 - 2428)
Please try to be professional here. Thanks in advance.
i don't know how else to word it so hope this helps
this is 2 monitors side by side
OK. And? You have to actually click on an app/icon/button to do something in the app.
it's an unnecessary 2nd click
on discord and any other app the first click focuses and 'activates' w/e you click on
There are multiple "Windows" inside the Windows version of Photoshop. I guess you'll have to actually click on the Window you want to interact with. Otherwise, you could accidentally trigger something. You can post this to the Photoshop Community Forum as a bug or a feature request and see if the Dev Team will look into it.
it all makes sense now, tbh if it hasn't been "fixed" by now I should probably just get used to it
thanks for the help
If you try to use various screen capture apps, you might see what I mean. It will see various panels in Photoshop as a unique "Window" that can be selected and captured. I'm not sure if that's the intended functionality or an artifact of writing the software. I'd be curious to know if it works the same way on MacOS.
oh NOW you're telling the truth
yeah i noticed the Tools window is one of few windows in photoshop that isn't focused on first click, though the "File, Edit, Image etc" is focused and clicked. I imagine if you hotkey all tool selections then you won't notice, thanks again
Gave +1 Creative Carma to @ripe quest (current: #3 - 2429)
...sorry I didn't explicitly state how I was taking a screenshot earlier.. wtf? I don't understand the suspicion or the hostility here
I outlined the entire process I used which resulted in the issue, provided the file, Franck I believe recreated it which gave the same problem, wtf am I lying about and why would I? Lying about this would be counterproductive to me getting help
we're not here to argue about it, don't worry about it 🙂
I think they're suggesting that you're not actually using Photoshop but some other app. The sample screenshot looks like Photopea, which we don't support here.
What's happening here?
Pushing pixels.
just PS help is happening ❤️
Ohh
You would do well to not accuse people of things. You're not staff and its not really your place to make accusations or call people out.
I think its just a misunderstanding. Perhaps we can just move on to the focus of this channel.
and I think you're doing just the same, look at you goooo
assuming and accusing 😄
Did you have a Ps-related question?
If you want to create problems, you can be timed out. Feel free to keep that in mind.
No and yes. How do I share one of my creations on this server?
Because I have my ps creation saved
If you want to post for suggestions and advice on a project, export a web-friendly image and post to #📝project-feedback.
Ohhh thank you! I will denfinetly check that out
If you're trying to share multiple images and longer bodies of text with it then its better to post in the #1110544577850511401.
when i use the brush tool and try and change the color, this color picker always pops up instead of the original color box thingy.

You're probably in 32bit color mode.
OH UR RIGHT
how can I make any image like this

like yk what i mean
do i have to manually draw it or is there some filter or something that does it
Posterization... Use: Threshold or Posterize
This is just a quick hit but probably this sort of workflow...
thank you so much
@marsh thicket - You can probably do that using a custom Pattern and then fill a shape with the Pattern.
guys i got two layers, the original manga artwork, and the cut out selection of the hair, i need on the original photo to get rid of the hair without having to cut out again is there a way? so in the end ive got one layers with just the hair cut out, and the other layer with just the main body frame but without the hair. if anyone could help that would be great ;p.
i'm new what is that?
Probably not trivial if you're new to Photoshop.
You're going to need a well-defined shape to use and probably another layer with the outlines to put over-top of it.
any tutorial you recommend
If you can select the hair, you can create a mask to mask out everything except the hair. Then you could use that object/selection to remove the hair on the other layer. (If I'm understanding your description.)
?
which layer do i put the mask on? the original photo or the one of the hair cut out?
There are two parts to this. One layer will have a shape that is filled with the "letters" pattern. Then another to put on top with the black outlines.

Can you show me the image because I'm not sure I'm completely getting the whole issue.
dont mind the hair 1/2 layer i just added that, i do manga animations on ae but the issue i stated above will make things 10x quicker for me if you can help me out aha

thats the cut out now i need that cut out to not be in on that original picutre so shes basicallyt hairless if that makes sense lol

Ctrl click on Layer 2 to make those pixels a selection. Then switch to Layer 1 by clicking on it in the Layers Panel. Then with the selection active, add a Layer Mask to Layer 1. That should do it, if I'm understanding the issue.
its doing the opposite i think

One moment
all good ive got time
Kind of a rush job trying to chop and recreate your character but hopefully this demonstrates what I mean...
The Layer Mask allows you to make refinements which is why we use that technique instead of erasing or deleting.
okay, thanks alot, ill try this rn, i do succkk on ps ive been using it for a very small time so still learning alot
I'm not sure if you'll be able to follow this entirely if you're brand new to the app but... You could do something like this:
Using Edit > Fill > Pattern... Script: Brick Fill...
how do i get that colour fill layer or do i not need?
I just added it so I could see the edges of the character.
how do auto select the whole subject? whats the key bind aha
Ctrl click on the Layer thumbnail.
ok im off topic but i got this somehow how do i get it to transparent now lmfao

im trying v hard aha
ahhhhh i did it
finally
i did it different somehow but yeah thank you sm either way i tried to do ur way and somehow messed up and got it lol
You can get rid of that color if you don't want it.
yeh i did
OK. Glad you got it sorted out
How could i make a slight motion blur like this on the bottom? I used motion blur but it blurs the whole image, is there a tool where i can manuelly pick to blur?

there's a blur brush but I think you'll want to mask the area you want to blur and then add the motion blur filter and it will only apply it to the masked area
Convert it to a Smart Object first. Then add the Blur. Then paint on the Smart Filter Mask to apply the blur where you want it.
thats smart didnt think of that thank you
Gave +1 Creative Carma to @ripe quest (current: #3 - 2430)
i have a group photo of me and my friends but i want to make my friend in the middle shorter, could someone help me with it? :D
Please describe "help me with it" - Do you want to learn how to do this with Photoshop or do you want someone to do it for you?
both actually xD
i am a beginner with photoshop and dont have the skills yet
hi

i want to select the bubble
but the selection tools are onle selecting the black
is there a easy way to switch the black and the white so i can select the bubble
inverse the selection is one way
it worked
i just did it
but still the magice selection took selecting every thing
nvm
my tolorence was 255
lower the tolerance
XD
yeah
thank you
get free carma from the master
Gave +1 Creative Carma to @haughty storm (current: #36 - 53)
tyty
Could someone teach me how to create this effect? I tried adjusting everything, but it didn’t work. I’m new to Photoshop.

paint blue layer then put it above the image you want then reduce the opacity of the blue layer
or purple i think in this image is purple
that pruple line you can just paint it on top
gonne need to add a mask of the grid then inverse the selection and clear it so that it looks white and you don't even have to paint it, you can use a solid color adjustment layer
How do I reduce the layer?
change the opacity

Try a Gradient Map Adjustment Layer and pick custom colors to suit your needs.
Create each image and then assmeble them into a grid afterwards.
You can create and save a custom gradient if you want or just drag/drop the same Gradient Map Adjustment Layer onto each document.
I made two! Thank you very much for your help! Normally, people don’t have patience with beginners.


will that what came out with me with my way
what different exactly?

dose it better to learn that for me ?
bec that is new mec for me
You only have one color. I have Gradient Ramp that can contain any number of colors.
Hello everyone, does anyone know if it's possible to keep the grainy effect from the dissolve layer pre exportation? or like something to create a similar effect
If I were doing to do what you did, I would use a Hue/Saturation Adjustment Layer and tick the Colorize option.
Not sure tounderstand what you mean by pre exportation... Could you clarify?
Blend Modes like Dissolve and others are mathematically calculated. You can't really rasterize that. You could try to use other "noise" effects.
is there is easy way to remove the red ?

Desaturate the Layer to remove the color. Image > Adjustments > Desaturate
how ?
make the red show more?
basically when you have a shape and you put it under a dissolver layer mode, on the photoshop render it's really grainy, like a thick grainy fade, but when you export it the render gets "multiplied" and you get more of a blur than a grainy fade
I want to know how can I keep the grainy effect
Maybe i can illustrate?
Ctrl+U
no the other way around XD
i want it to be black but not losing the white of the bubble
Or use a Hue/Saturation Adjustment and bring the saturation all the way down to 0.
Better to change your layer to smart object before @wanton tartan
that will change also the white of the bubble
Saturation only.

That's Lightness.
wrong cursor
SAT-UR-ATION.
lol as if we can "hear" that 😛
Are you looking at your image at 100% magnification?
I don't think so, how can I see that?
Double click the zoom tool.
Try to make a smart object with the two layers (dissolver one and the other) maybe...
And yes you could share your layer panel to give us a better idea.
True. It could be converted to a Smart Object. (There is no need to combine it with another layer.)
okay so, it is already a smart object, with a field blur and a dissolve mode layer
on the real time render it looks like this

and on the exported thing
it looks like this

I just like the more aggressive look and want to keep it
First make sure you're viewing the canvas at at 100%. Ctrl 1 or View > 100%.
Is ther any layer Fx applied to your shape? (like drop shadow, outer glow or something else)
there's a field blur (filter>blur effects gallery> field blur)
do I turn it off?
No. With the Dissolve Blend Mode applied, convert the Smart Object into a New Smart Object. That should "freeze" the Dissolve effect.
Wait... Could you share your layers panel or the entire UI please?
Although, if you want to edit the Blur again, you'll have to drill down into two Smart Objects. heh
im using graphic pen, i use wacom to draw.
DId I missunderstand?... I thought there were two layers involved
Sure, I have photoshop in french tho
no there is only one
It doesn't really matter how many layers are involved, tbh.
No problem.. I'm french 😉
Yep dissolve effect is great but we often have to deal with smart object (or rasterize for the most violent people) to keep the effect.
that's it

truly the problem is that I want to make the grains bigger
i mean the thing
this is too small

there s no way to make the grain look bigger?
Dissolve is a Blend Mode. Not an effect. If you want an effect that you can control, you'll have to do this a different way.
This is what I am asking, thank you, what would be the way?
Gave +1 Creative Carma to @ripe quest (current: #3 - 2431)
This method requires a somewhat complicated Effects and Adjustment Stack but can be modified in myriad ways...

Doing it this way, you could dial in various levels of control over each portion of the effect..
Someone else might have better ideas. Perhaps they will chime in.
[crickets]
Maybe not. :)
You could also try something like this. Not as infinitely tweak-able but perhaps easier to understand...
Thank you so much for your help, I will try it out!!!
Do you create your own effects or download them ready-made?
I’m extremely sad; I can never save my GIFs. Could someone help me, please?


GIFs remain static.
You're using a version of Photoshop that more than a decade old. Not sure I can troubleshoot that. Sorry.
How would you get rid of the annoying edges around the flower

Like I tried tutorials and stuff but nothing seems to work cleanly
You could try adding a Layer Mask and then refining the edge in the Select & Mask interface...
this is the original photo btw. i will try what you said

Also why do you choose grey
is it a random colour or there is some use
since I plan to put this on a white background
I just wanted to see the edge against a background color; not a transparency grid.
oh makes sense

Im trying to trace this but I got this instead


not a terrible trace, so what's the prob?
How to draw the lips?
idk man, I don't draw
how to adjust pivot point?


huh
Please ask Pr questions in the Adobe Video server.
It depends if you want it simply as a vector file format (that file will contain a raster image). In that case, export it as a .svg using export as in Photoshop (you need to have ticked the "legacy" export as n the preferences for the .svg to apear)
That said, the file format will be vector format, but not the content of the file
If you want the content of the file to be vector, and given that it seems to be a photo, you need to vectorise it. You can do that with the auto trace function in Illustrator. There will be some simplication, you'll probably need to tweak things manually since the details are a bit complex for a vectorising function.
Otherwise if you need a quick and dirty job, you can go to Adobe Express and check the "convert to .svg" quick action. You can also use this direct link
https://www.adobe.com/express/feature/image/convert/svg
https://discord.gg/adobepremiere
here it is
hi everyone
sandrine i need help
Ask your question!
Hello friend, I have an urgent small need for my workplace, can you help me?
Just ask your question and if me or someone can help, we will. Don't ask to ask, just ask 🙂
my ask is
Hello friend, I have an urgent small need for my workplace, can you help me?
As long as you don't tell whhat you need, I will not be able to help. Spit it out!
Can you dm me and I will explain it to you in detail?
I don't do DMs, this is a community, public forum. If you need help, you just ask publicly, and someone will help if they know the answer
okey
i send photo
this photo


How can we paste the white photo on it?
Can someone please do it?
@vapid flume please helpp
very urgent
You can use a function that is called "vanishing point"
here is the documentation and tutorial :
https://helpx.adobe.com/uk/photoshop/using/vanishing-point.html
https://www.youtube.com/watch?app=desktop&v=w5aMceFycN4
The Vanishing Point Filter and Perspective | Photoshop CC Tutorial | EASY
This Photoshop CC Tutorial discusses how to use the Vanishing Point Filter to add images, text and graphics to a photograph while maintaining proper perspective. This Photoshop tool allows us to create a simple grid and panels based on the perspective of your current image...
Someone needs to do it for me, I don't know
😞
i dont have adobe photoshop
I don't know anything about these things
So you need to ask in #💬chat-general if someone is nice enough to do it for you, they will. No guarantees
he keeps pinging other people too
@hallow rune Please don't ping people nilly willy. It's rude
If people want to help you, that's their call.
Hey, on my monitor I use increased saturation at all times. When I edit in photoshop, the colours I see, is there a way to export with the colours I'm seeing? With monitor saturation? 🤔🗨
I think you'll want to calibrate your monitor so that its correctly displaying colors. Then go from there.
Am I not able to use the saturation then globally?
I'm not sure what this means.
I like my monitor colorful, so I always use cranked saturation on my nvidia card
So when I'm editing, I'm wondering if I can export as I see on my screen
But that's probably not a real representation of RGB values.
Sorry if I'm a bad explainer
Just looking if there is a way to export exactly how I see it on my current monitor viewing.
Are you exporting to print or just to view on your own screen?
If you are exporting for screens that aren't yours, you need to emulate that extra saturation after thefact, because other people don't have your settings
Yes I got that part covered. I'm just wondering if there is a way to export exactly how I see it on my screen
One way you could do it, is NOT tweak your GC settings, but view your images (in photoshop and other colour controled software) with a specific colour profile and use the proof view in Photoshop
Not really
I over saturate it beforehand to my liking, kinda hard to explain the situation, just wondering if there is a way to export exactly how I see it
Photoshop doesn't know about any settings on your end, only the ones in Photoshop
So you would need to create a colour profile that simulates your oversaturation and tewaek your images according to the proof view with that profile
But please don'tever print anything! 🙂
Dumb question
Calibrating your monitor colour scheme like you mentioned, done within windows calibrate you mean?

I do mine with a calibration device (Spyder)
All those should be "normally" saturated, you need to create your own (And that's really out of the remit of this server tbh)
Other simpler solution would be to create your own LUT preset and apply it prior to exporting on all your images (you can automate that)
How to Make your own LUTS in Photoshop, step by step tutorial.
this is cool, but just for view? doesnt set actual colour profile?
Depends you can set it as hard baked into the image, or just using for proofing. For example as you would do to simulate the colours of a specific printing machine (ink/paper combo) and colour correct your image with an informed choice of what it will look like.
It changes the colours on your screen to simulate the specific profile you need
How to hard bake?
Honestly it is mostly used in controled evironments, not for simulating how things will look on a random person mobile phone (or even computer screen) since we never know how colours will look on others devices
That would work if everyone had a calibrated device, but it will never happen
edit> convert to profile (to "hard bake")

I would be wary of doing it in your case if the images you share are for other people consumption (ie social media)
Most people's phones are already oversaturated by default (mine certainly was, that's something I immediately tweaked when I unwrapped it)
tried that no difference, with my scenario
Did you choose a colour profile that you created?
Ya, it's a tricky situation and hard to explain for me what my goal, is, but thanks man for the help :/
Hello everyone, forgive me for my bad English. I'm French and I'm preparing a satellite image for a game called dayz. As someone who uses the "spot Healing Brush Tool" a lot, I would like to know how to apply a natural transition to the different color layers of the island while keeping certain patterns.

Because I can assure you there are no default colour profile that are saturated like you would wish to (I'm assuming there since I didn't see any image). Default profile tend to be for really maintream usages (paper, screen etc)
Your spot healing brush menu looks weird (see mine)
what version are you in?
Also, the French is weird in the interface 🙂 )

I would honestly use the stamp tool (clone stamp) because spot healing is taking its source sample from around the area you're clicking on and it can result in smudges when there is a hard delimitation between areas (say between sand and sea: different colour, different texture)
With the clone stamp you'll be the one deciding on what to sample, not Photoshop trying to create an average

Spot healing and the healing brush in general are good when the area you're sampling is relatively even (like skin for example) not when you're cloning on diverse areas
2022 😅
Ah OK
Maybe I'm not used to using this stamp...

you should update, there is now a new tool called the remove tool that react well with those situations. Keep the clear delimitation between areas

my flow was at 30%, sorry, it seemed effective to me. I would just have to correct the colors. Thank you so much.
You need to resample to a different area each time you paint, otherwise it creates repeats. The clone tool is entirely manual, you are the one who decides what to sample
Also you need to control the hardness so the texture is preserved (not too soft)
Yes, thank you very much 😁
Hello I wanna ask how to make my picture to only fill the blank bacground

like this,how can he make the flag filled a specific Place

Please help, I can't download Photoshop, I have a xps 13 2-in-1 9315
Try a Clipping Mask: https://discord.com/channels/547473772727238676/1081318392750940290
Use a different browser. Opera isn't supported. Try: Chrome, Firefox or Edge.
Just place your layer 1 above the shape you want to contain your image then right click beside Layer1 text in the layers panel and chose "Create Clipping Mask"... The link shared by @ripe quest is pretty clear I think you should get what you're looking for.

there are 2 layers which are duplicated, i cropped one of them to fit the board only
how do i crop the same area from the other layer so they are not overlapping?
Could you share the entire photoshop UI to see your layer order and which method you used to crop?
Best way is to duplicate your board. Use the rectangular marquee tool to mask one layer then Alt+Click and drag the layer mask of "Layer1" to the copy then invert the mask (Ctrl+I with the mask selected),
hey please help me with this
here are multiple elements/layers
i wanna drag this a bit down but its so difficult to bring each and every element down individually and then adjust .
so how do I drag entile elements together.

Group the Layers. Select all of the Layers in the Layers Panel by holding the Shift key and clicking on them. The do Ctrl G to put them in a Group. Then you can select the Group Layer and drag the Group around.
accidentally dragged my design from illustrator without grouping it

i cant remove the blue lines
how to fix?
guys i have a question
so basically how do u apply camera raw filters on multople layers
cuz whenever i have to do it i find myself having to merge it all into one layer
im a beginner thats why
I cannot apply it to multiple layers in one go, but one thing you can do is turn all the layers into smart objects (do it separately). Right click on the layer and choose "convert to smart layer), when all your layers are converted, apply the filter to one of them, you see the filter appear below the layer

So now, click on this line that says "Camera Raw filter" and drag it to each of the layers while holding ALT, you are now duplicating the filter to each of the other layers. Release the mouse button to copy it.
Note that now the filters can be tweaked individually, just double click on that same "Camera Raw filter" line
Alternatively, you can group all the layers, convert that group into a smart layer (same steps as before) and apply the ACR filter in that layer, it doesn't merge the group, but instead embed all the layers into one. If you want to see all your layers instact, just double click on that layer and it will open as a new document, that you can work on, save and that will update in your main document.

In this video, I explain Photoshop Smart Objects and some ways to use them to make photo editing easier.
LEARN PHOTOSHOP
Make learning Photoshop EASY with my Essential Adobe Photoshop CC book: https://lenscraft.co.uk/project/adobe-photoshop-cc-book/
FREE BOOK OFFER
Get your free copy of my book "6 Steps to Shooting Brilliant Landscape Photogra...
thanks , also is there any way by which i can know which layer is associated with what element ? like in my case its written layer 1 , layer 2 ................ so i need to know what are the layers that i have to group
Gave +1 Creative Carma to @ripe quest (current: #3 - 2432)
Click on the name in the Layers panel and rename them; give them meaningful names.
For support with Adobe Premiere, please join and post in the Adobe Video Server: https://discord.gg/adobepremiere
i have grouped , however still entire thing is not dragging
Click on the Group Layer in the Layers Panel to activate it. Then get the Move Tool. V on the keyboard.
thanks ,its working fine now . thanks a lot
I can't seem to change my program language, could anyone help?
@frank cipher wait 20 gb on c drive or 20gb on instal location?
System Requirements for Photoshop on the Desktop: https://helpx.adobe.com/photoshop/system-requirements.html
Got to preferences>Interface you have acces to UI language option,
Note you need to install photoshop in the other language first to have access to the different languages.
To do so reinstall Photoshop in the wanted language via creative cloud app.

so i can't instal it on d drive? i can only instal it on c ?

I wouldn't get too close to the ceiling on C / the drive with Windows installed. You could have problems beyond just running Photoshop. There should be significant free space for the Windows Paging File (virtual memory) as well as Scratch Disk space for Photoshop.
Perhaps @ripe quest could correct me if I'm wrong but the app must be on C/ drive. If you have an other drive I recommand you to set a scratch disk prior using Photoshop. 20GB will quickly be not enough to run photoshop... Temp files grow fast when photoshop is running...
You should definitely use another, separate fast device for Swap Disk space. But if someone doesn't have another one, they must use the OS Drive.
I don't think the app must be installed to C. You can set the install drive to be elsewhere. However, the Adobe Installer is going to put certain files on the OS drive anyways. So there's that as well. For certain files, DLLs, etc, I'm pretty sure the app expects some of those items to be on C. At least, on Windows.
I did that but i think its some sort of bug it doesnt work
i figured the amount out lol
it's 2.5 gb
just changed c drive so all good now
TBH I always install on my C because it's the fastest (SSD)... I've never tried installing apps on another disk... Good to know Thanks!
Gave +1 Creative Carma to @ripe quest (current: #3 - 2434)
I install everything to C as well because I don't want any problems. :)
Then I have separate SSDs for Scratch.
well ugh i have my C drive ssd then all programs on another ssd and all files on 2 hdd
I have to confess I'm still using a regular hard drive as scratch disk...
How dare you! heh
I don't have any spinning disks in my PC anymore. :)
I have a non PS related question. I made a server and I am trying to organize the channels. On this server if you look by the channels it says stuff like support and feedback, share and chat, and general announcements. How do I change the name of those on my server? I know how to change the name of the stuff on my server like # general and stuff like that. But how do I change like the topic of those channels? If you know what I mean so it's more organized.
i assume you haven't had a ssd die on you lol
file recovery on a spinny boi is doable on a ssd pain and suffering
I've had one in the 2 dozen or so that I've bought.
Not the appropriate channel/server for this question. Sorry.
I am unmasked! I am so ashamed!🫣
Ohh is there any channels to ask this question?
also tb ssds are expensive and for the stuff i work on aka booklets
Try a Discord Help Server.
Ok
so one booklet is roughly 15gb and i produce one every well 2 weeks
so filling 1 tb hardrive takes rly fast
I have 2 500 GB SSDs for Scratch. They're cheap. I ony use them for swap/scratch and transfer. If they die, so be it.
I will get new ones. :)
a fair i need to keep a archive of the files if it comes up again
so can't rly yolo it
been thinking on myb makeing a home server
bcs its getting rly taxing on space
can someone help me edit a picture, cause i have been trying for hours but its just not working
My work gets backed up to a network drive and second backup nightly on a spinning disk.
a fair enough
Are you wanting to learn how to do something with Photoshop or are you literally asking for someone to create this for you?
i dont mind learning it but i just need one picture edited so i can move on with a project im working on
i am going to be learning photoshop soon tho
I'm using the new Photoshop, but the image doesn't stay small like it did in Photoshop CS6 from 2012. The icon appears large. How can I make it the same size?

The icon where? In the Layers Panel?
In the Image Size.
I don't understand what you're talking about. Sorry.
Icon in tool bar are screen Resolution dependant but you can do some adjustment via Preference panel.
For panel you can adjust them via panel menu options... Please be more precise in your description...

What is the brightness percentage of your computer screen?
Image shared is called "Image" not icon... you can zoom to fit window with ctrl+0.
don't know why you ask me that but it's 75%... Driven by the built in menu of my screens...🤔
It seems that when I increase the brightness of the computer, the edits lose their visual quality.
Hi @viral sierra
Sorry, I didn't have enough time yesterday.
Your illustrator file seems to be well created and neatly organised. I could not find anything that could lead to an error during export.
I then opened a PNG exported from Illustrator in Photoshop, edited it with the values you specified and saved a PNG from Photoshop. Here are the results:


No problem,thank you for taking a look - I don't see any noticeable issue with that aside from the clouds filter so that looks good! I did end up doing some research to find out exactly what the white edge around elements in transparent images is and apparently it is called "haloing". Its the result of something called premultiplied alpha that happens due to antialiasing. Idk I'm not exactly an expert with that stuff but apparently it's somewhat common. I found a more reliable way of fixing this by using Layer > Matting > Defringe or Remove White Matte
It looks as if you have probably used different settings. This is because the problem does not seem to occur with the method you have described.
🤔
Perhaps, when exporting out of Illustrator I did an Export > Save for Web (Legacy) as a PNG-24 with default settings
Is that what you used as well?
I also wonder if it could be the cloud layer on yours. For mine I did a select pixels on my decals layer, inverted the selection, then deleted that selection on the clouds layer
Here my settings (Illu)

Wait a minute - lm try that
Here it is:

Ah yeah it shows up now - you can see the halo around the dark elements on the lower half
This is what the background color channel looks like

This is with a Layer > Matting > Defringe of 2 and then a Layer > Matting > Remove White Matte

Hmmh?
Do you mean the halo in the minimised view in Discord? You can't see it anymore if you download / save the file as PNG, open it in Photoshop and create a black layer underneath.
So in my opinion it's just a distorted browser view ...

It's not just a browser issue unfortunately. For context I am using this image to place the separate decals onto a 3d model - this is what it looks like when using your original image

versus what it looks like after I use the Matting options

Strange. That doesn't happen with me.

🤷♂️ Idk honestly, I'm by no means an expert so there's probably something I'm messing up
But either way I seemed to have solved it atleast on my end. Thank you for your help 🙏
You're welcome.
Please try one last time with the last file:
#❓ask-a-question message
Open it in the browser and save it. Please do not C&P !
Then open this file in Photoshop and drag your image into the file. What happens then?
Yes, same issue using those steps

Ok. Then I don't know what to do. Because it works for me without any problems ...
I therefore consider the ‘remove white’ step to be superfluous. But if that's the only way it works for you ...
hello, I would like to apply a paint to all the image except the part in red, how can i do it ?

Try using a Hue/Saturation Adjustment Layer. Apply the adjustment and paint on the layer mask to remove the adjustment in those areas.
Describe "apply a paint"
How can I change the strenght of the generative ai? Like I'm trying to convert a picture to an oil painting style but its too intense and you can't really tell what it is anymore
thank you!
Gave +1 Creative Carma to @ripe quest (current: #3 - 2436)
just want to apply some color on "top" of it
you want me to type that in?
sorry wrong message ahah
I just want to apply some color on "top" of it
Ctrl+A to select all the picture then with the selection brush tool activated change the opacity value> regenerate...

is that the same as making a new channel with a different brightness?
Are you talking about Luminosity Mask?
My option was more like this short:https://www.youtube.com/shorts/STPZTX7Si8c
so i am purposefully making a crappy edit of myself in a Halloween costume. However I cant get the shadow to "feel" right. can someone give a pointer on how to make the shadow look good in this strange perspective. Sorry if this is the wrong channel (I also censored my face for personal reasons)

I removed the shadow because i literally have no clue how it would look in this perspective
could someone make a dc server logo in a minecraft theme saying "Lush SMP"
willing to pay a small amount depending on quality
quick question how do I add a clipping mask for a group?
Convert the Group to a Smart Object.
hmm I have a cc layer with these and if I convert it just removes the effect

Is there anything else than the 2 adjustment layers in the group "1"? Could you share the whole Layers panel to help us understand?
yeah I mean this is what I ahve

If you change Group 1 in smart object it's normal to lost effects besause there are only adjustment layers inside it. Perhaps we missunderstood what you want to do... So you want to apply a clipping mask to which group?
oh you cant make clipping layers for adjustment layers in a group? I just want all the effects to apply to layer 7 only from the ccs group
No you can clip layers to a group but you can't clip a group to a layer.
In your case you can drag the 2 adjustment layers outside the group above (Layer 7) and clip them to it.
kk thanks whats the keybind to quickly clip something instead of right clicking?
Gave +1 Creative Carma to @viral palm (current: #9 - 595)
why don't letter sets have exactly the same dimensions? I selected all of the layers and resized them exactly the same
last 2-3 are not in the correct position so they're way off, but I'm talking M and U they're exactly the same size but they are not

updated, see, I and U are not the correct size

I didn't make these, so I have no idea
Hold Alt+ place your mouse cursor between the layers you want to clip. then click when you see the clipping icon appears.
It's normal that letters with round edges on the top and bottom are taller...Don't want to be too theorical... It's to compensate the optic illusion given by round shape... But in your case your U is really really weird. Did you rescale your letters?
yeah I rescaled them all exactly the same dimensions all at once
huh I noticed that when I first transform them the dimensions are not the final results; after committing they are completely different numbers
Which dimension are you referring to? Point size, Height, Width?
hang on
this shows the dimensions of all those layers selected at once px and H&W being 100%

yes I moved it to the project now yes I know its hard to see.. I ain't done yet
but here, the H&W are the same, but the pixels are not

JUst to illustrate what I said... all O,U,S,Q exceed baseline to compensate optical illusion and make them look the same size...
Letters on your design are not from a regular font, they are stock images, aren't they? Did you use "place embeded" to import them? If so I suggest you to import them one by one at 100% (width and Height) then after give them the same scale ratio (one by one)...

yeah I said they weren't a font; I don't know how I placed it, just dragged & dropped as a smart object
but I see the first two look ok the last one looks weird
Perhaps in this case eyeballing each letter one by one could be a solution... Your text is not so long 😉
I ended up doing just that, so how do you import this not embedded?
No it's OK to embed... You get smart object and that's what we want. But sometimes the scale ratio is not 100%. Photoshop will resize the letters to make them fit on your canvas and since each letters has a different width the ratio could be different for some letters. So after that if you apply the same rescaling ratio to all letters you could get weird results... Hope I didn't lost you with my bad english 😉
no you're good I understand you well 🙂
so as long as I make the W & H 100%, got it; easy to do
and they were at 100% I had to manually fix the U
and thanks @viral palm
Gave +1 Creative Carma to @viral palm (current: #9 - 596)
err except I didn't do them 100% for each so will have to do that next time I rerun this project
how to delete the shadow

I think you can probably just use layer mask to hide it?
that's what I was going to suggest, but hiding it with a mask just makes a white spot instead
they can use the remove tool
a white spot? given the shadow is on a separate layer, masking it shouldn't create any problems...
if its on a different layer? Did I didn't see anything about that?
sure yeah if its on a different layer; problem solved
hello guys I have a very specific request so lets say I am cards that have questions in them and I have automated the import of questions from excel since some questions are 2 lines some are 4 I was wondering if there is a way to center the text within a certain area not the canvas since the question isnt the only thing on the card it cant really be in the very center of it
basically how do I vertically center the changed text to be centered within a certain area of the canvas
hi everyone i need logo for my hairdesign saloon
As you can see from my avatar headshot, I’m probably not someone who can help 🤣
You seem like a much more expert person than usual. 🤗😆😆
Requests can be made in the #💬chat-general (same as yesterday)
and same as yesterday, it will be if people agree to help you (unless you are willing to learn how to do it, and in that case, you are welcome to ask for tips here)
If you want for someone to design you a logo for free, then it will be up to people to see if they want to help you, there is obviously no guarantees.
i know dude thx
Gave +1 Creative Carma to @vapid flume (current: #8 - 765)
You need to create a selection first and set the text to align according to the selection.
It's better when you set guides first, so the selection follows the guides
@unkempt mantle If you often design things from data from a excel sheet, you may want to investigate this function!
https://helpx.adobe.com/uk/photoshop/using/creating-data-driven-graphics.html
Not a dude but OK!
Dude is for men 🙂
@unkempt mantle
No worries!
thank you but I was wondering about the vertical one not the horizontal centering
Gave +1 Creative Carma to @vapid flume (current: #8 - 766)
Same... If you make a selection all you need is to click on these instead for the vertical

Everything you need is in the top menu
It's a contextual menu, it depends on the tool you've chosen. If it's not there it means you cannot use it in that case
So in that case you need to select the move tool AND have the text layer highlighted
for some reason it doesent work properly with text only if I rastorize it
oh I see is there a way I can automatically make the text layer get rid of all the blank lines
and automatically expand if the text insterted is longer
since I can shorten the initial text layer to lets say the 2 lines and then use actioins for centering but when the 4 line text would get inserted through the script it wouldent appear in the 4 lines since I have restricted it to 2 now
hi everyone i need logo for my hairdesign saloon
this isnt really about photoshop though?
help
can anyone guide how these reflection are created, i tried with motion blurr but couldn't succeed

Are you looking for some designers to hire? If so you can try to ask in #💬chat-general this channel is for asking question about Photoshop.
i write but anything dont answered
Posting the same question all over the channels is not the way to do. You asked in the right place first. If someone is interrested in working for free he will reply.
Possibly because nobody is interested.
It's not a right you have, but a favour someone may, or may not, grant you.
