#❓ask-a-question
1 messages · Page 83 of 1
i tried to download video as a gif but it keeps telling me this (this operation can't be finished, there isn't enough storage) and idk how to fix it cuz i have alot of storage


What are the dimnesions of the canvas? Also, Save for Web has a limit on the number of frames it will export.
its 3840x2160 and it has 65 frames
The bottom left corner of the Save for Web interface should display an estimated file size. What does it say there?

Trying to create a normal map, been following some tutorials and every one says go to filter< 3d, but there is no 3d. is there a plugin or something i need to get?

The 3D features are EOL: https://helpx.adobe.com/photoshop/kb/3d-faq.html
You'd have to be using an older version of Photoshop, version 22.x and below to still have those features availabe.
Have look to this page:https://helpx.adobe.com/ca/photoshop/kb/troubleshoot-scratch-disk-is-full.html
so there is not a way to make normal maps in the latest version at all?
Perhaps. With some sort of plugin. But I don't know off the top of my head. Sorry.
Maybe someone else will chime in.
Photoshop uses disk ressources to run … Do you have an other Disk on your machine? If yes try to set your second drive (with free space) as « scratch disk » (via preferences menu)
alright ill keep looking into it, thanks for your help🙏 .... if anyone has a plugin recommendation lmk thanks
Gave +1 Creative Carma to @ripe quest (current: #3 - 2424)
i dont since i have a laptop
31,6 mb
guys, how do i make a hair above match the color below

Any external drive you can plug to your laptop and use as scratch disk?
i dont have any
What is your open document size (bottom left of the window- not the size of the saved file)?
On my end Photoshop create a Temp file of 5.8Gb when I open a 3.4Mb psd file and this Tmp file grows to 8Gb when I open an 16Mb project… It could be your problem if your document is really huge…
Note: sizes here are sizes saw in the Photoshop app (bottom left) not psd sizes.
idk much about normal maps but I know of game modders who use PS for making them, not sure how they do it @livid quest
I want to put falling snow on a christmas photos.
like an animation?
or static?
Animation.
yeah you'll have to use Adobe After Effects
apparently you can do it in PS https://www.youtube.com/watch?v=sJIwzYJUybQ

Make realistic 3D animated snow in Photoshop. Colin Smith shows you how to make snow from scratch in Photoshop and then how to animate it in Photoshop with realistic depth and snowflakes falling at different speeds.
See how to use this as a video overlay here: http://bit.ly/2C0GRGZ
Become an Adobe Stock Contributor: https://adobe.ly/2qdDFRH
10 f...
Thanks.
np 🙂
Of course you can do it by animating the position of static layers. It just looks a bit cheesie. For good results, I'd use After Effects.
However, I realize there are technical hurdles with any of these suggestions, e.g. access to the app, knowledge, etc.
I think I've seen mobile apps that will just add snow to photos. You give it an image and it will spit out a video with snow falling over it.
so... the one in the video I suggested is cheesy? yeah I guess it is, the flakes aren't flakes; they're round instead
he almost got there though, some of the "flakes" are bigger and smaller but would be nice if there was a way to randomize the flake shape somehow
I mean, its fine. Its just that the entire layer moves and in a uniform motion. Not the individual flakes. A particle system would be a lot better.
If the person is putting that effect over a still image, its probably good enough.
I don't know how to use After Effects.
Well, if the effect shown in the video above works for your purposes then try that technique. It seems relatively straight-forward.
Can I do I with mouse and keyboard
Not sure what you mean there.
did you watch the video?
I didn't watch all of it. I got the gist of it after speeding through it.
You won't need a tablet to do this.
He is using one but the part about the Brush Jitter could be done with a mouse.
As per @ripe quest you can do exactly the same he does with a mouse. So yes you can do it with mouse and keyboard.
yo how do i put my text in more than one line.
Get the Type Tool and drag out a box instead of just tapping once.
OH MY GOD🤦♂️ thank you
My photoshop also holds it with a click. By default - I haven't changed anything either.
If I grab the node (with a click, not a hold) to get that menu, I have to click it again to drop it before moving my mouse.
I can never remember the Ctrl T shortcut, so I click the node twice to get the on screen buttons. (Not a double click, but once will grab it, then I need to drop it.)
Is there a way to align these lines to the number of icons or create a grid that can do it for me?

Hi guys so I'm in need of advice. I have a button/pin template which is 300dpi 8.5x11" and I am trying to paste images on it but it seems like they are all too high res so they get pixelated when I transform them to fit the template. I tried all the different resampling. Still pixelated. Not sure the best way to go about getting a smooth high res image render..
Use Guide Layouts to create a grid. See this: https://youtu.be/qeIW1I9P9lI?si=j4s4ccchkuKZc1c_

The Guide Layout feature in Photoshop enables you to quickly create custom grid layouts by specifying rows, columns, gutters, and margins. It simplifies the task of adding guides and assists in the precise alignment of design elements in visual design layouts.
This is a Quick Feature Demo for Photoshop (on the Desktop). The General Release of P...
Then turn on Snap and snap the lines to the Guides.
Then you can also turn on Smart Guides and drag the icons into place.
300dpi is high res, you're saying the images you're pasting are low res; you could use Topaz to upscale them so that they match the dpi of the template
IDK if Adobe has anything like that, but in my experience Topaz did better in the past
Raster (pixel-based) images should be similar sized if you're looking to composite them. You cannot scale pixel-based images up without noticeable quality loss.
Even upscaler apps (like Topaz Gigapixel) can only do so much.
is there a way to delete neural filter layers?
Only if it has been applied to a Smart Object. If you applied it to rasterized layer, it's burned in. You could only UNDO at that point (if you haven't already closed the document).
oh its def a smart object but I still can't remove it
I have the smart filter mask, that I can delete for sure
err I think I got it
Click on the name in the Layers Panel and drag it down to the Trash Can.
It will do it. Click and drag it down to the Trash Can.
tried, asks to save some sort of file
I'm also running into a neural filter timeout limit I'm guessing the beta still needs work
@ripe quest @haughty storm I'm actually downsizing them from one high res 20+inch 300dpi to a 8.5x11 300 dpi file. Using copy paste then the transform tool. I tried making it a smart object before moving it.
I ended up having to delete the mask first, then the neural filter layer
What Interpolation setting are you using for the Transform?
You shouldn't have to do that. You can just drag the Neural Filter itself down to the Trash Can icon. The Filter Mask will get deleted with it.
I changed the resampling to bicupic and I also tried 2.0 as well as no resampling this was under image size settings. Is there another setting I should be changing just for transform? @ripe quest
odd, will try again but its being really finicky
Can I duplicate & merge layers in one go?
Not sure I really understand what process/procedure you're using to do this. Bicubic Automatic should be fine but the results will really depend on how drastic the scaling is, I suppose.
CTRL ALT E and SHIFT CTRL ALT E
Select the uppermost layer first. Then do that keyboard shortcut.
Is there a channel here where I can ask guidance for making a specific gradient or is this one ok?
This is it.
Sweet, looking to make a kind of backlit gradient like this. Looks like a half radial gradient, where should I start?

my few attempts ended in failure
this was as close as I was able to get

I would maybe try a Layer Style > Outer Glow first. Then augment it with something like you have above.
I like using the harmonization neural filter but when I use it, it makes the person in the photo's skin a red blush pigment how can I adjust this afterwards?
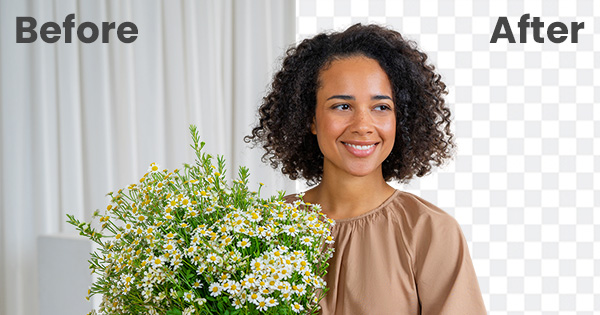
I've been using gimp to edit pictures and then paste the image into google docs, but I needed an easier way to remove backgrounds, so I decided to switch to photoshop - I have been able to figure out how to do EVERYTHING, but getting it to copy and paste into google docs,
I would Export to PNG and then put it in. The transparency information probably won't copy/paste correctly. File > Export > Export As... PNG, tick transparency.
there has to be another way around this, I wanted to save time
OK. Good luck.
btw if you want to know why you can't paste into Google Docs is because you're not pasting an image as you're likely copying the layer data 😉
Even if you merge layers with transparency, you probably can't copy/paste the image with the transparency intact.
One would need to export out to PNG and then upload/insert it into a Google Doc.
I have been able to copy transparency intact in some rare situations but I guess clipboard doesn't support transparency? Or Google docs doesn't right off the bat?
I don't think the browser can handle (copy/pasting) PNG transparency.
While transforming an image, is there any way to make a guide layout?
Guide Layout would have to be created first. You can turn on Smart Guides though which will appear while you're translating, scaling, etc. Main menu: View > Show > Smart Guides...
anybody here knowledgeable about the neural filters?
I should probably learn to use levels/curves/HSL cuz it likes putting red on my subjects
Which neural filter put red on your subject^
harmonization
see here

you can see a bit of red tinting in both dogs but not the bear, for some reason the bear gets the correct adjustments
ofc the dogs have the same light source, so I bet that's part of it; the bear is AI made
Did you try to play with color cursors in Neural filter?

oh, no I didn't hah! /SMH
just tried it, its hard for me to do cuz of my vision but I still see a little red but yeah that's the way to do it 🙂
You can also "Color Balance" each animal individualy... Better control

I also tried it on all 3 dogs after merging the layers, it comes out much worse; so I do each individually separately then merge
Ok but why do you want to merge them... As they come from different sources, I suggest you keep them isolated so that you can adjust them separately.
I merge them at the end for the outer shadow
Ok so you've made color correction before merge them?
yes I do it to each subject then I merge them when no other adjustments are needed if I'm doing a shadow otherwise no need to merge them at all
Can someone please help out a noob im just trying to remove this blue gradient background from a bunch of images but i can not for the life of me figure out how to do it without it not going horribly

( I need to be able to do this multiple times for different colored weapon skins)
you'll have to do this for each image; I'm not sure there's a way to do it for all images at once
First convert your layer to a smart object, then create a new mask layer and it should hide the background for you 🙂

Hello, sorry for stupid question, but how can I achieve this king of color grading ? I have tried few tutorials and went not as expected


you have to understand how colors work to do good at color grading; I'd like to know too 😉
:/
I know color grading is not the same as replacing colors; but I can replace colors 😄
Is there a good channel to ask for someone to do a simple project for me?
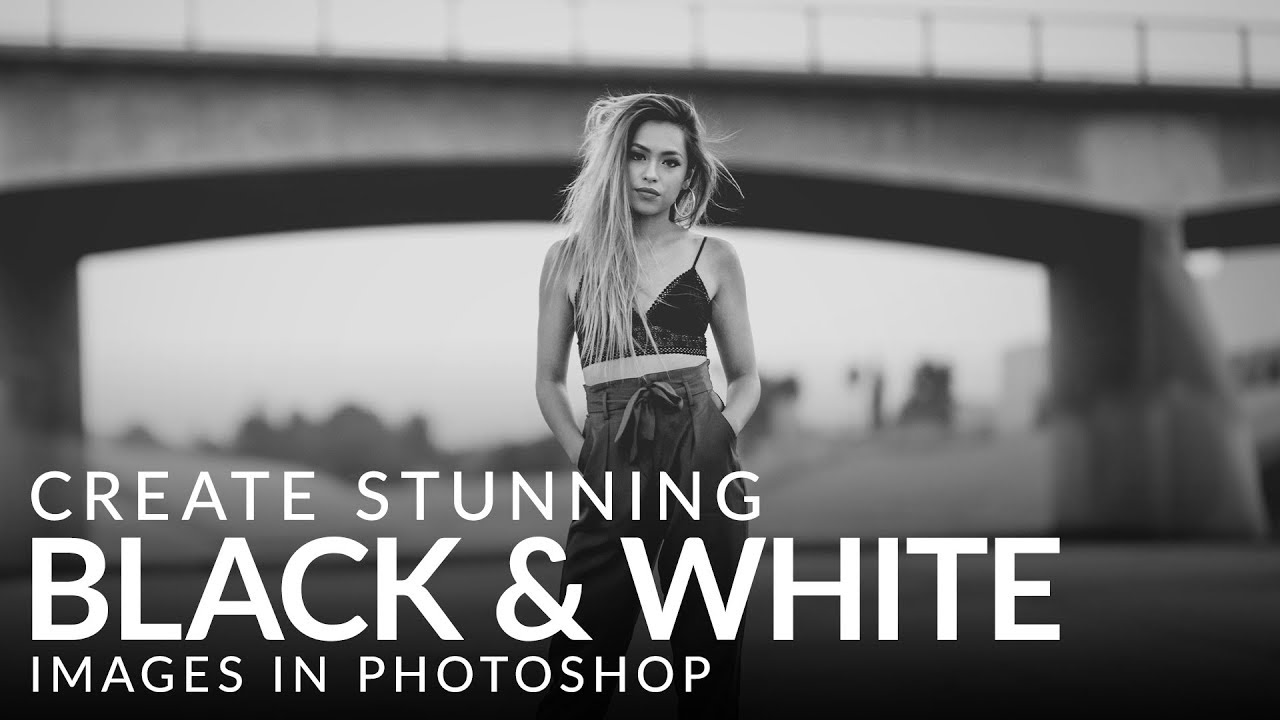
Do you mean the black and white treatment? or the localised colourisation?
yeah the b&w treatment
It depends if you are starting from Black and white photos or colour.
But generally, most people would do that with ACR (Adobe Camera Raw) or the Camera Raw filter in Photoshop.
The basic thing to think about is to have originals with enough tone depth (a good spread of the tones across all the histogram) to be able to enhance what you need without crunching the details.
As in not enough details in the shadows and everything remotely dark with appear as black (and the same for white)
actually it's also easier if you get decently exposed RAW images, it helps a lot
https://www.youtube.com/watch?v=lykFo-R-0_o
or
https://amateurphotographer.com/technique/improve-your-photography/creating-stunning-black-and-white-photos-with-ease/
–
Today Aaron breaks down the best method for converting photos to black and white in Photoshop. Learn how to use Black & White Adjustment Layers to change any image to monochrome and then use Levels to make adjustments to the brightness, contrast, and tonal values.
Download the Sample Image Here:
https://phlearn.com/tutorial/stunning-black-...

Discover how to convert to monochrome with ultimate control in Photoshop CC, Lightroom and Elements. We explain all you need to know
Hi @high latch
Not sure what you really mean.
Try:
- F6 ( or menu: Windows -> Color)
- then options of this panel -> Color wheel (or similar)
OR (maybe) the Color Picker:
click on the Foreground icon in the Tool Bar

Hello everyone. Does anyone know how to exclude certain variations when using the “Generative Fill” option? I’ve noticed that when I want to insert something, Generative Fill often generates elements from my photo and inserts them instead of generating what I wrote. Does anyone know how to solve this? Of course, generating again is one option, but is there another, easier way? Thanks.
Can you give an example?
I assume you're already drawing boxes around the areas you want to 'edit'
Hello guys, hope you're good. Is someone know how I Can manage my brush hardness on mac. I know as you Can see on windows its pretty simple and efficient with the alt + right click
Control + Option (Alt) + drag left/right?
(I'm not on a mac.... that's combo is a guess 🙂
its works thank you ( control option left click :D)
Gave +1 Creative Carma to @sly hawk (current: #5 - 1015)
Sure. In my image I have multiple elements already added with Generative Fill. Some water, ash, etc. Then I select another area, not always with a Rectangular Marque Tool, I use Quick Mask Option sometimes, and when I generate ''Aerial view of fire'' for example, Photoshop just add more ash, or something weird that is not even in the prompt.

Does anyone know how to achieve this sort of typography?

Learning graffiti / calligraphy would be a solid first step. Unless you mean the brush effect ?
With a graphic tablet and pressure sensitve brush you should able to mimic this Graphitti style. But you’ll need to trace it so it’ll take skills.
Otherwise you can try to find graphitti fonts and tweak it to mimic this style
I have a good graphic tablet so I’ll give it a go. I’ve tried to mimic it through spray paint text tutorials but it hasn’t come out all that well
I'm trying to remove the R and S on these rocks and tried generative fill and I get weird results 😦 patch tool isn't decent enough for this 😦

use patch
I did, doesn't give good results
hmm guess I will just blend it in myself after I patchwork it
What size are you working at and what size is the required output ?
idk what size; but this is the only image they could find; I've done searches myself to see if I could find blanks and it has to be these specific rocks; I'm trying to change the letters for them
I did use patch, got it to look halfway decent I guess
(pay no attention to the background)

Have u tried clone stamp?
not yet but I think I got an ok result
If u do it by little steps I think it could work
Alr then

Your M leftfoot seems too thin for this type of Hard chisel edge.
Don’t you think so? 🤔
oh yeah, its been improved since 😄 but nawt finished yet!!! 😛

the hard chisel isn't exactly like the original
Perhaps try different blend mode for the chiseled area(?)
definitely looking into this more; thanks for the advice
also changing the color of the blend mode may help
hey guys, can anyone teach me how I can make these lines like in ju-on the grudge's poster? sorry for noob question

My method would be to, on top of the image, place a new neutral layer set in overlay
(see screenshot)
To get to that screenshot create a new layer by going SHIFT+CTRL+N

next, add some noise on that new layer

filter>noise>add noise
The amount will depend on the dimensions and resolution of your image. It must be quite coarse

Then on that same layer, add a motion blur filter
filter>blur>motion blur

Yes that's how it's called
i see, thank you for the detailed guide, to make it coarser, would my canvas need to be smaller?
This is the collelation, or just increase the amount of noise, it would give you a coarser effect
You can turn your neutral grey layer into a smart layer, that way all the filters can be adjusted after the fact
Before adding the noise filter, right click on the grey layer and choose "convert to smart object"
can this be turned into a pattern for future uses?
Yes, sure but if you want it to be a repeat pattern, you'll need to retouch it at the adges (unless you don't need it to be repeating)
ah, how can avoid retouching then?
https://helpx.adobe.com/uk/photoshop/using/create-smart-objects.html
@atomic sorrel If you don't know about smart layers, check the help files here
smart object=smart layer?
You can't if they need to be repeat patterns, this method doesn't create repeating patterns
thank you, youre a great help
Yes basically
You're most welcome!
but then you can't use it in the future for other projects because it might not be long enough if the canvas is bigger hence why I asked about patterns unless there's another way?
If you make it big enough and export it as a multi layerd PSD then you can copy or duplicate that grey layer onto another file
What I call a pattern is that: It's specific

To create a pattern with that functions that way , generally you need it to be "infinite", or "seamless". It needs more work
https://www.photoshopessentials.com/basics/repeating-patterns-intro/

In this tutorial, learn the basics of creating and using simple repeating patterns in Photoshop!
Illustrator have specific tools for creating repeating patterns, but doing so in Photoshop (from raster elements) is still a bit heavy duty
right but the copy is only as big as the canvas it came from, you can resize it if its still a smart object ofc
vector=raster?
Yes, creating repeating patterns is done so it can be made even smaller and can adapt to any size.
Think for example wallpapers, you can buy rolls and they fill the space lokking like they are one unique big sheet . Also think background textures like this one

what you call is not in Photoshop a "pattern", it's a texture
ah ok, texture/pattern almost the same tbh
see how it adapts and feel seamless with reducing the scale

patterns are saved as .pat, that can be imported in Photoshop, you'll find lots of free .pat online. Texture are generally big PNGs, that you slap on top of your layer stack and change the blending mode of
textures are basically overlays
Yes exactly
just seems like creating a pattern would be a better way to go so you can use it in many projects, overlays can be too but its saved in one file you have to remember where it is vs a pattern its there and ready IMO I guess
Patterns can look too "neat", sometimes you want something like a paper texture or something very dirty or grungy, in that case you would prefer a texture, there is a lot of randomness.
ahh ok
wondering if his pinstripes or whatever you call it would have been easily done with a pinstripe kind of pattern unless he needed some randomness
well I g2g but this has been fun
That's a typical case of using a pattern.
am i able make it fade to another color like in the poster? i dont know what to google so sorry again for the noob question
The best way would be to place a coloured shape underneath, like here

tweak the settings as you wish, for xample here, I replaced "overlay" by "hard light" because the maximum effect in overlay is achived when the underlying colour is black.
red needs something more "powerful"
You need to experiment there
If you only want the "streaks to be coloured" then you can add a colour overlay to the neutral layer

see my settings

is it because its a smart object?
sorry, i posted the wrong screenshot, the rectangle is below the lines in layer, but its above the lines

It's called a drop letter, and you need to use the type in shape function (there is not feature for this in Photoshop, you need to do it manually)
I went a bit further and tried to render the whole effect, but more similar than your image
see the layer stack

the way yours look, maybe the neutral layer isn't in the right blending mode? which one is it?
I set mine in "linear burn" for maximal effect

my emboss filter just intensifies the effect, it's not entirely necessary
it was overlay, but i changed it to hard light and its working as expected
thank you very much
It really depends on the colour underneath, that's why it's better to put the colour shape first and then try all the blending modes afterwards
So, how please?
You need to create a shape that looks like that

then type inside the shape, take your text tool and click inside the path....
then this is what you get

then you just need to type another letter, bigger, to fill the space

Yh I got, it thanks
can someone help me with something
i wanna remove that skull emoji but i have no idea how to

Dear wise photoshop pros and gurus I yield to your experience and humbly request your help. I am a noob to photoshop and lightroom and am just about pulling out my hair for what I thought would be a simple task. I have hdr merged my 3 photos into an HDR image and have developed that image, but when I save it I feel like the twilight zone comes crashing down on me. When I save/export it with the colour space as HDR sRGB (Rec. 709) and HDR output checked. I can save it as a jpg and on my macbook preview the colours and quality appear pretty much the same as in the Lightroom app. But when I open it up in Photoshop that same image is dull, as if its not an HDR image anymore. I dont know what is happening but on the righthand side of my screen it tells me that I am in RGB mode and 8 Bits/channel. My colour space settings are RGB: sRGB IE61966-2.1 and the colour management policies say to "preserve embedded profile" so I'm not sure what I'm doing wrong. Please help
Hey so i've been trying to use photoshop and all that, but the issue is that whenever i import one of my textures it changes the saturation, hue or whatever, basically makes it so the color is more vivid, and thus breaks the original color pallet i had going. Had to use an online image tool to show this, but it becomes very clear once you see it...

Can anyone help me with something
See how the one in the right is way more vivid? Idk why it's doing that, i'm guessing it's related to the color profile i have? But then again, i got 0 clues on how to just disable the goddamn color profile so it just uses whatever i had when i imported the image
Photoshop supports partial transparency. The other programme cannot.
That is the difference.
ask away and you might be surprised 😉
Does anyone know how to change the color of the magnifying glass icon and the word "Prev" to #1c1c1c?

Whats the issue
Select it then change colors to whatever u want
yo so basically i want to make a similar design like this and i want to find an image to use as a clipping mask anyone know where i can find one and what to search for

you want to make a hoodie? What image would you use a clipping mask on?
How do I do that?
magic wand is probably easiest; you miight want to check out the photoshop basic tutorials on how to use the various tools.
Dear wise photoshop pros and gurus I yield to your experience and humbly request your help. I am a noob to photoshop and lightroom and am just about pulling out my hair for what I thought would be a simple task. I have hdr merged my 3 photos into an HDR image and have developed that image, but when I save it I feel like the twilight zone comes crashing down on me. When I save/export it with the colour space as HDR sRGB (Rec. 709) and HDR output checked. I can save it as a jpg and on my macbook preview the colours and quality appear pretty much the same as in the Lightroom app. But when I open it up in Photoshop that same image is dull, as if its not an HDR image anymore. I dont know what is happening but on the righthand side of my screen it tells me that I am in RGB mode and 8 Bits/channel. My colour space settings are RGB: sRGB IE61966-2.1 and the colour management policies say to "preserve embedded profile" so I'm not sure what I'm doing wrong. Please help
Magnifying glass u can select it with Magic Wand
Like that?

If Photoshop cant "recognize" the color....
I use this method: Apply Curves or Levels it doesnt matter on values just 'play' with them until the colors are different from each other then select it and turn off the adjustment layer...
Thank you very much.
Gave +1 Creative Carma to @tame cape (current: #38 - 49)
is it possible to do two bevel & emboss effects on the same subject/item? Kinda thinking it is, but wasn't sure if its a good idea? Hmm no option to do a 2nd Emboss 😦 on the same layer that is
No. That is not possible at the same layer.
That would work:
Duplicate the layer and set a blend mode.
This will probably work even better:
Group the layer and also give the group a relief effect.
Edit: meant bevel & emboss effect
how do you do a relief effect?
👆
ah ok cool 🙂 will try that
idk if im explaining wrong ik how to do this i just dont know where to find an image, basically i will use clipping mask on a text like this on the pic i just dont know where to find a a picture to use as a clipping mask


I was really hoping for some help 😦
I'm sure someone will help, there's a lot of people with varied skills; some know more than others
maybe repost your question in a more simplistic way? Your HDR in lightroom not coming out HDR in photoshop? I'm not too keen on that, I had issues with HDR myself and my monitors don't support HDR so there was no point
@haughty storm
Have you tried it?
It worked for me. see:
#❓ask-a-question message
I haven't, I ended up not needing to do it
I knew, that I've already asked that yesterday but is someone here really in to animations with photoshop? 've watched so many tuturials but it didn^t look very professional xD
you're going to be better off doing animations in After Effects, while its not impossible in PS its just not designed for that
can I make thera an animation on a finished grafic?
sorry I've never done that before
neither have I; but I believe so; from what little I know, yeah you can make something in PS then bring it into AE and either use it for animation or add to it
How can I disable that
meaning you don't want transparency at all?
I don’t want partial transparency cuz apparently it’s changing the tone of my textures
I'm curious myself so I wonder about your question; IDK if it can be turned off
Hi does anyone have some time for a quick help chat?
just ask; many of us are willing to help ❤️
Ok so it has nothing to do with transparency, it didn't help the fact that i didn't disable the transparent layer in the background
Lemme re add a clearer image here

The one on the left is how the texture should look like, the one on the right was literally just added into photoshop and exported right away, no changes or anything
It came in contact with photoshop and as you can see, it became somewhat brighter ?
you can adjust brightness yourself in PS though but yeah I get what you mean, its definitely a noticable difference
Here i made the two pixels on the bottom left corner get together

never even noticed this
They are supposed to be the SAME color
yet they seem to have a different brightness of some sort
I am extremely new to photoshop and am trying to do something kinda complex…
-
The guy on the left - change his socks to white.
-
The guy on the right - recuse the size of the socks and paint? His legs instead???? Basically I want the socks shorter and also white

If anyone’s got any advice anyway, this is the whole poster so far…very 50/50 on it

changing the socks to white is easy, use magic wand to select the socks and use HSL adjustment layer as for maknig the socks shorter on the other one; I have some ideas but I'm not sure how well that would work but some of the experts could possibly chime in and give you more pointers
Like would I cut a strip of the top of the sock off, clone the skin on the leg then add the top of the sock to the top of the shortened sock?
I bet there are some tutorial on how to shorten socks
@haughty storm I have no idea on what you said about the right one 😔 but thanks for the magic wand idea, I’ll deffo try it
Gave +1 Creative Carma to @haughty storm (current: #178 - 9)
for color replacement; this is a good resource https://helpx.adobe.com/photoshop/using/replace-colors.html
I FOUND IT, dear god, i had to set the color profile to sRGB

https://community.adobe.com
Hello. When I'm importing a image to Photoshop CC 2017, the colors all change to a "red-ish". Why is that? The same happenes when I import to a document with CMYK profile and RGB profile. Here you can see the diffenence. Photoshop on the left when imported, and original picture.
/facepalm, yeah that'll do it, not sure why we didn't think of that first cuz you're right it has nothing to do with transparency, I did a google search about transparency being partially support which is not true, PS does indeed support full transparency that's the whole point of PS!
@tame cape 😉 ^^ they figured it out gasp
how can I use the background of this in other projects? I don't have an original or layered version of this.

Don't know if this is the right place to post this, but I originally came to this discord to lurk for help on error 206, originally in august before school started. Most of the links provided from Adobe and the help center there didn't resolve anything for me. I actually ran into a different issue is how I got my error code resolved. If you are on Windows you can go to the Credential Manager > Windows Credential, and in the Generic Credential section, remove credentials related to Adobe. Again, I resolved the code because my Microsoft login continued to endlessly looped, so I had last ditch effort to just remove a bunch if not all of my generic credentials to try again. I am now able to sign back into my microsoft, and I am able to get Adobe CC installed.
Someone knows how can I fix this blue parts? to make it look grey? idk why it turned blue

Right click on this area a choose the color you want in the pop-up menu.
ooh okey thx
So I have this texture overlay I want to add to an image, but when I add it it makes the whole photo darker and I just want the texture on it. Could anyone help me?


you're only wanting the texture on part of your image? Or do you want it for the whole image? I'd do an opacity adjustment and maybe brighten/contrast adjustment layer on it
Whole image
When I try to brighten it, the texture goes away

I feel like this is beyond me, seems simple but I haven't played around with stuff like this much; I'm hoping someone who knows more about this will help
ah alright thanks alot
btw did you do both brighten and opacity or just opacity @river otter ?
try one or the other, do opacity first and see if that helps
How do I brighten?
gimme a sec, looking for some info for you
https://futurecurrent.io/how-to-brighten-photos-in-photoshop/#:~:text=To find this tool%2C go,the contrast%2C if need be. this is just some random page I found

Want brighter photos? This tutorial is so easy, even a Photoshop beginner will love it! We're teaching you how to brighten photos and make them POP.
@haughty storm Quick update, I found out how. Thanks for your help!
Gave +1 Creative Carma to @haughty storm (current: #166 - 10)
its a simple basic thing to do, did brightening help?
Not really, I just did the "Soft Light" blending option
ah ok, like I said there's lots of ways to do one thing; whatever gets the job done; eh?
I'll try to remember that next time, blending... this is why I feel like I'd never get a job in gfx design cuz too much guesswork 😛
😭
Hi! I’m trying to figure out how I’m gonna custom paint my guitar to the left with stripes like the right one but don’t know what colors the stripes should be?! The colours im considering is off white, white, dark blue, light blue, darksilver and silver. Is there someone who could photoshop that?? I appreciate anything, thx


do you have PS yourself? This is relatively easy to do to soem degree, you just want to replace the colors in the middle of the guitar or the stripes on the neck?
as far as color choices, that's gonna be preference what you want/like
I dont have access to my laptop for some days thats why and im rly curious how it would look
I only want to add two stripes in the middle with the colors that I mentioned
For references basically
ah ok adding the stripes is a little more difficult for me to do, but changing the colors as they are is a possibility so I'd see if someone else here wants to/can do this
nah sorry I don't but you could ask in #💬chat-general
Okay ty!
I was tracing a image with the brush tool but at the end I realized I traced it on the image layer, is there anyway to get the brush layer on its own layer?

agh I'm not sure I'd be really careful what you do next tho the undo history isn't infinite
what I'd do though is duplicate that layer to a fresh file and save it; then on the original see how far back you can undo
☝️
is it possible to recreate this in photoshop

sure, that's gonna take some skillz
how
Yes, it is possible to recreate this style in Photoshop but will be difficult. I think that the image seems to be created using like a textured, oil-paint style, with thick, visible brush strokes, impasto techniques, and a somewhat abstract portrayal of a human figure. Here’s how I think that you could attempt to recreate it:
Set up the canvas:
Start by setting up a new file with a dark background (similar to the one in the image).
Use a textured canvas to simulate the rough look of the oil painting.
Blocking Out Shapes:
Use a brush tool with varying opacity to block out the general shapes of the body.
Start with large areas of color to form the base of the figure.
Brush Selection:
Use Photoshop's Oil Paint filter or specialized brushes that simulate oil paint to create thick, textured strokes.
You can find impasto or thick-paint brushes either online or create custom brushes using Photoshop’s brush engine.
Layering Paint:
Build up the paint with different layers. Add texture and dimension to the strokes by layering lighter and darker colors.
Use the Smudge Tool to blend areas that need smoother transitions, while leaving some rough edges for texture.
Texture & Lighting:
Apply a texture overlay to mimic the feel of paint or canvas (you can find textures online or create one).
Adjust the lighting and shading using Dodge and Burn tools to create the highlights and shadows that give the illusion of depth and form.
Details and Impasto Effect:
To create the heavy paint clumps seen in impasto, use the Bevel & Emboss effect on certain layers to simulate the thickness of paint.
Add finer details like the necklace and the red accents on top.
That's just my opinion though personaly
Oh and then Use adjustment layers (Brightness/Contrast, Hue/Saturation) to fine-tune the color balance and contrast.
Photoshop’s blend modes and texture brushes are key here for mimicking the physical feel of paint.
I'm kind of a expert when it comes to this kind of stuff lol.
How's it going with your photoshop? @woeful python
You mean in general or this specific art style?
Your specific art style you were trying to do?

havent started
Ahhh okay
will let you know when i do
Okay!
If you can share the image WITHOUT the texture and then the seperate texture, I'll have a try
Yeah, possibly. - With Gen fill?
Obviously you could stop at 60 seconds, but I then go into masking to combine multiple versions together
No, but that approach sounds like a poor way to achieve the effect you're going for anyway?
bonjour , moi et mon ami n'arrivons pas à contacter le support nous ne savons pas pourquoi mais adobe firefly ne fonctionne plus depuis plus de 1 mois sur photoshop et sur internet aussi qu'elqu'un aurait'il une idée

pourtant nous avons belle et bien internet et nous sommes connecté
How can I hide/delete the drop shadow in than area without removing it entirely?


that was easier said than done! I had said something about possibly masking it in... and I was right 😄 ty for showing
Gave +1 Creative Carma to @sly hawk (current: #5 - 1016)
dang dude 😉
click on the eye of the effect that you want to hide in the layers panel
how can I reuse the background on this image (I want to use it in another project), I don't have the original for it

I didn't mean that, I meant to remove it, like, erasing it. This is a Changeling leg and I want the drop shadow to be only in holes of it
ah, ok create a mask layer for the drop shadow (NOT the image itself) then paint out the shadow you don't want visible.
hey @river otter yer wise, any ideas? 😉
Hi @ember sparrow
Create a vector mask for this layer and tick the box in the layer's fill options for: vector mask hides effects
Does anyone know how to solve the problem described in this post?
https://www.reddit.com/r/photoshop/comments/8xy46i/using_discord_makes_my_photoshop_stop_working/
MSI RTX 4060 8gb
Ryzen 5 5600X
32gb
how much HDD/SSD do you have?
RAM 32gb SSD 480gb with 200+ free space
your PC is fine it seems, I've never run into that kind of problem before


Been struggling with this problem for 2 months now. I could not find an answer to my question on the Internet. Only one post on reddit where a person describes my problem exactly. No answer was given to him.
As far as I can remember, it appeared after assembling a completely new PC.
its not a common issue; so not many know about this I guess
All drivers are installed and updated, bios too. Windows reinstalled 5 times already on different builds.
Most likely
So your Photoshop works fine as long you don’t open Discord. Right?
Are you using Wed browser Discord or the Discord App?
Ohhh i see why this is happening.
To reuse the background from your image, you can follow these steps in Photoshop:
Open the Image: Start by opening your image in Photoshop.
Select the Background:
Use the Quick Selection Tool (W) or Magic Wand Tool (W) to select the area of the background.
Adjust the tool size and tolerance to get a precise selection.
If the background is complex, you might need to use the Lasso Tool (L) or Pen Tool (P) for more control.
Refine the Selection:
Go to Select > Select and Mask to refine the edges of your selection.
Use the brush tools within the Select and Mask workspace to smooth and feather the edges.
Copy the Background:
Once you have the background selected, press Ctrl + C (Windows) or Cmd + C (Mac) to copy it.
Create a New Document:
Go to File > New and set the dimensions for your new project.
Paste the copied background (Ctrl + V or Cmd + V).
Save the Background:
Save your new document with the background as a separate file (File > Save As).
Import the Background into Another Project:
Open your new project in Photoshop.
Go to File > Place Embedded, and select the saved background file to import it into your new project.
If you run into any issues please message me back!
If you don't run discord, photoshop runs without any problems at all. Some amount of time passes after launching. From 2 to 10 minutes and it stops opening/creating files, somehow editing and saving them. Moving doesn't let you drag and drop objects and a lot of other things. Photoshop itself does not close.
Discord App
I have rocks in the middle of the background; this isn't an original otherwise this would be easy and wouldn't be asking... looks like I just need to do a genfill somehow
Sorry, i got it now. If you need to remove the rocks and fill in the background, here's how you can do it using Photoshop’s Generative Fill feature:
Select the Rocks:
Use the Lasso Tool (L) to carefully select the rocks you want to remove.
Refine Selection:
Go to Select > Modify > Expand and add a few pixels to your selection to ensure you capture all the edges.
Use Select and Mask to fine-tune the edges if necessary.
Apply Generative Fill:
With the rocks selected, go to Edit > Generative Fill.
Photoshop will automatically generate fill content that matches your background.
Adjust and Blend:
Use the Clone Stamp Tool (S) or Healing Brush Tool (J) to blend the filled area seamlessly with the rest of the background.
Adjust the color and brightness if needed using adjustment layers (Image > Adjustments).
This should help you cleanly remove the rocks and fill in the background for reuse in your project. If you run into any issues or need more details, feel free to ask! 😊
« Some amount of time passes after launching… » Launching what? Discord?
I just want to be sure to understand well. You don’t have any problem with Photoshop as long as you don’t launch Discord App? If so the problem is perhaps more on the Discord side. What is your default web browser?
If you are an. Opera user try set Chrome, Edge or firefox as default browser just to see if the problemstill occurs.
It takes a while after Discord starts up, yes. I'm also more inclined that the problem is on the Discord side, however after having this problem and closing Discord, the problem doesn't go away. Even if you delete discord from your computer before rebooting, the problem doesn't go away. Apparently some processes are in conflict. I don't know.
I'm using firefox, but I use the desktop discord app.
you'll want to post in #📝project-feedback
I'm not a mod; just helping out, no worries!
genfill works but its not generating the background at all; just a freaking black hole in the middle
and yeah I did doa variation of the selection, once with the edge of the rocks... no dice, then expanded the selection to include some of the background, same thing
mebbe I'll just try the clone tool or something idk
oh, I see; there's a huge shadow near the rocks... ok that's what's causing it
ahhh almost got it
Hmmm, try this
Check Selection: Make sure your selection isn't too tight. Sometimes expanding the selection slightly and feathering the edges can help.
Content-Aware Fill:
With your selection active, go to Edit > Content-Aware Fill.
Adjust the sampling area and settings to see if you can get a better result.
Duplicate Layer:
Duplicate your background layer (Ctrl + J or Cmd + J).
Apply the GenFill on the duplicated layer to see if that helps.
Brush Tool:
After applying the fill, use the Brush Tool (B) set to Soft Round with low opacity to paint in details manually.
Patch Tool:
Select the Patch Tool (J), and drag to areas of the background you want to replicate.
Clone Stamp:
Use the Clone Stamp Tool (S) to manually fill in the area by copying parts of the surrounding background.

Try my steps if you'd like to don't know if it'll make a difference or not.
Are pasting these instructions from ChatGPT?
No.
Or some other LLM?
it kinda explains how he's so quick
you should read the chat history from last night 😉
I took Honors English throughout my high school career and
Nope, I'm not pasting instructions from ChatGPT. The info I'm giving comes straight from my knowledge base and training,
from my photoshop classes
I kind of type fast also so that might be what your thinking
Hmm. Ok. Well, regardless of where the answers come from, if you're going to continue posting walls of text, please reply in a thread.
Okay, Sorry about that. My passion is that I really love helping people the best that I can.
We appreciate people helping out. Thats great! However, people should only reply to questions if they are truly experienced with the apps. (We don't want people posting bad information or information that is being copied and pasted from some generated source due to LLMs capacity to hallucinate and flat out provide bad info.)
You're new here. We don't know you yet or your skill level and it looks suspicious to be posting these giant replies that look like generated responses. We appreciate your understanding and cooperation.
Yeah, I understand. So, should i try and reduce it so it's not a really long response?
I would try to shorten the response in this channel. Longer responses would be more appreciated in the #1223011682012369027 where exchanges are self-contained and don't interfere with the channel flow.
Okay, Sorry about that Chief.
Also, there are a lot of total beginners here asking questions. Providing simple one or two step instruction response with a screen shot might be more helpful to someone just learning.
Sorry about that, I forgot about that. From now on for beginners, i will provide simple one or two-step instructions with screenshots for them.
Thanks for helping out! We appreciate you.
You are very much welcome!
how do I reuse this background in another project that has a different sized canvas? Its a little bigger and different shape

Resize and scale the background to fit the new canvas in Photoshop, then use the transform tools to adjust and fill any gaps. That should help a little bit.
right but the scale wouldn't match?
Scale it down to fit inside the new canvas and try Gen Fill to fill the empty spaces.
I tried to redesign the adobe logo. I think it looks bad but not sure.
sorry to keep bugging you but I don't understand genfill... why it won't fill the empty space, do I have to overlap the selection?

I also didn't scale it down cuz that's the correct scaling as it came from another project
wrong channe? Looks good to me tho, depends what you're aiming for
Ok . Understood. I’m sorry to hear that. Hope somebody else could help you.
Yes. I would make the selection overlap a tiny bit.
Hmmmmm, try use the Content-Aware Scale tool in Photoshop to stretch the background without distorting key elements. Maybe that would do something?
Ehh was just puting it in for fun.
lol.
oh bleh I still had the ref image from another genfill... but now adobe blocks it
getting to be pretty silly to even have the option to have reference image when you can't even use your own
Try to
Just try tiling this variant ...

I got content aware fill to work this time
Would you like to try anyway? (It's made tileable the old-fashioned way.)

just ask 🙂 someone will help you
i want it to be free
as i was saying a simple software that is free and easy for a starter to understand
there are some free image editing apps but not as robust as photoshop
???

well yeah but isint ps like 400 dollars
lol hasn't been for years
the photography sub which includes LR and PS is like $10-$12/month or something
then I think its $29/month for just the basic creative cloud which includes PS as well
Is there a way in Photoshop where I can fix the position of an Image to make a better transition between those 2 Images?

yeah; D Humann did that on two faces the other day, I think the same could be applied, idk how he did it though
but yes, there's absolutely a way but I'd rather let someone else with more skill answer this question for you
hey blur i dont mean to be inpatient but do you know any free softwares?
Can you please show the two pictures separately? (and not the shifted montage)
Can I send you that in dms?
but its one time payment
does that mean the others are free
im using photo pea right now
but its a little laggy at times and it said max memory reached and then crashed XD
but i had it saved
or does it even matter
We support Photoshop here. Not image editing apps from other manufacturers. Sorry.
sorry
thankyou dude
why everyone stop typing
what else is there to say? this isn't a chat channel
true i will try out gimp now thanks so much
Gave +1 Creative Carma to @haughty storm (current: #133 - 12)
and sorry mods
can I ask how this is done? I keep seeing questions like this come up so I'm curious (never know I might have a project of my own for this)
Where do i get this up?

Main menu: Window > Contextual Task Bar
TY1
Why not in public? You are depriving yourself of the chance of (possibly) several (good or better) results.
I'm here as a volunteer, and if I help and have the time, then it's also voluntary and unpaid.


I'm curious, did you do this yourself?
You are cordially invited to do so. But it would also be very kind of you if you would respond to assistance ...
On this subject:
The picture shown at the beginning is actually a somewhat unfortunate montage. The two images are simply superimposed (and the pointers are completely neglected). Then one half of the upper image was masked out and the colour reworked a little.
yes, I'm just wondering if you put that line in the middle and whatever that thing is in the middle too; just trying to figure out how I can help if I can
Ohh thats on the website
oh absolutely I plan to help/assist if I can, I'm just trying to "size" up the situation first
ah ok, so you want to replicate what they have... got it
The problem is we tried to match the position of both watches to make it as perfect as we could
but it didnt turn out great
well the silver watch is smaller than the gold one; you'd have to make one of the watches bigger or smaller, this can be done by making them a smart object and doing the transform and that should help with lining them up but the backgrounds won't match
once you make them a smart object you can mask out part of both watches so only half appear, but I'm not sure how to get the rest of it to match unless you replaced the background entirely
I was actually referring to my previous answer to your question. You didn't respond to that at all. Even if it was only a rough retouching and you can still recognise some repetitions in the parts - an answer from you would have been nice ...
#❓ask-a-question message
this is really good; I guess I should do a tiling method next time
sorry didn't realize you were asking for an answer, my bad
@proven shard
It would probably be better to simply rework one half of a clock and imitate the look of the assembly shown at the beginning. As I said before: Without the hour and minute pointers, the assembly doesn't look very nice.
Does anyone know how to convert TPL file to ABR file in photoshop?

How to convert Photoshop TPL (Tool Preset files) to ABR brushes that you can export and import to other apps like Clip Studio Pro, Artstudio Pro, Procreate 5, Adobe Sketch and Fresco
Get a new free digital painting brush (TPL and ABR) every week here: http://grutbrushes.com/freebrush and a FREE Photoshop watercolor brush here: http://grutbrushe...
could you do it for me pls🙏🙏🙏
Why do you need that?
I don't have photoshop 
@haughty storm hello canyou help me with gimp since i cant talk about non ps softwares in here can we dm?
I don't have skills with that app since I hate it
I'm here, What do you need help with?
We support Photoshop here. I suggest you find information about the application you want to use elsewhere than on the Adobe Photoshop Discord server.
okay still thanks
Gave +1 Creative Carma to @viral palm (current: #9 - 544)
looks like they deleted the chats
mods should we go dms or why are u deleting the chats
Last call here. Do not use this channel to talk about other apps than Photoshop.
Not the first time... Use DMs or other servers.
Thanks in advance!
Gave +1 Creative Carma to @main ibex (current: #939 - 1)
thankyou please dont ban me im just looking for help
First you're not in the chat channel #💬chat-general
I don't want to bann but you're are on the wrong server to talk about Gimp.
am i allowed to talk about gimp in chat general?
No. We use Photoshop here. If you need help with Gimp, you should join their Discord server or reddit. Sorry.
im sorry iv im wasting time
okay thank you is it okay if i ask for help with out using the name of software
Gave +1 Creative Carma to @ripe quest (current: #3 - 2426)
Please refrain from asking questions about software from other manufacturers. Is that clear enough?
yes
but like serious question is it okay to ask a general question like
how do i do this in A editing software
not spesific software
thankyou for your time
sorry
Hi im trying to use the remove tool, but whenever i select what im trying to remove it just turns the area white instead of removing the objects from the image. What am i doing wrong? Thx
I believe the remove tool just removes whatever is on that spot, if you want to remove the object, I'd try using select subject and using content aware fill
Hi @proven shard
Unfortunately, I forgot to ask the most important point: Who owns the rights to the images?

but if u hover over the remove tool and watch the tutorial it does show you what im trying to do with it
Me
and my brother
My brother made those Pictures
we make custom watches Seiko/Gshock
alr
that's the best variant
👍

I stand corrected, you are right; it should do what you want although this isn't the only way though. I'm curious if others who are more experienced can enlighten us on this
:) but the thing is tho that it doesnt do what i want 😭 , instead of removing the object it turns the selected area white. Does anyone else maybe know what im doing wrong?
thanks for the help tho
Gave +1 Creative Carma to @haughty storm (current: #116 - 14)
Just to ask do you have those 2 Images seperatly? so if I would lay them over they would perfectly match basically?
do you know what I mean
@tame cape Thank you very much tho! it looks perfect how did you made it fit so perfectly
Gave +1 Creative Carma to @tame cape (current: #37 - 50)
The images do not fit on top of each other. They were photographed from different angles (or the clock has a different angle). The whole thing is a montage/retouching.
And how did you made it circa?
This way:

So you cut out half of the golden watch and basically transformed it so it matches
right?
hi would you know any other way to remove objects with ai instead of the remove object tool? kinda wanna find a solution to this
ok nvm ive tried it like 5 times and for some reason it worked on the 6th try
maybe a bug or smth
thanks anyways!!!
That was my first thought. However, this only works if the angle of the shot and the angle of the clock are identical. Here is the simple overlay:

So you faded the middle cut more out and changed the clock hands
yep there are other ways, I like just selecting the subject and doing a content aware fill but you're right the remove tool is just as sufficient (or should be)
should be when it works lol

can someone help me make my background tranparent I have tried everything
I can, please send me the image.


just select the subject and mask it, its all done in the layers panel except for the selection
remove.bg
Remove image backgrounds automatically in 5 seconds with just one click. Don't spend hours manually picking pixels. Upload your photo now & see the magic.
you may need to play with the selection though
this doesn't work it cuts off the little marks
Ohh well dang
sorry i am new how do I do that
exactly you'll need to feather your selection and probably use color range
FYI Adobe Photoshop is much more superior, and this breaks rulez
That is very true
I tried holding shift with magic wand will not get the marks

nah, try using "select subject" instead of the magic wand
its better, but you still need to adjust the selection, when you have it selected, the bar at the bottom there's an option to modify the selection; this is one of my biggest struggles with stuff like this when parts of the subject is the same color as the background.
this isn't the original; can you show us what you have before you started editing?

I removed the background before I did it
I used real paint fx it's a plug in and it made a background for it
nah you don't want that; you want it to be transparent right?
yea
I'm saying I used real paint to make it look like this
ofc I'm willing to try; but its also good if you learn too 🙂 gimme a sec
I tried this but which one do I try for modify
this has no background on it either
that was the original


yeah... copy the image from where you got it, then File > NEW > then select the clipboard option then on the right you'll see the option to set transparent background

I tried thjat when I exported
clicked tranparent
did not work

this one is different
it was already tranparent

this is the one I am having trouble with
oh! I thought you didn't like the holes in that one... yeah that's gonna get tricky
no the holes make it hard haha
yeah it does! I don't like these but I'm gonna try something
What's the best wayto actually find a font
besides websites
I'm trying to find this font but no luck


I'm working on fixing this for you; having a little trouble but some success too!
I can see it is very hard I’m sorry
haha actually I think I got it!
yes the background is black, ignore that; that's just so I can see where the white is, is this how you wanted it?

there's small specks of white, I'll try to get those
What did i press that the whole view mode changed and i can only see the image

go to the window menu at the top and you'll be able to change/pick a workspace under workspace
THANKS
Gave +1 Creative Carma to @haughty storm (current: #108 - 15)
The black crack in the middle will be different when the wallpaper is black
you want it like that?
No transparent
yeah transparent is better cuz then you can put it on whatever color you want
I think this solves it 🙂

it looks black, but its not
YW
There was some marks on the bottom are they gone?
bottom of?

oh yeah I see, I'll have to redo this 😦
Oh that’s fine then
This sis good
Thank you
I'll send you another one, its easy to miss details like this (for me it is)
Are you sure don’t want to waste your time just tell me how to do it I’ll do it
I tried, but basically its using the magic wand first I use it with contigous then I delete the contents in the selection then I untick contigous and select the remaining white ensuring I unselect areas that I don't want selected
I don't mind, I've got all the time in the world unfortunately
Is this all you have to do
not really, but I've also added a black layer so its easier to see, this can be disabled once you're done
I know there's an easier way to do this, another is using color range selection, in selection > color range
but watch out, it'll try to select other similar colors
I had it really good the first time... now I struggle LOL
oh now I think I got it LOL
I did it for fun too 🙂

Wow this looks good
yeah it does; you have some pieces I wasn't sure about so I left it in, but if you want to try for yourself color range and magic wand are your friend ❤️
😔
?
how to fix?
when i choose anycolor it's always pick the gray one

you check your color mode?
hue cube
?
You're probably in grayscale mode. In the top menu go to >Image>Mode> then choose a color mode like RGB (most common used by photoshop users)
You can see in which mode you're in () at the top left of your image window... If you see the mention "Gray" = you're in grayscale mode.
In this mode even if you chose a color in the hue cube => you get the shade of gray corresponding the chosen color.
oh, sorry I didn't realize that's what they meant by the hue cube
would have answered
No problem... I rarely use this one... I'm a colorwheel guy😉
I tend to use the cube; but not sure how to switch to the wheel
also, I am wondering about using content aware tools and healing tools on a masking layer... it doesn't work right?
Healing, spot healing and content-aware move tool should work well with mask but make sure your mask is activated (white square around the mask thumbnail).

ok cuz it seems like its better to work in the mask than on the image layer itself and when I try to, the color or result isn't what I wanted, so I could be doing it wrong
I have to confess I'm oldstyle so I just use regular brushes on masks most of the time... And keep healing brush and content-aware move tool for image treatments.
Hello, I'm experiencing issues when I'm trying to add a new font family to library or to download it.The error message says an error occured when I tried to add font and some fonts cannot be added. Why is this please?
idk
that's about kinda what I do sorta I guess; do you do your content aware and healing treatments on images on the mask or on the image itself?
how are you adding the font?
I was changing fonts on photoshop desktop and clicked on add more fonts and was redirected to another page on browser where i signed up and tried to add fonts
you downloaded the font from the page right? I'm not sure exactly how you can add fonts directly into Adobe products but you should be able to install it directly to windows simply by double clicking the font file wherever you saved it and then a window will pop up showing you the font and then a button saying "OK" or "install"
Oh, this is so helpful
Thank you so much
np 🙂
I was trying to add it directly from the web
I suppose you could, like you do with regular install files but I find it just better/easier to download it THEN install
the 2nd pic is smaller

how to fix this? because the image width size is the same 1140
they're not the same dimensions
1st image width is 1440 the 2nd one is 1140 width, but you can use free transform after you make it a smart object first
Oh my!!! my mistake thank you!!!
i hope this is visible enough, i basically want to split this into 3 ways, I did so by pen tooling a path around the side, stroke path, and then cut out the resulting selection and put into a new layer. Is there an easier way to match that same fractured edge with the pen tool so that I am not overlapping or should I just eyeball it. I just kinda pen tooled over the same edge for the other side and assumed it would look nice enough


See if this option helps
"guide from shape"

so it doesn't work with path, just shapes (but you can copy your path and turn the copy into a shape)
Convert it into a guide, so you can follow the guide on the shared edege with the pen tool.
To convert the path into a shape, go to the path panel, duplicate that path, and use the new solid colour layer to create a fiiled path, which automatically becomes a shape (and then you can convert it a guide)
You'll also need to activate the snapping, so your pen tool will "stick" to the guide

how would i go about recreating this, after talking to the guy who made it he told me that he didnt have the files no more so might aswell ask here :D
"just choose an appropriate color palette, add some colors with a soft brush, then spread it with a smudging brush"
For the smoky effects in the corners
Does anyone know how to replicate it specifically?

is there a youtube tutorial maybe out there that can simplify the process?
It's just painting IMHO. Like you would paint with a "cloudy" brush and then work it with the smudge tool. I don't think you'll find tutorials on that exact process (but who knows?)
You probably need to trial and error with some chosen brushes
those kind of brushes

with texture and such
Yooo that's sick
guess i dont need to watch 2 hours worth of indian guy speaking how to use every tool in photoshop
If anything you could find tutorials on how to use brushes and drawing methods
ty!!! +rep!!!
If there wasn't for the Indian guys, lots of people here would be clueless 🙂
true to that 😩
another question
(dont mind the UI, im forced to use paint.net since its a dds file)
how would i use photoshop to emulate the small textures that exist here?


You could use that

with a click of a button
ona plain grey or black layer (be sure to have your foreground and background set as black and white, because those colours are taken into account in the filter. Press D to reset to standard)
Most things in Photoshop are not done with a click of a button (some, very few are, but most things require minimum steps and a bit of knowledge, hence why this server exist 🙂 )
ah i see, once again, thank you for the help!
now i dont have to manually replicate it by placing gray and white pixels and then turning the opacity down
I mean you could, some people like the predictability of having things done the way they like, but if you want to have a totally random effect, then this filter is good
will do!
thank you for the knowledge +rep!
not necessarily a photoshop question, but idk where to ask..
when I click "edit in -> photoshop" in lightroom, it doesn't ask me if I wanna edit the original or with adjustments. It just opens the edited photo...
Any ideas?
On the top of my head, it doesn't ask (Unless adjustments have already been made prior - and saved)
JUst tested it, that's what happens: First time it didn't ask. Opened it, draw something on it, saved. Then tried to edit it again with the LrC comand and

Well I figured I had a stack, and I edited the original one
After I saved in PS it created another stack
So it has to be modified once at elast to trigger the pop up
But the denoise is not there 🥲
Yes, that happens, you have to "unfold" the stack and access the modified one
I still don't get the popupppp
I saved the modifications
You can have the denoise in the enhance option (right click on the image)

in the edit>preferences soo if resetting the warnings help

641 -> original
640 -> after denoiser + modifications
639 -> i have no idea how this was created, doesn't seem to be different than 640
638 -> I opened 641 in photoshop -> did a sky replacement -> saved it

did it.. Right clicking on 640 -> Edit In -> Adobe Photoshop 2024, still opens the modified one

No questions asked
Both software updated to the latest version 🙂 Lightroom almost freshly installed, Photoshop freshly installed like 30mins ago
I wanna cry
There seems to have been adjustments in 639 (I can see the icons), 638 was modified and cropped, 640 was modified, denoised and cropped (all from the icons)
I cannot really tell you more
When you save, do you "save as" or just CTRL+S?

OK, that' s the right thing
It asks this though
I press continue
It's a RAW file (.CR3) btw
I have no idea what I'm doing wrong 🙂
I just want 640, without the modifications
Yes, if it's RAW it will generate an xmp with the same filename

The you can display the 640 and remove the modifications, you can do that on a virtual copy if needed

639 -> original
638 -> ran through denoiser and modified
I want the 638 to do a sky replacement on Photoshop, before the modifications are applied... then come back from PS to lightroom with the sky replacement done and the modifications of LR to be applied
am i asking too much 
No I've done that plenty of times. I don't know why your pop up doesn't come
Let me restart it
It's not normal. Did you reset the warnings?
Yep

check what you got in the external handling prefs
Maybe the file format isn't the right one? Just throwing ideas here
I think something went really wrong. LR refuses to even open now lol

restarted the whole PC, LR opens now.. still no question :)))
seems to match exactly 100% to your settings

seems like this was done as well, can't be clicked any more

still brings it in photoshop with the adjustments

I'm doing the virtual copy thingie, I'm tired
OK, maybe this is something obvious but I have no more ideas here. You can try in the Official Lightroom forum, there are people way more knowledgeable than me there
now all the colors are wrong 
https://community.adobe.com
Connect with fellow editors in our Lr Classic community.
That dialog box only shows if you are sending a JPG, TIFF or PSD (or maybe even a PNG) file to PS. If you are sending a RAW to PS then as long as both LR and PS are using the same version of ACR you don't get that dialog box.
There isn't a way to fix it. Nothing is broken.
hm?
To be fair, after I opened the TIFF (after I saved the photoshop file)
i get teh question

so I guess that's true
Sorry, I have some work still today so can only pop in when I get a minute.
I have genuinely no idea. The files I have tested are RAW files on my end (.RW2 to be specific), and all I know is that I get the pop up showing and I am saving a modified version of the same file as a stacked file when I save
The only option I can offer is to try to open as a smart object instead

and when I open the file in Photoshop, it stays a .RW2

But converts as a TIFF when I save (which is what the files handling is important to check)
So the stacked, modified version is a TIFF and the original is RAW
Anyway, I'm off now...
Anyone known how to convert old version of photoshop into new version of 2024
Idk what's going wrong. Thank you so much for your time tho 🙂
Gave +1 Creative Carma to @vapid flume (current: #8 - 755)
Can I scam it and give you one more ?
Thank you once again 🙂
Gave +1 Creative Carma to @vapid flume (current: #8 - 756)
Cool, you deserve it 😁
I do my healing treatments on a cliped layer. Note : it only works if you check the box "Sample all layers"

What do you mean by old version? In top menu go to >Help>About Photoshop... and tell us what's the release version you're using.
it's version is 19.1.7
In general (if you have a legal version), all you need to do is update your application via the Creative Cloud desktop application...
You need to log into the Creative Cloud app with your Adobe ID and use the “update section”.
If you don't know what I'm talking about, you're probably using a pirated version.
If that's the case, you'll need to sign up for a Creative Cloud account to use version 2024 legally.
I've understand and find it thank you for your information and time.
Gave +1 Creative Carma to @viral palm (current: #9 - 547)
I'm trying to work on the text for this advert but i can't figure out what layout i should go with. Here is what it currently looks like but to be it looks a bit weird. Any tips on what I can do with the text (im open to taking an entirely different approach with it, im still not sold on the current look of it)

Hi @hoary locust best to put these questions in the Project feedback channel 🙂
oh, of course; how silly of me 😉 thanks for this!
Gave +1 Creative Carma to @viral palm (current: #9 - 548)
Guys what about new update i dont have a update on the apps
if you have a subscription, it can auto update 🙂 check your creative cloud app for the apps that need updates.
I was trying it yesterday and when I did it the problem is if you put it over something it has white spots when u did it, it had none how do I do that

hi guys
i connect with and live suport agent and sent my logs but the chat it stoped and dont wont connect it keep circling
]


could anyone help me or explain to me?
I don't want to kill the party here but I follow this project since yesterday and honnestly I think what you're trying to get is simply "impossible"... The render of you effect has so many light grey tones really close of full white. It looks like torn paper effect. If you want to use this on a black background you will have to make a choice: loose some bright parts of your design (and probably ruin the torn effect) or still have slim white borders... I tried some different technique and get nothing better than what @haughty storm got. If you really want to use this on a dark background you should consider redo your design on its own layer (without any white background)...Sorry and good luck!
thank you yea I knew I had to make some sacrifices, I just wondering how she made some of the white transparent
Gave +1 Creative Carma to @viral palm (current: #9 - 549)

@haughty storm seems to be offline but I'm pretty sure she'll reply later.
You want something like that or do you want to keep the "distressed" particles around the head?

no I want to keep the distressed particles effect but the face is better on the one you made
do you know how she made it transparent

where do ppl find cool yt banners with their names, cuz i know they dont make it, well not all of them at least
There's probably some websites that do it for ppl, or they hire other ppl to do it
aside from making them themselves
i did find one but its not as cool as other ppls

this isnt as cool as this

Idk looks pretty cool~ Just a bit small, I can't read what's written aside from the big name
IMO the first one is way cooler hehe
the bottom one can be made with not that much work. For what I can see it's 3 imgs of levi, geometry overlays, a scrible line across and the letters. Then lens flar, color layer, contrast layer. The first one looks more well put together IMO.
If you want to do something like the bottom one I'm sure you can do it yourself, I believe in you~
reminds me a bit of what I did when I created my Anilist banner, it was all overlays as well hehe.

wait how did u make it
cropped some montains and a silluete of the character, pasted some pattern with slight distortion on the BG, some text, then many layers over it of tasteless filters xD
except the crt look, I really enjoy how that one went
after using some slightly dented brushes, some smudges here and there, i finally managed to make some sort of UI that uses edits from photoshop
Anyone maybe can give this ui some suggestions on what to fix or if my edits werent enough?

used an oil effect on the background because it looked funny
Perhaps : Select>Color Range then click on a white part and play with fuziness.
Then mask the selection to hide white parts. You could lost some parts inside your statue but you can recover them painting white on the layer mask.
anyone know this font or any similar ones

I can't tell if that's white or just grey... or like a grey/green mix I'm not color blind but my low vision limits how many colors I can see naturally and even using the color range tools is tricky for me so I can't always get it right for some reason

how did you make it transparent like this

I'm amazed I was able to get it the way it I got it 😉 I saved it, obviously its not mine to do anything with it but its something I can keep for reference and to show people but that's it its not for me to do anything further with it unless I design or buy the artwork
I used the magic wand tool, color range and some masking
I can send you the PSD since its technically yours
errr I didn't save it with all the original layers, I had to rasterize it 😦
I'll still send it to you anyway
Hey guys, is it possible to remove a person from a picture and blend the background like they weren’t even in it
sure, use the spot removal tool or content aware fill when making the selection
there's a decent basic tutorial on how to do this its right in PS I'll send you a screenshot to get started; unless you're planning on compensating me I'm out of free time for the moment; be happy to discuss that in DM though but here it is

More detailed technique here: https://www.youtube.com/watch?v=fkzi7nzpGec

Frustrated by unwanted people in your breathtaking landscape photos? This Photoshop tutorial is here to save the day! Learn how to erase photo bombers using our two favorite methods: the Lasso Tool for quick fixes on simple scenes, and the powerful Quick Mask Mode for intricate landscapes with many people.
Download the Sample Images and PSDs:
h...
can't use sample all layers from the mask layer?
Sorry if this is a weird question, but can anyone help me identify at least one specific stock image from Adobe Stock? I've been taking some tutorials dealing with Photoshop, and I've decided to try and save at least some of the stock assets used in those tutorials in case I ever have a use for them. I'm on this tutorial right now, and I've identified two assets from Igor Dmitriev and Galyna Andrushko. However, I need to identify the image(s) from Al that were used in the tutorial as well. Here is the link to the tutorial in question, with the credited contributors listed below:
https://www.adobe.com/learn/photoshop/paths/photo-editing/photoshop/series/photography/orientation/photoshop/in-app/introduction-to-the-workspace
Sign into Adobe Creative Cloud to access your favorite Creative Cloud apps, services, file management, and more. Log in to start creating.
anyone have tips on how to make thumbnails like these


I dont know the tut, however if you can clip the image from Al then you can search stock using that.

some tutorials have free assets included so you can practice along with the tutorial
if u find out tell me 🙏
think the whole point of thumbnails is to make them smaller 😉
Trying to edit mask with quick mask mode that I created a day ago , but even with mask selected PS just pretends that I have no mask


what do

Or you can't edit the mask with quick mask option afterwards ?
And if so , how can I edit the mask then rather than remaking it from scratch
I don't even see a mask layer even selected here either

I get that, but there's no mask selected; there's no box around the mask layer; the folder is red for some reason which is preventing this I would presume; not sure why its red
It's red because I'm in Quick Mask mode , it's doensn't matter
Nevermind
You actually right
It's different now
My bad
what did you do?
Just skipped the quick mask mode part and noticed that subtract from the mask option appear
how do i copy an object??
select it and copy it 🙂
you can use the object selection tool to make copying easier, it can work very well if the object is well defined.
Can selection be flipped horizontally or just the object
I think only the object, but I guess you could select the object as you want it, flip the object while keeping the selection then add selection? IDK if it will let you, or flip the object on a new layer and select each part (you can move between layers without losing selection as long as you use "add" or subtract, etc).
Yeah that's what I meant, just figured I'd ask if there's an option if not , then I'll just flip the object and align it I suppose
AFAIK there's no way to manipulate the selection other add/remove the selection itself so I'd just flip the object
wich tool can help me make shadows??
Hi I just got here, but I have several questions, can I ?
Pretty vague question... Several techniques for shadows but painting with a soft dark brush on a seperate layer in Multiply blend mode is a common way to do it.
Hi! I just need to know if its possible to remove gaussian blur from an image.
If anyone here is able to perhaps remove or make it more visible, please help if possible.
(for context this was taken from a file that I had downloaded, and it came out like this)
Thank you.

If they're about Photoshop, you are at the right place.
It's more about the adobe collection (but photoshop does make part of it)
I just had a new computer, (HP Omen) for my studies and, it's about 2 days that I serch how to install Ps and his "friends".
Unfortunately, there's no way to recover an image with such Gaussian blur.
Aw? For real? Thats tough
Would there be a way to upscale it?
cuz apparently my computer doesn't have what the adobe collection needs to be install on it
(im sorry my english is pretty poor (i'm french))
upscale like this?

Increase its pixel count, make the image more legible
No problem, I'm french to so I understand your english 😉
Do you have any warning message? How do you know you don't what Adobe needs to be installed on your machine?
You must install the Creative Cloud Desktop app first.
It's all they say me

I've tripled the size of your image. To make it more legible you'll need a legible image. You can apply a "minimum" filter to enhance the light area but not sure it's what your looking for.
As I said before, unfortunately such a gaussian blur can't be recovered.

Are you using Opera web browser? (Adobe suite doesn't support this browser> Try with Chrome, edge or firefox as default browser.)
Did you check your minimum requirements?https://helpx.adobe.com/fr/illustrator/system-requirements.html#ai-on-the-desktop
I'm on Opera GX, right now
so you won't be able to install Adobe programs as long this Browser is your default browser.
okay thanks i'll try !
Gif is horrible but it was just a preview. Here the png with "minimum filter applied.
Best I can do with your reference image...

Is there a way to export from illustrator to photoshop with all of the layers?
Select and Copy your layers in illustrator then > open you Photoshop file > Paste and choose the option "Layers"

thanks
Gave +1 Creative Carma to @viral palm (current: #9 - 550)
How can I create a 3D effect like this balloon?
Thank you for your help

how would i make a rectangle that has like these curves so it isnt fully straight
the left and right is turned a bit

How can I create that swirly effect?

You can use pen tool to make it from scratch, or create a rectangle and transform (ctrl+t) to skew it
If you're not using 3D software, the easiest way to do this would be to create the shape with pen tool and then create multiple layers that are all masked to the shape, and on each layer draw with a soft brush the different colors that make up the lighting.
Base color, direct light, bounce light, ambient occlusion, and shadow
hey im trying to figure out why theres a blue streak left over after using the paint tool.

that thin blue line
ah i figured it out
what was it?
gradient overlay layer style was making it do that
interesting; good to know and thanks 🙂 glad you got it figured out
For which app do you have a 30days Free trial?
As per Adobe website: "Free trials vary by product. Some free trials require purchase information upfront and will convert to a paid subscription if they are not canceled before the trial period expires. Other free trials allow you to download the product and use it for a specific period of time, and they simply stop working when that trial period expires.
To find out how the free trial works for a specific product, find your product in the list above and Click the Free trial button."
im using surface painter through my college email as a school account and activated a free surface painter trial is this aloud?
its for educational reasons
Are sure the name of your app is Surface painter? If so it's not an Adobe Product.
If you mean Substance 3D painter you should contact Adobe support directly or ask your shool account manager.
Ok i have done so
How do i remove the white part? whiteout losing any quality?

how do i add glow to text?
Is your white made with inner glow?
No the white is just a logo, and then i added some stroke to the logo, but im tryna just only keep the stroke
use the magic wand tool to remove it
press W and then press on the white part then press backspace
go to blending modes and click on outer or inner glow
Gave +1 Creative Carma to @haughty storm (current: #94 - 18)
Best way in your case > Change your Layer fill value to 0%

I already did, its just not removing, look at the photo i sent you can see it at the side corner
It dont work, it just makes a selection but i cant delete
make sure the layer is a smart object
you need to have the layer selected
and this
nah that won't work, needs to be rasterized
thats what i mean
i get mixed between the two
smart object=!rasterized hunny

Can you share your Fx panel? (Inner glow and Stroke)
this is not my work
where could i get stuff like in this, i mean the random text lines and symbols

do i have to make them or is there somewhere i can get them?
you probably could make them easily; but I'm sure you could find assets somewhere on stock photo sites or even Etsy
hey does anyone know how i can apply a clipping mask?
i want this blue part to be applied in that shape

so its not a clipping mask anymore but it stays in the shape
Im applying a color overlay effect but it keeps that transparency, any help on how to fix it?

Perhaps the brown layer is simply a frame that lies over the gradient shape.

no the brown layer is just a background so i can see the colors better
it helps me see better
Please show a fullscreen screenshot with visible layers panel.
this is photopea btw

I don't quite understand what you want to achieve. I would create a clipping mask in Photoshop.
I can't say anything about Photopea. I have never used the programme and here is the Photoshop server.


this is what i have rn, but i want to "apply" that clipping mask so that it stays in that shape
doesn't the clipping mask need to be above the layer that it should affect?
Not sure if it's good to ask here or in #📝project-feedback but I have this composite and don't have any ideas on what to do for the background, anyone got any ideas?
Context is that it's for a school assignment where I make a poster based on a list of selected holidays, and I chose veteran's day

