#❓ask-a-question
1 messages · Page 76 of 1
Do you know what font this is? or is it self made? it has a very special meaning to me (nostalgic) and cant find it via fontfinders?
amazinnng
Which font?

Lemme try
Thank you!
Gave +1 Creative Carma to @honest thicket (current: #214 - 7)
https://www.myfonts.com/products/cube-imagine-font-319041?queryId=9dc1522b24e2bc64f05ed0a14c1dd72a&index=universal_search_data&objectIDs=8659658001 Seems to be a modified version of this possibly.
Imagine Font Font: 8 nice and simple futuristic fonts for headlines and styles!
https://www.fontzillion.com/fonts/iconian-fonts/stuntman?utm_source=fontsquirrel.com&utm_medium=matcherator_link&utm_campaign=stuntman The "M" is the same here but not the G.
I think what you're asking for is a basic mask?
This is my Inkscape problem if anyone could help.. I'm trying to alpha out the white but I get that... :/ There has to be a way to flatten the image or something right?


Converting to bitmap and then alphaing works but lord is the quality bad.
What's the end goal?
Just black outline (as in the first picture) and alpha
This but of course not bitmap


....and you're asking in a photoshop discord group about something in inkscape?
Either way, - you're obviously going to get this pixelated anti-aliasing on, unless work on the image and increase the size?
There's no Inkscape Discord. Somebody here might know something. Illustrator questions are asked here too, I could go on.
Illustrator questions are usually directed to the illustrator discord group - but yeah - I understand that some of the knowledge here is helpful in other applications 🙂
Cool - Changing the curve positions helps decide the stroke thickness. - So play around as required.
So there is indeed a flatten feature and performs as suspected but I'm getting outline artifacts. I'll have to figure this out.
Inscape has a forum. This is an Adobe server, some random person might answer, but I wouldn't bet on it.

Reddit
An online community of Inkscape users with discussion, tutorials, and shared creations made with Inkscape: a free and open-source SVG editor.
new official forum
I tried to change the colour of a grey object to pink, didnt work through masking and hue/saturation, what can i do?
Check the Colorize box


thank you soo much!
Gave +1 Creative Carma to @viral palm (current: #9 - 496)
how to remove the background (behind whiskers and the top) cleanly in 1st photo


Mask and refine selection
use "Remove Background" button of the contextual taskbar
if it doesn't work on the picture on the left, use it on the wide shot (on the right) then crop it to get the close up version.
Can someone help me remove someone from my pic please?


If you're looking for feedback, please post to the #📝project-feedback channel.
oops i accidentally deleted my question
but my question is how do i acheive such an effect
ik thats not only grain
Probably some combination of a Noise Filter effect and Heavy Grain. Its also extremely over-saturated. Maybe even saved as JPEG; compressed and recompressed, given the weird/poor quality of it.
So I am interested in "Attack on Titan" word here. I want to change it to "Photoshop". Is there any shortcut to do it? Or do I have to make it from scratch? Thank you.

Maybe someone can share a youtube tutorial video....
I got a client that wants me to flatten this up, no the heart rate but the paper itself and its curved, by any chance do you guys know how to do that?

Yo, can anyone help me on to change this shirt to white without losing its texture?

Follow this tutorial online, thisll help you out heaps. https://www.youtube.com/watch?v=PyNcSqwLFMc
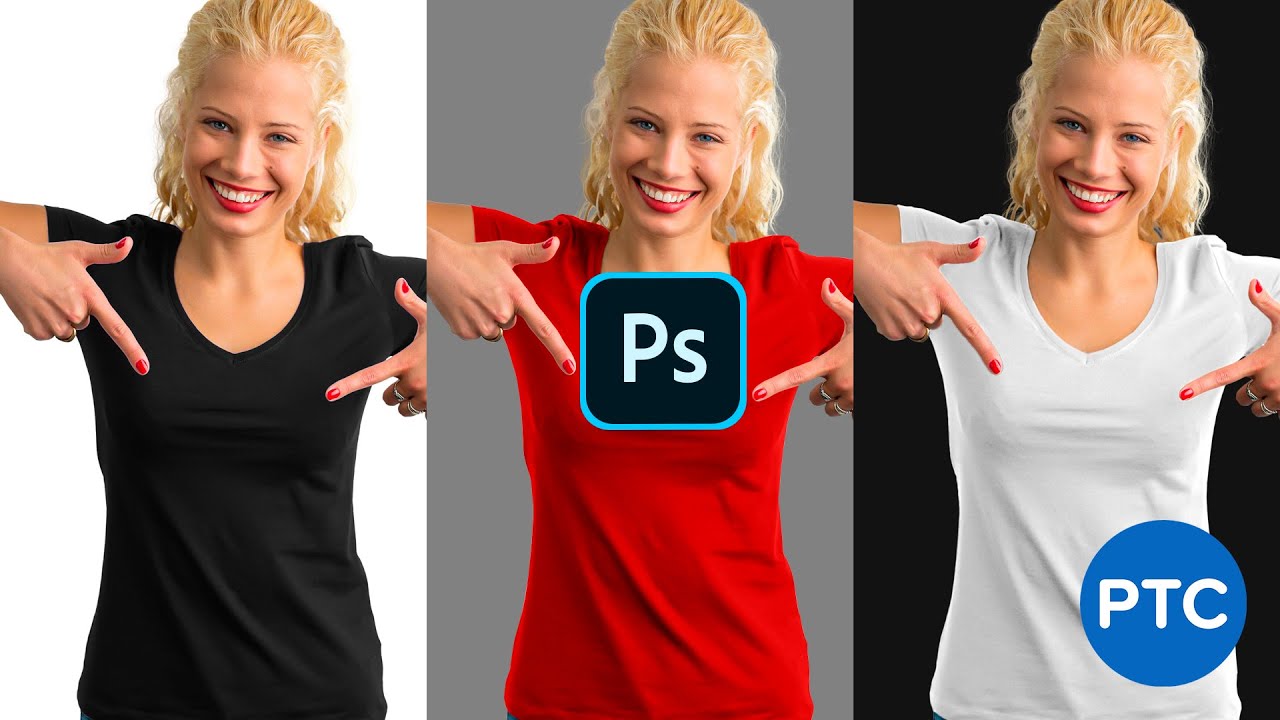
Learn a unique, easy-to-use, and powerful method to black into any color that you want (including white!) in Photoshop.
The challenge with changing black into any other colors is that you need a lot of control over the brightness and contrast.
Most techniques use a single Hue and Saturation Adjustment Layer to create the color swap, which can...

show me the full screen please
the texture tho can be lost unfortunately as your working with a black colour
yo how can i get like this dot effect/texture

you can search "dot effect png" on internet.
add it to your project and play with blending options.
aight
Another way is to 1. select subject (the car) 2. jump a copy of the car 3. Creat a new layer bove the car 4.Mask the car & I locked the transparency as well on the new layer. 5. Fill the new layer with pink. Change the layer from normal to overlay and mask out the windshield, headlights extera. See the screen shot. Frank's way is much simpler. I also Blured out the Background.

This method is actually easier to control an exact color. (As opposed to Hue/Saturation.)
\
Post Photoshop-related projects to #1110544577850511401 - You've already shared something there.
Does anyone know why my pentool is like this I want to transparent the bottle upper side only

so i got this picture and i have done some changes:

how do i make the picture match the art style a bit more?

here is the original pic

You probably click and drag your mouse before release the mouse button.
if your click and release you'll get straight lines in betwwen each anchor point.
If you click and drag without releasing the mouse button you'll get Bezier curves with handle (like on your image)
The video below should learn you all you need about pentool. 30min but it worth it!
https://www.youtube.com/watch?v=5kAQUNFZJXY

► SUPPORT THE CHANNEL & GAIN PREMIUM ACCESS: https://www.patreon.com/piximperfect
► RECOMMENDED SOFTWARE & GEAR:
✅ My Graphic Tablet: https://pix.live/wacom
✅ Recommended Budget Tablet: https://pix.live/wacomlite
✅ Try Photoshop for Free: https://pix.live/photoshop
✅ Artificial Intelligence Photo Editor: https://pix.live/luminarai
✅ Unlimited Ph...
Thank you 🙏🏻
Gave +1 Creative Carma to @viral palm (current: #9 - 498)
Can anyone recommend a good training video? It's been a while for photoshop for me
A good training video for which type of work? Photoshop can be used for so many different things...
Maybe this one will make you happy:
https://www.youtube.com/@PhotoshopTrainingChannel

YouTube
Photoshop Tutorials for beginners.
Hi, I'm Jesus Ramirez! I'm here to help you learn Adobe Photoshop and Lightroom!
The Photoshop Training Channel (PTC) has been around since 2012. You will find professional Adobe Photoshop Tutorials for photo manipulation, compositing, retouching, text effects, and much more.
I keep the tutorials concise, ...

Saw this a bit ago,and Im wondering how they got the hazy fog and glow effects? (Mainly the hazy fog)


Ping or dmme ty
Thank you
Gave +1 Creative Carma to @viral palm (current: #9 - 499)
Guys could anyone please help me. usually when i try to rescale my image and hold shift it keeps the aspect ratio. but now its not doing that anymore please help!
In preference menu check the box " Use Legacy Free Transform"

Did you update your PS?
Since PS2020 or 2021 this box come unchecked by default
na i didnt update
OK so I don't know why... Now you know to fix it quickly😉
thx man :)
Saw this a bit ago,and Im wondering how they got the hazy fog and glow effects? (Mainly the hazy fog)
Ping or dm me ty


Like this?

@night cedar going to bed so answer is yes here is the psd file of the picture above if you want to see how I made it.

Glows on swords can be done by painting on a layer with soft brush set on bright color (white or very close) then set the blending mode of your layer in one of the lighten mode (Lighten, Screen, color dodge or Linear dodge). Superposition of layers with different blend modes can give you interesting result.
I’m sorry I went to do something, heading to bed rn. But the sword glow isn’t what I was asking. It is nice to know though. I mean the background mist and patterns, like for sharpness it was purple, clownpierce red,flame frogs red and orange (this one has interesting patterns)
That misty fog stuff
Hi Asking again. The ´x` keyboard shorcut in classic gradient is not changing the color picker. Is there a way to fix it or enable it. it does work in the new Gradient. Thanks. Using Ps 25.13
How do I get rid of these black spots without removing the glow/original style of the writing design layer? Background must be transparent (pink bg in the first pic is to show the white glow from the writing which may not be easily visible with transparent background).


Sorry if this is a stupid question, I'm a beginner.
try using blend ifs and target black areas. this may affect other parts too so you might need to mask it
Is anyone good at improving photo resolutions? I'm having issues with an ex partner she's trying to take away my dog from me, I've found a photo of my dog and the dog tag isn't very clear just wondering if someone could help make it clearer?
why the gradient is so "solid"?

i'm loosing my mind at this point
it's not even a gradient anymore
I’m on my phone but I can try to help you.
In your gradient properties, your color stops are probably to clone one of each other. Check the method settings (there are 3 interpolation methods: Classic, perceptual et linear). Usually Classic settings gives a more « brutal » transition. So check your actual method, maybe it’s the root cause of your problem.
Check this page for more details https://helpx.adobe.com/photoshop/using/gradient-interpolation.html
can someone help me? I can't select things normally with select by color range. when I delete the green screen, it leaves behind a transparent residue thing and lowering the fuzziness just forces me to manually select parts of the photo which is annoying when you have to do it a lot
hi i need help cause i delate the background and after i put this photo into illustrator that gray grid after delating stay on this
can you share the image or a part of it?
The contour of the subject you’re trying to select is probably too blury. If you share the picture it could be easier to help you find the issue.
Sharing a picture of your issue could be useful if you want members help you.
here


this's the photo
but when I try to use select by color range and delete the background it turns out like this (I moved it slightly to the right to make the difference obvious)

There are several ways you can seperate the background:
- If you are insistant on using color select, make sure to use the dropper tool and hold shift to select all the different greens
- Since the model has hard edges ( no hair ) I recommend selection the subject itself and separating it accordingly. Methods:
- Use the object selective tool ( Automatic)
- Use the quick selection tool - click the select subject button inquick actions
- Use the object selective tool ( Automatic)
pls help
.
so lower the fuzziness and just select all the greens?
How did you transfer your image from Photoshop to Illustrator?
Did you save your image as a png?
@onyx narwhal I can show you how to make a roblox gfx.
by copy and paste
and i save as png
1st i save and then open in ilkustrator
I was making an old style propaganda poster
for a game
any advice on that would be VERY apreciated
i use blender for my character renders.
blender allow you to have a transparent background of your character.
I see so try to save your image as a png in photoshop (check the transparency box in « save as menu » then open illustrator go to « file - Place and choose your png file.
Copy paste problem is that you’ve probably copied the transparency grid (checked background)
so when you get to photoshop, you won't have to deal with makin the background disappear.
I'm not doing the modelling part but I will ask him to do that if he can since yeah roblox studio is VERY limiting
i will try it
@onyx narwhal if not, i'll do it for yah.
we got most of the models ready, it's just that none of us are really experienced in blender
Yes pretty much. You can also Use the selection tools to select the subject itself then copy it to another layer

I'm the only one who knows how to stuff, and even then I'm beginner level
also yeah

I don't see any borders or stuff
another job well done, thakns a lot guys :)
Perfect, well done!
Anyone using 7artisans EF R adapters?
one more question
why when im using filtergallery my imagine is getting grey
i want it to be black

any clues?
nevermind
got it
why is photoshop extremely slow and laggy when i try to basically do anything, im on a fresh os, have more than great pc specs and I allocate enough enough ram for PS
when I use the transform while trying to make the text bigger, it takes nearly 30 secs or 1 min to make it the wanted size
you need to have extreamly good pc belive me
i have
rtx 4070 ti super
o
i7 14700K, 64 gb ram at 6400 mhz, samsung 990 evo pro for ssd
so I don't know the solution
what could I expect from someone with a travis pfp
any problem to travis?
probably immature
🤣
sry for being immature webzy
What size is your canvas?
There you go.
It happens haha, good luck!
Can someone help me why the ereaser is harsh and not soft?
It seems like it should be hard from the selected brush.. Can you click on that and show us?
Also, do all of your "soft brushes" have this issue?


Sorry its in Dutch
Lower the hardness slider

is that the case with your other soft brushes or any as well?
Its all the same :(
My friend has the blue circle and small dots, but i only have big dots


Oh, you have your eraser set to "Pencil" it should be "Brush"
Clock the Modus (mode) dropdown and change the mode

Omg yes
Thank you so muxh
My cursor was changing the whole time so i clicked everything
No Problem, good luck!
Tysm!!!
why do photos in JPEG XL format open in camera raw but TIFF, JPG, whatever normally straight to photoshop
doesn't make any sense since the JXL file is straight form the JPG file losslessly converted
but I guess JPG and HEIC are the only well working compressed photo formats
How do you convert a flat box mockup template into a 3d cube model on dimensions?
Are talking about Dimesnion the software? If yes, you need to post in the Substance server
(you need to search for it because the bots blocks the sharing of external discord servers, but it looks like thet (see screenshot)
if if you have an exploded view, like a die cut, you can use what is called UVs to apply a graphics to every face of your cube (the exploded view is called UV unwrapping)
https://www.youtube.com/watch?v=owmKwHZz74E

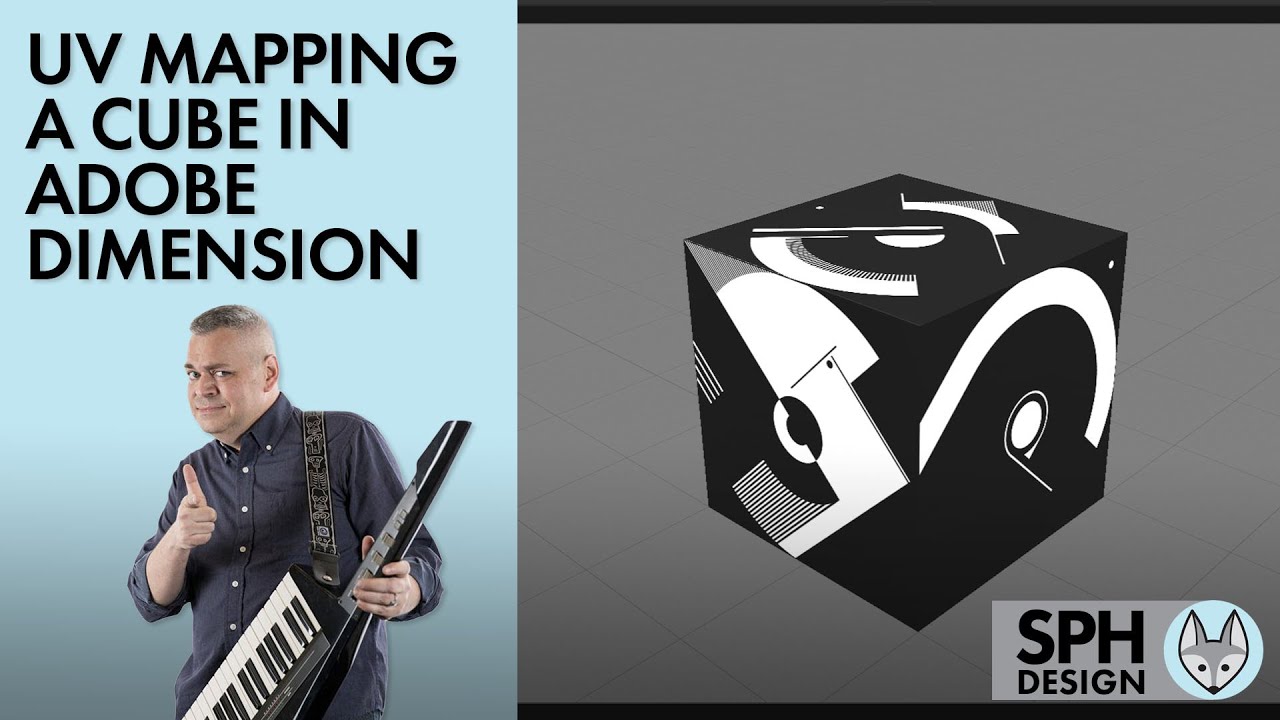
In this tutorial, we'll be using Adobe Dimension, Illustrator, and Photoshop to create a UV map for a cube, and create an interactive web-based link for others to view it with.
You need to set your file associations in Photoshop
(or in Bridge if you're clever enough to use Bridge 😉)


might be a dumb question but i made a youtube banner yesterday. Now i'm going back to it and want to edit text i created in it. But i can't select it to where i can change the font etc. How?
Can you share screenshot of how your layers look like?

Thanks
Gave +1 Creative Carma to @vapid flume (current: #8 - 726)
Thank you, The reason why you can't edit the text is because the layer is "Rasterized" Meaning at some point it was turned into an image probably because you tried to do some editing. Usually a pop-up appears when that is about to happen.
Its always good practice to duplicate your layers for backup and placing your text inside a "Smart Object" by right-clicking the text layer then > convert to smart object. That way, you'll be able to transform it and edit it without permanently getting rid of the text and you can change the text again by going inside the smart object layer.
Gave +1 Creative Carma to @thorny pond (current: #601 - 2)
And after going to the smart object layer?
Youll need to re type the text. I was suggesting ways to prevent this issue in the future!
Ah okay, thanks! Will do.
Hey guys I just got photoshop and I want to edit my youtube videos with it but I can't get it to full length
Why would you want to edit videos with photoshop?
Premier pro and after effects are tools for videos
Do you mean editting thumbnails and/or freeze frames for your youtube videos?
hello, how do I select a specific object in a photo to outline it? I want to outline an axe in a Roblox game, but I want it perfect, and I don't know how
I mean editing my videos with photoshop , it just shows 2 minutes of it even though it's 27 minutes long
You can't edit your video's with photoshop.
oh I thought that would work with it
Unfortunately not. Can you shoot me a dm? I can maybe help you with it.
Hello Gabo! Can you share a screenshot of the picture?
hello! sure!
and also I want to do it with this pistol:
oh wait, my wifi is exploding


I want to only select the axe and the pistol
and another question, when I outline this image, the gun is also outlined, and I only want the character to be outlined, how do I adjust that to only the character?

I would separate character and axe to own layers
That's the thing, I'm a noob to Photoshop and I don't know how to do that
Could you help me? 😭
Copy your main layer
Twice
On first layer mask everything apart of character
On 2 everything apart of axe
How do I do that
Like outline myself things
with a pointer
As i said you have to mask objects

That’s selection
Invert it and press mask icon
But tbh i would recommend watching tutorial about basics

Discover what Layer Masks are and jump straight into real-world examples to learn the best ways to use them in Photoshop! Starting from basic concepts to fundamental techniques and best practices, this lesson covers every aspect of Layer Masking for beginners. I hope you enjoy this tutorial. Thank you so much for watching :)
► TIMESTAMPS:
00:00...
Okay, tysm
How do I remove everything except the design I want to put this design on something else

And how TF do I do that

hey I'm trying to Draw on Photoshop using my Microsoft Surface Pro 9, however it is nearly unusable. the framerate seems to be 1-2fps when I draw, and the line lags behind heavily. usually I use Photoshop on my fast desktop built for video editing, however the specs on the Surface Pro 9 should be sufficient enough, especially considering all I am doing at the moment is drawing on a blank layer on a blank small project.
how do I remove this lag? I would like to use Photoshop and not some other program. Photoshop on my desktop does not behave in this way, so it shouldn't here
it is also worth noting that all other software involving drawing and writing, such as stock note taking programs that are preinstalled with Windows, do not have any added latency and display the motion in the full 120fps
ok, I've found a workaround by changing settings that seemingly works for now
@void dock :Happy to hear you found a solution. Just in case you can check Photoshop minimum system requirements on this page.
https://helpx.adobe.com/photoshop/system-requirements.html
How do I get rid of these black spots without removing the glow/original style of the writing design layer? Background must be transparent (pink bg in the first pic is to show the white glow from the writing which may not be easily visible with transparent background).


@proper spruce : there no easy and clean way to remove black here... I added a solid pink layer under your image the select the "ugly" one, double -click on its thumbnail to access "Blend if" menu to conceal black spots. Then copy merged to get a clean version layer on top. Then go to select/Color range to make a selection of the white text. With selection active, add a new layer on top and fill the selection with white and add a layer style to simulate the original glows. You'll find here a jpeg version and a PSD if you want to dig my method. The fact that there are dark areas on your text (due to the bevel effect) makes the job harder than it looks. I hope this helps! 🤞


How can I make it work with a transparent background?
@proper spruce : open the psd, disable visibility of all layers (eye icon on the left of the layers in layers panel) except the one on the top.
Set Layer 3 fill to 100%.
Export your file to png if you want to use your image with transparency outside photoshop.
need help installing this texture but when i copy it in it leaves a dark filter

Thank you very much!
Gave +1 Creative Carma to @viral palm (current: #9 - 503)
How I can make a picture look like it has hand written drawing on it (on a blank paper) if anyone can help pls let me know 😭
notebook paper png background and custom brush
Im a bit confused not gonna lie
u dont even need a custom brush just go to dry media category under brushes
My hand writing literally looks too bad
LOL
Hey everyone! I'm having a bit of trouble putting together my portfolio. I’m confident in my work, but I’m finding it challenging to present my portfolio because my work is so varied, ranging from designing posters, websites to creating random 3D stuff in Blender or random work including cars. Also, is it okay to include work as if I've done projects for some big brands? Any advice would be greatly appreciated! thanks in advance
add different pages to your portfolio, and if needed add more categorization. I would do different pages for each area of expertise.
you don't need to work for big brands just show your work and if you want to mention your contributions go ahead
Why do each time i make something bigger the quality goes bad?
because you're stretching the pixels, to avoid this try using high resolution images
I need a photoshopper asap
I want to wrap this the seahawks logo to combine with the rings behind. Anyone have some advice for how to go about that

cut the rings in half vertically then meet the ends of the logo and the rings, create a mask on the other half of the ring or add white stroke
appreciate that, was kinda wanting the seahawks logo to bend with the rings, sorry for the bad explaination
transform then warp
@rough hill as @surreal granite said: Ctrl+T then use warp feature (1,2,3... put a negative value for the bending) .
Note: A distortion of the head will occur.

awesome!
hey i needed some assistance
do hue/saturation adjustments apply to ALL layers? or are you able to make it so it only applies to certain ones
Apply a clipping mask
Hold the alt key and click between the layer you want to affect and the adjustment layer
ok what about when i apply "overlay" i want this to follow the texture of the background but dont want it to change colors

without the logo being overlay

with it
@finite sleet
I don't understand what you mean

So what are you trying to imply here
when i set that top part where it says "overylay" to overlay it gets a lot darker when i want it to keep the same color
but it follows not only the texture of the background (what I want) but it also gets darker with the background (not what i want)
Because that is what the overlay blending mode does
After you've done what you just did turn it into a smart object
Then go to layer styles
From there you can see two sliders on the bottom. Use the black slider the one that is below and mess around with it to get what you want. That will control the black colour
this is all i see in layer styles
What happened here is that when you applied those smart filters for the adjustments you wanted which you shouldn't have but did

Just select blending options
@strange estuary do you want the texture of those water leaves on your logo?
nah i just had patterns open it wasnt for anything on this project
Hmm ok
Well first use adjustment layers to apply the adjustment you want to the logo and don't use smart filters please
Then I'll tell you what to do next
i think i found a simpler fix for what i was going for

what I did was, have my base layer (its a vmap for a beret) put my logo on top of it without the overlay effect, then to emulate an overlay effect i duped the base layer and lowered the opacity
so you can still see the texture on the logo but it does not darken said logo dramaticallyt
That was exactly what you were supposed to do in the first place. Well no biggie
xd
there is a reason i have the newbie tag
ty for the help tho lmao
Like this?

If so... - see vid above
Is it possible to use one of these presets as curves?

You could if you were able to download them as a .acv file format which is the file format for curves
Instead these as .shc files (for contour)
Although this one doesn't seem too much a hassle to create (and save) as a curve?
If you click on the square icon, you can see it in large format

then take a screenshot, and place it besides a curve and then try to place the points at the same position etc...
Then save the curve as a preset to find it again
That's great thanks @vapid flume!
Gave +1 Creative Carma to @vapid flume (current: #8 - 727)
When I crop or select an image, the minimum difference (so the distance the I crop in) seems to be a few millimeters. Is there a way to be more refined?
Whenever I add fonts to my favorites, they all disappear when I reopen Photoshop.
I just did that and it works on my version of PS. You have 2024 or Beta?
im using 2024
And you closed PS. It didn't crash? It seems it is not saving your preferences. I have 2024 on Mac and it works nice.
Right, it didn't crash. I also tried adding them through fonts.adobe.com, but it's still not showing in the app. How can I fix this? How can I make sure that Ps is saving my preferences?
Hi, you should be able to select and crop with pixel-perfect accuracy. Maybe you could show what it looks like in a video? Perhaps setting up guides and snapping to them might help?
Thanks for your reply. I don't know how to make a video. But when I have a selection or area to crop, and I move the line (any line) with a cursor, it immediately moves a block and not just a pixel, but many pixels. I will try to set op guides....
Gave +1 Creative Carma to @iron locust (current: #352 - 4)
If you use arrow key you should move your selection pixel by pixel.
Sometimes zooming in can help to get more precision when moving boundings of a selection or crop area.
Who can I commission for a quick photoshop sm me
@gusty elm : uncheck the « Snap » option can help too (shift+ctrl+;)
Thanks @viral palm unchecking the "snap"option helped.
Using the arrow-key was very precise, but I could not lock it. But perhaps I must start with a selection and then use the arrow key
Gave +1 Creative Carma to @viral palm (current: #9 - 504)
I think I already figured it out. Thank you!
Gave +1 Creative Carma to @iron locust (current: #287 - 5)
Solved, thanks.
Gave +1 Creative Carma to @viral palm (current: #9 - 505)
so guys i got approved for the education thing for adobe what do i do now?
how come my exports come out different compared to the ps preview?


the colors are way less vibrant when i export
nvm i figured it out
Hey
If one day i decide to reinstall Photoshop or maybe move to another PC how can i save the Photoshop data?
Like brushes i used to use and settings and fonts and plugins
I would make regular back-ups of those items.
How?
Open the Brushes Panel. Select the brushes (or folder of brushes) Brushes Panel > Hamburger Menu > Export Selected Brushes

Other resources can be saved the same way.
Sorry for the long response. This time, I would be inquiring on just changing a consistent background to perhaps white. Not sure if that is doable.
Can you show an example image of what you're trying to remove?

You can't remove the background from this?
Yes, however I'm just experimenting with techniques and such. I'm still open to learning better ways to removing the background also. Currently, I use select and mask, and then use the brush tool on each string of pixels not properly included in the selection.
I'm just wondering.
I would use the Color Select tool and select the grey background accordingly

Then seperate it
With this particular image it should be simple...
I'm not sure what you're looking for specifically but that is the general workflow. Make a selection. Add a Layer Mask. Refine the selection using any assortment of methods, e.g. Select and Mask and adjusting edges, painting the with a brush, using Levels Adjustments, etc.
Right, understood.
I don't know what this means. You'd have to provide more of an explanation.
sorry, i just found out, but i meant repositioning a certain layer moving it
if that makes sense
is there a way to add brightness to the image?
You can move whatever is on a layer by activating the Move Tool (V on the keyboard) and then clicking and dragging inside the canvas.
thanks
Gave +1 Creative Carma to @ripe quest (current: #3 - 2360)
You can add a "Brightness/Contrast" adjustment layer above a layer if that's what you mean.
thats probably what i mean
Perhaps you'd benefit from doing the basic tutorials that Adobe provides with the app. Hit Ctrl F on the keyboard to open the Discover Window. Look at the "Tutorials" and "Hands-on Tutorials" sections. Work through those materials. They should give you a good understanding of the basic tools and techniques you'll need to be effective using the app.
thanks
Gave +1 Creative Carma to @ripe quest (current: #3 - 2361)
hey guys, im practicing matching images together. I tried to match the guy with the background but i feel like it's really bad - what do you think could be improved?

Good job, I would add a slight blurr to the background considering the subject is closer.
Also try exploring the autoblend option ( sometimes could save alot of time) https://www.youtube.com/watch?v=OZqdJu_Mb48

In this Photoshop tutorial, you will learn how to auto blend layers in Photoshop.
Link to images: https://drive.google.com/drive/folders/1djb0b8wRO8cZVaGVmpH1VtbW4hbfeVsI?usp=sharing
If you find my content helpful, 🔔 Subscribe for more tutorials like this:
https://www.youtube.com/channel/UCzV9TfDn40mpakBbFMT9jEQ?sub_confirmation=1
✅ For busi...
so other than blurring the backkground and adding highlights to the image, you think colors and brightness are ok? I will check out autoblend right now!
The edges are a little crisp. They probably shouldn't be as sharp as they are.
Also, there is street light or whatever directly behind where the glasses are. The lens doesn't look right. I would either brighten the lens or move the man so I didn't have to deal with that edit.

To make the composition a bit more interesting, I'd explore a Rule of Thirds approach to the layout, where a primary focal point of the image falls on one of the points on the grid.

Oh man, thank you for the feedback! I'm working on your tips right now, a few questions tho - what does it mean "the lens doesn't look right."? Other than composition, are the colors and brightness ok in your opinion? I will send the results in a minute
Look at the image I posted. I pointed to it. There is a bright light directly behind where the eyeglasses are. The lens on that side is dark. Its a give-away that its a composite.
I would either brighten it or move the guy. I'd probably move the guy.
I apologize, english is not my first language. You mean glasses lenses, yes?
Correct
Maybe final adjustments on the image as a whole using a Camera Raw filter. You could add a bit of depth blur as was suggested above using that filter.

Just suggestions. Its your comp. You'll need to decide what direction you go with it. :)
Applied everyones suggestions - made the background blurry, made the guy less sharp, I tried your subject placement, painted highlights and also changed the original highlights color to yellow (using blend if) and made some smaller adjustments on color. Thank you so much! Anything you guys would change now?

Maybe a little heavy on the background blur. I'd try the new Lens Blur feature in Camera Raw and let it try to visualize the depth.

Made the background less blurry + added field blur around the subjecto to blend him better. Thank you so much for the help, I appreciate it a lot, really. Will come back to this topic tomorrow with the fresh eye and I will check out the autoblend and lens blur options! Goodnight 🙂

I have a question: If we make a slight adjustment to the typeface Helvetica Neue in a logo design, is the client allowed to use it for their LinkedIn profile icon, Instagram icon, and website without purchasing a typeface license? Please note that we have a combination logo, which includes both a logomark and a typeface.
As long you don't redistribute the font itself it's ok. So modified text on a png/jpg=Ok.
Font itself = your client need to purchase it to use it
Thank you.
Gave +1 Creative Carma to @viral palm (current: #9 - 506)
I know this isnt the lightroom discord, but does anyone know if you can edit remixes in lightroom? i remixed one of my own photos and want to add more to it.
Can you clarify what you mean by "Edit remixes" if you want someone try to help you?
Sorry, i'm not sure if remixes are a feature in Photoshop, but they allow other users of lightroom to edit your own photos.

i attempt to "Save as Version" but it never saves with the edits from the remix.
Even if it's not a Lightroom Discord channel lot of Photoshop users use Lightroom in their workflow (I don't).
Hopefully someone will be able to help you🤞
No worries, thanks!
Hi all! The ´x` keyboard shorcut in classic gradient is not changing the color picker. Is there a way to fix it or enable it. Thanks. Using Ps 25.13
I have no idea what caused this but my gradients look completely broken. Does anyone know how to reset them? I tried looking but I genuinely cannot find anything like that.


You might have the Layer set to "Dissolve" Blend Mode.
the layer is set to normal


Works fine on my end (PS 25.13 too). For you info X shortcut works only with the default gradient "Foreground to Backgroud" (the 1st of the Basics group) so if you're trying to use an other gradient it won't work.
Thanks a lot Frank Beaume. Not a good news for my BW workflow. Hope PS beta team reinstate the X shortcut behaviour in the classic gradient.
Gave +1 Creative Carma to @viral palm (current: #9 - 507)
hello guys, I am a very newb to photoshop so I am trying to learn thru some tutorials.
and while following this one,
[https://www.youtube.com/watch?v=XHaZKt4MF7k&ab_channel=PiXimperfect](https://youtu.be/XHaZKt4MF7k?t=200)
my photoshop has kinda weird visual glitch going on
it is removable by clicking the chain icon multiple times between the graph symbol and mask, however as I use the brush tool again, same glitch comes back

not only the big black pixelated boxes, but there are white pixelated boxed on the mask area too, which is very annoying 😦
any help will be greatly appreciated!
It can be a GPU glitch, can you check in
Help>GPU compatibility and screenshot what it says?
you can also have a look here and see if you can tweak things
https://helpx.adobe.com/uk/photoshop/kb/optimize-photoshop-cc-performance.html

Yes all good!
Seeif you have everything ticked in the right place in the preferences (check with the artcle link I posted)
and try with another image.
If it does that repeatedly, it may be worth ticking the "older GPU" thingy in the preferences. The title is misleading, it's not necessarily for older GPUs.
I have the same graphic card as yours so it should work without resorting to that, so check you have everything in order in the "performance" section of the preferences first.
uh nope, it's unchecked by default

It is unchecked by default. You only check it if you have GPU issues with every image you try.
ah okay.. then should I try to reproduce the issue with different image first?
Aldo, obviously, check your Nvidia drivers are up to date as well
If it happens only with one image it could be something with the driver or temporarily gitch. Try with another image and follow along the link I shared, it's good practice to increase the performance, even if you don't have any issue.
it is up to date, if it's the same thing from the Geforce Exp app!
copy that, I will continue reading that article and see if helps!
thanks for the help 🙂
You're welcome!
hello everyone! I need to produce some hand-drawn images or change existing images as in the pictures. Most videos I find on youtube look quite unreal or overly artificial. Is there anyone who has an advice or tutorial on how to realize this kind of design? I really need this so much. Thank you very much


well, the way to produce hand-drawn images is to hand-draw them 😉 if you're looking for a filter or action to do it, those will never give you 100% real look you're going for
Obviously working with a Wacom style tablet and pen helps. - Check out "Freehand" videos for some help.
Thank u for your answer. I see. But I dont want %100 ofc. Just looking for better than I saw on youtube yet. And those images are made in totally digital. So, what can I do to get the closest out? 😊
Gave +1 Creative Carma to @serene coral (current: #6 - 898)
I will check thank you very much
as James said - pen tablet and drawing manually. plus good brushes, knowledge how to use them and some textures
Okey thanks 🤗
They can still be 100% digital and 100% hand drawn. The medium changes (tablet and display pen, like a wacom (other brands are available), or an Ipad or any other tablet, instead of pen and paper. The skills are 100% the same. You can't be a good digital illustrator if you're not an illustrator first, whatever the medium.
https://www.youtube.com/watch?v=dLOVqoBXpkg
See for example this series (spencer Nugent) with a drawing app from Adobe (Adobe Fresco) which is very similar than Photoshop, but really geared towards drawing
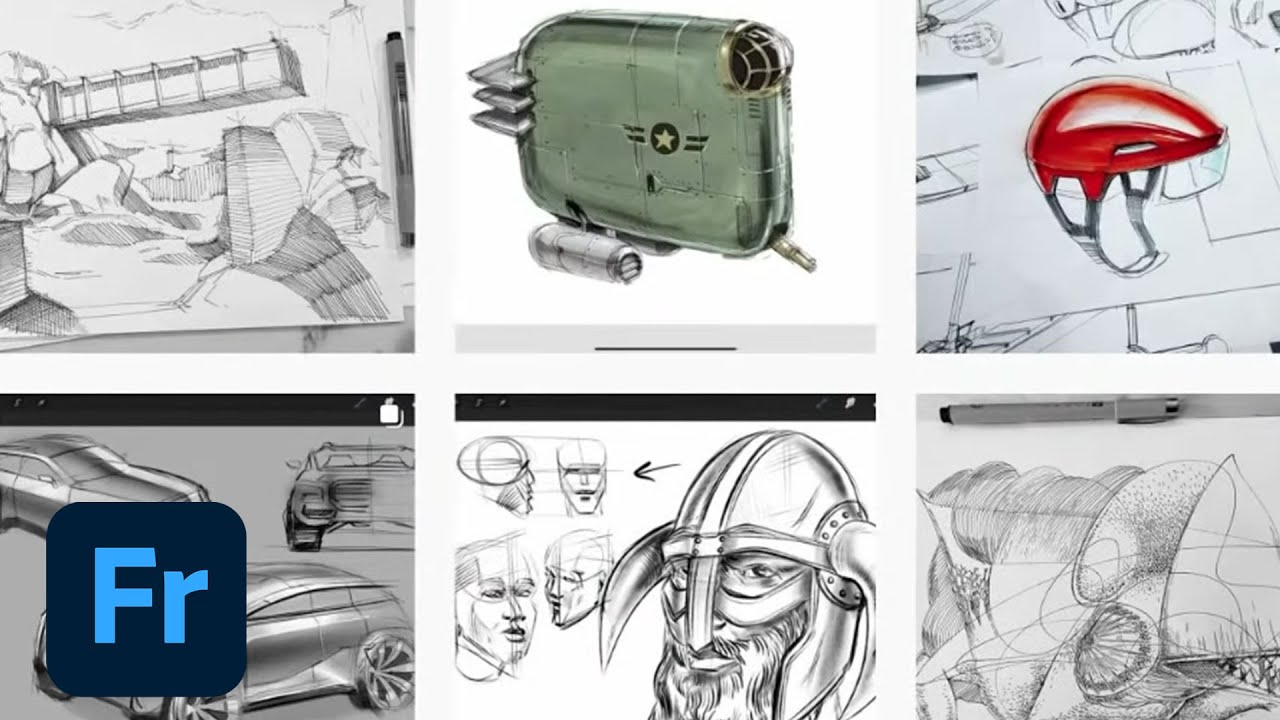
Join Spencer Nugent as we draw from our imagination using Adobe Fresco on the Apple iPad Pro! Spencer will be showing his process of drawing and painting sci fi concepts – spaceships, robots, aliens, futuristic architecture – your name it, he’ll draw it!
Spencer is the founder of Sketch-A-Day.com and IDSKETCHING.COM, has been providing free, hi...
See that one for Photoshop
https://www.youtube.com/watch?v=ZOQ0A46IAGI

Easy Art Lessons - https://gumroad.com/trentk
Ebay (signed books and original art) - https://www.ebay.com/usr/tkaniuga
Audiobooks + fiction - https://www.youtube.com/aquaticmoon
Books + Merch - http://www.aquatic-moon.com
Ikeda (free game on Steam) - https://bit.ly/32DrSzP
Discord = https://discord.gg/vvAQpRA
Twitch gaming + livestream = https:/...
Obviously you'll have to adapt to your style
Hey guys, I play a video game where you can design your base with these walls that look like a pixel. I got a cool idea where I want to spell my in-game name (same as discord) using these pixel like walls. I found a cool font I found, which I wrote my discord name using it. Is there a way I can convert this black font on an empty canvas so that the shape of this font and the text is translated to exactly 325 pixels?
I see, thank u very much. I will check that
Gave +1 Creative Carma to @vapid flume (current: #8 - 728)
place the text, trim the canvas to contents, Image>Image size and scale to 325px (width? height?) with the nearest neighbor interpolation method
Hey guys, can anyone help me? Please, I did something in my Photoshop and now this error appears.
Could not load default keyboard shortcuts because the file name was not valid. Please reinstall Photoshop
try resetting preferences first https://discord.com/channels/547473772727238676/1042970894911410277
Ok. Is this how I can reset Photoshop preferences?
Select on the keyboard, use the control+alt+shift keys and double-click on the Photoshop program file
or Edit > Preferences > General... Reset Prefs button
That would be if you already have the app open.
Hold Shift Ctrl Alt while Photoshop is starting up and it will ask if you want to reset.
Ok. Thank you very much, I will carry out the instructions.

You'll probably want to find a different background because the perspective doesn't match.
Any idea how to find the image with appropriate perspective?
e.g. draw an imaginary Horizontal line to find out the best option
Is there even a method ?
For your background, the plane should be dead center and front facing
Would you like to change background or the plain?
and what about this
how do I know what is the problem ?

I don't quite understand. Could you elaborate? Maybe some visual references?
may I know what does the icon on right mean? I try to clip mask the pic on my text but it doesn't work
oh I just solve it by convert it to smart object and the icon dissapear, but still no clue what the icon means
If you hover on most things and wait a moment, a tooltip should appear. In this case it means that Advanced Blending options have been applied to the Layer.

If you dbl-click that, it should open the Layer Styles Window. The top section of the box would show Blending Options...
My work area is totally red. It's not a mask. It's trully frustrating.

thank you
Gave +1 Creative Carma to @ripe quest (current: #3 - 2363)
please help My work area is totally red. It's not a mask. It's trully frustrating. I'm a furious as my screen right now
#? My work area is totally red. It's not a mask. It's trully frustrating. How do I fix this?
Tap the \ key on the keyboard
Oh. Wait. You're using the web app.
I confess that I don't know where to start. However, how can I add this border to the image? If someone could teach me, I would be very grateful.

yes, it's the web app
ok, solved. I restarted my computer and it looks like Chrome updated. Thanks
Yeah. The only other thing that might cause that is if you had Quick Mask mode activated. You didn't seem to have that and I was a bit confused. Must've just been some weird display/rendering issue.
Generally, you remove the background and add a Stroke layer style to the layer. Similar to this...
yo how do you fix paint bucket tool ruining the edges (ive tried turning off anti alias)

Thank you so much! I save all the videos you send. I love learning new things.
Gave +1 Creative Carma to @ripe quest (current: #3 - 2364)
I'm not sure the Bucket would be my first choice for filling something. Also, you'd probably want Anti-aliasing activated. How far are you zoomed in? What does it look like at 100% zoom?

probably changed blending mode to overlay
is there a way in adobe photoshop to start with a template to print an image to a cd?
what is a difference between mask and vector mask?
I mean
Sth like this\

You'd get a better answer by literally googling it?

After updating Photoshop, this option isn't working. Is anybody facing the same issue?

Works for me in v25.12
There isn't one really. The end result of a vector mask and a raster based layer mask could end up looking identical.
99% of the time, I use layer masks, or, more recently - clipping masks...
I am using the same version, but it's not working. I have restarted my pc but still not working.
same mac/win
any clues
Document settings?
Seve for Web doesn't work with 32bit RGB.
I’m using photoshop beta and notice that in select and mask, decontaminate colours not working and I wonder why?
any idea
custom brush with slightly lighter color

@vague remnant
This is probably just a single colour gradient. Masked over a coloured area. Both layers overlaid by a gradation adjustment layer, which is also masked.

how do I color the image like on the right. What settings do I mess with? I can only get it to go more orange/red


Removing the insane red levels would be a good start;

getting a higher definition picture helps as well
I do have HQ those are compressed from where they are uploaded, screenshot was not from PS
@valid jungle - Please do not post things like that here.
woah I think its just my monitor too. I was looking at it on my asus and its like red af, but on my other two view sonics its like normal looking. could just be that too ig
Okay, so, I recently installed Photoshop on my iPad [iPad Air 13-inch. Ver. 17.6.1] and when I draw the linearts shows after I do the line not while I’m drawing. How can I fix that? Because I’m used to see the line where I draw.
If anyone knows, could you tell me how to distress something in photoshop like this? and how do i do it with colour like in here?

It should already work that way. Not sure why it isn’t.
There are probably a bunch of different ways to approach this. Here's one off the top of my head...
Perfect, thank you so much! 😁
I think I found out how to make the image how I wanted. I just had to edit it in the camera raw filter and it gave me way more options. I didnt know about that

I think your image lacks a bit of detail when compared to the example you shared. If you were trying to "enhance" that image to add detail where it was lacking or non-existent, you'd have to use an AI image-to-image with low strength to attempt that.
Ik, but it isn't and Idk why that is happening.
Have you restarted the iPad? Just to see if something was potentially hanging up in iOS.
I did.
And it still the same.
Could it be the storage space?
its not the detail its how they make it look so good with the colors. like the darks are really dark. highlights look good. its not just a flat pale looking image
its like the weird shiny look on the ludwig thuimbnails too
Its part of it. Its also in the highlight/shadow adjustment, clarity, texture emphasis, etc. You can't drag enough contrast out of certain areas because its lacking in detail.
Storage space. Maybe. I was thinking like a lot of other apps running. Is there anything else running on the iPad at the same time? Running in the background? If so, have you tried closing any other apps that might be open?
Just Discord and Photoshop.
How would one make a logo like this? really interested in this type of design but unsure on how to go about it, is this hand drawn? or have they gone for a vector approach or something completely different. Any advice much appreciated

@ripe quest so by accident I drew with my finger and it showed the trace but with the Apple Pen it didn't.
Is something wrong with my Apple Pen then?
Hmm. Could be.
I would say... texturized vectors.
They could've hand-drawn it or hand-traced a photo. Posterized a photo and edited to simplify the design. Difficult to know exactly. The texture overlay is the simple part.
I think I have either the Apple Pencil (2 gen or USB).
USB? I thought all Apple Pencils were Bluetooth.

i have no idea what i did but my drawing pen works on literally anything but photoshop now
((btw i can still use the brush tool when i use my mouse so its something with the pen
Open the Windows Services. Scroll all the way down to the "W's" and restart the Wacom Service. Try that.
(Tap the Windows Key and start typing "Services" into the box. It should be at the top of the list.)
anybody know why when i try and press control T for free transform i just see a blue line/box

i made a custom nintendo switch is there a way i can put my design over this box?

so i cant move what i have selected with lasso tool
Do you have just the nintendo switch or a the complette image (Logo+ tV in background)?
If your image is rectngular: import it (place embeded). You'll get a smart object then go to Edit/Transform/Distort. You'll be able to drag corner of your image one by one on the corner of the box.
Can you share the whole screen? It seems something else is active
thank you (:
Gave +1 Creative Carma to @viral palm (current: #9 - 510)
Can anyone help me keep the image color solid? It shouldn’t have these pixels with different shades. I'm using magenta for transparency, but the different shades are causing it not to work properly. Is there a way to keep the background flat, with no varying shades of pixels?
I tried to use stroke and the do the stroke with magenta color as well but it does not work quite well.
Thanks!

What's the zoom value of the picture you're sharing? It looks really zoomed in.

are there any brushes that imitate the thick paint buildup and shine from this picture
Yes, it is really zoomed in to see the corners. The total image size is 450x40 on purpose.
Are your buttons made with live shapes or already rasterized?
I imported them
Understood! Text are on seperate layers? Sorry for the questions I'm just trying to find out best way to fix your problem...
Thanks, Franck. The whole image was imported. I just had a second layer with the background.
I was checking to see if using a shapes, the border would be solid, but it does have this shade variation as well

Photoshop is a pixel based app. Pixels are square so anti-aliasing is necessary to get smooth contour and reduce the "stairs"look ... If you remove anti-aliasing you'll "pixel art" images (harsh contour) espacially on heavy zoomed previews. If you're design is made to be displayed on a screen, try to preview it at the size it will be used (100% zoom not more).If you still need clean and sharp contours whatever the zoom amount Adobe illustrator is maybe a better choice (vector based app).
How to make this more realstic ?

@slow cedar : here is an exemple Top = Pixel Bottom= Vector (same Zoom value)

The thing is I need to use it in PNG. Thanks for the support, Franck.
Gave +1 Creative Carma to @viral palm (current: #9 - 511)
I can make one png version for you if you want? Do you know what's the font used for the text?
I have different buttons that I need, but with your tip, it makes sense now. I created a button on illustrator and exported as PNG. No pixels with different shade. Will test it and report back. Thanks
You already helped me a lot. Thanks!
Start by getting rid of that brown area using a Layer Mask to hide those pixels.
Gave +1 Creative Carma to @ripe quest (current: #3 - 2366)
Hopefully, those things are on different layers... (?) The foreground, the boat in the midground and the oil rig in the background.
Good. That should make it easier.
Is this line spacing?

Yes. That is the space between lines of text, called leading.
does anyone know how to fix full scratch disk
this is probably a stupid question but how would I achieve something similar to this in PS which is just outlining a portion of the image to group sections together as a visual guide

nvm I figured it out
I think it needs the addition of a shadow from the design onto the ground behind it.
I'm no pro, since I don't often do this sort of work, but I'd try adding in some adjustment layers with masks on like this...
Also, I suppose the shadow you've added on yourself is way too harsh...
It's presumably the same material on the front and sides, but because the render was made with a what looks like a TORCH as the lightsource, the contrast is too much
Here's the file if you want it.

May I be permitted to ask a non-Photoshop-related question in here?
Ask, and we'll tell you if you need to ask somewhere else or if anyone can answer
Ask questions, don't post polls 🙂
..which is more Hawaiian?
Eggs or Potions?
The hell I know. What is it supposed to be?
If it's a fun question, you'd rather ask in #💬chat-general since this channel we're in is for technical questions about Photoshop
I.. could ask there..
I'm going to a Hawaiian-themed party and I only have potion earrings and egg earrings..
:c stupid lack of variety..
Well I would ask an hawaiian person for starters, not sure you're in the right time zone right now
Go and ask in chat, maybe you'll be in luck
Okay!
I really aprreciate that!!
Thank you very much!
Gave +1 Creative Carma to @sly hawk (current: #5 - 992)
Hello chat
I've so much to ask tbh
I've a very huge image of moon that looks like this

as you can see, the black portion is...well, black

I used the equalize feature to get it to this visiblity so now I can study the craters within the black portion (I am not sure if that's the most viable way to get the dark region, please guide me in this regards as well)

this is one very tiny portion of the dark region (now equalized) that I need to work with
Have a try with curves where you will be able to adjust brightness and contrast at specific luminosities 🙂
if anyone can help in any sorts (what I can do to improve visibility, quality, noise reduction, equilization, guassian filters, or as little (big) help as pointing me towards some resources for image processing will be greatly appreciated <3 )
Curves didn't help much but I tried using Level and it does make it look better (i mean, going from pitch black to this is progress) but it adds so much noise.

Plus that histogram is so fragil 🥲
If it's an image you've taken yourself with a camera that allows RAW output, then you can extract way more information, notably in the shadows) that you could with a 8bit JPEG.
You can use Lightroom or Camera Raw (inside Photoshop) to extract those details
even better if you can take multiple exposure and "stack them" to expand your tonal range
Lightroom and Camera Raw will function the same in that instance
Disclaimer: I know nothing about astronomy Photography 🙂
It's a high res image captured by a Moon Orbiter's OHRC camera, belongs to NASA, can say..
Idk much either to be honest
let me show you something

This is what a regular photo of same area looks like, taken by the same satellite
aim is to reach this quality and turn it into 3D (I've already figured that part out)
The problem is, with these dark regions, the noise is so high, plotting is always incorrect so I am trying to learn as much about image processing (levels, curves, histogram equilization, all this)so I can get the white-ish pic to this pic's quality
Well, my advice was if he image is taken with a high tonal range so that depends what NASA gives you. Sometimes with JPegs 8 bits, there is not much you can see in shadows, no details at all, and you can fire up the curves layers as much as you want, if there's nothing in the histogram, then there's nothing to extract
I will leave you in better hands,
I need to go.. Bye!
Thank you for your time and insights, I dont know what tonal range means and Camera Raw, so you've definitely helped with some direction :) I'll look into it now
Gave +1 Creative Carma to @vapid flume (current: #8 - 731)


can i ask question about thumbnails/content creation here?
Go ahead! ( I assume in relation to photoshop )
We typically answer questions related to Photoshop so the replies might vary.
yo how do you make a design like dis(if anyone is willing to help @ me)

I dont want a tutorial and allat I just need to get an idea how to do dis and ill figure it out
Looks like a black and white design distressed by the addition of a texture layer with blending mode on the top.
For the black and white effect: use of threshold adjustment layer over the main design could be a idea to dig.
If your’re talking about the style of the design itself I think a quick search for « Grunge design » on YT could gives lot of clues.
Hey, my name is Shinra I am new at Photoshop and I just want to ask, if anyone has general tips or tricks for me.
What do you want to create with Photoshop? Also, feel free to browse https://discord.com/channels/547473772727238676/1042476087642423369 for helpful tutorials :)
okay i will look at that channel
Be sure to learn about (and use) Smart Objects. Also, the masks. Layer Masks and Clipping Masks. And Adjustment Layers. Those are must-haves in your knowledge base. :)
okay thank u so much
Gave +1 Creative Carma to @ripe quest (current: #3 - 2367)
Can you please capture a proper screenshot of the Photoshop GUI? instead of this cinema verite video.
It’s very crucial

I don't see any reason why you shouldn't be able to fill that selection with whatever color. Make the selection and try to fill it on a different layer as a test. It could be the stroke and shadow layer styles are causing an issue with the fill.
Also, is there any particular reason you're using RGB/16? 16-bit color?
8 bit RGB should be enough for this Mario thing….
@shrewd dome : there’s as Layer fx on the layer you’re trying to paint on… Could you share the settings of the stroke applied? Huge inner black stroke could be the root cause.
That seemed to be the issue thank you
Gave +1 Creative Carma to @viral palm (current: #9 - 512)

im a beginner, took this photo and worked on it abit
my next step is to take a pic of me laying down and replace the top foot with my head
anyone know where I can start with? kinda clueless tbh. I tried taking one of me laying on bed and import is here but it looked terrible
i got this idea to use blender 3d to mimic the boxes and get the camera set right
but then it wouldnt be me laying down itd be a random model
where dod you make that photo?😅
a city park in calgary, i layed flat, got a friend to take the photo
then i added an extra building, brushed it up and duped it
maybe back of the head?
it would look better if first version was terrible
the impact on the recipient will be smaller, but they will still be interested, etc
or all of your back place instead of legs
Yeah something like this

So my issues rn is that the quality is crap, I can’t get the angle right and the lighting is terrible

heres the general idea but with horrible execution

nvm this is hopeless
you can edit a photo
of yourself by for example
camera raw
convert to smart object by clicking right button on a layer "convert to smart object"
next stęp is to filtee camera raw
because for beginners is the easiest way in my opinion instead of tons of adjustment layers
it has potential bro btw
Hey I need some help with my Photoshop on my laptop. It says it's incompatible even though I'm within the app specification. Ive got a windows 11 OS and the laptop is a gaming laptop
Have you downloaded it with Opera as a browser?
Yeah, opera GX
I did it on my desktop PC which worked fine
Opera is the issue. It basically fails to detect you're on PC and redirects you to the Mac downloads.
You need to try it through the CCapp obviously but with another browser
ie: Chrome, Edge, Firefox work well
Alrighty, Ill give it a go, thanks
Let me know if it works
Yup that solved the problem. Thank you, you saved me from alot of stress lol
Gave +1 Creative Carma to @vapid flume (current: #8 - 732)
You're most welcome! 🙂
If you intend on using any of the web-based features of Creative Cloud, probably be prepared to use a different browser as generally Opera is unsupported.
Hey. I have a question about graphic labels for various products. Which program is better to do this in? Illustrator or Photoshop? Some people tell me that they should use Illustrator for printing, others tell me to set it to 300 dpi and do it in Photoshop, so I don't know.
Professionals choose the best tool for the task they're trying to accomplish. Photoshop is an app primarily for the creation and editing of raster-based images. Illustrator is an app primarily for the creation and editing of vector-based images.
Thanks for answer! but for example this. I know that logo was made in Illustrator but rest of label can be made in photoshop? Quality of print text with 300 dpi file will be good?

Gave +1 Creative Carma to @ripe quest (current: #3 - 2368)
In this example, I would create the logo in Illustrator, the product mockups in Photoshop. And if I was going to create print layouts, I would bring the product images back into Illustrator and do the page layouts there. I would constantly be using both apps.
so photoshop only for mockups?
or i misunderstood
Maybe even InDesign as well. Particularly if I had to make a multi-page layout, magazine spread, catalog, brochure. etc.
If I had to take the vector logo I created in Illustrator and put it on product packaging photo, I would do that in Photoshop.
and text describing product also in illustrator right?
Anyplace to get a photoshop license with discount or less expansive?
Are you a student?
Yep
You mean in a product layout? I would bring the logo(s), product photos, and create the layout and do the typesetting in Illustrator (or InDesign depending on the type of layout it was.)
@river otter you also can try to talk with Adobe after buying - my friends got discounts for all adobe apps plan
Okki doki
Sorry to bother, but I am allowed to ask for a commisson in this server? I'm only looking for two quick images to be made, and their super quick and easy.
Yes but please read this first: https://discord.com/channels/547473772727238676/1042833042378592329
Hi, can i ask a quick question about a photoshop filters message that I get?
I have a problem with only the sketch filters off photoshop. Other filters work fine. But when I for instance click photocopy or stamp filter it gives this message:
This effect uses the foreground and background colors. Since they are the same, all details in the image will
be lost. Please ensure that the foreground and background colors are different.
What does this mean? I never had this problem before.
They mean these colours
those filters work with the foreground and background colour

100% of the issues that people have with those filters are because they got the wrong colours before they start launching the filter but actually the program only warns you when you have the same colour for both
what does the button on the top left do?
going back to default (same as pressing D). The right one inverts what you have
I never had this message before. I just used any photo and applied the filter.
the default should be Black as foreground and White as background, but you also need to check if you're not in a weird colour mode. I can tell you if you share a full screenshot of the Photoshop window
That's the default

Ok, I have the white as foreground.
X to switch foreground and background and D to revert back to default
But again, check your colour mode
Thats it thank you it worked.
Great!
hey guys could anyone help me plz ive been trying to get somethign to work for an hour
im working on a video in photoshop, the edges are rough because it had a green screen before. im trying to soften the edges to I can apply a layer style stroke to the video
plz help
i want the stroke to be smooth, rn its all jagged
Can you screenshot the settings of your stroke? (in the layer styles panel)

for a quick fix, try "middle" instead of "outside". But a stroke will never soften a jagged edge if it's jagged at the source. Is it a mask, or did you delete the background of your video?
Alo be careful that most video formats don't accept transparencies (Ignore this if you know already)
i tried middle but it still looks bad, the original is this character with a green screen behind him
How did you cut out the background? Celete or a mask? If you can show the layers panel I will be able to tell
i just magic erasered it
A stroke strickly follows the edge, if the edges are bad, the stroke will be bad
yes exactly
Well, that's bad because now you have no way to to smooth it out. Why didn't you use a mask instead?
im new to photoshop, i dont know anything about masks, i can look into it
Hello, can you tell me why when I open a png image when transforming photoshop selects only the place where the picture is and not the whole layer? Can I make photoshop select the whole layer (highlighted in red boxes)?

Please help
Try that:
delete that stroke
Select the content of the character layer (CTRL+ click on the layer thumbnail)
Go to Select (top menu) > modify > contract.
contract it by say 2 or 3 pixels
then go to select> modify > smooth (smooth it by half the amount you put in in "contract"
Then use this selection as a mask, select your layer and click on this icon

the (circle inside a rectangle)... That's a mask
Now your edge will be smoother
Reapply the stroke if needed
In the move tool menu (top) check those settings

It will show them but it won't necessarily transform them. Photoshop only transform pixels. If your layer contains transparent pixels, Photoshop doesn't try to transform them, there is nothing to transform
you can only act on pixels in Photoshop
But there is another problem, before when importing a png image I used to get blank edges in the layer, now they are cut out
Can I import png images along with blank edges like before?
Do you open the PNG? Or do you place the PNG? Embedded or linked?
PNGs come either with a transparency or whith a background. The advantage of a PNG is that it accepts transparencies, not JPEG
So if you want to have a png with a background you need to either save it with a background or download it with a background already
But it used to work differently, in ps 2022 this problem appeared
I am using Photoshop since Version 2.5 and it never happened to me. When I had PNGs with a transparency, I never had a background. That was the whole point
Which of the two options?


Probably because when placing they come as smart objects, (that's something you set up in the preferences, maybe you didn't saved the preferences after 2022)
smart objects are embedded with the transparency content
My screenshot shows what I was talking about.
pixxxelschubser +rep


Yes, because you now have a smart object
yes, that's really true, I will now disable that feature, thank you too
Sandrine +rep
Sorry for coming back here every single day 😭
Sandrine taught me ctrl+j to cut a grid cell as a separate layer and export it

I want all the squares within that grey area exported as tif or png, not the outside areas
there's no way I can go ctrl+j and export each individually? 😭😭 And I have to do this for multiple images too, any Photoshop magical method that allows me to draw around the grey area, select those grid cells and export it??? I am fine with some miscellaneous ones coming
or any other method to export all those little boxes as separate pngs/tifs?

if you have a black tshirt use brush with white color and set layer to overlay blending mode
it cause black will be more "bright" if it would be too much
change opacity to less
To add something to the great suggestions made by @still cradle also try to use a soft brush with a low flow (around 20%) to make it more "natural" and keep control (particularly if you're painting with a mouse).
lets say I want to somehow crop the guy out of the picture so I can put text behind the guy but so it is visible on the image but like the guy is covering some of it

sort of like my pfp
Use a Layer Mask.
I demo'd something similar a couple weeks ago. See: #❓ask-a-question message
Tysm, now I gotta figure out how to mess around with the text font etc and im set
a little problem

wrong ss i figured that out
idk how to create that mask, in the vid i see ur curson at 0:17 showing and then it just dissapears
this thing also doesnt pop up
NVM I GOT IT I GOT IT
but that bar doesnt pop up for me
this one

when putting the image on the left into photoshop, it is adding the gray squares and I have no idea why. I can't paint over it with the hot pink I need, just turns back to gray


god this project is so difficult
im gonna put so much effort in it and its gonna end up trash
it's my first time using photoshop
even in the color picker it shows up gray lol

@flat sundial
please show a fullscreen screenshot with layers panel unfolded
@tame cape you mind helping out
when i try to use the brursh tool to brush over a part that has already been brushed, the color gets lighter, like this:

how do i stop that
Check your document color mode. Image > Mode > Grayscale... ?
@frosty forge
change the mode in the control bar from screen to normal
where exactly
thanks!
Gave +1 Creative Carma to @ripe quest (current: #3 - 2370)
thanks!
Gave +1 Creative Carma to @ripe quest (current: #3 - 2371)
Thanks, Humann got it with the gray scale! Will do so next time though :)


@flat sundial
a screenshot would have shown the greyscale mode in the title bar
😉
Lucky guess on my part. heh
I was a little unsure about the pink stripes in the picture …

Hi everyone, I have just started learning PS and am trying to make copies of some pictures I found on internet. I am having trouble to cut out a shape in triangle as shown in the picture. Any tips and tricks how to do this to get the exact shape as highlited in the picture?

Use the polygon tool to select the area. Then either delete or colour - depending on what you want

ok I learned slicing how do I save all these grid cells individually as PNGs? 😭😭
free to use Guides if that's easier
Managed to do it, but now I need to do this for every corner. Is it possible to select the same size shape all the time? Or rotate a selection?
hey may i ask a question
im working with a short video in photoshop. it has a green screen and a subject character that moves around. im trying to remove the greenscreen and then put a black stroke around the subject. the issue is when I remove the greenscreen the stroke is jagged because the removal job i did left it jagged. i tried asking for help earlier on this but i am still stuck after trying other's recommendations
you can save and load a selection, you can rotate a selection you can save a shape and use it for make selection from shape or … or …
Please don't ping the staff, mods or experts. If you have a question about Photoshop, then feel free to ask it here. If someone knows the answer, they will probably reply.
i have quastion
oh my bad as well
How do I make an image in it?

Photoshop is probably not the appropriate tool for a greenscreen/chromakey video edit.
You have already asked the question before - correct? Aren't you better off asking this question in the video server? Because here you will be given help for individual images.
(Btw. I've seen tutorials in the past about masks in Premiere that adapt to the image/video. But I don't work in video).
What sort of image?


yes i asked earlier but the thing is i want to use the stroke from layer styles in photoshop bc i think it looks best. the stroke in premiere looks bad. i also tried removing the greenscreen with premiere pro ultra key and then importing the subject with alpha channel to photoshop. at this point i just need to be able to feather or smooth out the edges but thats what im having trouble with
what should i do ?

How to Place Logo on T-shirt in adobe Photoshop
❤ Order Any Graphic Work:
https://www.fiverr.com/shokorazimi
▽ FOLLOW
Behance ► https://www.behance.net/shokorazimi
Instagram ► https://www.instagram.com/smart.graphicss
Facebook ► https://www.facebook.com/smart_graphic_designs
Tiktok ►https://www.tiktok.com/@smart_graphics
#Photoshop #Tutori...
Gave +1 Creative Carma to @spark snow (current: #100 - 16)
Thank you, and sorry for the inconvenience
Thanks, @spark snow!
Gave +1 Creative Carma to @spark snow (current: #96 - 17)
something like that?

Np sirs 
yes
So you want to do this on one frame or many frames?
Also, this seems like it would be better accomplished with After Effects. Not Premiere.
Anyone experienced with brush creation? I am struggling to understand how to control line thickness through tilting. Essentially, what I want to create is something similar to real world graphite/charcoal/wax pencil for gesture/figure drawing.
The tip should be thin and pointy when drawing upright, and wide and soft when tilted on its side. Does anyone know how to achieve this?
Try using the Get more brushes option in the brushes panel flout menu. There are some great packs available.
Alternatively for this kind if control, some get a Wacom art pen that has barrel rotation

I have all of Kyle's brushes and just tested a new pack from Proko. I am wondering if the problem is my tablet? I do not have access to my Cintiq at the moment, so I am using a xencelabs small. I do have an Intuos small with me as well. They do support tilt, but it sounds like rotation is a separate function?
Thank you very much for responding to me, by the way.
It seems my pen supports it, at least the option is available to switch to rotation?
Tilt and rotation ate different functions.
I'm able to select rotation and no errors come up.
Yeah this is too confusing for me lmao
There are key commands you can use for rotation, it's just the artpen lets you do it with movement of the pen in your hand....https://www.elevateyourart.com/blog/set-up-wacom-art-pen

The Wacom Art pen is a must-have. The barrel rotation allows for precise positioning of the "bristles" of your digital brushes. This setup will ensure success!
I will watch this. Thank you very much. Just to clarify, are we talking about the same functionality? Here is an example of the Proko pencil on iPad. Straight on with the tip and tilted on its side.

Gave +1 Creative Carma to @spark snow (current: #93 - 18)
Go to : File/Export/Save for web(Legacy)...
In the save window click [Save...], a window should appear make sure to select "All slices" option.

hi, can someone help me
why is my art blurry. even at 100% zoom its blurry
-
its on 300 dpi, 512 x 512 pixels
-
no anti aliasing
-
no opacity for layers except for the mouth to 70%
-
i tried matting > defringe and it changed my art and it made it worse so i undid it
-
i flattened the image and its still blurry
-
after exporting trying out all the different ways its still blurred
-
the recommended was 8 bit before creating the canvas, i used 32 bit. i feel like its because of this, im not sure
-
should i have used 1024 x 1024 pixels? would scaling it down reduce its quality and make it blurry?


pretty sure this is a super simple fix that i'm missing, anyone know how to fix this export error? on macOS, exporting as PNG works, however need it in JPG format (which is when the error pops up), exports as PNG fine, I appreciate it fellas

fixed this, literally was just because my scratch disk was full hahahaha, cheers
how to crop the image so it's follow the line that I make?

Grab the crop tool and hit CTRL. You'll see a levl icon
Use that level icon to follow the line you've drawn
Alternatively, use the level tool, drag it across your line, then go to image> image rotation > arbitrary, and the angle set with the level tool will already be input in the field

This is the ruler tool

Click OK, and your canvas is rotated. You can then crop if you want to

💀 nahhh

crop tool then hit ctrl
I mean the end result?
then I drag a line
see that boundaries line in the middle? (not the white line) but the margin line between my image. I want to make like comparasion between the left image (the solo guy) and the right image ( the group guys).

OK, that wasn't clear in your original question.
Do I understand well that you want to align the left and right image so you have a continuous image (same floor level etc)
Are the left and right image in different layers? If not you need to separate them
yes, you can see in my layer , I name it the left guy ( main char) and right group (zombie)
If yes, the best way is to mask. Create a selection that follows your angled line and that only selects - say - the left side. You can do that with the polygonal selection tool.
Then click on the left image layer and click on the mask icon at the bottom of your layers panel
If the right image covers enough of the remaining area, no need to do anything else but place it underneath the left layer.
If not, you need to find a way to fill the empty space (generative fill, clone stamp etc)
It's keep follow my cursor. how to cut this?


press "esc"
or change tools. To use the polygonal lasso tool, you don't have to drag while pressing the mouse button. click the mouse button only when you want to place an angle. There should be only 4 angles in your selection
I need to make this?
You don't need to reposition the selection. Only place the angles and once you're done with the complete selection, click on the mask icon
change tools after completing the selection if you find it too fiddly
A starter tutorial on masks if you want to start from a good place
https://www.youtube.com/watch?v=mqqVmGxvHaY

Masking is the granddaddy of skills in Photoshop. Master masking and you're well on your way to conquering Photoshop. In graphic and web design as well as photograph retouching, masking is the fastest and easiest way to erase layers without actually erasing them. This allows you to fine tune your adjustments and graphics down to the pixel withou...
This clip much better for my understanding
Finally it's done, youre the goat thank you so muchh

Glad I could help!

how does one fix this error
@vapid flume sorry for pinging
ended up fixing it, took me a bit
Hello guys, I am using cracked adobe softwares for 2 years and finally i got a subscription. I am wondering if i delete all my adobe apps and install the new ones from the subscription does the file saves? I kinda know it will save but i want someone to boost my confidence deleting the app, or should i do something first before deleting?
sry for my english
Thank you very much for deciding to subscribe 🙂 This allows us to develop the app and create even better software to support creators! And it is legally right... Are your concerns related to whether the files you've created in cracked Adobe will disappear upon deletion? Am I understanding correctly?
Gave +1 Creative Carma to @hidden barn (current: #933 - 1)
I copied these borders from an SVG where they were shape layers when i pasted them into photoshop the borders look too feathered and are flattened

is there a better way to copy they SVG to photoshop in a way that would keep each layer as a shape so i that i can edit it easier
Can you please paste here this SVG file? I will check 🙂
it pasts as png

oh, you said SVG...
it is svg
when i copy layers from illustrator it does a pixel copy
you want the svg itself

btw i am copying it into a 21500x10800 canvas in photoshop
its a world map, it has to be zoomable

ok, give me a min.
Thats ok. Well it works on my side...
I have polish labguage version 😅 Sorry for that.
np whats weird is that i didnt get that at all when i pasted
oh i see
you just opened the svg
but its not editable its all 1 layer
i need each country to be a separte layer
Anyway, I use "place embed" from File.
yeah i did too in the first try it perfectly zoomable
but i couldnt make it seperate layers
i tried exporting from illustrator as psd with perserve layers option as well as maximum editablity but still it only exported 1 flat layer
Ok, so you need it as separate layers in PS? Well in AI it is not seperate layers either.
Just seperate paths.
oh
but i can move them independently
can i convert them somehow into shapes?
or import them as seperate paths in ps that would work too
Try simply to copy each layer and paste it into Photoshop.
You'll get that message when you paste into PS:
Choose either path or smart object

and yes you'll have to do it for all the layers separately
If you choose place embedded, you'll have a smart object (If that option is ticked in your preferences) and it will come up as an embedded .ai file, where the different layers are still accessible, but only in Illustrator
If you actually double click on the smart layer, it will open Illustrator
i am more comfortable with ps am not used to illustrator
That's why you need to import all the layers as separate entities within Photoshop to be able to access the layers in photoshop instead of illustrator
I belive there is no way to automate that, right?
there is hundreds
Not that I know of, unles someone coded a script to do so
i still dont understand why cant ps understand paths
Well that's that, or you inport your base map into illustrator
when i past as path it has the strokes but its merged into one
i have about 30 minute experince in illustrator and about a year in ps, id rather edit where i know how to XD
Photoshop is not exactly a fully vector program. It was initially made to retouch photos (hence the name 🙂 )
This is what I think also. And pasting them wil make them jump in the center so he than will have to place them in the right order... Better learn illustartor that that...
i dont want it to be a vector in ps
That would be my go to, honestly
would illustrator even be able to read psb
Then it will be blurry. Unless the size of your paths are gigantic sbut it's generally not the case since vetor files are meant to be resiized with no loss
if I open a typical .ai file in Photoshop and don't keep it vector, then the result is generally pitiful because they are very small files
this is all the formats that Ai can read

so PSB is in the list