#❓ask-a-question
1 messages · Page 45 of 1
CEP?
I like how in photoshop you can just load a script through File, Script, Browser
but you have to code in 1997 javascript or something lol
oh
by uxp i did not mean the uxp developer tools app
i meant the new photoshop dom
here is a simple way to learn
are you naming your script file as .js or .jsx or .psjs?
.js
huh, so i can just write a .psjs file? I don't need to installed the " UXP Developer Tool " ?
the attribute color would exist there?
well uxp is drastically different from cep
but yes you don t need the app if you name it .psjs you will reach uxp scripting
i am looking at cep resources and can't find a way to get group color tag really
yea thats what i thought lol, thanks for looking
Gave +1 Creative Carma to @twin bronze (current: #28 - 68)
It seems that the sync/save did not finish trough.
Is the c: listed as well? I’ve seen strange cases lately, where the first disk to be capped caused issues. Some built-in plugins/modules can also use their own scratch space, distinct from the main one.
It isnt listed
And I’m not using plugins
I’m mostly using actions
Which is a built in photoshop feature
Does anyone know this font?

Have you tried the ussual websites?
Adobe fonts visual search
What's the font
What font is?
I have tried what the font and what font is

Let me try adobe fonts
This is what what the font tell me
If it's not there there is quite a chance that's a custom font
Hmm I see, thank you very much for the help
Killwiners looks a good match
Assuming that the letters were tweaked

Frakturs/Blackfaces are quite popular styles for calligraphy anyway
I’ll look through a few of them, thank you very much
Gave +1 Creative Carma to @vapid flume (current: #8 - 581)
@vapid flume oop… just looked through a website and I came across the font it’s ditty regular 
Oh great ! (and it's free 🙂 )
For instance, the scripts events manager uses the Mondo framework that uses a different cache.
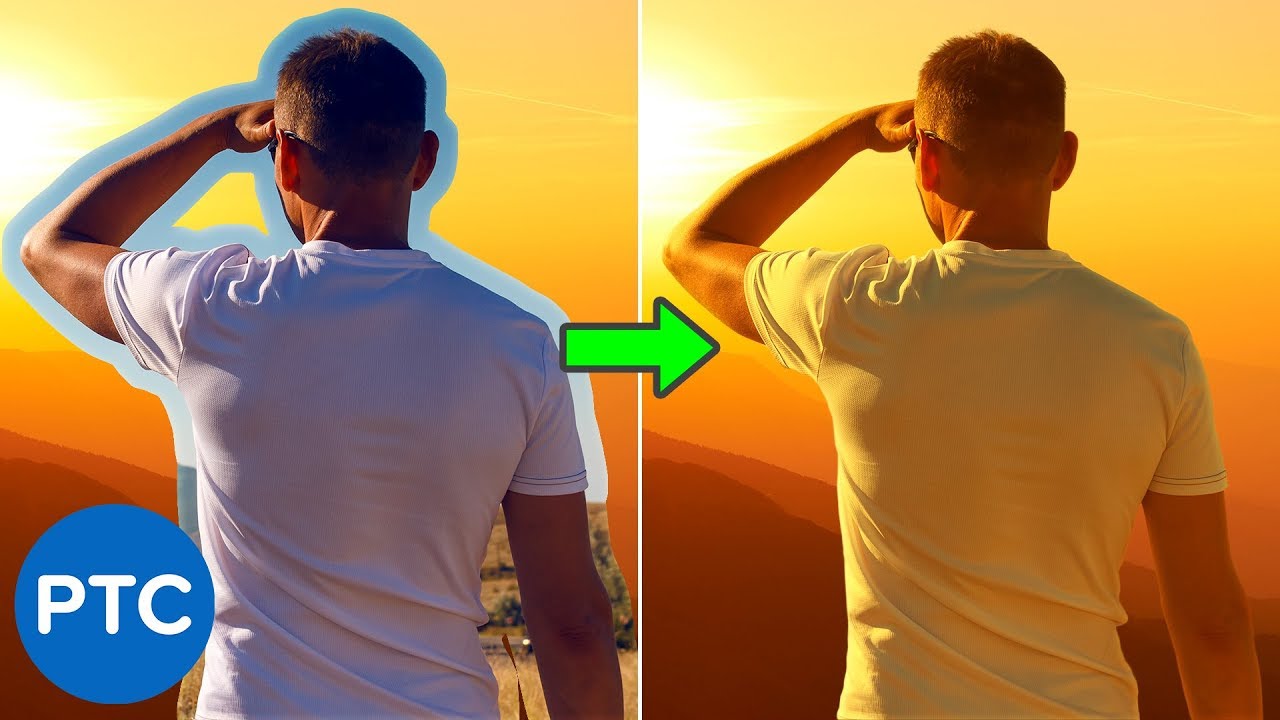
Hi. I'd like to ask a question. On the image you can see a file I created years ago in CS 6 with gradients and a cloud-layer in a Group set to Divide as background and some soft brush dots (white and light grey) in the foreground, each on a seperate layer in a layer group set to Color Dodge. After opening the same file in the newest beta 25.8 (same effect in 25.6 stable) it seems the way how group blending modes are calculated have changed over the years (right side of the image, lower right corner). Does anyone have any idea or know a simple way, how I could achieve the same result in CC? Many thanks in advance.

to me seems like just these two dots were affected, almost like the blending mode has been changed
hiii does anyone have some advice on how i could remove the design from this tag? :)

It's the same file, nothing changed, just opened in different versions of PS. Blending mode excactly the same. 🤷
can you send me the .psd? i wanna check it
just curious
I'd select the area, make Generative fill with Clear area.
In a few moments. Thanks.
Gave +1 Creative Carma to @lunar hollow (current: #177 - 8)
Hi, is it a 16bits file? Are you comparing screenshots at 100% magnification ?
It's at 100% magnification. 8 bits/channel. I could provide you the file for a closer look.
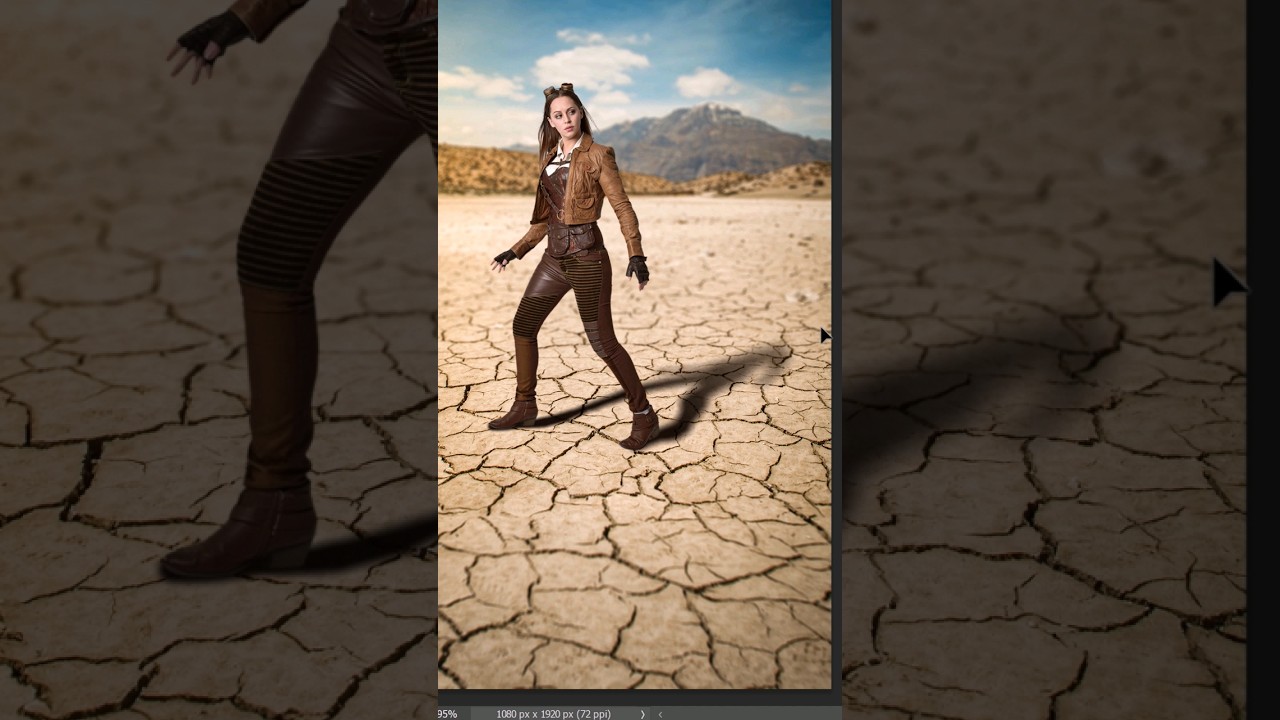
could someone help me figure out how I can achieve this affect in photoshop?

I don't want it to be skewed like in the transformations but I want to be able to warp it but not in curves (if that makes sense)
Does anybody know why photoshop is doing this/how to fix it? I have a fully legit and paid for Photoshop but I've consistently been getting issues with this one file. Is it because I'm using Artboards? I have to close and reopen the file constantly but the glitches continue
Where could I find some textures/assets similar to this distressed/rough style, please?

You can still do that using the warp, just set your curve value to 0 https://imgur.com/IpMkeih

wait how do you access that panel?
no worries <3
Try downloading and opening the file in Photoshop Beta and see if the problem is still there
Okii, thank you!
Where can I download this? It isn't in the list of apps that's 'Available in my plan'
Thank you 🙂
Gave +1 Creative Carma to @serene coral (current: #7 - 848)
there is a 'Beta' tab in the apps section of the Creative Cloud app
how do i make a effect like that?

assuming you mean the less opaque gray stripes, you can duplicate the subject to its own layer and draw 2 light gray rectangles in it, then rotate and lower the opacity
is adobe live going right now
at the moment?
how can i join and check on the live sessions which are going?
many thanks a lot ❤️

hey i am having some trouble with certain files and adobe can someonoen h elp me
you don t need to ask to ask a question mate
as the name of this channel implies
Hi! You need to smooth the edges of the object they are applied to.
is there any other way?
the reason i added the stroke was to kind of cover up a lousy masking
you can draw a line manually
that would be rough
yes, i recommend tracing the arm with the pen tool and delete the outer side
maybe select > modify > smooth could work but not sure
how would you do something like the stussy workmark with the outline, i haven't been able to figure it out

Its just a Layer Style > Stoke... set the stroke to be white and increase the stroke size until you achieve that same effect.
oh wow i forgot about that, preciate it
how do i find the weaving filters in photoshop? i remember there being something like it that i found before but cant find it again
I'm assuming that you're thinking of the "Filter Gallery"? If so, select a Layer and go to the main menu: Filter > Filter Gallery...
is there a way to crop a image to the size and the shape of the image?
Say more. :)
i find it hard to explane but i can show what i mean
Can you show me a screen shot of Photoshop with your image and the Layers Panel open?
so this is the size of the image
and i want the outline to be the face

just 1 layer
Does noise reduction effect grain?
So you want the background to be transparent then? Is that correct?
Yes. It likely will.
Sick, just need to make sure for a assignment 🤣
i want the pic to just be the face no background no transparancy
No background means that it is transparent.
Is there any feature or way to have a rubber that takes away only one specific colour?
"Rubber?" -> You can select by Color Range and then use a Layer Mask to hide that selected color.
yes but cuz of the outline of the pic when i try and add color to it transparent part as well if u understand
yea i tried but it keeps picking up grey type gradients :/
oh srry
Sorry. I do not understand what you're talking about.
@ripe quest can we VC i think i can explan it better like that, along that i can so more what i mean
i just realised i can i adjust the fuzziness

I cannot do voice chat at the moment.
ok ill try and show u a diff way
1 sec
There or Window > Contextual Task Bar...

ah thanks so much 😅
Is this even in Photoshop? Are you using Photoshop?
@ripe quest haopfully this help more explane what i mean
so what ive selected is what i wanna crop (white line)
i hit "crop selected"
and it crops to the yellow line
and i dont wan it to do that
i want the crop to be what i selected (white line)
hope that makes more sence of what i wanna try and do

no it's gimp
ik it not the same at all
i just want to know if what im asking is possible at all
I have no idea. I don't use GIMP. Sorry.
but can u do what im asking in PS?
Bitmaps are rectangular. You cannot crop an image into the shape of a rhomboid or skewed rectangle. You would have to draw a selection and use that selection to make a mask. Then you mask out (hide) the pixels that you don't want to see. Then you export the image out to PNG so that it has a transparent background. This will give the illusion of an irregular shape.
Its always going to be a rectangle where the corners are perpendicular and where the document/canvas is aligned to the Window. There are no irregularly shaped bitmaps. If they appear to be, its just a rectangle with a mask and/or transparent pixels.

Hope this makes sense.

anyone know how to describe the "ELLAS" part of the font
so i can find something similar
thanks 🙂
Sans-serif. Hand writing or hand printed, maybe.
thanks a lot 🙏 !
Hey, would anyone be able to suggest the best possible way to extract this text? - They're 3 notes left by my sister-in-laws father before he died recently. Their mum wants to know if I can get a few notes like this embroidered into some kind of dress/fabric.


The white one is fine, - I was able to just do a curves adjustment and the result looked like this:

It's the other two which are more of a struggle.
This is my best attempt so far, but does anyone have any better solutions?
I was going to say: convert to black and white but it seems you've already tried that. :)

I've tried a few techniques like colour picker, gussian blur with a curves adjustment to remove the 'spikey-ness' and to be honest, I think this is the best I'm going to get,,,


Is there a way I could cut out only the non-red part

I have a bunch of marble brushes, I can't get this still.

Such backs are wonderful for designs, I would like to make own.
Or these.


You could try using Gen Fill and/or Firefly... (or other generative services)


I think you'd be better learning and using the blend modes properly.
What's your full/image and end goal? - I can't really get any overall context from your screenshot
These?

Yeah. That's it
Just a little edit I tried to make for a friend

Thanks, I'll try playing around with them
Gave +1 Creative Carma to @sly hawk (current: #6 - 858)
So you have the character, but you want to add that red flare/light?
Yeah
You should at least get the idea here for how it can be used. - Note that there is no need to try and 'cut around' the glow if you start with a half decent image.
Hey, how would i make a colour look weathered?
Like i wanna keep the colour bright but make it look weathered
I need advice from experienced artists on how much I need to charge for my for my illustrations, dm if willing to help thank you
If you're literally talking about a COLOUR and not TEXTURE, I'd simply suggest you lower the saturation.
But if you want a more weathered texture, I'd find something online and add it over the top with a blend mode...
I accidentally deleted the little bar thing with the eraser, brushes, and stuff like that. Does anyone know how to get it back?

Try hitting TAB?
Anyone help me real quick I have a question on how to add letters that look similar to what I have going
Otherwise...

THANK YOU SMMMM
Gave +1 Creative Carma to @sly hawk (current: #6 - 859)
Usually it's a case of finding a matching or at least similar font online.
Can you share an image?

Cheers man, I dont think im allowed to use outsourced images but ill definitely try
any way I could stream and show someone?
This would be your general logic/workflow...
...obviously if you can follow and get that far... you'd then be able to nudge the other letters around to help fit it all in.
Ok. try using assets INSIDE photoshop, like Render > Clouds...
Oh my god James you makin that look easy thank you man
Gave +1 Creative Carma to @sly hawk (current: #6 - 860)
Can I ask what is this for 😭
only if u plan on helping bby
My photoshop skills ain't great
damn
Some people are so talented for drawing.
I know AI is awesome
Still in hunt for this font.
I just need itnto solve my all Life design problems.
It is just perfect for ads.

I have Moderna bought, similar, but not like this one.
Is it Antartida, umm.
Anyone know to fix that stroke?

Hello, Did anyone here was succesful turning a picture to watercolor painting or something simliar with generative fill?
for that you usually wanna use other ai tools, civitai was cooking image to image editing but i haven't read about them for a while
i'd manually errase the rought edges cuz i don't know of any automatic way or tool that could do that
maybe google it up
thank you
Gave +1 Creative Carma to @lunar hollow (current: #122 - 12)
hi guys i dont know why but my mice left button is lockt. same if i go to settins cant do nothing

try restarting Photoshop first
Click on "Reset Preferences on Quit" in the "General" tab and press OK to confirm. Press OK to close the Preferences window. Restart Photoshop.
done
didn't help?
no..
Silly question I know, but does it just happen in Photoshop or everywhere else as well?
only in photoshop
you got mac or windows?
if if i untick something and press X to exit it ticks back and dont go exit

windows 11
i need to press escape button
something is wrong
go %appdata% - Adobe - Adobe Photoshop - save a copy of that folder then try deleting it
What happens if you click Enter? Because clicking escape will do the same as clicking "cancel"
so basically you don't commit to anything when you click escape
If i press enter nothing hapening
some ryzen cpu ahh situation
i tryed to delete but nothing helping
7800x ryzen
i have
have you tried restarting the pc...?
Which version do you have? can you try - temporarily- to revert back to an earlier version?
You can find that in the CC app
i have new version

Let us know how it's going!
ok tnks!
same...
See if this post helps
https://community.adobe.com/t5/photoshop-ecosystem-discussions/left-click-lock/td-p/13634435
if it doesn't, I'm afraid that we will have to redirect you to the Customer service

https://community.adobe.com
For the last few days I have had this annoying issue where the left mouse button sticks on. Say if I am doing a free transform or panning around the screen (space bar + left click). I'll release the left mouse button but when I move the mouse the action keeps happening as though the left button is s...
Read the post carefully and try the solutions given by the people here (not just the "correct" one, your issue may be slightly different the the OP's)
If you google "picture to watercolor painting photoshop genfill" you'll find plenty of short video guides - e.g. this one is less than 1 min long:
https://www.youtube.com/shorts/IqbDDRgzSg4

Use this @Photoshop Generative Fill hack to turn a photo into a watercolor painting!
You can try this with everything (pencil drawings, textures, oil paintings in the style of...)!
Step by step:
- Go to Photoshop (Bèta) Quick Mask Mode (Q)
- Fill with 30% Grey (Edit, Fill, Color)
- Exit Photoshop Quick Mask Mode (Q). You now have a 30% opa...
Like this. - although I'd be interested to see how your PSD is constructed.
i didi google but for some reason i tried it multiple times and it only worked once
i cannot figure out what i am doing incorrectly
What picture are you trying to convert? Are you ok sharing it here?
I can try it at my side @undone girder and if it works, I'll show you an exact recording of the process I followed.
Here we go @undone girder
Hello, I know you can rasterize a smart object but if I edited within the smart object would the result appear sharper? Is that the idea?
Otherwise I'm looking at path tracing. :/
Hey! Technically not new to photoshop as I used it around 19 years ago, but it feels like Im completely new as its much more different, and I didnt really use it on a hardcore level back then. I bought PS now because I want to try to make some posters of different sizes to hang on our walls, so I was wondering is there a feature to add lines to cover bleed cuts? Is there a feature / template to insert a mat around my image? I got my image saved as a vector (svg) which should not loose its quality if I size it down or up, but if I add text to my poster will that be affected if i scale it down? or up?
Kind regards
as soon as you import your .svg image into photoshop it will become raster and you wont be able to scale it without lossing quality, but, as long as you keep .svg file you can just resize it in illustrator and then convert it to jpeg/png and then import to photoshop
that way you can resize it without losing the quality
If you have a document opened and it's the size you want it to be printed, you can use canvas size command and set it to relative mode to add specific size on the edges. prior to that, you can add guides on the edges of your canvas that will stay in place after adding canvas space
as long as imported media is a smart object, it will keep it's original size. Imported vector media will be scaled accordingly
How do I "choose" to import it as a smart object? I just opened a canvas and > import underneat the canvas
it does it automatically as soon as you drag it onto canvas
And should I import it as a smart object and not having to worry about the quality if i scale up / down?
given you haven't changed it in the settings, eveything should be imported as a smart object. Smart object will have  icon
icon
Or follow the guide you wrote @lunar hollow and import it into illustrator and convert?
What I want to do is; Make my image scaleable > make a few mockups in different sizes > Show the missus > let her choose size
you can try both wertos and mine methods and see what works for you, he's an expert in ps while me being just a guy that doesn't know all the aspects
to me, adding Illustrator to this process is an unnecessary step - Photoshop can scale vector graphics
Thank you both for the feedback 🙂
I'm not sure what is behind "make my image scaleable", can you clarify this?
Sure thing, I might not have used the correct words / wording as I am not an english native speaker. I'll try to clarify; My missus wants pictures on our wall but she is unsure of the sizes, so my goal is to take a picture of the wall ('s) > import them and use them as a mockup template. I then insert various frames and insert my picture into the frames so she can choose which size she wants. My image (for testing purposes) is a 2:3 aspect ratio portrait image and if I have understood correctly it can fit well with theese frame sizes; 5x7 (small I know), 12x18, 16x20, 18x24, 24x36 and 30x40. So my goal is to just make the mockup with different frames > import the SVG and make the poster or whatever and then scale it easily up / down into the frames so I can show it to her and let her pick the size she wants
Sorry for the confusion
So what I ment with scaleable is that since its a SVG and they dont lose their quality if they are zoomed or resizes I figured I can make the poster in one canva size > scale it down to fit all the "frames" (I make the poster in 30x40 to begin with, then shrink it to fit all the smaller sizes)
This might be a dumb way to do it, but I dont know any other way and this is what I have figured out myself so if you have any better ideas I'm all ears 🙂
the tricky part will be matching the real size of the print. You could take a A4 paper sheet and place it on the wall when taking the photo. This will be you reference for relative size and will make it easier matching the rest of the sizes
Couldn't I just insert a frame element > define its size?
ok, what size would you define? your photo of the wall is going to be a specific pixel size. placing a 30x40 poster on it will probably cover the size of the photo itself
True, it wont be 100% accurate
I guess I could Take a picture with a wall > insert all the frames > showcase it that way
So she see the different sizes
It's not quite like that. - It's basically an object nested inside another object. - what's your end goal and we can hopefully help pick the best workflow for you.
hello dear people >.< i recently found a small side hustle at my fathers job, he works at a sports company which has all these competitions and such, but thats not what really matters. im here to ask a small question regarding some photoshop functions. i know nothing about photoshop (ive watched some funny photoshop tutorial-ish videos, but that didnt teach me much), so help is really important for me. below is an estimate of the export i want to do. what are some functions which are used in this photo? i want to know how to put 2 players on top of eachother (like in the photo, one is in front and one is behind), how to put the almost-transparent faces in the background and how to put an overall background (as in the photo, you can see that behind everything else is a fighting ring). what are all of these functions called? so i can go to youtube and get straight to business. many thanks in advance

hello, I have an object in photoshop which varies greatly in color. I was wondering if there is a way to apply an outer glow which corresponds to the shifting color of said object?
I just found the answer to it, sorry! If anyone finds this someday and is wondering how to do this, just copy the layer, put it below the original layer, and add a gaussian blur to it.
Well the faces behind are some masks and lowered opacity/fill
The layer on top of each other as u said its nothing special just layers placed over another layer
And that background some textures maybe?...
is there ruler or show coordinates? my photoshop is language native portuguese

i want to do it like this, but the balls are crooked I need a ruler or show coordinates

theese can help u...

ty
Gave +1 Creative Carma to @thick tangle (current: #232 - 6)
np
That's all fine and easy enough to achieve. - I'm not free now but if you can hang on for a couple of hours, I'll provide you with some specific guidance. - if you have two actual shots you want to use, can you DM them to me? I'll then use them in my example.
not a problem. thanks a lot
Gave +1 Creative Carma to @sly hawk (current: #6 - 861)
Can someone help/walk me through something im trying to do in photoshop?
i'm seeking for help for weeks
i want to make my sketch into a cartoon

but i really don't know how to dit
it
and yt isn't helping
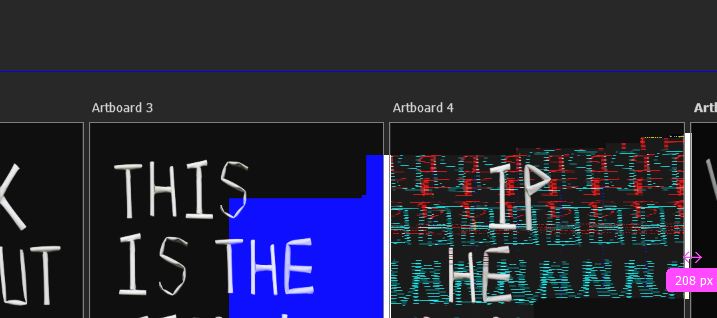
hey, can someone tell me how i can write a text in 7px high like picture one. every font looks like picture 2 :/


is there a similar server to this for illustrator or can i ask illustrator questions here ?
anyone know if theres an offiical after effects discord?
I have an animated WEBP file, but would like to edit it in photoshop, but when opening, doesn't show as animated anymore, its just a flat image. Do I need to have the webp converted to gif before I can edit or?
Hey! Yes: https://discord.gg/adobeillustrator
Hello! And yes, the Adobe video channel: https://discord.gg/adobepremiere
Hi, what are your settings in the character panel? Is it a pixel font?
Look for a specific PIXEL style font.
Hi! That happens because fonts are not made for such small sizes, usually. Try using a pixel font and turn off all anti-aliasing within Photoshop for the text
i download a pixelfont but it looks good about 30px but i need like 6
Archive of freely downloadable fonts. Browse by alphabetical listing, by style, by author or by popularity.
Hi! Could you explain what you want your end result to look like?
Which one?
Hi, what are you exactly struggling with? I believe we’ve already replied to you… There is no filter, you basically draw the edges/contours, then fill in colors... Which kind of comic are you after? There is also firefly that accepts structure, now.
This is a 7 pixels tall font, and it looks like you are trying to make fit in a 5 pixels high space.
And did you disable anti aliasing, as Dena’s suggested?
hi
is there no way to actually completely change an images color
not hue and saturation, i have a hex code that i want to change it to
disabling anti aliasing is critical. - You can see me do this at about 1.20 mins
Yes. Sort of. Via a gradient map.
hm?
What object was it?
Gave +1 Creative Carma to @sly hawk (current: #6 - 862)
uhh trying to change this to #bc9879

the whole thing yes
oh, you posted the fire link!
cool. Just gotta dash off, I'll try it with your flame in a bit

Can i send you an dm?
I'm almost done with my design, but I need one more adjustment, I want the edges to be transparent but to me there not gradual enough, it does fade but not really gradually, it's hard to explain but I hope someone can understand what I'm trying to say, I'll provide screenshots. So in photoshop I have the edges gradually become transparent, but when I look at mockups in printify, it doesn't look ideal to me. how can I fix this?


I want it to become more gradual, not suttle, nor too slow when it goes gradient
Hey there!
How could i move an artboard?
i gto a business card, the back is horizontal, the front needs to be vertical.
But i couldnt really find a tutorial on youtube.
Do i just change the canvas size ?
you mean like a "card" ?
Hi! There are several new modes for the gradients, with different slopes, or gammas… But your example does not tell us how you faded the edges.
I'd PM you the clip but the file is too large,,, video here shows how you can clip, use smart objects, apply some overlay effects etc,
Hi, there is an artboards panel. Check in windows>Artboards
I put on mask layer, and then used the gradient tool mirrored reversed, and then applied and repeat for the two other sides.
oh my lord
i did not expect such a video
thanks a lot
def getting a raise after this one
To do a decent gradient you need a suprisingly LARGE border for the graduation effect.
Hi, I would place a circle at the 12 o clock spot, move the anchor point to the center of the main circle, then transform a copy with shift+ctrl+T and with 72 degrees (360/5) of rotation. Then do a repeat Ctrl+Shift+Alt+T 3 more times.
ah thx!
Yes, you can on a brush.
@last eagle @hushed niche - Yep, this worked perfectly 🙂
would anyone be able to give me a font suggestion to write the illustrators name in the style of these illustrations

thanks 🙂
How do you do this???


My old Favourite.... Helvetica Neue.
I think having a contrasting font, helps focus the eye on the art .
Some swirly style handwritten font that you'd find on a greetings card I think would look kinda poor.
Hey there ... any clue on why community.adobe always skips back to the main page when trying to log in ? I cant even see any forum posts like that :/
makes me insane xDD
Thanks for the visual recap !
Gave +1 Creative Carma to @sly hawk (current: #6 - 863)
I wanted to change the UIcolors, but i saw that this doesnt work anymore?
Anyone got me a backup of UIcolors.txt ? :D
Looks like lots of gradients, some outer glows, outer and inner glows and then some noise added.
I assumed it would, but figured you'd already tried that and failed.
I did not expect photoshop doing that tbf xD
Thanksss
I would like to give me a preview of a smartobject (busienss card mockup), how would i arrange that so i can preview that as a window on my 3rd screen? 
Canva has a nice feature for that tho
You can have multiple instances/windows open of the same file. - but what you've descibed wouldn't need that anyway
i could just use the smartobject with the mockup and move my window to the 3rd screen right? :D
Yes.
Just make sure to hit SAVE on the nested smart object for the mock-up page to update,
it won't technically update in instant 'real-time' - but a quick cntrl+S or whatever will quickly refresh the view
@elfin dawn
yes works. thx a lot!
Gave +1 Creative Carma to @sly hawk (current: #6 - 864)
Is there a "asking for feedback" channel?
ah thx :D
Gave +1 Creative Carma to @lucid crane (current: #36 - 50)
how did he "drag it over there"?
Activate the Move Tool (V). Then hold the ALT key, click on the Artboard name and drag that, it should clone the artboard.
thanks it worked
just to know, he already had a duplicate "frame 2" on "frame 1", how did he move it?
😕
the internet let me down for this question, so here i am. can i move this somewhere so i dont need to click it, find the window i want, and then go back every time? i know theres the bar at the top, but i have too many files open at once to see all of them

Click on the Artboard Name.
I don't think you can move that.
damn okay
Hi I may be of help.
Hello, Im running into an issue with the random fill pattern option, in the preview everything is the right size and I can see all of the dots but when I press OK it only shoes a small square of the preview, I think im missing something can someone help?


Hello so I have this pattern (image) which I want to make into a semi-circle

I've used the warp tool with arc and set it to 100%, but the thing is that I want it to be equally distorted. Can anyone help me?

Or if anyone knows how to adjust the image into a path or shape it would be helpful
anyone have ag ood idea on how i would make this entire thing the river

im trying with clone stsamp tool but its not looking good i need to crop that out and get it to be the water
a newbie here, how can i make my rectangle opaque? blending mode is at normal and opacity is 100%

it's also ruining my clipping mask

You could try drawing a vector arc and then using Fill with Pattern > Place Along Path. This video a bit old but it shows the technique: https://youtu.be/VoRMDjvedAg?si=36iQ69QHlrtn14kR

Photoshop - Bend and Scale Objects along a Path
Learn to make objects that will bend and scale along a path using Photoshop. You will see how to use shapes and also photos for this technique. It's fun do do and quicker and easier than you might imagine.
SKILLSHARE AND UDEMY COUPONS
Skillshare.com (all classes) ► https://www.skillshare.com/r/u...
You could try using Generative Fill but its probably still going to require some trial and error and a lot of clean-up...

That rect shape layer is below the horn. Move the layer in the Layers Panel so that its above it.
cant use photoshop 2024
unfortunately
Then you'll have to do it the hard way... try and copy and paste those parts of the railing and attempt to position them next to each other.
u got this reuslt with generative fill?
Gen Fill and the Remove Tool.
dang that came out pretty good
It still would need work but it can save a lot of time compared to old school methods.
Yeah I already watched that hehe, it results in something like this. Anyways thx for the help

Its probably easier with Adobe Illustrator.
yeah im just not sure if were allowed to use it lol
thanks man
Gave +1 Creative Carma to @ripe quest (current: #3 - 1893)
hate to pester but does anyone have a solution Im in a rush
Well... copy/paste and Clone Stamp your way to victory. heh
That will be my next shot, the same woman has the same tutorial but for illustrator and it seems to be what I want . I just wanted to try it first on Ps cause that's where I have more knowledge
thx
That’s what I’m doing 🥲 lowkey ur ai gen 100x looks better tho
Anyone how to how replicate this sort of gradient? Either in photoshop or illustrator. The gradient has to be set per word

Without creating it into outlines aka the text should still be editable
If an image has 3 colours for example, how can I only isolate one colour and remove the rest? Select tools don't work perfectly.
Where would be the best place for beginners to learn the basics of photoshop?
color range selection
Thanks, I used Inkscape to split the colours 😂
Gave +1 Creative Carma to @serene coral (current: #7 - 849)
in Photoshop, I'd just go with gradients as clipping masks and a layer mask to contain them within a single word. You could also make each word be a separate type layer and use gradient overlay layer style
Good morning!
Photoshop School day 2 for me. I have a smart object (imported vectorfile .svg) that is 13.3x16.6 which I am gonna use for a poster design. I set my back canvas to 30x40 as that is the highest size I want > When I import the image it really doesnt fit well, so I have to resize it - though, I want to add the "bottom weighted matboard" effect (since its an art design). Say I want a matboard size that is ; 2 inches on the sides and top, and 3 on the bottom. I can manually scale it using the rulers, but its hard getting it exactly right so I tried using resize with numbers (example 24x32) and that didnt size up the image to the 30x40 canvas... I could remove the background and size the image to 30x40, then scale it down, then add a background with the specific inches I want and / or use percentages to add the "matboard effect" but surely there must be an easier way than this long process? Thanks in advance
so you have the canvas of a specific size, want your mat to be a specific size and have your design of specific dimensions... does it all add up? I mean math? Is this the problem here?
It should add up if I am not misunderstanding something, the aspect ratio is 4:5 and the canvas is 30x40, so should not be a problem to achieve the effect that I want? I am able to "manually" size the image to achieve the similar effect, but it wont be spot on accurate. I did have a good result with having the canvas the same size as the image > canva size > adjust by xx percent on width and xx percent on top, but since the image I am importing is not in 30x40 size I need to scale it up and make it fit nice on the 30x40 canvas so I can use that as a template and downscale (as I have read that downscaling is always better than upscaling (?) )
I guess my question was if there is a way to resize the imported image with inputting i.e 28x38 (that would create a 2 inch matboard around it)? Becuase when I use the Image > Image Size > set a number it doesnt get anywhere close to canva size
And I dont want my mat to be a specific size per say, I will use the canvas as the mat to achieve the effect. The canvas needs to be 2 inc bigger on sides and top and a little bigger on bottom, that way I'd achieve the bottom weighted matboard effect
Image Size affects your whole canvas together with the contents. Since you want to resize an imported image (a single layer) you have to use the transform mode (ctrl+T) and input your desired size at the top in the options bar while the transform mode is active
Oh, thank you for that
I'm noticing some layers are rescaling to 1023.98 when I put 1024.. any way to fix this? The seams were driving me nuts until I discovered that was the issue..........
How do i make something like this? That transparent glass kinda effect

is there like a video that i can watch?
locked aspect ratio? would help if you sent screenshot of the whole screen
I think I suspect what the issue is.. I noticed some edges a pixel thick were kinda transparent..
That's what I get for using free images from Adobe.
MapleStory? xD I'd look up "transparent glass .png" on Google and use one of those images for a quick and dirty solution.
I would do with a custom gradient overlay (in the layer styles)
It will need to be black/white/black/white with hard stops instead of gentle gradients

Add a stroke with a gradient
oh ignore me. @vapid flume said it already 🙂
Just wanted to ask, are these type of shapes, frames made from altering normal rectangles with anchor points, maybe using pen tool for addons or what? If so, how would you get it to be so symmetrical

If you cut them at the right place, duplicate them and merge the shapes together it will do. However, better done in Illustrator where you'll be able to merge vector shapes efficiently. Another option would be to create a mirror effect (still in illustrator)
Basically, it's like creating a pattern, you create only one half (for example in the case iof those with a dot in the middle, you need to create only a half of a circle) and duplicate + flip horizontally
ah okay makes sense, I tried finding some tutorials on this, not much to go by online so wanted to ask here since I don't know where to start from, thank you
In making the shape I use the pen tool right? These parts
I understand duplicating it so it's the same on both sides but, I'm still new to this
so I don't rly understand in starting to make it? I guess
If you don't really care about the sahpes being really united, you can just flip a duplicate of one side in Photoshop and align them
If you want to do it preceisely, you can , when transforming (CTRL+T) move the reference point, the point from which the shape will flip. and instead of being in the center, you can position it on the edge (it will snap to the border). That wy when you right click, with your transformation active, you will choose "flip horizontally" - at the bottom of th contextual menu) and it will flip VERY PRECISELY from the border


yeah so I just make it, duplicate it, flip horizontaly and then merge
Yes, the pen tool: but did you notice that, apart the shading, those shapes are also vertically symmetrical?
yeah, did he only make 1/4th of it then did the same thing? only flipped vertically?
Excellent thinking! You'll have to make more duplicates and flip one vertically and flip those two horizontally
thank you a lot guys makes more sense now
I tried it but struggled to to get the same gradient to apply over the stroke AND the fill at the same time, so had to kinda cheat....
(I know I don't need to explain/teach you how to make a gradient like Sandrines example above)
If you turn it into a smart object, you could do the flipping and duplicating FIRST and the design later! 🙂
Thanks for that, but how i fix the rest? I actually just erase this image background and then do the stroke, may you show me how to do it properly ?
Gave +1 Creative Carma to @sly hawk (current: #6 - 865)
It looks like the white has some wierd other shades in it. - it's easy enough to fix though
Oh, lets fix that error in the cup too...
thank you so much, I did learn the use of smart object but I didn't know you could do it on this too
Gave +1 Creative Carma to @sly hawk (current: #6 - 866)
only ever used it on templates, mockups from what I remember
You can save smart objects INSIDE other smart objects, inception style! - meaning you could save your final shape as a smart object, then apply all sorts of colour overlays, bevels, shadows etc... and then this will also work when you tweak your shapes too
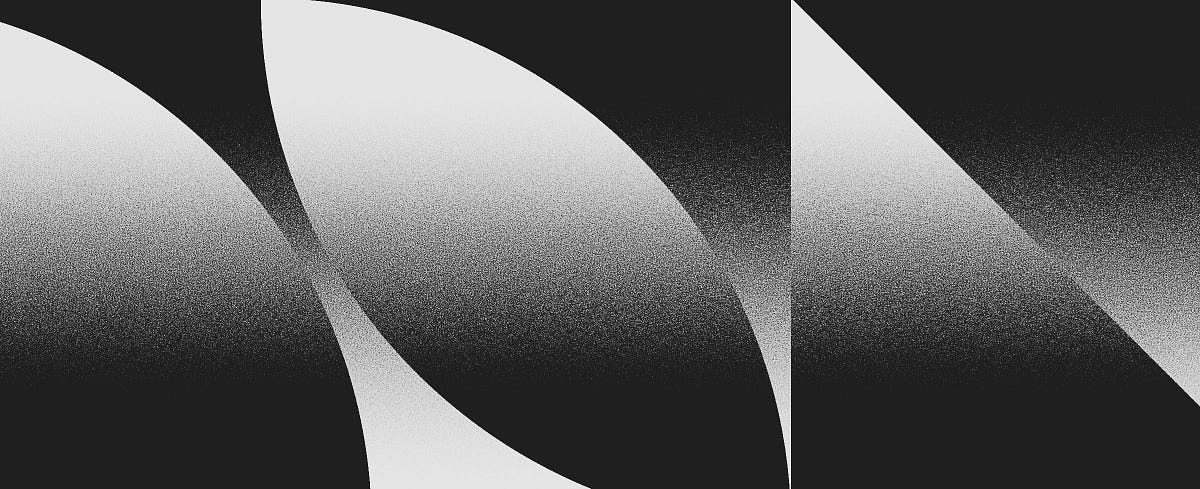
Is there an easy way of making this effect on a layer

the dots from the t-shirt?
Yes - it starts of solid then goes down to this.
Ive tried gradient but doesnt look right
hello i cant make a normal map for some reason and this has been a major pain. ive been trying to fix this for awhile


From the gradient, add some noise from one of these methods : https://medium.com/@stefanhrlemann/how-to-create-noisy-risograph-style-gradients-and-textures-in-photoshop-in-3-ways-394d6012a93a
Medium
Originally published at Stefan Hürlemann — Designer.
I'm sure there are easier, less faffy ways, but this is one option....
...10 times easier if you can download the noise covered gradient online first
Thank you sooooo much, there's no way I can figuring out all that without you
Gave +1 Creative Carma to @sly hawk (current: #6 - 867)
https://i.imgur.com/LGcuClR.png
What could I do to improve this?
https://i.imgur.com/M768GSq.png
(don't mind this thing, I'll cut it out)

How to show that purple line when you move image?

Please use the #📝project-feedback for suggestions/advice on projects.
Main menu: View > Show > Smart Guides... should be toggled on.
how to make the background transparent while keeping the gradient?

In the gradient editor use the opacity tabs to make one end fully or partially transparent.
Hi, so i want to convert my image from sRBG to CMYK. I've used "convert to Profile" and changed the image mode to CMYK. Then I exported it as jpg, since png doesn't support cmyk. I also unchecked "convert to srgb" and checked "embed color profile". But when i inspected the color profile in Apple Preview it sais sRGB. What am I missing or is there another way to do it?
tysm
let's start from the beginning - why do you need a cmyk jpg?
hi, i play this game that lets users create clothes. the textures im using having different lighting on pictures, how do i go about making the textures have the same lighting?
Thanks for answering. I'm creating a magazine. It's a project for university and cmyk is required.
Gave +1 Creative Carma to @serene coral (current: #7 - 850)
you have to work on the edge of the texture to match the exposure change. I would grab a soft light layer and white or black low flow brush
so you have the whole magazine created in Photoshop and want to export it for print in cmyk?
I wanna import them to inDesign.
like this?

ahh i see i got it to work thanks
So I'm using inDesign for the magazine and want to convert the images to cmyk in photoshop before placing them in inDesign.
In this case I would export regular RGB jpg and let InDesign handle the cmyk conversion.
you'll export from InDesign to cmyk pdf, right?
Correct
The professor suggested to not do it this way. He provided the way using image mode, that apparently doesn't work.
https://community.adobe.com/t5/photoshop-ecosystem-discussions/convert-jpg-image-from-rgb-to-cmyk/m-p/10365092
I'm testing it right now and you're right Windows displays cmyk exported jpegs as rgb (remember to use save as not export as as it strips the metadata). However, these jpegs are saved in cmyk gamut so "what you see is what you get". I'll do some more research and get back to you!
https://community.adobe.com
I have a lot of rgb jpg images but when I want to bring them into a book and print this book, the colours need to be in cmyk. Is there any possibility to convert this images without any colour changement? For example that the orange are going to be darker. The photos are mostly about trains so with ...
Thank you. I did use export, so that might be one mistake.
I think i found a sneaky way that works. But surely there has to be a better one. So if you duplicate the image layer and then export layers to files the images are in cmyk.
is there a defacto standard course for learning photoshop 2024? No Remote AI stuff (Moral issues)
i need to rotate this shape ( it's a seperate layer) By 12 degrees clockwise. How can i input the exact angle? Image rotation rotates the entire canvas

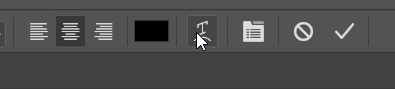
Edit > Transform (or Ctrl T on the kb). Then type in the rotation angle into the field in the Options bar...

sick i totally forgot that bc of the panic 😂
thank you!!!
@calm palm - Use Layer Styles. Probably a Color Overlay and an Inner Glow with specific/strategic color choices.

okay this is strange, my gradient tool is not working, i am trying to create a reflection of something and then when using gradient tool its not...doing what its supposed to do
hello guys. i was just wondering on how to tilt an image

in this pic you can kind of see to the left that it seems tilted up and to the right
the background image*
GOT IT so I just make the edges dark instead of center light, :)) thanks
Gave +1 Creative Carma to @ripe quest (current: #3 - 1894)
Edit > Transform > Rotate... If you want to tilt/rotate it to a specific angle, I just explained this above: #❓ask-a-question message
thank you!
Gave +1 Creative Carma to @ripe quest (current: #3 - 1895)
yo, why is my gradient tool not working
its strange
I have no idea.
You'll have to provide a better description of the issue besides "not working."
when i click on add layer mask, and then use gradient tool dragging from bottom to up in a line to create the reflection of the object
it just doesnt...do it...
like thats all there is to it, i dont know what else to say
another question. whenever i use the polygonal lasso tool, i use fill color, but i get a weird sort of texture to it?

Layer Masks use greyscale to either show or hide pixels. (Black conceals. White reveals.) Are you sure there is enough contrast in the Gradient you're using. Feel free to share screen shots because I can't "imagine" the problem. Sorry.
No need to apologize man
but yeah thats the thing im trying to apply it onto
Set "Feather" to 0

This doesn't help. I need to see the Layers Panel. The Gradient Settings, etc. I obviously cannot diagnose this just seeing the image.
ohh that you meant
thanks again
Gave +1 Creative Carma to @ripe quest (current: #3 - 1896)

The Layer Mask is completely white meaning that the entire layer is visible.
right, i never had to change the color of it as it always worked
so now what
Cntrl I
Press Control I and then it will be black
then get a soft white brush and go over the area u want highlighting
okay but then what about the gradient, thats honestly so easy it takes one click to make a good reflection
i gotta know the issue for future
Wdym sorry?
were you talking to me?
Yup
Adjust the Gradient you're using so that its black and white....
still not working
i even checked the options
so strange, today morning it was
i think i will reset everything in photoshop, perhaps i clicked on something that might have changed it
Screen shot the entire Photoshop GUI with the Layers Panel open.
Do you understand how Layer Masks work?
Because that should be the first thing if not...
i have been using them for a while for almost every project, but i wont say i know 100% of it.
There doesn't seem to be anything painted on the Layer Mask. It appears completely white. That means the layer is 100% visible.
Big ask here, anybody able to do a step by step design with me? I have some consistent issues and would like live help
i did as you said and chose the gradient option of black and white in first 5 seconds of the video
and i even made it black according to LVP Graphics, yet it still did not work

You need to paint it with a white colored soft brush
alright
@ripe quest wdym?
okay it works now 

I do that for my football edits all the time
This made me crack up

@ripe quest lol sorry, i was so silly i forgot it wasnt on normal, thanks for noticing
Gave +1 Creative Carma to @ripe quest (current: #3 - 1897)
What do you mean, what do I mean?

They are trying to use the Gradient Tool on a Layer Mask. Not "do lighting".
Ohhh mb
No i was trying to make a reflection because the perfume is standing on a reflective marble surface.
Oh ok
btw what are you trying to design?
Curtis jones Matchday poster
I got like 1 hour to do it 😭
I already have done a lil bit
Idk what to do

It looks off.. Idk how
what is the goal for the poster
the hair looks off, that is for sure
the upper body

I fogor how to speak 💀
lol dw relax
this is different images yes?
do you have the background picture?
before posting the football guy on it, did you try to blend the guy into the background picture?
using curves or any methods?
there are 3, i only know of 2 (3rd one d.human knows)
Alright one second i will show you one of the biggest and easiest tricks of photoshop
could you give me both of them
both the pictures?
In this tutorial, you will learn how to color match images in Photoshop.
You're going to learn a powerful color matching technique using the Curves Adjustment Layer and the Auto Options.
This technique is great for composites with different tones.
LINKS - How to Color Match Images in Photoshop
Sky Replacement Technique - 90 Second Tip
► ht...
incase you not getting it i will try myself
Ok 1 sec
alrigh
I need to go
I will be busy for a lil bit
I will most likely do a different project.
Thanks anyway.
ahaha alright
cya
tc
Btw, i am sorry i know this could be beneficial for others, but could you please delete this, its for a client
Nvm, My 2 hour long plan was cancelled
So, where were we?
Ah yes
well
the way to make it look slightly better is to blend it with background
Bc I just copied and pasted the background from another project
just watch the 2 minute video man, trust me its so easy to implement
not a problem
Idk if that will solve my problem. It's been zoomed in and it has lost quality
bruh
wha?
broski just watch the video first, IF there is problems then ill tell what to do
1:16 saying to do smth which idk 💀
Im overwhelmed atm. If any more stress goes to me I will quit. I hate my brain icl
But that is how it is
ty anyway
why is my stroke bumpy like that


turn them all off for ur brushstroke
^^
^^
hold ctrl (windows idk about mac) and click on the bigger football guy image
lol okay, send me the images
not psd
dont have em
ill do it, while im at it i will record the entire thing and send you so you know in future
you dont have the images? you told me earlier you have the images in seperate
The background was from sm1 elses project and I deleted them
I have the small guy PNg but that is it
is there a way to remove the transparent-like background? i want it to be pure gray

im using the gray gradient, maybe im doing something wrong
you want the two guys at the back removed?
bruh idk what i can do then..
selection tool or bg remover
no, i want them to stay there, but i hope its visible in the photo, near them there are a lot of small squares
huh?
ps is complicated
idk how to explain it, but the upper background has the transparency gray squares
is that how you say it
you are right, now that you told me and i took a closer look it is there.
Here is what you can do the easiest way:
Use the object selection tool and select the two guys, and the two guys at front.
Ctrl+C and then make the previous layers invisible and then past ctrl+c
Then add a new layer below it and choose the color and apply using paint bucket
@somber anvil everything alright?
wait im trying
alright
alright i think i found out the problem
the problem is in the gradient
is there a way to make my own gradient settings?
yeahhh the problem is in the gradient definetly
Of course you can create your own gradients. If your are editing it in properties, extend the properties panel to see the transparency settings. https://helpx.adobe.com/photoshop/using/gradients.html#gradient-editor
nice, thanks
Hi, so I'm trying to make it so that wherever the line and text intersect, the line color inverts or basically turns white. I've been fiddling around with layer masks and clipping masks but I don't think I'm getting it quite right.

This may be a really simple question, but how do I get this effect with pictures of people?

You'll probably have to duplicate the layer and use the text shape selection to make the Layer Mask...
That was really helpful, thanks so much!
Gave +1 Creative Carma to @ripe quest (current: #3 - 1898)
Posterization... It can probably be done using only Adjustment Layers. It might require more work depending on the image. Its probably easier if you just watch this...
How do I change the color a already painted stuff on a paint layer?
Color Overlay Layer Style
Hi, you can also simply lay some type, then make scribbles with a white brush. Then set the scribble layer to difference mode. What is white below will turn black, and what is black will turn white.
Not knowing what your layer stack is, it is difficult to help you.
no i found the solution already, i had to make another gradient
Thanks!
Gave +1 Creative Carma to @ripe quest (current: #3 - 1899)
This will only work if the background is also pure white. If the background is anything other than white, the effect won't work and you'll see a ghost stroke...
Indeed, I replied accordingly to his example
I've been asked to 'turn off the rear lights' on this van to better show the reflective strips for for a press ad. I was after anyones thoughts 🙂

With maybe 20 mins of work, I've got this far... - I'm worried that if I push it any more, it's going to look silly...


Thinking about it - I suppose I'd better darken the reflection on the floor too.
when exporting
should be fine, yeah i mean the are glowing
the only way you can remove all of it
is by turning them off
fully
which is also doable
"After spending hours on the phone with Adobe trying to get my Save for the Web feature working I finally found the answer. It was a problem with Windows Defender. I have to go to Windows Security/Virus & Threat Protection/Virus & Threat Protection Settings/Controlled Folder Access. Click on Manage Controlled Folder Access. From here you can add the application you want to allow through or just turn off the controlled access. This also fixed my Lightroom error too."
tysm
Let me know if it works 🙂
.
yepp it worked
finally got my stuff workin nicely
how'd the lights go?
@iron prairie @eager heron => These requests should be posted in #💬chat-general as per the guidelines: https://discord.com/channels/547473772727238676/1042833042378592329
Okii, Thanks and sorry
Gave +1 Creative Carma to @ripe quest (current: #3 - 1900)
Ohk
Hi, I'm working on a game project and we are working with some old HUD icons that are low resolution and I'm trying to figure out the best way to figure out the best way to upscale the image so that we can use it in a larger format. Any help you guys could give me would be much appreciated. I've attached an example of one of the icons we are working with. I've tried adjusting the image size through changing the height and width, while resampling with nearest neighbor. I've also tried changing the resampling method but I've had varying results.

trace it to vector? 
I can give that a go. do you have a good link to walk me through it? if not i can just google it.

A quick and easy way to turn a raster image into a vector image in Adobe Photoshop.
Become a channel member:
https://www.youtube.com/channel/UCSyXRUw4nYVactx_5cwrpEA/join
Learn more on our blog:
https://www.mindislanddesign.com/blog
Follow us on Instagram:
https://www.instagram.com/mindislanddesign
Follow us on Facebook:
https://www.facebook...
Oh shoot. Thanks!
if your textures are 1-2 colors should be pretty easy to convert it
Yea, all of the HUD items are 2 colors. Having trouble making it into `a vector image though.
Upscayl could be a good start...

@main lantern
This video example uses illustrator, should you need a vector, but you could probably do a good job with photoshop alone if needed...
(As you can tell, I'm not very good at using Adobe Illustrator!)
Client LOVED what I'd done, far better than they had expected it would come out. But I myself suggested that I tweak it a little more in the morning to deal with the bright road reflections.
How can i make this effect? It's sweat/smell

I've been looking for fog brushes, but i can't find anything close to this..
i bought a template from basportsdesign.com i watch their video all the time but how do i put the template into photoshop im new and confused
someone plz help
I know this is a stupid question, but how can I achieve a similar result? This is from Wild Rift website. I want to make something similar, but I don't want to straight up steal their image

Hi A template, like a document ? Double -click it, or drag it to photoshop. If it is a zip file, you first need to decompress (right-click, extract all)
Hi! There is a repeating pattern, I wonder if there was not a fill of a triangular selection to black, followed by a brush stroke.
this looks like a cloud to me so I would probably get a 'cloudy' brush and use it in low flow to create this effect
How can I get this kind of effect? (the hard shadow and single color)


duotone workflows. threshold and gradient map
When I am adding shadows for chairs and tables, as it usually has different looking stands, I need different shadows.
Problem is transform or distort changes the direction of shadow, and it is not realistic, how to squeeze shadow and make it face same directon and to be same long?

use perfectly horizontal/vertical smart objects. You'll keep the rotation after transforming, letting you change rotated layer's height and width the way you want to. This way you can overcome the problem of Ps not letting you specify the transform angle
Just find some fog image/texture online and use that perhaps?

Hi, to make them realistic, you need to find the light source, if it is not the sun, and draw guide lines from there. There are several tutorials for cast shadows: https://m.youtube.com/watch?v=9v5YV6xzFsA
Pretty impossible in many situations.
I have watched those ebfore.
Where you have 4 legs, distorting it, mirroring just creates complete mess.
I’d do two legs at a time, in this case
i want to assign a shortcut to rasterize layer but istg i cant find it under here 😭

In the layers list

after smart objects, and before video layers
ohhhh found it thanks... its under the "applications menu" and not the panel menu thanks
Yes, you need to choose in the drop down list!
We need a search bar in there! And a better KBSC editor, like they have in Bridge or in the video apps
exactly
another question... does anyone know how to make an effect like this? i agree its a little advanced

i tried using this as a displcament map

and also tried out all the filters in the distrort category
and the filter gallery as well
if any expert here can help 🙏
I think it should work as a displacement map but you need more contrast for the concentric circle (not the middle one but the outer ones)
It's best to apply the displacement map filter on a smart object, for two reasons
1- it's notoriously a PITA to tweak and load the image everytime you want to run a test
2- you can set the blending mode for the filter itself independently of the content of the layer. I think "overlay would be beneficial here, but you need to test

Also, don't hesitate to tweak the displacement map settings, it's a very old filter (probably dates back to Photoshop before CS) and the interface isn't really intuitive. But absolutely tweak things
See if that helps

Photoshop CC tutorial showing how to use the displace filter in Photoshop.
If you have any questions please leave them below
or head over to this tutorial's page on our website:
https://photoshoptrainingchannel.com/compositing/
Subscribe + Like + Share + Comment = More Video Tutorials!
Thank you for watching!
===============================...

The two scale fields for example will drive how visible the effect is (to put it roughly) and depend greatly of the size of the image (the layer contents), so sometimes when you apply a displace, and see nothing, it's because those numbers are either too low, or sometimes too high. You will only be able to find out the sweet spot by trial and error since there is no preview. That's why applying it to a smart object saves some time
hey thats a great advice thanks! i got this as a result

Gave +1 Creative Carma to @vapid flume (current: #8 - 584)
however, changing blending modes doesnt really seem to help
That's a really great start!
i will increase the contrast even more and try 👍

It depends on the layer you've filtered and what's underneath. I pointed it out as this is something that people seem to overlook
yes indeed, i didnt even know bledning modes for displacement existed and i hv been using ps for over 2 years! thanks 🙂
is there a way to extract the chains from this photo? so everything else is removed and i'm left with only the chains/squares?

magic wand tool with low tolerance
i will try that, thank you
also, @vapid flume any idea how to make such a background as well...?
Any idea on how to make this with an image?

oh yes this is very easy
- make a gradient from black to lavendar with the gradient adjustment layer
- trace out this shape using the pen tool
- add the image
- clip it to the underneath layer by pressing ctrl alt g
- add text
note its not "gradient map" but the gradient*
Thank you!
Hello, I want to resize using this bar but it is greyed out, how do I fix this?

Hi, Please post a full screenshot…

I want to resize multiple images fast,,,
Forgive me if this is a super basic question, but it's been YEARS since I've used PS with any regularity - but I am trying to figure out how to make this circle not "blurry" - i.e. every pixel of the circle should be solid black. I can't convert to BMP because I need layers and such. Is there a way to make this a crisp, black circle without converting to BMP?

This is what it looks like zoomed in to pixel level, and this is what I meant by blurry.

Yes. If you want a SOLID line, turn off anti-aliasing.
Awesome, thanks but I'm having trouble finding that option, is it in settings or is it specific to the tool?
A bitmap is a grid of blocks that are assigned a color value. If you're going to make a bitmap at the size 128x128 pixels, there are only so many pixels in the grid to approximate the shape. Of course, when you zoom in 1000%, you're going to see each pixel. Thus, I'm not sure what your expectations are. Either make the image larger, at a higher pixel resolution or don't zoom in to the pixel level.

You've completely misunderstood me. I want to see each pixel, but I want each pixel to be black, not a bunch of different shades of gray. But I can't work in BMP because it removes the ability to have multiple layers and other functionality.
I'm using the elipse shape tool. If I change the tool from shape to pixels, I get the solid black I'm looking for, BUT I can't draw outlines, it only makes solid shapes, which I don't want
In other words I want to draw a circle (and other shapes) that look like this:

instead of the blurry one I posted initially
Yes, sorry I started responding and then took a call @south hedge !
No biggie!
help pls... very urgent.
it's not "blur" but anti-aliasing. Ps is attempting to draw a smooth-looking curve. If you're using the Ellipse Tool, you can turn anti-aliasing off in the Options bar...

@south hedge
But, yes, "pixel" mode doesn't give you access to shape level control over fill and stroke qualities.
I must admit, I just tried, but couldn't get....
...yeah, what @ripe quest just said.
My example shows what I feel is a slighly messy solution, by adding a threshold adjustment layer over it.
Hmm okay it seems like what I am trying to accomplish is not quite possible then, but I thank you both for your time!
actually I'll try the first trick you showed and see if I can get that to work for me
So you have a bunch of layers, and you want to resize them all?
Using the transform > Width and Height controls?
You can change them here instead:

Try changing the 100% to say ... I dunno 450px
Any "automatic" functions are going to result in some form of anti-aliasing as the algorithm attempts to make smooth transitions. You can mitigate this to a certain extent but its going to be frustrating. :)
you cant resize multiple of them together afaik
how do you remove a background?
Thank you!!
Gave +1 Creative Carma to @sly hawk (current: #6 - 869)
depends 🥸
Hello, i cannot do lens flare on my normal layer, why?
i have a picture with thunderbolts, but i only want to remove one from the picture
does the thunderbolt intersects with another object? what does it have in its background? does it glow or is it a flat graphic?
Check the document mode. Image > Mode... Is it RGB?
could be easier if you could share the image, as far as i understand you don t wan to remove the background
no and it glows
Its cmyk, thank you human
Gave +1 Creative Carma to @ripe quest (current: #3 - 1901)

i just want the lightning of the picture
What exactly are you trying to remove?
alright it is a bit tricky but i have an idea
that one glowing thunderbolt
ok thx man
Gave +1 Creative Carma to @twin bronze (current: #28 - 69)
yeh it worked lol
Did you try painting over it with the Remove Tool?

Are you trying to remove the background or a specific portions of the lightning?
just the whole background
the background
I just asked you and you said: "that one glowing thunderbolt" -> #❓ask-a-question message
thx i will try
Gave +1 Creative Carma to @twin bronze (current: #28 - 70)
ok sorry, sorry it was just a mistake
I feel like you're thinking of it a little backwards.
Presumably you want to place that lightning over another image?
I'd place it first, as whole image, pick a blend mode next, and then mask around it very loosely to get your final desired effect.
@orchid mortar
yea
i wish for too much
Out of interest @twin bronze - Did you generate your PNG like this?
yes sir
(Cool. - I was just wondering if there was a different/smarter way)
something like that
i watched a you tube shorts or tiktok video a long time ago, they were removing background of a smoke using this method
i did not know it was that common lol
Advanced Blending...

Thanks for your help @ripe quest @twin bronze @sly hawk
Gave +1 Creative Carma to @ripe quest (current: #3 - 1902)
whats the best way to go about drawing custom shapes and letters? i have tried using the polygonal lasso tool but it always ends up weird.
Use the Pen Tool to draw vector shapes.
How can I remove the shadow on this camera-'scanned' document?

Well try maybe selecting the "yellow ish" area and filling with white then maybe layer mask + soft brush and 'play' with it
...
soft brush? I want it in Greyscale (I'm prepping it for faxing), I used a Channels Adjustment Layer with the "Orange Filter" Preset* and it works ok.
* Don't use this on Photos of Trump. He'll disappear.
if that's too political, I'll delete it
I ot it good enough
thanks
You can try using Adjustment Layers to convert to B&W and then use Levels to remove the mid-tones.

trying to make a border that concaves in like this- what can I do with my shape layers to get this result?

isn't it possible to merge these shapes together in order to get the result? I haven't had luck with it

It's simple with pen tool
Just hold on a point with the pen tool and drag to the left and it will make that curve
Yes. You can use compound shapes to do that.
See: Path Operations in the Options bar...

thanks :D
@ripe quest the option seems greyed out for me- is there something I messed up?

The shapes need to be drawn on the same layer.
Or you need to move the shape (copy/paste) it to the other layer.
I still seem to be getting the same result (?)
One moment...
oh wait, there we go
thank you :> I don't ever really do mutiple shapes on one layer, so is there a trick to moving/snapping certain shapes along the same layer without transforming everything?
You'll need to create on the same layer. But also, keep in mind, you'll need to use the Direct Selection Tools to manipulate the shapes.
I would turn on Smart Guides and Snapping, etc.
thank you :)
The Smart Guides are nice for lining things up. (You just have to move the objects somewhat slowly and watch for the Guides to appear as they come into alignment.)
I'm designing something on photoshop that I will be painting on my wall in a 3ft by 3ft square and I want to make my canvas in photoshop the same size as my wall but don't know how. anyone know how to do that?
File > New... Set the Width and Height to 36. Set the unit type to "Inches".
If you're planning on printing this out and/or doing some sort of 'dry transfer' to prep the wall, you might want to use a high(er) resolution. Probably minimum 300.
If its just for viewing on the screen, the resolution of 72 is probably enough.
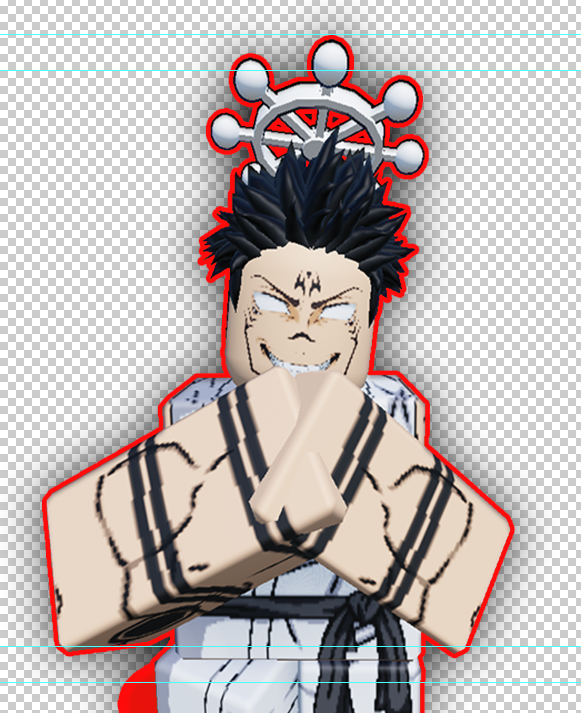
can anyone explain to me how to get such a purple aura around my charachter?

Separate the character from the background. Then use a Layer Style > Outer Glow on the Layer.
How could I add a glow/halo blur like seen in the Lebron you are my sunshine meme?
Probably Inner and Outer Glow Layer Styles...
I'll try that. Thank you!

Hi, I've got to make a bunch of images for a webshop showing different color options, basically a line-art layer in 1 specific color and a second layer with a background. Anyone know if there's a way to export the images in all set colors in one go instead of 1 by 1?
You'll have to adjust the effect based on your image, the size, what colors are in the background, etc.
Are there two layers for each composite that you want to make? Does each thing have its own background image?
same background every time, just need to change color of art layer (12 diff colors)
Do you already have all 12 colors on each layer?
no, I only have a png in 1 color and then I have to do the rest, just replacing color and exporting rn...
Ideally, you'd probably want to have one layer for each color and the static background. Then you could try: File > Export > Layers to Files... Choose a location to save and file type, JPG or PNG probably. Each layer should be exported to a new file.
I see, will give that a try already, thx!
how do i make like this type aura ive already tried everything with outer glow but it seems there's something more to it

It's an entirely different object/layer simply behind it.
so what if i download an aura how do i make it go around the charachter like that?
e.g.

is that also the case with this?

It's not 'around it', it's just BEHIND IT.
Yeah. Pretty much 🙂
aight thank you so much bro
how does he get it to spread so much?
like it isnt just a ball but like
i dont know how to explain it
is there like a transform tab?
yeah it feels kinda random

yes, it could also be be 'masked' in places to help get the right shape
Hello! I have a weird question but I feel like the fix should be very simple, I just cant seem to find it.
I'm currently making a pixelated gif, for this I'm using an action to resize everything and then save, however, the saving is not using nearest neighbor so the image itself is blurry after I batch action.
Does anyone know how to change the batch save into nearest neighboor?
Are you using the "Image Processor" script for the resizing?
No, basically the rezising is done in an action, the resizing holds the nearest neighbor
The problem is the saving in the action
basically the last step sort of kills the nearest neighbor and just saves with blur, but the 'save as' which is usedd for batch actions does not have an option for that
so im kinda stuck
I assume that if your script doesn't feature a 'change' to the interpolation, it will just "not change it".
assuming that if you set it to nearest neighbour at the start, I'd have thought it would keep it throughout
the thing is that the script does, but then once it saves it sort of overrides it, and saves it as the other interpolation
Yeah! That's what I'd think too!
It only works if I 'save copy for web', the thing is that that will make the script replace the images with themselves
I'm no good at scripts, or even actions. - but can you share a screengrab of your actions panel?

Interpolation **can **be defined in the action.

Are you asking the save to save it a different size to the 192px you defined in the action?

I am trying to make a custom loading bar.
Can I condense my layers at all? Also, say I wanted to make 50 different segments, is there a way to create these quicker than duplicate -> select mask -> draw new selection box -> fill. Also, I need multiple colors, so wondering if I can speed that up as well?
The base image is a raster image
Thanks

I think the fact it's being saved to a PNG is the issue. - nothing to do with the action/script @proud gyro
how can i save it with transparency and keeping interpolation?

Have you tried 're-opening' your blurry/fuzzy png back up in photoshop?
hmmm
very interesting
works
vey interesting
then I think this has solved my issue!
THank you so much!
I've tested something myself and can see that a PNG looks fuzzier when viewed in the usual windows 'photo app' vs photoshop or krita
- may be that they were correct all along 🙂
Thanks!
No Problem 🙂
Yes. I'm sure there is a quicker way
What do you want the finished thing to be?
a gif?
i think at the moment, a bunch of png that I will later convert to texture files the engine will use. I'll then change the referenced image depending on values. its basically going to be a health bar for an aircraft carrier overlayed as a display
ok. - cool.
I'm having a play... and got this far...
Now I just need to see how to save all frames out as seperate PNGs
ah. here we go...
File > Export > Render Video

End result....

@coral olive
oh, you don't want a black BG on it... so...


oh wow. i have never messed with the timeline feature before (also, that carrier/destroyer combo thing image is fire ;))

well thanks man, this is exactly the kind of thing I was looking for
