#❓ask-a-question
1 messages · Page 36 of 1
Does someone know how to add this black highlight automatically when writing text? (not manually, as in adding rectangle playing with the free transform etc, i mean a standard highlight/background of the written text like this;

Unfortunately, from what I know there is no way to do it automatically.
Damn
What about Canva?
or a alternative
Kinda weird that Photoshop hasn’t that feature
(sounds like I am a amateur but our goal is to post in high quantity news stuff on instagram)
There is way to do that using layer styles but its kind of a kludge. Its much easier with Adobe Illustrator.
I've previously done it by creating a MASSIVE UNDERLINE beneath the text, but that still technically wouldn't work in the example below.
Also, that it may have been done in indesign or Illustrator.
@rich spindle
😟😟😟, how tho
It was probably done with a literal pen/paper and scanned in.
Not ideal, but it can be done with Layer Styles...
(You spelt colour wrong @ripe quest ) 🃏
You spelled "spelt" wrong.
Spelt? WTH is that? lol
With a pen/marker and a piece of paper, or the Photoshop equivalent, with a digital marker brush . It's basic hatching technique, something you learn when you take drawing classes
both are correct in BrEn (I routinely say Spelt myself, but I'm not really British) Spelt is also the name of a type of wheat 🙂

I'm not big on irony, so the whole conversation may as well made a big swoosh over my head
It looks ridiculous, regardless.
it's not there for looks I suppose 🙂
I used to like correcting people's grammar. But then I realized what I liked more was having friends. :)
Yeah
Man I have no experience with Illustrator really, I’ve worked with Photoshop for over 12+ years but Illustrator no idea.
true yeah
The best way would be to set your text and then draw rectangle around it afterwards. Neither solution is ideal but that's the state of things ATM.
Or use Illustrator, which is probably overkill for this use-case.
Anyone has a clue on how to get this warm stone-like b&w?

I’ve been trying to play around with saturation and temp but I can’t reach the same results
What about using a LUT (Color Lookup Table) or a Camera Raw Filter. I think there are already Presets for "sepia tone" and similar effects.

Good advice I’ll try now
Hey there, I'm having some issues with the animation timeline in photoshop.
Currently trying to move some layers I rotoscoped up to where the part I am working on starts. Unfortunately, when I try to move more than one layer to a group, photoshop moves the entire group to the start of the timeline.
Video GRoup 2 is the rotoscoped layers I want to use as reference
Video Group 2 is where I am trying to move them to. When I moved only one frame, it started where the video marker currently is (where I put it). When I moved the next frame, it moved both frames to the start of the timeline.
I want to move all of these frames at once so they line up with the part I am trying to animate.

Hi everyone! How do you center text that has a tail in the font? For example the “y” in this image:

Do I center within the “A”, “m”, or “y” ?


this guy was a grammar cop 
is this a question? no right
that is going to give you malware lol
for sure it will, @ripe quest
well, its prolly not getting center aligned because of the black part, the photoshop is most likely thinking that the pink spaces should not be touched
Sorry, in that photo what I’m showing is that I’ve centered the text from the m only. If this text has the y and a which makes them not perfectly centered for padding for a profile picture/website logo. What do I center from so it doesn’t look uneven
@sly hawk is just joking around. He likes to tease me about my [apparently] inferior American version of the English language :)
Yeah. @ripe quest knows I was entirely joking. I wouldn't want to compete with Dhumman in either photoshop skills or grammar. He would beat me at both.
Doubtful. I'm a lifelong learner of both. Still learning.
Good morning all, I posted a request in #💬chat-general about coloring/shading. I'd really appreciate it if anyone could help me out with my project.
Thank you
Hey, so I'm trying to make a flash light texture for a game I'm working on. This is what I have so far, but I need the edges of the cone to be more faded. Does anyone have any suggestions on how to do this?

And by faded I mean something like this (I want the edges to fade to black/transparent)

How about starting by adding a Layer Mask with a Linear Gradient...

Then convert the Layer to a Smart Object and add a Gaussian Blur to soften the whole thing. (I added a background so the effect was visible.)

That’s exactly perfect! Thank you so much!
Anyone could help me? Photoshop won't let me draw, I need to wait a minute before it is back to normal every time I come across the problem.
can i ask about adobe animate
i couldnt find any adobe animate servers
this is the only server i found
not sure, but that sounds a bit like your system itself seem to be a bit slow or outdated or something like that. Is that only when you draw or also when doing other things?
There is also the Adobe Premiere Discord you can try https://discord.gg/adobepremiere
Oh i meant if i can ask other question here but i forgot to write it somehow..
Could you please advise me, there is a window with white glass on the photo. I need to remove this fragment and insert another background. How do I do it?
Well at least you're inclusive in your mockery
i dont mean to mock or anything, why bother making this and that
when clearly there is no special font style or anything to disturb that easy process i told you about
you want to save time?
Yeah

Sorry
is it possible to widen the blue boxes (the ones in background not green boxes) or to change their lines? the img in background isnt worked by me and I cannot retrieve its PSD file

if I can actually change the dimensions of that box how can I do it ?
I'm sure I might have seen a tutorial about this but I don't know where
Am I supposed to ping anyone here or no ?
No
ok
And yeah you can make it wider, just stretch it
i cant as transformation controls dont work there
as i said its a plain image
But you can stretch a plain image
But That will require to stretch the entire
image
let me send only the file real quick
I can't open .ps files right now
dw

so it is basically just this plain image
with no layers no nothing
just this
and i was asking if i could stretch those box lines
in a way or smth
they arent layers
Wait do you mean only the gold border or the entire image?
do u see the two boxes that are seperated by a thin layer?
thin bar
yeah
but those aint layers
how do i do it
do i make a pen selection or smth
i want to strech in height more or like
And do you want to keep the same aspect-ratio of the entire image?
oh in height
see, thats why i dont know how
So not wider but taller
YEAH
my bad
taller
but i dont want to change the dimensions of the entire image
just that part
but that part aint a layer so idk how to do it
I'd use the clone stamp tool
Or just make a selection of them and stretch them, but then the background would get stretched as well
idk how to do that
lMFOA
Get the rectangle selection tool, make a selection of one of the boxes, press CTRL+J, CTRL+T then shift+move one of the anchors
hmm nice
Does it work?
lemme trty
yeah it does work
kinda looks bad cuz of the big ass bar now in the low end of the box
screenshot?

i also did a poor selection tbh
i will cut that layer with refined edges or smth idk
Do you want to remove it or fix it?
remove it
and also
how do i do a cut with rounded corners
When you make a selection leave some margins so you can select the corners
Then just select the line (and the white glow around it) and press shift+backspace and then enter, then it should do the trick
EYYY crazyy
Worked?
screen?
i will fill that up dw
Oh ok
do i lengthen the midbar here in height the same waY?
didnt understand this sorry.
And I dont understand this
the yellow midbar that seperates both of the boxes
i want to make it taller
actually
idk
i will leave it once like that
this is more important
I meant this

The red is the selection
If you leave some margins you can cut the rounded corners
Ok, it's the same process for the boxes, select it, and then stretch it. The exact same way you did for the boxes
unfortunaly yup
hmm
right now i have a rectangle
and i want the rectangle to have rounded corners
i can do it like that?
but it already has rounded corners
no cuz i copied it in selection
bad
i copied as a rectangle
cuz idk how to copy with corner
ok, then go back and remake the selection
how do i select with corner
freehand selection?
oh its ellipse selection
As I did here, the blue thing is the box with rounded corners, the red thing is the selection you have to make
The selection doesnt have to be with rounded corners
then how do i cut afterwards and leave just the rounded corners?
First do it and then send me a screenshot

ok but be careful because you also selected a bit of the golden bar on the right, remake the selection and then yeah, ctrl j and do as before
ok how do i cut just the rounded corners

i mean cut and leave jsut hte bpx
the box**
and remove my margin selection

Sometimes i think when i switch tabs i keep making the gui/toolbar go away, i remember i solved this but i forget what keys i press to get it back
ok perfet, now as you can see on the right there is a lot of difference in color, press ctrl shift E, then select the difference but not the inside of the box and then shift delete
can you make a screenshot of your whole screen

Sure!
I had this last time i used ps which was a while back, it was a easy fix but i dont remember the keys to press
also sorry for bad english
I think you just have to select the toolbar and then drag it to the side of the screen
if you cant see it go to window > toolbar or view > toolbar I dont remember
appearantly this workaround doesnt work
as ctrl shift E merges stuff
is there a tool i can click for this
why i can't define as pattern?

with the bucket tool i cant fill the gaps even when i have close gap option selected

why why why
I don't think Define Pattern will work if the selection is "Feathered" at all. Even 1 pixel...

i can only fill stuff with the bucket when there isnt a gap
and the close gaps option just doesnt work for gaps

in adobe animate
Yeah, I'm not familiar with Animate. Sorry.
i tried removing fx but still not, it only allows me to define the entire photo
Drop the current selection (Ctrl D). Then Ctrl-click on the Layer Thumbnail to select the pixels on that layer. Then try Edit > Define Pattern...
do you know anyone who knows animate?
You may have more luck in the Adobe video server:
https://discord.gg/adobepremiere
Yeah. The AV Discord might be a good place to ask. If not, there is always the Animate User Guide: https://helpx.adobe.com/animate/user-guide.html
yo question how do u make the rectangle on the left be the same size as the one at the right?

How can i remove the fill and keep only the stroke from this image?

Select by colour and mask it
Is the star on a Layer by itself?
If you have Adobe Illustrator, you can just make a pristine vector star to the desired specs. It's simple. If not, I can give you vector art of a star....


Do adjustment layers not work on brushes? I used a brush to make a smoke effect and it won't change colors when I clip the adjustments layer.
Adjustment Layers operate on Layers. Not on tools. Make sure you're applying the Adjustment to the correct layer.
I have it clipped to the laye I used the tool on

Its pure white. Turn the "Lightness" value down a bit.
wow thanks, can't believe I missed that
Gave +1 Creative Carma to @ripe quest (current: #3 - 1768)
yo how do u align 2 different images?
You can use the Alignment Tools... See this quick demo: #💬chat-general message
hmm mainly looking for aligning like this

2 different images
heres what I got so far but idk

You've drawn the Guides. If the areas are defined how you want them, drop the images in, turn on Snapping (View > Snap) and drag the images into place.
yeah but the areas are uneven idk how to make it even
OK. One moment,
One way to set up your Guides is to use fixed sized shapes. However, you could also just use fixed size Marquee Selections...
what do you think is the best way to edit this photo?

Hey there. I'm working on some astrophotography, and I'm trying to sample the color on one part of a star, and use it to correct some fringing on another part of the star. My question is twofold:
- Is this the best way to do this type of correction?
- If it is, how do I make it work?

how the hell do you remove the background of a hairy object? im trying using color range but thats the best i can do. please help

You can use select and mask to refine the edges, there are also some other options there you can tweak

If I adjust hue and saturation to a monochrome layer. Can I pick a color with the Eyedropper and apply it?
How can I process PDFs logos that are transparent all centered into 2000x2000px white background?
To use action?
"process" how? export to svg, png? I would probably use Acrobat's export options
I'm not sure if I understand your question, do you want to sample from the selected layer only? If so, set the tool's options in the options bar at the top accordingly
PNG
yes, you can export to png directly from Acrobat
Ok, thanks.
Btw, is it possible to export Main project multiple times by updating smart object layer comps one after another and export all of them?
Gave +1 Creative Carma to @serene coral (current: #6 - 831)
I have that project with layer comps.

unless you're using artboards. then you have to do everyting manually
Yeah, but layer comps are "different project (smart object)".
I dont have layer comps in my main project
layer comps can control the selection of the smart objects' layer comps

If it were me, I'd include one last step - I'd download a FUR brush online, and paint in the mask using it in the biggest trouble areas
Your other problem is that the image you're clipping out is too small.
Hello, I'm trying my luck, maybe someone knows or can give me ideas for a logo with the letters I + V. I can't find an explanation of how to do it anywhere. Thanks in advance everyone
Most of those are stock images, so if you buy/use one, you're not 'stealing it' from a real brand/company.
Thank you very much friend, you helped a lot, I found some that I liked
Which star/effect are you hoping to copy?
I want the stars that are 2- or 3-tone to be monotone
Get rid of the blues on the majority yellow stars and vice versa
This looks like it will affect all stars on my image though, right? I only want to heal the blemishes. I don't wanna turn all blue stars yellow or all yellow stars blue. This is a small sampling of a much larger image
Yeah, keep watching the whole video
At the 30 second mark I turn the mask black, which hides ALL my adjustments... - then I use the white brush to 'pick out' the bits I want.
Gave +1 Creative Carma to @sly hawk (current: #7 - 821)
guys how would u go about pasting in a design over this retaining the shadows?

You add it in with a MULTIPLY BLEND MODE
thank uuu
it was actually in my 'clipboard' from a client project I'm working on 🙂
can anyone help me as i dont understand why?

I think it's an error @gaunt forge - I'll see if I can contact the organiser/posters...
so pressed something and i've lost all the windows, help please 

Tap the TAB key
thank you !
Gave +1 Creative Carma to @ripe quest (current: #3 - 1771)
Can I ask indesign question here? Didn't find discord for it
you can try your luck asking here or look for an aswer here https://community.adobe.com/t5/indesign/ct-p/ct-indesign
guys what do i do when i select white parts of the image then delete them but it leaves this small like 1px trace behind .... how do i deal with this?
do i only expand the selection or whats the best solution
sounds like you might want to adjust your selection, either by Selection>Modify or with the help of Select&Mask workspace https://helpx.adobe.com/photoshop/using/select-mask.html
I would suggest using Illustrator's tracing option
...how are you working with .ai files with no Illustrator installed?
yeah that uses the Photoshop's "tracing" that uses the selection to create paths. The only option there is to alt-click the Make Work Path button and specify the tolerance but that's it
well, as expected - the path tried to follow the selection as precisely as possible
an option here would be to manually trace the shapes using the pen tool to create smooth paths directly in Ps
If you did use illustrator, there is literally a 'smooth paths' button to fix stuff like that.
If it makes you feel any better, it's not INSANELY better...
If I were you, if it was important, I'd suck it up and just manually hand-trace it in photoshop or something. It's 5-10 minute job.
Maybe 2 mins, if you're quick.
Pen Tool + elbow grease, FTW!
Which I prefer to do so I can warp it
102 seconds 🙂
I guess you could warp it first then, and then trace over the warped shape.
Thanks for the demo, James
Gave +1 Creative Carma to @sly hawk (current: #7 - 823)
Hi, I have a small issue I could use some help with. I do some liveries for games (in this case GTA V) and I want to change a "main" color of an existing livery with a lot of detail. I know how to do this in most cases, either just use a brush/bucket, multiply a layer ontop or hue/saturation. The issue I have is that the livery is basically black and multiply barely changes anything, even with white and same issue with hue/saturation. Brush/bucket is a no option since there are a lot of "screws/rivets" as well as some pattern thats will be lost if I use paint over the existing color. Any ideas on how to tackle this? I know it is possible since another guy has managed it, but I can't get ahold of him... Best regards
Is there a method in which I can separate the hand from the face? I plan on animating the hand in AE.

@livid otter Lasso tool maybe? And ctrl+c ctrl+v for new layer to keep it
I tried that but the transparency comes through, the goal is to have the face where the hand covers to be consistent.

Something that'll keep the fill color of the face
As I said, ctrl+c ctrl+v, dont move the hand. and then you can just use either lasso or something like the elliptical marquee tool to mark the hand and press shift+f5 to "content aware" remove the hand
okay, I'll try that.
maybe just cut the hand out and then u can perhaps use this 😶 emoji to 'fill' in that space
If you use the elliptical marquee, dont necessarily mark the hand, "align" along the outer edge of the smiley, if you understand
not really, I hardly use PS.
Send me the file and I'll do it for you if you want

Hey guys can anyone help me? I cant get a normal version of PS, I signed up for the 7 day free trial and it wont let me install in the cloud app, please help me :(((
u have there 4 layers finish them how u want it by urself 😉 .... just cut the hand out from that 'face layer'
also crop the document to make it bigger (the 'missing part') is already there... i made it too small... but im sure u'll figure it out ur self
yo can anyone dm if their willing to do a very small task for me
if i'll know how to do it😅
Would anyone know?
@spark snow Pete, since I read your bio, would you know?
What happens when you try to install the creative cloud desktop app?
The try button does big nothing 😭
did I get baited by adobe? hehhh im lost

Ummm I got it installed, I think.. Is this it?:

I put my card in there, it said that its all ready and good to go, installed this app, now im running on that free trial thing I assume, but I thought that I may get a chance to work with photoshop before actually buying it, turns out I was wrong? Or how does this whole thing work?
You should definitely get the 7 day trial to install and use Photoshop before deciding to continue with the subscription.
Does it help to log out of the CC desktop app, and then log back in? Maybe the system is taking a minute to grant your account the installation access
Umm let me see, by the way just to state this: Ive had the app installed for like good 40 minutes now, strange..
I will try to sign out and sign in again, I ll let you know.
Yeah, strange... Hopefully that works.
Just to check -- you're an admin on the system?
Ummm ok, Apparently, I CANT even do that! sign out button is grayed out, what the hell is happening?

Is this normal?
I shall be yes.
It's possible it's installing Photoshop -- that could be a reason it's not allowing sign out.
Oh right maybe, where could I possibly look for any instalation which may be happening on my system?
From my home page it tells me quite big nothing ngl..

this is where the actual PS is located..

Under Apps to try
It should show progress in the CC desktop app itself. What does that Open Photoshop button do on the Learn card towards the top? Does that open Ps?
Can you DM me the email address you set up your AdobeID with?
sure
how would i go about doing something like the hand-drawn text in ps

You could create a text layer (Type tool) with the Font you'd like to emulate with the hand drawn effect, then create a new blank layer on top of it and trace it (mouse or stylus) with a brush or pencil tool. Once complete, you could hide or delete the text layer
thanks for the reply, i'm going try this
Gave +1 Creative Carma to @spark snow (current: #149 - 10)
I'll try again... I have a small issue I could use some help with. I do some liveries for games (in this case GTA V) and I want to change a "main" color of an existing livery with a lot of detail. I know how to do this in most cases, either just use a brush/bucket, multiply a layer ontop or hue/saturation. The issue I have is that the livery is basically black and multiply barely changes anything, even with white and same issue with hue/saturation. Brush/bucket is a no option since there are a lot of "screws/rivets" as well as some pattern thats will be lost if I use paint over the existing color. Any ideas on how to tackle this? I know it is possible since another guy has managed it, but I can't get ahold of him... DDS file, one layer. Original on the left, modified on the right (I want to replicate this with another color) Best regards

Hi everyone. I'm trying to recreate the red and white ribbon from the Sonic 1 logo, but I'm having a lot of trouble manipulating the design in the same way. Specifically the curves of the edge of the ribbon fold. Does anyone have any advice?

wouldn't be easier to work on that modified version?
I was using the program normally when, out of nowhere, the mask icon in the layers panel stays activated all the time, and I can't click on it to add a mask. The only way to fix it is by closing the program. Does anyone know what could be causing this?
I'm using Photoshop CC 2020.

I've tried both, obviously, but doesn't really matter it seems unfortunately... I tried the blacked one since the modified had to be made from that one but yes, the green is easier 🙂
Try updating to a current version of Photoshop.
all textures in gta wasting so much space? as this look like half of space is unused
What do you mean? I just pasted them side by side to show them both, original is covering all 2048x2048 pixels
ah ok
Hello, few days ago I got a new graphic cart RTX 4080 SUPER. Before I used my integrate one from my processor i713700k, but I don’t see any evidence maybe a little. When i save my doc it’s like before don’t see any difference maybe little bit faster 🤷♂️. Anyone does know what I have todo?
I hope this is the right channel to ask that
i was like there so much unused space on top and bottom 
@quick wind Preferences
a lot of things

if you are testing on empty documents you won't see much difference in performance
Watched a tutorial but nothing

Learn how to set up and switch to a dedicated Nvidia GPU for Photoshop.
Adjust playback speed from 1X to 0.75 to easily follow the steps.
For setting up AMD & Intel GPUs, please watch this video: https://youtu.be/9Juptx9YKbM
For more details, comments, or discussion on the topic, please visit: https://community.adobe.com/t5/photoshop-ecosystem...
Does PS recognize your GPU?
Make sure everything is ticked in the Performance tab
What spec do you have?
3070ti
Should I stream and show you what I mean?
Sure
Which talk channel should I join?
It’s the load speed normal?
Also on integrated gpu loaded a little slower
@quick wind DM me, Ill talk to you there
Ok
What would be the best method of "bending" the edge of this ribbon fold in the Sonic logo to achieve the same kind of look and shape?

i need help, photoshop is a kek again. all i did is working with color range, then tapped ctrl + z and all of a sudden my color for "abo assis gmbh" went from red to gray???????????

every. single. time. Photoshop is way to irresponsible and not cooperative.
and yea, repasting the photo wont do the job
Probably an accidental mistype and it got set to Proof Colors. View > Proof Colors... or Ctrl Y...
...
thanks for the answer
i just dropped the project
never in my life did i have an application like photoshop that would always push me to my mental limits
hey, how do I extend the V to the top and make it last to the end of the sentence, and the Z would have like a tail under the sentence?
Also is there like a font that would do that or do i have to do it myself?

InDesign, Illustrator And Photoshop all have problem exporting PDF if there are transparent elements.
There are glitches, any fix for this?


The subject selection is not made well. Is there a way I can edit the selection?\

If done alot of research on this topic but i cant seem to find a consistent rule on exporting psd file for print. Im trying to prep some of my photos to upload on to a third party print on demand site. My current method right now is "save a copy" then export in order to maintain my originaly DPI and dimensions. When i use another method of exporting iv noticed that the resolution goes down to 92 for some reason even though the dimensions are havent changed.
While holding Alt the selection cursor should go from + to - then just paint over the areas you dont want
You would have to do it yourself
Do you know anyone who could help me with my question
tryna get this taken care of as soon as possible
Perhaps yeah.
1- What's it for
2- What software do you have
3- What original file do you have?
- Print on deman website known as DarkRoom. (photography Portfolio/print) 2. I have PS version 25.1
- raw file transfer from Lightroom
I use Photoshop to export because i find it easier
i dont export directly from lightroom
do u know how? Any tutorials or anything
Perhaps yeah.
1- What's it for
2- What software do you have?
3- What original file do you have to work from?
@elfin wigeon - sorry, one sec, I was responding to someone else but your answers help... - give me a moment and I'll try and help.
1- Personal logo for youtube channel
2- PSC6
3- i don’t get the question
Can you share the original image without you drawing lines over it?

Sounds good i will patiently wait sensei
That's different to your earlier image! 🙂
ye i like this one more
You'll really want to use the pen tool to trace it... or I I guess you could just keep the poor quality low res image and just draw your extra bit on...
I'm assuming that you're printing direct to sub/garment, as opposed to screen printing?

damn bro that looks dope but you made it look too easy, hope I don’t struggle
Uh no im not printing on garments. I meant fine art photography prints. I use a third-party website to do so as i don't like wasting time with fulfillment and all the logistics of running a successful print shop right now.
oh sorry, I'm so used to everyone trying to put their designs on t-shirts!
Do they have a specific print-spec on their website?
--
Like I'd suggest to you send it as a 300DPI TIFF file or something if it's fine art, but that's insane if your image is over 1 metre in size.
They do have specs. im trying to pull it up right now. one sec

ok. Cool - TIFF is bigger, but better quality due to less compression.
I'd suggest you set your 'image size' in CM's to whatever you want it to be ....and set the PPI to 300.
For example, a 300PPI image, which is 50cm square, is almost 6,000 pixels across, which sounds pretty decent.
So i get that. I guess where im getting hung up on is the various wasy of exporting. So for example whenever im exporting for instagram i use "save for web" color profile is main concern and DPI not so much. Its exporting for print that im confused on. I need my color profile to be accurate and my dpi to stay at 300. As i had said earlier iv been using the "save a copy" method as it retains both color profile (SRGB ) and dpi of 300. So i guess my question is if im doing that correctly.
Correct i understand most print shops require CMYK but intrestinlgy enough they say SRGB works too. Iv ran a few tests with printers locally as well as on demand websites and me using SRGB has never been a problem.
now how accurate the colors are well thats a different story as i havent done a side by side comparison. But chaning color profiles isnt my issue. Im just having trouble deciding what method to export as as theres so many and little to know info online.
Yeah, printers are less fussed these days. Not worth their effort in trying to push a customer to change a setting in their images
Honestly, I'd just click file > save as > and pick TIFF/
Job done 🙂
If the filesize ends up too large, change the PPI down to 200 and try again.
Awsome i will give this method a try thanks for your help!
Gave +1 Creative Carma to @sly hawk (current: #7 - 824)
oh wait are you still there
i just realized iv never exported a tiff file
so i dont know what options to choose

I'm not sure myself. - maybe go with NONE? - and see how big the file is?
@sly hawk
I keep getting this result, it's not going in a straight line, plus I can't do it in 1 step like you did in the video. It only lets me do it Point by Point

Plus there's a gap in between that's not filled somehow
just click once when drawing lines - don't hold the mouse down
It's a bit of a challenge...
How you got it at 1:13 minute in the video is perfect! if yo in any way could send it 😄
But yeah i understand & agree with you, I've tried for like, 1-2 houres now 🤣
I don't mind doing/sending things over like this if you've already been trying/learning etc.

Thank you 🙏
Yes, I've tried to figure it out by my self but no luck 😄
Gave +1 Creative Carma to @sly hawk (current: #7 - 825)
How would I do this airbrush design in photoshop, Ive tried one way and didn't get the results I wanted

that’s what i am doing but it won’t make points unless i let go
How do i make pictures like this?
So basically I’ve attached a few images of this person who makes really cool nostalgic pics that look like they were straight out of 2012 but how do they do this editing? How do they get the exact ebay font for example or fake the old iphone text message and honestly every aspect about it. How could i create something like these? Is this even photoshop?


I have a quick question. I am trying to remove a part of a screenshot, not sure how to go about it.
hi. Does anyone know how to make this effect? tysm

If you look up comic book effects on youtube you can find it
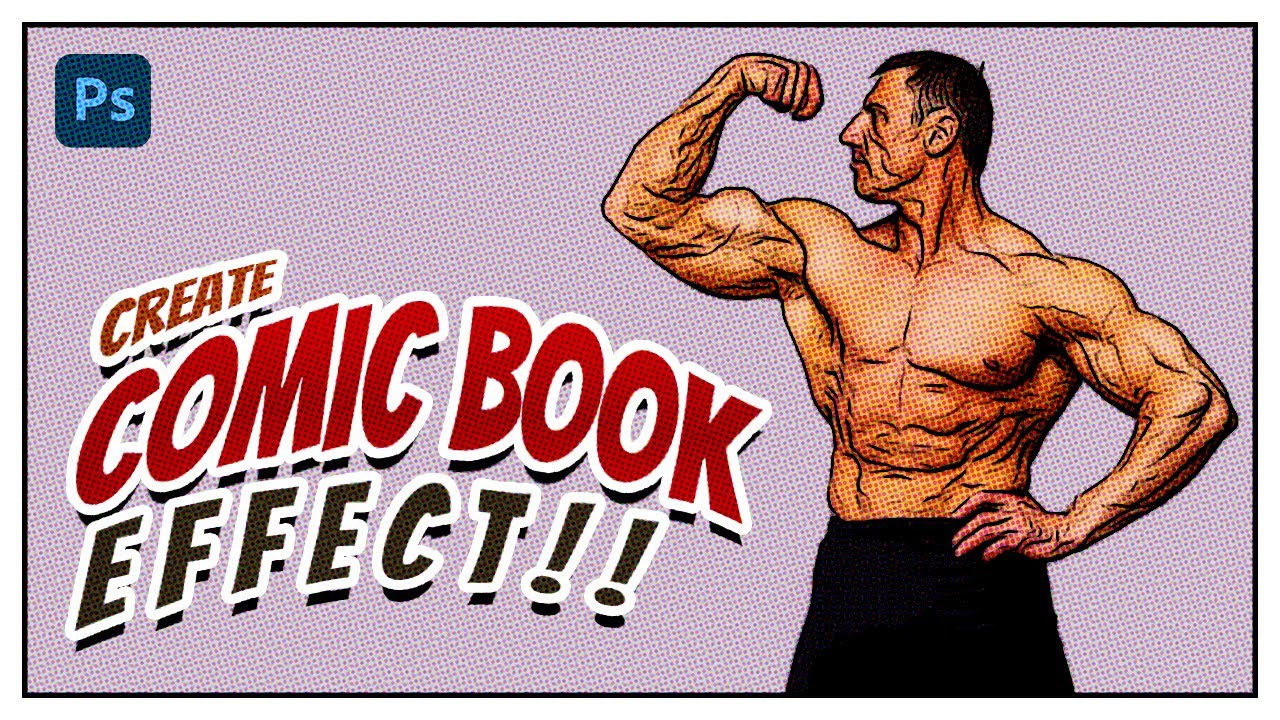
Are you looking for a YouTube video description for a tutorial on how to create a comic book effect in Photoshop? Here's a draft of a potential description:
"In this tutorial, we'll show you how to create a stunning comic book effect in Photoshop in just a few minutes! We'll walk you through the steps to transform your photos into a classic com...
thank you sm. I think it kinda looks like the halftone effect
yeah halftone that's what it is


Which one do you think is better? and what should I do to make it loop more presentable?
If the purpose is to display the text then the 2nd one
Im trying to replace a 2d models color using a paint bucket tool but it has places that have a dark gradient color and i cant replace the color so easily. Any ideas?


Do people pay for work in this discord and if so can someone tell me how much they have made In here doing photoshop
?
try using hue/saturation adjustment that targets the range instead of a single color
can anyone help me start with photoshop
I tried it with a hue/sat adjustment and couldn't do it, so then did it with a gradient map.
oooh
ah!!! media encoder keeps failing onme
is there things i could look for so it stops failing on me?
Mind you typos!
For real feedback you can go to #📝project-feedback
I think in both instances the text is too close to the sides, it's not breathing! Use the empty space liberally 🙂
And check the copy, beyond the fact that what you are trying to say doesn't immediately make sense to me
I use Media encoder but really I'm not an expert.
I would go to discord.gg/adobepremiere where all video software lives.
Unless someone else knows better here (It would also help if you could describe what happens when you use Ae, but honestly I would ask in the video server)
Hi guys! I am new to Photoshop, and i have suck a problem that my photoshop just doesnt want to draw with a colour that i want. In Images -> Mode -> i have RGB , but idk why its just dont want to draw with a colour that i choose. I would be really gr8ful if u guys could help me
Can you show a screenshot of what you have? A whole screenshot, with the layers etc... The whole window! It helps a lot understanding what is wrong
All good, i solved this problem. The issue was in the colour mode in was "Japan Newspaper Mode" or something like that. idk..
but tysm anyway!
Can somebody tell me what’s wrong? Basically i opened a photo, duplicated it,made a previous modification (i erased an object on the beach with AI gen fill), then I merged both layers in a unique layer. I made another selection, and this pops up. Never ever had this kind of problem. Can anyone help? many thanks in advance


what is your selection tool?
@ruby geyser is it possible that you have a feather applied to your selection that is actually bigger than the area you're trying to select?
like a 10 px wide area with a 25 pixel feather applied

How do i get only the white lines and the black gray things away?

i was using quick selection tool
oh! i didnn’t think about it! i try to change it and see if it works!
-Thanks to both of u @vapid flume @serene coral for all ur help! i think both of ur suggestions will help! Fingers crossed 🫶🏻
You're welcome!
I'm not sure of your end goal, but I'd just start by changing the blend mode:

**Linear Dodge **is probably enouhh

Also, please don't post questions as headers.
Do you know how to fix it?
Probably: Select > Color Range... white. Then add a Layer Mask.
Alright thanks and yes i wont any further
Gave +1 Creative Carma to @ripe quest (current: #3 - 1772)
i really did not understand
Please share just that layer or PNG or whatever it is so I can see the actual pixels in it.
(Not the whole Photoshop Doc. Just that Layer.)
hey guys, i'm having some considerable pen input lag, making it unusable to draw
what could be the issue?
smoothing is turned off obviously
Windows/MacOS? Photoshop Version? Tablet Brand? Has it ever worked correctly?
Obviously? This is the most common reason. Smoothing set really high. It will lag regardless of any other consideration.
Windows, version 25.1.0, huion. Works just fine on software like clip studio art
The lag is also present when drawing with mouse
Regardless of the file resolution
Help > GPU Compatibility... Any issues reported there?
nope

Size of the document? Dimensions / resolution?
right now a 900x900 @ 72ppi, any document and resolution has the same issue thoigh
though*
It’s probably smoothing percentage
even a square as small as 20x20 has the same lag
the one i find on the top bar is set at 0%
Hmm
Don't know then. I never have any issues with my kamvas 27. Worked fine with current Huion drivers, etc.
yeah its def not an issue on the tablet, other drawing software works perfectly
drawing lag is also on mouse too
on photoshop only
does anyone know how to make these lines coming out of an square for example?

Then its probably not the tablet. Try updating Photoshop.
i remember time ago you told me to disable something regarding experimental canvas and that fixed
tho there's no option such as that in this version
alright, will try thanks
Gave +1 Creative Carma to @ripe quest (current: #3 - 1773)
You can disable Native Canvas in Preferences

You can probably "pull them" out with the Smudge Tool.
I'm trying to change the background colour of this mockup but keep the logo yellow does anyone know how this is possible?


Feel free to describe the project a bit more. What is the size of the document? Is it Indexed Color?
When I say background colour I mean the colour background colour of apron not the background of image
got it finally 😭
Seems like there is a 'Change Color' Adjustment Layer there. Try editing that. Your Logo Here is a Smart Object that you will have to enter and edit it. Double-click on the Layer Thumbnail for that to open that into a new tab for editing.
I think you'd benefit from doing the Beginner tutorials that come with Photoshop. Help > Hands-on Tutorials... Set the fiter to "Beginner" and start with those and work your way up to the Advanced Lessons.

Gave +1 Creative Carma to @ripe quest (current: #3 - 1774)
Also worked it out was the blend mode on multiple when I changed it to hard light I was able to see the logo without adjument layer effecting the logo

just tried, now it crashes as soon as i open or create any canvas
updated it to latest btw
fixed it
if i disable the option it doesnt crash but still has same drawing lag
both mouse/pen
any chance you can record it happening?
the drawing lag? sure
linees seem to be rendered in a chunklike way
its weird
does anyone have some fire particles png? pls? if yes could u send? thanks
Texturelabs is an online resource for free, original textures and tutorials for art and design.
use blending modes
disabling native canvas + disabling gpu seem to slightly help
theres some screen tearing tho
what the hell going on with the lines lmao

if i for example use a software like clip studio paint to draw,
there's absolutely 0 input lag
even on 4k canvas at 300ppi
I never had any issues with my Huion Kamvas tablet. However, I have an actual GPU. Not an integrated graphics chip like you do.
ah i see
is photoshop heavier on the gpu compared to other programs?
If its a display tablet device, the display itself can require better graphics support because obviously it has to drive a display as well as be a drawing device.
Check the Huion Support and FAQ pages for that device and see if they suggest any specific drivers or settings for its use with Photoshop.
Other than that, I don't know. Sorry.
issue's also there with standard mouse tho
its probably a rendering issue
Does your computer meet the suggested system requirements to run Photoshop?
yep, even dedicating 10gb ram to it
and yes i do have enough ram for the rest of the sys stuff
I don't know. Sorry. I don't have any experience with that device or know anything about your computer. Thus, its difficult to diagnose the problem.
how do i duplicate selection?

what do u mean
The selection I now have I want to copy and split it into two parts upper and lower part
while still keeping the selection/path
if that makes sense
well if i understood correctly u can save that selection... and after that u can 'cut' the selection with holding alt key and selecting what u want to delete
how do i save it?
Huh how?

Thank you :)
ohhh yeah something like that
when holding ALT key on ur keyboard u can - ur selection like 'cut' it
and if u want to select ur layer/channel hol ctrl + click on the layer u want
Im pretty new to ps so if i say things that doesnt make sense lmk
Yeah thats exactly what i want to do
but i didnt know how
now u know
u can do it with pretty much with any type of selection tool ... lasso,quick selection,rectangular selection etc.

right click ur selection then make work path
can generative fill create graphics ? if so is it any good ?
and it should appear there
Hi... this is probably a stupid question, but how do I edit 'frames' in a video in photoshop... I can figure out how to see it as seperate frames....am I missing something or is it not possible?
I can't figure it out*
Thank you
Gave +1 Creative Carma to @thick tangle (current: #404 - 3)
Okay....
I will try that next time thank you
Gave +1 Creative Carma to @thick tangle (current: #323 - 4)
So I want to use the clone brush tool. How do I create my own pattern from my image ? I want to clone a part of the pain of the car and use that as a pattern to clean up the clean how do i do that?

I will take that as a "No" to my question and not that I forgot to remove the "im invisible" post-it on my forehead
What is your question?
You can edit single frames after converting video file into image sequence
I dont think you can import video file directly into ps
To work with videos it’s better to use premiere pro or after effects
Oh yes, you can totally open a video file in photoshop...gives you layers etc and will even edit audio... it's just i couldn't 'see' a way to see the frames individually so i could alter them, or remove them
And THANK you! for answering...
I dont think I have photoshop pro...
Premiere pro
that sounds expensive I'mma broke little thing
ughhhhhhh I AM about brain dead! LOL
Unless you want to work with 4k videos
Well I have davinci and openshot... Am having some issues with my graphics card..so I thought I'd try my photoshop
I've created some animated images in my leo program and wanted to splice two of them together for a smoother run before my puter crashed for a second...
As it is, there is a 'bump' in the playback lol
There’s also kdenlive
I've never heard of that...is it graphics intensive?
That would be awesome!
Having to save every second or so so I dont lose progress..is a pain as it is. lol
Safe travels! And Thank you!
There are some reflection and some sunray on the left side on the car that i want to remove. whats the best way to clean up the car in ps?

Why when im drawing my colour doesnt appear until hide and unhide the layer. theres also weird white boxes glitching
Check the GPU. Help > GPU Compatibility... are there any errors or issues reported there?
all green ticks
i know im going to drive myself insane looking for the solution so im just going to restart
does anyone know the name of this font i use to use it and i think its on photoshop does anyone know the name

you know you can see your recent used fonts? its saved, just check there and you will find it easily
this is a new pc
and itsd been a long time
Arial Rounded MT Bold
its not showing up
Hi guys. I am having trouble understanding perspectives. I watched a handful of tutorials and explainers about perspectives, horizons, matching vanishing points etc, but they all seem to be using naturally and easily matching photos which don't seem to be the case for me. The problem with mine is, that the photo of the room is shot on a wide-angle lens, whereas the sofa seems to have a completely different perspective.
I drew perspective lines (red for the room and blue for the sofa) - however, I might be completely misunderstanding the whole concept. What would be my next step to match them? If I match the vanishing points, my object (sofa) falls off the photo completely. But even then, the planes of the sofa don't match the planes of the background. I could use perspective warp, but the sofa isn't made of neat rectangular planes. Is there a handy method that I could use here or am I completely missing a point?

its a default font
which means?
it should be there, i didnt custom download this font
Guys whats the shortcut called in keyboard shortcuts to toggle each track on and off

This is Premiere? You might want to refer to the Adobe Premiere User Guide: https://helpx.adobe.com/premiere-pro/using/keyboard-shortcuts.html
does it matter if its on regular bold or italic etc?
Does it matter? Bold is a thicker typeface and italic is skewed/slanted so they will look very different.
yes but the font am searching for which is arial rounded mt bold is not showing up
I guess it depends on where you getting the font. Certain fonts will contain bold and italic variations.
disabling gpu for some reason seems to help it slightly
its weird
its a font supposed to alr be on photoshop
Not sure why. You don't really have a GPU, do you?
eh, its a laptop with a discrete dedicated gpu
a mx330
not the best but should be able to handle basic drawing
You have an integrated graphics chip, no?
atleast better than a cpu igpu
ye
igpu somehow seems to work better than the dedicated lmao
idk how thats even possible
There is a setting in the Edit > Preferences > Tech Previews.... "Older GPUs" checkbox. You can try ticking that and restarting the app. See if it helps.
yep tried
for some reaso checking disable native canvas also crashes when keeping enabled dedicated gpu
doesnt crash if i disable gpu
how was this effect made?

weird thing is gimp and other software has absolutely 0 issues
work straight off the bat
Yeah. You've mentioned that several times now.
And as I've said. I never had problems with using my Huion tablet with Photoshop.
I'm using huion hs610 and have no issues 
Could be a custom brush and painted. Probably the easiest solution.
hi!!!! i upgraded my photoshop from like 2020 to 2024, why does the select marquee tools always lock onto my mouse after clicking down unless i slow down my mouse while still holding it down then releasing ?? has anyone else experienced this how do i turn this feature AWFFF!!!
yeah its def not an issue with the tablet
thank you so much!
Gave +1 Creative Carma to @ripe quest (current: #3 - 1775)
Its possible newer versions of Photoshop don't play well with your integrated graphics chip.
when it locks on it wont stop until i click my mouse agiain. im using razer blade 15 laptop maybe it could be a laptop gesture option possibly idk but i have gestures turned off
yeah
i might try a cs6 at this point lol
here r my preferences is there anything i can change !


I don't know what this means. I haven't experienced that. Can you record your screen so we can see it happening? Or you could also file a bug report on the Photoshop Community Forum.
FUAWWKKK
1st and 3rd time it worked normaly but 2nd and 4th it just locks onto my mouse even after releasing and wont place select until i click my mouse again

there is not rly any way i can show it lol
but i need it GONE !!!!!!
This is a GPU / real-time rendering issue. Make sure you have update-to-drivers for whatever graphics device you have.
OMG RLY
There is no reason to behave that way here.
wait just to be clear ur not judging that based off how the gif i recorded stamps the mouse right? that wa sjust off the gif capture
?????
is there any way to see which drivers photoshop uses so i know which ones to update ? :)


I'm basing it off the glitchiness that is appearing in the thing you posted. Are you saying that is the result of it being a GIF or is that how it actually appears on the screen?
is expressing emotion informally prohibited here 😭
yess the visual glitchiness is just from the gif capture
the actual problem is just the way the select tool locks onto my mouse
I don't understand this question. Help > GPU Compatibility... should show you which device you're using. Then go to the manufacturer's website and see if there are any updates for that GPU. If there are, you can install them. That is a simple thing that could be done to see if the issue is resolved.
If not, you can try Disabling the Native Canvas in Preferences... or using the "Older GPU Option" if its older hardware.
oooo let me try that!!! i will see if my drivers have any updates available first tho also
No. Its not. But when people start replying in ALL CAPS IT TENDS TO GET A BIT ANNOYING, YOU KNOW!? :)
lol fair enough it be tthe hyperactivity flowing thru my fingers and into the caps lock
this worked omg !!!!!!!!!!!!!!!!!thank u so much!!!!!(trying not to use caps lock but i am happy af rn)
is it logically possible to remove the text "KINGS" in this image, i have been trying but the background behind the text is looking absolutely trash

anyone here got some cool ideas or tricks that could make this a success, i am trying to practice with hardest photos possible recently yet im getting stuck in the most simplest thing such as removing text
 would be very tedious
is this the high quality version, or a screen shot of it I'm assuming screenshot.

idk if there is any difference
but yeah this is the downloaded version
could just be my eyes. let me give a go at it to see.
(from pinterest)
when i try to draw and this white box keeps appearing


For one, that res is terrible. - There are better ones online

You could use Gen Fill to remove it, but you'd need to decide what to put in it's place....


@native shard
how do i edit 360 degree image? the 3d menue is gone and i cant edit my 360 degree image.
Yes, the 3D features have been announced as terminated for a few years now, They've been removeing them little by little.
In which way did you want to edit your image? It could be a case of using another (readily available) program instead.
i need to be able to remove myself from photos. and no im not using other softwares. i have no money to buy them.
I was talking about free software, but here you go
what prevents you from using the normal retouching features of Photoshop, why does it have to be 3D?
i have used adobe so much and dont wanna put countles hours on learnign new softwares.
why removing a feature many people have been using? seriously!!!!
I don't know, I don't work at Adobe 🙂
To be honest it was very buggy (and yes, I used it a lot!)
typical bigh tech company. hey lets remove a important feature and force them to pay more.
il try to downgrade to the oldest version available on creative cloud.
Good call. I guess you won't need my help?
i got it to work. case is closed.
Hello team !
I would like simply make this text more aesthetic by removing all of this big gaps but leaving it "square". Any solutions pls ?

You can use Hyphanate. Just click on paragraph.

Yooo bro thks u
you got 4 options: Flush left, flush right, centred and justified (justifié a gauche, a droite et centré+ centré justifié)
The problem is that you have a very narrow column, and it's often quite difficult to properly use it

Suite et fin sur les enrichissements typographique : nous allons maintenant évoquer l'alignement des texte et expliquer les principaux cas d'utilisation.
La france 🇫🇷
1- as offered by @remote vapor you can hyphenate (trait d'union). But beware as it could be horrible if they're too many of them. Other solution is to play with the space between words (spacing) or the space between letters (kerning)
Photoshop doesn't allow to automate that, you would need Illustrator or InDesign
Pas forcement
Anyhow, in Photoshop, the help is here!
https://helpx.adobe.com/be_fr/photoshop/using/formatting-paragraphs.html
I think that I should take a break. I was certain that I'm responding to a question on the Illustrator discord.😴
Don't worry, the panel is the same 🙂
I don't use InDesign very often but for that kind of things, it's really is best. as you can declare a % of spacing to fit the line when justified, like 95% to 105% of the line. I also sometimes prefer ragged (flush left). Sometimes I feel a justified text is a bit old-school. Although in that case, the ratio column width VS font size is so short that it wouldn't feel nice either
I guess it's a question of preference
Hey, do I really get Photoshop cheaper in this bundle than buying Photoshop alone? Is there some catch? Is it full version of Photoshop?

No, there is no catch! I used to have this one until I upgraded to the full CC...
In fact it's a long running promotion, it was supposed to be temporary, but they never really cancelled it
Because full version is like 24$ or something. Thanks
Yes, I don't think anybody buys the standard version (maybe it comes with more storage space though, I haven't checked)
But the photography plan definitely is a bargain!
Is there a way to instantly desaturate a layer? Im trying to make like 30 layers just black and white and im too lazy to apply it to each layer lol
And they are sepeated so i cant just apply one adjustment layer to all
You can group them in a folder and apply an adjustments layer to the group
I would do that but they're each in their own groups already
and each group has other stuff i dont want to be affected
the clipping mask doesnt work either because the layer im trying to apply it on is also a clipping mask so it apllies to both layers
Okay so apparently it is Ctrl + U, took me forever to find
Does there happen to be an official adobe illustrator discord ?
Yep. Here ya go. Adobe Illustrator - https://www.discord.gg/adobeillustrator
legend ❤️
Good eve all! I am new to sublimination printing. I am needing to make this drawing print ready for sub. I am pretty lost as i usually have only done vinyl slap ons for shirts etc. Is it even possible to do so with this drawing? thanks

how do i make a logo like this

If I where to try to make something like that I would use a brush, or I would create the shape with the lasso tool and fill it in. There is probably a better way though.
How do i replicate the left side of this piece?

kind of like an equalizer waveform type of thing going on, Idk what to call it but I want to be able to replicate it
lol how do i get them
sorry for late response, it was like 12:21 am when you replied
this is pretty sick btw
thanks for the help man, i appreciate it 💪 ❤️
generative fill is a pretty time saving option and good idea!
These tutorials might help get that effect

In this video, we're going to learn how to create a liquid paint marbling effect in Adobe Photoshop.
Download https://www.dropbox.com/s/ewy2c7rvzc2mu1c/Dansky_Patterns_Paint Marbling Effect.psd?dl=0
⭐️ Master Adobe Illustrator and unleash your creativity!
View course: https://www.dansky.com/courses/the-adobe-illustrator-masterclass
Get 1...

the cutoffs for the glitch effect seems too sharp and clear of a cut than what the picture im trying to replicate has
the first one might help though
There is probably a better tutorial out there
Anyone know how to make it to so this can be screen printed (sublimination?) I am new to this kind. I am basically seeing if i can seperate each color, i don't know if its possible with this though

If anyone can chime in on this and help me out I'd greatly appreciate it
how can i crop this single layer? when i choose the crop tool, it crops the entire canvas, but i just want to crop a single layer

try magic wand tool
then copy it and paste
Alright, lemme try thank you
Gave +1 Creative Carma to @stuck kestrel (current: #851 - 1)
Np 😄
Is there a setting to enable viewing the brush tip on the cursor, and not just the brush outline? My Google-fu is either failing me tonight or I'm looking for a setting that doesn't exist.
Preferences > Cursors, and under Painting Cursors, select "Full Size Brush"
So I had that enabled. In this image for example I've used the brush on the left, and the right is the brush outline. But what I really want is to see a preview of whats on the left inside the brush outline when using it.

I'm not sure that's even possible
Yea that's what I was worried about. I couldn't find anything so I figured I'd ask here.
There might be a plugin that adds that feature out there somewhere
you want to have the preview of what it will look like after you make a stroke/point? sorry, not a feature in Photoshop 🫠
how do i make this white

Google 'turn black clothes white photoshop' @river vapor
none worked
Ctrl+i 
i can barely see the details now
The quality/resolution of the image is dreadful - which doesn't help.
There are LOADS of videos with guidance on how to change colours - I find it had to believe that NONE of them worked.
Anyway, here's a clip above of it working,.
Just send psd
I lied I just wanted someone experienced like you to do it so its easier for me sorry
Thanks tho
I already closed the file anyway.
Darn it
bumping this!!
u can use smudge tool
Not with his hands in that position 🙂 - Unless he's serving you the guitar on a plate.
Have you tried using Gen fil, and then fixing it up/masking?

I mean, his hands aren't in the right position to hold a guitar
No, I don't know what gen fil are 🤣
But that picture you have there also work!
But the picture is for my fathers band, I'm doing photos and videos for the band so they can post it on social medias etc. So it's important for the clothes to be the same as everyone else in the picture. If this guy would wear that jacket, It would be a little "weird" for the actually picture 😄
Ahh, Alright, Then i guess i would have to redo the whole picture with his hands and etc
Wild suggestion but if they're in a band, why don't you get a picture of them holding their instruments? Sounds like trying to photoshop one in is a bit wierd if I'm honest?
@harsh dock u can try something like this... play with it more ,change the colors, add some glow, add some effects . blur perhaps ... idk u can try 😅
haha yeah i know. The problem is that, I'm not there when the pictures are taken. My father took these pictures. And all of them exept my father is super stressed to change their clothes after the "performance"
But do you think you maybe could help me with placing a guitar in hes hands? 🙏
whats the best way to blend something to dark sky ... ? cos when i try it doesnt fit or i cant see it...
You're best off showing what you're trying to do/blend. - share any pics?
Not really. It's fair to go back and tell them to take a better picture. - Learning photoshop, retouching, design etc is also knowing about when to push back and avoid wasting your time as well as your clients (aka dad) time.
i want it to be in a backrgound like a silhouette fyling far away in the back

It's like you could fudge it, but it would look ridiculous since the person in the image doesn't have his hands in the right place
That's cool. - Your only problem is that the dragon would be darker than the sky - you have it LIGHTER


I know, I didn’t ask them to take with their instruments. He doesn’t know that I’m trying to do this either. I roughy the whole picture could be better 😄
ok, so so you wanted to make it almost illuminated by some glow from the ground below.
I think if you want it illuminated more, from the ground below (since moonlight just cause it to be a **black **shadow), you'd need a reason to it to be lit up from below, in which case you'd need some basic texture/legs, scales etc...

oh okay i'll try that


hmm... thats not looking bad
I kinda get what you are trying for
Bang on. - Good call there! - I'm almost annoyed I didn't suggest the same myself
should i also lower the oppacity of the drgon?
Absolutely not. 🙂
You can't have stars shining through it's wings/neck.
😅 ...em okay
It would end up looking like a little feeble translucent moth looking thing.
Yea, might look like a see through dragon then
post another pic of what you are trying to achieve again 🙂
idk if its only me but still it doesnt seems to fit
thanks 🙂
im gonna dm u the whole pic if thats alr
Ok sounds good
how to remove green pixels?

@thick tangle

color replace, but it will only have black pixels, there is no way to remove it
remove, hide or replace?
What on earth happened to the image?
this mostly works except the subjects face!
uhh nice
Thanks for your efforts @stuck kestrel
Gave +1 Creative Carma to @stuck kestrel (current: #549 - 2)
Of course, np! 🙂 ty
@stuck kestrel i found my new image that would fit i think... now how do i make it look like like we talked about before?
I drag a full sized image and it shows up like this, any help!

also it lags my pc when scaling it up
anyone have any good crash courses to get started with visual design?
Does Photoshop work with touchscreens? I can’t use a stylus long before my hand hurts. Arthritis.
Also: a Fresco question. Is it possible to make tapered brush strokes using finger rather than stylus pressure?
On iPad it does. On desktop, its going to require a drawing device.
as far as I know, no you can't
I'm assuming you're asking about Fresco on desktop? Because it was specifically designed for the tablet (though it is available on desktop as well).
No I’m using Fresco on iPad
because ipad itself does not have pressure sensitivity build in, it takes the pressure data from the pen
I do have the pen. Just bothers my hand to use it a lot.
I see, I don t think there is any way to send pressure data using your finger
I’ve made man paintings using just fingers. But yeah, that’s what I miss — no pressure sensitivity with fingers
many*
help me
Also, is full photoshop available on ipad? Or just Elements?
btw technically you can do this, but desktop ps is not optimized for it
I have a surface pro. I think i’ve tried with limited success
Some PS elements respond well to touch input. Some not.
ps desktop is not available on ipad, i pad version is not the same with elements version i think
Thanks. That’s what I figured.
There is no "touch" interface for Ps on Desktop like there is for Illustrator.
So people typically use a Wacom tablet or such to draw with PS?
typically
i think they will make one
My image shows up like this when I drag and drop and when I scale it up it lags my pc out any help?

You think they will, eh? Well, we'll see I guess. :)
When the document canvas is enormous and the image you're importing is significantly smaller, this is what happens. You should check the size of your document. Its probably set to the wrong unit type, e.g. 2000 centimeters instead of 2000 pixels. This is a common error.
any leaks? 
Even if I knew, I wouldn't be able to say anything about it. :)
ohh alright thank you!!
Gave +1 Creative Carma to @ripe quest (current: #3 - 1776)
On Fresco: is there a way to download more live brushes? I have tons of pixel bridges courtesy of kyle, but the app doesn’t have a comparable button for downloading live brushes.
brushes* not bridges lol
I’d particularly like to”lighter” oil brushes. Less crusty, less impasto, creamier.
I don't think there is any way since fresco does not have brush making functionality and ps does not support the live brush tech
Thanks. That was my guess. Th watercolor brushes are awesome. The oil brushes dig too much for my taste. Anyway, onward. Thanks.
Gave +1 Creative Carma to @twin bronze (current: #27 - 65)
could someone help me put this drawing into photoshop and make it cartoon like

if someone has tim to dm me so that i can explain it clear
would be nice
Can someone give me places for some texutres like plastic etc, ones i had saved on youtube links got removed and idk why and i have no overlays for my cover art
there's lots of results

Yeah i guess so but i cba just want a mass download also if cant find shi dont want low quality stuff, will prob look up some on unsplash
go on envato elements if you have a subscription


I’ve already turned the couch to black, but now what I want to do is change the pillow color to white, anyone have any suggestions on how I can achieve this?
I wasn’t really confused with turning the couch black as the couch was more or less one color, however the pillows are multicolored
Create different layers for couch and pillows and color them separately
Yea that’s what I planned on doing, but because the pillow is multi colored, how do I make it all white? Like one way I thought of would look like the whole pillow is white and the patterns wouldn’t be visible, and the other way would be white but the patterns are still visible (visible but white colored)
you can use adjustment layers like "Hue/Saturation" or "Levels" to desaturate or lighten the colors selectively. You could also try using blending modes like "Screen" or "Overlay" with a white layer
Oh okay, cus I’m not really sure of how I would match the blue to the tan when I turn them white
Like the hue of white that comes from the two
Cus it’s going to be different
You can always adjust it until you get the desired colors
how do we create this type of cloud/smoke? I tried achieving it by using custom brushes but it never looks the same

Yeah, I understand that but I don’t really know how I’m supposed to individualize the colors affected by the filters or adjustments
the ones I make end up looking like this

.
To match the original image you can try blurring some parts of the image, or lowering the opacity of some parts, there also might be a different brush out there that matches better.
But the clouds you made are larger and thicker than the originals so maybe try matching them better
Like so the adjustments only affect one layer?
thank you! I'll try
Np

Clicking that button makes it so it only effects the layer below it
does anyone know how to switch the color of the from white

Can I see your full screen

Is that a shape?
yea i used the rectangular marquee tool
Alr so click the rectangle tool and then the options should appear on top of your screen

Oh I see, I thought you made a shape
You resterized the layer so you need to use layer effects or create new shape
Or paint over the existing layer with brush.

Its the Opacity and Fill value above layers

Click twice on layer and go to Color Overlay
Thank you
Gave +1 Creative Carma to @flat parcel (current: #852 - 1)
No. Notice in the colored pic, the pillows are multicolored. If I were to make the pillow white colored, the areas where there are those different colors, would appear as different shade of white, and the design that is created from the colors would still be visible. I want the pillow to look like a regular plain white pillow
Question for the people who do vector stuff within Photoshop- I want a rectangle that has a skew of 2 degrees, but I want it to remain a rectangle and not turn into a shape path. I want to be able to resize the rectangle on the X-axis whilst keeping that 2 degrees skew. Is this possible at all?
How can i make this blur out like the other one?


Do you mean the anti-aliasing on the brush strokes that were drawn?
You can try finding an image of a white pillow and use a clipping mask to change the pillows white
Uh yes
It looks like you're likely using the pencil tool, so instead of using the pencil tool, try using the brush tool
If you draw a line via the brush tool, it will have anti-aliasing applied, unlike the pencil tool which won't
Oh thx

Bump!
Didn't someone already provide help on this?
sorry if this was already answered, but to screen print, you'll need to make it into a max of maybe 3 colour vector file.