#❓ask-a-question
1 messages · Page 22 of 1
Raw files don't have a set resolution until they're past camera raw and brought into Ps. If the file is still large and at 75 dpi, unchecked resample if using image size, and set the higher resolution (300) and ratio you're after.
Crop tool works too, just specify in the options bar the resolution you want the resulting crop to be.
Hey guys im trying to select this Calligraphy and make the actual text transparant instead of the background to put an image behind it

Do you know how this is done i tried selection tool but the edges are bad and i end up with this

This is what im trying to achieve

select by color range maybe?
Try select subject, or select > color range to select the black. Add a white layer behind the logo. Then Bring your image in and clip it to the logo layer
oke ill try this
had quick try and selecting white and reversing selection works better for some reason


I got this now
this is going on a flyer the edges dont seem smooth
if i try select > modify > smooth
with 1 pixel then a lot gets deselected
a lot of this is like 1-2 pixel thick
you could try to trace it in illustrator or inkscape to create vector
and then use it as a mask for another pic
Okay ill try that, is it straight forward or should i watch a toturial
depends if you used illstrator or inkscape earlier
with black/white picture should be easy
just don't forget that mask has to be inverted when you will trace it as black color is removing pixels
okay
so you want black background and white logo for mask
Hello, i'm doing some work on photoshop and imo they're not aligned into the center. How do i fix my pov so i can make sure everything is centered? I'm using a 4k monitor, this kinda of confuses my vision sometimes

I look at it and i don't think it's lined up

But how do i use it for the entire thing?
select parts you want to center and then use align to center
it dosen't let me

@ivory rampart i just succesfully traced the logo but dont know what i need to do now cuz i dont understand what it does
its traced should i now invert and deselect or what ahppens now
it's probably text layer, convert it to smart object and then ctrl+T and manually move it to center of your image


it probably traced as black color as pixels where black, so yes you have to change color of your logo to white and set bg as black
nope, didn't work

i dont think i can do that cuz its a stock image from google
do you want that A in center?
Thank You
anyone have a recommendation for photoshop draw along tutorials? similar to the procreate ones you can find
Hello everyone, I am struggling to make a cutout of my layer in the layer behind it...
I know how to do it normally, but for some reason it is not working this time
hello first of all, im trying something for two days and stuck in same point i will add 2 pictures, what im trying is; wanna keep the white parts i want them but all the grey and black areas are not needed i need to clear them. I tried masking it but im doing something wrong https://prnt.sc/7LX7nS2npYHr https://prnt.sc/e0TOIx3j3iGp


Did you try Select color range / Highlights / Mask or Ctrl + J?
im kinda new so i will try now if i can make it happen i can finally sleep lol
on the drop down or upper menu you should find "Select" and that offers you the "Color Range" option
https://prnt.sc/3SGJYYey4hdw this one

yes... in the Sec option there should be the highlights preset
that selects the whites
you can play with the range and fuzziness depending on how masked you want to select the white
Group it, press Ctrl + A and then allign the group
i think i did it kinda right (maybe i adjusted wrong something but) is this result in the right way ? https://prnt.sc/PdUm61xZCKU8

Reduce Fuzzinezz, the first slider, and up the second slider for a more "pure" white
ty a lot you saved my sleep routine ❤️
i can take over from here
ty and ty and ty a lot ^_^
no problem!
Do you know why my Layer Via Cut wouldn't be working?

If you could help me out as well that'd be amazing 🙂
For context: I have rasterized both layers, I am highlighting the black lines and when I click layer via cut, nothing is happening
Sorry, what are you trying to do? I'm not familiar with the layer via cut
Can you post a screen shot that includes your Layers panel both before and after the action you are performing?
Have you tried changing the blending mode of the top image to Screen?
Another question. I made all this circles, but the images inside i had to cut and then put inside. Is there anyway to just add the images (Drag & Drop) to fit inside the circle, without need to paste, cut etc

Trying to cut the layer out of the background image
hey It says I have insufficient disk space yet I have 777 GB remaining
Try using a Layer Mask...
Does anyone happen to know what font this is?

Could you be accidentally trying to write to something smaller like a USB drive?
wym trace it?
there's no actual picture of the bbgz logo
so i gotta make it myself
hello ive been tryna figure out how to do this for a couple days but i dont get how to

how can i do the writing on the lip ?
How familiar are you with Photoshop?
Do you know how to select the Brush Tool and paint on a new layer?
yea
So?
Any thoughts on replicating this effect for someone relatively new?

There's a lot going on in this image in terms of skills. Any particular part you are wanting to first reproduce?
So this is from an actual anatomy text (cant find the original) and recolored in photoshop. Talked to the artist very briefly and the only thing I could get out of them is that they didnt color it by hand.
Im trying to do something similar with full human anatomy to toss on a gym hoodie. My GF has one of those printers that you can add on stuff as a side hustle.

well how can i get it too look real
like that
like on the musix the light on the x
marker B)
It says DIsk Drive D
hi , guys the generate fill(ai) is greyed and off i cant use it , pls need help
Does anyone know how i can get an angled stoke like the miami text in this photo?

Your best bet might be to find a font. Lots of free sources including https://www.dafont.com/
Archive of freely downloadable fonts. Browse by alphabetical listing, by style, by author or by popularity.
eh i have the right font alreaady unfortuntley
If you have the font already what's the exact problem?
im having a problem layering it without it looking sloppt
the font doesnt already have 3 layers just 1
Can you not just have 3 copies of the text in different colours on different layers all offset a little from each other?
yea it just wasnt looking great hold pu

maybe im being picky but it looks a little off
I think it's looking good. Do you know what you're not liking?
Very TikTok


Yeah those areas you might have to clean up by hand
Are you comfortable using the vector tools? You can convert text into a vector and then manipulate it however you like.
Sorry mate. Something you'll have to build yourself if someone else can't help.
Are you familiar with the Brush Tool in Photoshop? You can create blank layers between the text layers and then paint in those gaps with the appropriate color.
Whats a good tutorial that covers all the METHODS of creating something? I know all the BASICS from GIMP/Photopea but I dont know what to do
You're welcome!
You have complete course in Photoshop available on Youtube (I will share a couple below) but you also have the Help files. They are incredibly thorough, and generally explain in a different way than tutorials do. I think studying both is important.
You also have in apps tutorials, directly within photoshop to cover the basics (go to help>hands-on tutorials)
Photoshop is a mouthful, been at it for 20 years and don't know everything! (far from it 😉 )

Learn Adobe Photoshop with this amazing FREE course. Go from beginner to pro in 23 lessons exploring all the essential Photoshop tools and techniques. You'll start at the beginning and work quickly into more exciting techniques. Learn how to use Photoshop layer styles, how to change color levels, how to retouch and manipulate images, and much mo...
Ah okay. Ill check out the hands-on tutorials

The Complete Guide to Getting Started with Photoshop for Beginners! Whether you are starting from scratch or want to build a strong and solid foundation, this is the lesson to help you every step of the way. We will leave no detail unturned, and cover everything you need to know to get started right now!
► TRY PHOTOSHOP FOR FREE: https://pix.li...
You also got courses available on Skillshare, and Udemy
You got a skillshare offer (1 month free + 50% off) if you have a paying subscription at Adobe
Good offer but I think I can get along with free resources
You can get the skillshare offer and cancel before the free month is over. Just saying! 😉
Maybe some other time
When I have more free time to really use the month to the fullest for photoshop, illustrator, blender and other stuff
hey guys does anyone know how to create this effect with text in photoshop? like where the subject is infront of the text fill but not the outline


anyone know why the outer glow effect on layer style is grey?
It might be something else, but it could simply be two shapes, one with the outline only, placed on to, and the same, with the fill only, placed behind the object, like a sandwich...
ah ok I'll try that thank you
so for example you can create your text, turn it into a vector shape, duplicate it, place one of them below the character, and then remove the fill on the top one, and set a stroke
You need to have your character cut out obviously

This is how it should look
Obviously not the ideal photo for this example but you see the layers so it should help
thank you yeah thats exactly what im going for
The only thing I didn't show you was how to convert your type into a shape

just right click on your text layer and go for "convert to shape", that's how you'll be able to set stroke and fill independently
anyone know of settings to fix adobe photoshop from popping up on my second monitor instead of staying focused on my tablet?
does anyone know how to turn a 24x26 pixel image into a bigger one?
Image resize, but it’s going to be pixelated
it's a kirby's adventure nes remade sprite, would it still look good?
anyone have a recommendation for photoshop draw along tutorials? similar to the procreate ones you can find
Depends how much you want to resize it maybe twice the size will look okish
Anything bigger than that will probably look awful
Also I wouldn’t touch anything with trademark for any other reason than personal project
Especially from Nintendo
As they are very strict with IP
That should be a setting on your tablet driver (at least it is on mine)
it depends of how do you set up your second screen as well
I have to set which monitor is covered here

and there I need to "extend" instead of duplicate

and then drag Photoshop to the screen of my choice manually
it should stay put
I do have it extended but some of the photoshop menus like color picking like to pop up onto my main display, the non-tablet one
In that case, it maybe because the tablet driver is not properly set up.
Also sometimes, having all the panels docked, instead of floating, helps
I guess it depends on the tablet (mine is an XPPen)
thank you! that made me realize something which I think fixed it, I think I may have had a floating window just barely on my main screen and not realizing which was causing it
Gave +1 Creative Carma to @vapid flume (current: #8 - 481)
I have a question - old facebook photos like this is there any way to crisp this up?

I dont think its noise really, just dont know a technique to improve it
I think one of neural filters have option to do it
no tradiitional way of doing it?
There’s probably a way
I’m just lazy 😂
you can play with hue/sat, levels and curves to get bit more from this picture

just using classic filters
i'm not pro so it doesn't look great 😄
How hard would it be to turn this or something similar into something that resembles the second?


Im having a heck of a time playing with stuff trying to get that vibrance etc
Hello,
I'm using the "historic brush tool" and when I use it, the "noise" of the picture is disappearing. Can please someone tell me how to fix that ?
Thanks a lot !

when I open an image in photoshop, why does it default to having a selection frame around it with the white boxes? I think this is keeping my alt+scroll zoom from functioning.
Is it possible to colorize only gray color?
Turn gray to cyan or other?
Try exposure instead.
ello, is it possible to change the degree of rotation when u press shift, its normally 15, id like to change it. can i?
You need to confirm the image being placed. Either press enter or press the checkmark at the top
Try select-color range, select the gray you want to colorize, then set your threshold as you want it, and confirm selection. Then use either hue/saturation adjustment set to colorize
Thanks.
Gave +1 Creative Carma to @sweet field (current: #22 - 78)
It may be easier for you to set a custom rotation here in the ctrl+t transform mode

thx! cuz im making a gif and ye
The reason it may not appear the way you want it to is because the muscle image has a lot of black outlines. The heart drawing does not have black lines, only colors. What you can do to make it more similar is colorize the outlines. Here I have the base image, a +100 saturation adjustment, and then just added a layer of orange on top of the blacks after selecting them with select-color range.
But really, the answer is that the second picture was drawn that way, with a lot of colors, and the artist understands how to use colors very well. So it was made purposefully to include all of them without mudding anything. So it would really take drawing it that way from scratch. But this is an alternative!
Hello,
I was using firefly as usual and for no reason, it does'nt work and tell me that i have a connection problem.
When I go firefly online, I can't see my credits anymore and when I try to access to one of the option, I got nothing, the page load and nothing happen, juste a blanck screen.
Can someone help me plz ?
(sorry for my poor english)
Yeah, I'd try upscaling it, and then adding a high pass filter over it. - Something like this.
Do you know what the History brush actually does?
? - What are you trying to do?
Hey guys do u know a discord or someone where i can find ppl to inform me about the brightness/filter settings used on this video https://www.youtube.com/watch?v=fgaAbRWe5HQ

WHERE ARE YOU GOING? CAN I COME?
EP out now https://bennettcoast.com/wayg
https://bennettcoast.com
instagram https://www.instagram.com/bennettcoast
twitter https://twitter.com/bennettcoast
additional photography by John Kim
concert photography by Tom Bolles, Kaveh Hodjat, and Owen Solomon
How far have you got so far?
#✍how-to-discord - Check the ADOBE VIDEO server perhaps
ty :))
Oh, sorry, I missed the screenshot above 🙂
Can you share the whole photoshop screen? along with the layers panel?
Simple masking 👆
@river otter
I'll assume that translates to "oh, I see. Thank you for showing me" - Good luck!
Gave +1 Creative Carma to @sly hawk (current: #7 - 695)
As Denas has already said, you can't make it exactly this style without redoing it, but you could get some more vibrant colours in like this perhaps....
Nobody ? 😅
g'day, i'm trying to make a very simple text pic that only says '2024'. i've somehow manage to get stuck in the 3d part of photoshop and i'm even more confused than i was before
Don't panic. Do you just want to go back?

yeah i've tried restarting, going into different tabs looking for it etc haha\
It's not showing the check mark for me. Does this have something to do with my adjustment layer?

It's annoying because I think it's keeping me from using alt+scroll to zoom
Auto select is turned off.

try clicking this, then click a blank area on the canvas - This will 'deselect it' and stop the box/frame appearing.
ALT+Scroll?
Surely you mean** CNTRL+Scroll **to zoom?
didn't you have to hold alt and scroll to zoom into the document?
Also, your curves adjustment layer is literally adding/changing nothing 🙂
No. I press Cntrl+scroll to zoom.
Well now it's zooming for me when I just scroll the wheel without holding down a key
in fact. I don't hold anything. I just use the wheel.
Isn't that a good thing?
What would you want it to do?
Alternatively, you can hold down the Alt key (or the Option key on Mac) and scroll your mouse wheel up or down.
Holding ALT makes the scroll wheel pan up and down.
I guess this is what I was referencing
what's the easiest way to make a simple text pic? i'm having 0 luck with whatever i'm trying to do 🫠

Presumably if I unticked this box, it would then ONLY zoom if I held Alt or cntrl or something.

A simple line of text? Like a headline?
yeah i pretty much wanna recreate this because the quality is bad

ahhhh
i have no words... there's no way you're a real human 🤣
that's insane, cheers 🙂
@sly hawkhow do i make it so i can move the canvas? i tried starting over to see if i could do 'no canvas' but couldn't find anything
You mean the crop tool?
yeah i was about to say i just realised i was on the wrong tool haha
because i figured out how to open the image without starting with a blank canvas then realised i was still on the text tool
Yep. Always keep an eye on what tool you have selected.
i don't have 2 icons where the black and white squares are

🤦🏻♂️🤦🏻♂️🤦🏻♂️ mine is underneath
fk i'm slow
I'm suprised that your toolbar is so wide...
can someone do "Divinity" in png for me using this style called "saber"? lol

Will please you buy me this first? ...."lol" 🙂
https://graphicriver.net/item/lightning-light-effects-photoshop-actions/6010897

GraphicRiver
Lightning Photoshop Actions by psddude
This set contains 5 Photoshop actions that will allow you to create realistic lightning light effects out of any text, shape or raster. The lightning eff...
i'm trying to work with a greenscreen and found a tutorial, when i try to remove the greenscreen in my video with the brush it only addss more greenscreen, can someone help me what i'm doing wrong?


Hey, check the last half of my old video here, maybe it will help you...
#💬chat-general message
Watching back, I realise I just removed the green from the whole image, but this could just be combined with a mask, where you just paint where you want to remove/desaturate the green tints.
i even tried to do the first step, but it cant even remove the background
.
Can your share/send your original pic? I'll try it at my end and show you if/how I did it?
Is the border a separate layer?
If so, just select it and hit cntrl+i to invert the colour.
Given that you're swapping the cover anyway, can you just invert the whole background then?
It will turn the thread black and background white.
Wow man thats really good actually is this a specific technique or ?
Hello! Is there a way to change skin color to match the skincolor with an other part of the body?
If yes, how? Can someone help me?
As you can see the right hand is so red, while the left is normal. Can we match the left hand to the right hand’s color? Or just to doesnt be this weird?
Thx!
So im curious about the method. So how to do it?
Okay.
I do not know if this question will make sense to you.
Basically, I have a problem matching object A to object B via color balance.
I do not know how much blue, how much cyan etc.
Is there easier way then practicing this for days?
select part you want to adjust and then click on adjustements and play with hue

Matching these towers forever and still not very good.

How can I make the quality of the photo the same from the web into photoshop as everytime the quality gets worse when I copy and paste it


File - Open. right click on layer and turn it to smart object, so when you resize it does not lose quality.
i changed it to pixels the image size from cm and the quality is lost
Nah. Just trial and error from playing around with blend modes and colours.
Your making the image too small. This is why.
oh ok thanks
Gave +1 Creative Carma to @sly hawk (current: #7 - 696)
Not enough pixels available on the canvas to be able render it nicely.... like you trying to recreate a photo using just perhaps only 100,000 square lego bricks
Hey all!
I'm struggling on how to approach editing out this finger that's covering the lens in this photo.
Any tips or ideas?
Thanks in advance ❤️

Try Generative Fill. :)
Gen Fill should get you started. Then you can manipulate it more after you have a base to work with.
That's brilliant!! thank you so much @ripe quest ❤️
Gave +1 Creative Carma to @ripe quest (current: #4 - 1594)
Hi, I have a problem and i'm wondering if anyone knows a solution?
I was using the pen tool to make a line for me to fill in with the brush tool by pressing enter
and it was working before
but now when I press the enter button it highlights the opacity of my brush tool
How do I extend my timeline bar to see more numbers

Use the slider bar at the bottom of the timeline panel.
thanks
Happy to help, @wintry sparrow
I'm trying to understand your question. Are you drawing a path, and using the Fill path? Not a shape layer?
oh i'm drawing a shape not a path
my bad
that's probably why?
no
still the same result, pressing enter still highlights the opacity
they are different, though very similar
You can fill/stroke a shape layer using the dropdown menus on the Options bar. Shape layers are dynamic and if you change the size/shape the colors adjust. Separately, you can fill/stroke a path using the panel menu or buttons on the paths panel. This adds the colors as pixels. Are you doing the second?
this might be a really stupid question but im currently using photoshop beta. And whenever i click generative fill it it makes its own image shouldn't it be inserting it to the image ?
@rich halo It can do either. If you want to something to an existing image, make a selection and then add your prompt. GenFill will add it inside your selection boundaries.
I think i'm doing the second? I've never had used the stroke/fill for the shape, i've just been using the enter key to fill it with whatever color (in my case black)
maybe I had a panel open before and haven't had it open since
okay i got it thank you
Gave +1 Creative Carma to @willow gale (current: #27 - 61)
Great! 🥳
I see
Now, I know I didn't answer your question. Are you ok to move on or do you want to revisit your question?
if there's not really a definitive solution it's no biggie, I only needed it for a specific thing that I might need down the line but for now I think i'll be okay
OK, sounds good. If you can use an editable shape layer, it may be better in the long run. At the end of both demos I adjusted the shape—the color adjusted with the Shape layer, but didn't adjust for the path.
im trying to generative fill some sings but they all come out gibberish is that ussaly how it comes out?
when im editing my timeline after a bit my timeline stops working and I can't edit it and I have to restart my progress from where I left off and when I try saving it, it says could not build a preview because the scratch disks are full. how do I fix this?
GenFill can't handle words yet. It's still learning...your best bet is to type them after.
hi guys,the latest photoshop doesnt detect my gpu it says unknow, i have to downgrade to 25.0 for it to detect my gpu, im on windows 11, anyone has the same issue
my driver is the newest
nvidia driver
i even downgraded the driver and still doesnt work
Are you not allowed to make a clipping mask to a brush made shape?
why when i apply a mask ( i want to brighten the kart and do stuff with the background do i get this transparent section of pixles around the mask?

Hello, when you ''Save as'' an image, and choose the JPEG option, the quality range is from 1-12
but when you ''Quick export'' as a JPEG, the quality range is from 1-7
is there a way to make the ''Quick export'' quality 12?
I basically want to quickly export/save as/save as a copy (any is fine) to JPEG, currently the ''Save + Save as + Save a copy'' options default to PSD (as shown in the picture), and photoshop refuses to remember the last used option, always defaulting to PSD

''Scripts > Image processor'' is a way to do it quickly, but can I make it only save the currently open image? rather than all images open in photoshop
You can use image processor within bridge, and choose the image you want to process (one or several) by seleceting them and go to Tools>photoshop>image processor
it will open the module in Photoshop and work as normal
In Photoshop proper, the image processor works with open images, or a specific folder

in bridge, the wording changes to "process files from bridge"

I am to believe that 7 is equivalent to 12, although, let's be honest I never use Quick export (As I use bridge mainly, I'll use the export options with custom presets)
these are all my custom presets (specific to clients and standard sizes as well)

Probably because the mask isn't 100% accurate (if it's an automatic selection and mask, sometimes it happens when part of the image is blurry)
You can contract the mask by going to filter>other>minimum (or maximum if you want to extend it)
Yopu may want to add a bit of feather (check in the properties panel when your mask is selected) so the transition isn't that hash between the tires and the road...
Is it an older GPU? Have you tried the compatibility test?

Thank you very much, I've never really used Brdige before, it seems very helpful 🙏

it's the place where you'll be able to automate things 🙂 I couldn't live without it!
That looks like a gradient overlay (light yellow to gold yellow) but reflected instead of standard

in the layer styles, same place as glow
ohh okay thanks I'll try it
Gave +1 Creative Carma to @vapid flume (current: #8 - 482)
any tips to achieve this type of effect for an image?

For me it looks like some noise applied on a neutral layer, to which a motion blur (or a wind effect) has been applied
thank you
Gave +1 Creative Carma to @vapid flume (current: #8 - 484)
where can I ask InDesign related questions?
Sure! I'm sure there are people here acquainted with Indesign (otherwise I will try to point you in the right forum)
Just to clarify, there is no InDesign discord server (no official one at least)
But this is the InDesign Community forum
https://community.adobe.com/t5/indesign/ct-p/ct-indesign?page=1&sort=latest_replies&lang=all&tabid=all
I sometimes direct people to the Adobe Illustrator server too.
Yes, makes sense!
I have a little knowledge of Indesign, enough to get me through standard layouts and menus like styles etc... so sometimes I can answer, but it would be very limited 🙂
giving it another go and i still can't figure it out 😦 @sly hawk

seems like the ratio is stuck on 16:9
yeah nah i've never been this confused in my life 🤣 the colours aren't even right
and the crop tool is on the piss


This is the reason for the locked ratio, Clear it.
The colours ARE right, you just have the text selected!, so it's inverting them whilst you have the white selection box over them.

yeah i figured that out, i thought the white was the colour of the text box 🤦🏻♂️ sorry i'm veeeery slow haha

@sly hawklifesaverrrrr
i was sick of needing to change the font size haha
so if i lower the text size and increase the box size will that fix the quality? because where i'm at right now there are edges around the numbers
it's not fully rounded
HELLO! does anyone ever have an issue with photoshop not opening a new file or preset?
No, not really.
guys anyone here?
im tryin'n to blend in some moss, grass ish... kind of , and i cant find any good brushes that looks a little bit like moss or something like that
so i was wndering if someone can help me or something...
thx
Have you googled 'free grass brushes photoshop'?
e.g. - first result:

I was but there wereonly paid ones
so I made this flashlight texture for a night scene im working in in PS, but I'm wondering how would I apply it to the scene after i have it positioned where I want it? Would I use it as a clipping mask for the lut adjustment layer I'm using?

Hello. How do I apply a smart object layer to another layer? If I right click the smart object layer, I do not have the option to merge it down.
quick question, I'm using the pen tool then making a selection then doing ctrl x to remove a certain part of an image, but instead of that deleted part being transparent, it's white. Any idea?

Is it a "Background" Layer? Unlock it first by tapping the little lock icon.
yup works thanks 🙏
Gave +1 Creative Carma to @ripe quest (current: #4 - 1595)
guys whats the easiest way to add glow like under the helmet ... like the glow is comig from behind helmet like "face" or something , some advice would be awesome thx
I have a png that I want to use as a grid. is there a way I can enable snap to for the grid lines in the png without having to trace over the grid?
im trying to select it but looks bad

can anyone help edit something for me? Im noob 
Try select it using the channels instead of the selection tool. then add some outer glow to it!
Select what?
The lightning strikes? What for? There is probably a better method for whatever you're trying to use them for.
I can probably help YOU edit something yourself, yeah. - what's the problem?
Unlikely, why are you using the PNG as a grid instead of the native, customisable, 'snapable' grid built within photoshop?
Show example.
its a triangular grid, im not sure how to make that in the grid tools if its possible or not
I'm just wondering what the purpose of a Triangular grid is. - unless you're going for something isometric. - In which case, you can still match isometic points to be the same position as normal horizontal/vertical lines:

yeah its isometric

how are you doing that?
I nicked the image off the internet for the purpose of my question/visual. - but I'm just working on replicating it properly now.
thank you for the help
Gave +1 Creative Carma to @sly hawk (current: #7 - 698)

I just downloaded this free isometric grid template from here:
https://dribbble.com/shots/2142956-Isometric-Grid-Template
Dribbble
From trial and error, I see that you can get the same snap points by making your grid exactly 32 pixels.
If you want it larger, just scale the entire image up by perhaps 200%, and then change the grid spacing to of course 64 pixels.
awesome, thank you.. I thought I had to make the grid isometric somehow but I see what your doing now, that makes sense
Gave +1 Creative Carma to @sly hawk (current: #7 - 699)
Ah. you may need to make your grid 16 pixels, not 32, since it skips out every other 'cross' on the isometric grid.
okay, sounds good.. ill try that
If a fully working isometic grid is CRITICAL for you, you can always try out KRITA. Which is an alternative software. - I presume this grid allows snap points, but don't quote me on it!

oh nice, ill check that out too.. its for a topdown game/isometric game so its fairly important
OKAY, i want to continue the white border to the bottom white square and make it black but i have no idea how to do that

I'm applying for a graphical designer job and they just sent me a task/challenge with the following information from the image to test my skills.
Do I make one design for 3 products and make them in all 3 provided resolutions? OR different design per resolution per product?

I'm reading it as three separate projects, but can't you just ask for clarification from whomever sent it?
@pallid oracle I would do nothing for them.
The flip side of this request is they are getting free designs from @pallid oracle. This is a tricky situation, I agree.
Hi @scenic compass Not sure how well you know Photoshop... one approach is to create two outlined shape layers—one black and one white—and mask one of them.
Not only that, it is wrong on so many levels, I was in similar situation, and I can already see what kind of company that is.
I dont know if I am allowed about my situation here.
I hear you. There was a recent Reddit post where the applicant wrote "I don't offer free design services" to a similar request and then came back to say they got the job.
Basically I did 10 InDesign catalogs, I got a job, but with broken pc screen, not working mice, old computer, while boss is driving 2023 car.
I quit first day.
Since I recognize it is east europe from language, he is in the same boat.
If someone ask me again that, I would just say to give me 5 monthly payements.
I wont return any and possibly wont accept job.
Comes to same as what they ask for.
Only @pallid oracle can decide what to do, but I think it's helpful that you shared your experience.
i got as far as. to the "load selection" part, its grayed out andi cant press it
How is white border supposed to be seen on white image (down part)?
Change it to other color, and draw rectangle without fill and white stroke.
I think that this can be done pasting lines with same diatance, then merging it into one shape.
Then just change rotation.
i dont understand what you said ngl 😭 im sorry
You want down border to continue in black color?
yes
Two same rectangles, neither has fill, one has white and other has black stroke.
Select down white part (that down white rectangle, hold CTRL and mouse click it) now apply selection as a mask for both of the rectangles (only stroke) layers, play inverting CTRL+I on masks until you realize what does what, and you are done.
i think im just bad at reading and understanding text tbh is there any way you could take a video?
Not on pc now, but i can take you step by step in dm if you want.

Sorry @scenic compass , I was helping someone else, do you still need help? Happy to break down what I showed.
I sent him project. Since then we did not heard for him. 😁
Awesome! 😊
hi peeps, i want to know from yall how do i make this better

this is something that i like to approach, in terms of theme it doesnt hurt the eyes

change the gradient
Use eye dropper to pick the light color and the dark color in the second pic and blend it
I have followed many tutorials and troubleshooted but I cannot find how to fix. I have logged out of my account and signed back in, I have uninstalled and reinstalled, as well as trying previous versions but I still need help does anyone know how to fix this? (This issue is happening with every application in creative cloud btw)

Is the Creative Cloud app updated to the latest version?
How do I check?
Have you updated the CC app or the individual apps recently?
I just got creative cloud today and signed into my school account
You're trying to install the Adobe Apps using credentials from your school's Teams/Enterprise Account?
I think so
You might not be able to do that. You might have to contact your plan administrator and ask them.
If we want to make photo composition of 3 elements.
Photo is half underwater.
- Sky
- Sea
- Person (Half person is under water)
All 3 elements coming from different photos.
Matching sea, underwater and sky would not be that hard, we would boost cyans, blues and aquas, and escape reds, yellows and oranges.
And now problems comes in.
Our skin is full of red, yellows and oranges, all the colors we are escaping for sea and sky.
How to match a person in this situation?
Escaping = Having low or none level of the particular color.
Not Photoshop question, but I hope I can ask it.
my adobe file i made yesterday wont open, i double click it in photoshop and nothing happens when i got to the file of it on folders and click it it says couldnt open to due to program error, any help? or do i have to restart?

Why 😂
I checked their company and they seem legit
Invert color ctrl+i
Hey, i used to make these in davinci resolve. Is it possible to recreate that red glow on the character in photoshop ?

If character is on separate layer just add layer style to it
i used to do it with a plug in i have no idea how to do it by hand
I doubt there will be a way to make it easily exactly like this.
Yeah i doubt it too, thought i'd ask anyway incase
Give me a moment and I'll have a think
There are things like that
https://www.youtube.com/watch?v=r6JidcNegBI
although I don't know if it helps

This tutorial will demonstrate how to use brushes to create a realistic fire effect in Adobe Photoshop.
Photoshop action https://www.dropbox.com/s/k7gaa3k6pvp2q9d/Dansky_Actions_Realistic Fire Shortcut.atn?dl=0
Free brushes http://bit.ly/3pOUDnC
Paid brushes http://bit.ly/3bdbmx0
#Photoshop #Tutorial #Fire
⭐️ Master Adobe Illustrator an...
How would i go about extending this sky downwards? I want to kinda keep it with the same blueish style and not make it obvious that its changed. heres the original as well
or is there a better way to maybe just change the yellowish colors in the original image to like blue


Also you could create a brush that looks like fire and "draw" with it.

These smoke and fire brushes were created and provided by Reto aka xresch, they are part of a bigger pack that is available on his Creative Market store. Included are 22 Photoshop brushes (high resolution 1000 – 2500px) and PNGs for each brush.
then all you have to do is change the colour to red...
I would try the generative fill first.
If you have a relatively recent version, take your crop tool, extend your canvas to the final size you want
Making sure this option is selected

it will try to replacate the missing bit using generative AI
That is pretty interesting to know even if it doesn't end up working thanks
Gave +1 Creative Carma to @vapid flume (current: #8 - 485)
I may need to dig for better brushes than those, or maybe learn to do your own, but it's a place to start!
im definitely uh doing something wrong
Not exactly, but this is one approach I just tried (by hand) - on the fly....
tyvm, gonna try this right now
dont know if u care about it but i'll give u the karma too
thanks
Gave +1 Creative Carma to @sly hawk (current: #7 - 700)
You forgot the bit where you had to EXTEND the canvas
you didn't extend it upwards, you just left it as it was, hence no change. Use the top handles (holding SHIFT or not, depending if you want to conserve the same ratio)
i see, now its expanding to where i crop but everything thats already cut is not being filled


It only works from the pixel content and based on the area you are extending:
just fill the transparent bits with something else. I think the result is pretty good there! Saved you hours of drawing 🙂
you can take this new layer (the generated layer) and use it to perform your own composition. It's a nice starting point
At the very least if you want to fill a specific area, you need to select it first, and use the "generative fill" (different than the generative expand)
So select the area and click on the contextual bar

either don't write anything and it will try to fill based on the surrounding areas, or type a prompt and click "generate" (You need to generate for both cases)
ohhh this is perfect thank you so much
Gave +1 Creative Carma to @vapid flume (current: #8 - 486)
hey
i have a problem when i am trying to select text in circular format
its not selecting after a point
Hello guys, could someone teach me how to re-create this type of thumbnail ? (steps included) Thank you.


how to turn any color of a shirt to white of a person in photoshop?
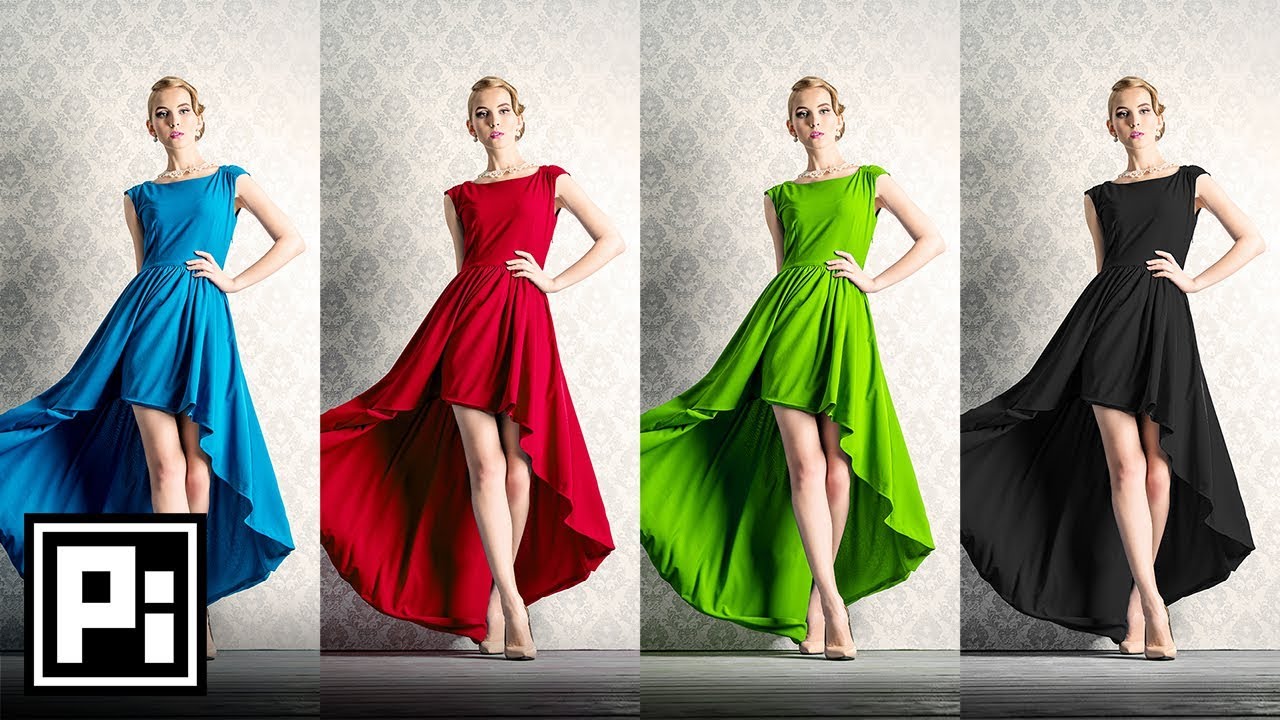
Change Color of Anything to Anything in Photoshop! Learn how to selectively use the Hue/Saturation Adjustment Layer to Target and Change Colors easily.
Hope this video helps you. Thank you for watching :)
► DOWNLOADS:
- Sample Image: http://bit.ly/2BBitiy
- Finished PSD: http://bit.ly/2o14w3y (Only for our Patreon Family)
► HELP US CREATE M...

Using the Basic Concepts of Blend Modes, Easily Change White into Any Color Including Black in Photoshop! Create realistic colors by combining the power of Blend-If coupled with Adjustment Layers and Blend Modes!
In this tutorial, we will be using Solid Color Fill Layers along with Multiply Blend Mode to project color on the white object. Then,...
Hi I'm having issues saving my project to a location. It can save fine to my Downloads folder, but if I try documents it says I don't have permission, even when it says try the pictures folder it still has no permission, sometimes it goes through but gives me error code -45. What is this lol. PS is ran as admin and I don't have any custom secure folders. Drive space isn't an issue.
Hey I want to copy and paste an image on top of the original, is that possible?
yeah
Just duplicate the layer

Why does the image get slightly pushed to the side when using the normal ctrl c/v
Well.. that feature is infuriating, thanks though
able to help with my issue james?
You can also DRAG a layer here to duplicate it...
@inland atlas

Doesn't sound like a Photoshop issue. Can you make a random folder or file in this location nomally?
If so, try opening photoshop as an administrator.
I have
Don’t know if anyone would know this but in illustrator I tried making a stripe pattern but now i am getting a grey line when using the swatch I made. Any idea on how to remove or fix? It is located towards the bottom moving horizontally.

(back now)
Is that grey line where the pattern seam is?
Check layers, Illustrator often leaves trash paths.
I created it in a 12x12 art-board and then put it in a 11x14 and when I used the rectangle tool to outline the bigger art-board it showed up
It is simply off your artboard.
That is artboard bottom line.
And possibly not in artboard but bellow it.
I think it’s in the artboard, here it is made smaller on a blank artboard

Send project in dm i ll check it.
Hello, I'm looking for a bit of help with the glassmorphism effect in Adobe. I am looking to create the effect to use as a overlay in my twitch streams, but I'm at a bit of a loss seeing as how the effect requires a background with gaussian blur
I believe it is the seam because they are showing up exactly in a 12x12
Is that screen shot taken in Illustrator or did you place the art in Photoshop and then take it?
Taken in illustrator. Maybe I need to create the pattern starting in the dimensions that I will be using it in
I'm asking because while a bunch of us use Illustrator, the mods would prefer Illustrator questions be asked on the Illustrator discord: https://discord.com/channels/634884897185595412/637037500451258369
Just an FYI - I'm sure there is a smarter way, but it worked for me....
Its simply a waste path.
Yes Ive done it in photoshop but I am trying it in illustrator to try and get rid of the pixelated edges that photoshop does on the diagonal bars. I might just keep the one I made in photoshop lol
Hello guys, could someone teach me how to re-create this type of thumbnail ? (steps included) Thank you.


Stop expanding appearance and using pathfinder to join lines with rectangle, do it with shape tool.
That is possible reason too.
I tried creating it and I have no any problem resizing however I want.

is there a fix for Huion tablets when PS doesn't register pen pressure?
Hello, I'm looking for a bit of help with the glassmorphism effect in Adobe. I am looking to create the effect to use as a overlay in my twitch streams, but I'm at a bit of a loss seeing as how the effect requires a background with gaussian blur
Did you try: closing Photoshop, restarting the Huion service and then restarting Photoshop?
I did all three. I also deleted all my settings.
Have you checked the Huion site and their FAQs page to see if anyone is reporting similar behavior?
I have a Kamvas 24 and I haven't experienced that so I have no insight to add there.
I have Kamvas 22 and I have that problem. Funny thing is that when I use my non monitor drawing tablet, photoshop normally uses pen pressure
Okay so I turned off Windows Ink in Huion settings, resetted my photoshop, created PSUserConfig cuz I didn't had one for some reason and it's working
Nice! Glad you got it sorted out.
You'll probably have to create the image and export to PNG-24 with transparency.
Can someone give me some tips how to make it look more realistic and "glowy" and maybe som more blending so it acutally looks like itps in the backgorund and the glow is coming like from the inside of the helmet

some advices would be perfect
thanks
A guide to this exact look?

Take a look at a few of my recent posts and you'll see me post a video of using the cloud render feature to make the glow look like MIST.
Go onto ebay and find a buy a Nokia camera phone from 2004. Job done! 🙂
...
Sorry I know that wasn't very helpful!
yeah man i have heard that like the 10th time now
but im really tryna figure out things 😂

You won't be able to edit the text unless you have the source file as an editable text layer. Otherwise, you'd have to rebuild it.
i have the file to it
Is the text editable?
Share a screenshot of the Photoshop UI with the Layers Panel open.
Hi design community
had a real quick question
This is the channel for questions (about Photoshop). Feel free to ask.
mine is mostly about graphic illustartion u know
so how do I practice to achieve this level of Designing? https://www.youtube.com/watch?v=6OW5Fb9Nq6Y&ab_channel=seven
any tips or personal experience
Tnx a lot

안녕하세요!
'A motion' 이후로 정말 오랜만에 올려보는 작품입니다:)
유튜브 채널을 개설하고 작품 활동을 시작한지가 어느덧 4주년이 다되었는데,
벌써 이렇게 큰 프로젝트를 경험해보았다는게 새삼스럽고 여러모로 신기합니다.
공 애니메이션, 그리고 로고부분의 별들이 움직이는 애니메이션은
PlayStudy 애니메이터이신 @gphic_x 님이 도와주셨습니다.
좋은 프로젝트 연결해주신 투래빗츠분들 감사드리며,
프로젝트 디테일은 정리하여 Behance, Instagram에 게시해보도록 하겠습니다.
감사합니다!
*본 영상은 납품된 원본이 아닌 seven의 초기기획을 바탕으로 재구성된 영상입니다.
[info]
...
So this is a heavily animated, professional presentation. What aspect specifically are you wanting to learn? To create things like this, you'd definitely want to start learning and working with Adobe Photoshop, Illustrator, After Effects, Premiere. Adobe provides a lot of instructional content that you can use to start learning. That can get you started. The real learning happens when you start applying the lessons to your own projects.
I mean I know after effects and illustrator already
but I don't have design skill
I'm an animator
just want to know how to practice to able to design on this level
"How to practice?" You learn the fundamentals of graphic design and practice by doing, i.e. create sample projects and try to emulate the design style that you like.
Post the projects online. Get feedback. Keep going.
I agree to all that D. Humann told you.
I can just add that you also need to be naturaly talented.
It is not about knowing software, it is about getting idea and struggling to achieve it.
For particular illustration you need a lot of Illustrator knowledge.
All that details of glow are possibly gradients placed or circle is 3D with applied lights on places.
I did this time ago.
From zero in Illustrator.
Was not fun at all for me, took few weeks, but I learn few things from it.

Ohh, now I see it is video.
It is all 3D I think, because it spins in video!
what am i doing wrong here? trying to get the rectangle to transform but its just moving around the selection box

hey! i know this isnt really photoshop related but i found this server so i can ask for help because ive researched and there are no answers anywere so if anyone here is smart enough to know how to fix this issue please let me know. Ive tried everythingi could and nothing has helped me (ive tried resetting my pc, ive tried to task manage, ive tried CMD ive tried things and my last thought/option is to wipe my computer out to see if that helps but i dont really feel like doing that and i would like to try and avoid that problem if possible. My old computer neverhad this problem at all it would be a one and done thing no problems to the downloads at all.) If there is a fix to this please let me know ive been tying to figure this out for a few days now. please @ me. Thank you! (sorry if this makes no sense)

check your task manager and close any adobe process
ive tried task managing it theres no other adobe process unless i open the adobe cloud set-up

this is the only thing that pops up and i have nothing else that is being installed at the moment while trying to install adobe
Great tips
Thanks man
Gave +1 Creative Carma to @ripe quest (current: #4 - 1598)
are there other users on this pc?
the user im using for the computer right now is being shared with my old pc im pretty sure
but thats the only account thats on here
check under task manager --> user, is there anything that shows up there?
how many users show up there?
just 1
i click on it and it shows what on my pc
thats not everythingbut it shows all the stuff on my computer and thats the only user that shows
yeah.. nothing adobe or creative running?
no
had you installed adobe or creative on this computer before?
no because this is a completely new computer
i havent tried downloading it up until recently
I think you'd want to modify the shape using the Direct Selection tool to manipulate the anchor points. (As opposed to using Transform operations.)
Did you quit the installation and restart the machine as the dialog box suggests?
yeah ive clicked on the link and it didnt help
im not sure if this would cause it but i noticed the installer mentions 32 bit, are you sure your computer is 32 bit?
okay thanks, i will try that
Gave +1 Creative Carma to @ripe quest (current: #4 - 1599)
no my pc is a 64 bit
Are you signed in to your Adobe Account?
im pretty sure you saw the discord which says 32 bit but im able to use discord just fine?
yes
Is Creative Cloud is already installed?
yeah but when i open it it gives me this error
Did you uninstall the app completely and now you're trying to reinstall it?
yeah ive tried that multiple times and still gives me the error
idk if i unintalled it properly but i did uininstall it
What about trying the Adobe CC Cleaner app to completely remove everything from the computer? Cleaner app. Restart. Then reinstall Creative Cloud.
ive even tried lightroom classic by itself (cause thats what i use) and does the same thing
does this delete everything off the pc??
Everything meaning "Adobe Creative Cloud" apps.
okay ill try this
Follow the instructions on that page... carefully.
Use the CC Cleaner. Restart the PC. Boot back up to Windows. Try running the Creative Cloud installer again.
@lost drift you could also try the free version of revo uninstaller, it comes with a trial, its very good at removing bad uninstalls
Please try the Adobe Cleaner app before using any third-party stuff.
yeah do that first

yep
@ripe quest that worked, I did direct selection then transform path? not sure what that is yet but then that allowed me to do a distort and I could warp it the way I needed it, thanks!
Gave +1 Creative Carma to @ripe quest (current: #4 - 1600)
You are editing the elements of the vector object individually... directly selecting the anchor points and editing the shape. As opposed to editing the entire shape with a Transform operation. This is one of the many benefits of using vector graphics.
hi I recently got ps with school and the projects i make at school show on the computers there, but my computer at home does not show the same projects
same account as well
@ripe quest okay I see, ill have to remember that, putting that in the notes
???????? i do not see this cloud??? (im running this on a school account im not sure if that really matters but its worked on my older computer before using a school account)

im sure my stuff in synced up tho
Are there files sync'd on this computer?
like adobe files?
Yes.
I think you can just skip down to the step where you run the Cleaner app.
ok
Download it. Run as Admin.
i dont need this then?

anyone know why this is because last night i made this project and it didn't show at school and then my school project doesnt show now on my pc
Are you signed in to your Adobe Account? Can you look in the "Files" area?
here? sorry i just dont wanna mess anything up haha

yes they are the same account
Yes. This. Download the app and follow the instructions when its finished downloading.
This is what it looks like on my pc but at school it shows my projects I’ve done on that computer

Check in the Creative Cloud app and see if they show up there.
These are RECENTLY loaded projects. Not sync'd projects on the computer.
is there any way to have the two computers sync
Are you storing the files locally somewhere or are they cloud files?
Well I usually save the files as a psd and they are just there when i get back on the software
If you want work on projects between different PCs, I'd suggest saving the files as PSDC files.
PSDC = Photoshop Document Cloud files.
ohh ok thank you so that means they should show at home and school because they are saved to my account rather than the computer, correct?
Thanks for the help
You should be able to see them in your Creative Cloud app... under "Files"


You ran the cleaner app and uninstalled, restarted the PC already?
thank you! i will do this with my project im working on
Gave +1 Creative Carma to @ripe quest (current: #4 - 1601)
You've restarted Windows, yes?
yes i restarted my pc
also quick question when u have a sec - do plugins on one computer work on another or only the pc they are downloaded to
Sorry but you'll probably have to contact Adobe Customer Care. I'm not sure what else to suggest at this point. I'm not dedicated Support Staff.
okay
thanks for trying to help 😢
ill just try and wipe my pc or something cause idk why its doing this
I wouldn't do that right now.
I would contact Customer Care first before you wipe/reinstall Windows.
how do i contact them??
At the bottom of that page, there should be a link...

Tell them that you've already tried to uninstall and use the CC Cleaner app and you're still having this Error: 87 when trying to install Creative Cloud.
sorry were did you find that
Its at the bottom of that page I posted with the info about the Cleaner app. (or almost any page at adobe.com)
ok
do u know this
Generally, they have to be installed on the PC you're sitting at.
Unless its a Cloud Service, it will need to be installed.
ok thank you i was assuming that, but wanted to make sure
Hey there. Ive recently been having some issues with my Adobe CC when downloading it. Ive tried everything that could of possibly worked but hasnt. Ive already tried uninstalling and reinstalling, Ive tried using Adobe CC Cleaner App and i still receive the error code: 87 when i try installing Adobe CC.
you think this is good
or just makes sense at least
"Adobe CC Cleaner App"

Yes. Error Code.

App: Adobe Creative Cloud

Creative Suite

There may not be any actual person to speak with at the moment. You might have to wait until tomorrow.
What about trying to sign in to your account via the web and using the web tools? Lightroom Web.... ?
Photoshop for the Web, Lightroom Web... etc.
yeah this one works
i can try using this one for now
thanks for helping ill try more tomorrow see if anything works
I would contact Adobe Customer Care, and try to speak to a real person. Go over with them the steps you've tried. Hoepfully, they can give you more insight than I can.
how do i take one picture then use a tool to make a certain part another layer that can be moved like if i want to take a circle out of the center of a picture and can move it
Use a Layer Mask. See: https://discord.com/channels/547473772727238676/1045711257178738760
Or just make a selection and copy and paste it to a new layer.
(Not really sure what the desired outcome is.)
@sly hawk where can I find it ? Is it on YT or where? (Sry for pinging u)
Is it possible to make an image like this straight? As in looking directly at the camera?

Hi everyone, I am fairly new at Photoshop and I've been struggling to cut off the bounding box around the shapes I created (I used combine shape --> subtract front shape) for the logo. Now it looks like in the image and I was wondering if there is any way to remove it without rasterizing the layers?

Hello, my action is behaving correctly if I activate it via the ''Play Selection'' or ''Button Mode > Click the action'', but is behaving differently if I activate it via the hotkey assigned to it, why is that? Example below
Edit for anyone reading this from the future, the issue lies with the ''SHIFT'' key being used as a hotkey, you can solve the issue by using ''CTRL'' instead of it
Forgot to convert the recording to MP4 🫢
I'd suggest to investigate 'SMART OBJECTS'. This would basically allow you to 'nest' your truly editable image inside a single, simple layer non-distructively.
...then use a layer mask to hide all the protruding bits sticking off the canvas,.
There is a filter in neural filters that allows to change the eye direction, but it's made for photos and it will need the eyes visible which is not the case here
Unless you manage to get a prompt in the generative AI from that (not idea if it will work) then I would say you'll have to redraw it...


A guide to this exact look?

You might want to try a pixellation effect, and that effect would be blurred. I wouldn't know the exact amount of pixellation and blur, as it will depend on the size of your file, but you can try experimenting with that
I suggest you do on a smart object so that you can tweak the settings without having to redo everything every time.

Or maybe there is a filter developped by someone (as an action or script) that does that already?
That would be "I went to a Dinosaur Jr concert, been invited backstage and I forgot my camera 😉" filter
on a more brute force approach, there seem to be a hell lot of jpeg artifacts
So one way would be to simply save as a JPEG, low quality, and open the newly saved JPEG, save it again, low quality, agian and again, saving from the newest version until it gets destroyed like it is here
How do you save jpeg in low quality?
it asks you the quality when you do "save as"

12 is the maximum, but if you go 4 or under, you will start to see the degradation
It's good to test things also. If you had tried to save as a JPEG, you would have found out yourself. Experimentation is how you achieve things in Photoshop. There is no better school!
Okay thanks, i will try that out 
Gave +1 Creative Carma to @vapid flume (current: #8 - 487)
I usually just make sure the image is RASTERISED and just shrink, accept, and then stretch it back out again.
any know how i can do this?

Select object -> create new layer -> fill selection with solid color -> add text layer with question mark
Yep, just like M4gpul suggested. - Here are the buttons if you're stuck....
@agile forum
Hello I need to make a magazine cover for a school project
basically the picture is supposted to be vertical but mine i 1920x1080

does anyone know how i can make it vertical without ruining it
Change image size to what you need and fill gaps with same color as its solid color
Image-> canvas size
Or you can use generative fill on new canvas
Whatever your magazine is
You can just revert size
1080x1920
But your teacher probably gave you resolution
I guess my best bet is to ask this question in the photoshop forums online? I'm not sure if it's a bug
One thing would be to go to the crop tool, set it to 16/9 (it's a preset) and then switch both sizes

then go to the drop down menu on the right and choose "content aware"

you can also try generative expand
Now before commiting to the crop, go and refine the composition of the image. Are you on centre? how's the ratio of the empty space at the top? Correct that.
When you hit enter, Photoshop will try to fill the empty space based on the rest of the image
in your case, the grey background
Need Link Installer Photo Shop


What is it exactly?

Combine, retouch & remix images. With Photoshop, everyone can. Transform how you create high-quality, unique content with Gen AI in Photoshop. Try for free!
please do not post the same questions on different Channels. Thanks.
Gave +1 Creative Carma to @cobalt plank (current: #836 - 1)
Thanks I solved it, but now I can't put the logo under his head like the original


Ctrl+j to copy layer with model -> select model and use selection as mask -> move masked layer above logo
Thanks my man, it seems like common sense when you actually think about it, dunno why I didn't think of that
Gave +1 Creative Carma to @ivory rampart (current: #315 - 4)
No problem 🙂
how do i change the color of my font when its a smart object i tried using gradient overlay but the thing is that it also has stroke so that messes the whole text
You will need to double click on it to open the nested file and change the colour there
Another way would be to duplicate your smart object and have the stroke on one layer, the colour overlay on the other, and set the "fill" (not opacity) setting to 0 for the top one.
Did that work for you @warm hill ?
i didnt have enough patience to wait so i just played around with hue saturation and that somehow worked.
anyways thank you
Gave +1 Creative Carma to @vapid flume (current: #8 - 488)
Why can Premiere Ultrakey out a green screen in hundreds of frames instantly and Photoshop does this nonsense? Is there a setting to turn all instances of a particular color transparent?

How can i make it so the halftone texture (the one in front of the rectangle) fits right into it? Without these loose parts hanging on the bottom.

One way is a Clipping Mask. Right-click on the halftone pattern and choose 'Create Clipping Mask'
Premiere was designed for editing video/video frames and doing some visual effects. Photoshop, while having some video functionality, was not designed to edit thousands of frames of video. You can run Batch Actions on still frames of video but this requires some time and care setting up the Action.
Sorry, I wasn't clear, I just wanted to remove the lime green background from a single image
Try: Select > Color Range and adjust the fuzziness. With the selection active, add a Layer Mask. Then you can tweak the mask edges to remove any stray pixels.
And every time I try to do something similar, PS is like "I'd better keep this random blob of green, it feels important"
where is the select menu?
File, Edit, Image, Layer, Type,... Select
Thank you!
It's just so weird to me that this isn't a task that can be done from the "remove background" option. Like let us say what the background is when we're lucky enough to have a picture taken against a plain background.
There is a Quick Action called "Remove Background"
It doesn't work for every instance. This is why I suggested that you try "Color Range and Layer Mask"
I will, assuming PS is even the right tool for this? Like Pr does it better(except you can't save the result to a picture file), maybe Illustrator has a good background remover
photoshop spellcheck seems a bit broken...
both of these are spelled correctly


If you're working with a raster image, Photoshop is the correct tool.
....

Can you report it to the Photoshop Community Forum as a bug?
If I open a .png as a new Ps file, is that a raster image?

There are raster/bitmap images which are built using a grid of pixels (each one is assigned a color value), e.g. JPEG, PNG, TIFF, etc. There are vector graphics which are made of shapes with anchor points, color information, e.g. AI, SVG, EPS, etc.
Some file formats handle both types of graphics.
Heyo! Been wanting to install PS but I only need that one app, do I need to install Creative Cloud or can I pay and download PS directly?
@zealous fossil installing Creative Cloud doesn't mean you need the full suite.
Think of it like STEAM for games.
I think you can dl just installer for PS
You can install steam, even if you want to use it for one single game.


it seems difficult to create something so photo realistic with that kind of details in Photoshop only, unless you're willing to draw it from scrtach (which is entirely possible)
Check that and see if it gives you ideas. I know it's not entirely the same thing, but it could be a starting point
https://www.youtube.com/watch?v=QD385BGtzsI

In this step-by-step Photoshop tutorial, we'll show you how to transform any ordinary image into a frozen wonderland with a stunning ice effect. Whether you want to add an icy touch to your winter-themed designs or create a chilling atmosphere for your photos, this tutorial will guide you through the process.
📷 What You'll Learn:
How to select...
This kind of image is generally done in 3D
so not with Photoshop
Same here:
https://www.youtube.com/watch?v=Dyx5UoPR0fk

Photoshop CC 2021 tutorial showing how to flash-freeze someone or something into an ice sculpture.
Northern Lights photo: https://1drv.ms/u/s!ArAEPhCK6XBWgeklmurWXqUmS_ZyoA
Explosion Brushes: https://1drv.ms/u/s!ArAEPhCK6XBWjj2P71_vrs9T-ab5
Smoke Brushes: https://1drv.ms/u/s!ArAEPhCK6XBWgehCoZwrZTGtD57B7w
TY
do you guys know any fonts that i can use with this? english font that matches this kinds like a sharp fony

kinda like these fonts


I've created a patter by creating a 500x500 pixel square and then filter offset then choose 250 & 250 although there is a gap imbertween my pattern here anyone know why this is and how to emend it?

please
also why so pixelated?
hey i'm having an issue from exporting from Illustrator to Photoshop, when i create the file, it can take some time, opening it in photoshop takes 10+ minutes, it's extremely slow, file is 15mb, specs 64gb, 5950x cpu, 4090 gpu, 980 pro nvme, i've tried studio drivers for nvidia, i've tried increasing ram, decreasing ram, changed scratch disk, changing to a lower DPI when exporting, also tried updating
Does anyone know how to fix ps freezing and I have to go to task manager and close the program?
Are you working on the latest version of Photoshop?
fixed thanks
I just made a test here, it's working fine, maybe the offset options or the size?
Oh awesome! How did you fixed? Just curious 😄
I worked it out I then applied the pattern to some text although when I copy the text as an smart object into another photoshop document and try to resize it the orange is showing through and the dimaonds have disappeared

i used the orange so could make a mask easliy
I just moved the pattern around and then resaved it and it worked
may have accidently left a gap to the left of the pattern which was casusing the line
no
will updating fix it?
I will update
Generally, this is the easiest thing to try and may fix certain issues.
Awesome. Thanks for sharing
Gave +1 Creative Carma to @quasi canyon (current: #537 - 2)
I think i figured it out, uncheck "maxiumum editability" in illustrator, when exporting to PSD
Hi, I'm trying to add a gradient map to a text with a double stroke effect, but after applying the gradient the stroke looks like that..any help will be appreciated.Tia

Are you sure a 'gradient map' is what you're looking for here?
A gradient and a gradient map are both different things.
Yeah, with gradient map and inner shadow i can achieve that chrome look...
Cool. Just checking
I can duplicate the text layer and place it above the gradient map, but I'm looking to make the text editable...
How are you applying it to stroke when 48 looks like shape?
I've added the effects and convert the text to smart object
Ahh, you want to all.
Delete that gradient fill.
And draw on gradient map mask.
I dont see why you have it there.

You should be able to use gradient tool on mask to repeat what you had on gradient fill.
But, already you can see it works now.
I am not sure what is your end goal, I just noticed Gradient Fill is what was messing it.
Just to be clear.
without the gradient fill the text is only grey color with strokes...I'm looking to do it with gradient color
Just do this on Gradient Map mask.

Your text layer is not the same, it is not smart object now.
Non destructive text gradient should be done in text effects, not gradient map, if you are going for that.
And it is the best way.
I wanna do it that way...

with curved gradient "line"
that's why I'm using the gradient map
How to create a simple 3 or more colour gradient inside the text with a drop shadow and a nice colour mix. This works with a lot of different colours to achieve a gradient text effect.
〓 GET ADOBE APPS ▾
✅ Photoshop ➧ https://prf.hn/l/20Bd3Lj
✅ After Effects ➧ https://prf.hn/l/OVxMyzj
✅ Premiere Pro ➧ https://prf.hn/l/DRPwkEZ...
thx, will take a look
Can anybody help me edit an image of me and my friend who passed?
@sharp vortex gradient map applies color to tonal range.
Gradient fill alone is maybe better in your case
But, again, text should be smart object.
can i share you my psd file to check if i did it right?
Sure
What you want stroke to be like?
One stroke is black and it disctates to gradient map tonality.


great
You already did it before.
It is your text layer that dictates what color will gradient map apply.
For example, if I put stroke to be black
got it

my goal was to do it without duplicate the text layer if possible
Aha! Lets see
Make selection of top layer, apply mask to gradient map and invert it.
Sorry, wasn't understanding.
Hope that solves it for you.
Just, when you change text, you will have to change that mask too.
I don't think there is another way, but this one is easier, then to update 2 type layers.
great, thank you.. appreciate your help
Hey, hey.
I am just thinking.
You have very easy solution for this.
Lemme just try it to be sure.
why doesn't it go around the box? I made the inversed selection of the box a work path


trying to make it like this

Hello, I'm designing a shirt that can only use at most 4 colors including the background. I'm noticing that the more I work on it, he more a couple of slightly different colors keep popping up. Do you know of any way to seek those colors out quickly so I can make everything match exactly? Maybe a tool that searches automatically and tells me how much of each hex code there are. I can't really share the design for privacy reasons
Or, optimistically, do you think it will actually matter for most screenprinting places?
Oh wait I actually know this one, just move the text layer further down
right in front of the background
still doesn't work

is the square partly transparent or something
you're welcome
bumping this message up
Hello! So I took 2 winter design courses, but due to life's craziness I didn't have much time to work on them...so here I am I guess haha (I rlly hope this is the right place to ask..).
For reference, I have some previous adobe experience, but am a bit rusty as most of my experience is from YEARS ago. I have until Jan. 26 to complete everything, so if there is anyone I could connect with to help with questions and other stuff (such as keeping me in check with doing my work) I would really appreciate it lmao! If you took the time to read this I really appreciate it btw -- I hope you all have a lovely day!
Yes
This is the right channel for questions! Can you explain more about the scope of work you need to complete? A week to do 2 courses' worth seems intense. As for keeping in check, that's part of self-discipline and grown over time. You could try posting progress in #📝project-feedback along the way at intervals you set for yourself if that helps motivate you
If you can only use 4 colours on a t-shirt, I assume you're doing a screenprint.
That means you're probably doing something that would be suited to vector.
That means you can use illustrator for this
This means you can use illustrators tools to specifically only use exactly 4 colours.
OK, what's your task/brief?
Can you share your design? I'll hopefully show you how to achieve what you want.
Mind if I DM?
It's all pretty introductory UI/UX Adobe work -- so use of Photoshop/Illustrator for creating logos, posters for UX research (which I have already conducted), creating a tutorial video on Premiere Pro which I used to use a lot, and using InDesign to animate a logo/character .... which I have no experience with. And I think I will definitely make use of the feedback channel, thank you!!
Gave +1 Creative Carma to @patent gyro (current: #394 - 3)
That's fine.
Indesign to animate a logo?
InDesign is page layout, do you mean Animate?
Do you mean After Effects?
or that
many options! probably just not indesign
That's what I had written in my notebook for the project, but I will check that right now!
Yeah. You'd have a better chance of animating using Microsoft Paint than with Adobe Indesign.
Animating Logo entrance is a crap load easier than a 'character'
Also, what's the video meant to be a tutorial for?
Omg haha -- so it is After Effects (which I also have never used..) I will paste the outline below so I sound less crazy haha:
Using Vector artwork and After Effects shape layers, create a brief yet compelling graphic animation.
Including any of the 12 principals of animation as well as advanced keyframing techniques is encouraged.
The resulting video should be at least 5-7 seconds minimum, however, please feel free to exceed this length if you need to.
....
The rest is fine and could literally be done in a couple of hours - but learning AfterEffects in a day or two is a TALL order.
it could be for anything we learned in the course - since most of my expertise lies with using Photoshop, Illustrator, and Premiere Pro I may do something for one of those programs?
Exactly haha, I'm not too worried for the rest. But using InDesign for creating a "brochure" and After Effects? I'm not too confident tbh
@sharp vortex Sorry, none worked with effect like you want.
Gradient is always line.
The only way is that to have mask always.
Indesign is a piece of cake. If you can use photoshop and illustrator, indesign follows that same sort of principals.
Illustrator and InDesign you can get tips and feedback in the Illustrator server, I see you've already cross-posted there so that'll be a good resource
Oh that's great! So I guess most of my time will be dedicated to trying to figure out After Effects lmao
So... what's the plan?
Design a logo in photoshop or illustrator
Use logo for a poster in indesign
Use logo for a brochure in indesign
Make a tutorial video using premiere Pro
Animate the logo entrance animation using After Effects
It's fine,i can live with that:) Thank you
Gave +1 Creative Carma to @vernal ember (current: #106 - 13)
Pretty much! I just need to get started and hopefully I will be alright haha. It's just very overwhelming looking at it all at once, so I just need to direct my focus to doing one thing at a time
I believe the best course of action is creating the logo first haha
I drew a few (not great) sketches? They're logos for ourselves and I couldn't think of much
Share em! (Publicly or privately) and let's get started!
here is photo of some of them...pls pardon my inability to draw haha

Where did the interpolation options go? I am using the latest version.

You need to be in transform mode first mate!
Cntrl + T I assume
Are there any courses that help with grafic design?
It used to be there if transform controls were activated with the move tool, and even when i enter transform mode it doesn't show up.

mm. Will have a quick think
Yes.
On Udemy a bunch.
you're still not in transform mode

Start trying to resize your layer and it will appear as if by magicc
Personal branding can be daunting, there's a good "crash course" Hoch and Nick hosted here: https://www.youtube.com/live/0JWJzl644EA?si=IuNX9dgH818TGe88&t=246
(video title is incorrect)

Join Andrew Hochradel and Nick Longo as they head to Camp Knowhow for Office Hours: Summer Camp. Today, you’ll learn how to define your voice and speed up yo...

That's what it used to do
Is the image a smart object?
ah
...ta dah!
I forgot to set the default import setting for the new install
I like options 2 and 5.
I also think you could do something with the M and the 'tail'...
i think i may go with 5 ? but i'm not too fond of the styling for the 'm'
5 for me too.
when hitting ctrl+t to rotate, is it possible to add an anchor point so it spins from like a certain corner of something instead of the center?
Yes, activate it on upper toolbar.

It will be in center of object, than you move it to a place which will be rotation center.

I think I could definitely do something like that! I may want to do something to "feminize" it? but i think that's very good inspo....now to see if i can recreate something as good haha
You do want to have one black one white version of logo too.
Do not forget that.
Like, one fancy, but also white and black versions.
i definitely agree - i will work on something now
uh i just accidentally pressed controll W and my project just vanished
Hey, maybe utilise the negative space of the M for a cat!

that is beautiful
that is really cute! I think I will definitely do something like that !!
I;m heading to bed shortly, - report back when you've decided on your logo. -
I downloaded a 3d text templte but I dont know how to change text color, can anyone please help me
Can you provide a screenshot of the template? with the layers panel showing