
#❓ask-a-question
1 messages · Page 19 of 1
is it possible to change the default Save a copy file extension
this is my workspace can anyone help me change the center so the light dirrection

Yoo can someone help me with a pic
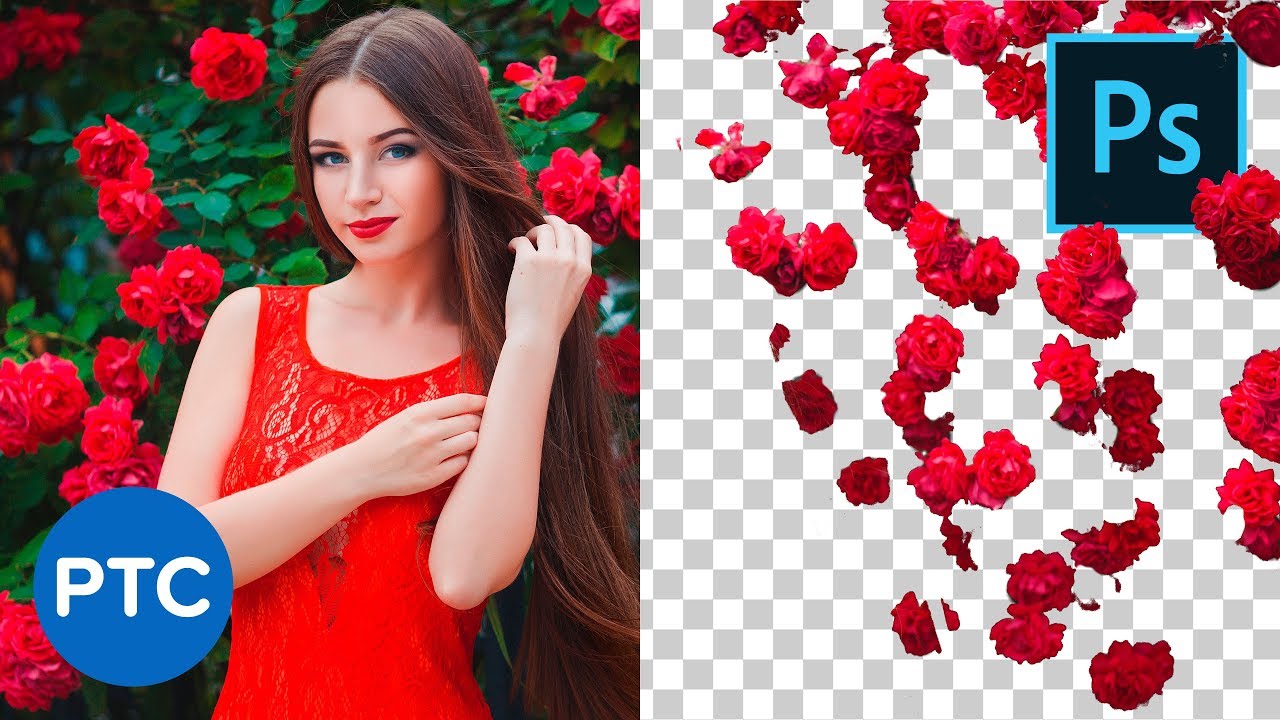
I know this looks nearly impossible but is there any way to remove the white background of this?

That depends on what you want to do with it. Will there be something underneath or are you wanting to export to PNG with transparency?
Just the transparent file
Probably will require some Advanced Blending > Blend If... and tweaking


Is there a way to color replace/hue saturation chagne only a section of an image? It's Layer Mask right? How exactly do i layer mask just the parts of the image I need to change, individually highlight each part?
Hi @white canopy Selections allow you to target an area, and a layer mask is just a variation on the same theme. It sounds like you are new to masking, so perhaps start with Adobe Evangelist Julianne Kost's video: https://jkost.com/blog/2017/08/15-shortcuts-for-working-with-layer-masks-in-photoshop-cc.html.

Discover fifteen tips for working with Layer Masks Tips in Photoshop.
Once you get the basics, you can make a selection, add a hue/sat adjustment layer which will create a mask for you automatically based on your selection, and then your adjustments will only target that selected area.
I did figure it out good enough for now, i can just select the part i want, and while it's selected, Hue/Saturation will only affect that part as well.
So I don't think I need a layer mask right now, but i'll keep that video in mind for next time, thank you!
@willow gale
fortnite
hello, i kinda have an issue with 3D on an older version, ive mistakely made "helmet_visor" invisible from the thing on the screen i opened for "visor_attachment"

how can i make "helmet_visor" back visible? I can't right click on it because i've made it invisible and even though i tried for like 17 minutes to find results in google i think my keywording wasn't good enough to explain the problem
I can’t help but why you making seb Vettel’s helmet?
bro

why is ti when I use gradient map
I only have black and white
like no matter how much I change it
it always stays black and white
even using a preset
the colors stay black and white
help pls
First of all, check Color Mode:
Ensure that your document is in RGB color mode rather than grayscale. Grayscale documents will only display grayscale gradients.
Anyone do tshirt designs i need work done?
Is it possible to fill the generative fill with imported variables in an auto action❓
Thanks
omg tysm
wait may I ask one more thing

why am I unable to use liquify
you should have at least one pixel layer
The best way is to do the card in Illustrator, there have you more controll.
but here is a YT how to do it in Photoshop
https://youtu.be/o9P1Ec5LSyA?si=JfXpiAWOcu9bM8_i
https://youtu.be/PwB3sRlIYjc?si=6cx35oCIGULrwID8
I know this is a 10 year old YT but still useful
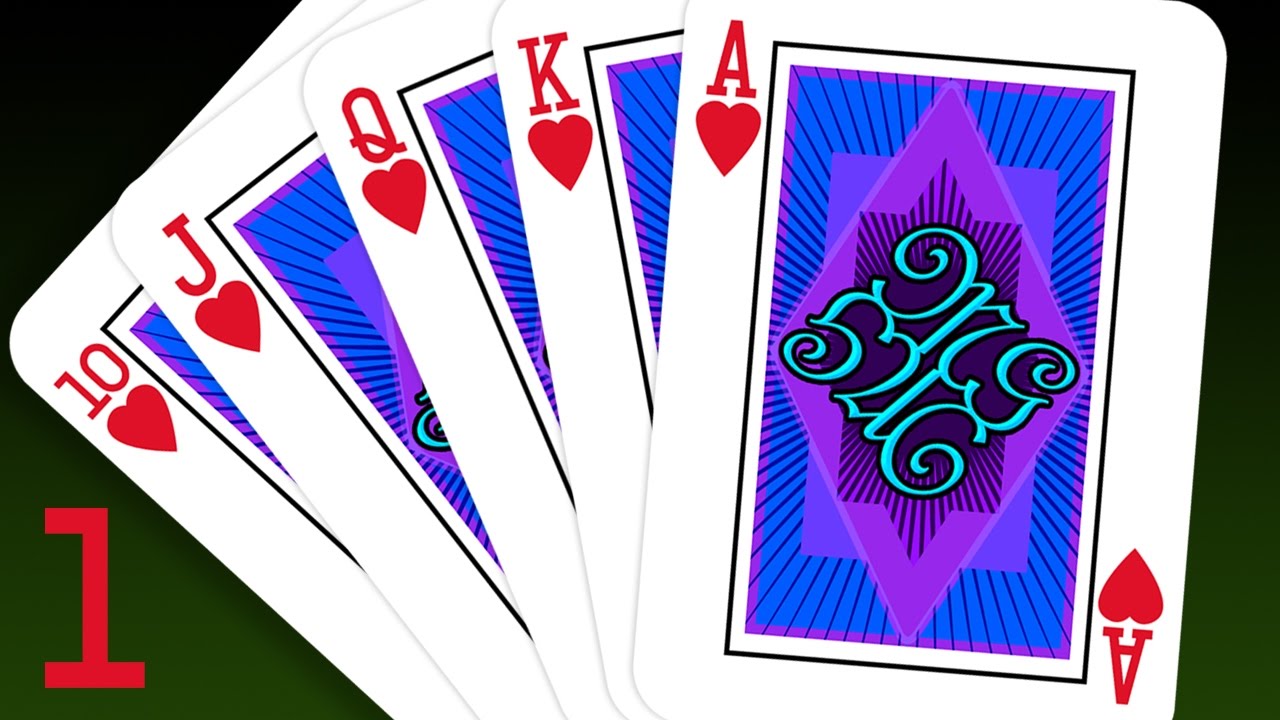
Photoshop CC 2017 tutorial in 2 parts showing how to design and create your own custom playing card with an integrated monogram.
NOTE: At 5:52 in the video, press Ctrl (Cmd) + J to copy the card number and its suit.
Part 2: https://goo.gl/LmL96c
➤ Get 15% off BORIS FX OPTICS! - The BEST special effects plug-in for PHOTOS in Photoshop! Go to ...
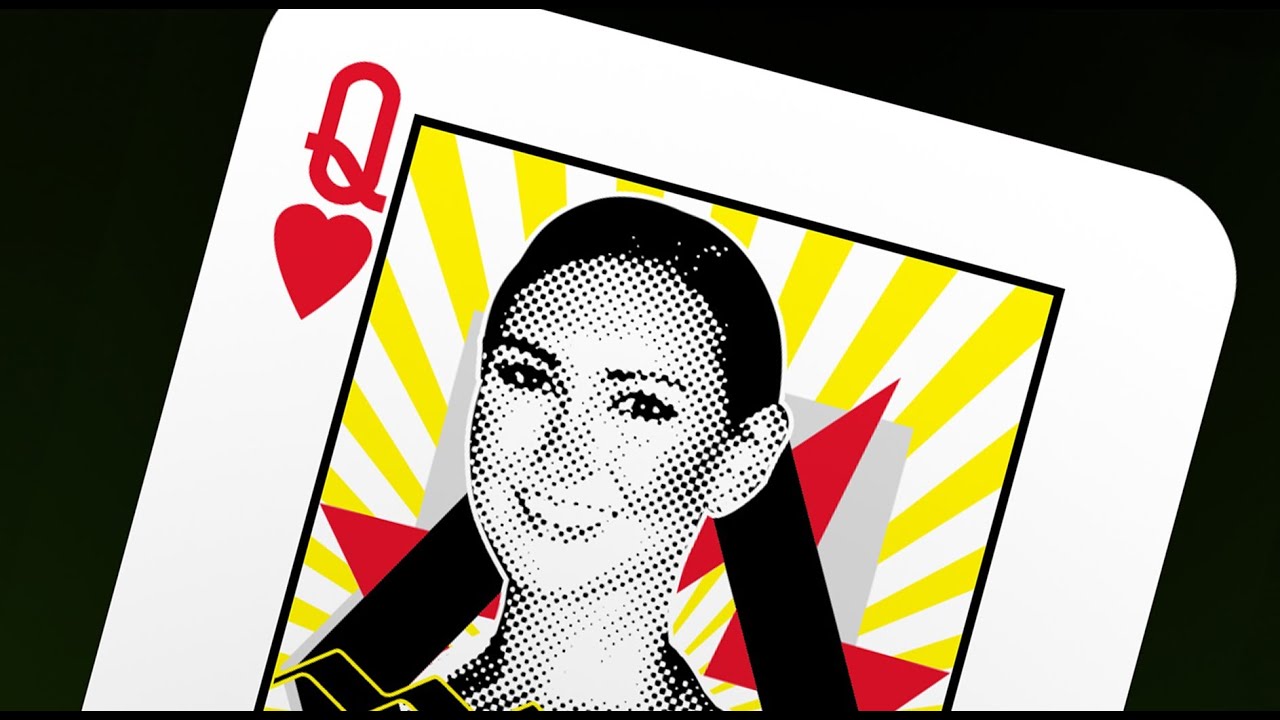
This is Part 2 of a Photoshop CS6 tutorial showing how to design your own picture, playing card (ie: Queen of Hearts). The techniques shown can be easily applied to any suit of the King, Queen or Jack.
Part 1: How to design your own picture, playing card.
Part 2: How to add a face to the card and other design elements.
Card FONT:
http://bl...
Would anyone be willing to photoshop a photo for me?
Try your luck in #💬chat-general
Alrighty
It depends how you changed the size. If you changed the size in inches or cm and didn't tick the "resample" option, then you didn't change the number of pixels (which is how it should be)
If you want to enlarge the artwork "physically" you need to alter the number of pixels. That means that your artwork will risk looking a bit different (a bit blurrier etc) as you tell Photoshop to "invent" pixels.
If you artwork is made of vectors, then all good, they will be resized without loss, but if it's raster (like the photo) then there can be a visible loss.
THat's why that sort of thing is generally done, if done in Photoshop, using the real size as a start, and all sizable elemnets nested into smart objects (I don't know if that's your case) as it allows for more flexibility when resizing. Ideally, if you need multiple size of the same document, it's also best to create artboards for each size (or a new document) and avoid changing sizes of an existing document
Please show us the whole Photoshop interface. It may be a question of colour profile but we can't tell with just the gradient panel. The whole window with the layers panel and the document tab is best... the whole thing

Again, please show the whole window. As a general rule, when you ask a question please screenshot the whole thing. When people answer, it will be a shot in the dark if you don't (It may work first shot, but many times it won't)
You are hiding the colour mode with the filter window 🙂
I suspect this is the culprit as half of your filters don't show

it's because it's in 32 bits
most filters work in 8 bits and 16 bits, some just 8 bits
32 bits is quite overkill there, I don't know how and why you decided to go for it
Yeah my bad do I have to redo it?

oh okay tysmmm
image>mode>8bits
okay it works now tysm!
the number of bits is the colour range. 8 bits is sufficient for most thimgs but sometimes for Photos of very high quality or artwork with lots of subtle gradients (which is not the case here), you'll need more than that
I work with photography and I have photos to work on that can be 16 bits if they're for books or magazines
I am yet to work on a 32 bit image though
So I'm trying to work with gradient maps but I sometimes run into the problem that the edges (the transition between the black lines and the colors) doesn't look clean and ends up in a mix of colors. What can I do to fix it?

may I ask if increasing image size cause ramm?
usage of ramm*
I would expect so as if you're adding more pixels, the file is larger, unless you mean something else?
It's maybe because your line work isn't super clean, and since your gradinets maps are clipped, it's picking on the pixel content of the line work
Try this
Take one clipped gradient map and instead of having its blending mode to "normal" set it to "darken", it will not pick up any colour that is lighter than the colours of the gradient map. In this case you wish to eliminate the gradient map picking up the white fringe so it Should work
If it works for one, you can undo it, group all the gradient maps, clip that group to the line layer and set the whole group to darken
But ultimately, if you want those things to stop happening, you'll need to clean up your line work, or better still work in a vector format so you don't get any artifacts
also be sure you work at 100% maginification. I'm saying that because anything seen at another magnification than 100% cannot be accurate by Photoshop standards. I don't think that's a concern for the artifacts in the line work, but it certainly is for the gradients.
Alright, got it!! Tysm for taking the time to help me!
You're very welcome!
Sandrine in this case do you think that increase the color mode to 16 bits as you do then you will get read of the banding effect?
I also design for RedBubble. I find it easier to design either in Illustrator (but the bulk of my designs there would be vector anyway) or I use artboards to create multiple sizes of the same design.
I don't know if it applies to you, but I see that your design is very large. And yes shower curtains and duvet covers call for a large size like this, but they are about the only ones... Also, do they really sell (as opposite to tee-shirst and prints)
So if your design call for it, you could investigate the possibility of creating similar designs as patterns, and use the in-built pattern design feature in Redbubble
if makes your files WAYYYYYY smaller
But maybe it's not applicable, I only saw a close up of your design
The issue with increasing the bit depth is that you are creating a bunch of colours that do not exist in the original artowork if you're working from a photo for example. But if you're creating an artwork from scratch, then it could help greatly
The source material needs to be 16 bits from the get go
Oh I see!! I have tried Illustrator a bit but I do find the program to be a bit hard 2 work in sometimes since I got a lot more experience with Photoshop. Yea true the design is quite large tho I'm not fully sure how to use Redbubbles features very well yet but I will make sure 2 experiment some more with it!
@steady verge this is what I'm talking about

If your intend is to be a surface designer (even if it's just a side gig!), you'll need to learn about creating repeat patterns. It can be quite daunting, but it's well worth it!
Ohhhh I see!! Do you think repeatable pattern would work if the pattern is based on hexagons tho?
In the screnshot I share just above, this is a design I made with Photoshop (one of the very few) so I just created it so it displays one tile, and let RB apply their pattern feature to it. The file is something like 2500 px wide and it covers all the needs without craeting 10s of different file sizes

Yes it works 🙂
Again another Photoshop file, this one done follwing a silly experiment with the capture module within Photoshop (there is a repeat pattern option)
Ideas comes from all places!
Got it!! Tnx for explaining it 2 me!
No problem!
While we are already on the topic, how do you tackle patterns for Hardcover Journal on redbubble since they sometimes cut off the patterns a bit in a not so eye pleasing way?
Sandrine is RedBubble a plugin or online pattern generator
I place them by hand, let's be honest, it's not their best feature!. But I never sold any journal and I suspect they don't sell loads. The bulk of my sales are tee-shirts, occasionnaly posters and stickers so that's where I am concentrating
For example puzzles. They cost a bomb to buy, nobody buys them, they're a PITA to design.
I won't even go there unless it's straightforward
It's an online Print on demand platform. You can post your designs and people can buy items based on these. They are made and sold on your behalf to people around the world
Yea true, got it tnx!
thanks
if you're interested in surface design, I would recommend following her
https://www.lizkohlerbrown.com/
she has lots of free advice and tips. Also sells courses (her course on Skillshare is very good)
can any one help it is week ago without any solution
What exactly will you do with the shadow, is it difficult to guide you if you not what you will do with the image
I cannot help there, sorry. 3D features are slowly retired from Photoshop (I'm surpised some still work) so I've stopped using 3D within Photoshop.
Sandrin what I can see is that only a 2D work
I suspect you need to click on the IBL and change its rotation (if possible)

that's a 3D layer within Photoshop
the cube icon is the marker for a 3D layer (in the same vein that icon is a marker for a smart object)
That's why I always ask to see the full Photoshop window 🙂
But you're right it is a 3D layer within a 2D environment!
I see that now, but to change the light on the photo you don't need to use 3d, only select the object and copy to new layer, get read of the shadow an make a new shadow
Yes of course, but I assume the shadow has been generated by the 3D environemnet (The IBL, image based light - that's an assumption there) so if you want to use 2D features only, you'll need to rasterise the car and its shadow, and remove the shadow to create a new one using the standard methods
If the OP is able to enter the 3D mode and change the settings of the IBL present in their 3D environment, then that would change the orientation of the shadow
I assume they have been using a 3D layer for a reason
But we don't know enough to be absolutely sure
@undone lagoon est ce que cela repond a votre question?
what I can see is it a Swedish copy of Photoshop
yes that help thank you so much
Gave +1 Creative Carma to @vapid flume (current: #9 - 461)
sorry wrong of my it was Google how foule me
If you're not able to change the rotation of light in your 3D layer - for example if they disabled that possibility, then you'll have to rasterise and recreate the light, and shadow, manually. That will be another story, but if that's the case, just come back and we'll guide you through it. In the meantime, if you can do it in a 3D environment, then it will be 1- easier 2 - probably more realistic
what version of Photoshop do you have older than 2022 can make 3D
that idea thont cross my mind i will try it
the video that teach me this methode was 4 yoers ago
then they have an older version of Photoshop
this is a youtube thumbnail and can anyone help me on how I can fit the text perfeclty too the monitor

i will be apperciate if some one tell me how i can do this effect to my image in photoge i dont mention the text just the effect on the image

If you type the text on separate layer and make it to smart object it will be easy to make it fits with help of move tool, you control the perspective with Ctrl and anchor markings
photoshop*
what effect text or face
It looks lika a textuer cliped to the face
thank you!
Gave +1 Creative Carma to @dire sable (current: #13 - 158)
this is made in Ae but I think you can do it in Ps also
how i can do it
select the face, make a copy ctrl+j , clip the texture to the face and blend face an texture together
can you mention a video explain how

Are you looking for a photo editing, photo retouching,
manipulation, art work and more tutorials in photoshop?
You are at the right place!
#photoshop #photoediting #photomanipulation #photoshoptutorial
More tutos :
Glow effect photo editing in photoshop
https://youtube.com/shorts/JyogqfAL4Yg
Auto blend layers - swap photo in photoshop
http...

or you tell the name of this effect
it is not an direct effect but a blending technic , I will look for a diffrent video
click this then PANEL OPTIONS

you can then change the thumbnail size.
(Assuming you want bigger thumbnails)
Since I assume you're not asking how to make the panel itself larger? But if so... just click and drag:

I have a problem in finding the right text for my design …Does anyone have any online tutorials on texts usage in photoshop designs ?
this is one way to do it https://youtu.be/LjnNF_-YoJc?si=rB73XddsKpQMBKsN
SUBSCRIBE!
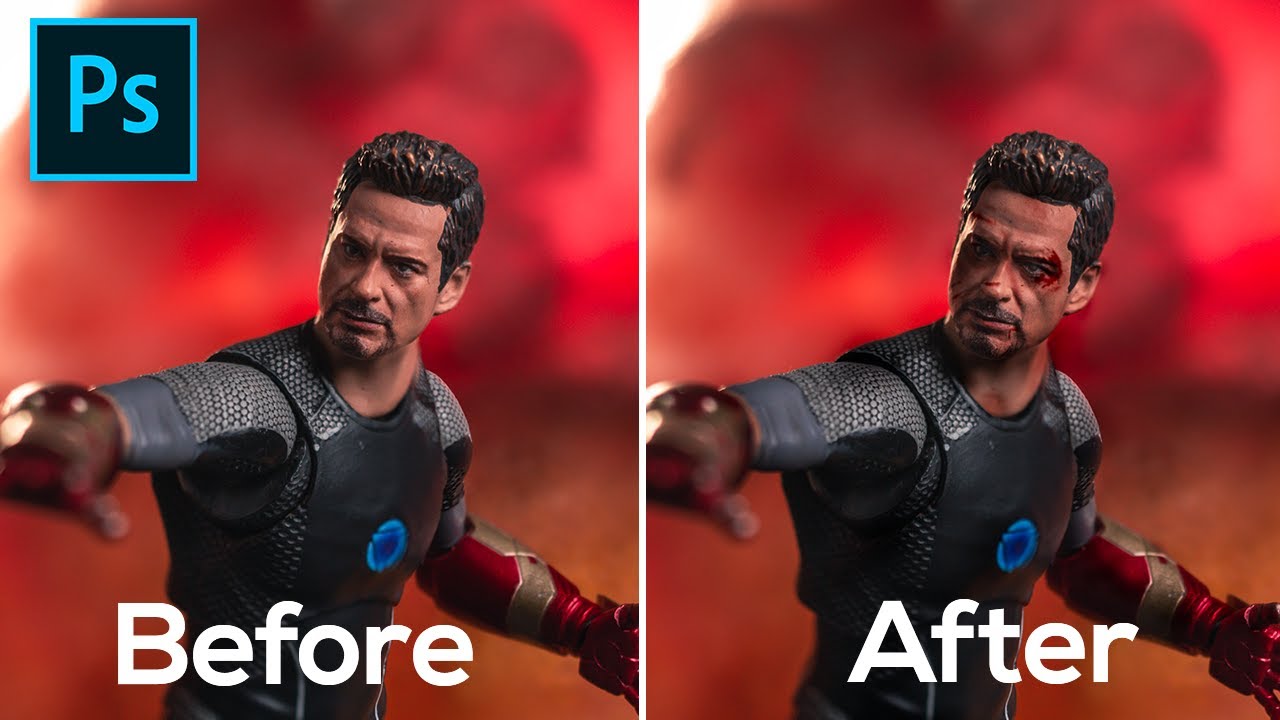
Hey guys!
Today I'm going to teach you how to do blood and bruise effect in photoshop. I made this because I saw a lot of toy photographers who do battle pose/ battle scene, but their figure still looks clean without any blood or scar.
Download the blood image here 👇
https://drive.google.com/open?id=19DENWKEdd1X5g8BiAu8seW7layCY...
how do i copy the selected mask over the one below?

Delete existing mask, hold ALT and pull upper mask.
thank you 👍
Gave +1 Creative Carma to @vernal ember (current: #169 - 8)
okay how i know size my work ?
Real question is why not

Hey
I didn’t want to “override” the guy who originally made this for me (sry g) but can anyone make this grid black, while keeping the transparent background?
This one actually
And maybe improve the resolution if it’s possible
Tyvm!
Hey does anyone know how to do this effect? I can do two toned 3D letters I don’t know how to get the fill as a material and the stroke as a solid colour

First, please stop pinging the Moderator role. Also, Sandrine attempted to answer your question earlier. The short answer is: you cannot just rescale raster graphics up 4 or 5 times large without noticeable quality loss. You will likely need to "recreate" the layout at the desired size. Raster graphics are designed at a specific scale and pixel resolution. If you arbitrarily scale the layout and/or the elements contained within, they can look "blurry" or "fuzzy" at the edges. The vector-based elements like text can likely be scaled without issues. However, the raster elements, you will need to recreate them to the appropriate size.
How do you edit I non vector PDF in illustrator?
Illustrator is primarily for creating/editing vector graphics so the short answer is: you can't.
I did not think so. thank you
Gave +1 Creative Carma to @ripe quest (current: #4 - 1573)
Can I use Photoshop to cut corners of this image and then combine layers to create a poker card? I understand how to add the card into Photoshop as a layer but I am having issues with how to edit the image so the number and suit would be visible. and then I think I could combine layers for the finished card?


im sorry about pinging , i understand you but now i just want to know my size of my work cuz i dont remmber what was this ( just size to know )
Main Menu: Image > Image Size and Image > Canvas Size will give your that info. :)
look when i type with arabic in this Templet The letters are jumbled like this pic

but if i make a new project fix
Just asking again if anyone can help me out🥲

Hi @white canopy Good! Just to clarify my last sentence... when you make a selection and then apply an adjustment layer, Photoshop creates a mask for you automatically. In the video clip that follows, you can see the Ps uses my marching ants selection to create the b/w mask next to the Hue/Sat adjustment layer—that's why the dog changes color and the background does not. You are masking without realizing it. 😉
Is there a way to restore corrupted files?
Without downloading some random software
Hi @wheat jungle Take a look at this post from Adobe: https://helpx.adobe.com/photoshop/kb/file-recovery-photoshop.html
And it is always a good time to remind everyone that incremental back-ups should be an integral part of any document workflow. You can regularly save versions of the same file with a new date or time, or just save to a cloud service that does this for you automatically (i.e, Save to Cloud Documents in Photoshop's File > Save as dialog box, or Dropbox, etc.) This allows you to easily retrieve a version of the file before it was corrupted.
Thank you!!!
Happy to help. We've all been there!
This is what i got

Nothing on the website worked
Photoshop sucks
I didn't even do anything wrong closing photosho
I saved it normally and everything was fine
a day later, nothing workds
?how to get clients
So to clarify. - Can I assume you've downloaded a template/image online, which I assume was perhaps an AI file, and you've opened it up in photoshop?
You've found that it's completely flat and pretty much useless in this format.
You now cannot edit it, or resize it in any way?
any ideas on how to make this image more natural? im new to photoshop

Thank you my friend, it's really nice that you took the time to show me, you're a good guy.👍🏼
Gave +1 Creative Carma to @sly hawk (current: #7 - 681)
Wow, you made that look too easy. Thank you so much for taking the time to create that video.
Gave +1 Creative Carma to @sly hawk (current: #7 - 682)
No problem 🙂 Happy to help
What is the command for this bot to give +1?
Hi. I like to draw low resolution pixel art in photoshop on top of high resolution irl images. Is there a good way to draw in one resolution and have it be scaled automatically for preview? Constantly making a backup copy of pixel art with HQ background, duplicating it, resizing it, etc.., it's all getting quite tedious.
is it possible to change the default Save a copy file extension?

I make sure to have a relatively recent version of photoshop.
You probably need to do an update?
This appears to be an older version of Photoshop that doesn't include Gen Fill. Open the Creative Cloud app and update to the latest version.
Doing that now. Thanks
how can i make it so these 2 are the same "layer" but i can toggle between the blue one and red one at any time so it looks like the 2nd pic normally but if i "flip" it i get the 3rd pic


also is there a way to make the layers actually show the images that are part of the layer?

Hi @exotic sand To alternate the visiblity of the two objects, they need to be on their own layer. You could create a layer group though, if that helps you get organized.
Layer thumbnails will show the contents unless you set them to "no thumbnails" which you didn't. So either this is a very high resolution file and the layer contents is so small that you can't see it when the layers are set to "Clip thumbnails to document bounds" or Photoshop is misbehaving. You can fix the latter by resetting preferences. Be sure to save custom presets, brushes, etc. first.

Really bugging me this!
im trying to add a paper effect to one of my text layers which ive done but it's also automatically adding a 3d bevel and emboss effect?? i dont want that.


"LEWIS" is fine, but it's the bevel i dont want
when i press the  for bevel it turns off the texture as well
Hi @winter ermine Texture is a component of Bevel & Emboss. They work together. Alternatives include playing the with texture controls in the Filter Gallery or finding a texture online and using a clipping mask to clip it to the letters.
Or, you could draw a white rectangle over the words, add the layer style with bevel and emboss and clip that to the letters.
can someone help me put someone’s hair on someone else
Hi @pliant ore Take a look at this video tutorial. https://www.youtube.com/watch?v=Wd5eYJEqxM4

Have you try edit a pdf in Illustrator, it work very well, but it can depend how the pdf file is done from beginning.
Hey
okie dokie
you need editing Then you have to come to me
how do i disable "clip thumbnails to document bounds"
should I learn that for you?
what?
It's a toggle. Right click under the bottom-most layer to change the thumbnail size and switch between Clip thumnails to layer bounds or thumbnail bounds. Or choose Panel Options for the Layers panel menu.
ahh ok xD
there is no space under the bottom-most layer
It is not I'm how have problem with edit PDF in Illustrator it work very well but it depends on if pdf-file is made from Illustrator or Photoshop
so if there is no space even at full length i just have to shrink tabs?
(which is what i did, was just curious if there was another way to do it)
Or use the Layers panel menu?
good idea
It's in my first reply and in the video clip. 😉
@willow gale is there a way to make it so if i click one piece, it moves the other one under it too?
(besides dragging a box)
Gave +1 Creative Carma to @sly hawk (current: #7 - 683)
All you can do in the layers panel is change the visibility. A Layer Comp can toggle the visiblity and change the position.
okie
Glad I could help. Should give you some guidance now moving forwards! 🙂
I will be thankful for you sir
This templates is an PDF-template of Pocker card downloade to Illustrator
Her how you do the design of the card https://youtu.be/qlynzuMeNFY


Challenge: Design a set of unique playing cards using layers, brushes, Blend Modes and the Swatches panel.
Get the starter file here: http://bit.ly/aidcc8-23-4
You are watching a replay of a recent live stream. Adobe is live every weekday with content just like this. To find more, join us at behance.net/adobelive
For more challenges like this,...
my images wont allow me to do all that 😂
this question might not really fit here but i dont know where else to go.
i cannot download CC on my computer, like it literally will not download or even prompt me for an install when i launch the installer. i just get the little loading icon next to my cursor for a couple seconds, and nothing else ever happens. i'm on windows 10, 22H2. adobe support has been zero help to me
and i'm basically just paying for my subscription that i can't even use
Have you had Creative Cloud apps on your PC previous to installing this time?
yes i've used CC and LR before, but within the last month it will not download anymore
Were they legit versions of the software?
yep official paid versions only
Have you tried the CC Cleaner app yet?
several times
i've also wiped all adobe folders from my machine manually
don't know what else to do except reinstall windows, but i'm not doing that until i'm absolutely sure there's nothing else i can do
I understand. So is the Creative Cloud app loaded on your machine right now?
no i tried installing it last night again but gave up because it wasn't working
the support team just tells me to restart my computer, or allow them remote access to my computer which im not doing
Are you able to sign in to your Adobe Account on the web? Like, does your account actually work?
yeah i can use web LR just fine
the only thing i was able to think of is if adobe software needs microsoft edge, which i have completely disabled on my computer
Just so I understand, you had the Creative Cloud app on your PC previously but have since removed it? Now you're trying to reinstall it and it won't run.
right
i removed it when i canceled my subscription a while back
either my pc isn't allowing it to run, or my subscription is broken
Some of the apps might need Edge to operate properly, for the "web-based" features. I'm not sure if the Creative Cloud app requires that but it is possible.
and it's not like i can cancel my subscription and resubscribe because im gonna get charged too much
$40 for early cancellation is ridiculous
You shouldn't have to do that anyway but if you've already tried the CC Cleaner, completely removed everything from the PC and it won't reinstall, I'm not sure what else you can do. Other things I might suggest would be difficult and dangerous. Like searching the Windows Registry for entries that might be left over from a previous install that is keeping it from running now.
i can try running CCleaner and clean the registry
not adobe cleaner, another software
I would try the CC Cleaner first before fiddling with the registry. That is a bit dangerous; if you don't know what you're doing, you can delete something that causes Windows to stop functioning.
Other than, reinstalling Windows is an option. However, that can be a lot of work.
yeah if i'm being honest im not gonna reinstall my os just to run one software
Which app are we talking about? Photoshop only?
i really only use LR
Because Creative Cloud has like 40 different apps.
just to edit photos i take
OK.
i can try to use a macbook i have, but i haven't used mac os in so long, and failed to update it because LR isn't supported on the current version
I'm not sure what to suggest beyond what I've already said above. Sorry. Good luck with it.
no it's ok i appreciate your responses
this is an adobe customer support ticket, unfortunately
is it possible to add multiple outer glows to a layer? I don't see a plus option like with stroke.

The main characters glow is hitting the black box which I dont want, but I have used the pen tool to cut the right leg off so i could get the cool effect of the black box being in between the legs
hi, my layer mask isnt working. when masking out the layer using black it does remove properly but it doesnt work when using white to add it back in, I checked and my white is the proper hex code. can anyone help?
CAN someone tells me how and wehre to check the counts, done, for GENERATIVE AI. i heard it it limited to some numbers of only? is it true?
Put glow layer bellow box.
Then erease leg for black box interwine thing.
Check the brush color. Black vs white and opposite.
Hey guys, any idea on how to create the letter "B" from a bacteria like this. I'm looking for a way to turn the put the bacteria as 2 circle of the letter "B" to create it ? Any idea would be appreciated


Clipping mask and fur brush.
do u know any clip that also tried to create a typography using image like this ?
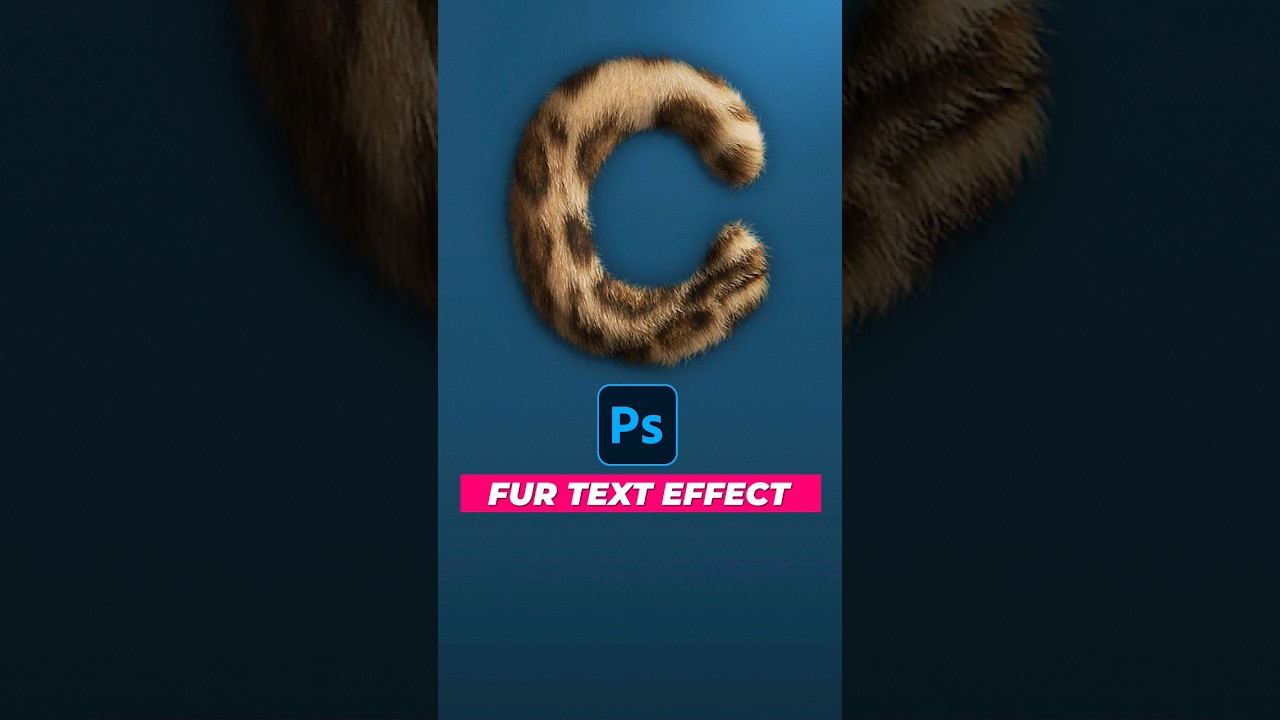
Hmm... I dont think that what I'm looking for. I'm trying to create a letter B like in this image

like not just overlay the texture on but literally use the pic and shape to form a letter (like the B here)
Then add 2 circle and one straight bacteria image and form a B.
For the B you sent, you will have to use first approach.
also, anyone got a good method to change pixel to vector?
CTRL + I, while on mask.
nice
also I need that guide on how to change specific colors via blend
I used a pen tool to make this, how do I create a selection from it?

I have no idea what they said in this tutorial.
Can't be more unclear.
Not sure what do you mean by this.
Select by color range, select black then invert the selection.
In this tutorial, you will learn how to isolate areas of a photo to use with Color Range.
📘 INDEX -
LINKS:
All 90-Second Photoshop Tips
► https://www.youtube.com/playlist?list=PL3bfN-31F9Rdzg20w9tWbhIySXN11SmzY
2 Little-Known Filters to Remove White Edges (Fringing)
► https://www.youtube.com/watch?v=0qcWeuWCkJ4&list=PL3bfN-31F9RcsA9rVxmi...
Ohh, this is for one color vector.
No, some effects cannot be stacked. But you can stack "invisible layers" with an outer glow.
Copy your layer with the outer glow, place it underneath the original, modify the outer glow as you see fit. Now in the general blending options: put the "fill slider" to 0, leaving the opacity at 100
What you have now is the layer with just the effect. You can repeat the operation as many tiomes as you want. Of course if you had some blending modes interactions theres, you might have to tweak them.
You have a vectorising feauture in the capture module of Photoshop.
To access it, go to your "libraries" panel and check the little + at the bottom

be sure you have your layer selected, the one with the design you want to vectorise
and select "extract from image"

in the pop up window, choose "shape" and play with the sliders

it's a crude tool, let's be honest, you might prefer using the image trace feature in Illustrator which is the best on the market (And I've tested many!)
The capture module serves many purposes which are really handy, even if sometimes a bit limited
https://helpx.adobe.com/uk/photoshop/using/capture-extension-in-libraries-panel.html
check that one!
Right click on the canvas with a vector tool (pen, shape, vector selection tools) and right click... Choose "make selection"

https://youtu.be/p-lbeAeIqd0?si=hU-fQ27RBJLT5OF_
@vapid flume
This tutorial looks okay until the point where we need to select second color (light gray), after that darker gray, and black at the end.
He uses actions, but, do you know how would we do this without actions.
Maybe by color range, then make working path and add color to make it a vector?

In this Photoshop Tutorial, you'll learn how to vectorize, Vector an image in Photoshop using an easy trick. After completing this tutorial, you'll be able to completely convert any raster image (the regular jpg photo) to a pure vector in Photoshop, the final vector photo will be colorful. This is the second Photoshop vector tutorial on the chan...
I guess you'll have to draw it. Or another solution would be to summon the AI tool in Photoshop select a blanck space in the canvas and prompt what you want.
You can also go to the Firefly website and upload an image as a reference (your bactera) and ask it to make a B in that style. I suspect there will be lots of trials and errors, but might worth a try
https://firefly.adobe.com/
I'll be honest, I won't watch 11 minutes of a tutorial just to find out 🙂 (I am in a middle of a project now, so use a bit of my free time to answer on the server)
Okay. When you have time, it starts at 5th minute, and just 2 mins away is that thing.
But know that some tutorials are crap. It's just the way it is. In the same vein that not evrything you see on TikToK is real (shock... horror!) not all tutorials are valid
That said, I haven't checked but some people who use presets actions etc, do offer to download them, you need to check the text beneath the video
Most time they might want to monetise these, that's the game. You need to check if that's the case
I understood it.
He doesn't isolate colors.
He just have them both as a vector.
I agree that YouTube and everything else is just a monetizing try of different people and it is hard to find worth things.
Well, sometimes I do tutorials (but I prefer "static" not videos. You learn quicker 🙂
This 11 minutes tutorial could have been an 1/2 page step by step 🙂
a closer look at the tutorial will show you that that assets are given here

which contains a step by step (miracle 1/2 a page!) and the actions to download for free
I didn't have to watch the video 🙂
And a quick Google search tells me that they added a new version recently
Illustrator - Image Trace 💁♂️
I guess the point is to obtain a clean line work, which uses all the techniques he used prior (oil filter, blend if) and then turn a selection into a path which you can do with a simple clicking on this icon in the path panel

Yes.
I acknoledge that not everyone has Illustrator
If you don't use it and still want to do things with Photoshop, it's still possible with some elbow grease!
hi guys, im wondering what function i can use to get this text lined up, im not having much luck with warp and perspective rn, thanks.

damn this is hard
@vapid flume Manager just clarify that they want sth like this. Any suggestion

Like this but look more like a B
Try the vanishing point in filters
Maybe it will help?
https://helpx.adobe.com/uk/photoshop/using/vanishing-point.html
No suggestion at all than maybe use liquify (filter>liquify) to change the shape. Would have been me, I would have drawn it. Sometimes it's just quicker/less tedious to do it from scratch
You can also use a mask to hide portions of the artwork you don't want to see, and make it look more like a B
Tks let me try to figure it out
Hi Sandrine, thx for your help. I was wondering if there were any glaring parts to the edit i made that make it seem fake. 1: original
2: n and r replaced
3: content fill over whole text and then whole text roughly lined up and replaced


Gave +1 Creative Carma to @vapid flume (current: #9 - 463)
how do i create this glowish effect around the text? exactly like shown

any suggested tutorials to make thumbnail like this?

Try a Layer Style > Outer Glow
No specific tutorial comes to mind. However, it seems mostly just text with Layer Styles and a couple of screenshots.
create a layer on the text then outer glow?
Just apply the Layer Style to a Text Layer. Dbl-click on the text layer in the Layers Panel, add the style and adjust to get the desired effect...
i got something like this, very similar but the color seems kinda off, the one i sent is much brighter

I can see two text layers here. the top one is yellow and sharp and the one below has a median filter on, red outer glow and opacity lowered
wdym by median filter
You can also combine it with other effects like a Drop Shadow with a specific color defined. If you experiment the Styles and their settings, I'm sure you can arrive at something very similar to the example.
So, uhm
Bit of an awkward question
If I have layers consisting of images of text with white backgrounds, and trying to remove said white backgrounds with the wand tool is an imperfect and inefficient task, what is the more efficient route to giving those images transparent backgrounds? They're just black and white but the images themselves were imperfectly taken so there are red and blue artifacts
Hi, I'm having trouble placing multiple lines above the circle like the first pic. It would be nice If you can help me.


Try Advanced Blending > Blend If... I demo'd it for a similar thing earlier this week. See: #❓ask-a-question message


This is much easier in Adobe Illustrator where you can easily/quickly create a "Spiral" path and the paste text onto it...

@ripe quest could it be possible to... make a little less jittery? I don't want to sound ungrateful. I totally am
I just want to know if there is a way. Maybe adding pixels to smoothen it out or something
Watch the video carefully. You can split the white handle in two by holding the ALT key.
Oh...

I kind of did what you told me to, but maybe the layers were confusing my low-attention-span brain
This kind of worked as intended, though

Hold the ALT key and click on the white handle. Then drag. You should be able to split that in half and adjust it a bit better.


I wouldn't do anything with the underlying layer unless you want to "see through" the text. Move those handles back to their default positions.
Ohh I think I see what you mean
In that case, this should do the trick


The text will be sort of small compared to the whole image, anyway. So, the image quality shouldn't be an issue down the line
I hope I didn't end up following just half your steps, because this was helpful
Thank you, @ripe quest
Gave +1 Creative Carma to @ripe quest (current: #4 - 1574)
I gotta go for a bit now, so thank you for helping me in a pinch
I wonder what this is
You can also apply a Blend Mode to the layer itself. Multiply or Screen depending on which luminance you want to drop out of the layer.
I totally missed that!
I was using some other layer, but I will test this out soon
Thank you again
What county do you live in, it can be a country related problem that you don't can download it or that you use VPN
Hello, im new to PS and I was wondering how hard it be to recreate something like this? Thanks

Difficulty is directly proportional to your experience using the app. If you're new to Photoshop, I suggest you begin by doing the tutorials that ship with the app. Main menu: Help > Hands-on Tutorials... Start with the "Beginner" Level and work your way through them.
gotchu , do you think you could recreate this easily? I'm just tryna grasp on if this is a easy, medium or hard level
I could probably create this easily but I've been doing this a LONG time. You'd first probably want to start by designing that "disp arity" logo design. Then once you have a "perfect" version of that, then move on to the flag. Then use an effect to make it look "worn out."
Understood. Thank you for the help
Gave +1 Creative Carma to @ripe quest (current: #4 - 1576)
Also, one thing people learn quickly is that things don't need to be created 'from scratch'
After you done the tutorials how included in the app, so take a look at the videos recommended in #🔨resources after that can you make the challenges in #📣creative-challenges and the PS DCC spreadsheet https://bit.ly/3BfI7WT

Google Docs
2024
Date,Time,Host / Guest / Speaker,Creative Challenge /Agenda,Starter
File,To Do / Challenge,TypOfStream #,Discord,Video Behance,YouTube ,NOTES
1/3/2024,9:00 AM PST
5:00 PM UTC/GMT
6:00 PM CET,Catarine Pitt
Mark Davids
,OFFSET: Form Play
EP 48
Motio...
How can i put photo inside of it or how can the text stay above of the photo? The text is going all the way to the end.
i know this is a super newbie question, but how do i finish the mask/color fill after im done editing it? i want to edit the other layers, but can't see anything because of the black 😭

Just tap the "Eye icon" on that Black Color Fill layer to toggle it on/off... if that's what you mean.
Im confused, im trying to upload some files on the creative cloud. But the thing keeps saying file type is not supported. The Camera is taking it in RAW how do i convert it into something that creative cloud can handle?
Hello, I am using Mac Pro, but I switched to Windows system due to lack of system. I made logo work. While preparing the corporate identity, I am working on Illustrator. While scaling the logo in my contribution to Indesign, I encounter a problem like the one in the attachment, and this happens all the time, and even occasionally, I get errors like this in programs: "The Update Smart Objects command could not be completed due to a program." My system is new, so the graphics card is RTX 4060 ti, it is not old, so what do you think is the problem? I upgraded from Windows 11 to 10 but I'm still getting the same errors. Creative Cloud programs are definitely not crack. I would be happy if you help.


if i do that, then the image appears as if i have not done any changes to it, with rough edges.

i want to keep the smooth edges, but get rid of the black
hey, is there a way to make rtl the default here?

Hi @lean kelp The edges are defined by your mask (the b/w square next to the top layer thumbnail). Click it and then choose Select > Select and Mask to refine it. The smooth slider will average the outside edges to produce a smoother result. Here's a good overview if this is new to you https://helpx.adobe.com/photoshop/using/select-mask.html Outputting to a New Layer with Layer Mask will leave the current layer alone and create a new one in case your first effort isn't as good as you want it to be.
Hi @ruby mountain I don't have that version installed so I can't test but this page (https://helpx.adobe.com/photoshop/using/arabic-hebrew.html) states: Character direction defaults can be set from the Character > Middle Eastern Features flyout menu.
this is huge. those are massive dubs. ty
Gave +1 Creative Carma to @willow gale (current: #31 - 54)
Happy to help!
Hi @pastel fractal I have to run but not following the question, so perhaps clarifyng it will help someone else help you faster. If you create this logo in Illustrator, place it in InDesign and scale it, it can't give you a smart object error message because neither of those two apps use smart objects—just Photoshop does. I'm not clear where Photoshop fits in your described workflow. Again, likely someone else can help, but I'll swing back later to check.
ignore my previous message it was an optical illusion
does anybody know where or how i can upload RAW into creative cloud?
The smart object problem applies to photoshop. You misunderstood the question we asked. The problem in the image is the problem that occurred when I transferred the logo from Illustrator to Indesign. The smart object problem is valid for Photoshop
tysm
haihai, can anyone guide me the way to remove this red thingy left from the edges hair of selection and the glasses frame? so it can match with the new blue background.
i imported this from remove.bg btw, so there is no way for me to modify the masking
i appreciate for all your response

Hello, can anyone help me to identify the gradient and bevel used for that text, pls....looks like linear, but there's a bright yellow circle in the middle...

how do i remove the bg i try to select the gold but it looks bad

select the white instead, then inverse
good idea
Try Advanced Blending > Blend If... I demo'd it for a similar thing earlier this week. See: #❓ask-a-question message
can you help with my thread above?
thx
Gave +1 Creative Carma to @ripe quest (current: #4 - 1577)
zoom in on the red areas and change the color to match the frames
You may need to use an Adjustment Layer to shift the colors and use a mask on the Adjustment to only affect those areas on the edges.
I've stepped away from my PC for a meeting.

Hi, did you create it yourself? if so, create it at a larger size...
Is there a discord server for other adobe apps
Ok ty
Gave +1 Creative Carma to @hushed niche (current: #169 - 8)
You can find all of the Adobe Discord Servers here: https://adobediscord.com/
Can I apply text so I can share the file to someone who doesn't have the specific font installed? like illustrator's outline
Do you want the text in that font to still be editable or not? If so, they would need to install the font on their system.
Otherwise, you would have to rasterize the text.
As a PSD file?
Yeah
Is the font that you used an Adobe Font?
No
Or some other font on your system?
I got it from the internet, it's in my system only
Make a copy of the file. File > Save as... Then right-click on the layers with the text objects. Choose "Rasterize Type" from the context menu. Save the file. Then send that copy to your Prof.
Correct. Its pixels now.
is that a game lmao
yeah:)... i kind of recreated it already,lol
thats good thats good
Is there a way to disable clear layer with ctrl+backspace? I went through the shortcuts and I don't see it
It's really frustrating when I try to zoom but accidentally clear my layer because they're next to each other, then don't notice and end up not being able to retrieve my work
It's not "Ctrl + backspace" - its just Backspace that deletes things. How about Zooming a different way? For example Spacebar Ctrl + click and drag...
Oh 😭 that’s silly of me
You can probably get close to this using Layer Styles but this is probably done another way.
I mean, there are likely multiple text layers used and various Layer Styles employed for each. I don't know exactly. I would have to mess around with it for a while and try to figure it out. This sort of effect is probably available to download on Freepik or something like that and it would probably be faster/easier to look there.
It seems to work

The next step, then, is finding a way to make some of the texts formatted specific ways. Like making some translucent, some white, etc.
I also want to draw over some. More like imitate Adobe Illustrator using brushes, with some of the design going over the text, while the rest goes under
I do have to go right now, though. So maybe we could resume later? Or if you find it more convenient you could link a few things so I can see them in my own time?
hey i was wondering if im allowed to ask in chat if anyone who is good at photoshop can work with me its like a business idea
Look into using "Layer Styles." Here is one tutorial: https://youtu.be/KDO1NAGfRzA?si=JyjJ4O_9btucSmz2 - Searching YouTube, you can also find many others.
► Check out our amazing new FREE course, Photoshop for Beginners: https://youtu.be/IyR_uYsRdPs
Photoshop layer styles are a popular way to add effects, such as drop shadows and strokes, to layers in a non-destructive way. With the right knowledge and experience, any effect can be achieved. Whether it's a Photoshop metal layer style, a Photoshop...
You can ask in #💬chat-general and briefly describe the project. If someone is interested in working on it, they will probably reach out to you.
ok thanks
yo i need help i want to turn somthing in to another layers colour any tips
excuse me i am a beginer why my line look like this ? am i do something wrong?

please help
how do i remove the white stuff i tried jusing erase tool but it aint looking good

why every time i darw the line it has thickness
hi! how can i remove easily background from the text? i tried AI remove background but it wont work how i need

Vector Shapes can have a "stroke" assigned. If that is what you mean. You can remove it.

Can you show me the image before you started messing with it?
hi guys, is there any way to turn make the upper of the letter "B" smaller than it bottom

You're likely going to have to make selections and use a Layer Mask to remove the pixels you don't want to see. It will likely require a bit of tweaking. Something like this...
Describe "smaller"
thank you!!

like the circle on top that make up the "B" is smaller than the cirlce bellow that make up the "B"
One moment...
yeah no prob
It might be possible to use Content-Aware Scale to scale that portion down a bit. However, the texture will shift and you might have to repair that after.

I think it would be easier to make a new, perfect "B" shape to look like you want. Then apply a texture to that new shape.
I think this look perfect for what I need. I just need a draft sketch so this is awesome
thanks a lot
did you use the content aware scale for this ?
Yes. Here is my example PSD file if you want to look at it.

Tks a lot man 😭 . I was crying trying to figure this thing out
No prob. If you want to mess around with this for yourself, this is what I did, more or less...
OMG 10/10 thank you
Gave +1 Creative Carma to @ripe quest (current: #4 - 1580)
@ripe quest May I ask one more question. Are there any way for me to transform the first image (2 circle shape bacteria sticking together) into the second image (1 bacteria on each side)


the first image has kinda different perspective to so I try to do perspective warp but it fail horribly 😭
That isn't going to be easy.
yeah just want to hear ur opinion on this
Perhaps you could use a Mask to remove the right side, warp the left side so it was more round. Then duplicate/mirror it to make it symmetrical. But this is theoretical since I don't really know how good it needs to look.
what is best lite windows laptop for all creative cloud software's?
I see thank you so much btw
Gave +1 Creative Carma to @ripe quest (current: #4 - 1581)
Do you understand what I was suggesting?
You'll want a decent PC if you intend on doing video editing / video effects.
I need laptop that's lite & great for college.
what is best photoshop course so far in Udemy? Only Photoshop.
Screen has to support Adobe RGB for graphic design too?
I don't really know. I use desktop systems because I need resources. Laptops are generally not adequate for my needs. Sorry.
Anyone else?
Yeah I understand . Basically crop it then use warp to make it round and mirror it to create the thing like the picture. Let see if it work thou
Graphics and video apps are resource hungry so generally, you'll need a bit of power (RAM and GPU resources).
how much?
how much will it cost?
I can upgrade ram & storage later on.
How much it costs depends on the brand and components. You'll probably have to set a budget and then figure out what you can afford.
My suggest will be $1000 under. I really wanna save a lot cause adobe subscription model, etc.
somebody please help me how do i change the text of a psd into something else without the font changing 🙏
Please don't spam the same post multiple times / in multiple channels.
Do you have the same font on your system?
no
Did you try to install it from Adobe Fonts?
i dont think its on there becaused its a banner psd and i want to change the text to my name but i dont know how to change the text
it dont let me
Its possible the text is not editable. And if you don't have the same font, you can't change the text and keep the font.
does anybody know of a photoshop feature were i can add designs to a blank garment and photoshop makes it look like the design is actually on the garment with ease?
You can usually find templates and mock-ups. But I think it will depend what you're looking for. What type of "garmnet?"
i just wan to drag the designs on to them and it look realistic, is that a possible feature in PS?
A feature? That isn't a specific capability of Photoshop. It would depend on the template or mock-up.
ok i saw something on social media where one could just drag a design onto a garment, press a drop down menu and it would look real.
guess that was a fake video
would be nice though
I've been using blend, and editing the design on the garment myself to make them look real
but if i could save time that would be great
They were probably using a specific clothing template, using Smart Objects.
nope not a specfic clothing tempalate, wish i could find it again. ive worked with templates for a long time.. they literally went to a drop down, and selected "place design on object" (or soemthing like that) and made it look real
sigh lol
Yes. You can do that with Smart Objects in a specific template that was already designed to be realistic. There is no feature in Photoshop or no "make it look realistic" button.

⭐Photoshop: https://bit.ly/photoshopPA
🎁FREE Mockups https://bit.ly/FreeMockupsPA
📫My FREE Print on Demand Email NEWSLETTER https://bit.ly/philipanders 📧
✅TOOLS I USE ON A REGULAR BASIS✅
Creative Fabrica: https://bit.ly/CreativeFabricaPA23 (TRY FOR FREE🥳)
Adobe Illustrator: https://bit.ly/illustratorPA
MyDesigns: https://bit.ly/3vsgENA 🔥GET 25%...
Hi @ripe quest . I try doing this like you but it seem to reduce the size of the whole image instead of just the tip like you. Did you hold down any hotkey to achieved that ?
ah, how do i find these tempaltes? do you have a source?
Watch the tutorial. He goes through all the steps it requires. Its not just a one-button solution here.
I only selected the top part of the B. Not the entire B shape.
I do not. I don't really make clothing designs. There are probably websites like Adobe Stock and Freepik that have those sorts of templates.
Hmm I also did that but it just make the whole top part of the B smaller. Can you look at my vid to understand what I meant better
thank you for you help, much appreciated
Gave +1 Creative Carma to @ripe quest (current: #4 - 1583)
Please post a file that Discord can display.
Try holding Shift when you scale
can we do custom filters, or is there a filter library were we can download more?
I suppose that depends on what you mean by "filters." There are Adjustment Layers and you can create "Actions" to recreate certain effects.
yeah I did but it seem to not work
Perhaps you have "Maintain aspect ratio" active in the Options Bar...

is anyone here ? i need some help with something
hello hello! i was wondering if anyone knew where this setting went in the polygon tool? :0

video im watching is from 5 years ago Dx
Does anyone know how I can edit this to make it look like I’m staring down instead of my eyes being closed

Do you have other photos that you could copy your eyes from? Ideally such a photo would be taken in the same lighting conditions.
Have you played with the “Star Ratio” percentage in that same pop up set of options?
i have but im still not exactly sure if it does the same thing or not
i just dont really have the understanding

also ty for responding :3
No worries and thank you. I recommend you have a bit of a play with this option. The lower you make the percentage, the more star like your shape will be.
Gave +1 Creative Carma to @turbid umbra (current: #833 - 1)
My eraser fills with colour instead of actually erasing. pls help 😭
is anyone here godly at photoshop i need help w something
the eraser use the same color as the background of the layer, for example if you erase a copy of image you done with Ctrl+J Command + J then you erase it will transparent but if you erase on the background will be same color as the background color you have selected. Then you erase will you get the same color as the background for the selected layer.
So if you get a color then you erase you try to erase somthing on a background layer ther is lock to the left, but do you unlock yoy will get a transparent eraser.
If you want someone to do something for you, try your luck in #💬chat-general
no, i just didn't know how the eraser worked properly, but thankfully, my question has been answered by the person above ☮️
thank you
Gave +1 Creative Carma to @dire sable (current: #13 - 159)
Oh my mistake!, I meant to answer to @crimson topaz ignore me 🙂
no worries 🤗
Sandrin do I remember wrong or have they change the how the eraser work on a background layer, before it always got transparent then you used eraser no mater what layer you selected. I seldom use the eraser tool.
For me it's as it's always been. It erases as transparent
Not sure if it's something that can be changed to be honest
You got 3 options in the eraser (that I never use, hence why I'm not entirely sure if they can be changed)

If you want to erase a single colour (eg white) from the background then maybe the magic eraser is the best option?
Then I didn't remember wrong maybe they have change it PS 2024
I honestly don't think they have it changed. I'm on the latest version and it's as it's always been - at least for me.
Maybe we need more info about the issue (and maybe it's a plain old bug!)
As usual, a screenshot of the whole Photoshop window with the layer panels showing etc is always more helpful than anything
if I erase on the looked background the eraser get the same color as the background swath , but on a copy of background it get transparent. so it looks like it's only on a background layer the eraser work that way.
yo guys i updated my photoshop from the last year version what changed in this new one
Well, I cannot erase on a locked background since it's locked. It's supposed not to be working when a layer is locked
Plenty of things!
you can see for yourself here
help> what's new!

oh its just their ai tools
not necessarily just the AI, but also the contextual bar if you haven't had it previously, an some optimisations (GPU etc)
Sandrin if you unlook the background layer you get a layer 0 instead of a look if you now go to meny/new/ new background from layer. You get a loock again and now you can paint on the layer
I still can't erase a layer (background or otherwise) that is locked
Maybe that's just me?
I pressed hide bar and now i can't get it back LOL
dont use the look at the layer panel if you do it will be look and you can't paint
nevermind just fixed it
I'm reassured, since it's the point of locking layers 🙂
the looks work on a diffrent way it look like, then I use the look on the panel and paint it automatic get a new layer
I'll try that. I've done a quick test now with the sequence you described (new layer from background) and it's just not working (or let's say it's working as I expect it to work)
I'll try further
I will do a screenchoot
No I got it
my background colour was white and it painted with white
so, today I learned that a locked layer is not entirely llocked, which is the most idiotic thing ever
so accept my apologies 🙂 @dire sable
As I said, I rarely use the eraser tool. and I would never do anything on the background layer (which is discarded first thing in my usual workflow. I even have an action that does that automatically)
NP Sandrine It's the same for me if you will be sure that the background is looked look it from the panel I have learned by the same mistake.
I still think it doesn't make sense. On a user logic point of view, it's very counter intuitive. I can only think that it's a remnant of an ancient behaviour, because I cannot see the idea behind it.
If it had happened to me by accident, then I wouldn't have known and I would have probably asked the question here 🙂
the only way you can see the layer is looked is that the look is high light in the panel
I never keep the background layers because they're dead pixels for me. I would replace by a solid colour adjustment layer which does the same thing except that it's not counted in the file size (or only marginally) and you cannot accidentally draw on it. So that's what I have an action that I run every time I start a new file (that asks for it) which replaces the background layer by a solid colour white
I have learned by PixImperfect always make a copy of your background, maybe this is the reason.
I tend to really avopid pixel layers if they can be replaced with adjustment layers. It just makes the file lighter. Particularly if you start to work with 10s of layers (or 100s as it's sometimes my case) on big files
Sometimes a bunch of solid pixel layers are the difference between a .psd and a .psb, which you'd want to avoid (at least I'd want to)
if you hover ower the look the looked from the menu that explains why it not total looked, and now we know why the eraser get a color because, only the transparent pixels is looked, not the color pixels
I do, however copy backlground layers when I open an image, and lock it (expecting it's really locked by the way 🙂 ), so I always have a back up in case of mistake. But I would never do it for a white pixel layer
same as I, and now after ours discussion I have learn it even more
Hard to understand this conversation.
Once unlocked layer is not anymore really lockable, is that the point?
Yes it is!
That's what those icons are for

We discussed the Layer Look mechanizes in Ps and why the eraser get a color in some case
You can decide to lock an unlocked layer, either completely (the lock icon) or just position, transparency, drawing, or auto-nesting
You generally lock your layers so you don't accidentally act on them.
I usually just lock the position and transparency because in my line of work I don't need much else, but you can choose as you see fit
Aha.
Ereaser gets color if Photoshop considers locked layer as background layer.
If locked layer is just locked layer, ereaser will not work.
yes that's what I learned today 🙂
Interesting.
I did not know this either.
How you pick what to lock?
I just press lock button which I assume locks it fully.
Depending on what I would need to do on the layer. Let's imagine I have to retouch a face. I would lock the position, but not the drawing. Imagine I want to create shadows on a base drawing , I would lock the transparency (although I think I would prefer clipping another layer to the base drawing).
I am sure there are specific usages for specific type of work (video?, texturing?)
You might want to lock it somehow but still want to add layer styles, or change the blending mode. You can't if you lock everything
This a fun thread Sandrine and we both learned something new
Time for lunch have a great day
is it possible to photoshop writing on a picture eg change the numbers on a picture of a passport
why when i make a adjustment layer with a layer mask and when i paint white it paints but when i use black it doesnt erase

nvm i figured it out its because of the mode
can someone help me with this? im a beginner and the remove background tool isnt working its magic too well because the fins or gills are somewhat seethrough

Wonderful stuff. Truly
My only obstacle is...

And I have used both methods to get the text without the background
But it seems the stroke style option doesn't "know" that
I'll have a look again in a bit (shorter bit than last time)
If you used Blend If to remove the background, you'll probably have to rasterize that layer first. Then apply the Layer Styles.
how come when i export as a png, the png loses saturation and vibrancy whenever i export it? idk if this helps but my project has gradient maps and the dimensions are 5000x5000
it only looks like the original file if i export it at 10% of its original scale
Hi I wanna scale my robot by trying to go command + T however it gives a error like this, any ideas?

Hey guys! Anyone know how this effect is called?

it's not called anything specific, you've got three books, all in a floating stack.
you're on the wrong layer
what are your export settings?

you might try unmesh's piximperfect tutorials on youtube - he did one sometime back that dealt with this. personally, i'd seperate the fins to their own layer, remve the background around them, then make the layer semi-transparent
i just selected whole file and tried to transform
rasterize your effects and commit them to your layer, then try the transform
it's selecting something with no data
how do i do that
Not bad

Thanks again
Hey people i need your advice. Is there a way to calibrate the colours on the tab s9 ultra or those tablets? I plan to make tshirts so need accurate colours .
Also i heard ipad pros colours are calibrated and correct, is that true?
right click on the layer with the effects, select rasterize from the menu
but i used to transform stuff when its on the group
It will not work because it is a path.
yeahh
Activate the path.
Go to the paths on right panel.
i couldnt see it
i have nothing to do with the path tho
i need to edit the shape
i used the path thing to do a flame effect
To have path shape/vector on layer you need to fill path with color, turn it to shape.
i don't wanna edit or make any path
i just wanna edit the shape
so i wanna close this path mode
however i have no idea how to
Well, I don't know what else is in that group.
Glows from eyes look empty, but it could be low opacity white.
Recheck that group for empty layers.

https://community.adobe.com
I have come upon an issue. Whenever I try to transform any of the images I have in photshop it gives me this message. Initially when I embed the image in it allows me to transform but once I hit enter there is no going back. Has anyone else experinced this and if so please help!
/url

trace
como funciona?
#como funciona
?
I want to make this drawing in ps, what is the best and fastest way to do it?

/url
@grizzled berry Somewhere you have a path in group. At least that is what error says.
Could be some Photoshop bug, but it says what it says.

okay man thanks
Gave +1 Creative Carma to @vernal ember (current: #157 - 9)

► SUPPORT THE CHANNEL & GAIN PREMIUM ACCESS: https://www.patreon.com/piximperfect
► RECOMMENDED SOFTWARE & GEAR:
✅ My Graphic Tablet: https://pix.live/wacom
✅ Recommended Budget Tablet: https://pix.live/wacomlite
✅ Try Photoshop for Free: https://pix.live/photoshop
✅ Artificial Intelligence Photo Editor: https://pix.live/luminarai
✅ Unlimited Ph...
thankd
If you mean on inside drawing, I guess Graphic Tablet drawing.
and what's that?
i just want to have the outlines of the girl in ps
but idk reeally know how to start
Does anyone know how to do all dat 😅

Anyone know how to fix these white boxes appearing?

it looks VERY isometric. If what you want is that effect of wonky perspective, then that's how it's called (think 80s video games)
Okay so I've got a pixel map of Croatia (without color or anything), but I want it with the flag, does anyone know how I could put the flag over the shape of the country?

Hi Andy. Is that happening with the Brush tool? See if going to Photoshop Preferences/Technology Preview and check “Disable Native Canvas” and restarting Photoshop helps.
Uh one more question @ripe quest...
You want to flag to be in the shape of the country? If yes, add the flag on the layer directly above the country layer and resize if necessary to cover it. Then right click the flag layer > Create Clipping Mask.
I'm trying to make it so there is a green lining in the middle of my text, as if it is metallic. How do I pull off the effect here? I did the effect at some point but it didn't register and I never got the steps

How would I be able to replicate these lines? For like a background

Worked! thanks man!
Gave +1 Creative Carma to @willow gale (current: #31 - 55)
rq whats the name of the type of color palletes that is flashy like hot pink and yellow, or indigo purple and green
Great to hear, Andy!
I guess I figured it out
Mostly by pure coincidence when checking out the other layers
The little contour should look like a bell curve
Anyway, I am done with my masterpiece
Thank you, @ripe quest
Gave +1 Creative Carma to @ripe quest (current: #4 - 1584)
Man, armed with this knowledge, who knows what serious and high quality images I could work on next!
snap a shot of something in the room with you, with your phone, and then turn it into an oil painting
I could do that
But... I prefer getting creative sometimes, which is an excellent opportunity to go finish my comic test!
Speaking of that, I am currently looking at it again!
I am curious what this symbol represents


It appeared once I created a new layer and clicked on "Artboard from layer"
Maybe it is referring to Layer 0 as belonging to Artboard 1?
Just a guess
I did this because of a guide on CMYK files using Artboards
Scratch that, my biggest issue at the present moment is building on existing guide templates for a large file meant for two pages.
I don't know how to make the distance between the two new columns 225 px from the central column, despite searching

I'm so freaking silly lol

I solved it! I think!
Needed a little brain power, but I think it worked
And I assume it is centered, looking at the ruler

... uh... I'm sure it's fine that way and won't introduce new obstacles along my production
The width is 4960 pixels, A3 in landscape
how do i fix the pixelness of the font ? this is in indesign

its kinda jagged not smooth like the two sympols next to it.
I think AI might be able to refill it pretty well
Do you guys have any suggestions for making this sticker mock-up look more realistic?

I think it looks fine as is
It doesn't work 100% of the time.
thanks!
Gave +1 Creative Carma to @golden plinth (current: #833 - 1)
what would be the best method of upscaling this image?

i havent been able to find anything higher quality which is understandable seeing as its 24+ years old
explain?
https://magnific.ai/ this site

Magnific AI
The most advanced AI upscaler & enhancer. Magnific can hallucinate and reimagine as many details as you wish guided by your own prompt and parameters!
$40 is crazy brah
you asked. that's the top of the line
yeah true
or you can use the image upscaler on capcut's magic tools page
i guess it makes sense
i think it would be tough for it to upscale
the logos would get butchered
really? can i see the image?

you just turn creativity off and resemblance up to max
the upscaler ones ive found online which are probably bad to begin with just make the words a blob

that's the before and after
fye
that's because they aren't javi's upscaler
lemme sling you some cash to fix it and draw the two little cut off segments 🙏 😭
no charge
i figured it out thanks tho
Gave +1 Creative Carma to @late osprey (current: #534 - 2)
how can i make the rectangle like in this picture its see through but it has a glow in it

Do any of you know a font that has a curve at the bottom left of the capitol A? I have looked everywhere but I can't find one!
I assume this is photo of a texture, that is masked so only the rectangle is visible and set with something like an overlay blending mode at a lower opacity
bear with me and I'll share a screenshot

see my layers (1) is the mask, see how the white strip on the left only shows the texture (2) that the mask is linked to.
This layer has had it's opacity reduced (3) and the blending mode changed to verlay (4)
now maybe overlay isn't the right blending mode for you, you need to test. It depends on how your texture is:
Mine is white background with black dirt or whatever
so I would probably choose "multiply instead


your particular image has a drop shdow which will be a layer style (exagerated here)
and the glow is probably given with the blending mode

So there will be trials and errors because it all depends on the texture you choose to put there. I suspect that if you want that glow, you will need to find a transparent image with -say -white specs or noise, and then change the blending mode to something like overlay or soft light. But you definitely need to test things by yourself
@river otter don't forget you have an AI upscaler directly in Photoshop!
in filter>neural filter, the filter is called super zoom

once you've run the super zoom filter and clicked OK, you'll notice that the image is cropped.
You need to go toimage>reveal allfor it to be whole again
thanks a lot 🙂
Gave +1 Creative Carma to @vapid flume (current: #9 - 464)
Yo, so I have 2 images, how would I align the pixels of each image correctly?
Can you show what the images are?
are they similar in any way?
ye imma just show a recording cause I cant take a screenshot
so like if I press ctrl and then select the 2 different images, the pixels of each one in different directions are different, how would I make it the same for each one?
So do you mean you want to make the faces the same size and everything?
Honestly, first of all I would create a square (with a vector shape) that will act as a mask, so you're sure your faces are fit exactly within that square. Then you can adjust the size of the face within that square, and only what's within the square will be visisble
so imagine your faces are the colour layers, and the vector mask constrain the image into the square

that's a vector mask
once you got that, you can use guides to create your layout. in that case so you can position your squares exactly where they need to be.
I would suggest you try a guide layout

see if I create a very nice even guide layout (guides are bright cyan here)

and you see that my squares aren't aligned to the guides!
once you've set your guides layout, you can position your layers very neatly

(this is very badly done here, just showing)
once your squares are positionned correctly, you'll just need to move the faces inside the masks so it fits...
Here are the tutorials that may help you
https://www.youtube.com/watch?v=7526LhIXzoA
https://helpx.adobe.com/uk/photoshop/using/masking-layers-vector-masks.html

In this video, you'll learn quick and efficient ways to work with Vector Masks in Photoshop.
Additional tips, tricks, and tutorials from Julieanne Kost can be found on her blog: https://jkost.com/blog
Facebook: https://facebook.com/julieannekost
Twitter: https://twitter.com/julieannekost
Instagram: https://instagram.com/jkost/
Behance: https://b...
for the guide layout

Learn how to set guides in exact positions in Adobe Photoshop in this quick and easy tutorial.
#photoshop2023
#photoshoptutorial
#designwithdale
In this easy Photoshop tutorial, I will show you two methods for setting guides in exact pixel perfect positions in your document.
We will first look at how to add a 'new guide' in an exact position,...
I'm assuming your making a thumbnail or something of that kind so it's quite crucial that you also learn about smart objects so you don't spend ages replacing the faces in the square and re-positionning them each time you create a new image with different people
oh okay, much appreciated, thank you!
I know it's a lot to take in, but just check the tutorials and if it's something you want to do on a regular basis, it will help you create a template so all you got to do in the end is changing the faces and possibly some text.
hey guys would anybody be open to helping me edit a photo for school? I really need it mane i cant lie
@everyone only if you can, thankyou!
Pls,help, how to make a gradien a bit curved at the edges like on that pic? tia

Try your luck in #💬chat-general you're likely to have more interest
gotcha thank you so much! if not could I maybe get some help from you? only if ur free ofc
Gave +1 Creative Carma to @vapid flume (current: #9 - 466)
TRy using the bevel and emboss option in the layer style. Here you've got a stroke (set as orange), a gradient overlay, possibly a "satin" and a bevel and emboss.
I really just give advice and help others how to do things, so if you're ready to learn I can help
that would be perfect yeah I just have a few questions 🙏
I think this is complex to do in photoshop still, you'll really need to test and trail and errors (because the different layer styles interact with each others)
@raw scaffold ask the questions 🙂
check dm
oh looks like someone is down to help me I'll ask them for the questions cause it seems like someone else also needs help thank you btw really appreciate it
Gave +1 Creative Carma to @vapid flume (current: #9 - 467)
thank you, i thought about bevel and embos and maybe inner shadow? will try
Gave +1 Creative Carma to @vapid flume (current: #9 - 468)
@raw scaffold Yes, beware of scams, they will likely to ask for money (which is fine by me) just be sure you know what you are signing up for
Does anyone know how to make this type of background?

Yes, I did try a bit, but it's quite fidgety because you cannot arrange effects in a specific order like you are able to in Illustrator, so the interaction between all the effects have to be thought of carefully
I would suspect a gradient, and then a texture on top of it, set in a overlay or multiply blending mode, with the opacity down. Just check the posts earlier today where I explained how to apply textures to someone else
I can try with illustrator, but I'm total noob there...probably photoshop will be easier option for me,thank you
What I would suggest is to try to find a a style that someone offers
they're a set of layer styles that you can download and install. If you find something vaguely similar, you can open it in the layer style and try to either modify them, or reverse engineer them
see for example those you can find on Behance (but you can find them everywhere really)

I swear by the reverse engineering method when I try to learn something. IMHO it's the best way to learn how things are done instead of simply following a tutorial (unless you're in a rush)
Once you get what you want you can save that style, so you can apply it to other texts
Got it, thank you for the advice:)
for example the ones at the bottom in my screenshot are ones I created for specific projects
Behance is the world's largest creative network for showcasing and discovering creative work
forgot the link 🙂
how do i put this text on that letter

gotcha thank you again
Gave +1 Creative Carma to @vapid flume (current: #9 - 469)
hey guys how do I crop one photo without the rest follwing
Is there any way I can adjust the photoshop pattern function so the pattern fits perfectly without cutting off?

it depends only on your pattern. The pattern layer (if that's what you're using) only tiles what you tell it to tile
of course, you can rasterize the pattern fill layer and adjust it to fit manually using transform mode
I would recommend using masks. Make a selection with the square selection tool  , make the selection and with the proper layer selected press the mask button
  at the bottom of the layers panel
Transform mode to skew it first, then some warping to make it follow the paper
one more question if you're still here...is there a way to like copy effects from another open project?
depends if the effects are still live or rasterized... but you can just hold alt (to duplicate) and grab the smart filters to move anywhere else
I mean between these

not sure of the layers inside but yes, you can drag an effect over the other tab and it will activate
ohh okay thank you it had a red x over it but I just did it and it worked lol thank you
Gave +1 Creative Carma to @serene coral (current: #6 - 790)
and thank you for this too
Anyone hve a good tutorial for adding people into a picture
I tried myself but I'm struggling 💀
is this good?

Does anyone know how I could remove the green and red boxes that are imposed on the vehicles?


yes, well done!
using smart approach - you can use black&white adjustment layer and adjust reds and greens luminosity to match the rest like so

Holy smokes, that is perfect! Is there any free web-based tool I could utilize to do that? I am operating solely in MS Paint at the moment. By inverting the colors this is my result so far, definitely not ideal.

you could try looking for a tool that turns pictures b&w with the ability to control the specific colors brightness like Ps does
Could any of yall help me with my picture. I need to change 3 things in it. DM if you can
this is ask a question channel, feel free to ask any Photoshop-related question here if you want 😄
This is just a general photoshop / editing concern, not for exactly Adobe Photoshop.
Where and what is the tool called that allows me to cut out the text (SizzleBurger) out of the picture?
I just want the burger to be visible (without the text), what allows me to do that?
Like free internet software, or Canva?

I just started out with photoshop and its really hard for me to blend images in another or adjust lighting. Do you have any tips how I could learn this?
Can someone photoshop a my roblox avatar
Adjusting lighting/color balance is done by levels/curves for lighting and contrast and saturation/vibrance for color match.
Now, some photos will have more cyan color, others will be warmer and so on, to match such you will need to fix particular color strenght.
For blending images, it depends what you mean by your question, the way you want to blend, but half job is matching color and then brushing with opacity.
What you ask is basically a freedom of artist, but these are tools you gotta use.
Removing text and redrawing removed burger parts.
Pen tool.
Selective color is the tool to fix particular color.
At least I use it for that.
Ok ty very much
Great art, just remove assassin fully and make new text.
Actually, after removing text and part of burger, these parts that would be missing are creatable by rectangle with bended corners.
How do i end a path with the pen tool. I don't want to continue it I want to start drawing a new path without needing a new path layer???
Hello i need help, i want to break down an illustration drawing into multiple layers for animation project, but everytime i use a Pen tool to do so, i get chunks of line art missing, is there an efficient way to bring back missing colors and parts cut out?
i think i did it:) without any templates, just a lot of trial and error,thanx

Can u do that for me? I don’t have access for computer right now


Ahh I see, tnx!
Should i use an inverted Eraser brush and then Color replacement to fix the lines? I tried that but it came out very wrong
is anyone in here familiar with s_Cartoon?
used pixilate filter once on text and now every single font i use is pixilated, even in other projects. how do i turn it off??
Filters are applied to the selected layer, they don't carry over to other files. Check the anti-alising on the Options bar. (The aa button). Is it set to None?

Yes its set to none
and it is carrying over
idk why
i used filter pixilate mosiac and now it just keeps happening to every font even when i open a new project
my aa is set to none like always
None means no blending on the edges. The default is Sharp. Option bar settings are sticky state—they remain in place after you set them.
The sticky state concept applies to all tools. I routinely reset all my tools so that I'm not fighting choices I made in a previous project. Right click the tool icon on the Options bar and either Reset Tool or Reset all Tools.
That didint work
Set your text layer to the smart object by right clicking on the text layer and selecting, then go to filters>radial blur, blur method: spin and play with the amount setting, the higher the number the more blur. Hope it helps.
What didn't work?
i think i may have fixed it actually
i dont think it was the filter, for some reason my resolution of my project was set to like 30
actually no it didint fix it
im so lost
i watch 1 min vid on how to pixilate text and this happens lol
LOL. We can fix it. It's not the filter, it sounds like we agree on that. Can you share a screen shot with the type selected, the anti-aliasing setting visible, and tell me the file resolution and the magification value?
one thing i am noticing is when i zoom out my text looks normal. i am working on a very small 240px by 120px canvas size. the thing is when i would zoom in on very small text any time before it would look smooth with no pixilation but after that prior project now it is.
im guessing it has something to do with me zooming in so much but ive never had that problem in the past when zooming in that my font goes all pixilated
Well yes, that's why I was asking for the magnification level.
resolution is 1080 pixel/centimeter should i make it higher?
sorry, about 240 mag level
Let's back up for a second. How is the final image going to be seen? Viewed online? Added to an InDesign print layout?
So then you want to design it so that it looks good at 100% magnification, and size it to fill the space designated for it on the website.
Yes. zoom in for detail work but worry about how the type looks at 100%.
I'm looking for a resource for you—have been the entire time—but can find it. BRB
I can't find it... I can see it in my little head—it's a table that explains the anti-aliasing options and where to use each. If I find it, I'll come back and post the link.
okay thank you
Setting small type clearly is a challenge in a bitmapped file. My advice is focus on the clarity of the letterforms at 100%—try out the various anti-aliasing options to see which looks best—and then don't worry about it as you zoom in. You really don't want it set to none, though. Let Ps smooth out the edges for you.
yeah thats what i have been doing thank you
You are welcome.
i do need to pixilate this font tho
??
little scared im gonna make things worse lol
With the filter?
yes, well i dont really know any other ways to pixilate font so
Filters are only applied to the selected layer. They don't carry forward. Options bar settings do, filters truly do not.
the pixilate filter seems to not even be working anymore
I only have a few more minutes. Which one are you using and are you converting the type to a smart object or rasterizing?
its okay i think i am gonna leave the pixilate alone for now i do appricate all the help tho
OK. Don't be discouraged! Come back when you are ready to try again.

I have an alpha texture I'm using in a 3d program, but the resulting model looks like this (pixelated as you can see)
how can I edit my alpha image to fix this a bit? Its 8k resolution 16bit, tried a small gaussian blur but no changes

hey bb not sure if your around but i finished the logo curious if i can edit it even tho its a eps file
or do all files need to be psd to edit in photo shop?
A question for later review:
If I have saved my progress and then the file corrupts, is it no longer viable to recover the work?
I know that temporary files exist which may work, but I mean is the main file done for?
What precautions can I regularly take to ensure my work is mostly safe from loss due to such incidents?
I appreciate just a ping and response. I don't want to drag it out into a full discussion
does anyone know how i can recreate this text in photoshop? anyone know the font and how to do the effect
Goodnight does anyone know how to do the LOVELY part of this?

This might be illustrator
hey everyone, i'm having trouble with clarity, so i paste the following graphic from illustrator into photoshop and it looks messed up

when i export it also looks crap
any idea how to imrpove
did you get your question resolved? I was wondering why you weren't using vectors? Especially if exporting from a 3D program..
Do you mean vector displacement maps?
is there a channel where i can ask for some work?
Adobe Photoshopの「生成拡張」の機能を使うと
「生成塗りつぶし」コマンドのパラメーターが無効です
となり、機能を使うことができません。「生成ぬりつぶし」の機能は使えるのですが、どうすれは「生成拡張」の機能を使えるのでしょうか。
When using Adobe Photoshop's "Generate Extension" feature, the
The parameters of the "Generate Fill" command are invalid
and I cannot use the function. I can use the "Generate Fill" function, but how can I use the "Generate Extension" function?
(↓from AdobeFirefly↓)


Hi.does someone know how i can change the color of an object? i want to make something like this.the thing is brown and i want it to make it light blue.someone told me that i have to do this "masked, color change, color dodge" but i don't know what that means. Please

Please help me, is there way to unlocks all the layers/groups, even if it is hidden(without headache to find the layers)?
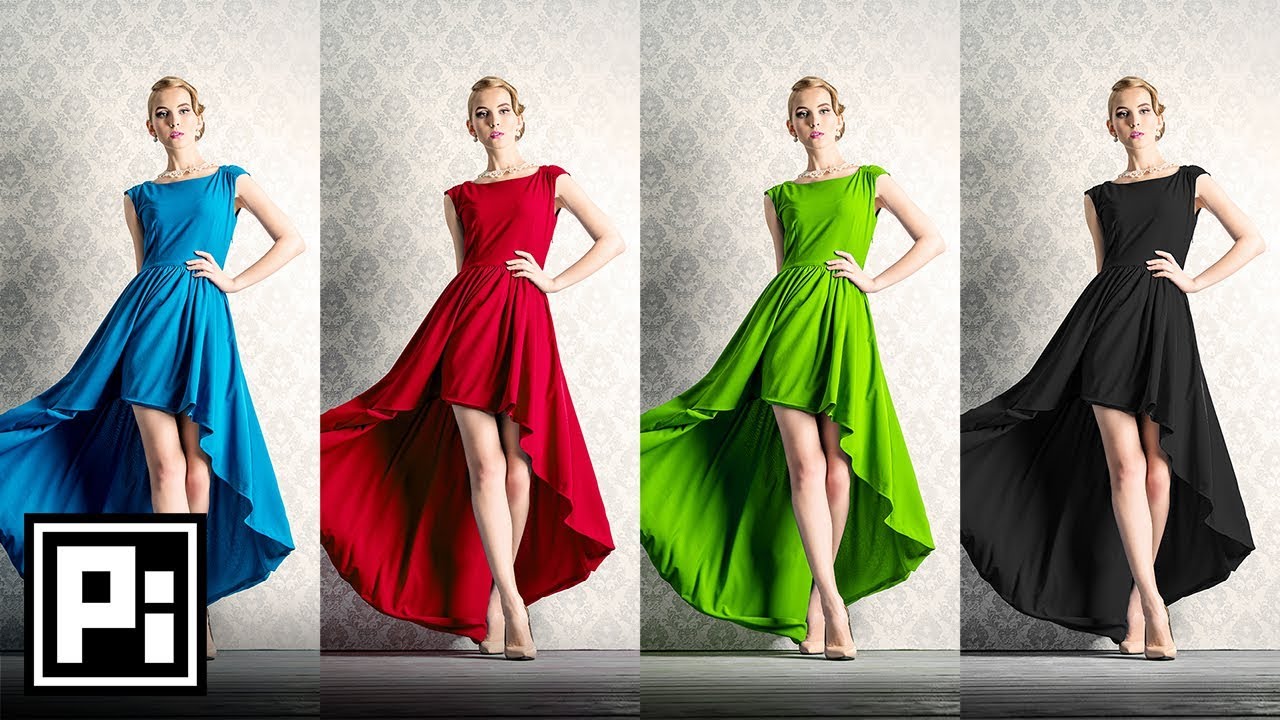
Change Color of Anything to Anything in Photoshop! Learn how to selectively use the Hue/Saturation Adjustment Layer to Target and Change Colors easily.
Hope this video helps you. Thank you for watching :)
► DOWNLOADS:
- Sample Image: http://bit.ly/2BBitiy
- Finished PSD: http://bit.ly/2o14w3y (Only for our Patreon Family)
► HELP US CREATE M...
my grandfather is a painter by heart and i want to see if he will paint this, only issue is i want these bodies out of the picture entirely. i dont know how to Photoshop at all and was hoping someone would want to take this task on and make this picture look completely free of any bodies in the foreground

When ever I mask using the object selection tool, I always get this feathered black and white border even when I am on full hardness. Do any of you guys know why this is occuring? Thanks.

How can I fix this And how do I set up a stracth disk


you have low space on your C drive
It has 110 GB free isnt that a lot
@keen arrow
is should be enough. maybe double check if that's actually the free space you have on your drive. I had that same error a while ago because of my low disk space.
So what my next step to do