
#❓ask-a-question
1 messages · Page 16 of 1
what exactly are you trying to do? remove the masked areas?
im trying to remove the motorcylces
so select the white area in the second picture
you could ctrl+click the layer mask to get the selection but the GenFill result will look bad because of lack of a safe area for the blending. I would use the lasso tool  to make an outlined selection and then use GenFill
oh yeah alright that work
I do have a question. How do one create a glass Shard effect with Photoshop showing scenes or characters.
is this the effect you're looking for?
https://youtu.be/kzlpJ_YHB_U

Photoshop CC 2020 tutorial showing how to create the effect of a reflection in a broken mirror.
➤ Get 15% off BORIS FX OPTICS! - The Academy & Emmy Award-winning plug-in for PHOTOS in Photoshop! Go to https://bit.ly/3aDnh4A and use my special code: bltv2020
Broken Mirror image: https://1drv.ms/u/s!ArAEPhCK6XBWgbEzAok4WNXtRez1pw?e=OwBAph
Pen ...
More of like a piece of glass on one part of the canvas.
the same workflow with different base image. do you have a photo of a shard(s) you want to use? you can use layer masks and blending modes to make it work
I see. Thanks @serene coral
Gave +1 Creative Carma to @serene coral
hello, what is the best and accurate way to cast a direct shadow of an object ? sometimes the drop shadow effect is not realistic depending on the object
Casting realistic shadows is quite hard, sometimes you need to take extra steps to ensure the shadow follows the shape of the object it's cast onto, and we see a lot of people forgetting that one.
There is no 1 method IMHO. It really depends the kind of situation you are in. If you want to show an example, maybe I can help
I must admit that sometimes I take the short route. I create a rough model in Substance Stager or Adobe Dimension (3D stager software) and either just study how the light falls, or if the model and environemnt is realistic enough, I export the render in PSD and use it to be composited into my PS document
That really depends on the degree of realism needed and the completxity of, for example, the ground
Hey, any idea to how i can get an effect similar to this? I’ve tried using displacement maps on my text but it doesn’t look anywhere near as defined as it does in this reference picture

This is the closest I’ve reached, the problem is when i remove the background photo, it just looks like a random warp effect i added to the text

I would try recreating this effect using a 3D program like Blender or C4D. You could do it in Ps with a lot of patience and warping/liquifying and masking
Haven’t thought about that but you’re probably right, I’ll try projecting the text onto a cloth texture in blender and hopefully that will work out better. Thanks‼️
A simple decal thingy might work as well (image as material). I'm not there yet in Blender, but in Substance Stager it's quite easy
The issue with displacement maps is that creating a good reference map is hard, particularly if you want neat, sharp outlines. You spend way more time fine tuning your map and since it's rather a blind process, progressing through trials and errors it takes quite some time.
Hey everone, does anybody knows how to make this effect?

I would try using the filter> distort > polar coodinates although you would need to start with stars arranged in straight lines I guesss (You got two options: Polar to rectangular and rectangular to polar, I'd try the former)
And then cut the result in half and then duplicate and mirror the duplicate.
The tricky bit would be to figure out how to align the stars in the pre-filter image to get the result you want. You'll have to trial and error it

Yeah, I tried very similar approach but unfortunately it behaves a little unpredictably and distorts the stars, and I need them to keep consistent shape
i have a psd file and i need it into svg
hi guys i have a question, i have a photo that is black and white and some other shades of white and i want to make every color transparent beside black. can someone help please
you can use color range masking, blending mode or blend if
can you elaborate? do you know the difference between raster and vector graphics?
You need to export as .svg, but it's only possible if you enable to "use legacy export as" in the preferences
at the bottom

It only has a use if your design is 100% vector (like vector shapes, or pen paths)
otherwise it will just be an embedded image
Any distortion effect you will apply in Photoshop will also distort the subject. I would say this have been done with illustrator (just half and mirrorred)
yeah, thanks, the idea of doing just half/quarter might help find a solution
Gave +1 Creative Carma to @vapid flume
Concentric circles and a "blend " along the paths
That's how I see it in my head (But haven't tested it)
Is it safe to delete these?

yes
Thank you, it's getting out of hand now

Gave +1 Creative Carma to @serene coral
depends on files you open/create and your workflows
It's probably because of this isn't it
😳 yes...

Also random question, but why is there a "let photoshop use x MB ram" while it doesn't work?
how do i make the "t" visible like some clipping mask or something

how doesn't it work? it's ram, not disk space
Because it uses more

I think you could use a layer mask but I'm not entirely sure what the goal is
i mean look, this is the logo and i need it like in one color but that the text is visible

I believe Windows displays commit charge and not physical memory but I am not 100% sure
The choice is up to you as you are the designer here. you could use an outline or drop shadow to regain the contrast
why does my generative fill stop at like 20% it just cancels randomly
Make sure to read guideline
about generative fill
Hello mates , i want to swap the batlogo any video or tips for this ?

I would remove the entirety of the current bat logo and light streaks and start fresh. Content aware fill or generative fill for that. Then create a circle with your cutout image, adjust the perspective, add an outer glow and slightly blur the edges. Then use selections and a soft brush to create the light rays. I'm sure there are other ways, but that's what I would do. I hour it helps!
Hope*
Thanks a lot mate i will try this !
Gave +1 Creative Carma to @valid bison
No problem! You could even play around with the blending layer, maybe screen, to get it to look like it's more on top of the clouds. Good luck!
hello community
It’s been 2 hours now that I’m looking for a way to make a small simple animation as in the video opposite but I can’t find the way to make the animation easily, could give me a tips please not to have to replace each time the mesh and the inking point, as for a video editing with the key frame, I would like to slightly move my character, that it records that I advance a frame etc... is it possible?
thank you for your attention ^^
I have this arrow I designed for a speed-o-meter, is there a way to make it so the rotation point is in the middle of the image?

yes it's easy
ctrl + t
and on top you have ths
click here and move you'r rotation point
Thank you so much!
Gave +1 Creative Carma to @sturdy terrace
no problem ^^
Hello, It’s been 2 hours now that I’m looking for a way to make a small simple animation as in the video opposite but I can’t find the way to make the animation easily, could give me a tips please not to have to replace each time the mesh and the inking point, as for a video editing with the key frame, I would like to slightly move my character, that it records that I advance a frame etc... is it possible?
thank you for your attention ^^
How do I save it? When I press the ✔️ it just goes back to it's original rotation point
I searched but according to the answers I got, there is no way to save a new inking point (at least as far as I know)
The only way I see and add a much lower invisible pixel casiment to bring back the point of rotation where you want 😅
I was surprised that there was no solution x(
I have no clue how to do this 😭

you guys trying to animate your puppet warp in photoshop or in after effects? because if you wanna puppet warp to reshape and set something that's cool in photoshop. but if you wanna animate the movement, you're life is gonna be a whole lot easier doing it in after effects.
yeah, I want to believe you but I don’t have after affect 😢
thx for your answer
Hello guys im new in photoshop and i want help to make person face half with lion head
thank you so much! do you think you could do this with a png of the image to avoid quality loss?
Gave +1 Creative Carma to @sturdy terrace
Does anyone know if it would be possible to automate this task? I like to create tables in photoshop like this for illustration purposes but I have to recreate a bunch of them with different titles and text but in the same format

https://www.youtube.com/watch?v=6W9C61U5jgU
this video gonna help u

Welcome to this complete tutorial on how to import and save variable data in Adobe Photoshop CC 2020. We start of with a blank document and a spreadsheet and end up with 20 different data sets which can be saved as .psd .jpeg and .pdf! Make sure to subscribe if it helped you!
(00:00) Start
(00:16) Set up Photoshop document
(01:25) Define the va...
who can help me @everyone

In this video, I will show you how to edit Half Man Half Lion Face Editing in photoshop.
After watching this video you will be able to edit your Photos into half man half lion face.
Sub for More.
Thanks For Watching.
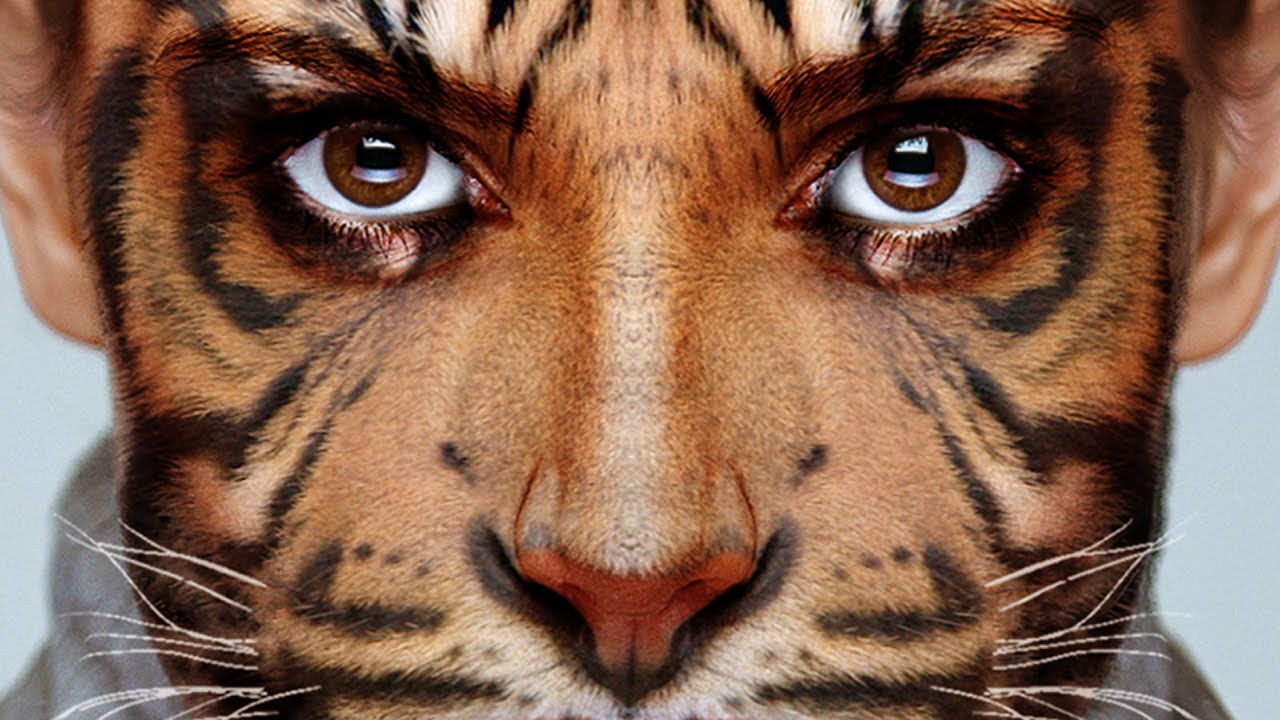
Photoshop CC 2014 tutorial showing how to realistically blend an animal’s face onto a person.
Photo provided by www.Shutterstock.com
High-quality, royalty-free stock images
ID #: 222400888
Tiger: https://1drv.ms/u/s!ArAEPhCK6XBWgedNpoMm2ByTiaqGpw?e=gfaium
Subscribe to Blue Lightning TV!:
https://www.youtube.com/user/bluelightningtv?sub_conf...
@warm grove you are amazing thank you so much
Gave +1 Creative Carma to @warm grove
Does using the remove background feature downsize the image?
If I get an older version of Adobe apps will the be less laggy?
Currently both Photoshop and After Effects are extremely laggy on my laptop, even with settings LOWLOW
If Im able to downgrade, will it be less laggy?
Could it be the size of your Canvas? Probably not but I've seen waaay too many people get confused because their image is somtimes 1080cm across, instead of pixels.
i used 500x500
i wanted to go with 1920 1080 but it was so laggy i was like wait let me try 500x500
EXTREMELY laggy
I uninstalled it already its basically useless
for some reason adobe animate 2023 works "ok" .. less laggy..
and it was defo PIXELS? (Sorry, to potentially insult your intelligence)
yes
it was pixels
xd
i even tried cm to see if that changes anything but it was still laggy
ummm. Have you got plenty of scratch disk space?
i have no idea what that means
oh i cant post images
i have 16 gb ram i thought that was enough
I want to draw an object using a tablet. Is there a way to limit the drawing to a certain area/line so it doesn't get misaligned with the rest of the elements?
hihi! could someone help me figure out why the center isnt a single anchor point pls? :;

its instead a bunch of points that act independently when im trying to have it as 1 point if that makes sense !

because one anchor point can only have two other points connected to it. a three point intersection (like in the letter Y) would not be possible.
ohh... thank you so much!
would you happen to know how to make it so that i can do what this video is doing? :0
Gave +1 Creative Carma to @plush stirrup
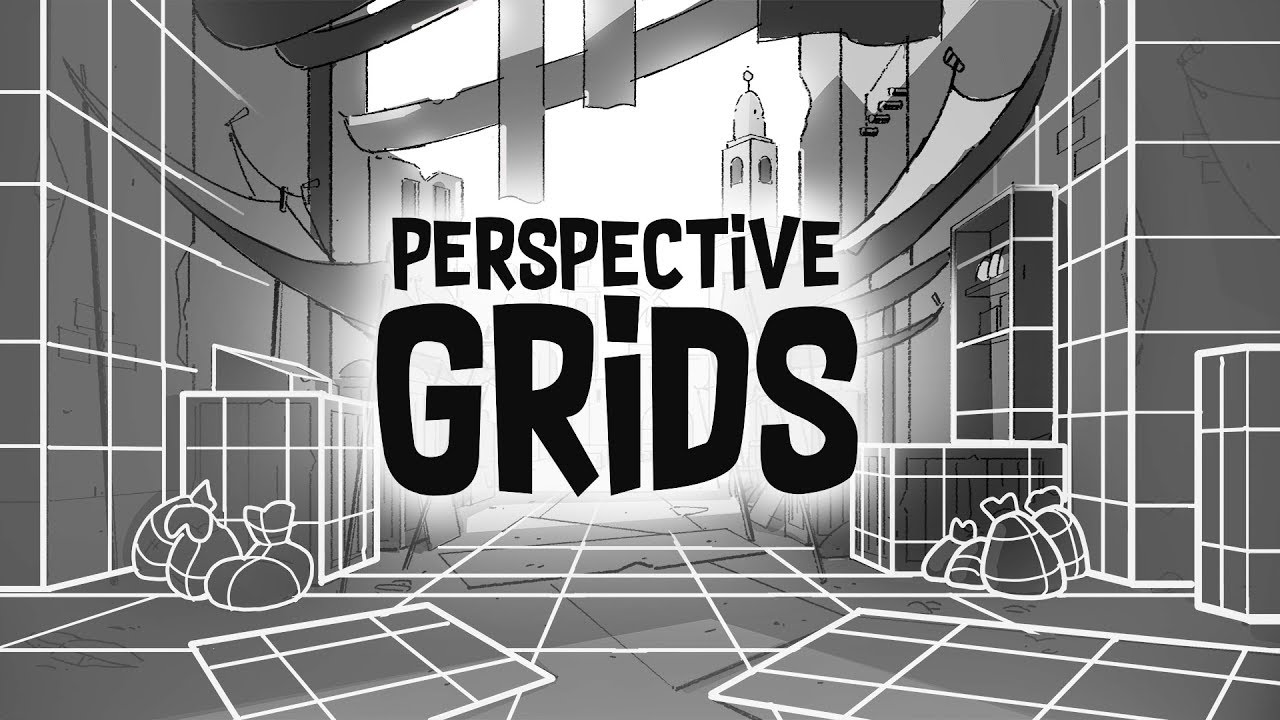
Perspective grids in Photoshop are easy to make. We show you how to use perspective grids in this episode, we show you 1, 2 and 3 point. And how to make a Warped Perspective Grid! Perspective is great for animation backgrounds, comics, concept art, and illustration. And as bonus. Brent and Max will teach you all about composition, set dressing...
its time stamped
you would have to select all the points at once in the center using this tool. note: this is not the normal cursor, but the direct selection tool

i fiollowed what he said w the white cursor but it doesnt do it ;;
it selects every point but its like the middle is empty? or.. idk... my head is overheating lol

is your cursor white or black?
white
so just to triple check, it looks like this at the top of the toolbar?
and not like this:

okay, looks good. try deselecting everything first (CMD/CTRL + D) and then draw the rectangular selection over the center of the grid
then, click and drag to move the center

most likely, yes
thank you so much
for real, youre a life saver
not to have another issue lol but how can i make it so that the center is like.... like having the lines go alllllll the way into it instead of leaving like a lil circle?

you would select the center points again (just like before) and use CMD/CTRL + T to transform them. you would then scale them down like any other layer. you can hold down the ALT/OPT key when transforming to make sure the center stays in the right position.
How could I embed purple glowing runes into this artwork?

you could draw the basic shape with a thin brush and apply a glow effect via the layer styles. then you can adjust how much glow you'd like to add.

here is a cool tutorial https://www.youtube.com/watch?v=t_Z4gpYkB0w @river otter

In this video, we'll check out two unexpected approaches in Photoshop. First, introducing all kinds of wild color into a black and white image. Then, giving the typography an organic grainy glowing effect with a hidden feature of Layer Style Effects. Thanks for watching!
Free textures in this tutorial:
https://texturelabs.org/tutorials/two-esse...
and here is a tutorial outlining a different technique to create glows https://www.youtube.com/watch?v=OoX9scQ57lc

Looking for an alternative to the flat-looking Outer Glow Effect in Photoshop? In this tutorial, we’ll check out a simple technique that generates awesome results to create a more realistic glow for text and logos. Be sure to try out the same technique to make your photographs glow as well!
State7 Studio's glow tutorial inspired me to make this...
youre THE BEST
ummm
just updated photoshop


random gray box
wont go away?!?!!??!!?

restarting PS fixed it
Hi I have a little problem with my drawing I made in Procreate. I painted most of the colors with lower opacity because I wanted a specific gray, I know that was dumb idk why. And now I have it in photoshop and even though I turn the opacity all the up on the layer it is still see through. Is there a way around this or do I have to restart?
This method is crude but it generally works quite well.
DUPLICATE LAYER
Select a layer with partial transparency in the Layers panel and duplicate it multiple times by pressing Control/Command + J
SELECT LAYERS
Within the Layers panel select that original layer you duplicated, hold down the Shift key and select the last duplicated layer
MERGE LAYERS
Press Control/Command + E
I didnt think about that thank you that will help.
Thanks mate. No worries.
Gave +1 Creative Carma to @wet sapphire
Yo, I can't seem to find where people get this omegle template where it just shows the bar at the top, and the white background, it looks the same in multiple omegle vids, but I can't find where to get the background

If this is a Ps-related question, you can cut it out with selection tools and layer masks
What exactly are you trying to do? Bucket tool might not be the best way to do it...
You literally feathered the selection before filling it. Just don't feather it if you don't want it to be feathered
Different selection modifications do different things. There is a smoothen option and I believe this is the one you want to use in your case. Otherwise, use different selection methods
Nice work… I have no idea what you guys are talking about
What did you use to record this?
Just if it's of any interested, you also have the in-built Windows snipping tool, that also creates videos

Unless you're still on Windows 10, like me....

(recording videos is better than gifs since they're smaller and the user can play/pause the video)
Do you have the Gamers module on Windows 10? (windows key + G) I used to record with that one before, but I can't remember if it was available with Windows 10
Sometimes the tools are already inside the machine. Particularly when you use video sparcingly, like me. James, on the other hand, might need something a bit more substantial 😊
I've had corporate clients record training videos for banking and finance applications using their Xbox Gamer Module :), because their super secure PCs won't allow them to install anything 3rd party.
I had that too (the "not installing 3rd party). I used OBS succcessfully for longer video. I can put overlays very easily and I can do all sorts of things like blurring areas of the screen etc. It's a faff for a 10 second video tough
for some reason since the update my hue cube selector hasn't been updating with the pick colour tool, anyone else found this problem/ a solution?
I've seen people having this issue here,
See if that fixes it, but maybe @sly hawk knows the direct answer?
https://community.adobe.com/t5/photoshop-ecosystem-discussions/eye-dropper-color-picker-not-working-2023/td-p/13498520

https://community.adobe.com
HI I'm using the latest update to PS, on a Mac, which is also completely updated. I am only using 1 screen as I have seen there were issues with two screens. Currently, my eye-dropper/color picker is not working and hasn't been for about a month. I have also tried rebooting the Mac, signing i...
I already tried resetting preferences aswell as fully reinstalling the app, the question also mentions problems with 2 screens, which i have.
It could potentially be related to that?
I know I've seen questions earlier this year about that here. I will try to find the answers...
ok, thanks a lot for the help
Damn, I can't find them, the search function on Discord is a bit... tedious. (lots of very old posts, but maybe I didn't phrase it correctly)
Which version are you on? I know they updated it recently, maybe that fixed it?
BY the way, there is an update today for me

i just reinstalled it so im most likely on the new version
Can you just check? Just in case?
Current version is 25.2 for me (before updating today)
go to help>about Photoshop and then the version will show up here
You can also find it on the CC app, where you update the software
in about photoshop it says 25.1 but creative cloud doesn't mention an update
OK< because it's still 2 minor version behind then
Not saying, that will fix it, but just in case
Updates come for different users at different times, so I would keep an eye on the CC app today
ok, thanks
ill just try to get what i need done without the colour picker, as annoying as it is
Can you try double clicking on a colour, or the colour squares? That rings a bell for me, bizarelly
Once the colour picker is open I mean
Another thread:
https://community.adobe.com/t5/photoshop-ecosystem-bugs/photoshop-2024-v25-1-color-sliders-don-t-work-color-picker-issue-merged/idc-p/14206745
All the threads I have been reading mention the issue being fixed in 25.2 so I don't know why you don't have that option to update...
https://community.adobe.com
Update.. I can confirm that going back to version 25 fixes the problem. The color picker, color wheel and color sliders are all working!
Check if that one works, directly in Photoshop
help> updates
oh nice thanks, ill check it out soon

Hello, i have a texture and i want area except center transparent like this
from

to

how to do this
https://community.adobe.com
Primary Storage Device C: Ssd 240 GB / 80 GB free space Secondary Storage Device Hdd 1 TB GB / a lot GB free space Windows 10 Pro updated Photoshop CC 2015 updated Video Card Gtx 770 2 GB i5 Quad Core Processor 3.5 Ghz 16 GB Ram 1600 Mhz When I click in Filter < Filter Gallery / Adaptive Wide An...
does anyone know how to make like this effect

Doesnt work

And also i have only D drive in photoshop

Follow me on Twitter :https://twitter.com/DarkKing_0707
Follow me on Instagram :https://www.instagram.com/dark.king_0707/
My Facebook Page :https://www.facebook.com/TheDarkKing0707/
Snapchat :darkking_07
SUBSCRIBE SUBSCRIBE SUBSCRIBE
can you specify "like this"?
Assuming you're on about the black background, I imagine perhaps a gradient map and maybe a threshold layer.... - See below! 🙂
same thing, nothing changed
can someone please help me make the rest of the shirt grey but keep the snowman white?

Include a "please" in there first 🙂
perfect
james has to be one of the best mods in here i swear
so, is the t-shirt, the WHITE cross bit right now?
yeah
Did you add the snowman over the top yourself?
yeah i did with help of a friend of mine who makes templates like these
Can you please share a screenshot of your whole photoshop window, including the layers panel please?
small issue this photopea im too broke for photoshop 😭

is this like a good screenshot?
yeah great. - So your image is completely FLAT which makes it a bit more difficult...
ahh damn
so is this like something thats still somewhat possible
Hello! Sorry if this might sound a stupid question, I am very new to PS. My professor requires us to send a "PSD" file but I'm a bit confused if this is supposed to happen. If I press the PSD file it's either you open it on Microsoft word/Opera GX/Notepad, it doesn't open directly into the Adobe Photoshop like in Adobe Animation where FLA files sends you directly into the application and you can do whatever you want. Is this like a normal thing for PSD or no?

@steep scaffold
If you want the EXACT same snowman, it a bit more akward since the resolution is rubbish
of if you want to avoid masks, just paint it in....
Don't panic. You're saving it in the right format.
Oh, so how do you like open it?
I guess your system is currently trying to (incorrectly) open it in something that isn't photoshop
you on a PC?
Yup I am
Thank you :D
Gave +1 Creative Carma to @sly hawk

Right click, OPEN WITH and see if 'Adobe Photoshop' is there.
if not, click 'choose another app' and find where it's installed and click the photoshop .exe file.
alternatively, it's annoying in the long term, but you can also simply DRAG AND DROP the file into photoshop.
OOooh my photoshop wasn't there yet lol, I found it now though
Thanks!
Another thing if I save a 2023 PS and open it on a 2022 it wouldn't cause any issue with it right? My school uses 2022 and the one in my PC is 2023 lol
ty
Gave +1 Creative Carma to @sly hawk
I think that will work.
Yeah, you should be fine.
alright thanks
trying to remake tekken 8 hp bar, but im having difficulties to. Please help hahaha

When’s the next update gonna be?
How does one resize/adjust specific images in PS? this screenshot is from photopea I tried if there if it's the same for adobe, basically when I put my first image you get to resize it in adobe right? once you click the check button I can't seem to resize them again.
ex: I wanted to adjust the persons size only and not the background, I lock the BG layer and to go seperate layer for the person but I can't adjust it 💀


Oh yea also most of the guides in youtube are literally telling me to resize the entire thing so yea lol
anyone have recommended prompt ideas for adding a paint job with different things on it like Skulls, when I have a vehicle selected?
When I select a vehicle with object selector and type Pirate theme paint job or Skull theme paint job, it just changes the whole vehicle to look funny
hi peeps, so right now i know this question will sound like
"can yall make this for me for free because im lazy" BUT! I want to learn how to make it pretty much,
what i want to know is 2 things
How to make a good frame (if you look at the corners of the icon you can see light green dark green, and how do i make it seem like it's shining, any tips on how to make a "frame" visible to the eye

Bro


yo what font is this?

why does windows have trouble selecting photoshop 2024 as a default app in the open dialog?

related question: why is the 2023 version left behind when the 2024 version is installed? Perhaps I missed a step for replace instead of add.
answer:

Because Windows has problems with 'open with' dialog in general. You might need to manually find and select the app you want to use within the Explorer
Can you elaborate? What is the error message?
let me check
seems to be problem with the download files
it said that
error code 4
It depends whether you chose to delete the old files when updating or not. Adobe apps automatically copy the preferences from previous versions so you can just uninstall the old version from the CC app
Not enough disk space?
idk
how do i refund?
I want my money back
I got scammed 😭
I shouldnt of bought that from that sketchy guy
@serene coral what do I do?

Error code 4 means not enough disk space
What exactly happened?
when I open photoshop, I get this message and when I click on close, it closes the application
"adobe has found a solution for the above error"
Try restarting your PC first, reinstall the app if it doesn't help
already done
Reinstall with the CC cleaner tool
sorry im french, its dificult for me to explain my problem sorry
how do I see it?
you can vocal ?
call
thx

what is for photoshop ?
all ?
Please follow the instructions on the website. Your problem is Ps related so you can start with cleaning Ps files only
Whoops sorry, yes, just select all
One message removed from a suspended account.
Can you open other photos? Does the error occur when trying to open the file with other apps?
One message removed from a suspended account.
Any that can open the file
One message removed from a suspended account.
But your problem is about a specific arw file?
One message removed from a suspended account.
One message removed from a suspended account.
One message removed from a suspended account.
@dhumann download camera raw plug in raw
One message removed from a suspended account.
One message removed from a suspended account.
ok i follow instruction but no
😭
idu why
Maybe your files corrupt
How do I fix this?

Any idea why I can’t install Photoshop
I’m always getting another installer is already running error
Is there a way to copie the stroke and bevel from one text to past it to another?
I found it copy layer style
How would you mirror this?
For boxes with two sides I usually cut two parts and skew it.
But, such shapes are really hard.
What is best possible way to mirror this, human legs, animal legs and such difficult shapes?

whats the best way to achieve something like this in photoshop? (the blue shapes)

Hi how are you?
I need this image with pure white background

but I'd like to keep the shadows
is that possible (and easy)?
I don't want the colors to change, so I won't be adding bright to the entire image

thanks
Gave +1 Creative Carma to @vernal ember
Well it's not a **pure **white background then is it?

nevermind, I did it

thanks anyway
the trick was selecting the bg with the magik wand, then redefine edges of selection, increase feather, manage levels
@river otter thanks for your attempt anyway. - Doesn't help when the brief changes after you've done it 🙂
Gave +1 Creative Carma to @vernal ember
👍
You're lucky it works that way, usually it does not.
yeah, I think it's because the bg was already pretty white and uniform
Presumable this is to make a reflection/shadow?
Maybe I'm mistaken, but technically it's impossible since the 'reflection' would show the underside of the chair legs, which isn't in the shot.
Yes, reflection.

As you can see by the AI generated image here, it's showing the **underside **of the chair.
It's nothing you could have created by simply copying, pasting, warping the product, which I'm guessing is what you were previously trying to do.
Wheels are a bit transparent in my case, but, maybe you have better image quality.
(https://www.youtube.com/watch?v=PnlEr39BfV8) - but I'm sure you can handle this already 🙂

In this "Photoshop Shorts" episode from masteringportraitphotogaphy.com I show how to create a reflection in Photoshop. Not just that but one that can be done quickly and can then be tuned so that it looks like a mirror-reflection all the way through to a semi-matt surface. I use a picture of a dog to demonstrate the technique but it's equally...

I guess I will just leave it like this then.
Although in other images there is reflection like in second image.


I think it looks absolutely fine 🙂
Yah, works when bottom line is straight, otherwise does not as you said
Exactly.
I want to add text for image and make it look like the whisper app
Text in photoshop looks...blocky
ahoy ya'll I have a pretty noob question.
My screen mutes reds to look pink and shifts the blues to cyan and desaturates and lightens everything (I think?). I tried printing today and I forgot to change to cmyk so it turned out pretty bad... /fp. How would I change the colours to look like my screen (and convert to cmyk without it changing?)
Here are some pictures. (what it looks like on ur screen), (my screen), (and the terrible print).


The print came out more saturated, more red and a lot brighter.
Is it possible to change a jpeg/png into a texture?
im trying to change these two images into knit texture

I may be speaking in complete ignorance but I assume this does it? Under edit?

(while selecting)
how do i do this?
yes you're speaking in complete ignorance, I didn't want an actual pattern I wanted a texture like yarn for fashion design
is it possible to rotate the image without losing quality for pixelart?

Any idea why I can’t install Photoshop
I’m always getting another installer is already running error
I downloaded wrong font
Got correct one
and replaced it
but photoshop keeps using the old one?
Right click convert into a smartobject
Open the Fonts folder in Windows 11 by pressing the Windows key + R, typing "fonts" in the Run dialog box, and then pressing Enter. Scroll through the list of fonts and identify the ones that you want to remove from Photoshop. Right-click on each font and select "Delete" from the context menu.
doesnt help 😭
Did you rotated or resized it before the smartobject?
The first thing you do in photoshop is the SMARTOBJECT thing. And then you can play with it
i rotated with transform
looks like this on transform

press enter and this happens 😭

Yup convert to smart object and then transform
Image > Mode > CMYK
From memory ctrl+Y also enables cmyk preview mode
Find a knitted texture image, position it over the shapes and add a clipping mask (like pinning it to the layer below). Then change the blend mode to overlay
Here's a fake embroidered patch design I made with that technique
Might just be the result of the pixels not aliasing to the new grid. You could try filter > sharpen
how do u upload fonts to web version of photoshop, it says I have to upgrade plans?

thats weird i gotten the same thing before on my pc but it came off the next day without me doing anything
maybe try restarting ur pc?
anyone know if you can change where the fx is located in premiere pro?

kinda makes it hard to see where to cut sometimes
Can't install Photoshop for the life of me, getting this error 24/7 and I don't have anything running

You can hide the FX icon altogether if you like. Click on the wrench icon and toggle off "Show FX Badges"

In the future you might want to post such questions on the Adobe Video Discord server 🙂
When I open this image in photoshop or copy it into photoshop it shows a more green hue... but when i view it in my normal photo viewer app or open the image in a browser it looks normal. U can see the left is in photoshop and the right is in my normal photo viewer.

The image is RGB and opening as RBG file
I converted it to cmyk to see if there was a difference but still prodominently green.
What could cause photoshop to show such drastic difference in the asset then everywhere else?
Here is another example:

Windows 11 pro
Whats even more crazy is if i take the screenshot from above and put that in photoshop. The original on the right-side becomes green hue again but then the green hued one becomes even MORE green. Here is all for comparison
wth is going on lol? this sux :(

😭
like if i just screenshot what is in photoshop and paste it directly in above itself as a new layer over and over eventually it just becomes this>

Photoshop is changing the actual image and its a new document so its not overlays or weird settings or anything
im so confused
Photoshop uses a different monitor profile than the other Windows programs. You should check which color profile your monitor has and which color profile Photoshop has. Because Adobe does not use the color profiles of the standard Windows programs.

hello
so im making a livery for a car in an old game
and i want to paint some specific parts of the car

but i dont know how to use the wireframe

when i remove the wireframe layer
its hard to mark objects like door etc
sometimes its uneven
can someone teach me how to use the wireframe
when i mark an object in the wireframe it doesnt mark it right sometimes

look how it gets marked
Can u share the file?

ok taking a took one sec
So everything here is just a raster layer. Meaning its just an image ontop of an image
the wireframe is just a visual guide
if u wana be accurate u will need to use the pen-tool
I was hoping the wireframe was a png that would let me parse out the shapes but its not
Youtube has hundreds of tutorials for using the pen tool. I would look up those.
Additionally if this is for a real car wrap this is far too small to achieve anything unless its being parsed by another program or designer
okay thank you that was really helpful!
couldnt find the answer one hour
thank you wish you happy holidays
Overall the wireframe is a terrible starting point its not high enough quality to determin the correct shapes even with the pen tool for something like a car wrap
Try changing the interpolation settings to 'Nearest Neighbour' - it's at the top of the screen when in transform mode.
Oh he was trying to use magic wand that makes sense
They said it was an old game. I assume the textures are understandably tiny.
Ya i missed that part
i tried lasso tool
use pen tool
yeah i have some basic skills with it
Why would you want to 'blend' more? The strong line is a GOOD thing.
Further visual shown here:
Hello, I am trying to blend a logo in this illustration : I have tried to do it with the AI but not working as intended 😛 i would appreciate any tips

Do you mean you want to wrap the logo around the arm? (as in distort it) or something else?
i can do the distorsion, im looking to have it look like the other tatoos
So play with the blending mode (see screnshot), particularly multiply, opacity and possibly the blend if option.
However, there isn't much contrast so I would position the hotel logo where it's already lighter...


Discover the Magic of Blend If in Photoshop! Learn how "Blend If" works and explore the amazing effects you can create with it. In this video, we'll dive deep into the mechanics of what "Blend If" controls and go through real-world applications, from masking to special effects, and even retouching. I hope this video helps you. Thank you so much ...
If you want it to look like drawn and not a neat vector logo, then one thing you can look at are the sketch options in the gallery filter (filter>filter gallery)

something like graphic pen or torn edges. Just try them all
I think this would be a good start...
With a little bit of simple masking, you could give it a few different colours/shades too.
maybe increase the MINIMUM filter again...

@pastel bridge
Wow thank you very much for the detailed explanation, I am going to try this now 🙂
happy enough with the result, thank you again for the help @vapid flume and @sly hawk !

Gave +1 Creative Carma to @vapid flume
Nice! - Looks like you followed all the steps!
Yes, with good explanations it's easy :p
Is there anyone who is willing to make me a thumnail for my new christmas Jump up/ DNB mix that is coming out
I AM WILLING TO PAY

Try your luck in the #💬chat-general channel. Please note that you enter deals with others at your own risks, and in private messages only. We do not have an official job board here and prefer people go to https://www.behance.net/hire if possible
Discover, connect with, and hire the world’s best design talent on Behance
Sometimes it's due to a glitch in the GC/Photoshop interface
Check if you graphic cards is up to date.
is there a fix for that? i reinstalled it and it always comes back.
OK, so check that FAQ to see if you can resolve things on Photoshop's end
https://helpx.adobe.com/uk/photoshop/kb/photoshop-cc-gpu-card-faq.html
does that look right?

Yes, that looks OK. Check what you have here:

exactly this
Check that video in case it helps
There are options in the preferences, notably in technology previews you can disable if your GC is too old (I have no idea if yours is BTW)
nope, new pc :( i fear that my graphic card is kinda fcked
Ultimately, what you can do is revert back to an older version of Photoshop (you can do that in the CC app) and see if it resolves things
But basically the first link I shared is your first port of call
It could also be a temporary glitch that could get resolved by closing Photoshop and opening it again (But I assume you've tried that one 🙂 )
I wouldn't bother uninstall and reinstall like some people always advise... If your install is clean, then it would just add some inconvenience
To be clear, I sometimes have similar things happening (zooming in and out goes bonkers, unless you type in the exact magification % in the field + some weird UI glitches) always come back normal after closing and opening again.
yo I can make a thumbnail for you
(tho u gotta see if u like how I make them or not)
Please go to #💬chat-general and use the DM function...
Check on your task manager, Photoshop might, surely be running in background apps...
can someone tell me why there is stuff left when I paint black on a layer mask? everything is on 100%

Is your layer at 100% opacity?
or the paint brush?
@river otter ?
if you can share your whole photoshop window/screen we can probably identify why
yep all
100% black as well, updated photoshop, restarted my pc

its all on 100%
.... if you can share your whole photoshop window/screen we can try to identify why
what u wanna do ?
(They presumably don't want the black to look 95% opaque)
When u Choose layer mask, u have 2 option, if u select Black color and paint, u gonna remove what u paint it,
The second option is the White color, and this to bring what u removed before back
so if u want's this happened, just make a new layer and paint what ever u want
lel bist du Jules der immer diese wild gecutteten Videos macht? haha
:d
freut mich, dass sie dir gefallen
Probleme mit photoshop hab auch ich :(
Wie klein die Welt ist. Ja selbst Promis haben ihre Alltagshürden hehehe
promi haha
kuss
check dm
why isnt my selection working properly? the fill goes outside the select edges and isnt one solid color.
Hi @river otter The Magic Wand is a color-based selection tool, and has controls on the Options Bar (which is cut off in your video). The tolerance value will determine how close the color has to be to the original pixel you used to start the selection. A higher value is more tolerant of a color change, and a lower value is less tolerant.

thanks
Gave +1 Creative Carma to @willow gale
is there any way where can i color picker the environment

in shortwords
i want to color picker the lighting in this image
here is a short tutorial https://www.youtube.com/watch?v=UrTzFExOCFA
In this tutorial, you will learn how to color match images in Photoshop.
You're going to learn a powerful color matching technique using the Curves Adjustment Layer and the Auto Options.
This technique is great for composites with different tones.
LINKS - How to Color Match Images in Photoshop
Sky Replacement Technique - 90 Second Tip
► ht...
you can also use "match color" in Photoshop, explained here https://www.youtube.com/watch?v=SXIzI_a6Tgs

Photoshop CC 2023 tutorial showing two methods of applying the color grades of movies to your photos and how to save them for future use.
https://www.shutterstock.com/photos
Royalty-free stock photos provided by Shutterstock
ID #: 2112134777 by ANITEKMEDIA
ID #: 59767480 By Sean Pavone
Cyberpunk photo: Patricio González from Pixabay
Desert H...
Gave +1 Creative Carma to @sly hawk
thank you
Gave +1 Creative Carma to @plush stirrup
I already checked, I don't have anything else running, I don't know what the issue is
Hello. Does anyone here take commisions for photo shop work? please DM me if you do

Hey, does anyone know how to create these retro lines and put them on any object?

How can I convert these lines to png?

is there any possible way to change the color range on this with a color code???

how do I get rid of the gray area

looks like there are semi-transparent areas around the figure. If this was done with a layer mask, try increasing the contrast of the layer mask. If it is a layer with transparency, try erasing the area you don't want
so you'd like to only save the black lines with the transparent background? you can use Select -> Select Color or the magic wand to get rid of the white shapes.
I got a question, i want to make this woman into like a cartoon type design, is there a certain way that i clould do this in yhe best/fastest way to do it?

Photoshop can show the wireframes via the 3d panel. or you can find a wireframe material online (https://substance3d.adobe.com/ for example) and apply it as a texture


I would import it into Photoshop and reduce the opacity. Then, use your favorite brush and draw over the outlines. finally, on a new layer, you can fill in the shapes and put it behind the outlines
you were right, how should i go about deleting these leftovers
I mean, you can clean it up manually with the pen tool and eraser... but perhaps finding a clean version would be easier. Here is a close one https://stock.adobe.com/images/vector-icon-of-a-walking-pedestrian-illustration-of-a-walking-man-on-a-gray-background/393122220

Adobe Stock
Download Vector icon of a walking pedestrian. Illustration of a walking man on a gray background Stock Vector and explore similar vectors at Adobe Stock.
@hardy maple
Yeah, I agree with Tim. If you particulary want the NOISE shown, maybe keep it, otherwise, it's easier to just start again 🙂
Why can't i draw in black, i changed the colours, but it's still greyt

Can you share the WHOLE screen? 🙂
Your layer opacity might be on 20%
EDIT: Oh wait, you did... and I see it's on 14%!
?

change that back to 100 🙂

ow okay thakns!
If you're planning to TRACE something, create a new layer first
Hey thx Toby. That wasn't really my dificulty though.
Gave +1 Creative Carma to @cursive mantle
Thanks! I am going to try it out.
Gave +1 Creative Carma to @plush stirrup
You can. It looks like it's the wrong format. - It looks like it says it's a ".PN" file.
alright ty
Gave +1 Creative Carma to @sly hawk
How do ya'll think this was made?

Want to make something similar
What filter to make the moniter effect
a camera and a computer monitor? looks just like someone took their phone and captured their screen
hi guys I need help I wanna delete Adobe but I can't I don't know why ???

can someone help me?
Once I create a shape, I have to draw a rectangle and then press "Shape" at the top of my screen. That's fine.
Once I've set it as that colour is there a way to change the colour again? I cant seem to see this (screenshot)

i recently reinstalled photoshop and this layout is different. for example the "convert to smart object" button is down there when it should be in the upper part. Why is that?

So I was wandering if there is a way to make every frame in animation different from each other, for example if I erase on frame 1 I dont want it to appear on frame 2, is this possible?
InDesign will not install if your computer does not meet the minimum listed system requirements. For people on older computers, it's the RAM requirement that often is the issue: 2023 and 2024 both require a minimum 8 GB of RAM (16 GB recommended). Luckily, RAM is fairly inexpensive, so if you can't upgrade your computer, look into updating the RAM.
You can see the system requirments for all recent versions here: https://helpx.adobe.com/indesign/system-requirements/earlier-versions.html
Hi @inland creek What kind of layer is active? It's completely blocked by the context menu so we can't see it.
With a regular floating layer selected, it's here in 2024.

Hi Xman: You need to have the Shape Layer active, and a Shape tool, Selection tool or Direct Selection tool to change the color.
I'm using the Control panel, but you can also use the Properties panel, as per your screen shot.
Hi @steel garnet Super tight screen shots make it hard for us to figure out where you are.
Open the CC Desktop app > Apps > All Apps > and click the 3 dot menu ... to the right of the CC application you want to uninstall.

legend!
yup, figured it out thanks!
Gave +1 Creative Carma to @willow gale
Hey, I'm trying to apply the border of a shape to another picture, but I'm having a hard time even getting the center of it removed. Is there an easy way to just crop out the center? Every time I've tried I either don't get the option, says it can't be altered, or I crop away the section I want to keep.

Hi @fading dagger You can remove the pixels (destructive) or mask the pixels (non destructive). I'm masking them in this demo which is a better workflow.
How much and what image
Which college provides the greatest graphic design lessons?
Does Adobe beat affinity?
Would anyone be able to help clear up a photo of my grandpa for me? I’d be willing to throw ya a $5 tip or something
Anybody use the Stable Diffusion plugin? I'm trying to use the controlnet inpaint with it but not sure how to
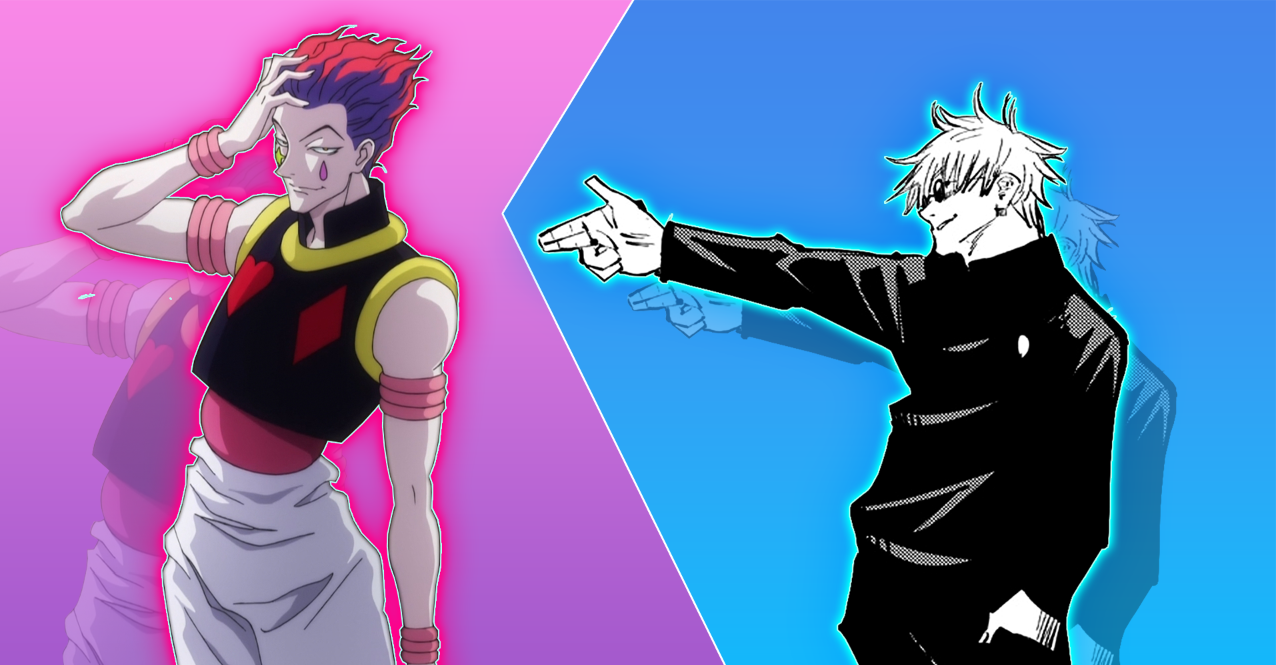
what effect gives u the left side like red stuff?

I would say this is an outer glow layer style but it also could be an inverted image with hue/sat modifications or a gradient map
do u know how I could make the same effect with another logo maybe?
🙂
it depends on the logo but I would go with gradient map as it will give you more control over what is going on
this the logo
how would i do that
you could also try using a hue/sat  adjustment layer in colorize mode
what do u think would give the most accurate result

This grainy heatmap effect gives a photo an abstract, retro vibe with its ultra-bright colours that resemble thermal imaging. In this tutorial I’ll show you how to create it using three examples, each with a different colour scheme. First we'll convert the photo with a gradient map to generate the surreal colours, then the addition of some blur ...
i dont think the one in that photo is like grainy tho
it's for the gradient map tutorial only
i see i'll check it out and see if it works for me
you have to try yourself and see what works the best for you
alr 1 moment lemme see
you can send requests in #💬chat-general, precisely describing the job and sending all the needed materials can help you get it done quicker
same ^
have you solved your problem? if no, can you describe what your goal is? are you trying to alter the image you sent?
what exactly do you mean? controlnet and inpainting are two different things
tried with hue saturation didnt look the same
if you want it to look the same same you have to use gradient map and sample colors one by one. good luck
sample colors?
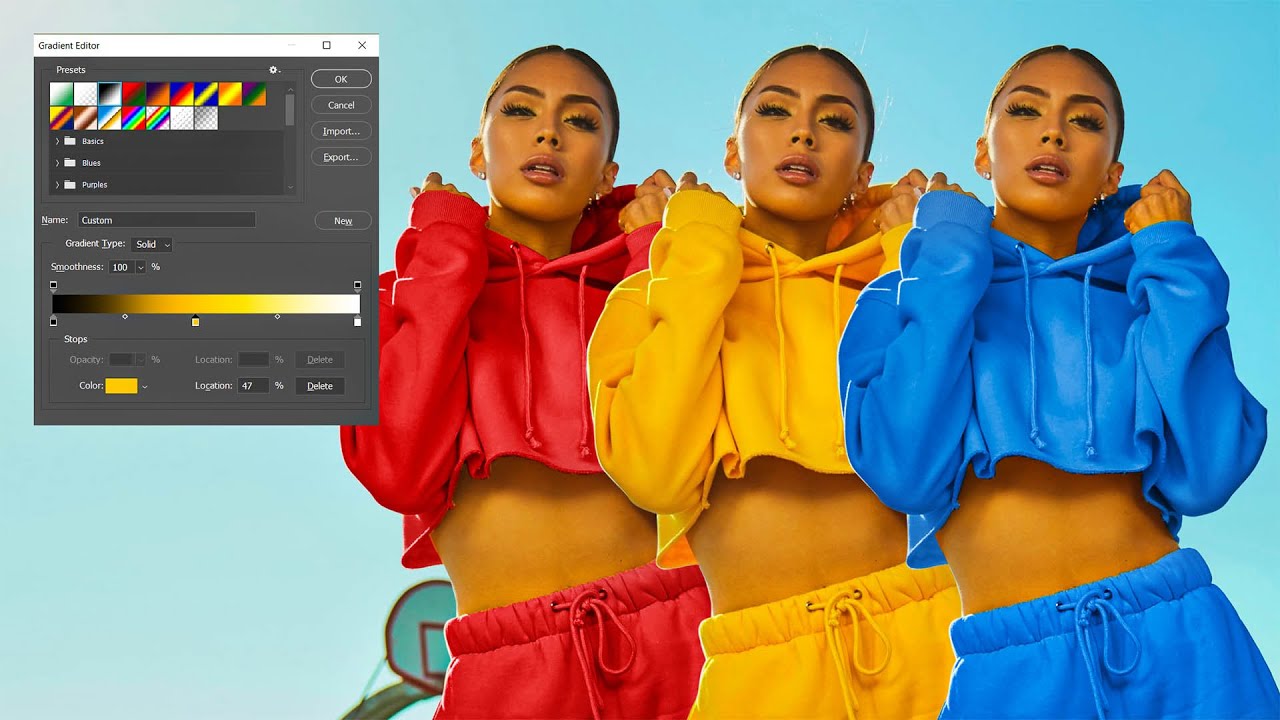
In this fun tutorial I will show you how you can change any color to any other precisely in Photoshop using gradient map adjustment layer.
Enjoy!
➤PATREON: https://www.patreon.com/nemanjasekulic
➤My Photoshop brushes: https://nemanjasekulic.com/product/cloud-dust-smoke-bru...
Learn the power of the Gradient Map tool in Photoshop for color matching! This tutorial unveils a simple yet effective technique to harmonize and match colors effortlessly. Learn how to utilize the Gradient Map feature to achieve seamless color across your images. This trick is incredibly useful for precisely matching the color of any specific ...

A Super Easy Trick to Copy the Color Grading from Paintings with Photoshop! In this short tutorial, we will use the Curves' sampling technique to automatically match the colors of highlights, mid-tones, and shadows using the power of The Almighty Curves! You can use this technique to match any area of the image. From skin tones to the landscape ...
damn so its gonna be hard to make that like exact style
?

what r the settings on those
after inverting, reds bumped, yellows moved to red, blues and cyans moved to red, desaturated and darkened
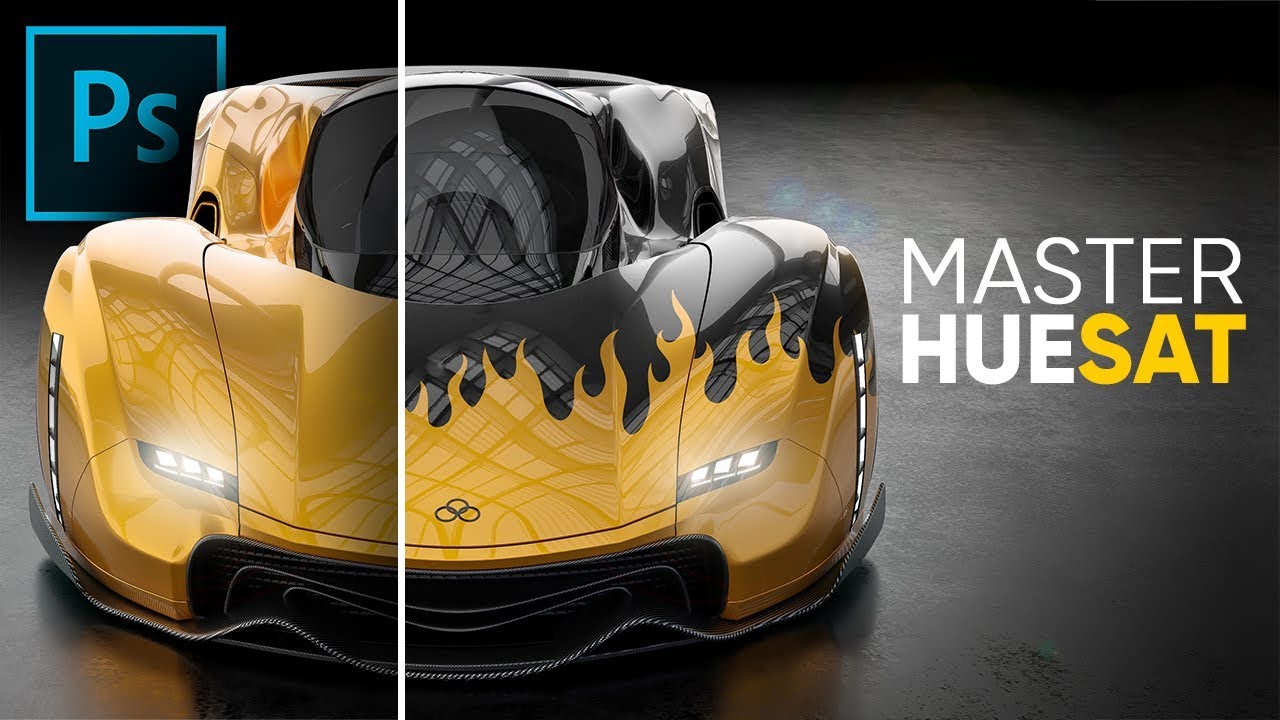
Learn Everything You Need to Know About the Hue/Saturation Adjustment in Photoshop! From making complex color changes to creating the best skin tones or color correction, in this tutorial, we will learn how Hue & Saturation works and the fundamental concepts behind it.
We will first start with what is Hue, Saturation, and Lightness with will he...
So I was wandering if there is a way to make every frame in animation different from each other, for example if I erase on frame 1 I dont want that change to appear on frame 2, is this possible?
you'll have to duplicate the layer you're working on first, edit it, and swap the visible layer for the frame
it is possible. What method of video timeline are you using?
I don’t know really
can you screenshot?

so it's a frame animation. each frame can use different set of layers. if you want to make changes and follow the expected workflow with this type of animation, you have to duplicate the layer, edit its content, and change the visible layers for the selected frame
That's what I've been trying but sometimes I need to erase something from a layer and it's just not very effective to duplicate, hide the original and erase
You can try to enable onion skins (in the little burger menu on the right of your timeline). You'll still have to duplicate but at least you'll see what that is your erasing (a bit like if you're lowering the opacity of a layer to see what you are masking in a regular photoshop file)
I thinks onion skin is only possible in video animation
Onion skins are taking some getting use to, sometimes it can be a little confusing, but once you understand the concept, it's super useful. Every frame by frame animation software uses it anyway.

Dammit, sorry
Yeah, I used to use it in a different software
I'm used to Fresco and onions skins are there in the frame by frame. Let me check in case there's something else to enable
Is it possible what im looking for is in a plugin?
That's what I'm looking for.
I found that
https://github.com/sbaril/Photoshop-Animation
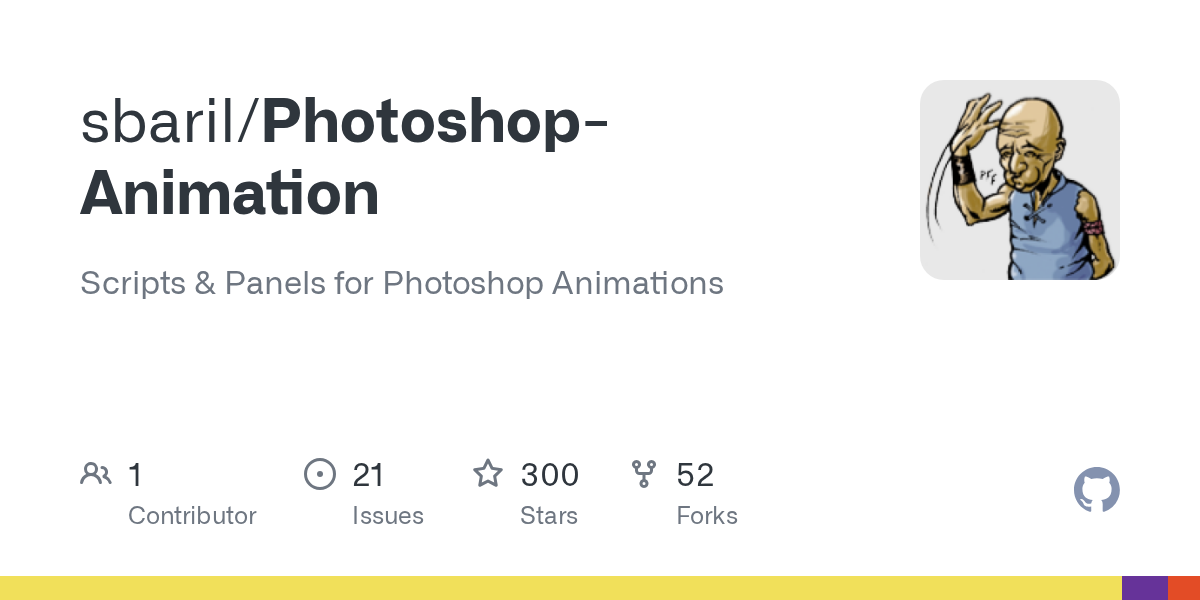
GitHub
Scripts & Panels for Photoshop Animations. Contribute to sbaril/Photoshop-Animation development by creating an account on GitHub.
I haven't tested it
Do you know how to install it into Photoshop?
I am putting a frecking user voice angry note on Photoshop community forum. No onion skin in frame by frame... You must be kidding me?
I am afraid of git hub as much as a I am of a rabid bat or a demented cobra. I will try to find out, but I hope someone else will enlighten me as well. I always find it very obscure!
💀
(I'll go back into my hole) 🙂
it seems like the plugin is no longer active (unless someone understands what the developper is saying in the notes)
the link above lists all the animation based plugin from Adobe Exchange and theirs is not here
Again, I don't know the context, but if you're literally doing animation, isn't there more suitable software to use? Adobe Character Animator etc?
If anything I would need onion skin specifically in a frame by frame, and less in a video timeline (unless I would be using video for hnad drawing)
But I am sure the usage for a video timeline is mostly editing
But maybe I'm wrong
Or simple Adobe Animate
Character animator would need the character to be rigged, if that's something theta @molten finch wants to do
Ill try it out
If you need to know about Animate, check out Joseph Labreque's videos on YouTube
Also Chris Georgenes'
I remember my first time in animation. I was in year 7 at school and we had these old macs with some 'clipboard history' app.
So we would draw a stickman, and then cmd+A and copy.
then adjust drawing and then copy again
then adjust and copy again...
Literally no way to go back and edit any of it later, no tweening, no copying in images from the internet, since 1)there was no internet on the computer 2) if it was on the clipboard it ended up in the animation.
We friggin loved it!
😉 That's cool. Our computer science stuff was mainly computing stuff in early Excel like software
Made the stickmen jump into pits, fight, shoot guns and explode 🙂
Precursors (by about 10 years) to: https://www.youtube.com/watch?v=npTC6b5-yvM
But MAYBE I'm older than you and computers weren't supposed to be fun then!
Oh... to clarify.... we were **supposed **to be doing excel lessons.
but they were easy, so 1/4 of the class doing the task, and then back to animation/play
When I went to art school, I had a demo on an Amiga 2000 and 🤯. I never really recovered from it tbh
Of course it was, financially, way out of my reach (given a crappy computer was way out of my reach too)
BUT WE DIGRESS!
@molten finch Vote for me ! 😅
https://community.adobe.com/t5/photoshop-ecosystem-ideas/could-onion-skinning-be-a-feature-for-frame-by-frame-animation-too/idi-p/14314275#M20082
https://community.adobe.com
The title says it all really. I don't even really use it that much (I'm using Fresco) but I don't really understand why this feature isn't available in both modes (video timeline and frame animation). Unless there is a technical reason? Fresco manages it pretty well, and the workflow is similar than...
Anyone who would be interested can vote for this request

just click here in the page from the link
It's strange this hasn't been implemented before
My thoughts exactly. I did search for a previous request and as far as I saw, there was none
Hey, PS noob/beginner here. I am trying to make a album cover poster for my room to put inside an A1 paper sized frame. I have found around 24 (24 because 4 X 6 grid, though I have many more I would like to fit) album covers that I would like in a grid on the poster but I can't seem to find a way to put the square pictures evenly on the poster and I have no clue how to go about doing this. I don't mind one side of the grid being slightly off the edge or for there to be space in between the pictures. Can anyone give any tips on how I could do this in photoshop to then send to my local printer?
Hey, is it allowed here to have a request? I have a picture of me but the mirror is dirty and i thought I could find somebody making it clean for some paypal cash? Im sorry if it’s not allowed and I’m in a wrong discord for the request
dm me
I have this image but I would like to remove the artifacts. Is there a way to do this? Or a search term I can use?

You can ask in #💬chat-general . Just keep in mind that we have no system in place for requests (paid or not) and that you're on your own. Definitely all proceedings have to go through DM
We generally encourage people to go through officila platforms (like Behance) particularly for bigger projects
It's quite hard as it's all over the image and any filter you can apply will likely affect the design it self as well. Common ways would be all the "noise" category filters (like median) but it will destry the design undoubtely.
There is a specialist filter called FFT (fast Fourrier transformation, for the mathematicians around us 🙂 ) that may do the trick, but it's not an easy one to use, and may not be sufficient enough
Any search terms would be "removing texture", or "removing patterns"
The problem here is that the underlying pattern doesn't seem to be repeating , it seems random. so the FFT may not pick it up
if you are interested, check this conversation in the forum
https://community.adobe.com/t5/photoshop-ecosystem-discussions/download-fft-fast-fourier-transform-to-ps-cc-2019/td-p/10712026
https://community.adobe.com
Am looking for a FFT plug in for Photoshop CC 2019 and how to install. Tried to install one but could not find where to put it. edit/references/plug in offers no help. I am a novice with Windows 10 filing sysem and can never can get it wor work right. Please helop George {Thread renamed by moder...
linking to a few filters
http://ft.rognemedia.no/
or
https://imagej.net/

Photoshop Pattern Suppressor
Free plugins/actions to easily remove periodically repeating patterns 😃.
ImageJ Wiki
The ImageJ wiki is a community-edited knowledge base on topics relating to ImageJ, a public domain program for processing and analyzing scientific images, and its ecosystem of derivatives and variants, including ImageJ2, Fiji, and others.
Awesome! Thanks fore the help! Will look into it!
You're welcome. you might also get away with very slight blurs, particularly box blur or surface blurs, followed by a sharpening of some sort...
There are a few good options for this. If it were me, I'd use **Adobe Indesign **since I can just make a bunch of empty square frames, position them easily in a grid and then just select all of my images and pretty much 'pour' the images into each frame.
http://blog.gilbertconsulting.com/2009/11/automatically-place-multiple-images-in.html#:~:text=Hold down command-shift (Mac,command%2Fctrl-shift%20keys

One of the nicest new features of InDesign CS4 is the ability to automatically place multiple images at once, arranged neatly in a grid of f...
It doesn't help, but there was a feature in the old photoshops just for that. Basically something similar to the Contact sheet, but with disparate frames
Technically you could do it in bridge too.

Looks like a cross-stich 🙂
They're not really artifacts. it's just pixelation/pattern.
You could take it into illustrator and have it TRACE the image using only a few specific colours:

Export all paths from Illustrator to Photoshop as paths ?
Looking for a way to export all paths separately from illustrator project to photoshop project to keep working on it in photoshop.
Copy - Pasting a shape or path from Ai to Ps does bring related path with it, but I'm talking about around 400ish paths to move, need a bulk solution, any suggestions ?
I don't usually like to blindly post from ChatGPT - but maybe it's relevant?

where can i ask for tips and advice for my creation?
you can ask for feedback in #📝project-feedback
thankyou
Hi @novel jackal So are you trying to get all vector paths from an Illustrator project to be listed as individual paths in the the Photoshop paths panel?
I'm not aware of any way to do that automatically... doesn't mean there isn't a script or plug-in... but you can paste as a paths or a shape layer and then separate them yourself with additional copy/paste commands. Not sure where you are going with this, so maybe take a look at this tutorial to get an overview of how to work with Illustrator's vector shapes in Photoshop: https://www.youtube.com/watch?v=vnOdm1vsajY

Having copied content from Illustrator, pasting into Photoshop will launch a dialog box with 4 major options. These options are...
1:04 PIXELS
The vector content from Illustrator will be rasterised, creating a pixel based layer. The content of such a layer can easily be distorted or erased and it retains no link to the original content.
2:12 P...
Yeah I've looked into that video already , it will work , but it will take like, days and a bit more on top, to separate it all, I've way too many objects to separate it manually X_X
But I suppose this right here, is the only workaround, I've been searching for better solution all day and couldn't find anything better, you can easily export paths from PS to AI as I want them to be, but not the other way around as I need it to be
Just confirming that you need to be able to work on the individual paths in Photoshop? You can add photos to an Illustrator artboard—and link back to Ps to edit them—would that simpify your workflow?
someone stole my work and put their own watermark, does anyone know how to remove it?
Can someone help me to make text smaller than 1pt
No sorry
naw so like , direct problem looks like this: I'm working on a character in Illustrator around 500-600 objects in total (all separate layers), and at this point I'm just limited in AI so I wanted to transfer all my paths to photoshop, IE convert all my shapes/layers to paths preserving the hierarchy and re-fill and re-stroke them all and just continue working by hand from there
Hi @hidden wind What's the endgame here? Adding the type but making it too small to read?

That's the typesize range allowed in Ps.
So I am trying to make text for the character in my profile but I can’t get right size text
I can export AI to PS in PSD format that would be one solution, but due how AI to PS handles anti-alias it breaks couple things, so for better result I'm hoping to restroke it in raster
Hence all paths out would be ideal
Don't know if this all made any sense

It does. I just had to shift from Ps to Ai—it's slower as I get older! 😂 So working with layers/sub layers/sub-sub layers Illustrator isn't streamlining the re-fillling, re-stroking?
Oh and also I can’t stop it from saying the lorem ipsum text
Sorry I am newer to photoshop not new but not that good at it
Hi @hidden wind You should be able to select the type and spec any size from 0.01 pt to 1296.0 pt. What is happening when you try?
Idk I can’t get rid of the lorem ipsum text
Ah. the Lorem Ispum shows up to give you a typeface, size, color preview. Just select it and type over it to replace it with your content. However, if it is driving you nuts, you can turn off the feature in Settings > Type.

I can’t find settings
Mac or Windows
I'm on a Mac... so i think it's still Edit > Preferences on Windows
Macs changed it to Settings, but not sure about Windows. It would be awesome if you could confirm the wording. It will be at the bottom of the Edit menu.
Macs have a separate menu for it. Let me go to Windows computer. BRB. Ps 2024?
Yes
I just downloaded
Thx
Gave +1 Creative Carma to @willow gale
You are welcome.

It's inpainting but with controlnet. For example using depth map for the hands
pls help
can anyone tell me why my text doesn''t match with the purple color I picked ... keeps remaining as grey

Your document is set to Grayscale color mode.
Image > Mode > RGB Color...
If you have a question about how to do something with Photoshop, post it here and if someone knows the answer they will probably reply.
true, thanks!
Gave +1 Creative Carma to @ripe quest
my subscription ended 31 dec 2023, will it ask for my permission to continue or will it just stop?
Dunno. My guess is that it will just stop.
depends on multiple factors: was it a one time code without auto-renew (from a reseller)? Do you have a working payment method setup in your account? Have you canceled your subscription?
it should tell your over at https://account.adobe.com/
Manage your Adobe Account profile, password, security options, product and service subscriptions, privacy settings, and communication preferences.
because when i go to cancel my subscription just out of curiousity, it shows i have to pay cancellation fee 😭 but it said my subs ended in 31 dec.
can you double-check your subscription status? open https://account.adobe.com/ and click on this button:

Manage your Adobe Account profile, password, security options, product and service subscriptions, privacy settings, and communication preferences.
does it say when the next payment is due?

idk where to find that but will this do?


Normally subscriptions auto-renew unless you cancel. I would recommend contacting Adobe Support as I can't look into your accounts billing details remotely, but they can https://helpx.adobe.com/contact.html
Hello friends, how can I make light like this on the ground?

if you are just looking for a 2d image, you can select the basic shape like this

and fill it with a gradient

finally, apply a small blur

oh, thank you very much
Gave +1 Creative Carma to @plush stirrup
Thank you for the answer, I already deleted it, but I still have 9 GB on my computer.
Gave +1 Creative Carma to @willow gale
How can I add shadows to coastlines like in the 2nd photo?


you would have to cut out the land area (by using the magic wand, quick select or any other selection tool you prefer). then you would add a drop shadow via the layer styles. here's how: https://www.youtube.com/watch?v=HtNzPWadOJU

In this Photoshop tutorial, learn how to add drop shadow with layer styles in Adobe Photoshop.
Check out my Photoshop classes on Skillshare! https://bit.ly/PBSkillshare
Try Canva Pro for free! https://bit.ly/PBCanva
MY TUTORIAL CHANNELS //
• Main Channel: https://bit.ly/PixelAndBracketYT
• Illustrator: http://bit.ly/PBIllustrator
• Photoshop: ...
Hi @steel garnet You asked how to remove Photoshop yesterday and it sounds you were successuful. How does "but I still have 9GB on my computer" fit in to the question? Are you trying to make more space available on your drive? I'm not clear on what you're asking today.
Just remove card details
Hey thanks for the tip, works like a charm!
Gave +1 Creative Carma to @sly hawk
Could someone please help and explain how I can achieve a similar results as this please? Thanks in advance for taking the time to help.

guys i want a photo in this way but when i click open and add the imagine then why does that happen (2ndpic)


pleaseeee help a noobbb outtt
Hello, how would I go about making lines like this in the picture?

hey I'm trying to edit a sprite sheet and every time I place it it blurs, I changed the image size to be rample nearest neighbor and it still doesn't seem to be helping
does anyone have any ideas as what may be happening? my canvas size is the correct pixel amount so it's not like I'm trying to upscale the image or anything, and in transform mode the image isn't blurred at all
but then I hit enter and it becomes this

found it, image interpolation was set incorrectly
is there a way to split an image in half? like the sprite sheet is all one long line and I need it to be a new animation on each line for simplicity in how I'm storing my animations for now, is there a way I can cut the image into seperate sections and move each section individually or do I just have to erase the parts I don't want and paste the image over and over again?
How can I zoom in and crop a photo to get a close up macro shot of some flowers. I can do it on my IPhone in Lightroom but I’m having trouble doing on my computer
please make sure the resolution is the same. not the dimensions (height x width), but the ppi. Usually it is 72 but some files have 96 or 300. If they are not the same, Photoshop will try to interpolate and you'll get blurry pixel art
probably best to do this in Illustrator using the blend tool https://www.youtube.com/watch?app=desktop&v=NMerkeTJ0nY

This is a Geometric Line Art Tutorial in Adobe Illustrator CC 2018. Showing how to use the Blend and Transform tools.
I’ve been a Graphic Designer for over 17 years so I’ll be teaching you all the Illustrator shortcuts to make your design workflow as streamlined as possible.
I hope this Illustrator tutorial helps, if it does, please take a mo...
you would use the crop tool (shortcut key C ). then you can upscale the image again if required
you might want to look at the slice tool there. First, you could generate guides in Photoshop first via View -> Guides -> New Guide Layout. then, select the slice tool (probably behind the crop tool) and click on the button "Slices from guides". Finally, you can export the slices as individual images
how would I make the top thick lines?
thank you btw
looks like they just fade out. the thick line can be done by drawing out a single path line and using the width tool in Illustrator to make the line thicker or thinner. https://www.youtube.com/watch?v=g93VnyveQxI


In this tutorial we're going to learn how to manually adjust stroke widths using the Width Tool in Adobe Illustrator.
⭐️ Master Adobe Illustrator and unleash your creativity!
View course: https://www.dansky.com/courses/the-adobe-illustrator-masterclass
Get 15% off: https://academy.dansky.com/opt-in
✅ Download unlimited photos, videos, font...
Thank You!
Yo, Wanted to ask how to make a white circle in photoshop
How can I make this shape without putting a Triangle shape, selecting, then deleting from the rectangle layer? When I do that it becomes really pixelated around the edges. Any way to mask out the triangle shape without select > delete?

How i do my pic background black anyone help me
It would be nice it you could show the image (and a full screenshot) so someone can advise the best way. There are probably 100s of way to make a background black, some more difficult than others and the choice depends on the type of subject
A full screenshot would be nice because people can see what are the layers on your designs (so the layers panel is a must!) and it helps with telling you what's best for your case
Are you using vector shapes? Because using vector shapes would allow you to reshape, enlarge etc without it becoming pixellated.
You got the option to make a raster, or a vector circle.
It depends why you need a white circle really so more info would be needed
Vector circles are done with the ellipse tool in the vector tools, set as a "shape" and filled with white.
Holding shift constrains the elipse shape into a perfect circle

If you want a raster circle, you need to select a circle first, with the elliptical selection tool

and once you got this selection, you got to fill it with white (edit>fill>choose the colour in the drop down menu)
Same SHIFT key holding applies to draw a perfect circle from an ellipse
In that latter case you need to first select the layer onto which the white circle will stay, the former will create its own layer automatically.
Is there a way i can select a layer for another layer to ignore instead of wrapping to the layer.
hey i am using the polygon tool and it doesnt register every click, more like every second one, is there a fix to this?

Other users have successfully fixed this issue by following these steps:
- Create a backup of the "C:\Users\YOUR_USERNAME\AppData\Roaming\AdobeAdobe Photoshop 2024 Settings" folder
- Clear the preferences on launch by holding CTRL/STRG + ALT + SHIFT when opening Photoshop
- Closing Photoshop again and replacing the new settings folder with the old one
thank you! i will try!
Gave +1 Creative Carma to @plush stirrup
Hey! Any idea how I make a text like this?

This just looks like a mix of Stroke and Drop Shadow!
Start with the blue-green stroke, and then add a Green drop shadow, set it's Distance accordingly and then increase it's Size to make sure it lines up with the edges of the text. Spread 100
Rasterize layer styles now.
Then add a second stroke in white, and do the same with the drop shadow but in white so that it blends in with the stroke
Not the same font or colors but you get the gist

How do I open a .tiff file and edit it? Every time I import it its a png (technically im using photopea by the way)
I think you can only open it in Photoshop
and there is a one more step 

ahh shame
can you determine the font used?
In my image or yours?
how did you open a layer style
Right click on the text, then Blending option

but how can i even make a text? sorry i’m new that’s why i’m asking many dumb questions
It's okay
how do i get out of the magnetic tool thing?
Prees T on the keyboard, and write what u want
how do i? i’m pressing and nothings happening
maybe this is why
make sure this is disabled

Double click until it looks like marching ants, then change to your marquee tool and click anywhere

Or that
yeah i tried double clicking and it didn't change anything
accidentally pressed P and it switched tools tho so sorted now haha
cheers ❤️
File > New

You can also use your paint bucket tool to paint it any color

how can i get the options back on the left? because it's gone

Window > Tools

thanks
any idea what font was used

Does anyone know how I can achieve this rhinestone effect? in either phootoshop or illustrator

I don't, but "That’s All Folks" is a relatively similar font

been trying for like 30 mins and i give up haha
a mate of mine wants these 2 people cut out for a profile pic (that's the one he did on the right but i wanted to try and make the quality a bit better
What would be the best way to do this?

See if that helps!https://www.youtube.com/watch?v=uAgu7rgdWek

See part two here: https://youtu.be/u8dXTZYE0LI
**Starting at 1:06 learn how to make sure your brushes stay bright and shiny on colored backgrounds or color adjustments on the brush.
In this tutorial, I will be working with the brush tool inside of Photoshop to create realistic jewel brushes like diamonds, ruby, emeralds, etc. using imag...
no clue how he did that on an ipad and i'm here struggling on a laptop with ps haha
how do i edit a font
Once you have your Text placed, at the top you can see your text options
You can use https://www.myfonts.com/pages/whatthefont if ever need to find a font or this tool in illustrator https://www.youtube.com/watch?v=N9eFEddgvv8
Identify any font with our font finder tool. Upload an image, and we’ll search our collection of over 133,000 fonts for the best match.

In this Illustrator tutorial, learn how to use Retype (Beta) to find fonts from images in Illustrator. You can convert shapes to font and images to font using Retype in Illustrator!
Check out my Illustrator classes on Skillshare! https://bit.ly/PBSkillshare
New to graphic design? Try Canva Pro for free 👉 https://pxlbr.link/canva
I use Screen S...
Where mine says "Fredoka One" is the fon
I would trace them with the pen tool in "shape" mode, and apply a black fill to this shape
Thanks Sandrine you are awesome. Do you think I could use the brush tool to fill in a font?
Gave +1 Creative Carma to @vapid flume
all you need to know about identifying fonts
https://www.instagram.com/p/CqughxJstif/?utm_source=ig_web_copy_link&igsh=MzRlODBiNWFlZA==
What do you do when you find a font you like, but then have no idea what it is: You use a font identifier!
Whether it's in an app like Photoshop or Adobe Capture, or using online resources online: I got you covered!
See the links below:
https://fonts.adobe.com/
https://www.whatfontis.com/
http://www.identifont.com/
https://new.myfonts.com/WhatT...

is there any way to keep it rounded? or do i just do really close points
You could use a pattern, but since the area seem quite small you can fill with a brush instead
sorry this is my first time properly trying to do something in ps haha
oh nvm
just realised i can drag the points
edit: nevermind i fkd it
@quasi canyon sorry I wasn't clear, you can CTRL+click on the text layer to select the content and then use that selection to brush over the gems

Have you downloaded and installed the font first?
ohh where do i do that from
Did the person who answered gave you the link?
@vapid flume the font I am planning to use is more like neue helvetica I saw one video on YouTube of someone using a pattern but didn't look as realistic. Would you suggest still using a brush or patttern?
I would personally use a pattern, once that I would have created myself. But that's just me. I am quite used to creating patterns so for me it's easier than creating a brush.
I would create a new documnet of say 100 x 100 pixels (an example) place gems over over, varying sizes colours etc... Pack them up in the canvas, but make sure they don't overlap the edges. Then create the pattern from there and apply it with a pattern layer style, applied to the text layer. That way it's entirely customisable (you can change the text and the gem follow)
@untold mortar https://www.myfonts.com/products/bold-thats-all-folks-224422
That’s All Folks Font: Run amuck and head on down to Toon Town with us to enjoy some Madcap Laffs with our latest Frolicking Font, 'THAT'S ALL FOLKS'.
It's...
But I won't enter into a full on explanation on how to create patterns, but I can give you tutorials
@vapid flume that would be fantastic I'll try both ways suggested
That’s All Folks Outline Bold
hey can anyone download this font and send it here?
this is what u need ?

https://www.photoshopessentials.com/basics/repeating-patterns-intro/
see that one. In the bit where they create black dots to make up the pattern, place gems instead.

In this tutorial, learn the basics of creating and using simple repeating patterns in Photoshop!
Amazing thank you so much for time and assistant Sandrine
holyyy that quality is so much better haha, legend cheers 🙂


first the text and second the pattern overlay in layer style mode


Idk if i made right, but have fun with it xd @onyx moth
hold up you made that?????
i thought you found a much better version 🤣 there's no way you're human hahaha
xd
Hail all the makers and doers and grafters!
legend, thanks ❤️
Everyone is super nice today 😉
Like always
I wish I could say that, but let's not be a grinch... On the whole that's true!
Speaking of nice people, this happened today 💙

That’s All Folks Outline Bold
hey can anyone download this font and send it here?
@untold mortar
alright and where do i upload this
Just download the file, and install it
then go to photosop

why does it show like this after i followed ur steps about layer thing
see the difference

U missed one step, which is the Color of the main text


where


/imagine

don't worry about it something about compatibility with previous versions, so it's nothing
It's a normal warning. I disabled it in the preferences but that comes as a default
Is there a way to lock clips in place in the timeline? Everytime i shorten a clip on the timeline all clips in front of it move backwards its so annoying


I don't have PS open now, but you can find it in the file handling section (or something like that) of the preferences
nvm I set the pen to eraser mode that's why nothing draws lol

Still couldnt figure this out. Does anyone have experience with this and can assist me?
No worry's
did u changed the font ?
yes
why cant i see font

select the text, then go to proprieties, then change it All Folk
i did
i selected but cant find font area
which do i use to select
U new in photopshop right ? @untold mortar
yes

From here, u can change the Font

if this panel don't show

u can active it from here


idk it was bugged or smth


how do i add like a small background just behind my text and not covering other aspects of the page


make it like this @untold mortar