#❓ask-a-question
1 messages · Page 15 of 1
You'll need to cut out the painting from the frame (pen tool is perfect for that)
and place another frame (lots to be found on legit websites for free) and place the PNG of the new frame on top of the painting layer
If you want something specific I think you should look at image then canvas size
yes this work, tq 

Ohh I misunderstood
thanks
Gave +1 Creative Carma to @vapid flume
i will try that
Glad it worked!
do you have a site to look out for were i can find good quality ones?
because most i tried get bad when scaling
Adobe stock, the free section
https://stock.adobe.com/uk/search/free?k=frame&search_type=usertyped
artists get paid with you download the images
Boom! 💥
No more scrapping the internet while breaching copyrights!
thanks a lot

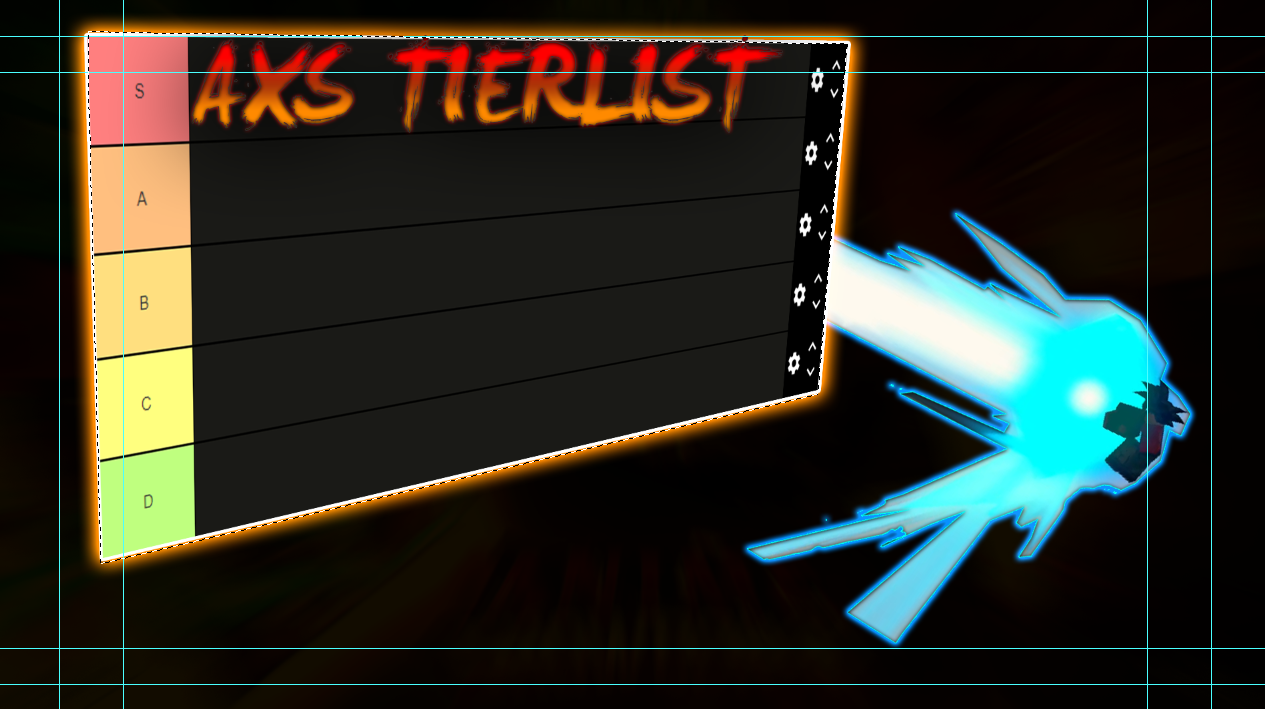
so i took my picture with a side angle. Theres probably a feature to distort it right?
to make the new 2d frame 3d
size: choose large, usage rights : choose: creative commons

Filter> vanishing point if you want to distort the image (or simply use the transform function)
But it won't transform it into 3D (showing sides you can't see in the image)
for that you need a 3D frame in a 3D software
ok
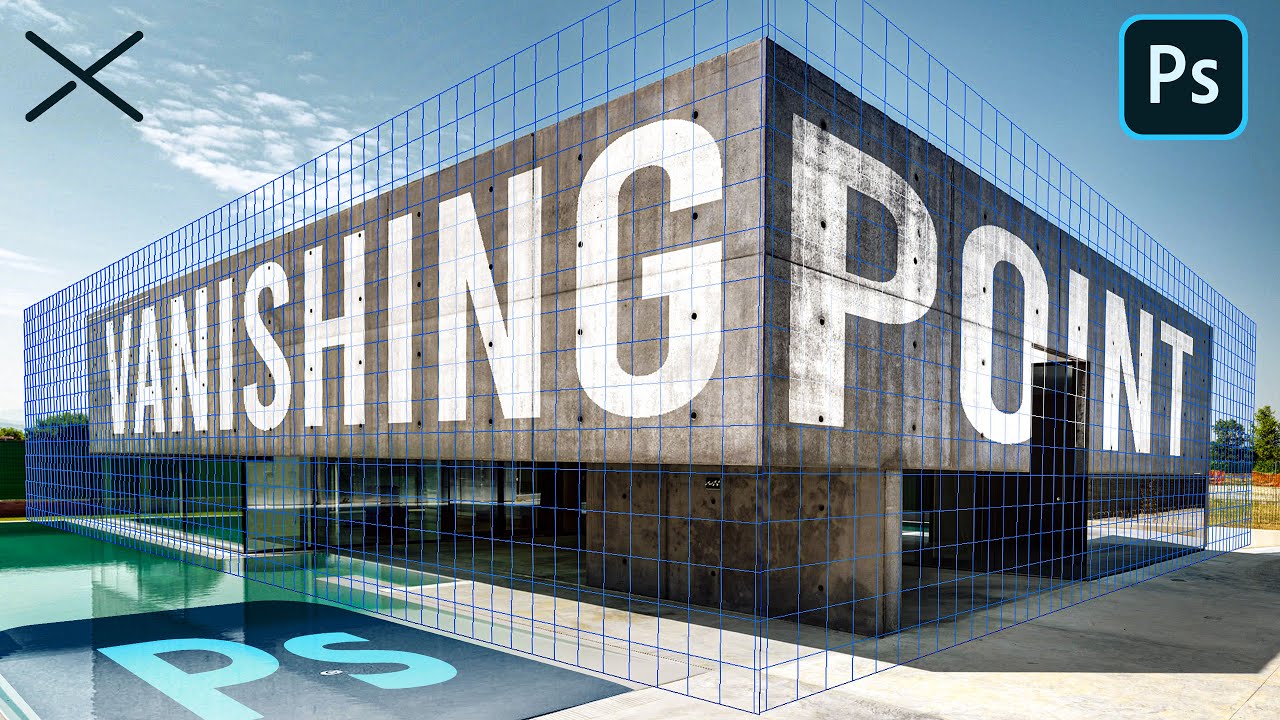
The Vanishing Point Filter and Perspective | Photoshop CC Tutorial | EASY
This Photoshop CC Tutorial discusses how to use the Vanishing Point Filter to add images, text and graphics to a photograph while maintaining proper perspective. This Photoshop tool allows us to create a simple grid and panels based on the perspective of your current image...

Learn how to transform layers, images, text & graphics in Photoshop CC 2022. Transformations include resize, rotate, flip, skew, distort, alter perspective and warp. Manipulate images like a pro using the Free Transform Tool in Photoshop!
Chapters:
0:00 Introduction
1:20 Raster Image vs Smart Object
3:10 How To Change Image Position
3:47 How To...
They are, but the vanishing point is more precise, particularly in that case if you want to put the frame and canvas combo onto a wall that already has a specific perspective
If that's not the case, then of course, the classic transform will do the trick
I see
Hello, I am trying to transform an image of me and my girlfriend to be in this style, but I am not very experienced with Photoshop. I've tried neural style transfer things but it didn't really do what I want, do you guys recon theres a simple way to achieve a style like this in my own photo?

Does anyone know why adding a Stroke to a shape with a corner radius of 0 still makes the stroke curved instead of straight?


anyone not using this we are not friends
which one you playing with again?

try this

ohh thank you! i forgot about those haha
Gave +1 Creative Carma to @neat ravine
note that this works well if it's a lliteral SHAPE, but a pain in the butt if it's an IMAGE you want to have non-rounded corners on...

if so, the quickest way is to change the stroke to INSIDE:

but if this covers too much of the image, i think you'd need to fake it by putting a SHAPE with a stroke behind your image!
I am trying to select the design and it kind of misses som parts, is it possible to modify the selection more precies because all the options I see adds pixel to the whole border instead of certain places?

how is like this effect called and how to make it

yo i need help
.
just got a new pc, and i opened a fresh file blank page, 900 x 500, and i used paint bucket just grey and my pc nearly blew up, went to 91% memory
and i have good specs so thats not an issue, 32g 4070ti

??
U need help wit a deagin or anything
so im trying to make a circle using the marquee tool but im not getting the results i want, the circle keeps coming out blurry

does anyone know how to make it more solid?
depens which type of selection tool u using

I can make u something if u need using it just lmk what u tryna desgin and I can do it for $5
no dude, i need help figuring out this specific thing
.
since when is it okay to sell services here?
What's up
I'm not selling I do work it ain't free
youre not making sense, im out
my ram keeps gyinmg idk why
am I trippin cus I cant find any of those
nvm
found it
Whenever I try to select the small part left it selects the whold damn picture, how do I fix that?

how to make this type of effect?


I can make those lmk what u looking for like what u need it to say or anything
"lifted"
So u need it to say that
yes
Sorry then
ok
if it up to me i will do it manually
u can try masking it fisrt with the current selection that u have so far than touch it up on the masking layer to reveal the desire area
I think they added the lext Liquid
then they copy the text and using blend if they only take the outer line of the text.
After that they use liquify from filter for both text layer
how do i animate something like this? maybe even with neat interpolation?

windows>workplace> motion
tyty
im tryna interpole these 3 frames by color and have this setting:


but it seems to just duplicate the frames

give me a screenshot of your motion section
Does anyone need any deagins or anything?
what is the motion selection?
here i think?

Watch this... it shows a few different solutions to your issue.
with that setting it just produces empty frames
Avoid asking the same thing everywhere, please.
My bad
is there even a way to interpolate the color change or does that just not work?
you just want to change the color?
I have a shadow moving across a number and would like the animation to be smoother (have more frames inbetween) without having to draw more frames

So im curious if there is a way to automate that
If you want to move the shadow. there should be a shadow layer individually. if you are talking about his black shadow. I am not sure if there is Ease In/Ease Out option (makes the animation smoother).

No auto option I guess
guys i have a file with marks
i need help editing it
who can help me i need to change the numbers
Why you want to change number?
Obviously it is his Mark's card
And he want to cheat
I guess so
Then this is not the server where you get help.
My friend was get banned from fiverr for changing a number
Hi!
I have multiple layers with different blend modes.
How can I "apply" those changes so they remain after the merge?
by "apply" I mean like make those changes be the new normal state
If you want someone to create something for you, please post in the #💬chat-general channel. Briefly describe the project. If someone is interested in working on it, they might reach out to you.
Blend Modes work because there are layers under them that they can blend with. When you merge or rasterize layers, Blending Modes no longer make sense as the layers are merged and thus nothing to blend with.
You can convert various layers to a Smart Object. Depending on the type of effect you have, that may or may not work.
Thanks!
i am trying to make a jester hat logo and i don't know which colors to use, i made the top of the hat but the bottom part is empty what colors should i use (note: i am trying to make it simple and make it sort of discord style)


Maybe white or grey for the "band" on the hat and a slight darker blue for the "inside" of the hat.
i feel gray may look bland/boring
You'll likely have to try some different things to see what works best.
need some logo designers to help
For future reference, please post in #📝project-feedback - This channel is for learning Photoshop, getting technical help with using Photoshop, etc.
Ok sure i don't mind, Thanks for your help!
Gave +1 Creative Carma to @ripe quest
Look at hats online and match one you like the colours of. - this might be better than picking 3 random bright primary colours.
Most of em' use 2 colors for the whole hat
i found a color anyway its a darkish purple

@ripe quest What do you think?

Your colour choice looks good to me. Looks better than the first version
But Thanks i may use it later btw how would you rate it outta 10
i used hot pink and red and blurple
wasn't really what i wanted so changed it
I've asked you above: Please post in #📝project-feedback
How create i do that chin?


The objects are probably made flat and then warped to fit the face.
hey is there a way to use space outside of artboard for displaying references , like in AI

Hi, I wonder is there a channel for plugin / dev?
I can't create a text zone with a width / height.
No. In Photoshop, the Canvas is it. There is no "outside of the Canvas" that is visible/usable.
so there is not other way than using seperate documents to use references
Perhaps is a display problem. Main menu: Help > GPU Compatibility... Any errors or issues reported there?
Other Layers, other Artboards, other documents.
nope
no problems
ok tnx for answering
Then I don't know. Unless you'd like to share more about your problem. Save and restart Photoshop and see if it continues. If it does, perhaps post a bug to the Adobe Photoshop Community Forum and the dev team will look into it.
I would still check into updating GPU drivers because, to me, this looks like a realtime display issue.
Not outside of an artboard. You could create a second artboard and use that for reference materials I guess. I just use a third party program to display my references and mood boards.
You can create a new [temp] document and then line them up side-by-side, using the Window > Arrange commands.
It's free. Idk if we're allowed to mention other programs here. I'm sure a quick google search for "reference photo display program" will bring it up as the first result. 😉
Is this what you're referring to? PureRef? https://www.pureref.com/
Bingo.
waits for Adobe ninjas to take you away
It's fine to share most app recommendations here. As long as its not belligerent attemps at spamming your own products/services. Or things in direct competition with Photoshop. heh
I'll be fine. I'm on the Adobe Ninja Squad. :)
Ah. Well, as it offers a feature Adobe doesn't seem to care about... yes. PureRef is my go-to for creating/displaying moodboards while I work. No, I'm not affiliated.
Deeply bows
I see the badge now.
I wouldn't say they "don't care about it." Send the team feedback about that and perhaps they will consider adding a feature like that.
True, "don't care" may have been poorly worded. I just doubt it's anywhere near a main concern.
Although, a perm window overlay in Windows appears to extend beyond the scope of Photoshop and into "general purpose" use.
Seems like this could be used for anything really.
Maybe not a perm window overlay, so much as a window in PS that stays above the working document. Can stay entirely in PS and only be above PS, but just needs to accept pastings from other apps.
Oh. It is just for Photoshop then?
PureRef? Nah, it stays above all other Windows app windows.
I'm saying if PS were to implement such a feature, they should limit it to staying above Photoshop windows only. Kind of like that new little toolbar does, except you can paste images and text into it.
Seems like a nice tool. Thanks for mentioning it.
No problem, thinking about it, it could probably just be a plugin.
It probably could. However, I think its better the way it is. Then it could be used with any app.
WHAT IS THIS
An icon?
i cant find it on my own premier and idk the name
I don't know. I'm not a "Premiere" expert. Perhaps ask in the Adobe Video server.
oop
i thought this was premiere since i joined through the preimere app 😭
sorry friend
No problem. Do you need the link?
yes please
I think that's premiere's feature that extends an audio clip using AI
blesss your soul
Don't bless me, I just read a lot and use Premiere on occaision
i am trying to learn so i admire you for that!
THANK YOU!!!
Gave +1 Creative Carma to @ripe quest
What other Adobe Discords are there? I just joined this one after getting the notification from Photoshop @ripe quest
id assume the other applications
There is also a server for the Substance Suite of products that is not included on that page (for whatever reason).
no one has any idea with uxp how to define the width / height of a ParagraphText ?
For scripting/UXP, posting to the Photoshop Community Server is probably a better bet.
thanks, is this another discord or are you talking about the community forum?
The Community Forum on the web. (Probably shouldn't have said "server." Sorry for the confusion.)
i make this picture move forward by this funkcion and now my question is can i rotate it like with this?

This is probably a weird question, but is there like a manual of photoshop that I can download for offline use which has everything in it? (I got a photoshop exam on Monday and I'm allowed to use everything on my device, but not the internet)
Can I send you my shop for a label. I am apart of and yall lmk if u would buy sum merch
i have a picture with some effects from the effect gallery applied to it and then i put a threshold adjustment and a gradient map on top of it
when i try to export or merge them it seems to completely ignore the threshold adjustment and just export the pic with the gradient map how can i fix this
Try a couple of things, A. have all layers selected, on PC ctrl + E (merge them all) B. Put all layers and adjustment layers into a folder, then apply smart object, then duplicate (keep orig) and rasterize the duplicate smart object...
i did both and still the same
it seems to be bc of the threshold layer bc i tried merging the image and threshold and the same happened
what is this pixely / comic book stippling effect called and how do I fix it or clean it up so that its not present on parts like the lip and the eye?


when in doubt, restart Photoshop and try again 😅 - if Iuse space bar (hand tool) and slide around while zoomed in, and do touch ups, after awhile no tools work, no zoom in or out, have to shut down file and restart and sometimes PS also
What type of file is it? what is DPI resolution? what effects did you use, did the effects cause this? or a low camera capture
So its actually a scan of my brother's yearbook picture, its a jpg
I'm just trying to clean it up to have it laser engraved, so I'm trying to clean up any shading effects that might confuse the laser software
I did two scans, let me see if the one with the higher DPI has this effect...
Try scanning it again at a higher resolution....then clean it up using soften and smoothing techniques - in small increments, you don't want to fuzz it out....
Yeah it does, so it was the way the yearbook company processed the photo

yeah doesn't look like high resolution....very pixelated
Well like I said, its scanned from a photo, so I am stuck with what I got
So the best course of action is to clean it up bit by bit?
Poop in is normal Poop out, You can polish a turd, but it's still a turd! 😉
Yeah, slow and steady- see what you can get...
the classic method would be to blur it to the point where single dots are not visible and then sharpen it digitally
Can someone help me turn an image into an iPhone 14 background?
Basically, if you know the IOS feature that lets you make the album cover your lock screen while you’re listening to music, I want that, but as a permanent background even when I’m not listening, for a specific album cover.
I can pay like $5 or gift nitro.
DMs are open.
does anybody knovv about vvhats happening vvith the creative cloud sync files being removed in february? adobe says photoshop clou files vvont be removed, but CCF ones vvill? this doesnt make sense, can someone please explain?
Does anyone know how to add to the sky mask in Lightroom when it missed part of the sky?
get an image, find out the resulution ios wallpapers are and scale/crop
check dm.
after i remove background in photoshop, how do i get back some missing pixels
can anyone tell me how to render on macos everytime i render it only does the audio and says quicktime player cant play the video because it isnt supported
Hello everyone I want to embed my sneakers on this background, but I don't know how I can make this realistic, if someone could help me it will be a pleasure

press fx and press reset to default list
my animation is not rendering, can anyone help?
can someone help me, im pretty new to ps and i need help retouching an image
I tell my clients this all the time when they provide me bad pics.
At a guess, do you need to first convert the layer to a smart object?
It's greyed out?
Change to 8 bit colour
Image>Mode> 8bit
Looks like filter gallery only supports 8 bit colour
8-bit RGB, plus the active layer can't be locked.
Gave +1 Creative Carma to @cursive mantle
I'm working on a project and my "scratch disks are full." Google said this meant the storage allocated was full. I've tried restarting and trying in a new document and same issue. My project involves compliling a mosiac with 200 pictures, so I understand why. Any solutions?
Your "scratch disk" is the hard drive that you running photoshop from (most likely the C: drive)
You might need to make sure you have at least 10gb or so free on the C: drive for photoshop to store all the temp files
also, is there any shortcut to fix this spacing issue without manually resizing each image

Best I can think would be: Convert all to smart object => centre align all => transform all by expanding horizontally => distribute all to canvas width with alignment tools
There was a action some guy made to "expand all from own centres" but I can't remember exactly where to download
thanks! ill give that a try and let you know how it goes.
Gave +1 Creative Carma to @cursive mantle
how can I convert all to smart object
Might have to make an action to do it, or just click through them manually
I assigned it a shortcut (in my case F2), it makes life easier.
to do that you need to go to edit>keyboard shortcuts

choose "layer" in the list, scroll until it says smart object>convert to smart object (this is where you would find the option via the menus), and click in the place holder next to it to type in a shortcut
If it says that shortcut is already used, check which one is it already assigned to and sometimes you'll find that either some options aren't critical enough for you to assign them a shortcut, or even that some options have two shortcuts! (silly, I know)
in that case, when you assign it to your new shortcut, it will disable the other one
I made a file with different layers and I'm happy with how it turned out. I want to split those layers/groups (manual selection) into separate files to have them as reusable components for future projects.
How can I split a psd into multiple psd files?
yoooo this is the best tip i have heard in a while
Try to analyze it:
- the background has soft colors, the shoe is bright: so use a curve (or "levels") on the shoe and decrease the lights/whites and do the same for the shadows/blacks
- the objects have shadows going from left to right, the shoes doesn't have any: make a duplicate of the shoe, place it under the shoe and paint it black, then distort it to give it the right position and size and then apply gaussian blur to make it blurred. Put it in multiply mode and then decrease the opacity, so that it looks like the other shadows.
- adjust the shoe to match the colors better, you can use any adjustment you prefer.
Just go to file>export>layers to files, and choose your parametres from there

Glad it helped!
Thanks 👍🏻
Gave +1 Creative Carma to @vapid flume


Search for Japanese font
and u need to put some texture on the text
like old paper
i need it in english
U can find it, English but in Japanese style
I just googled "japanese calligraphy style font" and there are tons that look like what you want

That kind of things
https://elements.envato.com/osake-japanese-font-TZK8ZWL

Envato Elements
Get Osake - Japanese Font that includes calligraphy & japanese, from our library of Decorative. Get unlimited downloads with an Envato Elements subscription!
Save your work before u used this font, cause it's overloaded Font, can Crash your PC
Bloody hell, I didn't think one font could do that 🙂
Yeah it does
There is a warning message before u install it
I am used to creating fonts myself and it never happened to me...
Good catch then, thanks!
it already did
is it free?
For personal use, Yes
alr ty
Gave +1 Creative Carma to @warm grove

If it's on a separate layer, you have multiple options. My personal go to:
- select the layer, select -> color range, then sample the white color, play with the range till you're happy with the selection and delete
Or..
2) just use something like the magnetic/polygon lasso tool around the envelope. Then right click -> select inverse then delete
hi
as you can see, blue is the color of my brush right now. Why is the color pallett red though?

if i wanted to change the tone of my blue right now id have to press x, change the tone then press x again to have the blue color activated
nvm i just solved it myself  im dumb. just had to press on that little blue box to activate its pallett. Been with this issue for a month ahaha
how do i use this eraser brush preset, on a normal brush?

Hi Everyone, I am trying to recreate the background of the card in terms of texture, color, and effect ? I looks like a gradiant with a white to dark blue but not sure how that effect is done.

how can i blend these shades together across my whole image?


please ping me with any responses!! thank you
Hello everyone, I'm currently trying to do some rlly basic stuff but I'm still confused about how to actually do it,
I want to make something like this gradient shadowing over 2 circles


They are separate circles, each having their own shading...so layer them up..
I did layer them lol but it doesn't give the gradient yet, haven't figured out how to give those shadows

What I mean is the outside beige with the stroke on it is one, then the next blue one is one, then the last blue one is one...then they are put together, follow me? 🙂
so the first blue one next to beige one, layered above the beige one, could throw a drop shadow or outer glow onto the beige one, then the second blue one could have a gradient fill with dark on the edge etc...layered above previous one
That's a fiber filter
You need to set up blue and black as Foreground and background colour and then run the filter on a middle grey standard layer. You can tweak the settings of the filter to make the lines thinner or thicker

You need to duplicate it first
See the screenshot
It should work!

anyone?
Try filter>blur>box blur, the two colours need to be on the same layer. If they aren't, select both layers and right click on the thumbnails and choose "convert to smart layer", then apply the filter. You'll need to play with the settings
thx will try!
Basically, if those colours are devoid of texture then any blur should work, but box blur is the filter specifically to blend colours. Try it!
so. it only lets me do 2000 pixels radius. i need 16385x16385 for the whole image.
how do i get around this?
Maybe do it multiple times? THat's a crazy size for an image!
a heightmap
(and I work with Photographers 🙂 )
heightfield/ dem for terrain
Try another type of blur: Surface blur is another good contender
Also you don't have to put it at full whack. But if you just want the median of the 2 colours, then you can use image>adjustments>equalize, you'll get just one colour at the end
Gaussian blur goes up to 1000 pixels. I have never known an image that needed that much. If you need to blend colours softly, even at that size, I would say 200 would be more than enough
hmm.

i have tried those techniques and am left with almost what i started.
not blending the diff shades together very well.
so this is for terrain height data and each diff shade reps diff elevation, i need it smooth so it comes out the other end looking like smooth terrain/ contour
So maybe you'll have to do it multiple times in a row or do it in areas (select a square, apply the filter, select another square, run the filter again etc)
no way i can do as i mention in one click or a seemingly quicker way?
no AI tools or any other methods?
You can try with the generaive fill, but honestly it will just invent things I guess. And no, not everything can be done in one click unfortunately....
Maybe someone else will have a better idea!
thank you for your help.
Thank you so much !
Gave +1 Creative Carma to @vapid flume
Hello, someone know what type of filter or creative-challenges this is? how to make it look sketched. At the welcome screen

asking again
Hi @lament moth Have you read this post? https://helpx.adobe.com/creative-cloud/kb/eol-creative-cloud-synced-files.html#:~:text=Creative Cloud Synced files are,Cloud for Teams business account.
<@&548221840750018590> ban @sacred creek

Hi, yes I have and it did not clarify the difference between ‘Creative Cloud Files’ and ‘Photoshop Cloud Files’. Will only one be deleted or both? I’m just wondering if I’ll be able to have synced files through multiple devices on Photoshop.
So if you look at my screen cap, Creative Cloud Files is a location listed with my folders. Save to Cloud Documents is a separate option. The one the left is going away for personal users, not Save to Cloud Documents.

At least, that is my understanding.
Oh, wonderful. So I’ll still be able to save PSDs to cloud documents and access them through different devices?
Understood. Hopefully that’s the case at the very least! Thanks for your help!
Gave +1 Creative Carma to @willow gale
This is from the article I linked to:
Cloud Documents
Cloud Documents are cloud-native files that you can open and edit in compatible apps. With Cloud Documents, your work is always updated, across every device, wherever you are. Compatible apps include Photoshop, Illustrator, Fresco, and Adobe Express. Cloud Documents also allow you to save your work from one compatible app and open it in another compatible app without losing any fidelity. Autosave allows you to view any past version of your document quickly.
That excerpt is listed under: "Is there an alternative to Creative Cloud Synced files?" so again, yes, that is my interpretation, @lament moth.
Great! Thank you!
Happy to help.
Hi @molten sapphire That's the sample file shown in Filter > Neural Filters > Style Transfer.
You'll see those two images in the filter panel on the right before you activate and download the Style Transfer module. You can read more about how to use it here: https://creativecloud.adobe.com/cc/discover/article/how-to-transfer-styles-to-images-with-adobe-photoshop?locale=en
Access Adobe Creative Cloud apps, services, file management, and more. Sign in to start creating.


does anyone know how to make a fading out pattern like this?

This would be likely a white (top) to white (bottom) gradient applied on a mask. That mask hides the pattern gradually...

how can i make that gradient mask?
Just select the mask and apply a simple gradient with the gradient tool


Black to white, start by the top, drag the tool until you reach the bottom, and the gradient will apply to your mask
It works like a standard mask!
when i use the gradient tool it creates a new layer instead of making a mask
It is likely that you didn't have the mask selected. See how it is highlighted with a white border around the mask and not the layer?
Can you share a screenshot?
I need to go, so I will leave you with this. Pay attention to which part is highlighted in the process: Layer VS mask
i am selecting the mask and already created a gradient within the mask but the gradient is not showing

oh nvm
i set the mode to screen instead of normal
😅
ty for the help!
can i get some help before i shoot my brains out tyvm


trying to add a gradient overlay to this layer
but instead of applying to the pink swoop shape its applying to the entire canvas
even if i create a gradient adjustment layer and clip it to the layer below, its the same thing
just created it using the pen tool
Or what’s to goal
im trying to create an abstract apple looking wall paper
with gradients within the swoop shapes
like this?

as soon as i apple gradient overlay the whole thing becomes a gradient

instead of whats insside the shape
essentially
how do i fix that
how do i make it transparent on my layer 1
im so confused
i dont understand
dont know if my brain is fried of trying to figure this out for so long
anyway you can join vc, ill share my screen and show u
I’m at work
iight my apologies
made a cool design using ur idea tho

happy for u
just selecte the pink part ur self and mask (hides white part)
then it should apply gradient only to the pink
if thats ur goal
Hey guys… so I’m working on something and it has a transparent background on photoshop (or it seems like it does) but everytime I save it to my desktop it has a white background. I want it to be transparent, how can I fix this?


What 💀
Hi. Is there a way to insert your reference image inside photshop so you could color pick but without having it get in your way. and without having to enlarge your canvas.
Just put it a layer above and hide/unhide when needed
hello guys, can someone please tell me what this effect is called?

Stroke and outer glow
so this isn't motion blur?
Hey guys, im a noobie in photoshop and need help with something. Would rather personally message someone so please feel free to dm me to help, thanks
Make the hair look like they are made of chocolate for example.
You can hair mask it over
There is definitely a motion blur there
but not the kind you could do with a simple Filter>blur>motion blur in Photoshop (since it happens in the 3rd dimension ). I even suspect there is more than 1 motion blur...
Probbaly more something done with the blur gallery

But you'll have to trial and error that, because it's definitely not a one click thing.
What file format do you save it in? Not all file formats accept transparency, it may also depend on your photo viewer (but that's unlikely)
I would use a clipping mask. That would be the easiest way. It constrains your top layer to the pixel content of your bottom layer (so the layers need to be one directly next to one another)
highlight the gradient layer, right click, choose "clipping mask", and then the top layer will be clipped to the bottom.

it will look like that

How is this person using the brush for putting the overlay on the head? I have my overlay but I want to be able to brush it on. I am a beginner so use basic terms
hey sandrine, appreciate the response.
for some reason clipping masks weren’t working either for it. i ended up using the object selection tool to grab the pink shape, and created a mask of that selection which enabled the gradient overlay to work correctly, thank god.
Gave +1 Creative Carma to @vapid flume
He's probably painting white on the black mask to revel the texture of the overlay. He doesn't paint the overlay itself
you can see the mask is hightlighted in the video, not the layer
It should work, but it's on you to modify your gradient so it covers only the area you want (which is now smaller than its original size) you have to play with the gradient sliders to make it cover properly a smaller area
You could also create a gradient layer style, and it's a good way to make sure you got the gradient covering exactly what you need
he likely has the overlay with with a specific blending option aside from the default “normal” and then uses the black like sandrine said to gradually bring the overlay to the front.

That's also a very good possibility
will keep this noted for next time!
The thing is I ve seen you used the gradient overlay layer style (sorry I came up mid conversation and I didn't read everything) It could also be that your pixel content for the bottom layer isn't 100% opaque.

this is how it looks for me, with a clipped mask

So there is a difference between the two in the way that a layer style, y default, only work within the constrain of the pixel content of the layer holding it.
For example, if I have this gradient as a layer style and I want the green to disapear like it did in the clipped gradient example, I will have to remove that colour from the gradient. In the first example, the gradient cover the whole canvas but is only visisble when there is a pixel content to clip on. Meaning in that case, the green is still there, at the top and is not visible
The way to make the green visible in the first example would be to move the left slider inwards (and the right one too) to "compress" the gradient only to cover the bottom part of the canvas, and it's will be up to you to visually determine where it starts and where it ends
Those sliders to be clear

Thx for this what hit key do you use to hide the layer? Also is the grey area outside the canvas useable? Can you place stuff there
Gave +1 Creative Carma to @strange hull
how do i make this i already have a font but how do i get those slices and that pattern

is there like a guide or a tutorial for those slices??
How do i crop to a selection in photoshop? I did photoscans with multiple photos and i need to separate and crop them all efficiently
i downloaded this course and what do u think is it good if i wanna learn something similar to that i attached as image


Design Bootcamp shows you how to put design knowledge into practice through several real-world client jobs. You’ll create style frames and storyboards while watching typography, composition, and color theory lessons in a challenging, social environment.
Can anyone point me to a tutorial on how to change a headshot into a highly stylized art look similar to the marvel movie posters?
Hi @west root There is an easy-to-use crop tool in the toolbox, plus a Crop command in the Edit menu. In addition, you can use File > Automate > Crop & Straighten Photos to crop a group of images scanned at one time.
Hi @candid fulcrum Something like this? https://www.youtube.com/watch?v=Vv6Wys7pztQ

Photoshop Tutorial with voice-over to Create Morbius movie poster. Jared Leto Is a "Living Vampire" in Marvel's Next Film 'Morbius'. Learn to create a movie poster in Photoshop by following along with my tutorials. We will also use Lightroom to make the artwork even better.
Use code: "YTZENZ" To Get 15% OFF on my courses!
► My Photoshop Course...
Hi @magic bluff It's hard to say if this course will take you where you want to go. I'd reach out to the company to ask, but in the meantime, this statement may be reassuring:
Our no-risk money back policy
We want to make sure you have a positive learning experience with us, so for any session based course you're enrolled in, you can request a refund up until the end of Week 3 of the course.
thanks! can u suggest any course or youtube tutorials that might help me learn what i want to learn
Gave +1 Creative Carma to @willow gale
Hi @warm hill I would draw the slice shape as a Shape Layer with the Pen or Curvature tool and add an outer glow with the blend mode set to Multiply instead of the default Screen.
If you aren't already familiar with the vector drawing tools in Photoshop, just note that there is a learning curve. You might want to seek out some video tutorials on using the Pen tool/Curvature tool and read up on shape layers.
Hi @magic bluff Are you new to Photoshop?
yes! @willow gale
Ok, so my recommendation is to start by focusing on the "big three": interface, selections and layers, which represent the foundation of anything we do in Photoshop. Once you master those, you can find tutorials on anything you want to accomplish.
okay okay
from where should i learn this stuff
If you have access to a LinkedIn Learning subscription, you will find excellent courses led by top instructions, but it is a paid service. Free options include the very popular https://www.piximperfect.com, and Adobe is now making some training available for free with your Creative Cloud subscription: https://creativecloud.adobe.com/cc/discover/article/creative-cloud-perks?sdid=71KW6RDZ&mv=affiliate
Access Adobe Creative Cloud apps, services, file management, and more. Sign in to start creating.
My best advice is to start with those basics and then pursue anything else you are interested in.
okay thanks for the advice
yes i will go through it!!
Great! I wish you the best!
Can I somehow disable or is there an option to prevent PS from feathering object by default, I know it's not feather per se, but rather how raster works, but result I'm going for is sharp pixel edge on my objects, same way that bitmap handles it but without going bitmap because bitmap flattens layers and I gotta preserve layers

Any ideas ?
Hi @novel jackal: are you referring to anti-aliasing? That's the slight edge blending that Photoshop adds to curved shapes?
Actually I think spot on , it do be anti-aliasing yeah , though in my case it applies onto straight edge objects too, which is undesired effect in my case
Hey, I hope im writing in the right section. I have a big favour to ask . Im trying to do a design but i cant seem to achive the result im looking for.
Is there anyone that could help ?
Then another more specific question, since I'm not working directly with PS tools, so I can't apply or remove anti-aliasing right from the get go , I'm exporting Illustrator projects into PS, so is there a way that you know of to disable AA on already existing layers/objects ?
Doesn't have to be ideal , because I assume it's harder to do when layer is already on paper, but maybe there's a layer effect or something similar to reverse it ?
ie trim edge till it's solid color
🤔
I think it's based on the interpolation setting in Prefs > General. (This setting also impacts transformations.) Does Nearest Neighbor do the trick?
Hi @inland aspen I'm the only one here right now and about to take off. You can certainly post your image and your question and hopefully someone else will be here soon.
To slightly clarify, I think changing the interpolation may impact future placed Illustrator art. It's not going to change what is already there. You probably know this, but Illustrator is vector-based meaning, the artwork is drawn with equations, and Photoshop is bitmapped, which means the artwork is added to a square pixel grid. Antialiasing is meant to soften the edges on the grid.
Nope no go , tried Nearest Neighbor as well as disabling anti-aliased artwork in Illustrator, tried exporting as Art optimized and Type Optimized , still applies it
I assume yeah , I gotta find a way to force it in illustrator export to begin with
I have to run, but I'll play with this later if someone doesn't sweep in with a clear answer for you.
Alright, thanks !
Gave +1 Creative Carma to @willow gale
Solved it , in illustrator disabling anti-aliased artwork in prefs, and when exporting selecting Anti-alias to none did the trick, no photoshop prefs changes required

how i can i enlarge the picture wihout it beeing blurred


i want it to have it unblurred but it gets blurry when i press the tick


Try changing the Interpolation Method to "Nearest Neighbor"


i cant see it

You have to initiate the transform. Edit > Transform... Scale, Rotate or whatever you were doing.
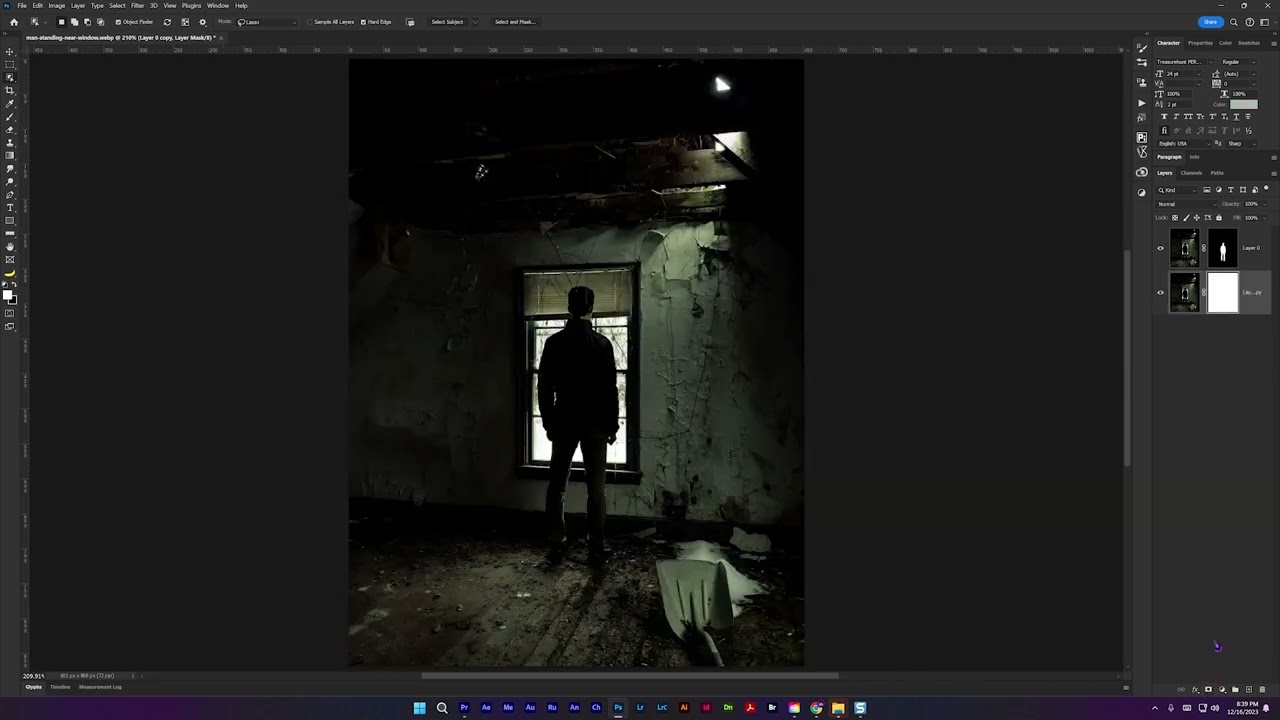
I need to clarify that image, make it sharper and basically make it look better. The most important thing is the person in the blue jacket.
what should i do
still doesnt show up
The photo is extremely dark. I'm not sure if there is any pixel information that could be enhanced or recaptured.
i tried to make some work but a lot of noise and grain is appearing
You might be able to tweak it with a Camera Raw Filter. However, as I said, there isn't a lot there that can be reclaimed...

There probably isn't much you can do with this. If there is no image information there, there is nothing to enhance.
Hi @novel jackalI also found the control in Photoshop. Assuming you are working with Smart Objects, you can disable Anti-Alias in the Options bar when placing or pasting.
oh that's handy, not applicable atm in my case, since I'm opening up full PSD that I exported rather than pasting bits, but I do that sometimes, so it's nice to know that workaround too
Thanks for the input o7
Understood! Glad you have a working solution and I learned something in the process. Win-win.
how do i select the layers for all these parts without having to click on eahc one? is there a box select to select all?

Hi @kind fractal You can draw a box around all of them with the Move tool.
wow thanks for the demo @willow gale
Gave +1 Creative Carma to @willow gale
I’ve saved it as both PDF and PSG. I could be a total idiot, I’m new to photoshop. Is it possible it looks transparent on photoshop but isn’t actually transparent? How could I fix that?
Hello, can anyone tell me what the new update for photoshop beta includes? Please & thank you
I have this problem, I can't use the other colors, just black, white and gray. I just want to know how to use colors please somebody help me

click on the hamburger icon in the upper right and select RGB
or any other modes you prefer
Hello, I'd like to know what is the purpose of these two variants? Do both contain the normal Photoshop, not Photoshop Elements, not Photoshop Express, but the normal Photoshiop? And why does the one for 9.99$ costs less than the one one for 22.99$? The left one does include cheaper one does contain Lightroom and some kind of Photoshop and the expensiver one only a kind of Photoshop.


for some reason I can't click

looks like your image is in black & white mode. try changing it to RGB

it is a special bundle, made for photographers. both contain the fully functional version of Photoshop
thank youu
Gave +1 Creative Carma to @plush stirrup
the one-app plan has 100 GB of Cloud storage, while the Lr + Ps has 20 GB by default (1 TB upgrade available)
Oh ok, so I can save up to 20 GB on the Adobe Cloud thing and if I have more files than 20 GB, I can only save them local?
The creative cloud storage is used for syncing libraries and cloud documents (like in Photoshop). If you have filled the space, you can no longer save additional files as cloud documents. But storing locally is absolutely an option, regardless of Cloud space
if you are a photographer and you'd like to work across devices, the 1 TB option would make more sense
here is an overview of the differenecs https://www.adobe.com/creativecloud/photography/compare-plans.html
Ok so since I only would use it for fun and such stuff and not as a real pro (at least for now), I would be fine to use the 20GB version since I do not really do it as my work.
Thank you.
Gave +1 Creative Carma to @plush stirrup
I'd say that would be your best option, yes 🙂
you're welcome! and if you have any other questions, you know where to find us 😉
Alright
Yes, thank you very much.
Any sources for free cutouts or brushes
Actually I have one more question. Do you know if the full version of the Photoshop app from the special bundle counts to one of this cases regarding the generative points for the KI? If yes, to which?

yes, this paragraph should apply to the Photography bundle and the single app bundle. But the number of credits per month differs from plan to plan. The Creative All Apps plan has more credits
Ok, good to know. Thanks :)
Gave +1 Creative Carma to @plush stirrup
how do i extend this transparent part of my artboard?

use the crop tool (shortcut C )
but double check the mode - you don't want generative expand for this type of crop
got it, thanks tim
Discord stream question
Discord keeps popping in and out when I stream photoshop. Like whenever I'm actually drawing, it pops into just showing the canvas, but when I pull my brush up it shows the whole window.
It's annoying, is there a workaround?
How do i change the backround of a image?
can you show what you are trying to do?
would you like to cut out the subject or are you working with multiple layers?
Multiple layers
you would unlock the background layer by clicking on the lock icon next to the name. then it will be converted to a normal layer, which you can delete or swap out
Thanks!
Hey there ! I'm looking to simulate old-school airbrush on photoshop 2022. I saw this in a tutorial about Photoshop CC and wondered if I could achieve a similar result on my version

Dont you just hate it when you one day open photoshop and lose all your skill
How to make the magic wand be able to be used in a fill layer
if that is what you mean, you are not supposed to generally

if you want to select boundaries, you can set selection to transparency channel, or maybe the mask using the actions panel
I have a monitor problem. I dont know if i could share it here in hopes of a nice tech guy that could help me? The issue is that my monitor shows a black thick line of dead pixels at the bottom of the screen when turning on 144 hz.
are u using an hdmi cable or display port cable ?
both have worked before
but the dp is like kinda broken
but i get the same results either way it doesnt matter
its like a dp converter its not a direct dp
thats the first thing i could think, i wouldve suggested. Sometimes swapping for one or the other could make a difference.
is there no way for u to connect direct dp?
i dont have one
and i know it doesnt make a difference becuse it didnt when it worked
hmmm im not an expert and dont know too much but i know a server that focuses on everything monitor related
i can send u the link
nice yes please
gotchu ill dm
anyone have any idea to cover the foot of the microphone with the layer behind (which i already clipped with the circle)


when i tried to clip it with layer 2 it disappeared completely, applying it on another copy layer failed to work as it doesnt even change
Is anyone else having problems with the new update, 25.3.1 ?
The program Photoshop.exe version 25.3.1.241 stopped interacting with Windows and was closed. To see if more information about the problem is available, check the problem history in the Security and Maintenance control panel.
Guess I'll just roll back to the previous version
clipping layers are committed to their layer styles. in ways that cause funky reactions. but if you converted them to smart objects so that their respective color overlays, gradient overlays, etc were in a sealed container, you'd get the results you are looking for.
unclip everything. convert to smart objects so that the layer styles won't bleed over when clipping, then re-clip. bet you it works.


Nope...
anyone know how this guy is using his brush to paint the background in? I want to do this but dont know how, i am a beginner so please use basic terms thanks
benny is one of the dopest photoshoppers in the game right now. I love him sooo much. dude is amazing!
yeah he has great work, just trying to figure out how he did that in the video, not too sure how
I guess I should start paying actual attention here. I'm usually good about the pulling answers out of my [word deleted by chat bot]. but lemme try and figure out what you're trying to accomplish here.
technically i want to cover the little part of the microphone within the yellow layer

layer 2 should be above 1 right?
Thank XD
hahaha, glad it was something simple.
hi 10th element do you know how to do the thing in the video i sent up above?
thank a ton
Gave +1 Creative Carma to @gusty drum
probably yes.
can you explain how to do it
he's got his subject extracted onto an independant layer on top so he's just working on the background. that's sitting over a black solid, he created an inverted layer mask and he's gently painting it back in with a soft brush.
technically speaking, that's exactly what's happening in that clip.


did you extract your subject?
also you have you layer selected. you're not painting on your mask, you're painting directly on your layer from what I can see.
i have a 1 picture of a room and a guy (just 1 photo) 1. i put solid color on 2. i invert it with crtl i 3. i use brush to draw and it doesnt really work
and the layer is white. needa hit ctrl (command on mac) and backspace with mask selected to invert it, which which hide it, then you can paint with white to paint it back in.
let's rewind. I think we're getting too ahead of ourselves. you wanna send me the psd, and I'll make a quick vid for ya?
yes, where should i send it
here is ya wanna. DM me if ya don't want to publicly.
ok dmed you
you should probably put more time and effort into your subject extraction than I did. but I made ya a video. it's rendering.
and it's uploading.
and it's processing
PSD in your DM, watch video. I didn't do a crazy detailed job or anything. but the concept is there in order for you to execute the technique for yourself.
and sorry for the slow start on the video. girl was texting me. you know how it goes.
Appreciate you man
Got jagged edges on everything I do on photoshop on Mac
Can I please get a hand?

You use illustrator
@strange hull wym? Only use illustrator?
hello guys I met this problem when I tryna use fill generate function

the orange part says that some mistakes occur please try again
What am I supposed to do to deal with this situation?
Log out of adobe and log back in
Probably a account error
Or you dont have wifi
The orange Box says it already. Try it again later or as said before re-login to make sure the connection is Ok.
The scroll bar consistently moves by itself if I dare lay my pen off the screen. Anyway to fix this
hey, i was wondering if any of you knows how i can "lock" the curser position. I'm using the patch tool quite a lot. with shift for example you can keep it on the same height when moving. is there any way to lock it in place somewhere else that is not on the same height?. whenever i remove my wacom pen it jumps a few pixels and i dont get straight lines...
Jagged edges happen for 2 reasons. You're looking at your artwork at more than 100% (100% is showing you the real artwork) and that happens even on a vector shape
or you increased or decresaed the size of the raster element and your interpolation method is not right (for example you chose cloesest neighbour)
There may be other reasons, but these two are the most obvious
I am not sure you can really "lock" it per se.
Just a couple of things. If you hold SHIFT moving anything (a brush, a level tool, a shape) it will constain your movement to a straight line
Also you can see if enable/disable this helps

in the top bar
The clone stamp tool, also have additional settings found here, that lets you control how the clone tool reacts according to its sampling point
here is a good tutorial
https://www.youtube.com/watch?v=zRZR_INs8iA

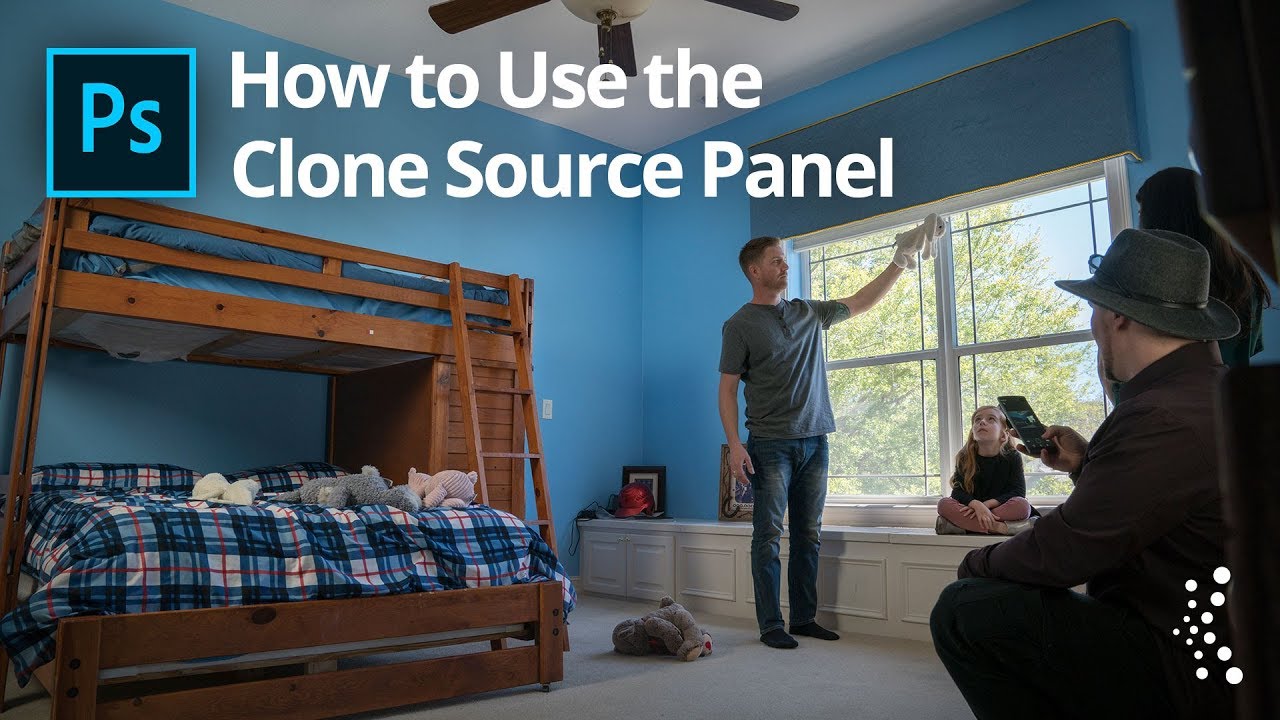
Bret Malley shows you how to use the Clone Source panel in Photoshop to rotate the object you need to clone for a better match!
Learn more about compositing from Bret Malley: https://kel.by/CreatingFantasticalComposites
.
.
And check out our compositing classes from other instructors: https://kel.by/CompositingClasses
anyone know how to prevent PS from using my c drive to store data etc... ? it uses like 5gb for 2 days of sketching wth
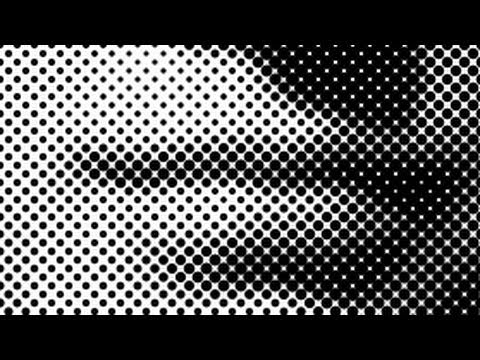
anyone know how to use this filter

I already answered yesterday, it's a halftone filter to be found in the filter gallery
i saw it but there is no filter ab

i try it again let me ssee
in the "sketch" section
Once you had the name you could have done a quick google search 🙂


You need to learn how to use it first!
This filter is dependent on the type of image you have (is it very contrasty, is it too bright? too dark?). And is also dependent on the foreground and background colour you got set before you launch the filter
https://www.youtube.com/watch?v=usDDwwraaRk
My Effects Shop: https://justinodisho.com/shop
Adobe Software Download: https://prf.hn/l/dlXjya5
Support the Channel: https://www.youtube.com/channel/UCy7DyWXJ0jghyMsUoOU6F7g/join
yh its contrasty
it depends on the colors you have in your sidebar. there is a small button with a black square over a white one on the bottom part of the sidebar, click on it and then try to use again the filter gallery, it should be fixed
Follow the tutorial, you need the image to be detailed enough the halftone picks them up, also you need to tweak the sliders as the size of the dots will aslo depend on the size of the image. I would avoid doing it on very small images)
yeaah its working
thanks

Sometimes if there is too much contrast to an image, darkening it may solve it to an extend, but you need to start with a proper well defined image. It's a filter that is derived on the way prints where made before there was a means to produce continuous ink printing. They always had well exposed images
Cool, glad it worked!
all right thanks
Hello guys. I have an issue with my photoshop, since some days the "open with photoshop" disappeard. When i was clicking on it while opening a photo, It would open on photoshop beta . If my regular photoshop was on, it would open on it. To fix it, I decided to unistall photoshop beta... But now I can't open anymore with photoshop from my windows file --' (the software is working tho, just the "open with" don't show me photoshop anymore". I don't know if i'm clear, sorry for my english
I just changed it chosing "borwsing another app", so I have the option. But still, it's weird for example my PSD file don't have the logo photoshop anymore but libreoffice one, even tho i can do "open with" and then open with photoshop
What does it show when you say "open with"?
You could reassign Photoshop and as option. By "choosing another app" at the bottom of the menu when you right click
You can then choose PS again
You souldn't have to if it's already a .PSD though
Hi, I'm a beginner. I have a question, How can i create 3d car models like this in PS? I want to design car livery. mockups are expensive for me. I want to create 3d car models first like this in PS. Hard to find good tutorials anywhere


Photoshop is not a 3D software. There used to be 3D options there, but they are being phased out since proper 3D software were way better at it
Now you can use Photoshop to apply 3D decals onto a 3D image, but not in a 3D environment. You image will be 2D (a 2D render of a 3D image)
No right, it was annoying me when it was opening with the beta instead of normal photoshop. It changed some days ago, so i unistall beta thinking it will fix it ... but no. Now i did what you said, but yes the logo of the psd file is "libre office" haha ... also since now I can do "open with photoshop" on a jpeg, now it's lightroom who disappeard
Now you can do "fake 3D", designing images in 2D that do have a look of a 3D image. But it's more a question of knowing how to draw than being good at photoshop
yeah for livery design fake 3d will be fine ig
THat means that .psd have been assined to libre office. It happens, you need to re-assign the file to the right software. I'll be honest, I never really use "open as" . I use either open within photoshop, or just drag and drop the image within Photoshop. Or because I use Brisge nearly 100% of the time. I open my files using Bridge
Because at least in Bridge I have a visualisation of the .psd file and not just the icon
Do you need some input on how to composite the livery onto cars images you already have? or to create the cars from scratch?
If you are building the cars from a 3D software already, it will be more realistic to apply the decals from the 3D software, but if you are taking existing images you bought from a stock image website for example, then that's can be done (although it may be a bit fiddly so don't expect a 1-click solution)
You have a guy doing this here:

PLEASE BE KIND - MY FIRST VIDEO. I have not done one before so I know it will be rough whilst I learn.
For this video I have decided to quickly mock up a fictional formula 1 livery deisgn on my static photoshop template. Let me know your thoughts and hopefully contructive tips.
Don't forget to like and subscribe.
Thank you Sandrine, merci j'ai réussi à ré-assigné photoshop aux fichiers PSD
Parfait!
@primal basin if you are building your own car models you can see how Photoshop can be used here with Blender
https://www.youtube.com/watch?v=CBGB0OiRPYk
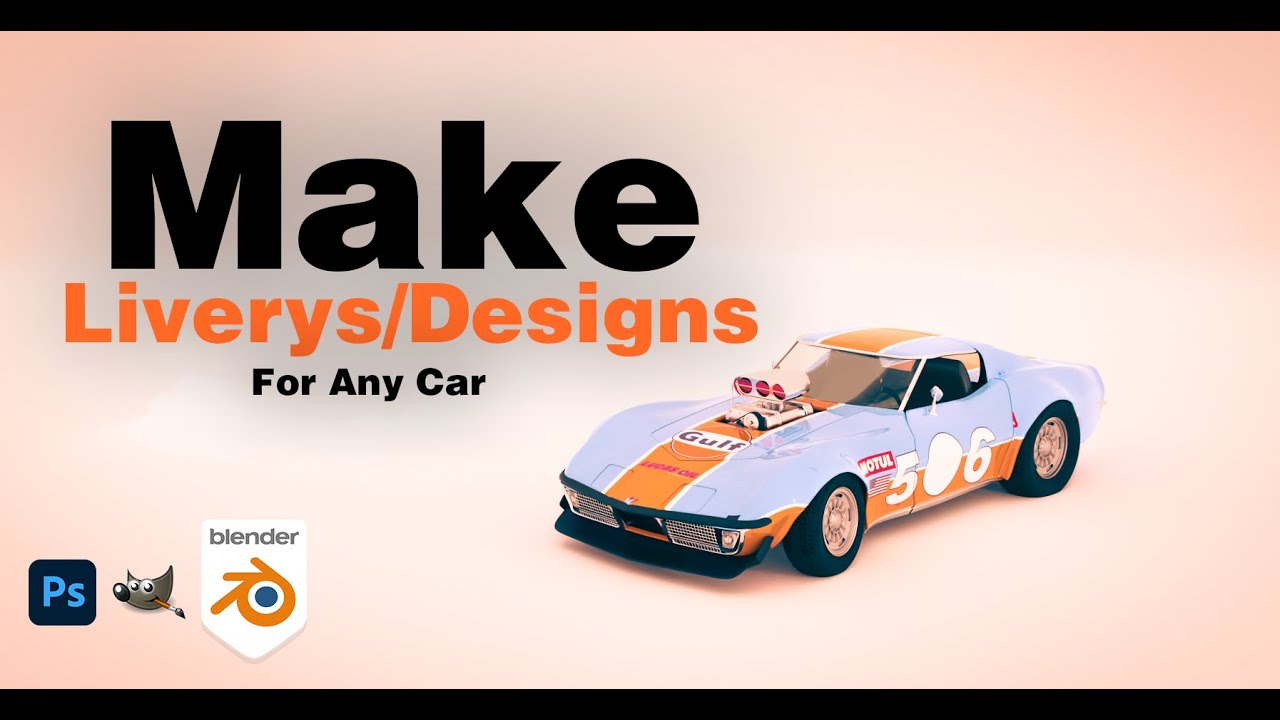
In this tutorial, I show you how to make Liverys/Designs for any car using blender and photoshop or any other image editor of choice
Links:
Gumroad: https://app.gumroad.com/bswm3d
Paint Shader: TBD
But it can easily done with other software like Substance modeler for example
thank u for the resources, is substance modeler easier than blender?
Gave +1 Creative Carma to @vapid flume
I find Blender very tricky to learn and find Substance easier. Unfortunately Substance is more ressource hungry so you need to have a powerful computer.
any lightweight program to create depth maps offline?
I find Blender tricky because the whole UI/Shortcuts/logic is not very beginner friendly. The whole subtance suite is more straightforward to learn, and you can start by an easy one (substance Stager) and move your way up onto more complex ones (3D will never really be 100% easy) and it will still retain the same logic. On the other hand Blender is more lightweight and also free.
thank u so much for help, now i know what to do. i was bit confused about 3d fake models.
Gave +1 Creative Carma to @vapid flume
See that one (it's for shoes but you can extrapolate) about making fake 3D in Photoshop
A word of caution, turn the music down 😅
https://www.youtube.com/watch?v=qipyQXvkTr4
It's just to give you an idea about what it involves
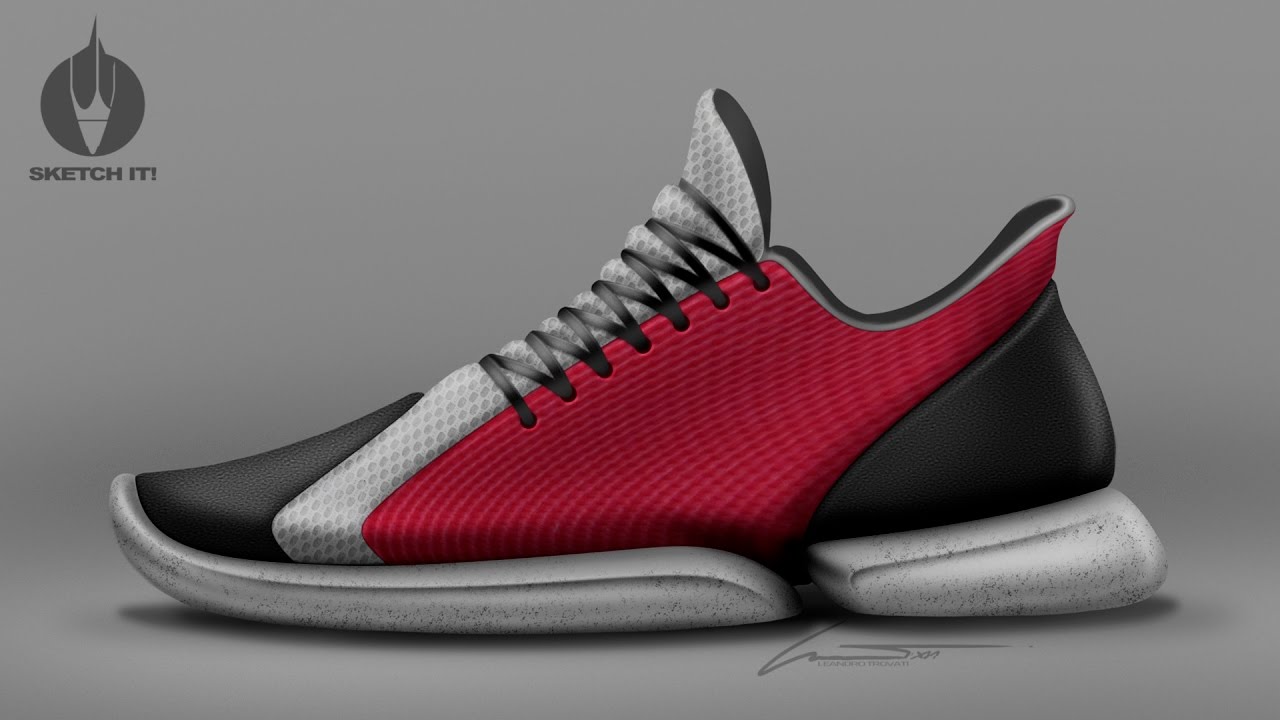
INFO ABOUT COURSES AND TUTORIALS
➥ https://beacons.ai/sketchit.br
INSTAGRAM
➥ https://www.instagram.com/sketchit.br/
Featured Hardware & Software :
• MacBookPro 15” Retina Display
• Wacom Cintiq13HD
• Adobe Photoshop ®
••••••••
Song: Jim Yosef - Speed [NCS Release]
Music provided by NoCopyrightSounds.
Video Link: https://youtu.be/lP6mK2-nLIk
...
yea it takes so much effort, as a rookie, the shades and the lights drawing looks kind of hard for me. i need to practice
Definitely, and already knowing how to draw with pencil and paper wouldn't hurt neither (so that's a no from me 🙂 )
No idea on how to do that?
Hi Momomo: I'm sure you can. You will need to use the same Brush Settings shown in the tutorial.

Just stop the tutorial as each setting is displayed/explained, grab a screen shot and recreate.
ive seen some videos recently on people using the new AI the expand their images. what tool should i use for that_
That's what I did, except that the dude behind the tutorial starts off with a brush I don't have
It's a basic one tho
I can't manage to find the brushes that display the inclinasion of my pen when using them
which is th best method for compress images for instagram feed.. and whatsupp status?🥲

i just want this text to be one image but
no matter what i do to merge those layers it breaks the hard mix thingy
this happens when i put something behind it


clipping mask
find an image you like

put ur mouse between the 2 layers
hold alt on your keyboard
and click
That would be the crop tool 🙂
How do you run Flash content?
Hello,
I have a problem.
When I use the eyedropper to copy a color and then use the fill, my pink doesn't look the same as what I copied with the eyedropper, the shade of pink comes out differently.
How could I photoship this to look as if it was taken from Iphone 11

Hi new to the photoshop could anybody help me to figure out if a picture is photoshoped
and if you can shoot me a dm
Make it look like it is tilting at in irregular angle
what??
How do you mean?
Like how amaterish people hold phones.
Blend if
If what? I hear you asking.
?
Kind of that classic "who's on first, what's on second" humor lol.
lol, ok. not everyone knows the classics. sorry. I'll get to the point.
blend if

Discover the Magic of Blend If in Photoshop! Learn how "Blend If" works and explore the amazing effects you can create with it. In this video, we'll dive deep into the mechanics of what "Blend If" controls and go through real-world applications, from masking to special effects, and even retouching. I hope this video helps you. Thank you so much ...

I want to use the overlay blend mode on a layer, but I want it to only affect luminance of the layers beneath, not saturation
how can I achieve this?
lol, the answer is so close it's almost biting you in the butt.
blend if what? I hear you asking.
ok the joke is getting old. 😒 I get it.
scroll up about 4 inches and click on the Piximperfect video.
sorry, I'm wondering if there's a way to do it with an actual blend mode
I'm actually trying to accomplish this in after effects
luma key
hi everyone im havening some trouble why is the gradient not exporting with the artwork?


The purple is gone and idk why
I don't know either. but that looks pretty badass.
thank you!
you should hit ctrl + 1 on your keyboard and lemme know if the purple is still there when the image is at 100% scale.
you're using a layer style to achieve the affect, which doesn't look accurate when it's a live effect. I have that problem all the time. a bevel will look perfect then I save as a png and it's all wrong.
how can i fix this
you'll have to look at your design at 100% for an accurate reflection of the final result. and scale your layer styles accordingly.
i was usein a threash hold and a gradient map
not sure how that's supposed to work. I'm using a grain layer that has dark and light grains overlaid on a gray bg. So typically overlay would work to brighten and darken the layers beneath where the grains are. But I'm exaggerating the grain with curves and it's messing with the saturation
okay upon experimenting, it looks like just using the soft light blend mode is actually what I needed.
It's hard to really nail these without the project being open in front of me. I usually have to give answers based on the information I get. which can be vague. glad you got where you wanted to be on your results though.
are you using layer styles or adjustment layers?
sry for the misunderstanding. I basically just wanted to know if there was a blend mode that did what overlay does but with only luminance, and it turns out that softlight is exactly that
the thres is a adjustment the graident is a layer style
I learned how each mode reacts before on a technical level but it was so in one ear and out the other lol. I usually do exactly what you did. I experiment and just trial and error it until I land where I wanna be or if I don't get the result I start looking at other options.
scale the design to 100%, and then right click on the layer style and scale it til it looks right.

sorry. said scale too many times about too many things. scale the image to 100%. then use "scale effects". once you make the design "fit to screen" again it will look like too much or too little. but render it out and you'll see the final result will be correct.


if ya shoot me the PSD I'll fix it and show ya what I did.
you can DM if ya don't want it public.
I'll tell ya now, that skull line work layer doesn't have any layer styles. that gradient is an adjustment layer not a layer style. that layer above those two with the drop shadow/outter glow/gradient, etc. THOSE are layer styles.
Oh my bad just started photoshop so it's all a bit confusing
allllll good. that's why I'm here.
Is there a way to transform the Gradient adjustment layer into a layer style?
I doubt that's even the problem to be honest.
What do you recommend to fix it
the thing is layer styles don't look accurate in a live view. unless you scale your design to 100%. the fact that you scaled it to 100% and the issue appeared is a tip off to me that layer styles in that project are definitely the culprit. so whatever layer styles, on whatever layer, is what needs fixed.
since you're still familiarizing yourself with the terminology on all this stuff, me telling you what to do to fix it like we're doing is just the blind leading the blind. I can't see your project, so I can't see the issue, and you can't see what I'm explaining. so the easiest solution for both of us is for you to send me that PSD, and then I can actually show you the problem with a video. and send it to you fixed.
usually aren't that big of files. literally just send it. like sending a picture. drop it in the DM and send. if it is too big you can use google drive and send a link or somethin.
just sent
Hey, quick question, doing a small project for fun, but I've been trying to make the gradient of the inner ringer on this coin match more so the rest of the coin but I've been having a rough time of it. Any quick solutions?

I'm not very well versed in flash, sorry
What were you using to animate?
Not going for animation here, just trying to have the inner ring gradient be lighter up top, darker on the bottom
I thought the lighting looked a bit realistic 😄
It looked like it was shining from the left like in real life.
Yeahhh
Though now I'm now sure if the gradient look is what I wanna go for
I'll get back to you in case I have more issues
so when i set the transform values of a layer it sets the position of the top left corner of that layer, how could i make it so that i set the position of the bottom right corner of the layer
for context im trying to get the date in the bottom right to be 250px away from the edge of the image

nvm i just used a rectangle to make a sort of margin tool
uncheck the reverse chekc box. will flip the colors on the gradient.
can you not export as an animated gif in Ps?
Yep. You can. Use File > Export > Save for Web... Choose GIF.
I did that but it isnt auto playing on behance
I'm not sure if Behance has some issue with GIFa files but I can check into it.
I'm glad you got it sorted out.
I see people have there screenshots look like this after doing Photoshop but I just don’t know how to get it to look like that


This what mine looks like

hello
if i install adobe creative with all softwares
and it was downloaded in drive c
if i want to shift it inot drive e or f
does the programs works
You can't just move them. You'd need to install them to the desired drive from the start.
what if i change the location after downloading ?
it work or not ?
After downloading what?
software
i accedently downloaded creative cloud 2018 set in drive c but i want it in drive e
what i do
hmmm
We're here to support legitimate Adobe software. Not applications that you've just "downloaded" from somewhere.
i donwloded adobe creative cloud
From where? Through your adobe.com account?
Not 2018 software.
yup
Then open up the Creative Cloud app. Uninstall the applications from the C drive. Then reinstall them to the other drive.
thanks i got m anwser
hello, could someone please help me with removing reflections? thats one of my main problems with photography
hey am looking for help i just got a canon r8, and it shows CR3 files and i cant use stuff like the ai denoise on it or some stuff on it. does anyone know how it works? on lightroom classic
those are raw files, you should be able to do whatever you want with the file, given you are on the latest version of the Lightroom that supports this camera
Sure
anyone found a resolution when Photoshop is stuck in video export rendering on "initializing video export"? Thank you!
can you share more details? what is your Ps version? what size is your canvas? how long the video is?
latest update of Photoshop. It doesn't matter the canvas. I start new file, with two frames, each few strokes and it gets stuck
and it never gets unstuck from there on.
It never happened this to me before. My laptop is with Nvidia GTX 2060


Omg, closing Bridge really does it! 🫢 But it's strange, isn't it? What Bridge has to do with PS?
thank you! ❤️ 😊
Both Ps and Br must be using some common space that gets clogged up when exporting a video in Ps...

kk
does anyone know how to recreate the splatter effect on the corners

i cant get my head aroun the brushtool
probably just a texture or a smoke brush. https://texturelabs.org/ has a lot of free textures
Texturelabs is an online resource for free, original textures and tutorials for art and design.
is there any trim tool that makes it like the image above
like you can see on the corners
theres cuts and cits
also is texturelabs compatible with adobe photoshop or is it for another adobe app
im using photoshop because the others r confusing
texturelabs is an independent website with a bunch of free images, specifically focused on textures.
to recreate this stone-ish effect, you can follow this tutorial https://www.youtube.com/watch?v=hwRwUeVoFTo

Create this cracked and weathered concrete stone text look with a few simple and versatile techniques in Adobe Photoshop. Free texture links and more listed below. Thanks for watching and please leave your comments or questions below!
FREE TEXTURES USED IN THIS TUTORIAL:
https://texturelabs.org/tutorials/3d-stone-concrete-text-effect/
MORE FRE...
the first 4 minutes explain the effect, the rest isn't as important for your image @frozen magnet
i assume the stonish effect
is the corners i was talking about
what about the thin lines
anything about that?
these?

aye
Ah I see
I would say, they drew regular lines using the line tool and overlayed a texture with a blending mode
do you have any recommendation from the texturelabs site
on the effects for the smoke
can I ask any advice on how to photoshop something?
https://texturelabs.org/?ct=744 probably here, download one you like, import it into Photoshop and set the blending mode to screen
Texturelabs is an online resource for free, original textures and tutorials for art and design.
you're in the right channel. what would you like to know?
thank you for the big help!
i hope im not too much of a bother seeing i might be asking here and there for more details ^^
Gave +1 Creative Carma to @plush stirrup
no worries! we're here to help 🙂

I assume the letter and the lines are on the same layer?
this is an image
so yeah
I see. You probably will have to repaint the stripes as the letter is baked into the image. My recommendation would be to either use the path tool and take your best guess at outlining the covered shapes or you can try copy-pasting the lines from above by rotating them 90°

these stripes are shorted and have a different shape :(
have already tried to do that
but thanks!
hm, I'm afraid you'll have to do some pen tool magic then :/
got it thank you very much!
using generative fill could give you a good starting point

ok thanks! will try
oh yeah quick question @plush stirrup
i pretty much got photoshop on a whim seeing i used paint.net back then but
do you know how to scroll in using the mouse or using ctrl
or is the zoom tool the only way
hold down the alt or opt key (windows vs mac) and scroll 🙂
yoo sick
thanks! karma >:)
Gave +1 Creative Carma to @plush stirrup

so far your guide works! @plush stirrup however this may be something photoshop can do i really dont know but,
is there any way for me to figure out a color that is subtle yet pop off?


i wish to get this kind of subtle on the bottom
its good to read a description but inherintly doesnt pop out
and fits the color
is there a photoshop feature to figure this out
like a color ai
somewhere here

https://color.adobe.com/ could help you here. You could add a new layer with that specific color and reduce the opacity. That way it would only tint the area
Hey, if I make my own Pikachu for a t-shirt design, would I get in trouble with Pokémon?
Yes. I would avoid using copyrighted and trademarked characters without permission.
Maybe not if you're just doing it for your own fun / educational purposes. But if you try to print the shirts and sell them... that's where you can land in legal trouble.
Is there any way sell without getting into trouble?
buy dem rights
Get a licensing agreement with the owners of the characters.
How would I do that?
basically send them an email, right?

Creating these mass quantities requires a licensing agreement with Nintendo, which authorizes you to use its intellectual property on behalf of the manufacturer. In exchange for using their IP, you can charge either a flat fee or a percentage of sales. Table of contents how do you get a pokemon license?what does pokemon license cost?is it legal ...
this might help
You'd have to contact the company and find out what sorts of licensing is available, if any. This will likely be difficult
I'll check it out & let you know.
oh wait
thats for the GAME
@cobalt glen correction
right now i believe nintendo owns it

Would it be better to work for a company that has a license for it?
in my opinion yeah, i dont have experience but from someone who knows a thing or two about selling stuff, if you can sell something that means you are a good marketing officer
especially if they keep coming back
thanks.
I can’t open this jpeg in photoshop because if a program error, and I have already tried everything the support page says to do to fix it and it still doesn’t work
Are we sure that the file is acutally a JPEG? Perhaps, it was saved with the wrong extension or the file name was changed accidentally. (?)
it is saved as a .jpg, it wasn’t my file originally
i also can’t preview it on my pc after downloaded
The file extension (.jpg) can be changed after the file was saved. Its also possible that the file was corrupted. If so, it would report an error attempting to load it.
how can i change it?
It's probably safe to assume that the file was saved as JPEG and that's the file type. Its possible the file was damaged or corrupted.
need some help. ive got this image, and ive gotten the subject (i think) now i want to make the car, which has been selected, as a new layer, so that i can put text between it and the backround. how do i do that?


The step after Select object is "CTRL+ J" to make it in new layer
does anyone know what kinda effect is on the background and the circles

what its caleld and how i can get that same effect
how do i get rid of this tiny end at the end of my strokes with a pen tablet

How could i recreate the lifeless look on the face of the guy?

on this image right here

Just uncheck Smoothing at the bottom of the brush settings panel, unchecking makes tip´more smoothly you might also consider fine tuning the presure sensibility of your pen in case you need the smoothing option
Enable those option in photoshop

Multiply or Overlay or Screen, in Blending option
This is complicated a little bit xd, u need to take a shot like the thumbnail, then remove the guy from the photo, and u need to add some texure and clarity in your face, and some black effect under ur eyes
ty
Gave +1 Creative Carma to @warm grove
no sharpening?
you can add what ever u want, no roles in thumbnail
I appreciate it, thank you for your input
You welcome ❤️
my installer is stuck at 48%
Hi @river otter See if this helps: https://helpx.adobe.com/download-install/kb/creative-cloud-install-stuck-advanced.html
I have a kind of a map of a hall and want to simplify it. I want to make the outlines ( simple walls in real life) with rectangles. My first question is: is there any chance of key that I can press to just rotate a rectangle? And my second question is: when I press on the shortcut in the left bar in Photoshop, every time I press this and draw a new rectangle, a new “object” appears. Can I make it that all my rectangles are one object above the general map of the hall?
Is there any way i can change where photoshop installs,
does anyone know a font which looks like this? thank you

Hi! I've been having an issue with Photoshop for some time now. Take a look for yourself sometimes when I move an object, it creates these large white squares that significantly obstruct visibility. I wanted to know if anyone else is experiencing the same issue. My Photoshop is up to date, and I had the same bug in previous versions.
LED pixel C Small Caps

It’s close
Looks like a hardware issue
Update your drivers
or try and reinstall photoshop
What version of Photoshop is this? Check, main menu: Help > GPU Compatibility... any errors or issues reported there?
How do I edit a silhouette of Santa and his reindeer in the sky?
Does anyone know how to add coloring onto an object like the picture on the right?


Hi @river otter Yes. You can change the install location in the CC Desktop app. Click your avatar > Preferences > Apps.

Hi @karmic falcon See if this helps: https://photoshopcafe.com/add-colored-highlights-in-photoshop-with-color-curves/

How to control color with Curves in Photoshop, easier and more powerful than you imagine
Hi @foggy saffron Have you ever used Photoshop before?
Thank you!!!
Gave +1 Creative Carma to @willow gale
how can i get this pink rectangle to clip over the text beneath it (only show the parts of the rectangle that is intersecting with the text)

i tried doing a clipping mask like this

but the rectangle disappears
I have text that I'd like to add a glowing red stroke behind, similar to these photos. How do I do this?
Nvm I got it 🙂
i needed to rasterize the layer styles for the layer i was clipping over :)
figured out a method using brush tool
How can I make sure that one image looks exactly the same as the other?
Duplicate shortcut is ctrl+j
Try gradient tool or create a vector shape and try gradient fill, will be easier to create or edit later
Yes those features can be incompatible, try selecting the text area (ctrl + left click on layer thumbnail) go to rectangle layer and create a mask holding alt next time for a non destructive alternative
hey, im trying to generativ fill the objects but dont know how to select my alpha layer

