#❓ask-a-question
1 messages · Page 13 of 1
yeah i guess im gonna try an older version of the drivers
because the new one isn't working for premiere or photoshop
could try this too


i'll leave it here lol but this also might help?

sorry i can't figure it out for you lmao
oh yeah that's right
about a version earlier than the newest one
sorry i haven't slept lmao, my brain isn't workin
hopefully that works
if it doesn't i've got no clue at all
Does anybody know solution for "no pixels selected"?
Hi! Am I able to request work from somebody here and pay them for it? I’m not sure if that is allowed here and where I would go for that
Hello. Any idea how I could reproduce this effect with text, please?

You'll need Adobe Illustrator from what I learn
The way i would do it, is get a font that's made to look handwritten, like this one, and use a seamless pattern like this as a filler. It's the closest i can think of using photoshop


Does anyone know how to wrap cursive text around a layer, like in this Teletubbies logo?

I was talking about the effect on the text. Not the pattern. I want to give my text the same look
Oh i'm sorry, i think you need illustrator then
Yeah, you can do that. - but I can't help at the moment 🙂
someone here that has a clothe brand??
I think it's a brush, but I have no idea how to mimic the style 😦
did anyone figure this out, yet?

the "no pixels selected" problem
anyone have solution for that?
Does anybody know how to solve the "no pixels selected"?
how?
oh, unless you already merged it.
Can you share your PSD here?
sure
I could perhaps try?
yeah. Wetransfer.com

Hello folks. When I change color of a shape in layer using the bucket tool, why does that shape change definition and lose its clarity?
Hi Paul. The paint bucket is intended for brand new users and doesn't offer a lot of control. There are other options that will deliver better results. Can you share a screen shot of the area you are trying to change?
Well, I am indeed a noob. Thank you. These stipes are 3 individual layers and I am trying to change their color without losing integrity in the shape.

OK. BRB.
Thank you so much
Give this a shot using a selection and a solid color layer.
That is so simple, I really appreciate it. It's amazing how much of PS is almost common sense, but while I am learning, my brain doesn't easily find it. LOL
Thanks again. 🙂
Well, wait... you did say three separate layers, didn't you? The file I opened was had the three stripes on layer and I forgot your opening sentence. Give me one more minute.
My bad, yes. I am working on a project and I seem to have a zillion layers.
That's on me. You said it, I just immediately forgot. The selection technique is a little different when you have multiple layers. Are you on Mac or Windows?
Windows
Ok, so same tool, different approach to the selection. Control Click the thumbnail for the first stripe, and then Control+Shift click the thumbnails for the two additional stripes. That selects all three, and the rest is the same. (Control clicking a thumbnail selects the pixels and ignores the transparency. Shift adds to the selection.)
I'm tired. And select the top stripe layer before clicking on the b/w cookie button so that the fill layer and mask appear at the top of all three.
Haha, I understand. Let me give this a whirl and I'll check back in.
I'll nap while I wait! 😉
Hot Dang! Worked like a charm.
woohoo!
Thank you BB.
Always happy to help, Paul. It was just a loooong day.
Hello, I need hlep with this picture. I'm trying to remove the child from this pic. No matter what I do, I'm having so much provblems. The remove tool and generative is adding an extra person there. The fill content isn't helping. What else can I do please?

Maybe with a stamp tool, piece by piece, tedious job 🤨
Try to mirror the right side of his body with the stamp tool
i've tried that. It's still ntoright
thanks it worked
Gave +1 Creative Carma to @willow gale

Does it look good?
Not really, you could still see that something was there
Yes a complex edit should be done to make it look perfect,

Now?

It's great wow
my quick version. very small size, not good quality
Thank you!
Gave +1 Creative Carma to @nocturne sphinx
I used lasso to copy the left side, some shadow adjustments, and copied some presents
Ya ya I got it
I need help for this Shift + Crtl + Alt + T where you can duplicate things and turns your text into 3d if you duplicate it like 50+
im having issues here since i can't do what this video tutorial do
In this tutorial you'll learn how to create a text effect based on the title treatment of the Superman comics in Photoshop. Likes and Comments appreciated. Thx for watching.
Purchase this and many more text-effects on GraphicElements:
https://cutt.ly/icn34Tu
Or check out the rest of my Portfolio:
https://bit.ly/3woau0y
Font Source:
SPARTAN MB...
How to lay an image to a perspective, or however it sounds, how to distort it but don't distort it?
Visual example will show the best, I am trying to create some triangle corridor like in image example, but when I distort, use vanishing point or perspective, it distorts floor/wall texture.


Can anyone help with this? I cant seem to properly put in the screenshot image in the 3d mockup. Been looking and trying for ages


Ngl that’s a awful mockup phone to even use lol


Thanks ! Can you explain, how you did this please ?
Gave +1 Creative Carma to @nocturne sphinx
Adding shadows
Adjusting hue and saturation
Adjusting colors according to the background
How can I add shadows ?


Yea it looks better, keep working on it
Hello, I am new to Photoshop so I don't really have the talent and capability to do this, but I wanted to ask if there's someone here who can make me a cool, professional profile picture for my YouTube channel. I can't really pay you. So am asking who can do it for free. Dm me.
@river otter Can you transfer your question to #💬chat-general ?
BTW it's a very legit question, so no worries here. It's just that's it's the channel for Photoshop technical questions and you may not get answers
Also, can you make it smaller? Too many spaces and the list takes up the whole screen. Don't make people think! Make it easy for people to answer 🙂
AS soon as you put it in the right channel I'll delete it here
One last thing, an explanation as to why you need this info might help people what they are answering to!
Got it
Excuse me
Not a problem !
Ok
It's a shame there isn't a poll feature here. Or maybe I missed it
I sent this to #💬chat-general
Perfect, thank you. The formatting is way better now 🙂
I've deleted it now, I'll answer to some soon in the right channel
and thank you too
I have answered!
there is a filter on snapchat which distorts the picture like this. there is any method to fix the picture? maybe another filter which restore the picture?

(there is a lens in the middle and this distorts the image)
like this
Maybe liquify (filter> liquify)
https://helpx.adobe.com/uk/photoshop/using/liquify-filter.html
spherize filter is what it basically is but in Ps you cannot control its curve or center point. Still, I'd have a try
hey guys i want to remove the red color just that so i can print the white part to a shirt
is this possible?

you can use the wand tool, color range masking, blend ifs... there is a number of methods

In this tutorial, we’ll check out a nice little timesaver for converting black and white to black and transparent, white and transparent, or a solid color and transparent. In just 4 steps, this approach will even preserve the parts of your image that might be off the edges of the canvas. Works great for creating keyable logos, textures for knock...
yeah but the wand always makes a bad job lol
\

lol thanks
its prety good
can i like change red to white?
to have a white text on a white background?
follow the tutorial I linked above
thanks man i got it
I guess using the colour range tool in Photoshop is the best
Yeah, it's nice and simple...

I mean.... I can't read it so don't understand the context... but... yeah, cool.
Yea it looks cool

How can I add waves ?

No hope for me eh?
Is anyone down to edit a photo for me I’ll pay them?
Where can i get generative fill option in photoshop 2023
@onyx swallow what kind of photo it is can you please DM me
Please post this sort of thing in #💬chat-general. Briefly describe the project. If someone is interested in working on it, they will probably reach out to you.
Window > Contextual Task Bar... then make a selection. Generative Fill should be an option there.
Sorry. I'm not really sure what you're asking here.
is this the right place to ask for help or in chat general?
basically, i'm trying to change the colors of the crystals/bars in real time without getting rid of the dark grey section
Explain "in realtime"
like an overlay for a stream
For questions regarding how to do something in Photoshop, then this is the channel. If you're asking for somene to create something for you, then in #💬chat-general as I described above.
But you're trying to animate something in real-time while the stream is running?
not so much animation, the animation is done in game, i'm just trying to change the color of it (i was thinking hue? but not sure if that would work)

You can use an Adjustment Layer > Hue/Saturation (maybe with the Colorize option) to shift the color of something.
okay okay
That reply was to the other person.
You can make a copy of the face, put it above the main image and then blur it. Soften the edges, probably.
gotcha, thanks, wasn't sure if that would work for a stream overlay type ordeal
Gave +1 Creative Carma to @ripe quest
I'm still not sure what you mean. Photoshop makes bitmaps. Its not going to operate in realtime. Like sending commands to it to update an image. Sorry. I'm genuinely confused as to what you're attempting to do here.
can anyone tell me how to separate all colors of one picture please
Hey, Im a Professional Styrofoam Cutter. I have used many many platforms to make files to get cut. Right now I use Adobe Illustrator to make files. I have heard that Photoshop works more efficiently. Should I stick with Illustrator or switch to Photoshop?
Can anyone help me? I REALLY need to see whats under the black shadow!!!
I was only able to do the one below ---> ! §4r§6a§ein§ab§bo§1w§7-§8pack.zip/file
ASAP

It depends on the file types you require. Photoshop was designed for the creation and editing of raster graphics. Illustrator for vector graphics.
I work with mostly eps files.
While you can try to use a Levels adjustment on it, it will probably still be mostly illegible.
Are you doing vector graphics primarily then?
If so, stick with Illustrator.
ight thanks!
Not possible
what do you think photoshop is? magic?
the text is literally blocked there is no way to delete it because there's no data behind the black lines
anyone know how to edit a face to look like that

If I was desperate I'd try AI lol. But I doubt I'd get much results.
Doesn't work because there is no data there its just black pixels
most AI could do is come up with its own letters
exactly what I had in mind - guessing
by the way
I have a question of my own
See the artifacts between the roof and the sky? Any tips how can I remove that?

this image was originally a jpg, that I put in Lightroom, and then Photoshop
You really can't see the problem unless you zoom in on the image. And unfortunately, that's exactly what I'm doing in video editing.
yeah, either blur.... or replace the sky
EDIT: I could have skipped the 1st step by just going to SELECT > SKY 🙂
Hi everybody, I would be very thankful if
some of you could help me, I've tried to
find a way to do it myself, maybe with AI,
but haven't found anything useful in days.
How to change the magazine the kid is
reading from the LEGO one to PlayBoy?


im a beginner but i think just warping and cropping it
on the magazine
I tried but I'm not good at it and anyway it
is not that easy, there is more to consider.
like lighting and stuff i get it
you DO NOT NEED AI TO DO SOMETHING THIS SIMPLE
aint gon lie u could jus tell him how its done
I was but I got off track
I was going to recommend a youtube video I have saved and I forgot
How do I save a grayscale photo to 16bits of depth ? Mine are always 8 bit :/ It's for UE5
How to warp anything easily with help of distort tool in photoshop 2022
#bennyproductions
#graphicdesign
#photoshop
#piximperfect
#editor
CALM DOWN! NO ONE IS THREATENING YOU!
Yea true sorry lol
Yes, I have already seen it, but it's not enough.
just warp it
Do you have any short memory issues? 😐
kay bru just trynna help u, thought u meant it didnt fit perfectly size wise, u can use camera raw filter too and play with the exposure and colors and stuff
I just made a simple square all I wanna do is to change the color of the square with a short cut, select the object (square) and change the color how do I do this?
why is ps one of the worst apps ever
bro u find anything better ngl
You can do it with some careful Transform > Warp operations and a Harmonization filter. This is just a quick attempt.

You just make a square shape and assign a color to it. Its pretty simple.
And Photoshop is an industry standard for bitmap editing. Perhaps, just take some time and learn how to use it.
Thanks for an actual answer... But my
problem is that I am such a newbie that
now I've got more questions than before.
How do you put it under the kid's fingers?
Could it also be done for the back cover?
Can you do it on a smartphone or tablet?
Gave +1 Creative Carma to @ripe quest
You use a layer mask to hide the areas where the fingers are.
You can do the same thing with the back cover.
You would do this using the desktop version of Photoshop.
This looks like a thorough answer to me...
I was hoping to do it with an AI because it
seemed the kind of transformation it can
be trained to do and I wouldn't be able to
do it by myself;would you be so kind to do
it for me with the 3 real images this time?


"A.I." is not going to composite the Playboy cover automatically. No. It cannot be trained to do that.
I cannot do this for you. Sorry. I'm busy doing something else right now.
Thanks for your help anyway... And if you
can't do it with ML today, you will be able
tomorrow: the harmonization is already
done with a neural filter for example, so...


on the rectangle tool. why is the handle for rounded corners missing ?


It was there yesterday
is it a live shape or a shape path? does the handle appear when you select the shape tool?  can you control the corner radius in the properties panel?
Vanguard CF, font by Connary Fagen Type Design. Vanguard CF can be purchased as a desktop and a web font.
i figured it out. its some weird ass bug. After i flipped the fill to a color and back to no fill the handles appeared again

This is the sort of approach you'd follow.... maybe with more effort spent on doing the fingers....
@sly hawk how would you do it in this
case where there is a light shadow and
it's a bit out of focus? Can you help me?
@reef eagle You got a super comprehensive video here
https://www.youtube.com/watch?v=g3qe4rDw1XU

Learn how to create composite images and explore photo manipulation in Photoshop by using these 10 steps that will get you on track creating great composites of your own! We will cover lighting, color, shadows, perspective, and much, much more in this Photoshop tutorial.
Get a free 7-day trial for Envato Elements here: https://1.envato.market/...
yes it's a bit long but you can't really do something natural in 3 clicks, so it's worth learning how to do it properly. It's a beginner's guide, so you won't feel overwhelmed, I can guarantee it :). You just need to keep at it
you can use a clipped soft light layer to create shadows and highlights. controlling the focus is basically blurring the mask, the smudge tool  is great for it
Hi, is there anyone kind enough to erase everything but "Super Quarter" and put it into a PNG? Thanks

Ask in #💬chat-general You'll have more luck there. Here's the channel to ask technical questions about Photoshop... Thanks!
Gave +1 Creative Carma to @oblique canyon
Yeah. Since you were polite enough to include a please/thanks! 🙂

Anyone know the best way to blend whats highlghted with the greyish background?

just clone a bit from above/below 🙂
Doesn't blend well
For a quick go, I would simply blur it. It won't be perfect. Just select along the edge, make sure you set a high enough feather in your selection boundaries (see top menu)
and then apply a blur
Could be box blur or gaussian blur


But a clone with very low opacity and flow will give you more accurate results, it just doesn't happen in one stroke, you need to carefully go over multiple times by layering clone stamps strokes
So basically as @sly hawk said!
you can also make the most of the rotation settings in the clone stamp tool....
I had prepared that but you beat me to it 🙂

I like your handwriting...
if it's all about blending the colors together, the regular healing brush tool  is really good at it. just make sure you are sampling a solid color area and the tool will do the rest for you. I have my diffusion set to 7

My attempt on a mouse:

Thank God (the DJ, and this is my church!) I have a tablet
Gave +1 Creative Carma to @sly hawk
Where do I find the regular healing brush tool?
(P.S. - That's my current work diary for next week)
If your tool is acting up, sometime you can reset it
Click on the left arrow here

and click on the cog that comes after and "reset tool"

I dont have that tool in general
can you please screenshot your toolbar?


Can someone help me out? I'm trying to change the purple in this picture to white/gray while keeping the underlying shading there. (1st pic)
I've tried using the lasso tool+a hue layer to change it, but I get wonky results (2nd pic)
Is there a cleaner way to go about this?


the shading is still there, but it doesnt match the rest of the image. I'm trying to make it look like there was no purple there to begin with.
You could try to replace the hue saturation by a simple solid colour grey, but set it to overlay blending mode (or multiply if you just have darker colours to appear). Use the mask you've done for the H/S for the solid colour
just drag and drop the mask from one layer to the other
Actually I would leave a H/S layer but with just the saturation at 0%. I miscalculated that 🙂 You need to get rid of the colour, and then the solid color layer will give you the shading

like this?

Maybe it's better if we see what's in your Hue/Saturation settings

Yes, I think it's better but it still needs to be perfectly grey
In that case I suspect your masks aren't 100% black and white. It looks like there's still a bit of purple in there. How were the masks created?
I think youre right, I made this mask by using the select>color replacement tool, chose the purople the covered the most area and then made a hue/saturation layer
Just try this quick thing: select the mask (not the layer) and go to layer>adjustment>levels
once there increase the contrast like this

Sorry Image>adjustment>levels (not layer)
it will remove the grey parts of your mask
and only keep it Black, or white
like this?


it's a temp data that wasn't automatically deleted for some reason. you can safely delete it
See this thread it will help!
https://community.adobe.com/t5/photoshop-ecosystem-discussions/photoshop-temp-files/td-p/10457033
https://community.adobe.com
Not sure how to exactly articulate what I am trying to say. I will try to explain it in the best way possible to help you! Does photo shop store files like premier pro would store "media cache" files? (Temp Project files) and do these files impact the hard drive in a big way? Can you also set a loca...
Gave +1 Creative Carma to @serene coral

Anyone have advice on how i can balance all the colors and such
so it looks less messy
Using a mask sounds like a slightly over-complicated way if you simply want to edit the purple...
I think thats what I may end up doing at this point
but initially i was trying to remove the purple and keep the shading to make this skin look entirely white
just so that i can use it as a base for future projects on it
You don't want it ENTIRELY white do you?
well not entirely white, but not purple haha
like the 2 spots in the center, theyre going to contrain what skins i can make cause i'll always have to have those spots there
i was look to remove them seamlessly
Here's the way to make them look MORE white.,..
but you can remove them completely if you wanted....
omg that looks so much better!
how would i go about doing that?
i am flabbergasted
im gonna try that the second i get home, that is literally perfect
Lovely!
Here's your bear pic... in the meantime...

You can use this to change the colour of the bear too... It's a bit more faffy. - You can see me playing around with the sliders
@thorny patio
omg thank you so much!
Gave +1 Creative Carma to @sly hawk
can i do the same thing to the purple above the eyes?
oh i meant is there a way to remove the purple from the eyes entirely, like the ears were done
i tried but this was my result

i guess the fill assumes theres black between the eye and brow
Yeah, like you probably did it...
i think it came out decently enough

once i start shading it all the red/blues/golds it should be unnoticeable
Someone would have a lightning brush ?
Hello everyone i need little help, i downloaded a mockup that i wanna use but i couldn't edit it says (Could not edit original object because the layer is locked)
i did rasterize layer but still i cannot edit it cause still locked i wanna just modify the mockup then i press CTRL S to applicate it
Thanks ! Is the file safe ?
Gave +1 Creative Carma to @nocturne sphinx
I think the biggest critique I have is that everything feels like it's leaning to the left too much, so I feel that puts off the balance. Whether you could somehow get a better angle of GLaDOS and the portal device, that might make all the difference. The portals aren't really adding anything to the image, given they aren't going anywhere. Potentially the earlier part of the game is not a good view for the thumbnail, and you'd be better off choosing a different part of the game with a better composition?

U can maybe just draw red on the portions with a paint brush?
does anyone know what I did? All my tools are gone lol

Couldn't find anything on google
that will ruin the brush effect
Maybe u can use this function? if u select the layer and select color range and then pick the red. Not sure if it'll work but it's worth a shot

it worked a treat
Had to press TAB in case someone else is looking for the issue
thanks dude
Good advice, Honestly i was trying to keep everything to the left so the Text section was left easy to see and popped out, i even took the screenshot while trying to keep glados to the left lol
The portals are there to make it look less like a random screenshot from the game
And i used this specific part of the game because it's meant to show Glados at large scale next to you in VR, Couldn't think of any more interesting places throughout portal 2 where a screenshot would look interesting honestly
Here's the thumbnail without the potals @loud moat

More than safe
How to do a fade ?
Use a gradient on a Layer Mask. See: https://discord.com/channels/547473772727238676/1045711257178738760
I do it and nothing happen
Describe "it"
Can I call you ?
Negative
When I click nothing happn
Watch the tutorial in that thread and learn how to use Layer Masks.
Thx
I'd probably take a look and see what competition you're up against on YouTube - text on a game screenshot doesn't really cut it for VR content, a lot of times it shows the player in the game world, or shows a headset.
this is showing the player in the game world lol
its a flatscreen game ported to VR so it obviously just looks like a PC screenshot
Not answer my question
You can use a Layer Mask to hide portions of a layer. When you paint a white to black gradient on the mask, you can create a fade.
For YouTube you should be taking inspiration from other videos. Your thumbnail does not stand out in the crowd of alternative videos

I'm already getting above average CTR with this style of thumbnail..
that's not the issue
i already know the formula works, i'm asking for advice on the actual overall image
you've already given me advice so thanks
i'll move stuff around
it doesnt work
Use a gradient on a Layer Mask to make an object fade from opaque to transparent.
sorry it's not like the thing i want

like that dude
It's the same technique.
Can you do it for me plz ?
No.
Why ?
Because it's your homework. The idea is that you learn how to do it. Not have someone do it for you.
Not to step on D Humann's toes or anything, but another way you can do it is to use a clipping mask - create a rectangle on the left hand side of the screen, blur it to get the feathered edge, put the layer you want on the left above it and the layer you want on the right below it, and then alt + click between the layers.
What is the problem? look at the video, open your two Images in one PS File, adding a Layer Mask, clicking on the just made mask, paint a Gradient from black-to-white (maybe adjust it as you like) and you are done. Its all in the video BUT you have to do it for your own and also learn how to do it for yourself.
There's always multiple ways to achieve what you want. It's definitely worth exploring how to do both techniques anyhow. Just thought I'd add another technique if you are really stuck with how to do it.
Can someone make this table look plain for me please instead of having all of the dishes and stuff please

anybody know what filter?

how to do the shadow like in the 2nd pic
I dont get it. my try is the first one


the more i increase the distance, the different it looks. somehow the area in between has to be filled in

look up "Photoshop long shadow". There is no direct method to do this but you'll find some workarounds, including this one: https://youtu.be/z-65Pb3K5lc
Ever get hit by a bolt of lightning and realize there's a better way to do something you've done a million times!? Love it when that happens. In this video, we'll check out a completely different way to create short and long cast shadows in Photoshop. With an approach that finally gives you the ability to experiment, it opens up the doors to all...
could it be a horizontal blur at screen blending mode?
you could try using Generative Fill but that's a lot of stuff to remove here
Thank you so much!
I didn't even know how I should have googled that xD
Gave +1 Creative Carma to @serene coral
hi guys, may any gentleman help me with a very simple thing that im for some reason struggling to do? thanks
hi i need a help with something. I created a logo in illustrator then added 3d effect from photoshop. now I want that effect to be created in illustrator no phtoshop. is that possible? is so please let me know also if there is any shortcut to it. RIGHT ONE IS PHOTOSHOP ONE , LEFT ONE I CREATED IN ILLUSTRATOR. now client wants that effect to be done in illustrator single file not in photoshop. Thank you!


how to draw on non-transparent objects
sure, feel free to ask any Photoshop related questions here!
And it was very hard to just blend two of logos in Illustrator for the wannabe 3d effect?
Or use isometric 3d.
Illustrator has much more 3D features and there is a ton of tutorials on it on YouTube! https://youtu.be/K1eGDB8thcQ

In Adobe Illustrator, creating 3D text involves using the "Extrude & Bevel" effect to give flat text depth and dimension. First, type out your desired text using the Type tool. Then, select the text and apply the "Effect" menu, navigate to "3D" and choose "Extrude & Bevel" to customize the depth, angle, and shading options to achieve the desired...
can you elaborate on your question? do you have any examples or screenshots?
Save as copy as eps if you want it the way you are doing it.
what are you referring to?
To use PS thing in Illustrator.
You owe me $10.


Thank you for the image, but what I actually meant is that the "Super Quarter" text is by itself and transparent. Just without the background colours. Sorry about that but I will use your image as I do see its convenience. Thank you.
Gave +1 Creative Carma to @sly hawk
how can i know the size of my canvas
hi, how can i make joaquin have his hands on the zipper?

Main menu: Image > Canvas Size
Good luck lol
is there a dictionary-like thing where I can find what different effects mean?

Thank you!
Hi Katrina: That's the "dictionary-like thing" but this video will likely be way more useful: https://photoshoptrainingchannel.com/blending-modes-explained/
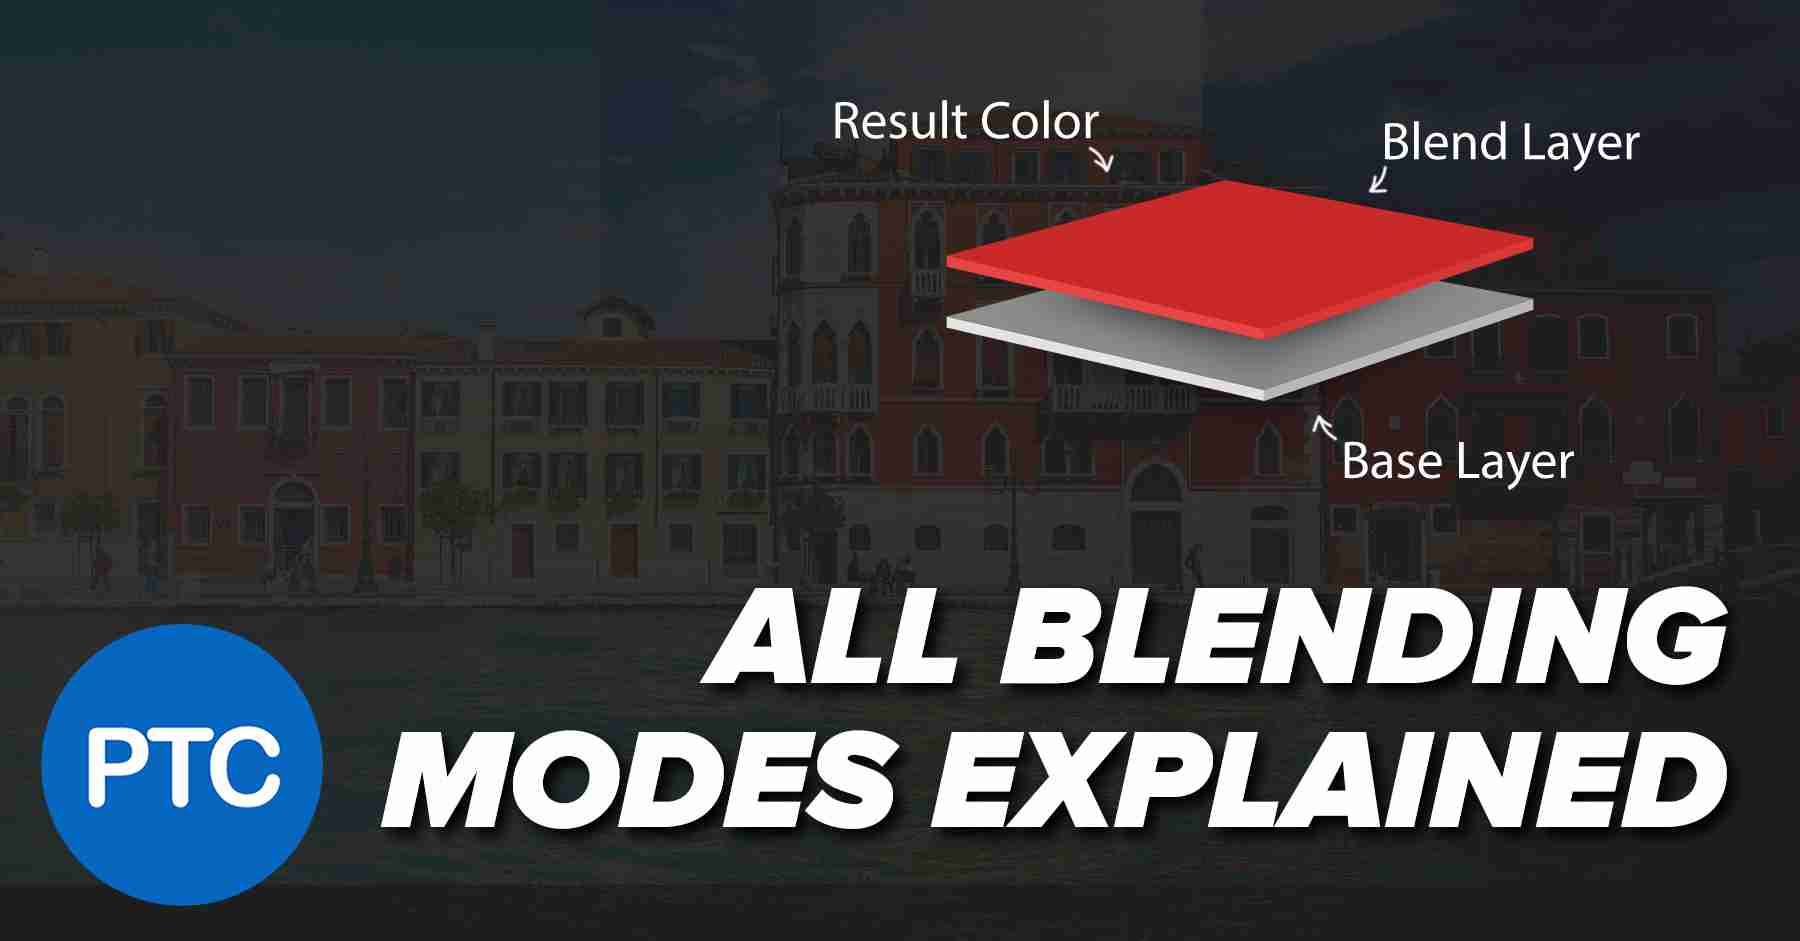
In-depth explanation of how Blending Moes work. No more scrolling through all of them to find the right one!
As a visual learner, when I was learning blend modes, I just kept playing with them until I could see what they were doing. The descriptions weren't as helpful as I would have liked them to be.
Oh I see. No problem. Can fix when back online tomorrow
Cheers mate, appreciate it.
I did think about replacing the entire table surface but came to the conclusion that they might have specifically wanted it to look like the original table.... Good work though! Nice lighting!
hey really really random but can someone make something for me in photoshop? i tried multitimes but im way to ass for that at the moment. And my deadline is tomorrow
Need help resetting my crop box outline. I stretched the canvas in order to make a white boarder but now want the original ratio and it wont go back unless i manually grab the corners and drag them in. There has to be a more precise way can anyone help me

is it possible to rotate objects along a oval
so for example the little like wisps i want to rotate along that

Can you explain a little more about what you are trying to do?
do have channel for Dreamweaver ? how can i find hat channel ?
the answer on it's face is no. but there's a million ways to approach these things. everything is possible. is there a button or a switch that you missed in photoshop, the rotate oval button? no. would it be possible to make the rim of your little 8-bit portal rotate? absolutely. probably a dozen different ways to pull it off.
what do i need to do to fix his arm?

image menu at the top has a canvas size window where you can be as precise as your heart desires. also, a couple bonus tips. hold down alt when cropping to scale from the center, and alt+shift to constrain the ratio. or just look for the crop settings dropdown at the top of the screen when crop is active, change it to ratio and type in what you want it to be.
another fun fact. all the places in adobe software where you punch in numbers. they can do math! next time you need something to be half the size and the resolution is 1920x1080. don't break out a calculator. just type in "1920/2" and "1080/2" into your settings and it will divide your number by 2. when you hit enter the 1920/2 will instantly turn into a 960 and your 1080/2 will turn into 540. It can also multiply.. so if you need something exactly twice as big. 1920*2 etc.


clone stamp tool. smudge tool would probably work. paint brush. because of the animation style you really can't go wrong with most options. grab a tool that pushes pixels around and push 'em where ya want 'em to go. if they're the wrong color, grab a brush and make 'em the right color. I know the answer sounds over simplified, but sometimes the best approach is the simplest one. and that animation style is pretty forgiving to manipulation.
Real time. took 1 minute. smudge tool. brush tool. easy peezy
ohh you caught something i didnt llol i was talking ab his other arm it looks funny to me for some reason
haha, I wasn't even paying attention. try and find some reference photos of someone with that body type standing at that angle. bet if you google GTA, or probably the fast and the furious you'll find plenty of good reference photos. then you can use that to help you do the correct shaping. even onion skin it over your image. then you can do the same thing I just did, and just form the contour correctly. I'd even say use liquify too, but I don't know off hand if you can onion skin in liquify. I'm sure you can but I'm just feeling lazy and don't wanna look right now lol
Can someone help me remove my mom from a picture
I need it for school if you can please dm me
TY!!
If I find out that has something to do with a nasty divorce I'm going to be very upset. I normally wouldn't be willing to photoshop moms out of photos. but sigggghhhhhh, since it's for school. I suppose. 😑
No hahaha its for graduation and i dont have any other normal pictures right now hahahah
Love to moms
normal pictures. good sir, it's nearly 2024. there's a camera on your phone. brush your hair, turn on some lights. and have your mom snap a picture for you. she'll be behind the camera that way.
lol. I take it that's you in my inbox. alrighty, let's git r done I guess.
Everyone say hello to @low sundial's mom. Let her know she's a lovely lady and didn't deserve to be photoshopped out of existence.


and before you give me a hard time. yes I had permission to share. he's a pretty chill guy.
If the AI made your face look like...not your face. lemme know, I can just let the photo be blurry like it was. my robot friend did what he could though.
I know you weren't about to just download that off discord smh. this is why your photos be look like they were shot on potato.
https://drive.google.com/file/d/1OnS9xnYRpk_cPrzWRHdBeFlr1jcVCpm-/view?usp=sharing
take that and run along youngin. good luck in college.
Google Docs
❤️
tough break to the guy who's shirt you stole. guess he walkin home naked. (that was Dani0's joke not mine 😂) alright. I'm outta here. night night.

Anyone want to be get there photo edited dm me paid!!
Just post it in #💬chat-general as this is the channel for Photoshop technical questions here
Also remember that we do not have a job board here, so everything you do and that involved money, is at your own disk, for both parties!
Hello, since a recent update the generative fill button has been gone and I can't find it anywhere...
You'll get it in "Window" > contextual task bar

Otherwise you can access it manaully in edit> generative fill as well (it will not be within the task bar)
I still have that bar, generative fill just disappeared from it
it's replaced

You need to select something first, is that what you've done?
yup
OH OK, sorry
hahaha all good :)

I don't know here. But are you connected to the internet (in case you are typing this from another computer of course)
Wich version do you have?
I am, I just updated to the newest update v25.2
it's been like this for a minute now and I need it now
Do brushes affect PS performance?
I have really huge number.
As I search for good ones, I am not unloading useless or they come in package so I wonder of they affect the overal performance?
I think I just figured it out, thanks a lot!
Yes, they're part of presets and those are generally the thing that affects how long it takes PS to open. As it needs to load all presets before starting
I am not sure if it really affects the perfeormance when you're not using those brushes, but at start up it certainly does
I have loads, but for me my main culprit are patterns, due to the work I do. I have loads, and some are very large. I tend to keep them at minimum, and back them up when not needed anymore
What was it?
I had 2 versions installed, I was opening the old one
Oh OK, makes sense! Glad you sorted it!
thank you!!!
Ty.
Can we export brushes we like and form some own bigger brushes pack file?
I would take some days just to do that. Easier for me, easier for PS. 🤷♂️
Should do the same with Fonts too.
🙄 No wonder my PS take long to load.
Yes, I also find it useful to organise them in folders
For example here are mine
the 1- personal are a mix of ones I created + some from kyle Webster packs all folded into one folder + I have some folder for specialised uses

If I want a clean standrad brush (eg: for masking) I can find it in my "general brushes" folder
But whatever feel organised for you
I found that synced fonts (from Adobe Fonts) not so so much, but loading fonts that are installed in full certainly does. Guilty as charged, I keep buyinbg fonts on a regular basis 🙂
There were- a long time ago - proper fonts managing software. I used Nexus fonts for its ability to view even uninstalled fonts and the possibility to install them on the fly (so you just have your core set installed, and you can add/remove as needed) but It was a bit cumbersome.
You have that for adobe synced fonts in the font manager, but it obvioulsy doesn't work with external fonts.
I wish there could be something integrated within Adobe, but beside Adobe fonts, Typefaces are not something that Adobe is heavily invested with (as in no Font designer and no proper font manager)
Hello, I have a question. Could someone improve this image for me? To make it look like a Marvel poster. I'm asking about free work. / I will send the elements if someone decides to do so

Please ask in #💬chat-general as it's the Photoshop technical channel here
Has anyone noticed that this takes WAAAAY longer than it used to?

Hi
@wanton nimbus same thing I stated here still applies 🙂 #❓ask-a-question message
It's been ages I haven't used the generative fill 🙂
But I have noticed some syncing issues on other Adobe stuff (for example Adobe Express). Nothing sinister, just long waits
I relased I didn't answer that question and the answer is yes
Select multiple brushes by SHIFT+Click and choose "export selected brushes" in the hambuger menu of your brushes panel. Rename the resulting .abr file so it makes sense...

@sly hawk Apparently you're not alone
https://community.adobe.com/t5/photoshop-beta-discussions/generative-fill-very-slow/m-p/14275810#M12900
https://community.adobe.com
Adobe has told me that they will monitor. It has been 2 weeks, so I guess it's their way of saying "sorry you are on your own".
Maybe it's because it's the beginning of the roll out of the generative credits?
Thanks - I have at least 20 images where I need to remove some floor graphics. This slowdown will turn this from a 30 minute job to potentially all day:

Gave +1 Creative Carma to @vapid flume
perhaps - but it struggled to match the gradient/blur as the image went back. - also this was a simple example here.
I wonder if gen credits can be 'per company' instead per user.
I for example pay for 12 full creative cloud licences for myself and my colleagues. Not 1.
It's per user, within the company. You can't transfer them
However, I imagine only 3 of us (at most) would likely use the credits
At least, last I heard, I'll check that
oh... so many wasted credits! by my 'artworker' colleagues who open up photoshop once every 2 months!

Thanks
Nick their account credentials 🙂
*I couldn't possibly promote that sort of activity! * 😉
what would be the easiest way
How can i get this kind of effect?

The base effect is an halftone effect. But before applying the haftone, the text have probably been distorted and then blurred, so there could be a bit of trail and error
In filter>sketch> halftone pattern (can be also found in the Filter gallery at the top)

be sure to set your background and foregroud colours accordingly as it's taking its cues from the default colours there

I guess this effect for the Tate gallery has been done with illustrator though (the result would be vector) the PS result will be a raster image
Do you know how it would be possible through illus.
The best bet is to ask in the #illustrator server, they will give you a more precise answer... it's also probably best you show them the image you want to start from and the end goal (a logo, or something else)
https://discord.gg/2WxMHBdg
Ok thank you
you could separate the rim from the rest, convert it to a smart object so it doesn't take damage when being altered, then scale it horizontally to be a perfect circle, rotate it, then scale it back to an oval.
sorry for the rattled off response. it's just late and I'm a bit tired.
I thought that, but I don't think the effect would work well without a lot of time and effort put into it.
can someone make this look better? i have 20 mins left

i just have no idea on how to make it blend better
I have the psd for it
For a quick edit, you can change the buildings in the bakcground to some asset that has the same style as the subject and the street he's on. Even though there is Atomepheric Perspective, the buildings still look very flat when compared to the other elements.
Damn see ion even notice that my creativity sure is bad ahah. Think yiu can help me out ?
I can't edit for you, but you can post your results in #📝project-feedback so I can guide you
Okay perfect thank you
how can I change the blue light into purple?

gen fill works OK but it changes the headlight stand thing (and this is def not something that gen fill should be used for)
Hue/Sat might help https://www.youtube.com/watch?v=YEY4RID2dlc

Adjusting a small range of colors is helpful when you have to match colors between images, or if you just like a photo but want it to match a specific color palette.
Doing this used to require complex selections, but it can now be easily done using nothing but basic selections and a hue/saturation adjustment layer.
This video will teach you ho...
how would I go about creating something similar to this?

Hello, I’m new on the server, and a master illustrator at photoshop,, I been having a weird problem with photoshop, so when I’m drawing and using the selection tool plus the moving tool, with the wacom controls or some times with my pc keyboard, photoshop stop working, like it freeze itself. I sometimes fear that this happen while Imm doing something important, bcause I could loose art works, homework’s from my art classes etc. My pc is a very good pc so, probably is not my pc.
nice, thanks!
Gave +1 Creative Carma to @wind narwhal
Super easy, first put the image on a canvas, depending on the canvas resolution that you desire, choose it, then go to filters, then to blur, after that there’s a bunch of blur options, I recommend motion blur, but any could do the same exact work. There’s a few options there when you choose one, with the little circle you can choose the direction of the blur, also the amount of blur you want and where. After you are done, click ok to save, or control+s to save your work
ok than you, but how would I create the color splashes?
There’s several ways to do it, with that video you could, but know this, hue= varietion pf color, Saturation= the sharpnest of a color, Lightness=the brightnest of a color. With Ctrl+ U or B. You could change the colors. Well with the B option you could mix color and make new ones but I recommend F2, with F2 you can choose where you want the color and what kind of color or temperature you want on a specific part of a drawing, picture or anything you want.
Oh, well, for that you will need a brush, choose a brush on the settings, on brush settings, I recommend the air brush with opacity, before that click on color picker, choose a black midnight color, that would be a blue-black, mid black, not dark. And then choose the colors you want and draw, then do what I told you with the blur option or. More easy you can
Hello guys I need your help, I don't know what I did but just see the menu when I rightclick on layers is completly different. I tried reset preference but it didn't change anything

Do that, and instead of the blur option, make a copy of it, with ctrl+J, then on the original copy, go to filters, on the option bar, go to render, click sharpen, then go to the copy photo, and then click blur, motion blur on filters again and after that, go to the copy you made earlier, and then click mask, after that, choose the brush and with the brush you can blur any specific part you want on the image, and with the erase you can undo it.
I believe this way achieves more easily what you want
If reset didn’t work, then reinstall photoshop?
To avoid this, next time, save a copy of the controls, option you made.
hello . I want a free website to draw die cut to boxes . like this pls 🥺

I don’t think believe that is made by a website, but manually. But you will need to know the inside of the box and how to draw it.
I mean, maybe there could be some website who do it, like an ai one but, I don’t know it, sorry 😞
I'll ask later maybe someone know how to fix it
There are actually free sites. I can draw it but I have 100 boxes 🥹
@everyone some help pls
hey guys which is a better program to use DaVinci resolve or Premiere Pro
Oh wait, I read bad, my apologies, yea, there’s one called pix something, if you put on google you could find it
But the interface is different to the photoshop one, if you can’t find it, go on YouTube and put, free editing program like photoshop or free drawing editor, it should appear, and that’s all I know about it
Link please
I never used those programs, except photoshop
Ok, no problem
Is there any history on photoshop to see the changes that have been made in preferences ?
I don't understand where i clicked drive me crazy
Create it in Illustrator 🥹 
There’s a history panel, but I don’t know if could work for that, go to the panel option, then go to the last option, I don’t remember how is called, and search history panel and that’s it, you will see it on your panel option, left part on your screen
Sorry, I only know about photoshop, and procreate and a bit of Corel Painter 2023
No problem . Thank you for answering me
Gave +1 Creative Carma to @warm forge
But now I have a doubt hahaha Am I getting crazy because too much hours editing and the scrolling menu didn't change at all ? 🥲

Pixlr.com - Creative AI suite
Get creative with Pixlr’s online photo editing & design tools. Including AI image generator, batch editor, animation design, enhancer & more. Try now for FREE!
Then I recommend you to take a break, of 15 min, so your mind can rest and think better, is good have breaks every 30 min of focus work
That one @vast yew
thanks a lot ❤️
Gave +1 Creative Carma to @naive apex
thanks
what do you mean by F2?
Wait a couple min and I will show you, I just woke up
There’s you go
Just make sure to have a copy of your original work in case you make a mistake
I did that with an illustration but you can do it with anything
thank you!!
how can i take all these white/gray pixels and "hue shift" them to be another color but keep the texture.

hello again, what is the best way of getting the white colors blend together?

ok i managed to do it by using "Curves", not perfect outcome but it's ok

what would've been a better way to do it?
Hey all I do need some help with putting links in PDF file
I am having problems that it does not load correctly and cannot not click the hyperlink
Is this a Photoshop question or an Adobe Acrobat question?
photoshop question
So what is your workflow?
Can anyone help me with photoshopping? I’ll even pay, just dm me please.
I got caught up a situation in the premiere discord. good news though. admin is gonna make me a pro member soon. so I guess photoshop discord is gonna be the next badge on my cubscout vest. figured since the concesus would be that rotating the rim of this in photoshop would be too coplicated, it was a good place to start. pretty tired though. gonna head to bed soon.
I used the slice tool > add the links with a _blank key. Then I export> automate > PDF presentation without changing anything
the proof I did it in photoshop. and you may use this as you need sir.

The slice tool/links is for html export not PDF.
and that's the way the cookie crumbles 🥱
hmm so what the right flow to put the links in a PDF?
You'll have to edit the PDF and add the links.
so export it to PDF then edit ineto adobe acrobat
Yes. I have to step into a meeting that starts in a minute. I'll swing back and check on you after that.
Alright thanks
So can no one help me photoshop 😭 even for money.. ok
thanks im gonna use that to see how you did it and replicate it
Gave +1 Creative Carma to @gusty drum
cause now i gotta try and do it for every layer lol
hmm the loading is slow
once you open the psd you'll be able to get an idea. what I said earlier though about making it a circle, doing rotations. but I made an action for rotation so I wasn't sitting there all night going copy, turn 5 degrees, copy, turn 5 degrees, copy...
so yeah, I made an action that did that.
I seperated the pixels by color. then made it a circle. used that action to do a full rotatation, then transformed all the layers at once that I made, but with only the first one visibile, using the original as a guide, to scale it back to the correct proportion horizontally.
also, I didn't make it a smart object. there's a little warping but it's fine. making it a smart object made the transformations more complicated since it held onto the rotation angle info. whereas without being a smart object, once you set it, when you transformed it again, the directions it considered up/down/left/right were reset.
that's all confusing. but if you hands on do what I described, you'll see exactly what I'm talking about.
so 1 question wdym by made a action for rotation
Yeah got it thanks for the help
Gave +1 Creative Carma to @willow gale
Looking for some help here. I have this Firefly generated pattern that I want to modify and not sure how to do it. I have a tie dye pattern with a skull in the middle and I want to put a bunch of smaller skulls around it and blend them in so it looks natural. I've tried generative fill but the results aren't blending the skulls into the pattern. What other methods could I try? Thanks!

so first thing is how do i make it a circle
because i would like to get it to be a almost perfect circle first so the rotation looks really consistant and nice
i think i got it let me check
yeah that looks like a good enough circle

I made a circle. with the shape tool. and used the keys to constrain it. then when I would stretch it, I would use the circle as a guide.
I'd stretch it like this
ah ok thanks
Gave +1 Creative Carma to @gusty drum
then when I made all the layers that I rotated, I'd turn them off, but have them ALL selected and transform them all, but have the first one , that I didn't rotate, switch it to difference mode, and align it with a copy I never warped. like this.
if you apply a layer style to one, and then 'copy layer style'. you can select ALL the other layers at once, and 'paste layer style' and it will apply to all of them.
from there it gets tricky because I'm sleepy and about to go to bed. you can go to file>export>layers to files and save all of them out in an automated fashion. but how to do that and apply the clipping mask, I'm not totally sure.
I do know how you can apply a clipping mask to all your layers at once. you group them all and then apply the clipping mask to the group.. but I don't think the export layers command would acknowledge the clipping mask that way.. it might. you could try. but not too sure. and not too awake much longer.
which reminds me. layers to files. that's how I saved out all those rotations. to make an image sequence in after effects. thats how I animated that.
ok good night yall
hey please it is urgent, it is indesign and i wonder how to print it out as pdf the way it looks in my screen instead of the pages seperating


I would take screenshots of each page and then add them to a PDF with Acrobat.
they would lose quality
Well, if you want the InDesign interface markings, I'm not sure how you think you're going to do that.
Or you mean that you want the page "spreads" ?
Also, something I think you can just turn on in Acrobat.
also occurs to me, you can also apply layer styles to a group that affect whatever's visible in the folder. so instead of applying the layer style to every layer, apply it to the group instead as well.
would you help me? can i send you the indesign file 😄
pleas
or pdf
whatever suit u
You can just turn on "Two-page view" in Acrobat... Its a function of Acrobat.

then save it?
No. Its an option for people who are viewing PDFs in Acrobat.
You're designing pages. Users can choose how they view them.
I'm looking to extend the background on some phone wallpapers. I know you can do it on desktop with Photoshop Actual. Is this possible on Android with any AI-augmented tool you know of, whether Adobe or otherwise?
(For the sake of future search, we're talking about keywords like generative fill, extend image background, content-aware fill, android, uhh. Probably some others I can't think of immediately.)
ctrl + , --------- to toggle visibility of layer
alt + [ --------- to select next layer down
ctrl + shift + s --------- to save as of course
name
tab to select the the save as type dropdown.
then arrow key down repeating to hit png
and I guess enter enter.
hope that helps with script. take care.
my preferences are so customized in every way I don't even know what defaults even look like anymore.
I run macros. which wouldn't make unique file names. but I'd make a two macros on my mouse. one would
turn off current layer
move to next layer
turn on that layer
save as
then I'd name it.
next macro
tab to file type
down 18 times (to png)
enter enter
then I guess I could go click name click. click name click. click name click. until I ran through the whole lot.
Probably a better way. but I'm ACTUALLY going to bed this time.
your situation is very unique considering the need to apply a layer mask to all of them. usually I can just run layers to files. or even quick export on layers.
hey guys, how do you get this shading effect?

thank you i'm gonn atry that
Gave +1 Creative Carma to @fathom vessel
Hello, anyone had a lightning brush ?
Yes, a brush with the lightning effect.
how I do my command bar visible?

yes sorry I don't know the name
thank you so much!!!!!!
Gave +1 Creative Carma to @fathom vessel
OK thanks
Working in Motion workspace and my timeline is just gone, how do I get it back?

guys how do i know whci blending mode i use
Main menu: Window > Timeline...
Recommendations on getting the lighting right for the middle section? Found that using solely a gradient with the pink blue and green didn’t look correct, supposed to be a glowy effect from the rift thing in the middle

Also that top right pic in the middle section prob needs to be darkened a bit
yeah it worked for me again thank you so much
Gave +1 Creative Carma to @fathom vessel
Anyone had a lightning effect brush ?
Can someone help me???
If its about how to do something in Photoshop, please post your question. If someone knows the answer, they will probably reach out to you.
If you're asking for someone to make something for you, please post a brief description of it in the #💬chat-general channel.
Anyone know how this effect is done? Can I do this post edit? I'm wondering how her face is so white and hair is so black, it doesn't make sense to me

^ 🙏
hello, How can I make it more realistic?

You can add more highlights, a bit of red with curves on astronaut and more details in the background.
Hey All! I'm working on a very big print project of a deck of cards. the cards are 4x4 but the factory is requiring that I expand the cards to have a 3mm bleed. The cards have a paper pulp texture so I can't just paint it in. Is there an efficient wkay to expand the edges of the cards all of the cards?

the original size of the cards is 101.6x101.6mm, but they need to be 104.6x104.6mm without changing the size of the central image. As in i need to expand the size of the border to accomodate a proper bleed
I've been waiting for 5 mins generation fill after restart photoshop, and even if it obviously doesn't work it took me off one credit still
Such a state?

It's better but the highlights is too strong, you can just paint with a brush ( with a low fill ).
Oh, I did it with inner glow, is it better with a brush?
There is a lot of technics, personnaly I use many brush with different colors and fill for the light and Hue/Saturation for the highlights.
Inner glow is very strong, I use for a source of light.
oh ok
It's difficult at first to manage the lights, it comes with practice.
I'm not that new to Photoshop, but I'm still pretty bad at adding shadows and highlights
I did a lot of exercises but I still have problems
I understand, for me it was too and it's still difficult.
For train, you can pick an animal or human, put a source of light and try to add highlights. Like this :

oh that cool
PixImperfect, it's very good for learning that.
And then everyone has their own way of lighting. You can take inspiration from other people's techniques and add your own touch.
I had made something like this before, but now I don't remember how I added light to it

It's very good ! It is a personal preference but I will slightly reduce the intensity of the lights. You can see the photoshop file for remember.
okay thanks
Welcome. Have fun !
thanks, you too
Gave +1 Creative Carma to @pine elbow
( PS : I'm french so sorry for the mistakes ).
Hi how to remove that background , I used png , but when uploaded to YouTube it still has the black background

could be wrong but youtube doesnt support transparency on thumbnails?
done sorry for the late reply
i got a extention haha.
pretty sure it does not
Hi sorry for bothering you guys but i wanted to ask you if you could help me my friend asked me if i can remove something from photo its over her eye but i dont know how to use photoshop can someone do it if its possible
Hello, I need help
https://i.imgur.com/dFxPqLn.png
What If I wanted to make the bandana fit more like it's part of the character
Thank you.
Unfortunately, I am not able to select multiple brushes, because I just can't do it that way.
I would like to have like "Animal Claw.abr", and I have to give it a hour to find all Animal Claw brushes there and export every single one.
I am doing it, but the problem is in importing them, every single gets its folder, which is annoying.
Is there a way to merge abr to group of abr, abr to abr?

Gave +1 Creative Carma to @vapid flume
You will have to use vanishing effect or perspective tool first.
That will allow you to line up as close as possible to face contour (which is hard).
After that, you would use warp tool, I would hold low opacity and warp it slowly around face.
Use "the right" blend mode or don't after you did that.
What you ask is a big task for professionals, and again it will not look good.
Why don't you find an image of the character with straight perspective instead?
I'll do that
no wait
I don't think it will fit a lot
I'm tryna make them stay side by side
It can be done to look okay, do not expect amazing result.
ye js to look okay
I liked how it came out
@river otter ty for helpin me
Gave +1 Creative Carma to @vernal ember
👍
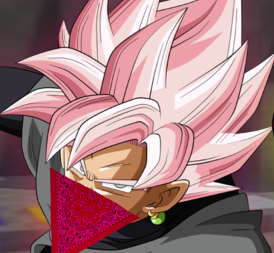
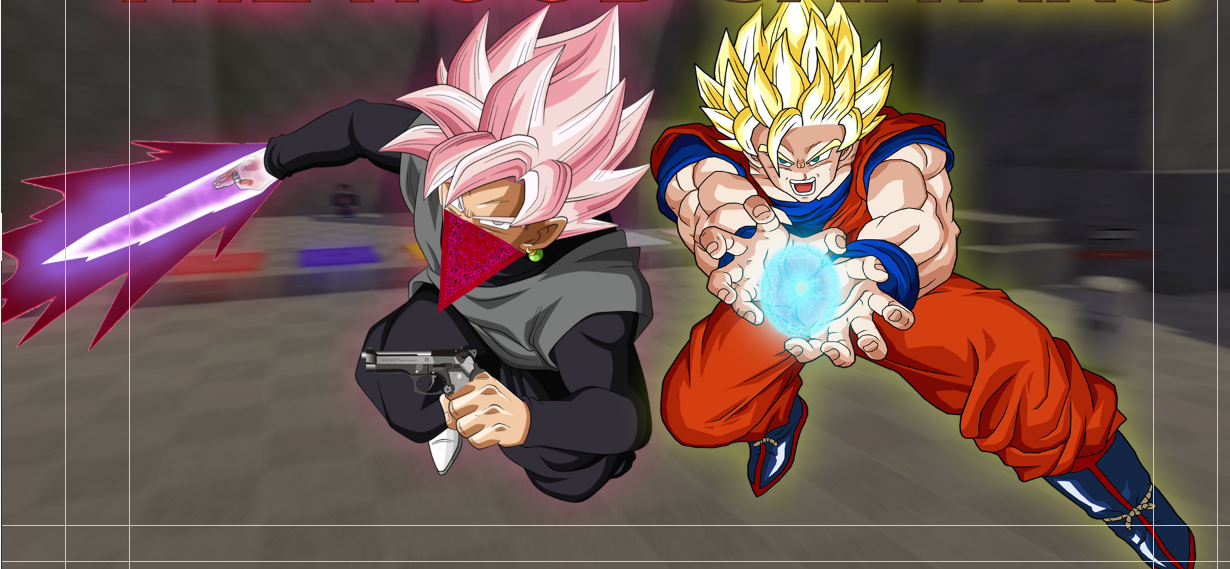
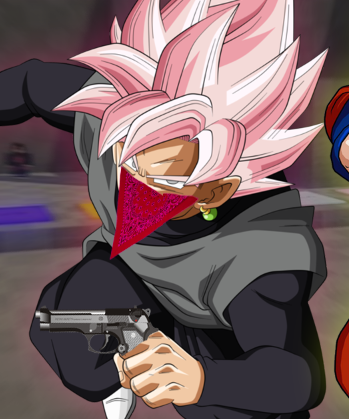
I just noticed he holds a gun too. 😄
No problem.
btw do u have suggestions on how to make it better?
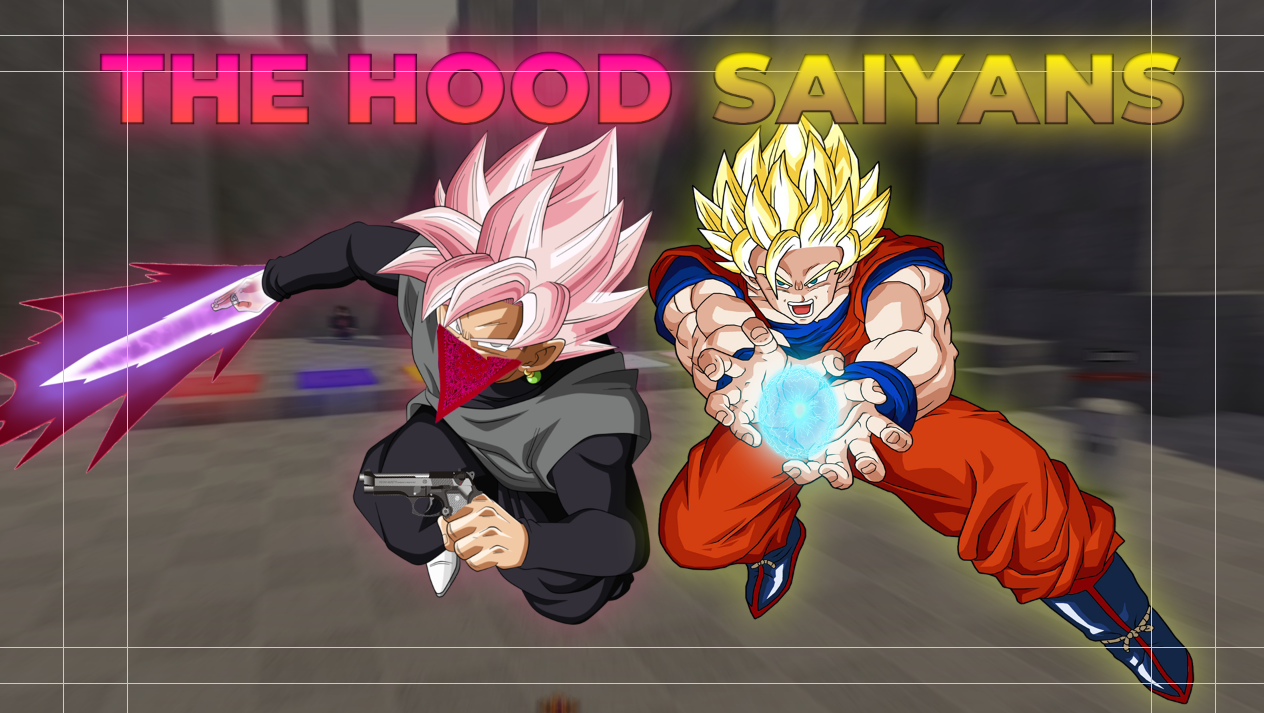
this is the full picture
It's for an upcoming roblox game
and I'm preparing a thumbnail for it
oh, I used the picture of a map of the game
but tbh it's bad
Something like this would fit in, because of the neon lights on characters.

yeah true hollon lemme try it
Then just match photos with levels or curves and with hue, saturation, vibrance.
k i'll see
Ok, I tried with something like this
I used the lasso tool
Already looks better.
Overflow two background images, use soft brush with high opacity to make softer transition. Or keep it that wqy, not it is better.
overflow?
what does that mean
Means one image is over another.
Then you add layer mask on upper one, and with soft brush you delete parts that will reveal image under.
Uhm I tried but I don't rlly understand how should I make a transition between em

Send me project in dm
k
I am trying to use the tween to create 5 more slides but it will not give me the option for next slide. it was available until slide 19 and im not sure how to get it back

figured it out. minor mistake lol
Anyone got guidance for this?
if i have put an image into photoshop and i delete that same image from my computer files will the image in photoshop be deleted as well or have its quality lessened
when an image is loaded into photoshop it is converted into part of the photoshop document. if you delete the image it came from it won't have any affect.
THANK YOU
His finger is not on the trigger like when u hold a gun ur index finger should be on the trigger
opened photoshop today and it looked like this…no tools no layers can anyone help

Be sure you reset the workspace you usually are in, just in case
Mine is "standard" so I've hit "reset standard"

(and yes, it happened to me too just this morning)
hi quick question, im more a video editor than a designer  just curious what method/tool we'd use to wrap this mask around her ear here

is it a masking angle?
I would cut the mask with the pen tool, and rearrange it with a puppet warp (same thing as in Ae), then I would create a mask to hide the bit of the ear that on top when placed
 good idea
No worries. here is where to find the puppe warp.

let us know if it works!
don't forget to strategically place some contact shadows for added realism (where depends on the directlion of light!)
yeee, thought about drop shadows maybe
thanks 
I know you didn't ask for this, but I liked the challenge, so I had a play. This may have all been obvious to you but if not... please see guide here! 🙂
LOL okok
the brush tech 
didnt think of that for blending, im trying some stuff now 
(Yeah, when I saw you mention "drop shadow" I was like.... "NOOOO!"
Also, given the strong light from the right, you man want to lighten the right side of the mask.... - JUST DO IT ON A SEPERATE LAYER!
ya its been some years, only really mess with davinci nowadays
n im cooking irl atm so im a lil slow 
i see it tho
drop shadow just causes more problems around the ear
I wasn't expecting much of a response anyway. - Enjoy the cooking.
i like the lighting tech 
prob could blend the logo a bit more but im happy with the end result, learned some stuff ty again lol
Cool. - Also, check out the arc warping too...

Logo is not symetric.
It is usually on one side or in center, yours is neither.
KO is on the right side, and rest is on the left.
I agree, but they're not asking for feedback here.
Just pointing out.
Also, that 2nd image is my 30 second fudge/play
(Yeah, totally. - I'm aways doing that too!) Cheers for the input.
please help here to create high quily pic and auto corrrect all colours

Depending what you want to do, you might want to try the "auto" function on a curves or level adjustment layer
(next to RGB here)
If you want to go a bit further you can watch this

Discover the "4-Point" color correction technique in Photoshop to get the most accurate colors! Learn precise methods to locate the white, black, and gray point, along with a mysterious 4th point to automatically fix the colors of any image. We will learn both manual and one-click methods to instantly use the power of Curves to auto-correct the ...
Basically your photo seems just *a bit * oversaturated (those greens!) so it won't be too drastic
thank u dude
Gave +1 Creative Carma to @vapid flume
You're welcome! (you might to have a look at my profile 😂)
ohhhhhh im so sorry i didn't notice
sorry
No worries 🙂 You're forgiven!

Guys, do you know how to crop out these designs (not remove them), because I need them? Can you maybe send a yt video relating to this?

That's a nice jersey you got here!
Yeah, they're all over Etsy and Ebay.
Ikr, its clean
There is a slightly unethical take to it if you want to make money out of it. If you want it for personal use then it should be OK.
Lol nope, I wanna put the dragon design on my own tee
I cant find anything similar tbh
Given that loads are selling it, the design probably exists already online. - But yeah, I'd be interested to know WHY you want it before I help you steal someones work for possible commercial gain
You know I had to point it out! 🙂 This is a black background so relatively easy to cut from the jersey if you remove the black
(I'm keeping an open mind - making no accusations!)
This is a Japanese x Tokyo 2023 jersey special, they’re all over online my guy, what do you mean specifically?

Redbubble
Japanese Tokyo Dragon Asian inspired Neon retro 80’s style • Millions of unique designs by independent artists. Find your thing.
If I wanted to I could buy one
You'll probably need a higher resolution version of that
Meaning the guy on RedBubble stole it 🙂
As in Adidas don't sell on RedBubble
Yeah thanks, but Im doing it for my own tee, the design only, and these go crazy when it comes to prices because of dropshipping, so no worries I’m not using it for any personal financial gain, I couldn’t care less
Gave +1 Creative Carma to @sly hawk

AS I said, you'll need a good hi res version of this. Because at the end, it will need to be A4, 300 dpi without being upscaled
that means THAT number, just for the design

otherwise it will look crap
A4 is a common approximate size to check designs on tee shirts
Yeah, I need to find a high resolution one, but it’s kinda complicated
you might want to go bigger tho
No amount of photoshop will give you a good hi res from a low res image
That's the sad thuth
I might as well just buy it, although the sites that sell these look hella suspicious
Also depends the method used to print it (screenprint, sublimation, heat transfer?)
You wouldn't want to screenprint it.
Hmmm
I haven't seen this thing, but is it an official adidas jersey? some fan art of some kind?
It’s a special edition jersey I assume, I’m pretty sure it’s original yeah
I do not know though
Because I can't find it on the Adidas website
It's maybe a knock off from the get go... Just saying
You wont find it on the adidas website, this is a soccer jersey
I’m pretty sure it’s authentic, it’s from Japanese Football Association
Because it's not there under National teams jerseys in the UK
https://www.adidas.co.uk/federations-football
Official FIFA Store - The Home of Official World Cup Shirts & Clothing
Support the Japan National Team with official kit including the 2022 Qatar World Cup home and away shirt.
Not there
I'm interested because it could make a nice Xmas present (but you HAVE to have Captain Tsubasa written in the back)

the New kits
The Newkits | Buy new Japan kits in home, away and third . Top quality. Free worldwide shipping. Latest Kits at lowest prices.
I'm really unsure as the only shop that presents it this way is the one you pointed to. Also there is no image of a player wearing this jersey (and they claim these are replicas)
Also €46 is insanely cheap for national team jersey. Maybe it's an old one?
I would assume it’s either a fake design (which I dont mind), or rather a special edition like they claim it to be, however this is most likely a jersey for fashion
You cant wear these in a normal game lol, obv they’re not allowed
I thought as much. But even then their wording is misleading
It's nicer than Millwall's... that's all I can say 🙂
It’s definitely nice for sure, unique too
Anyhow, I think the best bet would be to find the original design (didn't James find the one on a stock website earlier)
and once you bought the original vector design, all you have to do id give it to the printing platform of your choice. I wouldn't vouch for any result taken from the image you posted, even with the best of will
Yeah it doesnt seem possible, the quality is bad and there isnt any high quality design of that on the internet, I mean even if there were it still wouldnt look nice probably
If the link you are taling about is the RedBubble one, you can usually sell designs on all items, meaning if you click on the link, the POster is declined in tee shirts, mugs, duvet covers and what not
I was talking about this one
#❓ask-a-question message
Hmmm, tbh I’d rather just buy the jersey
Its still somewhat expensive at 40 something euros, considering it’s just a random one
I’ve seen some go for 20, 25, interesting thouhh
What makes me suspiscious is that I don't see a national team having juts one city written on the front of the Jersey (not Tokyo team, but it's Japan team)
Redbubble
Japanese Tokyo Dragon Asian inspired Neon retro 80’s style • Millions of unique designs by independent artists. Find your thing.
Ooh lol
I would bet that it's not an official jersey at all
Yeah it definitely isnt, thought it was though because of the ‘special edition’ lol
Thanks either way though, and tbh I might just buy the jersey even though it is most likely fake. On the contrary, it looks pretty nice
Yep
The image is literally a stock image from Vector Stock. It's not 'official' - looks nice though
Interestingly, I asked AI to discribe it, and then redraw it from the description:

I don't know what you're asking. Can you please be more specific.
Hi! Create a selection of your subjects, jump it to its own layer (CMD+J on a Mac, CTRL+J on a PC) then deselect, either insert the background you want, below the subject or generate it from a prompt.
Looks nice lol
Hello
I need some help, like my problem is probably too dumb to even ask but it is what it is

So like how to remove this black and white dots

And i am sorry if this is not the correct channel to ask.
not intirely photoshop but still kinda related, maybe you guys have an idea!
one of the squares is half of the big part. so it SHOULD fit with the gradient right? sadly it does not
i can remove it if its too far away from photoshop


I know what you mean, and it's not a 'dumb question;
Instead of saving/dragging the PREVIEW from the website, look for a download button...

Are you searching for Luffy Gear 5 sitting PNG Image? Then download free high quality pixels Luffy Gear 5 sitting PNG Image from ONGPNG.

The squares were in the preview to show people what was and wasn't transparent in the REAL file.
I assume the textures are placed at different scales, that's all.
Hey guys, i have a question.
I need to make a document template in photoshop, my client doesn't have photoshop. can i export it to a way where they can edit the template? ( they only need to place their photo and text.)
lets say i make it an editable .pdf or so?
If they don't have photoshop, would they be willing to use something like Powerpoint?
You can place your image and setup the text boxes within PowerPoint easly enough, and most clients I imagine have this software and can use it.
You can create 'PDF forms' but I don't think you can insert images into a PDF form.
yeah. Powerpoint sounds like the route to go.
I have a client who uses FRONTIFY, but it sounds like that would be overload for your needs.

how can i create this type of effect? and it is called?

I've created Digital Poster screens and Xmas animations that the client has asked to edit themselves later. - They of course can't use Indesign, photoshop, AfterEffects etc, so the PPT route worked well for them... - plus it's kind of idiot-proof 🙂
So what's the route to go for ?
Photoshop -> ??? -> powerpoint
What does your design look like?
(brb)
well i can show you the example .pdf
Oh I see, thanks a lot buddy
Gave +1 Creative Carma to @sly hawk
i took as inspiration
i'm sending you a DM @sly hawk
basically, a A4 explaining what the client does, who we are and how.
i need to make it my own design
and make it a template so they can edit for own photos and text
got it. - looks good.
So to clarify, is this yours? Or do you need to design something like it?
design something like it
i got the design ready, just need to know how to export to make it an editable template.
Well if you turn it into a PDF, you can use Acrobat Pro (part of the CC suite) to convert PDF to PPT
The result will be an editable Powerpoint.
It will likely be a bit of a mess, with text boxes in the wrong place but it will give you the basics.
If it were me, I would:
- Design it in Photoshop/Indesign/Illustrator (basically whaever I wanted)
- Get the client to approve the design
- Export all the 'bits' of the design into seperate items like 'background', logo, etc... -
- Take all the bits and recreate the design in Powerpoint.
this is a reasonable workflow, i already got 1 and 2 done.
Thank you as usual for the help James !!
Gave +1 Creative Carma to @sly hawk
Play with the different blend modes for one that you like 🙂
does anyone know what those shapes in the backgrounds are called?

(When I'm off this call I'll try and help)
Dont worry man!
Its already fixed
IF you’d like i would like to send you a concept design in DM. I still need to do some stuff
yeahm go for it
curious what type of like art or style this is called?

Not a clue, but AI Identified it as:
the poster for the lisbon symphonos in june at the sacramento library, in the style of steelpunk, polish folklore motifs, haunting houses, red, baroque ornate flourishes, blueprint, digitally enhanced --ar 67:84
2️⃣ the flyer for the blackbeard society, in the style of baroque ornate and dramatic compositions, vytautas kairiukstis, haunting houses, red, trompe-l'œil graffiti, silvia pelissero, sleepycore --ar 67:84
3️⃣ 'the old women in russia' poster, in the style of steelpunk, baroque compositions, wäinö aaltonen, red, haunting houses, concert poster, leanne surfleet --ar 67:84
4️⃣ concert flyer for the lincoln center for the ages, in the style of cluj school, gothic steampunk, igbo (ibo) art, red, inkblots, zombiecore, intricate foliage --ar 67:84
Maybe there are some keywords from above you can pick out?
what photoshop version would be most compatible with these specs?


upon my search it seemed 2019-2023 would be fine? but i don't know which one would be most suitable
uhh dang
lot of styles
is there a way to make like a low quality image, like this for example

even lower quality but sum like dat
Howdy, noob here. Zero graphic design skills and photoshop skills so I'm sorry in advance. But I want to make a layer that is only the letters from this image. How would I do that?

ay my selection tool bar thing dissapeard
like when i outline/select something the lil tools dont come up idk what i pressed

Just to follow up - At the moment everything is good!
The problem kept coming back - but it's been behaving the last few days after I moved one monitor.
I have multiple monitors - and one of them was connected to my motherboard's hdmi slot - everything else was connected to my GPU's HDMI/Displayport/etc slots.
Connecting that one monitor to a GPU input slot so that everything was connected to the GPU input slots (and nothing to the motherboard's) seemed to fix everything.
If PS Adobe preferences referenced something on the one monitor not connected to the GPU, that's when the issue would occur and stay.
Deleting "Adobe PHotoshop 2023 Prefs.psp" or unchecking "Use Graphics Processor" would fix the issue - until preferences would once again try to reference something on the monitor not connected to the GPU.
[2023-12-08_16-28-26][32576][Error] [console] [object Object]
Glad it's over for now. Motherboard integrated graphics stuff vs main GPU vs photoshop spaghetti.
Thanks so much for all the help! 
Gave +1 Creative Carma to @hushed niche
im trying to turn the 1st image to the 2nd


this is what I've done so far, how should I continue?

i want to make the face look good like in the end goal, ie extend the green color to the neck area. How do I extend the texture to the neck area and how do I actually add a realistic neck shadow?
Hi @river otter. Are you asking how to make a downloaded image a background layer?
Simply opening a file in Photoshop puts the image on the background layer.
If you to make it a background layer on a multi-layer file, you can drag it into the file (or use File > Place), drag it to the bottom of the Layers panel and chose Layer > New > Background from Layer.
Hi @sweet nacelle Start by adjusting the opacity and blend mode of Layer 1 to better blend in the green image with the background.
You will then need to reset your default colros (tap d on the keyboard) and then paint with b/w to adjust the mask on either side of her face.
Finally, you will want to sample that green color, make a new layer and adjust the blend mode/opacity for the new layer and add the green paint to her neck and hands.
Happy to help.
should I do something to the background? If i change the opacity or blend mode of layer 1, the mona lisa face will still be visible

Hey everyone so im fairly beginner to photoshop and need help doing this. here I have a text with a outer stroke thats colorburned on the outside of this text, I want to remove the background but keep the background for the stroke for the color burn, how would I do this?

I DID IT NVM LOL
hello, I imported an action file but when im running the action it always gets stuck at some point in a select and mask step
what could be the issue
i imported the brushes and patterns separately but i dont think it has something to do with those, dont know
i also dont get a popup saying something is missing, it just keeps loading forever
It would be helpful to see the rror message you get when you get stuck.
It could be because you're running it on a smart object for example and that the action doesn't allow for that. Or any other reason.
If you don't have an error message, can you open the action window, enlarge the panel and screenshot the whole list of actions, and tell us where it's stopping and looping?
Like that, with all the arrows down

I literally said theres no error message
But I solved it because I just installed ps 2020
And its working
OK, I was just exploring all solutions. Sometimes the action plays so fast that if you have a non-critical error message you may not see it
That's why I asked WITH or WITHOUT error message
In that case I would have ask you to play the action in "step-by-step" mode, but glad you resolved it
Sure
Ok
I dont know why it doesnt work in my 2021 version
All my drivers are up to date
It is what it is
Maybe something like a way to handle files that have changed, but we can never know as we don't know what your action does.
There was a change a few years ago when they changed the way to "save as" with copy, as opposite to save as without (due to an iOS internal change) so some actions has to be redone.
That's why knowing what downloaded actions do is always a good idea (retro-engineer them if needed) so you can customise them to be version-proof.
Hi @eerop Good point. I was looking at the chin and jaw shadowing at not her hidden facial features. You might pull the opacity back up and remove the blend mode and paint the shadows back in, or knowing that a mask can be black, white or shades of gray—gray is partially transparent—play with painting gray on the mask where you want the shadowing to show throw. The lighter the gray, the more will be visible.