@magic wagon this is looking very cool, Bruno! I like the way you blended the images to the mask, allowing it to have a textured look and more depth with the highlight. This is just a minor nitpick, but I wonder if you could align the mask to the center of the background image, this way the yellow area from the bottom right would have more contrast, since it wouldn't be placed in a similar color area, making it stand out a little more. About day 4, I'm pretty sure your son is going to love it, if you want, you might add a subtle amount of motion blur (filter > blur > motion blur) to create a movement feel to him! Great job! 😉
#✂challenges-feedback
1 messages · Page 81 of 1
@tacit condor you achieved a great sense of movement in this one! The glow around him added a powerful look for the composition. Also, the comic book style really enhances that superhero/villain feel. If you want to apply the style to the city image as well, I would recommend the Cutout effect from the Filters Gallery (Filter > Filter Gallery), there you can play with the sliders as much as you want. Excellent job!
@untold iron Day 4 came out really great! I like how you played with the brightness of the images, it helped the overlays stand out with the highlights. My tip would be to apply a very subtle amount of gaussian blur in the background, this is a nice way to create depth in a composition, or if you want to get fancy, you can use the Tilt-Shift from the BLur Gallery instead and create some gradual blur as the image gets farther. Well done, Jae!
Hey @lucid plover! I like the visibility adjustments you applied to the emblem and the helmet! I also like how the lighting and colors play very well together, especially the warm and cool colors contrast, the warm for the action, and the cool representing calm. Very nice job!
thanks will make those updates 🙂 @coral stone
Gave +1 Creative Carma to @coral stone
Day 4: Photo Composite - this is the first one i've tried. I've got another going, but had trouble finding one of the assets, only to find that the backup drive is going wonky, so I've spend the last hour or so trying to reach technical support. Arrgghh! Maybe tomorrow . . .
@compact pecan it's looking very good, Hugh! I know that the process to make it look realistic is a little tricky, taking breaks and search for some reference images might be helpful. Here are some tips that hopefully will help: You might try to replicate the subject's light directly to the layer mask, right now it looks like she is receiving some light coming from the front-left, so you might add some highlights to the front-left area of the mask as well and don't forget that the mask would cast some shadows, since it's closer to the subject's surface, it would be darker and a little sharper, shadows aren't 100% black, so you might pick a color present on the mask and, if that's the case, darken it a bit, and then paint the shadows in a multiply layer (you might also do this using the Drop Shadow layer style). Even though the mask is mostly black, there are some warm tones coming from the subject and the lights, to apply the same colors to the mask you can use this cool technique taught by Jesús Ramirez, to create a color blending between the mask and the subject. https://www.youtube.com/watch?v=UrTzFExOCFA
I can see that some areas of the subject are blurred, this kind of makes hair masking and even some areas a little bit more difficult. If you want you might fine-tune the layer mask or even replace the subject where the areas are better defined. 🙂
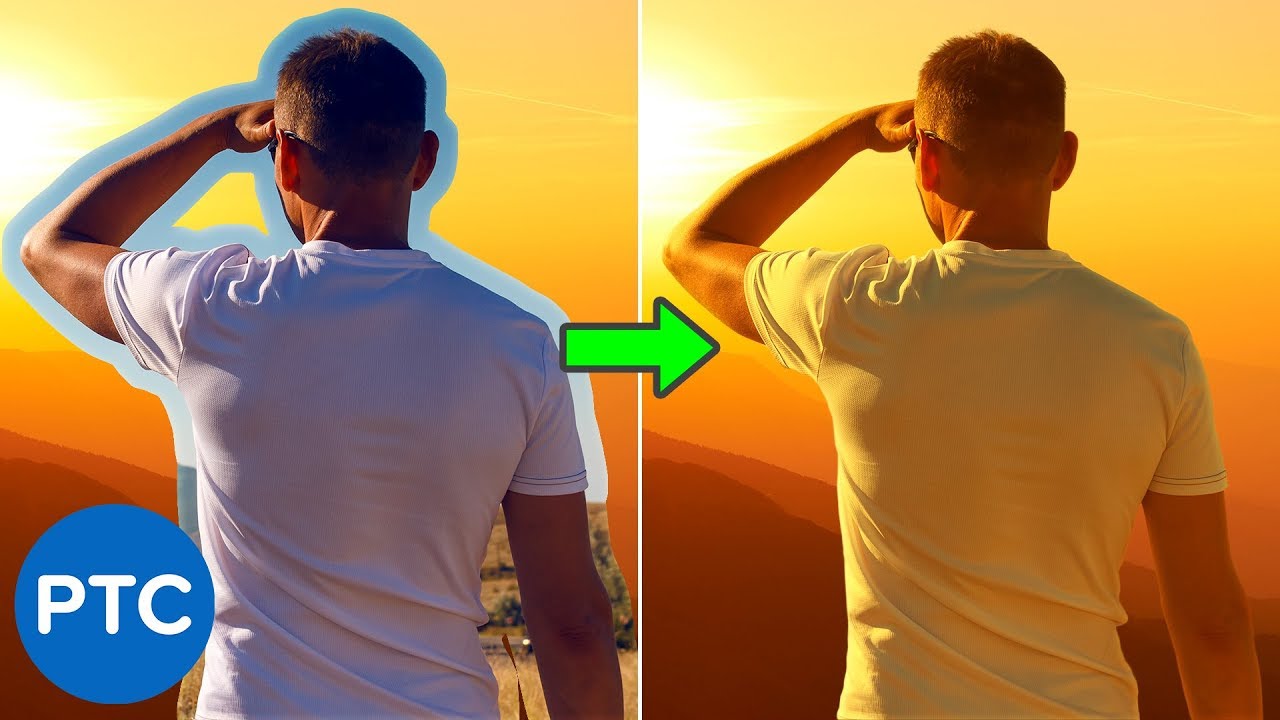
In this tutorial, you will learn how to color match images in Photoshop.
You're going to learn a powerful color matching technique using the Curves Adjustment Layer and the Auto Options.
This technique is great for composites with different tones.
LINKS - How to Color Matc...
This mask is looking really cool @simple idol! I like the shiny spots showing the zig-zag pattern. I wonder if you increased the brightness of the top middle area would make it stand out a little more. For that you can add a curves adjustment layer and create a point in the middle-left and drag it up a little bit > then set the blend mode to Color Dodge > Fill the layer mask with black > with the brush tool and white as the foreground color, paint on the spots you want to create the shine. If you see that it's a strong effect, you can reduce the fill slider (the one below the opacity) this will reduce the spread of the effect without losing its shininess. Color dodge is part of the 8 special blend modes that have different behavior with the Fill and Opacity sliders. You can check this video in case you want to know more about it: https://www.youtube.com/watch?v=jT45zxPDXvM
You can also use it to create some additional areas of brightness:
Oh the gif messes up with the color, but you get the idea 😄
redid the emblem in photoshop only...messed with drop shadows/sat/hue/cont/brightness
@gaunt knoll look at the shadows on the cat & try to add the same to the cheese
@cold oyster I'm a big fan of the dark atmosphere that you created. Your attention to the details like the dispersion and the lighting, made every spot of the image look very interesting. The only suggestion I have would be to recover some details from the darker areas from the bottom, or even create a smoother transition from light to dark. This will add more balance to the composition. Great job!
Behance cover art and a new mask!
Yet another morph of my Bear 🙂 he waits for his composite to be completed
A change of clothes
Here is an update applying the tilt-shift t the composition - is this better? Day 4 @coral stone
Great job with the textures @jagged falcon! The emblem has a nice sense of depth, especially with the Bevel and Emboss applied. It might be nice to apply the textures to the B as well, so the emblem might be able to have a more unified look. Well done! 🙂
Daily Challenge 200821 - Compositing - Introducing Ramona
Nice improvement @untold iron! If you want the planes to be separated by the blur, you might rotate the Tilt-Shift handles to be from horizontal to vertical, following the lines of the street, making the areas that are closer to the viewer sharper and the far ones more blurred. Here I created two points of blur, one for the left and another for the right, and adjusted the transition. 🙂
This came out really great @sacred field! I like how you colorized the shadows giving them a monochromatic look. The duplicated city image turned out very interesting, it reminds me of that mirrored images that connect to each other. Nicely done!
@coral stone Thanks, Valdair! I appreciate it a lot! Have a great weekend my friend!
Gave +1 Creative Carma to @coral stone
You too! 😀
Hi, @gaunt knoll! I loved the cat's expression haha! Pat's suggestion about the shadows is very on point. Since the light that is affecting the cat is coming from the left, I suggest that you create the light sources for the cheese and the background image in the same direction. This way, your composition will feel more realistic.
One last tip is that you might mask the fur using a custom brush, I'll give you the link for a video tutorial that teaches how to do that. I know it looks a bit difficult, but trust me, it will be super fun. 😉 Let me know if you need any help.
https://youtu.be/IebGy4H07iw?t=730
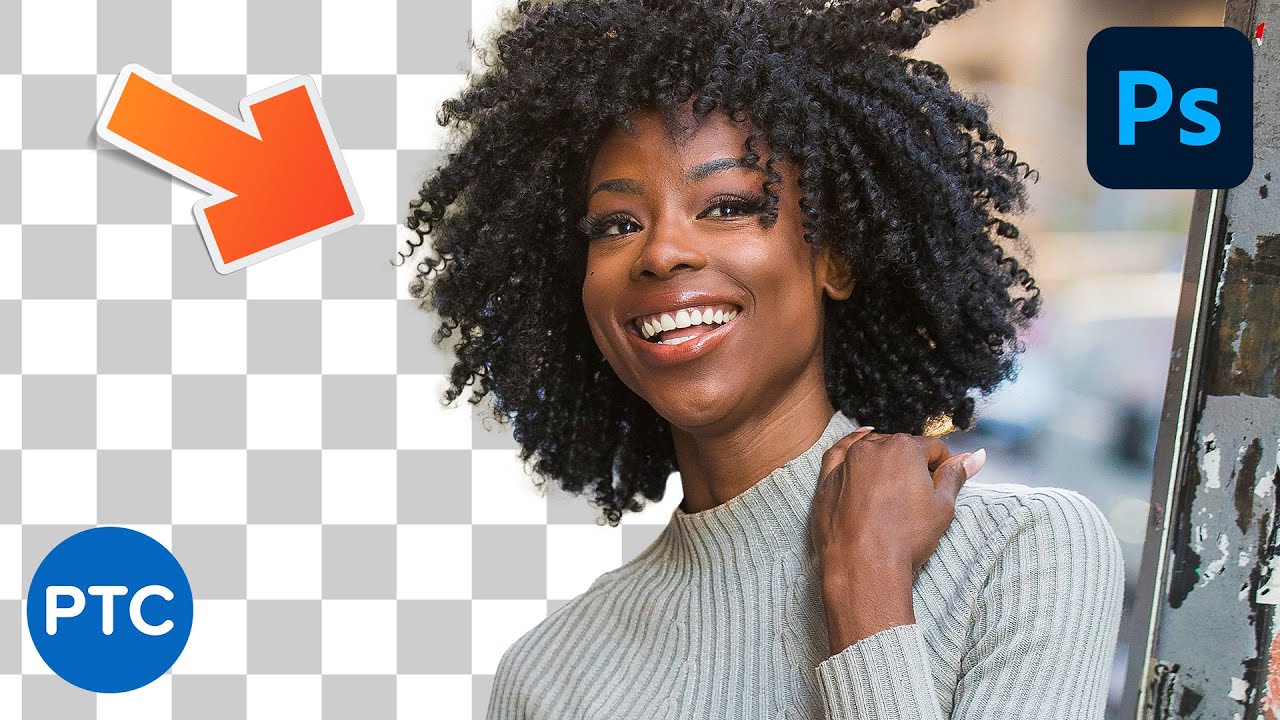
In this Photoshop tutorial, you will learn 10 Photoshop masking tips, tricks, and hacks for better cuts outs that you probably don't know.
LINKS:
MSI Prestige Laptop
► https://amzn.to/2U3ZggC
MSI & Wacom Limited Time Offer :
► https://us.msi.com/Promotion/wacom_special_202...
should I create multiple layers of the background to apply this effect or just the main background layer? @coral stone
Thank you so much for sharing a context @safe flint! The colors of your moodboard are looking pretty nice, I think that sticking with them will allow you to have more flexibility throughout the next days. Well done!
Gave +1 Creative Carma to @safe flint
What step am I missing to help make the emblem and mask fit in better?
@untold iron you can convert the background image into a smart object, to make it non-destructive, and apply the tilt-shift just in this one. You can add multiple points on the Tilt-Shift workspace, you just need to click in a different area when you see the cursor look like a pin with a plus sign 🙂
needs work, but for the moment will do 🙂
ok great I'll do that thanks @coral stone
No problem! Let me know if you need any help 🙂 @untold iron
Gave +1 Creative Carma to @coral stone
will do 🙂 @coral stone
is anyone else having problems uploading or it's just the great australian internet lol
@fresh swallow I like that the intensity of the colors of your updated version combined with textures and the strokes resulted in a super cool look. My only thought would be to give a little bit of a breathing space of the edges, the bottom area of the emblem is fixed to the bottom edge, and there is more space on the top, the same as the left and right. I believe that just increasing the background size or just scaling down the emblem a bit will already help. Awesome work!
The amazing Star Flight! Challenge #4
Thanks @coral stone ! I will give that a shot after I get off work tonight!
Gave +1 Creative Carma to @coral stone
emblem..
VILLAINS emblem. Now that I have the two badges complete, onward I go to the masks! What a fun adventure. Thanks to all who make this opportunity possible!
That's a powerful composition @sweet fern! The color grading of the background and the mask on the Atomic Burn is very on point. This is an optional step for you to try and see if you like, maybe playing with the scale of the subject, like bringing it "closer" to the viewer, almost like a close-up, would enhance the powerful look, giving the expression and the mask more emphasis 🙂
Here's an update. I'm still getting used to the tool. I may need some help. I'm not sure if this came out correct @coral stone
Hey @eternal mica very cool job! I like how you played with some overlaps with the buildings and the heroes. I think that the superman costume looks a bit pixelated, you might try to replace it more to a high quality image. I know that some free stock website like Unsplash and Pexels might have the right one for you. And, if you want to unify all the elements with a drawing effect, you might try to apply the Cutout effect from the Filter Gallery. You did a fantastic job with the contrast of the text. Well done!
@coral stone is this more along the lines of what you are talking about?
I was able to edit it on my ipad 😄
Thanks @coral stone for the tip. I considered that but the scale of the entire image seemed a bit off. After looking at it again, I saw your point and I agree.
Gave +1 Creative Carma to @coral stone
The subtlety of the blur already added a nice sense of depth to the composition @untold iron! Here's a quick look of what each area of the handles does: The middle area is where you can position and adjust the intensity of the blur. The distance between the line to the dashed line is the transition which means that it's going from 0 to the 15px of blur (the amount that I set) and the areas after the dashed line is all with the 15 pixels. 🙂
Here's how the panel is set 🙂
Yes @fresh swallow! If you want more balance you might align it to the middle of the canvas as well. Great improvement!
Thank you, Sir! I just recently started using my ipad for photoshop. It's a little weird using a stylus lol
hah no problem 😄
@sweet fern ooh very nice! If you want more attention to the mask and more of a dramatic effect you might scale her even more, kind of like this: 🙂
So the mask and her expression will enhance this effect 🙂
oh ok that make sense I get it now. Thanks! So in your sample we're blurring the edges is that the idea we're going for? The middle back of the composition is sharp and then gradually blurs outward of the edge. @coral stone
Gave +1 Creative Carma to @coral stone
Oh no no, I just place it the lines in the middle just to help with the explanation, so it could appear more. The effect we're going for will look like this 👇
With the background layer, I created two points with vertical lines and positioned on the edges, creating the transition of the blur going from the edge to the center.
Ooh ok, let me update it.
Here is the update @coral stone 🤞 it looks to subtle I can barely see it. 😟 I'll play with it over the weekend.
Here is where I went with the mask 😄
Yaay @untold iron No problem, Jae, glad it worked out! I can see a very subtle difference. Let me know if you need any help.

PCC2 an emblem for an antihero kind of guy. Does it work?
thanks so much @coral stone 😀
Gave +1 Creative Carma to @coral stone
Thank you @coral stone
Gave +1 Creative Carma to @coral stone
I know this is super subtle, but I feel like my hero would be a semi-ordinary person without a flashy mask or uniform. This feels right.
@wooden pebble I too agree. It feels right
@wooden pebble I love it!!!
My composite. All feedback welcome. Thank you in advance!
Thank you so much @fringe harness!
Gave +1 Creative Carma to @fringe harness
No problem!
Day 4 - Photo Compositing
Nightwalker
Decided to do a gauntlet instead of a mask...
@shy bobcat looks nice, one suggestion tho is when you composite two different images
try to match the colors and lighting of one with the other
because otherwise it looks weird and out of scene
WHOSE
I believe he explicitly stated @shy bobcat , Cheethu94
Thanks 😄 I couldn't sleep so I decided to work on it
😸
@chilly hawk I love your designs!
@shy bobcat I just LOVE it!
@quasi swan thanks for the feedback but I am a newbie at photoshop and am not too sure how to colour grade two images together so I looked up a fast and easy method by Jesus Ramirez and this is what I came up with, is it an improvement.
Gave +1 Creative Carma to @quasi swan
@edgy sierra thanks for the comment, I don't know if she is a Hero or a Villian.
Gave +1 Creative Carma to @edgy sierra
@young karma Really cool idea and application of this challenge! Is the emblem acting as a sort of lapel and collar area? I think with the searching you could probably find a dress with a similar shape and collar of what you’re shooting for and more easily edit the emblem into the collar if that’s what you’re going for. A lot of time finding the right image is half the battle, then small tweaks like colors and such become much easier. Really cool design, I like how well the color scheme works with this!
@abstract parcel The colors and lighting on the mask are looking really good! It might help to put the logo on a blend mode that also reacts to the lighting of the mask so the lighting looks a bit more natural. Sometimes I do that then duplicate the layer and leave the copy as a “normal” blending mode and adjust the opacity until it looks good if the original blending mode didn’t work out completely. It could also be nice to make the background a slightly contrasting hue to better contrast the mask and add a little sense of dimension. Maybe a slightly lighter gradient shifted more towards the blue range to mimic the logo. Of course these are all just ideas and suggestions, it depends on what you’re going for. Really nice work!
@plain sable I like this mockup idea! The way the lighting information from the shirt shows through the logo really helps sell the effect. This is super subtle, but I think giving the shirt layer a subtle drop shadow might help it look even more natural on the background. Nice job!
@magic wagon This looks great! I love the lively background gradient and particle effects, it definitely gives the whole thing a dynamic feel. This design works really well across the mask, and the texture really adds a realistic touch. Great to see all the source images too, very cool!
@shy bobcat Same. Newbie. I couldn't have made something like that
Challenge 4. Our Hero Nurse stands up to the evil Spray-on Tan glow of the Villain Trump.
challenge 3 😉
Happy weekend everyone. Let me know what you think of my take:)
It took quite a bit of googling how to do things but I've made my first ever composite image 😀
Nice @mortal crescent! Like that background!
@edgy sierra Happy weekend to you, too! Would never have bee able to make something like that! Amazing stuff!
@ruby panther Wow! Lighting is great!
Ps: I'm not a mod if anyone thinks so (。_。)
Just did a big all in one review
@abstract parcel love yours as well!
Thanks @fringe harness
Gave +1 Creative Carma to @fringe harness
No problemo!
@edgy sierra Yours work is good
Even @mortal crescent’s work
@fringe harness Thanks!
Gave +1 Creative Carma to @fringe harness
@abstract parcel Thanks.
Thank you @fringe harness & @abstract parcel .
Gave +1 Creative Carma to @fringe harness
What is this +1 Creative Carma
@abstract parcel It's a ranking system of helping or commenting on peoples projects. When someone says "Thank you" you get a point.
Thank you
Say thanks @ someone
Gave +1 Creative Carma to @sharp sentinel
Thank @ruby panther
Gave +1 Creative Carma to @ruby panther
Ha
This should be in the Chat channel. Not here.
Day 4 - Photo compositing
Amazing! Looks like the city is a cloud @buoyant nova !
Amazing work @buoyant nova
Yeah. Supervillain or superhero?
@fringe harness @abstract parcel Thank you
Gave +1 Creative Carma to @fringe harness
@fringe harness Supervillain
Composite updated. PS Daily Challenge_Composite
i don't know if this would fit into the current challenge, but yea, here travis scott with ultron mecha parts
Thanks @fringe harness @abstract parcel
Gave +1 Creative Carma to @fringe harness
Beautiful composition, @simple idol! I like how you dealt with the element's hierarchy very nicely. Also, great job with the subtle overlays as well!
These colors are amazing @buoyant nova, I loved the way that the overlays turned out! The distribution of the images is looking very well balanced. Nicely done!
Thank you @coral stone! I appreciate you!
Gave +1 Creative Carma to @coral stone
Thanks @coral stone for your comments, they are much appreciated
Gave +1 Creative Carma to @coral stone
@buoyant nova cool! I'm working on supervillains for the first week, and superheroes for the second.
@mortal crescent Welcome!
🦹♀️
woman_supervillain🤣 😇
Hi, @gaunt knoll! I loved the cat's expression haha! Pat's suggestion about the shadows is very on point. Since the light that is affecting the cat is coming from the left, I suggest that you create the light sources for the cheese and the background image in the same direction. This way, your composition will feel more realistic.
One last tip is that you might mask the fur using a custom brush, I'll give you the link for a video tutorial that teaches how to do that. I know it looks a bit difficult, but trust me, it will be super fun. 😉 Let me know if you need any help.
https://youtu.be/IebGy4H07iw?t=730
@coral stone PTC hosted by Jesus Ramirez! Great man.
In this Photoshop tutorial, you will learn 10 Photoshop masking tips, tricks, and hacks for better cuts outs that you probably don't know.
LINKS:
MSI Prestige Laptop
► https://amzn.to/2U3ZggC
MSI & Wacom Limited Time Offer :
► https://us.msi.com/Promotion/wacom_special_202...
Look. I'm in CS6. So can't create moodboards. So I used the rectangular marquee and the brush tool to make it look like that. Feedback appreciated
Challenge 2. Feedback 👍 (appreciated) Guess bevel for the 'V' could have been shifted right?
Challenge 3. Feedback 👍 (appreciated) Didn't give textures. My worst habit while working with Ps:
Flat colors are easier. Using polygonal selection tool
Waiting for confirmation in the #💬chat-general for challenge 4
Day 3 Hero Mockup
So how did I do? I notice a bit of lines on my "H" like symbol on the bevel. How do I fix that? The background came from a free download from Dreamtime. The oily metallic texture that matches my villain palette is tin foil I photographed with a color dodge filter.
Day 1 Challenge
@hot thicket Nice! Love the bkgd! How about making it like grass and creating a sky?
@safe flint Minimal emblem! Love the bkgd (again. Well, yeah)
@gilded flame Wow! Nice! Did we have to add color schemes?
Everyone, please review my work! Have been waiting patiently for reviews
Also in #💬chat-general!
@fringe harness I can't right now. But thanks for leaving a reply.
Gave +1 Creative Carma to @fringe harness
Composite using Paul Trani's Tutorial with Type and Animals
@fringe harness from what i've understood (the moodboard is about colors, fonts and images...and stuff that can inspires you )
Day 4 Putting it together. Is she evil? Is she good?
Day 4. Two City Scenes, One Person & One Mask.
when i started using photoshop i just scared out
i feel its really hard 😦 any suggestion as a beginner ?
@quiet compass it's best to watch tutorials to learn and understand the basic tools and workflow
@compact pecan I think this is looking pretty good! The colors are working really well. The shadow under the mask is a great touch to sell the effect and although this is super minor I’d probably try and make the shadow a bit closer to the reddish shadows we see in her skin and away from the grey/blue of the shadow currently. As far as making it more realistic I think matching the lighting of the mask to the girl a bit more might help? She has a shadow on the right side of her face and the light source in the center/left of her face is quite bright. I think you could adjust the coloration on her to fit the background slightly more and/or warm up the highlight area on the mask and add a bit more shadow on the right. I often like to use multiply layers for shadow effects and color dodge for lighting. It’s subtle, but maybe something like this helps?
(Click "Open Original" for best quality)
@tacit condor This is awesome, really great idea for the composite! I love how the glow around him matches the color of his mask and logo. The sort of comic book styling you gave the image is a great touch!
@untold iron Day 4 is looking good! I really like this character pose, though I wonder if the character could be separated from the background a bit more clearly since both have so much dark tones and black in them. Maybe adding some sort of hazy atmospheric glow or something in the background could help? That and making the darks even a bit darker on the character to match the contrast of the background could help to pull more focus to the character along with a sort of background glow. Of course this is just an idea. Nice job!
@lucid plover Very nice Day 4 design here! I like the uniform lighting across the image, very nice compositing! The blurred background and triangle arrangement of the characters works nicely for this compositing too. My only thought is the font looks a bit soft and friendly for what seems like an intense image/movie poster style image. Maybe a similar font but with a bit sharper edges and angles? This came out great!
thank you for the feedback @bleak fossil
Gave +1 Creative Carma to @bleak fossil
@simple idol Very nice Biola! The mask gradient and texture is looking really cool. I love the sort of metallic/pearlescent look of the colors and shine of the zig zag designs on this. The logo in the center is looking really nice too 👍
@cold oyster Really cool idea for the photo composite! I love the sort of comic book feel you gave everything with the styling effect you chose. It works really well for both the background and figures. I think it could look nice to scale up the super heroes a bit just to make them a bit more prominent and in focus, and even maybe slightly mask off a bit of the texture on them just to separate them from the background a touch more, though I think some of the texture is a great effect. Just some thoughts. Really great job on this, love the result!
Thanks so much @bleak fossil! Your feedback is appreciated very much!
Gave +1 Creative Carma to @bleak fossil
SuperHero Composite
Awesome work @prime temple
Composite updated. PS Daily Challenge_Composite
@simple idol Love this one!! Brava!!
Composite challenge - these is my Truth Brigade
Challenge 4. Our Hero Nurse stands up to the evil Spray-on Tan glow of the Villain Trump.
@ruby panther Your hero nurse needs some PPE...or even a uniform! 🤣 Somehow I knew this was yours just by reading the caption! Fabulous imagel
Compositing with @crystal aurora
Thought my Brigade needed to be more colorful.
@arctic rover thank you!!!!☺️
Gave +1 Creative Carma to @arctic rover
@fringe harness from what i've understood (the moodboard is about colors, fonts and images...and stuff that can inspires you )
@gilded flame Yeah.
Can anyone reply to my post in the #💬chat-general channel?
Challenge 4. Feedback 👍 (appreciated). Ok. Thanks to @arctic rover once again for letting me know which one was better. Any suggestions for minor edits?
Know it's kiddish.
I basically love flat colors
Challenge 4. Feedback 👍 (appreciated). Ok. Thanks to @arctic rover once again for letting me know which one was better. Any suggestions for minor edits?
@fringe harness For a Merchant of Death, he sure has a happy/poopy colored background. I'd go for a more sinister backdrop. But, that's me. I tend to lean to the dark side. 😆
This is a redo of the Villain Cat, after @coral stone shared a tutorial by @lethal mural 10 Amazing Photoshop MASKING Secrets, Tips, and Tricks (You Probably DON'T Know!). I was able to fix the fur of the cat using custom brush tool. Thanks a lot Valdair and Jesus.
Gave +1 Creative Carma to @coral stone
my friend's breast cancer spread to her brain. She had to wear the yellow honeycombed mask to her radiation. did some facebook shot grabs off of her page...
Day 4 Challenge
Gave +1 Creative Carma to @coral stone
My first challenge
Hello everyone. For professional reasons, I was only able to start this challenge today. In any case, I love the theme of these challenges. During the weekend I commit to responding to previous challenges. I leave you here the answer to day 1: Moodboard
@fringe harness For a Merchant of Death, he sure has a happy/poopy colored background. I'd go for a more sinister backdrop. But, that's me. I tend to lean to the dark side. 😆
@arctic rover Yeah! I forgot that! Let me add a new version later today (IST [Indian Standard Time] )
Challenge #2: Emblem Design (used Adobe Photoshop, plus Adobe Dimension)
Please leave feedback on my work, if possible. Thanks
@ebon crescent, this is really good. i think the blood on her body should be more vivid, like the blood on her face..
@young karma, your emblem looks like ice. the gold "S" is really beautiful. What does the bule triangle stand for?
your mask, and your photo composition look like a party...
I'm not sure, what your idea is, but your executions are very good!!
Thanks @slow stirrup. Yes the ideia is a party, a super villains party.
Gave +1 Creative Carma to @slow stirrup
@slow stirrup in my emblem the triangle is the triangle is a outline stylized of tradicional emblems. The golden s is of super power, and the gold era of superhero. The cracked ice capsule symbolize the a test tube of scientists, with super powers (super power/super villains. The black background is the dark lifestyle and underground of superheros vs villains
@young karma, wow!You really gave it a lot of thouhgt!!! I understand much better now.
@arctic rover Thanks! She's off duty for the night. I'm just having fun with these challenges!
Gave +1 Creative Carma to @arctic rover
Day 2 Challenge
PS DCC - Challenge 2 - Please help me improve the emblems
PS DCC - Challenge 3 - Please help me to give a wow factor to the mask
@coral stone Thank you. I had selected that cartoon image when I had a different concept in mind. Now I swapped out the image and also used the Ink Outline filter. I think it gives the characters a nice cartoonish effect.
Gave +1 Creative Carma to @coral stone
Day 3 Challenge
@young karma I think your design image is creative and beautiful, but so busy as to make it difficult to see the elements within. I would suggest you lower the intensity of the shine on the letter S so it can be more recognizable, maybe even give it a small stroke. It appears cramped in its space, maybe shrink it down a bit. Im not sure if you intended for part of the S to protrude from the ice on the right side, but to me its distracting. Maybe have the blue triangle show through part of the ice where it enters and exits, in a lower opacity to show that it is inside the ice. Great job on the ice and the cracks, and the bg. Strong effort.
@sweet arch wishing your friend all the best. A full complete speedy recovery.
Beautiful mask, @gilded flame! Loved the way that you blended the images and the textures! The shining areas are looking very on point! Well done!
@quiet compass Try PHLEARN 30 days of Photoshop. Great tutorials for beginners with an excellent instructor, Aaron Nace
Thank you @coral stone 😊
Gave +1 Creative Carma to @coral stone
@slow stirrup Thank you for tour comment. It’s very stimulating. You are right about the blood.
Gave +1 Creative Carma to @slow stirrup
@quiet compass Try PHLEARN 30 days of Photoshop. Great tutorials for beginners with an excellent instructor, Aaron Nace
@eternal mica please can u provide me link ?
@quiet compass https://phlearn.com/playlist/30-days-of-photoshop/
PHLEARN
@quiet compass https://phlearn.com/playlist/30-days-of-photoshop/
@eternal mica thank you so mcuhhh
PHLEARN
Day 4 Photo compositing. The emblem on the rectangle building is my hero badge. The woman archer is a stock image. The zombie is one of my photographs. Surprise he posed this way, must be doubled jointed or something, quite unusual.
Hello everybody! I'm new here! Love this challenge and love all your work! I'm trying to catch up))
Hello, @vague sail, good luck!!
Challenge 1 Mood board- Joining in late on the fun, with some Vader inspiration!
Challenge 2 Emblem which was supposed to be like a dagger ( looks like teeth to me now 😂 )
@earnest junco OOOOH, VooDoo Val going to LOOOOVE you!!!!
😁
Complete newbie but learning so much from her! have tried tutorials before but none as fun!
@earnest junco VDV is a huge dark side fan, yet has a super cheery fun personality and makes the DCC fun from start to finish. Im sure, if you stick with it, you'll enjoy the process.
me too! Yes I plan to. This is so great. Just started the illustrator challenges too. Learning so much!
I made my Behance cover image this weekend.
DCC 2 Hero Emblem
DCC 2 Villain Emblem -- Inspired by @jolly quest
DCC 4 Photo Compositing
DCC 3 Mask Mockup
MASK Mockup. This may not be great but I learned alot. Thank you for this opportunity! This is supposed to be the HERO materializing.
@tropic knoll I like it. very imaginative.
#✂challenges-feedback Hi. Late start, but want to see what you think. First time posting to Discord and First time taking up the challenge.
Photo Compositing #2
Great job with the shading, @neat sparrow! Really like the way that you emphasised the light direction on the mask, preserving its dramatic look. Very well done!
Welcome @acoustic heron! Great to have you here! Really liked the saturated colors that you chose for the hero, the dark ones for the villains were a nice choice as well. Can't wait to see your next works! 🙂
Oh that's a dramatic effect, @tropic knoll! I like how you played with the negative effect on the eyes emphasising the glow that is coming from the mask. The two contrasting colors in each sizes makes me feel curious if he has another side 😄 Great job, CK!
Hello everyone, here is my Day 4 challenge. any feedback is welcome.
Day 3 Mock-up (fixed)
Emblem Design Day 2
@eternal mica Thanks, Ted! The talent here in Discord in phenomenal. It's fun to see what is posted. I have learned so much. Thanks again!
Gave +1 Creative Carma to @eternal mica
@coral stone. Thank you! I suprised myself with the outcome.
Gave +1 Creative Carma to @coral stone
Ramona vs the Villianous Bull 200823 - colors have more depth if you click on "open original."
Ramona and the Bull image sources:
Arches: by Indigodeep
Bull: from AdobeStock
Superhero: from AdobeStock
Books with tree: from Adobe Stock
Background: from Depositphotos
Flying books: from Dollarphotoclub
Checkered pattern: from Pixabay
Little Red Schoolhouse: from Wikimedia
@gilded flame Really loving this design, it works really well on this mask. The color and texture gives it a really cool gritty feel and a nice sense of dimension, especially in the highlights. The Day 2 two works really well on the brick wall as well. Very nicely done!
@eternal mica Really cool idea! The effect is looking pretty good, I think I recall Jesus having a pretty good tutorial on that effect if this helps https://www.youtube.com/watch?v=OHwl_O8YoZ0 I think having a little less texture in the face and a bit more of a comic book-like outline might help. The texture contrast between the characters and background definitely help the characters stand out, nice work!
@little root Really cool pattern and texture on the mask! I like how the size and boldness of the center design seems to stand out a bit more too. The emblems are looking cool, I like the sort of retro feel these ones have with the colors. I think the H logo is working well, though I think the V could use a little something. You could always play with adding dimension to these with gradients, bevels, etc, but I think that would ruin the retro feel you have going on. I think maybe making the stroke of the V a bit thinner, and playing around with the spikes shape of the side could help? Perhaps making the spikes shapes get a bit longer/bigger towards the top, and giving it a more orange color could help give it a bit more flair and attention? Just an idea. Nice work with these designs!
@young karma Ooh, awesome effect and look to this background! It kind of gives the feel that the villain/hero deals with illusions or holograms or something. I do think it’s bordering on distracting from the mask design, more specifically the little blue splash areas. Perhaps lowering the opacity on that specific part ever so slightly could create a nice balance? Even seeing a very slight blur on the background could be interesting, though I wonder if it would take away from that crystal like hologram effect. I really like the pattern and bold colors on the mask, it makes for a really eye catching design. The emblem is really cool too! I love that you used Adobe Dimension with this as well. Great texture and lighting. I think perhaps giving the triangle a gradient and slight texture may help it fit in with the realistic look of the rest of the emblem a bit more. Looking good!
@ebon crescent Very cool, welcome in! Glad you’re joining us. Really great dark mood to this design! I also like how you modified the shape of the mask to make it more unique, it seems to fit that sort of spikey villainous look. My only suggestions would be to maybe increase the contrast/darkness of the mask so it matches the deep darks of her jacket and hair which could make it a bit stronger of a focal point. Also to maybe soften the cloud layer where it overlaps her jacket on the left side so it doesn’t look like clouds of smoke far off it the background are overlapping in front of her which confuses the depth a bit. But I think the general soft cloudy look in front of her adds to the mood nicely. Really great work!
Thanks @bleak fossil
Gave +1 Creative Carma to @bleak fossil
Challenge No 4 the summoning
challenge 3!!! I created my own superheo eye mask (Vampire Nightwalker) 🧛🏽♀️ 🦸🏽♀️😎
Challenge 4
An angel is considered a superhero right? 😅
Wow, @hot herald, this is stunning!!
@slow stirrup thank you ♥️
Gave +1 Creative Carma to @slow stirrup
Wow this is looking great @inland kiln! Loved how you blended the mask and built a whole scene for the subject making the city, the lights and the colors very cohesive. Awesome work!
@inland kiln This looks great! Really nice variety and balance in the shapes, and the colors have a really nice contrast as well. I love the look of that turquoise/yellow combination. The gradients and textures add a really nice sense of depth and believability as well!
@bleak fossil Was thinking it would be a nice idea! Thanks a lot!! ^^
Gave +1 Creative Carma to @inland kiln
Very nice @abstract parcel! Really like the highlights on both sides. Right now the image looks a bit pixelated, you might increase the dimensions and check the resolution, so the textures might be able to appear a little more. (You can do that by going to Image > Image Size) 🙂
This is beautiful @hot herald! Loved the hazy look of your composition. The colors are looking amazing as well! 💯
@coral stone thank you ♥️
Gave +1 Creative Carma to @coral stone
@bleak fossil Thank you very much for your comments, I find it very constructive
Gave +1 Creative Carma to @bleak fossil
@coral stone @bleak fossil I made some changes based on your suggestions.
And this is where the first one started
@bleak fossil Thanks Sam. That PTC video is awesome. @fierce valley is the absolute best. Im definitely going to rework my image. I'll keep you posted.
Gave +1 Creative Carma to @bleak fossil
Thank you for the feedback @coral stone !!!
Gave +1 Creative Carma to @coral stone
Finally my Mood board! I planned on catching up over the weekend but some unforeseen events took place (I had a mild allergic reaction) And was unable to catch up but I still plan on completing most if not all the challenges.
Morning to you all! I made a few updates to my composite. Thank you in advance for your feedback.
@young karma Thanks, love this set of challenges
Gave +1 Creative Carma to @gaunt hazel
Cool emblem @chilly hawk
Challenge 5. Ver 1.
I drew the Libra icon and used bevel and puppet warp! I masked it over the mask template. I put the foil in the mask with the burnished muddy blue. Personally the character likely would wear this bit it was fun to try.
@inland kiln Hi Pat. I like what you've done with 'the summoning'. congrats.
@tropic knoll Thanks 😀
Gave +1 Creative Carma to @tropic knoll
Colorful Ninja Turtles Mask - Little Graffiti Effect 🤓
it is really awesome! @young karma
Thank you @bleak fossil for the feedback 🙂
Gave +1 Creative Carma to @bleak fossil
WHAP! The sound a Congressional subpoena makes when hitting Louis DeJoy with one!
Day 5 Brush and Pattern
Day 5 - Onomatopoeia - Brush + Pattern
Challenge 3 Mock up- Here's my mask!
Mockup Mask_Day3
Day 4 - Composite Update - Emblem Added
Onomatopoeia_Challenge #5  👍🏾
👍🏾
DCC12 05 200824 This Challenge was way way too much fun. I couldnt stop playing with it.
DCC12 05 200824 The Brush file
DCC12 05 200824 A panel of the patterns I made up, and I wanted to make so many more.
#PSDCC Day 3 The Mask
Here he comes to save the day. Mighty Mouse is on the way! (That always reminds me of Andy Kaufman.)
Ninja Turtle Hero Girl - Girl Photo by: Judeus Samson on Unsplash.
Day 5 Challenge
Challenge 4 Photo Compositing I'm not fully sure what I did, played around with everything!
Photo credits:Photograph from Noah Buscher here
https://unsplash.com/photos/_E-ogRrpM0s
Background volcano photo from here
https://unsplash.com/photos/WQ5HOvrDZ6Y

Breathe.. Download this photo by Noah Buscher on Unsplash

Aerial view, from the east, of waning lava fountain from Pu'u 'O'o on Hawai'i Island's Kilauea Volcano. Taken at the end of eruption episode 32. Pu'u 'O'o rose 209 meters above the pre-1983 surface (928 meters above sea level).. Download this photo by USGS on Unsplash
Day 5 Onomatopoeia
Day 5 - I can still add some "bling" but I'll have to go look at some real examples first.
@young karma I hope you feel better soon! Great job with the moodboard. Really like the colors and the textures. Keep creating! 🙂
Very cool distortions in this one, @ruby panther! I like how the red gradient is subtle and how it stands out really nicely from the background. Well done!
@safe flint wow this turned out really beautiful! I like the way that you blended the drawing to the mask. The colors are looking awesome as well. Nicely done!
Challege 5. Hero. There is a 1% Opacity Dissolve across the front. The Hero is looking through an energy field. Just seemed right to me. Please, I am open to suggestions. Thanks to all!
I like the way that you positioned the graphics @lucid plover! Also, it looks very hand made which is a great style for the decal. Great job!
@slow stirrup super cool explosions! I like the stroke on version two, especially because it helps the B and M to separate themselves from the background. Great job!
my hero challenge, mood board, etc
Very explosive @sacred field! Hah! Really like how you played with the pattern. If you want, you might decrease the pattern’s opacity so the words in the front might be able to be read a little bit easier. Loved the subtle gradient fill for the word of the bottom! Nicely done!
Thank you @coral stone
Gave +1 Creative Carma to @coral stone
@coral stone thank you. I also did a logo. I haven’t gotten other feedback on it. It’s something I had in my head a while
Gave +1 Creative Carma to @coral stone
Super cool work @bold valley! I like the colors that you used, that's a very interesting approach to the challenge. My only suggestion would be to apply a brighter tone, or even the white from the background, for the word Bazinga, so it will stand out from the background a little more and won’t blend with the dark tones from the shape behind 🙂 Well done
@safe flint let me take a look 🙂
@coral stone Thanks, Valdair! There were some things I didn’t understand, like why didn’t the whole pattern take the color? I’ll play with it! Appreciate it! 👍
Gave +1 Creative Carma to @coral stone
So how did I do? I notice a bit of lines on my "H" like symbol on the bevel. How do I fix that? The background came from a free download from Dreamtime. The oily metallic texture that matches my villain palette is tin foil I photographed with a color dodge filter.
@safe flint Loved how the metallic background is very consistent to the emblem, I like how it suggests a movement to the composition. The colors also turned out into a great combination, especially with the golden stroke and the gray/silver H. Awesome work .
@sacred field no problem 🙂
When you are creating the pattern, make sure that the selected layer has the colors as well, not just the graphic. If they are in different layers, one thing that you can do is create a merged copy (ctrl+shift+alt+E (that's a long shortcut hah)) > press Ctrl+A and then Edit > Define Pattern. This way, you won't need to merge the original layers to create the pattern. Let me know if it worked out.
@coral stone thank you. I hope I can get more done this week. I hurt my hand.
Gave +1 Creative Carma to @coral stone
@vague sail Super cool colors! Really like the dark atmosphere of your composition. This is just a nitpick, but I think that brightening the background just a bit would make the bottom area of the mask pop a little more. Great job with the textures and colors.
Sorry for that @safe flint, hope you feel well soon. Feel free to share here the results 🙂
@coral stone Thank you! 🙏
Gave +1 Creative Carma to @coral stone
@hollow yarrow WOW this is amazing! The composition came together really great! Loved the halftone patterns, the colors, the strokes, and everything haha. Fantastic work! 💯
@untold iron awesome work, Jae! Really like how you created a blending behind the WHAM! My only suggestion would be to brighten the Wham colors just a bit, this will add more contrast and will help it standing out a little more. Great job with the pattern! 🙂
@magic wagon very nice use of the effect, Bruno! The subtle pattern on the background with the colors was a great way to keep the design consistent, allowing the BAM! stand out. The dotted pattern was also a pretty nice touch. Excellent work!
This is super cool @eternal mica! Loved the way that you played the effect. The font and the colors suggest a playful drawing mood. The repetition of the Kaboom Pattern 3 and the movement from the 2 is looking very on point. Nicely done!
thanks I'll make the update 🙂 @coral stone
Gave +1 Creative Carma to @coral stone
Not an onomatopoeia...but I did create with a custom brush! Struggling with a pattern.
@safe linden very nice work! The way that you paid attention to the details made the whole composition come together really great, especially the small explosions on each eye. My suggestion is actually an optional one, if you want to enhance the metallic look of the layer, you might add a little bit more contrast to the overall image, for that you can use a Levels adjustment layer and bring the first and third slider a little closer to each other. This will help to make the texture stand out a little more as well. 🙂 Awesome work!
Loved the way that the yellow pattern stands out from the background @cold oyster! The 3D look of the “Zap” worked out amazing! I like how the 3D lines indicate some movement. Super cool work! 🙂
@sweet fern Cool work, Ron! Loved the way that you combined the shapes and the organic edges of the text. The warp worked out really great as well.
These colors are awesome @young karma! I like how the lines from the background enhance the focal point straight to the subject. The colors on her hair are looking great, and I like how the mask combine really well to the walls and the clothes. Well done! 👍
@gilded flame Loved the intensity of the colors that you used, Nadia! The black outline was a great choice to separate the yellow text to the yellow explosion. I can see that you added a subtle drawing clipped to the text, I like how it enhanced that comic book style at the same time that it's not distracting. Great job!
Great job with the pattern @half lichen! I like how the graphics are fading on the diagonals. Excellent use of colors as well! 👍
This is looking very cool @earnest junco! Really like the way that the overlays turned out in your composition. My only suggestion is just a personal preference that you might try and see if you like 🙂 You might add a levels adjustment layer and increase the contrast of the subject just a bit more, for that you can decrease the distance between the first and the third slider, bringing them closer to each other. This will help to add more of a dramatic effect with a high contrast 🙂 You did an excellent job with the mask, loved how the lighting is, and the 3D effect of the element in the middle!
Loved the texture that you used for the pink organic shape @hot thicket! My only suggestion would be to adjust the "O" color so it will have more amount of contrast against the background, allowing it to pop a little more and to be read more easily!
Great job! @compact pecan I loved the way that the graphics have a 3D look! I also like that you added a shadow to them, making some background separation. The small "splats" overlapping the other words turned out really cool as well. Nicely done!
@simple idol this is looking super cool, Biola! Really like the halftone pattern and the colors that you chose. My only suggestion is that you might try putting the patten behind the decal, so the attention could be straight to the graphic in the front. If you see that your image looks very busy, you can also play with the opacity of the pattern, just some ideas, of course 🙂 Nice job!
@coral stone thank you for your feedback. I had a tough time working with the pattens. I’ll give it a shot! 🙏🏿
Gave +1 Creative Carma to @coral stone
@simple idol Feel free to tag me if you need any help 🙂
@coral stone Thank you. I appreciate your critique
Gave +1 Creative Carma to @coral stone
Challenge 5. Hero Re-Do. I hope the Dissolve shows up in this. A long time ago, I took a class where Val placed a Dissolve over the entire image. She made it look lovely. I tried.
@coral stone I obviously need to learn to work with custom patterns, more! This is a lot easier to read! 😉
Day 5 Update - I brighten the Wham @coral stone
Hello everyone, here is my Day 5 challenge, any feedback is welcome
Thank you @coral stone!
Gave +1 Creative Carma to @coral stone
Daily Challenge 200824 - Onomatopoeia CRACK
Day 5 - Onomatopoeia (Take2)
After a "BANG!" there is a "SPLASH!"
@hollow yarrow WOW this is amazing! The composition came together really great! Loved the halftone patterns, the colors, the strokes, and everything haha. Fantastic work! 💯
Thanks@coral stone! I appreciate!👍
@young karma I love how you matched the pattern and coloring of her outfit and the mask as well as the background environment. Really cool theming there! My only minor suggestion would be to match the lighting of the mask to the lighting of the source images. She seems to have shadow on the sides of her face and hard light in the center. Perhaps darkening down the sides and boosting the light a little in the center might look good. Here's a quick example. I use a soft brush with a multiply layer for the shadows, and a color dodge layer for the boost of brightness in the center. Really nice work, this looks great!
(Click "Open Original" for best quality)
@young karma Oh no, hope you're feeling better! I like the sort of retro look you're going for with the black and white images and the more subdued color palette! The like the contrast you have in the brighter hero colors vs the darker villain tones. The textures add a nice element as well!
@simple idol Very nice! I like the way you handled layering the images here to create this composition. There's a nice balance and sense of movement to it. If I had any suggestions I think you could add a subtle very short shadow under the mask on the face of the large background figure to act as an occlusion shadow. I usually do this with a multiply layer and a soft round brush but a simple drop shadow could do the trick. It might also help to tweak the mask ever so slightly to be a bit taller on the left side, and shorter on the right side to match the perspective a bit more. You could do this with the perspective warp or even tweak it with the normal warp tool. The way you faded the background figure with the dissolve works really nicely!
@ruby panther Very nice! I love the halftone texture in the background, it really adds to that comic book feel. It could be interesting to see a version with the explosion shape in the background filled in with yellow. I think that could push that classic comic feel even more. If the values of the red and yellow are too close together you could always add a drop shadow or black stroke around the text which I think would still fit the look of the comic theme. I like the warping of size on the text!
@safe flint Great design! I like the simple structured lines across the mask, it gives it a very orderly and heroic type feel. The color scheme and texture of the mask is working really well too!
@lucid plover Ooh, loving the text change. It feels very on theme with the mood and look of this image, nice work 👍
thank you @bleak fossil
Gave +1 Creative Carma to @bleak fossil
AMAZING! I didn't even notice that! Thank you @bleak fossil! You've given me something to obsess about for a few hours! 😄 Merci!
Gave +1 Creative Carma to @bleak fossil
Hah, no problem! @simple idol
@young karma Really cool combination of textures and colors on this mask design! The half tone texture and the more glittery texture give it a really interesting feel. Very nice job!
@slow stirrup Looking good! I like how you included both colors of this one too. It could be interesting to see each shape and the text with a bit of a bold stroke to push that comic book feel, but of course that personal preference based on what you're going for. I like the idea for this one with the cauldron, nice work!
@sacred field Hah, very nice Marc! My only thought is that it's a bit hard to read at a glance with all the information going on. The text and logo are a bit overpowered by the patterned background, though I think this could be an easy fix in a few ways. Instead of having the background pattern black, maybe a light grey (or just lowering the opacity) could help. Also giving the top text and the star shape behind "Whap" something like a yellow fill could help them read a little more from a graphic shape standpoint. I think both of these changes could possibly help everything read a bit more clearly. Nice job with the "Whap" shape and design!
Edit: Just saw your latest updated one, much better readability! Really nicely done 😄
@bold valley Looking good Ralph! I like the background pattern you got going here. I feel like the center shape could look nice as a gradient shifting between that red and a brighter orange to give it a bit more of a dynamic feel, and the black text might look a bit better colored white with a black stroke, though both of these things are really just up to personal preference. Just a couple ideas. I really like the style of the shapes behind the text 👍
@untold iron Great effect for the Day 5 challenge! I really like the contrast between the green and black/orange background colors. I wonder if giving the WHAM text layer a bright yellow/white outer glow could give it a bit more punch to sell that "WHAM" effect. Nice work on this design!
Edit: I saw your update, and I think the brighter text is definitely a nice addition.
@earnest junco Really cool! Really neat gradients across the mask, it gives it a nice look. Also, nice job on the beveled shape you added to the center, it does a nice job of making the mask stand out as a unique design. Looking good!
@vague sail I really like the bold look of the yellow/purple design on this! The added lighting helps give it some pop too. The only thing I might suggest is I feel like the background glow or brightness could be raised up a bit to separate the background from the dark silhouette of the mask a bit more, but while still retaining that dark and moody feel of the lighting you have. Very nice!
@hollow yarrow You're killing it with this Day 5 design! The gradients and the shadow do an awesome job of giving this design some great depth. The background texture and halftone texture also add a really nice element and classic look. Great work with all the shapes as well, you really captured that bright and punchy comic book style with this one! I especially like the one with the plain background but both have a really nice look to them. Well done!
@magic wagon I like the gradient and halftone texture on this Challenge 5 design! The bowing shape of the letters makes for a cool effect. I wonder if a bolder color in the center like yellow or orange (or a gradient) could give it a little extra punch. Nice work, the faded background texture is a nice touch too!
@eternal mica Very cool Ted! Really digging the style and look of the Day 5 challenge. I like how it has a bit of a hippie/tie dye look to it, and the layering of the text adds a nice sense of depth while still reading clearly against the background. Great colors 👍
@safe linden Ooh, great colors on this! I like the sort of metallic look of the shine too. I assume you're going for a dark image/mood with this, but I feel like a levels adjustment to boost the brights a bit might look good overall, even if it's just softly masked to the center only to maintain a sort of vignetted look. Also adding a drop shadow to the mask layer might help give the mask a slight ambient occlusion shadow look to make it a bit more realistic. Really cool design!
@cold oyster Looking good! I like your take on this challenge. Almost looks somewhere between a metal texture and a stormy sky. This is just personal preference but it might be nice to see the center of the design boosted up a bit brighter for a punchier effect. I often like to use a soft round brush and color dodge layer, or a masked levels adjustment to control areas of boosted light. Just an idea. Nice work!
@sweet fern Really cool to see these colors applied to this design! They definitely have that classic look to them. I feel like it might look cool to give the text a solid black hard edged drop shadow to create that sort of 3D text look you often see with this effect. It seems like it might give you text an extra bit of punch and focus. The stars are a nice addition!
@gilded flame Nicely done! I really like the classic bold colors here, it gives it a lot of contrast. The extra thickness of the stroke on the text also helps make that bit stronger visually than the other elements which works really well. Nice job!
@half lichen This pattern is looking really good! Nice job on the design graphic, I like the warping of the text too. The color gradient adds a nice sense of depth to the image 👍
Thank you @bleak fossil ! 😁
Gave +1 Creative Carma to @bleak fossil
@young karma Ooh, great styling to this! I really like the color theming between the graphic and the super hero. The sort of paper cut out effect with the stroke around the super hero and the shadow makes for a really cool look. The halftone texture is a nice touch too!
@plain sable These are looking good! I like the added shadow on the shirt and how the design breaks the frame of the circle. The background gradient and texture on Challenge 5 makes for a really cool effect. Though I wonder if the star shape would work better as a lighter blue like we see in the K against the dark background, or maybe even a bit of a bright outer glow? Just something to give it a bit more pop. Nice work on both of these!
@bleak fossil Thanks Sam. I really had a lot of fun with this project.
Gave +1 Creative Carma to @bleak fossil
@bleak fossil Thanks. I'm gonna work on it some tomorrow.
Gave +1 Creative Carma to @bleak fossil
@urban berry I love your take on this challenge! Really cool to see something with more of this friendly, light pastel color palette. The texture to separate the two star shapes is a nice touch as well. I think these are working really well, if I had to suggest anything it might be interesting to see the text with a subtle drop shadow to see if that adds any more depth? But that's a minor point of personal taste. Looks great!
@neat sparrow Very nice! I like the beveled star shape you have going around the text! It could even be cool to see a couple fragmented dots/pieces around a couple of the star tips (like the piece we see next to the M) to add a bit more pop. I also think the text might look a bit better without the lines from the star across the B and M. It might just help separate it and stand out a bit more. A bit of a drop shadow on all these elements might be a nice effect as well. Just some ideas, this is looking good!
@burnt marten Very cool Jen! You seem to have a really strong stylistic direction going with all these elements. The color palette is looking really solid, and I like the extensive font exploration. Really interested to see what you come up with using this mood board. Nice work!
@coral stone Thanks for the input. I used a daisy instead of a more traditional back. Sheldon would have liked it, I hope. I will definitely work on making it stand out more. It does look a little bland.
Gave +1 Creative Carma to @coral stone
Thanks @bleak fossil modified challenge #5
Gave +1 Creative Carma to @bleak fossil
Thanks, Sam! Valdair already suggested those changes, so there’s a 2nd version! 😉 I appreciate it, buddy! Thank you!
Thanks @bleak fossil I'll keep working on it!
Gave +1 Creative Carma to @bleak fossil
@coral stone Thank you for the feedback!
Day 5 - Onomatopoeia
These colors are looking very nice, @shy bobcat! I like how the pattern suggests a movement feel, enhancing even more the decal. Well done!
@young karma I love how you matched the pattern and coloring of her outfit and the mask as well as the background environment. Really cool theming there! My only minor suggestion would be to match the lighting of the mask to the lighting of the source images. She seems to have shadow on the sides of her face and hard light in the center. Perhaps darkening down the sides and boosting the light a little in the center might look good. Here's a quick example. I use a soft brush with a multiply layer for the shadows, and a color dodge layer for the boost of brightness in the center. Really nice work, this looks great!
(Click "Open Original" for best quality)
@bleak fossil Thanks a lot!!! a was thinking about it, but I didn´t know how to do it. I will try to do how u do it!!
These colors are awesome @young karma! I like how the lines from the background enhance the focal point straight to the subject. The colors on her hair are looking great, and I like how the mask combine really well to the walls and the clothes. Well done! 👍
@coral stone Thanks a lot!! 😉
@young karma Really cool combination of textures and colors on this mask design! The half tone texture and the more glittery texture give it a really interesting feel. Very nice job!
@bleak fossil Thanks! 🙂
@hollow yarrow You're killing it with this Day 5 design! The gradients and the shadow do an awesome job of giving this design some great depth. The background texture and halftone texture also add a really nice element and classic look. Great work with all the shapes as well, you really captured that bright and punchy comic book style with this one! I especially like the one with the plain background but both have a really nice look to them. Well done!
@bleak fossil : Thanks man I appreciate!
Daily Challenge 200824 - Onomatopoeia CRACK
Great take@young karma! love the sticker effect (or papercut...call it as you want) on your superRamona (😉)
👍
Super cool work @mild mural! I really like how you played with the colors, my only suggestion would be increase the brighter areas around the decal a little more, so it would have a bigger transition from dark to light. Good job! 🙂
Finally managed to get something for Challenge 5 - had a lot of trouble doing this. The background is my pattern and the main image was my pattern brush
Challenge #4 ...catching up here...Hero photo credit to Sahin Yesilyaprak. Villain photo credit to Drew Hays, both from UnSplash. Are my background and character images working together for the “Hero” ? I wasn’t able to ‘Equalize’ them so they had the right vibe. Always looking too light.
Decided to go with the "SPLAT!" onomatopoeia and messed with the background gradient and blend modes.
PS DCC #5 Onomatopoeia — Brush
PS DCC #5 Onomatopoeia — Brush2
PS DCC #5 Onomatopoeia — Pattern
PS DCC #5 Onomatopoeia — pattern2
Colorful KABOOM 💢
@coral stone Thank you so much for your feedback.
Gave +1 Creative Carma to @coral stone
Hey everyone here is my updated version of Day 5
Great take@young karma! love the sticker effect (or papercut...call it as you want) on your superRamona (😉)
👍
@hollow yarrow 😀 Thx
@compact pecan Looks great!
Very nice effect @mortal crescent! Sorry you had trouble, let me know if I can help you. I really like the way that you positioned the pattern. Also, the warm colors add a nice sense of action as well 🙂
Thanks @buoyant nova !
Gave +1 Creative Carma to @buoyant nova
Hey, @winter tinsel! This is looking great! Really like how you managed the colors. A cool trick to make the lights work is by creating a solid color 50% gray (#808080) and change the blend mode to Color. It will remove the color distractions and show only the luminosity values. To match both images, you can use the brightest area of the background and the brightest area of the subject and see if they match. Right now her hair looks a bit brighter than the sky of the background. You can correct that with a Levels adjustment layer and decrease the white point by moving it to the left. I'll give you a link for a super cool technique that Aaron uses the Threshold adjustment layer to define the brighter and darker spots of the image and uses the Levels to correct. I hope this helps 🙂
https://www.youtube.com/watch?v=Up62iKaydfE

Today we show you how to realistically match lighting between two photos in Photoshop! Learn how to use a Threshold Adjustment Layer in combination with a Levels Adjustment Layer to adjust the highlights and shadows and help your subject to blend in seamlessly to a new backgro...
These textures are amazing @tacit condor! Really like how the decal turned out. The subtle strokes and the gradient really helps adding the comic book style. Very well done!
Daily Challenge 200824 - onomatopoeia -- with gradient
Morning all. Here is my updated pattern. Thanks for your feedback @coral stone. Is this better?
Gave +1 Creative Carma to @coral stone
Day 5 - Onomatopoeia (3rd Design)
ZAP! Regular
Day 5 - Onomatopoeia (3rd Design)
ZAP! Inverted
Day 5 - Onomatopoeia (3rd Design)
ZAP! Animated
Day 5 with a little more contrast
Great improvement @simple idol! Well done! 🙂
DCC day 6
Challenge 5 ZAP version 2
#psdcc Day 6 Calling Card, tried to go with a flashlight discovering the card look.
Villain tag.
I did challenge 5 before challenge 4. I didn't make a brush but had so much fun with so happy accidents I left it as is.
DCC - Day 6 - Calling Card
DCC - Day 6 - HellCat Calling Card
Thanks for the feedback @bleak fossil and @coral stone I tried playing with the levels adjustment layer and here is the before and after!
Gave +1 Creative Carma to @bleak fossil
@earnest junco This is looking really good! Great mockup, the brightness boost definitely helps give it more contrast and pop. The drop shadow under the mask is a really nice touch as well. The only small suggestion I have would be to perhaps tweak the lighting on the mask a bit to fit the photo of the girl. She seems to have a bit more shadow on the left side, and more light on the right. I often like to use a multiply layer with a soft brush for shadows, and a color dodge layer for lights to adjust images in that way. Maybe something like this? It's subtle but I think it helps. Looking good!
@hollow yarrow Really cool to see how many variations you're doing for this Day 5 design and how far you're taking it! I love the animation too, lots of contrast and energy to it. Great work!
@bold valley Loving the contrast of the center design in this! Really nice contrast and read to it. I think the background's equal contrast is competing a bit with the center design, perhaps lowering the opacity of the background pattern, or even switching it to a different hue like blue could help separate the two elements a bit further? Really nice work!
@fringe sun Really cool style to this! I like the sort of hand drawn look to it. I wonder if using a more textured brush for the edges of the blue part of the text might help push that feel a bit more. Maybe even a halftone texture over the text could look cool too. Of course these are just ideas. Nice work, the sharpness of the star shape in the background gives it a lot of energy!
@safe linden Really cool! The texture on the symbol is looking good. I really like the flashlight idea as well. My only thought is flashlights tend to have a slightly harder edge where the light drops off a bit more noticeably, but that's a bit of a minor detail really. The contrast pulls the focus to the symbol extremely well. Your pattern design is looking very nice too, I really like the layering of the different colors, nice work!
@sacred field Very nice Marc! Really great logo/symbol, it works really well with the textured wall backing. I really like the addition of the drips, though I wonder if they might look more realistic if you found some paint drips graphic/texture and composited that in, since the shape and texture of the soft drip lines makes it look more spray painted than dripping naturally. Of course that's just a small nitpick. Really liking this logo!
@safe flint Looks great! I really like the style and warping of the text on this. I wonder if lowering the opacity on the background pattern, or even adding a yellow stroke around the star shape to mirror the text could help draw even more attention to the center graphic. Though I think it's reading quite well as is. Nicely done!
@untold iron Very nice Jae D! You got a nice spray paint effect on this one, I like a bit of the hue variation with the green and yellow shifts in the coloration. It seems to fit nicely with the gritty wall texture. I like the flashlight effect as well!
@simple idol Really great shape on the pattern challenge! I like the bold colors and stroke on the text, it definitely has that comic book feel. My only suggestion would be to make the big logo in the center compete less with the images in the background. Perhaps a bit of a drop shadow behind the center logo would help, or even using a soft brush the logos in the center of the background so it fades them out ever so slightly where the center logo overlaps. Just a couple things that might help them compete less with each other. Great design and colors!
@bleak fossil thanks for the suggestion. That was bothering me and now I know what to do!
Gave +1 Creative Carma to @bleak fossil
@bleak fossil Thanks, Sam! I’ll see what I can come up with! I’ve got to do some real work for a while (laying out a sheet of four up, postcards and designing a new business card for the big boss, my wife 😉) hopefully it won't take all day! ~ Marc
Gave +1 Creative Carma to @bleak fossil
calling card_Challenge #6 👍🏾
Challenge 6 calling card for Deception and Rhapsody
thanks so much 🙂 @bleak fossil
Gave +1 Creative Carma to @bleak fossil
Day 6 hero calling card
@bleak fossil Thanks, Sam. I'll try those recommendations.
Gave +1 Creative Carma to @bleak fossil
A little blue in the back. Did you know a bazinga is a type of jellyfish? There is one in the very back, colored yellow. Not really distinguishable.
I can't get my challenge 4 to post. Can anyone help me? What format do I use? What size?
Calling Card - Ninja Turtles 
PCC 6 My attempt at portraying a realistic sprayed hero emblem on a wall cheers for the demo @jolly quest does it work?
@bleak fossil yes the mask looks more a part of the face now, thank you!
Gave +1 Creative Carma to @bleak fossil
Day 5 - Onomatopoeia
Day 6 calling card
Challenge 6. Kept it simple.
I figured out my posting problem. File was too beefy! I took a couple of celestial wallpapers to use. I make it look like the icon in attached to her skin which is a little creepy. 😆 This was my first real test of photo work outside standard tutorials.
Bishop's Peak in San Luis Obispo, CA. That's my wife and daughter at the summit. Don't get any ideas, they put you in jail for really painting here.
@bold valley that's awesome, for a moment I thought it was just a picture of the cliff lol
PCC ZIING
Daily Challenge 200825 - Hero Calling Card
@hollow yarrow Youre having way too much fun with the onomatopeia. Keep them coming, theyre awesome. Which is your favorite?
Super Dad left his calling card late last night in this coffee shop/diner.
Having way too much tagging ....
It looks like someone is angry @magic wagon haha. Great job on the effect, Bruno! The paint drippings are looking super cool, I also like the vignette that you added, it matches the black painting very nicely. Well done!
@mortal crescent you got some really cool blending in these ones! I loved the way that Rhapsody is interacting with the background. Great job!
I’m a big fan of your font choice @slow stirrup! I like how it matches really well the magic mood at the same time as it is geometric! Great job making the texture as well. 🙂
That’s very creative @hot thicket! Really like how it looks like a magical portal. The colors are looking very on point as well. If you want to play with some perspective, here’s one thing that you can try: select the portal layer > press ctrl+T to get the transform handles > right click on the portal and choose Perspective. With the top left handle, start adjusting the portal's perspective following the horizontal brick lines. Let me know if you need any help 🙂 Well done!
It’s always great to see the Ninja Turtles back @young karma! The way that you played with the edges of the painting made it work very nicely. I like the small paint drippings on the circles as well.
@buoyant nova Super cool job positioning and distributing the elements. I like how the background lines help to guide the attention to the middle area in a subtle way. My only point of feedback would be to choose a brighter tone for the Boom instead of black, you might play with the yellow or even the red or white., so it won’t blend to the dark explosion from behind 🙂 Great job!
This is beautiful @forest aspen! I loved the way that Composite Magic feels very hand-painted. The dripping and the painting edges are looking very on point as well. Nicely done!
Nice job with the composite @fresh swallow! I like how the gloves give the impression that there is some power that might be coming from them. I also like how you changed the colors, how did you make the face green? Excellent work!
You did an amazing job with the blending @safe flint! The only nitpick I have would be to position the shadows from the emblem and the mask just a bit to the left, to match the light direction. (Using her nose as a reference, we can see that she has more light coming from the right, creating the shadows on the left side). Spectacular work with the celestial wallpapers. Day 6 is looking very nice as well, I like how you kept consistency using the Libra symbol and how the drippings on the left really suggest the direction that it was painted, creating even more realism to the scene 💯
@plain sable very nice, Susan! I like how the minimalistic lines are looking. The edges with the noise and the small drippings were a super cool touch for it as well. Well done! 👍
Just like @fresh swallow I thought it was really part of the picture, @bold valley 😄 ! Loved the way that you blended the decal to the rock especially how you preserved the original shadows and highlights making it very realistic. Amazing job.
Super cool job @vague shuttle! I really like the warp shape that you added to the word, and how the glow gives a neon and a 3D effect at the same time. Day 6 is looking very nice as well. I like the intensity of the blue/cyan tones. Great work!
Wow cheers @coral stone
Ted, this is amazing! @eternal mica Loved how you played with the color splashes of colors. The black and white strokes of the letters are looking very cool. My only suggestion would be to apply a blend mode or play with the opacity for the cyan tones, so the bricks on the background might be able to appear a little more 😉
Super cool approach to the challenge @young karma! I loved how you played with the lights. The subtle irregular edges add a nice touch for the effect as well. Nicely done! 😄
@coral stone Thanks! I selected the face separately from the eyes and changed the color balance, then used the pattern brush I created to give him the decayed/sludgy look.
Gave +1 Creative Carma to @coral stone
That's great, @fresh swallow! Thanks for sharing, you did a very impressive job!
Gave +1 Creative Carma to @fresh swallow
@compact pecan this great, Hugh! I like how the drawing is interacting with the wall, especially on the lighter areas from the right. Super Dad will be very proud when seeing this 😄 Well done!
@arctic rover It really does, Jude! Loved how you blended the text to the background. My only nitpick would be to brighten it a little bit more, you can use the red areas on the left as a reference guide, so the lines between the bricks won’t be fully black. Awesome blending on version 2, I like how the textures of the bricks are showing through! Amazing work. 👍
@coral stone I appreciate it! I'm really having a blast learning how to use photoshop. I started learning photoshop because I create things in blender and needed to learn photoshop for concepting
You're doing awesome! 🙂
@hollow yarrow Youre having way too much fun with the onomatopeia. Keep them coming, theyre awesome. Which is your favorite?
Thanks@eternal mica... I have a little preference for inverted ZAP! but I plan to do a "ZZZ..." one as tribute for one of my favorite occupation... If I found time 😴
I created this for a project. I made the letters and crystals in blender and did some minor tweaks in photoshop
this was the final image:
@bleak fossil Not great, but a little better! (I hope) 👍
@coral stone Ok Valdair. I’ll make sure I fix the shadows on the composite.
@hollow yarrow what did you use to get the texture inside the letters in the first one? and the dot texture behind the white shape?
Thanks for the kind words @coral stone ! This is really turning out to be a fun challenge.
Gave +1 Creative Carma to @coral stone
@coral stone WOW. I changed the BM to Subtract and the cyan turned into this blood red. The image is so much more sinister this way. I love it. Thank you Valdair.
Gave +1 Creative Carma to @coral stone
That looks really nice
@neat sparrow I would suggest you add a stroke to the text in your image, increase the contrast between the text and the magenta, or play with the saturation. I believe its too difficult to read.
@fresh swallow I have no idea what Blender is but that is one heck of an image. I have no idea how it relates to our challenge, but its cool none the less
@neat sparrow I would suggest you add a stroke to the text in your image, increase the contrast between the text and the magenta, or play with the saturation. I believe its too difficult to read.
@eternal mica Thank you much for good advice!
thanks @coral stone
Gave +1 Creative Carma to @coral stone
Challenge #5
@hollow yarrow what did you use to get the texture inside the letters in the first one? and the dot texture behind the white shape?
@eternal mica : Hope this screen shot will help answer your question... Nothing complicated.
I tried to be as clear as possible but sorry for my bad English... If you have any question or comment don't hesitate!
@hollow yarrow Thank you. Youre very kind to share in this fashion. Im definitely going to print and save those instructions. They are simple and clear.
Gave +1 Creative Carma to @hollow yarrow
@vast sphinx I like the contrast in the structured symbol vs the more handwritten look of the text. The spray paint effect is looking good!
@magic wagon Hah, very nice, I like this little character face! The design and spray paint effect is looking good. The only suggestion I have is lowering the opacity just a bit so it looks a bit more realistic as black paint one a light wall like that wouldn't be completely black. It might also allow a bit more of the texture of the wall to show through which should give it a natural look. Nice job!
@mortal crescent Nice job making these emblems into a spray painted look! I think another blending mode might give a more natural look to this by showing the texture underneath a bit more. Maybe a multiply blending mode? You can always layer different effects too if need be. Looks good!
@slow stirrup Ooh, very nice! Great choice of photos for this design. The logo is looking good, definitely has that spray painted look, it shows the texture nicely!
@hot thicket Very cool John! I like the texture and gradient of this. The purple-blue gradient adds some nice dimension. I think another blending mode that shows a bit more of the texture of the wall underneath might help this look a bit more natural. Sometimes I even stack two blending modes and adjust the opacity to get the right balance if I need to as well. Nice job!
@young karma Hah, very nice, I like this idea! The spray paint effect came out really nicely, and the blending mode works really well to show that texture under the paint. Looking good!
@vague shuttle I like this symbol, and the dripping effect is looking good! My only thought is it looks a bit neon, but at the same time that could be a cool look for a superhero. Something that looks a little bit like it's glowing could be a calling card that really stands out. Though if you want to make it more realistic like regular paint you could always duplicate it and use a multiply layer with an opacity that suits your taste. Though this is really cool as is, nice work!
@winter tinsel I really like the style and texture of this! I definitely get a comic book vibe from this, and the bold colors work nicely. The fragmented text is a nice effect too. I like the hand drawn elements of the second design, though I wonder if lowering the background texture's opacity 10-20% might make it compete a little less with the black hand drawn lines. Nicely done!
@neat sparrow I like the bold color of this design! The only thing is it seems a bit hard to read the center text. I'm not sure if changing the text or blending mode would help, but the texture seems a bit too intense around the edges to give it a clean read. The general design and style are looking good!
@eternal mica Really cool ted! I like how far you took this design with the different colors and shapes. The colorful background is a nice effect too. The blending mode you used seems to be doing a nice job of showing the texture of the wall in a realistic way. Looks good!
@sacred field Ooh, I like it, definitely has a more realistic drip effect to it. Nicely done 😄
@eternal mica Blender is a 3D modeling suite. I only posted those pics to illustrate my point of using blender to create assets and round them out in photoshop. Thanks for the feedback
Gave +1 Creative Carma to @eternal mica
@bleak fossil Thanks, Sam! I really appreciate it! 👍
Gave +1 Creative Carma to @bleak fossil
@fresh swallow Very cool to see you combine techniques like this! I really like the font styles of these, both have a distinct feel to them. I feel like the text in the final image could even be a bit brighter to balance the intensity of the bright points on the crystals. Looking good!
@arctic rover Very nice Jude! I haven't seen the original source images for the second one, but I assume you added the "vote" text at the top? I think it's looking really good, my only thought is it could use a slight perspective warp to match the angle of the wall a bit more. Very subtle, but it might help give it that extra bit of realism. For the “Not Indicted…” image you really nailed the hand drawn/stenciled spraypainted look. Though I think another blending mode (maybe multiply, though you might have to raise the brightness of the design) would help to realistically show the texture of the wall underneath a bit more. Nice work!
@compact pecan Ahh, I love it! Great image for the mockup too. I really like the design of this logo and you did a really nice job with the texture and painted look of it. My only suggestion is I feel like the blending mode you used makes the two wings a little too different looking. The left wing almost looks too dark and bold, and right wing seems a little too washed out. If you can't find a blending mode that fits perfectly what I might do in this situation would be to mask out the left wing with a soft brush ever so slightly so it essentially lowers the opacity of it just a little, and then maybe duplicate the whole logo and mask out everything expect the right wing to double it up, maybe even on a multiply layer, and adjust the opacity until they look even. Hopefully that makes sense, it's looking solid, but that's just an idea if you think that might help balance it. Nicely done!
@young karma Ooh, really cool take on this challenge! Kind of looks like light projected onto the building, but I'm assuming it's more along the lines of the symbol on the building giving off a glow? If that's the case I think you could make the symbol even brighter and more intense if it's actually emitting light, though if it's light being projected onto the building I think it's working great. Either way, really cool idea and effect!
@vague shuttle Really cool effect with how you layered the letters and colors in this "Zing" design! The outer glow helps give it a nice readability too. I like the colors!
@bold valley Hah, really cool idea! You did a great job of handling the brightness and contrast of this design on the rocks. It looks really realistic in the light and shadow of this image without seeming unnaturally saturated or anything like that. The texture shows through very well and it even seems to conform to the shape of the rock. You nailed it!
@bleak fossil Thanks! I'll mess around with it and see what comes out 😄
Gave +1 Creative Carma to @bleak fossil
@young karma Ooh, really cool take on this challenge! Kind of looks like light projected onto the building, but I'm assuming it's more along the lines of the symbol on the building giving off a glow? If that's the case I think you could make the symbol even brighter and more intense if it's actually emitting light, though if it's light being projected onto the building I think it's working great. Either way, really cool idea and effect!
@bleak fossil -- I was hoping for it to be light being projected onto the building, but I wish it were more authentic.
@young karma Ahh very nice, that's the impression I got when I looked at it! Just wanted to make sure that's the effect you were going for.
@hollow yarrow Thank you. Youre very kind to share in this fashion. Im definitely going to print and save those instructions. They are simple and clear.
@eternal mica : always happy to share!
@bleak fossil Thanks Sam. Im really enjoying this series of challenges, and Im trying to pull off some things Ive never done before. With yours and @coral stone's help, I feel im getting fun technical results. I still have a long way to go creativity wise.
Gave +1 Creative Carma to @bleak fossil
@bleak fossil Wow. Thanks.
Gave +1 Creative Carma to @bleak fossil
POW_WHAM Challenge
Nice
@abstract parcel Thanks
Gave +1 Creative Carma to @abstract parcel
You are welcome 🙏
@coral stone Thank you for your suggestion, made the changes 🙂
Gave +1 Creative Carma to @coral stone
Nice
Challenge 6, I wanted to use the bleach bottle with the post box but did not work. Here is my hero tag.
Great feedback @bleak fossil I was thinking the colors seemed a bit off but I was also liking how the right side really seemed to look like the light bulb was washing it out. A conundrum for sure.
Challenge 6 ( Calling Card-Night Walker) 🧛🏽♀️ 🦸🏽♀️ 😎 😉
Calling Cad - Tornado
chanllege 6
@fluid wharf, nice work! I think the first mask is better.
thank you ... yes you right less is more
PS DCC #6 Calling Card
Very nice work @abstract parcel! Loved how textures on the Onomatopeia 1, and how the words and the explosion graphic have a nice amount of contrast on version 2. Well done!
Super cool job adding a context for the onomatopeias. @chilly hawk! I really like the way that you brought an image, enhancing the action mood. Great job!
Thanks @coral stone
Gave +1 Creative Carma to @coral stone
@shy bobcat this is looking very nice, Pam! I loved the drippings and the color combination. I wonder if you could brighten the triangle and the S just a bit, this will help to sell even more the effect since there is some light where they are placed 😉 Well done!
Great job with the textures @ruby panther! Loved the way that the graphic is blending to the brick wall and the organic edges. My only suggestion would be to darken the emblem just a touch, right now the area where it's placed seems to be losing a bit of a contrast. This will help the bricks and the lines appear a little more from it 🙂 Awesome work!
Super cool tornado @cold oyster! I like the textures you created for the painting. My only suggestion would be to brighten the background just a bit more to match the brightness of the tornado, this will help it to be even more realistic 😉 Great job!
I really wasn't feeling inspired yesterday because of the Gulf of Mexico weather situation. When I woke up this morning, I realized I was reminded of the "V" television series in 1983 - 1984. So, it's simple but meaningful, to me (at least.)
Thanks @coral stone I'll work on it!
Gave +1 Creative Carma to @coral stone
@coral stone Thanks for the feedback and compliment.
Gave +1 Creative Carma to @coral stone
Challenge #5
Gave the Calling Card another shot...better or worse?
@coral stone
@untold iron it might be because of the Graphic Processor.
Go to Edit > Preferences > Performance and enable this check box:
I got an error
That's odd, try to restart Ps and check the preferences again.
ok will do 🙂
@sweet fern I remember that series, really good
@coral stone it's checked already 😯
Answered you in #❓ask-a-question 🙂
DCC Day 7,superhero power from the villain
Onomatopeia
Challenge No 6 The Wall
Decided less is more and simplified my pattern.. Catching up!
St Peter's Gate/Portal. Not the color you want to see reaching for you! 👹
Photo Composing_Day4, that challenge was hard for me. Not the best work but I'm trying to catch up.
Hello everyone, I'm a little late with the challenge but here I share my day 4 🥳
Fun w PCC 7
DCC - Day 7 - Super Powers
late submission...sorry
Calling card Challenge. Running a day behind 😅
All right. Here is my calling card. Thank you in advance for your feedback. It is appreciated.
Challenge#7_Super Power Effects : "RISE BAD BOY" 👍
KaPOW Brush and Pattern. The possiblities are endless! Thank you for the teachings!
Looks like trouble at the portal...
Coming into another realm. Day 6 superpowers
PS DCC #7 Super Powers
Very nice @cold oyster! I like that you brightened the vignette as well. The tornado looks very consistent to the background now 🙂
Day 7: Super Dad's super power (well, one of them) would obviously be his ability to protect his children from harm. The stock image of the hand was black&white, so it was a challenge to colorize and (TRY to) get the skin tone to match the baby.
Day 6 - Calling Card
Daily Challenge 200826 - Super Powers
Hi everyone! I'm back on the mask day. But I'm not thrilled with the transition between her face and mask. Especially the way her cheeks are highlighted. does anyone have ideas? Thank you!!
@sacred field love it. terrific interpretation of the challenge.
Thank you @coral stone 🙂
Gave +1 Creative Carma to @coral stone
Thank you @bleak fossil 🙂
@cold oyster Awesome effort.
Hi everyone! I'm new and a little behind, but here's my take on DCC #7, Superpowers:
@oak mist Can you try uploading again? See the little plus sign in the chat box? use that to upload your image. And welcome in!
@arctic rover lol, you type more quickly than I do!!!!
Hi @arctic rover ! Have been trying, doesn't seem to like my image :(. And thank you for the welcome!
Gave +1 Creative Carma to @arctic rover
@oak mist there is a size limitation you may be exceeding. Try shrinking your file size then give it another try.
@oak mist HOOORRRAAAAYYYYY, Now we can really welcome you in!!!! Very Poltergeist Image.
@oak mist HOOORRRAAAAYYYYY, Now we can really welcome you in!!!! Very Poltergeist Image.
@eternal mica Thank you!!! 😆 Haha!
Day 7: Show a super power. This only repeats 3 times; you'll have to click again to see more. It's a little abrupt in the middle, but . . . .
Day 7
@slow stirrup I am loving your magic potions!
She's evil. Thru and thru. Who left the portal open?? (PS That's me in last year's Halloween costume. And yes, I did scare the little children...)
oops wrong image don't know how to delete
Challenge #6
I really like the effect on this one @vague sail! The overlays created a nice double exposure look for the composition. Here's one suggestion that you can try and see if you like. You might position the dog to the bottom of the rectangle and increase its scale as little more, so his body would look like it was covered by the edge of the image, like a continuity effect 😉 Well done!
@dreamy drift no problem, Mari! Day 4 is looking very nice! I like the atmosphere that the colors created for the composition. My tip would be to add the colors and the texture to this area 👇just to help to sell even more the effect. 😄 Nicely done!
This turned out really cool @vague shuttle! I like how the noise textures created kind of a disintegration effect for the hand. Great job playing with the scale of the spaceship and the hand, I think this makes the composition look way cooler. Excellent work! 💯
Lovely work @cunning sand! I loved how colorful your work is, especially of the pastel tones in the sky! Very well done!
Woow this is looking very cool @untold iron! Loved the green tone that you chose, especially how, when combined with the dark tones from the image, it creates a thriller atmosphere for the composition. Well done!
@fringe sun super cool effect, Macmat! I like how the Star Flight has sort of a hand-made style, the edges and the dripping are looking great. I also like how you managed the brightness of the graphics as well, though I wonder if brightening juuuust a bit more the airplane emblem might help to sell the effect even more 😄 Good job!
@fluid wharf super cool onomatopoeia! I like the colors that you used for the explosion creating kind of a stack for strokes, my only suggestion in this one is that you might apply a darker tone of the colors already present in the explosion, maybe a dark red or dark blue would make everything even more consistent. Just an idea, of course, 😄 Day 6 is looking very nice! I like how you played with the edges of the graphic, I wonder if a blend mode as Multiply or Linear Burn would make the wall textures appear more through the emblem. 😉
Great effect @simple idol! I like how you blended the emblem to the wall and let the textures appear through it. The drippings are looking very on point as well. Excellent work! 👍
@magic wagon wooow this is looking amazing, Bruno! I like how you managed the direction of the flames and added some flames to enhance their effect. I don't know if that was already on the original image, but I like how the hand looks a little brighter where the flame is standing, suggesting some light as well. Nicely done!
thanks 🙂 @coral stone
Gave +1 Creative Carma to @coral stone
Looking great @slow stirrup! Loved the knockout effect on the text and the way that you managed its perspective with the tag, making it look very realistic. The glow worked out very well, it makes me want to find out which Super Power I can get if I drink one of them 😄
Yay! Thanks @coral stone ! You’re appreciated!
Gave +1 Creative Carma to @coral stone
Lovely work @tropic knoll! I like how you added a drop shadow to the text making it stand out more from the background. The pattern is looking very nice as well, I like how it's not distracting being a nice contextual element for the scene. Well done!
@coral stone Thank you for your feedback. I wasn't sure what to do but this is what I came up with.
Gave +1 Creative Carma to @coral stone
Super cool @shy bobcat! I can see it blending better especially because the highlight textures from the background are appearing now 🙂
Very nice job @sweet fern! I like how you managed the perspective of the edge of the portal and the inside area. The motion effect created for the hand makes me think that someone is calling from help! 😄 Great job!
Woow @hot thicket this is looking very cool! I loved how you played with the perspective of the birds and the portal, the kid coming from is looking nice as well! Nicely done!
Day 7 is looking pretty awesome @cold oyster! Loved the way that you blended the assets. My only suggestion would be to brighten the cape just a little bit more since it looks like there is some light coming from the bottom area 😉 Amazing work!
Super cool work @tacit condor! I loved the way that the subject seems to be running from something that was in the portal. Well done!
Thank you @coral stone . The idea just jumped into my head. I’m a big fan of Stargate SG-1 and I think that helped.
Gave +1 Creative Carma to @coral stone
That’s a super cool job @compact pecan! I like how your composition passes a protection feeling. Very nice job with the image colorization. If you want, you might add some subtle yellow highlights. There is a cool trick to make that, you can create a solid color adjustment layer with some color tone from the fire > put the blend mode in Color Dodge > fill the mask with black > with a soft brush and a low amount of flow, just dab to reveal the new highlights. The baby has a very subtle halo around bottom edges, the ones in contact with the hand, you can mask it so the shadows might look a little more realistic. For the last tip, you might use a brush with a hardness 90%-100% and paint an occlusion shadow which the darkest part of a shadow, they are in the points of contact between the baby and the hand. 🙂
@prime temple I loved the grayscale the pink contrast. I like how the shadows of the words help to separate themselves from the background. Well done!
Loved the results on day 6 @buoyant nova! Especially how you managed the shadows and highlights. My only suggestion would be that, if you want, you might add a blend mode to the Beware text, so it will blend with the background just like the symbol. 🙂 Great job!
That’s a powerful image @young karma! Really like the way the power creates a nice movement to the scene, even though the subject is still. I also like the way that there are some cyan tones mixed to the white ones on the ray. Nicely done
This turned out really great @burnt marten! I like how you kept consistency among the shadows and highlights of the mask and the subject. Even though the mask is placed on a highlight of the subject, it would be creating a sharp and dark shadow. You can use a drop shadow layer style to create that, or even a brush with a high amount of hardness. Finding some reference images on the web might help as well. Bear in mind that shadows aren’t 100% black, so I recommend that you use a darker tone present on the scene and use the multiply blend mode 🙂 Let me know if you need any help! Great job!
Welcome, @oak mist! This is looking super cool, Mykala! Loved the colors and the results that you achieved with the blur. Awesome job!
@eternal mica Thanks, Ted! 😇👹
Gave +1 Creative Carma to @eternal mica
@forest aspen wow you nailed it! Very creative! Loved the animation that you created. Spectacular job!
Thank you, @coral stone! You are always so encouraging. Thanks!
Gave +1 Creative Carma to @coral stone
CARROTS. I tried to add a texture to the overall image, but I couldn't seem to figure it out. It kept coming out as a heavy rainfall. Any suggestions, please and thanks!
thank you Valdair... the problem with me is how to change the color shape .. so I select the shape with laso then fill with new color that make the graphic edge as you see in challenge 6
I think photoshop after update go wrong with me for a bit then everything will be ok
Welcome, @oak mist! This is looking super cool, Mykala! Loved the colors and the results that you achieved with the blur. Awesome job!
@coral stone Thank you so much for the welcome and comments!
Thanks for the tips, @coral stone! I think the subtle yellow highlights really make it seem more like the fire projecting light on the hand and baby. I can't figure out what is causing the halo, but this is about the best I can get - I was even using solid black with 100% opacity to try and fill that in a little. I got "most" of it.
Gave +1 Creative Carma to @coral stone
@sacred field Boy Marc, I thought I didnt like a certain yellow colored hair buffoon, but youve got me beat. 😜 😜 😜
DCC12 07 200826 Assets
DCC12 07 200826 New time travel super power for a superhero
@forest aspen I love your interpretation of the challenge.
Day 7 - Super Powers
Challenge 6 ( Calling Card - Stay home and stay safe) 😎 😉
Challenge 7-(Superpowers-Levitation)
@sacred field The portal image is looking really good! I like the glowing blue portal effect. I feel like the fire could have a bit more brightness and glow to it to sell that flame effect. Maybe even casting some light on the hand. I often like to use a color dodge and/or a screen layer for this effect. Maybe something like this? Nice work!
(Click "Open Original" for best quality)
@tacit condor Nicely done! The Day 6 challenge is looking good. The bold lines and colors of this logo work well for this sort of spray painted effect. The blend mode and texture of the wall turned out nicely!
@sweet fern Very cool, I think a simple symbol works nicely for this effect, as if they leave in quickly before disappearing. The bold areas of spray in the corners and drips are a nice touch 👍
@ebon crescent Nice effect! The masking of the text behind the hand and the shattered glass adds some nice depth and action to the image. I wonder if darkening the background a bit will allow the glass shards and text to read a bit more clearly, the glass seems like it might look good if it was separated from the background a bit more. Just a thought. Really cool idea!
@vague shuttle I think this came out nicely! The texture shows through the logo in a believable way and the softer edges give it a natural look. The only thing that seems odd is it’s a bit hard to tell what the holes on each side are. It looks like torn paper, but the wall looks more like rock? Perhaps the texture difference is confusing me a bit, as it almost seems like it should be more of a broken stone hole type of look. I like the dramatic lighting of this image too, as if it was discovered in a dark room with a flashlight. Very cool!
Good day all. Here is my superpower. I just added it to my composite. Thank you all. I am learning so much!
@lucid plover Very cool! I really like the dramatic lighting on this image, and it seems to match both the fist and blade very well. Nice contrast in the highlights to really make this pop. The background color and texture works well too!
@lime meadow Looking good Fani! I like how both the "crash" graphic and the image have a sort of retro look and feel to them. The breaking glass effect works nicely!
@inland kiln Ooh, the shadow is a really cool effect! The color contrast really makes the logo pop, and the texture showing through really sells that painted effect. If I had any suggestions it might be to lower the opacity of the shadow shape a bit, and maybe even give it a slight blur to give it a more natural look. Really cool texture in this!
thank you @bleak fossil
Gave +1 Creative Carma to @bleak fossil
@simple idol I like it! Really liking the bold colors and half tone texture in this “Splat” pattern image. Really strong comic book feel to it 👍
@fluid wharf I like the colorful design of the Day 5 design! For some reason it almost gives me a bit of a Nickelodeon vibe, hah. I feel like the background yellow shape could look good with a sort of radial gradient with a slightly brighter center to give it a bit more punch. Just personal preference really. For the logo on the brick wall design I’d try using something like a multiply layer to preserve the texture of the wall underneath as well as the lighting and shadow effect from the wall. Nice work!
@dreamy drift This is super cool, really great villain look and design! The high value contrast of the skin and color contrast of the costume does a nice job of making her stand out really well. I think the background clouds and grain add a bit more to that creepy villain vibe too. I like how you fit the emblem into the headpiece. Very nice!
@vague shuttle Really cool idea for the Day 7 challenge! I like the shift between the two backgrounds. My only suggestion would be to mask off a bit of the dissolve effect on the hand to make it read a bit more clearly against the dark background. I think it would help strengthen it as more of a focal point and balance the space ship. Looking good!
@cunning sand Ooh, really great compositing in this! I love the soft colors/lighting and whimsical look of this design. Really nice clean masking with all these elements too. If I had any suggestion it would be that it might be nice to see the cats a little bigger in the scene to create a strong focal point for the viewer. Just a thought, really great work!
@untold iron Really cool idea! I like the sort of ghostly green hand reaching over from the spooky ghost realm. I think a little bit of a brighter section/gradient in the sky on the right might help give the city a slightly more natural/dynamic feel. Just a little boost to the brightness in the center of the sky for example, just so it doesn't look quite as flat. The white portal really helps with that ghostly look, very nice!
@upper rover This is looking good! Though I'm not 100% sure if the van was composited in, if the graphics were applied to the van or both, without seeing the source images. Either way both elements are looking really convincing! The only nitpick would be that the tire almost look too jet black for that lighting, so maybe brightening up the van overall just a touch might help it fit the lighting in a more natural way? Also, I'm not sure what challenge this is for, but if it's for a past set of DCC in previous weeks we have a #💎past-challenge section as well. Really nice job with this!
Thanks @bleak fossil Your feedback helped a lot!
Gave +1 Creative Carma to @bleak fossil
@vague sail Hah, very cute, I like this take on the Day 4 challenge! I like how you handled the colors to really make the mask pop, and it gives the background a really interesting feel too. The only real suggestion I have is there's a bit of an odd hard edge on the right side of the dog's face. Blending that more naturally might help. Nicely done!
@fringe sun The calling card image is looking really nice! The texture shows nicely underneath and the text has a really convincing hand written spray paint feel to it. Nicely done!
@simple idol Really cool Biola, this has a nice convincing sort of painted mural look to it on the brick wall. The blending mode is working really well and I think the faded edges help it look more natural too. Nice job!
@magic wagon Hah, really cool idea! I like how you recreated this logo with the flame effect, and the lighting in the hand really helps sell the effect. I feel like you could probably even add a bit more glow or brightness on the flames in the center of the design to push that fiery feel. Looking good!
@slow stirrup Very cool! I really like the sort of glowing feel these two potions have. Though I think the glow on the purple one could even be pushed a touch further to match the green potion. Though that's super minor. The little tag is an excellent touch, I really like how you themed it to fit the style of these potions too!
@tropic knoll Hah, very nice! I really like the playful, festive look of the "Kapow" design. It really has a sort of party look to it with all the bright colors. The patterned background came out very well too!
@sweet fern Ooh, I like the sort of blurred hand effect with the portal image! Though I think giving all but the main hand slightly varying levels of opacity and blur could give it more of a motion blur/waving effect if that's what you're going for. I also wonder if fading the edge of the arm out as it comes out of the portal with a slightly softer edge might look a bit more natural? Really cool portal effect!
@hot thicket Really cool effect on the Day 6 design, John! I like the sort of surreal color scheme of this. I think it might look good to give the super hero a slightly boost to their brightness to make them stand out from the background a bit more and make them a stronger focal point. Really cool idea with the birds!
@abstract parcel Really nice job on the displacement effect on the bricks for the Day 6 challenge! It really helps add some dimension. Challenge 7 is looking good too to show off levitation. My only suggestion would be to lower the shadow down a bit further and make it a touch smaller to give him a more natural look of being high above the ground. Nice work on these!
@shy bobcat Really cool take on this Day 7 challenge Pam! I like the combination of the portal effect with the lightning. My only small suggestion would be to mask off the end of the lighting with a soft brush in the bottom left corner to avoid that hard edge cut off. It could also be interesting to see the black lighting layer with an outer glow effect of a lighter color (purple?) to make it pop off the background a bit more. Looking good!
@gaunt wagon I love this mask design Bonita! The gradient in tone and texture gives it a really interesting feel, and the starry look of the bottom adds a nice heroic feel. The mood board is looking solid too!
@eternal mica Great to see the source image breakdown of the Day 7 challenge! I like the concept behind this one with the dinosaurs, hah, very cool. My only suggestion is all the bright colors and bold textures become a bit visually busy and the different elements begins to compete for attention. I'd suggest masking off the star texture on the city image and maybe even lowering its opacity overall just a bit. Perhaps even reducing the contrast of the dinosaur image so that orange is a little less bold, which might also help add a bit of an aged feeling, even if that wouldn't make sense outside an old photo context, hah. Just some ideas. Really cool composite!
Challenge -7(Superpower -Levitation)
@compact pecan Really cool! Nice work compositing all these images together. I think overall the image seems a bit dark for essentially being a pit of flames. I think boosting the brightness with a levels adjustment could help. If you want to push it even further I think you could try faking a lighting effect on the edges of the hands as if they're getting light from the fire. Sometimes I like to do this with a screen layer. Maybe something like this? Nice work!
(Click "Open Original" for best quality)
Whoa @bleak fossil! Love that before-after effect!
The after one has just so much brightness too!
@fringe harness Thanks! The screen layer and color dodge layer are good friends of mine for glow effects, hah.
Gave +1 Creative Carma to @fringe harness
https://www.youtube.com/watch?v=zU9Xe4qV7X0&t=149s
For adding fake light!

Follow this simple technique to create beautiful light rays or sunbeams in Photoshop!
🎯 SUBSCRIBE to get more amazing Photoshop tutorials!
► https://www.youtube.com/user/photoshoptrainingch?sub_confirmation=1
📘 INDEX -
00:00 - Introduction
00:06 - Step 01 - Create a Desatur...
Jesus's magic! Ha! 🤣
@neat sparrow The fiery effect on that ring came out extremely well! I love the little bits of orange flame breaking away from the white core. The ring and perspective of the arm adds some nice depth to this design. Really liking the background colors as well!
@abstract parcel Not to keep nitpicking, hah, but if you want to push it even more I think compressing the shadow vertically a little might help a bit. So it's not quite as tall, since shadows aren't usually too long around the middle of the day, you usually see longer shadows around sunrise or sunset.
Challenge -7(Superpower -Levitation) 😅 😄
Cheers for super on-point input I totally feel the same way TY @bleak fossil
challege 7 superpower
challenge 6
@coral stone thanks for the input. this is the image i use to make the composition!👀
Gave +1 Creative Carma to @coral stone
Final Result
@bleak fossil thanks for the feedback... will try to apply the suggestions you wrote!💯
thanks sam for feedback
someone can define me calling card challege please?
Thanks again @coral stone for your help 🙂
Gave +1 Creative Carma to @coral stone
Challenge 7. I had fun with this one! 😆
Its actually good
Stupid suggestion:- Instaead of those floating leaves, put corona virus there
@weak bolt Those are Trump Tweets.
I dont know what that means, it looked like leaves to me (maybe because I dont know abt it). I will google it
Donald Trump's head on Twitter logo.
Thank you @eternal mica
Gave +1 Creative Carma to @eternal mica
@bleak fossil Yes, that does look better! Thanks for the advice!
Gave +1 Creative Carma to @bleak fossil
day7
@coral stone I lightened up the cape. I think it made a difference, thank you for your feedback!
Gave +1 Creative Carma to @coral stone
Challenge 7 - Deception's superpower of mind control
That’s a powerful image @young karma! Really like the way the power creates a nice movement to the scene, even though the subject is still. I also like the way that there are some cyan tones mixed to the white ones on the ray. Nicely done
@coral stone Thanks for the encouragement..
@cold oyster -- really like the cape and would like it for my files, can you point me to where I might find it?
@bleak fossil, what do you think?
@compact pecan Really cool! Nice work compositing all these images together. I think overall the image seems a bit dark for essentially being a pit of flames. I think boosting the brightness with a levels adjustment could help. If you want to push it even further I think you could try faking a lighting effect on the edges of the hands as if they're getting light from the fire. Sometimes I like to do this with a screen layer. Maybe something like this? Nice work!
(Click "Open Original" for best quality) @bleak fossil - awesome advice! On your screen layer, are you painting the yellow in? Mine isn’t coming out like yours with a brighter yellow screen layer, clipped mask or not. Thanks!!
Challenge 7 part 2 - Rhapsody's animagus power
Ver 2 Challenge 7. Added the logo to the mask.
@compact pecan Yeah, I think I used a very bright and saturated orange color. Let me know if you’re able to get it, if not I can check exactly what I used when I’m at my computer in awhile.
Thanks @young karma this is how the original image looked, I got it off Pixabay and here is the link to the image. https://cdn.pixabay.com/photo/2019/09/25/11/56/power-4503462_1280.jpg

Gave +1 Creative Carma to @warm oasis
@cold oyster Thanks soo.. much
Gave +1 Creative Carma to @cold oyster
Superpower Part 2
This is super cool @olive karma! I like how you made the rings overlap the subject. My only suggestion would be to fine-tune the edges of the subject, you can select the mask and go to the Select & Mask workspace (Select > Select & Mask) and apply a little bit of smooth and/or feather. If you see that the white edges around him are still visible, you can use the Minimum filter to contract the mask https://youtu.be/Ddfq_wzDVqA?t=414 🙂 Let me know if you have any questions.

In this tutorial, you will learn how to quickly smooth out a selection or mask with easy-to-use tools.
📘 INDEX - How To Refine and Smooth an Edge in Photoshop
00:00 - Introduction
00:35 - How to Bring Back The Refine Mask (Ps CS6)
02:10 - How to Use the Select and Mask Works...
Loved the textures on this one, @bronze bluff! Especially the way that the letters are blending on the white area. Well done!
Very nice improvement, @buoyant nova. Since the word is blending more with the background, you might brighten the vignette just a bit more, so the B and E might be even more visible 🙂
I would love to have this power @fluid wharf haha! I like how you used a soft round brush to create the effect. About Day 6, try to check if the lasso tool has some feather applied (you can check on the top bar with the tool selected). 😄
Beautiful job combining the assets. @mortal crescent! I really like your color choice for the powers, suggesting something magical and mysterious. Very well done!
@ruby panther this turned out great! Loved the movement that you created for the scene and how you managed the lights of the Twitter logos. The powers are looking very on point as well 😄
Thanks @coral stone This was fun to work on.
Gave +1 Creative Carma to @coral stone
Hi @bleak fossil. Thank you! I believe the hardest part in creating is getting the colors to flow properly. I appreciate your kind words.
Gave +1 Creative Carma to @bleak fossil
Here is an image to use for your wanted poster!
Revised Challenge 6, I've revised this taking on all the comments and I'm much happier with this version 👍
Thx
Nice
what is the challenge Right now ?
Promotional image by Voodoo Val
Challenge No 7 The Power
@tropic knoll I had to laugh since I was just asked to make a logo for a new drink called - are you sitting down? Carrot Cola. I kid you not. i thought it sounded disgusting so I said thanks for thinking of me, but no thanks!
Gave +1 Creative Carma to @tropic knoll
We can make any poster of any superhero 🦸🏾♀️ posters
Yes, @abstract parcel, or a supervillain if you prefer
Day 8 In work
Day 8
I have a serious dilemma, bacause the brownish ad looks most original, but i've been doing my entire project in 2 colors.... so what do you, guys, think? Which is better?
Super
Thanks @coral stone will do 🙂
Gave +1 Creative Carma to @coral stone
DCC Day 8,John Wick reference
SuperPower Redux PCC 7
Day 8 - Scarecrow
DCC - Day 8
#PSDCC DAY 8
Day 7 - Super Powers
hello everyone, I am new! My name is Marco and I write from Milan (Italy). I would like to try a challenge... give me all possible tips and where to interact with the others in the group. Thanks
Welcome, @young karma! Glad you joined us! You can go to this landing page to register for the challenges, so you'll get notifications via your CC App https://www.behance.net/challenge/photoshop
Each day a new challenge is going to unlock and at 9:00am PT the host will be live, showing how to get started and some techniques, tips and tricks. To watch live and the replays you can go to this link: https://www.behance.net/live
After you finished your challenge work, feel free to post here so we can give you feedback, also we encourage you to give feedbacks for the other participants as well.
If you have any questions, please tag me on the #❓ask-a-question channel 😉

Daily Creative Challenge

Join us right now to get inspired by leading creatives. Get your questions answered and share your work with the community.
@coral stone thank you very much for your answer.
Gave +1 Creative Carma to @coral stone
Super Power revealed! Star Fire! (Not really sure what it does... Lights up the night or it generates a blinding burst of light to stun the Villain! LOL)
@fringe sun, it could be cold fire, or ice.
Watch out for her!
DCC - Day 8 - Update
Day 8 - Scarecrow wanted poster (updated)
Bring blood splat over the text, grunge effect on text for more realism and light/curves/colors adjustment.
Credit photo: Jagged-eye (professional photographer)
@hollow yarrow, I'll sleep better, when this thing is behind bars...
Challenge #4 (Revised) Thank you @coral stone for posting that Phlearn video! I probably should tweak it a bit more but here’s where I am with it.
Photo credit goes to Sahin Yesilyaprak on UnSplash.
Gave +1 Creative Carma to @coral stone
Hi @primal fulcrum. Carrot cola does sound disgusting. That sounds about as delicious as Broccoli soda.
@slow stirrup. I personally like the brown one. My eyes are drawn more to the text. The ones in color seem to detour my attention. You've been hard at work! 🙂
Thnaks, @tropic knoll.
@hollow yarrow, I'll sleep better, when this thing is behind bars...
@slow stirrup : Don't worry... It's not real😴
Day 2 - Emblem Design (at last 😅 ) @jolly quest
@hollow yarrow super rendition.
@hollow yarrow super rendition.
@eternal mica : Thank you!
@slow stirrup I think the purple and green motif has worked well up until this piece. The brown image looks much more relaistic (does that even count in this stuff). Nice job throughout with your concept and execution.
@young karma This challenge began on Mon 08/17. It ends tomorrow. A new one begins on Monday 08/31. If youre intending to do any/all of the current challenge, get your work in for review on this tab before next Monday. After that submit your work for this challenge on the past-challenge tab. Join the party. Its lots of fun.
@inland kiln very nice composition, Pat! I like the use of red, orange, and yellow on the composition, they were a great choice to add a powerful context to the scene. Excellent work!
@bold valley I like how the textures turned out in the background, it brings a unique style for the composition. Also, the subject adds a nice visual interest to it! I wonder if you could make her edges a little sharper, especially on the top and the sides. One thing that is totally optional, you might try to see if you like, is maybe positioning the Wanted to the top and position the subject a little lower. I believe that this way, since she’ll be positioned between the texts, it will make the whole poster look more balanced. Just an idea 😉 Great work, Ralph!
The image is working great in the three versions @slow stirrup! I agree with you, the first one feels very original, and has more of a poster style, allowing the textures to appear a little bit more. (I promise I won’t drink any potions this time 😅 ) Super cool job!
Nice job @lucid plover! I loved how you added a stamp and the faded look of the type. My only suggestion would be to make the photo's shadow a little bit smaller and sharper, this will increase the realistic effect that the photo is really attached to the paper. 🙂
This looks super fun @cunning sand! Loved your attention to the details, especially for the frames and the diagonal text with some scale variation! The textures are looking very on point as well. 👍
@safe linden this turned out really awesome! I like how your poster has a nice sense of hierarchy, and the Wanted is catching my attention when I first look at it. The elements are feeling very well balanced. I know it can be a challenge when there are a lot of texts to place, but you achieved a great result. 💯
Thank you for your suggestion @coral stone
Gave +1 Creative Carma to @coral stone
Hah this is looking very nice, @eternal mica! I like how you played with some visual elements like the kid with the bear pointing to the Penguin! That is a great way to direct the viewer’s eyes.
My suggestion would be to extend the canvas vertically, so it can give you more room to position the elements. You might position the Let Me Do It text and the other ones from bellow, a little lower, and the ones from above, higher. (You can keep creating some overlaps with the new positions, just make sure that it won’t make the text a little hard to read), so the poster might have a strong focal point making it look more balanced with more breathing space 🙂 Great job, Ted!
@buoyant nova, super cool work, Susan! I like the small splatters that you added to the portal. It looks like there are some rough edges at the bottom part of the portal and on the edges of the hand. If you used a layer mask, you might use the Smooth option from the Select & Mask workspace (Select > Select & Mask). 🙂
Wow @fringe sun! This is looking awesome! I like how the powers have a great sense of movement. My suggestion would be to refine the subject mask a little more, so the edges might look a little smoother and hide the bright spots on his feet. Also, since the power is generating some light, you might add a rim light to the face and the hands. I’ll give you a link for a super cool technique with Inner Glow and Color Dodge that I think you’ll like it. https://www.youtube.com/watch?v=Ir1mL2P36iQ Well done!
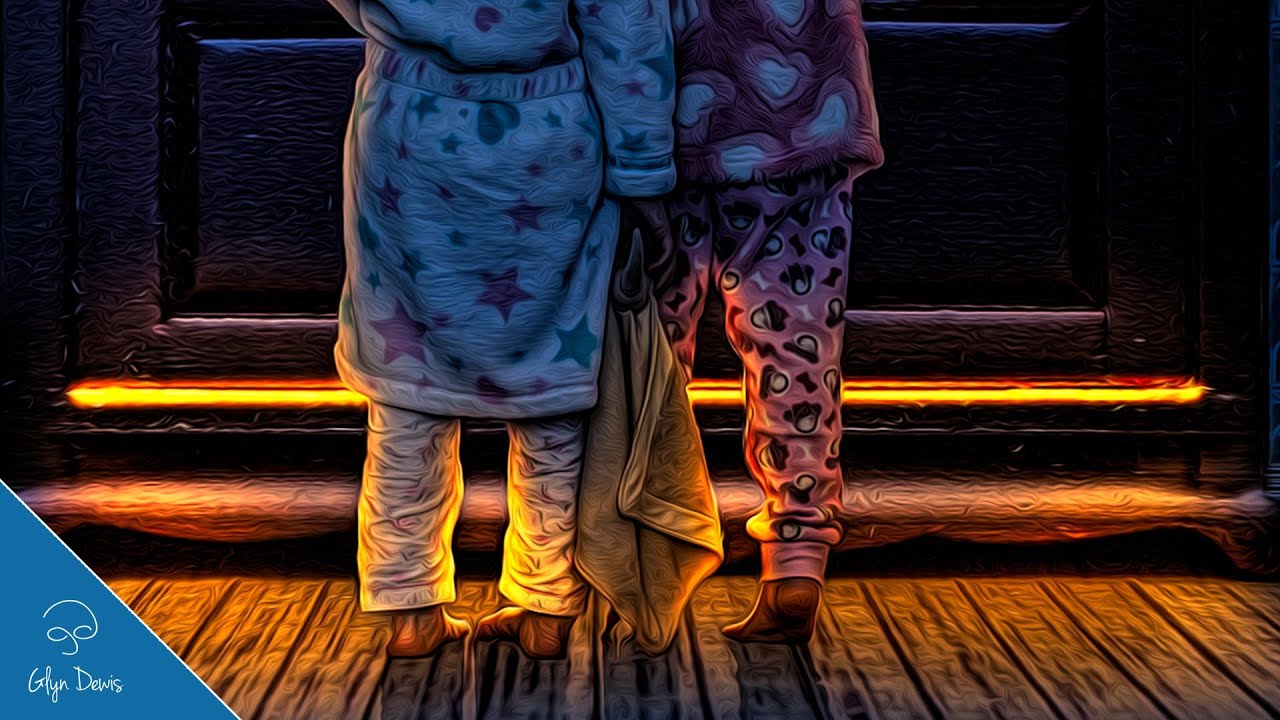
In this video (#33) I show you how to quickly and easily create fake coloured rim lights using Photoshop Layer Styles.
Each week I also produce a Photography, Photoshop and Lightroom Video Show; a weekly video that goes 'Live' each and every Thursday where you can learn all m...
@sweet fern I really like the way that you blended the subject, making it look like it was really part of the poster. Loved how there are some subtle textures popping from the letters as well. Very nice job!
@untold iron I like that you brought a gradient for the text, Jae! I can see by the screenshot that you used some guides for the alignment, this is a great way to bring more balance to a design. Well done!
You did a spectacular job bringing depth to the poster, @hollow yarrow! Especially with the overlaps and the Scarecrow with the out of bounds effect. The subtle elements like the textures, the blood splat, and the details of the font added a great context to the overall poster. Nailed it! 💯
Gave +1 Creative Carma to @coral stone
thanks 🙂! @coral stone
That’s a great improvement @winter tinsel! You're doing a super cool job! Really like how my attention is going straight to the face when I look at the image! 🙂
Very nice @dapper basin! Loved the scratched texture that you added to the emblem, I think it matches really well the 3D look that the Bevel & Emboss brought! Well done!
Day 8 Wanted poster and Newspaper Ad. Paper texture from Graphic Authority's Antique Paper collection. Hands from Adobe Stock, newspaper & bullet hoes from Pixabay, and villain virus from PixelSquid.
@safe linden I just saw Day 7! It's looking super cool! I like how you added a cyan glow to the subject! My only suggestion would be that if you want to increase the realistic look of the shadow, you might darken a little bit more the shadow that she is casting on the floor. Great to see your moodboard coming together 🙂
Very nice @forest aspen! Loved the way that you positioned the elements. If you want the textures to appear more through the text, you might reduce its opacity just a bit, so everything might be able to look even more cohesive 😉 Great job!
@bleak fossil Thanks for the input Sam. I'll play around with the different elements and see how your suggestions work.
Gave +1 Creative Carma to @bleak fossil
Hah this is looking very nice, @eternal mica! I like how you played with some visual elements like the kid with the bear pointing to the Penguin! That is a great way to direct the viewer’s eyes.
My suggestion would be to extend the canvas vertically, so it can give you more room to position the elements. You might position the Let Me Do It text and the other ones from bellow, a little lower, and the ones from above, higher. (You can keep creating some overlaps with the new positions, just make sure that it won’t make the text a little hard to read), so the poster might have a strong focal point making it look more balanced with more breathing space 🙂 Great job, Ted!
@coral stone Thanks for that insight. I increased the height 50% and rearranged the assets to spread them all out. I also made them larger. The central image is much more the focus now. Better?
Slippery Pete has gone and run. Now the posse is after him.
Awesome @neat sparrow
Awesome @neat sparrow
@vague shuttle Is it really horribly?😱
Great job, @eternal mica ! Really like how the elements are distributed now! The poster feels very balanced 👍
This is looking very cool @compact pecan! I really like the style of the font that you used. I wonder if increasing the contrast of the subject might make it even more consistent to the darkness present in the words and the frame stroke, making it have more visual presence. For that you can use a levels adjustment layer and bring the sliders closer to each other. If you see that it saturates the tones, you can change the blend mode for the levels adjustment layer to Luminosity 🙂
@safe linden I just saw Day 7! It's looking super cool! I like how you added a cyan glow to the subject! My only suggestion would be that if you want to increase the realistic look of the shadow, you might darken a little bit more the shadow that she is casting on the floor. Great to see your moodboard coming together 🙂
@coral stone thanks, that helped quite a bit, to blend her more with the shadow on the floor!
@coral stone Great. Thanks for the advice. I realized an important lesson. Im still not confident enough in my creativity to have too much blank space in my designs. I worry I need to do more. By starting with the smaller canvas, and then increasing the size, without adding more elements, I ended up with a more open airier readable design. Very important lesson learned through the back door. Thank you.
Gave +1 Creative Carma to @coral stone
thank you Valdair
Super Power Challenge # 7 - Glad how this one came out 😃
You did a spectacular job bringing depth to the poster, @hollow yarrow! Especially with the overlaps and the Scarecrow with the out of bounds effect. The subtle elements like the textures, the blood splat, and the details of the font added a great context to the overall poster. Nailed it! 💯
Thanks@coral stone
I saw the western theme and instantly thought of WestWorld. Not as much supervillain/hero but still sinister and still fun!
@slow stirrup I think the classic brown image works really well for the Day 8, but if you wanted to go more on theme with your previous designs I think a different design approach might work better? This one definitely has a bit of old western feel to it, but maybe you could go with an older classic sort of academic look. I don't know a great example, but I feel like an image like this has that sort of vibe. I know that's not very specific, but a different sort of aesthetic might suit your project better if that's where you want to go with it.
@safe linden Really cool lighting in this Day 7 challenge! I like the effect for her super power, kind of like she's wielding a staff of energy or something. I like the blue light you added onto her face, though I think adding a little along the right side of her body might look good too. I often like to use a screen layer for this. It might help balance out the contrast between her and shield as well. Maybe something like this? Though it doesn't need to be as heavy handed.
(Click "Open Original" for best quality)
@mortal crescent Very nice Key! The wall and texture is showing through nicely. This is a small detail, but I feel like the logos almost look unnaturally dark on the spot lit background. Perhaps giving them a quick brightening up with a levels adjustment might make them fit the scene a bit better. Nice job with the spray paint look!
@inland kiln Really cool graphic style to this! I really like the bold colors and shapes. All these visual effects really give a strong feeling to the image like she's wielding something really powerful. Great look to this design!
@bold valley Ooh, I like the coloring you did here. The green eyes are a nice touch too. I like the classic Wanted type, I feel like toning down the yellow background might help draw more focus to the face? Really just a stylistic choice. Nice job 👍
@lucid plover Ooh, great theming for this Day 8 design! This is looking really solid. The texture of the paper, the paperclipped photo, and the stamp all add a nice element of theming and detail. Looks good!
@vague shuttle Ooh nice, the wall makes for a really cool addition. It makes for a really solid portal effect with the void behind it. Hand is looking good too!
@cunning sand Hah, I love it. All the elements and theming in this design work really well for that circus feel. From the text you chose, and border around the edge, and the banner with the information. Really nice composition too. Impressive work!
Thank You @bleak fossil
Gave +1 Creative Carma to @bleak fossil
I saw the western theme and instantly thought of WestWorld. Not as much supervillain/hero but still sinister and still fun!
@sweet cedar Awesome! I like that!
@hollow yarrow Super cool Franck! The classic Wanted power text is looking really good, and the bold color draws nice focus to the Scarecrow. I really like the way you made the rope and scythe break the frame of the circle. Very nicely done!
@untold iron Nice work Jae D. I like how you gave the portrait a sort of sepia tone to fit with the look of the rest of the design. Looks good!
@eternal mica Haha, perfect idea for this poster Ted. Always great to see the asset breakdown for these designs too. With all the colors and information going on I wonder if there's a way to give the text a little bit of a stronger read against the background. I wonder if darkening down the background slightly would give the skin tones of the kids a better separation against the background which might help, or even just adding a subtle drop shadow to the text to separate it a touch further? Not completely sure, just a thought. I like the balance of all the shapes in this composition!
@bleak fossil, yea, it's not good, if you're getting western vibes...
@bleak fossil Hey thanks Sam. I wanted it to be very colorful and comic book style. I had a rainbow gradient clipping mask in the text, but I thought it was too difficult to read. I'll play with a drop shadow and some other text enhancements. Thanks for the advice.
Gave +1 Creative Carma to @bleak fossil
@slow stirrup Maybe something as simple as a font change or some sort of decorative border could change the vibe pretty easily. Though since I don't often do this type of design myself, I'm struggling to identify the style of design I'm thinking of to find reference of it. The Harry Potter was just a quick one I found. That old European university type of feel. At least that's what I got from your previous design with the spray painted symbol on the door. Just depends what you're going for.
@bleak fossil, it's ok. Even without a demonstration, I understand what you mean.
@ruby panther Really cool effect with the sort of zooming/light flash of the background! I like the blue and orange contrast of this design as well, it gives it a great read and contrast. The symbol on the mask came out really nice too! My only suggestion is I feel like maybe the fire and lightning could be giving off a bit more of a glow. I really like how you added the light on the sides of her face from the hands, but I feel like it could be pushed a bit further on the hands themselves. Maybe something like this?
(Click "Open Original" for best quality)
@buoyant nova Very cool Susan! I like the sort of sparkle effect around the edges of the portal. My only suggestion is that I think the inner edge of the portal seems a bit jagged, perhaps softening that edge might give it a more natural look. Nice job!
@fringe sun Super cool effect for the super power! It almost looks like it could be some sort of reality distorting effect or something like that. Really great contrast between the power effect and the rest of the scene. I like Valdair's suggestion about the rim light. Maybe even just a tiny bit of light bleed peaking around the edges of his arms. I often like to do this with a screen layer and soft brush. Looking good!
@sweet fern The poo lab animals D: This is looking really nice Ron, I like the classic wanted poster look with the font and texture you chose. The treatment you gave the portrait to fit this style came out really well too!
@winter tinsel Great hero portrait image! I really like the blue/purple mask with the purple hair. It looks like you added a layer on top of the hair to tone it down a bit? It seems like the blending mode you used is something opaque like the normal layer, I think a multiply layer might be a better choice for darkening it down more naturally. I'd still allow it to be the brightest part of the hair, but maybe just a bit darker if you're trying to draw more contrast to the face. That way the form still reads. Nice work with this!
@dapper basin Really nice emblem design! The beveled effect and high contrast of the lighting gives it a nice sense of dimension. Great textures on this design too between the emblem and background. The bold green/red colors give it a nice contrast and the red really pushes that villainous look. My only suggestion is it might be nice to add a slight gradient across the red part of the emblem to match the lighting and gradient across the green part and the background. Maybe by using a multiply layer and soft round brush to add a little bit of shadow in the bottom left as it gradates to the light in the top right. Very cool!
@sweet cedar Looks good! I like the paper texture and the bold black classic Wanted font is looking good. The design matches nicely, and I like how there's even some rough texture within the text and design 👍
@mild mural I love how the stars blend in seamlessly with his hoodie, really cool effect! It could be nice to extend a darker color like the space has up into the purple cloud behind "Telepathy" to give the white text a bit stronger of a read. Looking good!
@neat sparrow Ooh, great style to this! I really like the different artistic direction you went with the bold neon pink and green. It definitely gives the dark figure a bold contrast and I like how you repeated the pink for the logo into the text. Very cool!
@compact pecan Hah, classic Slippery Pete causing trouble again. Really great texture in this, and I really like the texture and style of this font. Kind of a carved/wood burned look which is neat. Nice work on the sort of draw/sepia effect, and I agree with Valdair, darkening the portrait a bit would be a nice touch to draw more attention to him. Nicely done!
@forest aspen This is great! I really love the styling of this, and the red color of the virus against the tan background really gives it a nice contrast. The bullet holes are a nice touch, and I like how they even have a sort of cartoony look that fits in with the rest of the design. The mockup is a great addition too, hah. These came out great!
@simple idol I love this combination of effects! Really nice job with the reddish glow on the sleeve of the arm. The blue of the glove and orange of the fire make for a nice contrast. The connection of the fire portal and the fire from the syringe is a really cool idea. Great eye catching design all around!
@mortal crescent These Day 7 designs are looking really good! I especially like the second version with the bird. The starry sky makes for a really interesting backdrop and contrasts the bird and girl nicely. Overall I feel like the brightness and contrast could be pushed a bit. A simple levels adjustment to up the brightness might look good, or even certain elements to draw more focus like the bird's face or girl's eyes. Just some thoughts. Nice work!
@bleak fossil I made the changes you suggested.