#keyboards
1 messages · Page 2 of 1
 finite rose
 warm lodge
And about compiling with a larger pystack, might be a good idea, but I already have some itsym4 on their way, so I'll work around it that way. The nice!nano seem a bit to small for cpy.
warm lodge
I did not read carefully that the itsy bitsy has a different pinout from the nice!nano. 
I did noticed that before soldering it... but I did not noticed that before unsoldering from the keyboard last night.
(Note to self: always use socket headers instead of direct soldering...)
An my local provider doesn't carry kb2040s :(.
 fast isle
Crazy idea here... no idea if it would be any good... a version of the Adafruit Swirly Aluminum Mounting grid that is a 1U keyboard grid?
fast isle
for ortholinear alpha, or numeric keypads I guess.
fast isle
here you go.
 finite rose
fast isle
Crazy idea here... no idea if it would be any good... a version of the Adafruit ...
finite rose
fast isle
Crazy idea here... no idea if it would be any good... a version of the Adafruit ...
For the plate itself? I've seen generators for keyboard plates online
fast isle
I'm thinking it isn't any good.
fast isle
finite rose
For the plate itself? I've seen generators for keyboard plates online
you need either a plate, or a plate and a pcb. I don't think a board with holes in it that match up with the 1u grid will be of much help, and the mounting plate needs to have square holes in it.
 hexed wing
I'm working on a 8×32 ortholinear kb. I'm trying to use those Adafruit Ortholinear 5×6 Grids with the built-in NeoPixels. My plan is to break it up in to modules of 8×8, each being scanned by the Adafruit TCA8418 8×10 matrix reader.. Then feed each TCA8418 in to a PCA9548 I²C 8 channel multiplexer which will go on to a single RP2040 based board's I²C bus.
Can anyone direct me to any of those plate layout apps? I'd hate to go the the trouble of designing a plate in KiCAD<sp> if it has already been done.
I found a neat YouTube video where someone designed a keyboard that was totally 3D Filament Printed in multiple parts that are then bolted together.
I figure maybe I could use that as a base and then just have PCBWay make the parts instead of buying a Filament Printer, learning how to use it & then make the keyboard. A credit card sized resin 3D printer could be used to make custom keycaps.
Once I lay everything out on the breadboards and it's working, then I will buy one of those nice wireless temp programmable soldering irons to make up for my awful soldering skills. I haven't done any major soldering since the mid 90s. I'm 63yo, retired on Disability with my Federal payments about to start in 2025 so I've got a lot of time on my hands & the money to spend on toys.
Any constructive criticism on my ideas or am I totally off in the tall weeds without a machete? Long Blades are still easier to own in Canada then Long Arms.
hexed wing
fast isle
here you go.
Add one more column and a total of 8 rows and you have my planned keyboard.
 wintry skiff
hexed wing
Any constructive criticism on my ideas or am I totally off in the tall weeds wit...
wintry skiff
hexed wing
Any constructive criticism on my ideas or am I totally off in the tall weeds wit...
im not too familiar with I2C stuff, but sounds like the PCA chip would be needed to have several TCA's on the same bus (which would otherwise collide because they have the same address?), am i correct?
if so, it could be worth looking into SPI alternatives, where the chip selection is done with an extra pin (CS) instead of an address (would be a few pins if you had several devices, tho), and you would get a device out of the mix. SPI is also faster than I2C
either way, i would probably order a PCB instead of hand soldering everything (from the prev messages im not sure what your plan is in this regard), and if you do so you can most likely save space, money and time by embedding the devices on the PCB instead of hooking tons of breakout modules to each other
but yeah, idea sounds about right, you need some helping hardware to scan that many inputs with a reasonable amount of GPIOs... tho i dont really see the point on having +250 keys 😛 (or even +100 to be honest)
fast isle
hexed wing
Add one more column and a total of 8 rows and you have my planned keyboard.
The swirly plate I worked with in the render was actually 9 x 16, so wouldn't I need to double up the width?
hexed wing
wintry skiff
im not too familiar with I2C stuff, but sounds like the PCA chip would be needed...
I plan on using those Adafruit Ortholinear 5×6 grids. I already have enough for four(4) modules (the most expensive item).
I just need to decide how I'm going to design/create/have made the plate.
With all the small boards under the modules, the finished keyboard height should be rather low.
I only need two(2) modules to get every key on a 104 keyboard, the rest are for UNICODE characters, rotary encoders & potentiometers.
I found an open source project about creating a CLI for the StreamDecks. I also own a StreamDeck XL.
Big keyboard & big Macropad
On each side of the keyboard are left & right handed marble mice and on the far left is a 6DoF SpaceMouse. This whole rig is for playing Cities.Skylines II.
I have both the PCA & the TCA versions of that board your refered to.
With a I²C multiplexer, I²C is easy.
 nova pike
hexed wing
I plan on using those Adafruit Ortholinear 5×6 grids. I already have enough for ...
nova pike
hexed wing
I plan on using those Adafruit Ortholinear 5×6 grids. I already have enough for ...
https://github.com/jeffminton/keyboard_stl_generator might be of interest. Great plate generator for the new enthusiast.
If you want one big plate, you might want to consider a laser-cut part instead of a printed one. I believe DXF generators are available online, and is probably the better way to design a large custom plate.

GitHub
Generate a 3D model from a keyboard design from keyboard layout editor and split up the design so it can be printed on a 3D printer - GitHub - jeffminton/keyboard_stl_generator: Generate a 3D model...
hexed wing
nova pike
https://github.com/jeffminton/keyboard_stl_generator might be of interest. Great...
Thanks. I think I will look at that project I mentioned for the case and design it to allow repeated full disassembly along with the capability to increase the case width wise with additional modules up to four(4) 8×8 modules sideways. I can't see a keyboard being anything more than ten(10) rows high and four(4) modules of 8×8 is a maximum of 256 keys in total.
Unfortunately I bought four(4) of these 8×8 Plexiglas grids for making key testers only to find that they have no accuracy up/down or sideways vs those Adafruit Ortholinear 5×6 Keyboard grids. They are out of alignment even between adjacent rows or columns. Bye Bye $50. If I design the plate like it was done in the YouTube project, I can just have one of those 3D printing houses print the case parts and use that app you referred to to design the parts of the plate and farm it out as well.
Anyone know of any good custom metal cutting outfits?
There are lots of good reviews of 3D printing houses and articles/videos on how to use free CAD software to create the file in the format they would need.
 silk kraken
Check local welding and job shops. Many of them have laser or plasma cutters.
I believe SendCutSend is another popular service.
hexed wing
Thanks and that GitHub page looks like exactly what I want.
If I can play Cities.Skylines II in 4K60Hz at a decent frame rate then I shouldn't have any problems running the software as the keyboard will be programmed in CircuitPhython and I already have a 6DoF SpaceMouse attached to my system to control the camera viewpoint in the game. With even a standard 104 keyboard and a StreamDesk XL allready in use, using a CAD program for just one project shouldn't be that hard (famous last words). And if I do have problems, we have a Hacker Space in town that has at least two(2) filament printers available.
Edited because I can't count.
That other project I mentioned is also a GitHub project. I will check my bookmarks and post it's URL ASAP.
This is the Ortholinear Keyswitch Grid I mentioned: https://forums.adafruit.com/viewtopic.php?f=19&t=189773&p=925675#p925675
The Adafruit TCA9548A 1-to-8 I2C Multiplexer Breakout board: https://learn.adafruit.com/adafruit-tca9548a-1-to-8-i2c-multiplexer-breakout?view=all

Adafruit Learning System
I2C addresses collisions? No prob!
And the 10×8 I²C matrix reader: https://www.adafruit.com/product/4918
It's a GPIO expander, it's a keypad matrix driver... its the Adafruit TCA8418 Keypad Matrix and GPIO Expander Breakout - a cute and powerful I2C GPIO expander and keypad matrix ...
With a nicer one with sockets already in place: https://www.adafruit.com/product/5626

You just found the perfect I2C sensor, available in a handy chainable Qwiic, or STEMMA QT package, and you want to wire up two or three or more of them to your microcontroller when ...
hexed wing
It took awhile but here is the URL for the YouTube video about a 3D printed case & plate. He hand soldered it but that shouldn't be much of an issue to change to a PCB.
https://m.youtube.com/watch?v=iOeYkLlq9Ds&embeds_referring_euri=https%3A%2F%2Fcults3d.com%2F&embeds_referring_origin=https%3A%2F%2Fcults3d.com&source_ve_path=Mjg2NjY

In this video I will show you my favorite 3D printed mechanical keyboard and how you can build your own DIY handwired mechanical keyboard. This model was originally designed by Thingiverse user Fumbucker. I will be sharing my modified design. The keyboard uses a teensy 2.0 to run QMK Firmware. This build could also be completed with an Arduino P...
finite rose
jlcpcb's aluminum service is cheaper than sendcutsend afaik
hexed wing
finite rose
jlcpcb's aluminum service is cheaper than sendcutsend afaik
Thank you... JLCpcb seems like a one stop shop.
Does PCBway have as many offerings?
Just thought I'd ask as I've seen both outfits get good reviews.
I just had a weird thought!!
Just go nuts and use a Rpi Zero 2 W as the heart of my keyboard instead of a RP2040 based board.
Also I never looked at KMK before, thinking that it was as much 'Black Magic' as QMK.
finite rose
hexed wing
Thank you... JLCpcb seems like a one stop shop.
Does PCBway have as many offerin...
I've only used JLC
hexed wing
Just watch a almost 3 hr video by FoamyGuy video from about a year ago.
From the looks of things, I been trying to reinvent the wheel instead of using KMK based CircuitPython.
finite rose
I have my own CP code. KMK is complicated
hexed wing
Well at least I did a lot of research and shouldn't get totally lost restarting with KMK. It's list of features is a SuperSet of the things that I wanted to do myself.
I'm a retired custom software developer who was also a UNIX administrator trained at AT&T Bell Labs Denver so complicated doesn't scare me.
Another project I want to start is converting a C library of routines to Full Python and then looking at if they could then be made to work with CP.
Those two projects should bring me up to snuff on Python.
Can anyone suggest a good "Full Starter Kit" for the Rpi Zero 2 W ?
I have a Starter Kit for the Pico as well as a RFID Starter Kit as well but you can never have too many sensors to choose from.
 bronze summit
Does this make sense?
Rather than what I have in the image with the RGB LED mounted to the bottom of the PCB and it poking the light through a hole I could sort of reverse it.
Place the LED on the top of the PCB and have its 'bottom' sitting in the hole, I imagine it might make routing the traces easier and the LED is closer to the lens of the switch which probably lights it up better?
The Switches I plan on using (Gateron SK-15) have quite a bit of a LED clearance.

 wintry skiff
as in, still having the light pointing up, but mounting the LED on the top instead of the bottom?
are you sure it wont collide with the switch itself?
bronze summit
wintry skiff
as in, still having the light pointing up, but mounting the LED on the top inste...
Exactly.
Found a part to better illustrate it now as well.

I'll have to wait for my switches to arrive so I can do some measuring but on paper it seems to work out (There's no exact spec sheet for KS-15 switches, but they should be very similar to KS-22 aside from the stem size)
The KS-22 has 2.3mm of height clearance and 8.9 of width starting at 3.75mm off the center point
https://cdn.shopify.com/s/files/1/0565/8070/2297/t/3/assets/structure-diagram-1655800073249.jpg?v=1655800074
 wintry skiff
bronze summit
Exactly.
Found a part to better illustrate it now as well.
wintry skiff
bronze summit
Exactly.
Found a part to better illustrate it now as well.
keep in mind that you will also need a different footprint if you connect it that way
anyway, i would still connect them on the back, it doesnt look too bad space-wise and could save some headaches
RGB's wiring on the back, GND and VCC planes on either side, seems like you could also connect columns rows on the back, and then the columns on the top of the PCB (with some vias)
bronze summit
The footprint I'm working with at the moment - not sure why the pads have holes in them. Seems to check out, but won't know for sure untill some parts arrive.
Just figured the closer the LED to the lens the better the key is lighting up. Although it will have pudding keycaps so light leaking could have a charm of its own

You're right though, it's not that bad space-wise. Guess I'll just stick to the norm 🙂
 tired juniper
silk kraken
I believe SendCutSend is another popular service.
tired juniper
silk kraken
I believe SendCutSend is another popular service.
I use SCS. They are great but can't do everything
Make sure to read the limitations of each material/process carefully
That said they are great if you want multiple of something. Huge per part discounts
fast isle
As per the title of the images, orthogonal split keyboard. The two rectangles between the left and right hand side are stand ins for a 3.2 inch 320x820 display with capacitive touch (Adafruit product 5797) that will work with the Qualia ESP32-S3 for TTL RGB-666 displays (Adafruit product 5800) I still need to design a case that will hold the display, the keys, and the Qualia board. I think the TCA8418 chip, maybe even via the Adafruit STEMMA QT board, could be paired with the Qualia board to handle the 6 row by 7 key matrix on the left and the 6 row by 9 key matrix on the right. Should be possible to do this with any of the displays that work with the Qualia board. With capacitive touch, and a good display, programmable inputs and touchpads should be possible. Renders with the other displays may follow.


 royal gulch
that is a lot of keys
fast isle
Meh, it's the way I would like it... I guess it would be possible to do one minus the function and cursor control keys, and chord those.
royal gulch
ergonomic keyboards usually have anything from 32 to 36 keys
 buoyant berry
There's a whole spectrum! Going from staggered rows to ortho split by itself a big step into ergonomics, plus there's always the chance to play with the layout going forwards ✨
A keyboard like that would be immediately usable by a guest who doesn't know what chords are set up, too 🙂
fast isle
royal gulch
ergonomic keyboards usually have anything from 32 to 36 keys
I am currently typing on a Kinesis Freestyle 2 (https://kinesis-ergo.com/shop/freestyle2-for-pc-us/), a keyboard I purchased because of carpal tunnel issues, and labeled as an ergonomic keyboard because it's split and you can have each half of the keyboard perpendicular to your wrist, hence, less carpal tunnel issues. (IMNSHO) To be considered ergonomic, the keyboard needs to allow the wrists to be held in a more neutral position as compared to a keyboard that is based on the IBM selectric typewriter key layout.
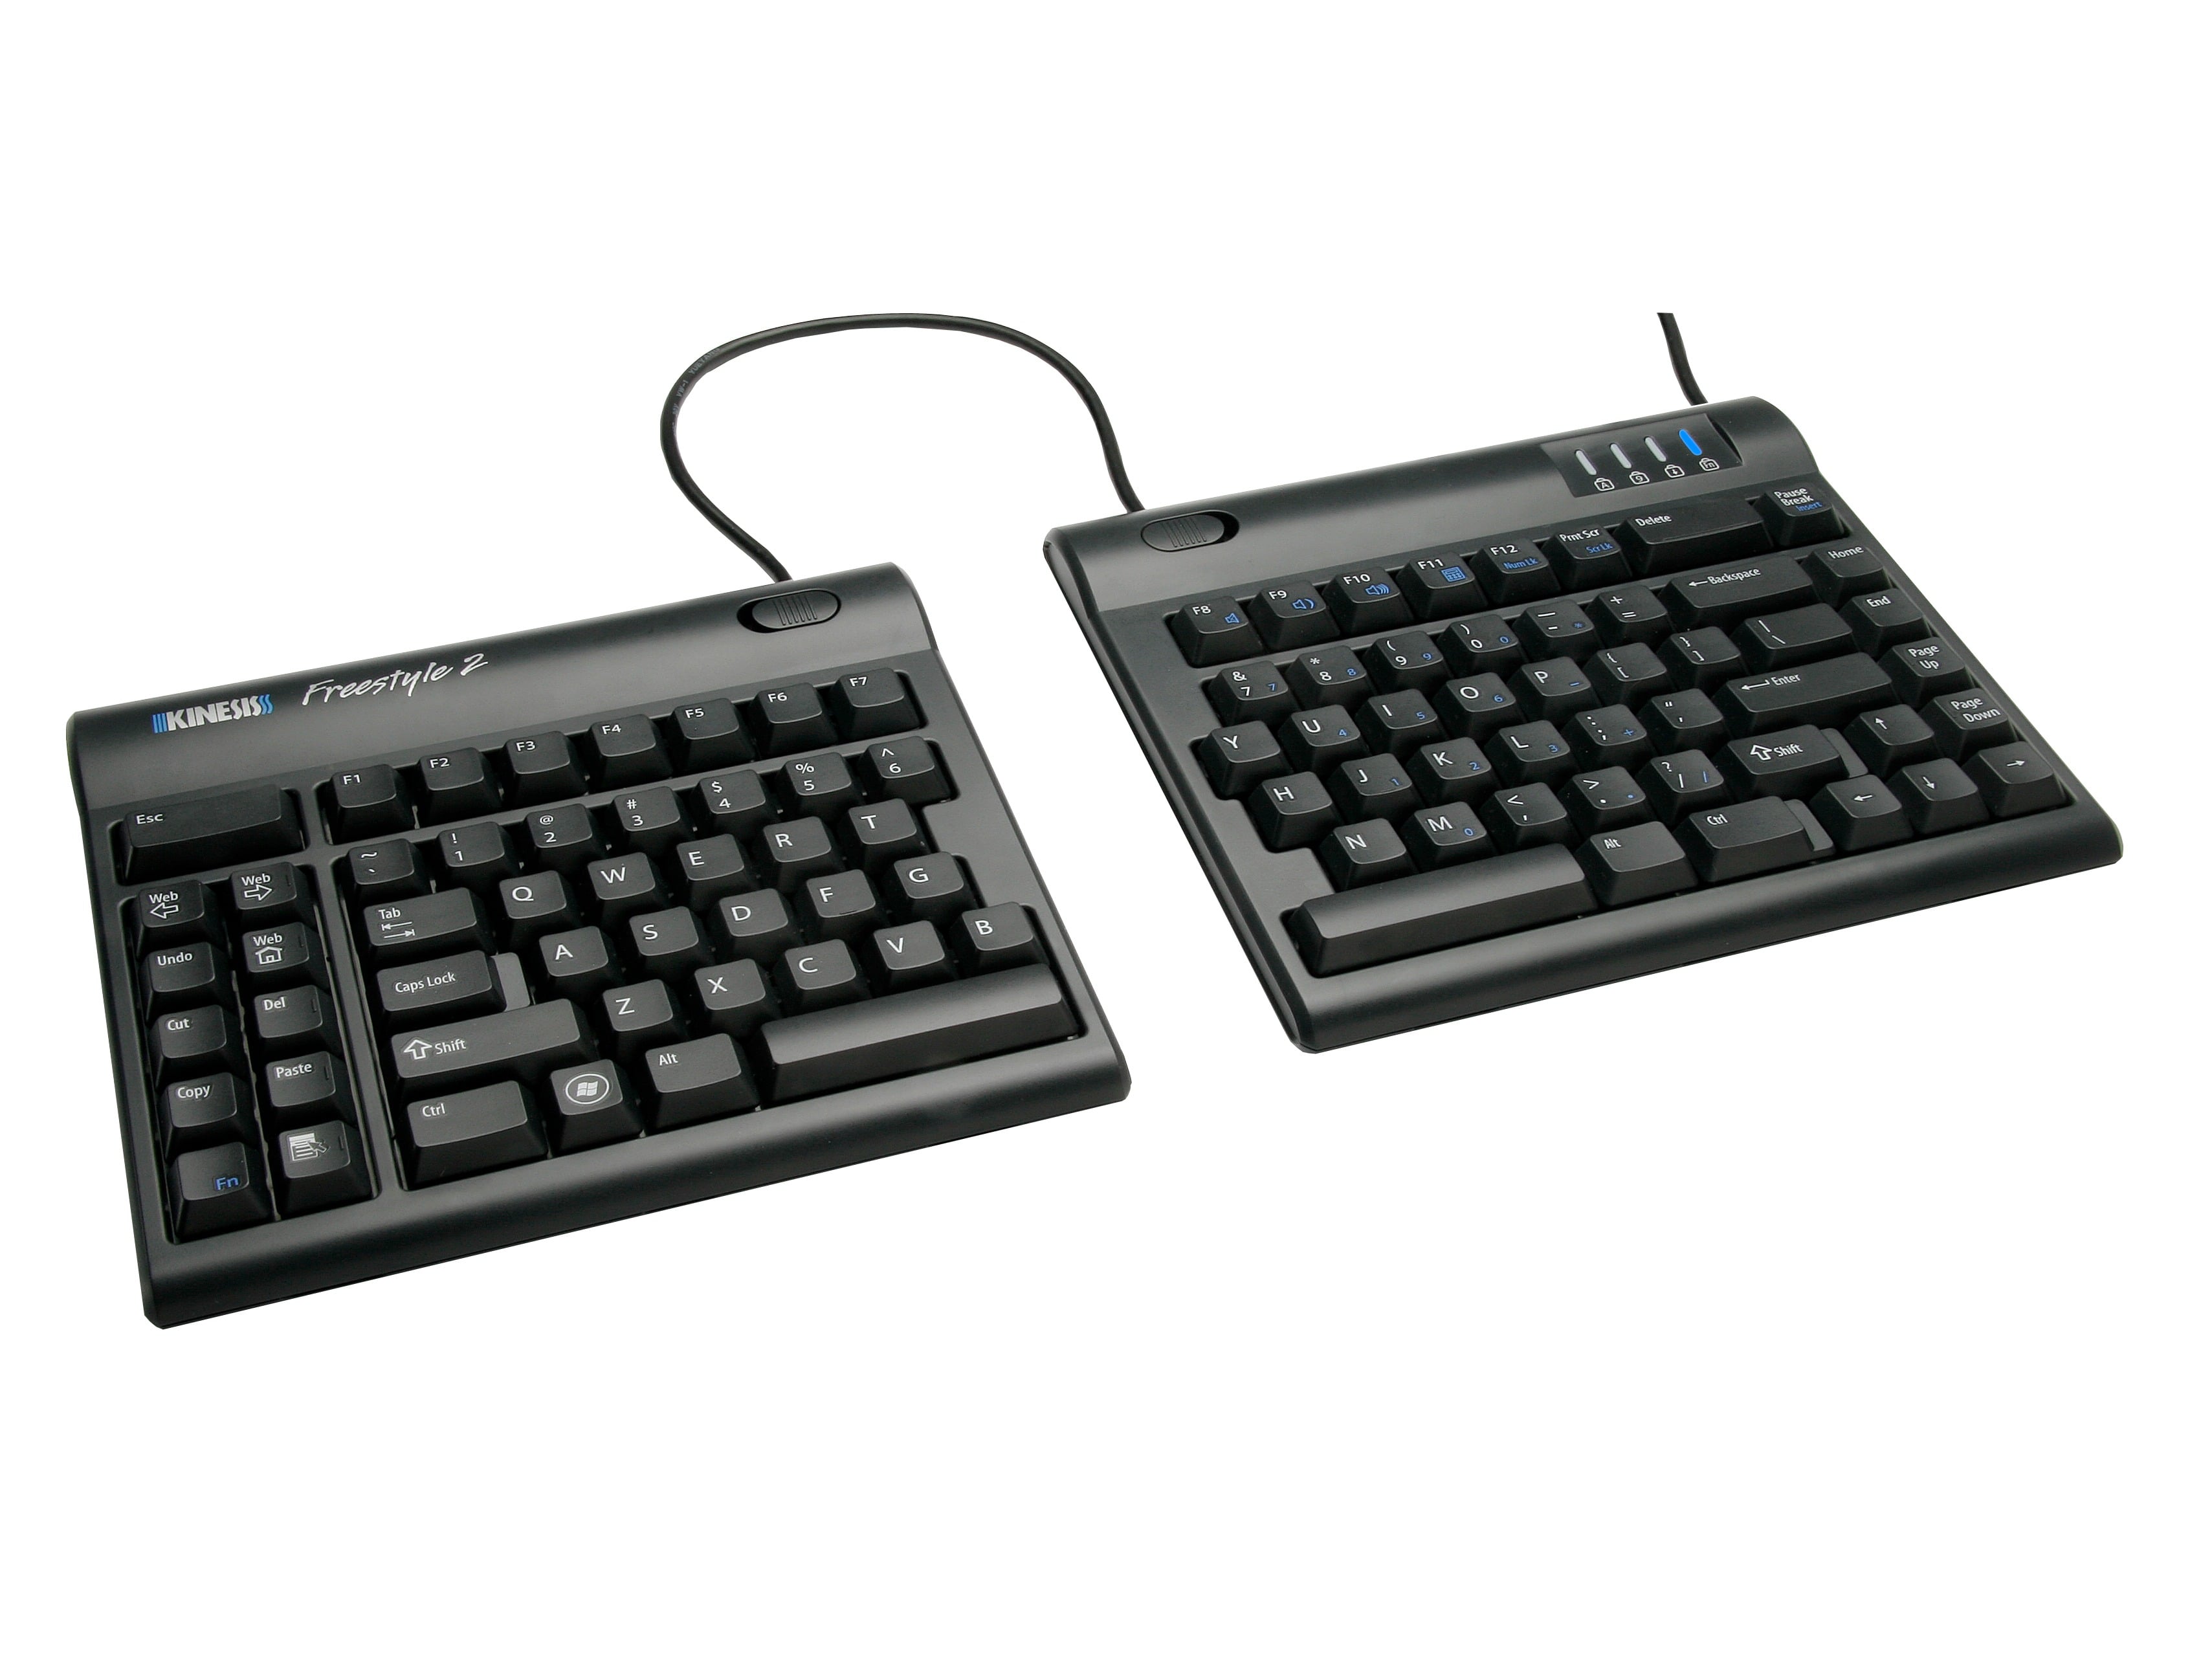
The Freestyle2 Keyboard for PC is the perfect solution for those looking for an adjustable setup that increases both comfort and productivity.
My understanding (connotation?) of chording, is using more than one key to generate a "key press" event. Shift-a chords to A
royal gulch
"ergonomic" is a marketing term, so of course the companies define it however they like, but my personal experience is that I only got rid of the pain in my wrists when I switched to a keyboard in which only my fingers move, and my wrists lie on the table, and that means a "1u from home", and low-profile
fast isle
Perfectly understandable, for a keyboard that allows you to type with out pain.
royal gulch
fast isle
My understanding (connotation?) of chording, is using more than one key to gener...
I would call that shifting, chording is more when you press and release the keys all together, like on as tenotype
but of course that's just my understanding of what you wrote
thanks for clarification
fast isle
Sorry, I'm reacting negatively to your comment on ergonomic keyboards, partially because I didn't actually call what I had posted ergonomic. My appologies.
royal gulch
for example, it's common for small keyboards to only have two keys for your pinkies, and the third key is sent by pressing both of those two keys at once
I'm kind of a preacher, because I went through this myself recently, and I went through all the steps
I started with this https://cdn.hackaday.io/images/6627451603722942962.jpg

which was a horrible idea
then I made this https://cdn.hackaday.io/images/8606591629380442865.jpg

which was pretty nice and I used it for some two years
but I ended up with this https://cdn.hackaday.io/images/4942261674839620923.jpg
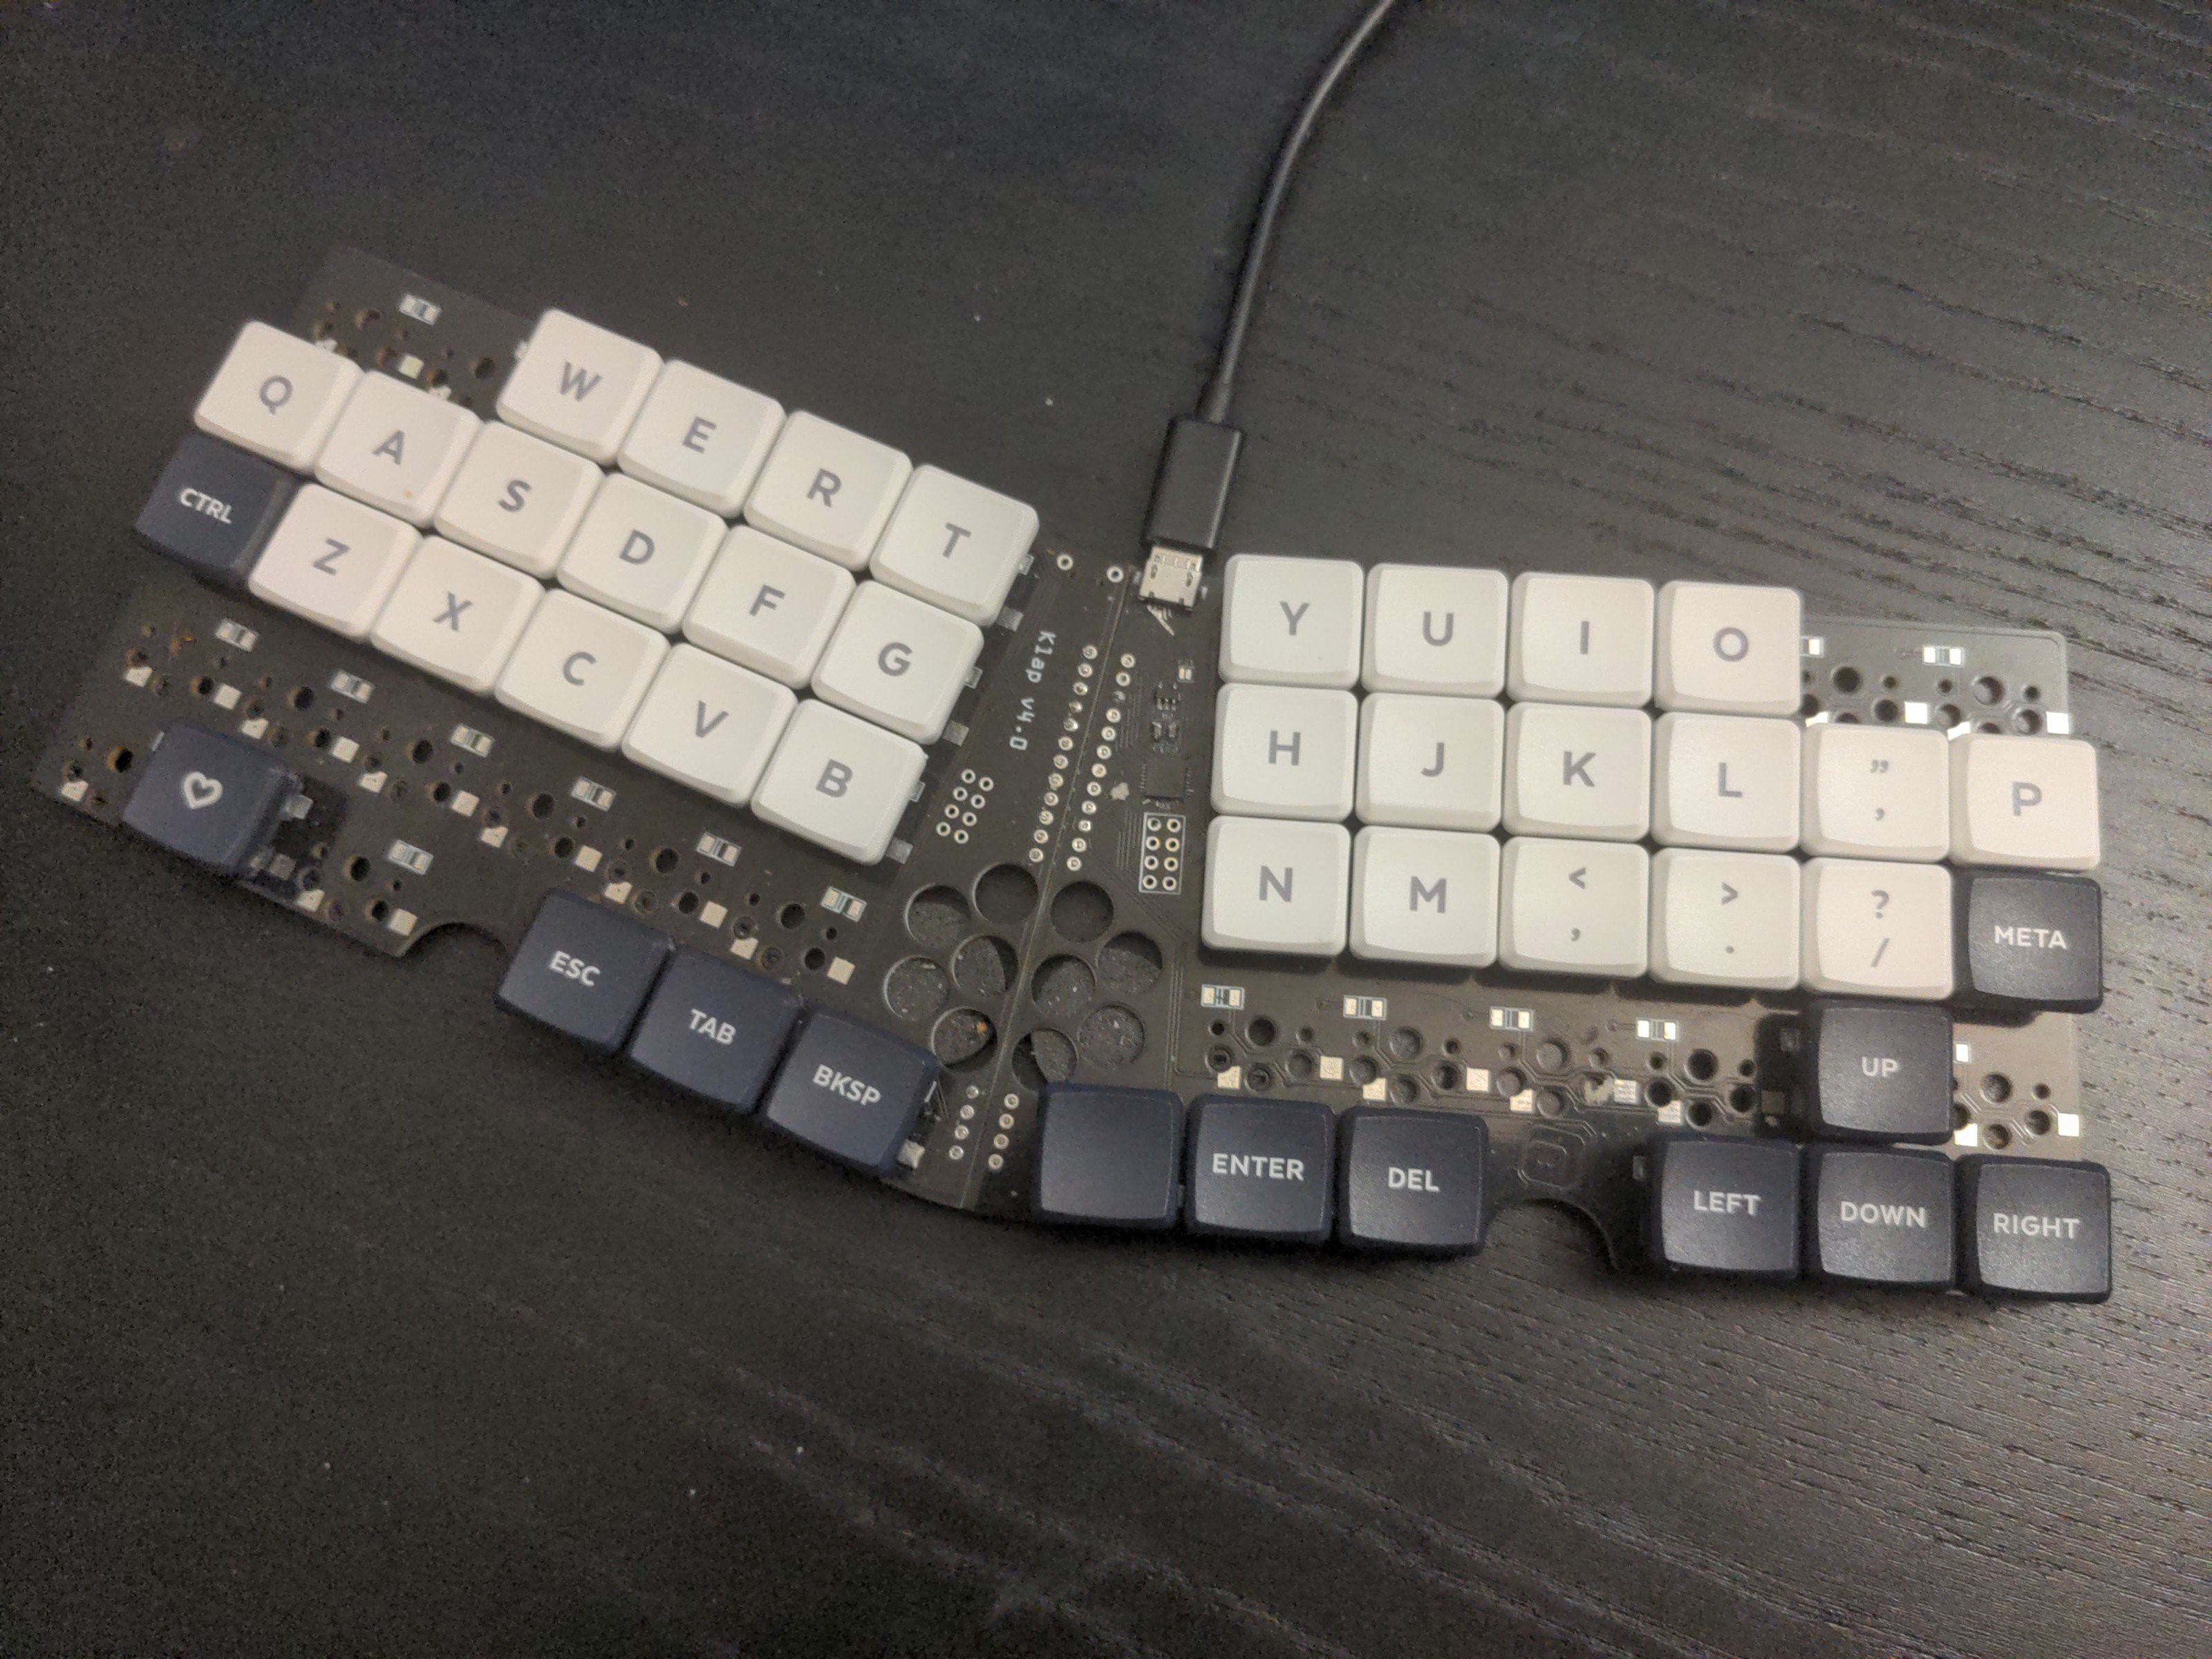
and I think that I will stay with it for a long time, maybe with some minimal changes
fast isle
royal gulch
I'm kind of a preacher, because I went through this myself recently, and I went ...
Understood, as I have gone to the Kinesis after having increasing pain in the hands while typing back in the middle of 2019, and am a bit of an evangelist with respect to things like ADHD and Autism lately. btw, as a very much not christian individual, I actually think of evangelicism to be a negative trait.
royal gulch
I do realize other people have different needs, of course
fast isle
I am most happy that you have found what helps your situation.
the spacing between the two halves of the keyboard in the image with both of them in it is because I need to have them that far appart to be comfortable.
royal gulch
I'm commenting because large keyboards with a lot of keys tend to become very expensive very fast, and if you continue your ergonomic experiments, you are likely to discard it in favor of a smaller and cheaper keyboard, but I realize that not all people have to go all the way, and skipping steps is not always possible
royal gulch
fast isle
the spacing between the two halves of the keyboard in the image with both of the...
sure, I made a unibody one, because with the two-piece ones I can never locate one of the pieces with my hand after using mouse etc.
I used this one for a while as well https://cdn.hackaday.io/images/2478881619906682379.jpg
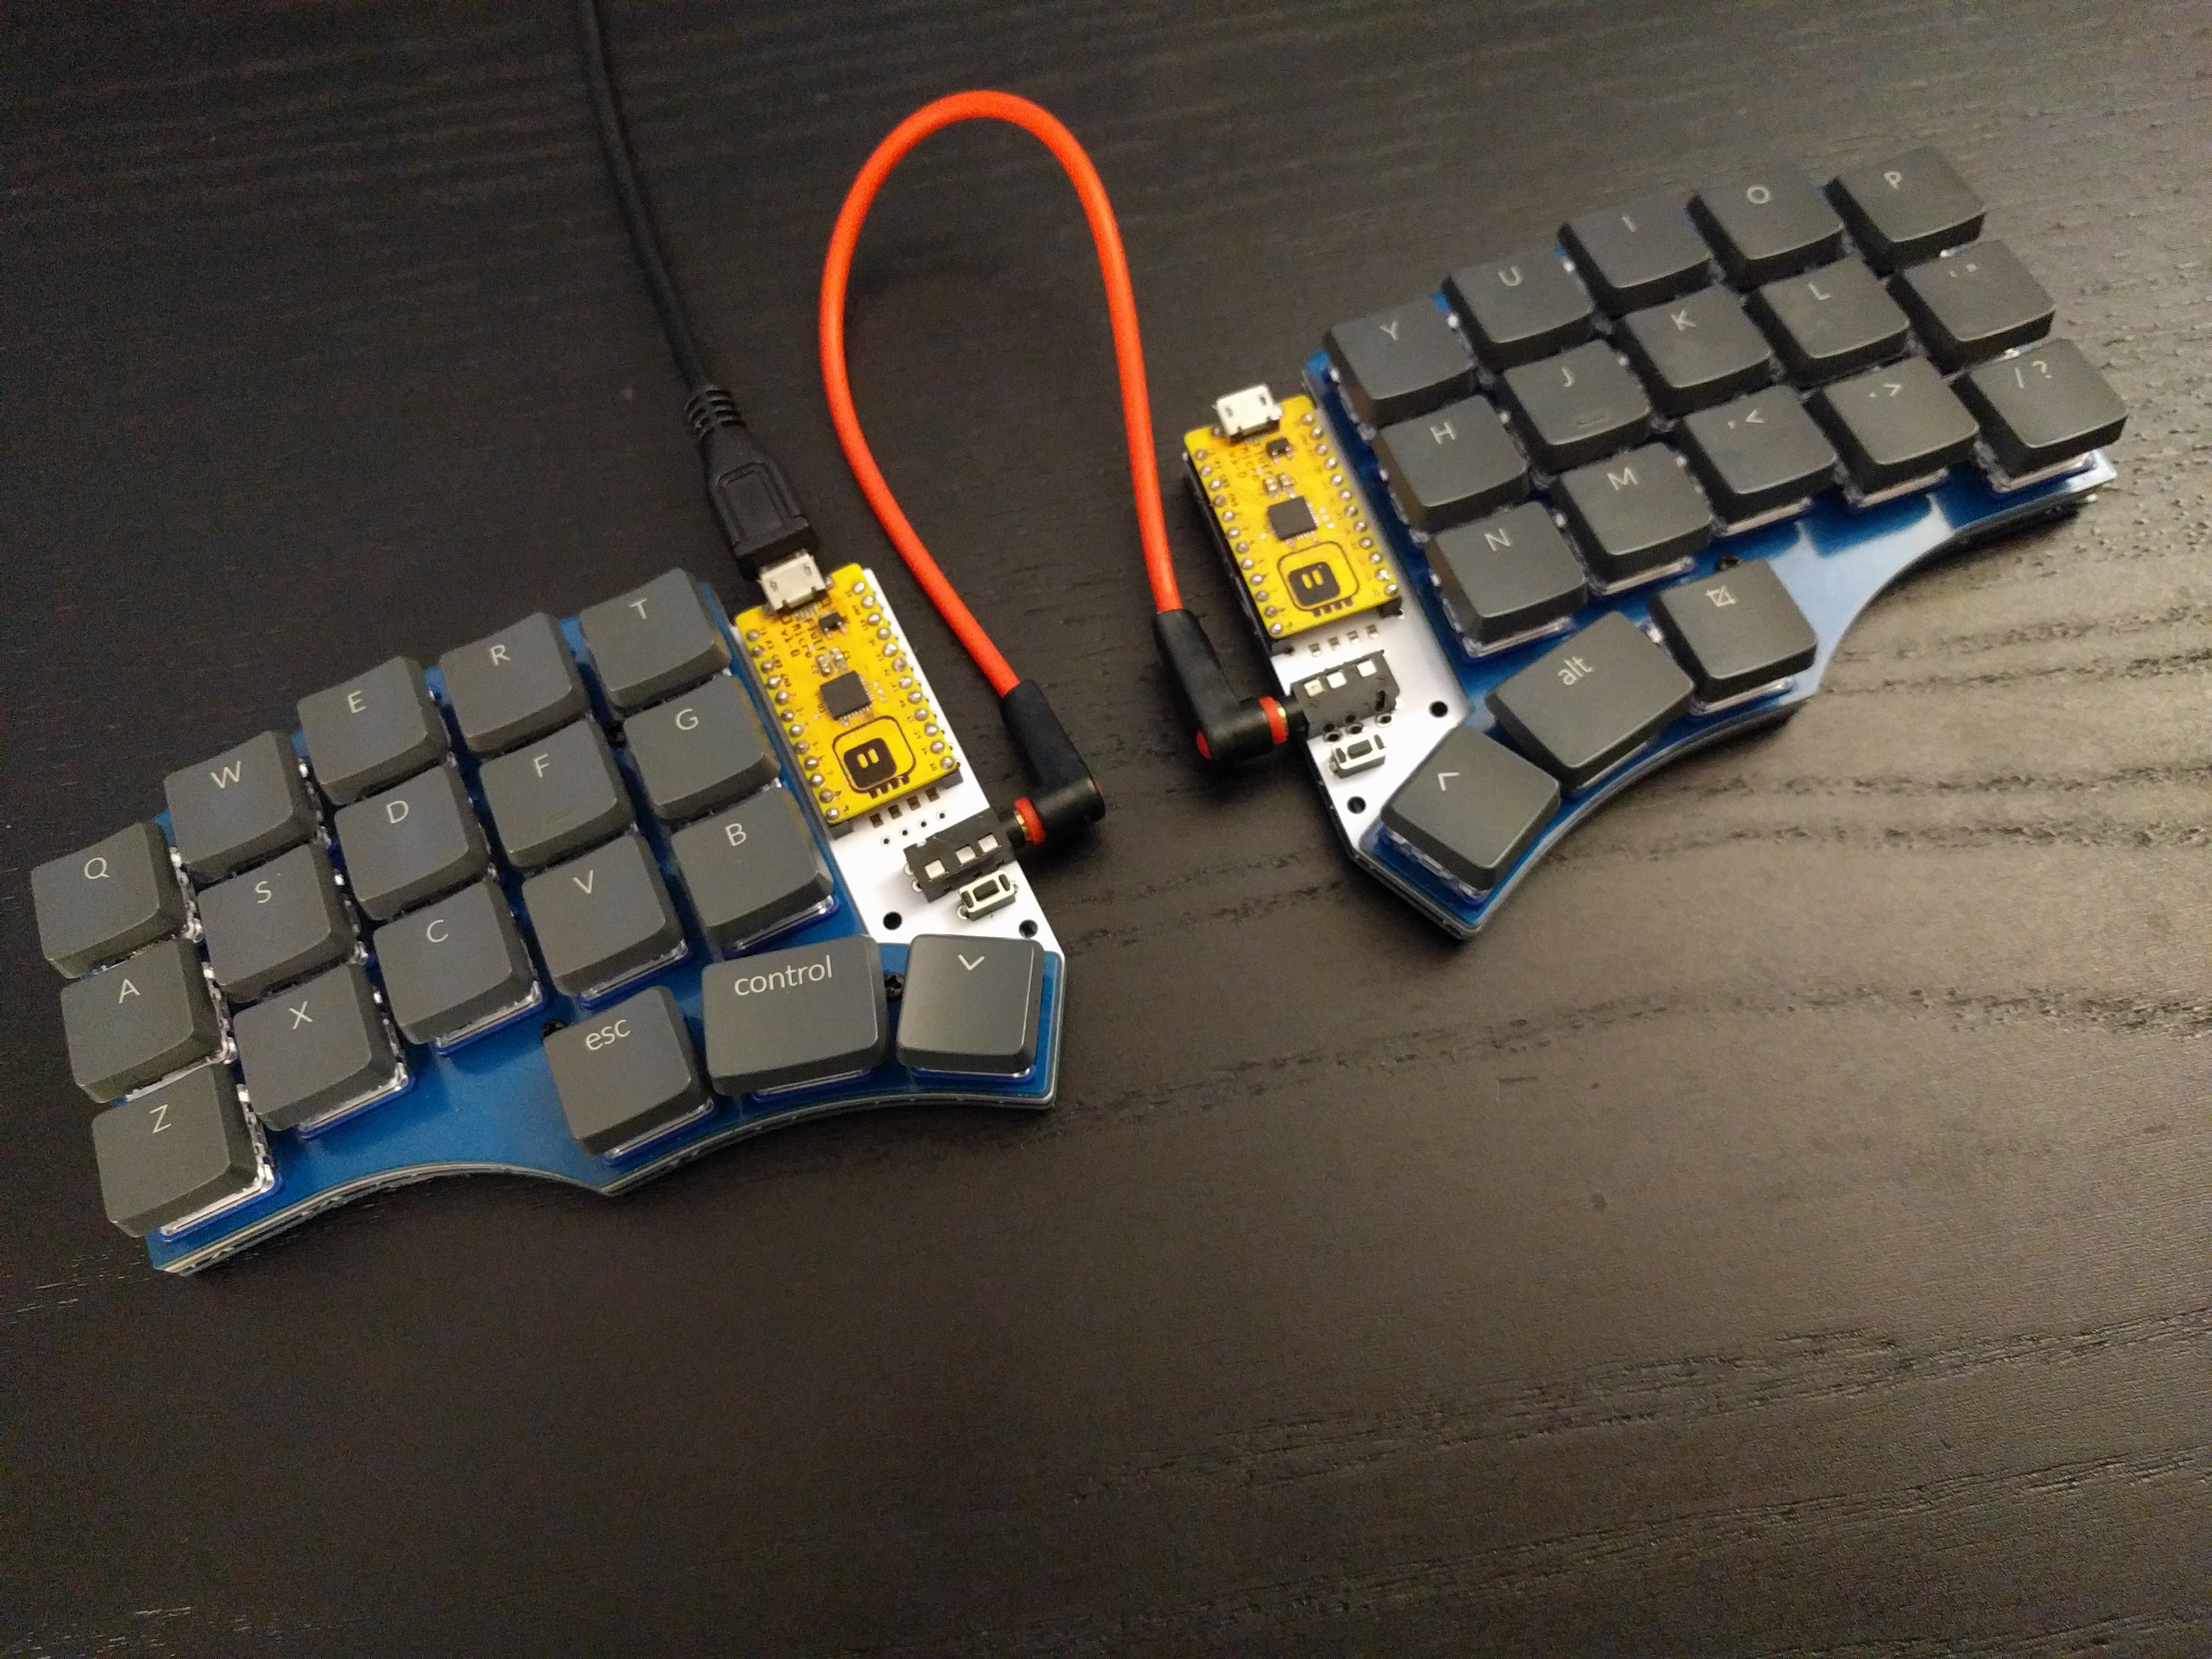
(not my design)
fast isle
royal gulch
sure, I made a unibody one, because with the two-piece ones I can never locate o...
ghah, I would find that frustrating and I actually have never had that problem.
royal gulch
but my wrist pain was rsi not carpal tunnel, so that's another difference
(not that rsi can't happen to people who also have carpal tunnel problems)
fast isle
yup, NIH even says so, kinda.
royal gulch
in any case, I would recommend you to try a small keyboard before you go ahead with that big one, just in case you actually like it
there might be a keyboard meetup near you where you can try it easily without having to buy anything
and ignore my advice if you are really sure you want to build the big one
fast isle
executive dysfunction means my tolerance for frustration is low enough that I am concerned that I would not be able to dedicate the time to learning something like a 40% enough to know if it is something that I would enjoy.
royal gulch
well, as an added benefit I also learned proper touch-typing with all fingers with it
fast isle
I've been a touch typist since 1980.
royal gulch
but you move your hands
anyways, sorry for butting in
the render looks very nice for sure, and I can confirm that a very similar ortho layout worked for me for two years
fast isle
I thank you for your feedback.
royal gulch
you might want to make your life a bit easier and get rid of the wide keys, then you don't have the complication of having to use stabilizers
and it will be much easier to find compatible keycaps too
fast isle
While I would love to get custom double-shot keytops it is possible to use a laser engraver to do something similar to selective laser sintering with powder coat paint. Hopefully that would be more robust than simple decals or stickers.
royal gulch
even blank space at 3U may be a problem
royal gulch
I keep forgetting this is mx and not low-profile, and it's so much easier to find keycaps
fast isle
Low profile seems expensive from my admittedly limited research in that direction. Also, my experience with low profile has been limited to OEM laptop keyboards, and I'm not impressed.
do you consider hailh choc v2 to be low profile?
royal gulch
it's kinda in the middle, but it has the worst problems of both worlds
fast isle
too thick, and unstable?
royal gulch
if you use it with regular sized keycaps, it's not really much lower profile, so you still have to search for special keycaps like DSA, and it requires a custom footprint, so you can't easily change your mind and switch to regular chocs
I didn't notice problems with stability, but I never built a full keyboard with them, just a 2x6 macropad

chocs get substantially cheaper with smaller keyboards, too :-)
 valid gate
I made this one... I have been using it for +1 year... although not 100% of the time...

(It's not wireless)
fast isle
royal gulch
https://cdn.hackaday.io/images/3105011605355837354.jpg
is that your own design?
royal gulch
fast isle
is that your own design?

Minimal macro keyboard
fast isle
ty, that's the v1 version of the choc, correct?
royal gulch
yes, I dremeled the footprints a bit to fit the v2
fast isle
apparently I don't need to make a pcb... if I can use an Arduino Pro Micro connection from the Qualia board to the Keeb.io BFO-9000... it's already a 4, 5, or 6 row by 7, 8, or 9 column key matrix.
fast isle
How common are diy keyboards based on attaching a pro micro pin out controller? I ask because I have a design idea that may be best to add some sort of a keyboard matrix to I2C connection between the matrix and the primary micro controller. The Qualia RGB-666 board has an ESP32-S3, but most of the GPIO is used for the attached 18 bit RGB TTL display. It does have an I2C connection though. The TCA8418 would work for this, but any unused pins on it are suppose to be tied to +3.3v. Adding optional resistors to pull pins high makes routing... difficult.
royal gulch
it used to be the go to board for a long time, and it's still quite popular
keyboards based on pro micro, I mean
 red sandal
Isn't that adafruit key-boar RP2040 also the same pinout to make it a pro micro drop-in replacement? 🤔
royal gulch
yes, there are several such boards
precisely for that reason, I even made one myself
fast isle
I've got a TCA8418 (8x10 matrix with gpio capabilities) and a TCA99543A (dual channel I2C switch) laid out on pro-micro pinout. This could be controlled by the Qualia, and allow me to use something like the BFO-9000 as the matrix PCB.
 carmine sedge
I don't want to brag or anything... But I've been rocking this layout for a couple months now. Super easy learning curve, no unnecessary keys or switches, incredibly ergonomic. and to top it off, fast to print and program.
 wintry skiff
Does it use morse? Some shortcut? Just decoration?
fast isle
BeardyMike for got to add the <sarcasm> and < /sarcasm> tags.
wintry skiff
i know it is not a serious thing, but im curious whether they have something (ever so slightly) useful/fun on it, or is just decoration
fast isle
could be a macro key.
And if it uses Morse code, I don't think he should be using the phrase "super easy learning curve" 🙂
wintry skiff
given the whole post is sarcasm... why not 😛
fast isle
fair enough...
finite rose
Interesting design that flexes thin pcbs: https://github.com/sevmeyer/chrumm-keyboard/

GitHub
Ergonomic monoblock keyboard. Contribute to sevmeyer/chrumm-keyboard development by creating an account on GitHub.
fast isle
Neat, flexures are an underutilized design tool, IMHO.
 steady cave
Has anyone gotten one of these to send HID commands like a keyboard? https://shop.m5stack.com/products/m5stack-dial-esp32-s3-smart-rotary-knob-w-1-28-round-touch-screen
royal gulch
what's the problem?
steady cave
royal gulch
what's the problem?
Well, I just got mine and I have only really used Circuit Python for HID stuff. I thought I could make a cool scroll wheel out of it but I didn't realize there wasn't that many examples of how to do that for this exact device. I was hoping someone would have a repo that I could peak at. The M5 stack stuff mainly says to use their UI Flow program.
royal gulch
I think there is an exmple for a rotary encoder and mousewheel in the hid examples
steady cave
Okay cool. I will see if I can use some of those. I was thinking it had it's own langauge but it looks like it uses the Audrino language?
 steady cave
Oohhhh, okay cool. Thank you!
 noble portal
royal gulch
that looks like micropython
noble portal
royal gulch
that looks like micropython
Wait, I used both before, but how do you tell in this case? I dont see anything that wouldnt be possible in Circuit- and Micropython?
Or is it because of the M5 library?
royal gulch
I know it's not circuitpython, it might actually be regular python
depending on whether this runs on the device or on your computer
warm lodge
Tiny keyboard news: Today I'll be presenting to the Unicode CLDR, a keyboard layout for Costa Rica, that will allow people to write of course in Spanish and English, but also in any of the indigenous languages.
Very simple to create this layouts by using a tool called Keyman Developer (alpha version so that it can output in the format required for the standard).
This means that in a few years, when this version of the standard gets adopted, anyone could buy a "Costa Rica" keyboard just like you can buy engligh or la-latin keyboards right now. This will allow schools to teach in native languages as well.
 past wraith
Personally I wish they made an oled keyboard with protective transparent epoxy on top and the keys would simply change letter on layout change in the OS
I find the approach of fixed static keys so 20th century
silk kraken
past wraith
I find the approach of fixed static keys so 20th century
Uhh... you realize that there's a mechanical keyboard industry right?
wintry skiff
... change in the OS
Would need custom software on the computer, talking to the keyboard, to provide that info
By default, keyboards have (almost?) no information about the device they get plugged into
finite rose
There is also: https://ko-fi.com/polykb

Ko-fi
Become a supporter of thpoll today! ❤️ Ko-fi lets you support the creators you love with no fees on donations.
 ruby stirrup
Didn't know that one... Very interesting
 reef canopy
Can Pi Pico W handle split wireless keyboard? either through some sort of USB dongle or BLE?
reef canopy
ok thanks! zmk has support for the usb dongle kind of setup too right? Not a big fan of bluetooth if I can avoid it
royal gulch
not sure, you might want to ask on their discord
 neat niche
Has anyone done QMK (or similar) with the Adafruit Neotrellis boards or something with the Seesaw driver boards?
@thin viper suggested looking at KMK so I might poke at that
wintry skiff
neat niche
Has anyone done QMK (or similar) with the Adafruit Neotrellis boards or somethin...
QMK does not support those out of the box and you would need to write custom key scanning code (probably just a couple dozen lines of I2C stuff, but idk how those devices work)
maybe someone has already written the KMK code for such thing
neat niche
wintry skiff
QMK does not support those out of the box and you would need to write custom key...
Thanks - yeah I expected i'd need to write a translation layer.
Ws just curious if anyone else had tried similar.
wintry skiff
"custom matrix lite" is the term if you wanna read QMK's docs
no idea how those keys (nor I2C in general) work, so that's as far as i can help 😅
 glass kraken
Working on a Fusion360 add-in that takes a KLE json file and generates a plate for handwiring ... making some progress. I still need to account for non-standard sized keys and stabilizer parts.
 ruby stirrup
glass kraken
Working on a Fusion360 add-in that takes a KLE json file and generates a plate f...
ruby stirrup
glass kraken
Working on a Fusion360 add-in that takes a KLE json file and generates a plate f...
impressive
do you plan to opensource it ?
I'd be glad to port that to siemens solid edge for example
 ionic veldt
I used this tool to generate the .STP file for a spare PCB I had lying around: http://builder.swillkb.com/
if you pick the sandwich option it gives you the various layers that you can further modify.
ruby stirrup
ionic veldt
I used this tool to generate the .STP file for a spare PCB I had lying around: h...
that's what I use to get the plate profile, too
but having a plugin right inside the CAD package, with parameters to easily modify things would be nice, though
ruby stirrup
I think i'm stuck here... I just read that I cannot create scripts for solid edge without being a commercial user....
 rich osprey
im designing a mouse and this is just the scroll wheel. this is so much more complicated than i thought it was going to be 😅


 foggy island
rich osprey
im designing a mouse and this is just the scroll wheel. this is so much more com...
foggy island
rich osprey
im designing a mouse and this is just the scroll wheel. this is so much more com...
Looks incredible
foggy island
Flying by the seams of your pants is usually the best way to have fun doing new things
rich osprey
it sure is
rich osprey
test jig with a standard keyboard switch for middle click lmao

best part is, the keyboard switch supplies both the electrical switching, as well as the mechanical spring required by the bearing assembly
just have to make sure that the force imparted on the switch by the mass of the scroll wheel is less than the actuation force of the switch.
rich osprey
i think? im ready? to hit the buy button??

 rich osprey
missed some parts in the explosion ☺️
 royal gulch
what error did you get?
 daring condor
countdown till ban.....
 wind stirrup
Your behaviour is wrong...
daring condor
nobody said to ping every user in the member list
 gusty owl
The help on this discord server comes from volunteers, it's not customer support (even if it was, the site you linked has nothing to do with Adafruit)
 prisma fox
@tough fog please don't tag random people. It is considered rude.
gusty owl
You would have, by just reading the discord rules https://discord.com/channels/327254708534116352/330410763594498050
 rustic peak
Yes
rustic peak
Perhaps reachout to the person that said "come bother me on discord" not "come bother everyone"
:)
They are indeed on the discord and you can try pinging them specifically
"neradoc.me" -> there's someone on the discord with the handle neradoc
gusty owl
rustic peak
They are indeed on the discord and you can try pinging them specifically
They're probably regretting it already 😆
rustic peak
gusty owl
They're probably regretting it already 😆
Ehh, if it's their project and they like what they do? I'd be cool with it. The biggest issue right now is that nobody here knows what this project is or how it should or shouldn't work.
wind stirrup
Nobody like to be pinged for problem they are not related with...
I am out... I was typing something that could helped, but this behavious is just wrong. (two persons blocked)
 wicked quest
Thank you to everyone who attempted to steer their behavior to be more positive. The two users not abiding by the #code-of-conduct have been banned.
gusty owl
Thank you! That was becoming... disturbing
wind stirrup
rustic peak
Ehh, if it's their project and they like what they do? I'd be cool with it. Th...
The project seems to be pico-badusb https://github.com/kacperbartocha/pico-badusb and a custom firmware for the Pico that is based on Circuit Python 8.2.
I am not sure how different from CP it is, but it surely use USB-HID.
Now if your keyboard mapping is not EN-US, in CP, you would use neradoc library for other mapping. (I did that once for French AZERTY, and almost tried to follow his instruction for Belgian AZERTY...).
But how exactly map that CP knowledge to pico-badusb, I don't know (also need a CP 8 version).
Why did that project need it's own UF2 and does not suggest to download official CP... I don't know (they claim filesystem initialisation, maybe to put libraries and config file in the flash).

GitHub
Raspberry Pi Pico BadUSB is a simple implementation of the BadUSB idea using DuckyScript-alike syntax. - kacperbartocha/pico-badusb
valid gate
That name, bad USB, is not that encouraging in the first place 👻
 storm nexus
Hi! I’m looking at the page for “Miniature Wireless USB Keyboard with Touchpad” (Product ID: 922). It looks like it only operates over the (non-Bluetooth) wireless to a dongle in the computer’s USB, and that the USB cable is only for charging - it can’t operate as a wired device over that cable. Does it seem like I’m reading this correctly?

Add a miniature wireless controller to your computer project with this combination keyboard and touchpad. We found the smallest wireless USB keyboard available, a mere 6" x 2.4" x ...
finite rose
storm nexus
Hi! I’m looking at the page for “Miniature Wireless USB Keyboard with Touchpad” ...
Matches my understanding
 rose tapir
HI, I am strugling with such problem, I use Adafruit library Bluefruit52 and I don't know why, but after connecting my device as hid keyboard to android phone, battery level is not gathered by phone. I am using BleBas class and function blebas.notify(...);. I can see battery level using nrf connect android app - service is properly notifying, but it is not visible in notification center nor android settings. I have latest android 14.. Do you know what could be the issue?
 echo marlin
Do you have a kit to ISP flash a System76 Launch 1? Not quite sure what all I need for this.
 visual stag
Im doing trying to make a Keyboard, I have in the matrix array stage, I believe I have solved the connections in a matrix like this:
but I want to know if the ENCODER, the 3 pin part, the encoder itself, not the push-switch, must be apart in the matrix design directly to a 2 pins of the MCU, What you think?
And how you see this diagram ? (lacks the connections to the Mcu... but I wanted to show it in this way bcs is more cleaner to see)
 royal gulch
yes, the encoder needs dedicated pins
visual stag
royal gulch
yes, the encoder needs dedicated pins
ok, great! do you have some advice for the rest of the diagram?
royal gulch
not really, should work
visual stag
soo im going to burn my fingers 😅
visual stag
Outs A and B must be on separated pins.
and the ground can be attached to any pin Ground, used or not? can be the Grounds shared ?
and the encoder does not need Diode ?


 visual stag
royal gulch
all grounds should normally be shared
visual stag
royal gulch
all grounds should normally be shared
I have this RP2040, and my matrix is 7 colums, 5 rows and the Encoder. I need to connect the interface for the other half... is this well ? Where to connect the 2 comm wires for the Half ?? have some suggestion ?
 royal gulch
visual stag
I have this RP2040, and my matrix is 7 colums, 5 rows and the Encoder. I need to...
royal gulch
visual stag
I have this RP2040, and my matrix is 7 colums, 5 rows and the Encoder. I need to...
not sure what you mean, what 2 wires?
visual stag
royal gulch
not sure what you mean, what 2 wires?
4 wires goes to the other Halve, right ? its split keeb. And I have the 2 oranges (3v and ground out) and need 2 more for the interface with the other MCU (the other half)
ima right ?
royal gulch
really depends on what you plan to use for the communication
if the communication is only one way, and you don't need a clock, then you could get away with one wire
but of course you would need to write the code for it
visual stag
all the builds of split keebs are 4 wires, 2 power and 2 comm
thats why are using TRRS socket
I will use QMK for this
visual stag
yes, I will be for a I2C connection with the other half
so need 4 wires, thats why I was asking what Pin is more convenient to choose
the GND pins (grounds ones) can not be choosen for Columns and Rows right ?
royal gulch
for i2c, you need to pick i2c-capable pins
they are marked on your diagram with those blue rectangles
note the number next to the diagram -- this is the i2c peripheralm, since rp2040 has two of them
you need to use sda and scl pins belonging to the same peripheral
you can use pins for different peripherals on different sides though
it's just that on one side the sda has to have the same number of the peripheral as the scl
I think traditionally people tend to use pins gpio4 and gpio5
wintry skiff
visual stag
yes, I will be for a I2C connection with the other half
QMK doesnt do I2C split on ARM chips (which RP is)
it uses PIO for RP (or you can opt into UART, without any benefit), and you can use either 1 or 2 data lines
you should ask on QMK server, btw, if you plan to use it for the firmware
as per answering the actual question... PIO can be used on any pin (or pair of pins if you want 2 data lines instead of 1)
visual stag
wintry skiff
QMK doesnt do I2C split on ARM chips (which RP is)
so.. can help me to decide how to connect the halves? what pins to use? what u recommend ?
wintry skiff
i explained everything you need to know (so do the docs)
quoting myself....
can be used on any pin
royal gulch
just use 4 and 5, it doesn't matter
visual stag
And I plan to add the display Oled

Where is best to wire this one?
Its spi oled 0.96
royal gulch
it's the pink rectangles on your diagram
 glossy sierra
@visual stag If you read the adafruit guide it tells you which pins to use. You have to use the SPI bus for the oled screen.
wintry skiff
Which, for RP, could be plenty of pin sets, because it is much more flexible than say at32u4
glossy sierra
Thats true, and I havent dug into the code to see if it requries the primary bus or if you could put it on the secondary
visual stag
glossy sierra
<@229376370352848898> If you read the adafruit guide it tells you which pins to ...
Im looking in the channel of Adafruit guides but there is a lot of videos. There is something specifically where to looking for?
glossy sierra
I think I can find the tutorial for you yes one second
just to clarify its one of hte pitft screens right?
https://learn.adafruit.com/adafruit-pitft-28-inch-resistive-touchscreen-display-raspberry-pi/overview This is what I read to learn about the pitfts and why they use spi and how.

Add a compact 320x240 resolution screen to the top of your Pi
(make sure your screen is one of the pitfts, I can treally tell from just the picture)
The long and short of it is, that The Adafruit tema uses a special custom in house method to push the pixels to the oled screen one at a time, this makes a super crisp really good screen for how small they are. This creates two kind of "problems", which is their refresh rate, from both oled and using the spi bus, is meh... (check snes emulation on one of the screens to see).
The next thing you will run into is if you want ot use the hdmi port or not. It can apparently cause some preformance degrade because of hdmi mirroring code thats used basically as a system service.
Anyway, its all a perfect storm to make a really easy to use tiny oled for a normal user to code and work with, but do be advised about how it works and its limitations.
oh and also unless you really know what you are doing it takes up that whole spi bus
visual stag
glossy sierra
just to clarify its one of hte pitft screens right?
WHAT ? haha sorry man, Im very new on this, Idk what is HTE Pitft. I just have the Oled Display SPI 0.96 SSD1306
visual stag
Im looking to use QMK as my firmware in the Keyboard. But after start with all the QMK stuff, I need to know how to wire all properly
glossy sierra
I thought it was one of the pitfts
Wireing a keyboard matrix is uhh.. "fun for sure"?
visual stag
Im looking for a similar build where show the connections to copy but I can not find it with RP2040 :/
glossy sierra
visual stag
glossy sierra
Wireing a keyboard matrix is uhh.. "fun for sure"?
haha ya: The part of wiring and soldier is done 😄
I just need to connect to the Mcu (rp2040)
visual stag
glossy sierra
do you understand how the keymatrix works?
yeap! and the matrix is done
glossy sierra
Awesome, so in theory you could plug into into the pins of your micro controller and start reading the voltage changes with the button presses right?
visual stag
but its my first time with a MCU, so I want not to mess up the wiring to the MCU
I have 7 columns and 5 rows
but want to let space for the Other Half (its split keeb), the Oled display, the Encoder, and I want to let pins to wire argb at future
glossy sierra
it includes wiring up the matrix (which you have done) connecting it to the MCU and then coding the MCU to detect the button presses
as far as your OLED goes, its pretty straight forward to use it, plug it into spi, give it a selection pin of your choice, select it and send it draw commands
visual stag
ok... will check
royal gulch
also be sure to check https://docs.qmk.fm/features/oled_driver
visual stag
royal gulch
also be sure to check https://docs.qmk.fm/features/oled_driver
my display is SSD1306 128x64 Spi 0.96... so I think will work
 royal gulch
@visual stag will you please stop messaging me?
visual stag
royal gulch
<@229376370352848898> will you please stop messaging me?
Ohhh wow
wintry skiff
glossy sierra
Thats true, and I havent dug into the code to see if it requries the primary bus...
There is no "primary" or "secondary"
They could be named X and Y instead of 1 and 2
It is the exact same hw, there is 2 of em
glossy sierra
Oh thank you!
wintry skiff
glossy sierra
https://learn.adafruit.com/adafruit-pitft-28-inch-resistive-touchscreen-display-...
Also, this seems to be for the pi single board computer on image preview, nothing to do with the RP2040 MCU (except the manufacturer)
glossy sierra
yeah I came to that conclusion later on in the convo
Also when I said secondary bus, did you mean like that I thought the second bus was worse or something?
I just reffered to it as "number 2"
or at least that was my intention maybe my words have a different meaning in like the eletronic space I didnt know about
wintry skiff
To me it just seemed like you were unsure whether they were diff
glossy sierra
Honestly I was....
wintry skiff
So, just clarified it was x2 hardware
glossy sierra
I just diodnt craft my sentence to imply it, and was worried that now others might have taken it like that and I was spreading wrong info
but yeah I was kind of wondering it
and I am really glad you cleared it up
Everyones making their own keyboards is there something going around I dont know about?
wintry skiff
3 screens on my keyboard??? No clue what you talking bout
glossy sierra
HAHA!!!
wintry skiff
I think there is a photo somewhere in the server
glossy sierra
Good point brb I gotta place an order
wintry skiff
Lmao
Honestly they arent too useful, but playing with graphics code (im using C, not CircuitPy) is quite fun imo
glossy sierra
Yeah! Come to think of it its not the worst project and really could be expanded out into a fully smart keyboard.
wintry skiff
Sure, showing cpu / ram usage or currently playing song (needs custom software running on PC) is somewhat useful, but....
glossy sierra
you know, a detecated tops monitor would be nice.
wintry skiff
I also made minimal PoC to use the touchscreen to interact with HomeAssistant API, but i really dont have any domotics at home, so....
glossy sierra
I might build a big boy keyboard too1
OHH! I could use rotary encoders for my nerf turret targeting!
wintry skiff
The PoC was a slider (nothing shown, just an edge of the screen) controlling the brightness of a lightbulb (allegedly, there was nothing connected really xddd)
glossy sierra
lol
ive been wanting to start working on like pcb style skills, maybe ill work on a keyboard, pcb.. that could be fun, and would be well documented so I would know if I am doing it right or not
 frosty pilot
Do we have wireless keyboards using pi pico w yet?
 honest bane
frosty pilot
Do we have wireless keyboards using pi pico w yet?
honest bane
frosty pilot
Do we have wireless keyboards using pi pico w yet?
The Philhower rp2040 BSP has a KeyboardBLE library. Example of use (I"m sure there are more): https://www.instructables.com/Wireless-Bluetooth-Keyboard-Using-Raspberry-Pi-Pic/
There isn't CircuitPython support for RP2040 BLE yet, and we may wait for RP2350, because Pi Pico W (RP2040) has significant flash and RAM constraints in CircuitPython.
 kindred pilot
I don't suppose anybody knows what these look like inside? https://www.adafruit.com/product/5063 I'm wondering if it be possible to wedge the trackball portion in a smallish space on my existing keyboard.

Add a rolling interface with your project with this Panel Mount USB Trackball with Three Buttons that is super easy to use and interface with. Simply plug it into your computer (desktop of ...
 faint lodge
I’m trying to install Guy DuPont’s t9 predictive text onto the macropad rp2040. I’m having lots of trouble, can someone recommend a guide or something
 storm mortar
faint lodge
I’m trying to install Guy DuPont’s t9 predictive text onto the macropad rp2040. ...
storm mortar
faint lodge
I’m trying to install Guy DuPont’s t9 predictive text onto the macropad rp2040. ...
I think the only instructions are the one in his GitHub repo: https://github.com/dupontgu/t9-macropad-circuitpython/tree/main/fw
faint lodge
storm mortar
I think the only instructions are the one in his GitHub repo: <https://github.c...
I tried everything in GitHub and it gives me an error.

 meager raptor
faint lodge
I tried everything in GitHub and it gives me an error.
meager raptor
faint lodge
I tried everything in GitHub and it gives me an error.
Did you load the required libraries?
honest bane
faint lodge
I tried everything in GitHub and it gives me an error.
SimpleTextDisplay.WHITE is in the library: https://github.com/adafruit/Adafruit_CircuitPython_Simple_Text_Display/blob/main/adafruit_simple_text_display.py. That's myseterious. You could try this in the REPL:
>>> from adafruit_simple_text_display import SimpleTextDisplay
>>> SimpleTextDisplay.WHITE
(255, 255, 255)
I don't see a typo
I tried it myself and got the above
faint lodge
I loaded all the required libraries but in the libraries there are two init in two folders. How does it know which to use
honest bane
faint lodge
I loaded all the required libraries but in the libraries there are two __init__ ...
if a library is just one file, like some_library.mpy, put it in the lib/ folder. If the library is multiple files in a folder, like some_library/, put the whole library folder in lib/. Do not take the files out of the some_library/ folder.
faint lodge
Ok I understand. After fixing the library I’m getting this error
 honest bane
faint lodge
Ok I understand. After fixing the library I’m getting this error
honest bane
faint lodge
Ok I understand. After fixing the library I’m getting this error
IOError is not an error that is used in CircuitPython. Replace that with OSError in the code.py. But it's here: https://github.com/dupontgu/t9-macropad-circuitpython/blob/0b38b97155b571bfcf269119efb15f29e83522fa/fw/core/code.py#L133, and indicates that the priority_words.txt file does not exist (which appears to be OK)
IOError was replace in Python 3.3 by OSError
faint lodge
Awesome. That fixed that. Now I’m getting an error on line 307 no such file as library.t9l. But I have that file in the library
honest bane
it should not be in the library, it should be at the top level (directly in CIRCUITPY). The same is true for priority_words.txt.
(if you had it)
The code is with open("library.t9l", "rb") as fp:, and it's not lib/library.t9l, so it should be at the top level.
faint lodge
awesome! i think its working
honest bane
I submitted a pull request to the original repo to fix the IOError thing.
faint lodge
thank you so much for your help
honest bane
you're welcome!
 eager mica
The local 5 Below store is offering Halloween themed keycaps

 snow matrix
I received my ZSA Moonlander today! I'm really excited to get started with it. It won't support CircuitPython (I looked into it), but it runs QMK and they provide a GUI configuration tool that generates the firmware files for you. Definitely looking forward to seeing what I can do with it.
wintry skiff
QMK's autocorrect feature is lovely 😉
meager raptor
More of a general keyboard question, but any thoughts on how to troubleshoot a key that's sticking down? specifically left shift, with stabilizer
royal gulch
see if the stabilizer wire is bent...
 river kelp
Project description: I watched a video [YouTube link: https://youtu.be/Bicjxl4EcJg?si=mHz] anhttps://github.com/chromalock/TI--32/].
I want to create a similar project but with lower costs. It's about bringing ChatGPT to a handheld calculator like the TI-84.
I want the calculator to have features like
Color
Animated
Multi-page responses
Chat history from
A larger menu (only 320x240 resolution
Support for lowercase characters and "Vietnamese" language
Documentation
Basic
HTTPS
Sending and reading emails
Wi
Video play
I need your advice to help me complete this project, specifically on programming and the electronic components that need to be purchased. I'll exch Gmail

don't let any of your teachers see this.
Keith Sachs: @KeithSachs
github: https://github.com/chromalock/TI-32/
patreon: https://patreon.com/ChromaLock
:)
Can you help me? I beg you, if you can, I will pay you.
gusty owl
river kelp
Project description: I watched a video [YouTube link: https://youtu.be/Bicjxl4Ec...
Please don't spam multiple channels.
 strange ibex
does anyone have any experience here configuring the neopixel onboard the kb2040 for qmk? I am hitting a dead end here
royal gulch
strange ibex
does anyone have any experience here configuring the neopixel onboard the kb2040...
I would ask at the qmk discord
wintry skiff
strange ibex
does anyone have any experience here configuring the neopixel onboard the kb2040...
agree with above, QMK discord is very active and would lead to quick answers
but, FWIW, configuring it would take pretty much 2 simple lines of config
- the chain (in your case, with 1 element) of LEDs is connected to this pin
- i want to use the
vendor(PIO) driver to generate the WS2812-protocol signal
strange ibex
Ok thanks for the the help😊
rich osprey
re: #show-and-tell message
the plan is to build many modules that can be swapped-out and patched together into an abundance of different buttonboard/simrig setups, either as an accessory to your desk's keyboard, a complete joystick setup, or to attach to your sim rig for complete customizability, ease-of-access, and modularity :3
not over-engineered, simple to make, and easy to assemble/fix/change.

i got annoyed at all the buttonboard options available on the market, and decided to put this together.
first PCBs just arived, and took all of 1:30 hours to design and order.
it was suppoaed to take 2 weeks to ship the PCBs to me so i wasnt temped to buy the case and such that it goes in, but it showed up on my doorstep a week earlier than expected, because JLCPCB are Just That Good
so i only have to hold out until payday before i have some fun and buy Things >:3
hopefully this project ends up actually happening lmao. so many times do i overengineer projects to the point it ends up being really expensive to actually order the first prototype parts, but this time im doing Simple and Cheap!!
ruby stirrup
rich osprey
re: https://discord.com/channels/327254708534116352/334905778857050125/130140499...
Looks very promising. How do you intend to make the firmware aware of connected modules?
I suppose you'll also have to use IO expanders to account for the number of required pins?
rich osprey
i dont intend to make the modules "smart" in any way at all- all the wiring will be done by me/the user, and done on the "front" like a breadboard, so i will simply not bother making it smart. since a joystick always reports to windows with the full 32 buttons and 8 axes, i dont need to worry about any of that.
as for IO expanders, i also dont need to worry about that either! i can use the matrix built right into the adafruit neokey boards to access all the buttons i need, and since a joystick can only have 32 buttons max, i dont need to worry about running out of GPIO because ill run out of firmware assignments first 🙂
i can simply add more itsybitsy's to the system as necessary, since they too will be swappable modules, to get both more GPIO and more joystick button assignments in firmware
ive also open-sourced it, tho atm im still converting all the blender stuff into kicad pcbs so i can order them 😜 https://github.com/MostlyCoraGrace/EurorackButtonBoard
GitHub
A modular, hot-swappable, and patchable, Eurorack-compatible simrig/buttonboard system - MostlyCoraGrace/EurorackButtonBoard
rich osprey
test piece fits 👀 💯
 royal gulch
is that... an eurorack keyboard?
rich osprey
yes >:3
royal gulch
well done
rich osprey
more PCBs for my keyboard arrived 👀 🔜 

 rich osprey
just a dry fit so far, but look!! this already looks so good!!

 keen pivot
RIP. Hazards of cheap PLA...
 keen pivot
The other side of my keyboard has no cracks at all, and it's pretty much the same design aside from being printed in Overture Matte Black PLA instead of whatever cheap black PLA this side was printed in. I guess that proves that material quality really does matter 😹
nova pike
Oh yeah, for sure. Even worse is cheap pla that’s absorbed some moisture; that gets really brittle. As filament, it ends up breaking in Bowden tubes, so imagine that brittleness as a printed part.
keen pivot
Yeah, this stuff broke in the Bowden tube too, so I probably shouldn't be surprised 😹
I'm looking forward to moving back into a regular apartment so I can print some new pieces
 rapid jasper
I bought a vintage short throw Topre board to retrofit with a modern PCB:
 rapid jasper
Ok, so this thing is gorgeous inside:


 ruby stirrup
rich osprey
i dont intend to make the modules "smart" in any way at all- all the wiring will...
ruby stirrup
rich osprey
i dont intend to make the modules "smart" in any way at all- all the wiring will...
sorry, I hadn't seen your answer. It's interesting. I didn't know about the neokey boards.
very nice work
thanks for the opensource part 🙂
keen pivot
Just finished rendering the latest version of my keyboard design... lots has changed since the version I'm using right now. 😺

 soft sand
here is my macro foot pedal keyboard project. 🙂


 keen pivot
Very nice!
keen pivot
soft sand
here is my macro foot pedal keyboard project. 🙂
I would have thought red switches would be a bit too light for foot pedals... how sensitive are they?
soft sand
theyre pretty good, plus if they do end up being too sensitive, I have placements for external springs
if you see the circles next to them
keen pivot
aah yeah, that makes sense 🙂
soft sand
i find im not resting my foot on it anyway and only really reaching for it when i need so never feel its too sensitive
I already sold 5 of them within australia pretty happy with the result so far
keen pivot
Very nice 🙂 I've been thinking about maybe selling my keyboard once I get the design to where I want it. (it's almost there now!)
soft sand
yep, thats the thing, for me its one of the first projects ive got this far :p
so pretty happy with that
keen pivot
Same with my keyboard... I think there's something about input devices - since you always have your hands/feet on them, it helps push you to get them to a place you're happy with. It's easier to lose track of most other projects 😹
soft sand
agreed
im happy with where im at with this project, jsut a few little tweaks for the designs, but the way ive set it up is that i can use the same PCB designs ive already made and make new things pretty fast hopefully
rich osprey
footpedals v cool
keen pivot
If anyone wants to use SolidPython to generate OpenSCAD keyboard models, I just released my keyboard-building library: https://spkb.readthedocs.io/en/stable/spkb.html


 mild niche
Has anyone used the wooting keyboards? https://wooting.io/wooting-two-he what did you think of the switches? And can you map buttons to macros?

The Wooting Two HE is an analog mechanical keyboard with <1ms input response. The magnetic Lekker switches are adjustable up to 0.1mm for finger brushing sensitivity.

 azure osprey
Hello everyone, does the KMK firmware support oled animation gifs (I am using oled SSD1331) ?
honest bane
azure osprey
Hello everyone, does the KMK firmware support oled animation gifs (I am using ol...
That would be a question for https://kmkfw.zulipchat.com/ if you get no answer here.
 night pier
azure osprey
Hello everyone, does the KMK firmware support oled animation gifs (I am using ol...
night pier
azure osprey
Hello everyone, does the KMK firmware support oled animation gifs (I am using ol...
yes it does. Images and informative text. I would only recommend it for USB builds, not ble
night pier
keen pivot
Just finished rendering the latest version of my keyboard design... lots has cha...
Nice thumb cluster
keen pivot
night pier
Nice thumb cluster
Thanks! That was the major impetus for modifying the Dactyl in the first place
night pier
 rare parrot
Hi, I'm trying to create a pattern to automatically enter a password with my Raspberry Pico 2 in Lenovo ThinkPad BIOS (as part of my work). However, when I try to enter a password containing uppercase letters, the password is typed only in lowercase. I've tried using layout.write(password) (for example, "BoNjOuR"), as well as manually writing the pattern using keyboard.send(Keycode.SHIFT) or Keycode.CAPS_LOCK, but nothing seems to work...
Do you have any ideas? Here is an example function:
def bios_pattern_thinkpad(keyboard: Keyboard, layout: KeyboardLayoutUS, password: str):
for _ in range(3):
    keyboard.press(Keycode.DOWN_ARROW)
    keyboard.release_all()
    time.sleep(0.4)

keyboard.press(Keycode.ENTER)
keyboard.release_all()
time.sleep(0.4)

keyboard.press(Keycode.RIGHT_ARROW)
keyboard.release_all()
time.sleep(0.5)

for _ in range(2):
    keyboard.press(Keycode.DOWN_ARROW)
    keyboard.release_all()
    time.sleep(0.4)

keyboard.press(Keycode.ENTER)
keyboard.release_all()
time.sleep(0.4)

keyboard.press(Keycode.DOWN_ARROW)
keyboard.release_all()
time.sleep(0.9)

keyboard.press(Keycode.DOWN_ARROW)
keyboard.release_all()
time.sleep(0.5)

keyboard.press(Keycode.ENTER)
keyboard.release_all()
time.sleep(0.3)

layout.write(password)

keyboard.press(Keycode.ENTER)
keyboard.release_all()
time.sleep(0.3)

layout.write(password)
 obtuse sand
(not sure if right channel..) I guess you can't connect https://www.adafruit.com/product/4980 to the stemmaqt connector of a sparkle motion board and use the key presses directly as button presses in WLED?
The only thing better than a nice mechanical key is, perhaps, FOUR mechanical keys that also can glow any color of the rainbow - and that's what the Adafruit NeoKey 1x4 QT I2C ...
foggy island
obtuse sand
(not sure if right channel..) I guess you can't connect https://www.adafruit.com...
You can
Both have Stemma QT/QWIIC connectors
obtuse sand
They both do, but can WLED use the keys as buttons? I'm guessing not since these won't be GPIO switches, and I don't see anything about i2c keyboards on https://kno.wled.ge/basics/compatible-hardware/
gusty owl
obtuse sand
They both do, but can WLED use the keys as buttons? I'm guessing not since these...
the neokey board has its own microcontroller with the seesaw firmware on, and that controls the neopixels and reads the inputs.
so wled would need to use the adafruit seesaw library to communicate with it, which is not supported
foggy island
gusty owl
the neokey board has its own microcontroller with the seesaw firmware on, and th...
If it’s (WLED) using circuitpython you could communicate with the neokey
I believe there is also an Arduino library for talking to the neokey as well
obtuse sand
WLED is c++, looks like it's based on arduino maybe? Might be easy to mod to support neokey Arduino lib
gusty owl
obtuse sand
WLED is c++, looks like it's based on arduino maybe? Might be easy to mod to sup...
Yep, looks like it's Arduino based https://kno.wled.ge/advanced/compiling-wled/ , so you could probably add support for the seesaw library

GitHub
Arduino library driver for seesaw multi-use chip. Contribute to adafruit/Adafruit_Seesaw development by creating an account on GitHub.
foggy island
obtuse sand
WLED is c++, looks like it's based on arduino maybe? Might be easy to mod to sup...
There should be a circuitpython web workflow for it https://learn.adafruit.com/adafruit-sparkle-motion/install-circuitpython

Get up and running with your Sparkle Motion Board
No need to strictly do Arduino
gusty owl
foggy island
There should be a circuitpython web workflow for it https://learn.adafruit.com/a...
wled is independent firmware, it can't be used with circuitpython... and the built in LED animations are way more complex than what cp libraries can do.
foggy island
I get that, I was just saying the sparkle motion can do CP workflow
If they wanted to use the neokey easily
rich osprey
progress on my buttonboard v2 😤

 grand gulch
rich osprey
progress on my buttonboard v2 😤
grand gulch
rich osprey
progress on my buttonboard v2 😤
That is GORGEOUS. I'd love to know how you sourced the parts for that.
Also, why does the triumph emoji look like a particularly violent sneeze?
rich osprey
grand gulch
That is GORGEOUS. I'd love to know how you sourced the parts for that.
hi im glad you like it! 🥰 ✨
the source files for the plates are on github: https://github.com/MostlyCoraGrace/EurorackButtonBoard
and the Hackaday project has links to the individual electronics and hardware I use: https://hackaday.io/project/199159-eurorack-buttonboard
GitHub
A modular, hot-swappable, and patchable, Eurorack-compatible simrig/buttonboard system - MostlyCoraGrace/EurorackButtonBoard
using standard consumer-grade PCB ordering services, existing consumer electronics hardware, and hobbyist-grade electronics parts, this simrig buttonboard system should be easy-to-make, easy-to-modify, and easy-to-use.
the tiny handles were the hardest to find, i could only see the one aliexpress seller who has them, and they dont have many
 hushed latch
Does anyone have some keycaps they really like? I'm looking for some numpad ones for a project with the Ortho Neokeys and struggling to find ones that let the light through...
rich osprey
very few custom keycaps will let light shine through
cant go wrong with pudding keycaps tho
finite rose
 silver gyro
rich osprey
hi im glad you like it! 🥰 ✨
the source files for the plates are on github: htt...
silver gyro
rich osprey
hi im glad you like it! 🥰 ✨
the source files for the plates are on github: htt...
This is really cool! I tried building my own buttonboard using adafruit's KB2040 and KMK as a quick proof of concept for Assetto Corsa and American Truck simulator and have been procrastinating and coming back to the project to get it actually working. This is inspiring me though! haha
 compact zealot
Does anyone know if or how i could get an i2c signal from one of those rii i8 mini keyboards? Maybe a converter soldered to some place on the board?
 valid light
Anyone with NeoTrellis wanna try out a cool OS for it? I ported Matrix OS to it (See 203.io and matrix.203.io) and I would need people testing it
You will need a 8x8 NeoTellis and ESP32-S3 feather.
It turn NeoTrellis into a very powerful macro pad, midi controller, lightshow player, and some other cool features as well.
keen pivot
Finally finished building the new version of my Dactyl Lynx keyboard design that I posted a render of back in November!
It's built with my Snowshoe MX single-keyswitch hot-swap boards; that made wiring it up much simpler than my first hand-wired hot-swap version.
I've actually been using it as my daily driver for a couple of weeks now, but I forgot to post an update here.


 harsh violet
Hi, I have been working on my little passion project that I called Quickey, i made my custom macropad with 27 programmable keys and knob. But mainly I made a web app where you can configure your key bindings and that communicates with the device through web serial api. If you are interested look at: https://quickey.pro


Quickey is a customizable macropad designed for creatives and developers. Configure keys easily via our web app.
 lusty kite
I just joined here and I figured I'd show off my current hobby project and the progress so far. its an nRF5340-based board my best friend and i designed – and also ask if anyone has ideas for good keycaps that would fit 17x18 spacing (choc v1 mbk spacing) with mx stems. the 3D-printed keycaps on it get dirty way too easily and fade (and I need to practice dying nylone more – they're nowhere near the color I was trying for)?


also 6mm encoder knobs that are really short? every one I can find makes the encoders stick up way too much
 molten tendon
lusty kite
I just joined here and I figured I'd show off my current hobby project and the p...
molten tendon
lusty kite
I just joined here and I figured I'd show off my current hobby project and the p...
The board is so pretty! Love the image on the back.
lusty kite
molten tendon
The board is so pretty! Love the image on the back.
thank you and the images are from a public domain art set called transhumans
 rugged moat
wanted to be able to swipe in termux but couldnt find an open source gesture->word model so spent the last few months building one + kb app. i realize this channel is probably intended for physical but thought i'd share lol
been using it as my daily driver for about a month, i based it originally on unexpected keyboard
https://github.com/tribixbite/CleverKeys

GitHub
Privacy-first neural Android keyboard with advanced swipe prediction - tribixbite/CleverKeys
rich osprey
hmm i may be over-engineering this project if i need four layers of pcb in two different materials and three colours, an additional layer of acrylic, two handles, two different types of screw, and two leds all for a single switch..
but it do be pretty

version 2 hasnt even been shipped to me yet (but it is all ordered!!) and im already figuring out what version 3 will be
rich osprey
PVKK out here making me so inspired
the game, for reference: https://store.steampowered.com/app/2956040/PVKK_Planetenverteidigungskanonenkommandant/
rich osprey
its happening!!
 rich osprey
its coming along nicely


 rich osprey
slow and steady


 rich osprey
slow and steady progress

 cunning minnow
@rich osprey I have no idea what you are building but I can tell it is freaking awesome!
ruby stirrup
@rich osprey : this is just a beauty. Is the hardware you showed in the video above dedicated hardware for the game ?
rich osprey
ruby stirrup
<@218929950172905473> : this is just a beauty. Is the hardware you showed in th...
the PVKK video? yeah thats a toy they made for a conference that replicates the in-game controls of PVKK
ruby stirrup
rich osprey
the PVKK video? yeah thats a toy they made for a conference that replicates the ...
Thanks !
hushed latch
Does anyone know where to get Low Profile MX-Compatible Key Switches? The ones on Adafruit are out of stock. I'm trying to prototype something out and want to see how well they would work
royal gulch
hushed latch
Does anyone know where to get Low Profile MX-Compatible Key Switches? The ones o...
kailh has an official store on aliexpress, their choc v2 switches are mx-compatible, in terms of keycaps. the footprints are of course different
hushed latch
royal gulch
kailh has an official store on aliexpress, their choc v2 switches are mx-compati...
Will they work in https://www.adafruit.com/product/5157
For folks who want ready-to-go keeb action, we've got the lovely Adafruit Macropad with a 3x4 grid of MX+NeoPixel key switches - but for those who like to forge their own path, we now ...
hushed latch
Ahh
meager raptor
hushed latch
Does anyone know where to get Low Profile MX-Compatible Key Switches? The ones o...
lots of stores specialize in switches, for example: https://chosfox.com/collections/kailh-low-profile-switch-pg1350

Chosfox
At Chosfox, we offer 16 types of Kailh Low Profile Mechanical Choc Switches - PG1350, including light blue, pink, silver, and more. New keycaps are available for your low-profile builds! Try our Chocfox - CFX, available in BoW and WoB. Gateron Low Profile Switch is also available!

NuPhy
Our keyboard switches are engineered for top-notch performance, ensuring each keystroke is smooth, responsive, & satisfying. It is the best choice for gamers.
Not particularly endorsing any one, just some samples
hushed latch
Thanks!
I found these: https://www.keychron.com/products/keychron-low-profile-mechanical-switch?variant=42033230610521
That look like they should work?

Keychron
Our exclusive Keychron Low Profile Mechanical Switch provides 11.95 mm in height, a 3.1 mm total travel distance and activates at 1.3 mm (The banana switch activates at 1.4 mm), allowing for the responsiveness and reliability of mechanical switches in an ergonomically designed. It is also compatible with most low-profile keycaps with MX-style de...
 gloomy oak
I'm going to do a @quick frost c7k keychain 7-Key Pocket Chorded Keyboard build.
If you have done this and have extra boards, or just want to say hi and comment on how your build went, LMK.
If you want to do this and either get in now or necropost reply to this a decade from now, go ahead - MOQ (minimum order quantity) on the boards is 5, so I'll have extras.
I'm new to this Discord, so please let me know if another channel would be better for a post like this.
https://www.hackster.io/mikeysklar/c7k-keychain-7367bd
by Mikey Sklar
Published May 5, 2025 © GPL3+
c7k keychain
Chording 7 Key wearable I2C keyboard

 earnest dew
channel is all about https://hackaday.io/project/165450-keyboard-featherwing

A FeatherWing with a LCD, BB Q10 keyboard and a 5-way button.
@dense crest is here!
earnest dew

 dense crest
🎉
 honest widget
It's beautiful, I really like this design, but then again I had a business Blackberry for awhile
dense crest
I more meant the channel, don't want to sound like I'm too narcissistic about my own design 😄
 sand needle
Nice, there is one thing I really want. An LCD screen like this https://financialpostcom.files.wordpress.com/2016/09/blackberry3.jpg?quality=60&strip=all&w=392

It is a color lcd that is reflective and not backlit
For some reason those are really rare
dense crest
Yes a transflective memory lcd would be nice but the choices are a bit limited
Sharp used to have some but I think they end of lifed them
sand needle
Apparently they are now almost exclusively used in smartwatches
royal gulch
play.date will have one
just the right size, too
they are on mouser, last time I checked
dense crest
But it's monochrome, right?
royal gulch
yes, high-res mono
you can do dithering for shades
but it's really nice to look at :P
dense crest
Yeah I've seen a 128x128 version on a silabs devkit, it's really nice
 boreal kraken
So cool, great job @dense crest
royal gulch
I have one from Adafruit
dense crest
BTW The form is still open if anyone wants to fill it out: https://docs.google.com/forms/d/1AFwEd6r3wwFKrcJLCO7_hHhIIZXA6lawobnCSoDhfAA/

Google Docs
This Form will help me assess the interest in the Keyboard FeatherWing, which should make it easier to decide how to proceed with putting it up for sale.
To learn more about the Keyboard FeatherWing see here:
https://hackaday.io/project/165450-keyboard-featherwing
All quest...
dense crest
Working on a factory test, preparing for production: https://twitter.com/arturo182/status/1159223395533381633


Working on a factory test for the Keyboard FeatherWing, bit more to be done but so good so far. All implemented in @CircuitPython!
(The keyboard and screen move around so much cause they're not taped to the board yet) https://t.co/hu6uEOMuVu
 Twitter
Twitter's video compression is a bit harsh
dense crest
I'm shipping a dev boards to a few selected devs so hopefully this channel becomes more active soon 😃
Also finishing up the factory test sw!
 rich basalt
This is really awesome
 wide quail
@dense crest Are the keyboards a component or are you buying a load of phones and ripping them apart?
royal gulch
I think they qualify as "spare parts"
dense crest

New hardware, new project ideas forming... Thanks to @arturo182
 Twitter
Larry will work on Arduino libraries for the FeatherWing so if CP is not your thing, keep an eye on his work
dense crest
Like this: My VT102 terminal emulator over serial to an OrangePi Zero @arturo182
 Twitter


Got a hackberry from @arturo182 yesterday spent most of today getting some stuff working on the Giant Board https://t.co/W54mHbto1V
Twitter
Things are heating up :)
 mystic thistle
:0
royal gulch
the giant board should be shipping soonish
 inner folio
Oct 9 if you backed the Beta board (which I did) and Nov otherwise.
mystic thistle
hey @honest bane Would it be feasible for me to try to allow the REPL to take input "locally" with input coming from an attached keyboard like on the keyboard featherwing?
honest bane
@mystic thistle it would need extra code to stuff the decoded key presses into the REPL input buffer. UART-driven REPL is possible and was added in a simple way for the STM32 port (I should say "put back", since that's what the ESP8266 did), but decoding raw keyboard events is yet more work
eager mica
That is an appealing use case, however.
mystic thistle
yes, yes it is. I'll add it to my pile 🙄
finite rose
@mystic thistle I hacked it together for my model m into circuitpython demo I did
mystic thistle
ooh, cool
@finite rose how far from being mergeable is it? Would that be something you'd in master or would I want to put it on a fork?
finite rose

GitHub
CircuitPython, an education focused port of MicroPython. - tannewt/circuitpython
I'd want a more proper way of managing inputs than what I did
lifecycle is tricky like the display work if you want them to work after user code it done
mystic thistle
hmm.. ok
mystic thistle
hey @dense crest, I'm working on a "all in one" library for the kbd wing to abstract some details away like the CPX library. Not much to it at this point but it's something. I'll give a try to including something to make it easy to get the libs needed as well. Longer term I plan on looking into the above input stuff
dense crest
Oh darn, I totally missed the whole conversation yesterday
Thanks for letting me know @mystic thistle
mystic thistle
@dense crest I don't know if you are soliciting feedback on the hardware but I have thoughts if you're interested
dense crest
Of course, always looking for improvements
mystic thistle
Firstly these are all nit-picks. The hardware is good as is. These are just small things that occurred to me as I have been using it.
Not knowing your goals here is what I noted:
- having the micro-sd behind/under the feather makes it slightly tricky to get at. Not a dealbreaker but either shifting the feather down 5mm or so, or moving it somewhere else would be imho a small improvement
- I'm not a fan of the feel of the buttons under the screen. The travel and squishyness is a somewhat jarring contrast to the buttons on the keyboard
- Having a battery connector on the wing would be nice so it could live with the wing when you wanted to unplug the feather for some other use. This could be tricky because you would probably want to account of the user trying to plug in two batteries which seems like it could be problematic? As I think out loud, maybe not since they'd be in parallel? Something to think about
- Using the ample room to provide a nicer reset button than the teeny kmr on the feather would be nice.
- Not sure how easy they are to get your hands on but the MSA301 is pretty dang good for the price. Doesn't have a magnetometer but 🤷
@dense crest ^
royal gulch
parallel batteries tend to discharge each other if they are not balanced :(
mystic thistle
right
I'm no EE but I play on on show and tell, and I think this would work, though instead of VBUS and VBAT, it'd be VBAT_INT and VBAT_EXT or somesuch:
But that's extra bom cost that you'll have to decide if it's worth it
hmm... maybe that wouldn't work.
either way I'm sure there is a solution to the two battery issue if you feel like creating and then solving that issue 🙂
Oh and if you do add a reset switch, a 90* one like on ther moster m4sk would be nice
mystic thistle
heya @dense crest This looks like the seesaw-ish code that you're using to i2cify the keyboard matrix. Is that right? If so, did you consider seesaw? Not saying you should have, just trying to understand what you considered

GitHub
Contribute to arturo182/bbq10kbd_i2c_sw development by creating an account on GitHub.
dense crest
What's seesaw? 😅
mystic thistle

GitHub
I2C friend to expand capabilities of other chips. Contribute to adafruit/seesaw development by creating an account on GitHub.
dense crest
Hmm, never heard of it, not sure I would put the effort to port that to the keyboard when my code is working pretty well.
Unless someone else feels like doing it :D
The current api is super simple
mystic thistle
Oh no, I think your code is perfectly fine. Honestly with less abstractions it's a bit easier to read/grok
dense crest
Just ask for number of keys and get them, then maybe set some registers if needed
mystic thistle
Is it just doing the keyboard or is it also proxying the accelerometer? Mine doesn't appear to be on the default address
dense crest
It's just the keyboard
I tested the board before sending so should work
Posted the CP lib I wrote for it, don't have it handy right now
mystic thistle
@dense crest no worries. I have the kbd lib (https://github.com/arturo182/keyboard_featherwing_sw ? ) and it works great. I think I was just slightly confused by the sequential i2c addresses but now I'm guessing you chose the keyboard address to be sequential?
GitHub
Contribute to arturo182/keyboard_featherwing_sw development by creating an account on GitHub.
dense crest
Actually no, I chose it way before I knew I was gonna use that accel, just luck, I guess ;)
mystic thistle
@dense crest I found the issue: You're using a different part number from the one that adafruit uses and it has a different i2c address for the accelerometer. This means that the CP driver as written doesn't work because it's hardcoded to look for a different address. I'll put in a PR to make it possible to pass in an alternate address
dense crest
Oh you mean the accel was not on the default address, I misunderstood
mystic thistle
Ya, I patched the driver to test it and it works fine, or at least your board test passes the accel
royal gulch
@dense crest so what's that firmware you are struggling with?
dense crest
it's not for this project, it's another CP project, but don't have much to show right now
made 1 rev, it works mostly, needs another rev to fix small details
it's both CP and FPGA, need to fix my migen code too a bit
royal gulch
ah, can't help with FPGA much
dense crest
While you wait for the keyboard you can check out my other board, now on Tindie 😅
Announcing Serpente, a tiny Digispark-inspired @CircuitPython board, now on @tindie!
SAMD21, 256KB flash and 32KB RAM, 4MB for files and code, 6 GPIOs.
Available in Type-C and PCB as A plug
Twitter friends, use the code "@arturo182" for a 25% discount!
Twitter
eager mica
Hmm, I wonder if I could add an IR LED and make one into a PirKey
 shut panther
@dense crest Are you ready to make a BBM client with hardware-based security? https://github.com/adafruit/Adafruit_CircuitPython_ATECC/pull/1
GitHub
This pull request adds initial code for using ATECCx08 cryptographic co-processors with CircuitPython. This library implements a subset of the available security commands.
This library is based on ...
Also - congratz on the serpente launch! I thought the above would interest you
eager mica
Blackberry messenger?
shut panther
yeah, or a blackberry messenger-like
dense crest
My little CircuitPython board is back in stock 🙂 https://www.tindie.com/products/arturo182/serpente-a-tiny-circuitpython-prototyping-board/

Tindie
A tiny CircuitPython development board, perfect for quick projects and prototyping!
dense crest
not quite the featherwing but if you're into qwerty you might enjoy my latest experiments with silicone keyboards 🙂 https://twitter.com/arturo182/status/1205897584432353286
I got a new silicone that is 10 times harder and let me tell you, this worked out great! Still needs degassing and the 3d printed mold is not great (I lost some plungers in the cast) but the result is very promising. Next step is to look into better mold
 Twitter

 dense crest
i dont like the feel of mechanical also too loud
royal gulch
you are just not snob enough
eager mica
That's why Matias offers the Quiet Touch Pro: good feel and less loud than many mechanical keyboards.
royal gulch
we need a mech keyboard with active noise cancellation
dense crest
I've been using a $20 Microsoft keyboard for years, when it got a bit old, I just bought the same model and carried on 😄
royal gulch
yeah, they make good keyboards, I think they should focus exclusively on that
 eager sky
in 20 years, the only keyboards that lasted more than 3 months in my hands are all microsoft's ... quite the same for mice...
royal gulch
I'm a big fan of low-profile mechanical keyboards recently
even made one
(it runs CircuitPython)
 wise phoenix
This isn’t exactly a feather wing but I need to share this: https://puu.sh/ETB6I/398c0e7b60.jpg

I’ve started mapping out this little QWERTY board and the rows are bleeding insane. No wonder it’s got a 36 pin connector.
The rows are all scrambled and halved and weird af.
royal gulch
typical "we will fix it in software" approach
rich basalt
@royal gulch Saw your comment from last month about your mechanical keyboard running circuitpython. I'm currently building a mechanical keyboard and was considering putting circuitpython on it, but never got around to writing some code because I was worried about possible latency. Has that been an issue for your build? Also, do you mind sharing the code you used so I can try it out on mine?
royal gulch
@rich basalt no noticeable latency, the code is very simple: https://hackaday.io/project/167912-flounder-keyboard/log/171496-firmware
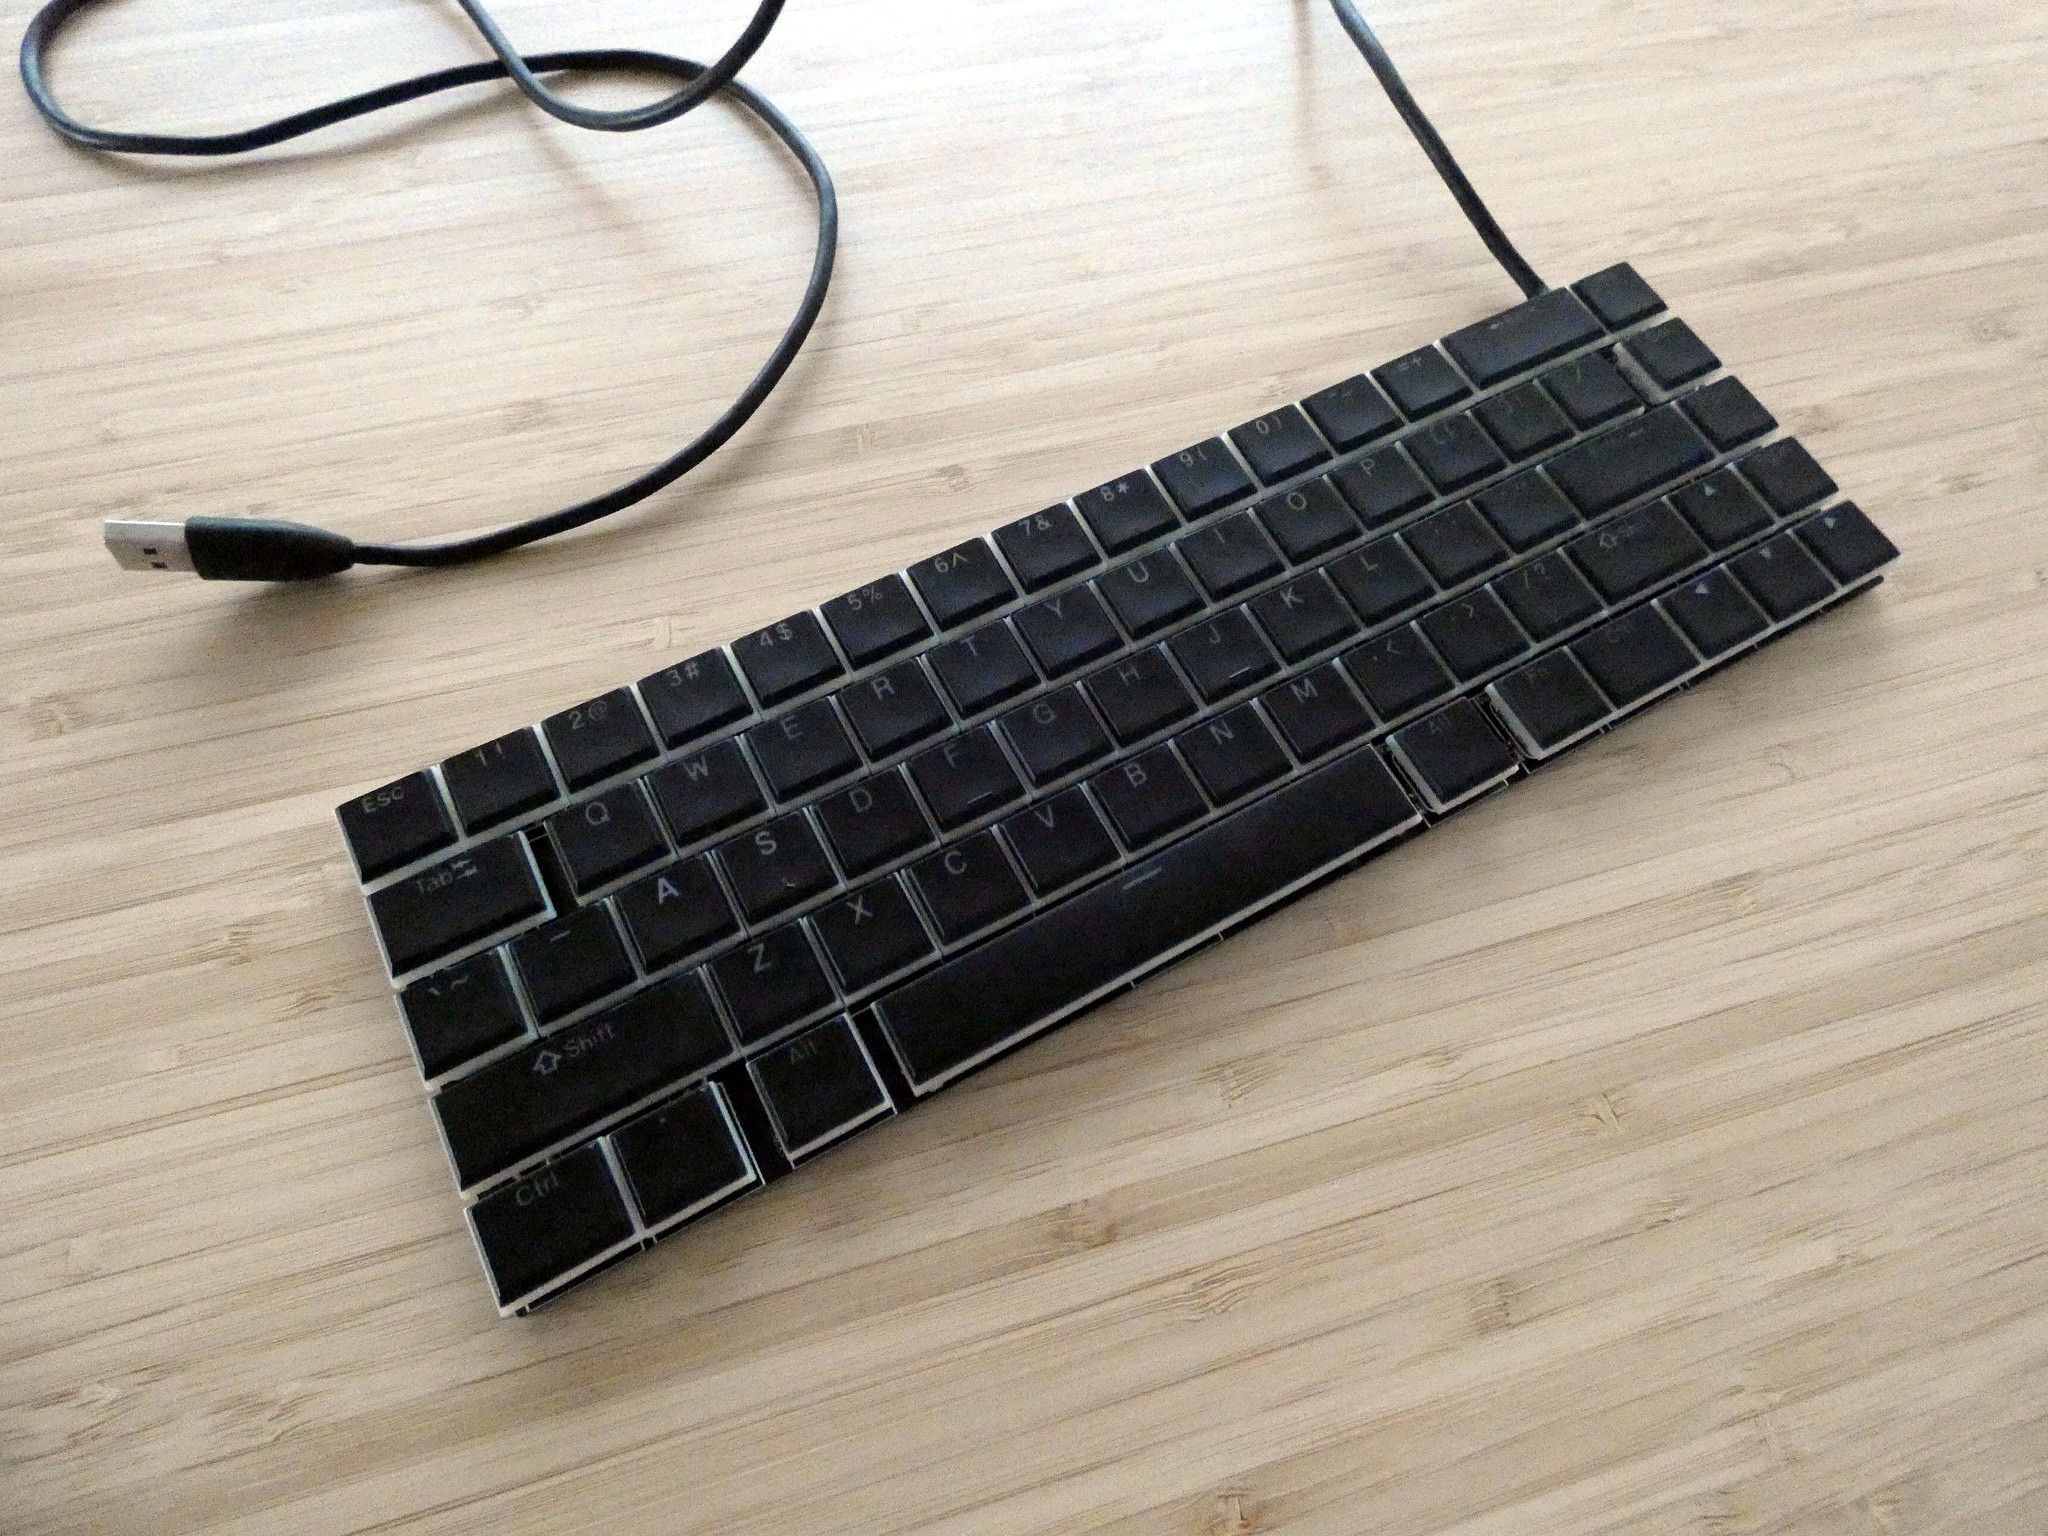
In its simplest form, keyboard firmware is not rocket science. You basically need to do three things: scan the key matrix to see which keys are pressed, translate the matrix locations into key codes and modifiers, and send USB HID reports with lists of currently pressed keys....
rich basalt
@royal gulch thanks.
 ancient berry
Hello,
I was told to ask my question here from #help-with-arduino by Lady Ada. @dense crest, I have your Serpente R2, and the very last thing I wanted to do was bother you, but I can't work out how to configure the Adafruit SPIFlash library for the board
I tried using pin 16 as SlaveSelect but I think it stopped USB serial working, I'm not sure 😅
I'm not good with SPI/I2C stuff
GitHub
Contribute to adafruit/Adafruit_SPIFlash development by creating an account on GitHub.
 abstract slate
@rich basalt I've been using a keyboard with circuitpython and kmk for literally 2 hours and .. it's fine, at least for coding. I'm not a gamer so I don't care about input latency at that level. Certainly it's the case that circuitpython can pause for multiple milliseconds for garbage collection, in general...
rich basalt
@abstract slate Ok. Is there any noticeable latency? I don’t really care if it’s super fast, I just find it kind of annoying for there to be a noticeable delay between touching the keys and it showing up on the screen.
abstract slate
I wasn't really on the lookout for latency, but it sure wasn't anything that bothered me.
I'll use it more critically in the coming days, I was just elated that it worked!
royal gulch
It should't be pausing for gc if you are not allocating new memory in your loop
rich basalt
@abstract slate when I finish the keyboard I’ve been building I’ll try to put circuitpython on it. I wonder how it’ll work with a split keyboard.
abstract slate
I hear kmk works with split keyboards but that's not my thing
rich basalt
Good to hear it works with split keyboards
sand needle
@royal gulchNice keyboard project. I've seen many people that wanted to do something similar. How many keys presses can you simultaneously register on your keyboard?
A lot of mechanical keyboards show up as multiple HID keyboards on a pc so that users can use more than 3 buttons simultaneously. Don't know if that can currently be implemented with circuitpython boards
royal gulch
@sand needle I used very simple code for it, so I can only send 6 normal keys (and 8 modifiers) at a time
sand needle
That is pretty good
royal gulch
@sand needle but there is no reason why it couldn't be improved
6 is the default with regular HID
there are advanced profiles that let you do full n-key rollover
but they are sometimes incompatible with BIOS or KVMs or other things that expect "basic" keyboard
sand needle
Always wondered about that, thanks!
royal gulch
some advanced keyboards have a way of switching between different modes for that reason
usually with some key combination
sand needle
Really different modes? When I plug in my keyboard it always shows up as multiple keyboards in device manager. I thought that was how the fast majority did higher number of n-key rollover
royal gulch
there are several ways
sand needle
You probably also could use both
😉
One regular HID and one more advanced HID protocol. When the user starts pressing more than 6 keys start sending the data over the more advanced protocol HID
dense crest
Not the FeatherWing, but you can now get the Q10 keyboard as a PMOD from my Tindie, comes with CircuitPython and Arduino support 🙂 https://www.tindie.com/products/arturo182/bb-q10-keyboard-pmod/

Tindie
A BB Q10 Keyboard in PMOD format. Easily add a QWERTY keyboard to your project!
eager mica
I actually want that version even more than the FeatherWing one!
 boreal lotus
that when you make keyboard and put it to your game controller
dense crest
I'm also thinking of making one with a stemma qt connector, would work great i think 😄
boreal lotus
well if you check what connector let say xbox one controller have in close to player as it have headphone jack and something what look usb-ish
royal gulch
shame you didn't just put the stemma connector footprint on this one
dense crest
yeah, i had these produced months ago
before i started using stemma
after this small batch sells out and the waitlist becomes reasonable size, i can get more made
eager mica
PMOD is fine for my uses.
Basically anything that means I don't have to attempt to solder that Hirose connector.
dense crest
😄
boreal lotus
would be thinking with stemma and add addional connector adapter board with stemma
 quasi meteor
hey, I am not sure if this is the place to ask. But I am trying to make small controller with the light sensor, so if the value of the sensor is equal to some number, it will generate a key stroke for instance S. Any tips on how to do this? What library to use
royal gulch
@quasi meteor this should give you a good starting point: https://learn.adafruit.com/the-foul-fowl-keyboard-injection-payload-gemma-m0/code-the-fowl-foul

Adafruit Learning System
Masquarede as a USB keyboard while sending commands to any computer!
dense crest
James on Twitter has been playing around with the Beta HW for the Keyboard FeatherWing and he seems to be having a lot of fun 🙂 https://twitter.com/bitshiftmask/status/1265431273964797954

Honestly, this has been the most pleasant project to work on. Almost every driver I've needed has already been written, @jam_waffles' e-g crate is just a pleasure, and @arturo182's featherwing is just a ton of fun!
I'll stream work later this week!
CC @adafruit @NordicTweet...
 Twitter
royal gulch
Twitter
royal gulch
uhh, framebuffer is not the best approach for ram-constrained platforms
especially when are you are doing is displaying text
a line buffer could work better
 river mist
 💣
💣
 flint perch
Guys, can you suggest where to find very cheap switches?
royal gulch
aliexpress? otherwise, maybe buy them from someone who wanted to make a mechanical keyboard but gave up?
eager mica
Surplus vendors can be a good source (these are $20 for 1000 switches https://www.goldmine-elec-products.com/prodinfo.asp?number=G20144)
royal gulch
oh, I assumed keyboard switches for some reason
eager mica
Good point, given the channel. I was vaguely thinking of the little keyboard on Lee Hart's VIP2K, which is built of tactile switches.
royal gulch
those are usually cheap, as long as you don't care about where they came from
 strange shore
That sounds omnious
royal gulch
@dense crest hey, did you get that keyboard to work in the REPL in CircuitPython in the end?
also, for everyone who didn't see it yet, https://twitter.com/solderparty/status/1295718694543294469

WiFi, Bluetooth, LoRa, Linux, FPGA? You make the rules!
The Keyboard FeatherWing itself does not contain an MCU/CPU/SoC that you can program; you can use any board compatible with the @adafruit Feather System!
You can read more about Feathers here: https://t.co/1HXZCMPiZt
 Twitter


 dense crest
oh yeah, i was so caught up in preparing this that i forgot to post here 😄
@royal gulch Hmm, I forgot about that demo, will try it in the coming days!
royal gulch
so you have a company now?
dense crest
yeah 😊
it made sense, i want to keep making and selling my designs
also @sweet karma was an inspiration 😳
royal gulch
nice, I've been thinking about it for a few years now, but it's too scary
dense crest
can confirm, very scary 😄
 sweet karma
Aww 💜
 glad kindle
Cool. So we've got a keyboard featherwing and an ebook featherwing.
What other ideas might... take flight?
I especially like the lisp-machine-but-with-circuitpython-instead sort of dynabook that a keyboard featherwing could be.
finite rose
@dense crest solder party is a great name
dense crest
i know, right? 😄
except it sounds a bit like it's a political party or something hehe
also pardon the self-promotion, but this is a channel dedicated to this project so I think it's ok:

Tindie
An easy way to add a handheld Qwerty keyboard and a 2.6” color display (+ more) to your project!
you can now buy it!
finite rose
np, it's not excessive
eager mica
I've been waiting for this!
royal gulch
@glad kindle I have a handheld featherwing too
a display, d-pad and fire buttons, plus battery holder and switch
and a piezo speaker
 plain plover
Too bad it dont have blackberry 8830 keyboard lol easily the best I ever used.
it does look similiar to it though so maybe its workable
 livid summit
Saw this earlier, congratulations! I’ll be buying one!
 stark magnet
Ooo, this + one of the FPGA feathers I've been seeing in the works + battery I hope someone if not myself runs linux with that as a HID (Or take Bunnies idea and secure enclave specific OS?).
stark magnet
Yes, I've been seeing the orange crab run linux on twitter on a RISC-V CPU, but also the Adafruit LoRa feathers would be interesting with that too
stark magnet
Im pretty sure it was running the mainline linux kernel but I could be totally mistaken
stark magnet
Ah yes, I mean, it has 8G of memory, cant ask more from a feather rn
foggy island
Yeah, maybe soon though
Memory is getting smaller, so it will only be a matter of time. Especially if what Intel revealed ends up coming to fruition
 tall rampart
has anyone tried the keyboard featherwing with a giant board? I have both on order, looking forward to trying that combo....
eager mica
I'm curious what the giant board is. I remember an Arduino built into a sheet of plywood that was pretty huge. There's also the MOnSter 6502.
tall rampart

that page has a subsection "Adafruit Blinka (CircuitPython for Linux)"
but I'm also interested if anyone has used kb-featherwing as the terminal for linux/bash on the giant board
royal gulch
@tall rampart like https://twitter.com/bitshiftmask/status/1265431273964797954 ?
Honestly, this has been the most pleasant project to work on. Almost every driver I've needed has already been written, @jam_waffles' e-g crate is just a pleasure, and @arturo182's featherwing is just a ton of fun!
I'll stream work later this week!
CC @adafruit @NordicTweet...
Twitter
glad kindle
1/10. The Giant Board isn't that giant. Will not buy again. 😁
royal gulch
I didn't use it much yet, apart from installing Linux on it and getting the wifi shield to work, but it seems to be working as advertised
tall rampart
@royal gulch, that one looks like nRF52840 ... I have one of those on order too. I'm planning to try the keyboard featherwing with the Giant, nRF52840 express, M4 express, and the Sparkfun SAMD51 thing plus.
glad kindle
This seems like a perfect FeatherWing port: https://www.hackster.io/news/aiie-is-a-portable-apple-e-emulated-on-a-teensy-4-1-b3e94b0cdfcc

Hackster.io
Advanced portable Apple //e project gets some upgrades.
dense crest
@tall rampart sorry for the late reply 😅 https://twitter.com/solderparty/status/1296227438415024128
@OrigamiEngineer @adafruit Yes, it does work with the Giant Board! :)
@groguard even made a Debian image, available here: https://t.co/YNVNMSnTCU (please note that despite the file name, we are not related to BlackBerry in any way).
You can see it in action here: https://t...
Twitter
tall rampart
@dense crest, thanks! I will try that soon. I got the giant board today. I tried the debian image on it and was wondering what the "blackberry" download was for. Now I know. 😀 Still waiting for the kb-featherwings to arrive from Sweden....
royal gulch
@dense crest just a heads up, I just got a letter from the post asking for the invoice, because your package apparently wasn't correctly declared
dense crest
Huh, I sent hundreds of packages out into the World and no one ever complained, US, Canada, Japan, China, India. Maybe Switzerland has some strange requirements?
royal gulch
they require the value of the package to be declared, including shipping cost
maybe the label got damaged in transport
dense crest
Yeah I put the CN22 label with contents and value
royal gulch
maybe they are doing in Italian strike
livid summit
Just seen your boards appear on the Pimoroni store @dense crest congrats!
dense crest
Thanks 🙂
royal gulch
tall rampart
I received my KB featherwings and have been trying them with different feathers.
The CircuitPython examples are really helpful ( https://www.solder.party/docs/keyboard-featherwing/examples/ )
That code shows how to connect the display to the REPL and how to read the keyboard. What I want to do next is connect the keyboard to the REPL also. Has anyone done that yet?
Of course, we don’t just leave you with the board and a “good luck”; here are some code examples to get you started with your FeatherWing.
Make sure to visit the example code repo on Github for more example code.
These examples have been tested with the Adafruit Feather M4 Exp...
It seems like I could write a main.py that reads lines and then calls eval() with each line. But I think that probably won't echo the keys to the screen.... or maybe it will. Any pointers on what API is best to tie the keyboard into the REPL are hugely appreciated...
wicked quest
Got my keyboard FeatherWing ordered. But got too excited and had to start tinkering before it arrived:
tall rampart
@dense crest, one odd thing I noticed with the KB featherwing: when I'm running it on battery and I turn the on/off switch off the neopixel stays on. I reproduced this with M4 express and nRF52840 express running CP 5.3.1
dense crest
hmm, that's really strange cause the switch should cut off the LDO
royal gulch
isn't the neopixel powered from 5V?
dense crest
ah you're right it is, so it bypasses the LDO
tall rampart
if I have it off (set to color 0x000000) will it still be drawing power? will anything else be drawing power in the off state?
royal gulch
it does, a little bit
tall rampart
well, this is a good time for new product https://www.adafruit.com/product/4712 to be coming out. 🙂

Low cost Lithium Polymer batteries have revolutionized electronics - they're thin, they're light, they can be regulated down to 3.3V and they're easy to charge. On your phone, ...
wicked quest
In CircuitPython it turns out the tft_featherwing_24 module inside adafruit_featherwing library in the bundle works with the keyboard featherwing. https://github.com/adafruit/Adafruit_CircuitPython_FeatherWing/blob/master/examples/featherwing_tft24_simpletest.py
eager mica
That's good to know, thanks!
wicked quest
And now there is a keyboard_featherwing module as well that initializes the keyboard and neopixel in addition to the screen, touchscreen, and SDCard: https://github.com/adafruit/Adafruit_CircuitPython_FeatherWing/blob/master/examples/featherwing_keyboard_featherwing.py
 oblique sail
@shell fable 🤩 https://twitter.com/patrickod/status/1307804010074710016

Took my first successful steps with embedded Rust development porting @bitshiftmask's demo code for the @solderparty Keyboard Featherwing to the Feather M4. Really impressed by the quality of the Rust tools involved and how accessible they made the process. Excited to dig dee...
 Twitter
I ported atsamd-rs to samd51 and feather m4 and have been maintaining it for a year and a half. Nice to meet you.
 shell fable
👋
likewise! thanks for all your work - I've followed the Rust embedded ecosystem from the sidelines for a while but only recently had the opportunity to dig in.
Embedded 🤝 Rust
it's nice having the backing of the Rust compiler in this domain - I feel way more confident in the results 🙂
oblique sail
yeah
shell fable
a question for you about your Feather M4 - what is the "default" state of the neopixel if you don't configure the pin? At the moment my code doesn't reference this pin at all yet the pixel is burning full bright white.
not strictly a "bug" given the nice halo effect it produced in the photo 😅 but it's running toasty.
oblique sail
it should stay in whatever state the bootloader leaves it in
shell fable
🤦♂️ I think that's exactly it
I just power cycled it again and it's working as expected
oblique sail
cool
atsamd-rs has a matrix room too for questions and development https://matrix.to/#/#atsamd-rs:matrix.org
A client-side matrix link redirection service
prisma fox
hello, i've been playing with the featherwing but having some problems with some of the code examples
i'm running this code https://www.solder.party/docs/keyboard-featherwing/examples/#using-the-microsd-card
Of course, we don’t just leave you with the board and a “good luck”; here are some code examples to get you started with your FeatherWing.
Make sure to visit the example code repo on Github for more example code.
These examples have been tested with the Adafruit Feather M4 Express, depending on which Feather you’re using, some modifications migh...
i've copied over adafruit_sdcard.mpy to the CIRCUITPYfolder, next to code.py , and the import line from the above code example works, but when i get to this line
sdcard = adafruit_sdcard.SDCard(spi, digitalio.DigitalInOut(sd_cs))
It fails with
Traceback (most recent call last):
  File "<stdin>", line 1, in <module>
  File "adafruit_sdcard.py", line 100, in __init__
  File "adafruit_sdcard.py", line 153, in _init_card
  File "adafruit_sdcard.py", line 121, in _init_card
OSError: no SD card
 rain cliff
@prisma fox see my reply in #help-with-circuitpython #help-with-circuitpython message
prisma fox
@rain cliff thanks for the thorough reply! I'll test your solution today.
Are there any consequences to setting the radio pin to high? Will it have an impact on being able to use the radio properly?
rain cliff
It should not -- the Radio driver will set the pin as needed when it is using it. Just set it High before attempting to access the SDCard -- At least that is my understanding.
rain cliff
@prisma fox I just set up a test with the feather_m0_lora on the keyboard_featherwing to receive and log packets to the SDCard -- here is the example and some readback of the written file. Warning -- this was a quick hack of some existing code ...
readback ```
Adafruit CircuitPython 6.2.0-beta.2-14-g766e79ad3 on 2021-02-14; Adafruit Feather M0 RFM9x with samd21g18
import sdmount_D5
import os
os.listdir("/sd")
['log.txt', 'hello.py', '.Trash-1000', '.Spotlight-V100', 'tft_featherwing.txt']
sdc=open("/sd/log.txt","r")
sdc.readline()
"291, I'm awake (feathers2): count 5 0 3 battery 3.728V\n"
sdc.readline()
"293, I'm awake (feathers2): count 5 0 3 battery 3.728V\n"
sdc.readline()
"300, I'm awake (feathers2): count 5 1 4 battery 3.719V\n"
I had another rfm9x sending some packets
prisma fox
Very awesome. So can I store my whole project in the sd card, including deps, and just kick it off from code.py?
Thanks for putting that test together!
rain cliff
You just have to have adafruit_sdcard on the local file system
rain cliff
and you will still be subject to the RAM limitations of the m0 board, I was not loading any libraies from the SDCard in this example. They are all on the M0 Filesystem
prisma fox
Oh interesting
Can I somehow add swap or something from the sd?
I'm not super familiar with this aspect yet
rain cliff
Using the SDCard lest you have more storage space but it will not help with the "Memory allocation" issues if you run out of RAM. Store any libraries on the SDCard as .mpy files. I
I don't know how much code you are hoping to load/run.
Are you planning to log data to the SDCard or just use it to get up and running?
I don't want to discourage you, but the M0_lora is still a very RAM limited device -- especially for CircuitPython. If you are hoping to use the display and keyboard, you may well have problems. A Feather M4 express with a Lora Featherwing will be a much better option.
I have not looked at the pinouts for that combination on the keyboard featherwing though .... nothing is ever simple...
prisma fox
I don't think such a device exists at the moment unfortunately
rain cliff
The Lora featherwing is a separate device. It connects to the M4 express. Both exist.
rain cliff
I'll try hooking one up later today or tomorrow. It looks like the the "standard" pins on the Lora_featherwing will conflict with the keyboard_featherwing, but it is easy to rejumper the Lora Featherwing to use other pins.. This will be fun to try.
Yup -- it works -- I had to use board.A3 for CS and board.A4 for RST for the Lora Featherwing with a feather_m4_express on the keyboard_featherwing --- now to see if I can also use the keyboard and display....
 rich mist
any interest in a 2.4G radio feather supporting keyboard-featherwing ? I have one in development

 cerulean holly
Do you know if there will be another batch of Keyboard Featherwing?
royal gulch
should be, especially since there is v2 designed...
rain cliff
There is a note on Tindie saying check back after May 2 https://www.tindie.com/products/arturo182/keyboard-featherwing-qwerty-keyboard-26-lcd/
prisma fox
@royal gulch do you have any more info on the v2?
royal gulch
@prisma fox only what @dense crest posted on Twitter
dense crest
The IC shortages right now are not making life easy 😦
But a new batch is being produced right now
royal gulch
if it was easy it wouldn't be worth it ;)
we do it not because it is easy, but because it looked like it was going to be easy
glad kindle
We do it not because it is easy, but because the sample application on the datasheet looked pretty darn trivial.
prisma fox
Nice. Any fun upgrades?
dense crest
Ordering Keyboard Feathering Rev 2 proto boards.
Changes:
- Switch now also turns off 5V (Neopixel)
- Keyboard INT routed to the Feather
- Changed to I2C touch IC (STMPE is EoL)
- Card Detect and LCD BL routed to the SAMD (will add GPIO Expander functionality)
- NeoPixel Out TP https://t.co/MdxF3Igvyj
Twitter
·
Fixed up version of Rev 2 of the Keyboard FeatherWing
Changes:
- The GPIO Expander functionality proved so nice that I added even more GPIOs as TPs, (5 extra GPIOs for free, accessible via I2C!)
- Added a light sensor, might be nice to control the backlight
- Fixed switch pinout https://t.co/yIn71LWmNV https://t.co/FzOWsHa8hz
Twitter
·
The SAMD that gives you access to the keyboard now also has GPIO Expander functionality
dense crest
samd20
foggy island
Ah okay cool
Samd are pretty tough to get these days for sure
I’ve got 200 coming today of the samd21e18a
 cerulean notch
foggy island
I’ve got 200 coming today of the samd21e18a
cerulean notch
foggy island
I’ve got 200 coming today of the samd21e18a
i've got a handful of 21e17a's coming Thursday too heh. not quite ready to dip my toes fully in the SAMD pool yet, but figured I'd better get my hands on a few to prototype with before they run out
foggy island
not a bad idea for sure
royal gulch
I thought I bought the last 50 of those from Mouser
foggy island
did ya?
foggy island
Nice. I have 20 left for projects
 mild field
They should have a #macropad-ideas channel
 neat fossil
like "port robotfindskitten to macropad"?
rich osprey
wasnt sure where else to ask, but this seemed the closest place-
ive been working on-and-off on my own keyboard macropad thingy,,,
and i thought hey, this exists https://www.adafruit.com/product/4978
and it would cut down on a lot of soldering, compared to my own variant!
The only thing better than a nice mechanical key, is one that also can glow any color of the rainbow - and that's what the Adafruit NeoKey Breakout will let you do! This little ...
but i cant find any info about the two extra holes on the pcb- are they mounting holes? what screw fits there? can a screw and nut actually fit there? it looks like the head of the screw would interfere with the key switch, and the nut would interfere with the kailh socket, so idk


 rose orbit
Hmm… yeah, I didn’t notice they were so close to the key and socket. Maybe they’re not supposed to be used for securing with screws, but like, have a nib go thru them and be held in place by a cover plate to stabilize? There isn’t enough room for a nut on top either because it’ll hit the switch
royal gulch
Sometimes a hole is just a hole — Freud
rose orbit
Lol
foggy island
Lol
rich osprey
I might just use my own design then 😅
soldering all the LEDs on will suck, but at least I know I can screw these down lol
 rose orbit
Oh cool! So I see two types there, one looks similar to the NeoKey version -- what's the difference for the one with the IC on the back? Looks like it has a thru-hole LED? Is the IC a controller for it?
rich osprey
yeah this is an old pic 😅
there are several versions there, and you're right, the one with the through hole led has the neopixel ic there. the latest revision that im working with is the bottom left one
rose orbit
Ahh, gotcha. Very nice!


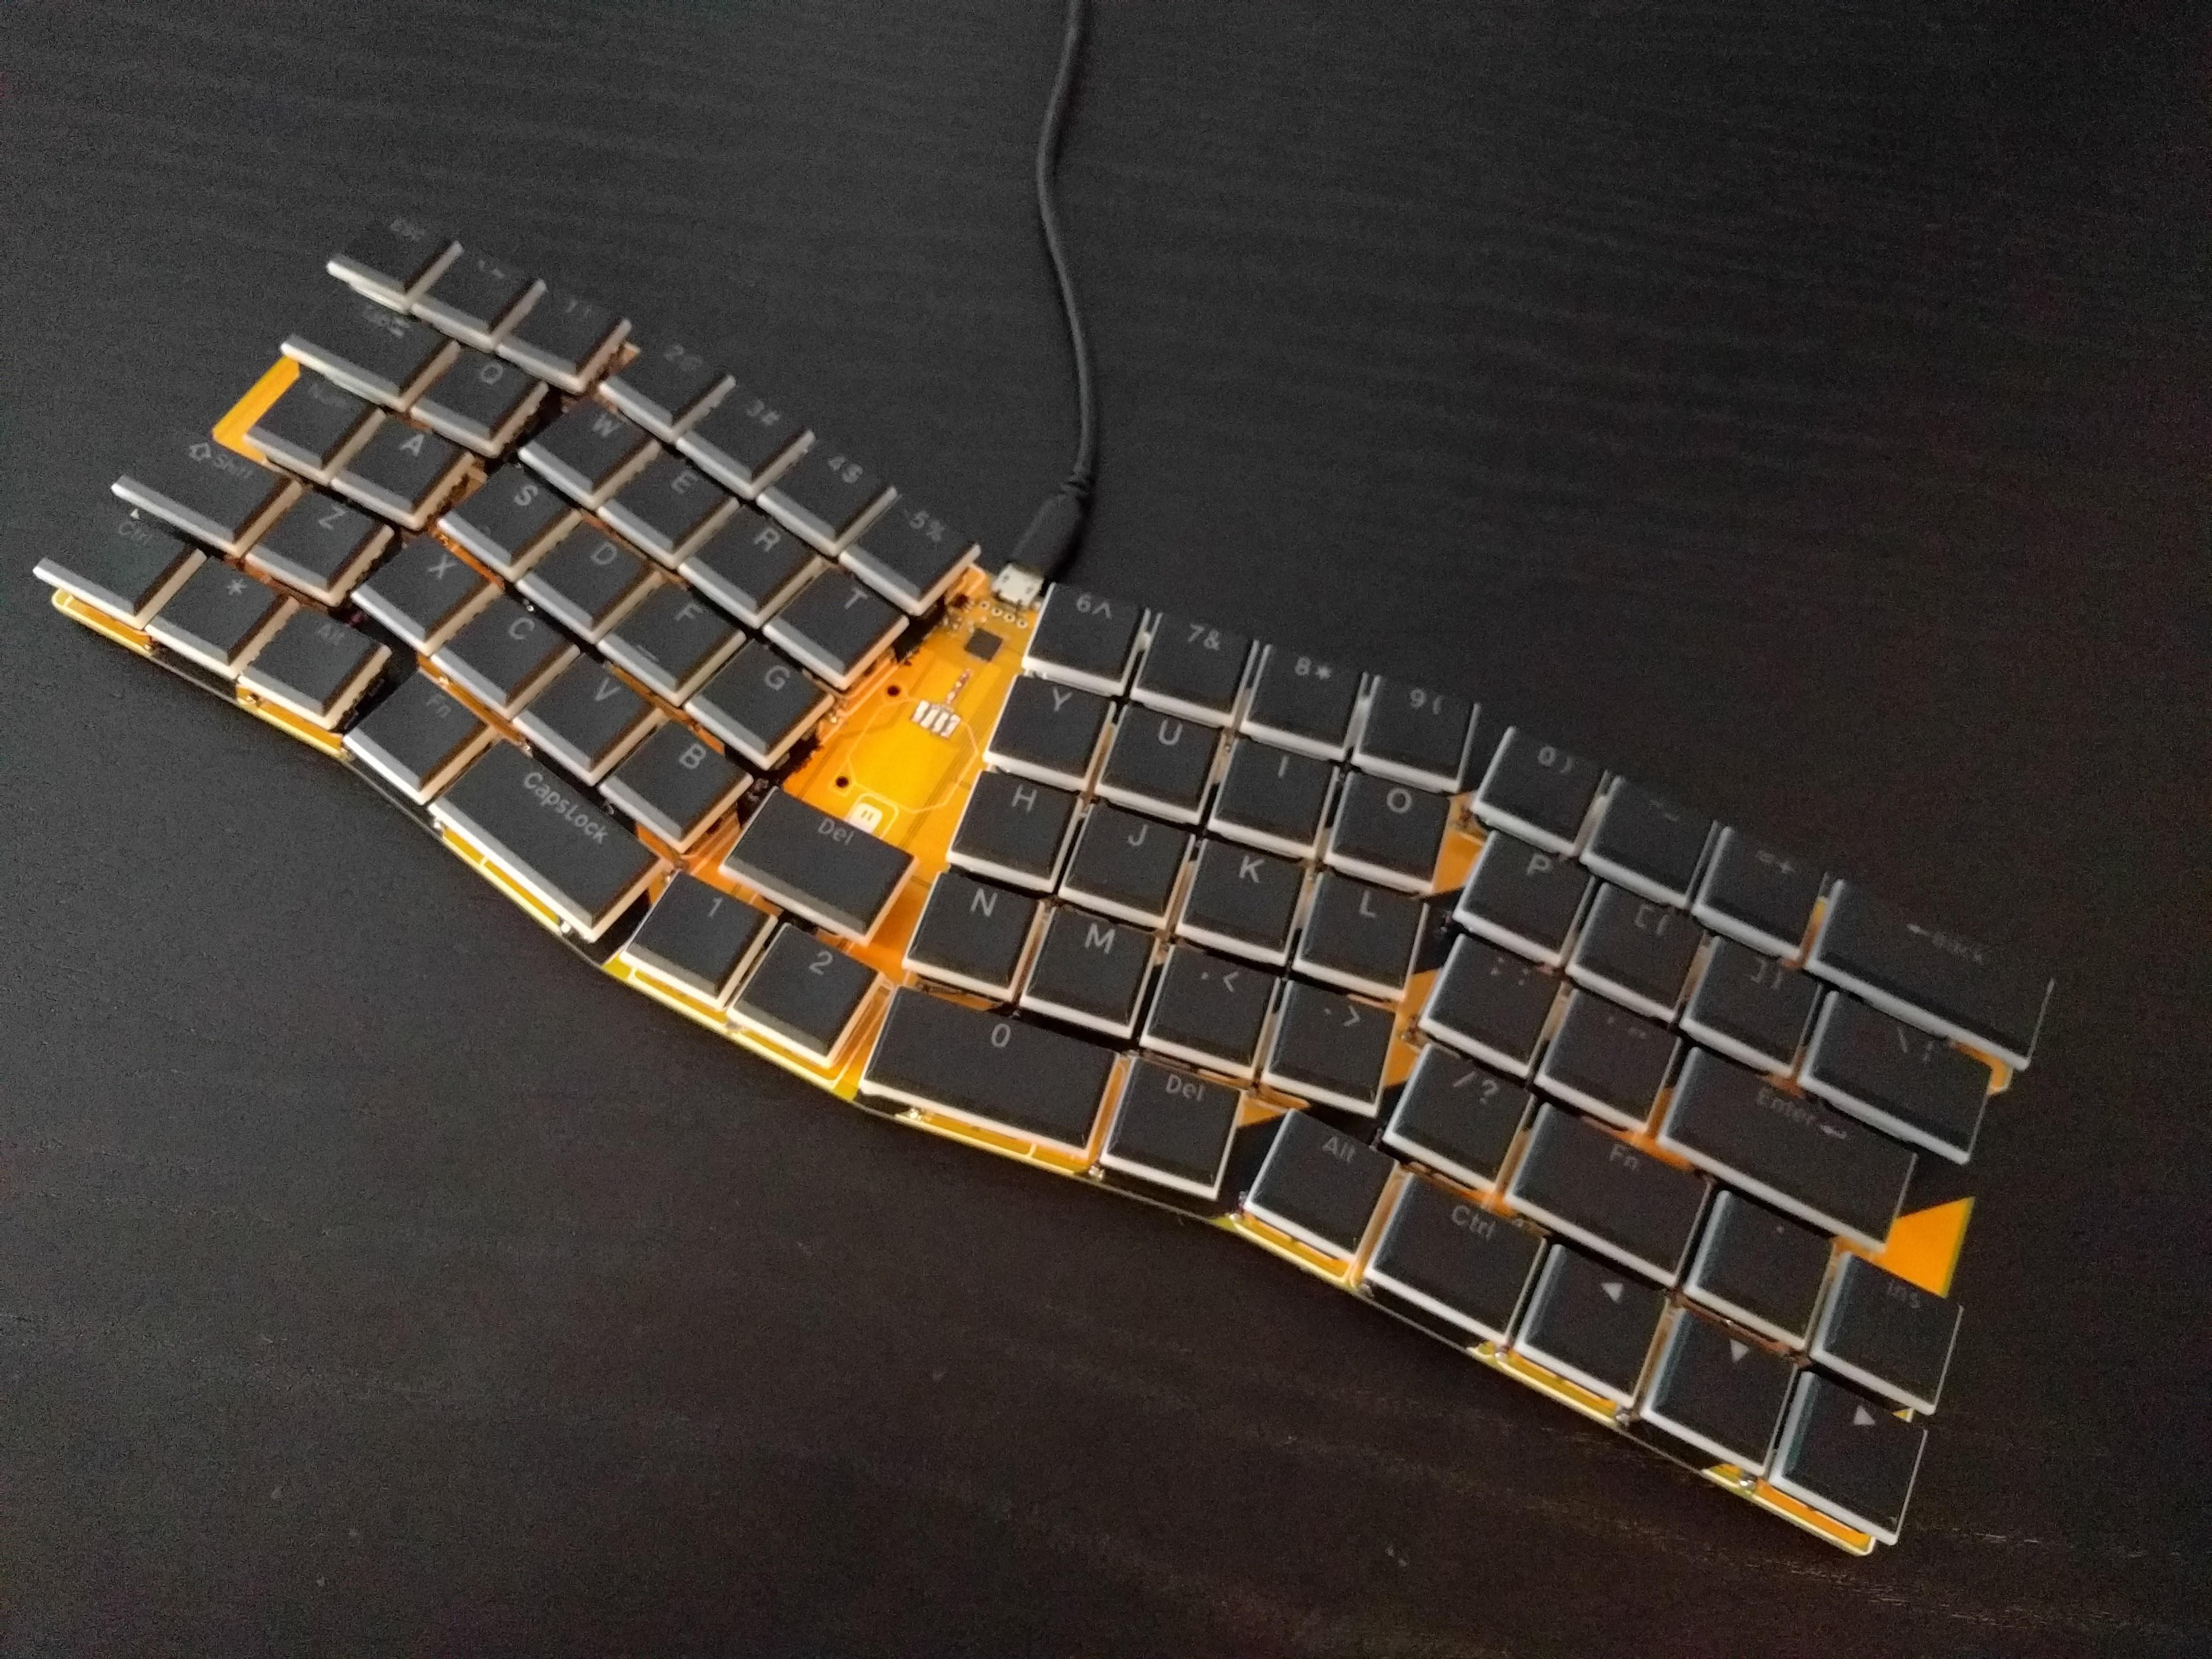
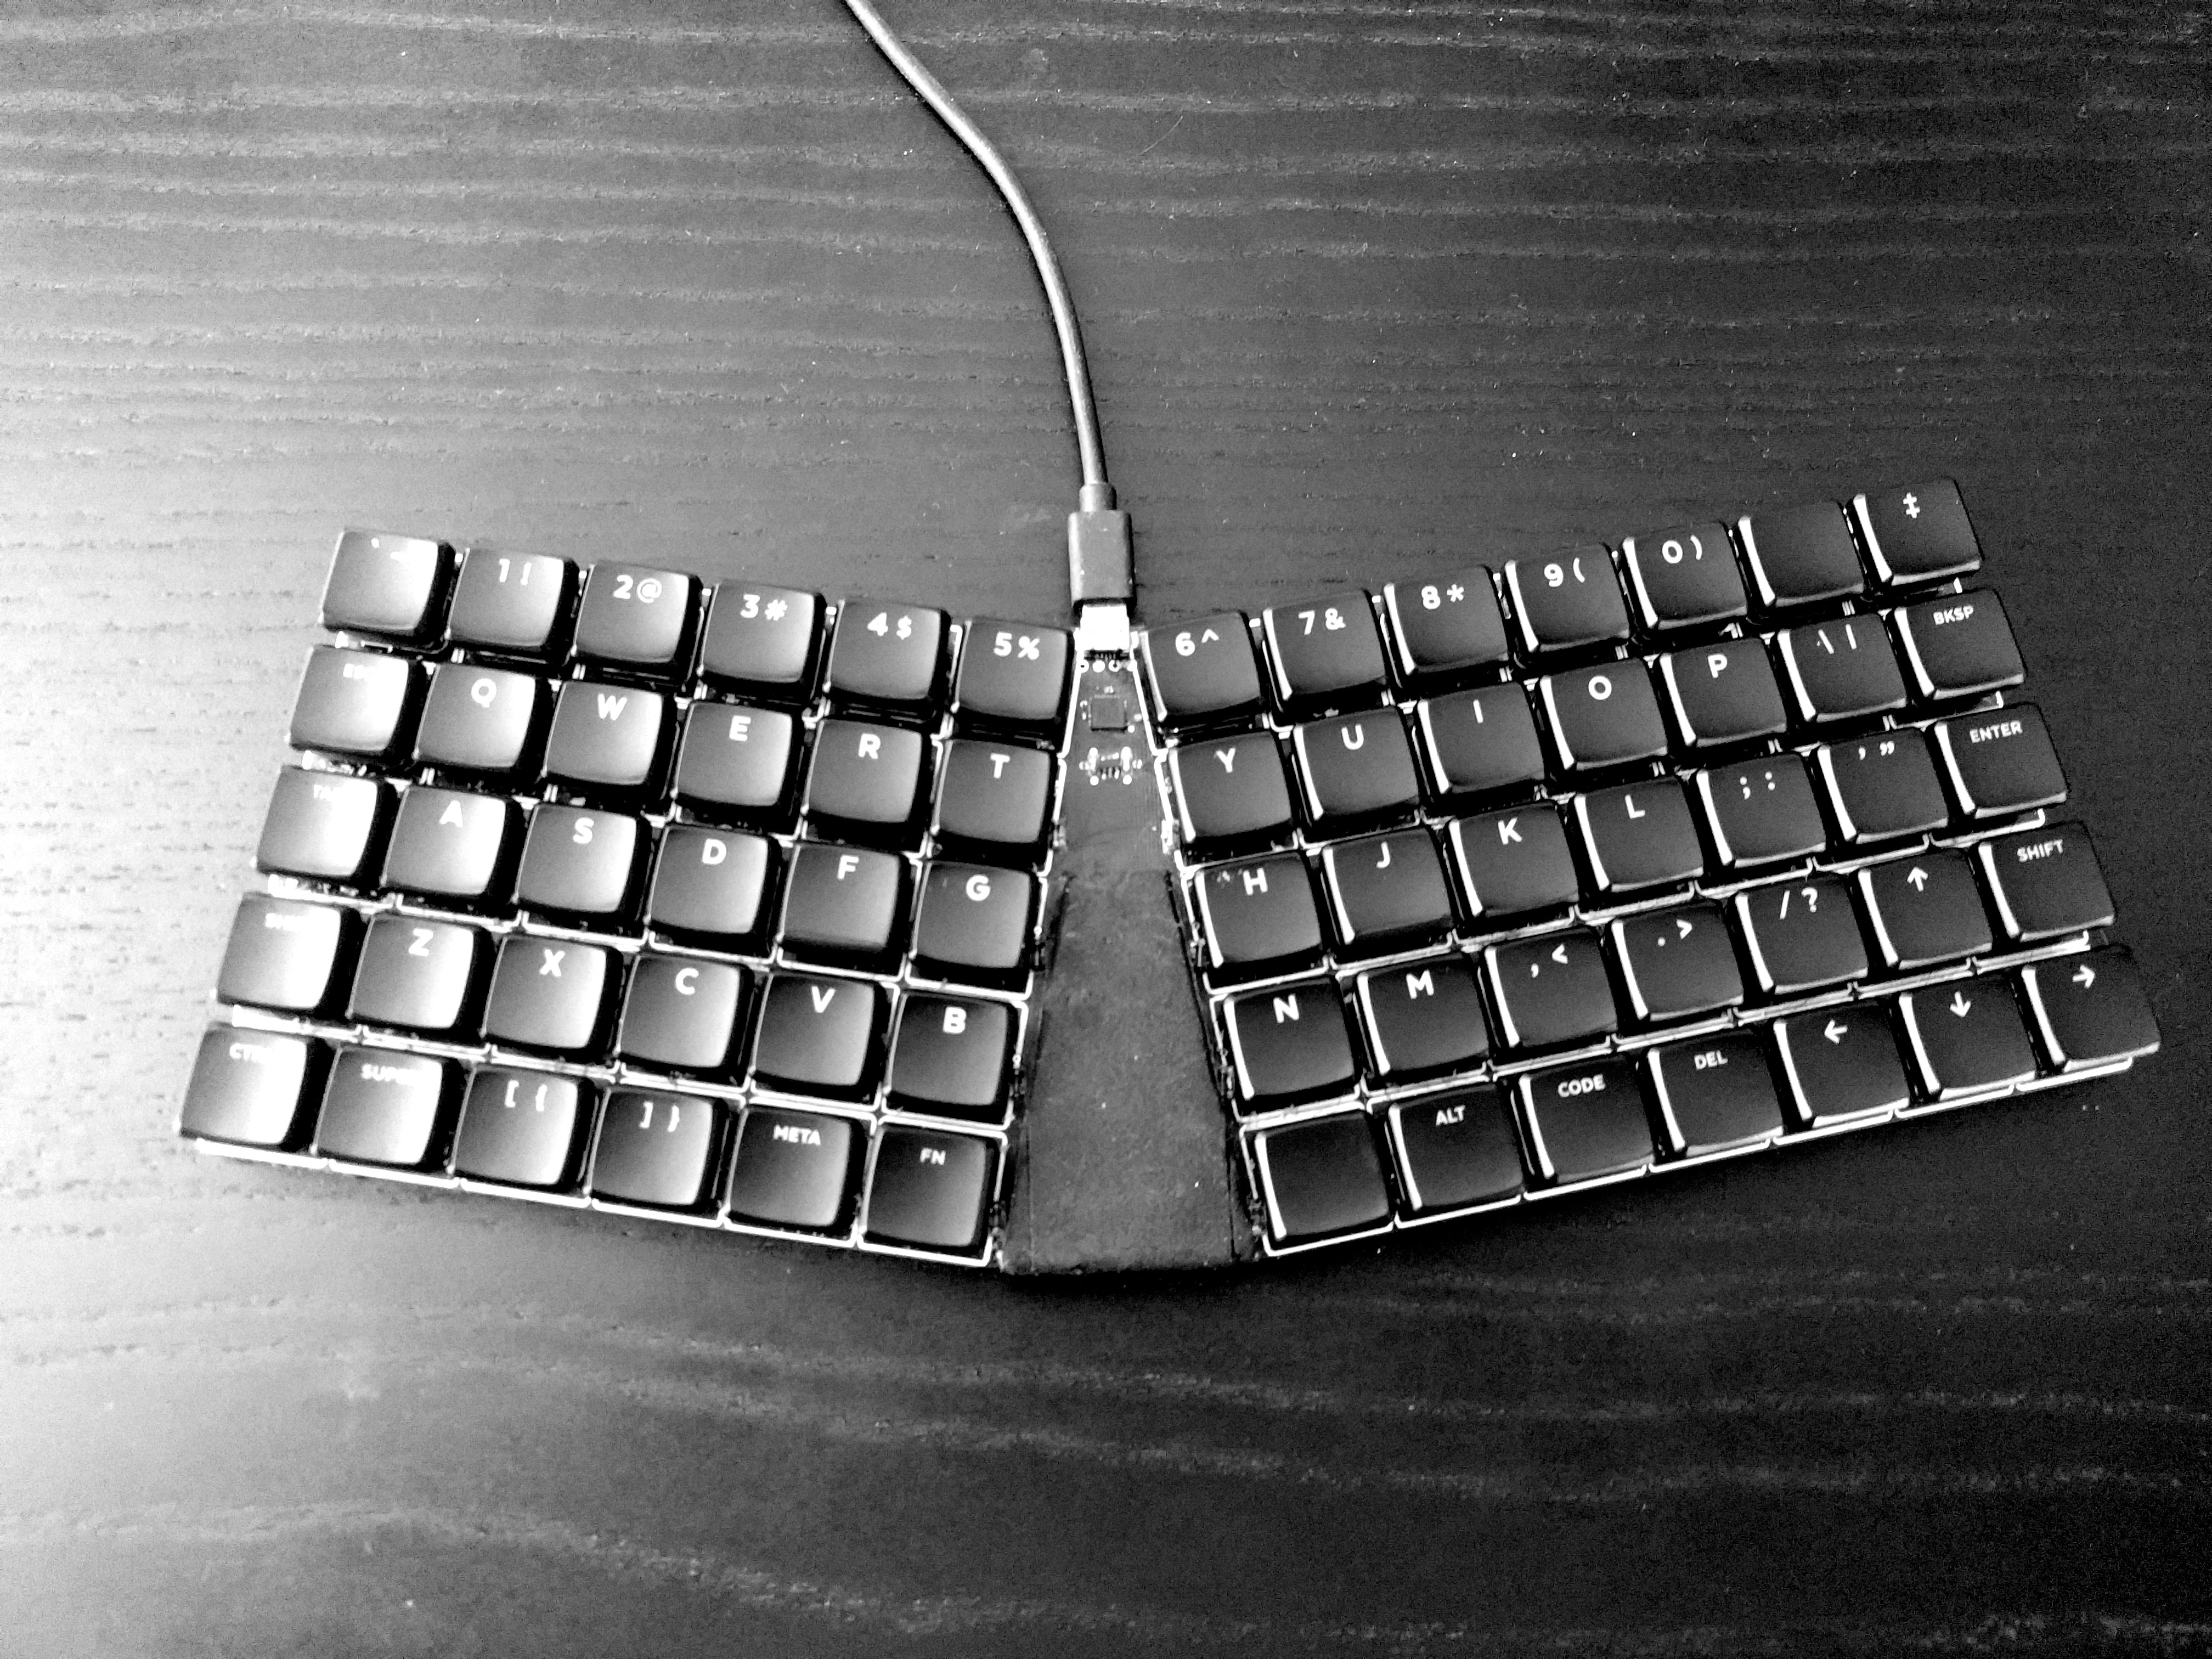
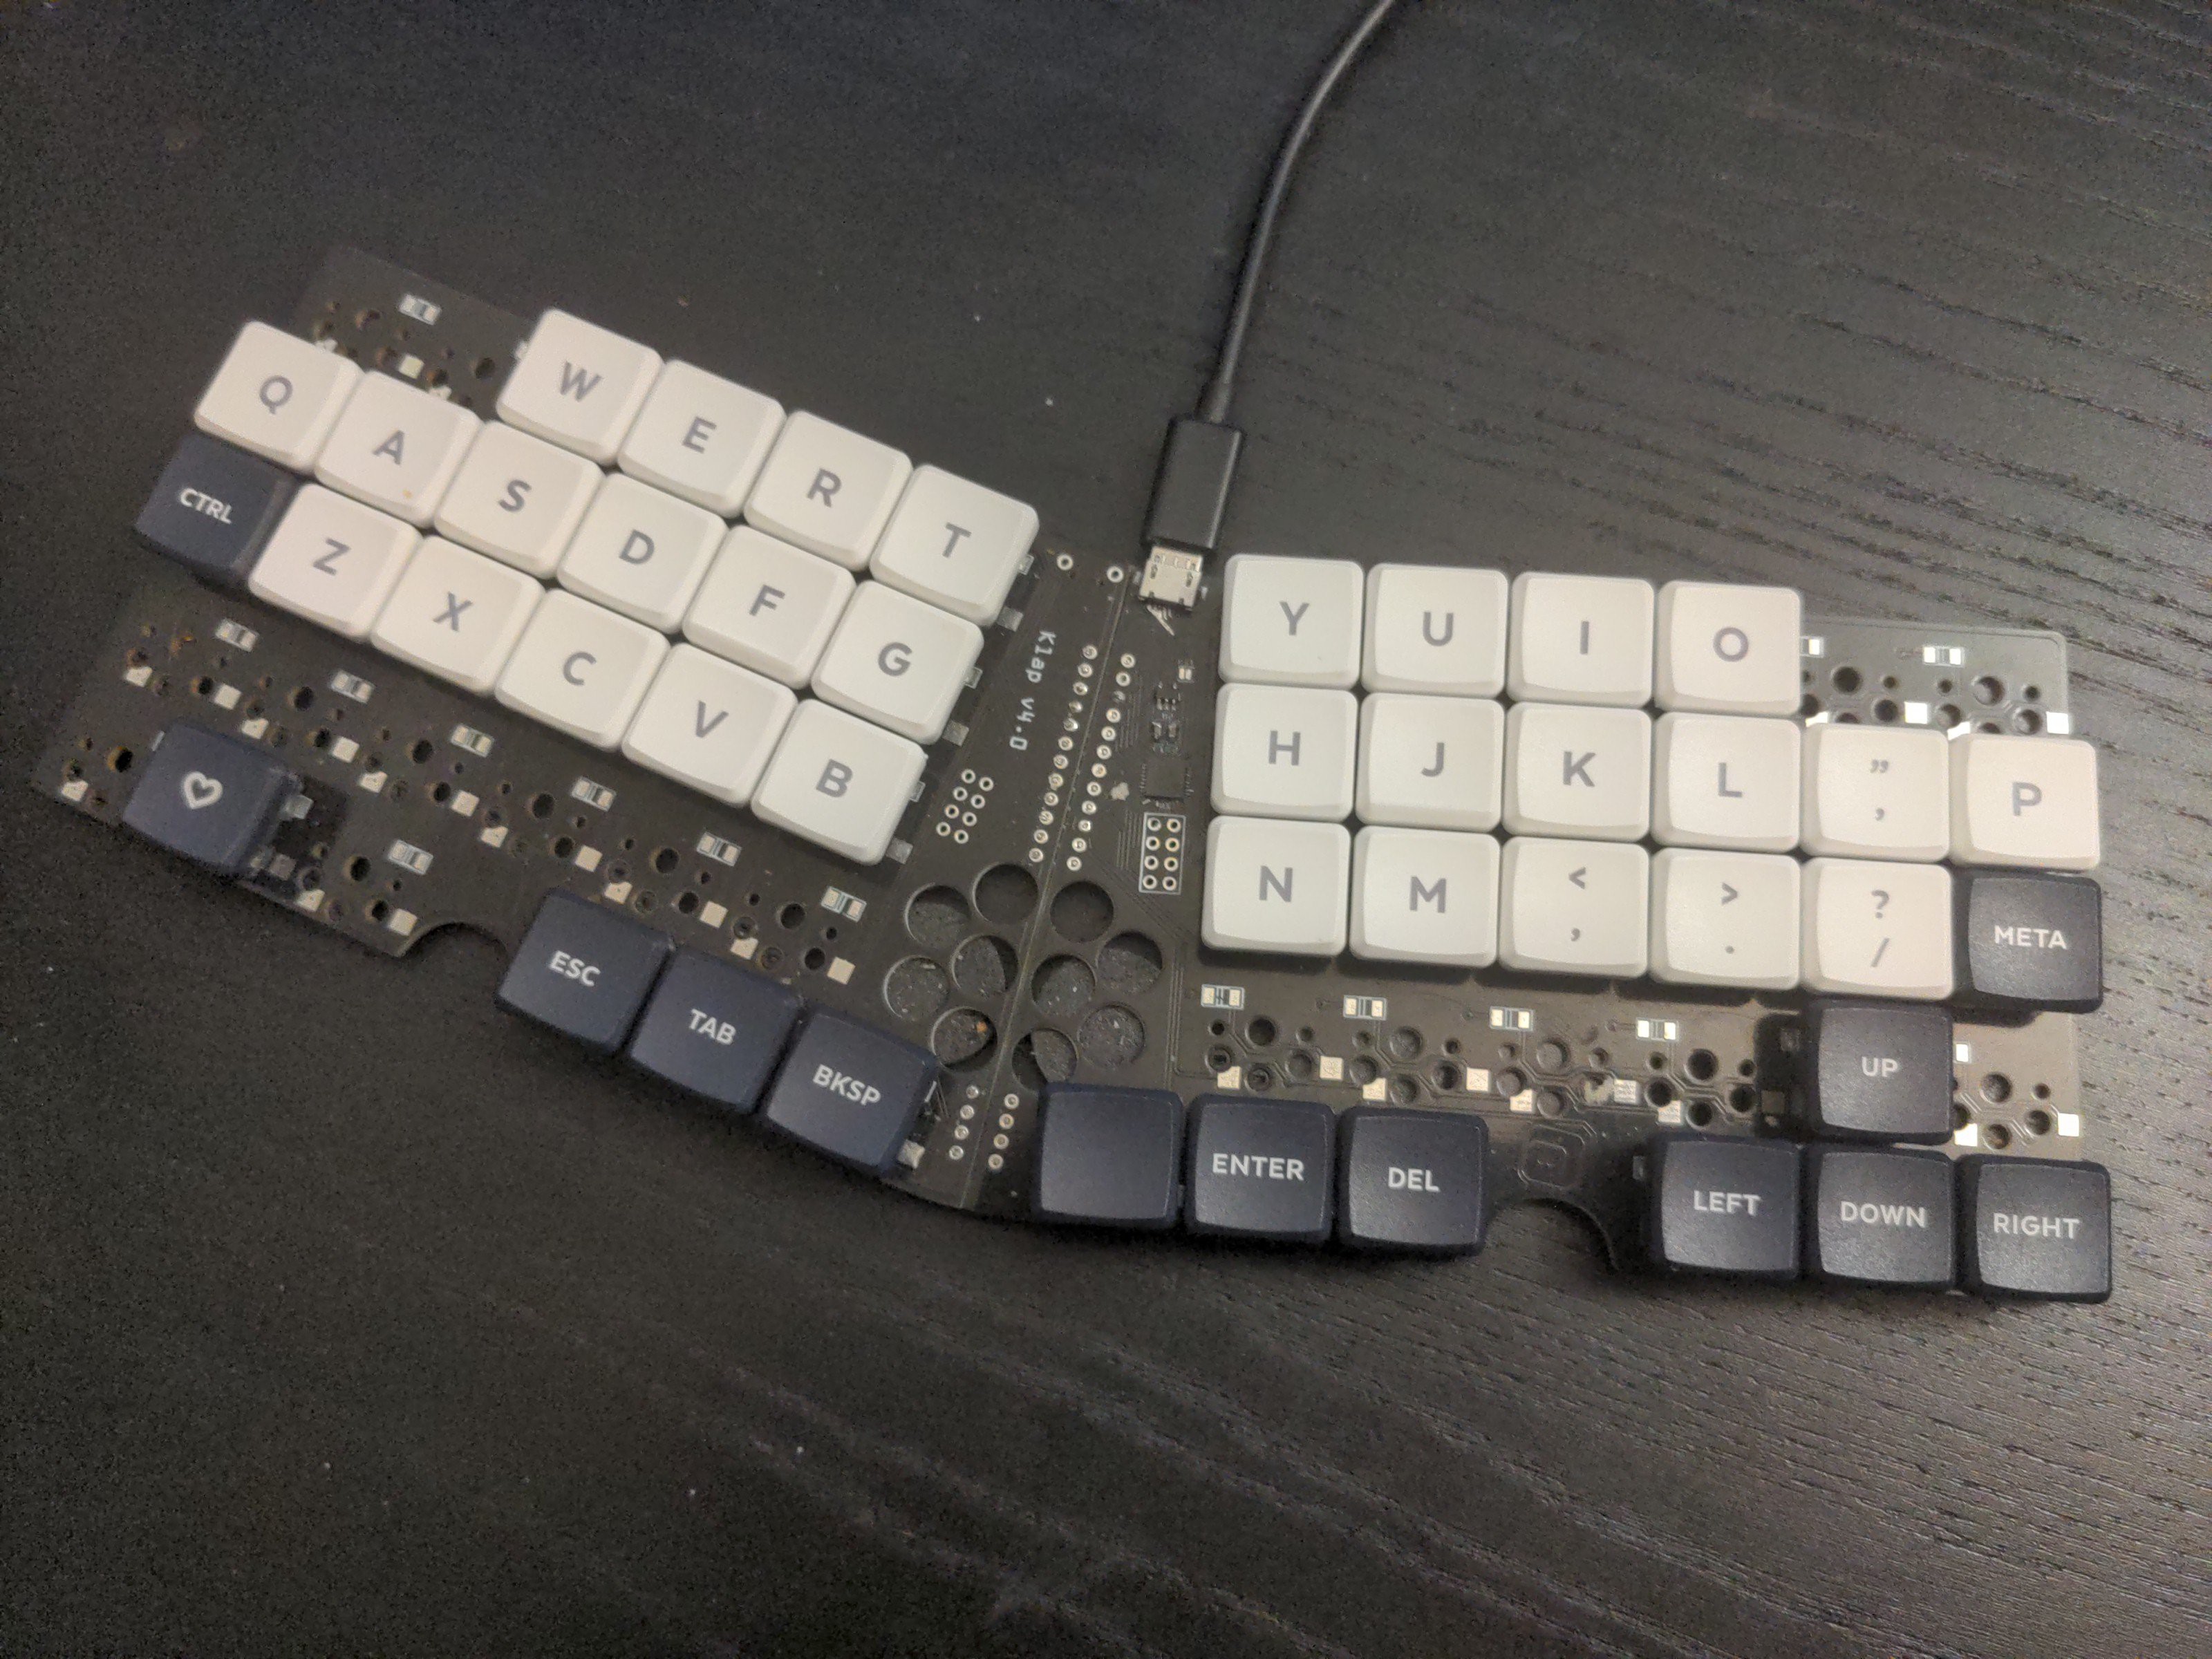
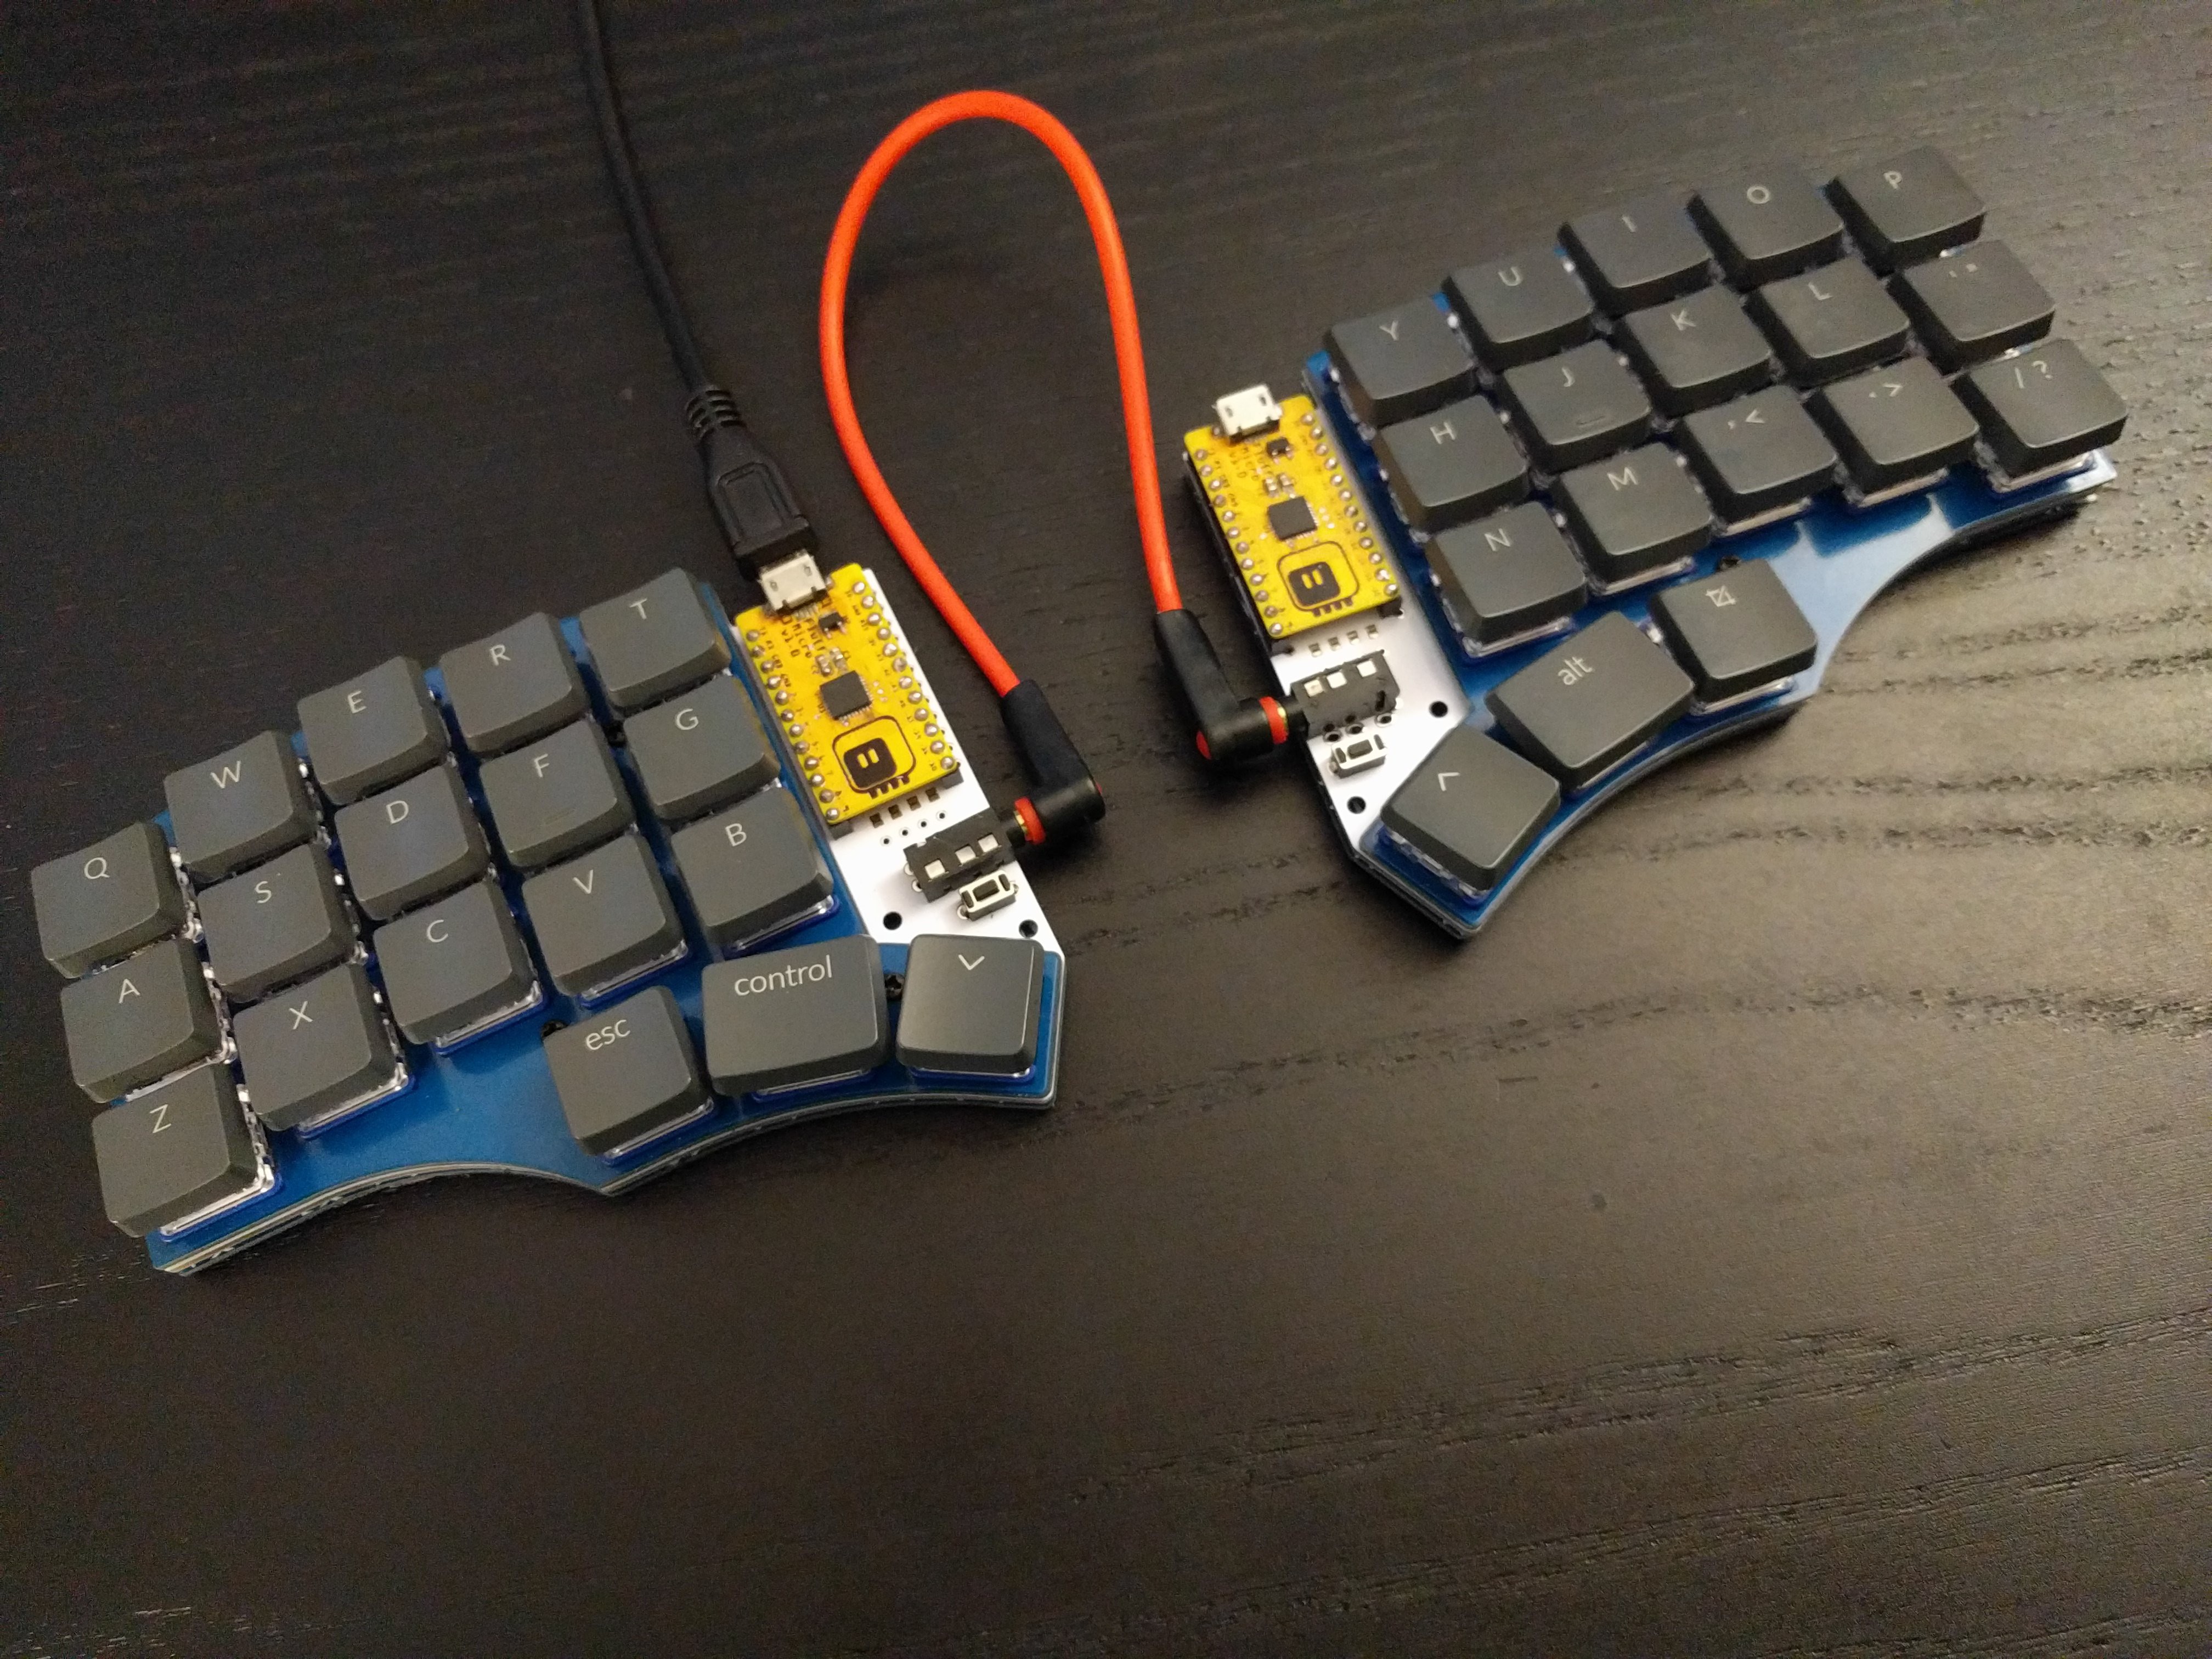
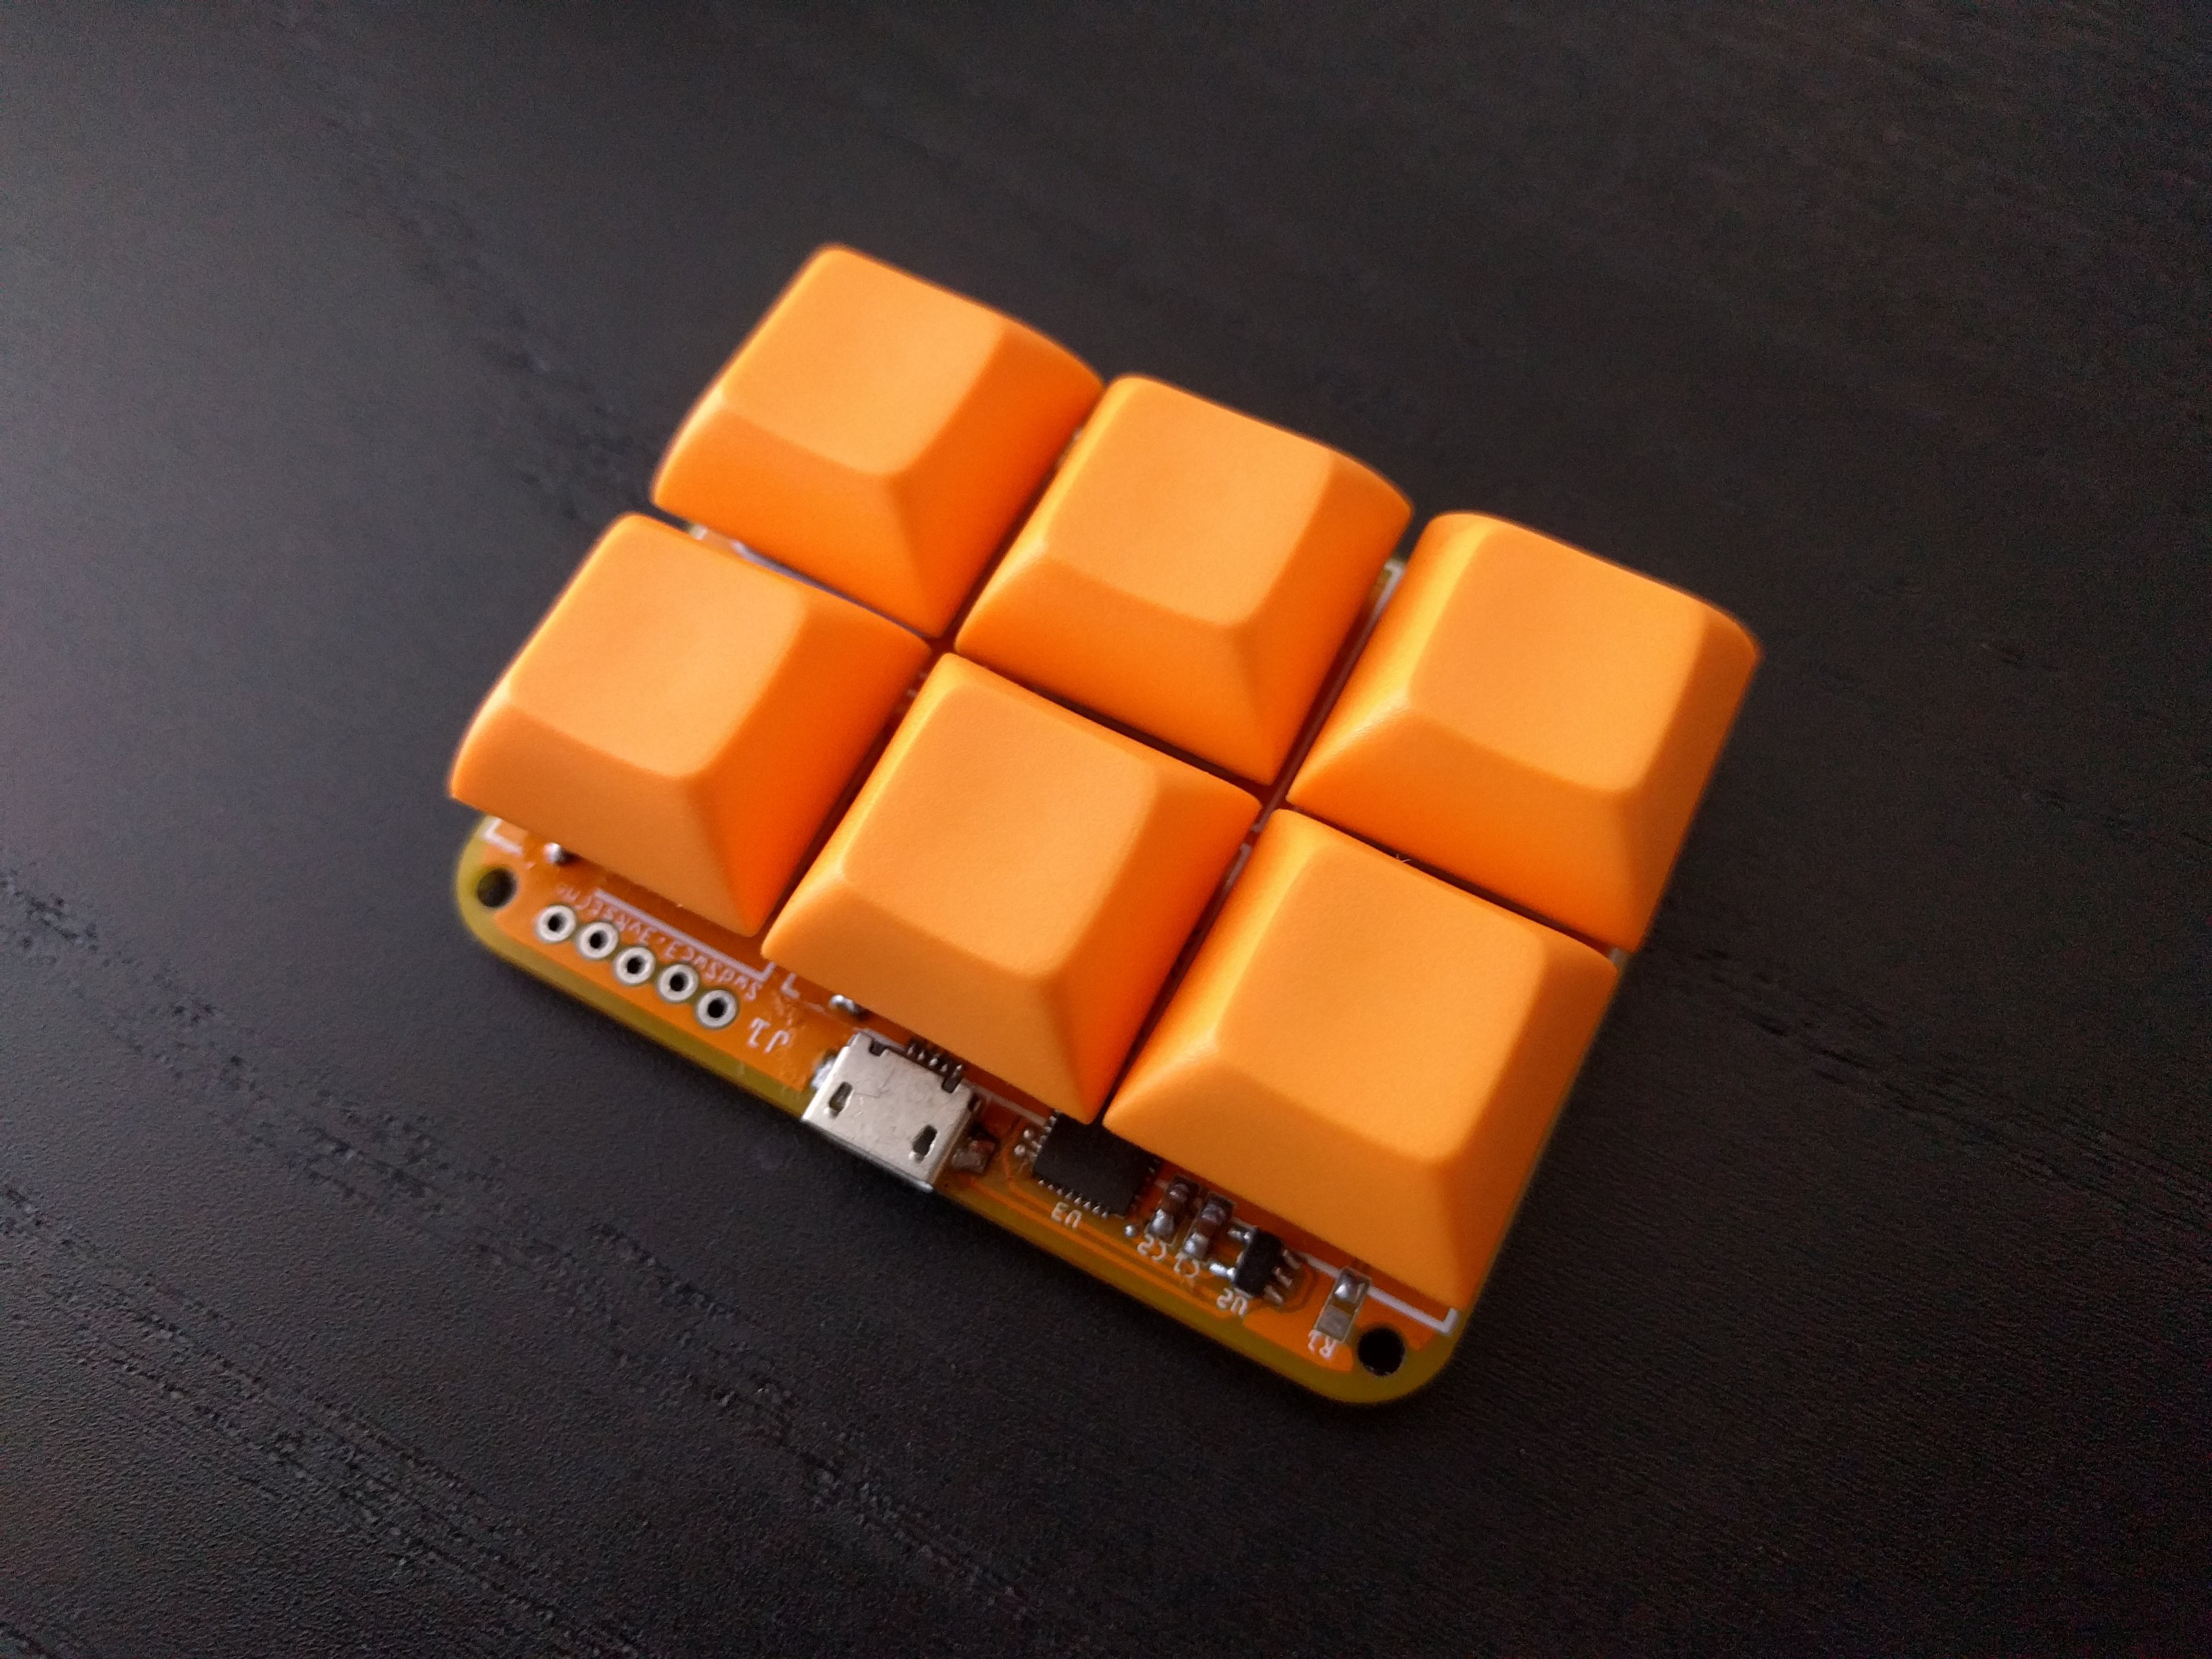

 rose orbit
rain cliff
Woohoo! Feather rp2040 with LoRa featherwing and keyboard featherwing.
rose orbit
rain cliff
Woohoo! Feather rp2040 with LoRa featherwing and keyboard featherwing.
Build guide? :O
nova pike
Build looks straightforward enough, having a source code repository would be nice though
rain cliff
 nova pike
It would be pretty sweet to build a personal messenger for something like an escape room
rain cliff
I used my own code. Still a work in progress. Just worked with guides from the keyboard featherwing and basic LoRa examples. Still much to do.
rose orbit
Beautiful hardware
rain cliff
I liked using the RP2040.
since the keyboard featherwing used most of the standard pins for the lora featherwing connections I moved them to A1,A2,A3. The loRa featherwing made that easy.
The tricky part was using short female headers to make it all fit in the case..
rain cliff
nova pike
Build looks straightforward enough, having a source code repository would be nic...
I'll be happy to share the code. It's a kludge of various demos right now. I hope to clean it up and features soon...
rain cliff
I’m abut disappointed in the range. Only about 500m. Walking around the neighborhood. But lots of trees, houses and elevation in the way. Needs much more testing in different conditions.
rose orbit
Still better than WiFi XD
 soft solstice
rain cliff
Woohoo! Feather rp2040 with LoRa featherwing and keyboard featherwing.
soft solstice
rain cliff
Woohoo! Feather rp2040 with LoRa featherwing and keyboard featherwing.
oh hey, did you have a v1 bbq10 featherwing, or the one with the stemma port and light sensor?
Because I printed those parts and they don't fit the power switch, and a few other things are slightly off, like there's no slot for the QT/Stemma port.
rain cliff
soft solstice
Because I printed those parts and they don't fit the power switch, and a few oth...
I have one of each. The v2 did not fit around the switch so I had to cut away some material with my Dremel tool.
soft solstice
rain cliff
I have one of each. The v2 did not fit around the switch so I had to cut away so...
I was hoping you modded the STL instead of using a Dremel.
Because... I don't have a Dremel.
rain cliff
Sorry about that.
plain plover
how strong is material anyway?
you could make hand drill by printing it. lemme link

2021/3/10
I upload the f3d file. If you want to modify it you can do it yourself.
Also, do me a favor. If you like my designs. Please watch my video a little longer. It will help me join the YPP program. I need 4000 hours to start.
Thanks a lot. Have a nice day.
2021/2/4
I have uploaded them two days ago. But they are not shown on my design page...
soft solstice
Printing a hand drill sounds like way more work than actually just redesigning the case in OpenSCAD. Which, is what I might do in case nobody else has an updated version.
soft solstice
Hi hello. It's me again. So, question, I have an Adafruit RP2040 Feather with an Adafruit rfm9x wing on top, and they're both sitting pretty on the back of my bbq wing. I had to do some rewiring for the radio, which worked out, also soldered on some resistors to be able to get BAT_VOLTAGE. Dandy. Now, how on God's green earth do I access that ALS on A5?
honest bane
soft solstice
Hi hello. It's me again. So, question, I have an Adafruit RP2040 Feather with an...
A5 on the FeatherWing? I'm confused. If you used stacking headers, then all the pins will be connected
 faint fulcrum
The Feather's A5 pin is mapped to the radio FeatherWing pin F in the same way that Feather pins 11, 10, 9, 6, 5 are mapped to FeatherWing pins A, B, C, D, E, respectively.
soft solstice
https://spectrum.ieee.org/amp/ham-radio-text-hacking-2655537290 feels like I need to use a BBQ and QT connectors and make a version of this!

ieeespectrum
An Arduino shield taps the potential of VHF handheld radios
Not sure what board to use, though... I wanna say M4 maybe, for the built-in cryptographic capabilities?
faint fulcrum
😩

 untold cobalt
Hope this is the best place to post this question, I’m pretty new to this but I have a keyboard featherwing and a RP2040 feather running on Circuitpython 7.1.0.
I can get the screen to display the REPL but am struggling to get the keyboard to work at all. When I run factory_test.py the keyboard works so I know the keys are operational.
I have placed the required files in the lib folder however when I use the example code, I get an ImportError: no module names ‘bbq10keyboard’
Ideally, I want to be able to run a script that allows me access to the REPL from the keyboard featherwing.
Any ideas?
rain cliff
untold cobalt
Hope this is the best place to post this question, I’m pretty new to this but I ...
What example code are you running and what libraries have you installed? Can you post a listing of the files on your CIRCUITYPY drive.?
I do not know of a way to access the REPL from the keyboard though.
untold cobalt
rain cliff
I do not know of a way to access the REPL from the keyboard though.
@rain cliff that is probably me using the wrong terminology, my plan was to switch the keyboard featherwing on and have ready for me to type in a code i created for reading temperature data from a sensor connected - I want to then be able to interrupt that code if needed and possibly run another code from a different sensor.
rain cliff
untold cobalt
<@!343570430042308609> that is probably me using the wrong terminology, my plan ...
Good. That sounds much simpler.
rain cliff
It is also used by the factory test
untold cobalt
rain cliff
What example code are you running and what libraries have you installed? Can you...
Hi @jerry the code im running is
from bbq10keyboard import BBQ10Keyboard
import adafruit_ili9341
import displayio
import digitalio
import tsc2004
import board
displayio.release_displays()
spi = board.SPI()
tft_cs = board.D9
tft_dc = board.D10
display_bus = displayio.FourWire(spi, command=tft_dc, chip_select=tft_cs)
display = adafruit_ili9341.ILI9341(display_bus, width=320, height=240)
touch = tsc2004.TSC2004(i2c)
while not touch.touched:
pass
print(touch.read_data())
i2c = board.I2C()
kbd = BBQ10Keyboard(i2c)
while kbd.key_count == 0:
pass
print(kbd.keys)
rain cliff
Is the library mentioned above installed?
untold cobalt
rain cliff
What example code are you running and what libraries have you installed? Can you...
in the lib folder I have,
adafruit_bus_device
adafruit_display_shapes
adafruit_display_text
adafruit_ili9341.mpy
adafruit_sdcard.py
adafruit_stmpe610.py
bbq10keyboard.py
neopixel.py
tsc2004.py
untold cobalt
rain cliff
Is the library mentioned above installed?
yes it is
royal gulch
then that error doesn't make sense, maybe there is a typo in the library name?
rain cliff
Sorry, I have to go offline for an hour or so. I can try to help when I get back, but as @royal gulch said, it looks ok. You don’t have another bbq10keyboard.py file in the top directory, do you?
untold cobalt
rain cliff
Sorry, I have to go offline for an hour or so. I can try to help when I get back...
No just the one, i'm confuded by the line of the code 'from bbq10keyboard import BBQ10Keyboard' as the bbq10keyboard.py file is in the 'lib' directory and not a separate folder
royal gulch
the lib directory is in the search path for importing, so that is fine
and the BBQ10Keyboard is a class name in that file
untold cobalt
royal gulch
the lib directory is in the search path for importing, so that is fine
so within the bbq10keyboard.py is the following, the adafruit_bus_device folder has an empty init file
class BBQ10Keyboard:
def init(self, i2c):
self._i2c = I2CDevice(i2c, _ADDRESS_KBD)
self._buffer = bytearray(2)
untold cobalt
royal gulch
can you try `import bbq10keyboard` in the REPL?
i'll give that a go when i get home, just at work at the moment, what should happen out of interest?
untold cobalt
royal gulch
you should get no error
excuse the silly question... should the keyboard work at that point, or litterrally nothing should happen?
royal gulch
literally nothing, it will only import the library into the memory
to make it ready for use
but right now your program errors at that step
note that from bbq10keyboard import BBQ10Keyboard is equivalent to
import bbq10keyboard
BBQ10Keyboard = bbq10keyboard.BBQ10Keyboard
could there be a i2c address conflict?
royal gulch
no, your error happens before the program even tries to connect to i2c
it can't find the library
untold cobalt
royal gulch
it can't find the library
ok thanks, i'll try the above when i get home and see what it throws back
royal gulch
I would suspect a typo in the library name in your program, that's the only thing I can think of
untold cobalt
royal gulch
I would suspect a typo in the library name in your program, that's the only thin...
Again sorry for the daft question, does uppercase or lower case make any difference?
royal gulch
yes
untold cobalt
royal gulch
yes
ok thanks, does the version of circuitpython make any difference too? I'm running 7.1.0 but I see it was tested on 6.0
royal gulch
I don't think there were any changes that would affect it
the importing mechanism didn't change for sure
untold cobalt
royal gulch
I don't think there were any changes that would affect it
im just looking at the code on my GitHub, can't see any spelling errors, there are references to BBQ10Keyboard and bbq10keyboard
royal gulch
let's wait until you can have your hands on it, if it's not a typo, then it might be a filesystem corruption
untold cobalt
royal gulch
let's wait until you can have your hands on it, if it's not a typo, then it migh...
that sounds like a good idea, thank you @royal gulch
untold cobalt
royal gulch
let's wait until you can have your hands on it, if it's not a typo, then it migh...
So I thought I’d flash the board to rule out corruption and reload the files, I’m not getting an error but still can’t type anything.. That might be down to the code
rain cliff
untold cobalt
So I thought I’d flash the board to rule out corruption and reload the files, I’...
If the factory_test or any of the other examples work, then the hardware is OK. You will need your own code to do your specific application. What are you running now that is not working?
untold cobalt
rain cliff
If the factory_test or any of the other examples work, then the hardware is OK. ...
Hi @rain cliff, at the moment when the code runs it waits for me to press the screen then prints the coordinates, then waits for me to press a key and prints that key the says 'Code Done Running' What i need to work out is how to get it working in a way that i can type 'import temp' and it runs the temp.py code but still allows me to keyboard interrupt and Ctrl D to reload
rain cliff
untold cobalt
Hi <@343570430042308609>, at the moment when the code runs it waits for me to pr...
If you are seeing "Code Done Running" then your code.py program has terminated, probably due to an error. It sounds like you are still think you can access the REPL from the keyboard. I don't think this is possible and very likely it is not really necessary. You can have your program accept typed in "commands" then execute some section of code based on the input. But it won't be like typing at the REPL. Think of the keyboard as an input device that your code can access, lIke a temperature sensor for example. You could write a program to read a temperature sensor and do something if the temperature gets above a certain level. In the same way, you can read inout form the keyboard and control the flow of your program. Does that make sense? I don't really understand the "big picture" of what you are trying to do. It might be best to describe what you want to do and see if people here can help with suggestions for accomplishing that.
@untold cobalt I am by no means an expert on how the keyboard featherwing can be used. You might get more responses if you post your question in #help-with-projects or #help-with-circuitpython to ask if what you are trying to do is possible.
untold cobalt
rain cliff
<@!834078023485227018> I am by no means an expert on how the keyboard featherwin...
Perfect thanks for this, I'll give those links a go. I think this might be the way forward though: "You can have your program accept typed in "commands" then execute some section of code based on the input"
royal gulch
I don't think you can have the keyboard working "in background" while executing a completely unrelated program
rain cliff
untold cobalt
Perfect thanks for this, I'll give those links a go. I think this might be the ...
That is the way I use the featherwing keyboard..
untold cobalt
royal gulch
I don't think you can have the keyboard working "in background" while executing ...
I think you are both right, how could it run if there is no code running in the first place...
untold cobalt
rain cliff
That is the way I use the featherwing keyboard..
This is what i need to work on
royal gulch
well, you can implement repl using exec
but it's a bit of work
and ctrl+c wouldn't work anyways
untold cobalt
royal gulch
well, you can implement repl using `exec`
I think that might be way above my ability
rain cliff
@untold cobalt here is a very basic example -- there are many ways to do this -- much more elegantly, but hopefully this is useful ```from bbq10keyboard import BBQ10Keyboard, STATE_PRESS, STATE_RELEASE, STATE_LONG_PRESS
import adafruit_ili9341
import digitalio
import displayio
import time
import board
Release any resources currently in use for the displays
displayio.release_displays()
Define the onboard LED
LED = digitalio.DigitalInOut(board.D13)
LED.direction = digitalio.Direction.OUTPUT
spi=board.SPI()
tft_cs = board.D9
tft_dc = board.D10
touch_cs = board.D6
sd_cs = board.D5
neopix_pin = board.D11
display_bus = displayio.FourWire(spi, command=tft_dc, chip_select=tft_cs)
display = adafruit_ili9341.ILI9341(display_bus, width=320, height=240)
i2c=board.I2C()
Keyboard
kbd = BBQ10Keyboard(i2c)
message= ""
while True:
if kbd.key_count > 1:
keys = kbd.keys
state,key=keys[1]
print(key,end='')
if key != '\n':
message+=key
else:
print(message)
if message == "do this":
print("got this")
elif message == "do that":
print("got that")
message= ""
This is amazing thank you! I was just looking at the code now and getting a little confused defining keys, will upload to the board and give it a go
 livid dagger
anyone good with KMK in here lol. I'm trying to get rgb lighting working in a keyboard for under glow. i dont get how to add it in my code. ill out in up for anyone to look at. thanks for the read>
nova pike
livid dagger
anyone good with KMK in here lol. I'm trying to get rgb lighting working in a ke...
I'd redirect this to #help-with-circuitpython, if you haven't already.
livid dagger
i have thats why im trying here
nova pike
livid dagger
i have thats why im trying here
Ah. Have you read up on https://github.com/KMKfw/kmk_firmware/blob/master/docs/rgb.md ?

GitHub
Clackety Keyboards Powered by Python. Contribute to KMKfw/kmk_firmware development by creating an account on GitHub.
livid dagger
yep cant figuer how to add it in i have tried many of times
nova pike
livid dagger
yep cant figuer how to add it in i have tried many of times
How are your LEDs connected?
livid dagger
they will be an add on to this via pin GP21 in the pico
 nova pike
So you need to import Adafruit_Circuitpython_Neopixel, enable the extension, and then use the keycodes or whatever to make the lights do things?
Code to enable extension is:
from kmk.extensions.RGB import RGB

rgb_ext = RGB(pixel_pin=rgb_pixel_pin, num_pixels=27)
keyboard.extensions.append(rgb_ext)
rgb_pixel_pin should be defined manually as GP21, and num_pixels should be the number of LEDs.
@livid dagger try that first and see how far you get?
 limpid blaze
Hi, anyone know what does it mean a kb2040 flashing red?
I am playing with KMK and trying to do a split with one with it's own rp2040. I managed to connect both sides and make they light up, but as soon as I press a key, the "slave" side starts flashing red...
I am not sure how to get a serial on that board that is not connected to USB to try to see what is happening....
livid dagger
check for bad connections first. @limpid blaze then trouble shoot the code. that's what i do when i have a problem.
limpid blaze
Hi @rokios, I am doing it on the breadboard, I've only connected the two rp2040 and I have one switch on each one.
honest bane
limpid blaze
I am playing with KMK and trying to do a split with one with it's own rp2040. I ...
you could connect USB cables to both. They will have different COM ports or /dev/tty ports
limpid blaze
Yes, but I am pretty sure they would be independent keyboards, making use of layers less usefull
It is an option, in any case. Thanks.
But what does the red flashing on KB2040 means? I could not find reference to it while reading the documentation, but I could have missed it.
honest bane
limpid blaze
But what does the red flashing on KB2040 means? I could not find reference to i...
limpid blaze
Thanks! So the code is crashing somehow... That's already good info!
 upbeat torrent
any info on how to get the giant board working with the keyboard featherwing? i have all the hardware but no soldering skills and no software/howtos
 sleek pawn
for the glow-through, etched keycaps that adafruit has with various logos, is it possible to get blanks that can be etched with a co2 laser? (i think these are translucent caps with an opaque dye sub layer?)
soft solstice
sleek pawn
for the glow-through, etched keycaps that adafruit has with various logos, is it...
probably better to ask this question in #general-tech since this channel is about the featherwing.
royal gulch
then again, I haven't seen Arturo in here for ages
perhaps a general keyboard channel would make sense
snow matrix
royal gulch
perhaps a general keyboard channel would make sense
Or simply archive it. A lot of what comes up here is suited to an existing help-with channel.
royal gulch
true, lots of dedicated keyboard discord servers out there anyways
but I suppose it's up to Arturo
snow matrix
I'll ping them. No idea whether I'll get a response though.
dense crest
I'm still here but have notifications muted except for @mentions, no one has been mentioning me recently 😄 But we discussed with Kattni and we'll make this a generic keyboards channel 🙂
royal gulch
@dense crest are you getting into large keyboards?
dense crest
nope, the channel will just be more generic
I like my $20 Microsoft basics keyboard 😄
royal gulch
the featherwing is lying in front of me on my desk and looking at me in accusatory way
dense crest
as it should 😉
nova pike
Sigh, that feel when I need to replace one keyswitch in a non-hotswap keyboard...
nova pike
The solder sucker?
snow matrix
That is so obvious but it never occurred to me.
nova pike
Honestly, unscrewing the case is probably more frustrating than the solder haha
But thanks for the tip
I really should build a custom at some point, when I have the time...
royal gulch
"when I have the time" aahahahahahaha
good one
on a more serious note, hope you will get the inspiration
I've seen a nice inspirational video about custom keyboards recently
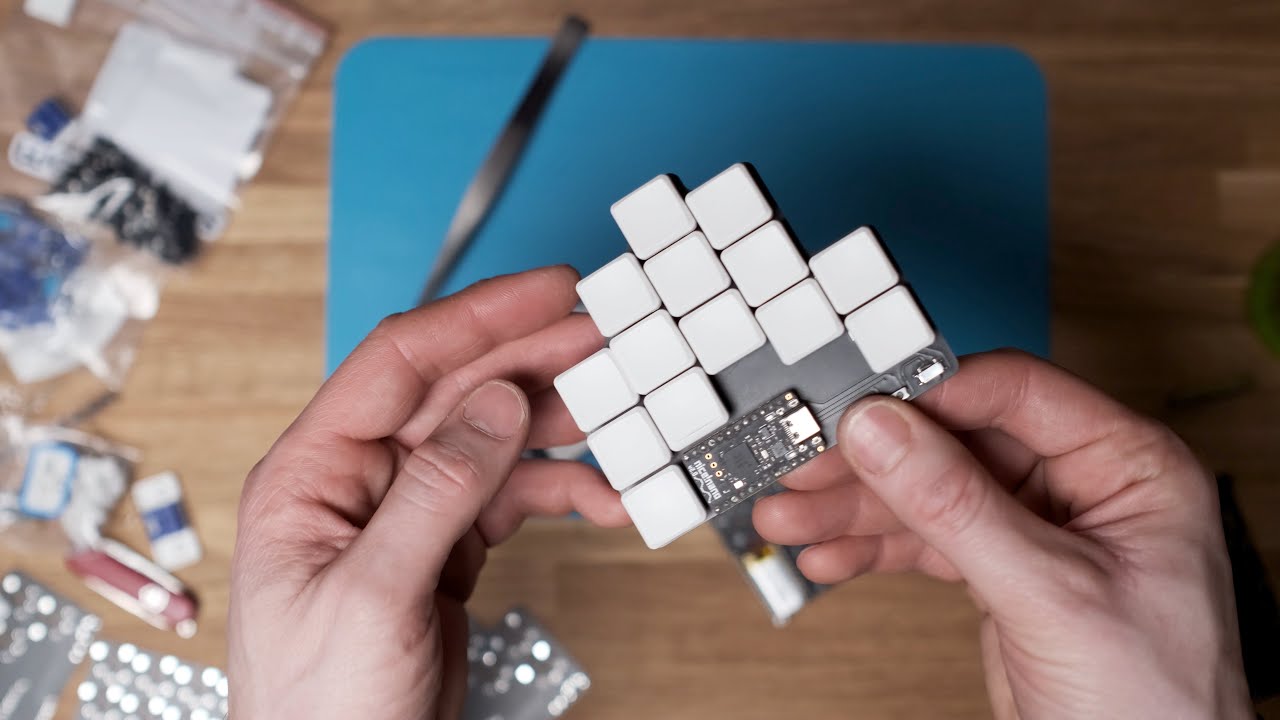
Here we go. How to build a custom ergonomic split keyboard that is affordable, Bluetooth (for the split and the connection to host), can easily be changed in the future and is designed by you for your own specific hand shape and keyboard preferences. Buckle up!
🪛Soldering Essentials!
Tooling up with these links helps me out at no extra cost to...
 echo sand
oh yay, a channel to discuss keyboards in general now~ ✨
 hybrid sonnet
exciting
soft solstice
Hey everyone! I was wondering if anybody has done anything with KB2040 and have some kind of designs to share? I don't even know where to start, but I think I am ready to build a keeb from scratch with a KB2040. I was primarily thinking 60%/64 keys and low-profile Kailh Choc switches with the 1350 hotswap sockets. Been trying to get some answers from Kailh themselves, but I think there's a language barrier in my way.
All my other keyboards are mostly heavy and clicky monsters with SA caps. 😅 I wanted something thinner and maybe lighter that I could bring with me for my laptop.
Thankful for any advice.
nova pike
soft solstice
Hey everyone! I was wondering if anybody has done anything with KB2040 and have ...
Kb2040 is designed to be a pin-compatible circuitpython substitute for an arduino sparkfun pro micro, so there should be plenty of hardware designs that already fit the kb2040. Just add code!
soft solstice
nova pike
Kb2040 is designed to be a pin-compatible circuitpython substitute for an ~~ardu...
Sweet, thank you!
 twilit lion
I'm trying to get single pin keys working on kmk using the scanner example they have on their github and i'm having limited luck. I'm going to be using single pin per key once this is all said and done, so i wanted to test with it. Getting a "Buffer incorrect size" error.
royal gulch
sounds like a bug in their script
twilit lion
Yeah, I'm thinking i need to change something in the scanner, since most people are just using the default matrix scanner.
Waiting on the shift registers to come in. I was hoping this would be pretty easy to just throw together, but now it looks like I'll actually need to learn python and know what I'm doing, rather than just cram in a webui configuration and hope for the best
royal gulch
you can always fall back to ZMK or QMK
twilit lion
Yeah, i might have to.
royal gulch
if you want something smaller and easier to understand than KMK, you can try my ukeeb library
you will need to write python for it, though
twilit lion
Might be worth a shot. Once i get the initial things working i can look at adding complexity on top of that
royal gulch
my library is here: https://github.com/deshipu/ukeeb
the docs are sparse, sorry about that
twilit lion
I'll plug it in after the kids go to bed. I want to start out with chording on 5 keys while I'm waiting for my ics to get here
royal gulch
the way it is written right now, it uses a matrix, if you want dedicated key per pin, either make it 1 long row, or use keypad.Keys in place of keypad.KeyMatrix
twilit lion
Ok