#help-with-arduino
1 messages · Page 5 of 1
 cerulean knoll
 pine bramble

GitHub
A Forth text interpreter for the Adafruit Feather M0, using the Arduino IDE. - Feather-M0-interpreter/Interpreter.ino at master · CharleyShattuck/Feather-M0-interpreter
  char *ram;
  int p = pop();
  ram = (char*)p;
  char buffer[5] = "";
  char *ram;
  int p = pop();
  ram = (char*)p;
  sprintf(buffer, "%4x", p);
  Serial.print(buffer);
same code in context
 sick mural
pine bramble
```cpp
char *ram;
int p = pop();
ram = (char*)p;
```
sick mural
pine bramble
```cpp
char *ram;
int p = pop();
ram = (char*)p;
```
wait you can assign an integer a function?
 tardy iron
sick mural
wait you can assign an integer a function?
tardy iron
sick mural
wait you can assign an integer a function?
that's initializing p to the output value of pop()
sick mural
that makes more sense
 gilded swift
Too bad Arduino doesn’t support auto, or it didn’t last I tried like a year ago..
sick mural
also how does functions like digitalRead() return text? i would look at the original function but i can't find it
 solemn cliff
gilded swift
Too bad Arduino doesn’t support auto, or it didn’t last I tried like a year ago....
solemn cliff
gilded swift
Too bad Arduino doesn’t support auto, or it didn’t last I tried like a year ago....
I'm pretty sure it does
tardy iron
sick mural
also how does functions like digitalRead() return text? i would look at the orig...
i think it returns an integer. the surrounding code might print or format it as a (decimal) string
sick mural
how do you return a float? i've tried but it keeps erroring
tardy iron
showing the actual code and error messages would help
gilded swift
solemn cliff
I'm pretty sure it does
Trying now and I guess it works lol
void setup() {
  // put your setup code here, to run once:
  pinMode(1, INPUT);
}

void loop() {
  // put your main code here, to run repeatedly:
  auto t = digitalRead(1);
}```cool
tardy iron
gilded swift
Trying now and I guess it works lol
might depend on platform? avr-gcc might be an older GCC version than other platforms
gilded swift
that was for ESP32-S2 so maybe that's true
nope, works on the 328p so maybe i just was doing something wrong
sick mural
here's a basic version c++ void foo() { float value = 0; value = 0.25;// some code sets it // some stuff return value; }
tardy iron
sick mural
here's a basic version ```c++
void foo() {
float value = 0;
value = 0.25;// ...
you need to replace void with your actual return type float
sick mural
so would that be c++ float foo() { float value = 0; value = 0.25;// some code sets it // some stuff return value; }
tardy iron
sick mural
so would that be ```c++
float foo() {
float value = 0;
value = 0.25;// some ...
that looks correct. (i haven't tested it)
sick mural
now vscode gives the error cannot overload functions distinguished by return type alone on foo()
tardy iron
sick mural
now vscode gives the error `cannot overload functions distinguished by return ty...
that probably means you have another copy of foo() somewhere. or maybe you declared it as void foo(); earlier?
tardy iron
can you show us your entire code? it really sounds like there's another copy somewhere
sick mural
the code's on github if you want to take a look https://github.com/TheDuckBoi/money-counter
the code's in the src folder and the header file is in the include folder
tardy iron
what's the full error message, and what's the actual function name?
sick mural
error name: "cannot overload functions distinguished by return type alone" function name: "readButtons()"
 tardy iron
sick mural
error name: "cannot overload functions distinguished by return type alone" funct...
tardy iron
sick mural
error name: "cannot overload functions distinguished by return type alone" funct...
on this line https://github.com/TheDuckBoi/money-counter/blob/master/src/main.cpp#L25 you're calling it as a void function, because you're not assigning its return value anywhere. there should be a warning about that as well
sick mural
there is no warning in main.cpp
tardy iron
Arduino tries to be helpful and synthesizes function prototypes if they're missing. that might be cheating you out of a proper warning here
tardy iron
so do you want the function to modify an input by reference, or return a value? it looks like you're trying to do both for some reason, but (some of?) the calling code expects it to modify the input by reference?
tardy iron
so you should decide which interface you want to make. doing both doesn't make a lot of sense, unless you have to be compatible with something unusual
sick mural
no it was just part of some old code that didn't end up working
i've been fighting against this for a while
thx for the help
is there a simple way to invert a float to turn it from 0.34 to -0.34?
 leaden walrus
foo*=-1;
cerulean knoll
next thing to watch out for, is comparing floats for equality can be fraught for technical reasons involving the way they're represented in memory
so generally better to do something like
#define TOLERANCE .0000001
float a = .03;
float b = .03;
if ((a - b) < TOLERANCE) {
    // they're equal
}
otherwise you can get a situation where .00000000000000001 is not equal to .000000000000000009999 or similar
sick mural
I did notice that
solemn cliff
cerulean knoll
so generally better to do something like
```
#define TOLERANCE .0000001
float a ...
also abs(a - b)
 inland gorge
bool sorta_equal(float a, float b) { return abs(a-b) < 0.001; }
lololol
solemn cliff
it's C++ right ? can't you overload an operator ? 😁
 stable dome
Hey there, I'm looking for reference code to display a gif on a GizmoTFT/CircuitPlaygroundBLE combo. I see there's an example on adafruit, but no source code to reference 😦
https://learn.adafruit.com/frozen-gizmo-pendant-with-temperature-sensing/software
Would anyone have a recommended resource for getting started with displaying gifs on GizmoTFT?
solemn cliff
it's probably based on or similar to this code with a different display setup (found in the gizmo guide) https://learn.adafruit.com/pyportal-animated-gif-display/set-up-arduino
stable dome
I did pass by that guide, I was cheekily hoping that there was a little more of a straightforward route to get started. But it seems like I'll have to just jump into the rabbit hole
 vague bramble
hi everyone. trying out a new circuit playground bluefruit i got free with an order. seems like a nifty board.
blink blink blink
 north stream
solemn cliff
it's C++ right ? can't you overload an operator ? 😁
north stream
solemn cliff
it's C++ right ? can't you overload an operator ? 😁
Now I'm imagining a Closefloat class where the == operator does an approximate match, but then I'm wondering how to set or compute epsilon. Maybe a fraction of whichever the largest number is? I figure if we're going to do this, may as well do it all the way.
cerulean knoll
sounds like you need a CloseFloatEpsilonStrategy
sick mural
Wat?
vague bramble
does anyone know if the adafruit_circuit_playground.h library disables serial communication? i tried to initialize serial output on my circuit playground bluefruit, but i'm getting nothing. another sketch where i didn't use that library allowed the serial monitor just fine.
i can't find anything in the library file that mentions serial
vague bramble
hmm... i got it to do something while using the library. maybe it doesn't like that i'm trying to use millis().
north stream
Note that the serial is handled in the loop outside calling the loop() routine: if your loop() doesn't exit, the serial handler doesn't get called.
 grave mortar
HardwareSerial SerialPort(2); // use UART2
void setup()
{
SerialPort.begin(57000, SERIAL_8N1, 16, 17);
}
void loop()
{
SerialPort.print( 0x22 );
SerialPort.print( 0x7e );
SerialPort.print( 0x44 );
SerialPort.print( 0x12 );
SerialPort.print( 0x66 );
SerialPort.print( 0x44 );
SerialPort.print( 0x22 );
delay(2000);}
I'm trying to send this over UART using but after I send each byte I need to pause for two bits, how would I do that?
tardy iron
grave mortar
> HardwareSerial SerialPort(2); // use UART2
>
>
> void setup()
> {
> Seri...
where is that requirement coming from? do you have a link to the spec?
tardy iron
grave mortar
directly sniffed the current uart
sniffed using what software or analyzer? is your two bits pause actually the stop and start bits, or in addition?
tardy iron
what chip are you using? usually anything that's described as a UART does asynchronous start/stop serial, so your SERIAL_8N1 seems like it should take care of setting that up (8 data bits, no parity, 1 stop bit; the start bit is implied)
grave mortar
esp32
vague bramble
north stream
Note that the serial is handled in the loop outside calling the `loop()` routine...
https://github.com/adafruit/Adafruit_nRF52_Arduino/issues/653
i found this discussion that refers to another adafruit nRF52840 board. apparently, a lot of libraries include a serial handler, but if you include none of them with this chip, the serial call falls flat. i added <Adafruit_TinyUSB.h>, and the serial handler kicked in. Strangely, <Arduino.h> didn't work.
GitHub
Describe the bug Adding Serial to the blinky example results in error /tmp/arduino_modified_sketch_618918/Blink.ino:41: undefined reference to `Serial' Set up (mandatory) PC & IDE :...
The lack of serial support with Arduino.h is a known issue per the discussion.
 fresh pendant
https://www.adafruit.com/product/5395 should I be able to do bluetooth HID with original generation ESP32 in C++/Arduino? does anyone have a link to an example? I see there's esp-idf documentation about it https://docs.espressif.com/projects/esp-idf/en/latest/esp32/api-reference/bluetooth/esp_hidd.html but hoping there's an arduino lib to make it .. easy.

This dev board is like when you're watching a super-hero movie and the protagonist shows up in a totally amazing costume in the third act and you're like 'OMG! That's the ...
 tribal briar
Hello all, I need to #define the version of my PCB in my Arduino code because of an error in the current PCB that will be fixed in the next version.
I'm trying to define the version number at the top of the main sketch file so it's easy to remember to change, But the #ifdef statement in the .h file where this info is needed is not working when it's defined in the main sketch.
Main sketch;
#define MAIN_BOARD_V02_01

#include "Pinmap.h"
#include "Controller.h"
#include "Buttons.h"
#include "Menutree.h"
Pinmap.h
#pragma once

#define DISPLAY_RS_PIN 0
...(lots of pin defines)

//Version specific pins
#ifdef MAIN_BOARD_V02_01

#define SX1509_INT_PIN 40 //add bodge wire between the top of C400/R400 and Spare.3

#endif
This is the error when compiling;
Buttons.cpp:12: error: 'SX1509_INT_PIN' was not declared in this scope
static const int INTERRUPT_PIN = SX1509_INT_PIN;
The code works if I put "#define MAIN_BOARD_V02_01" at the top of the Pinmap.h file
Can I put a #define in the main sketch so all of the .h files can see? If not, where can I define the board version (Later versions will be using a different GPIO expander for the buttons, and will have two versions of button code.)
 spring sand
are there any arduino nanos with esp chips in it?
cerulean knoll
Funny you mention it, the Nano IOT actually does have an esp32 on it
there's just no way to program it afaik. The u-blox NINA-W10 is an esp32 according to its datasheet
spring sand
ok i will just stick tk the esp
north stream
tribal briar
Hello all, I need to #define the version of my PCB in my Arduino code because of...
The .h files will all see it when it compiles the main sketch, but other modules (such as Buttons.cpp) won't see it. You'd have to either add the #define at the top of each file that depends on it, or have a separate .h file that's included in each such module. Alternatively, you could use some other technique besides preprocessor directives.
tribal briar
north stream
The .h files will all see it when it compiles the main sketch, but other modules...
Why is it that the .cpp files can't see it if it's declared it at the top of the main sketch before the "#include" statements? I thought the #includes were essentially like pasting the .h files into the place of the #include? Doesn't this #define it befor the .h and .cpp files are compiled?
As for alternatives, is there a way to compile in Aduino with something like a command-line argument? Where I can pass in the version number when I start the compiler?
north stream
tribal briar
Why is it that the .cpp files can't see it if it's declared it at the top of the...
Because the sketch and .cpp files are compiled separately. Internally, it complies the sketch into an object (.o) file, and each .cpp file into another object file, then it links all the object files together into a single executable.
My usual approach is to use extern declarations to point to a definition that's set somewhere. For example, you could have another .h file named config.h that simply has an external declaration for interrupt_pin:
extern int interrupt_pin;
Then in your sketch, you'd have your #define, a definition for interrupt_pin, and an assignment:
#define MAIN_BOARD_V02_01

#include "config.h"

#ifdef MAIN_BOARD_V02_01
int interrupt_pin = SX1509_INT_PIN;
#else
int interrupt_pin = whatever;
#endif
Then in Buttons.cpp, you'd include config.h again and then you could refer to interrupt_pin and it would be the same variable as the one in your sketch:
#include "config.h"

...

// do something with interrupt_pin
Note that since it's now a shared variable, you wouldn't declare it as static.
 hollow pivot
I have no idea how to code with Arduino
 loud dagger
how can i interface with the MCP23017?
north stream
loud dagger
how can i interface with the MCP23017?
It has an I2C interface, so you should be able to talk to it from anything that has an I2C host interface.
loud dagger
i have them connected but the code doesn't work
that does not matter anyways im switching to codepython
arduino is broken on my QT Py
 manic jewel
loud dagger
arduino is broken on my QT Py
manic jewel
loud dagger
arduino is broken on my QT Py
I suggest you summarize the problems with using Arduino with your QT Py. Hopefully someone can help here.

 cedar mountain
 crystal frigate
Can someone validate what the transistor and resistor do in this speaker setup?
crystal frigate
Can someone validate what the transistor and resistor do in this speaker setup?
It looks like it's just a power amplifier. The Uno's GPIO pin isn't strong enough to drive the speaker directly, so its current through the resistor is multiplied by the transistor's gain.
crystal frigate
Ah okay. I’m making kids toys and I need to figure out an ideal audio setup, coming from an RP2040
 modern sundial
Hello. I'm trying to add IR remote to a existing neopixel code but i'm gettin this error and not sure how should i make it work. ``` ide
C:\Users\claus\Downloads\Lava_Lamp.ino\Lava_Lamp.ino.ino: In function 'void loop()':
C:\Users\claus\Downloads\Lava_Lamp.ino\Lava_Lamp.ino.ino:38:9: error: 'received_data' was not declared in this scope
received_data = IR.decodedIRData.decodedRawData;
^~~~~~~~~~~~~
C:\Users\claus\Downloads\Lava_Lamp.ino\Lava_Lamp.ino.ino:43:9: error: 'received_data' was not declared in this scope
if (received_data == 0xBA45FF00)
^~~~~~~~~~~~~
C:\Users\claus\Downloads\Lava_Lamp.ino\Lava_Lamp.ino.ino:44:31: error: expected primary-expression before 'color'
theaterChase(uint32_t color, int wait)();
^~~~~
C:\Users\claus\Downloads\Lava_Lamp.ino\Lava_Lamp.ino.ino:44:38: error: expected primary-expression before 'int'
theaterChase(uint32_t color, int wait)();
^~~
exit status 1
Compilation error: 'received_data' was not declared in this scope
#include <IRremote.h>
#include <Adafruit_NeoPixel.h>
#ifdef __AVR__
 #include <avr/power.h>
#endif

#define LED_PIN    6


#define LED_COUNT 10

IRrecv IR(3);

Adafruit_NeoPixel strip(LED_COUNT, LED_PIN, NEO_GRB + NEO_KHZ800);


void setup() {
  IR.enableIRIn();
#if defined(__AVR_ATtiny85__) && (F_CPU == 16000000)
  clock_prescale_set(clock_div_1);
#endif


  strip.begin();
  strip.show();
  strip.setBrightness(240);
  Serial.begin(9600);
}


void loop() {
  if (IR.decode()) {
        received_data = IR.decodedIRData.decodedRawData;
        Serial.println(received_data, HEX);
        IR.resume();
    }

    if (received_data == 0xBA45FF00)
        theaterChase(uint32_t color, int wait)();


}
void theaterChase(uint32_t color, int wait) {
  for(int a=0; a<10; a++) {
    for(int b=0; b<3; b++) {
      strip.clear();

      for(int c=b; c<strip.numPixels(); c += 3) {
        strip.setPixelColor(c, color);
      }
      strip.show();
      delay(wait);
    }
  }
}
any chance you could format that with the whole thing between triple backticks?
it looks a lot better
when there are multiple lines
Not sure why it's should like that because the whole text is in between
cerulean knoll
you put three backticks at the start, and three backticks at the end, with no backticks in between? as in:
```
all my code
and all my lines
```
all my code
and all my lines
and even ````c` to get colors
cerulean knoll
woah, fancy
cerulean knoll
modern sundial
```
#include <IRremote.h>
#include <Adafruit_NeoPixel.h>
#ifdef __AVR__
#includ...
one problem is that you need to declare the variable received_data in your loop function
another is that, in your loop function, when you call theaterChase, you should not be providing the type of the arguments
solemn cliff
you seem to have pasted the theaterChase declaration, you are supposed to provide a color and wait value, like that for example:
theaterChase(0xFF00FF, 200);
(purple animation with 200 ms step if I'm not mistaken)
cerulean knoll
rather than
void loop() {
  if (IR.decode()) {
        received_data = IR.decodedIRData.decodedRawData;
        Serial.println(received_data, HEX);
        IR.resume();
    }

    if (received_data == 0xBA45FF00)
        theaterChase(uint32_t color, int wait)();


}
you should have something like
void loop() {
    int received_data;
    if (IR.decode()) {
        received_data = IR.decodedIRData.decodedRawData;
        Serial.println(received_data, HEX);
        IR.resume();
    }

    if (received_data == 0xBA45FF00)
        theaterChase(0xFF00FF, 200);
}```
for exampleI think there's a superfluous ()
modern sundial
cerulean knoll
rather than
```c
void loop() {
if (IR.decode()) {
received_data = IR.d...
Hy. Thanks for the input. The code works with your revision. I gotta upload it and see how it works and maybe work it from here to create functions for other buttons.
crystal frigate
Would anybody be able to help out with this?
import time
import alarm
import audiomixer
import busio
import digitalio
from digitalio import DigitalInOut
from digitalio import DigitalInOut, Direction, Pull
from random import randint
from audiomp3 import MP3Decoder
from adafruit_pn532.spi import PN532_SPI
import adafruit_tpa2016

# SPI connection:
spi = busio.SPI(board.SCK, board.MOSI, board.MISO)
cs_pin = DigitalInOut(board.A3)
pn532 = PN532_SPI(spi, cs_pin, debug=False)

ic, ver, rev, support = pn532.firmware_version
print("Found PN532 with firmware version: {0}.{1}".format(ver, rev))

pn532.SAM_configuration()
I'm getting this error:
Traceback (most recent call last):
  File "code.py", line 21, in <module>
  File "adafruit_pn532/spi.py", line 51, in __init__
  File "adafruit_pn532/adafruit_pn532.py", line 161, in __init__
  File "adafruit_pn532/adafruit_pn532.py", line 342, in firmware_version
RuntimeError: Failed to detect the PN532


My DIP switches are in the right place.
And all my connections are tested, and good
gilded swift
crystal frigate
And all my connections are tested, and good
Swap the dip switch. The pin towards the lettering “on” means it’s on. Right now yours is 01
crystal frigate
For the SPI? it should be.
 heavy star
Isn’t 01 right for SPI there?
crystal frigate
Yeah
heavy star
… crazy idea, try swapping, in case it’s backwards?
heavy star
Couldn’t hurt
heavy star
Well, if you get I2C working on that, I’d say it at least works
gilded swift
Oh sorry, thought you were doing i2c
But as mentioned, it will at least validate it works
crystal frigate
true
heavy star
gilded swift
Oh sorry, thought you were doing i2c
I think we all need more sleep XD
gilded swift
I suspect you might also have the MISO/MOSI lines swapped
heavy star
MISO/MOSI is the bane of my existence
gilded swift
It is like uart, easy to get mixed up
For most data collection, i2c is usually the best protocol to use. You rarely need more than 400kHz to read a sensor or even an NFC tag
gilded swift
crystal frigate
Even though I already have an I2C connected?
It’s a shared bus protocol. So long as the addresses don’t clash, you can usually put as many as the bus can handle
The biggest consideration is bus capacitance, but that can be solved with buffers and stronger pull-ups. People rarely use enough or have a bus long enough to worry about those things
And conflicting bus addresses can be solved by using i2c multiplexers
crystal frigate
Okay! I2C was able to find it.
    uid = pn532.read_passive_target(timeout=0.5)
    print('.', end="", flush=True)
    if uid is None:
        continue
    print('Found card with UID:', [hex(i) for i in uid])
.Traceback (most recent call last):
File "code.py", line 58, in <module>
OSError: [Errno 22] Invalid argument
58 being print('.', end="", flush=True)
 brazen falcon
gilded swift
And conflicting bus addresses can be solved by using i2c multiplexers
brazen falcon
gilded swift
And conflicting bus addresses can be solved by using i2c multiplexers
Or address translators if you don't really need multiple extra busses
If you just have one address conflict can just use something like an LTC4316
 livid osprey
crystal frigate
Would anybody be able to help out with this?
```import board
import time
import ...
livid osprey
crystal frigate
Would anybody be able to help out with this?
```import board
import time
import ...
Did you connect the SS pin to A3?
crystal frigate
no
modern sundial
Hi. I have a LED(WS2812b) rope and IR Remote that was working ok with 10 LEDs. I have extend it to 40 LEDs(in the code too), all LEDs are working but now it show me different HEX codes then usual when i press the buttons. What's going on?
north stream
It could be the PWM light from the LEDs is interfering with the IR receiver, or the electrical noise is injecting errors.
modern sundial
north stream
It could be the PWM light from the LEDs is interfering with the IR receiver, or ...
Any tips on what i could do to make it work? Thanks! 🍻
north stream
You could try powering the LEDs and the logic separately (with a shared ground so the LEDs will have a reference for the data input) to see if it's power supply issues. You could put something opaque between the LEDs and the IR receiver, if it goes back to how it had been, that would tend to point to an optical interference issue.
modern sundial
north stream
You could try powering the LEDs and the logic separately (with a shared ground s...
Thanks. I'm going to look for a schematic.
 edgy ibex
Is there a setting anywhere to change the color of compilation error messages in the Arduino IDE? I find the red on black that seems to be the default is completely unreadable. Something like yellow on black would be a **vast **improvement.
 thorny lintel
Hey everyone, I want to implement a 3 way switch into my latest Arduino project to select between three modes in the code, what's the best way to do this?
I'd like to use a bog standard switch to select between 3 modes of movement for a stepper motor driver

I'm currently designing the PCB and would like to get the traces and layout done so I can get it ordered, and whilst I am waiting for it I'll figure out the code
I'm trying to google but a lot of results online refer to a momentary switch to select the mode, can't find much about dip switches
Ah okay I see why people are using momentary, it's a lot simpler
north stream
edgy ibex
Is there a setting anywhere to change the color of compilation error messages in...
There's a thread here that describes how to edit the theme.txt file to change that https://forum.arduino.cc/t/cant-read-arduino-editor-error-message-colors/86644
north stream
thorny lintel
Hey everyone, I want to implement a 3 way switch into my latest Arduino project ...
You can use a 3-position switch (generally slide or toggle) or a pair of on/off switches (DIP switches are a popular option). And, as you pointed out, you can use momentary switches and have the code keep track of things.
thorny lintel
north stream
You can use a 3-position switch (generally slide or toggle) or a pair of on/off ...
I've been jotting up the PCB and it turns out I'm not going to be able to reach around the back of the project to access the button
How easy is it to implement an on off mode select? As in, each time you power it off and turn it back on, it goes to the next mode?
pine bramble
I would work out the mass (non-volatile) storage first. ;) On the RP2040 I found it especially easy as it has a large memory map for the QSPI flashROM space.
Then when it cold boots you just read from flashROM what you needed to retain when power was off.
I read in an entire Forth source code program after a cold boot, on RP2040, that way (from flashROM space).
Dr. Ting's scheme for eForth v7.x on STM32F4xx rewrote the entire flash space to 'save' the current state of the machine, it was always addative (had to zero out the flash storage to reduce it in size, at all).
But, you could do it from a serial terminal (no host PC compiler whatsoever). ;)
'EEPROM' is an idea used for the Arduino Uno R3, iirc. (or probably, any AVR).
north stream
thorny lintel
I've been jotting up the PCB and it turns out I'm not going to be able to reach ...
It may be easier to have a remote button. Otherwise, you'll either need a non-volatile memory (FRAM, battery backed RAM, EEPROM, flash, etc.) to remember the current mode. What's the use case? Big heavy object sitting on the floor where it would require moving furniture to get to the back of it? Wearable where the brains are out of reach? Something else?
thorny lintel
Ah okay, it sounds a bit out of my league to be honest
It's just a wall art piece that rotates, sits very close to the wall and you just couldn't get behind it to press any buttons
Designed a gearbox that gets powered by a Nano and a 28byj-48 stepper

Thought I'd quickly design a PCB so I can hard mount the electronics behind it, and to save space, wires get messy very fast

I'll abandon the mode select for now as I need to get this in production, maybe in the future!
north stream
thorny lintel
Ah okay, it sounds a bit out of my league to be honest
It's just a wall art pie...
A couple more thoughts: it's mechanical, you could have a mechanical mode memory instead of an electronic one. Also, how would you turn it on and off? Maybe you could make that control do double duty in a simpler way.
thorny lintel
On and off would just be done at the plug
It's not going to be fragile, but the more times you try and reach behind it or take it off the wall, you're increasing the odds a customer damages it
Mechanical mode memory?
north stream
Oh, it's going to be powered by a plug-in supply or somesuch? A mechanical memory might be something like a cam turned by a motor that actuates switches or optointerrupters or hall effect sensors or whatever in sequence. At power up, it reads the switches to determine the current state, then drives the motor until the next switch operates.
thorny lintel
Ooooo I like the sound of that, okay, version 2 gets more mechanised then
north stream
One advantage of a mechanical memory like that is that it's a physical object, so you can have a visual indication of what the mode is (and will be) for "free".
edgy ibex
Just a random rant before I turn in. I love Arduino - there's just nothing that beats coding to the bare metal on a constrained device. In a language that does not give you a safety net of any sort.
And with that, I will bid you all a good and restful night (or whatever). May your hardware always work, and your code never crash.
north stream
Using microcontrollers felt like coming home to me, as my first computer has 768B of RAM, so I had to program it in assembler, which is only one level below C.

 thorn trout
Hello all I’m newbie here, I working on a acrylic base project and I am looking for three separate addressable LED strips that I can combine into one power supply.. is this possible? TIA
cedar mountain
thorn trout
Hello all I’m newbie here, I working on a acrylic base project and I am looking ...
Yep, that should be no problem. If the strips are of the same type, they'll take the same input voltage, so you can just connect their powers and grounds together on a common supply.
gilded swift
cedar mountain
Yep, that should be no problem. If the strips are of the same type, they'll take...
So long as the supply can handle the load
Depending on total number of LEDs, you’d need at least 5A per 60 LEDs to account if they are run full brightness
thorn trout
Thanks
edgy ibex
Using microcontrollers felt like coming
 supple turret
Fnaar
edgy ibex
Do the Arduino C compilers set a compiler specific #define that I can use to verify I'm compiling for Arduino - ESP32- S2 in particular. As an example, MSVC under Windows defines _MSC_VER, so a line of the form
#ifdef _MSC_VER
can be used to limit code in a "portable" application to just compiling under MSVC. Likewise __GNUC__ on Raspberry Pi identifies the g++ toolchain on a PI. I'm looking for something similar for Arduino.
leaden walrus
yes
there's a def for ESP32
not sure if there something specific to determine ESP32-S2 specifically
you can see some of these by checking the (very long) compile line in the arduino ide output when compiling a sketch
there are several -D command line defines done
pine bramble
edgy ibex
Do the Arduino C compilers set a compiler specific #define that I can use to ver...
boards.txt for samd21 and check extra build flags iirc.
ESP32 I have not done this for.
leaden walrus
there are board specific defines, like ARDUINO_ADAFRUIT_FEATHER_ESP32S2 if that's useful
 deft flame
Hello, I have been attempting to use differntial mode on both arduino zero and Seeduino xiao which use the same mcu. First I used my own analog config but now I went just to using the simple code below
int sensorPin = A0;
int16_t sensorValue = 0;

void setup() {
  Serial.begin(9600);
  ADC->CTRLB.bit.DIFFMODE = 1;
}

void loop() {
  sensorValue = analogRead(sensorPin);
 Serial.println(sensorValue);
}
However I get the same behavior - if I connect a 1.5V battery from ground to A0 I get readings of around 230, while if I do it the other way around I get readings of -90. Any ideas how to fix this.
edgy ibex
leaden walrus
you can see some of these by checking the (very long) compile line in the arduin...
Got it sorted: ESP_PLATFORM seems to be as close as I can get. I don't see the command line in the compile debug output of the IDE, but taking a screen shot during compile with Process Explorer running was enough to catch it in the act.
pine bramble
I did a fairly careful study of platformio and the Arduino IDE and saw pretty much identical output in both environments.
The Arduino IDE echos all errors to the console (contolling tty) in Linux so if you start if from a terminal (instead of a dock of some sort) you can capture all of it.
Or just use the lower window (it scrolls) in the Arduino IDE.
 sacred ivy
Can I just have another set of eyes on my PID code? Im pretty sure I got all the terms. Derivative time happens once per second. Most code I can find online doesnt take use of interrupts and thats when its triggered. It does look like this all works.
signed int Intergral;
signed int Error;
unsigned short PreviousError;
unsigned int TempVariable;
unsigned int SetTemperature = 150;
unsigned int Derivative;
unsigned char PIDoutput;

unsigned char PIDLoop(void){
    if (DerivativeTime==1){     //check to see if its time to do math
        Error = SetTemperature - CurrentTemperature;
        Intergral = Intergral + Error;

        //check Intergral error to make sure it doesnt get too large

        if (Intergral >= 255){Intergral=255;}
        if (Intergral <= -255){Intergral=0;}


        PreviousError = Error;
        Derivative = (Error - PreviousError)/DerivativeTime;

        PIDoutput = (Kp*Error) + (Intergral/Ki) + (Kd*Derivative);

        //set min and max output for the PID output function
        //if (PIDoutput >= 250){PIDoutput=250;}
        //if (PIDoutput <= 50){PIDoutput=50;}
        //PIDoutput1=~PIDoutput; //NOTE HAVE TO INVERT OUTPUT FOR SCR
        //Error = 0;
        DerivativeTime=0;

    }

 return PIDoutput;
}
Im unsure if my derivative term should be a signed int too
livid osprey
sacred ivy
Can I just have another set of eyes on my PID code? Im pretty sure I got all the...
Functionally it looks fine, but why are you dividing by Ki instead of multiplying?
sacred ivy
livid osprey
Functionally it looks fine, but why are you dividing by Ki instead of multiplyin...
I knew this would come up: Im not using Floats or doubles, so the way around it is to divide by whole numbers. Ive seen in practice that people usually use decimals numbers for the Ki portion
(but thats easily changed back to multiply)
I might make more sense to be, but the I term is bounded anyway
livid osprey
That’s fair, so long as you make note of that wherever the coefficients are defined. Only other concern would be the ability to externally clear the error, in the case of set point changes or timeout handling.
sacred ivy
They are defined way above above, I just didnt post it 😅 I thought it might be irrelevant lol.
As you saw, I did have the error set to 0 after doing the math, but I might revert it. Im basically going to have to see how it works now that Ive changed some vars around.
livid osprey
sacred ivy
They are defined way above above, I just didnt post it 😅 I thought it might be ...
Sorry, I meant integral, not error. The accumulated error is often reset when the setpoint changes.
sacred ivy
hmm I could add in a conditional that says if the new SP is not equal to the current one, to reset the accumulated error. But realistically, Im going to have a set point near where I want and adjust it on the fly, so probably +/- tens of degree's.
I still have to experiment 😅 right now Ive taken it all apart so I can solder in connections for a TTL to USB signal, so I can watch things in real time
livid osprey
Well, there are plenty of additions or adjustments one can make to improve PID stability, and it likely won’t be too late to review after acquiring some experimental data haha
sacred ivy
Look in the #show-and-tell channel. Basically an air fryer turned into a coffee roaster, so air.
cerulean knoll
nice, I made a raspberry pi PID for my espresso machine
together we could have a nice picnic
sacred ivy
It does look promising so far but my temps are consistently +25C above set point
cerulean knoll
what thermo are you usign?
livid osprey
Or at least some really nice coffee haha
sacred ivy
K type
cerulean knoll
ah yeah I mean the amplifier/adc
sacred ivy
one sec
livid osprey
Are you confirming your software-read temperatures with an external thermometer?
sacred ivy
I tested it to be sure, so I calibrated it at boiling water (as close as I can get it), room temp and close to freezing
It was spot on
Maxim might be expensive, but they make some good stuff
Im using a MAX31855 IC
cerulean knoll
I'm not sure I understand why you're dividing by the integral error?
something to do with fixed point?
sacred ivy
Most people use decimals/FPs so thats my way around it
ie if you are multiplying by 0.5, its the same as dividing by 2
livid osprey
Are you constrained by limited memory or computing capacity?
sacred ivy
its an 8 bit micro. I kind of just dont want it to be stuck doing math
I have so many interrupts happening tbh
livid osprey
Because I ran a pid loop on an arduino mega with floats and it was responsive enough
sacred ivy
ZCD,
Timer 1 (1 sec timer)
Timer 2 (Heater timer)
Timer 4 (PWM for the drum)
Timer 6 (Fan timer)
USART Int (not yet implemented)
cerulean knoll
wouldn't it be more typical to multiply, and then lshift by the fixed poin?
sacred ivy
livid osprey
Because I ran a pid loop on an arduino mega with floats and it was responsive en...
hmm. I could also be worrying for nothing lol.
I havent exactly timed it
cerulean knoll
I'm still confused about the multiplication thing but I will think about it a bit more, I might be being slow here haha
(maybe my brain doesn't have an FPU...)
also I'm kinda curious, that seems like a lot of timers
could you reduce the need for some of those by writing the code async?
might simplify things
sacred ivy
I like using interrupts, so the micro isnt sitting there "waiting".
livid osprey
Just be wary of the issues that could result from too many interrupts.
livid osprey
I usually reserve interrupts for the most timing-critical functions
cerulean knoll
a one second timer interrupt, that triggers a run of the loop
which gets a new pid value, sends a new heat control value, etc
livid osprey
Iirc longer interrupt functions can potentiall throw of timer-based functions…
sacred ivy
But basically what happens is this: When ZCD sees a "0" cross on the AC line, which is when the sine wave crosses, it triggers that interrupt. That interrupt then starts a timer to turn the heater OR Fan SCR for a certain length of time, and then it shuts off when the timer is done.
The PID loop happens once per second that updates that value. The fan timer is set by me currently but I thought of doing a bang bang loop if the temp goes over too much, so shut the heater off and blast air. Kind of an emergency mode.
The PWM timer for the drum speed kind of just runs on its own, its not really an interrupt.
livid osprey
And as far as I’m concerned, PID loops aren’t that critical in comparison
cerulean knoll
inspiring that you're doing this all on an MCU, I figured I'd use linux for the multitasking 😄
sacred ivy
It services the interrupts pretty quickly actually. I timed it once and it does it in microseconds.
But this is why Ive kept my interrupt code very short. So the main functions happen in main, while the interrupts just toggle a bit
livid osprey
That means you wrote good interrupt functions. I recall a guy who once tried to put all of his computation in an interrupt, and that ended very poorly.
sacred ivy
Oh yea, I read about keeping int code short.
Id post my whole code but I dont know if the bot will like it
cerulean knoll
github?
cerulean knoll
I'm curious how well your ZCD works. I'm just turning an SSR on and off
with no regard for how many pulses actually get through
cerulean knoll
I limited minimum pulse width to like, 30ms though
livid osprey
Interrupts are great for instant triggers like inputs that require immediate response (estop, namely) but for everything else that would typically be polled for, benefits are minimal.
sacred ivy
cerulean knoll
I limited minimum pulse width to like, 30ms though
thats long. Thats almost two full AC cycles (60hz)
cerulean knoll
yeah that's why I picked it, so I didn't have to worry as much about chopping on and off in the same AC cycle or whatever
but when I tried to drop down to like, 8ms or about 1 AC pulse, things got kinda wonky
have you tried zeigler nichols tuning?
sacred ivy
thats a new word to me, so no lol
cerulean knoll
how are you determining your PID coefficients?
cerulean knoll
if you turn on only P gain, and find the point where you start to go into stable oscillations around the setpoint
from there you can derive some usually decent I and D values from that P gain (called the "ultimate gain") and the period of oscillation
another reason I used linux is it was a lot easier to make a web UI and modify P/I/D online 🙂
although you could probably do this over UART
sacred ivy
thats why I have things unplugged. I basically paused the debugger to see the current temp and started it back up again haha
I need UART comms to watch things
cerulean knoll
isn't your I gain going to go the wrong direction?
I'm still so confused about the division lol
oh it's error / gain
idk still seems weird. Have you unit tested it?
verified that it comes out with the expected values?
cerulean knoll
I liked this video too: https://www.youtube.com/watch?v=uXnDwojRb1g
 rigid mantle
How could I make an on-screen keyboard with a Joystick with TFT FeatherWing?|||||||||||||||||||||||||||||||||||||||||||||||||||||||||||||||||||||||||||||||||||||||||||||||||||||||||||||||||||||||||||||||||||||||||||||||||||||||||||||||||||||||||||||||||||||||||||||||||||||||||||||||||||||||||||||||||||||||||||||||||||||||||||||||||||||||||||||||||||||||||||||||||||||||||||||||||||||||||||||||||||||||||||||||||||||||||||||||||||||||||||||||||||||||||||||||||||||||||||||||||||||||||||||||||||||||||||||||||||||||||||||||||||||||||||||||||||||||||||||||||||||||||||||||||||||||||||||||||||||||||||||||||||||||||||||||||||||||||||||||||||||||||||||||||||||||||||||||||||||||||||||||||||||||||||||||||||||||||||||||||||||||||||||||||||||||||||||||||||||||||||||||||||||||||||||||||||||||||||||||||||||||||||||||||||||||||||||||||||||||||||||||||||||||||||||||||||||||| _ _ _ _ _ _ https://www.adafruit.com/product/3321

Add a dazzling color display to your Feather project with this Adafruit Mini Color TFT with Joystick FeatherWing.It has so much stuff going on, we could not fit any more parts on the ...
sacred ivy
Oh, I wrote a whole flowchart of how the thing works too
https://github.com/chrissavage2300/Air-Fryer-Coffee-Roaster/tree/main/code
Might be out of date

GitHub
Contribute to chrissavage2300/Air-Fryer-Coffee-Roaster development by creating an account on GitHub.
deft flame
I am not doing anything with pin 13 in the software this is weird
Anyone here has zero to test if it happens for them too?
gilded swift
deft flame
I am not doing anything with pin 13 in the software this is weird
Do you have the serial monitor open?
rigid mantle
rigid mantle
How could I make an on-screen keyboard with a Joystick with TFT FeatherWing?|||...
I'll search for a repo.
deft flame
gilded swift
Do you have the serial monitor open?
Yes, but this doesn’t happen with some other cases where I do have it open so it’s still weird
 mossy folio
Hello everyone, we are trying to use this 10-channel spectrometer in Arudino (https://www.adafruit.com/product/4698) but we have noticed that there is a green LED light on the breakout board that shows when the board is powered that influences the spectrometer readings. Is there a way to disable the LED light on this board (and more generally all breakout boards)?

The Adafruit AS7341 10-Channel Light / Color Sensor Breakout is a multi-channel spectrometer, which is a special type of light sensor that is able to detect not only the amount of light ...
north stream
mossy folio
Hello everyone, we are trying to use this 10-channel spectrometer in Arudino (ht...
The easiest way is often to just remove the resistor going to the LED, or remove the LED itself.
mossy folio
Ah we are tryingn to build a 150 of these... That would be a lot of work. Is there no other way?
 native dagger
Cut a trace?
 rigid cedar
mossy folio
Ah we are tryingn to build a 150 of these... That would be a lot of work. Is the...
rigid cedar
mossy folio
Ah we are tryingn to build a 150 of these... That would be a lot of work. Is the...
If you order 150 of them they'll possibly ship without LED. IDK 🤷♂️
mossy folio
Who do I talk to?
gilded swift
mossy folio
Who do I talk to?
Probably email support
Adafruit Industries, Unique & fun DIY electronics and kits : Contact Us - Tools Gift Certificates Arduino Cables Sensors LEDs Books Breakout Boards Power EL Wire/Tape/Panel Components & Parts LCDs & Displays Wearables Prototyping Raspberry Pi Wireless Young Engineers 3D printing NeoPixels Kits & Projects Robotics & CNC Accessories Cosplay/Costum...
mossy folio
Ok thank you!
 mild steeple
heeeeeeeeeeeeeeeeeeeeeeeeeeeeeeeeelp
sweeet jesus
i cannot seem to upload a simple example sketch to my esp32 s2 qt py
when micropython was installed initially, the lsusb showed it as adafruit, after i upload an arduino sketch, or attempted to, it shows up as 303a:0002 Espressif ESP32-S2
but then again i am in some sort of boot mode
north stream
The Arduino IDE should still be able to upload to it
mild steeple
@north stream thank you after i reset it with factory firmware, worked better!
brazen falcon
mossy folio
Ah we are tryingn to build a 150 of these... That would be a lot of work. Is the...
Piece of electrical tape?
north stream
Dab of black nail polish?
 midnight flume
Hi, I have a pretty difficult request here and for this project I have 2 months. I need to create a radio receiver for frequencies anywhere between 10-40MHz, I then need to use that to sample a radio signal and create some sort of graph for it using an arduino. If anyone has any reading material or website links or even advice, it would be much appreciated.
north stream
midnight flume
Hi, I have a pretty difficult request here and for this project I have 2 months....
The usual approach for this sort of thing is known as a heterodyne receiver, where the incoming frequency is mixed with another frequency (produced by a "local oscillator", or LO), producing outputs at the sum and difference between the two frequencies. The advantage of this is you can vary the LO frequency to make the difference frequency (which is known as the "intermediate frequency", or IF) always the same, as well as lower and easier to process than the original incoming one. For example, you could have a local oscillator that could be adjusted from 11MHz to 41MHz, and you would tune it 1MHz higher (or lower) than the incoming frequency you want to receive (say, if you wanted to receive 15MHz, you would adjust the LO to 16MHz). Then after mixing, you'd have the sum (31MHz) and difference (1MHz) frequencies. Then you could amplify and process the 1MHz frequency which wouldn't change, making your circuitry simpler. https://www.hamradioschool.com/post/the-superheterodyne-receiver-frequency-mixing-and-the-intermediate-frequency
midnight flume
oh wow
north stream
Another possibly useful link is https://electronicscoach.com/superheterodyne-receiver.html. These should give you a starting place and some useful search terms.
midnight flume
wow thanks a lot @north stream
I'll look into it
i would need to build my own version of this with components
I have an oscillator at the moment
north stream
You may want to take the receiver part of the conversation to #help-with-radio but it's not required. There are some of us here who have built radio receivers so we might be able to provide advice or answer questions

An oscillator is a good start, the next step might be either an amplifier or a mixer.
midnight flume
north stream
An oscillator is a good start, the next step might be either an amplifier or a m...
right of course, I will also need an antenna, some capacitors and the usual, but is it possible to make the radio data save on the arduino so we can graph it or do something to it later(analysis).
north stream
It depends on what about the signal you want to monitor. The Arduino isn't fast enough to do much even at an intermediate frequency, so most builders use some sort of "detector" to extract information for the Arduino to monitor. The simplest is an "envelope detector", which simply determines the varying amplitude of the carrier wave. This is, of course, amplitude modulation, or "AM" radio.
There are fancier kinds of detectors to monitor other information or modulation.
This project might have some useful ideas https://duino4projects.com/diy-am-radio-with-arduino/ and even if you aren't going to use all-in-one chips like the Si4844, it can be worth looking at the data sheet to see how the chip works inside.
midnight flume
right
midnight flume
north stream
It depends on what about the signal you want to monitor. The Arduino isn't fast...
bearing in mind this is all happening at an altitude at ~30km, an evelope detector seems quite good, but how do I store the data so that I can read it later at ground level.
midnight flume
north stream
This project might have some useful ideas <https://duino4projects.com/diy-am-rad...
Also this project is done in KHz, whereas mine will require 10-40 MHz which is much higher
north stream
The principles are the same, you'd just have a different incoming and LO frequency (and possibly a different IF frequency, that's up to you)
 frigid osprey
My Feather board has a built in boot drive folder. Can I store files in here that I can read with the feather. I know you can do it with circuit python but idk about normal arduino. Ive tried looking for information on this but havnt found anything.
 solemn cliff
frigid osprey
My Feather board has a built in boot drive folder. Can I store files in here tha...
solemn cliff
frigid osprey
My Feather board has a built in boot drive folder. Can I store files in here tha...
the bootloader is only an interface for flashing the board, not a real drive
you can access the fat formatted CIRCUITPY drive from arduino, like this guide:
https://learn.adafruit.com/pyportal-animated-gif-display
I'm not sure what it takes to do it on the ESP32-S2 (which you have according to the boot drive name) but if you use a partition scheme with a dedicated fatfs section, there should be a way to do it, I don't know if there's a guide for the ESP version of the code though
modern sundial
Hello guys. I'm trying to add a external power source to my DC motor and i've been a bit confused seeing different videos on youtube but i've done the sketch in tickercad and seems to work. Just want to make sure that i'm not destroying something. Thanks!
 modern sundial
Hello guys. I'm trying to add a external power source to my DC motor and i've be...
modern sundial
modern sundial
Hello guys. I'm trying to add a external power source to my DC motor and i've be...
...with this simpe code the motor runs continuously without stop even when the code wasn't uploaded. I guess something is wrong somewhere .. ```
#define motorPin 3
void setup() {
pinMode(motorPin, OUTPUT);
}
void loop() {
analogWrite(motorPin, 255);
delay(3000);
analogWrite(motorPin, 0);
delay(3000);
}
 tardy zealot
Anyone here able to answer an ESP32/Bluetooth SMP protocol question?
 ebon zephyr
Anyone seen any code that allows a Bluetooth arduino to act as a ble hid host. Ie receive ble keypress? A bit like https://www.arduino.cc/reference/en/libraries/usbhost/keyboardcontroller/ but for ble
The Arduino programming language Reference, organized into Functions, Variable and Constant, and Structure keywords.
north stream
modern sundial
Hello guys. I'm trying to add a external power source to my DC motor and i've be...
The transistor and diode are both connected wrong. Since you have the black lead from the motor on the same breadboard row as the wire from ground, the motor is connected directly to the ground and will run continuously even if the transistor were not even present.
modern sundial
north stream
The transistor and diode are both connected wrong. Since you have the black lea...
So what is the correct wiring if you don't mind. I have followed a few youtube videos, re-check the connections and seems to be fine but not working properly and not sure how to make it work. Should i go with the positive motor wire to the diode? Thanks! 🍻
north stream
Positive motor wire is correct, it goes to the power supply. Negative motor wire goes to the collector of the transistor. Diode goes between the positive motor wire and negative motor wire (cathode toward positive). Transistor emitter goes to ground (I think you have that), and base goes to an Arduino GPIO via a resistor (I think you have that too).
modern sundial
north stream
Positive motor wire is correct, it goes to the power supply. Negative motor wir...
Think i have managed to sort it out. It works on the thing simulation and real life. Just to check if what you said aligns with my schematic. Many thanks! 🍻
 north stream
Yeah, that looks right (I'll admit I don't remember the pinout of the transistor but it looks plausible)
modern sundial
north stream
Yeah, that looks right (I'll admit I don't remember the pinout of the transistor...
Thank you for confirmation. Well, it works. My issue now is that the motor spins to slow. I have to connect the alternative battery to see if it increases the rpm.
@north stream I have connected a external power source like in the image, witch works but when i unplug the arduino from USB the motor still spins. What might be the issue? To gain high RPMs from the motor how should i proceed?(if i connect the 9v battery straigh to the motor runs faster).
 north stream
It could be a) the transistor isn't capable of switching that much current, or b) the transistor doesn't have enough current gain (you could try a smaller base resistor to see if this is the case).
modern sundial
north stream
It could be a) the transistor isn't capable of switching that much current, or b...
im using 2N2222 transistor. I have tried with a 2.2kohms resistor(recommended by someone else) but i get the same results. How i connect the battery at the circuit motor starts and spins.
north stream
I think the diode is backwards there
modern sundial
north stream
I think the diode is backwards there
Yes, the diode was the other way around and the other issues was at the connection of the Emitter/Collector pin witch was the other way around. Now it works! Many thanks for help! 🍻 ❤️
 potent vale
I'm having some trouble with an ESP-32 S3 feather. Every time I try to upload a sketch it disconnects and the port disappears. If I reset it it comes back. Anyone experienced this? Mac OS, Arduino 2.0.3
leaden walrus
that sounds like known current behavior
see here for some potentially related discussion:
https://forums.adafruit.com/viewtopic.php?p=955875
potent vale
Thanks. Sounds related but no resolution 😦
leaden walrus
do you get same behavior uploading a basic blink sketch?
potent vale
I can't get any sketches to upload. It drops from the port and uploading fails. I was able to install the circuitpython uf2 fine so the board seems to work just not with Arduino.
leaden walrus
that sounds like a different issue. in that forum post, there isn't any issue uploading. it's just a bit awkward, requiring a manual reset to get sketch running
are you getting messages in the arduino ide that say upload failed?
potent vale
I'm seeing similar port weirdness. I reset and Arduino sees the board. As soon as it finishes compiling and starts to upload the board is disconnected and uploading fails because the port isn't there.
leaden walrus
can you paste the arduino output here?
potent vale
Sure. While I've got CPy installed I just want to check if I've got a working REPL real quick.
leaden walrus
no worries. just whenever. if you've got something else loaded / doing other things now, can wait.
potent vale
leaden walrus
can you paste the arduino output here?
Here's the output.

If I hit reset the device comes back.

I also couldn't connect to it using the Chrome serial interface app (was going to try to factory reset it.)
Using an Adafruit USB C cable 🙂
I have two of this feather but I haven't tried to see if the other is behaving the same.
leaden walrus
that looks like the port is just not there to begin with
potent vale
If you look at the second shot it's connected. It disconnects on upload and automatically reconnects on reset 🙂
Get board info
 leaden walrus
not seeing that? looks like esptool is being launched, but the port specified doesn't exist.
 leaden walrus
ok. it's showing up in the port list.
have you ever been able to get a sketch to upload?
potent vale
It looked like it was uploading a sketch earlier (trying to connect an LCD). It seemed to finish but the sketch never ran (no serial output).
At that point I tried to upload blink and haven't had luck.
leaden walrus
have you tried putting it into rom bootloader mode yet?
potent vale
If I choose a generic dev module I get a different error.

Yes. It goes into bootloader mode and I get the ...BOOT directory.
leaden walrus
that's different
rom bootloader = hold boot button and press reset button
shouldn't get anything but a com port
potent vale
I've done that. I don't know what it's supposed to be doing.
leaden walrus
then try upload blink again
potent vale
More progress this time. I tried that before but maybe I reset it again before uploading.
Stuck here.
 leaden walrus
looks better. now press reset.
you're now in the spot described in that forum post
potent vale
We have blink... 🙂
potent vale
Already doing that 🙂
leaden walrus
and then try a "normal" upload and see if it takes
 leaden walrus
hmm. ok. one sec. let me see if i can reproduce that.
potent vale
If I do the rom bootloader again I can get an upload to work. The next upload fails as well.
FYI I bought two of the ESP-32 QT pys and got one up and running but wasn't able to use the board defs cloning the latest as prescribed in the docs. The ones installable through the board manager worked for the Risc V board though.
I didn't have any upload issues with the qt-py
 queen verge
Hi, I'm currently having a problem where when I plug in my Itsy Bitsy 32u4 5v to the USB port on my computer a red flashing light comes on and the board starts to get hot. There are no shorts in my wiring what should I do. (This happened with two different boards)
leaden walrus
queen verge
Hi, I'm currently having a problem where when I plug in my Itsy Bitsy 32u4 5v to...
please post in the forums with photos of your setup
https://forums.adafruit.com/
@potent vale i think i'm seeing the same general behavior. it's even happening with arduino ide 1.8.19.
ESP32 BSP = 2.0.6 (current latest)
potent vale
leaden walrus
<@368183141648826370> i think i'm seeing the same general behavior. it's even ha...
Alrighty. Glad it's not just me. 🙂 Thank you for the troubleshooting help.
leaden walrus
that forum post behavior is being looked into. i'll also mention this behavior. seems like maybe it's something with the ESP32 BSP. may be related / may not.
for now, can use the manual ROM bootloader mode as a work around. that seems to work at least.
potent vale
Is there a public ticket system that I can "watch"?
leaden walrus
that'd probably end up in the ESP32 BSP github repo
but i don't think one has been created yet
potent vale
I'll sub to the forum topic then. Thanks again.
leaden walrus
yah. that's probably the best place to watch for now at least.
 uneven gazelle
what's the difference between the feather m0 and rp2040?
north stream
Different kind of CPU. The M0 is an Atmel SAMD21 chip, and the RP2040 is a Raspberry Pi chip. They have different speeds and capabilities.
uneven gazelle
yes but like is one more capable than the other?
north stream
It depends on what you're doing. In general, the RP2040 is faster (higher clock rate and dual cores). But if you want a built-in analog output, the M0 has one and the RP2040 doesn't.
uneven gazelle
does the e-ink featherwing need an analog?
north stream
No, it's a fully digital peripheral
uneven gazelle
lovely - thank you!
why would the pi be half the price though? seems strange if its faster
north stream
The Raspberry Pi foundation has a lot of industry support for their low cost hardware, and they make the RP2040 chips available quite cheaply for their capability (you can buy the chips for $1 apiece).
uneven gazelle
ah that makes sense
north stream
Lots of info is available on the chip page if you're curious https://www.adafruit.com/product/5041
 keen dagger
Quick question the Arduino outputs 5V but I see some projects with 12V fans hooked up. There must be a component that takes another power source to supplement the fan
What would this kind of component be called?
cedar mountain
keen dagger
What would this kind of component be called?
Often people will use either a relay or a power FET to control higher-voltage power to other devices from a microcontroller.
keen dagger
Ok I have a relay says it is a single -road 5V relay with 10 Amps
It doesn't mention 12V though
keen dagger
keen dagger
Ok I have a relay says it is a single -road 5V relay with 10 Amps
Also I'm kind of translating this part, the product info is in Mandarin
If it doesn't sound correct please feel free to correct me
How do you know if a relay can provide enough Volts, say 12V
cedar mountain
keen dagger
How do you know if a relay can provide enough Volts, say 12V
A relay doesn't provide a voltage itself, it just turns on and off a connection to a power supply that creates the voltage, like a switch. The relay would typically have a maximum voltage that it can safely handle, although often they're designed for relatively high wall-power voltages, 100-200V.
pine bramble
Hi , I pulled my buttons internally but it is still "floating", reading the value of the button when it is not pressed. Buttons are grounded and program should read value when it is pressed. what can I change?


It always detects button[0] and dont move further in if else cycle
north stream
keen dagger
Ok I have a relay says it is a single -road 5V relay with 10 Amps
That may be an automotive relay, many of which take 12V on the coil so you might need a transistor and 12V supply to control it with an Arduino. At that point, you may as well just switch the fan with the transistor directly.
north stream
pine bramble
Hi , I pulled my buttons internally but it is still "floating", reading the valu...
The part of the code you posted looks correct, so I'm guessing the issue is either wiring or elsewhere in the code.
Note you could use loops to simplify the code: ```arduino
#define NBUTTONS 4
int buttonno;
for (buttonno = 0; buttonno < NBUTTONS; ++buttonno) {
pinMode(button[buttonno], INPUT_PULLUP);
}
int buttonCheck() {
int buttonno;
for (buttonno = 0; buttonno < NBUTTONS; ++buttonno) {
if (digitalRead(button[buttonno]) == LOW) {
return buttonno;
}
}
return NBUTTONS;
}
Can I pullup analog inputs? A0-A5. I connected button to analog inputs. Maybe thats a problem?
north stream
The analog pins are also fully functional digital pins, including pull-up functionality https://docs.arduino.cc/learn/microcontrollers/analog-input
cedar mountain
pine bramble
Can I pullup analog inputs? A0-A5. I connected button to analog inputs. Maybe th...
Also double-check the orientation of the buttons. They'll typically have 4 pins, used as self-connected pairs. So if you have it rotated 90 degrees, you'll be shorting the input pin directly to ground all of the time and the button will read as pressed.
rigid mantle
How could I make an on-screen keyboard with a Joystick with TFT FeatherWing?|||||||||||||||||||||||||||||||||||||||||||||||||||||||||||||||||||||||||||||||||||||||||||||||||||||||||||||||||||||||||||||||||||||||||||||||||||||||||||||||||||||||||||||||||||||||||||||||||||||||||||||||||||||||||||||||||||||||||||||||||||||||||||||||||||||||||||||||||||||||||||||||||||||||||||||||||||||||||||||||||||||||||||||||||||||||||||||||||||||||||||||||||||||||||||||||||||||||||||||||||||||||||||||||||||||||||||||||||||||||||||||||||||||||||||||||||||||||||||||||||||||||||||||||||||||||||||||||||||||||||||||||||||||||||||||||||||||||||||||||||||||||||||||||||||||||||||||||||||||||||||||||||||||||||||||||||||||||||||||||||||||||||||||||||||||||||||||||||||||||||||||||||||||||||||||||||||||||||||||||||||||||||||||||||||||||||||||||||||||||||||||||||||||||||||||||||||||||| _ _ _ _ _ _ https://www.adafruit.com/product/3321
Add a dazzling color display to your Feather project with this Adafruit Mini Color TFT with Joystick FeatherWing.It has so much stuff going on, we could not fit any more parts on the ...
 untold depot
Using a MCP23017 i2c breakout to add enough pins for SPI to the 2040 macropad would probably not be possible, right?
tardy iron
hm, the RP2040 does have SPI, but it might not be nicely broken out onto connectors on the MacroPad. translating I2C to SPI via an I/O expander seems like it would need some tricky custom glue code, especially if you wanted to reuse existing code libraries that are expecting SPI
untold depot
tardy iron
hm, the RP2040 does have SPI, but it might not be nicely broken out onto connect...
It's technically accessible over the OLED ribbon cable
But idk if I can easily break that out and still use the screen
tardy iron
if you want to use both the OLED and an off-board SPI device, you will need a separate GPIO to be the chip select for the other device
untold depot
I could maybe use the stemma and speaker lines to get the four lines needed but idk enough about SPI yet to know if that would work
 prisma birch
Hi there, I got a APA106 rgb led, but when I hold my button down it starts to flicker. I use a pull up button
With 1 button it works fine, but I'm using 9 buttons with rgb leds and a few of them don't flicker, the rest does
untold depot
untold depot
I could maybe use the stemma and speaker lines to get the four lines needed but ...
I'm just looking to connect the vs1053 breakout without using a separate MCU as a middle-man.
Maybe I just use the built in audio playback on the macropad and figure out how to implement usb host for external storage
tardy iron
yeah, the MacroPad doesn't seem designed as a general-purpose dev board, so lots of stuff that is present and might be helpful isn't broken out nicely on connectors
untold depot
Seems like a wasted opportunity
solemn cliff
it uses most pins anyway
but yeah no pads to break out remaining pins (or used SPI pins)
tardy iron
if you're good with fine-pitch soldering, adding wires to the FPC connector for the OLED might help. you'd probably still need to find a GPIO to use for chip select
solemn cliff
chip select should work as an expander pin
(assuming you use the SPI pins and not a mix of the stemma QT pins)
untold depot
tardy iron
if you're good with fine-pitch soldering, adding wires to the FPC connector for ...
I very much am not :(
tardy iron
i guess you could repurpose the Stemma QT connector for SPI if you're willing to cut the I2C traces and add wire patches for SPI. but you'd still need another pin for chip select
untold depot
tardy iron
i guess you could repurpose the Stemma QT connector for SPI if you're willing to...
Why would I need to cut the I2C traces and not just use a cut up stemma cable?
pine bramble
Hi people, maybe it's a silly question but I'm a beginner with Arduino. Does anyone know if I can mix a script written in Python into a script of Arduino? Thanks in advance
tardy iron
untold depot
Why would I need to cut the I2C traces and not just use a cut up stemma cable?
hang on, you might be able to repurpose the pins at the RP2040 level, i need to check
solemn cliff
well they are just pins, you can use the pins for anything, though they don't quite support hardware SPI, that's fine there's software SPI, but there are also pull ups on the I2C lines
solemn cliff
pine bramble
Hi people, maybe it's a silly question but I'm a beginner with Arduino. Does any...
nope
what is it you want to do exactly ?
untold depot
tardy iron
hang on, you might be able to repurpose the pins at the RP2040 level, i need to ...
If I could repurpose the usb port pins, I could hack up a cable to break it out.
tardy iron
solemn cliff
well they are just pins, you can use the pins for anything, though they don't qu...
the Stemma QT connector seems to be on GPIO 20/21, which is also available as SPI0. but yeah, you'd have to remove the pullups
pine bramble
solemn cliff
what is it you want to do exactly ?
I want to insert a Py code (voice assistant) into a raspberry pi or arduino. Is it possible?
solemn cliff
tardy iron
the Stemma QT connector seems to be on GPIO 20/21, which is also available as SP...
well not really it's RX (MISO) and CS, we need MOSI MISO or SCK for hardware SPI, so only 1 out of 3
tardy iron
solemn cliff
well not really it's RX (MISO) and CS, we need MOSI MISO or SCK for hardware SPI...
oh, the VS1053 needs two-way communication?
tardy iron
solemn cliff
well not really it's RX (MISO) and CS, we need MOSI MISO or SCK for hardware SPI...
you're right. i hadn't looked at the individual signal names, just for SPIn
solemn cliff
I'm pretty sure you need both ways to know if it's still playing, but also the goal is to list the files that are on the card and show them on screen
tardy iron
yeah. and taking a closer look at the MacroPad photos, there might simply not be enough space on the board to break out some of the desired signals using friendlier connectors
untold depot
solemn cliff
I'm pretty sure you need both ways to know if it's still playing, but also the g...
Yeah, the end goal is a labelled UI of sound banks
Think the macropad hotkeys circuitpython example, but triggering sounds rather than HID keypresses, as well as the text files defining the banks being on the sd card
solemn cliff
pine bramble
I want to insert a Py code (voice assistant) into a raspberry pi or arduino. Is ...
if the python code is for Micropython or Circuitpython, you can use a microcontroller board that is compatible with it and program the board in python (no arduino code), but if it's a desktop python library, then no, you would have to use a computer, like a Pi 3 or 4 or Zero, but not the pico
untold depot
Are there any other non-adafruit audio boards with sd storage I could use over I2C?
solemn cliff
there is UART boards
pine bramble
solemn cliff
if the python code is for Micropython or Circuitpython, you can use a microcontr...
Thanks for your response. So, if I purchase the Raspberry Pi 3/4/Zero I've got the option to insert the desktop python library (code) into the motherboard?
untold depot
pine bramble
Thanks for your response. So, if I purchase the Raspberry Pi 3/4/Zero I've got t...
The raspberry pi 3/4/0 are small computers with audio and video that you can install linux or another compatible OS to and then run your python code under the OS, just like your PC.
#help-with-linux-sbcs is your best bet.
untold depot
solemn cliff
there is UART boards
Could I UART through the gpio expander? I'd like to have the expander for additional knobs and buttons and stuff, but afaik I can't UART and I2C over the stemma. If I could UART through the I2C, maybe?
tardy iron
it does look like UART1 TX/RX are available on the same RP2040 pins as the I2C0 SDA/SCL that are on the Stemma QT connector, so you could maybe repurpose it for that?
solemn cliff
yeah but you're not gonna do UART and I2C at the same time
untold depot
tardy iron
it does look like UART1 TX/RX are available on the same RP2040 pins as the I2C0 ...
Then I can't GPIO expander :(
tardy iron
i wonder if there's a Seesaw option to do I2C/SPI translation
untold depot
solemn cliff
well you really need an additional board 😛
Darn, guess i'll go back to that plan.
pine bramble
untold depot
The raspberry pi 3/4/0 are small computers with audio and video that you can ins...
Thanks👍 👍
tardy iron
you could use the GPIO expander to bit-bang SPI, but it might not be as fast as you need, and i don't know how well the libraries support it in place of hardware SPI
the Seesaw firmware does seem to support UART I/O, but the default builds don't include it https://learn.adafruit.com/adafruit-seesaw-atsamd09-breakout/uart
untold depot
tardy iron
you could use the GPIO expander to bit-bang SPI, but it might not be as fast as ...
I'm honestly not sure how fast the VS board needs, tbh I don't understand what's being communicated. Is the controller MCU doing any of the audio work, or is it just telling it "play this, do that"
tardy iron
untold depot
I'm honestly not sure how fast the VS board needs, tbh I don't understand what's...
that is something i don't know at the moment. my guess is it's mostly for triggers, etc. because of the onboard SD storage
untold depot
tardy iron
that is something i don't know at the moment. my guess is it's mostly for trigge...
No worries. My plan was to use a KB2040 running arduino to pass the soundbank text files from the SD to the macropad for populating the UI, and the macropad running CircuitPython telling the KB2040 to "play this, do that, etc". See #help-with-circuitpython for last night's rambles
solemn cliff
the VS1053 plays on its own, it even does GPIO expander with 8 pins !
untold depot
ugghhhhh if it just had I2C
tardy iron
solemn cliff
the VS1053 plays on its own, it even does GPIO expander with 8 pins !
but from reading https://docs.circuitpython.org/projects/vs1053/en/latest/ it looks like the VS1053 doesn't drive the SD card on its own; it depends on the controller to read from the SD card and write back to the VS1053 (which are on the same SPI bus on the breakout board)
untold depot
So the breakout board is actually two separate "peripherals" on one board that can only talk to each other through the controller?
solemn cliff
tardy iron
but from reading https://docs.circuitpython.org/projects/vs1053/en/latest/ it lo...
oooooh I didn't get that
untold depot
As if they were separate boards?
tardy iron
untold depot
So the breakout board is actually two separate "peripherals" on one board that c...
that's what it looks like to me. it makes sense, because if you want to do filesystem access, that's a lot of extra code to put in a codec chip
solemn cliff
it does make sense that you wouldn't be able to access the SD card at the same time as the chip would if it did
that would be a mess
tardy iron
so unfortunately, it looks like you might need a separate controller board that can do SPI fast enough to copy audio data from the SD to the VS1053 for your desired playback rate
untold depot
Okay so soundboard -> kb2040 (since I already have some) -> macropad it is.
Any advice on getting the I2C link between the two controllers working? I'm not sure how to test one board without the other already working. Some example sketch I can put on the KB2040 that I can have the macropad read from?
just enough for me to assume the KB2040 is working, and tinker with the macropad
tardy iron
you'd need an I2C target mode library for the KB2040. i don't know what the status of that is, offhand
the Arduino Wire library might do it; i haven't checked
https://www.arduino.cc/en/Tutorial/LibraryExamples/MasterWriter has an example that seems usable for Uno
untold depot
My gf also suggested that library. I was hoping for something a little more complete, since then i'm not sure how to test the kb2040 in isolation. Idk if that makes sense.
Maybe I should order an I2C sensor board and start there.
tardy iron
you can use that Wire demo, with the MacroPad as the controller (master) and the KB2040 as the target (slave)
untold depot
Oh I thought it needed the uno?
tardy iron
no, it's in the Wire library that's part of the Arduino package, i think. at least the Pico BSP claims to have both controller and target support, so it seems likely that the KB2040 and MacroPad ones do as well
untold depot
Oh cool, that's actually a huge help.
tardy iron
i mean if you have a simple I2C sensor board, talking to that might be slightly simpler than talking to a KB2040 in target mode
untold depot
tardy iron
i mean if you have a simple I2C sensor board, talking to that might be slightly ...
Even if I start with a sensor board, this'll give me a leg up on getting the KB2040 working. Thank you so much!
solemn cliff
you could have some test code in CP on the KB2040 too, might be faster to write at least for one side
pine bramble
@untold depot that bunny huang was on an Adafruit ask an engineer/show and tell -- he did a modular synth vid that showed up in my YT feed last night.
 rich coral
How do I refer pins to GPIO number in Arduino-pico core?
pine bramble
I was thinking 'GPIO25' for the LED for example, but I don't remember.
 main pilot
My waveshare rp2040 zero keyboard project is having some issues. Im able to design a 2x2 matrix but once i go above that im not getting a signal. Im using 1n4148 diodes. Could those be causing too much resistance? I was able to build an exact copy of this circuit design with a kb2040 and same diodes.
 lilac ginkgo
main pilot
My waveshare rp2040 zero keyboard project is having some issues. Im able to desi...
lilac ginkgo
main pilot
My waveshare rp2040 zero keyboard project is having some issues. Im able to desi...
maybe you wired them in series instead of parallel? if so, voltage will drop too much to be detected as a logical 1 after passing through a couple of diodes -- i've done that before 😅
other than that, i don't see any reason why the size of the matrix would matter
main pilot
Hmm...i did them in series on my last keyboard. Like i said its exactly the same as my last board just a different MCU.
Ive even got out the bread board to test my theory.
lilac ginkgo
no idea what the threshold voltage to be detected as high input is on the RP2040, but given it works at 3.3V + each diode will drop the voltage by 0.6-0.7V i don't think it will work after 2 o 3 of them, are you sure they weren't parallel on the other circuit?
main pilot
omg im such an idiot...
pine bramble
@rich coral probably just an int -- how did you get to the point where you are asking? ;)
main pilot
thank you...they are in series and thats the issue.
Im looking at my last board now and i soldered them in parallel. @lilac ginkgo saved the day! 🙂
lilac ginkgo
another option is not using diodes, so you can't screw up 😜
main pilot
i wouldnt know where to begin. Is that possible?
lilac ginkgo
still not finished designing, but i will use chained ParallelInput-SerialOutput registers for my keyboard's PCB :) -- no ghosting even without diodes
which also saves pins used

i will also use SIPO to drive several screens control lines with just a couple of GPIOs
many QMK code had to be written to even start designing this 🤣
main pilot
whats the maximum about of inputs that will support?
i can kinda make out whats going on there
lilac ginkgo
main pilot
whats the maximum about of inputs that will support?
as many as you want and the number of pins would remain constant
but... more info to be serialized and read over SPI -> slower scanning of keys
main pilot
really cool
lilac ginkgo
main pilot
i wouldnt know where to begin. Is that possible?
you can also make a matrix without diodes, but you will have ghosting (keys being as pressed when they weren't)
eg, red ones are pressed
when your firmware sends info to row 0, current flows and the key on col0/row1 gets mistakenly read as pressed

diodes prevent that

i hope the images are good enough to understand 🙃
lilac ginkgo
i know there are some keyboards which scan using IO-expanders and multiplexers(or was it de-?) but not much idea about those tbh 😛
main pilot
yeah thats adding a level of complexity way above my current understanding. I keep it simple with kmk and hand wired stuff. Are you going to have your board printed when you finish?
tardy iron
you can get away without multiplexing or diodes if you have few enough key switches to wire each one directly
lilac ginkgo
main pilot
yeah thats adding a level of complexity way above my current understanding. I ke...
idea is to 3d-print a case and get the PCB built
main pilot
Yeah but no more than 10 keys
lilac ginkgo
i still have to figure out how on earth to fit everything lmao
and what layout i want it to be....
main pilot
My current keyboard is 100% 3d printed. The last one i build i cut the PCB down to size from an old cherry kyb
lilac ginkgo
3 screens and custom code to drive them from the PC, why not? 🤓
one of them has a touch sensor i will use to make stuff on the computer, as controlling domotics pressing buttons/sliding (or anything i can code on Rust)
 untold depot
So, the adafruit VS1053B library only shows the chip with a line in for recording mode or line out for playback, which is set in hardware with a jumper. But this project shows it doing both, while even processing the audio with real time effects.
https://github.com/TobiasVanDyk/Audio-Effects-Preamp-VS1053b
Is there any documentation showing how it's able to do this digital passthrough? I assume the effects are being done with the mentioned manufacturer library, but I'm not even sure how it's accomplishing both an input and output. Is it just switching modes rapidly enough to not matter? Or is it lower level chip stuff that the adafruit docs don't mention?

GitHub
2017: Audio Effects VS1053 Preamp: Music effects box using the VLSI VS1053 Audio DSP with 5 adjustable effects parameters. It has 9 fixed effects and 1 customizable effect, where each effect has fi...
untold depot
Like, there is some intermediary state between the adafruit docs and whatever this repo is doing and I don't know how to get there because the adafruit docs for the board just end without even implying there's more you can make it do than the docs show
(inb4 "read the datasheet" I don't know how to translate it into "here's how to actually use these features that a normal human can understand")
solemn cliff
trying to understand what it's doing, it looks like it's loading a plugin into the board, that can be found using the VLSI IDE:
Further details of the VLSI effects processing can be obtained by installing their development tool - VSIDE - obtainable from their website, and then opening the folder VSIDE\templates\project\VS10X3_Audio_Effects. I used their Coff2All tool to convert the executable file into a C code type plugin which was then copied into the Arduino sketch and which loads before the loop function of the sketch starts.
it would be that plugin that does the pass-through and the effects, as configured by the values that the arduino sketch writes to certain registers
at least that's how I read it, without installing the VLSI IDE
untold depot
Ok but, what's the path I should've taken to get from point A to B? The ogg vorbis recorder example mentions plugins but not how to load them or interact with them. The datasheet doesn't contain any example code because its for people who already know what they're doing. I didn't even know writing to registers or any other form of interaction was possible beyond what the library does because the adafruit docs don't mention it at all.
Is there really no documentation between example code that doesn't really explain what each part does and the enterprise datasheet?
solemn cliff
that would be the VLSI IDE
the website has a list of applications:
https://www.vlsi.fi/en/support/software/vs10xxapplications.html
like one that "Plays ADC input(s) through DAC with bass and treble controls, or EarSpeaker." An equalizer, other stuff
(https://www.vlsi.fi/en/products/vs1053.html is the product page)
untold depot
So do I stop using the Arduino IDE and switch to this completely different, proprietary IDE? Does the KB2040 support that?
solemn cliff
that would be to develop plugins that you load from your arduino code, like the repo you linked above
 floral cipher

Run IoT and embedded projects in your browser: ESP32, Arduino, Pi Pico, and more. No installation required!
why does the 2nd tone never play? I would think it would play the first at 500 for 500ms then at 700 at 500ms
but it gets stuck at the first one

Run IoT and embedded projects in your browser: ESP32, Arduino, Pi Pico, and more. No installation required!
if i add a 500ms delay it works, why is that? i thought note executed for the amount of ms i tell it to
heavy star
Maybe it’s trying to play both simultaneously?
Could do a 1ms delay, that should be imperceptible
rich coral
pine bramble
<@305773500977643524> probably just an int -- how did you get to the point where...
different boards use different pin names, I don't want to deal with that, since GPIO is universal
pine bramble
I've forgotten now why I memorized 'GPIO25' for the LED. I don't remember if that gets typed into a program anywhere I use the RP2040 or not.
north stream
floral cipher
if i add a 500ms delay it works, why is that? i thought note executed for the am...
It's apparently not a synchronous/blocking call, so when you request it, it starts but the call returns immediately while the tone is still playing. That's kind of inconvenient for your use case.
floral cipher
What does that even meeeeean
leaden walrus
  tone(A0,500,500);
  tone(A0,700,500);
the first line returns immediately (that's what not blocking means)
then the second line runs, which immediately stops the first tone and starts the second tone
floral cipher
oh okay
floral cipher
pine bramble
*<https://wokwi.com/projects/354204266187872257>*
yeah, you have to use a delay between the notes playing
interesting, you can play 2 notes at the same time if you loop it and put really small delay in between

Run IoT and embedded projects in your browser: ESP32, Arduino, Pi Pico, and more. No installation required!
the pause in between each note is so small you can't even notice it
 somber furnace
I am hoping someone can provide direction. I am working on a sewing project and I plan to send data from my Adafruit CPB to my computer. I am using the basic examples provided by AF for the Arduino IDE. While I am comfortable sending data over serial, and using the Adafruit Connect App to have the input print on the serial console, ...I am confused as to the steps to send data (for example, the accelerometer data) from the CPB to my computer when I am not wired connected?
 nova comet
I should be able to play with the magnetic field strength of this magnet using pwm and a load switch right
cedar mountain
nova comet
I should be able to play with the magnetic field strength of this magnet using p...
Maybe. Ideally you'd have more of a solenoid/motor driver which is designed to deal with the inductive load of a coil... a load switch might not like the back EMF.
nova comet
cedar mountain
Maybe. Ideally you'd have more of a solenoid/motor driver which is designed to d...
Yeah ik, im designing the half bridge driver im mostly just checking that i can modulate these types of emagnets and get results
 sly bough
I can't find a single code for driving VL53L4CX and read it using ARM Arduino UNO/NANO. i wonder why. i have two units and i think the codes i found are only for STM based boards which might work but pins are not the same between the boards. what am i missing? i was under the impression it would be as simple as 1 2 3..
leaden walrus
STM has an Arduino library here:
https://github.com/stm32duino/VL53L4CX
 stable forge
@sly bough ⬆️
 ebon steeple
Trying to get hello_pyportal to run. I installed the Adafruit_LvGL_Glue on a clean Arduino IDE install and included it's dependencies. However, building the project I get a bunch of errors at the Adafruit_LvGL_Glue include line. So it seems not to match the LVGL library. Here is the first of many errors:
In file included from C:\Users\jeff\OneDrive\Documents\Arduino\hello_pyportal\hello_pyportal.ino:11:
c:\Users\jeff\OneDrive\Documents\Arduino\libraries\Adafruit_LittlevGL_Glue_Library/Adafruit_LvGL_Glue.h:46:3: error: 'lv_disp_buf_t' does not name a type; did you mean 'lv_disp_drv_t'?
   46 |   lv_disp_buf_t lv_disp_buf;
      |   ^~~~~~~~~~~~~
I am following this article.
I tried downgrading the LVGL version to 8.2.0 as the article suggests but that made no difference.
sly bough
leaden walrus
STM has an Arduino library here:
<https://github.com/stm32duino/VL53L4CX>
Noob here - isn't that what i was talking about? the code is for STM based controllers and not for UNO/NANO 8bit boards?
north stream
You said "ARM Arduino", which is confusing, as the 8 bit ones are AVR
ebon steeple
Anyone know how I can contact Phillip Burgess to confirm that the LVGL example still builds?
tardy iron
sly bough
Noob here - isn't that what i was talking about? the code is for STM based contr...
looks like it's not feasible to use this part with 8-bit Arduino boards
https://learn.adafruit.com/adafruit-vl53l4cx-time-of-flight-distance-sensor/arduino
Please note, the Arduino driver for this chip does not support 'small memory' boards like the ATmega328 - you'll need a SAMD21, SAMD51, ESP, etc chip with 50K of flash memory available!
(that's the claim, anyway. i haven't looked at the code in detail to investigate whether it's theoretically possible to port to an 8-bit board)
thorny lintel
I'm making a shield for a Nano, will have a couple ULN2003 stepper motor drivers on it
I can see on the schematic there's a ceramic cap between power and ground
Does it matter where in the circuit this cap goes?

I've just plonked one in the middle of the board
 leaden walrus
sly bough
Noob here - isn't that what i was talking about? the code is for STM based contr...
leaden walrus
sly bough
Noob here - isn't that what i was talking about? the code is for STM based contr...
AFAIK, it's a general purpose arduino library and doesn't do anything specific to STM processors. they even mention ESP32 in the readme.
leaden walrus
ebon steeple
Anyone know how I can contact Phillip Burgess to confirm that the LVGL example s...
what version of the Adafruit LvGL Glue library are you showing as being install in Library Manager?
leaden walrus
ebon steeple
Anyone know how I can contact Phillip Burgess to confirm that the LVGL example s...
check your forum post. more info there.
north stream
thorny lintel
I'm making a shield for a Nano, will have a couple ULN2003 stepper motor drivers...
I'll usually put the capacitors near whatever is likely to be pulling current spikes (in this case, probably the motor power supply lead where it connects to the motor). Another one for the power supply pin for the driver chip might also make sense.
mossy folio
Hello everyone, I could use some help with connecting this display hat (https://www.adafruit.com/product/1947) to the ESP32-S2 Metro (https://www.adafruit.com/product/4775) I can not seem to get the graphicstest example working. I mapped the pins to the 2x3 header as described in the connecting section of the tutorial (https://learn.adafruit.com/adafruit-2-8-tft-touch-shield-v2/connecting) but I can not get the example working. Here is the relevant part of the code:
#include "Adafruit_GFX.h"
#include "Adafruit_ILI9341.h"

// For the Adafruit shield, these are the default.
#define TFT_CS   10 //     10 or 34

#define TFT_MOSI 35 //     11 or 35
#define TFT_CLK 36 //     12 or 36
#define TFT_MISO 37 //     13 or 37

#define TFT_DC   9
#define TFT_RST -1

Adafruit_ILI9341 tft = Adafruit_ILI9341(TFT_CS, TFT_DC, TFT_MOSI, TFT_CLK, TFT_RST, TFT_MISO);
The screen just blinks off and on between the tests without anything showing during the test itself.
mossy folio
Hmm reading the schematic it looks like on the ESP32-S2 Metro board the DC pin would be 14 and the CS pin would be 15 but that still does not work...
leaden walrus
did you cut the top set of jumpers and then solder the bottom set?
 mossy folio
No I did not think I needed to. I am trying to use the default pins of the board
leaden walrus
oh, i see, mapped in software, not via jumpers
and agree with DC=14, CS=15 for the ESP32-S2 metro:
https://learn.adafruit.com/adafruit-metro-esp32-s2/pinouts
 stable cosmos
hello. I use the feather M0 with rfm69 for a project. I have downloaded all the libraries to get it started in arduiono ide and I have successfully ran the blink program. When I connect a sensor, although, and open the serial monitor, I get no response there. I should be getting at least 'sensor not found'. Does anybody know how to resolve this issue. Thanks in advance!
mossy folio
So I finally figured out how to get the display working but now I am having trouble using the display and the SD card at the same time. I can initialize both of them but then the display stops working.
My hardware setup is: https://www.adafruit.com/product/1947 https://www.adafruit.com/product/4775
#include <Adafruit_GFX.h>
#include <Adafruit_ILI9341.h>
#include <SdFat.h>
#include <Adafruit_SPIFlash.h>
#include <Adafruit_ImageReader.h>

#define SD_CS   9
SdFat SD;
Adafruit_ImageReader reader(SD);

#define TFT_CS   15
#define TFT_MOSI 35
#define TFT_CLK 36
#define TFT_MISO 37
#define TFT_DC   14
#define TFT_RST -1
#define TFT_BACKLIGHT 10

Adafruit_ILI9341 tft = Adafruit_ILI9341(TFT_CS, TFT_DC, TFT_MOSI, TFT_CLK, TFT_RST, TFT_MISO);
Adafruit_Image       img;
int32_t              width  = 0,
                     height = 0;

void setup(void) {
  Serial.begin(9600);
  while(!Serial);       // Wait for Serial Monitor before continuing

  tft.begin();          // Initialize screen
  tft.fillScreen(ILI9341_BLACK);
  tft.setTextColor(ILI9341_WHITE);
  tft.setTextSize(2);
  tft.setTextWrap(true);
  tft.setCursor(0, 0);
  tft.println("Starting SD Card init");

  Serial.print(F("Initializing filesystem..."));
  if(!SD.begin(SD_CS, SD_SCK_MHZ(25))) { // ESP32 requires 25 MHz limit
    Serial.println(F("SD begin() failed"));
    for(;;); // Fatal error, do not continue
  }
  Serial.println(F("Success!"));
  tft.println("Finished!");
  delay(2000); // Pause 2 seconds before moving on to loop()
}

void loop() {
  delay(100);
}
This code causes the Serial to print "Success" but the display is frozen and anything I try to do afterwards does not work. In this snippet, the display never displays "Finished".
With this code setup, I can read from the SD Card but the display remains frozen.
pine bramble
@mossy folio When I wrote my code (read rotary encoder, write to LCD what the encoder said to 'do') I blocked writes to the LCD when other things had the 'attention' of the program.
Very simple.
Never wrote garbage to the display again.
mossy folio
@pine bramble could you elaborate on that? Do you mean by doing something with the card select pin? I was not quite sure how to use that.
pine bramble
I created a global boolean (yes/no true/false) type of variable.
Then a function that makes the LCD busy. I named it first, then thought of a way to do it.
worthy of somethingawful:
https://github.com/wa1tnr/gps_wxprf-chassis/blob/main/re.d/rot_enc_bare_ff/n_rotenc_sketch.cpp#L44
Looks like I blocked everything that might damage the conversation with the LCD, rather than block writes to the LCD (ever).
In this case the hardware layer was satisfied by inhibiting interrupts related to the rotary encoder. Maybe. Was a hack project at best. ;)
 ember rivet
Hello, my Adafruit Metro 328 is plugged into my computer via micro USB and is just blinking red. Arduino I/O software does not see the device either. Anyone experience this or know a solution??
 slender oriole
ember rivet
Hello, my Adafruit Metro 328 is plugged into my computer via micro USB and is ju...
slender oriole
ember rivet
Hello, my Adafruit Metro 328 is plugged into my computer via micro USB and is ju...
this is on windows or mac?
mossy folio
@pine bramble I tried to do this but I still can't seem to get the Display to work again after I start communicating with the SD Card.
pine bramble
@mossy folio that's another talk show .. the SD card counts as a peripheral. Only one peripheral per project can be expected to work without at least some effort on your part, to integrate them.
Arduino was never really meant for that (yes it can do it but no it won't just happen without effort).
My opinion, only. ;)
Post the code. Post photographs. Post a schematic. Whatever is most likely the problem. ;)
mossy folio
I thought the whole point of SPI was to allow for multiple devices?
cedar mountain
mossy folio
I thought the whole point of SPI was to allow for multiple devices?
Electrically, there's no problem. The software libraries often assume that they're the only thing using the bus, though.
mossy folio
  digitalWrite(SD_CS, LOW);
  digitalWrite(TFT_CS, HIGH);
  Serial.print(F("Initializing filesystem..."));
  if(!SD.begin(SD_CS, SD_SCK_MHZ(25))) { // ESP32 requires 25 MHz limit
    Serial.println(F("SD begin() failed"));
    for(;;); // Fatal error, do not continue
  }
  digitalWrite(SD_CS, HIGH);
  digitalWrite(TFT_CS, LOW);
  Serial.println(F("Success!"));
  tft.println("Finished!");
  delay(2000); // Pause 2 seconds before moving on to loop()
I thought that would help and work but it does not seem to.
I understand that but this device (https://www.adafruit.com/product/1947) has the SD-Card and display integrated together and was built by Adafruit. So I would assume there would be a way to use them together.

Add some sizzle to your Arduino project with a beautiful large touchscreen display shield with built in microSD card connection and a capacitive touchscreen. This TFT display is big ...
pine bramble
'together' has to be explicit in that and it's nowhere in the advertisment.
It can be done; people do it. Just a matter of how (no I do not know exactly how).
mossy folio
For the record, I managed to get it working together! 🙂 The issue seemed to be that I was too explicit in setting my Display initialization.
Adafruit_ILI9341 tft = Adafruit_ILI9341(TFT_CS, TFT_DC); //, TFT_MOSI, TFT_CLK, TFT_RST, TFT_MISO);
leaden walrus
@mossy folio glad that worked! was going to suggest that. i unfortunately had a storm knock out power the other day when i was trying to respond to this. and then forgot later when power came back. 😦
with that initialization, everything shares the same hardware SPI peripheral
with the other initialization, the ILI driver would try and use the SPI pins as digitalio for a software/bitbang SPI usage. and that probably conflicted with other libs attempt to use the same pins for hardware SPI.
mossy folio
leaden walrus
with the other initialization, the ILI driver would try and use the SPI pins as ...
Ahhhh!!! That makes so much sense! Thank you!
I was struggling so much to get the display working that I never went back to something simpler. I never thought about how it would work under the hood, but it makes sense if I change the default values, it will use software SPI and then conflict with the other libraries.
 strong frigate
Hi guys, I want to build a system that can measure the soil humidity at 3 diferite soil dephts. I want to use a node mcu and Blynk, I tried with a rezistive/capacitive chinese sensors but all are very bad in terms of longevity and accuracy. I saw the sht30 sensors (Capsule variant) and I was thinking about it. Did anyone tried it for soil, or you know other types of sensors that would measure soil humidity reliably?
ember rivet
slender oriole
this is on windows or mac?
On windows
slender oriole
ember rivet
On windows
Have you used any arduino boards with arduino idle before on your windows?
 whole saffron
Feather RP2040 doesn't show up when I plug it in
pine bramble
Most RP2040 boards have a button associated with enumeration of the mass storage device used for drag and drop programming, iirc.
nova comet
would i be better off using a controllable constant current sink to drive an electromagnet than just using pwm on the gate of a half bridge driver?
ember rivet
slender oriole
Have you used any arduino boards with arduino idle before on your windows?
No, this is my first attempt at using an arduino.
ember rivet
I have the Arduino IDE installed and the Metro is not showing up.
slender oriole
ember rivet
No, this is my first attempt at using an arduino.
please go through this, you might be missing the drivers on your machine.
https://docs.arduino.cc/tutorials/generic/DriverInstallation

Learn how to install Arduino drivers manually on Windows 7, Vista & 10.
ember rivet
Okay, thank you so much!!
whole saffron
Anytime I try to upload certain Arduino code to my Feather, it disconnects, any ideas?
 dusky compass
Any1 has done this project? and could help me with it? https://learn.adafruit.com/mini-gif-players

I have been following each steps mentioned on this project guide but idk why i got this on uploading code

 rough torrent
dusky compass
rough torrent
dusky compass
unfortunately not
im not sure why the gif and everything else i setup on the feather rp2040 got formatted when i done with upload
leaden walrus
there's a two step process to that guide
you first install circuitpython:
https://learn.adafruit.com/mini-gif-players/circuitpython
to allow easy copying of the gifs to the board:
https://learn.adafruit.com/mini-gif-players/coding-the-mini-gif-players
(top of that page)
second, you upload the arduino sketch on that same page
were you able to see a CIRCUITPY folder and copy over gif files?
dusky compass
yes i did everything mentioned there
setup and etc. but it just auto format everything after upload
leaden walrus
the CIRCUITPY folder will go away after uploading the arduino sketch
thats expected
but the gif's that were copied will still be on the board
did you try using the gif's from the guide?
dusky compass
yes i did
leaden walrus
and then just nothing shows up on displays?
dusky compass
yep
leaden walrus
which one are you using? looks like guide has option for a couple of displays
leaden walrus
give me a sec to write a test sketch
meanwhile - try uploading a basic blink sketch just to verify the arduino part is working
just blink the LED on the feather
dusky compass
leaden walrus
just blink the LED on the feather
it is blinking
🤔
anyway thank you for the help
i got to go now
leaden walrus
oh no...
ok check back here later
i'll upload a UF2 that will test the display directly
without the gifs
since it might be a connection issue
livid osprey
whole saffron
Anytime I try to upload certain Arduino code to my Feather, it disconnects, any ...
The RP2040 feather? I believe that's expected behavior. RP2040's upload process with Earle Philhower core resets the board to try to put it in bootloader mode in order to upload a UF2 file to it. Try holding the BOOTSEL button when it tries to upload, and release it when you see the RPI-RP2 drive connect to your PC.
leaden walrus
@dusky compass try this UF2
(1) on the Feather RP2040, hold the BOOTSEL button and then press the RESET button
(2) should get a folder named RPI-RP2 to show up
(3) copy feather_rp2040_st7789_320x172_test.UF2 to the RPI-RP2 folder
(4) once copy is complete, board should reset, display should show stuff
 slate pebble
I have a seeed xiao seeed nrf52840 that I used with circuitpython. I want to start to look how the arduino is working now. I followed the tutorial to go back to arduino. and could upload a simple blink sketch to it.
But as soon as the program runs, it disconnect fro usb, and then of course isn't flashable again. I need then to reset it to dfu to flash again (which works)
Is this a normal behavior? if not (I think it's not) what should I do?
Thanks 🙂
*EDIT
I found it 🙂 I used the normal library from seed, but needed to use the mbed version. everything works now 🙂
livid osprey
Does anyone have a library that works for ILI9342c? I’m looking at modifying the ILI9341 library, but if anyone already has something to save me some time hehe
lilac ginkgo
i just googled for "ILI9342c driver" and this popped up, use the init sequence at your own risk :p
https://github.com/russhughes/ili9342c_mpy/blob/main/src/ili9342c.c#L965
pretty sure you mostly need the init sequence to integrate a new display on displayio but i have no clue as i've only written a couple of display drivers for QMK (C)
just noticed this is the arduino channel, oops
init sequence on C(++?) https://www.orientdisplay.com/wp-content/uploads/2021/02/ILI9342C_AN_01_20111228.pdf#page=4
apparently from the manufacturer itself (ILITEK)
livid osprey
lilac ginkgo
init sequence on C(++?) <https://www.orientdisplay.com/wp-content/uploads/2021/0...
Thanks, I’m already looking at this, I’m just waiting on a breakout board for my display before I start tinkering with it.
livid osprey
lilac ginkgo
*just noticed this is the arduino channel, oops*
And to be fair, I was certainly open to other languages but posted in here because I just finished testing another display with u8g2 haha
 celest bloom
Hi guys recently i got ts101 soldering iron, which using stm32 as the brain. I noticed that if i plug the solder to my computer than it shown as msc, and there is a config txt file inside them. Is there any way to do that with esp32 s3? Since both of them have hid builtin. I’ve tried several msc library example but everytime i change the config file, it back to the default every time i reset my esp
 inland gorge
celest bloom
Hi guys recently i got ts101 soldering iron, which using stm32 as the brain. I n...
inland gorge
celest bloom
Hi guys recently i got ts101 soldering iron, which using stm32 as the brain. I n...
Yes, there is a USB MSC example in the ESP32 Arduino core: https://github.com/espressif/arduino-esp32/blob/master/libraries/USB/examples/USBMSC/USBMSC.ino
and there are several different USB MSC examples in the Adafruit_TinyUSB Arduino library: https://github.com/adafruit/Adafruit_TinyUSB_Arduino/tree/master/examples/MassStorage
If you're having problem with persisting your changes, you need to make sure to write the changes to flash. You can do this with the EEPROM emulation in the ESP32. Something like this: https://randomnerdtutorials.com/esp32-flash-memory/
Actually, looks like this example does read & write to ESP32 flash: https://github.com/adafruit/Adafruit_TinyUSB_Arduino/blob/master/examples/MassStorage/msc_esp32_file_browser/msc_esp32_file_browser.ino
dusky compass
leaden walrus
<@297079563421220864> try this UF2
(1) on the Feather RP2040, hold the BOOTSEL b...
🤔 when i use your file
it does shows some animation
but when i try to upload the code from guide it just black screen although the black light is on
leaden walrus
hmmm. ok. that was a good check. so at least now we know the display and wiring are ok.
let me look more at the guide code for other reasons it may not work.
@dusky compass think i found it. try commenting out this line in setup():
while (!Serial);
can just add forward slashes so it looks like:
//while (!Serial);
 leaden walrus
did that work?
dusky compass
i will try that rn
🤔 still black screen
anyway thank you for the help
i will try troubleshooting
leaden walrus
ok, try removing the comments, so line is back to:
while (!Serial);
after uploading sketch, open the arduino serial monitor
it may have some useful messages
leaden walrus
@dusky compass would you be willing to try a few things first? i can help run you through them.
leaden walrus
@dusky compass sry, missed this. doesn't bug me at all. there are few things worth trying. feel free to ping me next time youre on.
whole saffron
livid osprey
The RP2040 feather? I believe that's expected behavior. RP2040's upload process ...
do I need to upload a new uf2 file to it?
livid osprey
Arduino IDE (Philhower core) will do that for you.
whole saffron
Trying to get this to run on the Feather RP2040 but with no success, anyone know how to make the neopixel blink?
Programming the Adafruit Feather nRF52840 Sense
Programming the Adafruit Feather nRF52840 Sense.
livid osprey
whole saffron
Trying to get this to run on the Feather RP2040 but with no success, anyone know...
Did you change pin 8 in the onePixel constructor to 16?
leaden walrus
this line:
Adafruit_NeoPixel onePixel = Adafruit_NeoPixel(1, 8, NEO_GRB + NEO_KHZ800);
second argument is the pin the neopixel is attached to
which varies from board to board
feather rp2040 uses different pin than feather sense
also can just use the PIN_NEOPIXEL shortcut
Adafruit_NeoPixel onePixel = Adafruit_NeoPixel(1, PIN_NEOPIXEL, NEO_GRB + NEO_KHZ800);
feather rp2040 pinout for ref:
https://learn.adafruit.com/adafruit-feather-rp2040-pico/pinouts
whole saffron
PErfect, thank you all so much!
I'm gonna use the neopixel as a visual debugging tool of sorts
dusky compass

any1 got an idea on how to fix this?
I've tried with solution i found, but still couldnt fix it
inland gorge
what did you do to cause that error?
dusky compass
leaden walrus
<@297079563421220864> try this UF2
(1) on the Feather RP2040, hold the BOOTSEL b...
could you tell me where did you get this file from?
or did you made it?
dusky compass
i changed the project and started this
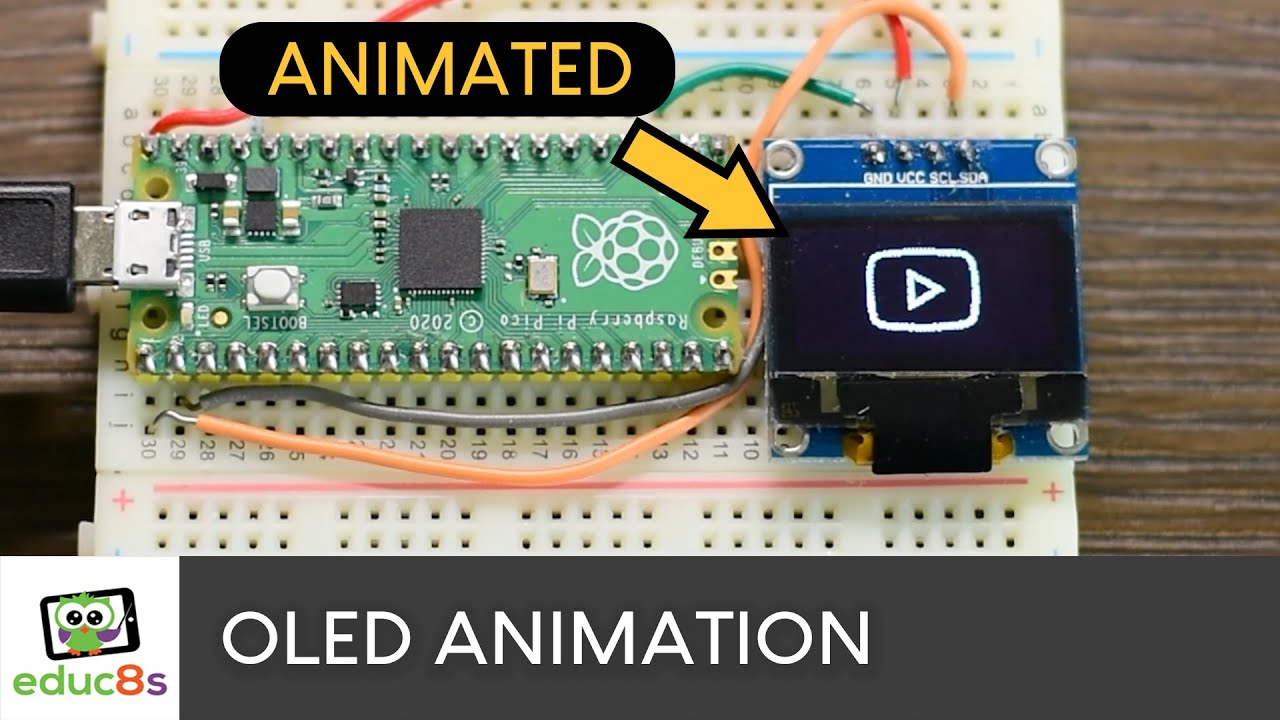
Animations on OLED displays using CircuitPython
There are many ways to load and display an animation on an OLED screen, either with Arduino or CircuitPython. I am going to show you what I think is the easiest way to achieve it. I will work with the monochrome OLED, but the procedure works with the Color one as well with only one minor differenc...
and it worked
🤔
not sure if i had some issues with Arduino IDE(like bug bc of the version i use and the version they used on the guide), which may cause the problem or whatever the reason is
leaden walrus
@dusky compass i made the UF2 using Arduino
dusky compass
Guess i got arduino installation issues
I tried to install that uf2 maker but couldn't get it to show up
🤔
leaden walrus
it could be other things
dusky compass
Well now i guess i will try with the approach that is in that video above
dusky compass
leaden walrus
<@297079563421220864> i made the UF2 using Arduino
Btw did you use the same(edited) code as they posted on that Mini gif player?
I was curious about generating uf2 file(if i manage to add it correctly to arduino ide)
leaden walrus
arduino is making a UF2 with each upload
nothing new needs to be added
the filename/location should show up in the arduino messages
leaden walrus
it makes the UF2, then resets the board into bootloader mode, copies the UF2 to RPI-RP2, and resets board again so UF2 is run
i just compiled the graphics test example from the ST7789 lib with pins and other things specific to the animated gif guide
and then uploaded the UF2 here
dusky compass
I guess the issues i got are with library or something else i have installed incorrectly, although everything was looking fine
😅
leaden walrus
that sketch with minor changes
  #define TFT_CS         7
  #define TFT_RST        9 // Or set to -1 and connect to Arduino RESET pin
  #define TFT_DC         8
tft.init(172, 320); // Init ST7789 172x320
Anyway thank you for the help till now XD
leaden walrus
i noticed what might have been some filesystem corruption when i was trying the guide
it's a little awkward the way the guide has you install CircuitPython - to copy the .gif files over
and then run the Arduino sketch next
at one point i started fresh by running storage.erase_filesystem() with CircuitPython before copying over the .gif files
that might be worth trying on your setup, if you know how to access the CircuitPython REPL
dusky compass
Atm i don't but soon i will know how to.
lilac ginkgo
Not Arduino, but I think this is similar enough. Working a C driver for the IL91874 to embed on QMK, the "regular" code (ie: MCU stores the framebuffer) works fine, however the module (https://www.adafruit.com/product/4098) has a built-in SRAM and I'm trying to have both options available... Pretty sure I had this code working before, but I've cleaned and refactored it a bunch in random sessions during the last 2 weeks and now draws a bunch of noise, can you spot any issue i couldn't find?
- There's also a funny bug of MCU locking unless I init an extra framebuffer "object" before code gets here, which makes no sense at all for me, but i'll get to that later...
Code: https://github.com/elpekenin/qmk_firmware/blob/pekelop/drivers/painter/il91874/sram.c
PS: Mostly concerned about the pixdata function, which takes care of parsing pixel data from an incoming buffer and drawing them (sending those bits to the RAM on this particular scenario) on the display
 raven perch
Is there any way to write hex data to the ST25DV16K? I've got about 600 bytes of it. Running on a yet-to-arrive ESP32S2 if that matters. Thanks!
Please feel free to ping me
north stream
raven perch
Is there any way to write hex data to the ST25DV16K? I've got about 600 bytes of...
I think you can write that one with NFC or via I2C
raven perch
north stream
I think you can write that one with NFC or via I2C
That's my plan, but I was wondering if I could write hex data to it through its I2C interface
north stream
raven perch
That's my plan, but I was wondering if I could write hex data to it through its ...
Note: data is data, hex is just an encoding
raven perch
Ok, thanks
solemn cliff
note that it's a complicated chip where the EEPROM user section is cut into areas that can be configured and a single (multibytes) write or read cannot overlap multiple areas
maybe by default there's only one section
untold depot
Am I understanding correctly that this demonstrates reading from a USB mass storage device with a microcontroller as the host, not the microcontroller presenting itself as a mass storage device?
GitHub
Arduino library for TinyUSB. Contribute to adafruit/Adafruit_TinyUSB_Arduino development by creating an account on GitHub.
 foggy anchor
hello , i have a lolin mcu v3 esp12F but it works with micro usb for data and power and i want to usb c do you think it's possible to use the adafruit usb c breakout board for the power and data transfer?

and this is my board
 north stream
You'd have to do some surgery to have it work for data transfer
heavy star
Yeah, no USB data breakouts
And if you want USB C but just the 2 data lines, I like these https://www.adafruit.com/product/5180

This Simple USB Type C breakout is kinda interesting, it looks similar to this USB Type C SMT Inline Breakout Board, but it's an 'inline' style with pads for soldering to ...
foggy anchor
hmm i see
I thought we could use the pins on the board and then plug them into the breakout board
thanks anyway
north stream
The USB data pins aren't broken out on the NodeMCU
heavy star
USB data isn't generally broken out on most boards I've seen
livid osprey
They’re not broken out on most development boards.
foggy anchor
yeah too bad -_-
tardy iron
sometimes D+/D- are exposed on the board as test points that are big enough to solder to, but not always
 zinc bridge
To put a Feather ESP32-S2 into flashing mode for a sketch from the Arduino IDE or PlatformIO, is just press and hold BOOT and press RESET and let go of BOOT, right?
 safe shell
yes: press boot, press and release reset, release boot
(the important part is that boot is low when reset goes high)
dusky compass
leaden walrus
i noticed what might have been some filesystem corruption when i was trying the ...
im able to play gif like that Mini gif player project
not sure what was the cause for it to not play before tho
😅
leaden walrus
@dusky compass hey, cool. is that with the original guide code? it's working now?
dusky compass
yes, with the original code
on forum they said to remove all other gif except badger-320.gif
not sure why i cant open all gifs in directory one after another
leaden walrus
hmm...so one of the gifs in the guide zip causes some grief?
dusky compass
no i mean i used only 1 gif
sorry i guess i said it wrong(not very best at english XD)
leaden walrus
no worries. i think maybe i was seeing something like that too.
it looked like it only cycled through like two gifs, but there were more files. just sort of noticed it but didn't look further. but maybe should.
dusky compass
ye from their example gif were 7 of them
leaden walrus
yep
ok. i'll take a look again. thanks for reporting back. might be something happening there.
 celest bloom
inland gorge
If you're having problem with persisting your changes, you need to make sure to ...
celest bloom
inland gorge
If you're having problem with persisting your changes, you need to make sure to ...
hi recently i was exploring usb msc example in esp32 arduino core by espressif by the link given by you, do you know how to read changes on the txt file ? and maybe print the new content of the txt file. so later i can save it to eeprom
 arctic grove
Hi y’all, trying to get an atmega 328p working here and realized that something seems off that I’m clearly not understanding here (I’m new-ish to circuitry). I am making a project that is powered by a wall charger that I’m using as my power supply, it should convert the ax power to dc and output 5v and 1A. Now the 5 volts is cool and all but apparently There would not be more than 40ma going into the atmega 328p… do I actually need a really chunky resistor? Does the atmega 328p just input as much current as it needs? What am I not getting here that I feel I should be able to understand?
leaden walrus
are you using a raw atmega 328p chip?
livid osprey
arctic grove
Hi y’all, trying to get an atmega 328p working here and realized that something ...
Given a voltage supply (constant voltage source) your actual current is determined by how much your load draws. The supply’s current rating is a maximum current rating, not an actual output.
arctic grove
Ahh
arctic grove
leaden walrus
are you using a raw atmega 328p chip?
Wdym, it’s not a break out or anything… it’s just the atmega 328p-pu
leaden walrus
that's what i mean by "raw"
arctic grove
Ok
leaden walrus
there's nothing else. no voltage reg, etc.
arctic grove
Nope
leaden walrus
i'd think some form of current limiting protection would be good
arctic grove
How should I go about implementing something like that?
leaden walrus
nothing will stop the 1A power supply from delivering more than 40mA if whatever is attached attempts to draw more
arctic grove
So will the ic attempt to draw more? If so do I add a resistor or Some other component?
leaden walrus
the 40mA limit is for the IO pins. the power input has a 200mA limit.
 leaden walrus
not sure what best "using parts laying around" option would be for this
arctic grove
I’ll buy parts, I’m not in a hurry to get this done, I’ll take whatever’s best.
leaden walrus
also, if you don't care about the potential blue smoke. could just direct power.
checkout boards like the UNO or the Adafruit Metros and Feather for some examples
leaden walrus
the Feather is probably the simplest example. since the UNO/Metro have the barrel jack input as well. (but Feather has battery)
maybe just inlining a polyfuse is simplest
slate pebble
Hello!
I use the u8g2 SPI on my project. I need one more port and the display works well with ça directly grounded and not connected
I want to use the (last port available on my board) CS for another peripheral.
How can I "release" it? Is there some dummy ports available?
livid osprey
slate pebble
Hello!
I use the u8g2 SPI on my project. I need one more port and the display wo...
Just to clarify, the CS pin on your current spi display is tied directly to ground?
And you only have one output left for another CS?
untold depot
https://github.com/adafruit/Adafruit_SSD1327/blob/master/examples/ssd1327_test/ssd1327_test.ino
Where am I supposed to set the I2C data line in this test software?
GitHub
Arduino GFX library for SSD1327 based grayscale OLED displays - Adafruit_SSD1327/ssd1327_test.ino at master · adafruit/Adafruit_SSD1327
leaden walrus
I2C should only need the pins on the STEMMA connector
can you clarify what you mean by data line?
Adafruit_SSD1327 display(128, 128, &Wire, OLED_RESET, 1000000);
the SCL and SDA pins are determined by whatever pins Wire is for your specific Arduino board
 feral pivot
hi I started to use RP2040 few weeks ago and it is a beautiful little thing. I want to use RP2040 pio to output 10, 12 or 14 bits based on the setting to GPIO pins. Like a parallel bus. I did had a look at the docs but I still can't figure it out.
It would be great if someone can go through it step by step but I wouldn't say no to a already written PIO code.
untold depot
leaden walrus
the `SCL` and `SDA` pins are determined by whatever pins `Wire` is for your spec...
the magic undocumented solution was change "Wire" to "Wire1" to make the Feather RP2040 look at the stemma connector
leaden walrus
untold depot
the magic undocumented solution was change "Wire" to "Wire1" to make the Feather...
yep. for that board, it's Wire1 in Arduino. its buried on pinout page:
https://learn.adafruit.com/adafruit-feather-rp2040-pico/pinouts#stemma-qt-3084853
grave mortar
https://www.diodes.com/assets/Datasheets/74AHC1G02.pdf can I use this with an esp32?
 full juniper
Hi! is this the place to ask about the ESP32-S2 Rev TFT Feather?
just recieved my first ever order of adafruit stuff earlier today so i have a bunch of questions
full juniper
ok great
so first off, i know the Rev TFT Feather is basically the same as the regular TFT feather, but do i need to select a separate board in IDE to work with the Rev Feather?
 solemn cliff
yes, pins assignements are different
full juniper
oh ok that explains a lot, where can i find the support package for the Reverse TFT Feather?
solemn cliff
hmmm there's a chance that the board def not available yet 🫤
full juniper
ok thats what i was thinking but i kinda just assumed they'd be the same
how quickly do new support packages get released?
solemn cliff
 livid osprey
It is true that there's no learn guide yet, but if you're familiar with how to import a BSP manually you can grab it from there
full juniper
Kiiiinda?
full juniper
full juniper
https://learn.adafruit.com/adafruit-esp32-s2-tft-feather/downloads
I've been following this guide under the assumption that it would apply to my board, so I've picked up some stuff
if by "manually" you mean pasting in the link then yeah

like this?
slate pebble
livid osprey
Just to clarify, the CS pin on your current spi display is tied directly to grou...
Hi thanks, no I want to use it as an input for a sensor. The CS port is currently on A1 and just want to "remove" it from the ug8lib defintion. I was thinking of using a dummy. like some port not wired/used from the nrf chip. But I have no Idea if it's the correct way to do that. or if there is some prefered way to handle this.
edgy ibex
Just confirming before I start soldering anything together. If I want to use pin 12 on an ESP32-S2 Feather as the output to drive neopixels, I'd just say
#define PIN 12
and then use PIN directly in the ctor for theNeoPixel strip. 40 plus years of C and C++ programming make it a little jarring to me to use a raw number rather than something like board::PIN_12
livid osprey
slate pebble
Hi thanks, no I want to use it as an input for a sensor. The CS port is currentl...
IIRC u8g2 uses “NONE” or “-1” for no pin. Not sure if it’ll work, but it’s worth an attempt.
slate pebble
YES! "-1" works in u8g2 !!! ("NONE" doesn't) that's awesome :))) thanks!
full juniper
Quick question how quickly are learn guides usually released after a product comes out?
solemn cliff
I would say more or less somewhere in the ballpark
full juniper
The ballpark of what
solemn cliff
what product are you looking for ?
solemn cliff
someone is working on it, I believe the goal is to release by the end of the week, but I don't have internal information
full juniper
Oh cool! Thanks! I was worried it would be like months
heavy star
I’d be shocked if it were more than like, 2 weeks? I think they usually start working on them before release of the product so they aren’t out too long without support
full juniper
Oh swag
 rotund gate
Hi , I'm currently trying to send messages from one LoRa module to another. I tried running the sample transmitter code provided, but the radio initialization doesn't go through and this is what I see on the serial monitor .
Feather LoRa TX Test!
LoRa radio init failed
Uncomment '#define SERIAL_DEBUG' in RH_RF95.cpp for detailed debug info
This is what my circuit wiring looks like . I'm really not sure where the problem is from
Any help / tips would be really appreciated
inland gorge
full juniper
Oh cool! Thanks! I was worried it would be like months
If you’re looking for pinouts for Arduino, that’s already been checked into the Esp32 Arduino core. https://github.com/espressif/arduino-esp32/blob/master/variants/adafruit_feather_esp32s2_reversetft/pins_arduino.h

GitHub
Arduino core for the ESP32. Contribute to espressif/arduino-esp32 development by creating an account on GitHub.
full juniper
Oh thanks, but I’m not actually wiring anything yet, I just have the feather plugged into my computer. Planning on hooking up the 4-key macro breakout with a Stemma QT cable but that’s a struggle for another day.
full juniper
full juniper
https://learn.adafruit.com/adafruit-esp32-s2-tft-feather/downloads
I’m just waiting for a guide like this one^
full juniper
inland gorge
If you’re looking for pinouts for Arduino, that’s already been checked into the ...
Oh wait just realized thisll probably help some of the issues I was having when I was trying to run the example ESP32-S2 TFT Feather code on the Reverse TFT version
feral pivot
feral pivot
hi I started to use RP2040 few weeks ago and it is a beautiful little thing. I w...
can anyone help me about this?
 pulsar lodge
Recently purchased the neokey 5x6 snap board with a adafruit feather RP2040. I have followed the guide using arduino to install the sample code. However the guide stops after testing serial monitoring. How do I get it to be recognized as a keyboard?
 crisp folio
feral pivot
can anyone help me about this?
crisp folio
feral pivot
can anyone help me about this?
Does this give you something to go of? https://community.element14.com/products/raspberry-pi/b/blog/posts/lcd-parallel-driver-using-pico-pio
 whole dagger
I'm trying to program a seeeduino xiao with the arduino ide, but it's not working. I was able to flash circuitpython to the board through the uf2 bootloader, but I can't get an arduino sketch to upload in both bootloader (shows up as "arduino" drive) and CP modes. Arduino is able to reset the board over usb when it's in CP mode, but not when it is in bootloader mode. When arduino resets the board fron CP mode, the board goes into bootloader mode, and arduino is unable to find it because its COM port changes.
deft flame
When using 2M baud rate and println sometimes numbers stop having spaces in between on arduino zero. Am I right to guess that that is because the clock of samd21 and EDBG don’t run perfectly in sync? And the difference is big enough to cause issues?
 light yacht
hi am just wondering if someone could help me . i have an adafruit as7341 soectrometer and was wondering whats the best distance the spectrometer needs to be away from an object with dimensions 21x21mm also is there a way to plot the data obtained from each of the channels into a histogram within arduino ?
also is there any advice someone could give me about how to calibrate this device or does that even need to be done ?
north stream
deft flame
When using 2M baud rate and println sometimes numbers stop having spaces in betw...
Incorrect characters are the usual result of a baud rate mismatch. Missing characters are the usual result of a buffer overrun.
deft flame
north stream
Incorrect characters are the usual result of a baud rate mismatch. Missing char...
It was not exactly like either of that, it would start working well, after few seconds space would go missing, and then it would get worse and worse. As if it fell out of sync by a bit every few seconds
north stream
light yacht
hi am just wondering if someone could help me . i have an adafruit as7341 soectr...
The histogram is fairly easy, the optical properties depend on what sort of diffuser/lense you're using.
north stream
deft flame
It was not exactly like either of that, it would start working well, after few s...
So instead of 11 22 33 44 would you get 11 223344 or 11 2357< or what?
deft flame
north stream
So instead of `11 22 33 44` would you get `11 223344` or `11 2357<` or what?
It would be kinda like instead of
111
111
111
I’d start getting
111111111111
That seems more like missing whole bytes (buffer overrun) than missing bits (which would transform the 1 characters into some other characters)
deft flame
Hmm, any way to deal with it apart from smaller baud rate?
north stream
Buffer overrun problems are tricky, the usual approach is bigger buffers, but if something is simply failing to keep up, it just makes the same problem occur later.
You could also use hardware flow control, so you don't lose any characters, but it would slow everything down, and is harder than just slowing the baud rate. Depending on the details of the actual use case, there are probably other approaches like sending the data at a lower rate but more efficiently packaged.
livid osprey
It’s pretty tough to find ways to clear you buffer faster, as even with more efficient processing, you eventually hit the limits of your hardware simply not being fast enough. Arduino Zero is likely one of those devices that will hit that limit fairly quickly while trying to keep up with a 2M baud rate.
livid osprey
whole dagger
I'm trying to program a seeeduino xiao with the arduino ide, but it's not workin...
There shouldn’t be a com port when rp2040 enters boot loader mode. Are you using philhower or mbed core?
whole dagger
livid osprey
There shouldn’t be a com port when rp2040 enters boot loader mode. Are you using...
It's not an rp2040. It's a samd21
 heavy star
I thought it was an RP2040 too, but that was a post above it, lol… reading is hard
 ivory mural
anybody ever try a Feather HUZZAH32(regular one, not s2/s3) with the RGB Matrix FeatherWing? haven't had any luck, wondering if something about it isn't doable... works with RP2040 feather fine so the wing is ok
light yacht
north stream
The histogram is fairly easy, the optical properties depend on what sort of diff...
i dont have a lense im just placing it against a piece of perspex for the time being ?
north stream
light yacht
i dont have a lense im just placing it against a piece of perspex for the time b...
Hmm, the reflections from that might cause problems, I don't know
light yacht
north stream
Hmm, the reflections from that might cause problems, I don't know
okay so would be a convexed lense be ideal . im literally using it to detect liquid colouring ?
north stream
For that, I might just aim a beam of light through the liquid into the sensor
 elder hare
Code:
https://hastebin.com/share/ohivinimol.cpp
Error:
[ 38419][E][vfs_api.cpp:104] open(): /sd/ManSpaceWalk.gif does not exist, no permits for creation
the folder sd/ exsist and also ManSpaceWalk.gif is inside sd/ :S so why do i get this
Hastebin is a free web-based pastebin service for storing and sharing text and code snippets with anyone. Get started now.
lilac ginkgo
im not an expert at all when it comes to working with files on low-level code, but maybe the SD (or even just the file) isn't mounted and thus your code can't access it even tho it exists
is that some code you've written youself, or some sort of example/test provided?
elder hare
example cause i needed to test to see if the SD-card dev board i bought worked with what i had in mind
north stream
Presumably this is a FAT formatted SD card, which would only support 8.3 filenames (which does not include names like ManSpaceWalk.gif)


 north stream
Try renaming the file with an 8.3 compliant name (ideally in upper case), like MNSPCWLK.GIF
elder hare
testing now
still getting same error
[ 5308][E][vfs_api.cpp:104] open(): /sd/MNSPCWLK.GIF does not exist, no permits for creation
You may need to use the reverse solidus (\) character as a path separator, depending on which SD library you're using
elder hare
i use bitbank2 / AnimatedGIF
GitHub
A lightweight Arduino GIF decoder for playing animated files from memory or files on SD cards - GitHub - bitbank2/AnimatedGIF: A lightweight Arduino GIF decoder for playing animated files from memo...
cerulean knoll
can you execute an "ls" style command?
cerulean knoll
elder hare
i use `bitbank2 / AnimatedGIF`
https://github.com/bitbank2/AnimatedGIF
it looks like this simply provides a callback for opening the file. Any idea how you're implementing that callback?
from the examples: https://github.com/bitbank2/AnimatedGIF/blob/master/examples/best_practices_example/best_practices_example.ino#L67-L76
GitHub
A lightweight Arduino GIF decoder for playing animated files from memory or files on SD cards - AnimatedGIF/best_practices_example.ino at master · bitbank2/AnimatedGIF
hollow pivot
Can I use an esp32 devkit v1 instead of an arduino nano?
north stream
It depends somewhat on what you're doing, but for many purposes, one MCU dev board is as good as another.
hollow pivot
north stream
It depends somewhat on what you're doing, but for many purposes, one MCU dev boa...
I am wiring up the controller for an Iron Man helmet. I had gotten the nano but the one I got was damaged and didn't work no matter what I did. I have some of the esp32 boards that I'm not using. Although I am not sure how to go about wiring it all up as it looks like the pinouts are not one to one
north stream
You'll probably have to adapt the pinout somewhat. I don't remember if the Nano is a 5V or 3V board, but I think all the ESP boards are 3V, which may or may not matter.
hollow pivot
north stream
You'll probably have to adapt the pinout somewhat. I don't remember if the Nano...
Oh I didn't consider that. I am running two servos and a set of LED lights.
The nano is a 5v board
north stream
Most servos work fine on 3V logic, LEDs vary depending on the type and how they're being powered.
hollow pivot
north stream
Most servos work fine on 3V logic, LEDs vary depending on the type and how they'...
The LED lights were 3 volts to begin with. Also, I have no idea how to code what I need to in order to get this to work. All I did was copy and paste the code into Arduino
north stream
Yeah, you might have to do some figuring to determine the wiring to use. The code may work as-is, or it may need some minor tweaks.
hollow pivot
I hope I can get this to work soon because I have been struggling on this for the past 3 days
hollow pivot
north stream
That's frustrating.
Yeah it's not been fun at all. Would you be willing to help me figure this out?
north stream
For a bit, but it's getting near my bedtime
hollow pivot
Same here. I was planning on staying up for another hour as it is after 10pm for me
north stream
Ah, we're probably in the same time zone


 north stream
Ah, not too much. Two switches, a pot, two servos, LED pair, and a battery pack. I don't remember offhand if the ESP boards can run on 6V so that might be worth checking.
hollow pivot
It says it can since the usb cable is providing 5 volts to it. It has an onboard voltage regulator as well
hollow pivot
north stream
Ah, not too much. Two switches, a pot, two servos, LED pair, and a battery pack...
Also, to be completely honest with you, I have no idea what I'm looking at when it comes to everything else like the code