#help-with-makecode
1 messages · Page 1 of 1 (latest)
 timid edge
 undone matrix
That sounds like the onboard voltage regulator is overheating because it's trying to power the motor - try using a seperate 5v power supply for the servo's power, connect the ground of the power supply and the CPX to the servo, and keep the data line connected.
 wanton portal
You could use PWM to play the notes: https://learn.adafruit.com/adafruit-circuit-playground-express/circuitpython-pwm
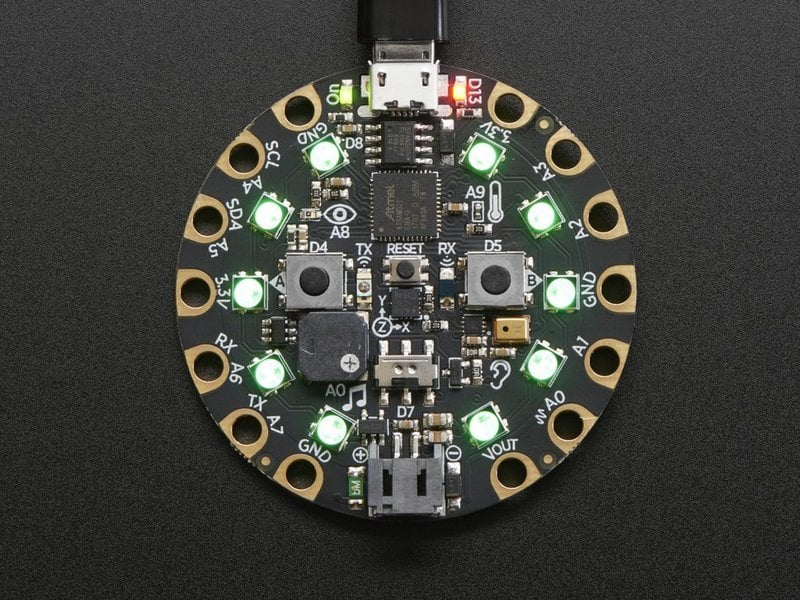
Adafruit Learning System
Make faster and easier than ever with MakeCode, code.org CSD, CircuitPython or Arduino!
 amber lagoon
will a circuit playground express bluefruit work with a cricket?
 vivid jetty
amber lagoon
will a circuit playground express bluefruit work with a cricket?
vivid jetty
amber lagoon
will a circuit playground express bluefruit work with a cricket?
Yes - this guide uses a Bluefruit with Crickit: https://learn.adafruit.com/bluetooth-turtle-bot-with-circuitpython-and-crickit
 nocturne dune
Are there any eyes that can be controlled by makecode?
nocturne dune
Are there any makecode-supporting microcontrollers which can use makecode to control Adafruit eyes, such as the eye mask?
vivid jetty
nocturne dune
Are there any makecode-supporting microcontrollers which can use makecode to con...
It might worth asking on the Makecode forum on forums.adafruit.com if no one replies here
 quasi fossil
I have bought my son a CPE as an 11th birthday present (end of month) and was wondering if anyone had any links to some good MakeCode tutorials / videos (other than the ones on the adafruit makecode site), so I can give him a list of them on the day. He is used to using Scratch at school, so he has some idea
vivid jetty
quasi fossil
I have bought my son a CPE as an 11th birthday present (end of month) and was wo...
I think some of the microbit projects on the Makecode site, like the soil moisture, could be converted to a CPX: https://makecode.microbit.org/. When your son is ready to move on from Scratch, check out Edublocks.org, too.
 glass narwhal
quasi fossil
I have bought my son a CPE as an 11th birthday present (end of month) and was wo...
glass narwhal
quasi fossil
I have bought my son a CPE as an 11th birthday present (end of month) and was wo...
There are a lot of guides and project ideas on the Adafruit learn site as well https://learn.adafruit.com/category/makecode
Some require some extra components (like servos)... and some crafting, but that's the fun part 🙂
quasi fossil
oh nice
 jade drift
hi how can i change the sda and slc pins, im using a stm32 blue pill. im trying to with softwire library but it doest compilled fine. has anyone done this or have an idea to solve it. also SOFT FAST doesnt work
timid edge
I'm making a tutorial using https://makecode.com/tutorial-tool and I want to use some servo blocks in it. I know I've used extensions before doing this, but I don't have that old thing I wrote and I'm having trouble finding the info in the documentation. Anyone here have any experience creating makecode tutorials?
Googling anything with the word "tutorial" just gives me a ton of cool fun projects, but not how to use the tutorial editor lol
 peak zinc
Hello, I am trying to do an outreach activity for elementary school kids about robotics. I wanted to use a MakeCode compatible microcontroller, a 360 degree servo motor and some sort of sensor to add a conditional component. So far I think I want to use Gemma M0 because they have larger pins and are the most affordable. I tried the adafruit makecode maker and for some reason I'm unable to add the servo extension to the makecode for a Gemma M0 or even the metro. It is available through the microsoft makecode for the microbit but the microbit is prohibitively expensive for this activity. Can anyone guide about this?

 glass narwhal
peak zinc
Hello, I am trying to do an outreach activity for elementary school kids about r...
glass narwhal
peak zinc
Hello, I am trying to do an outreach activity for elementary school kids about r...
There seems to be a problem with the Servo extension for all boards except Circuit Playground Express.
I think you should still be able to make it work by using the direct pin controls, as shown in this example https://learn.adafruit.com/makey-paper-craft/code
 peak zinc
glass narwhal
There seems to be a problem with the Servo extension for all boards except Circu...
peak zinc
glass narwhal
There seems to be a problem with the Servo extension for all boards except Circu...
Yes, thank you. I figured some of that out. It’s not super kid-friendly though
glass narwhal
peak zinc
Yes, thank you. I figured some of that out. It’s not super kid-friendly though
Yeah... Makecode for CPX seems to be a lot more polished than for the other Adafruit boards, I think because there are more users... maybe.
If you're good with JS you can try fixing the Servo extension yourself 😁
timid edge
To make a makecode tutorial for the microbit I can use github to create a repository and be able to change things and add to the tutorial after. Is there any way to do the same thing with the adafruit makecode editor?
This, but for circuit playgrounds https://youtu.be/R-kY-dQXZvA?t=401

Create your own tutorials for MakeCode and store them on GitHub.
 sand whale
Hi. i'm having these errors when i try to build my project with ninja using cmake configturation tool

Someone can tell me what's wrong ? the file was autogenerated by the Microsoft Embedded tools extension
 tight oar
does anyone know why VS Code (and other IDEs) can't find my board (RP2040)
I have this issue since... forever, but it never really messed with anything, but maybe THIS is why I have so many unsolvable problems lately
 tight oar
does anyone know why VS Code (and other IDEs) can't find my board (RP2040)
I hav...
tight oar
tight oar
does anyone know why VS Code (and other IDEs) can't find my board (RP2040)
I hav...
my bad, I didn't select the board...
 pulsar blade
Hey there, kind of a noob one, but how do I print out the adress nicely?
>>> address
b'\xe9\xbe\xe9\xfe\xff\xdb\xb4\x84'
>>> address.decode()
'←ᄒ←ᅴᄡト'
>>> type(address)
<class 'bytes'>
 broken charm
pulsar blade
Hey there, kind of a noob one, but how do I print out the adress nicely?
```
>>>...
broken charm
pulsar blade
Hey there, kind of a noob one, but how do I print out the adress nicely?
```
>>>...
Is this a MAC address?
 vestal merlin
Anyone else out there having issues with Chromebooks not staying paired with Microbit in Makecode?
I have a class of 5th graders who are having issues getting them to pair. They show up as "paired," but when you click on the download button, it downloads the file to the Chromebook and then you have to drag/drop it onto the Microbit from a folder. Just wondering if anyone has a fix for this so we can direct download to the Microbit. It worked last year, so I am guessing it is some sort of Chrome OS glitch.
 sterile crow
broken charm
Is this a MAC address?
sterile crow
broken charm
Is this a MAC address?
@pulsar blade I don't think it's a MAC address. Those are 6 bytes, while your address is 8 bytes. Assuming that's python, the following will convert the bytes to hex strings, and then join them together with a separator:
":".join(map(lambda x : "{:02x}".format(x), address))
That would print it in what I consider the standard format for a MAC address, i.e. 2 digit hex values separated by ':'s
Knowing exactly how you want the bytes of that address formatted would help a great deal.
broken charm
sterile crow
<@465430730353410060> I don't think it's a MAC address. Those are 6 bytes, whi...
MAC addresses can be 6-8 bytes in length. There is a 48 bit and 64 bit MAC address standard.
sterile crow
broken charm
MAC addresses can be 6-8 bytes in length. There is a 48 bit and 64 bit MAC addre...
Yes, although 64 bit MAC's are limited to non-ethernet use. Which means they will be extremely rare in the consumer space.
broken charm
sterile crow
Yes, although 64 bit MAC's are limited to non-ethernet use. Which means they wi...
Zigbee requires 64 bit MAC addresses and it’s pretty widely used
So in the context of Python, if it’s using a zigbee compatible device, you would use a 64-bit mac
But I’m uncertain of the context they are using in this case
sterile crow
TIL! Given that it's not ethernet, taht would make perfect sense. To quote from elsewhere "The IEEE encourages adoption of the more plentiful EUI-64 for non-Ethernet applications."
broken charm
More device freedom with 64 bit MAC addresses
It’s sort of assumed in our day and age that we will have more wireless devices
sterile crow
In any case, if it is a MAC, that code snippet would print it in the format I see most often for Ethernet MACs. If you just want all 8 bytes jammed together, replace the ":" with ""
broken charm
Also borrowing that formatting for my back pocket
sterile crow
You can also adapt it to print a dotted quad IPV4 address if you have that as 4 bytes:
pulsar blade
sterile crow
<@465430730353410060> I don't think it's a MAC address. Those are 6 bytes, whi...
it is mac adress for a digimesh mesh network 🙂
So yeah it is not the traditonal mac adress, but digi still call them mac adress.
MAC stands for Media Access Controll so it doesnt really make sense in the tradional way neither 😄
pulsar blade
sterile crow
<@465430730353410060> I don't think it's a MAC address. Those are 6 bytes, whi...
doesn't really matter, space or : is perfect thanks for the tipp.
sterile crow
pulsar blade
doesn't really matter, space or : is perfect thanks for the tipp.
Per the discussion with skerr(he/him) above, it actually is a MAC address, devices that are not ethernet are encouraged to use 64 bit MAC addresses, since there's far more space with two extra bytes. As for formatting it, just grab that code snippet I posted upthread and use that as is. Copied and pasted from the Python REPL:
>>> b = b"DeadBeef"
>>> s = ":".join(map(lambda x : "{:02x}".format(x), b))
>>> s
'44:65:61:64:42:65:65:66'
thank you I will.
amber lagoon
Im trying to get a circuit playground to go back to make code after i used it for some circuit python. I have it in bootloader mode have dropped in the utf, but it just sits there with green lights and doesnt update.
 hollow oracle
amber lagoon
Im trying to get a circuit playground to go back to make code after i used it fo...
hollow oracle
amber lagoon
Im trying to get a circuit playground to go back to make code after i used it fo...
If you press the reset buttno once does the makecode start? Makecode needs a single click to go into bootloader mode, not a double-click
amber lagoon
hollow oracle
If you press the reset buttno _once_ does the makecode start? Makecode needs a s...
Sorry I forgot to update this, this was totally a P.I.C.N.I.C. not a board problem, the USB port was not properly inserted...
 empty peak
i'm having a hard time with circuit playground express and the input.setLightThreshold function, it doesnt appear to work except in the simulator
empty peak
I got something working by checking the level in a loop rather than relying on the light changed event
 timber spear
can codes made in makecode.com/adafruit be used with flora?
empty peak
is there a compiled list of hexcodes that work with the circuit playground express? mine doesnt seem to work with any value i send it (ie light.setAll(0x999999))
this one above just appears white but should be grey
 fossil marten
what does it take to get a new board supported in arcade.makecode.com?
undone matrix
theres this: https://arcade.makecode.com/hardware/adding

Microsoft MakeCode
If you want to produce an Arcade-compatible product please let us know at arcadehdw@microsoft.com.
 foggy lotus
empty peak
this one above just appears white but should be grey
foggy lotus
empty peak
this one above just appears white but should be grey
An LED light cannot produce a "grey" of any kind just as it cannot produce black. 0x999999 will produce 60% of red, blue and green which your eye perceived as white.
empty peak
foggy lotus
An LED light cannot produce a "grey" of any kind just as it cannot produce black...
Thank you for this. Great explanation.
 stone stratus
hello, I am having trouble adding the cricket uf2 to the board. when I drag the uf2 to the boot folder they device does not do anything. any advice?
vivid jetty
stone stratus
hello, I am having trouble adding the cricket uf2 to the board. when I drag the ...
By chance, are you on macOS Ventura?
stone stratus
PC
vivid jetty
I'm not sure then, there's a bug in the latest macOS release, maybe someone else will know
 snow island
@stone stratus make sure it is the right uf2 for the board. it'll be ignored if it isn't
stone stratus
I am using this guide: https://learn.adafruit.com/adafruit-crickit-creative-robotic-interactive-construction-kit/update-your-crickit
I am trying to use the UF2 linked there. I have confirmed that my usb is a datasync cable, and I have to correct board selected (not the crickithat)

Adafruit Learning System
Make your robot pal who's fun to be with using Crickit!
snow island
hrm, I haven't done crickit stuff recently
the support forum may be the best place to ask
stone stratus
I went on to figure it out. Thank you all
snow island
stone stratus
I went on to figure it out. Thank you all
what was the issue?
stone stratus
The guide was not super clear on whether you put the Uf2 on the cricket or the CPE. and then not super clear on where you plug in to program
hollow oracle
@opaque igloo [moving to appropriate channel]
I tried https://makecode.adafruit.com with Google Chrome 108.0.5359.124 (Settings->Help->About Chrome). I made a tiny project and downloaded the UF2 successfully. This is on a Mac Mini M1 running macOS 13.1.
 gilded bluff
all I need now is to find some teeny-weeny little OLED or LCD display to sit on top of a button.
 halcyon warren
Hi. I'm a teacher working with the bluefruit circuit playgrounds. I know that makecode is in beta but I don't have the time to learn python from scratch and teach that to kids.
The project we are working on is using the thermometer sensor to display and affect once it reaches a certain temp. The Base code works, but only if I set the temperate to a outrages number.
Any ideas on what I'm doing wrong? If it's just a beta thing ? Or other programs I could use?
 slow rivet
halcyon warren
Hi. I'm a teacher working with the bluefruit circuit playgrounds. I know that ma...
slow rivet
halcyon warren
Hi. I'm a teacher working with the bluefruit circuit playgrounds. I know that ma...
Hello and welcome to our server! It is definitely possible that it's a bug with the beta. Unfortunately, I'm not in a position to verify, and I don't know from personal experience - I haven't done much with MakeCode. Further development on MakeCode seems to have paused, so I'm not sure you'll find a solution to it. What is your class specifically?
halcyon warren
slow rivet
Hello and welcome to our server! It is definitely possible that it's a bug with ...
Its a general 7th grade Science class. We are doing a project expanding on our thermal energy unit
 north storm
halcyon warren
Its a general 7th grade Science class. We are doing a project expanding on our t...
north storm
halcyon warren
Its a general 7th grade Science class. We are doing a project expanding on our t...
I see you made it over
slow rivet
halcyon warren
Its a general 7th grade Science class. We are doing a project expanding on our t...
I know you said you don't have time to learn Python, but hear me out. My entire experience with the Circuit Playground Bluefruit has been with CircuitPython. I wrote a library that makes using CircuitPython with the CPB super simple. I also wrote a guide on all the features of the library, including temperature. The example is 6 lines of code. Basically the library does all of the hardware setup in the background, so you can get straight to using the hardware. https://learn.adafruit.com/circuitpython-made-easy-on-circuit-playground-express/temperature
I realise there's still a learning curve, but if you understood how to use MakeCode, this should actually already make some sense to you.
halcyon warren
slow rivet
I know you said you don't have time to learn Python, but hear me out. My entire ...
It's a goal for next year! This is just a band-aid solution until then
slow rivet
e.g. while True: is a MakeCode "forever loop".
slow rivet
halcyon warren
It's a goal for next year! This is just a band-aid solution until then
Ahh ok. I wish I had more suggestions then. The MakeCode beta is exactly that, a beta, meaning it is almost certainly buggy.
For your own future reference, once you're onto the CircuitPython track with things, there are plenty of folks here who can help in the #help-with-circuitpython channel.
There's always a chance someone has sorted a workaround in MakeCode, and might reply here, but I make no guarantees.
halcyon warren
slow rivet
Ahh ok. I wish I had more suggestions then. The MakeCode beta is exactly that, a...
Nope this is super helpful! I can modify this for out unit and start working toward python. Thank you!!
slow rivet
halcyon warren
Nope this is super helpful! I can modify this for out unit and start working tow...
Oh, excellent to hear!
@halcyon warren What operating system are you going to be using for yourself and the kids?
I'm trying to grab the "getting started" slides out of a presentation I've done, which summarises the "Welcome to CircuitPython" guide getting-started parts. The Welcome guide is huge, so it can be intimidating, especially when you're time limited.
@halcyon warren Here's an edited version. If you get a chance to take a look, hopefully it helps.
 proper laurel
hi im using the adafruit as7341 for liquid colour detection and would like to display the colour channel values in a bar chart is this possible in arduino or is there another tool that i could use to plot this data for post research?
foggy lotus
proper laurel
hi im using the adafruit as7341 for liquid colour detection and would like to di...
Is this specific to MakeCode? Otherwise you may get more help in #help-with-projects .
proper laurel
i just thought there might be a lirbary in arduino that maybe im missing out on . but if not then ill try in #help-with-projects . thanks
 umbral forge
Hi ! I just bought a pca9685 on Amazon and i was wondering if adafruit library can be install on it ?
 broken charm
umbral forge
broken charm
umbral forge
Not on the servos directly, but can definitely drive them from a microcontroller that can use adafruits libraries
I assume you want to use Makecode?
umbral forge
im new to coding with circuit python and im trying to move continuous servo with a pca9685 and a raspberry pi pico … im following every tutorial on adafruit that i can find ,but nothing is working or moving … here my code and my lib … can anyone help me pls


 gleaming finch
umbral forge
im new to coding with circuit python and im trying to move continuous servo with...
gleaming finch
umbral forge
im new to coding with circuit python and im trying to move continuous servo with...
first thing I see is that. you are defining scl/sda after you are trying to initialize the i2c bus. Also you have lower case for scl/sda when you define them, but Upper case in the I2C setup.
move lines 16/17 before line 10 and fix the case
you do not need to import SCL/SDA
try i2c_bus= busio.I2C(board.GP1,board.GP0)
remove line 2 and lines 16/17
Also, you should move this discussion to #help-with-circuitpython You will get more help there. This channel is for people using MakeCode.
 orchid valley
Going around in circles with my circuit playground MakeCode code.... password button works great until I trigger function errorLights and then the correct password color array LEDs are no longer is displayed: https://pastebin.com/qBrxC5Af
Pastebin
Pastebin.com is the number one paste tool since 2002. Pastebin is a website where you can store text online for a set period of time.
foggy lotus
orchid valley
Going around in circles with my circuit playground MakeCode code.... password bu...
Seems like you need to reset the lightArray only if resetComparePassword == true in errorLights. But you reset the lights all the time. ```lightArray = [light.rgb(0, 0, 0)]
if (resetPasswordCompare) {
passwordCompare = 0
}
Thank you! I will try and fix that.
pulsar blade
hello there,
I am having some issue with mqtt.
It looks like my client object is continuously reconnecting. That way it messages the info most of the time..
pulsar blade
this reconnection is happening in every 2 seconds, so it has nothing to do with keepalive
pulsar blade
It was because of multiple user with same username i think. Solved now 🙂
 true cedar
I see a subchannel for Circuit Python and was wondering if that's there is a subchannel planned for those of us using Micropython?
I understand that the CP support is due to the Adafruit fork, but due to implementation differences for MP and CP some of us are choosing to still go down the MP route
snow island
true cedar
I understand that the CP support is due to the Adafruit fork, but due to impleme...
You can ask in the CP channel but the MicroPython discord is probably a better place
true cedar
That's where I started. My question/implementation found a wall that doesn't seem to have an answer
attempting to build off a tutorial in the process of learning MP, but running into an issue where adding what should be appropriate code is kicking back an error or not initializing hardware
 manic crane
I need help with microchip studio. i have all the code. I will show you.
broken charm
manic crane
I need help with microchip studio. i have all the code. I will show you.
The channel is for MakeCode which isn’t Microchip Studio. Your best bet will probably be #help-with-projects
 grand shadow
Question: Would the Matrix M4 be compatible with Make code or is it only Circuit playground? Working with a school and wanted to use expressive pixels for some of the art classes, but then have the flexibility to teach coding with makecode for other classes.
vivid jetty
No, it doesn' tlook like the M4 supports Make Code. What about using the PyGamer? (though it's currently out of stock)
hollow oracle
grand shadow
Question: Would the Matrix M4 be compatible with Make code or is it only Circui...
There is generalized M4 support in https://arcade.makecode.com/# for SAMD51: https://learn.adafruit.com/makecode-arcade-with-samd51-m4, but not for the MatriPortal
grand shadow
Thanks @hollow oracle and @vivid jetty
 pine pewter
I’m having problems connecting Makecode to github so that I can create some extensions. I have a github account and go though the steps to generate a token and keep getting an error from make code that the token format is incorrect. Any suggestions? What am I missing?
slow rivet
@pine pewter Hello and welcome! This sounds more like a question for #help-with-git. We discourage cross-posting in general, but in this case, I am suggesting it so you get better help. Not many folks keep an eye on this channel because not so many folks know enough about MakeCode to help out. Please repost your question to the #help-with-git channel. Feel free to mention that I asked you to repost it. Good luck! I hope someone can help you figure it out!
pine pewter
Ok I’ll try there although I think its more a problem in makecode
foggy lotus
pine pewter
I’m having problems connecting Makecode to github so that I can create some exte...
Are you following these instructions? https://makecode.com/extensions/github-authoring
And these to create your Github token https://docs.github.com/en/authentication/keeping-your-account-and-data-secure/creating-a-personal-access-token
 true sentinel
I believe I am. I posted some screen captures in #help-with-git
slow rivet
pine pewter
Ok I’ll try there although I think its more a problem in makecode
I agree, but it's with the backend, not MakeCode usage. I think there are many more folks that can help out with backend things than other things. And those folks likely do not frequent this channel. This channel is, on its face, more suitable. But, I wanted to ensure you received expedient help, so I suggested moving it to a more-watched channel. The channels are not topic-set-in-stone. 🙂
foggy lotus
This channel is specific to the Microsoft MakeCode platform. I suggest you ask your question in #help-with-projects instead.
 slow yacht
grand shadow
Thanks <@329766224093249548> and <@273162248615100417>
slow yacht
grand shadow
Thanks <@329766224093249548> and <@273162248615100417>
Sorry I am late to the party.
You could try this: https://learn.adafruit.com/expressive-pixels-for-matrix-portal/overview
It is also from Microsoft and was tested on Adafruit Hardware. Not sure if it is still alive: Microsoft Expressive Pixels Application

Adafruit Learning System
Create colorful animations for your RGB Matrix
true sentinel
I'd like to be able to drive more servos with CPX and would like to use the PCA9685. I would prefer not to have to write all the code to interface to it and would like a driver. I see that one exists for the microbit. I tried importing it on the off chance it might work and was able to make it show up in the block menu but it no luck. Anyone have any ideas or suggestions.
wanton portal
If anyone ever finds a guide for converting libraries microbit<~>CPX/CPB, please post here and tag me. That’s been a recurring frustration.
 pulsar patrol
I'm trying to flash a bootloader to Holyoit 18010 using this guide.
https://github.com/joric/nrfmicro/wiki/Bootloader
Is there a most appropriate release, here, that I should use?
https://github.com/adafruit/Adafruit_nRF52_Bootloader/releases
vivid jetty
pulsar patrol
I'm trying to flash a bootloader to Holyoit 18010 using this guide.
https://git...
You probably want to ask in #help-with-projects - this channel is for Microsoft's MakeCode
 glacial turtle
Hey everyone. New here, so apologies if this has been answered or explored before, wanted to check on the difference between the maker.makecode and the adafruit.makecode sites specifically regarding the Circuit Playground Express and Circuit Playground Bluefruit. Any idea when the Bluefruit MakeCode will come out of beta? And will it get its own treatment like the CPX on adafruit.makecode or live in the maker.makecode space? Thanks!
foggy lotus
According to https://learn.adafruit.com/makecode, the makecode.adafruit.com site is only for Circuit Playground Express. All others are on maker.makecode.com.
glacial turtle
foggy lotus
According to <https://learn.adafruit.com/makecode>, the makecode.adafruit.com si...
Thanks. The ones on maker.makecode are listed as Beta. Including the Circuit Playground Express on maker.makecode, which has less functionality than Adafruit.makecode. Any timetable for getting those out of beta? Most specifically the Bluefruit on maker.makecode. I teach AP CSP and we use MakeCode to deliver the course and now after the AP exam I have purchased a class set of Circuit Playground Express, Crickits for Circuit Playground Express and then about ten Bluefruit and TFT Gizmos. Being able to use makecode for the Bluefruit would be fantastic. I have a few students I can move to circuit Python but the drag and drop would open up the Bluefruit to a broader swath of students.
hollow oracle
glacial turtle
Thanks. The ones on maker.makecode are listed as Beta. Including the Circuit Pla...
Microsoft runs MakeCode development. We are not sure of their schedule for updates. https://forum.makecode.com/ might be a better place to ask this question. Sorry we cannot be of more help.

 ashen fox
Not sure if I'm right in the makecode channel with my question. NoRiskNoFun!
I've been tinkering with a custom board using an ATSAMD21E17A MCU for quite some time now.
After lots of trial and error and 'trying' to understand how things might work, I finally made some progress. (Especially thanks to https://github.com/candykingdom/uf2-samdx1 which implements the E17 variant).
My current bootloader works when uploading from VSCode (Platoform.IO over SAM-BA iirc) and it also works for reading (current.uf2) and flashing .uf2 files via MSC after the a double-tap of the reset button.
But here's the thing: When reset the MCU with a baud 1200 open&close, it starts the MSC and shows the current.uf2. It is however no more able to boot the program, and the current.uf2 on there seems corrupt as well.
TL;DR: baud 1200 open&close does start the bootloader, but also erases/corrupts/kills the code and produces a non working current.uf2.
foggy lotus
ashen fox
Not sure if I'm right in the makecode channel with my question. NoRiskNoFun!
I'...
This channel is specific to Microsoft MakeCode and https://makecode.adafruit.com/. Maybe you want #tinyuf2 or the more generic #help-with-projects .
ashen fox
foggy lotus
This channel is specific to Microsoft MakeCode and <https://makecode.adafruit.co...
Thanks 🙂
 cerulean haven
This code is for my dot matrix display I have run this code with dot matrix display. Now I am trying to run this code with P10 LED matrix display with some necessary changes like define pins of P10 display, define pin functions for P10 display etc. I tried but didn't succeed. Please, can anyone tell me how can I add SPIDMD function for P10 display, and how can I change this code according to P10 display. How to change functions according to P10 display. Please guide me.
Thank you.
vivid jetty
cerulean haven
This code is for my dot matrix display I have run this code with dot matrix disp...
This channel is for Microsoft's MakeCode. Looking at your code, I would recommend asking in #help-with-arduino
 civic venture
Hello, I’m new to coding and all this but I recently purchased a circuit playground. I want to mess around with it on makecode as it seems the most newb friendly. I’m having an issue getting it connected. It will connect to my computer and turn green, it’s folder will pop up, but when I add anything to it (or wait more than 20 secs) it will disconnect and it’s access will disappear. The playground stays green and a little bit after the windows connect noise will play, but the folder won’t show. Please help, I’m really excited to get this working.
civic venture
I just tried it on my laptop and it works just fine?
foggy lotus
civic venture
Hello, I’m new to coding and all this but I recently purchased a circuit playgro...
The Circuit Playground Express is probably starting in "bootloader" mode and showing the CPLAYBOOT drive. When you compile and download your UF2 file, this drive will go away. That's normal. See https://learn.adafruit.com/adafruit-circuit-playground-express/downloading-and-flashing for details.
hollow oracle
civic venture
Hello, I’m new to coding and all this but I recently purchased a circuit playgro...
Third party drivers, antivirus, or various disk utility programs can cause problems. Various problematic utilities are listed in https://learn.adafruit.com/welcome-to-circuitpython/troubleshooting. It sounds like the first computer may have such an issue, but the laptop does not.
 tender yew
Hello, I tried to compile circuitpython but got an error
CMake Error at esp-idf/tools/cmake/build.cmake:287 (message):
Some Python dependencies must be installed. Check above message for
details.
Call Stack (most recent call first):
esp-idf/tools/cmake/build.cmake:416 (__build_check_python)
esp-idf/tools/cmake/project.cmake:384 (idf_build_process)
CMakeLists.txt:19 (project)
Im using Fedora Linux
vivid jetty
tender yew
Hello, I tried to compile circuitpython but got an error
CMake Error at esp-idf/...
Hi! This channel is for MIcrosoft's MakeCode. For compiling CircuitPython, I would recommend asking in #circuitpython-dev
 errant wedge
What's the code for the Adafruit smallest playable doom?
 valid olive
errant wedge
What's the code for the Adafruit smallest playable doom?
valid olive
errant wedge
What's the code for the Adafruit smallest playable doom?
🤔 If you're looking for the smallest Adafruit hardware that could run doom, maybe it's the RP2040 QT Py https://kilograham.github.io/rp2040-doom/
foggy lotus
This channel is for Microsoft MakeCode. You can ask in #help-with-projects . Look at https://www.adafruit.com/product/5300.
 little thicket
on the raspberry pi pico, how do i make it so i can see the file system when its plugged in via USB
C++
actually, where is the documentation
!docs
hmm
foggy lotus
little thicket
on the raspberry pi pico, how do i make it so i can see the file system when its...
This channel specific to Microsoft MakeCode usage. I suggest you ask in #help-with-arduino or #help-with-projects .
errant wedge
valid olive
🤔 If you're looking for the smallest Adafruit hardware that could run doom, may...
I mean like this one https://blog.adafruit.com/2022/01/24/is-this-one-of-the-smallest-playable-doom-devices/ I dont know how to get the code but I have all the things I need like the esp32, screen, sd card and sd card reader, etc. I just dont know where or how to use and get the code and for it to work

Adafruit Industries - Makers, hackers, artists, designers and engineers!
We’ve been working on a super-tiny, super-sharp/readable, DOOM playing device (it does more than DOOM, but … DOOM!). DOOM is often the “hello world” for what’s possibl…
 sullen plank
Hey there! I wanted to add WiFi networking to a PyGamer with an "#4264 Adafruit AirLift FeatherWing – ESP32 WiFi Co-Processor" but I had a couple of questions:
- Would a "Lithium Ion Polymer Battery - 3.7V 350mAh" be enough to power both the PyGamer and the FeatherWing? The FeatherWing needs up to 250mA during WiFi usage (no clue of what that means).
- Can I make HTTP requests using this FeatherWing with Microsoft MakeCode Arcade? It would be a single request every x minutes to an API endpoint that returns JSON or Plain Text. I'm using the Static TypeScript version.
valid olive
Hi 😄
sorry, a few things:
- Not sure if it's a good idea to share your Adafruit IO key publicly.
- I wouldn't upload code as pdf. If it's short you can put it inside codeblocks
```ino
[your code, serial outpur or error message here]
```
or use a site like https://pastebin.com/ - This channel is for makecode (a thing from microsoft?). I would ask in #help-with-arduino for example
- Chatgpt can work. Sometimes. But it can also write total garbage. Especially because it's not designed to write accurate programming code. It's designed to write natural language and other stuff that looks believable, not code that is correct. If you don't understand the code fixing what chatgpt wrote can be harder than writing it yourself. I would start with something simple (or better, directly an example from a library) and then extend and modify it step by step
cerulean haven
valid olive
Hi 😄
sorry, a few things:
1. Not sure if it's a good idea to share your Adafru...
I taken this code from YouTube and after that I I edited this code according to my application.
Thanks for your suggestion, your suggestion is very good.
Thank you.
 left ocean
Hi! I'm trying to make a device for my brother. I was hoping to use Makecode to program it, so he can easily modify it himself later. It's supposed to consist of a Trinket M0, a NeoPixel Jewel 7 and an I2S MEMS Microphone Breakout. Specifically I want it to react using the "on loud sound" block, but as the Trinket M0 doesn't have a built in microphone I'm wondering ... is it possible? Or should I just go with standard arduino code, which he probably won't be able to work with
hollow oracle
left ocean
Hi! I'm trying to make a device for my brother. I was hoping to use Makecode to ...
could you use a CIrcuit Playground Express? 10 NeoPixels, microphone, battery connector
buttons, etc.
good MakeCode support
left ocean
Yeah that'd be great. Unfortunately it's a wooden staff he's already carved, so that won't fit - I really tried 🙂
I guess I can go with python too though, it'll likely be easier for him to grok than C++
hollow oracle
left ocean
Yeah that'd be great. Unfortunately it's a wooden staff he's already carved, so ...
a Trinket is short on RAM and flash. A QT Py RP2040 is only slightly bigger and much more capable
Trinket M0 also does not have audiobusio.PDMIn due to lack of space
left ocean
Oh, that's good to know, thanks
hollow oracle
no MakeCode support, but very good CircuitPython support
could it be Feather-sized? Feather RP2040 PropMaker has lots of stuff on it: accelerometer, audio out, level-shifted NeoPixel output
hollow oracle
left ocean
Oh, that's good to know, thanks
accelerometer could maybe substitute for microphone? e.g detect tapping the staff hard on the ground
if your goal is to make it light up on some kind of "strong" action
left ocean
When blowing on it is the request - the neopixels will be covered by a large translucent rock crystal
hollow oracle
also see Itsy Bitsy RP2040, Itsy Bitsy nRF52840 (Bluetooth).
itsy bitsy are quite small
left ocean
A cylinder of 30mm width is the max IIRC ... that should fit without issue
hollow oracle
you could use an analog mic instead of PDMIn, that would work with the trinket if you already ahve it
since you are not concerned with quality sound input, just detecting the blowing on it
Feathers would be good because they have battery charging circuitry on board
left ocean
Yeah, that'd be nice. Although it would have to come out for charging anyway, it's probably better to not rely on unplugging the lipo connector too many times right?
Anyway ... I did still get to play with Makecode and it's really cool. Will definitely be used for future projects where it may be a better fit
hollow oracle
left ocean
Yeah, that'd be nice. Although it would have to come out for charging anyway, it...
right, so you'd just have to plug in a USB cable
 jade crater
Hey all so I am super new at coding like way new. I have a tufty 2040 and am trying to make a custom badge for it. I would like it to have my name and Company at the top. that I think i have figured out. the hard part is the lower 1/3. I want a box in the left lower corner that displays GiFs and next to that box I want space for text. My goal is a nametag featuring my name and company as well as rotates through GiFs of icons for various social networks and featuring my user name next to them. I figure 8 seconds or so is enough time for each GiF and username. I am having a hard time getting GiFs to display. If someone could help me out or point me in the right direction that would be amazing!
 abstract blaze
Using the Adafruit Feather 32u4 RFM95 LoRa Radio- 868 or 915 MHz With the Adafruit Ultimate GPS featherwing.
The GPS code for the test from the web page works and the test for the radios works the parsing of the GPS does not work and I cannot combine any part of the GPS code into the message being transmitted.
I've only gotten one parsing code to work and it would only pull up the entire line by itself could not translate to degrees for Google
and none of the codes that combine any GPS parsing with the radio code the serial remains blank after upload.
vivid jetty
abstract blaze
Using the Adafruit Feather 32u4 RFM95 LoRa Radio- 868 or 915 MHz With the Adafru...
Hi - this channel is for Microsoft's MakeCode progamming language. I want to make sure you get help - depending on which programming language you're using you could try that channel (CircuitPython or Arduino) or #help-with-projects is also a catch-all
 rugged bramble
Are the LED's at the bottom of the Pygamer available in MakeCode? I'm looking to use them in a game.
 inner ingot
rugged bramble
Are the LED's at the bottom of the Pygamer available in MakeCode? I'm looking to...
inner ingot
rugged bramble
Are the LED's at the bottom of the Pygamer available in MakeCode? I'm looking to...
I'm new to makecode so not sure if possible. Can try looking at the pinouts page, or failing that the schematic download, but it looks like D8 or pin8 does the neopixels, and you'd need to tell makecode how many neopixels in the "strip" (5?)
 blazing plover
Hi @hollow oracle
I'm trying to add a timer in the bootloader uf2-samdx1 which is compatible with SAMD21G18A because our bootloader is getting stuck in the boot mode if exposed with ESD and we want it to jump to the firmware after x amount of time let's say 15 sec (for testing).
NOTE: We can use any bootloader as far as it is compatible with SAMD21.
The repo from adafruit/uf2-samdx1 is not compatible with ATmel/Microcip Studio so how can I use the debugerr J-Link EDU mini or ATMEL ICE to debug the code? Can you suggest alternative ways. Thanks
Right now building it through make which I've installed using chocolatey and I'm using VS Code with python3.
// Define the timeout duration in milliseconds
#define BOOTLOADER_TIMEOUT 15000 // 15 seconds

static volatile uint32_t millis = 0;

// Timer function to get current time in milliseconds
static uint32_t get_current_millis(void) {
    // This should return the number of milliseconds since the system started
    return millis;
}

void SysTick_Handler(void) {
    millis++;
}

void init_systick(void) {
    SysTick_Config(SystemCoreClock / 1000);
}
this is the code I'm using it to add a timer, but it needs to be adjusted in the repo in such a way that some parts will be going into different files and should be commented out from the main.c
Also, I'm initializing the below two lines in the very start of the main(void)
    SystemInit();
    init_systick();
and then initializing the start_time as below just before the while(1) loop
uint32_t start_time = get_current_millis();
and lastly editing in the main while(1) loop like below
// Check if the timeout has been reached
        if (get_current_millis() - start_time > BOOTLOADER_TIMEOUT) {
            //LED_MSC_ON();
            check_start_application(); // Jump to the main application
            break; // Exit the loop after jumping
        }
The above all mentioned changes are added and able to compile the code successfully but when flash the bootloader with the new .bin file the board is not behaving as expectedly means if double press or use ESD gun it will go into the bootloader mode and not coming out after 15 seconds. 🥲
I'm not sure how to debug I tried to put the LED_MSC_ON(); for debugging but maybe it's wrong or the code is never going into that if condition because the condition is not getting true.
Can anybody help to identify that or plz direct me in the correct direction.
Much appreciated !
hollow oracle
@June010 Hi - this is not the appropriate channel for discussing the bootloader, let's use #help-with-projects, and could you start a thread there? I will answer first in the GitHub issue.
GiutHub may be a better place to discuss given the timezone difference
blazing plover
Ok Dan
rugged bramble
inner ingot
I'm new to makecode so not sure if possible. Can try looking at the pinouts page...
Thanks for the info. I found an extension to add to my block code. Then I needed to say the board had 16 pixels. That covers the 5 on the front of the Pygamer and the one on back.
 viral sonnet
Ive been trying to use a circuit playground that is attached to a rotating Lazy Susan so that it will light up when it detects that it is in motion and a different color when stops. I have been trying out code based on this example: https://learn.adafruit.com/make-it-shake-rattle-and-roll/more-makecode-2
but since the circuit board is sitting flat and its movement is a somewhat smooth rotation it doesn't seem to detect much motion. Do I just need to find a lower sensitivity range?

Adafruit Learning System
Use the accelerometer on your Circuit Playground Express to detect movement
viral sonnet
Im using acceleromter range 1g
undone matrix
viral sonnet
Ive been trying to use a circuit playground that is attached to a rotating Lazy ...
Would a gyroscope be better? (I dont think the playground has that though, you would need external hardware)
 vale stream
if you want to detect rotation using an accelerometer, you’ll have to mount it far enough away from the rotation axis, and even then, it’s tricky
viral sonnet
I think I will have space to mount it loosely dangling underneath the surface, that should have it wiggle a bit more
vale stream
there will also be a minimum rotation rate that it can detect, which might be faster than is useful for your use case
 drowsy lynx
I'm making a virtual/digital pet game, which is too big for the meowbit, and I'm wondering what the best board would be? I see in makecode the pinout for the M4, are all of the M4 boards compatible? Which would the best one for a v-pet be?
 wheat bison
This is the list of compatible devices for makecode arcade. https://arcade.makecode.com/arcade-devices Is this the full list?

Microsoft MakeCode
These boards run MakeCode Arcade games. Choose a board to find out more about it and where you can get one!
After looking over the selections if I had to choose a board it would the the Adafruit PyGamer https://www.adafruit.com/product/4242 The CPU is twice as fast as the Meowbit and has 4 times more qspi flash (8MB).

What fits in your pocket, is fully Open Source, and can run CircuitPython, MakeCode Arcade or Arduino games you write yourself? That's right, it's the Adafruit PyGamer! We ...
It appears as if the SAMD51 (Cortex M4) is the best processor that is compatible with makecode arcade.
Doesn't seem as if an RP2040 or ESP32 based board is compatible or at least one doesn't exist in the list of compatible devices.
The majority of the compatible devices are using the SAMD51 including the PyGamer but the PyGamer is using a slightly faster version of the chip and a lot more flash storage. The RAM limit seems to be the same for all the devices though because it's built into the SAMD51 chip.
If you're running out of RAM on the Meowbit you'll run out of RAM on any devices in the list. They all have the same amount of RAM.
drowsy lynx
Thank you so much! How do I know if I'm using ram or flash?
wheat bison
flash is storage, like an onboard sd card. if you run out of storage like a USB thumb drive you should be able to see how much free/used space you have.
if you hit a ram limit it will likely throw a ram related error, such as cannot allocate ram
drowsy lynx
Ok, thanks
wheat bison
Flash is where you'll store game assets like spritesheets, images, sounds, files, code. It's easier to think of it like a USB drive. With the Meowbit you can store 2MB of assets. With the PyGamer you can store 8MB.
drowsy lynx
That explanation really helps, thank you!
undone matrix
The STM32F4 used by the Meowbit actually only has up to 96 KB of SRAM, the ATSAMD51 used by the PyGamer has 192 KB
I believe there is an RP2040 port somewhere that works as well
You can also switch to a Raspberry Pi which will have plenty of RAM and storage
drowsy lynx
Thank you, I will order a pygamer, and look into the pi more
drowsy lynx
If I convert my blocks to JavaScript or python will the file size be smaller (for memory storage?)
undone matrix
drowsy lynx
If I convert my blocks to JavaScript or python will the file size be smaller (fo...
no
blocks get compiled to JS anyways
drowsy lynx
thanks
 full warren
anyone know how to replace a single tile instead of covering it with something else?
undone matrix
full warren
anyone know how to replace a single tile instead of covering it with something e...
Scene > Tilemap Operations > set [tile] at [tilemap col [number] row [number]]
 full warren
Is there any way to make comments? Or something to separate the blocks kinda like UE5’s visual scripting type things?
 coral cipher
full warren
Is there any way to make comments? Or something to separate the blocks kinda lik...
coral cipher
full warren
Is there any way to make comments? Or something to separate the blocks kinda lik...
I use circuit playground makecode a a lot and i think there’s a comment block there?
full warren
What about for the pygamer?
coral cipher
full warren
What about for the pygamer?
Can’t really help there… mb I shouldn’t have said anything…
full warren
coral cipher
Can’t really help there… mb I shouldn’t have said anything…
All good, just curious ^^
undone matrix
full warren
Is there any way to make comments? Or something to separate the blocks kinda lik...
right click > add comment?

you can use functions to separate blocks out into...functions
 full warren
undone matrix
right click > add comment?
full warren
undone matrix
right click > add comment?
is there any comment block? and not just a small text when you hover over one of the main loop things
undone matrix
full warren
is there any comment block? and not just a small text when you hover over one of...
yes, right clicking on the workspace instead of a block and adding a comment adds a comment block
that is independent and can be moved around and resized
full warren
oh shoot, ok cool
drowsy lynx

I'm making a virtual pet game.
Using blocks, what is the best way to check if the time = 8pm, so I can pause the game while the pet 'sleeps'?
I tried using the clock extension (https://blobbey2000.github.io/pxt-clock/) but the previous code doesn't work
Perhaps I could get user input time in numbers upon start, and do a fancy equation (which I'd need help with) so that on game update every 24 hours, if "insert fancy equation", then pause for 8hrs, ?
pxt-clock
Makes blocks that create an in-game clock. The clock can run at whatever speed you want it to.
drowsy lynx
Anybody?
hollow oracle
drowsy lynx
Anybody?
There aren't many MakeCode users here. Have you tried https://forum.makecode.com/ ?
drowsy lynx
I'll try that, thanks
 rare compass
Hello, first time using circuitpython with Mu editor. And I have a Raspberry Pi Pico. I know how to make the LED light up, but I don't know how to make the LED pulse gently and evenly
vivid jetty
rare compass
Hello, first time using circuitpython with Mu editor. And I have a Raspberry Pi ...
welcome! This channel is for Microsoft's Make Code. I would recommend asking in #help-with-circuitpython so the right folks can see your question and help you out. Cross-posting is usually discouraged, but in this case I would recommend it.
 weary sail
Hello, I just got the neokey trinkey and the kailh big switch. I was able to get the sample code working with Mu to change RGB lights and other simple stuff although I am having issues setting it up as an external key for my Windows PC. I tried Chat gpt but was getting an error message for unrecognized attribute. Does anyone have a sample code for using the Neokey trinkey and big switch as a single external key that I could use? I am a little new to this and apologize if this is a stupid question.
glass narwhal
weary sail
Hello, I just got the neokey trinkey and the kailh big switch. I was able to get...
The neokey product guide has examples on how to use it as a PC key https://learn.adafruit.com/adafruit-neokey-trinkey/hid-and-cap-touch-example
If you have more questions, please continue the discussion in https://discord.com/channels/327254708534116352/537365702651150357 , this channel is for Microsoft MakeCode support.
weary sail
glass narwhal
The neokey product guide has examples on how to use it as a PC key https://learn...
I was able to get it working. Thanks for your reply!
 glad sapphire
PIC16F877A
hollow oracle
pleae do not cross-post. I'm deleting the post because it was duplicated in #general-chat
glad sapphire
hollow oracle
pleae do not cross-post. I'm deleting the post because it was duplicated in <#33...
sorry again
glad sapphire
hollow oracle
pleae do not cross-post. I'm deleting the post because it was duplicated in <#33...
its fine to post on general ?
hollow oracle
glad sapphire
its fine to post on general ?
yes, and you got answered there. If you post, wait a while if you don't get an answer right away
glad sapphire
hollow oracle
yes, and you got answered there. If you post, wait a while if you don't get an a...
thanks
 velvet ravine
From #general-chat :
hi, can someone tell me whats wrong with my prehistoric tamagotchi game?
it says there are some errors (and the stats arent showing up), and thats too big for mewbit/REE
https://arcade.makecode.com/S46548-00525-69809-63756

 true delta
i have no idea about makecode, but i had a little look at the error that happens and your code ..


i wonder if there's something about the statusbar value setting that's failing?
velvet ravine
i got it! but i dont know how to get them moving...
 unkempt chasm
Hi, does anyone have any experience with makercode internals? I would like to port it to a board with RP2040 and display with ST7789, but the official support is only for ILI9341 and ST7735. All these drivers are very similar and differ mainly in initialization details. By modifying MADCTL I made the display work with both the official ST7735 driver (part of the image and no colors) and ILI9341 (mirrored, strange colors). I might be able to modify the parameters further, or prepare my own binary patcher, but I would need to know the exact initialization parameters of the official drivers to do so. Unfortunately, I couldn't find their source code anywhere (e.g. ILI9341.h) https://github.com/microsoft/pxt-common-packages/blob/master/libs/screen---st7735/screen.cpp. Do you know where I could find them (maybe I searched wrong).
true delta
no idea about makecode, but i literally have this open on my screen at this instant; does it help? https://github.com/adafruit/Adafruit_ILI9341/blob/master/Adafruit_ILI9341.cpp
(.h is in same directory.)
unkempt chasm
I researched this way of course, but I found out that another driver is used there, in the code there is for example a function configure(madctl, frmctr1), which is not in the adafruit driver...
 calm gazelle
id call this lazyweb but ive just been failing to search it by my description. my stero has a volume knob that's a rotary encoder but with a detent for off if turned to the far left. what would that be called?
 agile olive
I'm starting out on building an OS for the RP2040 board and have an elementary question:
Recommended strategy to separate developer environments using only .NET libraries?
glass narwhal
agile olive
I'm starting out on building an OS for the RP2040 board and have an elementary q...
This channel is for questions related to the Microsoft MakeCode project. Try https://discord.com/channels/327254708534116352/330406777009209346 instead.
Not sure what you want to do with .NET on the RP2040 tho...
 toxic plover
Hi all! I am absolutely brand new to MakeCode (like under an hour new) and I just got it because I decided to get a Adafruit Circuit Playground Express. Trying out some very basic stuff and I wanted to make a sound bar and found really easy tut followed that no issue but now I have it loaded and the CPX is behaving rather odd. So I downloaded MakeCode Desktop App so I could watch sound detection.

I am in a quite room. The loudest thing around me is the occasional sound from the fridge kicking on and sometimes noise from husband's game. I don't know what to make of that read out and I am a little afraid something is wrong with my microphone. ... but I am also brand new so I am hoping someone here will be able to point out something ridiculously easy that I am missing
hollow oracle
toxic plover
I am in a quite room. The loudest thing around me is the occasional sound from t...
those I think are still low values of background noise; it's just scaled to show you the range of values it's sending. If you talk or make a load noise, you should get some much louder values
toxic plover
hollow oracle
those I think are still low values of background noise; it's just scaled to show...
So I tested for that and it didn't seem to pick up much. At this moment I only know how to adjust the upper level for my graph so I played around with it at 255, 100, 150 etc I "know" my range is 0-255 but I don't know what that actually correlates to in reality or if it relative however the CPX would only show minor reactions like maybe setting off an extra light but would then go back to just having a quarter to half the board lit up depending on what I had set upper value too. I would also expect the baseline sound to be low with spikes upward as things made noise not spikes of less noise.
Lastly the only comparison point that I have that is apples to apples is the tutorial I watched in which it was clear when the device was picking up when he was speaking and then would go back to 1 or 0 pixels little up when he wasn't. He also showed his sound graph and it looked the exact opposite of mine though I know that can be affected by your situation and location. If it helps I can post vids and pics or link tut I was using but I wanted to be sure that was ok before I posted more than I already had
hollow oracle
toxic plover
So I tested for that and it didn't seem to pick up much. At this moment I only k...
could you point to the makecode program you are using for sound level?
toxic plover
hollow oracle
could you point to the makecode program you are using for sound level?
I am second guessing whether I understand your question or not so please bear with me
If you are asking what program am I using to see the sound level it's some that is part of Microsoft Make Code app for desktop. Using the Desktop version of the app let's me see what the CPX is picking up live.
If you are asking to see the little bit of code I am using to attempt this project I will post that as soon as I get home and have access to it
If you are asking something completely different please explain it to me like I am 5 years old. I work in tech for a living but I also know I know nothing about this and don't feel like letting what I assume was meant derail any help I am receiving .
hollow oracle
toxic plover
I am second guessing whether I understand your question or not so please bear wi...
No problem. Makecode has "projects" you can store on the website, so I thought you could give me a link for that. Or you could give me a screenshot of the Makecode program you wrote.
toxic plover
hollow oracle
No problem. Makecode has "projects" you can store on the website, so I thought y...
input.onSwitchMoved(SwitchDirection.Left, function () {
light.setBrightness(240)
})
input.onSwitchMoved(SwitchDirection.Right, function () {
light.setBrightness(24)
})
forever(function () {
light.graph(input.soundLevel(), 255)
})
 toxic plover
hollow oracle
toxic plover
input.onSwitchMoved(SwitchDirection.Left, function () {
light.setBrightness(...
toxic plover
hollow oracle
toxic plover
input.onSwitchMoved(SwitchDirection.Left, function () {
light.setBrightness(...
I tested this and reproduced the issue. I found a number of similar reports that report the same behavior -- that "quiet" is still going to give you readings around 50-100. I have not seen any fix for this. We don't maintain MakeCode, so I can't say if/when this will be fixed. But it's also true that louder sounds will go above this level, for instance if you blow or talk loudly at the mic. I'm sorry I don't have better news.
toxic plover
hollow oracle
I tested this and reproduced the issue. I found a number of similar reports that...
Even if it is not great news it lets me understand what's going on and that I appreciate!
If it's specifically with make code there are I think to other coding options I code try with the CPX.
Thank you very much for your help troubleshooting this!
hollow oracle
toxic plover
Even if it is not great news it lets me understand what's going on and that I ap...
You're welcome! Check out https://learn.adafruit.com/adafruit-circuit-playground-express/playground-sound-meter for a CircuitPythonexample.
toxic plover
hollow oracle
You're welcome! Check out <https://learn.adafruit.com/adafruit-circuit-playgroun...
Will do! Thank you again 😊
 thorn apex
Will the pico 2 be added to the make code “beta” any time soon?
hollow oracle
thorn apex
Will the pico 2 be added to the make code “beta” any time soon?
it is already in the beta: https://circuitpython.org/board/raspberry_pi_pico2/. It is just way down the page when you search for "pico 2" (adding the 2 doesn't help narrow the search, unfortunately)
thorn apex
hollow oracle
~~it is already in the beta: https://circuitpython.org/board/raspberry_pi_pico2/...
For the block editor of Makecode? I only saw the original pico on there
hollow oracle
oh sorry I thought I was in #help-with-circuitpython . Adafruit doesn't put things into Makecode. That's up to Microsoft.
thorn apex
hollow oracle
oh sorry I thought I was in <#537365702651150357> . Adafruit doesn't put things ...
Oh interesting!
 spice quiver
Can someone help me with JSON?
hollow oracle
spice quiver
Can someone help me with JSON?
with makecode?
spice quiver
hollow oracle
with makecode?
Oh wait , im at wrong place , sorry 😅
i didnt knew wht makecode was
 nimble gazelle
Can someone help me? i have been trying to do an rc car code
which uses a NRF24 module ,a tb6612fng driver and a servomotor to control the direction
and for the controller im just using 2 joystick module one to make it advance forward and backward an the other one to control de servo
 glass narwhal
nimble gazelle
Can someone help me? i have been trying to do an rc car code
which uses a NRF24...
glass narwhal
nimble gazelle
Can someone help me? i have been trying to do an rc car code
which uses a NRF24...
I don't think there is support for any of these in Microsoft MakeCode 😆
 velvet panther
Good evening everyone, I was wondering if anyone knew how to make a rubber ducky detect the targets Keyboard language in order to write with different words (in my case I own a laptop with LAA as keyboard language but payload.dd writes as if it was in US)
 vale moat
Anyone know why the makecode forums are down?
hollow oracle
vale moat
Anyone know why the makecode forums are down?
seem to be back now
vale moat
hollow oracle
seem to be back now
yeah but every so often they go back into read only mode
smt abt overdue hosting payments
I hope the makecode team can sort it out
 wintry fox
How are the Animations built into MakeCode created? I made my own using a bunch of “Show Rings” in a function but for some reason it’s much slower than the animations built into makecode
hollow oracle
wintry fox
How are the Animations built into MakeCode created? I made my own using a bunch ...
They are probably written in C or C++
wintry fox
Is MakeCode random numbers actually random?
I made a program using MakeCode that displays a random color using RGB and it always generates the same colors in the same order whenever I turn it on

For me it always starts as Aqua, then it gets lighter, then lighter, then white, then a purple/pink
wintry fox
Yeah I guess the random numbers are the same every time it starts up
I made it log out the random RGB it generates and it's the same "random" numbers every time
 halcyon vale
pseudorandom with a fixed seed then
wanton portal
If you can read a sensor that has a bit of variation (microphone, accelerometer, light sensor) you might be able to do an empty loop based on that value and get some randomness.
 vale horizon
Hi. Suggestions for decoding IR button signals with Makecode for micro:bit? I’ve tried a couple of extensions with no success. I can detect changes on P0 so I believe the wiring is correct. I have an IR receiver module that come with an Elegoo starter kit. I’m also open to MicroPython or CircuitPython.
 stiff hazel
Yay
 sharp hamlet
okay great
so did you see the error I was getting with pyconv?
C:\Users\deanm\Documents\dev_stuff\pxt-seesaw\Untitled>pxt pyconv adafruit_seesaw
Using target adafruit with build engine codal
target: v1.1.19 C:\Users\deanm\Documents\dev_stuff\pxt-seesaw\node_modules\pxt-adafruit
pxt-core: v3.15.6 C:\Users\deanm\Documents\dev_stuff\pxt-seesaw\node_modules\pxt-core
[run] py
INTERNAL ERROR: Error: spawn py ENOENT
at _errnoException (util.js:1022:11)
at Process.ChildProcess._handle.onexit (internal/child_process.js:190:19)
at onErrorNT (internal/child_process.js:372:16)
at _combinedTickCallback (internal/process/next_tick.js:138:11)
at process._tickCallback (internal/process/next_tick.js:180:9)
stiff hazel
Ok so I have an update building
Which OS are you rubbing? Is “py” a alias of python on your system?
sharp hamlet
I'm using windows 10
py is nothing on my system
so I'm not entirely sure what it's trying to do
does your update fix anything related to what we've been doing?
stiff hazel
You need python 3
It does a best effort to convert circuit python code into TypeScript
I can run the tool and push the files in the branch
Build should be there in 5
sharp hamlet
ok I would like to get it running in case I need to do this in the future
so should 'py' be an alias of python3?
I have python3 but it looks like 'python' points to python2
stiff hazel
Ok it is done
So you need to run “pxt update
It should be “pxt-Adafruit 1.1.20”
Then go thé thé cp_seesaw folder
Run
“pyconv adafruit_seesaw”
sharp hamlet
should it be "pxt pyconv adafruit_seesaw"?
I've updated pxt-adafruit
pyconv isn't recognized and pxt pyconv adafruit_seesaw throws the same error
I tried aliasing both py and python to python3 and still throwing the error
stiff hazel
What is the output?
sharp hamlet
C:\Users\deanm\Documents\dev_stuff\pxt-seesaw>pxt pyconv adafruit_seesaw
Using target adafruit with build engine codal
target: v1.1.20 C:\Users\deanm\Documents\dev_stuff\pxt-seesaw\node_modules\pxt-adafruit
pxt-core: v3.16.3 C:\Users\deanm\Documents\dev_stuff\pxt-seesaw\node_modules\pxt-core
[run] py
INTERNAL ERROR: Error: spawn py ENOENT
at _errnoException (util.js:1022:11)
at Process.ChildProcess._handle.onexit (internal/child_process.js:190:19)
at onErrorNT (internal/child_process.js:372:16)
at _combinedTickCallback (internal/process/next_tick.js:138:11)
at process._tickCallback (internal/process/next_tick.js:180:9)
which OS are you using?
stiff hazel
i'm on WIndows 10, using git bash
what's the alias to python 3?
I have another fix that allows you to specify the location of python3 in an env var
stiff hazel
in 10 minutes, you should update to 1.1.21
you can se the "PYTHON3" env var to the alias of python 3 cli
and cross fingers 😬
stiff hazel
ok back tomorrow for another tryout. I was able to convert most of the phython files. neopixel.py uses default values in the init which breaks our converter
but we don't need that one since we already have a driver
 blazing ermine
oh a new channel!
stiff hazel
shiny
sharp hamlet
hi @stiff hazel thanks I'm back in the office now. After updating it shows the files it's gonna convert and then throws an error:
$ pxt pyconv adafruit_seesaw/
Using target adafruit with build engine codal
  target: v1.1.21 C:\Users\deanm\Documents\dev_stuff\pxt-seesaw\node_modules\pxt-adafruit
  pxt-core: v3.16.5 C:\Users\deanm\Documents\dev_stuff\pxt-seesaw\node_modules\pxt-adafruit\node_modules\pxt-core
files (8):
   adafruit_seesaw/adafruit_seesaw/analoginput.py
   adafruit_seesaw/adafruit_seesaw/crickit.py
   adafruit_seesaw/adafruit_seesaw/digitalio.py
   adafruit_seesaw/adafruit_seesaw/neopixel.py
   adafruit_seesaw/adafruit_seesaw/pwmout.py
   adafruit_seesaw/adafruit_seesaw/samd09.py
   adafruit_seesaw/adafruit_seesaw/seesaw.py
   adafruit_seesaw/adafruit_seesaw/__init__.py
[run] py
INTERNAL ERROR: Error: spawn py ENOENT
    at _errnoException (util.js:1022:11)
    at Process.ChildProcess._handle.onexit (internal/child_process.js:190:19)
    at onErrorNT (internal/child_process.js:372:16)
    at _combinedTickCallback (internal/process/next_tick.js:138:11)
    at process._tickCallback (internal/process/next_tick.js:180:9)
are there any other dependencies for using pxt pyconv (e.g. any visual studio tools, etc. that need to be installed)?
stiff hazel
Set PYTHON3 to the python 3 CLI
There are no dependencies, we need to run a bit of python to extract the AST of the python code
stiff hazel
Any luck?
Also there are some python construct that we can’t handle so it is not meant to be complete (like we don’t have types 😃 )
sharp hamlet
ok didn't work on cmd line or cygwin
deanm@DEAN10 /cygdrive/c/Users/deanm/Documents/dev_stuff/pxt-seesaw
$ export PYTHON3=python3

deanm@DEAN10 /cygdrive/c/Users/deanm/Documents/dev_stuff/pxt-seesaw
$ PYTHON3
Python 3.6.4 (default, Jan  7 2018, 15:53:53)
[GCC 6.4.0] on cygwin
Type "help", "copyright", "credits" or "license" for more information.
>>> exit()

deanm@DEAN10 /cygdrive/c/Users/deanm/Documents/dev_stuff/pxt-seesaw
$ pxt pyconv adafruit_seesaw/
Using target adafruit with build engine codal
  target: v1.1.21 C:\Users\deanm\Documents\dev_stuff\pxt-seesaw\node_modules\pxt-adafruit
  pxt-core: v3.16.5 C:\Users\deanm\Documents\dev_stuff\pxt-seesaw\node_modules\pxt-adafruit\node_modules\pxt-core
files (8):
   adafruit_seesaw/adafruit_seesaw/analoginput.py
   adafruit_seesaw/adafruit_seesaw/crickit.py
   adafruit_seesaw/adafruit_seesaw/digitalio.py
   adafruit_seesaw/adafruit_seesaw/neopixel.py
   adafruit_seesaw/adafruit_seesaw/pwmout.py
   adafruit_seesaw/adafruit_seesaw/samd09.py
   adafruit_seesaw/adafruit_seesaw/seesaw.py
   adafruit_seesaw/adafruit_seesaw/__init__.py
[run] python3
INTERNAL ERROR: Error: spawn python3 ENOENT
    at _errnoException (util.js:1022:11)
    at Process.ChildProcess._handle.onexit (internal/child_process.js:190:19)
    at onErrorNT (internal/child_process.js:372:16)
    at _combinedTickCallback (internal/process/next_tick.js:138:11)
    at process._tickCallback (internal/process/next_tick.js:180:9)
but then I tried reinstalling python3
and did
C:\Users\deanm\Documents\dev_stuff\pxt-seesaw>doskey PYTHON3=C:\Users\deanm\AppData\Local\Programs\Python\Python36\python.exe
and it did different stuff but failed somewhere with "assertion failed", etc.
so I deleted neopixel.py and it works
yay!
thanks!
it was definitely some sort of path problem, the path on this computer is super boned
ok I'll see if I can get this stuff tested now
stiff hazel
The assert is expected.
We can’t handle some language constructs.
We already have support for neopixels so you can leave that one alone
sharp hamlet
right right, neopixel.py was for the neopixel interface on the seesaw chip
so that the seesaw handles the neopixels instead of the host micro
but that's ok we don't need it right now
stiff hazel
You can do ‘light.createStrip(pins.A1, ...)’ to mount a neopixel strip on that pin
By the way, I recommend using Visual Studio Code
It will help you by type checking and also rename refactoring support
I did align the naming conventions to JS: camelized members, capitalized class/enums.
sharp hamlet
createStrip will send the commands to the seesaw chip though?
or will create a normal neopixel strip on pins.A1?
stiff hazel
My understanding is that crickit plugs into A1 directly
Right, you’ll need to port that one “manually”
sharp hamlet
ok that's fine we don't really need makecode support for it
stiff hazel
The bpp Args in init are confusing our converter
sharp hamlet
I'll check out VS code
stiff hazel
We have a debugger for MakeCode brewing there. I’ll share bits when we have something we can share
sharp hamlet
excellent, thanks!
stiff hazel
keep me updated!
sharp hamlet
hey hey do you know what the correct way to do this would be?
        public digital_write_bulk(pins: number, value: number) {
            let cmd = pins.packBuffer(">I", pins)
what is packBuffer?
sharp hamlet
oh wait issue might also be that it's overriding the global pins
with a number
ok ty I'll do that
looks like it's accepting this for now:
public digital_write_bulk(pinSet: number, value: number) {
            let cmd = pins.packBuffer(">I", pinSet)
do you know how I can make the seesaw type available to other files?
pxt_modules/seesaw/analoginput.ts(27,18): error TS2304: Cannot find name 'Seesaw'.
actually we do have that thing implemented 😃
update pxt.json and include the .ts files in there
if you push your changes to a branch, i can also take a peek via github
sharp hamlet
ok I'm gonna go get some lunch, here's some in progress edits

never done typescript before so I'm not entirely sure just yet how to type things
seems like we use mostly just 'number' instead of more specific types
stiff hazel
JavaScript only has 1 number type
sharp hamlet
cool I'll put in those edits and keep going
sharp hamlet
hey so if you see my latest commit it's throwing an error here: https://github.com/adafruit/pxt-seesaw/blob/dm-edits/seesaw.ts#L137
pxt_modules/seesaw/seesaw.ts(137,35): error TS9235: Unknown or undeclared identifier
pxt_modules/seesaw/seesaw.ts(139,35): error TS9235: Unknown or undeclared identifier
er wait I bet it needs to be an instance of the class
yea never mind figured it out
stiff hazel
getting closer
sharp hamlet
ok it compiles and communicates w/ seesaw chip now
stiff hazel
YES!
Once you have the runtime going, i'll give you some help on the blocks
we've gotten a lot of experience around that by now...
sharp hamlet
cool cool I'm gonna test some functionality out now (the first version I think had some endianness problems)
and then once that's all good we can look at blocks
stiff hazel
all changes pushed?
sharp hamlet
yea pushed to branch dm-edits
do you know off the top of your head how to concat 2 Buffers?
stiff hazel
let's make a list of those and we can back-port them into the runtime
sharp hamlet
do you know where the control.fail output goes?
stiff hazel
it'll surface in the editor or hardcrash the hardware
    export function fail(message: string) {
        serial.writeString("Fatal failure: ")
        serial.writeString(message)
        serial.writeString("\r\n")
        panic(108)
    }
actually send a message over serial, then dies
sharp hamlet
is that hardware uart or usb CDC
stiff hazel
on CPX, it is HF2

very very badly named "serial" for now
We'd love to have a usb CDC implementation in CODAL btw.
you can do "pxt hidserial" to listen for those messages
HF2 goes to our windows app or via WebUSB in the editor
sharp hamlet
all good, ok cool I can get some serial output now
looks like i2c may be throwing a NACK before the last byte?
stiff hazel
regarding blocks, we should split crickit from this repo so that seesaw stays seesaw only
i2c, i'm not sure about NACK. I'm a noob in that space
here is the driver for i2c for CPX: https://github.com/lancaster-university/codal-mbed/blob/master/source/MbedI2C.cpp

GitHub
Contribute to codal-mbed development by creating an account on GitHub.
and here is i2cWriteBuffer https://github.com/Microsoft/pxt-common-packages/blob/33669d5f8bce32b1d44249c5a65b642576e7afae/libs/core/i2c.cpp#L33
GitHub
pxt-common-packages - Common packages for Microsoft MakeCode editors
sharp hamlet
ok cool thanks, issue is just that it reads one extra byte all the time for some reason
so if it's reading one byte it's supposed to do
this
but instead it does
this
I just checked though and it looks like the correct data is returned to the application
and that byte is just discarded
so im just not gonna worry about it
sharp hamlet
ok digital input and output, analog input, PWM output, cap touch input all work
that's all I've tested so far
although there is a bit of a weird bug
stiff hazel
Open bugs on those weird bugs so that I can get more eyes on it
sharp hamlet
if I do this:
const dev = new seesaw.Seesaw();

forever(() => {
    let tval = dev.analogRead(2)
    serial.writeValue("signal1", tval)
})
On your repo
sharp hamlet
it works until I put 3.3V on the pin
then it'll kinda get freezy and start printing the wrong value
but if I do:
const dev = new seesaw.Seesaw();

forever(() => {
    let tval = dev.analogRead(2)
    serial.writeValue("signal1", tval - 3000)
})
it works fine
I'll open an issue
sharp hamlet
public analogRead(pin: number): number {
            let buf = pins.createBuffer(2)
            if (this.pinMapping.analogPins.indexOf(pin) < 0) {
                control.fail("Invalid ADC pin")
            }

            this.read(_ADC_BASE, _ADC_CHANNEL_OFFSET + this.pinMapping.analogPins.indexOf(pin), buf)
            let ret = pins.unpackBuffer(">H", buf)[0]
            pause(1)
            return ret
        }
never mind I can get it to freeze either way
stiff hazel
it should use NumberFormat.UInt16BE from this string
sharp hamlet
possibly some i2c issue
do you think there's even a reason to have these extra interface files? https://github.com/adafruit/pxt-seesaw/blob/dm-edits/digitalio.ts
pwmout.ts, analoginput.ts
those were there in cirpy to make things usable via the default cirpy apis
they don't add any functionality that's not in seesaw.ts, and if they don't increase compatibility in any way for pxt I think they should be removed
stiff hazel
if you don't need them, trash them
i think converter does a transivitive exploration of the code and dumps everything.
less is better
sharp hamlet
ok I'm gonna delete
i only ask because I'm not sure what the conversion to blocks is gonna look like yet
stiff hazel
I'm think that "seesaw" package should stay fairly agnostic
and we should have a adafruit/pxt-crickit repo that depends on this one
the editor will handle package resolution etc...
i can get a headstart on the crikit blocks if you create the repos
for example, crickit.ts should move out into the crikit repo
sharp hamlet
yea I agree
for circuit python they wanted them to be all in one package
but for this it's better to have them separate
sharp hamlet
cause there will likely be more seesaw configs to support
and yea they will all use the same core
ok cool I'll make some repos
stiff hazel
I'm happy to take a first stab at the blocks. This area is somewhat trickier to get right
and i've got a crickit to test it
i don't expect kids to ever do seesaw from blocks so this repo is pretty much done
sharp hamlet
ok yea go for it if you want 😃
I'll follow this for the repos? https://makecode.com/packages/getting-started
Microsoft MakeCode
It is easiest to tinker and design your blocks from the editor itself. Use the custom blocks feature for this purpose.
sharp hamlet
yea I mean if you want to take a stab at the blocks go for it, but you wanted me to create a separate crickit repo right?
stiff hazel
yes, just create new repo in github and give me write access
sharp hamlet
ok sorry for clarity though, you just want an empty repo right? you don't need me to follow those linked steps or do anything else in the repo?
stiff hazel
one last this you need to do
run pxt bump from the seesaw repo to create a new tag in the repo
sharp hamlet
looks like I might need to merge this all into master to do that?
C:\Users\deanm\Documents\dev_stuff\pxt-seesaw>pxt bump
Using target adafruit with build engine codal
  target: v1.1.21 C:\Users\deanm\Documents\dev_stuff\pxt-seesaw\node_modules\pxt-adafruit
  pxt-core: v3.16.5 C:\Users\deanm\Documents\dev_stuff\pxt-seesaw\node_modules\pxt-adafruit\node_modules\pxt-core
[run] git pull
remote: Counting objects: 6, done.
remote: Compressing objects: 100% (3/3), done.
remote: Total 6 (delta 4), reused 5 (delta 3), pack-reused 0
Unpacking objects: 100% (6/6), done.
From github.com:adafruit/pxt-seesaw
   34f8f2f..b1d9db8  dm-edits   -> origin/dm-edits
There is no tracking information for the current branch.
Please specify which branch you want to merge with.
See git-pull(1) for details.

    git pull <remote> <branch>

If you wish to set tracking information for this branch you can do so with:

    git branch --set-upstream-to=origin/<branch> dm-edits

INTERNAL ERROR: Error: Exit code: 1 from git pull
    at ChildProcess.<anonymous> (C:\Users\deanm\Documents\dev_stuff\pxt-seesaw\node_modules\pxt-adafruit\node_modules\pxt-core\built\nodeutil.js:65:24)
    at emitTwo (events.js:126:13)
    at ChildProcess.emit (events.js:214:7)
    at maybeClose (internal/child_process.js:925:16)
    at Process.ChildProcess._handle.onexit (internal/child_process.js:209:5)
right, first merge the branch
and bump from master
can you also enable the travis.ci build? https://travis-ci.org/adafruit/pxt-crickit
sharp hamlet
ok bumped and travis enabled
stiff hazel
don't forget to merge seesaw, and bump over there
stiff hazel
your branch is not merged https://github.com/adafruit/pxt-seesaw/pull/7

GitHub
I'm making this a PR so that I can add comments.
sharp hamlet
gotcha, ok bumped
stiff hazel
if you go to https://makecode.adafruit.com/beta -> new project -> gearwheel -> extensions -> search "seesaw", you'll get the code in TypeScript

Adafruit Circuit Playground Express - Blocks / Javascript editor
A Blocks / JavaScript code editor for the Adafruit Circuit Playground Express.
sharp hamlet
yay ok this works:
const dev = new seesaw.Seesaw();
dev.pinMode(2, 1);
forever(() => {
    dev.digitalWrite(2, true);
    pause(500)
    dev.digitalWrite(2, false);
    pause(500)
})
blinking Signal 1 on crickit board
stiff hazel
simulator really does not like crickit but we'll fix this later 😃
sharp hamlet
yeah it's fine for now
ok I'm gonna head home, but you have everything you need for now?
stiff hazel
yup, got it all
sharp hamlet
great, thanks for the help!
sharp hamlet
haha enjoy 😃
stiff hazel
it's freezing for me... anyway
I've started working on the motor blocks
btw, examples in https://learn.adafruit.com/adafruit-crickit-creative-robotic-interactive-construction-kit/circuitpython-dc-motors refer to motor A,B but the silk says "1", "2"
Make your robot pal who's fun to be with using Crickit!
stiff hazel
@sharp hamlet run “pxt update” - I bumped pxt to support new field editors
 floral plank
Hmm, I may have to deploy a makecode instance -- just another service to have in the homelab 😃
 vital flame
@stiff hazel is the colour picker in makecode broken?
I see only three columns / 12 colours, and no black option.
The fieldeditor definition says there should be four columns / 16 colours.
I made a copy under another name and using that as the picker, actually does work properly.
vital flame
@stiff hazel moving discussion here - do you know BTW why only A1 and A2 support servos in Makecode?
stiff hazel
We ran into locking issues when mixing A1 and, say, A5. We restricted the choice to a subset until we do can allocated engineering resources to address those issues.
vital flame
@stiff hazel that's fair enough. Limited and working is better than Fancy and broken.
Where is that low-level code found?
stiff hazel
this is the C++ layer, called CODAL, on top of which MakeCode builds: https://github.com/lancaster-university/codal-circuit-playground
GitHub
Contribute to codal-circuit-playground development by creating an account on GitHub.
it relies on https://github.com/lancaster-university/codal-samd21
GitHub
Contribute to codal-samd21 development by creating an account on GitHub.
GitHub
Contribute to codal-mbed development by creating an account on GitHub.
GitHub
Contribute to mbed-classic development by creating an account on GitHub.
GitHub
Contribute to codal-core development by creating an account on GitHub.
CODAL is an abstraction layer on top of MBed, or potentially other embedded RTOS
vital flame
makes sense. Is it loaded into the makecode project at build time?
or part of the bootloader?
stiff hazel
it is precompiled in the cloud and linked in the browser
our bootloader is also open source btw: https://github.com/Microsoft/uf2-samdx1
GitHub
uf2-samdx1 - USB Mass Storage bootloader (based on UF2) for SAMD21 and SAMD51
More info on the pins issues: https://github.com/lancaster-university/codal-circuit-playground/issues/5
GitHub
This is a follow up of Microsoft/pxt-adafruit#604
Test sample:
#include "CircuitPlayground.h"
CircuitPlayground cplay;
int main()
{
while(1)
{
cplay.io.a4.setAnalogValue(0...
vital flame
The default "colorNumberPicker", eg as used by setAll
stiff hazel
it involves fixing bugs in mbed
we've fixed it, try it at http://makecode.adafruit.com/beta
Adafruit Circuit Playground Express - Blocks / Javascript editor
A Blocks / JavaScript code editor for the Adafruit Circuit Playground Express.
vital flame
So you have. Excellent. 😃
I made a new "field editor" definition in my custom.ts, and it works fine in prod.
stiff hazel
we should really document all our field pickers 😃
vital flame
namespace fieldeditors {
/**
* Get the color wheel field editor
* @param color color, eg: #ff0000
*/
//% blockId=cliqNumberPicker block="%value"
//% blockHidden=true
//% shim=TD_ID colorSecondary="#FFFFFF"
//% value.fieldEditor="colornumber" value.fieldOptions.decompileLiterals=true
//% value.defl='#00ff00'
//% value.fieldOptions.colours='["#ff0000","#ff8000","#ffff00","#ff9da5","#00ff00","#b09eff","#00ffff","#007fff","#65471f","#0000ff","#7f00ff","#ff0080","#ff00ff","#ffffff","#999999","#000000"]'
//% value.fieldOptions.columns=4 value.fieldOptions.className='rgbColorPicker'
export function __cliqNumberPicker(value: number) {
return value;
}
}
stiff hazel
yup, they do take quite a few flags typically that's why we predefine them
vital flame
and as you can see the inlineInputMode works great. 😃
stiff hazel
    /**
     * Get the color wheel field editor
     * @param color color, eg: #ff0000
     */
    //% blockId=colorNumberPicker block="%value"
    //% blockHidden=true
    //% shim=TD_ID colorSecondary="#FFFFFF"
    //% value.fieldEditor="colornumber" value.fieldOptions.decompileLiterals=true
    //% value.defl='#ff0000'
    //% value.fieldOptions.colours='["#ff0000","#ff8000","#ffff00","#ff9da5","#00ff00","#b09eff","#00ffff","#007fff","#65471f","#0000ff","#7f00ff","#ff0080","#ff00ff","#ffffff","#999999","#000000"]'
    //% value.fieldOptions.columns=4 value.fieldOptions.className='rgbColorPicker'
    export function __colorNumberPicker(value: number) {
        return value;
    }
looks about right
smile block is intriguing 😃
vital flame
I should probably work out when this thing can be published, it is tres cool...
stiff hazel
we love très cool stuff
sharp hamlet
hey hey @stiff hazel I'm back in the office now.The Crickit was freezing for you when you were trying to use motors? Which motors were you using?
sharp hamlet
oh the CPX was freezing? I just mean were you using recommended DC motors: https://learn.adafruit.com/adafruit-crickit-creative-robotic-interactive-construction-kit/recommended-motors
Make your robot pal who's fun to be with using Crickit!
just cause I've seen some crazy noisy motors cause the board to stop working
sharp hamlet
oh no you'll need to power it from the 5V jack
great! I'm pushing one small update right now so the PID is correct on the crickit board
so if you just plug into the USB port on the crickit board (the one that says "seesaw only") and double tap the "crickit reset" button
you should be able to update the firmware by dragging in this uf2: https://github.com/adafruit/seesaw/releases/tag/1.1.0
and that's so it works with the update I just pushed to the pxt-seesaw repo
although I think we'll be removing the "auto-detect by PID" thing from makecode since it's not really necessary and we're going to have a separate pxt-crickit
stiff hazel
I can see kids trying to power the crickit via USB. It is logical since they also power the CPX like that.
The other issue was figuring out which way to connect a servo 😃 symmetric connectors...
We can keep the crickit stuff in PXT-seesaw and split it when it is stable
sharp hamlet
yea people will definitely do that
but we don't want people powering motors from USB
I'm sure it's in the guide somewhere but yea it could be clearer on the silkscreen
kids probably will skip over reading as much of the guide as they can (I know that's what I would do)
Make your robot pal who's fun to be with using Crickit!
sharp hamlet
ok sorry for the conflicting info, but don't do the update I told you to do earlier
I've reverted the changes since apparently the boards have already been bought and shipped to customers
so your firmware should be fine as is
stiff hazel
No worries I have some microbit stuff to attend to today
Kids will NEVER read the guide. If the cable can go in a hole, they will try it.
As long it does not fry it’s fine 😃
stiff hazel
@sharp hamlet if you have samples of seesaw code to drive crickit, we can work on putting blocks around them.
sharp hamlet
@stiff hazel yea you're right, but we'll do the best we can to get people to read ¯_(ツ)_/¯
I'm ready whenever you are to start on the blocks
sharp hamlet
we can just start with digital io because that's the most basic
and then maybe do analog input
then DC motor (PWM)
and servo
stiff hazel
i started on the motors here: https://github.com/adafruit/pxt-crickit/blob/master/crickit.ts
motor blocks
stiff hazel
sharp hamlet
love it
stiff hazel
ok let's do IO now
actually, servo is more interresting from a kids perspective
and we should eventually have a nicer angle picker
sharp hamlet
ok sorry just trying to figure one thing out with the motors
stiff hazel
so i can easily build those blocks if you have seesaw working and tested on hardware 😃
sharp hamlet
sorry I was having noise problems with the motors
fixed it, can you get the motors to work on your hardware?
stiff hazel
i haven't tried it yet
need to find a power supply -- forgot to order one
can it be powered via the CPX?
sharp hamlet
no unfortunately it needs a 5v supply into that barrel jack
powering motors off USB would possibly kill the users computer
these can get thirsty
stiff hazel
i can guarantee you that kids will try it
sharp hamlet
it would be kinda hard, they'd need something terrible like this: https://www.cdw.com/product/StarTech.com-3-ft-USB-to-Type-M-Barrel-5V-DC-Power-Cable/2148813?cm_cat=GoogleBase&cm_ite=2148813&cm_pla=NA-NA-STP_US&cm_ven=acquirgy&ef_id=WckWNwAAAVAizmpc:20180529204955:s&gclid=Cj0KCQjw9LPYBRDSARIsAHL7J5nGIRw4nIm_SuxZ8rQbTv3NFPvAu0nIwcYvebh5Bwuk7lVVotJdFnwaAuKmEALw_wcB&s_kwcid=AL!4223!3!198550684941!!!g!57277825727!

CDW.com
Buy a StarTech.com 3 ft USB to Type M Barrel 5V DC Power Cable
at CDW.com
lemme see... is there any way to tweak these blocks a bit in the editor?
stiff hazel
yes for sure
it's all in the comments,
it's easier to prototype the blocks in the web editor though
what are you trying to do?
 plush marsh
@stiff hazel hey hey
sharp hamlet
well for one we need to swap motors 1 and 2
plush marsh
the reason we can't power from USB is because USB ports have a 500mA fuse, it will blow instantly and people will think their computer is destroyed
standard servos and motors draw 1A each when stalled... its just super risky
if you have something like a 2 wheel'd bot, you need AA battery packs
stiff hazel
yup got it (i forgot to order a power supply thus asking)
does the crickit get power from the CPX?
plush marsh
yes
there's a diode that will auto-power the CPX
so you only need one attery pack
we'
've written a page in the guide here https://learn.adafruit.com/adafruit-crickit-creative-robotic-interactive-construction-kit/powering-crickit
Make your robot pal who's fun to be with using Crickit!
@stiff hazel sorry BACKWARDS - the CPX is powered from crickit
if you plug into the DC jack, it will power the CPX as well as motors, as CPX does not draw that much current
stiff hazel
i need to find a power supply with a barel jack
plush marsh
2.1mm barrel connectors are fairly common
if you have something with a DC jack, it'll be right
stiff hazel
no luck for me right now
forever(function () {
    light.showRing(
    `blue blue blue blue blue green green green green green`
    )
    crickit.motor1.run(50)
    pause(500)
    light.showRing(
    `red red red red red yellow yellow yellow yellow yellow`
    )
    crickit.motor2.run(50)
    pause(500)
})
this is what i'm running with the bump pxt-crickit, do i need to update?
sharp hamlet
that's a 12V power supply
it needs a 5V
@plush marsh can we overnight peli a power supply?
stiff hazel
it fits in the hole!
sharp hamlet
haha don't worry it has an efuse to protect against that
you're right though
ok I've verified the motors work well!
run in both directions works
plush marsh
@stiff hazel yeah you can see the red 😦 LED is lit
that means the power supply is too high or too low - wont break it but will not work
please order up a 5V 2A power supply
stiff hazel
is that a bad thing? I thought it meant it was correctly powered
stiff hazel
it should blink
plush marsh
we could have the seesaw detect it and blink red on the neopixel
sharp hamlet
I was a bit confused for a while because I guess the speed change doesn't take unless you hit enter or click out of the speed picker?
plush marsh
(there's a voltage-detect)
thats a good idea - we'll add to next rev of seesaw firmware
stiff hazel
i think i'll have to order a supply.
plush marsh
https://www.adafruit.com/product/276 is what you want

This is a FCC/CE certified and UL listed power supply. Need a lot of 5V power? This switching supply gives a clean regulated 5V output at up to 2000mA. 110 or 240 input, so it works in any ...
stiff hazel
we have tons of JST connectors
plush marsh
pick next day air, it'll go out tomorrow
stiff hazel
i forgot to add that to my order last week
sharp hamlet
forward, reverse, and invert work, just motors 1 and 2 need to be swapped in that block and then motor is done!
plush marsh
np, the crickit packs will come with batteries and/or power supplies - we're working it out as we go along!
stiff hazel
let's invert then 😃
power supply is definitely a challenge in the classroom
often overlooked.
stiff hazel
bare LiPo are too dangerous, fire hazard
AA, AAA batteries run out of juice because kids don't unplug things
wired power -- you run out of power plugs
plush marsh
@stiff hazel yeah i thought really hard about power suppy for this because its the biggest challenge
its a balance of price/performance. i decided in the end that a DC barrel jack and a 5V 2A power supply was the best tradoff
we could support more power supplies with a full buckboost - but it would add $5 to cost, and they dont like driving motors that much
so higher risk of xplody
stiff hazel
as long as there are accessories available we're good.
will you have USB -> Barrel jack cable?
stiff hazel
I've used USB powerbrickets a lot
plush marsh
again, because you'll fry the USB power supply
even if we say "use for USB power pack" its ineveitable they'll plug it into a computer
stiff hazel
for sure
plush marsh
the computer fuse isnt permanent, it does 'come back to life'
but for about 10 minutes its hysteria because it seems like the motherboard is busted 😃
so i was gonna just ship with a 5V2A plug and then a 3xAA battery pack
stiff hazel
i see the happy face diode on the silk now 😃
stiff hazel
yeah
let me get back to order moe
ordering
@sharp hamlet here is the pin mapping for the motors: https://github.com/adafruit/pxt-crickit/blob/master/crickit.ts#L73
plush marsh
added some bold text to https://www.adafruit.com/product/3093 to clarify

COMING SOON! Sign up to be notified as soon as we have these in stock!Sometimes we wonder if robotics engineers ever watch movies. If they did, they'd know that making robots into slaves ...
sharp hamlet
@stiff hazel right right I will PR
ok I've made this block
namespace crickit {
    let dev: seesaw.Seesaw;

    function saw(): seesaw.Seesaw {
        if (!dev)
            dev = new seesaw.Seesaw();
        return dev;
    }

    //% fixedInstances
    export class Signal {
        private _id: number;
        private _pin: number;

        private _inverted: boolean;

        constructor(id: number, pin: number) {
            this._id = id;
            this._pin = pin;
        }

        /**
         * set the signal
         */
        //% group="Signals"
        //% weight=100
        //% blockId=sawpinwrite block="set %pin to %value=toggleOnOff \\%"
        digitalWrite(value: boolean) {
            const dev2 = saw();
            dev2.pinMode(this._pin, 1);
            dev2.digitalWrite(this._pin, value);
        }
    }

    //% fixedInstance block="signal 1"
    export const signal1 = new Signal(1, 2);
}

forever(function () {
    crickit.signal1.digitalWrite(true);
    pause(100);
    crickit.signal1.digitalWrite(false);
    pause(100);
})
the code works but is there a way I can see if it renders the block correctly without PRing to the repo?
then I can do a bunch quickly
stiff hazel
create a new program on https://makecode.adafruit.com/beta
Adafruit Circuit Playground Express - Blocks / Javascript editor
A Blocks / JavaScript code editor for the Adafruit Circuit Playground Express.
click on Javascript, then Explorer, then + and add the custom.ts file
copy paste your Javascript in there and click back on blocks to preview
when you're done copy paste back the changes into your PR
stiff hazel
make sure to add the pxt-seesaw extension
stiff hazel
We can also probably do a better angle picker for the servo
and we'll need some simulator support as well
@sharp hamlet don't forget to run pxt bump when you push a change
the cloud will pick up the latest github release tag
plush marsh
ok gonna get movin' to my next things - thanks for all your assistance peli, this is epic!
thankfully when microbit's ready, it'll 'just work'
stiff hazel
yeah, we'll make sure it works on both sides
sharp hamlet
ok @stiff hazel I've added a digitalwrite block and it seems to work in the editor! https://github.com/adafruit/pxt-crickit/blob/master/crickit.ts
sorry I accidentally committed to master instead of PR
will PR for the next ones, but can you let me know if it's up to par?
I'm out for today but we will pick up tomorrow or next time you're available
stiff hazel
The initial version with fixedInstances was better
stiff hazel
I pushed an update
new blocks
@sharp hamlet do you have an API set you need to get in for Drives/Servos?
sharp hamlet
@stiff hazel ok great!
for drives I think we should just have analogWrite(pin)
no additional API needed for that
and for servos we would just need
void seesaw_Servo::write(int angle)
{
        _ss->setPWMFreq(_pin, 50);
        uint16_t val = map(angle, 0, 180, 3277, 6554);
        val = constrain(val, 3277, 6554);
        _ss->analogWrite(_pin, val);
}
that's a fake C++ version obviously
stiff hazel
Drives sound easy enough, clone the singles and tweak
(I left a TODO in signals btw)
sharp hamlet
yea I saw, ok I'll fix
do you want to do the drives and signals or I can have a go w/ the fixed instances approach
stiff hazel
We’re prinkling the code with magic numbers. Not sure where we could get the constants from tough...
Please go ahead
I did the signals
😃
sharp hamlet
great!
ok I'll get that all done soon
did you say you had an angle picker anywhere?
stiff hazel
For servo, we should have a positional api and a continuous api
We can use the min max annotation to specify a range on the angle
And I guess adjustable frequency could be another function on the instance (defaulted at 50)
Also, how do you control the neopixel that’s on board?
sharp hamlet
the neopixel defaults to being controlled by the CPX
so that can use the default CPX Neopixel API but with a fixedinstance pin I guess?
stiff hazel
What that single neopixel on board?
Let’s stay away from CPX specific stuff - this library will have to work on microbit as well
sharp hamlet
oh sorry the single neopixel is controlled by the seesaw chip
the "NeoPixel" connector defaults to being controlled by the host (CPX in this case)
for the drives should we have the slider go from 0 to 100 (for duty cycle percentage) or from 0 to 65535 (the actual 16 bit PWM value)?
stiff hazel
we use 0..1023 in the pins API in CPX
so I think we should stick to that
btw, does seesaw support any kind of event model?
sharp hamlet
internally it's an event-driven system but the API to the host is just simple i2c commands
it has an interrupt pin that can be activated by gpio interrupts, data ready in uart <-> i2c converter, etc.
but that all might be outside the scope of this
stiff hazel
CODAL has an event bus that would provide a nice abstraction to transfer events from the crickit to the CPX
sharp hamlet
hm yea it might
stiff hazel
e.g. an pin edge event could be surfaced to the crickit
stiff hazel
for example
pin edge edvent
btw, i'll be in your offices on June 12th, hope to meet F2F then
sharp hamlet
yea lets meet then and we can discuss all that if we havent implemented yet 😃
maybe after we get the basics implemented
that would be great though
stiff hazel
talking about docs, we do have a more efficient way (and lightweight) of rendering blocks
Microsoft MakeCode
MakeCode provides a lightweight blocks rendering engine that renders code snippets into SVG images.
plush marsh
you mean instead of screenshot?
stiff hazel
or instead of full simulator which is quite heavy
@sharp hamlet you'll want to add value = value | 0 to round it
sharp hamlet
oh here you mean?
//% blockId=driveanalogwrite block="crickit set %pin value to %value= value | 0"
@stiff hazel
stiff hazel
no, in the javascript
sharp hamlet
ok gotcha
stiff hazel
if you open a PR from your branch, i can add comments as you go 😃
sharp hamlet
ok cool lemme add the last module and I'll open a PR in a min
stiff hazel
I was looking at https://learn.adafruit.com/adafruit-crickit-creative-robotic-interactive-construction-kit/circuitpython-servos
Make your robot pal who's fun to be with using Crickit!
we can add min cycle/max cycle, and other knobs to the class as well. We have a magic trick for that too.
@plush marsh once the package is ready, we can add it to the "preferred" list of packages in CPX editor
then it'll be visible by default when opening the Extensions dialog
plush marsh
ok added https://learn.adafruit.com/adafruit-crickit-creative-robotic-interactive-construction-kit/makecode
Make your robot pal who's fun to be with using Crickit!
i think once we beta test and get all the blocks working that will b e good
stiff hazel
if you add "- beta" in the github repo description, the editor will flag the extension as beta
sharp hamlet
ok added beta and made a PR with new stuff!
plush marsh
nice art there
stiff hazel
merged (also deleted the branch oops)
sharp hamlet
thats fine
oops I forgot to add the new files to pxt.json
I'll commit that to master
hmm new blocks still aren't showing up in the editor, something I forgot to do?
stiff hazel
need to bump
plush marsh
@stiff hazel back. that neopixel is true outsider art
stiff hazel
@sharp hamlet i'm wondering if seesaw could expose an event API like the CODAL bus. This would allow to expose events for button presses or pin edges
plush marsh
@stiff hazel maybe? we didnt connect an IRQ pin so it would have to poll over I2C constantly :/
stiff hazel
hummm. let's finish the basics but events are an important aspects of sensors in makecode
the crickit is more of an output shield so it's ok
sharp hamlet
yea I think most projects are gonna use the outputs
but I agree that events are sorta necessary for makecode to work intuitively
for inputs
it's definitely within the seesaw structure to have an event bus
but as limor said on this particular hardware the IRQ pin isn't connected to the host so the bus would need to be polled
@plush marsh maybe we can put a jumper on the hardware for microbit, feather, etc for the IRQ?
stiff hazel
@sharp hamlet do you want to be able to change SERVO_MIN/MAX?
plush marsh
@sharp hamlet theres a wire for IRQ
you could solder/clip it to any of the GPIO on the CPX. on feather its a jumper too
CPX doesnt have a lot of pins so i hesitated to lose one to IRQ
stiff hazel
is there anything to do with the sound? I assume it amps the A0 output so it should just work.
plush marsh
it Just Works
stiff hazel
ITW(tm)
plush marsh
@stiff hazel do you think we need Invert Motor for Crickit?
i guess i can document it but most people can just flip wires
ok made guide page here
er
Make your robot pal who's fun to be with using Crickit!
stiff hazel
I'm happy to remove it. Less is better
stiff hazel
it's easier to add a block than swap to physical wires 😃
and one has a 50% change to get them wrong anyway
@plush marsh do you need to be able to set dc min/max for servos? This is also something we can expose in typescript.
would you want the "steer" block as well?
plush marsh
@stiff hazel hey do we still have webusb functionality in maekcode
if i --enable-webusb
stiff hazel
?webusb=1
plush marsh
right!
ok dano is working on the next crickit project
will be makecode!
so 😦 chrome disabled it by default
stiff hazel
right, we're waiting for them to reopen it (if they every do)
GitHub
A dedicate block to handle continuous servos.
plush marsh
@stiff hazel wow thanks! we're zipping along on the crickit support - this was so fast
you're coding faster than i can document
stiff hazel
looks like we're getting close to done. what's missing?
going faster than the delivery of power supplies 😃
plush marsh
for crickit? i mean, one thing we could do is add steppers
i dont wave around the deets but you can drive 5V steppers from the ULN and also from the DRV8833 port
stiff hazel
we haven't covered "drives" in the blocks too https://learn.adafruit.com/adafruit-crickit-creative-robotic-interactive-construction-kit/circuitpython-drives?preview_token=cF2FDuAZgiFczcRZGic43A
Make your robot pal who's fun to be with using Crickit!
we do have drives already...
plush marsh
oh yah i havent done any docs
sharp hamlet
@stiff hazel sry I am dumb and am having trouble getting my block changes to show up in the editor again
i tried bumping twice but still nothing
maybe I'm doing in the wrong order?
stiff hazel
you need to update the dependency
do you have the server running locally? there's an easier trick
- clone pxt-crickit under /projects
- open local editor, create new script, go to project settings, edit as text
use this project settings:
{
    "name": "Untitled",
    "dependencies": {
        "circuit-playground": "*",
        "crickit": "file:../pxt-crickit"
    },
    "description": "",
    "files": [
        "main.blocks",
        "main.ts",
        "README.md"
    ]
}
important line is "crickit": "file:../pxt-crickit" so that it loads it from your local repo
then just refresh to see changes
stiff hazel
for live, you either need to create a new script
or click on the "update" icon in the file explorer
but there might be a delay since we cache all this stuff
btw, continous servo PR ready for ingestion https://github.com/adafruit/pxt-crickit/pull/3
GitHub
A dedicate block to handle continuous servos.
sharp hamlet
great! we will test
hmm I tried doing those but what shows up in my editor is still not the same as what's in the repo
notably servo.ts setPulse function
stiff hazel
lemme see
sharp hamlet
oh wait it might be because travis died
stiff hazel
stiff hazel
to see what's loaded in the editor, go to JavaScript, then expolrer
then you can drill down into the files to see if it all got loaded properly.
we've gotten throttled by Travis 😃
@sharp hamlet the next step is to pick sensible default for every blocks
currently, it's 0 everywhere
 sharp hamlet
yup ok just checked back and travis finished and the changes came up
so @plush marsh you can set the pulse width in microseconds now
for a servo
ok @stiff hazel I'll try to set some defaults
btw @stiff hazel if you want to try out the over/undervoltage LED you can flash this new seesaw https://github.com/adafruit/seesaw/releases/tag/1.1.2
stiff hazel
tomorrow when i get to the office
stiff hazel
ohhhh i see our versioning getting in the way here
you'll want to generate the shared script on https://makecode.adafruit.com -- not beta
Adafruit Circuit Playground Express - Blocks / Javascript editor
A Blocks / JavaScript code editor for the Adafruit Circuit Playground Express.
i'm working on a fix
@plush marsh i'm going to add the "crickit" prefix to the analog write block
plush marsh
ok
@stiff hazel can i install crickit on nonbeta tho?
Make your robot pal who's fun to be with using Crickit!
stiff hazel
yeah... i'm fixing that
stiff hazel
so long story short: we do check if you are trying to load an newer script into an older editor
but we should only be using the major version in sember
semver
so for now to unblock you:
open your script in /beta, grab the javascript and paste it back in a script in non-beta
... oh snap... the blocks are using new blockly features so it's /beta only
plush marsh
i do tell people they need to use beta
stiff hazel
don't use embedded editor for now
until we push those fixes down to master because our OEmbed is loading your script in / instead of /beta
plush marsh
ok ill screenshot
stiff hazel
updated naming is live
reads a bit funny, i'll take suggesting for better wording...
note that we can also control the ordering of sub-categories in the blocks (motors, drives, siganls, servos) any preference?
plush marsh
ok changed
i think servos should be first, then motors, then drive, then signal
i think thats what people will use the most in order
er, touch then signal
so far my testing has been successful, very solid combo of hardware, firmware and software
stiff hazel
@sharp hamlet this line controls the ordering https://github.com/adafruit/pxt-crickit/blob/master/ns.ts#L6
 harsh moss
Any updates on CRIKIT stock? @plush marsh
plush marsh
usually having two microcontrollres communicate is a nightmare, especially in threads but i think we got it going 😃
@harsh moss more being made very soon but i dont have a fixed ETA i want to promise. if you sign up you'll be notified!
stiff hazel
nice icon @restive dagger, brings back memories of childhood
harsh moss
Cool, thanks @plush marsh
Ahahaha, Idk why it’s that but it’s kinda cool @stiff hazel
stiff hazel
@sharp hamlet we should add a block to control the on-board neopixel. Is there some seesaw code for that?
sharp hamlet
@stiff hazel there's python and C++ code but no typescript yet https://github.com/adafruit/Adafruit_CircuitPython_seesaw/blob/master/adafruit_seesaw/neopixel.py
GitHub
Adafruit_CircuitPython_seesaw - seesaw helper IC driver for circuitPython
it'll be simple though, just 4 commands:
- set pin to onboard neopix pin
- set buf length to 3 or 4 (I forget which type of pixel that is)
- send the pixel data
- send the show command
note that any of the "Signal" pins could also be used as a neopixel strip, but there's only one neopixel data buffer on the seesaw currently
maybe I should make more, there's plenty of ram
stiff hazel
Right our converter failed on this one
Having prebuilt animation and a small runtime to run them would go a long way too.
Can the seesaw play sounds too? (To offload it from the CPX)
sharp hamlet
nah no sound functionality in there yet
there's a skeleton for a DAC module but I havent filled it out since we haven't needed it yet
stiff hazel
Could the CPX send the buffer to run on the neopixel? Then reference it later on?
sharp hamlet
yea it stores the buffer internally
so you would send whatever pixels you want changed
and then send "show"
don't have to do all the setup every time
stiff hazel
Interresting.
blazing ermine
whoo - setting up my cricket today, v excited to play-along with makecode
sharp hamlet
@blazing ermine yaaaas please make some things
blazing ermine
yeppp I'm gonna share a table at Eastern Long Island Makerfaire with a Criket demo (and some other stuff) so that's def on the list
stiff hazel
@sharp hamlet if you remove the init in neopixel.py, thé converter should be able to handle it. I’ll make it more robust to keep going even when a member fails to convert.
I will try to repurpose our existing neopixel support to be able to talk seesaw as well.
sharp hamlet
very cool, thanks!
I will do the neopixel support by hand for now though?
just gotta finish up some unrelated things first
sharp hamlet
@stiff hazel ok back on this now. That looks great, I'll fix the errors now
I'm also going to move this stuff to the crickit repo: https://github.com/adafruit/pxt-seesaw/blob/master/crickit.ts
crickit (or whatever pxt-seesaw-based module) will create and pass in it's own SeesawPinmap
so that seesaw module doesn't need to know all possible pinmaps
stiff hazel
Let me handle the neopixel stuff
I am tweaking our neopixel api to be able to mount it on seesaw
sharp hamlet
ok I'll just PR the pinmap updates then
stiff hazel
I just need the send buffer and show features
sharp hamlet
oh no committed to master again
bad habits
ok just one sec
let me know if you need anything from me for those features
sharp hamlet
yea they're removed, I had done in an earlier commit before I deleted the files