#help-with-wearables
1 messages · Page 2 of 1
 stark storm
 wise light
Thank you! I've made a bunch of these so far - going to wire red LEDs behind them.
THAT might actually be the answer here although you're right that I'd be concerned about it eventually rubbing off

The gang so far. Will try to look for that paint + some PMC. Thank you for your help @stark storm!
stark storm
Yeah, stuff to think on. One more thought is something like conductive epoxy, which should be fairly durable. Here's one offering: https://www.cotronics.com/vo/cotr/ea_electricalconductive.htm
Applications for electrically conductive epoxy adhesives include semiconductor bonding, shielding, electronics, solder replacement, quick repairs, etc.
wise light
Oh that's good to know exists regardless
And actually come to think of it would prob be useful for mounting the LEDs
wise light
Actually now that I remember that drilling baked sculpey is relatively easy just sticking wires through and epoxying them in place might make the most sense
 stark storm
I showed those to my sweetie and she loved their look
wise light
Thank you! Let me know if either of you want one? I'm bound to wind up with extras here.
stark storm
wise light
Thank you! Let me know if either of you want one? I'm bound to wind up with extr...
Andrea is totally interested in one!
wise light
stark storm
Andrea is totally interested in one!
Great! Will send you a DM!
 worldly quest
(deleted my question cuz i solved it ^^)
 gentle aurora
Hi guys, totally new to this so this may be a dumb question...
I'm making a LED festival jacket using 5V LEDs and a PixelBlaze, but I'm using quite a few of them (like 300-400). From my understanding, a single power source (rechargeable usb battery in this case) would have too much voltage drop to adequately/safely power all of them even at lower brightness levels.
Would I be able to half the number of LEDs on a circuit and use 2 battery packs for power (one for each half), but string a single data line through all of them back into my PixelBlaze? The board and say 200 lights on one power circuit, the other 200 on a different power circuit, but the data line in the middle going through both strings of light and back to the board.
 vapid gorge
gentle aurora
Hi guys, totally new to this so this may be a dumb question...
I'm making a LED...
vapid gorge
gentle aurora
Hi guys, totally new to this so this may be a dumb question...
I'm making a LED...
Yes, you can connect all LEDs on one data line, and power half from one battery, and half from the second battery.
Just make sure to connect all the ground lines together -- from both batteries, LEDs, board
gentle aurora
vapid gorge
Yes, you can connect all LEDs on one data line, and power half from one battery,...
Together into one line/circuit? Or together as in back to their respective power source?
stark storm
For the kinds of current involved, you'll probably need to have separate ground runs for power and data at the input end, perhaps redundant power (and ground) at the other end, then have the power and ground of the second battery connected to the power and ground of the second half of the strip, and the ground from the output end of the first strip to the ground on the input end of the second strip (similarly with data out to data in)
worldly quest

So okay this looks like a total rats nest but this is just a jig for my helmets electronics

my worry rn is the V, M and H servos, they are all linked to their own MB102 boards and supplied 5 v each. The grounds are linked both to the MB102 boards aswell as the Raspberrys ground pins
The data cable is linked to pin 11,13 and 15 on the Rpi4s GIPO pinnouts
The code is a copy of this except I've tripled everything so instead of P=GPIO.PWM(11, 50) its
V=GPIO.PWM(11, 50)
M=GPIO.PWM(11, 50)
H=GPIO.PWM(11, 50)
etcetera

This is then activated by a button on an HID, this worked flawlessly with a single button named "p" before linked to a single servo but it doesn't work now
Im not very technical and this is my first programming project so there's a lot i don't understand but i really don't get why this isn't working
the only error message im getting is that the pins are "already in use" but that doesn't seem to be an error that has hindered the servos from working before
(the rest of the components are just to power fans aswell as a camera and monitor)
I'm guessing im missing something in the wiring, i know a lot of people have had the issue of not remembering to put together a common ground for both the MB102 board and Raspberry pi but i've made sure to put that in
can it be that you can't use 3 grounds at the same time?
worldly quest
I just double checked continuity on all circuits and seems fine except it also gave positive when bridging ground and 5v cables which i hope is okay (update this is apparently super NOT okay and i cannot recreate it so i guess it isnt happening anymore)
worldly quest
okay turns out it was the MB102 boards fault, one was not responding to 5v and the oterh one was just straight up dead
Okay now its just even wierder, so the cosplay im making the helmet drives the wearer insane + it starts acting on its own
Which it is currently also doing to me! The rightmost servo has completely stopped listening to commands and is acting alone and the other ones are jittering
worldly quest
 i think its been pin interferance cuz removing my bluetooth keyboard + seperating the pins has made it respond again and lessened the jittering
 errant pivot
based loosely on this guide: https://learn.adafruit.com/sound-reactive-led-top-hat I'm trying to make an image on a 2D matrix in WLED. Using the pixel art converter (https://kno.wled.ge/features/pixel-art-converter/) I can generate the image and get it to display as expected on my matrix. However, when I reboot the QT py, I lose the image. Any idea what I need to do to save it successfully?
I think I saved it correctly as a preset, but that just doesn't seem to work
stark storm
If you have a flash chip installed, you might be able to use https://github.com/adafruit/Adafruit_SPIFlash
gentle aurora
gentle aurora
Hi guys, totally new to this so this may be a dumb question...
I'm making a LED...
People who are more familiar with wearables and power consumption than me (which is pretty much all of you)... is it realistic to power 1000 LEDs on a single 5V power bank for a wearable? The jacket I am wearing has increased in complexity, for better or worse.
I'm still thinking that splitting the power requirements over 2 power banks would be the best way to go about this, but suffice to say as this is my first project I am starting to greatly reach beyond the limits of my knowledge here.
 pure echo
gentle aurora
People who are more familiar with wearables and power consumption than me (which...
pure echo
gentle aurora
People who are more familiar with wearables and power consumption than me (which...
1000 LEDs is quite a lot. It’s not impossible, but it does require some careful management of how many are on at one time.
Do you mind me asking what you’re trying to accomplish, and why you need so many LEDs?
gentle aurora
It's less that I need that many LEDs and more "well this is the pitch I ended up buying and it fits, so let's try and make it work" 😅
As for what I'm trying to accomplish? Bro idek at this point... it started as a "this will be a fun project for the rave I'm going to" and has turned into "oh god what have I gotten myself into"
vapid gorge
gentle aurora
People who are more familiar with wearables and power consumption than me (which...
You might want to take a look at some guides about powering large amounts of LEDs, https://learn.adafruit.com/adafruit-neopixel-uberguide/powering-neopixels#giant-power-supplies-2894491 and https://learn.adafruit.com/1500-neopixel-led-curtain-with-raspberry-pi-fadecandy/power-topology
gentle aurora
From what I have previously understood of what I've read, plus those articles, the answer is "no Aleks, stop, you will hurt yourself."
To be perfectly honest I'm still working on basic concepts like what exactly amps and volts are. Like I get them, but I don't fully understand them if that makes sense. When I started on this project it all seemed much much less complex than what I have tried to turn it into.
yay learning
stark storm
Assuming they're ordinary RGB LEDs, they draw 60mA at full brightness. So 1000 of them would draw 60A
gentle aurora
Ordinary, yes (ws2812b). But, I was going to have global max brightness set to 40 or 45%, and they’re going be running animations so they won’t always be on and they will rarely be full white when they are.
If I increase the pitch, and reduce the number of LEDs by half, I think I can still get the same result I want but still draw a much lower amp value.
 fervent tide
Is it possible to chop up a RGB pebble strand into smaller segments? I don't understand how the Neopixels are addressd in the "prototcol".
 long mango
fervent tide
Is it possible to chop up a RGB pebble strand into smaller segments? I don't und...
long mango
fervent tide
Is it possible to chop up a RGB pebble strand into smaller segments? I don't und...
Yes. Electrically, these are the same as regular NeoPixel strands. The NeoPixels in a strand are addressed relatively: If you send seven chunks of RGB data, the first seven NeoPixels on the strand are updated.
In practice, one knows the lenght of a strand (e.g. 10 pixels), and one always sends data for all of the 10. The RGB data is kept in RAM so individual pixels can be updated. But the NeoPixels themselves have no memory of their previous settings. You can't "skip" a NeoPixel.
 remote escarp
HELP: LED Glasses
Happy New Year! I'll try here first.
Is anyone aware of a better font to use for the LED glasses? Or dod you have suggestions for optial display characteristics. Most people are having a hard time reading the messages.
Or is it really a problem with the LED spacing and cutout around the nose bridge?
Thank you so very much.
- ty & maurice <woof> x
pure echo
remote escarp
HELP: LED Glasses
Happy New Year! I'll try here first.
Is anyone aware of a bet...
What font are you using? In what lighting conditions are you wearing these glasses?
I can definitely see the silkscreen affecting clarity in daylight, but in dark or dim settings the text should be pretty legible.
stark storm
My first thought was some diffusion material would make it more readable, but that would have the obvious drawback of making the glasses unsuitable for seeing through.
remote escarp
pure echo
What font are you using? In what lighting conditions are you wearing these glass...
Hi ! There was a font distributed with the sample code called "tfont.bdf". I don't know anything about anything,, but looking in tfont it looked like it was doing some sort of shading or maybe persistance of vision?
 solemn merlin
Help requested. 😊
I am planning on a cosplay project for a friend where I would like to power and control 3 24, and 16 neopixel rings, 3 7 neopixel jewls and one 35 ring. I'm guessing the Feather RP2040 Scorpio will get the job done but I don't know what else I would need. What size battery pack? Can I do rechargeable? I've tried finding projects that are similar but I haven't been able to to find anything.
If it helps, the project is three resin printed gems that will be mounted on a belt. They need to light up to look magical. I was going to play with code to see what looked best, but I need to know what housing and stuff to print.
Thank you in advance!
pure echo
solemn merlin
Help requested. 😊
I am planning on a cosplay project for a friend where I woul...
Size of battery pack is dependent on how much power your final device uses and how long you want it to last. Any of the lipo batteries from adafruit will work with the feather. With a lipo battery pack, one can recharge via usb c on the rp2040 Scorpio feather. See https://learn.adafruit.com/introducing-feather-rp2040-scorpio/lipoly-battery-jst for more information.
The only other materials you would need are whatever wires and/or connectors you need to connect all of your neopixel boards to said Scorpio.

8X Concurrent Digital I/O!
solemn merlin
Oh I thought I might need the propmaker or something too to run it. I guess I have to figure out how big my battery will need to be somehow
 delicate grove
pure echo
Size of battery pack is dependent on how much power your final device uses and h...
delicate grove
pure echo
Size of battery pack is dependent on how much power your final device uses and h...
🔥
 vital wharf
ok
serious question
https://www.youtube.com/watch?v=RBYZQWD9jnQ
...how possible would it be to construct glasses like this irl

Support my work: https://patreon.com/jamesleeanimation
X / Twitter: https://twitter.com/JamesLee03
Threads: https://www.threads.net/@jamesleeanimation
Instagram: https://www.instagram.com/jamesleeanimation
Facebook: https://www.facebook.com/JamesLeeAnimation
Email: mail@jameslee.art
-...
1-way + light emitting, plus the frame can change shape on-demand
The first thing that comes to mind for me is nitinol wires. I know they're used in glasses-making already, plus its material properties allow it to hold whatever shape a person sets for it.
But I understand if there's a limit when it comes to how many shapes it can remember...
 short fjord
I am looking for a mechanical way to fix a PCB inside a housing. It's very small and I might not be able to use screws because of the size/shape of the housing.
I was wondering if there are some other small low profile mechanical fastener options.
Maybe a piece of plastic that acts as a sort of spring/pushes the PCB down into the housing and holds jt there?
I know double sided tape/glue is another option but the PCB/battery would naturally want to push out from the housing so that might not be ideal for alignment.
 cobalt verge
There are a lot of Board supports [PCB clips] or equivalent, most want a through hole, but some are designed for side/corner clipping, and others work for both.
This is the digikey page:
https://www.digikey.co.uk/en/products/filter/board-supports/578

DigiKey Electronics
Board Supports are in stock at DigiKey. Order Now! Hardware, Fasteners, Accessories ship same day
short fjord
a bit too big still for my wearable product 😄
cobalt verge
short fjord
a bit too big still for my wearable product 😄
Maybe instead take inspiration from this QT Py snap fit case, like the other similar designs it's corner mounted. You could even print one of the snap fit holders, but in flexible material [like synthetic rubber called TPU or TPE]
https://www.adafruit.com/product/6183
Should be available in a guide and from the the Adafruit CAD parts repository on GitHub
 sterile tundra
I want to make a compute puck to pair with a few Bluetooth devices and do some basic computer stuff, is a pi zero 2 w a good computer choice or should I use something else?
I'm concerned about battery use and heat generation but it's not like I can use a microcontroller for this project
errant pivot
well your description of "basic computer stuff" is sort of non-specific. Given that you're in #help-with-wearables , I suspect space and battery life are pretty important, so the pi zero 2w is a pretty good choice for those criteria. However, it isn't super powerful, and only has 512 MB of RAM, so as long as that isn't too restrictive, it seems like a reasonable choice overall.
 unreal pulsar
do you guys think the concept of a cat wearables could work like a box of sensors on a cat collar and a battery pack on the cat collar to power it and a pets gopro on the side of the cat head for the borg look ?
thinking of finding a cat that would accept that as a cheap mobile sensors platform
Like one that think it's some sort of petting and purr when I install it
Couldn't find any book on how to safely do that
Id remove it when the cat sleep and when not directly supervising the cat of course
vapid gorge
unreal pulsar
Id remove it when the cat sleep and when not directly supervising the cat of cou...
Or you could maybe not torture and endanger your cat for a... "borg look" 😑
unreal pulsar
weird cringe ethical take 🤣
vapid gorge
unreal pulsar
weird cringe ethical take 🤣
I agree, animal abuse for the sake of your enjoyment is pretty cringe
 granite flame
I’m trying to add lights to a costume. I’ve tried multiple different things but nothing seems to be working. I will be performing so it must hold up to movement. I’m current using 300mm noodles, wired to a 43mhz universal RF controller, powered by a coin cell battery. The lights will work great for about 10-20 minutes then they will either dull quickly or small segments of the nood will go out. Am I missing something?
stark storm
A coin cell doesn't have enough energy to power that much noodles for long
granite flame
It’s just one nood. The website says it only needs 3V. What would you recommend? I have to have it concealed inside a bikini so it can’t be too big.
vapid gorge
granite flame
It’s just one nood. The website says it only needs 3V. What would you recommend?...
The voltage is correct, the problem is capacity -- a lithium cr2032 3V coin battery only has about 220mAh, which will not last you very long if you also have a radio module connected to it.
granite flame
vapid gorge
The voltage is correct, the problem is capacity -- a lithium cr2032 3V coin bat...
Can you recommend something that might be better?
 rapid radish
granite flame
Can you recommend something that might be better?
rapid radish
granite flame
Can you recommend something that might be better?
A lithium polymer battery would be pretty flat and compact: https://www.adafruit.com/category/917 There are different ones available to trade off size versus run-time, and they're rechargeable too. Note that you will want a current-limiting resistor in series to dial in the brightness and voltage.
Adafruit Industries, Unique & fun DIY electronics and kits : Batteries - Tools Gift Certificates Arduino Cables Sensors LEDs Books Breakout Boards Power EL Wire/Tape/Panel Components & Parts LCDs & Displays Wearables Prototyping Raspberry Pi Wireless Young Engineers 3D printing NeoPixels Kits & Projects Robotics & CNC Accessories Cosplay/Costumi...
 knotty hollow
Coin cells wired in parallel (not series) would add capacity. LiPo is good as long as you don't let the fire out of them. A sloppy guesstimate from the above, you need 1000 mah per hour of runtime?
Given a nood supposedly runs hours off of a coin cell, the RF controller may be eating 80% of the battery or more?
 sullen mauve
Hey folks! I joined this discord a long time ago for a LARP project, and now I'm back... with a DIFFERENT LARP project! Has anyone here made a larp safe weapon (a specification I can get into for the unfamiliar) that has an edge glow? I am familiar with EL tape and I think I could put it under white foam and have it shine through, but I'm worried about how and where to place a battery pack, and what my options are
the blade is going to be about 2 feet in length, so if I do all the striking surfaces it would need around 4 ft of tape to be powered
sullen mauve
Getting the impression from a power draw standpoint that I need to downswap to EL wire to power that much with something that can still be handheld
vapid gorge
sullen mauve
Getting the impression from a power draw standpoint that I need to downswap to E...
You could try these https://www.adafruit.com/product/5731 instead.
LEDs are most times the better option, way brighter, lower voltage needed, no annoying hum, and less fragile than EL.
Our favorite food when hacking on code or electronics is a hot bowl of noodles - and around NYC these are often called 'noods'! What we've got here are flexible LED ...
sullen mauve
Oh interesting! Thank you for the tip. I see these are 12V, so what would I be looking at from a portability standpoint to power that?
The benefit of the EL wire was that the inverter package was easy to integrate into a handle
vapid gorge
https://www.adafruit.com/product/449 this is an option for 8 alkaline (non rechargeable) AA
8 NiMh rechargeable AA batteries will only give you about 9.6V, which should work, but won't be as bright
If you're able to invest in battery and charger, there are LiPo RC battery packs at 11.1V, and some of them are very slim cylinders -- but it will need to be protected from impact/punctures
sullen mauve
Yeah I can definitely invest in this project, and if I can store it in the handle it will be impact and puncture protected, so that is very helpful info
oh these LiPo batteries are exactly what I needed to find, thank you so much!
sullen mauve
I think I need the 1.2m length which means I'm going to have to drive it with 22.2 V if I use two of those LiPo packs - luckily their form factor lets me fit it easily inside the handle of the sword if I 3d print it
vapid gorge
sullen mauve
I think I need the 1.2m length which means I'm going to have to drive it with 22...
2 of those lipo packs will not give 22V, they will just double the capacity, at the same 11 V, but it's not recommended to use them like that anyway
sullen mauve
vapid gorge
2 of those lipo packs will not give 22V, they will just double the capacity, at ...
oh bummer, yeah that makes sense. 😦
vapid gorge
Just use 2 60cm noods connected to one battery
one for one side of the blade, one for the other, and close the circuit with wire
sullen mauve
... okay yeah that's smart, this is why I think out loud. 😅
I guess my original instinct was that 2 60cm noods would act essentially as 1 1.2m nood and I would still need the higher voltage
vapid gorge
sullen mauve
I guess my original instinct was that 2 60cm noods would act essentially as 1 1....
it would, if you connect them to each other
but you can use wires to connect them separately, directly to the battery
sullen mauve
Right right, parallel vs series. I thought about that after I said that. Sorry it's been a long time since electronics lab
oh bummer, the 60cms are out of stock
(this is not a rush project but it is a hyperfixation, lol)
vapid gorge
They are in stock at DigiKey, if the itch gets unbearable 😆
sullen mauve
Did some digital design today for the handle compartment. I found a two-cell 2.2 Ah LiPo battery that removes the problem I was having of not being able to put it next to the handle for balance reasons!!

 sullen mauve
vapid gorge
https://www.adafruit.com/product/449 this is an option for 8 alkaline (non recha...
sullen mauve
vapid gorge
https://www.adafruit.com/product/449 this is an option for 8 alkaline (non recha...
Wanted to thank you again for this recommendation. Found this awesome split-cell design that works for my use case!

 sullen mauve
Wanted to follow up here with some WIP of the sword!


 lime wraith
Anybody else receive a GEMMA M0 with filesystem errors? The default image with CircuitPython comes as 5.0.0, and has a lot of filesystem errors. I've tried to update the bootloader, and it seems as though I have successfully updated CircuitPython, but most of the time when I try to mount the filesystem on the device (both GEMMABOOT and CIRCUITPYTHON) Linux reports filesystem errors. I've run fsck on it using partition manager, and sometimes it says it's fine, other times it says it has errors.
I bought two of them, and I'm seeing the exact same issue on both of them. I also just pulled them out of the package an hour ago (I had a delay in getting started on this project). I'm hoping that this is a common problem or that I just have a missing Linux package or something. Does anybody know anything that could help me?
 terse moon
lime wraith
Anybody else receive a GEMMA M0 with filesystem errors? The default image with C...
terse moon
lime wraith
Anybody else receive a GEMMA M0 with filesystem errors? The default image with C...
I believe there is some nuance to using circuitpython on Linux, let me see if I can find what specifically that is
Hmm, I’m not finding what I thought was a solution before. Any matter, #help-with-circuitpython would be a better place to ask for circuitpython specific help
lime wraith
I’ve used circuitpython on this machine with other microcontrollers without issue, that’s kinda why I’m confused.
These microcontrollers tend to with with circuitpython pretty quickly, and Thonny even tends to make it easier.
lime wraith
If I'm using neopixels with a Gemma M0, do I need to use any sort of protective components? Like, should I add a diode in series? I see that there's already a ceramic cap on the neopixels, but I think I just destroyed my first Gemma M0 being a little careless with aligator clips.
Sorry for all of the questions.
long mango
lime wraith
If I'm using neopixels with a Gemma M0, do I need to use any sort of protective ...
no, should be fine. how long is the string you're trying to drive?
lime wraith
Just five
long mango
did you power it with 3.3 or 5v? If you shorted something you might have fried something, but the regulator has protection. Reverse voltage might be an issue
lime wraith
I didn’t toast it, but I did trigger a protective circuit in my framework. Removing and reinserting the port adapter seems to have reset it.
I did vout per the tutorial. 3v3 seems like it be better, no?
Yeah, reverse voltage is what I was thinking, it seems a Schottky diode would mitigate that, no?
long mango
3.3v for only five should be fine
if you reversed the connection to the neopixel string, could have been an issue
lime wraith
When I take this into the field it will be on a battery, so no protective lappy circuits.
long mango
schottky diode would protect it, but careful wiring would too. You could use 5v, but then the 3.3V DIN signal could be marginal. A diode on the 5v would lower it slightly and make the margins better
or if lipo battery at 3.7v or whatever, direct powering is better. Otherwise you are taxing the regulator a bit
lime wraith
My string is just five neopixels wired together. It’s a jumbled mess right now, I just wanted to get the code sorted. Now that I have that I need to plan a more careful assembly.
 vernal sedge
Hello, I'm working on a lightup cosplay sword and needing to hide the battery pack within the handle of the sword. I'm hoping to use the RGB LED weatherproof strip (https://www.adafruit.com/product/2495) at about a meter long for the lights. A tutorial I was watching showed using the Lithium Ion Cylindrical Battery 3.7V 2200mAh (https://www.adafruit.com/product/1781#description) to power it which has a diameter of 18mm. The sword handle as it stands isn't large enough to accommodate the battery. I'm working with a 3d artist to update the sizing but wanted to check in with all of your brains and see if there was a physically smaller battery that anyone would recommend to be able to power this? Or a combination of different leds and smaller battery? Thank you so much for the help!

These LED strips are fun and glowy. There are 60 RGB LEDs per meter - twice as many as our other strip, and you can control the entire strip at once with any microcontroller and three ...

Need a big battery for your project? This lithium-ion battery contains a 2200mAh and a protection circuit that provides over-voltage, under-voltage, and over-current protection. Yet, it is ...
 grizzled fossil
I think this is the right chat for this but anyway, I'm planning on putting red and orange leds in my Praetor Helmet replica I made, what would be the easiest to use? I've marked where they're going in this image.

Im thinking of using a circuit playground classic as the board
long mango
grizzled fossil
I think this is the right chat for this but anyway, I'm planning on putting red ...
what do you want the LED's to do? Are they going to be animated in sequence? The easiest thing to do would be to use RGB LED's (NeoPixels) controlled by a animation program. The CIrcuit Playground Classic has its own NeoPixels, but they are not arranged as you wish. You could use almost any board. It would be better to use a board that has a built-in level shifter to get a 5V data signal to the NeoPixels?
Do you want to control the animation in real time, or just have it run a pre-programmed sequence? Do you need any sound effects?
Etc.
grizzled fossil
long mango
what do you want the LED's to do? Are they going to be animated in sequence? The...
I don't need sounds but I'd like to be able to switch them from static/solid to breathing via a button or switch.
long mango
grizzled fossil
I don't need sounds but I'd like to be able to switch them from static/solid to ...
do you want to use the Circuit Playground (I'll say CP) because it has a button built-in? How did you come to choose that board?
other possibilities are the various ItsyBitsy boards, which have a 5v level shifter, and https://learn.adafruit.com/adafruit-rp2040-prop-maker-feather
which also does
latter also has a built-in LiPo battery charger
or you could use something like a 5V USB power pack for power.
there are a zillion NeoPixel projects on https://learn.adafruit.com, including helmets, swords, etc.
grizzled fossil
long mango
other possibilities are the various ItsyBitsy boards, which have a 5v level shif...
what's a 5v level shifter?
long mango
converts a 3.3v logic signal to 5v
grizzled fossil
I barely know what that is but I understand aha.
long mango
Neopixels work well with a 5v logic signal. 3.3V is marginal, but might work
grizzled fossil
so are there any options that use plugs instead of soldering? I'd rather not risk breaking a board with my janky soldering skills
long mango
the Prop-maker has screw terminals. The CP you can make screw terminals with screws
grizzled fossil
that works too, does the prop-maker have a 5v level shifter?
long mango
yes
grizzled fossil
okay, I will look at that, thank you!
 tepid kernel
I picked up a Gemma 0 and a few neopixels (through hole and buttons w/ surface mount, not sure which I’m using for the final version of the project), I need some advice on putting them together. Initially I was planning to power the Gemma with 4 AAAs and power the neopixels with the Vout. However, I read that the neopixels don’t play well above 6V. How effective are they at 3.3V? I’d like them to be as bright as possible. Alternatively, I can run the Gemma off of 3 AAAs and keep the neopixels on Vout, though I feel like 3V might be too low for the Gemma and neopixels as the batteries start to run out.
I should mention that I’m planning on using 3-5 neopixels, so it’s not a very long strip
grizzled fossil
long mango
the Prop-maker has screw terminals. The CP you can make screw terminals with scr...
Is there any cheaper alternatives to the prop maker?
long mango
grizzled fossil
Is there any cheaper alternatives to the prop maker?
it's $20. The Itsy Bitsy RP2040 is $10. But you need to solder. Are you trying to figure out how to use the Circuit Playground you already ahve? It might work fine to drive the NeoPixels. You could try it.
long mango
tepid kernel
I picked up a Gemma 0 and a few neopixels (through hole and buttons w/ surface m...
3 AAA's would be good, and you can run the NeoPixels from VOUT. 4 AAA's could be too much. Fresh alkalines are 1.6V, times 4 is 6.4V, over the max.
though I feel like 3V
Not sure what you mean by this. 3 * 1.5 = 4.5; 3*1.6 = 4.8
grizzled fossil
long mango
it's $20. The Itsy Bitsy RP2040 is $10. But you need to solder. Are you trying t...
the pricing may work, are the Adafruit Soft Flexible Wire NeoPixel Strands addressable and compatible with the prop-maker?
long mango
Yes. Read the description on the product page https://www.adafruit.com/product/4560 carefully, because it's hard to tell which end is which on this strip.

We have all sorts of LED strips for a wide range of needs. Chonky strips? We got those! Strips with alligator clips that are easy-peasy to MakeCode? Oh definitely. ...
tepid kernel
long mango
> though I feel like 3V
Not sure what you mean by this. 3 * 1.5 = 4.5; 3*1.6 = ...
dont alkalines go as low as 1V when they get close to empty? im not entirely sure how it works if im being honest 😅
tepid kernel
long mango
3 AAA's would be good, and you can run the NeoPixels from VOUT. 4 AAA's could be...
that was my guess, but how well do they work on 3.3V? I was thinking of using 4 AAAs to power the board, then have the neopixels connected to 3Vo
long mango
tepid kernel
that was my guess, but how well do they work on 3.3V? I was thinking of using 4 ...
DO NOT use 4 AAA's to power the board. That's as much as 4 * 1.6v, which is 6.4V, which is too much. Use 3 AAA's, which is at most 3 * 1.6V, which is 4.8V.
Power the NeoPixels from the VOUT pin on the Gemma M0: that connects directly to the battery pack. You don't need to power them from the 3.3.V pin.
tepid kernel
ah i see, i thought you were saying that the neopixels were the ones that couldnt operate past 6V
long mango
no, the board guide says that too: https://learn.adafruit.com/adafruit-gemma-m0/pinouts#jst-battery-input-2912360
You can plug anything from around 4 VDC up to 6 VDC. That means any single-cell LiPoly, or 3-4 AAA or AA batteries.
It says 3-4 AAA's, but 4 is really too much if you are using alkalines. Would be good for NiMH rechargeables, which are 1.2V.
and 4 is certainly too much for the NeoPixels.
tepid kernel
I'll use 3 then, thank you for your help :)
oh i did have another question about the neopixels
would not using a .1uF capacitor have the potential to cause permanent damage to them? I move back to university in a month where I have my capacitor kit, so id rather not buy another one, though I would like to test them before then.
i read that they might have some issues without a capacitor, and from what i could tell it wouldnt be anything permament. just wanted to be sure that it wouldnt burn them out or anything like that
long mango
it's not really necessary, especially for short strands. I usually don't bother for my quickie Halloween display projects 🙂
tepid kernel
wonderful, thank you!
grizzled fossil
long mango
Yes. Read the description on the product page https://www.adafruit.com/product/4...
I ended up using a micro bit v2 + a sensor bit with 3 Dfrobot gravity digital RGB led modules I had in a box (plus a battery pack)


 long mango
grizzled fossil
I ended up using a micro bit v2 + a sensor bit with 3 Dfrobot gravity digital RG...
long mango
grizzled fossil
I ended up using a micro bit v2 + a sensor bit with 3 Dfrobot gravity digital RG...
Nice!
 rotund delta
hi i need help figuring out what LEDs i need or compatible with the circut playground and this is for the egghead island shoes from one piece


 glossy wharf
i need some sort of greeble gizmo for a cosplay prop.. in the original item it's supposed to be a tiny little VU meter or tuning frequency display, but i'm having a hard time finding something small enough that will fit in the place. The mounting screws are in an approximately 20mm rectangle, with a circular area in the middle. I could just put a light there, but if someone can recommend something nifty that might work, i'm open to suggestions. I don't have all that much depth to work with too, maybe 15-20mm as well? the smallest vu meters i've found are at least 50% too large and many of them are like 2 inches deep
 wooden chasm
glossy wharf
i need some sort of greeble gizmo for a cosplay prop.. in the original item it'...
wooden chasm
glossy wharf
i need some sort of greeble gizmo for a cosplay prop.. in the original item it'...
Umm… Just a Li-ion battery alone would likely be larger than that. How are you planning on powering it?
glossy wharf
wooden chasm
Umm… Just a Li-ion battery alone would likely be larger than that. How are you p...
ah my bad, the overall prop is pretty big, there's plenty of room for the rest of the electronics, i just need a cool "thing" to fill in a space on a control panel on it

 uneven flicker
glossy wharf
i need some sort of greeble gizmo for a cosplay prop.. in the original item it'...
uneven flicker
glossy wharf
i need some sort of greeble gizmo for a cosplay prop.. in the original item it'...
sounds like this might barely fit ... https://www.adafruit.com/product/5646
Our QT Py boards are a great way to make very small microcontroller projects that pack a ton of power - and now we have a way for you to quickly add a glittering grid of 25 RGB ...
With short headers, you might be able to stack that on a Qt Py and keep it under 20mm high (but still removable).
glossy wharf
uneven flicker
With [short headers](<https://www.adafruit.com/product/4174>), you might be abl...
interesting. that is pretty intruiging, that specific module looks like it's not quite right for my needs but it gives me ideas of possibilities
 drifting kiln
Hi, I need the actual products links for just the Link Tears of the Kingdom Zonai arm print you have.
I’ve ordered four different things and none of them are correct, and there isn’t an exact list in your video or the print. It just says a general description in the video but that’s not giving me the correct thing. There are a ton of lengths of the noodle lights, multiple coin cell battery’s so no idea which one. Same with the 9v pack. I’ve never solder before either and trying to make for a child
 supple dove
drifting kiln
Hi, I need the actual products links for just the Link Tears of the Kingdom Zona...
supple dove
drifting kiln
Hi, I need the actual products links for just the Link Tears of the Kingdom Zona...
Are you talking about this project? https://learn.adafruit.com/ultrahand If so, the parts are listed in the learn guide, though some appear to be out of stock
 twilit karma
Hi all, newbie here and not sure where I should ask this but here goes
🙂
Click to learn more
So I am making a hype chain for my brother that is for our local hocket team for him to wear to the games. Right now I have a 3 foot USB 5V COB LED strip in it and it has a slot in the back for him to drop a battery bank in it and plug in the USB. I am not sure if the battery bank is goign to work but we will see.
But I am wanting to find a better solution where I can have an internal rechargeable battery pack and I have always known Adafruit is great for cosplay and wearable projects.
The issue I am seeing is that the LED strip I have right now is this one https://www.amazon.com/dp/B0CDKVYPFN?ref_=ppx_hzsearch_conn_dt_b_fed_asin_title_6&th=1 it says that it is a 5V LED light strip that requires a 10W 5V 2.1A power supply to prevent the USB head from overheating working,
I was looking at using something like the PowerBoost 1000C https://www.adafruit.com/product/2465 with maybe a Lithium Ion Polymer Battery - 3.7v 2500mAh https://www.adafruit.com/product/328 but would need to try to find a LED solution that could be powered by that.
Thanks for any help.


This 3.28ft LED strip light leverages premium COB technology, featuring 320 COB LEDs that provide bright, consistent lighting for any space. The product emits a calming 6500K white light, Create a comfortable and bright atmosphere, perfect for bedrooms, dorms, or any living space. Designed for fl...

PowerBoost 1000C is the perfect power supply for your portable project! With a built-in load-sharing battery charger circuit, you'll be able to keep your power-hungry project ...

Lithium-ion polymer (also known as 'lipo' or 'lipoly') batteries are thin, light, and powerful. The output ranges from 4.2V when completely charged to 3.7V. This battery has ...
 delicate hatch
answered in #help-with-projects
 crude halo
Hi all I need some help with Gemma v2 - I have no joke 9 Gemma boards in front of me and NOT ONE works. Can someone help please 🙂 (they don't blink red or hold red at all).
long mango
 crimson gyro
has the demand for wearables dwindled?
crimson gyro
has the demand for wearables dwindled?
I don't think it has necessarily dwindled but there are a lot more small boards like Feathers. They are not conductive-thread-compatible but otherwise are good for projects like this.
wooden chasm
crimson gyro
has the demand for wearables dwindled?
From my perspective, it's just that wearable projects aren't as dependent on microcontroller specs, when compared to most other project categories. Or, at least that's my assumption on why the dev board used in https://learn.adafruit.com/water-drip-dress-with-oozemaster-3000, and the RP2040 Prop-Maker Feather, haven't been updated to the newer RP2350 yet.
crimson gyro
If you were brand new to wearables and were partnering with a art studio at a large company to explore the intersection of technology and fabric arts, what would you be considering for the basis of a project in 2026?
long mango
crimson gyro
If you were brand new to wearables and were partnering with a art studio at a la...
Gemma M0, Prop-Maker Feather RP2040, Feather RP2040 Scorpio, Sparkle Motion boards
Re intersection of technology and fabric arts, I have visited https://actlab.sites.northeastern.edu/. Also see https://www.megan-hofmann.com/
 trail quail
Hello. I need a bit of help. I have Adafruit Prop-Maker FeatherWing, Adafruit Feather M4 Express and Neopixel Digital Led Strip 60 leds 4 meter length. I have followed this tutorial how to do it https://youtu.be/O5RCWPbXorM?is=Z5-eoCHb_5Wc1Dl6 but i have not added the battery. I have entered the code, soldered the cables, added the strip to the laptop with USB but its not turning on. The chip lights up, when i save the code there is green light blinking but the light is not turning on. Changed the first led and the result is the same. I have been testing different codes and so on but nothing works😅 my only hope is that someone here can help me before i go insane

Get my book on this topic: https://www.kamuicosplay.com/product/lightandsoundeffects/
Support our YouTube channel: https://www.patreon.com/kamuicosplay
Want to get started with animated LEDs, triggers and sound effects? This video is for you!
Let me know if you have any questions! 😁
Svetlana
- Set up the Feather M4 Chip and download Circ...
long mango
trail quail
Hello. I need a bit of help. I have Adafruit Prop-Maker FeatherWing, Adafruit Fe...
I have not watched the whole video. How is the NeoPixel strip powered? If there's no battery there may be no power to the strip.
Also it's important that the arrow on the strip point AWAY from the microcontroller board.
Pictures are always helpful.
Look at what is in the REPL (serial connection) for the program. If there are any errors in your program they will show up there.
#help-with-circuitpython is a better channel for this
because you are using CircuitPython
trail quail
Yeah i so think that the absence of the battery might be a problem since the adafruit m4 express is on 3.3V while the strip is looking for 5V? So the V might not be enough to send the signal to the strip. The code is double checked no errors appear, the wires are soldered on the right place with them being on DIN not DOUT.
I suppose the whole problem comes that i have not added an additional battery but rely on the usb that i send the information to the microcontroller to


 long mango
trail quail
Yeah i so think that the absence of the battery might be a problem since the ada...
long mango
trail quail
Yeah i so think that the absence of the battery might be a problem since the ada...
looking at the this, the power is OK. But the soldering is not great on the pins I can see. Could I see side views of the pins between the two boards, and a top view of the FeatherWing.
trail quail

 long mango
In addition the program must turn on D10, the NeoPixel power pin, but I'm guessing that the code is doing that, or else the presenter's code would not work.
trail quail
I know some pins might need more soldering, noticed it a bit ago but have not done it yet

Yes the code is running on D10 but there is nothing. When i save the code the microcontroller blink in green but nothing more. Tested with few codes and none work
long mango
The longer pin side soldering here is not good:

all the pins on the blue arrow side are not good. The ones on the other side look quite good
do you have a voltmeter (multimeter)?
trail quail
They don’t need to be rough correct? Apologies on the question, first time soldering and doing stuff like this 😅
I do not
long mango
most importantly, the pins themselves little if any solder touching the board pads they are going through, and they should have a nice connection like the ones on the other side
Bad:

better:
 trail quail
Noted
long mango
are you doing this at home or at a makerspace or similar?
read our Learn guides on soldering
trail quail
At home, learning all from the net from tutorials
long mango
soldering is not a paste-spreading operation. press the iron firmly (to allow good heat transfer) against both the pin and the pad, and feed in a little solder
I recommend you buy a $20 multimeter from a hw store or similar. It is as useful as a screwdriver
trail quail
Gotcha, will find one tomorrow
long mango
the 3-wire JST-PH connector has swapped red/black wires. Normally black is ground, red is +V. Did you get that from us?
it's not that it won't work, but it's confusing. red/black is a pretty universal color code
This product is newer than the combo you are using, and is easier to use: https://www.adafruit.com/product/5768
The Adafruit Feather series gives you lots of options for a small, portable, rechargeable microcontroller board. By picking a feather and stacking on a FeatherWing you can create advanced ...
all on one board, and screw terminal connections
nothing wrong with what you have, but there are many more steps to getting started
The battery thing is a red herring, never mind about that. If you are power with 5v USB, that should be fine.
I'll repeat that you should also be connecting to the serial port to see if the program is raising an error. You might be missing a library or simiar.
trail quail
I have tested it with:
Red 5V
Black GND
White DIN
But it didn’t work. I got it from a shop in here, after i realised that the connector on the strip and the ones on the microcontrollers were to compatible
As for the library i have followed the steps from the Circuit python animation library
Since this sounds already complicated was thinking to try with arduino one
long mango
trail quail
I have tested it with:
Red 5V
Black GND
White DIN
But it didn’t work. I got it...
Did you use Red 5v black gnd to start with? That would have reversed the polarity on the strip and might have fried it 😢
it should follow the markings on the Featherwing, regardless of wire color
trail quail
I did it like that at first yes, then saw the marking on the featherwing and connected it. I had cut of the first led when i connected with the red 5v black then connected how it is shown on the marking :
gnd on featherwing red wire to gnd on the strip
V+ black to 5V
Neopixel white to DIN
 long mango
trail quail
I did it like that at first yes, then saw the marking on the featherwing and con...
long mango
trail quail
I did it like that at first yes, then saw the marking on the featherwing and con...
that is correct. but the pixels are all powered in parallel, so it's possible to damage them all with reverse polarity. I don't know how robust they are to that.
it is possible to test this with a very simple program. I'll work one up
in the meantime you could work on the soldering
if you have not already done so
trail quail
I have not haha its midnight and i have spend the whole day researching before i found the discord
long mango
i'd say sleep on it!
long mango
trail quail
I have not haha its midnight and i have spend the whole day researching before i...
This will turn the first 10 pixels red
import digitalio
import board
import neopixel

NUM_PIXELS = 10

# Turn on NeoPixel power
enable = digitalio.DigitalInOut(board.D10)
enable.switch_to_output(True)

strip = neopixel.NeoPixel(board.D5, NUM_PIXELS, brightness=0.5)

strip.fill(0xff0000)
while True:
    pass
This should work even without additional battery attached?
long mango
yes
if you have not installed the neopixel library to the lib/ folder, it will not work. That's why I say to look at the REPL output.
trail quail
Will check tomorrow but i am 99.9% sure that all the NeoPixel libraries are added
long mango
This will alternate the single NeoPixel on the M4 board (not the strip) red and blue(which will be hard to see because of the sandwich you made):
import digitalio
import board
import neopixel
import time

np = neopixel.NeoPixel(board.NEOPIXEL, 1, brightness=0.5)

while True:
    np[0] = 0xff0000
    time.sleep(1)
    np[0] = 0x0000ff
    time.sleep(1)
that does not require any wiring. If that doesn't work then the library may be missing.
trail quail
Will test later all the codes and come back with feedback. Thank you very much!
 weary mirage
This might actually be a more appropriate chat for this than the projects channel. It is wearable after all.
I'm working on figuring out what components I need for my next project and just wanted to get a sanity check on the design. The goal is super simple on the surface. Boot when receiving power, light LEDs on boot, and play a sound file on boot. It's going to be housed inside a bracer on my wrist with a membrane button feeding down to my palm. Sort of like a Spider-Man web shooter in a way. I'll want the controller to only receive power when I hold that button. Would a small form factor raspberry pi be best for something like this? I noticed that they have boot buttons which tells me they won't auto boot when receiving power. I'd be happy to be wrong in that regard though.
I also realized I forgot to include the amps power in the drawing. Also the leds but Im much more confident in getting them working.

 hot tree
weary mirage
This might actually be a more appropriate chat for this than the projects channe...
hot tree
weary mirage
This might actually be a more appropriate chat for this than the projects channe...
I love the rp2040 and rp2350, but they aren’t very power efficient, with minimum current draw around 30mA meaning you’ll only get 3 hours of use from a 100mAh battery. The good old Atmega328 performs well in that respect, but would require external flash or an SD card to store the music (unless you’re interested in 8-bit audio…?)
I hear the nRF chips have some good power save features
 weary mirage
I'll have to look at those, thanks! Really though if it helps me make it in a smaller footprint I wouldn't mind going with a 2040. If I ran through 3 hours worth of battery life it means I would have hit the button about 1080 times which would be crazy. The sound will be the arming sound for the whistling birds bracer used in the Mandalorian. I would expect to only hold it for 8-12 seconds at a time when I'm showing off
hot tree
Ohh, I see. So it’s the power button and once you release it, it powers off
Yes, RP2040 is fine for that
You will probably want to use Arduino to avoid the startup time of Circuitpython
But feel free to try the CircuitPython option first, since it’s faster to develop
The rp2040 Feather has a charger built-in, which might simplify your design if it’s not too big
weary mirage
Startup time was something I had zero knowledge of as a complete starter when it comes to RP so thats good info
Ive just got a servo turning on an itsybitsy for the helmet antenna and thats all my experience
hot tree
Yeah, Python is running a little virtual machine and it takes a second to get ready
Still quicker than python on Windows
weary mirage
This may be a dead end but micropython has come across my google results claiming sub second boot time on an RP2040. I still know very little about it other than it is less intuitive than circuitpython and that there is an official port of it for the qt py 2040. So I'm thinking I'll look more into that and if it's too beyond me I'll just cut my losses and go arduino with a separate decoder and mono amp
Honestly part of me is just interested in trying out new tech whether it works for this purpose or not lol
long mango
weary mirage
This may be a dead end but micropython has come across my google results claimin...
We aregoing to add some flags to settings.toml in CircuitPython to optionally reduce some of the startup delays (like safe mode delay).
weary mirage
So what I'm hearing is I should get my hands on a 2040 board just to cover all my bases 👀
hot tree
Yes, you should definitely get a rp2040 board of some kind.
long mango
rp2040 and/or RP2350
This board might be a good match, with its onboard I2S amp, battery charger, etc.
The Adafruit Feather series gives you lots of options for a small, portable, rechargeable microcontroller board. By picking a feather and stacking on a FeatherWing you can create advanced ...
lotsa projects: https://learn.adafruit.com/search?q=prop-maker%2520rp2040
@weary mirage 👆
hot tree
@long mango Have you tried power profiling the rp2040 propmaker in deep sleep?
long mango
rp2040 deep sleep is not that deep; coupla mA as opposed to microamps. RP2350 deep sleep is better but not done in CircuitPython yet. The board does have GPIO power control of the I2S amp and NeoPixel
weary mirage
Ive definitely been considering the propmaker when weighing price vs ease vs footprint. I'll say it's really tempting
hot tree
Maybe you want lights to accompany the sounds?
weary mirage
I do want some blue LEDs in the case to shine out the front
I have some leftover sequin LEDs from when I tried making Davids jacket from Cyberpunk. That had no controller though. Just a usb c breakout board
 whole bobcat
Hey all 👋
I’m working on a weird little wearable project and wanted to sanity check my setup with some experts here.
I made a leather Dr. Plague mask and I’m adding electronics inside: an Adafruit Flora driving two NeoPixel 24 rings (the eyes) that react to a mic, powered by a 3.7v 3000mAh LiPo. I’ve got everything working, but before I permanently install everything I wanted to run it by people who know this stuff better than me.
Main question: what’s the cleanest way to charge the LiPo without removing it? Ideally I’d like to just plug a cable into the mask.
Any recommended charging boards or approaches for this kind of wearable setup?
errant pivot
something like the powerboost boards?
hot tree
Since you have a 3Ah battery, you'll want to charge somewhat quickly. If you're ok with a six-hour charge time, the 500mA Adafruit lipo chargers will do just fine https://www.adafruit.com/product/4410

Oh so handy, this little lipo charger is so small and easy to use you can keep it on your desk or mount it easily into any project! Simply plug it via any USB C cable into a USB port and a ...
But with high charging speeds, the voltage drop of your wires becomes a bigger issue. So I'll assume you're using a short cable with 22AWG or larger. The Sparkfun charger can do 1A, which should get it done in just over three hours https://www.sparkfun.com/sparkfun-lipo-charger-plus.html

The SparkFun LiPo Charger Plus is the suped-up power option in the SparkFun line of single-cell lithium polymer (LiPo) battery chargers.
That's probably as far as we want to push it without knowing whether your battery can take high currents
They make fast chargers for RC hobbies which can do up to 5A, but it's not recommended to charge faster than 1C, and some batteries simply won't accept a charge that fast.
 tidal fractal
Hey guys I know it's been a while and all but I think I found some visuals to help with what I want for my Athena project. Namely the helmet part. Just look at this, it's awesome! https://www.instagram.com/p/DVJbxGED2xS/?hl=en
I want to do this!

Making a foam helmet. I put some LEDs between some layers of poly foam and then covered that with craft foam. Then used a wood burner to carve into the craft foam to reveal the light inside. #crafts #cosplay #glowup
Likes
13488
 Instagram
 normal glacier
hello! So, I got an el wire starter kit, and the 2x aa inverter isn't working, any recomendations to what I should try?
Just got it, the EL wire was connected before installing batteries, tried to turn on, nothing happened
both 2 aa batteries have 1.6v
trail quail
long mango
This will alternate the single NeoPixel **on the M4 board** (not the strip) red ...
Very late but i managed to find time to test. So the code works just fine. I have soldered all the pins correctly. I also got a battery with 2 pins from aliexpress (since the adafruit website was not letting me purchase one probably because i am in Bulgaria). Regrettably i cannot connect the battery ti my Feather M4 express because the connector on the microchip and the one on the battery doesn’t match. What can i do now in order to power additionally the chip?
 trail quail
long mango
This will turn the first 10 pixels red
```
import digitalio
import board
import ...
trail quail
long mango
This will turn the first 10 pixels red
```
import digitalio
import board
import ...
This code did not turn the lights on. Cant test if they will with a battery due to the reasons above
long mango
trail quail
Very late but i managed to find time to test. So the code works just fine. I hav...
The Bat and Gnd pins are the same as the JST connector, so you could solder the battery to that. Make sure the polarity of the battery is correct.
long mango
trail quail
This code did not turn the lights on. Cant test if they will with a battery due ...
you should need a battery to test. I just tried that code on a Feather M4 running CircuitPython 10.1.4, and it works fine. Here is some alternate code that will blink the red LED on the board, next to the USB jack:
import digitalio
import board
import time

led = digitalio.DigitalInOut(board.LED)
led.switch_to_output()

while True:
    led.value = not led.value
    time.sleep(1)
If this works but the neopixel example doesn't, then you have probably not put the neopixel library into lib/. If this does not work then there is something else wrong with how you are loading programs.
trail quail
It blinks, it was already tested
The problem now is that the battery is not connected to the microchip due to the connector types
long mango
are you connected to the REPL when you are running the neopixel test program? Add some print statements:
import digitalio
import board
import neopixel
import time

np = neopixel.NeoPixel(board.NEOPIXEL, 1, brightness=0.5)

while True:
    print("red")
    np[0] = 0xff0000
    time.sleep(1)
    print("blue")
    np[0] = 0x0000ff
    time.sleep(1)
Repl?
long mango
you connect to the board with a serial terminal program What OS are you running on the host computer?
long mango
click the "Serial" button in Mu. That will connect to the REPL
(we cannot send you batteries because they can't be shipped by air)
trail quail
long mango
click the "Serial" button in Mu. That will connect to the REPL
Sorry for asking such dumb questions, what is that for? What will it do?
long mango
trail quail
Sorry for asking such dumb questions, what is that for? What will it do?
it is where print(...) goes, and very importantly any errors that are encountered will get printed there
and you can type Python at it. Same as typing at the >>> prompt when you run Python on Windows.
trail quail
I see. I will find a way to connect the battery and will test everything
long mango
you don't need to connect a battery to test the strip with the REPL. You can use the USB connection, if the strip is not too long
trail quail
Its the 4m one
long mango
if you don't try to light up all the pixels, then you should be able to power it from the USB 5v. Just try giving the length as 10 pixels or so
I looked back at our old thread and I think I said that
trail quail
Tried it at the start of my testing, and it didn’t work either
Tested the code you gave me back then
long mango
try it with the Serial window open to see if you have a code error, as opposed to an electrical problme
so the on-board NeoPixel blink example did work, is that right?
 long mango
and if you run your code for the strip but set to, say, only, 10 pixels, what do you see?
trail quail
Traceback (most recent call last):
File "code.py", line 10, in <module>
KeyboardInterrupt:
Code done running.
Auto-reload is on. Simply save files over USB to run them or enter REPL to disable.
Press any key to enter the REPL. Use CTRL-D to reload.
soft reboot
Auto-reload is on. Simply save files over USB to run them or enter REPL to disable.
code.py output:
Traceback (most recent call last):
File "code.py", line 12, in <module>
KeyboardInterrupt:
Code done running.
Press any key to enter the REPL. Use CTRL-D to reload.
soft reboot
Auto-reload is on. Simply save files over USB to run them or enter REPL to disable.
code.py output:
trail quail
Upload it in here?
long mango
yes
upload the file using the + to the left, which uploads a whole file (don't paste it in as text)
long mango
here is a simple version that does the red/blue blink, but on the strip, on the first 10 pixels
trail quail
Also i have not yet attatched button for on and off, do i need it as well?
trail quail
long mango
Not lighting up
long mango
no, you don't need the on/off
trail quail
long mango
change strip = neopixel.NeoPixel(NEOPIXEL_PIN, NUM_PIXELS, brightness=0.3, auto_write=True) to np = .... sorry
k_star98 neopixel thread
 tulip ruin
This is a very silly question probably. I am trying to help my son sew a light on an anglerfish he is sewing and was thinking of using (https://www.adafruit.com/product/6456). However I really want to power it with AA or AAA or similar batteries. We are around small kids and lithium batteries are dangerous for swallowing so it would reduce my anxiety haha. ( I mean all batteries are dangerous for swallowing, but still.) What could I use, if anything? How many AA or AAA?
hot tree
tulip ruin
This is a very silly question probably. I am trying to help my son sew a light o...
Use three or four AA or AAA batteries
Not silly at all
hot tree
There’s an old adafruit kit (2006) called Minty Boost that created 5V from two AA batteries in a small Altoids tin. However, it appears these aren’t sold anymore.
 lost nexus
Pico-based atomic watch
 eternal moth
Got the 128x64 OLED Featherwing and the ESP32 S3 Feather bc I’m trying to make a version of the OLED badge here. https://learn.adafruit.com/digital-display-badge/wear-it
I got it displaying some stuff on the screen, then I dry fitted the magnetic pin back and since then the display doesn’t work. ESP32’s fine though. Any chance I’ve borked the Featherwing bc there’s some magnet sensitive stuff in there that I didn’t know about or is there a way to fix this? Thanks

with FeatherWing OLED
eternal moth
I’m connecting them with Qwiic cables if that helps
 eternal moth
I’m connecting them with Qwiic cables if that helps
eternal moth
eternal moth
I’m connecting them with Qwiic cables if that helps
Soldered the pins on and stacked them, still nothing. Same issue on a Bluefruit 32u4 with Qwiic, it definitely looks like I’ve screwed this up. I know I was being a ding dong here but I wish there was a little disclaimer on the instruction page saying “this magnetic pin back might brick one of the other components in the build so be careful”


I don’t have many baselines to compare it against but it kinda looks like the FPC is messed up

 rancid plank
eternal moth
Got the 128x64 OLED Featherwing and the ESP32 S3 Feather bc I’m trying to make a...
rancid plank
eternal moth
Got the 128x64 OLED Featherwing and the ESP32 S3 Feather bc I’m trying to make a...
was it powered on when you did the dry fitting? something might have shorted. also the product photos don’t make it clear whether there’s any insulation on the metal parts of the pin back. i agree that the project should warn about possibly shorting stuff out
 upper wagon
Was looking into potentially doing a wearable project, was looking for Flora, but it looks like most of the line is no longer produced
I can find some bits here and there, but any suggestions on alternatives?
long mango
upper wagon
Was looking into potentially doing a wearable project, was looking for Flora, bu...
what are you looking for that's no longer in stock?
and do you want Arduino or CircuitPython?
we have tons of wearable projects using various different boards. If you are looking for no-solder, then Flora, Gemma M0, Circuit Playground Express have larger holes
upper wagon
Arduino preferably, but I'm fairly flexible on programming
And it was mainly the neopixels, was hoping to do up some light up bits with potentially a accelerometer to sense motion and such
long mango
Feather RP2040 PropMaker has accelerometer, neopixel driver, audio amplifier, can be programmed in Arduino or CircuitPython. Out of stock temporarily by us, but I see a few resellers with stock
upper wagon
That could work
Thank you
 livid lotus
so, i have no clue if this is in the realm of possibility at all lmao
context: i don't have stereoscopic depth perception, so i only need one eye to see "normally"
is there some way to mount a tiny lcd or display to one of my glasses lenses? I know AR glasses are becoming a thing, but I know that does some weird funky optics stuff
The biggest issue would be making it seem farther away than it actually is so i can actually make things out on it, but I'm getting ahead of myself by not even knowing if this concept is possible
I don't care if the lens is transparent or not, just if I could see it
 tacit radish
The oldest standard was using camcorder viewfinders, which where used by MIT Cyborgs back to the 80's, more recently Voidstar Labs had taken to modifying Epson glasses to be single eye, but if both eyes are okay the Epson glasses are nice (I own a pair) and recently I learned that ROG has a pair of glasses with see-thru capability, but thoselike the Epson glasses are projection on lens you can see through
Cost is high on those but I'm probably going to aim for them when I can
livid lotus
Huh I wasn't sure if zack freedman's glasses were just a prop or an actual thing
And I was thinking about DIYing because like, I don't have 2k to shell out on a pair of glasses
tacit radish
the Movero he used was like $400 when I got them
Most designs for HMDs focus on both eyes, sadly, seeing a one eye display on e-bay for $140 but that is just a viewfinder, like the old MIT ones I mentioned
then again my Movero has sensors for rotation that I haven't even found docs for
 candid cosmos
Hi all, this is the place to post on wearables-glowy things-cosplay-arduino. I'm more than happy to help answer your questions or at least point you in the right direction. If you just have an idea of something you want, I'm sure everyone here will have excellent feedback to brainstorm or workshop a plan to create it. I have found wearables to be perfect projects for an introduction to electronics and know that those into traditional crafting /arts are integrating more electronics into their creations. So don't worry if you are non-techy or know nothing about electronics or even sewing. Ask away or just say hello!
 indigo fern
hello! this is awesome, i will hang out in here a bunch i'm sure! 😃 thanks!
candid cosmos
Hi, cool stuff you are working on shown on Show and Tell!
 stark lodge
yay! glad you found the channel you founded @candid cosmos
 sly ferry
This will be a useful channel for many. Good suggestion @candid cosmos!
 indigo barn
cool!
candid cosmos
Where I hope this is going: Second star to the right...
candid cosmos
@stark lodge Thank you for adding the channel. btw I was the random person meeting you and @twilit fox after the Maker Video Panel talk at NY Maker Faire. I got to talk to Becky Stern back inside the lobby but it got too crowded to try to meet @deft charm.
 lilac smelt
Guess this is relevant here the most, since I plan on integrating electronic bits into the resulting pieces: https://www.facebook.com/High-Vibes-Cosplay-467861040280536/
candid cosmos
ooo, how did you breathe when your face was being cast?
 silver token
the holes like nose holes with tubes
candid cosmos
I would want slurpee size straws for air when they do that.
silver token
you have that big nose holes?
candid cosmos
probably more to ease the claustrophobia
lilac smelt
@candid cosmos The trick is to start with the nose and carefully slap the gunk on around the nostrils. Once that dries (so nearly immediately after you've put it on), it makes keeping the nostrils clear much easier.
And as far as claustrophobia, I actually found it to be quite relaxing, especially when both the front and back halves of the plaster parts were done. I basically tranced out and meditated at some points while they were working.
But then I'm the kind of crazy chick who bases their costumes off of zentai suits, so take that one as you will.
Let me qualify that: who bases their year-round costumes off of zentai suits in Maryland where the weather is either b@lls hot or @#$% this nonsense cold.
candid cosmos
As long as you are comfortable in your second skin. We don't judge. Thanks.
stark lodge
@candid cosmos Thanks for the suggestion! It was great to meet you at Maker Faire! I'm excited to see more Show and Tell on the livestream and here on discord.
candid cosmos
I figured there was a crowd like me that would shy away from the intense development that was going on or confused on all the github activity and needed a place "I want blinky things" and how do I start making? Permission to make is handed out free.
indigo fern
Happy 10 year anniversary to Lilypad! That’s the product that got to start tinkering with electronics projects in the first place 😄
 real axle
@indigo fern did you see that sparkfun changed their site colours to purple :D?
indigo fern
@real axle oh so cool! I had not seen that!
real axle
@indigo fern I thought it was their halloween thing but they're doing a reduced pricing on the entire line 😮
candid cosmos
@indigo fern I jumped in the fray when Flora came out. It was easier to use since it didn't need the FTDI dongle to program it. Of course, I don't know if Adafruit was expecting the tech would fall into the wrong hands...
@indigo fern https://youtu.be/LmZJy8lvj5A
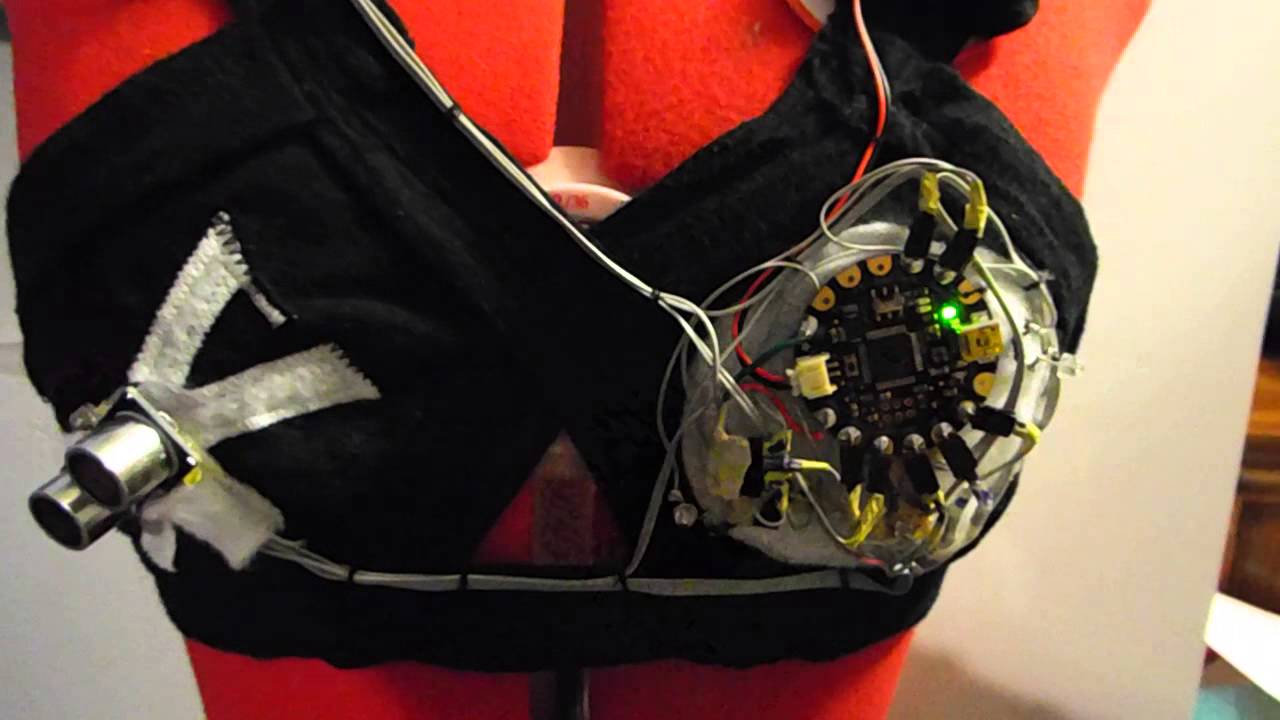
instructables.com Adafruit Flora arduino theremin ultrasonic ping sensor, photocell sensor
indigo fern
@candid cosmos haha omg that’s amazing
 rocky drift
Wait, @lilac smelt You're in Maryland too?
lilac smelt
OH Nice! Whereabouts?
rocky drift
@lilac smelt Cecil, way out of the way of everything. That said, pretty much anything's within two or three hours if I feel like it
lilac smelt
Was gonna say, you should come to Baltimore Hackerspace. Open hack is on wednesdays starting at 7 going to... whenever.
rocky drift
Could do that, but my job plus drive may get in the way often
 median quartz
Just an Idea for people who buy that OLED Screen and a Raspberry Pi - Make a Working Pipboy 3000
Looks like is has been done 😄

Explore the apocalypse with a trusty Pi
indigo fern
@median quartz necessary for wandering the wasteland!
median quartz
nods
 sudden scroll
Hey yall, I've built a lot of wearable computers, data gloves, etc. I've built apps on Google Glass, Moverio, Android Wear, and other platforms. If you need some tips for your cyborg project, I might be able to help
 reef vine
@median quartz I'd go a step further and install a piece of plexiglass on top of the screen, that adds a curvature to it, kinda making it look like a CRT screen
median quartz
@reef vine Good idea 😃
stark lodge
thanks @sudden scroll ! welcome!
reef vine
@median quartz you could use that "liquid glass" stuff (people use it a lot when modding Gameboy Colors to have a front light for the screen). That'll make the plexiglass look like part of the screen, and reduce possible reflections on the plexiglass from the screen that could make it look weird.
 wet gate
Hey there all ! I have experience with wearables for theater projects mostly. So my background is interaction design / theatre design (so costumes, lighting, etc).
I had a question regarding cost. For a costume I need atleast 80 pixels. I really love the Neopixels Flora since they are quite handy with sewing. Do any of you know a way to cut cost on it ? Since 4 sheets of 20 is quite expensive and theatre budgets aren't that big 😉 (Well they are, but not for a single costume 😉 )
stark lodge
@wet gate @indigo fern or @solemn horizon might have suggestions. they also integrate neopixels into costumes
indigo fern
Hi @wet gate ! Do they need to be spread out all over the costume or right next to each other like a line?
candid cosmos
@wet gate Can you post a sketch or give an idea of what you want to light up on the costume? There are a lot of things you can do to maximize the effect using only a few neopixels.
wet gate
Hi there ! Sorry for the late response.I'm currently busy with a costume for a dancer. I want to start with the arms / legs of the dancer. I was thinking about 14 pixels / each arm (3 at the lower arm, 3 at the upper arm and one at his wrist. (x2 since we also have to do it two sides for brightness reasons. The public will be around the dancer in a dark space..) = 26 pixels for two arms
@candid cosmos @indigo fern
We have OptiTrack suits that we want to light up. (Motion tracking system) In these type of suits we need to include some pixels to light up in the dark 😉
If you have questions, please ask ! And thanks a lot for helping 😃
 amber widget
@Velibor#8251 That's very cool!
amber widget
I've always found mocap fascinating.
indigo fern
That’s awesome! @velibor Do they need to be individually addressable and rgb? If you can’t come down on quantity, but you don’t need all of that functionality, you could use Adafruit LED sequins if they don’t need to change color https://www.adafruit.com/product/1757?gclid=CjwKCAjwjozPBRAqEiwA6xTOYFyts4XTrs39IdwHni4cfFM0PLngGMLZj-S25esLQZMY62dpWF-3fRoCeQIQAvD_BwE

Sew a little sparkle into your wearable project with an Adafruit LED Sequin. These are the kid-sister to our popular Flora NeoPixel, they only show a single color and they don't have ...
stark lodge
@lilac smelt the third pic here reminds me of your project: https://www.kamuicosplay.com/product/advancedlightsdownload/

Advanced Cosplay Lights - Animated LEDs - Ebook Download Shop - Kamui Cosplay - Professional Cosplayer - Guest - Worbla - Tutorial Books - Cosplay - Costumes - Armor Making - Props - Painting - Armor Patterns - Prints - Tutorial Videos
amber widget
@indigo fern I had forgotten about sequins!
I was trying to think of another option, and totally blanked on those.
indigo fern
Or you can even make regular LEDs sewable by twisting the wires
Here’s a tutorial by friend Chelsea explaining how to do it http://www.wearabletutorials.com/making_leds_sewable_for_wearables_conductive_thread/

@amber widget I forget about them sometimes too, but they’re so great and tiny!
amber widget
@indigo fern I have a few of them myself and I still forget about them! They are great!
wet gate
Oh wow ! That technique is so handy. Genius.
And yeah, sadly we need RGB leds. Perhaps not adresable, but it gives so many options for us to play on the floor 😉
lilac smelt
@stark lodge I really like the light up hair she did. I'd really like to know what material she's using to diffuse the LEDs.
candid cosmos
@Velibor#8251 Adafruit also has the neopixels as regular through hole components in 5mm or 8mm size that you could wind up the leads to make sewable. https://www.adafruit.com/product/1734 Use the silicone coated wire which is super flexible to make soldered connections instead of conductive thread for better connections and reliability. Blob on hot glue around the neopixel and joints to further ruggedize when sewn on to the garment. Zigzag the wire traces at flex points like at human joints to give the wires some slack for movement.

LOLwut? NeoPixels in through-hole variety? Oh yes, we haz them! If you like NeoPixel strips you'll luv these 8mm diffused through-hole NeoPixels. All the ...
candid cosmos
@lilac smelt The material is probably the sheet foam you can get as foam wrap for packaging sold at office supply / moving / home improvement places. There is also "caulk saver" foam insulation strips which are more flexible than what pool noodles are made of.
lilac smelt
@wet gate The other thing you can do is if there are any stiff portions of your costume, you could feed wires through that. The armor I am making lends itself well to doing lighting work.
@candid cosmos I'll look into that.
@candid cosmosthe character has another AI living in her head called "Medusa" that I'd love for her to represent somehow, and snake-like dreads on the helmet would be pretty awesome.
candid cosmos
Adafruit has got you covered https://learn.adafruit.com/neopixel-cyber-falls/overview

This Trinket project is really quite hairy!
apply the animatronics from those animal tail tutorials to make some of the dreads move.
indigo fern
Good point @lilac smelt ! @wet gate I would highly recommend the silicone coated wire instead of sewing the circuit with conductive thread for a costume worn by a dancer, insulating the sewn circuit from sweat can be tricky, I find
lilac smelt
W asnt going to do any movement. Just light up dreads.
The idea is just wires for hair.
To give a sort of "cyber medusa" like appearance.
candid cosmos
0ops-wrong link and there's this https://learn.adafruit.com/glowing-beehive-hairdo-wig/introduction Get side-glow fiber optic cable which shines all over and not just the pinpoint at the end.

There's a party on your head.
wet gate
Hey. Yeah for sure I would use Silicone wire instead of conductive thread. Thanks for all the great advice !
 ancient flame
Is there a good way to seal solder joins against sweat? Hot glue?
candid cosmos
@ancient flame Hot glue may be the easiest or if you can wrap it up with electrical tape. Actually a lot of things to consider depending on if the joint is flexed, subject to wear, or in an extreme environment. Pure Silicone caulks and some solvent based glues may actually corrode wires as the glue cures. You can coat it with epoxy. Hot glue may unstick if a lot of liquid gets to it. Liquid electrical tape - plastic-dip - has some noxious fumes to contend with before it cures. Duct tape leaves a residue. I have used the silicone self-bonding tapes from the home center-plumbing pipe wrap. Put the whole device in a plastic bag. Do whatever works with what you have on hand. Good luck.
 meager mirage
@ancient flame Clear nail polish also makes a decent hydrophobic coating that doesn't hide the solder joints from inspection. I've used it to cover entire circuit boards in weather stations to prodect from dew-point condensation-- except the sensors or moving parts, of course.
candid cosmos
speak of which https://youtu.be/GNJ4CEoOg4g

Can wearable electronics hold up to the elements? Becky Stern and Phil Torrone from Adafruit test out Rustoleum's NeverWet two-part spray-on hydrophobic coat...
 trail rampart
sudden scroll
trail rampart
sudden scroll
@ancient flame You can buy adhesive-lined heatshrink tubing that makes a watertight, airtight seal. DigiKey, Mouser, etc sell it
General PSA: Your wearable should never press exposed metal carrying a voltage against your skin. Even a low voltage or low current will quickly cause skin irritation and open sores
 uneven siren
Hey everyone quick question about powering a Flora. Does the on board regulator keep power consumtion at 250mA so itll last ~2 hours on a 500mA battery or am I not understanding it correctly.
 mortal edge
@uneven siren 250mA is the max current the on board regulator can source, the actual amount of current you use will depend on what you're doing with the board
uneven siren
gotcha. is there a rule of thumb i can use to estimate the amount time it will run or is more of a try and see type of thing @mortal edge
mortal edge
@uneven siren pretty much the math you were suggesting above. the trick is knowing what current draw value to use. more info:
https://learn.adafruit.com/all-about-batteries/overview

Everything you ever wanted to know about batteries!
but also, always good to test and check your actual performance
uneven siren
awesome thanks for all the advice @mortal edge
candid cosmos
If anyone is interested in using side glow fiber optic cable. There is also a version with sewable welt running on the side. Use as alternative to EL wire and color changing/animation when driven by neopixels. https://twitter.com/caitlinsdad/status/929935918005354496

When tackling this holiday season, accessorize with a Leslie Birch Florabrella tote bag. https://t.co/Ydvywf0V6s @adafruit @zengirl2 @ecken @PaintYourDragon @tdicola @johnedgarpark #wearables #wearabletech
 Twitter
 karmic mauve
Hello! Not sure where to write this, but I have a problem with a faulty pocket inverter for my El wire (bought from Adafruit) and I get no answers in the forum. Could someone here please help?
real axle
Hey @karmic mauve could you describe the issue you're having? (maybe post the link to your forum post if possible)
karmic mauve
 mystic tendon
Nobody's put anything here in a while... Here's something I did several years ago: http://xuth.net/jim/coat/
 mortal edge
@mystic tendon nice
candid cosmos
@mystic tendon Very cool. Was that back in the day before neopixel strips and you had to wire up the entire matrix of RGB LEDs?
mystic tendon
WS2801 and WS2811 flexible strips existed then. But you absolutely don't want to use them on something like this (well not if you want it to last for more than a couple hours).
The flexible PCBs are designed to flex a bit for installation but they will eat themselves if they are constantly flexed.
This is not theoretical, I have several friends who tried to go the easy route and use strips and it failed as quickly as I described. I know of another person who uses strips for a wearable but has it designed so that when a strip segment fails he can quickly replace it and when he goes out, he just carries a bunch of extras (and he just treats them as disposable).
That said, on something like a hat, or anything else that is rigid, the strips are an easy way to do things well.
@candid cosmos : I suppose I should tag you so you're likely to see this.
candid cosmos
@mystic tendon Thanks, I just checked out the link too. Battle tested at Burning Man. The liner reminds me of a flak jacket and that faux fur is a bear to work with.
indigo fern
@mystic tendon wow so cool!
and nice write up too, love seeing the inside, and I love that there's so much sewing in that project
 cloud mantle
i love that jacket so much! did you ever run any cool fastLED library palettes and animations on it @mystic tendon ?
 blazing void
Hey, I have some 3d printed goggles I made but at times they can be a bit uncomfortable. Looking to add some padding and was thinking I could cast a rubber mold, anyone have any suggestions on kits?
candid cosmos
@blazing void why not get some stick on window weatherstriping - epdm rubber or foam for an easy fix. If you want to do custom molding, you might want to ask @lilac smelt who has done some casting. Good luck.
lilac smelt
@blazing void The standard stuff for moulding silicone is Smooth-On, but it's hella expensive. Depending on the type of mould you need, you could also use plaster of paris or hydrocal.
But weather stripping or upholstery foam held on with glue could also serve your needs theoretically.
blazing void
Would the plasters be pretty stiff though? Ideally I'd like it to be something with a bit of flex / softness to it
Its something I'll be making a bunch of want want them to last so I'd prefer to make a mold so they fit on better versus cutting stripping and hoping the glue holds
candid cosmos
From a 3D print point of view, you could model in a channel for rubber weatherstripping which is jammed in to fit. The hard plaster is to make the mould in which you pour the molding silicone.
blazing void
ohh... thats an interesting idea
lilac smelt
YESSSSSS! I ordered the last Adafruit OLED screen for feathers on Amazon! Prime shipping! :D
Yeah, @blazing void, the idea is that you build a watertight box around your part, cover the part in a layer of vaseline, and then pour the plaster on top of it. When you tear the box apart to get the plaster out, you're left with a cavity to pour your final material in.
Post layering of fiberglass.
But that's basically just a plaster of paris block with a cavity in it where my part was. If I was any better with fiberglassing, the part would have come out much better.
The box method works for masters with overhangs that are flexible or are inflexible and don't have overhangs.
For something like a goggle cushion though, if you insist on moulding a custom part, the box method should work well for you.
(I don't recommend it though unless you're looking to learn how to mould stuff and have a lot of money, time, and patience, because the likelihood is high that your first attempts will fail.)
Moulding and casting is a tedious and difficult process for some kinds of parts.
And if you're looking to cast multiple copies of the cushion, probably best to use pourable silicone rather than plaster. Silicone will last you for hundreds of pulls, while the plaster will probably start to give out in about 5 or 10 (depends heavily on the material you're casting with).
For foam parts, you'd probably be able to get away with more than 20 pulls.
mystic tendon
@cloud mantle: All of the code running on my coat is my own including about a dozen animations. It might be interesting to try some of the fastled animations but I'd have to adapt them to the LED mapping on my coat (or maybe the other way around).
lilac smelt
Random question, has there been anyone who has tinkered with the RecoilWorld laser tag system?
@mystic tendon, the mapping of individual lights from the adafruit library to FastLED is pretty much 1:1.
So if you have animation code written for Adafruit, all you need to do is translate the indices over to mapping in the buffer you set up for the LEDs. I'm personally going to go with FastLED because my costume will require fast palette swapping with shared animations.
mystic tendon
@lilac smelt : I'm not even using adafruit's library for this. But more to the point, there is no formal mapping of location of any pixel and the pixels aren't in a rectangular array. So I would have to do some work to translate the 2D animation structures used in FastLED to my own mapping. It's not particularly difficult. Just one more thing.
Specifically all pixels are merely mapped relative to 4 (and always exactly 4) of their neighbors. It makes for a different paradigm but it means that certain things are simpler to compute (while others are harder) and it works with randomly placed LEDs as well without invoking fractional locations.
And I do have multiple palettes in the code but at this point I mostly only use one because that works best for the coat because fully saturated color becomes pastel with the white diffusing of the faux fur. Anything that isn't fully saturated looks pretty bad.
 wanton coral
@mystic tendon That coat is amazing. I was independently working on something extremely similar. Same LEDs and everything, except for a suit jacket.
But I'm totally stealing your method of attaching them with the elastic. Way better than my horribly complicated 3D printing idea. >.<
Also, your method of controlling the lights is really similar to mine. I map all the lights in a 2D space, with both rectangular and polar coordinates. In order to avoid fractional issues (and keep the math fast in general) I scale it all to integer space, so everything is 0-255. My patterns are pretty much just a shader program, they take each pixel, and output the 0-255 color on the palette they should be.
It's proven to be very versatile, and a few people have used it. If you're interested, it's on my github as "rgb-sousaphone". The pregen code is JS instead of Python though. Sorry. 😄
(It's also terribly organized, and I'm in the process of trying to clean it up)
mystic tendon
I also have an illuminated leather vest that I made where I used a similar type of modules (designed to press through a 12mm hole) but which have a flat bottom. #4 grommets are (almost) the perfect size for this. So I punched a bunch of half inch holes in the vest, installed grommets into the holes and then press fit the LED modules into the grommets.
https://www.adafruit.com/product/738 on adafruit but you can of course find them for much less elsewhere for when you need several hundred.

RGB Pixels are digitally-controllable lights you can set to any color, or animate. Each RGB LED and controller chip is molded into a 'dot' of silicone. The dots are weatherproof and ...
This all works extremely well so long as you don't insist on seeing the modules in grommets as nipples (or maybe that's a bonus to you).
mystic tendon
@wanton coral I don't so much have a map of the pixels so much as I have a notion that from each pixel I can go up, down, right, or left (with the caveat that going up and then down doesn't necessarily get you back to the same pixel) This was done when I was trying to run everything on an AVR microcontroller. I should probably make a newer mapping that has a more complete sense of where things are but all of my current code supports this past method because it can be done fast and small. Drawing a circle efficiently in this scheme is an interesting challenge though.
wanton coral
Yeah, I was also worried about fast and small with my code (it's AVR based too). I'm managing 144 lights at >75 fps, with the big chunk of the frame delay coming from pushing the bits to the lights.. It would probably slow down a good bit for 400 LEDs, but FastLED has a method to parallelize output, so that could be used to limit the overall impact of adding more lights.
Of course, the solution I'm slowly moving to is just using a Pi Zero...it's cheap, has a compartively huge amount of ram and cpu, and Pimoroni has some great ws2811 libraries for it.
mystic tendon
I'm currently using an Arduino Due with my coat and a Teensy 3.2 with my vest. At some point I'm going to switch my coat over to a Teensy 3.6 which will be far more capable and much smaller.
 timber pier
@wanton coral The Adafruit M0-based boards all have a DMA pin for neopixels that takes zero CPU time at the cost of increased RAM use, but the M0 boards also have way more RAM than AVR ones. https://learn.adafruit.com/dma-driven-neopixels/overview

NeoPixels and interrupts living in peace and harmony!
mystic tendon
That's a cute method of sending data to the ws281x chips. It certainly isn't to spec but with each iteration worldsemi seem to be making them more tolerant of out of spec timings.
wanton coral
@timber pier Yeah, I'm aware of that, but an M0 board is still considerably slower and more expensive than a Pi Zero W. 😄
 swift lichen
also considerably easier to use
it's actually not more expensive if you include the sd card and all the adapters
lilac smelt
The teensy 3.2, microphone, and Bluetooth. Then the notes that the adafruit app was receiving from the microphone.
Raspberry Pi is working as well, but I need to figure out the sound playback now, and sonic pi is not worth the hastle.
timber pier
What sort of sound do you need? I hooked up an old PC speaker to a spare LM358 audio amp kit I had and drove it from an Arduino Uno and it worked surprisingly well (audio off an SD card). You could do the same with the Teensy, and better quality too because of the improved DAC hardware.
lilac smelt
So I found out an interesting tidbit about my microphone project. I found that if I hold the microphone up to my jaw rather than in front of my mouth, it will reliably pick up a signal from the vibrations of my throat/jaw, but the note it calculates is lower than the actual note that I hum. This tells me that if I want to position the microphone for my facemask near my throat or around my jaw, I will have to make some kind of tuner for it that tweaks the frequency I use to detect the note. Alternatively, I am wondering how well a piezo speaker will detect a signal and whether the signal will be more true: https://makezine.com/projects/make-38-cameras-and-av/piezo-contact-mic/

Make: DIY Projects and Ideas for Makers
Salvage the piezo from an old toy and use it to build a small contact microphone that can be used to amplify acoustic instruments.
For general bleeps and boops, the setup works even if the note is off. If I want to use the setup as an instrument though, it would help if the sound was in tune with what I hum.
 brittle hearth
@lilac smelt if you go the piezo route, here are a couple things I learned on my current project:
- Buy a bare disk/element with leads. Much easier than breaking down a plastic encased one. DigiKey has them in a variety of sizes.
- Make sure your circuit & MCU (i forgot what you're using) can handle the voltage. It gets surprisingly high...
wrt the notes matching, I think trial and error will be the best. get your mounting point finalized, then use a tuner (standalone or app) to narrow down the difference. calibrate code, and voila! pitch perfect.
lilac smelt
@brittle hearth yeah, the note matching is definitely pitch perfect when I directly play it a note, but when held up to my throat it needs tweaking. That's where I think my second peripheral is going to have to come in so I can tell the pi to tell the Mic to tweak the frequency by a set amount. Then like you said, trial and error, like tuning any other instrument.
I MAY stick with what works for now due to my Dec 30th deadline.
And it's a teensy 3.2
 signal rose
does anyone have ideas on how to power one of these steppers or a similar low RPM high torque motor? https://www.amazon.com/Adafruit-Industries-32-Step-Reduction-Stepper/dp/B00ODWJSMW/ref=sr_1_16?ie=UTF8&qid=1512947412&sr=8-16&keywords=Adafruit+Motor+Shield
I see that you can use the motor shield with an ardunio board but i was hoping for something a bit more compact
 simple oar
@signal rose https://www.adafruit.com/product/3297
Spin two DC motors or step one bi-polar or uni-polar stepper with up to 1.2A per channel using the DRV8833. This motor driver chip is a nice alternative to the TB6612 driver. Like that chip, ...
signal rose
so @simple oar that board could be combined with an ESP8266 dev board I have laying around
and should be able to run off a single battery bank
simple oar
Yes
signal rose
I didn't intend on it, but having it controllable via web interface is... convenient
excessive but i'm all for it
signal rose
I see that most projects with an ESP8266 seem to be connecting them to an existing network, a control interface should still be accessible when connected directly, right?
meager mirage
@simple oar @signal rose I have a project with a DRV8833 module connected to a Trinket M0 (with CPy) to control a single DC motor. Works nicely.
signal rose
that does sound appealing
trinket M0, that is
having the stepper wirelessly controlled sounds like too much fun to pass on though, main hurdle is wifi
i'm only assuming control interfaces will work in AP mode instead of over a network, which makes sense, but i've been wrong before
simple oar
You could do it with a m0 and esp8266
get a esp8266 featherwing ontop of a m0 feather
signal rose
i have an 8266 laying around already
the only thing im not finding a straight answer for is the AP mode interface, which i've seen both a yes and a no
understandbly most people want it on a wifi network, but that's not going to work too well in public
signal rose
i have yet to test hosting it's own network and using the web interface to control the stepper
like i said, it seems straightforward and should work but i don't know of any quirks
i've only seen one person say that specifically won't work, but maybe they hadn't seen it been done before since most people wouldn't want it to work like that
brittle hearth
@signal rose the esp8266 will do AP just fine. WiFi.softAP(blah, blah, optional blah...). You can actually even use it in AP+STA mode (think repeater). Just don't make the web interface too big; you might run out of program space. also, loop speed may take a hit. Check out the WiFiAccessPoint example in Arduino IDE -> File -> Examples -> ESP8266WiFi. That's a very simple handling of http requests. some of the other examples can show you how to read the different data.
signal rose
smol interface, simple switch
brittle hearth
i will say this though. a BLE board maybe easier. distance will shrink a bit, but it's def had more documented uses for wireless control of tings. unless you go full IoT and implement something like adafruit.io. (that's "worldwide control". who doesn't NEED that? haha) EDIT: just re-realized we're in #help-with-wearables. IoT not all that applicable. but makes the case for BLE even more
 tawny ridge
@candid cosmos : we exchanged posts on the forum,about flora and capacitive fabric and you pointed me to an updated CapacitiveSense library. Thanks a lot for that
that one works. The only downer is that you have to use 2 onboard pins to make it work, one that sends and one that recieves and you have to use a resistor. The plush controller one only uses 1 pin per fabric. But ah well, i've hit a wall there and things are not looking the same as in the tutorial. Thanks a lot anyways 😃
candid cosmos
@RajivPerseedoss#8168 Glad I could at least get you moving forward, well, different direction maybe.... The Flora is one of those "slightly" different arduinos because it uses the main chip combined with the USB controller stuff. Updates to the Arduino IDE or libraries over time might cause things to break because that variation was not accounted for. Anyway, I know the newer Adafruit Circuit Playground boards or a regular Arduino UNO R3 work with the one pad/wire capacitive touch. Look into making soft switches to replace the capacitive touch. Good luck.
 serene eagle
Currently making some hoodies that cool you down with TEC
2 TEC in front(no heat sync, but there is fan), and 1 in back in position where weight isn't felt very much and it's very portable
 golden cloud
My First attempt at making a watch out of the Gemma Mo and the Neo ring 12 (and the GPS as a real time clock)
 light wigeon
Made this Neopixel crown (ft. Trinket, PowerBoost500C & Laser Cut Felt) last week. Kinda forgot about discord for a while but now I remembered!
I Instructablized it too... https://www.instructables.com/id/Felt-Neopixel-Rainbow-Crown/

Instructables.com
This weekend, I made a light up, neopixel-enabled crown for my 3-year-old cousin. She always seems quite taken with my light-up contraptions so I figured it was time...
indigo fern
That’s awesome @bright berry I bet she loves it, looks great!
 coarse bolt
I've seen and used the tinyscreen+ a lot, did you make it using a RTC tinyshield
real axle
@odd sundial cool! are there buttons?
candid cosmos
@odd sundial Looks like a fun tiny project. "Lots of tape", one of the greatest prototyping tools out there.
Any soldering involved with the watch kit?
I dunno, is there a real-time clock module onboard requiring a different library?
just taking a quick look at the teenyduino page, it runs at 8mhz instead of UNO 16mhz. maybe different timers/interrupts are not accounted for in generic library.
see the timelib link on this page https://tinycircuits.com/blogs/learn/158289927-tinyscreen-smartwatch-tutorial

TinyCircuits
Overview The following tutorial will show you how to assemble, program, pair, and test the TinyScreen SmartWatch kit. Begin by downloading the necessary drivers
fun+ then
I still run older versions of arduino IDE because they work.
coarse bolt
most watches have a RTC, for tinycircuits their kind of cheap https://tinycircuits.com/products/real-time-clock-tinyshield

TinyCircuits
DESCRIPTION This TinyShield lets you add a battery-backed real-time clock (RTC) to your TinyDuino projects. This lets your project keep accurate time even throu
candid cosmos
Great, you can put up an instructable on your build to share the good news. they have a couple of contests running that it would be good as an entry.
good luck
its the wayback watch...
that must be the missing code from VHS tape player machines
what kind of battery is it using? coin cells are probably underpowered for any kind of color display.
candid cosmos
@odd sundial That's great. Look on instructables for a message from me. There's an inbox from the YOU menu...
hmm, seems newer products are adopting the more powerful chips, going from AVR to the SAMD21 and beyond.
 alpine dock
I want to use TCS34725 color sensor with Gemma, would it work!? Making something like chameleon scarf but with gemma
indigo barn
It looks like it’s 3.3V and I2C so my uninformed opinion is it would
 manic pecan
I would say 3v3 & I2C would work great with gemma.
candid cosmos
@iayanpahwa#5390 I think the answer depends on which Gemma board version you are using. The original Gemmas, really the same as Adafruit Trinkets were attiny85 chip based and the reduced functionality - no serial and less pins/memory required them to use modified libraries and quirky techniques to program them. Adding an "advanced" sensor to the mix might not be as easy as it sounds. That said, and not to discourage you, there are a few posts in the adafruit help forums on the topic but I do not recall a finished project you can look into. It might be a good time to look into getting a more full featured board if you can and not run into those hurdles. Good luck.
real axle
@alpine dock https://www.adafruit.com/product/1356

Your electronics can now see in dazzling color with this lovely color light sensor. We found the best color sensor on the market, the TCS34725, which has RGB and Clear light sensing ...
@alpine dock also, https://cdn-learn.adafruit.com/assets/assets/000/049/776/original/adafruit_gemma_Adafruit_Gemma_M0.png?1514755968
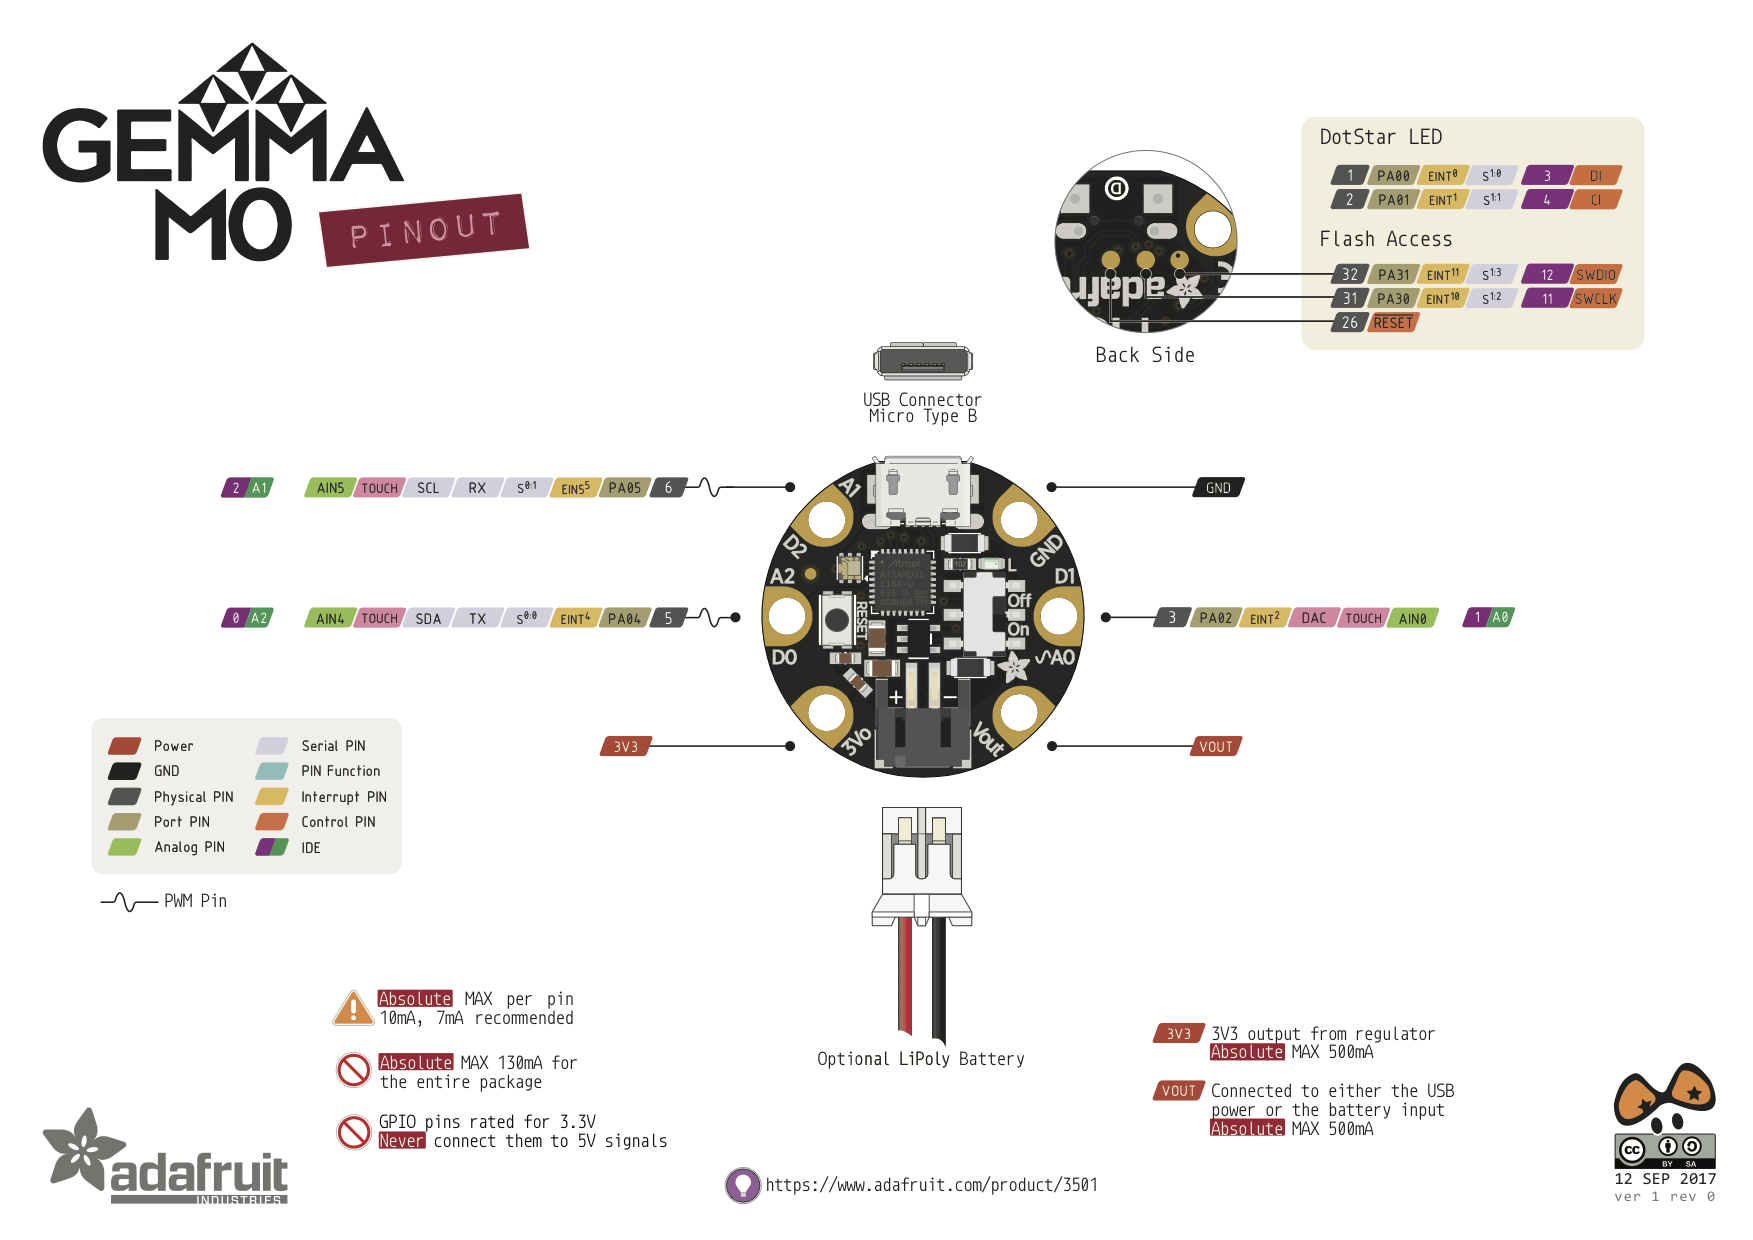

you may also use the breakout board https://www.adafruit.com/product/1334
Connect A1 to SCL, A2 to SDA, 3v to 3v3 and GND to GND.
There's an interrupt and led pin on the breakout which allows you to control the built in LED.
https://learn.adafruit.com/adafruit-color-sensors/circuitpython-code

Your electronics can now see in dazzling color with this lovely color light sensor. We found the best color sensor on the market, the TCS34725, which has RGB and Clear light sensing ...

Measure Light and Color with Adafruit TCS34725 Color Sensors
(side note, i love the backwards compatibility of Adafruit stuff ❤ )
alpine dock
@real axle thanks a lot for support! Since I am using gemma attiny version which doesn't have native serial port, debugging is difficult(though can use sw serial) also the chameleon code doesn't fits the flash memory of attiny! Soni guess I'm gonna use flora or lilypad for this project
real axle
sounds good 😃
candid cosmos
@iayanpahwa#5390 If you don't already have a Flora or lilypad, I would recommend you get one of the Circuit Playground boards - the best thing about it is the additional sensors built into the board which you will want to add once you start making wearables. The newer Circuit Playground Express can do Circuit Python but I find the Classic great for porting over all the stuff out there already for Arduino.
wanton coral
Aesthetics question. I have enough lights to cover either the front or the back of a shirt but not both. Which should I do?
The plan is just to have a grid of lights for various display purposes
The pros for the back is it's flatter and easier to work with. The con is I don't get to see people's reactions. 😄
candid cosmos
@wanton coral So the question is what is the purpose of displaying the lights? You have a grid of lights just flashing random patterns or does it scroll text? Are the lights part of a bigger costume or design? Do you want it to attract attention or just be there to enhance the garment? Will you be wearing anything over the shirt to obscure the front or back? Are you using addressable neopixels or JBOL - just a bunch of LEDs? Any kind of light effect you are looking for - fire, flames, chasing, strobe, sparkle, lava lamp, etc? It's usually easier to have an undergarment chassis for the electronics and let the outer or finished shirt diffuse the lights. Good luck.
wanton coral
So, it's a grid that will be showing random patterns sometimes, text and sprites others. It's not really part of anything bigger, just doing it for fun.
It's addressable LEDs but not a neopixel strip to allow for movement
And yeah, the plan is to connect them to a t-shirt that I'll wear under whatever normal shirt I have on.
I'm just wondering if I should have them on my front or back. 😄
candid cosmos
Easiest thing to do is to build everything on a vest or worker bib. You can wear that front or back.
wanton coral
That's a good idea
candid cosmos
or the Star wars chest plate.
wanton coral
Wait what
OK, apparently I'm not allowed to say the word for a garment that is a false shirt front.
candid cosmos
ah, haha
candid cosmos
but get some fiberfill batting to help diffuse the lights to make them so much better
candid cosmos
and get some sewing skillz
wanton coral
I have a few. 😃
Except my sewing machine's bobbin cover plate seems to have broken some time between november and now.
candid cosmos
have fun, look through my instructables for some ideas of stuff to make
wanton coral
Are you the person who made the led fur coat thing?
Because, if so, that's pretty much what I'm doing here, just sans coat. just attempting to make a wearable panel.
candid cosmos
no, but I think that is the holy grail project of wearables, and light up shoes. Faux fur + neopixels lit up is always awesome. https://youtu.be/yZo29muMq6M

Adafruit Circuit Playground with Neopixel strips. Use onboard mic for sound reactive lights or read accelerometer for motion sensing sparkle-glitter color ch...
wanton coral
I need to start actually making my instructables for my projects
I have about half the photos taken for the sousaphone one.
candid cosmos
By Thor's hammer, get that instructable done. There's a few good contests going that it would be a good entry in.
wanton coral
There's contests?
candid cosmos
LEDs, Epilog - make anything, Arduino, that sousaphone can be entered in up to 3 contests
wanton coral
Well, cool. Thanks!
 severe laurel
next level cosplay https://www.youtube.com/watch?v=jSpaic5hvhI

Learn with our books: https://www.kamuicosplay.com/books Support our videos: https://www.patreon.com/kamuicosplay Woooaah! I am SO excited for Monster Hunter...
with added adafruit goodness
 pearl minnow
Very cool. I bought her book on LEDs but she has some work to do on the use of sketches and power consumption
 queen cipher
Any fabric experts have a suggested way to sew on silicone clips like these? I'd be doing it by hand obviously
candid cosmos
@OsciX#6317 I'm not a fabric expert but by hand that would get pretty tedious real fast. Get a thimble to protect your fingers from being jabbed since you will be blindly trying to get the needle and thread through from back under. You could rig up a jig to use that in a buttonholder if you have a sewing machine that does 2-hole buttons or adjust your bar tack stitch to sew that on. I would be tempted to break out the pop riveter and mount it with a backing washer. You might want to get one of those label tagging guns with the short plastic tag wires to punch that in. Good luck.
 hardy edge
@queen cipher Have you considered using fabric rivets?
queen cipher
@hardy edge I'll look into that, thanks! Don't have much experience with fabric-based projects, but that looks like what I need
will there be an issue attaching them to a hoodie? (That's what I want to put my strips on)
serene eagle
if you have monopoly it comes with free pinkie thimble
candid cosmos
@OsciX#6317 What did you have in mind for placing the strips on the hoodie? Be aware that the led strips can eventually fail by being flexed too much or bent into extreme turns. It's best to actually sew a channel to insert the neopixel strip into but that would be more work than trying to tack on the clips.
@serene eagle I believe Patrick said it best "When in doubt, pinky out."
indigo fern
A friend showed me his f.lashes today, he backed the Kickstarter and just received them - super tiny magnet wire and cute pcb with attached hair clips, really cool wearable engineering
rocky drift
@indigo fern Those things are cool, but there's no way I'm attaching anything to my eyelashes.
 mint goblet
same here
 hot warren
@indigo fern lashes or eye brows?
 molten steeple
@hot warren it's… lashes! https://youtu.be/Do3eBpEt9Gc

This is an actual product available on eBay. As soon as I found out about them I ordered a set, and about 6 weeks later they arrived. Initially I thought it ...
It looks like these f.lashes have three wires and twelve LEDs? I'll bet they're also charlieplexed in groups of two.
indigo fern
Yep lashes! Thanks for link @molten steeple !
molten steeple
What I posted is a different product, but bigclive's teardowns are always very detailed and it looks like it works on the same principles
indigo barn
wow, I really want those. that looks awesome.
molten steeple
"You'll poke your eye out! You'll poke your eye out!"
indigo barn
and look cybre as heeeeck in the process
indigo fern
https://www.kickstarter.com/projects/flashes/flashes-fun-interactive-led-lashes here’s the Kickstarter page for the f.lashes

Fine, Fresh, Fierce - f.lashes are the next level up in wearable electronic and interactive cosmetics
And here’s the info sheet that ships with them
The little strips of LEDs are just flexible enough to curve to the shape of your eyelid while you’re wearing them
hot warren
Oh that's bizarre! It must feel strange to wear those and see the lights on things you look at
reef vine
This looks like the start of a pixar Cars horror side story: first, come the headlights...
Oh hey, there's an idea for a Halloween costume: nightmare McQueen
 eternal rune
interesting...
indigo fern
I think the idea of interactive cosmetics is interesting, I’d not heard that term before but it’s like this https://learn.adafruit.com/space-face-led-galaxy-makeup/overview

Wear a constellation with NeoPixels & GEMMA
candid cosmos
Maybe a better term is "augmented cosmetics" https://blog.adafruit.com/2016/09/15/realsexycyborg-make-wearables-more-wearable-with-tegaderm-adafruit-adafruit/ or https://youtu.be/Okk78DHoiu0

Adafruit Industries - Makers, hackers, artists, designers and engineers!
Happy Mid-Autumn Festival! We bring you mooncakes and a special guest video from @RealSexyCyborg (imgur & Twitter). She is a prolific maker based in China that is doing some fun videos with Ad…
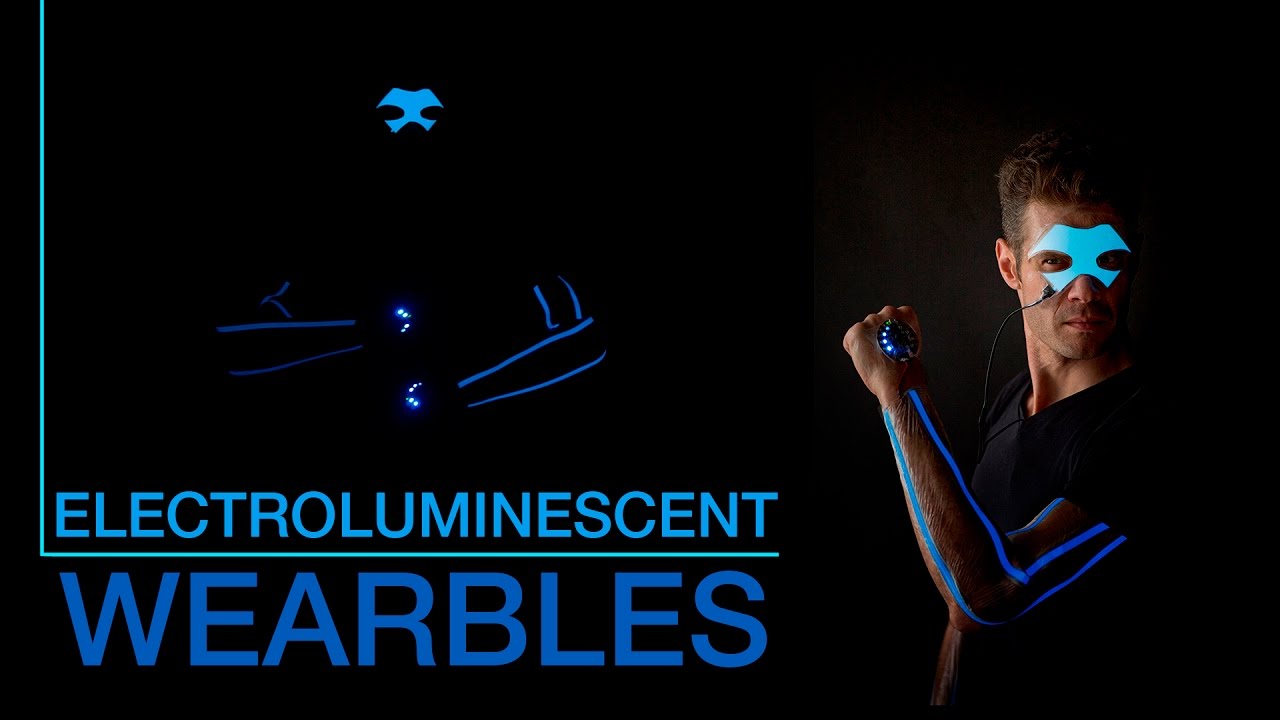
John Park make's electroluminescent tape sleeves and a mask by following the great tip by @realSexyCyborg on using Tegaderm tape to affix wearable electronic...
There's also the people embedding NFC and RFID chips in their body or limbs as an extreme example.
real axle

You can buy the LED Eyelashes here: https://goo.gl/NBwkuy Flash Deals: https://goo.gl/zaA42b ►Patreon: https://www.patreon.com/sexycyborg ►Twitter: https://t...
molten steeple
And don't forget LED fingernails!
mint goblet
you could hide the butten cell under the nail is long enough
molten steeple
Power-over-circulatory-system
Keep your BAC up, and power all your wearables with fuel cells!
 indigo chasm
Hi everyone. I just added a new linux system and went with Mint. I'm wondering if I want to use the adafruit classic playground. How do I install circuitpython on Mint?
mint goblet
@gary_butler288#4509 is this what you are looking for?
candid cosmos
@gary_butler288#4509 You need to make sure what board you have. Circuit Python only works on the newer "Circuit Playground Express" board which has a different controller chip. The Classic is for regular Arduino programming.
mint goblet
oh my link disapeard
odd i thought i posted the learn page about installing the board

Easily add support for Adafruit boards to Arduino v1.6.4!
light wigeon
I missed out on a twiddler 2 today on ebay so I think I might make my own chording keyboard and mouse out of a wii nunchuck.
indigo fern
Here’s are article about the wearable tech in the US Olympic teams uniforms! https://www.scientificamerican.com/article/olympic-clothing-designers-try-to-beat-the-cold-with-technology/

Scientific American
With electric self-warming jackets and new insulated fabrics, Team USA hopes to overcome record-setting chills
Our uniforms are so hot right now @rocky drift
rocky drift
@indigo fern They just don't want to be too cool
real axle
Thanks for sharing @indigo fern ! I wonder how the material they use compares to: https://www.adafruit.com/product/3670

High-conductive heating fabrics are so hot right now! Literally! This non-woven fabric feels a little like felted paper but is filled with conductive material that can make the fabric emit ...
meager mirage
@indigo fern Not as fashion-forward, but Milwaukee Tools has a jacket powered by one of their 12v power tool batteries.
light wigeon
often though of making various snow related garmets with the heating pads from the Adafruit shop. I think if they don't work, carring around all those battery packs will get your heat up.
 strange fjord
The most heat retaining material I’ve ever experienced in my life is pleather
That stuff reflects heat like 200% (way it feels)
The fact that Milwaukee uses easy to get a hold of rechargeable batteries helps, but my problem is, I wouldn’t wear that on any job site
indigo fern
@real axle yes I wonder! I’m experimenting with some of that fabric and heat reactive paint, getting some cool effects
@meager mirage oh neat! I didn’t know they made something like that!
I wonder where the battery sits
strange fjord
My guess is towards back, there is a zipper
indigo fern
@real axle the article describes it as some kind of silver/carbon conductive ink application on the fabric
Rather than an insertion of conductive fibers/fabric
Here’s another article that actually shows the printed panel inside https://www.cnet.com/news/2018-winter-olympics-team-usa-heated-jacket-ralph-lauren/

CNET
We try on Ralph Lauren’s opening ceremony jacket.
strange fjord
I don’t think they made the skiers & snowboarders jackets heated also
Although, that clarified how they done the Star field, which is cool
ancient flame
So, I know this is probably a bad idea....
But do you think that it would be possible to insulate the hot end of a cotton candy machine such that you could wear it, and dispense cotton candy webs?
mint goblet
i thought thase worked my spinng , and some sort of negitve presure in the drum? If I am wrong I am all for some strange walking up to me and dispensing candy
candid cosmos
It's certainly something to try and keep your old harddrive from polluting the landfill http://micgadget.com/24223/turning-an-old-hard-disk-into-a-candy-floss-machine/

A Chinese engineer who operates a data recovery and hard drive repair center is being hailed as a genius after inventing a DIY candy floss machine made from a used hard disk. According to the instr…
candid cosmos
@indigo fern Thanks for the article showing that heater patch. I do question the design choice of incorporating the US Flag as the "sticker", having Served, it seems to disrespect it in some way when people wear it covered or toss it around.
 upbeat wing
The guide for my wearable PiGlass is being reviewed by Adafruit, it's going to be my pet project
candid cosmos
@upbeat wing Cool! Is there some sort of display in the front or is that just a camera pod? Pi Zero W?
upbeat wing
Yea
The display is called a vufine+
I used pi zero w and the spy camera
It also has a phat dac and bone conduction transducer for audio
candid cosmos
ah, I can see where all that gear adds up to a lot of weight. Get a plastic hair headband and attach one side to the earpiece like the single ear telephone headsets. It will take the weight off and won't distract too much from the cyborg look.
indigo fern
@candid cosmos Good point, for sure
ancient flame
@upbeat wing I think I would want to be able to pivot the display out of the way.
upbeat wing
That may be possiblity, right now it's zip tied
One of the reasons I like this place so much is the suggestions and tips
these are the features covered in the guide
Take HD pictures and videos
which get uploaded to dropbox automatically
Bluetooth Music streaming from phone to PiGlass
Youtube audio streaming via mps-youtube
Live Stream camera to Youtube
Stream YouTube videos in hd
I am have some newer features to add in both hardware and software. I am also working on voice commands
upbeat wing
Maybe with ha-bridge
I used it before for lights but it can run any script with Alexa
serene eagle
made a shocking glove
 toxic imp
what did you use as a high voltage source?
light wigeon
looks great but don't know that I would want 2.4 ghz that close to my head
could use a zero 1.3 and extend the usb dongle to mount on my arm though, I been thinking about something similar. I been reading that you can't really read text on the vufine very well is this true?
candid cosmos
Get a matching tinfoil hat.
light wigeon
yea someone in chat earlier was saying that makes it worse lol
candid cosmos
I guess it turns your whole head into an antenna array
light wigeon
I would juse probably extend the usb to the bicep area
is it hard to read text on? this is why I have skipeed over the vufine
candid cosmos
I'm kinda wary of those bluetooth headphones or earpieces.
light wigeon
yea i never used to be, but after some of the tests that came out recently where students and researchers tried to germinate plant seeds near wifi routers and seeing the cell death and imparied cell activity I am more cautious
candid cosmos
I always make my daughter use wired earphones or speaker when she is on the cell phone for a long call.
light wigeon
yea that is awesome, we are half dead so probably won't know if it is bad for sure till later, but it would show up about our age in her then by then we might know that after 48 years of wifi exposure your toast.
mint goblet
im not a fan of a lot of them due to the fact that most in my budget sit on my hearing aids badly and cause reverb
light wigeon
yea I still have to wire up my bone conductor I'd like to try to make a bone conductor collar to wear
light wigeon
I got one to tinker with and really am putting that at top priority its been sitting in the package since relase day who knows how long ago it came out.
least a year or two
mint goblet
and be tight to the skin
light wigeon
maybe if you tape 20 to your skull and wear a hat it would drown out people I don't want to talk to.
mint goblet
nope
light wigeon
bummer
light wigeon
oh that dun sound fun
light wigeon
hey btw I see they put up a new shiny display today for sale now you need to get that one too! lol
mint goblet
no i just spent $80
light wigeon
yikes
mint goblet
now if i spent that last week i would have a circut play ground
light wigeon
yea I'm wanting to order so bad but the itsy bitsy M0 is still out of stock and want to get it in my cart grr on shipping
I mean I guess I don't really even need one. its just like geek crack
light wigeon
oh reminds me maybe my adafruit order from last week arrived! I need to go check! brb
nope, nothing, air mail, not even junk mail ;/
mint goblet
i did ups, it was only a little more and tracking
light wigeon
tracking says it be here tomorrow
I'm not even sure what I ordered off the top of my head, I think that is a bad sign I have an addictions
mint goblet
...
serene eagle
I used a 9v battery and a simple ac-ac transformer(low voltage to ~120v) with button @toxic imp
So basically i need to be touching the subject then press button
Because if it were 9v ac it would output constantly, instead of only once after switch/button is pressed.
So that's why the ac-ac transformer works with it, and is ideal, because it only outputs high voltage for split second
toxic imp
ah! yes, a simple approach. though it'd be something like the plasma-lighter dc-dc converter. little tiny box, 14x14x7 mm, feeds from one li-ion cell, and gives quite a shock (don't ask how i know).
thoughT
the timing of the pulse in that case can be limited with a simple monostable 555 flipflop.
timing -> duration
if using these, i'd recommend lining the inside of the glove with a conductive material, as a self-protection in case there'd be an unplanned current path through you (e.g. glove gets wet). in that case the fault current would be shorted before reaching your skin.
uneven siren
Has anyone built something with Flora/Gemma and an esp8266 like module? I'm working on a wearable mesh network this weekend and was looking at a project as a jumping off point. I was also looking at Bluetooth to create the network but was unsure if the bluefruit module supports bluetooth mesh.
candid cosmos
@just a dog#6771 You might want to browse the regular Adafruit forums on the wireless to see if anyone used Bluefruit (Bluetooth BLE) to be certain. I think there was excitement with the announcement of the new Particle boards https://blog.adafruit.com/2018/02/13/particles-next-generation-hardware-particle-compatible-with-adafruit-feather/ which is probably what you want to do. Good luck.

Adafruit Industries - Makers, hackers, artists, designers and engineers!
Introducing Particle’s Next Generation Hardware, Powered by Particle Mesh (blog post). And here is the press release, congrats Particle on the line up and of course Feather compatibility! Par…
upbeat wing
PiGlass now has voice commands i am psyched
light wigeon
@upbeat wing Did you roll your own with pocketSphinx or connecting to Amazon echo or google service?
upbeat wing
pocketsphinx
@light wigeon now im trying to tie voice commands to simulated keyboard input so i can control some of the programs i wrote with my voice
light wigeon
awesome great to hear your not relying on an api and now it truely mobile too. It will be great to see the write up. I know @molten oyster was seeking some answers to that too earlier in general. I had a project in the works a few years ago that used it but could not get past adding commands so I think this will inspire me to pick up a similar project I was doing. I hear the text is sort of hard to read on a vufine so I was weary of getting one, but even if this is the case I think this along with tts would make that issue minimal if its even a problem.
upbeat wing
i use opencv and text overlays so its readable i am trying to learn more about opencv so i can have more display functionality
light wigeon
oh great idea, yea open cv would be great, would go back to the old MIT and Georgia Tech days and have all the face rec and things they had going in the 80's and 90's
I just picked up a twiddler 2 recently so I'm looking to go retro again myself.
its funny these things were like 4 pounds heavier and 15 if you included the batteries back in the day, now it fits on your sunglasses and not on your belt/backpack.
Did you get the vufine or the vufine+ ? I might have to see if I can find it in my budget to get one.
upbeat wing
@light wigeon the plus because it has variable aspect ratios which allow my opencv programs to appear fullscreen
light wigeon
awesome yea considering 3d printing a side monocle for it as I see the main complaint is the glasses and light getting in. I think if this could be a mono welding goggle or eyepatch style it would be more functional.
Almost every review has pood this but they say if it was enclosed and no so wobbly it would be great, so I think maybe we or I could do just that, or if the Ruiz brothers took off with your idea after your learn tutorial I am sure they would do a fine job at bringing it to a consumer grade diy and we might even see some cyborgs about.
Something like this, with a mount for a servo to control the lense to swing the vufine up or down to get a clear view or video view would be a nice 3d print
https://www.amazon.com/Steampunk-Victorian-Goggles-welding-Glasses/dp/B00J3AM7LS/ref=sr_1_2?ie=UTF8&qid=1519073289&sr=8-2&keywords=steampunk+monocle
upbeat wing
I'm not using the vufine glasses or their subpar adjustable mount
light wigeon
ok great, yea hard to tell from the picture. Yea I not heard good things about the supplied one.
upbeat wing
@light wigeon how many words can you recognize with pocketsphinx?
light wigeon
@upbeat wing I think the max via generatred .dic file is like 6000?
upbeat wing
Oh wow
light wigeon
but those are sentences iirc so it can be broken up with more than that at least that is what I remember from the generator page saying, its been awhile i'll see if I can locate it.
hmm just a limitation of the lmtool so idk found it.
2.3) What are some technical limitations of lmtool?
It is most appropriate for generation of English-language models (due to the dictionary generation).
There is a current limit of 6000 word for the corpus.
If you need non-English models you may still be able to use the tool, either by downloading quicklm or by using the handdict option (see below). Otherwise we recommend that you use one of the standard tools described above.
The tool will reject requests consisting of a single sentence and single word. If you really need a single word language model (why?), copy the sentence a couple of times.
source: http://www.speech.cs.cmu.edu/tools/FAQ.html#_Toc252644369
 slim pelican
Anyone any good with fabric types? I want to make a thin liner for a knit yarn beanie cap I have. I want to sew some neopixels to the liner, then put the beanie over it. Looking for the right kind of material to make the liner out of. It needs to be a little streatchy to fit over a head, but not too much.
candid cosmos
@slim pelican Best thing to do is if you have a fabric store nearby is go up and down the aisle to check out the fabrics and find what you like. Depends on if you like it more functional - wear resistance, hair snagging, pilling, washability, grip on hair, thickness, insulation etc or looks - contrasting color, shine, effectiveness at diffusing neopixels, sheen, etc. Microfleece is usually used for stretch knit caps or just try cutting up an old T-shirt for fabric. Good luck.
slim pelican
hmm tshirt fabric does seems like a good material, and I have tons of black tshirts that I don't need...
candid cosmos
there ya go
slim pelican
thanks 😃 @candid cosmos
slim pelican
woo, sewing is hard. I really hope there's something wrong with my sewing machine... otherwise I'm really bad at this.
mint goblet
i suck at sewing, but I can use a machine, wahts the issue? if it's slow thats bad, so is clanging
slim pelican
something's wrong with the zigzag stich. the needle is zigging and zagging, but the resulting stitch only has like one side done... and the blind stitch mode is all sorts of messed up. skipping stitches all over the place
I haven't used this thing in years though, so might be time for a tune up. that's tomorrow's project!
amber widget
Bobbin might be empty.
Or the stitch... I can't remember the word. Tension maybe? Whatever determines where in the material the two layers of stitching connects, that can get you if it's off.
slim pelican
bobbin seems ok... its beyond my troubleshooting though. I even read the manual!
fortunately, this is a really small ammount of sewing... so hand sewing it is for tonight.
slim pelican
Knit cap liner with neopixels.
won't win any awards for my sewing, but it shouldn't fall apart. Once its covered up with the knit cap no one will see it.

First test fitting of knit cap, liner, neopixels and trinket microcontroller.
mint goblet
what kind of strand is that , I am not sure I have seen it before
slim pelican

Attaching NeoPixel strips to your costume can be a struggle as the flexible PCBs can crack when bent too much. So how to add little dots of color? Use these stranded NeoPixel dots! ...
They're nice because they flex and bend in any direction. The strips will only bend in one direction. They are a bit more expensive unfortunately, but I figure they're well worth the reduced frustration.
 brave tendon
If you were making a shoe insole with electronics under it, do you 1. Make your own with attuned fabric, or 2. Buy a high-quality one and put it over the electronics with a buffer in between the sole and electronics.
candid cosmos
@Girafficonical#2372 Were you embedding electronics in the shoe and just needed a cover inside? Get those foam cushion shoe inserts to cover the electronics below - add a plastic or thin wood plate and more foam so you don't crush anything below. But if you want to experiment... https://www.instructables.com/id/Blade-Runner-Harajuku-Light-Up-Sandals/

Instructables.com
It's a computing platform - and off world platform shoes. Make some unique shoes to show off at Harajuku and tell everyone this is the latest from Akihabara......
upbeat wing
I ended up making my own poseable mic for PiGlass with a USB mic, otg cable, electrical tape, piece of metal hanger and shrinkwrap
brave tendon
@candid cosmos ugh, I keep getting spam pop-ups when I click the link. I already cleared by cookies and website data, still popping up :/
mint goblet
@brave tendon you may need to run some anti spyware tools
 pastel fossil
^
pastel fossil
k? can I try it?
brave tendon
Can you try the instructable link?
pastel fossil
it works
brave tendon
Scroll down a bit btw
 severe coveBOT
Click the link for the product search you requested
 @MakerSandbot#7501 by @Codingpro#9213
mint goblet
@MakerSandbot#7501 by @Codingpro#9213
mint goblet
@brave tendon I don't see the popup
brave tendon
Did you scroll?
mint goblet
try running spybot
brave tendon
I get it around Parts
brave tendon
Ah
mint goblet
mast reputable sites don't
brave tendon
Can you show me a good spybot
mint goblet
spybot is the name of the app
brave tendon
Oh k
mint goblet

Spybot - Search & Destroy is a free malware removal tool provided by Safer-Networking Ltd. Users can now purchase Spybot +AV, our internet security suite.
also this https://www.malwarebytes.com/

Malwarebytes
Malwarebytes protects you against malware, ransomware, and other advanced online threats that have made antivirus obsolete and ineffective.
use both
brave tendon
I’m on mobile though
mint goblet
you plobs installed a bad app
brave tendon
Ugh I know what it is then
mint goblet
you have to factory reset your phone most like
brave tendon
I know what it is.
mint goblet
uninstalling the app wont fix it fully sadly

Certo
So you’ve used Certo iPhone to scan your Apple mobile device for spyware and you’re unlucky enough to find your device is bugged. What next? Since having a spy app installed on your device means that someone could be remotely monitoring your calls, texts, emails and other private data you’ll probably want to
mint goblet
i don't see them at my phone
brave tendon
Safari can’t block ads
mint goblet
most mobile browsers don't
brave tendon
It’s just links tied behind ads.
Yup it worked
Disabled cookies.
Yeah, it registers as “not secure connection” on Google.
Which for mobile devices means that ads can get their redirect links replaced.
candid cosmos
@Girafficonical#2372 instructables site underwent a site redesign recently, they are still shaking out the bugs. You are supposed to get a different user experience if logged in though.
brave tendon
I plan on buying on DHGate for Nike Air Mags. Found a good seller, 300 transactions, 98% rating, and the shoe has US Buyer reviews. I think I’m willing to take the risk next week.
 forest granite
What're they asking?
brave tendon
Pretty decent, $90.
forest granite
Meh, no biggie. I'm in the release engineering group, much happier chasing software issues than resellers.
forest granite
I was being sarcastic
brave tendon
Oh lol didnt catch it
forest granite
I didnt think you could even get 'em at retail any more.
brave tendon
Yeah, they were auctioned 1500 Lights only pair and raffled 89 Autolacing w/ lights.
brave tendon
And plus, Nike discloses “NOT A SHOE” on the actual Mag site.
And of course, as an avid fan of BTTF, I’m making some for actual shoe use.
forest granite
right on
brave tendon
Just need to work out the budget.
forest granite
I picked up some converse from an internal sale that I want to put motion-driven LEDs on
so many projects, so little time
brave tendon
Been fiddling around with the powerboost.
Sadly, EL lights don’t come in 5V so I’ve had a great time figuring out a small way to convert 5V to 3V
Plus, 3V = long EL lifespan.
Expected to finish in May.
forest granite
You can get tiny downconverter boards from alibaba and the like
(or Adafruit, I'm guessing 😃 )

Your power supply problems just got SUPER SOLVED! This 3.3V Buck Converter Breakout board is great for supplying power to low voltage circuits from a single Li-Ion ...
brave tendon
Yeah, I’m using that but it takes soo much vertical space.
I’ll see when I gut the shoe.
 granite scroll
just spotted this 😃 https://interestingengineering.com/nasa-looks-to-happy-space-suits-to-combat-astronaut-sadness

Space depression is a problem NASA thinks could be lessened with new space suit sensors which monitor various indicators of mood changes in astronauts.
 remote oar
Alright I am slowly dying making this, any tips or motivation for a lost soul.
I have to make 10 and I can't get one to work nicely. The neopixels should be yellow the leds should just be on.
It's for a school theatre performance.
mint goblet
they are turning on?
remote oar
sorta
mint goblet
btw yellow is a little tough to get right, it's doable
remote oar
Yeah its yellowish, which is fine.
but some are blue and some arnt on haha. it's most likely just poor sewing, but it takes forever to do one
mint goblet
i see sequence and flora pixels?
remote oar
yep
mint goblet
try turning the brightness down in the sketch, also do you have a millimeter to see if the are getting power ?
mint goblet
post the sketch ?
remote oar
mcdonaldsyellow
mint goblet
on line 15 try adding #define BRIGHTNESS 50
remote oar
ok
mint goblet
i have to add the something someware ese i have to find it in yyor code
remote oar
k
mint goblet
I think from the rgbstrad test example , you can use this around 43 strip.setBrightness(BRIGHTNESS); strip.begin(); strip.show(); // Initialize all pixels to 'off' }
i don't have any sequence to test with, but they are not rgb right ?
remote oar
they are just white leds
mint goblet
okay
remote oar
'strip' was not declared in this scope
mint goblet
crap , i have to rewrite thet to fully work, take it out for now, and check for crossed thread
remote oar
k
I'm assuming thats the main issue
threads somehwere touching
its a wild amount of stitching required though ay
Also do the data lines need to be all facing the same direction with their arrows?
when i stich wire to the middle of the M and then back up for example like hmmm
mint goblet
data flows it one direction, i believe power can do both, let me check something on that
have you looked at this https://learn.adafruit.com/adafruit-neopixel-uberguide

Everything you always wanted to know about Adafruit NeoPixels but were afraid to ask
remote oar
ok
mint goblet
crossed thread is a pain
candid cosmos
@remote oar Hi, what arduino board are you using as the controller? You cannot mix neopixels with those sequins in the same circuit/pin. Those smaller lights should be plain LEDs and are programmed differently.
remote oar
at the moment I use one long wire to go all the way round. Would I be ablle to make small re connectinos and test as ai build?
ive got a flora board
mint goblet
you make have to take it all apart and rewire
remote oar
yeah ive doen it a few times
@remote oar Hi, what arduino board are you using as the controller? You cannot mix neopixels with those sequins in the same circuit/pin. Those smaller lights should be plain LEDs and are programmed differently.
I've got a flora board
they do all share positive and negative
while the data lines are on their own
mint goblet
and @candid cosmos is right the sequence needs it's own pin
pixels.setBrightness(BRIGHTNESS); right before pixels.begin(); will set your brightness aslong as you have it defined
candid cosmos
The bigger round neopixel lights should be on one continuous circuit. Just sew and wire those up first and you can use the sketch you have. 3 lines should connect from the board (5v, gnd, from pin 6) to go to a neopixel (5v,gnd, data in). The data out from the first neopixel gets connected to the data in on the next. and so on.
remote oar
Ok. thats what I have except the led's also share postiive and negative?
mint goblet
you should be able to connect in sequence to each next pixel, and test as you go
candid cosmos
The positive(5v) and ground wires can each be one long thread that is shared.
remote oar
Yep, thats what I've done. I recon they are just touching somewhere
candid cosmos
Are the smaller lights and the round lights still connected together?
candid cosmos
and what is powering the setup? battery pack? the leds might be taking all the power.
candid cosmos
that's the difficulty with conductive thread - mysterious shorting or power issues
mint goblet
that's why I use thin silicone and find ways to hide or work it
candid cosmos
and why I still use a AAA battery pack or usb plug into the phone charger pack instead of lipos
but the thing for Teacher is to take out the LED sequins to get the neopixels working.
mint goblet
either way you have to pull back to the last working, then one at a time to find the short
remote oar
well I have it connected to the microusb for now
candid cosmos
and the positive going to the neopixels is connected to the VBATT pin on the Flora?
remote oar
yep
candid cosmos
disconnect the positive wire to the LEDs so you are just working with the neopixels.
candid cosmos
then cut the wire at the first small LED sequin to get them out of the equation.
remote oar
Will I be able to reconnect them later or will it be starting again haha?
candid cosmos
yeah, just sew another thread.
this is the only way to isolated neopixels and LEDs to see what is going on.
mint goblet
nice
remote oar
They just need to go yellow lol
mint goblet
it looks set to rainbow
candid cosmos
can you tell us if the neopixels have a yellowish half moon shape in the lens, that would mean you have RGBW neopixels which needs something else set in the sketch.
mint goblet
those are rgb and not rgbw right ?
mint goblet
I think flora pixels are rgb only so you are good