#show-and-tell
1 messages · Page 23 of 1
 lean elbow
 clear matrix
@lean elbow - do you have a project writeup or GitHub, I'd like to put this in the Python on Microcontrollers Newsletter - if so please send info to cpnews(at)adafruit(dot)com. Thanks!
lean elbow
clear matrix
<@!338136878828224512> - do you have a project writeup or GitHub, I'd like to pu...
I don't yet, everything's still in a pretty rough state lol. I will be a bit busy over the next 2 or 3 days, but I'll try to clean it up and do a small writeup on github. Is it okay that I used Arduino? I could port it to CircuitPython I think but it might take me a bit longer.
lean elbow
clear matrix
<@!338136878828224512> - do you have a project writeup or GitHub, I'd like to pu...
I pulled out the "shifty eyes" code into a sample project, added a bunch of comments, and posted it to my github at https://github.com/apendley/ShiftyEyesGlasses. I also sent an email with the link to the cpnews email address. If there's anything else I can do please let me know 😄
 west zinc
Finally documented my braiding mechanism along with bobbin carriers. https://hackaday.io/project/181960-braiding-machine-maypole-braider-and-bobbins

Basic guidelines on designing a 3D printed maypole style braiding machine. Also includes a basic bobbin with tension control.
 lucid bloom
My pi zero w freezer alarms at the food pantry have come through again. I have alarms setup with twilio and data to adafruit io. I get an sms alarm I check io. The freezer died around midnight, alarms caught it at 5, we emptied it at 8 and everything was still frozen solid. The total amount of food saved over the last 3+ years is around 5000 pounds.


That big spike it when we opened and emptied it
Here's a little context of what it's supposed to look like. Once I get an alarm I have about 4-5 hours to figure out what to do

 lapis jasper
nice work!
lucid bloom
Thanks. There are 5 freezer alarms and 2 fridge alarms. I always get a little worried when I get the message even though I have plenty of time to save the day.
One of the best things I did a few years ago to see how the freezers behave when their dead was to unplug one and leave it closed while monitoring the temp. A dead full freezer goes up 2-3 degrees per hour. My conditions for a dead freezer alarm are 30 minutes over 20 with the doors being closed.
lean elbow
Still haven't had any luck getting the glasses and the WiiChuck to play nice on the same bus on the nRF52840 boards, but I was able to get it working on the Feather RP2040. Ended up using both of the Feather RP2040's I2C busses anyway though because a) the WiiChuck library assumes you'll always be using Wire (so can't use Feather's stemma port without modifying the library, since it's Wire1), and b) the WiiChuck doesn't seem to like I2C clock speeds > 400KHz, meaning we have to accept a much slower rate updating the glasses LEDs. Even still, I'm happy I got it to work satisfactorily in some form, and I'm definitely going to wear this configuration out sometime lol.
 grizzled talon
lean elbow
Still haven't had any luck getting the glasses and the WiiChuck to play nice on ...
grizzled talon
lean elbow
Still haven't had any luck getting the glasses and the WiiChuck to play nice on ...
That's incredible!!! Very creative use of the nunchuck controller.
lean elbow
grizzled talon
That's incredible!!! Very creative use of the nunchuck controller.
Thanks! I've been looking for something like this to use it for 😄
 sage skiff
lean elbow
Still haven't had any luck getting the glasses and the WiiChuck to play nice on ...
sage skiff
lean elbow
Still haven't had any luck getting the glasses and the WiiChuck to play nice on ...
this is SO COOL
lean elbow
Hacked up a custom "wing" to make it easier to connect to the Nunchuck to the alternate I2C bus on the Feather RP2040, leaving the stemma port free for the glasses


 lucid bloom
I customized my own pyportal tides viewer for my parents beach house. My dad really likes the tide chart I have in that home assistant so I searched around and this seemed like the best option, the size is perfect. I changed the scale to fit the max/min tides for that location
https://learn.adafruit.com/pyportal-tides-viewer/graphical-tide-level-viewer


 twin oar
Made a huge thing for scientifically ruining solar panels. Cafeteria tray covered in Adafruit stuff is at 00:52. https://www.youtube.com/watch?v=aK8Sw8iMGMI

Solar panels are built to last decades, thanks to NREL scientists like Tim Silverman, whose job is to break them. Learn about his team's latest contraption for accelerated testing to help the industry put higher-quality, more reliable solar panels on the market.
Learn more about this work: https://www.nrel.gov/pv/accelerated-testing-analysis.html
 gusty shard
Today in the lab: ESP32 and Micropython.

This board was running WipperSnapper yesterday.
 rugged oar
I made a similar design a few months back. But it had a tonne of issues. From part sourcing to heating problems, that design just wouldn't work.
I finally made these two designs. I've ordered parts and pcb just yesterday. The first will go on a Pololu Zumo robot, the other I'll use to port CircuitPython/MicroPython and the use on the robot too. Fun times ahead.


 marble mantle
@rugged oar can you tell more about the pololu Zumo one?
I am also building a custom robot based on Zumo - would be interesting to compare.
BTW, there is also a discord dedicated to small robotics projects, - if you are interested, I can send you an invite
here is a video of my project in action: https://twitter.com/IslandRobotics/status/1425335575566065671?t=zH6n1s26cXvaT31NkOItQQ&s=19


robotic mushroom gathering
of course, mushrooms must be properly tagged https://t.co/3CzVjiAtqQ
 Twitter
·
rugged oar
Twitter
·
rugged oar
I'd be happy to.
In my design I've added
- Reverse voltage protection.
- Higher current management.
- USB-C type connector connected to the USB lines of the microcontroller.
- Power switching between USB and batteries.
- 2 User buttons and 3 LEDs.
- Cuts to add micro metal motors with encoders (specifically for dfrobot motors, but the cuts are wide enough to fit Pololu ones too.)
- MPU-6500 (it was the only simplest one available to me) and an OLED display header.
- Qwiic/StemmaQt Connector for the i2c devices, as well as to add a GPS module.
- A qwiic connector (not in same Pinout as qwiic/stemmaQt though) for a Jevois camera.
- 2 servo connectors.
- An 8 pin socket to add the esp8266 module for cheapest network connectivity.
rugged oar
marble mantle
BTW, there is also a discord dedicated to small robotics projects, - if you are ...
Yes please and thank you.
marble mantle
what mcu and prigramming language are you using?
rugged oar
Mostly C and then hopefully MicroPython/CircuitPython Port. The first I'm sure how to proceed with, the next two are why I made the smaller board for.
lean elbow
"Final" build of my hackneyed nunchuck-controlled eyes, using the LED glasses, a Feather RP2040, a featherwing doubler, a WiiChuck breakout, and 3D printed frames from the Ruiz brothers designs

 dapper maple
lean elbow
"Final" build of my hackneyed nunchuck-controlled eyes, using the LED glasses, a...
dapper maple
lean elbow
"Final" build of my hackneyed nunchuck-controlled eyes, using the LED glasses, a...
That's pretty cool!
lucid bloom

I added the current height of the tide graph as text in feet on the screen. I account for + or - numbers as well as 2 digit tide heights so the text stays in the same spot
https://gist.github.com/matt-desmarais/89291d6d04d55599a9c7a6e20ddb3f90

Gist
PyPortal Tide Graph with current Height displayed and it works heights exceeding positive/negative 10 - code.py
lucid bloom

 gentle fossil
Designed a minimalistic thermal camera case because I didn't have the external switches required to build the existing version https://www.thingiverse.com/thing:5023542

 lean elbow
Very elegant!
gentle fossil
thanks!
 tacit delta
always wanted heat camera, but its so expensive 😦
gentle fossil
Same, but I thought the Pybadge + MLX90640 brought the price down to more affordable levels (around €70 €90). On the minus side, it has very low resolution and short range. I think I get an accurate reading from my 3d printer's heat bed when the camera is 5cm away from it, but when I move it further it starts underreporting the temp. You can definitely see a human 1m away, but overall it feels more like a toy than a tool. Also was a little disappointed to find out that the MLX90640 can have up to 4 dead pixels, but at least mine only has 1 dead pixel near the corner
tacit delta
not too bad
 scenic siren
@clear matrix Wrong channel 🙂
 long hound
Huge thank you to Adafruit for the sensor libraries used to make this bedside clock project. I made it because my kids ask me what they should wear to school each morning. It’s fall here in Canada and the temperatures are all over the place: https://github.com/mike-rankin/ESP32_Desktop_Clock


GitHub
ESP32 based Desktop Clock. Contribute to mike-rankin/ESP32_Desktop_Clock development by creating an account on GitHub.
gusty shard
A thing of beauty is a joy forever. 😂
grizzled talon
Not sure what channel to put this in, but I created a fix for the EyeSPI rounded 240x280 tft for rotating for use with the Arduino Library. https://github.com/MichaelLacock/ST7789_Fix/blob/main/README.md
GitHub
Fix for Adafruit EyeSpi 280x240 tft Rotation Arduino Library - ST7789_Fix/README.md at main · MichaelLacock/ST7789_Fix
 cedar dew
So I finished off this project modelling and printing my own take into he Tron legacy disc and baton. The white disc is actually white but I guess the Lady Ada pink force is too strong https://youtu.be/0WxDgiRM9g8

This is a temp display of the TRON legacy black and white discs that I’ve made along with two batons and lighting effects. I’ve made these so the front face can be removed to show off some internal detailed work.
 inner egret
I’ve been 3d printing this helmet for about a week. Now I just need to add electronics to open the face plate on light up the eyes!

 exotic sierra
Ohhh very cool!
tacit delta
nice
grizzled talon
inner egret
I’ve been 3d printing this helmet for about a week. Now I just need to add elect...
That's awesome!!! What printer are you using?
inner egret
grizzled talon
That's awesome!!! What printer are you using?
CR-10
 devout verge
Prototype for my holiday light display using a bigger power supply. Code is written in CircuitPython on an RP2040 feather. The music (if you turn your volume up) is over the radio, being broadcast using an Si4713.
 patent nimbus
Just finished painting a 3d printed tree stump just got to add lights now . its a model from thingivers would recommend printed well on my cr20 🙂

 patent nimbus
😊 .Iv got some flickering candle LEDs to pop in side as well hopefully add to the spooky 🙂
 ancient slate
Customised a mask with some NeoPixels! 💖


Brittzay
Customising a mask with RGB LED’s, including a few thousand rhinestones 💖
ancient slate
exotic sierra
that mask looks really cool!
Aw thank you so much! ✨
rugged oar
rugged oar
I made a similar design a few months back. But it had a tonne of issues. From pa...
Got my PCBs for the two boards.

 smoky swift
Gotta try this…
inner egret
I finished up the coding and wiring for my iron man helmet!!
 shrewd epoch
Nice! Looks really cool
 charred ibex
Neopixel light toy to for lighting effects. parts render shown as well. Switch for power (li-poly), pushbutton to cycle patterns. M4 Express + neopixel wing


A little case detail. The lipoly goes in the bottom compartment
 exotic sierra
Oh very cool
I’m slowly getting better at 3D design
these are really nice enclosure designs
rugged oar
rugged oar
Got my PCBs for the two boards.
It works!
Kinda sorta!
Needs some work, but it's alive at least :)
Video is bad quality cause it's 4 in the morning and I do not wish to awaken people around me. I'll make something better soon.
http://imgur.com/a/0iHlwit

 plush gorge
Finally got the joystick 🕹 I wanted.

Now to figure out how to wire them all together

 arctic relic
I FINALLY DID IT

Briefcase with a screen embedded, part of my Halloween costume.
Controlled by a knob at the top

Five hours assembling it. Turns out taking apart half a suitcase isn't as easy as expected
The segmented display and knob really gave me some trouble. Top part of the briefcase was solid wood

Ignore the green tape that's the only color i had
Segmented display is I2C. Knob is analog I/O
 snow mango
inner egret
I finished up the coding and wiring for my iron man helmet!!
snow mango
inner egret
I finished up the coding and wiring for my iron man helmet!!
How do you toggle between up n down mask tho 
gusty shard
FunHouse Brickface https://gist.github.com/rsbohn/85cdff6152862af49d13f567ca7114f9
lean elbow
The stairwell in my apartment is really dark, and the light is positioned poorly and not very useful. It has an interesting handrail though, with a recessed bit underneath where I can hide some LED strips, so I built a controller with a QT Py M0 using both of its DMA enabled pins (so as not to mess with timing logic) to drive 2 LED strips, with 2 PIR motion sensors, one at each end of the stairwell. I'm really happy with how it turned out! This was also my first project to use a MOSFET so I could cut power to the strips when they aren't in use 😄


 unique rune
lean elbow
The stairwell in my apartment is really dark, and the light is positioned poorly...
unique rune
lean elbow
The stairwell in my apartment is really dark, and the light is positioned poorly...
I love the use of the wago levernuts, I use those all the time on house projects!
I need to make something similar for the front porch before halloween 😬
lean elbow
unique rune
I love the use of the wago levernuts, I use those all the time on house projects...
They're amazing! A bit pricy but worth their weight in gold imo, especially when prototyping. The 5 slot ones make great "power rails" too.
 hexed comet
I made some Halloween hardware tutorials for Particle!
How to Make a Skull Shoot Lasers out of its Eyes: https://youtu.be/0kLRLOGE4aY
and How to Build an IOT Haunted Doll:
https://youtu.be/DctQ-9RXZ2Q!

In this video, you’ll learn how to use a Particle Argon to make a foam skull shoot lasers out of its eyes when a button is pressed.
Check out the written tutorial at https://bit.ly/laserskull
To see more cool projects and ask any Particle questions visit https://community.particle.io/
To learn more about the Particle Argon visit https://doc...
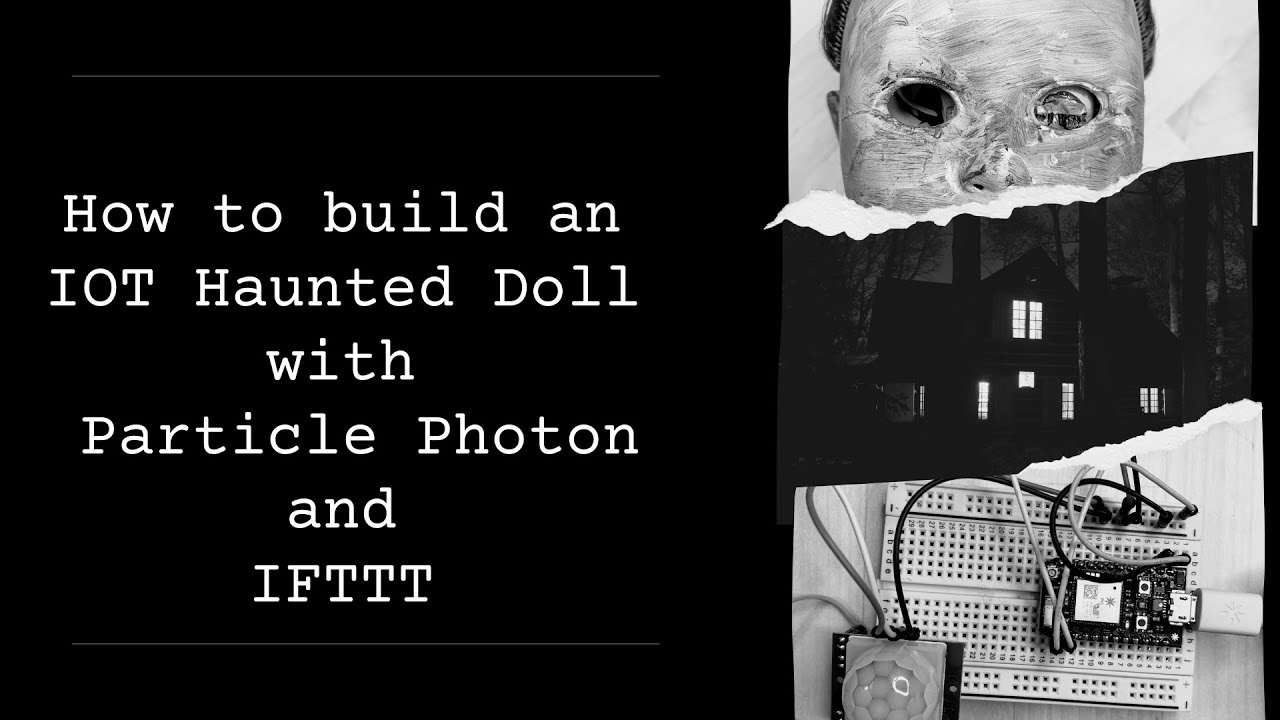
In this video, you’ll learn how to use a Particle Photon and IFTTT to make a Haunted Doll Halloween Prop that controls smart lights and causes a monster to pop out and scare whoever walks by.
Check out the written tutorial at https://bit.ly/haunteddoll
To see more cool projects and ask any Particle questions visit https://community.particle....
 empty plinth
Who’s peeking at you? Adafruit’s animated eyes bonnet, 1.5” OLED displays, and convex glass lenses give this “Creature in the Box” an eerily “living” gaze. The LED illuminated pumpkin, tombstones, and custom-designed box were printed with a MakerBot Method X 3D printer using ABS plastic and SR-30 support material. Designs for the pumpkin and tombstones were sourced from MakerBot’s Thingiverse. To set a ghoulish mood, a chilling array of sound effects were compiled from NASA’s Spooky Space Sounds and are played, for now, using an external Pimoroni Pirate Radio. A future revision will incorporate audio components inside the box. Happy Halloween! (#ElectronicHalloween) 🎃 👀 🎃

 modern elk
volume on my digital theremin is working!
inner egret
snow mango
How do you toggle between up n down mask tho <:flooshed:815287321485115413>
It’s just a 2 pin button with a digital input
grizzled talon
I carved my pumpkin to be an AdaPumpkin 😊 It has a NeoPixel ring inside controlled by a Gemma M0.

 young meadow
Hello! I am not sure if this is the right place to post this. I am a full-time artificial intelligence engineer. I got my start 3 years ago with the playground express. I was hoping to answer questions in an "Ask An Engineer" session.
 livid crow
I made a line following robot (Based on SMARS) and designed a pacman and ghost in Fusion 360. And a massive maze for them to chase around

 exotic sierra
oh those are cute
marble mantle
@livid crow really nice! now if you could program them to go chasing each other ..
 subtle delta
I made a library for working with CSV files like Python's standard library, and added it to the community bundle! Pairs well with the SD card storage attachments if you're using CircuitPython!

GitHub
CircuitPython helper library for working with CSV files - GitHub - tekktrik/CircuitPython_CSV: CircuitPython helper library for working with CSV files
charred ibex
Added “toothbrushing mode”. In addition to the single press mode change, you can double click and you get a 90s timer to brush teeth to. Daughter will have less excuses for being too short now:) conveniently each row is a quadrant.
Clear pic of device was #show-and-tell message
tacit delta
interesting!
charred ibex
The moving dot would take 90s to go all the way but no one wants to watch that lol
lucid bloom
I am working on piglass 2 with the pi zero w 2 and realized I made a pair of Bluetooth bone conduction headphones. The pi mounts on the back strap of a hat. It's awkward to put on as it consists of a hat and glasses that are wired together.

 lucid bloom
This is what it looks like and it sounds great

 amber flame
So you just listen to the sound through the vibrations on your head kind of?
lucid bloom
Yea I shrinkwraped 2 of the bone conduction transducers to the frame
Right above my ear
amber flame
That's awesome. That would be cool for listening system build in to a bicycle helmet
lucid bloom
Yea headgear is required
I am blasting it and I can still hear the rest of the world just fine
So the hardware so far costs about $60 to $70
amber flame
That doesn't seem too bad depending on the use case
lucid bloom
yea its not bad, its really easy to make too
all i had to do was wire the "speakers" and shrinkwrap
amber flame
I wonder how it would manage from a smaller device, something with a more convenient form factor
GitHub
tft-suite is an active development library for creating and switching between different screens on an Adafruit Mini PiTFT. - GitHub - DrewTChrist/tft-suite: tft-suite is an active development libra...
Hello everyone! I wanted to share my screen managing project for the Adafruit Mini PiTFT hardware. It supports both the 135x240 and 240x240 sizes. I hope to add support for creating menus in the near future 😄
amber flame
 grizzled talon
amber flame
grizzled talon
amber flame
Just ordered one of those cool screens with the new Raspberry Pi last week, I'm excited to mess around with it, the screen looks cool!
amber flame
grizzled talon
Just ordered one of those cool screens with the new Raspberry Pi last week, I'm ...
They're awesome! I just got the 240x240 size last week and I'm loving it.
grizzled talon
amber flame
They're awesome! I just got the 240x240 size last week and I'm loving it.
That's the one I ordered, I also ordered a tiny camera for it. It'll be a cool small OctoPrint setup for the new PI zero 2
amber flame
grizzled talon
That's the one I ordered, I also ordered a tiny camera for it. It'll be a cool s...
Exciting! Show it off once you get it all set up!
grizzled talon
amber flame
Exciting! Show it off once you get it all set up!
I'll make sure to! I have some other projects I need to wrap up first though.
 whole brook
Recently flashed some LED bulbs with Tasmota and wanted to control em. CircuitPython and MagTag can do that!
The code is a mess but with just a few hours of hacking I was able to get my MagTag set up to turn the fancy LED bulbs on and off, control their brightness, and display some basic bulb status.
Check it out if you're into that kind of thing. 🙂
https://github.com/fivesixzero/magtag-experiments/tree/main/tasmota-tag

GitHub
Experiments with the Adafruit MagTag device. Contribute to fivesixzero/magtag-experiments development by creating an account on GitHub.
exotic sierra
whole brook
Recently flashed some LED bulbs with Tasmota and wanted to control em. CircuitPy...
Nicely done!
Always fun to get a hack to work even if it’s a little messy
whole brook
Yeah, definitely. I usually code in Java working with large teams in enterprise software. Simple OOP stuff like breaking things into classes, following SOLID principles is kinda critical, even more so for POCs (which PMs love to just push to prod 😂 )… so writing a single script that does all the work is just terrifying 😭
exotic sierra
Totally get it. I work mostly in C++ for my day job
 civic vale
young meadow
Hello! I am not sure if this is the right place to post this. I am a full-time...
civic vale
young meadow
Hello! I am not sure if this is the right place to post this. I am a full-time...
It's been a while, but it seems nobody else responded, so here goes... If you're talking about the Wed at eight live stream, that's "Ask LadyAda" specifically, during the first hour or so they're doing mostly a What's Up wit Adafruit, and Phil collects any questions posted on the various live stream discussions and presents them to LadyAda at the end and she answers them. If you are just looking to help out answering questions, here on Discuss in the various help-with-... groups is where that happens (and occasionally here on #show-and-tell and #general-tech and #general-chat )
young meadow
civic vale
It's been a while, but it seems nobody else responded, so here goes... If you'r...
Thank you for the response!
 rancid kestrel
I made a cool privacy project by peeling off the polarizing layer on an old monitor. Without that layer, the monitor looks blank - unless some of the layer is in between your line of sight and the monitor! I even put some of it into empty glasses frames (not shown). There are some dead pixels because I didn't really know what I was supposed to be careful with while disassembling it (be careful with all of it!!) but it works fine other than that!


Note: if you try this, try to avoid touching the power supply, lots of zapping potential
The camera doesn't show it, but the polarizing film is just a tinted-looking sheet of thin plastic
 solar yew
Assembled Raspberry Pi Zero 2 W, Zero2Go Omini power supply, bottom plate of Adafruit Pi Protector, extra long GPIO stacking header 2x20, soldered a different 2x20 header to Pi, and Adafruit Perma Proto Bonnet Mini Kit. Installed Pi OS, followed instructions for Zero2Go software/hardware install...and it's ready to be the new brains for my big rover project. (acrylic spacers, 4-40 1-1/2" bolts and nuts from the local hardware store)
 marble mantle
solar yew
Assembled Raspberry Pi Zero 2 W, Zero2Go Omini power supply, bottom plate of Ada...
marble mantle
solar yew
Assembled Raspberry Pi Zero 2 W, Zero2Go Omini power supply, bottom plate of Ada...
Nice!
can you tell about the rover project?
I know there are several people here who would be very interested
 proper valley
Displaying a bitmap with CircuitPython and RP2040 PIO. It outputs to 16 pins to control two R-2R DACs.

 near ferry
proper valley
Displaying a bitmap with CircuitPython and RP2040 PIO. It outputs to 16 pins to ...
near ferry
proper valley
Displaying a bitmap with CircuitPython and RP2040 PIO. It outputs to 16 pins to ...
wow, if it has a "Z" input, brightness could be controlled per "pixel"
near ferry
i just realized that is what is being done
proper valley
near ferry
wow, if it has a "Z" input, brightness could be controlled per "pixel"
I'm controlling the x and y and leaving it in the same position longer to control the brightness. It has what looks like an RCA jack on the back for z control and the manual says it requires 30v, but I've not been able to get it to work.
solar yew
marble mantle
Nice!
can you tell about the rover project?
I know there are several people here...
Sure, happy to share. I wrote up a starter blog post a while back. Here's a link: https://hobijots.com/Blogs/Software/Raspberry Pi Mini Rover Using an Xbox Wireless Controller and .Net Core 3.1
There is a GitHub repo link in the post. I have a much larger project with a custom HUD written in WPF, and more sensors for the rover. Lidar on a servo rotating 180 degrees, pan-tilt camera, a little 3 ohm speaker to play a Star Wars mouse droid sound, x728 for Pi power, and a 11.1V 1350mAh remote control lipo battery for all the servos and motors (not ever running that through the Pi, obviosly). For the big rover I used a kit from ServoCity. Which looks like is discontinued or no longer listed. It was called Nomad. It is still showing on the SparkFun site: https://www.sparkfun.com/products/retired/13141. So, the blog post code should still work along with a simple 4 or 2 wheel chassis kit like this one Adafruit sells: https://www.adafruit.com/product/2939. Here's a screen capture of my WPF app HUD. The background fills with the live camera feed when it is running. The lidar data and a little radar line shows up in the top right control. Along with the relative direction (the Yaw) from a 9-dof sensor. C# for the HUD app and python for the robot code.
 lucid bloom
I am making progress on PiGlass v2. I have an 8bitdo bluetooth controller that I use in a few ways including RetroPie. The pi zero w 2 is mounted at the back of my head, attached to it is an audio hat, attached to that are 2 bone conduction transducers for the audio. I am currently playing super Mario on my contraption.

The camera in the back will eventually be attached to the eyepiece, it's there now so I can run my code which renders a basic interface over the picam feed tied to the bluetooth controller
inner egret
I built a table for my CR-10 and ER-20 with filament storage!
 lucid bloom
Brief demo of the code I have for PiGlass v2. I have written a launcher program that runs when you push the button on the audio hat behind my head and a camera program to take pics and videos.
 mental shell
VS Code extension for plotting like in Arduino IDE's Serial Plotter
https://github.com/nesnes/teleplot-vscode

GitHub
Teleplot's VSCode extension. Contribute to nesnes/teleplot-vscode development by creating an account on GitHub.
whole brook
Turned an inexpensive loupe into a fancy ring-lit configurable loupe with some help from a Trinket M0, CircuitPython and a half-size Perma-Proto. 😄
Documented the basics of my prototype in this Github repo:
https://github.com/fivesixzero/circuitpython-experiments/tree/main/trinket-m0/light-up-loupe

 woeful jolt
Turned a MacroPad RP2040 into a vintage HP-35 RPN calculator: https://www.youtube.com/watch?v=uhTHvXhsvXE

here's the Github https://github.com/funkfinger/adafruit-macropad-hp-35-calc
GitHub
Contribute to funkfinger/adafruit-macropad-hp-35-calc development by creating an account on GitHub.
exotic sierra
These remind me of some of the calculators I think Jepler has made 🙂
Very nicely done
 deft bloom
Made an alarm that pulls data from a website, parses it, adds it to a scheduler subtracting 5 minutes and then emails if the alarm was cancelled (or not). Uses a Raspberry 3b with the Adafruit Voice Bonnet/speakers with a right angle GPIO connector, arcade style button and laser cut sides and 3D printed top/bottom
lucid bloom
i broke one of the bone conduction transducer wires in my rush to get it on, camera is mounted temporarily. PiGlass v2 hardware almost complete I gotta get another bone conduction transducer now. I was streaming to YouTube from PiGlass at 25fps 720p 48kb audio
https://www.youtube.com/watch?v=3gCokzoqn38
 lucid bloom
Here is the front/side/back views.


 exotic sierra
Just showing off boards I made for someone who makes Mad Eye Moody’s moody eye cosplay props: https://mobile.twitter.com/NickRuffilo/status/1459657693501829126


I have some code to tweak but got the 240x240 eye to display! Great collab with @oakdevtech https://t.co/bxxeKuV6uE
Twitter
·

@oakdevtech Better iris size…. Now to redesign the shell… https://t.co/WL01r7osVE
Twitter
·
There’s more on that thread 🙂
 lost osprey
Got the Pygamer, wrote a little solitaire poker game in CircuitPython. It works but the code's a bit of a mess of global variables... I need to look at some other projects for inspiration on structure 🙂
 inner egret
I just bought a giant key switch 😂😂

 slow cairn
Feather based CO2 Monitor using SCD41 CO2 sensor


Uses SH1107 Featherwing display and PCF8523 SDCard and real time clock. Records to SD Card based on RTC timing. And custom 3D printed case.
inner egret
I’m almost done with this macro pad that has a giant functioning switch on top

 peak nest
 whole brook
The things we do to rescue our lost friends.
Not a “project” in the more common sense but this required a lot more work than the average board reflash! A flaky USB connection during a CircuitPython update (100% user error) bricked this poor little guy. Couldn’t just leave it that way.
Thanks to a well written Learn guide on flashing SAMD bootloaders, the easy to find board PCB files, and the well-maintained uf2-samdx1 project (which built right the first time! Woo!) this adorable Proximity Trinkey is back in action. ❤️
Learn Guide: https://learn.adafruit.com/how-to-program-samd-bootloaders
PCB Files: https://github.com/adafruit/Adafruit-Proximity-Trinkey-PCB
uf2-samdx1: https://github.com/adafruit/uf2-samdx1
 subtle delta
A fun robot friend I made meant for entertaining guests! Powered by the Feather M4 Express and a few FeatherWings, and runs off of 12V power. Can do a few different tasks, the silliest being selecting a random glass if you choose fill them with different things. In the process of a refresh, turning those laser cut acrylic panels into some nicer laser cut bamboo wood ones!
 subtle delta
Here it is in the wild!
I uploaded everything on GitHub, including CAD files, wiring schematic, and of course software. If anyone does end up recreating it feel free to reach out since everything there is more for my memory than anything but always happy to explain! https://github.com/tekktrik/shotbot/tree/main
 inner egret
I finished wiring, coding, and installing all the switches and the micro controller. Now I have a functioning macro pad!
 tacit delta
lol cool. can i share image
exotic sierra
The big button is when you need to add —force to your push
inner egret
tacit delta
lol cool. can i share image
Sure
 azure salmon
#include <ESP_8_BIT_composite.h>
ESP_8_BIT_composite videoOut(true /* = NTSC */);
// Color channels
uint8_t R = 128;
uint8_t G = 128;
uint8_t B = 128;
void setup() {
videoOut.begin();
}
void loop() {
uint8_t** Buffer = videoOut.getFrameBufferLines();
// Wait for the next frame to minimize chance of visible tearing
videoOut.waitForFrame();
for (int y = 0; y < 240; y++)
{
for (int x = 0; x < 256; x++)
{
//Converts R G B into rgb332
//Red = (R/30) << 5
//Green = (G & 0xE0) >> 3
//Blue = B/64
Buffer[y][x] = (R/30) << 5 | (G & 0xE0) >> 3 | B/64;
}
}
// Wait before next redraw
delay(250);
}``` torn elbow
Finally built my custom lab bench PSU. I couldn't find one in the form factor I wanted- something tall and thin that I can put at the edge of the desk against the wall that won't protrude far forward into my workspace.
It has one (eventually two) adjustable 0-47V 5A supplies, and three fixed voltage supplies (a 6V 20A for servos, and likely a 12V 2A and a 24V 2A.) Added an inlet (at great difficulty) so I can route the wire permanently and unplug it to bring it around if I ever have to.
Will use waterslide decals to label each supply. 144W total capacity.
 marble mantle
how did you make the case?
 rough root
Echoing that. I'm sure the guts are gorgeous too but I'm in love with the case construction
torn elbow
@marble mantle @rough root Not sure if I'm allowed to post a link to it, but I got it off amazon, searching for 'electronics project box' or similar will show you tons of them. They have PCB slots inside too if that's what you need. It dissasembles, so it was straightforward to drill holes for the plugs and cut rectangles for the power inlet and buck converter module. This is the one I used, pretty nice for $23: https://www.amazon.com/Tysun-Aluminum-Electronic-Enclosure-Project/dp/B08G4ZKVL1/ref=sr_1_56?keywords=electronics+project+box&qid=1637422258&sr=8-56

Tysun Silver Aluminum Electronic Enclosure Project Box for Electronics 9.84"x 8.07"x 3.94" / 250 x 205 x 100mm (LWH)
exotic sierra
torn elbow
<@!320665963886280706> <@!887510739462537236> Not sure if I'm allowed to post a ...
You can share the link 🙂
torn elbow
rough root
Echoing that. I'm sure the guts are gorgeous too but I'm in love with the case c...
The guts, by the way. Will neaten up when I add the other voltage supplies.
 marble mantle
nice indeed
 sharp comet
I took @eternal maple 's new bargraph widget for a spin today on my stream. Got it hooked up to the microphone on a CLUE showing the volume level that the microphone is detecting. Great work on widgets Cedar Grove, I played around a bit with the magic eye, and the scale as well. Really cool stuff!
torn elbow
Ended up adding a 12V 360W PSU into my custom lab bench PSU, so the 48V 4A is only for the adjustable and the 12V 360W is for the other three outputs. Mainly so that I could have enough current to run 12-16 servos off of it.


 eternal maple
sharp comet
I took <@!339922377746022402> 's new bargraph widget for a spin today on my stre...
eternal maple
sharp comet
I took <@!339922377746022402> 's new bargraph widget for a spin today on my stre...
Thanks @sharp comet. Made some UI changes this morning to add a value property to each widget. Currently, only the scale and magic eye widgets are scalable and display size independent. Plan is for all widgets to get there, too.
sharp comet
eternal maple
Thanks <@382939733107408897>. Made some UI changes this morning to add a value p...
Nice, I like their flexibility. If you are interested maybe check out the Widget class in the DisplayIO_Layout library. It can be used as a superclass to provide anchor_point and anchoed_position properties which allow similar location setting capabilities. Sometimes creating widgets I also find it nice to extend displayio.Group with the class that I am creating. This allows the widget to get shown onto the display directly or appended to another group i.e.:
bargraph = Bargraph()
display.show(bargraph)
# instead of
display.show(bargraph.display_group)
Appreciate your review today. Yes, I’ve looked at the Widget class and was influenced somewhat by the approach. Using the anchor point terminology is a great recommendation that will probably make it into the next versions. I’m still a Python neophyte and don’t yet understand the concept of extension, but would prefer that UI approach. The end goal for my retro widget collection is to have display size independence and accurate scaling.
eternal maple
@sharp comet BTW, the dual scale widget was originally designed to be used with load cells via a custom NAU7802 ADC FeatherWing. https://www.adafruit.com/product/4540

A strain gauge is a type of electronic sensor used to measure force or strain (big surprise there). They are made of an insulating flexible backing with a metallic foil ...

 sharp comet
eternal maple
sharp comet
eternal maple
Nice! that is a great looking interface. Neat featherwing as well. It's for coffee beans?
eternal maple
Yes, designed for measuring beans prior to grinding and expressing.
solar yew
Used my Adafruit Perma Proto Bonnet to solder on a screw terminal block, a few short wires, a header section with 3 pins, and appropriated wiring from a bad servo to hook up a latching switch for my Raspberry Pi Zero 2 W / Zero2Go Omini project. Spent the morning planning with Fritzing.

 gusty shard
# MagicEye FunHouse Demo
# Use the built-in light sensor.
import time

from adafruit_funhouse import FunHouse
from cedargrove_widgets.magic_eye import MagicEye

funhouse = FunHouse(default_bg=0x002244, scale=1)
eye = MagicEye(size=0.55)
funhouse.display.show(eye.display_group)

while True:
    # MagicEye plot values 0.0..2.0
    v=funhouse.peripherals.light/2**14
    print((v,))
    eye.plot_eye(v)
    time.sleep(0.1)
Excellent. Thanks for trying the widget. The latest (2021-11-20) version of MagicEye's UI uses .value = to set the eye wedge width. In your code, replace eye.plot_eye(v) with eye.value = v
gusty shard
That works. I do get some tearing, looks like a spark jumping across the gap.
 sterile zodiac
Thanks to help from some folks on here: I finished the software for my Fallout Radiation King Radio. https://youtu.be/Y0_Ofxme-Is

Project Log: https://www.therpf.com/forums/threads/zaps-fallout-radiation-king-radio.304867/
Git Hub: https://github.com/zapwizard/radiation_king_radio
Prototype electronics and code for my Radiation King Radio replica, from Fallout 3 & 4.
Correction: The remote is part of Fallout New Miami (not New Vegas)
 ember pendant

Im very happy with this circuit. All the electronics for it are in that box and its holding
In the vid the button turns the overall circuit on and off. Later it will have an led ring that tells you how much power is l3ft in the battery. Right now, its just a testor for another circuit. The microseitch in the tight hand corner acts as an interupt, interupting the power to the electromag, allowing for quick disconnect without having to actually power the device down
eternal maple
gusty shard
That works. I do get some tearing, looks like a spark jumping across the gap.
Likely due to racing of the rectangular wedge mask and the triangle outline algorithm. I have a fix planned when the newest rev of Display Shapes Line is released. However, the 6E5 tube had some inherent phosphor charge glitches, so a little rendering noise is acceptable.
eternal maple
eternal maple
Likely due to racing of the rectangular wedge mask and the triangle outline algo...
@gusty shard @sharp comet The animation glitch is fixed in the latest version of MagicEye (2021-11-22). For the fun of it, I replaced five Display Shapes objects with four vectorio objects. Memory use decreased by about 7.8K. Thank you for the suggestions.
sharp comet
eternal maple
<@!439129780865204259> <@!382939733107408897> The animation glitch is fixed in t...
Nice!
 broken rain

GitHub
Adafruit LED Glasses. Contribute to bdsvac/adafruit_led_glasses development by creating an account on GitHub.
cedar dew
Sorry I missed show and tell this week - just finished off a light tank build for teh TRON fans out there

My take on the light tank from Tron legacy. At 14 inches long, this is a big display piece. Running off a single Trinket MO with the default effect randomly cycling between colours.
gusty shard
The (nasty looking) peas turn into carrots and drop to the floor. Uses easing.bounce_easeout() from the Displayio Widgets library.
 eternal maple
sharp comet
Nice!
eternal maple
sharp comet
Nice!
@sharp comet @gusty shard Replaced all but one Display Shapes objects with vectorio objects. No only did gc.mem_free increase significantly, the MagicEye widget display time improved about 8x. Holy cow. I know what I'll be re-doing this weekend.
eternal maple
eternal maple
<@382939733107408897> <@!439129780865204259> Replaced all but one `Display Shape...
Going to have to take a look at easing in the Widgets library to help smooth out the improved performance.
sharp comet
eternal maple
<@382939733107408897> <@!439129780865204259> Replaced all but one `Display Shape...
Nice!
gusty shard
Uptime via QR code.
 gusty shard
sharp comet
gusty shard
Uptime via QR code.
gusty shard
sharp comet
gusty shard
Uptime via QR code.
Nice! I love to see QRCodes used for things beyond URLs
 pulsar mortar
Out of chaos comes order. Making progress on my BLDC motor controller that uses a dsPIC. I know not many people use PIC's around here, but its what I grew into using.

 candid oar


Here's my diy load tester
1 amp resolution
Be nice

Controlled via serial
Blue is target red is shunt reading
 drifting crater
https://github.com/UnsignedArduino/CircuitPython-Bundle-Manager-v2 
Releases are available for Windows and Debian 🙂
PRs welcomed anyday!
https://user-images.githubusercontent.com/38868705/143666017-dd05b7dc-b38b-4994-8bae-59b58901ffb4.png
GitHub
A Python program that makes it easy to manage modules on a CircuitPython device! - GitHub - UnsignedArduino/CircuitPython-Bundle-Manager-v2: A Python program that makes it easy to manage modules on...
 gusty shard
Vectorio Shapes -- should run on anything with a built-in display (and the vectorio module). https://gist.github.com/rsbohn/f647bc103dd811dcf24732ea1b03bcb3
candid oar
candid oar
Here's my diy load tester
Down to 50-10 ma accuracy
100 ma min and up to 6 amps max
 wicked sun
Hey everyone. I have been designing a manual PNP assist it has magnets attached to the rails that let you lock each axis. Looking for suggestions before I get it milled.


All built should be less than $250. I am confident it can do solder paste as well which is where locking the z axis is handy.
marble mantle
Woudlbe interesting to see it in action.
What slides do you plan to use?
pulsar mortar
wicked sun
Hey everyone. I have been designing a manual PNP assist it has magnets attached...
I would be worried that magnets arent strong enough. Why not use pins to lock it in place? Or something like a ratchet
wicked sun
Mgn15
 short summit
I used an rp2040 Feather and NeoPixel Featherwing to make my speaker stand sound reactive (and 3d printed my own stand and diffuser).

Thanks to whomever wrote the code on the LED glasses in the last Adabox. Worked perfectly for this, just made a few minor changes
lean elbow
Nice! 😄
short summit
Thanks 🙂
 formal hamlet
Dactyl manuform 4x6, all 3d printed except for electronics of course

 trail coral
formal hamlet
Dactyl manuform 4x6, all 3d printed except for electronics of course
trail coral
formal hamlet
Dactyl manuform 4x6, all 3d printed except for electronics of course
I am not sure what I am looking at, but it looks like someone threw keys onto a sheet of glue and then made a keyboard out of it. Can you tell me more about this layout?
formal hamlet
@trail coral it's a dactyl manuform 4x6 keyboard, ortholinear, mechanical, ergonomic. key layout is primarily qwerty, but the thumb cluster and other keys are somewhat customized to what I think are my preferences
pulsar mortar
Dont you just love it when projects start to snowball?
"Oh I'll just add more FETs to spread power dissipation across the board"
Meanwhile
"Should I upgrade to a bigger micro with more pins? Maybe I'll need other pins down the line"
🤔 😅 😂
This whole thing started out as a "I want to build my own lathe" and now I cant get past the part of "Well I need a motor controller too..."
 marble mantle
"feature creep"
pulsar mortar
yeap lol
hence why Im thinking I might need extra IO. Yea it has UART, which should be enough if I want to communicate with another micro. But then theres the "Well what if I missed something?" My IO's are pretty packed and I dont have any left
 dusk zinc

@unexpectedmaker @EspressifSystem @adafruit #CircuitPython with 4 networks:
• @Adafruit Feather w/ @EspressifSystem ESP32-S2
• @WiznetTeam Ethernet Hat (for Pico) connected via @solderparty Pico KB Adapter PCB
• Adafruit Ethernet FeatherWing
• Adafruit Airlift FeatherWing
@CircuitPython 7 code
https://t.co/GKgF3klIYV
 Twitter
·
Twitter
·
 trail coral
formal hamlet
<@!438791522285256715> it's a dactyl manuform 4x6 keyboard, ortholinear, mechani...
trail coral
formal hamlet
<@!438791522285256715> it's a dactyl manuform 4x6 keyboard, ortholinear, mechani...
that's pretty awesome!
 modern lynx
drifting crater
https://github.com/UnsignedArduino/CircuitPython-Bundle-Manager-v2 <a:partyparro...
modern lynx
drifting crater
https://github.com/UnsignedArduino/CircuitPython-Bundle-Manager-v2 <a:partyparro...
Thank you for this, been looking for a way to simplify.
sharp comet
formal hamlet
Dactyl manuform 4x6, all 3d printed except for electronics of course
Did you document your build anywhere online? If not do you have any plans to? I know someone who writes a column about cool keyboards that is always on the lookout for things like this to feature.
sharp comet
dusk zinc
lol https://twitter.com/anecdat/status/1466528521413529600
I didn't even know there was support 2 networks on a single device, let alone 4. That is awesome.
trail coral
This is what I am working on right now. Jetson Nanos with Greengrass and LoRaWAN, and LoRa 433 MHz communicators (and then some) and I need a bigger desk. And a maid. And there's technically also a #pet-photos in there.

And I think by some small miracle I also avoided doxxing myself.
the bbqkbd10 feather on the right is running with an Adafruit fuel gauge, and it's been so much better than reading VBAT.
Both of them have 1200mAh Adafruit batteries. One is running an M4 Feather, the other one of my beloved RP2040s.
Both with 433 MHz adafruit LoRa RFM9x wings.
trail coral
 lean elbow
This is really cool. I've been playing around with the radio featherwings and having a lot of fun with them the last couple of months, and this is really inspiring me to build my own little communicator devices lol
formal hamlet
sharp comet
Did you document your build anywhere online? If not do you have any plans to? I ...
I dont have much of a build log, but it's not a super uncommon keyboard, at least in the realm of diy mechs
trail coral
lean elbow
This is really cool. I've been playing around with the radio featherwings and ha...
I love the radio featherwings, and the keyboard featherwing is just the neatest. I really do like that BBQ keyboard.
 arctic peak
Anyone remember the old computerized board game Dark Tower? I'm making a mini reproduction with the FeatherS2 and other afafruit parts. Electronics and programming are finished. Next up is a 3D printed case to resemble the old game.
 amber flame
Sending/Receiving basic messages with a couple of RFM95W feather wings on top of Huzzah32* feathers. Hopefully more to come!

 pulsar mortar
Does mechanical stuff count? This is going to be a gift but its hard to explain what it entails exactly. Basically the whole thing will look and feel like a piece of metal, but the top will screw off to reveal and hidden compartment. Here, Ive made an insert for the "top". It was a separate piece that was pushed in with lock-tite.


Im currently making the top half and just finished the insert today. I have to bring down 2.000" of Aluminum down to ~1.5" and then even lower for the threads.
exotic sierra
neat! metal working really is an art
i wish i had the skills, patience, space, and money to get a lathe
pulsar mortar
Yeaaaa I almost messed up the insert. It was my fault too, I kept misreading the micrometer and then go too adventurous and took to much off in one pass. My final dimension needed to be 1.207" +0.001" and I hit it on the mark in one go. Way too close as I was trying to sneak up on it.
exotic sierra
hehe
pulsar mortar
exotic sierra
i wish i had the skills, patience, space, and money to get a lathe
So I got this mini lathe for $900 I think. Maybe less but its gone up substantially. If I had to do it again, I would have gotten a lathe from Grizzly.
Im also working out on how to build my own for shoots and ladders.
pulsar mortar
Depends on which you get. But your other option is to look into makerspaces/hackerspaces
trail coral
3D-printed a case for my Jetson Nano. Also adjusted a 3D model in OpenSCAD to work with nut inserts.


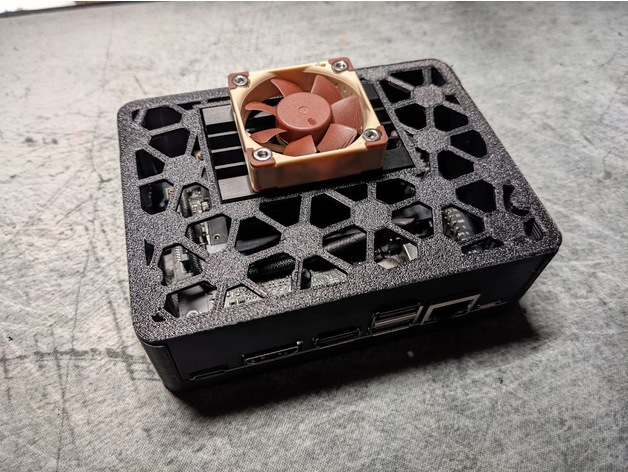
This is a remix of the NanoMesh Mini and it also includes the proper top for the NVIDIA Jetson Nano 2GB Developer Kit (which uses USB instead of a barrel connector for power).
NanoMesh Mini is a compact case design for the Jetson Nano Developer Kit. This case be used entirely tool-less, although it can be secured with four case screws. The carr...
solar yew
I found out that on the next physics lesson were gonna measure car speed using stopwatches so I made this.
It's a speed measuring device that uses 2 ultrasound sensors and measure time between the car triggering the first one and the second one. It also automatically calculates the speed in m/s. It contains an esp8266. I made it in 3 days from idea to working prototype! I'm 14


 heavy ingot
howdy all! I recently picked up one of Adafruit's minipov4's and found myself pretty disappointed with the imaging / flashing tools (the processing stuff was not easy to install in 2021 lol, and it would crash randomly). So I spent a few hours and made my own! Hoping this might help anyone else playing with the minipov's! https://github.com/spencatro/minipov-designer

GitHub
A better program for designing MiniPOV bin files. Contribute to Spencatro/minipov-designer development by creating an account on GitHub.
 green crane
Hey Adafruit and everyone, Happy Holidays. Since the Pandemic I've been making one-off controllers for the 1982 Vectrex Game system. Most of them are using a Feather micro and other Adafruit sensors (tilt, neopixel strip, etc). Most of the controllers are wireless using a nRF24L01+. Here are a few photos. I have videos too if anyone wants to see them let me know. If you think these are interesting I'd be happy to jump on one of the show and tell youtube shows at some point if you like.


 scenic siren
green crane
Hey Adafruit and everyone, Happy Holidays. Since the Pandemic I've been making o...
scenic siren
green crane
Hey Adafruit and everyone, Happy Holidays. Since the Pandemic I've been making o...
We'd love to see these on Show and Tell!
short summit
How does Show & Tell work tonight? I've watched it, but I think I might show something if I work up the courage. 🙂
scenic siren
short summit
How does Show & Tell work tonight? I've watched it, but I think I might show som...
Hang out in the #live-broadcast-chat channel, and wait for the StreamYard link to be posted, then click to join. If it's full, keep trying, folks will drop off after showing to make room for more.
short summit
cool, didn't know about StreamYard, thank you
scenic siren
You're welcome. Hope to see you there!
gusty shard
Snow is in the forecast.
lapis jasper
@short summit it isn't tonight. It's 26.5 hours away from now
short summit
@lapis jasper Thank you. I think I've been coding too much and losing track of the days
lapis jasper
😄
scenic siren
I'm doing just as well, I totally missed the "tonight" part of your statement. Apologies!
short summit
No need!
scenic siren
One more day to build up courage! 🙂
short summit
I'll do it, I just can't figure out where to put my camera without having to move it mid-livestream, which no one wants to see
scenic siren
People do it, but it is a bit jarring, yes. What OS are you using? You could hook up 2 cameras and use share screen to view the other one on your project.
This is assuming you have two cameras, though.
short summit
Oh yeah, I could take a camera off my 3d printer
actually, the speaker doesn't need the speaker wire plugged in during the livestream, so I could move it now that I think about it
scenic siren
I do it on MacOS. You can open QuickTime, start a "new video recording" and then use the video preview as the other camera's preview.
Or an app called "Quick Camera" does a similar thing, but it's $8 or something on the App store. QuickTime is built in.
There's options for other OSs as well though.
Moving the project is also a valid option 🙂
short summit
I think it was your code I borrowed in the end to make this work, too (from the led glasses), so thank you
scenic siren
Oh! You're welcome 🙂
 slim finch
Finally hitting a solid enough point to show off my indoor and outdoor air quality sensors, which stream to a local server. The data is then grabbed from the server by magtags, which update once every 15 minutes if they're powered by battery (once a minute when plugged in--handwaving there since there's a few bugs at that point) and displayed on another eink screen at my desk which updates once a minute as well. I've kept half of the screen update empty so I can add more features, like notifications for bills, appointments, birthdays, etc. On the magtag--the middle two rows are indoor sensor readings, the bottom row is outdoor sensor readings, and the top row is the time and date.

In addition, we haven't had guests for a while, so we haven't dusted. 😅 But circuit python has made most of this a dream to build, and a lot of these sensors are things I dreamed about making back in college so it feels amazing to start getting it's bare bones online
trail coral
Guess what? There's a way to mount a square Pimoroni HyperPixel 4.0 on a Cyberdeck and have it fit on a 400.
Don't question my madness.


I figured... These pins are probably wired straight on this Pimoroni Hacker Hat.
What's the worst that can happen, I thought... Then when the screen didn't start and had a weird color, I freaked out. Turns out you need to install drivers. Then I could see the boot sequence, but not X. Turns out there's some issues with Bullseye and the HP4. Fixed in /boot/config.txt.
I know you want one.
trail coral
Built with these components (and some extra protoboard standoffs I had laying around):
https://www.adafruit.com/product/4499
https://www.adafruit.com/product/4673
https://www.adafruit.com/product/4863
https://www.adafruit.com/product/4795
It's hip to be square with the Pimoroni's HyperPixel 4.0 Square Display with Capacitive Touch for Raspberry Pi computers. This display has all the great features of ...

For when two (mini) HATs are better than one! A nifty prototyping tool for connecting multiple mini HATs (a.k.a. Bonnets, pHATs, Zero-HATs, etc!) to one Pi.This HAT gives your Pi two sets of ...
Cyber-warriors, listen up here! We’ve got with some zero-day unreleased hardware we just dumpster-dived. Now you can crack kodes, and write skripts with style, thanks to the CYBERDECK ...

Raspberry Pi 400 is a complete Raspberry Pi 4-based personal computer, integrated into a keyboard. The Pi 4 is the first computer from the Pi Foundation that really feels 'desktop ...
I am assuming I cannot really use anything on that extra HAT header since the display uses it all. But, there's actually room underneath for a feather, hahahah
I haven't done any of the rewiring to get I2C to work, and I am not sure if the Stemma/QT works at all.
From Pimoroni:
Raspberry Pi OS Bullseye includes major changes to how DPI display drivers work - a quick hack to get the screen working (with some loss of rotation/touch functionality) is to comment out
dtoverlay=vc4-kms-v3dinboot/config.txt. We're working on full support for Bullseye, but if you're after an easy, fully featured Hyperpixel experience you should probably stick with Buster for now.
But, since I didn't need rotation I didn't bother downgrading. All I had to do was comment out the VC4 driver and add gpio=0-25=a2 to the block where the hyperpixel driver statements are.
sharp comet
I am working on some practical examples for NVM storage. Latest one allows you to choose from one of 4 LED_Animations and stores your selection in NVM so that when the device boots up from cold it will resume playing the animation that was most recently selected before it was last turned off. I think this makes a good example of storing application state / configuration and reference it to decide what to do when code.py runs.

Code here if anyone is interested in using similar technique for their projects: https://github.com/FoamyGuy/CircuitPython_Persistent_LED_Animation_Selector/blob/main/code.py
broken rain
sharp comet
I am working on some practical examples for NVM storage. Latest one allows you t...
is NVM memory built into the esp32 s2 or is it a separate i2c device that you plug in and write to?
 candid crescent
broken rain
is NVM memory built into the esp32 s2 or is it a separate i2c device that you pl...
candid crescent
broken rain
is NVM memory built into the esp32 s2 or is it a separate i2c device that you pl...
The main flash is part of the ESP32 chip package, connected via an internal SPI bus.
sharp comet
broken rain
is NVM memory built into the esp32 s2 or is it a separate i2c device that you pl...
It is built in to the ESP32 S2. I did not need to connect anything externally to be able to read and write to it. (There are similar types of storage that can plug in over I2C but I didn't use them for this example).
pulsar mortar
Show and tell isnt just for stuff that works right? Ok so I was pretty proud of myself! I got two things to screw into each other! I successfully made threads! (1"- 12). The top half screwed in correctly with no play..until it started getting stuck about 3/4 as show. Then it got REALLY stuck and wouldnt budge. As you can tell, I used vice grips on it to try and un screw it. Literally, it wont budge. Both pieces are aluminum.
😭 I worked hard on both pieces as it used both internal and external threading. Never did that before! But even though it was a success, it turned into a failure lol.
 scenic siren
pulsar mortar
Show and tell isnt just for stuff that works right? Ok so I was pretty proud of ...
scenic siren
pulsar mortar
Show and tell isnt just for stuff that works right? Ok so I was pretty proud of ...
It's not a failure if it turns into a learning experience. But failures are always welcome here! Sometimes knowing someone else had issues with something can make or break whether someone continues on a project or not. It's really useful!
pulsar mortar
scenic siren
It's not a failure if it turns into a learning experience. But failures are alwa...
Yes! I kind of think Ive figured it out anyway. But the success's of this project dont out weigh the failure. It will make for a nice desk ornament or talking piece
scenic siren
pulsar mortar
Yes! I kind of think Ive figured it out anyway. But the success's of this projec...
Also true! Those make for some of the best stories.
eternal maple
sharp comet
I am working on some practical examples for NVM storage. Latest one allows you t...
@sharp comet Just tried your NVM helpers with the PyPortal espresso scale project -- they're working perfectly! Overall a much better solution than using an SD card especially for boards without an SD connector. Very nice. Thank you!
gusty shard
Yay SD card is working again!

 restive forum
pulsar mortar
Show and tell isnt just for stuff that works right? Ok so I was pretty proud of ...
restive forum
pulsar mortar
Show and tell isnt just for stuff that works right? Ok so I was pretty proud of ...
Mistakes make for greater success. 👍
sharp comet
gusty shard
Yay SD card is working again!
Is your script getting the build version string programmatically and putting it into a label? Or is that hardcoded / copied from boot_out.txt or something?
gusty shard
os.uname().version, I put it in a label.
sharp comet
Nice thank you! I didn't know it was that easy to get that information programmatically.
gusty shard
It's a build number that doesn't seem to match the .uf2 filename.
gusty shard

 vernal vigil
I haven't made much progress with my DIY modular synth lately, but I've started posting open-source design docs here: https://github.com/Len42/Synth-pub

GitHub
Eurorack synthesizer module designs. Contribute to Len42/Synth-pub development by creating an account on GitHub.
Here's a better pic of its current state:

 rough dew

 marble mantle
wow
exotic sierra
impressive
ancient slate
I guess this is loosely considered an electronics project since I didn’t make the LED part of this project haha, but these are some boots I customised! 💖

 trail cypress
Hello everyone! I've been working on a project for making a reprogrammable Eurorack module using the Pico. It's kind of the concept of a HAT, shifting the levels up to modular standards (0-10V) and adding some extra I/O like an OLED and some knobs and buttons.
It's all free hardware and software, so you can see all the source files on the GitHub!


GitHub
EuroPi: A reprogrammable Eurorack module based on the Raspberry Pi Pico - GitHub - Allen-Synthesis/EuroPi: EuroPi: A reprogrammable Eurorack module based on the Raspberry Pi Pico
Eurorack being a format for modular synthesisers by the way for anyone unfamiliar!
sharp comet
I made a "Slider" game to test some changes I am working on to TileGrid as well as just practice using it more:
arctic peak
It's finished! Here's a mini reproduction of the 80's electronic board game Dark Tower. It's using a FeatherS2, 2.0" Adafruit TFT and the Stemma audio speaker amp. This was made in a hurry as a gift, so the 3D models and source code are not shared just yet. I need to do some cleanup on those items to make them presentable.
 gusty shard
Bubbles on the LED Glasses @median spoke @sharp comet
gusty shard
Bubbles on the TFT Featherwing 3.5: Singularity.
solar yew
Air Quality monitoring platform for all entire Europe, anyone can join in few minutes, hookup any of the 3 (bme280, CCS811, SDS011) sensor with your nodemcu esp8266 board, register your node upload the firmware on your board connect to wifi and done
https://yousensor.eu
trail coral

Boot Up or Shut Up!
/-c00l /-r4D 4u+h0r1zZ3d 'l33+
So listen up, kids, remember how we've all been dying to run something other than Raspberry Pi OS on our HyperPixel 4.0s? Well, the time is nigh for I HAVE DONE THE UNTHINKABLE.
What you see here is a DEATH SKELETON PLAGUE MACHINE of the highest order. A HYPER MANJARO, if you will. It is cons...
 inland robin
GB Linkcable communication with a Raspberry Pico to spoof Pokémon trading or trading without the need for a second Gameboy (Please don't mind the jumper wire mess in the background :D)
 sharp comet
inland robin
GB Linkcable communication with a Raspberry Pico to spoof Pokémon trading or tra...
sharp comet
inland robin
GB Linkcable communication with a Raspberry Pico to spoof Pokémon trading or tra...
Very cool! Do you have this written up online or any more information available about it?
inland robin
Haven't put anything online yet. I'm quite new in fact so not sure where and how to put my code and documentation out there :D
Ask if you have any questions :D
sharp comet
inland robin
Haven't put anything online yet. I'm quite new in fact so not sure where and how...
A couple good options for documenting full projects are https://www.instructables.com/ or https://hackaday.io/ A good spot for source code and even more minimal documentation is Github. Throwing your source code and just a README.md file with some explanation of your project into Github is a great start.
I don't have any specific questions but I'm always on the lookout for neat projects to pass along to my wife who works for hackaday.com they feature projects made by the community frequently.
inland robin
@sharp comet thanks, I will see if I manage to put something up there this weekend. The code isn't the prettiest tho, there are better methods but hey it works. The documentation of the communication is more interesting to be honest
sharp comet
No worries. I am firmly on-board with the "if it works, it's good enough" mindset. There are some projects I've intended to share but never got around to the cleaning it up further step and ended up either not publishing or being very delayed from when I originally worked on them. So now a-days I try to keep that in mind and publish minimum viable version ASAP, that is often enough for folks that may find it in the future to build on top of or take inspiration from. And that documentation does sound interesting. I'm always drawn to projects using new hardware or software techniques to interface with older systems that were created before that hardware ever existed. So this idea of using PIO to communicate with Gameboy link cable is awesome!
inland robin
That's a nice mind set. I only found a documentation of the datastructure of Pokémon which helped a lot, but the full communication is more than just that :) What impressed me is the fact that the game does have some sort of basic anti tamper protection. For example you can't trade a pokemon with level 101. The game will then tell you that something is wrong with that Pokémon :D pretty basic but I think it's cool. I also triggered a lot of error messages I bet you wouldn't ever see without messing with the communication :D
vernal vigil
trail cypress
Hello everyone! I've been working on a project for making a reprogrammable Euror...
Nice! I'm working on my own Eurorack system (scroll up a bit for a photo). I've made an Arduino-based LFO module and I've got an RP2040 Feather that I want to use in a module so I'll definitely check out your work!
lean elbow
inland robin
GB Linkcable communication with a Raspberry Pico to spoof Pokémon trading or tra...
Just wanted to add that this is super cool, and I also would be very interested in some sort of write-up about it. Disclaimer: I used to develop GBA games back in the day, so things like this are of special interest to me 😄
inland robin
@lean elbow ohh that sounds awesome! Sadly I haven't found a cheap gba link cable so I can't mess with gba games :D but reading through the Gameboy documentation kinda made me wanna make a gb game :D
Will link a write-up here soon :)
trail cypress
vernal vigil
Nice! I'm working on my own Eurorack system (scroll up a bit for a photo). I've ...
Yours looks so cool!! I wish I could program in other languages so I could do cool stuff with audio
vernal vigil
trail cypress
Yours looks so cool!! I wish I could program in other languages so I could do co...
And I'm thinking of learning python. 😄
trail cypress
i certainly love python a lot, and its great for quickly writing CV programs, just it can never get fast enough for good sounding audio without some extra hardware
 delicate linden
Happy Holidays everyone!
I wired up my Christmas Village and Christmas Trains to the be controlled by the internet to help spread that holiday cheer https://christmasvillage.io
I use a total of 3 raspberry pi's:
Main Camera - Pi3 with HQ Camera sensor & wide angle lens
Train Camera - Pi Zero W with v2 camera
Relay Controller - Pi 2 with 8 channel relay
Lastly, I use my linux desktop to run a local RTMP docker container to collect the video streams and broadcast using OBS to YouTube.
The website is a simple vue.js component that sends user input to a SQS queue to be processed by the Pi Relay Controller.

ChristmasVillage.io
ChristmasVillage.io is controlled via a Raspberry Pi, Python, and electrical relays. We hope you enjoy watching and controlling our christmas village and train. Happy Holidays and Merry Christmas!
sharp comet
delicate linden
Happy Holidays everyone!
I wired up my Christmas Village and Christmas Trains t...
Neat project! thanks for sharing.
delicate linden
sharp comet
Neat project! thanks for sharing.
Thank you! Glad you enjoyed it
@sharp comet does your name happen to refer to being a train enthusiast by chance 🚆
sharp comet
delicate linden
<@!382939733107408897> does your name happen to refer to being a train enthusias...
It's a reference to an internet cartoon that I was a fan of when I was younger. Foamy the Squirrel. I think they are still going, but I've fallen out of keeping up with the new ones as I once did. But I've been using it as a name for so long and different places that it would be a ton of effort to switch to something else.
I do happen to think trains are pretty cool as well though. Never had my own setup but definitely think it would be cool to do at some point.
 amber flame
formal hamlet
DIY keyboards are so amazing now
amber flame
formal hamlet
DIY keyboards are so amazing now
Nice! Did you design the pcbs they're on?
formal hamlet
no, I don't have the energy to do that, especially when there's bound to be someone that has a design I like already (there are several, and I have a few more in queue to build) @amber flame
I built a dactyl manuform 4x6 a few weeks ago, and I have parts imminently incoming to build a couple sofle rgb, then I have chocofi also coming soon thereafter
amber flame
Very nice! I'm just about to get into the custom keyboard world
broken rain
gusty shard
Bubbles on the TFT Featherwing 3.5: Singularity.
do you have code for this on your github?
gusty shard
Here's the Bubbles script: https://gist.github.com/rsbohn/a76ffcd0e90504f6bb8b137c7da9dbdb
Here is the singularity animation: https://gist.github.com/rsbohn/8f4a2d4f18ccdafde5f7de2fcb02aaa8
 exotic sierra
trail coral
exotic sierra
trail coral
Neat!
ember pendant
Spent all night building it. Its simple and all but i am happy with it. Its just a small control hub for my bread board. It has a toggle for primary power control, a microswitch for reset switches or other momentary needs, a logarithmic and a linear pot, and a resistor based battery level indicator. I burned through a dremel bit and burned myself a few times to many, but i managed to make it a neat enclosure. All of them are wired into a common negative except for the ba/ery indicator, which has its own lines

Right now its controlling the leds. When i hit reset, it lights up an led as well as i wired in all terminals so you can choose which way they work. 2 2 leds are tied into each pot . Im not sure if i wired something wtong on the log pot, one led changes brightnedd, but the other stays constant
 upbeat geyser
I picked up a homemade light decoration that has 4 strings of lights controlled by 2 plug-in flashers, but one of the flashers is dead, and that style flasher isn't easy to find these days. So I co-opted some boards for an early version of a computer controlled light dimmer into a 4-channel flasher. The LEDs are plugged into the optoisolator sockets to test the code before I hook it up to mains.
marble mantle
another small project of mine: I2C shield for Feather and ItsyBitsy boards
Provides pullups resistors, qwiic connectors and connection points for oscilloscope probes
When you need to debug


 exotic sierra
Very nice!
 sudden pike
Took apart a broken projector and turned it into a microscope


Blade of grass for example
 rugged coral
I made a board based on a Raspberry pi pico that can be connected to a FeatherWing. If you already have a Featherwing, you may be able to save money.
 pulsar mortar
https://cdn.discordapp.com/attachments/246063156420542464/923379491307421786/20211222_191839.jpg
WIP-Steady rest for my mini lathe.

Test Fit:
https://cdn.discordapp.com/attachments/246063156420542464/923379673390518342/20211222_194812.jpg

 frosty topaz
rugged coral
I made a board based on a Raspberry pi pico that can be connected to a FeatherWi...
frosty topaz
rugged coral
I made a board based on a Raspberry pi pico that can be connected to a FeatherWi...
Nice use of extra connectors for BAT and I2C! Did you match the pinouts based on the RP2040 feather?
rugged coral
frosty topaz
Nice use of extra connectors for BAT and I2C! Did you match the pinouts based on...
That's right, I used the Feather RP2040 design as a basis for connecting the Pico to the Wing.
The pins surrounded by squares are the ones that could not be connected due to different assignments.
The VBUS connector, reset button, Onbord Neopix, and STEMMA/QT connector are additional elements.
 native basalt
Just got finalized my asynchronous python wrapper for the open trivia API, works pretty well and is on both github and pypi for those who'd like to try it. Wanted to try out something a little more polished and usable for others that didn't require me to make a pretty UI so figured this was a good balance
https://pypi.org/project/aiotriviapy/
https://github.com/mcurranseijo/triviapy
 fossil tusk


Was having a nightmare with cables all over so I made a little board where everything is routed to wherever it needs to go and to my driver chip.(for a PC game controller project with a motorized throttle)
 ancient skiff
It's a lamp
 inner egret
I made this as a Christmas present for my mom!
candid crescent
inner egret
I made this as a Christmas present for my mom!
Awesome, nicely done!
inner egret
candid crescent
Awesome, nicely done!
Thanks
inner egret
Just wanted to share what I got for Christmas!

 amber hedge
inner egret
Just wanted to share what I got for Christmas!
amber hedge
inner egret
Just wanted to share what I got for Christmas!
really nice gift
 bitter hazel
So not exactly a show and tell but i need some help figuring out what kind of connector this is


Its like a 3 pin jst but real deep
Back story btw is some crazy person stole my car’s side mirror glass. Just the glass part. And did not have the decency to unclip the wires for the temp and blindside assist light but instead just clipped them. The service center was asking for $1500 to replace it because the wires were clipped and they wanted to replace a $800 part because of it. Apparently auto shops dont know how to splice wires anymore and need to replace every part with a cut wire 🤷🏻♂️. Anyways, i decided to get an oem part for $40 and just need to splice some wires back into the side mirror housing. I want it to at least look nice so im looking for the same connectors but if i cant find them i prob would just cut these off and splice a different one instead


 trail coral
bitter hazel
Back story btw is some crazy person stole my car’s side mirror glass. Just the g...
trail coral
bitter hazel
Back story btw is some crazy person stole my car’s side mirror glass. Just the g...
Car make/model?
Also, do you have the male end?
(maybe on the other mirror?)
bitter hazel
Mb gl450 2014
trail coral
yeah, that figures because that's why I can't find it... dang Germans
bitter hazel
I actually need the male end that goes into that deep female connector end
trail coral
can you take the other mirror apart to see what that looks like?
bitter hazel
TIL though is that I always thought that the blind spot assist sensor is actually built into that glass (wc is why i thought the thief stole the part) but turns out its just an led light for the yellow or red. Which really now baffles me why someone would go thru all the trouble of making someone’s life miserable for $40
trail coral
is that it?
 bitter hazel
 bitter hazel
trail coral
is that it?
bitter hazel
trail coral
is that it?
Kind of looks like it would fit. Would you happen to know what its called so i can look it up?
Ah wait no. That looks too big
This one is like less than 1/4 inch wide
trail coral
the one I linked was older, but I think it's still the same connector
that's definitely not it then
let's move this out of show and tell, OK?
bitter hazel
No thats too big. What im looking for is just 3 pin but the connector housing looks correct
bitter hazel
Sure. Once i fix it up then ill post it as a show and tell 😂
 azure wedge
Made a gift with a TPL5110! https://twitter.com/gregoryknauff/status/1474861904363327495?t=eDVwtbqVlO88bucWieDYZg&s=19


Pressing the button will turn on the LEDs for 60 seconds https://t.co/Iz8ZDQ72lN
Twitter
·
torn elbow
V2 of my robot dog is going together well. PCB en route and then I can wire up all 12 servos. https://youtu.be/MkhD2uTs_gQ


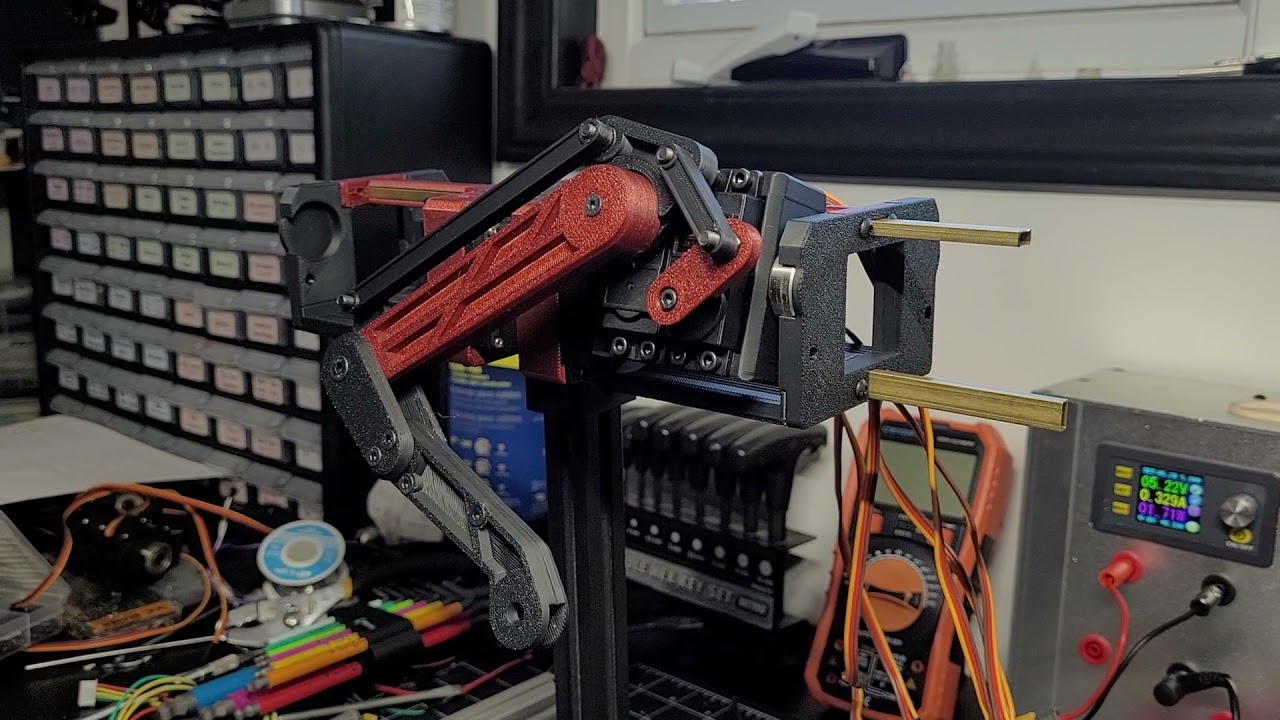
Version two of my 3D printed quadruped 'robot dog'. This time it has been miniaturized, and legs lightened with all servos located on the body with a linkage. It has had an overall weight reduction.
Bonus: V1 and carcass of V1 after harvesting the insides.

 gusty shard
Status display with ForkAwesome fonts (thanks @trail coral) https://github.com/rsbohn/Dexter_CircuitPython_Widgets
 trail coral
Nice!!!
torn elbow

it's strong enough to lift itself up which is great, I am confident that it will be able to walk which I will work on soon.
 cobalt badge
Our bioreactor project is coming together! https://twitter.com/Cmrn_DP/status/1475546007475789828

New photos of the @pioreactor bioreactor with our new matte-black @Raspberry_Pi HAT. What else is new?
- new STEMMA QT/Qwiic connector to integrate third-party breakout boards, like @adafruit's
- EEPROM for hardware version-y goodness
- new faceplates around the RPi + HAT
 Twitter
·
Twitter
·

 slim finch
cobalt badge
Our bioreactor project is coming together! https://twitter.com/Cmrn_DP/status/14...
slim finch
cobalt badge
Our bioreactor project is coming together! https://twitter.com/Cmrn_DP/status/14...
That looks amazing! I just used a co2 sensor to track the first stage of a tepache ferment. I might need to look into this!
cobalt badge
slim finch
That looks amazing! I just used a co2 sensor to track the first stage of a tepac...
hey that's cool! Did you have good results? What CO2 sensor did you use?
slim finch
cobalt badge
hey that's cool! Did you have good results? What CO2 sensor did you use?
I used the SCD41 (https://www.adafruit.com/product/5190). It worked out pretty well and matched how bubbly the ferment was which took a few days to get rolling. I set the jar in a tub and placed the co2 sensor as well as a sgp40 VOC sensor on the lid to the tub. Buuut I've never made tepache, and never did a control test for the tub so for the first few days I couldn't tell if the setup would get reasonable values. Now I need to go through and run those tests, and try my sourdough starter in the tub to see if I can watch the CO2 rise, then fall. Just a lot of trying stuff and seeing what I can see with the sensors right now
 solar yew
If you need to play around with a jigsaw and a soldering iron in your holidays, then here you have some inspiration : https://www.youtube.com/watch?v=LrLCPcfc_rA

Here you can learn how to make / create your own 1:1 Christmas tree with LED effects - use your skills with a jigsaw and a soldering iron and you can enjoy this piece of Christmas decoration.
Links to items in the video:
https://www.freepatternsarea.com/designs/stylized-christmas-xmas-tree-silhouette-vector-art-free/
Links to GitHub folder:
ht...
 inland frigate
https://youtube.com/c/somecomputerguy - hi, new here, this is my channel. I have done a bunch with LEDs but do not put that stuff online as much
 pulsar mortar
Success! It works...I think lol. I also do have a failure to share, although not my fault, it was interesting none the less.
 lucid bloom
Got one of these for my home assistant
https://www.aqara.com/us/cube.html
Now I have a cubically controlled serial terminal (that's attached to a pi). The terminal is also controlled with an ir remote, smartwatch, phone or voice commands.
Enrich your smart home control with Aqara Cube! 6 gestures to simplify the control of lighting and home appliances. A magic cube with funny ways to control!
I just got the cube today, 3 of the actions can also detect which side is up so I have 22 unique possible actions
grizzled talon
I got the new ESP32 Wifi QTPY yesterday and have been having fun putting together a JSON API parsing thing for it. Here's the code I modified and made for this use case. It has examples for both SSL and non-SSL servers. https://github.com/MichaelLacock/ESP32-QTPY-JSON/tree/main


GitHub
Contribute to MichaelLacock/ESP32-QTPY-JSON development by creating an account on GitHub.
sharp comet
Using the CAD file that Adafruit publishes I was able to import a Pink Feather RP2040 into Minecraft. I'm hoping to make a plugin that will "sync" it with a physical pink feather plugged in to my PC so that the physical feather can control redstone circuits in the game, and vice versa, redstone circuits in the game can control physical hardware connected to the IRL feather.
 exotic sierra
sharp comet
Using the CAD file that Adafruit publishes I was able to import a Pink Feather R...
exotic sierra
sharp comet
Using the CAD file that Adafruit publishes I was able to import a Pink Feather R...
That is incredible
frosty topaz
sharp comet
Using the CAD file that Adafruit publishes I was able to import a Pink Feather R...
That’s awesome! Next, you need to replace the surface with pink cloth hehe
gusty shard
Over the rainbow that is. 🌈
devout verge
That's neat! I'm on a bunch of Minecraft Discord servers, so I thought I clicked on the wrong server for a moment.
 fair jasper
@ancient skiff Lol! I love it. Did the power just flash again or am I visiting my parents.
 tender plover
inland robin
Haven't put anything online yet. I'm quite new in fact so not sure where and how...
tender plover
inland robin
Haven't put anything online yet. I'm quite new in fact so not sure where and how...
make a github.com repo, share a description in a readme.md file in that repo, and put your code files in there.
Other folks can read the code, download it,
make their own improvements on it && submit it back to you for approval,
or fork it -- and develop their own branch as well
drifting crater


Spent an entire day dealing with some cheap smelly strip board off Amazon so that I could just "plug" the OLED in like a shield 🙂
And you can all look at my horrible soldering as well 🙃

 night peak
@tannewt thanks all the help and inspiration https://youtu.be/_skhZGujV98

PyDOS is moving to the Raspberry Pi RP2040 Pico's big brother. Today, I'm demonstrating PyDOS running on CircuitPython's Alpha build for the Broadcom (Raspberry PI Zero 2W SBC) chipset.
The Python and Basic code demonstrated can be found on GitHub at:
https://github.com/RetiredWizard/PyDOS/
The CircuitPython SD image for a Pi Zero 2W, I built ...
 strong topaz
i made a controller :), or a macropad if you will

the end result is held together by rubber bands because the internals are a bit of a mess, but i'm proud nonetheless. even if i copied someone's code
sharp comet
Filled in some of the detail and changed to a better pink.
 lapis jasper
night peak
@tannewt thanks all the help and inspiration https://youtu.be/_skhZGujV98
lapis jasper
night peak
@tannewt thanks all the help and inspiration https://youtu.be/_skhZGujV98
Thanks! I laughed when you said it'll be more stable. I wish I could get it stable
night peak
lapis jasper
Thanks! I laughed when you said it'll be more stable. I wish I could get it stab...
Well in theory 😁
It will get there
lapis jasper
ya, I'm hoping to move onto something else though soon
ideally after it gets a bit more stable
night peak
lapis jasper
ya, I'm hoping to move onto something else though soon
You have put a bunch of time into it, taking a break makes sense.
lapis jasper
I'll get some other folks to look at the issues with me before I give up
 left inlet
Good morning. Here is m y latest creation: Dot Invaders. A modern take on Invaders, running on a 64x32 Matrix Display. Raspberry Pi 3 with Adafruit RGB Hat. https://www.youtube.com/watch?v=3ekUMhRTu3E

Originally created for an 8x8 LED screen this version has been converted to support 64x32 pixels.
Code is written in Python and is here:
https://github.com/datagod/LEDarcade
grizzled talon
left inlet
Good morning. Here is m y latest creation: Dot Invaders. A modern take on Inv...
That's really cool!
left inlet
This is available as part of the LEDarcade library. https://github.com/datagod/LEDarcade

GitHub
A collection of classes and functions to display animations on an LED matrix - GitHub - datagod/LEDarcade: A collection of classes and functions to display animations on an LED matrix
This is part of a twitch powered display (showing the chat, viewer count, subscribers, animations) but I still need to write up the documentation.
grizzled talon
I'm working on the fifth version of my custom smart-watch. It uses the new QTPY-ESP32-S2 board to get time synced from a web server, which is nice so I won't have to ever worry about setting it's time again. Once finished, it'll attempt to sync twice daily to make sure the time is accurate.


It also has a 500mah battery, so I hope the battery life lasts at least 12 to 24 hours, still alot of testing to do before finalizing the hardware.
left inlet
That looks awesome!
 wheat glen
just build this last night would love to be on show and tell


 lean elbow
Made a weird crystal ball lamp thing from a snow globe (https://www.adafruit.com/product/3722) and some of the milky-white slim neopixels (https://www.adafruit.com/product/5225), and filled the globe with a bunch of acrylic "rocks". I really like the effect!
Not merely a snow globe, but a show globe! This custom container is durable, clear and round, with a large flat screw-on top and a press-fit rubber stopper. The stopper makes a nice seal, ...
 rigid onyx
My new favorite project I’ve done: a text display choker for status updates at the club. 😈 Uses an alphanumeric display featherwing and a feather M0. The little prototyping grid has a button to switch patterns, and CircuitPython lets the owner edit the code to add new text!


 lean elbow
I love this 😄
solar yew
For years I promised myself that I would go on the Show and Tell once my clock was working. I wanted to demo it as it used the Adafruit Motor Shield and I had long been a fan of the Adafruit team. Alas, when I got the clock working (Aug 2021) I found its way too early in the a.m. because of all the timezones in between here and there. So the next best thing is a link to my Youtube playlist. Arduino Leonardo (its been a few years in development!), Motorshield v2 and Raspberry Pi. I hope you enjoy it, its intended to raise a smile 🙂 https://www.youtube.com/watch?v=zStgIWnbF40&list=PL7oLb36SX4C4t9qjBIYS9zjK3HEihIArA

The sequence after n O'clock where n remains but O'clock has to be removed
sharp comet
wheat glen
just build this last night would love to be on show and tell
I didn't notice that you posted in this channel until today (after Show & Tell). In order to get on the show you can hang out in #live-broadcast-chat on Wednesday night. a few minutes before the show begins whoever is hosting will post a link to streamyard which you click on and get your camera / mic loaded up with in order to be on the show.
 thick depot
Hello. My friends and I worked on a 7-segment display made with NeoPixels, and a library for Arduino to simplify the show of numbers, text and colors.
There's a Kickstarter campaing that will finish at january 12
https://www.kickstarter.com/projects/neodigitos/neodigito-modular-7-segment-rgb-display?ref=creator_nav
print("INVENTO")

 sterile zephyr
Changed sensors from si7021 to sht30, seems to work fine
https://github.com/hexthat/VPD-wifi
so much math for "feels like temp" and "VPD"


 vocal aurora
Ah yes, there's a lot of thermodynamics that goes into calculating the "feels like" temperature. If I remember correctly the "feels like" temp has something to do with the wet bulb temperature since that's closer to how our bodies respond to temperature.
sterile zephyr
yes! wind chill factor for cold temps and heat index for hot temps, but i'm not sure how what to do from 50f to 80f.
in that range i just copy and paste actual temp... Anyone have tips?
I'm using "Arden Buck equations(1996)" for VPD works for range of −112f to 122f
vocal aurora
If I understand correctly that you're looking for a different equation to find vapor pressure, then the Antoine equation might be a better correlation. It provides the vapor pressure of water based on temperature and NIST provides coefficients for the equation in the range of 273 K (33 F) to 303 K (85.7 F). Here's a link: https://webbook.nist.gov/cgi/cbook.cgi?ID=C7732185&Mask=4&Type=ANTOINE&Plot=on
sterile zephyr
looking for equation for feels like temp in that range not VPD
ancient skiff
https://github.com/jepler/wifi-gps-pps first time I did a standalone project with esp-idf ... goal is to create a GPS-style "pulse per second" output, but from a board synced to internet time (NTP). Uses QT Py ESP32-S2.
GitHub
1pps generator for Adafruit QT Py ESP32-S2. Contribute to jepler/wifi-gps-pps development by creating an account on GitHub.
one painful part is you have to rebuild to select wifi AP details & ntp server details .. another is I dunno how to get idf to cooperate with uf2.
wheat glen
@sharp comet kk sound good thank you for everything
 tender basalt
Had a 64x32 RGB led matrix at 6mm pitch, so I created a frame and grid for it to use with the diffuse acrylic and a matrix portal


Made the grid and frame so it can be printed in a standard Ender/Prusa bed size, then slide together and secured by the m3 screws for the frame
lean elbow
Control panel thingy that's constantly evolving on the magnetic board next to my desk. The 2 lit up keys on the MacroPad are used to toggle lights in my apartment, via UART connection to the "dispatcher" on the left (Feather ESP32-S2 + RFM69 Featherwing). Eventually I want the MacroPad to control many more things. Most recent addition is the CO2 sensor + Funhouse, and the thing on the bottom right is an ItsyBitsy nRF52840 + IS31FL3741 LED matrix that I made into a mini-marquee to scroll silly messages

 grand rose
lean elbow
Control panel thingy that's constantly evolving on the magnetic board next to my...
grand rose
lean elbow
Control panel thingy that's constantly evolving on the magnetic board next to my...
looks interesting, do you have a project page or code repository public ?
lean elbow
Thanks! I don't, but I like the idea. It's a bit tricky because each of those devices have their own (currently poorly written) firmware, plus the 2 devices not shown that actually receive the RF signals and/or adafruit.io wifi feed updates. I will start working on making this shareable though 😄
grand rose
thx
gusty shard


Found this QVGA TFT in a box, a relic from an earlier age (OpenWest anyone?).
Connected it to the FeatherS2 and with just a little research was able to get it working.
formal hamlet
https://www.youtube.com/watch?v=Cs0L1_hI-f4 I've gotten addicted to typing on the latest keyboard I've built

Getting used to typing on Chocofi after making myself a memorable keymap. Forgot to turn off the reticles in Filmic though :-( -- I do not want to go through this again :-D
Chocofi keyboard - https://github.com/pashutk/chocofi
Choc robin key switches
MBK PBT keycaps
Nicely coiled cable from my friend at Sunny Cables
rugged coral
I made a kind of air vibrometer using CircuitPython, Raspberry Pi pico, and a highly sensitive differential pressure gauge called OMRON D6F-PH0505. (The sensor is in a white container.)
With a resolution of 0.02 Pa, it captures military artillery fire 10 km away in a room.
 gusty shard
In the doubler, ready to roll.
 gusty shard
Nobody told me how much fun the gesture sensor was going to be. I can turn the light different colors just by waving my hand!
This would also be a fun way to roll the dice...
 rose phoenix
Time to start messing with CircuitPython again now that I have a couple of kb2040.

 plain perch
Hi everyone, We just launched The Layered Onion (https://thelayeredonion.com/), a social impact community and platform for artists with mental health challenges. Our goal is to share and promote work from artists with lived experience.
I'd love to meet any artists or creators in this community that could use our services.
I'm also open to connecting on here locally (NYC) or globally. DM me!
thanks,
Lili
devout verge
Neat idea, but I'm getting an SSL error when I visit the website.
west zinc
It’s possible to read the pixel colors from a display (ILI9341 display driver) as long as the MISO pin is connected. Here I’m reading the pixel colors and redrawing them in an offset position, coded in Arduino for now. Maybe you could use this to expand your memory by storing important info on the display and reading it back when you need it (color encryption? If that’s a thing). Or you could do some weird adaptive art where the colors morph when you touch them.
drifting crater

Been making a text file reader with an ESP32 and an 4.2in Waveshare EPaper display and it can read text.txt off the SD card and display it. The left and right buttons will scroll up and down (or "flip pages" but scrolling up is much harder then scrolling down because i have to do a bunch of seeking and reading to detect newlines and such and it takes significantly longer then scrolling down and my logic isn't accurate right now getting closer to perfect pages but missing a line or two)
 wise lion
gusty shard
Nobody told me how much fun the gesture sensor was going to be. I can turn the l...
wise lion
gusty shard
Nobody told me how much fun the gesture sensor was going to be. I can turn the l...
OMG it's the best
marble mantle
drifting crater
Very impressive management of jumper wires!
Mine usually look like an explosion in a spaghetti bowl
drifting crater
marble mantle
Very impressive management of jumper wires!
Mine usually look like an explosion ...
haha i spent way too long making it look pretty
frosty topaz
drifting crater
haha i spent way too long making it look pretty
No such thing if the end result is that perfect. Art takes time...
tender plover
Thank you @tepid swift and the Arduino channel for the help getting this product to wrap this weekend!
https://learn.adafruit.com/holiday-icicle-lights-with-flair/arduino-code
sharp comet
Neko kitty now on more devices:
 tepid swift
@gusty shard what feather is that that has a gesture sensor?
gusty shard
Adafruit Feather nRF52840 Sense https://www.adafruit.com/product/4516. It's awesome!
left inlet
I have added DotInvaders (space invaders) to my LEDarcade library. https://youtu.be/3ekUMhRTu3E
Originally created for an 8x8 LED screen this version has been converted to support 64x32 pixels.
Code is written in Python and is here:
https://github.com/datagod/LEDarcade
I also added a virus infection simulator (sort of like game of life) but I don't have a video yet.
All the graphic effects are my own. My favorite is the terminal emulator with the blinking cursor.

GitHub
A collection of classes and functions to display animations on an LED matrix - GitHub - datagod/LEDarcade: A collection of classes and functions to display animations on an LED matrix
lean elbow
@left inlet This is super cool! Thanks for sharing
wise lion
Gesture-based desk lighting. I’ve been surprising myself with lights all day long today. (Can also use it under the door)
gusty shard
Love it!
vernal vigil
Wavefolder module for my Eurorack synth


GitHub
Eurorack synthesizer module designs. Contribute to Len42/Synth-pub development by creating an account on GitHub.
gusty shard
FeatherS2 plus 3.5" TFT Featherwing = fake PyPortal.
 wise lion
gusty shard
FeatherS2 plus 3.5" TFT Featherwing = fake PyPortal.
wise lion
gusty shard
FeatherS2 plus 3.5" TFT Featherwing = fake PyPortal.
LOOOOOOVE IT.
 wide brook
gusty shard
FeatherS2 plus 3.5" TFT Featherwing = fake PyPortal.
wide brook
gusty shard
FeatherS2 plus 3.5" TFT Featherwing = fake PyPortal.
“Expect moire” — That’s an A+ pun right there 😄
 vernal vigil
Got these today - the first PCBs that I've ever designed!

I wonder if they will work...
gusty shard
Nice!
wide brook
vernal vigil
Got these today - the first PCBs that I've ever designed!
Well done! (The emoji reaction symbol features text with a similar meaning)
I hope I will find the time to design a PCB one day.. What is your project supposed to do?
vernal vigil
It's an envelope generator module for a modular synth.
wide brook
Hope it ends up working as you wish
But even if it doesn’t, it will still be a learning experience:)
wise lion
west zinc
https://xkcd.com/1814/
DYING.
lucid bloom
We have been working on a small automated computer museum using home assistant. I am not very good at recording videos but I think you can get the idea from this. The tour is triggered by a tof sensor in the doorway, the tour starts with tour selection on the adm31, with the self guided tour you press a computer's dash button, it turns on, talks about it then plays an ad on the tv. It is a work in progress, there is a raspberry pi 4 running home assistant and a pi 3B in use with the adm31 and one for the TV. There is still much to be done but I couldn't help but show off some of what we have working and the general concept of the tour.


 honest lark
ooh i have one of those
 vapid radish
This thing is a pain in the butt to work on
honest lark
can you reprogram the processor it came with?
or do you have to use the arduino library they make
vapid radish
honest lark
can you reprogram the processor it came with?
I can barely get information OUT of the processor it came with
I used Arduino because people make libraries to control it
If it weren’t for these terrible smart modules it uses, I’d have a way easier time getting it running.
honest lark
i found the protocol docs, but the arduino library isnt well documented https://archive.org/details/meccanoid-arduino

Internet Archive
Meccanoid Smart Module docs circa 2016. Uploaded here because the Wayback Machine makes it hard to get to.
vapid radish
I’m trying to make the Arduino into a command line interpreter for it. That way I can communicate between it and a raspberry pi, because the Pi sucks at interfacing with it directly.
vapid radish
honest lark
i found the protocol docs, but the arduino library isnt well documented https://...
I found a 3rd-party library that makes it easier to understand
One that actually RUNS
If I can communicate from a Raspberry Pi to the Arduino, I can make it into a WiFi-connected robot
Believe me, I’ve tried working on the original processor

It’s not easy
amber flame
https://github.com/drewtchrist/nibble-rp2040-rs
https://github.com/DrewTChrist/nibble-rp2040-rs/blob/master/images/kb2040.jpg?raw=true
https://github.com/DrewTChrist/nibble-rp2040-rs/blob/master/images/no_under_light.jpg?raw=true
https://github.com/DrewTChrist/nibble-rp2040-rs/blob/master/images/under_light.jpg?raw=true
It took me almost a month to get going, but I finally have a working keyboard. This is my nullbits nibble paired with Adafruit's KB2040 and a firmware programmed in Rust.

GitHub
Firmware for KB2040 based Nibble keyboard using Keyberon. - GitHub - DrewTChrist/nibble-rp2040-rs: Firmware for KB2040 based Nibble keyboard using Keyberon.


 rose phoenix
Two keyboards I designed with 5 way switches and KB2040's.

 solar yew
rose phoenix
Two keyboards I designed with 5 way switches and KB2040's.
solar yew
rose phoenix
Two keyboards I designed with 5 way switches and KB2040's.
5 way switch? That sounds interesting
Is that the circular thing in the middle?
gusty shard
Random BOM Game: You have five items from which to build a project. (The script queries the Adafruit Product API for all the details.) GO!
 rose phoenix
solar yew
5 way switch? That sounds interesting
Is that the circular thing in the middle?
rose phoenix
solar yew
5 way switch? That sounds interesting
Is that the circular thing in the middle?
Rotary encoder.
solar yew
Is the rotary encoder the five way switch? What's the component name?
sharp comet
rose phoenix
Two keyboards I designed with 5 way switches and KB2040's.
Neat! Do you have any more information about these documented online anywhere?
wide brook
5 way switch... Sounds like a way to implement a physical kana flip keyboard!

Most young Japanese using the "flick" method when writing on their smartphone - the video shows how fast it can be done. See the blog post for details: https://abritishprofinjapan.blogspot.com/2017/07/the-japanese-is-difficult-reality-how.html
 sand bough
We made a HomeKit lock for a sliding door using an Adafruit ESP32-S2 Feather and Homebridge. Details at https://eric.clst.org/tech/smoothlock/
Eric Celeste
rose phoenix
wide brook
https://www.youtube.com/watch?v=BhD6r8NKlmY
Interesting
rose phoenix
sharp comet
Neat! Do you have any more information about these documented online anywhere?
Not much yet, but I can tell you they use KMK on top of CircuitPython to make it easy to change keymaps.
 shrewd zealot
Working on de-cluttering my desk and printed a stand for my air quality sensor. Then I decided to get real fancy and throw it on Github. https://github.com/dgriswo/Feather-AQI-Sensors

GitHub
Contribute to dgriswo/Feather-AQI-Sensors development by creating an account on GitHub.
dusk zinc
Had a Stemma QT RGB matrix for a while, just realized it has 13 columns (2.4GHz wifi has 13 channels), so... Like the old police scanners, but for Wi-Fi. (blue are beacons, green are probe requests, red are other management frame subtypes; height of the bar is the signal strength; blips in the top two rows show other monitor conditions). Monitor mode works on any ESP32-S2 with CircuitPython.
exotic sierra
dusk zinc
Had a Stemma QT RGB matrix for a while, just realized it has 13 columns (2.4GHz ...
Wow! Neat application
lapis jasper
@dusk zinc have you tried monitor on an S3 or C3 yet?
dusk zinc
yes, it works fine on S3 🙂
lapis jasper
🎉
broken rain
dusk zinc
Had a Stemma QT RGB matrix for a while, just realized it has 13 columns (2.4GHz ...
can you post code for this?
lean elbow
Those LED matrices are really cool, I love this application 😄
dusk zinc
https://gist.github.com/anecdata/fdb33f1b3c5c3e36cff84d32e8e6f620 (I tweaked the code to what's in the gist, and there's a better video on my Twitter @anecdat)
I really need to get a 3D printer
broken rain
 shrewd zealot
dusk zinc
I really need to get a 3D printer
shrewd zealot
dusk zinc
I really need to get a 3D printer
Look at your pile of microcontrollers and realize you will have the same number of filament spools that takes exponentially more space. 😄
broken rain
shrewd zealot
Look at your pile of microcontrollers and realize you will have the same number ...
haha
also, you can't really get a nice organizer to organize your filament like you can your microcontrollers
frosty topaz
broken rain
also, you can't really get a nice organizer to organize your filament like you c...
Might be a bit more work, but https://all3dp.com/2/filament-storage-rack/ says otherwise?

All3DP
If you're proud of your filament collection, organize and show it off! Read on for some clever filament storage solutions to buy or build.
drifting crater

forgot to add a way to measure the battery percentage so after fiddling with the breadboard even more i was able to fit a voltage divider and a npn transistor on it
it can now show in 5% increments
it's starting to feel like a badly designed PCB with the multiple layers of wires snaking everywhere 😆
honest lark
Found a great use for an old Kindle

(type “~ds” in the search bar to turn off the screensaver, then go to http://oldschool.mti.run/clock in the browser)
vernal vigil
An envelope generator module for my Eurorack synth - first time designing PCBs and I only needed to add 1 bodge wire! https://github.com/Len42/Synth-pub/tree/main/modules/Envelope2

GitHub
Eurorack synthesizer module designs. Contribute to Len42/Synth-pub development by creating an account on GitHub.

 trim talon
had to be done 🙂 ESP32-C3 + Arduino + 25 leds (a funky dev board)
 normal rune
Breakout board for turning breadboards to gamepads

actually uses adafruit analog joysticks
rugged oar
Hello all,
I've made the initial commit to a Keyboard driver for the Keyboard-pmod and keyboard-featherwing pmod. Hopefully the Readme is descriptive enough for one to get it installed on their system. If you have one of the Keyboard Featherwings and you wished to make a handheld linux console out of it, please try this out. I've tested the driver on a few of my RPis, and I'd highly appreciate any and all feedback for this. Do let me know of any issues or use cases you have of this. Thanks again to @ arturo182 and solder party's amazing creations.
GitHub
BBQX0KBD is a Keyboard Device Driver for the BB Q Keyboard - GitHub - wallComputer/bbqX0kbd_driver: BBQX0KBD is a Keyboard Device Driver for the BB Q Keyboard
inner egret
trim talon
had to be done 🙂 ESP32-C3 + Arduino + 25 leds (a funky dev board)
Does it solve the wordle or just show what you got?
trim talon
inner egret
Does it solve the wordle or just show what you got?
It just shows what people post to Twitter, nothing smart 🙂
inner egret
Oh, that’s cool
 oak raven
I learned how to design a PCB and built my own macro keyboard!

...it's nothing fancy, but I'm pretty proud that it actually works. Especially given some of the design errors I found, but was able to work around. All in all, a very good learning experience!

 fresh zephyr

 broken dock
I replaced many of my Raspberry PIs with other small Linux machines, but wanted to still be able to use some of my Adafruit PI hats with them. I made a simple FT232H to I2C/SPI PI hat adapter PCB so now I can use them over USB with any of my machines.


Adafruit has a FT232H adapter, but I wish they sold one like this which allows you to easily use it with your PI hats.
inner egret
This is the first PCB I’ve ever designed! It’s a macro pad with a rotary encoder as a volume knob.
 oak raven
inner egret
This is the first PCB I’ve ever designed! It’s a macro pad with a rotary encoder...
oak raven
inner egret
This is the first PCB I’ve ever designed! It’s a macro pad with a rotary encoder...
Nice! What are you use using as a microcontroller?
left inlet
I made a real trippy clock: Starry Night https://www.youtube.com/watch?v=q6Cl8fxm45s
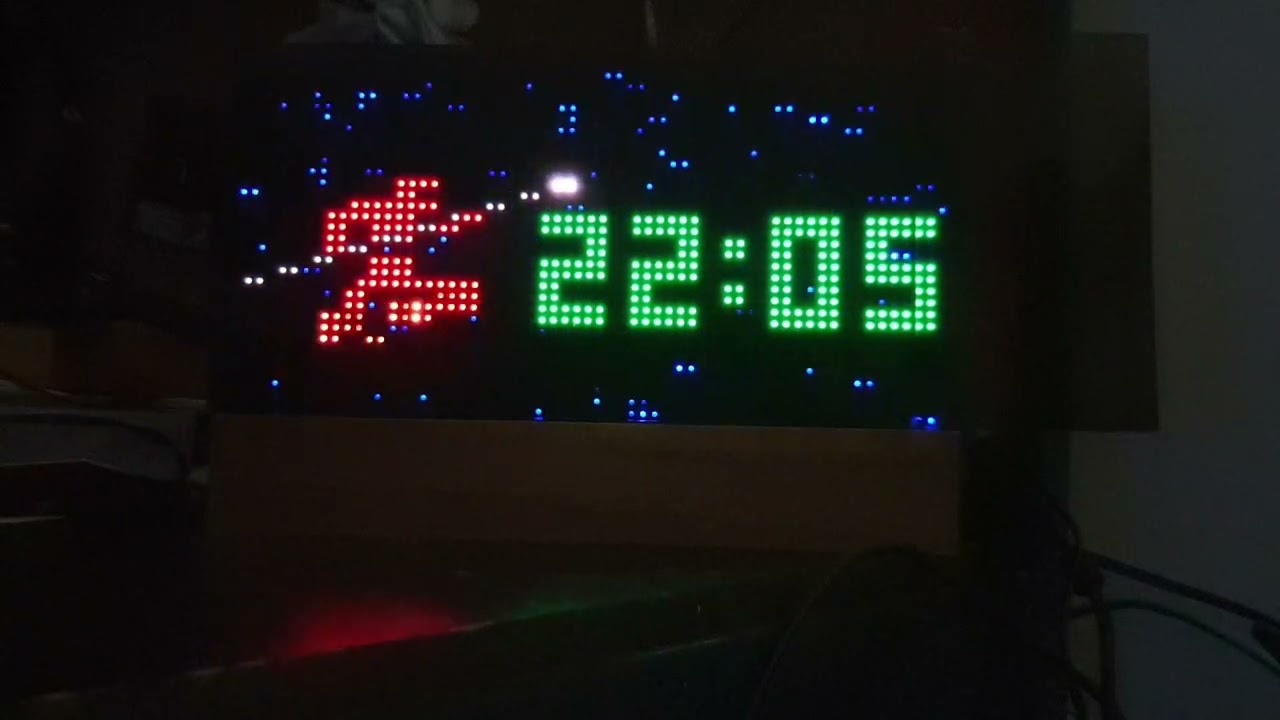
An example of paralax scrolling on the LEDarcade.
inner egret
oak raven
Nice! What are you use using as a microcontroller?
A pro micro. I saw someone use one for a macro pad but now I know there are better boards.
frosty topaz
inner egret
A pro micro. I saw someone use one for a macro pad but now I know there are bett...
Pro micro is popular enough that there are plenty of pin-compatible microcontrollers to switch to. Elite-C is great for QMK, while KB2040 offers all the conveniences of CiruitPython.
Looks great!
frosty topaz
broken dock
Adafruit has a FT232H adapter, but I wish they sold one like this which allows y...
That's awesome! Pi hats aren't usually given enough attention these days, but I've seen people using perfboard to make adapter boards. Finished PCBs look way cleaner though, very nice!
 lapis bronze
Working on my interactive toy project
ancient skiff
My 400% creamsicle macro pad is coming along, still need the base and stick

based on this great design by oxisidia https://github.com/oxisidia/macropopsicle but scaled for https://www.adafruit.com/product/5306
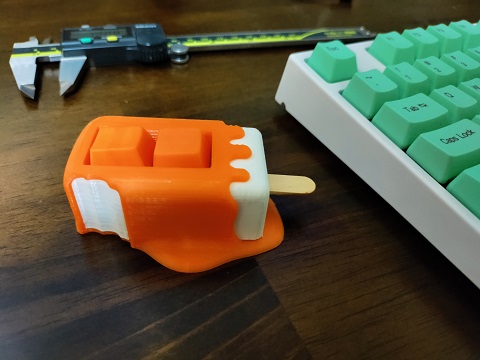
GitHub
An open source two key macro-pad modeled to look like a cartoony melting popsicle. - GitHub - oxisidia/macropopsicle: An open source two key macro-pad modeled to look like a cartoony melting popsi...

Kailh Big Switch Series comes to Adafruit! These switches are 4 times bigger on each side than a normal MX switch. That comes up to 64 times bigger in volume. Yet, these switches are fully ...
since metric screws are sensible, the 400% scaling just means to replace an M3 screw with an M12
ancient skiff
and I think it turns out that I can put the qtpy in the USB-C connector of a 400% scaled qtpy 🤣

not sure about printing the overhang of the USB-C, removing the support from in there would not be fun, but printing w/o support doesn't seem like a hot idea either
maybe slice the USB-C connector shell in half and glue? maybe paint the infill where it doesn't make the design unworkable if I can't remove it, and leave the top to bridging
yeah that
drifting crater
added a file selector so you can read all the text files you want that can fit on the screen lol
also switched to sdfat library so it is much faster and can support exfat
 grizzled talon
I recreated WORDLE for the Clue in Circuit Python!

It is compatible with the BBQ10 keyboard driver made by Solder Party and the one from TTGO. But if you don't have a keyboard, no problem, I made it so you can use the buttons as well.

It also lets you pick the date, so you can play the actual word of the day.
GitHub
WORDLE clone for Adafruit Clue. Contribute to MichaelLacock/Wordle_for_CLUE development by creating an account on GitHub.
 supple breach
grizzled talon
https://github.com/MichaelLacock/Wordle_for_CLUE
supple breach
grizzled talon
https://github.com/MichaelLacock/Wordle_for_CLUE
That’s really cool! Though I definitely do not need more things to sink my time. lol
solar yew
Nice to see something published. ;)
wow - an embedded video in a README.md file! /boggle
Now I'm officially interested (in that method of documentation) since it plays automagically.
grizzled talon
solar yew
Nice to see something published. ;)
The videos are .gif files hosted in the 'examples' folder. I just link to it with in the readme file with a " " tag.
solar yew
yeah I saw it later. nice!
gusty shard
Street chicken in trouble. Thanks JP for the original.
 steep sonnet
I used a pyPortal to pull issues from my Zabbix system monitoring server at the office. This was a fun little project.
https://github.com/strlng/pyportal-zabbix-problems


GitHub
Contribute to strlng/pyportal-zabbix-problems development by creating an account on GitHub.
tacit delta
steep sonnet
I used a pyPortal to pull issues from my Zabbix system monitoring server at the ...
thats cool!
 vestal cove

Instructables
How to Turn Your 3D Printer Into a Laser Engraver: While I took some time off for Christmas, I received a laser engraver attachment for an Ender 3. It's a pretty good model, and engraves wood, plastic, and cardboard. I set it up over the last few weeks, and now it's ready!So once you've ordered one,…
west zinc
https://github.com/circuitpython/DisplayIO_ScrollBox Here’s a new CircuitPython widget for scrolling test in a graphs box using displayio.
torn elbow
Before vs after spending 4 hours today making a PCB for the robot dog


 potent hazel
I made a little cluster out of 12 Raspberry Pi Zero 2s and put them in a cute 3d printed case. I call it Clustered-Pi - http://www.clustered-pi.com Just need to figure out how to use letsencrypt to make the self-hosted site more secure.
 tacit delta
lol that is cool
candid crescent
LOL, love the Cray callback in the form factor...
 dim isle
super cute Cray cluster there :p
eternal maple
Was messing around creating sprite sheets for simulated 7-segment like display graphics and decided to give .bdf fonts a try instead. Here’s what I designed so far, 9 and 11-point monospaced fonts. 6 and 12 will be coming after the retro RPN calculator project wraps. https://github.com/CedarGroveStudios/SevenSeg_font

GitHub
A Seven Segment .bdf font library. Contribute to CedarGroveStudios/SevenSeg_font development by creating an account on GitHub.
torn elbow
https://youtu.be/g7d2IzCZoEQ
Made some more progress on my robot dog today


3D Printed Robot Dog V2 'Clifford' is now remote controlled with a 6-channel transmitter. It now has new axes of movement and can tilt side to side among others.
 tardy mason
hey everyone! what is the process to demo a project for the wednesday night show-and-tell? i haven't demo'd a project since the google hangouts days. thanks for your help!
scenic siren
tardy mason
hey everyone! what is the process to demo a project for the wednesday night sh...
Hello! Hang out in the #live-broadcast-chat channel here on Discord around 7:30pmET Wednesdays, and wait for the StreamYard link to be posted. If it's full, keep trying - folks will drop off as they show their projects to make room for more folks to join.
tardy mason
scenic siren
Hello! Hang out in the <#330406870256975873> channel here on Discord around 7:30...
Thank you!!!!
 dapper plank

I made a weather readout that displays my personal weather station data
I can set it to read lots of different stats such as the co2 levels in each office in my house

Next step is weather/carbon alerts and overview dashboards so I can read lots of sensors at the same time
tepid swift
Electronic music instrument, made from a Circuit Playground Express:
https://youtu.be/_DH8dCt-kZ4
 wise lion
The “I am out of ideas” Twitter advisor I made for work.
(The wiring situation is 5x more amusing than the build)
 reef flax
Just put the final touches to a little project I was working on for the Level1Techs devember competition. It's a tool that allows you to make your C/C++ executable with a shebang. https://github.com/HamAndEggs/seabang

GitHub
Allows you to run c++ source file as a script. Contribute to HamAndEggs/seabang development by creating an account on GitHub.
vernal vigil
Another synth module in the works
 sterile zodiac
https://youtu.be/XkVyAGh5xzg Lots of thanks to folks here to helping me get this far on this project.
 gusty shard
New displayio_layouts widget, LedMatrix. https://github.com/rsbohn/Dexter_CircuitPython_Widgets/blob/main/examples/led_matrix_demo.py

 chilly yacht
First real run of my tea timer

 cedar trellis
My first ever brass wire free form circuit.
Valentine’s Day themed, because of the cute heart-shaped pink LEDs from Teknikio (and also, why not  ).
).
Soldering perfect rectangles definitely needs more work, but I'm pretty happy with my first attempt!
 frosty topaz
cedar trellis
My first ever brass wire free form circuit.
Valentine’s Day themed, because of ...
frosty topaz
cedar trellis
My first ever brass wire free form circuit.
Valentine’s Day themed, because of ...
Very nice! Do you have any insulation on your wires post-solder?
cedar trellis
frosty topaz
Very nice! Do you have any insulation on your wires post-solder?
These are just naked brass wires, no insulation, but since I'm powering the circuit from a 3V battery, any risks are virtually non existent 

solar yew
cedar trellis
My first ever brass wire free form circuit.
Valentine’s Day themed, because of ...
that's a nice project for valentines day 😉
rose phoenix
I made three sizes of an ergonomic low profile keyboard, powered by the Pi Pico and utilizing CircuitPython. I plan to upload Gerbers once I've tested things so others can make them too.

 timber pawn
Hello, I made this sensor/calendar about a year ago and it's on my cork board ever since... The intention is to move it to a proper proto board, but it looks good enough in its current form, so no hurry...

 quiet quartz
made a python program that makes a 5x7 astericks character version of whatever you put in. It currently works for the alphabet, numbers and limited punctuation. It's my first project in Python 3 that I did with just a few lessons from my uni labs
 marble mantle
Brings back memories of ASCII art printed on wide dot matrix printers like this: https://en.wikipedia.org/wiki/IBM_1403

The IBM 1403 line printer was introduced as part of the IBM 1401 computer in 1959 and had an especially long life in the IBM product line.
 craggy parrot
memories... seems like yesterday... It was so much fun when you goofed up the "carriage control" and set paper spewing all over the room 😉
marble mantle

 cedar root
Exploring using the AS7341 BoB + QT PY ESP32 S2 as a PAR Meter. In case you are interested: https://github.com/solarslurpi/GrowBuddy/blob/main/pages/PAR_Buddy.md

GitHub
Contribute to solarslurpi/GrowBuddy development by creating an account on GitHub.
west zinc
Got to LCD “blink” running a dot clock RGB display running directly from the ESP32-S3’s LCD peripheral. Using Espressif’s RGB LCD demo code and on a scavenged display from a conference room scheduler.
 bitter hazel

The reason I love computers is because they cannot lie. You tell them (give them code) to do something and they do it exactly the way you told them to. If it came out different from what you expect…
 marble oracle
west zinc
Got to LCD “blink” running a dot clock RGB display running directly from the ESP...
marble oracle
west zinc
Got to LCD “blink” running a dot clock RGB display running directly from the ESP...
Can you share more info about this?
west zinc
marble oracle
Can you share more info about this?
Sure, I've got a few things sprinkled in different locations. First, is the teardown of this conference display https://hackaday.io/project/183895-crestron-tsw-732-teardown.

I came into a couple of conference room scheduling displays (Crestron TSW-732) and wanted to see if I could salvage the display and touchscreen. Touchscreen is YES, display is NO. Details inside. I conclude its cheaper and less hassle to buy a touchpanel than bother with salvaging one of these. Hmmm.. may be rethinking that if the ESP32-S3 RGB L...
Second, here is the ESP-IDF code that I'm running on the demo: https://github.com/espressif/esp-idf/tree/b66cc63c413a3b012f8cce9213dcb7ca281501d2/examples/peripherals/lcd/rgb_panel
Third, here's the CircuitPython issue for adding ESP32-S3 RGB display peripheral capability. I'm just getting started, so if others have knowledge and code to contribute, please do! https://github.com/adafruit/circuitpython/issues/6049
 slow helm
My first CircuitPython project: magtag wakes up twice a day and checks what position I am in my library's wait list queue. I ended up using Selenium extract the queue information, so that's a separate python function that runs on a schedule from my laptop then pushes the queue number to adafruit.io.
 gusty shard
Fritter & Waste: a virtual fretboard MIDI instrument.
Equipment: FeatherS2 and TFT 3.5" FeatherWing.
 west zinc
Tore down another conference room display. Looks like the same 40-pin pinout and touch panel interfaces, but with a smaller overall footprint. Also it’s much easier to disassemble than the previous one that I tore down. I think this one is a better version for repurposing. Also it houses a pair of red/green LED boards with I2C driver chips. https://hackaday.io/project/184118-crestron-tss-752-teardown
I procured another Crestron display unit and decided to see the similarities to previous one that I tore down. This time it’s a TSS-752. This has several capacitive touch pads built onto the front screen and an overall smaller size of the housing. The touchscreen display panel comes out more cleanly from the housing, leaving a much smaller displ...
 proud valley
Today I bumped into this story about putting Winamp into the pocket - which is awesome! And from there I found the fantastic video by @marsh quest of some LCD and Winamp fun https://gizmodo.com/hero-hobbyist-puts-winamp-in-a-portable-pyportal-mp3-pl-1848576138

Gizmodo
You can really whip the llama's ass wherever you go.
This reminded me that almost 20 years ago I made my own skin - would be cool to see it on a physical device in my pocket
 sharp comet
proud valley
This reminded me that almost 20 years ago I made my own skin - would be cool to ...
sharp comet
proud valley
This reminded me that almost 20 years ago I made my own skin - would be cool to ...
Cool skin! thanks for sharing it here. It turns out that it is listed in the Skin Museum and it is compatible with the PyPortal project.

my camera seems to enhance the blue-ness of it. IRL the color more on the grey side.
proud valley
sharp comet
Cool skin! thanks for sharing it here. It turns out that it is listed in the Ski...
omg, this is awesome! 😄
not sure how the 'scanlines' work on that screen though - I remember people criticising it at the time...
slow helm
slow helm
My first CircuitPython project: magtag wakes up twice a day and checks what posi...
Just a little scope creep: added the kids' lunch menu from their school's API
 candid crescent
My 18-digit custom RGB LED clock came in handy today, heh heh.
 civic vale
I have a negative event from 10-02-20@02:20 that your display made me realize I hadn't actually spent the day extra depressed this year, it passed without me even noticing. That actually makes me feel great that I'm finally mostly over it. Thanks, 🙂
vernal vigil
Turns out I need this sticker as a reminder. 😧
 vernal vigil
pAnother purple PCB pile

 topaz basin
Hello eveyone! I got an awesome production broadcast lens from Apex Electronics and I'm going to murder it on Friday. Come check it out if you're into that sort of thing!. (Just an FYI -- I'm pushing it back a week to give me a chance to figure out how to record this giant on camera).

In this exciting edition of Mark Voids a Warranty, we celebrate 500 subscribers by tearing down a broadcast camera lens, the Canon J40x9.5B IE.
This lens has a front element the size of a dinner plate! Inside there is bound to be all sorts of servos and other electromechanical gizmos for us to look at. I can't wait!
Join me, Phat Ollie, an...
lapis bronze
vernal vigil
pAnother purple PCB pile
What did you use to design these?
torn elbow
PCBs finally came in!!! Two and a half hours of teeny tiny soldering later:


 topaz basin
Nice! That looks so cool!
vernal vigil
lapis bronze
What did you use to design these?
KiCad
civic vale
vernal vigil
Turns out I need this sticker as a reminder. 😧
Reminds me of the summer I worked for MIT's Dormitory Phone Services (DormPhone) and some of the rewiring involved was on what's called a grading frame (basically a normal frame but basically holding just wires that go vertically forming a sort of plane. There were two guys rewiring one of these, one on each side, and they were sharing a soldering iron. At one point, one of the guys reached through to grab the iron, but picked it up by the wrong end. He then reflexively dropped it, then consciously noticed there was a falling thing and snatched it out of the air with his other hand, but once again grabbing the wrong end and repeated. After getting treated at the campus Medical Center, he reported back to work some more, but the manager decided he should take the rest of the day off.
 pearl lodge
Angle bracket for the macropad: D battery + double sided sticky tape. Working out way better than I'd have thought.


Battery is just a hair narrower than bored itself, and the added weight helps keep it in place too.
It's like they were made for each other.
 raw yoke
pearl lodge
Angle bracket for the macropad: D battery + double sided sticky tape. Working ou...
raw yoke
pearl lodge
Angle bracket for the macropad: D battery + double sided sticky tape. Working ou...
Good reuse, makes me think of electrolytic leak (capacitor failure) on older electronics (e.g. the IBM M2 keyboard).
Wondering if anyone thinks hall effect mechanical switches are cool...
rugged oar
Hello all,
I made a Kernel driver for the Pimoroni Trackball Breakout board. It doesn't use the Interrupt line, but is decent enough to be used in different orientations, adjustable sensitivities for up, down, left, and right directions, and even provides userspace files to read and write to the LEDs. Here's a link to the same https://github.com/wallComputer/ptMouse.git
If you've ever had the trackball and wanted to use it (say outside of a QMK based keyboard) right off your raspberry pi, this might be for you. Thanks for reading 🙂
GitHub
Contribute to wallComputer/ptMouse development by creating an account on GitHub.
 versed lava
rugged oar
Hello all,
I made a Kernel driver for the Pimoroni Trackball Breakout board. It...
versed lava
rugged oar
Hello all,
I made a Kernel driver for the Pimoroni Trackball Breakout board. It...
- This is awesome - I have 2 of these - one is to add a trackball to my trackpad - but i've been thinking I want to use the other with my pi pan/tilt project
rugged oar
versed lava
+ This is awesome - I have 2 of these - one is to add a trackball to my trackpad...
Thanks. Tell us more about your project please. Sounds interesting.
rose phoenix
Two new minimalist CircuitPython keyboards I designed using the KB2040.

 plucky lynx
@scenic siren
I think I might solder some jumpers on the back of the pins in the actual setup
west zinc
That’s cool.
scenic siren
plucky lynx
<@330227457296957440>
👍🏻
gusty shard
Fritter & Waste: A MIDI instrument.
https://github.com/rsbohn/frywas
 subtle delta
Hey all! Wanna turn that PyBadge or EdgeBadge lying around into a sweet Discord notification companion? I just finished my DisBadge project for doing just that! Just connect an AirLift FeatherWing on the back, create and connect your Discord bot, and get messages on your screen! Information and code in the project Github repository:
GitHub
Turn that PyBadge into a sweet Discord notification companion - GitHub - tekktrik/disbadge: Turn that PyBadge into a sweet Discord notification companion
versed lava
rugged oar
Thanks. Tell us more about your project please. Sounds interesting.
Its a pan tilt that uses a custom trained AI model to track the specific circus apparatus I perform in. My goal is to be able to keep a close up shot so I can catch the detail I need to analyze my training. I'm on version 2.5ish. It uses an off-the-shelf Pan/Tilt (strong and the gearing system it uses prevents backlash) with the electronics removed and replaced with a Raspberry pi 3, adafruit motor hat (uses the batteries in the tripod), and an Oak-1 camera to offload the AI. Latest stress test is here: https://youtu.be/PMSygpfg074 (note the video cameras weren't calibrated in that video so the performer is a bit biased to the bottom of the frame - I was just testing for crashes when recording over a long period of time)


Stress testing the software for crashes. The tracking camera wasn't calibrated with the video camera so the performer is biased towards the bottom of the frame.
 cerulean dirge
I… didn’t program the charge light to blink to the music. Indeed, I can’t even access it from code. I think max volume stereo may be causing power fluctuations that make it briefly attempt to charge a nonexistent battery? Does that seem like a problem?
cerulean dirge
Oh good
If there isn't one it may flicker once in a while when you use power because it's trying to charge a (non-existant) battery. It's not harmful, and its totally normal!
grizzled talon
Happy 10 year Birthday to the Raspberry PI!!! This is my first Raspberry PI I got on Christmas back in 2013 when I was 13. And yes, at some point I did attempt to remove the GPIO and ethernet for some reason lol.

I'm currently working on making the most epic Raspberry Pi portable ever, using the new Pi Zero 2W with a TFT, boost converter/LiPo charger, blackberry keyboard, camera w/ flash, USB-C (power and data), half a terabyte of internal storage (also acting as a dedicated NAS for my local network), and will have an internal fan with heat sink. I still need to design a case and document the project, but just wanted to share a work in progress.
 bitter hazel
Saw these window stoppers in the kitchen drawer and told myself “these have the perfect angle for a display mount”. 6 hours later I end up building a lap-able portable battery powered retro pie with my mayflash arcade stick and a 7” pi display. This is what madness looks like 🤣


 rugged oar
grizzled talon
I'm currently working on making the most epic Raspberry Pi portable ever, using ...
rugged oar
grizzled talon
I'm currently working on making the most epic Raspberry Pi portable ever, using ...
Looks really cool. How are you communicating with the keyboard and the Pi?
sharp comet
bitter hazel
Saw these window stoppers in the kitchen drawer and told myself “these have the ...
Nice job, that looks awesome!
versed lava
I put my macropad print files on prusaprints for people who were asking for it to be on an alternative to thingiverse: https://www.prusaprinters.org/prints/138045-adafruit-macropad-case
 versed lava
This ones a 3D printable recreation of the 8x8 Neotrellis acrylic case: https://www.prusaprinters.org/prints/143552-8x8-neotrellis-case Its a nice case if you're adding extra electronics to your neotrellis + feather m4 project since it lets you open and modify a bit quicker than the acrylic case.
 cerulean dirge
The 120mm drawers seem to fit most of my Adafruit boards and components pretty well. A common anti static bag they use fits in it.
 cedar trellis
I published my first guide ever, and it's being featured on Instructables: https://www.instructables.com/Heart-shaped-LED-Freeform-Circuit/
This feels so weird... and like such a huge step! 🎉 

Instructables
Heart-shaped LED Freeform Circuit: In this project, I'm presenting my first attempt at building a freeform circuit sculpture, out of soldered brass wire and a few LEDs. Since it's February, and the LEDs I had laying around were pink and heart-shaped, my sculpture is Valentine's day t…
grizzled talon
rugged oar
Looks really cool. How are you communicating with the keyboard and the Pi?
Over I2C, I have a python script start up at boot that interprets the key presses and translates it to be an actual key press. The script also interprets the two buttons on the TFT breakout as up and down keys, which is helpful for a Linux terminal.
rugged oar
grizzled talon
Over I2C, I have a python script start up at boot that interprets the key presse...
If you're willing to use Solder Party's Keyboard PMODs which use the same Keyboard, I've written an I2C based kernel driver for it and Raspberry pi. It will make the keyboard far more usable imo. https://github.com/wallComputer/bbqX0kbd_driver.git

GitHub
BBQX0KBD is a Keyboard Device Driver for the BB Q Keyboard - GitHub - wallComputer/bbqX0kbd_driver: BBQX0KBD is a Keyboard Device Driver for the BB Q Keyboard
Here's my tinyDeck project.
It uses Keyboard FeatherWing, a Raspberry Pi Zero 2 W, a Zero2Go Omini Rev2 for power management, 4xAA batteries, and a PCB to connect everything up.
https://imgur.com/a/4vMCmIh

Here's a smaller demo for using the Pimoroni's trackball breakout as a mouse with a custom Linux Driver.
https://imgur.com/a/bxqMPH7
 craggy parrot
Very nice! Thank you for sharing this project!
rugged oar
Thank you.
It's chunky at the moment, hopefully I'll be able to make it thinner in next iteration with a Lip battery.
grizzled talon
rugged oar
If you're willing to use Solder Party's Keyboard PMODs which use the same Keyboa...
That's awesome! Thanks for sharing that! I'm using the TTGO driver board which I believe might be compatible with this (they use the same address and works the same in arduino/circuit python at least).
rugged oar
If the internal controller of the TTGo keyboard works just how the Solder Party one's does, my code should work too. I could see it has 5 pin i2c connection, but I don't see any source code for it on most sites that sell it here, so I can't confirm.
topaz basin
I tried doing this last week and had camera issues -- so I'm going to try again this week. Going to take apart a very expensive camera lens here at noon https://youtu.be/aVxM7-OFB4M
In this exciting edition of Mark Voids a Warranty, we celebrate 500 subscribers by tearing down a broadcast camera lens, the Canon J40x9.5B IE.
This lens has a front element the size of a dinner plate! Inside there is bound to be all sorts of servos and other electromechanical gizmos for us to look at. I can't wait!
Join me, Phat Ollie, an...
 thick wedge
I made an app that's hosted on a Raspberry pi! This was so fun! https://www.whurdal.com/
Whurdal - a better Wordle
frosty topaz
thick wedge
I made an app that's hosted on a Raspberry pi! This was so fun! https://www.whur...
How does it handle multiple letters?
versed lava
thick wedge
I made an app that's hosted on a Raspberry pi! This was so fun! https://www.whur...
Excellent
thick wedge
frosty topaz
How does it handle multiple letters?
What do you mean?
thick wedge
versed lava
Excellent
Thanks!
honest lark
thick wedge
What do you mean?
Like if the goal word has a repeated letter, like APPLE
thick wedge
honest lark
Like if the goal word has a repeated letter, like APPLE
The same way wordle does. If the guessed letter is in the correct position, green, if the letter is in the wrong position, yellow. There is no extra indication if there is a repeated letter. That frustrates me in the original wordle but I wasn’t able to find a solution that wouldn’t make the game too easy for repeated letter words
frosty topaz
thick wedge
The same way wordle does. If the guessed letter is in the correct position, gree...
Actually, if you guess APPLE on a word with only one P, the original game gives you green/yellow on only one of the two, and makes the other colorless.
If I guess rarer on a word with one r, I’m told there are three in yours.
thick wedge
Oh interesting.
I guess my app says, yeah there’s an R, but none of these are in the right spot. But I can see why someone would want it to behave like the original wordle.
 round zodiac
MIDI graphical display in CircuitPython that runs on PyBadge and PyGamer with MIDI Featherwing. It’s tricky to receive high speed MIDI and display it in real-time using Circuit Python. The regular CircuitPython MIDI library is too slow. Code is on Github (in description of the YouTube video) https://youtu.be/8wvDsd-fElc

MIDI receive and display code for use with Adafruit MIDI featherwing attached to a PyGamer or PyBadge.
Circuit Python code is shared on Github
https://github.com/gmeader/pybadge/tree/master/MIDImatrix
Inspired by Kevin's project: https://diyelectromusic.wordpress.com/2020/11/03
vernal vigil
Synth VCO module - it mostly works, which is about all I could reasonably expect.

 ruby ledge
Anyone interested in adding a few small functions to the Adafruit_GFX library to provide fast text drawing?
https://youtu.be/SSrdWZNyAhI

A demo showing stretched+smoothed text based on the 5x7 font and drawn as efficiently as possible on the ILI9341. The scrolling is done by redrawing all of the text on the display.
versed lava
ruby ledge
Anyone interested in adding a few small functions to the Adafruit_GFX library to...
Its open source so you can open a pull request!
ruby ledge
versed lava
Its open source so you can open a pull request!
I know - the question was whether anyone cared. I'm not going to invest time in something that no one uses.
I already have this functionality in my own display libraries. I don't have any real interest in writing for other people's libraries except if it's useful for the community
versed lava
ruby ledge
I know - the question was whether anyone cared. I'm not going to invest time in ...
There probably isn't a good way to guage how many people would use it or not, unfortunately. Usually - if you needed it, someone else will. I know I've had to implement partial display updates for some of the oleds they sell to eek out a little extra performance for some projects.
ruby ledge
getting feedback is always challenging. A lot of people use my libraries, but maybe 1 in a 1000 will give feedback
Most of my interest is in speeding things up and there seems to be interest in that, so I thought a small addition to the Adafruit_GFX API could be helpful
versed lava
I know I'd probably end up using it at some point. Is this a pure software optimization? I wouldn't mind trying it on my synth project to see if I get a little ore performance. The display updating is probably the most expensive part
ruby ledge
I was intending to add a few new methods instead of trying to rewrite the existing ones. It would be something like tft.fastText(char *string, bool smooth)
not printf, just quick characters on a single line
it could honor the current cursor position, color and font stretching
It will overwrite the background
versed lava
Hrmmm, looks like I'm actually using the display's native text implementation (I think the display is meant as an oled alternative to those 2x24 lcds)
I think I need to switch my project to use a dual-core chip like an ESP32 so that all the interupts, controls, display, etc can be handled on 1 core and the synth can be handled on the other.
trail coral
ruby ledge
I know - the question was whether anyone cared. I'm not going to invest time in ...
I care, and think it would be awesome!
lapis bronze
Finished the brains of my interactive toy project today. Thanks to everyone here to helped out! I couldn’t have done it without everyone’s support.

 ruby ledge
trail coral
I care, and think it would be awesome!
ruby ledge
trail coral
I care, and think it would be awesome!
Would you mind testing the current code and providing feedback?
trail coral
ruby ledge
Would you mind testing the current code and providing feedback?
Of course.
As a matter of fact, this would be extremely useful on the Keyboard Featherwing.
 jagged parrot
Little self balancer using the feather sense. 😍
 ruby ledge
trail coral
Of course.
ruby ledge
trail coral
Of course.
Send me an email (bitbank@pobox.com) and I'll share the code with you.
trail coral
ruby ledge
Send me an email (bitbank@pobox.com) and I'll share the code with you.
Done.
ruby ledge
got it - will respond shortly
normal rune
hey everyone I got a project to share with you all https://hackaday.io/project/184273-electronic-cv

Welcome! Hope you are doing well. This is my journey of creating an electronic CV. As you probably figured out, it is not going to be very practical business card, but it is going to be a cool one. What is the porpoise of it then? Well this is me dipping my toes in the world of radios. It is my first BT project and the first time I am using sili...
jagged parrot
normal rune
hey everyone I got a project to share with you all https://hackaday.io/project/1...
thats sick!
thick wedge
frosty topaz
If I guess rarer on a word with one r, I’m told there are three in yours.
I've thought about this more. The behavior that you described makes much more sense. I've gone back and updated the code to reflect that behavior. Thank you for bringing that to my attention!
Whurdal - a better Wordle
normal rune
jagged parrot
thats sick!
Thanks, I will try and keep the updates coming.
 dense summit


Been a while since I wrote some code
I think I'm prepared for when the new DMGC boards get delivered 😁 https://t.co/e8pe27l3An
Twitter
·
I had some fun with neopixels :D
drifting crater
A project I made in collaboration with @wooden snow (he did most of the math, I just helped him with the C part) to easily run TensorFlow models on an Arduino board. An Arduino Uno can run the XOR model! (You are only limited by the amount of RAM you have and your processor speed)
https://github.com/Bobingstern/MicroFlow
GitHub
Export and run tensorflow models on arduino microcontrollers! - GitHub - Bobingstern/MicroFlow: Export and run tensorflow models on arduino microcontrollers!
 wooden snow
drifting crater
A project I made in collaboration with <@!683462739905347596> (he did most of th...
wooden snow
drifting crater
A project I made in collaboration with <@!683462739905347596> (he did most of th...
Hey it’s me!
 sterile loom
Hey everyone, I just put together a quick blog about Web Bluetooth. I’m getting more and more into using Web Bluetooth lately. I really feel like it’s one of the more better solutions out there for cross platform Bluetooth. The only problem is that you need to know your way around web development to get started. This tutorial shows how to setup the most basic web development environment possible to keep things from getting overwhelming. https://getwavecake.com/blog/getting-started-with-web-bluetooth/?utm_source=self&utm_medium=discord&utm_campaign=outreach
 lucid bloom
This is my project called PiGlass v2
https://magpi.raspberrypi.com/articles/piglass-v2
I put the hardware, hardware tutorial and software tutorial on my website, it's held together with zipties, heat shrink and 2 paper clips.
https://www.mrdcreations.org/

The MagPi magazine
A new Raspberry Pi Zero means a new take on PiGlass, the smart glasses powered by Raspberry Pi

PiGlass v2
charred ibex
A while back an adafruit box had a SDR. Used it to day to pick up the signal from my wireless meat thermometer, for the pork shoulder that just went on the smoker. Used rtl-433 on a pi-zero w

 median oracle
Custom board for pico-ducky with switches.
 cedar trellis
I have never owned, or worked on a 3D printer before, but for some reason, I decided it would be a good idea to buy my very first one... as a kit 🤦♀️
One whole week of work later, it is fully assembled and tested, and seems to be working reasonably well.
One small (really tiny!) step for humankind, one giant leap for... me 😅
Hello 3D printing world, I made Adabot friend! 
 tacit delta
nice. yeah prusa have excellent instructions!
cedar trellis
Yep, their documentation is great! And when it's not, there are comments from other people who suffered through the same torture, lol. I found a lot of solutions from the community 🤩
ancient skiff
It's extremely niche but I made web-ified the "c2t" program for converting Apple disk images to audio streams that let you write a real physical floppy of the disk on your Apple ][ @twilit mortar might be interested. https://www.unpythonic.net/web-c2t/ original c2t is https://github.com/datajerk/c2t and is what makes the Apple ][ Disk & Game Servers files too https://asciiexpress.net/diskserver/ -- I've been pulling down random software from archive.org and trying it and it seems to work.
GitHub
Retro Code (Apple II, Cosmac VIP) to Tape/Text. Contribute to datajerk/c2t development by creating an account on GitHub.
 hexed ravine
i made a timelapse of me building my sorting platform https://www.youtube.com/watch?v=oesyhr4oEl8

In this installment of obsession sessions we build a Rotary Delta Robot frame to facilicate pick and place R&D.
Join the Discord to see more and to talk about delta robots, 3d printing, art and other obsessions. No obsession too small, no obsession too big.
https://discord.gg/AvSvA4vquY
 burnt wyvern
My first fully custom cassette. It's of "Mercury - Act 1" and "Evolve" by Imagine Dragons. The label was a pain because I couldn't find the right template so i had to align it manually. I also had to splice out about 2-3 minutes of blank tape too. It actually sounds really nice for a cassette.

 west zinc
Another baby step driving an 800x480 pixel RBG dot clock display using the ESP32-S3. Don’t adjust your television, the stuttering is real (and a source of exasperation for me to figure out why).
broken rain
hexed ravine
i made a timelapse of me building my sorting platform https://www.youtube.com/wa...
do you have a link to the song you used in the video?
west zinc
Solid progress today on the ESP32-S3 and the 800x480 RGB display.
Volume warning! That’s my wife sewing in the background.
tacit delta
looks awesome
west zinc
Thanks! Feels good to see some reasonable operation. Now that there is proof of concept, I’ll begin the journey to get it working in CircuitPython.
hexed ravine
broken rain
do you have a link to the song you used in the video?
no, it was on adobe rush
pulsar mortar
Simple coffee/tea timer. Times are selectable, either 2 minutes (greentea), 3 minutes (black tea)or 4 (coffee). Used this for a test board to see how well I can do QFN packages.
Also has a USB-C connector and charger.

It beeps and flashes when done :) I'll have it on my github soon
 leaden orbit
im not dead


miss shaky hands is back, this time a vis of the 3d printed parts for my custom gamepad/keyboard thing!
it's finally coming together! https://t.co/MiIuBUSC5e
Twitter
·
rugged coral
An original STEMMA / QT-style character LCD board.
 burnt wyvern
I made this quite a while ago, there was a tool called PiPROM that is used to copy an original Xbox's EEPROM, however I found it was outdated and didn't work for me. So I wrote a little CircuitPython code (with the help of this wonderful server) and made an (in theory) easy to use and straightforward tool to read, write, and confirm the Xbox's EEPROM chip via I2C. This also happens to be my first repository on GitHub! 
https://github.com/guighub/Xbox-EEPROM-Manager
GitHub
A CircuitPython based original Xbox EEPROM manager, this tool can read, write, and confirm an Xbox's EEPROM. - GitHub - guighub/Xbox-EEPROM-Manager: A CircuitPython based original Xbox EEPR...
bitter hazel
jagged parrot
Little self balancer using the feather sense. 😍
Cool. You have a video of this thing in action?
 blazing dew
Here was my first project, im really happy with how it turned out
sharp comet
blazing dew
Here was my first project, im really happy with how it turned out
This is AMAZING!!! Engineer will always have a special place in my heart. The controller turned out great, the sentry is so freaking cool. I love everything about this! If you would ever consider making another one to sell please let me know.
 sage pike
Syncing the neopixel colours of 2 MagTags via adafruit.io... :) The flickering is some hysteresis. I adjust the brightness using the value from the light sensor... Goal is to have 4 of them amongst my twin sons, my brother and myself. My brother and soon one of my boys will live on the other side of the globe... The idea is that we can leave each other notes on the fridge. Living apart together. :)
The CircuitPython code is on GitHub https://github.com/CharString/tagteam

GitHub
A MagTag project to let 4 of them communicate between them. - GitHub - CharString/tagteam: A MagTag project to let 4 of them communicate between them.
west zinc
Stemma QT slot. First trial.
cedar trellis
west zinc
Stemma QT slot. First trial.
Nice, I neeed that! Design files shared somewhere? 😋
west zinc
cedar trellis
Nice, I neeed that! Design files shared somewhere? 😋
Here you go, including my CAD files. I finally got it down to two 3D printed pieces. https://hackaday.io/project/184474-stemma-qt-slot
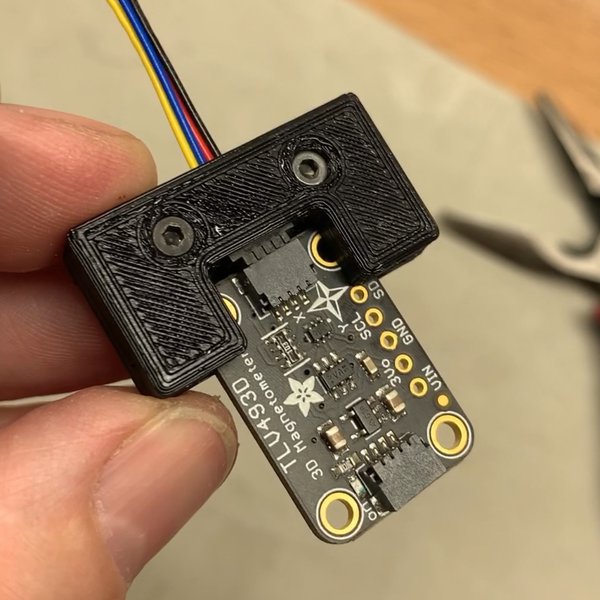
A quick mock-up to solidly hold a Stemma QT cable in a slot so you can plug and unplug sensor boards easily.
vernal vigil
Sunday mornin'
 arctic peak
I posted about this project a couple months ago but finally got around to editing the video. It's a mini reproduction of the Dark Tower board game using the Feather S2 and other adafruit parts. The introduction video is up if you want to follow the series. https://youtu.be/FMZSXwdLvgo

Greg kicks off a new project - reproducing a vintage Dark Tower board game in miniature using a modern microcontroller. This will be a fully playable homage to the original game - travel sized!
For a full demo of the original game, visit
https://youtu.be/DKOOkqDzVxM
Parts purchased from http://www.adafruit.com
(not a sponsor)
Music: https://w...
pearl lodge
NGL, pretty happy with myself.
I'm doing this with a python script that is running a powershell script (providing the active window name) on a loop, checking for changes. This data is then sent via serial. The loop on the device is checking if there's any serial data every loop (which may not be ideal).
pearl lodge
pearl lodge
NGL, pretty happy with myself.
I'm doing this with a python script that is runn...
Would love any thoughts on how to make the host computers job a little easier and faster. Calling a (relatively slow, the cause of the delay you're seeing) powershell script is kinda hacky in a bad way I feel.
vernal vigil
pearl lodge
Would love any thoughts on how to make the host computers job a little easier an...
In my experience it always takes time to start up Powershell which makes it slow to run a simple one-line script. If that's where your delay is, my recommendation is to write that utility in C.
pearl lodge
vernal vigil
In my experience it always takes time to start up Powershell which makes it slow...
What would you think about an implementation using Auto hot key, can I expect that to run quickly, or perhaps powershell can run the loop checking for changes?
vernal vigil
I don't know about Auto Hotkey, I've never used it.
Having Powershell running the loop instead of python might be the best way, if you can get it to write the data to the serial port. I guess there's probably a way to do that.
pearl lodge
vernal vigil
I don't know about Auto Hotkey, I've never used it.
Having Powershell running th...
I'd rather learn C 🤦♂️
I was thinking to trigger the python script from a powershell running in a loop. Some latency is acceptable
vernal vigil
That sounds like it's worth a try.
 tender cipher
WIP portable cyberdeck I made at home, all I need is the LCD screen and it's complete

if the external hard drive looks like its about to fall out, its actually not, thats just the angle of my camera
blazing dew
I’m working on a bit of a long term project, I’m gonna try to make a full body aswell, I’m very excited
 versed lava
pearl lodge
Would love any thoughts on how to make the host computers job a little easier an...
versed lava
pearl lodge
Would love any thoughts on how to make the host computers job a little easier an...
This may be harder or easier but you could look in to using the host computer's accessibility API if you just want window names.
pearl lodge
versed lava
This may be harder or easier but you could look in to using the host computer's ...
That's a wonderful idea! Thank you.
drifting crater
I'm back with another video player!
This time, I've whipped up a video encoding in about 15 minutes so the video and audio are actually in sync, and you can seek!
Terribly made video encoding/decoder script made with a lot of FFmpeg calls and Python: https://github.com/UnsignedArduino/RAV-converter
Also the terribly made PlatformIO project that plays the video: https://github.com/UnsignedArduino/PyGamer-RAV-player
The audio is static-y, as there is no buffering, so once the audio buffer runs out, we have to read 16k bytes into RAM which takes a bit of time, but then we can decode the JPEG frame while the audio is being played.
Also the father you are in the video file (like 50 minutes into a video) the longer it takes to seek - at the beginning seeking is incredibly fast, but if you are 50 minutes in a video seeking takes ages.
 whole brook
Made a bunch of improvements to the tasmota-tag CircuitPython project I started back in November last year. These changes should make it more usable, maybe even usable enough for other people to play with it. Figured I'd share here even though the code could definitely use some cleaning up. 🙂
At the very least it could provide some useful examples for any other people looking to control MQTT-enabled Tasmota-flashed smart bulbs via CircuitPython. The MagTag provides a pretty great platform for this but it should work (with some reworking of the display stuff, of course) on just about any CircuitPython platform with WiFi and enough memory to handle the weight of all the libs required.
Long term I might take this code and make a robust, easy-to-use library to operate Tasmota devices within CircuitPython if anyone's interested in such a thing.
https://github.com/fivesixzero/circuitpython-experiments/tree/main/magtag-esp32-s2/tasmota-tag
here's an image of the project running on one of my MagTags:
 scenic siren
whole brook
Made a bunch of improvements to the `tasmota-tag` CircuitPython project I starte...
scenic siren
whole brook
Made a bunch of improvements to the `tasmota-tag` CircuitPython project I starte...
If you do make a library, please submit it to the Community Bundle!
whole brook
scenic siren
If you do make a library, please submit it to the Community Bundle!
Of course! 😄
lucid bloom
I am making great progress on my wearable computer project. I have created a new camera program that uses opencv and face detection to draw overlays on faces detected in pictures. It is fed by a toml file that includes the title, name, picture filename and location on the face. I am going to be redoing my other programs to use toml files as well, which will remove coding skills from the requirements to customize what PiGlass v2 does. I've had quite a few self described beginners that want to make one, they can physically make it easily but they don't have coding experience. The problem wasn't them it was me hard coding everything
[thuglife]
display_name = "Thugs"
file = "mask.png"
location = "center"

[brainslug]
display_name = "Slugs"
file = "mask2.png"
location = "top-right"

["dum sticker"]
display_name = "Dum"
file = "maskdum.png"
location = "center-right"


 grizzled talon
I finally went down the rabbit hole of learning how to program an ATTiny85v and so far have been mostly successful up to this point with this journey. I'm using the Adafruit USBtinyISP kit (https://www.adafruit.com/product/46) with a USB type C connector instead of the old USB-B connector connected to a USB 2.0 hub. I'm using the Arduino IDE in MacOS Mojave (dual boot because Mojave is last to have 32-bit support) to program it. So far I got NeoPixels working, however I'm still trying to figure out how to get i2c oled displays to play nice with it (having a weird SPI compile error). Planing to fabricate my own boards with this fun microprocessor! 😁

USBtinyISP is a simple open-source USB AVR programmer and SPI interface. It is low cost, easy to make, works great with avrdude, has both 6 and 10 pin standard ISP cables, is ...


 west zinc
Got to “backlight” on my first PCB! Now I have to muster the courage to plug in a microcontroller and test the display.
 subtle delta
The beginning of Steppotron, inspired by Floppotron. Stepper motor hooked up to a TIC stepper motor driver connected via I2C to a Feather M4 Express running CircuitPython. Currently plays RTTTL songs, but the goal is to add more hardware to misuse play and switch over to MIDI.

Google Photos
@ancient skiff not sure if that was your intention for floppyio but it's definitely mine 😂
ancient skiff
I had wanted to add floppy music but didn't get around to it. nice!
eeeepppp I swear I see a spark passing between the wires & the motor housing
subtle delta
I know, I just noticed that too, hindsight really is 20/20 haha, I'll have to look into it. The goal is to switch over to some 5V motors anyway available from Adafruit, I just happened to have a destroyed 12V one serving no other purpose so tested it with that.
I may have also had the power supply wrong, I saw it at 24V at one point for some reason, not sure if that's related
ancient skiff
https://www.youtube.com/watch?v=R26yo7P9mwA This is one I played a hand in ages ago, I worked on linuxcnc (then known as emc2), worked out the math to encode chords in gcode; a friend of mine arranged "a bicycle built for two (daisy)" for 3 parts, and there's at least one surviving video of it running...

Home built CNC machine playing music through controlling the frequency of the steppers. http://media.adamziegler.com/cnc/
subtle delta
This is incredible, taking this for inspiration for sure!!
left inlet
Howdy folks. Here is my latest version of the LEDarcade - Defender / Offender game. https://www.youtube.com/watch?v=HTOpaYVw0Wk&t=27s
west zinc
We have display control from the ESP32-S3 DevKit! Yay, wiring checks out, backlight controller works.
Way better than this mess.
 frosty topaz
west zinc
We have display control from the ESP32-S3 DevKit! Yay, wiring checks out, backl...
frosty topaz
west zinc
We have display control from the ESP32-S3 DevKit! Yay, wiring checks out, backl...
In CircuitPython?
west zinc
Not yet....
sharp comet
Playing around to test the RotatedPolygon I'm working on, we can get some very pretty effects with some circle geometry and rainbowio
 lucid bloom
I demonstrated my funny camera for my wearable on show and tell last night. I wanted to show how easy it is to add more
[anonymous]
display_name = "anons"
file = "anon.png"
location = "center"
there is another toml file to customize my launcher/process killer
[Kodi]
color = "red"
cmd = "sudo -u pi kodi"
process = "kodi.bin_v7"

[RetroPie]
color = "green"
cmd = "sudo ttyecho -n /dev/tty1 emulationstation"
process = "retroarch emulationstatio"

["Funny Camera"]
color = "yellow"
cmd = "sudo python3 funnycamera.py"
process = "python3"

["Camera"]
color = "blue"
cmd = "sudo python3 camera.py"
process = "python3"

["Video w/Audio"]
color = "brown"
cmd = "sh videosound.sh"
process = "raspivid ffmpeg"

["Livestream (YT)"]
color = "orange"
cmd = "sh youtube.sh"
process = "raspivid ffmpeg"
Everything was essentially hard coded before which was wearing on me, now it is so much simpler
sharp comet
lucid bloom
I demonstrated my funny camera for my wearable on show and tell last night. I wa...
Nice job! It's always so satisfying to take something from "well it works but it's tedious" to "this is so easy to do now, it makes me want to try a bunch of extra variations just because I can so quickly"
lucid bloom
thanks, I am making a list of all working combinations, I'm up to 12. I added a special feature. One thing that I think only I know about it is the battery life. I have the pi zero 2 attached to the vufine display with a micro to micro cable. I can power the device for over 10 hours with a 10,000mah battery (the controller lasts 8 hours but you can turn it off when you arent using it)
["X-Ray Vision"]
color = "magenta"
cmd = "vlc -f rickroll.mp4"
process = "vlc"
 lucid bloom
I made the PiGlass v2 construction video, it didn't go as smoothly as I had hoped because I was going from memory and my hands were shaking a bit. It took 24 minutes, if I was doing it without explaining/shaking it would have been 15 minutes
https://youtu.be/4HxX9L4pO4Q
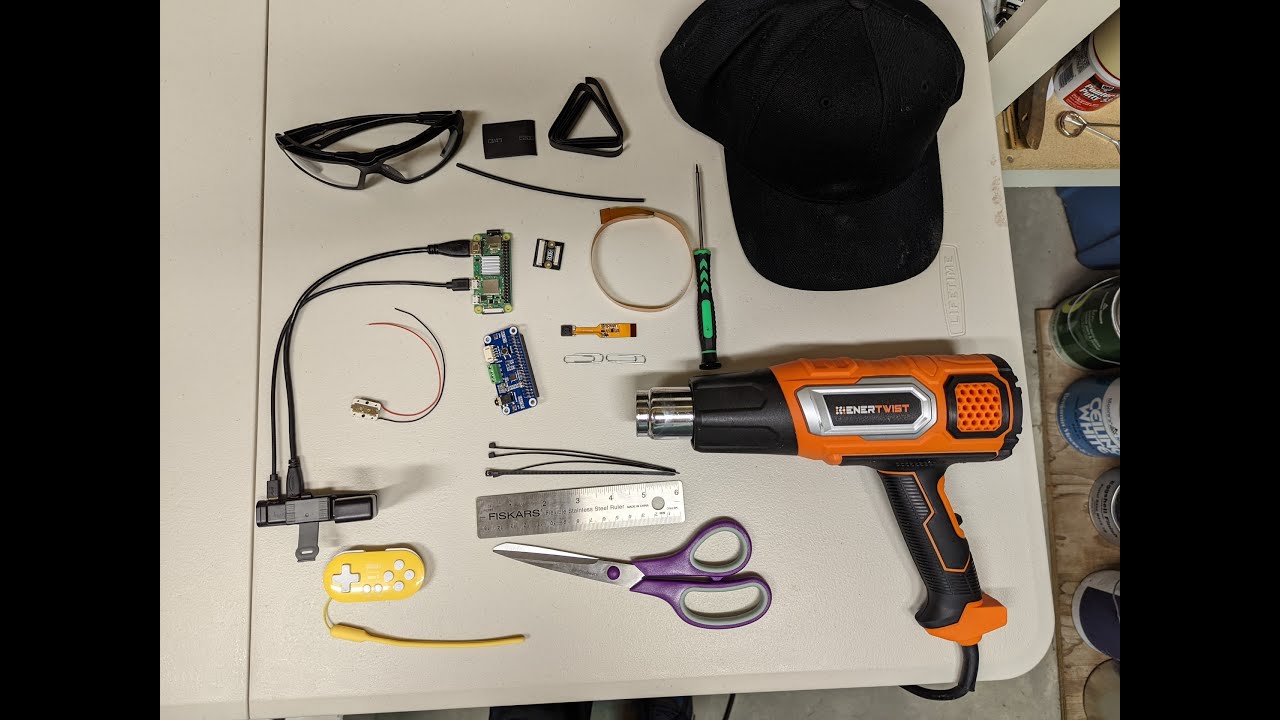
Video of the assembly of PiGlass v2, this is the second one I have made.
More Info:
https://www.mrdcreations.org/
https://magpi.raspberrypi.com/articles/piglass-v2
Tools used:
Soldering Iron
Heat gun
Ruler
Scissors
Small flathead screwdriver
Xacto knife
Parts List:
Raspberry Pi Zero 2
40 pin header
Vufine+
8bitdo zero 2 gamepad
Waveshare WM8...
eternal maple
lucid bloom
I made the PiGlass v2 construction video, it didn't go as smoothly as I had hope...
@lucid bloom Excellent video with just the right footage for a final version, if you’re so inclined. It’s obvious that you developed a reliable approach and some techniques that are useful beyond this design. What a great project!
lucid bloom
I wanted it to be easy to make and fun to use, I wasn't concerned about being user friendly for modifications until I started talking to other people, I had two people try it today at our maker meetup and I got some good feedback. I had them try the new one so in case anything went wrong I still have mine but it went fine
vernal vigil
Pmore Purple Pcbs

 fading wind
Using the MacroPad as a four-chord MIDI device and drum pad to quickly write loops and backing tracks: https://youtu.be/2-FtnHHVXCg

Write a short song in under 4 minutes using standard chord progressions and the Adafruit MacroPad. See https://github.com/deckerego/Macropad_4chord_MIDI for more details, including how to build your own.
 glad roost
fading wind
Using the MacroPad as a four-chord MIDI device and drum pad to quickly write loo...
glad roost
fading wind
Using the MacroPad as a four-chord MIDI device and drum pad to quickly write loo...
great! submitted for the weekly newsletter
 loud prawn
drifting crater
A project I made in collaboration with <@!683462739905347596> (he did most of th...
loud prawn
drifting crater
A project I made in collaboration with <@!683462739905347596> (he did most of th...
This looks really cool! I've made Surfboard: https://sfbd.is/ for people like you that want to share this project out into the community 🙂 We haven't indexed the new libraries yet but you should still be able to create examples through Surfboard that you can share via URL or web embed! Let me know if you need any help with the setup!
Build for the world.
vernal vigil
An audio output module for my homebrew Eurorack synth

 zealous eagle
Crookes Radiometer for Playground Bluefruit w/ TFT Gizmo
https://youtu.be/6e7l1va4atc
I've been watching foamyguy, John Park, and TodBot play with vectorio, and we have a Crookes Radiometer on our kitchen window sill...
The animation effect is created by changing the points of the polygons over a range. Then I mapped the light sensor value to the time.sleep delay in the for loop so the animation speeds up as the light sensor value increases.
I can't describe how much fun I have been having learning to code these past few months... Thank you to the whole community!

Crookes Radiometer with vectorio and the Circuit Playground Bluefruit with TFT Gizmo.
vernal vigil
Another shot of my audio output module including adafruit
 drifting crater
I had an Arduino Uno and an LCD shield lying around, and I decided to re-invent the wheel once again (probably) and show my computer stats on it lol
https://user-images.githubusercontent.com/38868705/161362976-7f61f7ba-11e2-4924-9e02-678ab5eecd12.gif
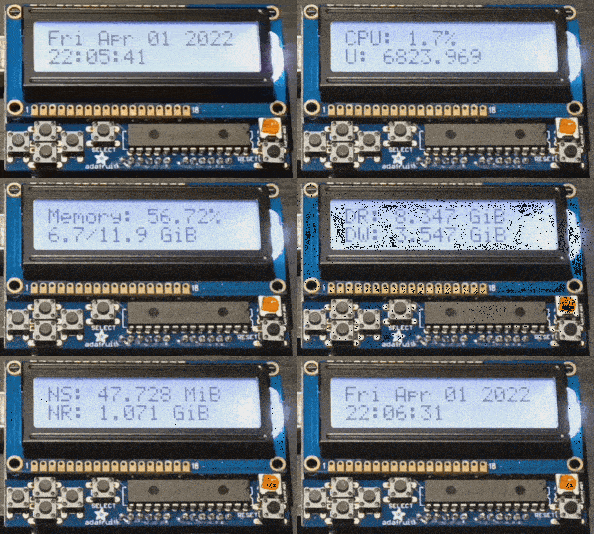
💀 I want to post the GitHub links and the GIF animation in seperate message why Dyno
dapper plank


Got a 3D printed shell for my weather station monitor. Really useful thing I use it everyday
Got battery life to last 2weeks with a 400 battery
Will open source the code soon too

 arctic peak
Finally finished editing the video for my mini Dark Tower build. This is using the Feather S2, 2.0" LCD and stemma speaker amp to recreate the electronic board game from 1981. Feedback on these videos is appreciated. I'm hoping to improve them for the next project. https://youtu.be/neajD8c7Fl8 Links to all the source code & 3D models are in the video description.


Completing the vintage Dark Tower board game in miniature using a modern microcontroller. It's a fully playable homage to the original game - travel sized!
For a full demo of the original game, visit
https://youtu.be/DKOOkqDzVxM
Parts purchased from http://www.adafruit.com
(not a sponsor)
Adafruit Parts:
FeatherS2: https://www.adafruit.com/pr...
west zinc
Got to "Blinka" with an RGB dot clock display using the ESP32-S3 LCD peripheral.

And here's a REPL output, showing some offset weirdness that will need to be resolved.
 gusty shard
Don't see many of these nowadays. Project from 2007.

 sharp comet
zealous eagle
Crookes Radiometer for Playground Bluefruit w/ TFT Gizmo
https://youtu.be/6e7l1v...
sharp comet
zealous eagle
Crookes Radiometer for Playground Bluefruit w/ TFT Gizmo
https://youtu.be/6e7l1v...
This is super cool! I had never heard of this type of device before but reading up on it some now, quite fascinating. Great job on the animation and integrating it with data coming from the sensor 🎉 If you're interested you could submit this project / video for inclusion in the python on hardware weekly newsletter.
 azure flame
here's a thing I worked on a month-ish ago: https://github.com/tjhorner/tetris-gamepad
https://user-images.githubusercontent.com/2646487/157792560-db880a13-472a-42d5-8050-d12b237e9058.gif

GitHub
Source files for a gamepad designed for Tetris gameplay - GitHub - tjhorner/tetris-gamepad: Source files for a gamepad designed for Tetris gameplay

 magic oracle

Hi all My name is Mike and for my first show and tell is a mini weather station that I made. Some back story if anyone cares. I have ZERO experience in programming. I started with M5Stack devices and quickly relized that documentation was lacking or non exsistant, not knocking them but that ecosystem was nor for me. I knew about Adafruit from back in the day and decided to buy a CircuitPlayground Express, I read and watched as many Youtube videos as possible and hooked on CircuitPython ever since. Still new and still a lot to learn but wanted to share my first "real" project that is not copy and pasting example code. Here are some pictures of my complete WeatherFi project. Board is a Lolin S2 mini with a BMP280 and AH20 sensor. Date and time comes from Adafuit IO and internet weather comes from Openweahtermap. Without the documents from Kattni and the videos from Professor G, I would be very lost 🙂


That didn't post well. Sorry about that.
vernal vigil
Another module for my homebrew Eurorack synth - Quad VCA


GitHub
Eurorack synthesizer module designs. Contribute to Len42/Synth development by creating an account on GitHub.
 cunning lava

 zealous eagle
sharp comet
This is super cool! I had never heard of this type of device before but reading ...
zealous eagle
sharp comet
This is super cool! I had never heard of this type of device before but reading ...
Hi! Thank you for your kind comments, I would be stoked to submit for the newsletter and share my code! I will have to work my way through how to do that though... I followed the links on how to contribute at the bottom of this weeks newsletter, it looks like I need a GitHub account to edit. I’ll get started on it, thanks again!
sharp comet
zealous eagle
Hi! Thank you for your kind comments, I would be stoked to submit for the newsl...
Contributing via PR on Github is one way, there are a few others as well. You can tag @anne_engineer on twitter, or email to cpnews@adafruit.com with links / information about your project.
dapper plank

Finished my overview dashboard for all my house temp and air quality monitors
And I open sourced it too

GitHub
A display for your netatmo device for the magtag. Contribute to Brogie/netatmo-magtag development by creating an account on GitHub.
sharp comet
testing out some slightly fancier 9patch assets with the tilegrid_inflator. Nice results with some tweaked game assets I got in a pack.
 zealous eagle
sharp comet
Contributing via PR on Github is one way, there are a few others as well. You ca...
zealous eagle
sharp comet
Contributing via PR on Github is one way, there are a few others as well. You ca...
Thank you for the tip, email was a little more my speed... I did create a GitHub account and got the code up in my first repo... https://github.com/Airplane-Journal/CircuitPython-Crookes-Radiometer
GitHub
Crookes Radiometer for Circuit Playground Bluefruit and TFT Gizmo - GitHub - Airplane-Journal/CircuitPython-Crookes-Radiometer: Crookes Radiometer for Circuit Playground Bluefruit and TFT Gizmo
sharp comet
zealous eagle
Thank you for the tip, email was a little more my speed... I did create a GitHu...
Nice! thanks for sharing this and submitting for the newsletter 🎉. I see it in the draft now so it should be included in the newsletter when it mails out this week!
 rustic stream

My latest creation, Pinball Dreams mini cab. rpi + bunch of Arduino nanos in a custom 3d printed shell
 normal orchid
50 seconds of semi-epic loading music :-)
Zeus presents Pinball Dreams (un-emulated) for the Amiga A500, a true classic from the golden era of amiga gaming which must not be forgotten alongside the software house and all programmers that were involved in making this game.
Year of release: 1992
Pinball has never been one of my favourite types of computer game but this is a real beauty ...
 warm elbow
RPi400
ADAFruit Cyberdeck Hat
MakerFocus UPS
ADAFruit PiTFT 3.5inch
3D-Print Case


 granite parrot
@warm elbowhow are those keys caps made? It looks really cool.
cedar trellis
dapper plank
And I open sourced it too
Nice project! 🤩 Did you by any chance share the 3d printing files too? I love that magtag case, especially the grid type back.
warm elbow
granite parrot
<@542795370665869315>how are those keys caps made? It looks really cool.
I got them on Amazon! (not affiliated)
https://www.amazon.com/dp/B08V5896N9/ref=cm_sw_r_cp_api_i_2CBD9RBMQ1BBN7P7223K?_encoding=UTF8&psc=1

Custom Keycaps, XDA Profile PBT Keycaps, Japanese Ukiyo-e Coral Sea Style Keycaps for Mechanical Keyboards, Full 108 Key Set with Key Puller (Coral Sea)
upbeat geyser
Teaching myself sheet metal design, to be laser cut and bent into this 3D form
 granite parrot
@warm elbow aah I thought those are DIY by you
blazing dew
Freddy update: music box, new power supply, and eyes are a little shinier.
 gloomy juniper
My little project.
Receive and decode temperature from a couple of off the shelf rf433 temperature sensors. Show on the e-ink display and transmit to home assistant via mqtt

 distant stone
This post has been a long time in the making but I wrote up instructions on how to somewhat reliably use USB from WSL2 https://blog.golioth.io/program-mcu-from-wsl2-with-usb-support/

Golioth
Microsoft added USB support to Windows Subsystem for Linux (WSL). Here's how to set it up and use it when developing for embedded systems.
 gaunt flower
My presentation card/macropad using a QTPY M0 and Circuit Python
https://github.com/JaimeCababie/4-BIT-touch/blob/main/README.md

GitHub
4-BIT touch is a macro pad that uses key combos to execute actions. Programed in Circuit Python. Code and PCB files available! - 4-BIT-touch/README.md at main · JaimeCababie/4-BIT-touch

 solar wadi
So, I wanted to have a functional proof of concept for a web page that lists Circuitpython bundles' libraries and lets you chose a selection to download as a zip that will automatically include the dependencies which can be a chore to get when copying files from the bundle zip. And it can get you all the dependencies of a code.py file dropped on it. (Think circup --auto, hence the URL).
https://neradoc.github.io/circup-web/
sharp comet
solar wadi
So, I wanted to have a functional proof of concept for a web page that lists Cir...
this seems super cool. I am getting a CORS error trying to use the page published in github.io. Is there a repo? I'm curious to try running it locally with some workarounds for cross site requests.
solar wadi
oh yeah CORS, I need to learn how to get around that... I would usually make that with server side code, but I am kind of targeting circuitpython.org
we have websites that link to 200 different content trackers, but we can't download one zip file from js...
solar wadi
sharp comet
this seems super cool. I am getting a CORS error trying to use the page publishe...
sharp comet
Thank you!
solar wadi
ok I put it here in a version that uses a server-side script to get the json and the zip from github
https://www.neradoc.me/bundler/


 smoky swift
Finally got off my butt and finished these for my kids. Big thanks to EdKeyes for some short circuit troubleshooting info, and the Ruiz brothers for the guide!

 frosty lark
Managed to get a Wordle bot working on an RP2040 + Waveshare LCD. Takes result input back from serial at the moment, but plan to add a few buttons for input
lucid bloom
I don't think I've shown this project here. It's my portable wifi scanner. 3x wifi dongles means it covers 15 channels per second plus it does bluetooth. I use gps+pps to get the time when network time is not available. My idea was to create something I could use plugged into power in my car and then carry it around for a while and have 1 capture file. The longer you run it/more data you collect the hotter it gets, it will start throttling after 4 or 5 hours or if you are in a city

 rain crown
Spam Likely Ergo Keyboard - Uses a single kb2040, 6x piso shift registers, 6x 9pin 10k,resistor networks, 4x trrs connectors, 48 kailh choc keys, hotswaps, a psp joystick and a 5 way navigation stick
Confirmed working with KMK. Extra pinouts available for sd card slot, spi interface, secondary i2c connector on pins d0,d1.
Parts from Adafruit, digikey, and mkultra.click.

 sterile coral
Just finished a preliminary QMK port for the Adafruit Macropad, I still need to cleanup my SPI OLED driver but so far the experience running QMK has been amazing
 lucid bloom
My Sunday morning project. Bluetooth bone conduction headphones for less than $70

Because the audio hat moves the connection points from center I can use 2 transducers without trouble putting it on. 10 minutes assembly, 10 minutes setup
exotic sierra
lucid bloom
My Sunday morning project. Bluetooth bone conduction headphones for less than $7...
That’s really cool! Nice work!
lucid bloom
I sometimes come up with something and buy the parts but just sit on it for a rainy day
So far it seems good, I should be able to run it for quite a while off a 10,000ma battery. I need to use my special USB cable to see how much it draws. I'm using a pi zero w. I also added a button to connect/disconnect my phone to the headphones.
 candid bough
I finally caved in and got one of those Nest cameras... ;^)
It's a -very- quick and dirty "project", but the other day I noticed that a bird had made a nest on one of my windowsills, so I grabbed a cheap webcam, loaded up an old RasPi with MotionEyeOS, and did a quick design and print of a glass mount for the camera.
Quality isn't too great, but it's a bargain-basement webcam with exposure control so poor that I had to put a heavy filter on it just to be able to expose in daylight conditions, shooting at a shallow angle through a double-glazed window, on a mount taped directly to the glass.
It's kind of amazing that it works at all.
 scenic siren
candid bough
I finally caved in and got one of those Nest cameras... ;^)
It's a -very- qui...
scenic siren
candid bough
I finally caved in and got one of those Nest cameras... ;^)
It's a -very- qui...
Oooh, that will be fun!
lucid bloom
Imo if it's temporary then it doesn't have to be the highest quality it just has to work, i do something similar for large winter storms. Tape is one of the signs that it's a temporary project @candid bough
solar yew
yah can't do this here because of canadian winters and most electronics not being rated at under -30oC + the possible condensation/handling water
lucid bloom
Make sure to share the end result or if anything cool happens. You have the perfect view of it.
 pale pumice
Thank you CircuitPython for letting me quickly prototype and play around with making a keyboard. In the photo: Seeeduino Xiao running CircuitPython, my own keyboard PCB designed entirely by a keyboard auto router I wrote.
 ancient skiff
LEDs though 0.3mm thick plastic look so good, minimal color shift even though the plastic is green (silk pla)
 burnt wyvern
I found these ancient 7-segment displays (Monsanto MAN1A) and decided to find the datasheet and make a simple driver for it! I might turn them into a watch. The only problem is that one display uses 8 GPIO pins so I'd probably have to use an I²C expander. Maybe this time I'll finally learn to make a custom PCB.
left inlet
I use Adafruit LED matrix and RGB Hat to build interactive displays. This one reacts to Twitch streaming events: https://clips.twitch.tv/FuriousFuriousGrouseStoneLightning-yDK0DVBijVEFhwLF

Twitch
Watch XtianNinja's clip titled "XtianNinja reacts to the LEDarcade "bits thrown" feature"
lucid bloom
I try to make it easy for other people in the house to get my attention when I'm working on something or I'm wearing headphones or both. When you press my summoning button my phone/headphones say something, the lights in my room flash and the lights in my basement work area flash too.
https://youtu.be/Mino-ql0dKc

how to summon me from the depths of mysterious circumstances
whole brook
Remixed the Pi Zero stand 3D model from way back in 2019 to add some mounts for a Pi Cam and breakouts! Finally got around to sharing it on Printables, if anyone's into that kind of thing.
https://www.printables.com/model/180910-raspberry-pi-zero-stand-stemmafied
I also made a bunch of remixes for various boards as well, like Feathers, the Clue, and a few more. Should have those posted to Printables sometime soon too.

 civic vale
Great job. I love the display rack in the second shot.
solar wadi
I particularly love the use of magnets, magnets are cool
whole brook
Yeah! The mag feet are amazingly useful. I stocked up on a bunch a year or so ago, didn't know they were a thing until they showed up in the MagTag Adabox.
Sadly they're out of stock now. 😦 I have no idea how to find those adorable little M3-screw mag feet now. 😢
solar wadi
resellers might have them (eg pimoroni does but that's on my side of the pond)
grizzled talon
Here's some photos of my custom NeoPixel Pyramids, being powered by the ATTiny85 on a PCB I designed. I'll be sure to finish documenting everything but here's a preview.


 exotic sierra
grizzled talon
Here's some photos of my custom NeoPixel Pyramids, being powered by the ATTiny85...
exotic sierra
grizzled talon
Here's some photos of my custom NeoPixel Pyramids, being powered by the ATTiny85...
Wow! Looks great!
whole brook
Spent the last few days learning more about Fusion 360 by modeling a protective case for the Flipper Zero's ESP32-S2 WiFi dev board (which I'm gonna try to port CircuitPython for soon, because why not?). Super niche project but was a fun way to lend a hand to the growing community around the Flipper.
Watched a lot of Layer by Layer videos while learning how to make a good case, so major thanks to @junior dust for the huge volume of educational content over the years. 🙏 ❤️
https://www.printables.com/model/179910-case-for-flipper-zero-wi-fi-module-v1
 grizzled talon
exotic sierra
Wow! Looks great!
grizzled talon
exotic sierra
Wow! Looks great!
Thanks!
solar yew
Learn a thing or two about BJT transistors : https://youtu.be/pWEvI6I17LE

Learn how to use a BJT transistor as a switch, there are some theory mixed with practical measurements and explanations.
Streaming Gear Used:
RØDE NT-USB MIC:
https://amzn.to/3EPc5QZ
#BC547 #2N2222 #BJT #TRANSISTOR #THEORY
 sharp bobcat
Hi Show-and-Tell folks! I think I have something fun to talk about with you on Wed.
Well, at least I hope to make it so I can thank you for all the things that made this project possible: @sharp comet's progressbarUI, @junior agate's IO support, @glad roost and @sterile lodge ... to name a few of you. ☺️ That list is far from complete. Anyways, here is a link to the project:
https://github.com/flavio-fernandes/adaio/tree/master/evbays/matrix_portal
More on that on Wed PM (hopefully!).
sharp comet
sharp bobcat
Hi Show-and-Tell folks! I think I have something fun to talk about with you on W...
That is awesome! I love the UI you came up with. If memory serves I think @night bronze made those vertical progress bars. You could submit that for the weekly newsletter if your interested in more people seeing your work.
 junior agate
sharp bobcat
Hi Show-and-Tell folks! I think I have something fun to talk about with you on W...
junior agate
sharp bobcat
Hi Show-and-Tell folks! I think I have something fun to talk about with you on W...
woah
sharp bobcat
sharp comet
That is awesome! I love the UI you came up with. If memory serves I think <@3611...
@clear matrix is it okay if I make a PR as Tim suggested for my project? ^^
I see you just merged _drafts/2022-05-03-draft.md so maybe we best to do it next week?
sharp bobcat
@clear matrix https://github.com/adafruit/circuitpython-weekly-newsletter/pull/307 <--- if that is useful. 😉
 frosty lark
Finished up my portable physical wordle bot.
 sharp bobcat
hi all. Is this the right place for someone who wants to participate in the upcoming show and tell?
rough root
sharp bobcat
hi all. Is this the right place for someone who wants to participate in the upco...
You want to be in the #live-broadcast-chat thread
Look for the Streamyard link
sharp bobcat
ah, TY!
rough root
np
 long solstice
Hello, this is my first post here. I hope I am posting in the correct segment to talk about a project that I am working on.
I also need your help to decide which module to pick for my project (please read below)
I am working on a new revision of PlainDAQ.
PlainDAQ is a simple, useful tool to add basic precision analog functionality to your Raspberry Pi Pico board.
Subscribe if you want to get notified: https://www.crowdsupply.com/kuncu-teknoloji/plaindaq
PlainDAQ has:
✅ Low-noise, low-drift 12-bit 500k sps/s ADC for capturing wavefroms
✅ 10-bit DAC for creating waveforms
✅ Low-drift voltage reference
✅ Bipolar voltage supply
✅ Optional Wireless Connectivity.
In the new revision I've made the following changes:
✅ Changed the form factor
✅ Added QWiiC connector (to connect to various gadgets)
✅ Moved terminals to the same side. The new terminals can accept dupont cable
✅ Added cool visuals 😁 (top left corner)
There is one thing left to decide, I need to decide what module to use. I have two modules that I can source easily and they are:
1-ESP-WROOM-02 (Wi-Fi) Vote 🇦
2-HM-BT4502(A) (BLE) Vote 🇧
I have to pick one, please help me decide. 😁
Here are the pics of the new PlainDAQ with each module: (blue one is the wifi module, the black one is the BLE)


 exotic sierra
Probably works here, though it is crowdsupply so #crowd-supply might be better
But super cool product!
long solstice
exotic sierra
But super cool product!
Thanks!
Let me know if you have any feedback to give me, anytime 😄