#show-and-tell
1 messages · Page 22 of 1
 wary atlas
 upbeat geyser


 modest raven
I've made a tool that automates the placement of clusters of parts in KiCAD : https://github.com/cgarcia2097/kle-placement-router

GitHub
KiCAD plugin written in Python for programatically placing clusters of components onto a PCB from a layout file. - cgarcia2097/kle-placement-router
 brittle nymph
I wrote up a blog post on resistance and voltage dividers: https://blog.demofox.org/2021/06/27/resistance-and-voltage-dividers/

 coarse fjord
I put together one of those Conway's Game of Life kits. I was out of practice with soldering but it turned on and worked first try so going slow and careful paid off.

I have been fascinated with Conway's Game of Life since I read about it it Steven Levy's book, Hackers when I was a young teenager. Adafruit sells a kit that plays it in hardware, so I really enjoyed building this kit. The kits can connect for larger numbers of cells, so I will be building some more.

 lean elbow
The RP2040 QT Trinkey plus a Wii Nunchuck breakout and some nylon standoffs make a pretty cool and compact custom nunchuck adapter 😄


 shadow sail
I made an Arduboy that has Rumble , and an "Ardumiibo" scanner for putting real life 3d printed collectibles into your Arduboy games.
https://youtube.com/playlist?list=PLI37KAai0mUhJ3Yi7gZaNxqZhPj6SuK46


Hackster.io
An Arduboy based nod to Tiger Electronics handhelds, Rumble Features, and Amiibos. By William Wimberly.
 shut shard
Here's my fully-featured HID compatible, plug and play remote receiver. Took a few hours of work.
 dawn acorn
Not bad for the AMG8833 8x8 thermal sensor! Uses linear interpolation code from here: https://learn.adafruit.com/improved-amg8833-pygamer-thermal-camera/circuitpython-code but stripped right back for use in my PicoPicorder.


Adafruit Learning System
Now with higher resolution and fortified with iron (colors)!
 gusty shard
Today in the lab.

 clever plank
I made a thing 😄

Project AGV made for my mechatronics study. this is only the engine part.
Easy to use and attach sensor and electronics ontop.
All files free to use. Head over to:
https://github.com/Remlly/AGV
Do send me videos or pictures of your project
Music: ride of the valkyries
CAD program: solidworks student edition.
I make no money of this and cl...
 sacred timber
clever plank
https://www.youtube.com/watch?v=r_xRG8e-q2k
sacred timber
clever plank
https://www.youtube.com/watch?v=r_xRG8e-q2k
Hi @clever plank, you've done a very nice job on the design, especially choosing to not start with a kit but from the ground up. I'm curious to know more about its programming. I see from the video you've added ultrasonics on the front and sides, so how have you gone about making the robot autonomous? And any plans for bumpers or an IMU (to detect collisions or falls) should the ultrasonics fail?
 lean zodiac
Oh hey

either that was intentional (thank you) or I got lucky that the neopixels are on one of the pins I can use as the (unused) SPI Tx, because PIO isn't working yet and bitbang neopixel is gross
 limber swan
Making my Matrixportal query my Octoprint server to get the current print status, still needs stability work. Top row is the current file, middle is time left, bottom is a progress bar
Working on an idea I had for the PyPortal that will do the same but show snapshots of the current print as well
 viscid halo
@twilit rune I just saw this. Very nicely done. When are you publishing the library? I think you called it 'bb_spi_lcd'
 ancient skiff
I had to print a few keys before getting it "just right". Big thanks to the author of "KeyV2" openscad library for 3d printable keycaps!

my custom key profile can print with the "face" of the keycap right on the bed, making it easy to do the colored legend by a single "change filament at layer height".


the stem geometry is REAL fiddly so there's a lot of trying while changing the two adjustment numbers by .05mm or less per test; and then just swapping rolls of filament [both were hatchbox brand PLA] it can stop fitting. It required patience.
 shrewd zealot
I referenced a handful of learn guides and threw together a Macropad with multiple keymaps. Holding down the rotary encoder while turning changes the keymap. The screen updates with the current keymap and key legend. I posted my code to GitHub. https://github.com/dgriswo/Macropad_RP2040


GitHub
Contribute to dgriswo/Macropad_RP2040 development by creating an account on GitHub.
gusty shard
OLED Vanity: 5x5 grid display https://gist.github.com/rsbohn/3683b5776edf254c584e93cafdcd8bbb
ancient skiff


With all the color sensibilities of Star Trek: The Animated Series 🙂 but the enclosure 3d printable design is essentially finished and I'm pretty happy with the geometry. I could make the "rim" go up a bit more, though.
 exotic sierra
Ohhh that looks great
Just want to share a project someone else is doing that uses a board I made 🙂 https://mobile.twitter.com/deckerego/status/1411752369768046598

The @oakdevtech PixelLeaf RGB Matrix is the perfect replacement for the Unicorn pHat that TallyPi has been using. Next up is moving the HTYP server to Python 3,and migrating to the NeoPixel Blinka library.

 Twitter
·
Twitter
·
 dire meadow
Congrats, skerr
 supple mortar
I just open-sourced a project i've been working on. It's IoT display gadget firmware for esp based boards. https://github.com/tavdog/general-tron/tree/master

GitHub
Contribute to tavdog/general-tron development by creating an account on GitHub.
 dreamy cipher
Hey all, I have a project I'd like to share. I'm calling it the PowerBand for now. Here are the features in V2 which I just finished:
Feather S2 and 128x64OLED with STEMMA Fuel Gauge and Temp/Humidity Modules and a port for extending the chain. A 2000mah battery pack and a custom dial selector that I designed using what I'm calling "magnetic haptic feedback" which selects 2 lasers, a light, black light, and originally a flashlight until I ran into some trouble. Let me know what you think!


Oh - and it's also a charger for my earbuds... I integrated the soundpeats t2 into it. It also has 3 custom connector magnetic pogo pin ports supplying 3.7, 5 and 12v.
dreamy cipher
Something that would be very useful not only in the next iteration of this project is a basic mosfet switching STEMMA module that just has something like 8 outputs for switching up to 12V or more ideally. If anyone could give any assistance with designing such a board I do have some experience just not specifically with STEMMA. I'm also not formally trained, so most of the deeper maths and circuit methodology I wont be able to follow. Let me know if this makes sense
 candid crescent
dreamy cipher
Something that would be very useful not only in the next iteration of this proje...
candid crescent
dreamy cipher
Something that would be very useful not only in the next iteration of this proje...
Maybe a product idea for @exotic sierra 's Oak Dev Tech?
dreamy cipher
The usefulness is pretty clear I think but especially in this scenario because you accomplish with i2c what would normally be a ton of IO which would all need wiring through the neckband to the other side
this dial uses a series of magnets and a selector magnet to activate Reed switches through a waterproof wall. My next plan is to use a magnetometer instead and then switch mosfets like discussed but a serial module would be ideal (a STEMMA magnetometer already exists)
lean zodiac
I kinda wanna make that now (the STEMMA MOSFET board)
upbeat geyser
A little math could convert the magnetometer readings to an angle, which you could then use to control something just like a rotary control, but coupled via a magnetic field.
dreamy cipher
That's the idea ^
I do YouTube as well, not much on electronics thus far (mostly philosophy) but it's this https://youtube.com/channel/UCpbR9Ga1GcroozoVKi70hMg

not sure if that's koscher for the chat so apologies if not. Anyway if anyone could help me understand the hardware requirements for the STEMMA switch board or a general methodology for how to go about tackling that project I'd be really appreciative.... I want to learn primarily here
lean zodiac
maybe #help-with-projects?
but in general, (assuming you are talking about the mosfet board?) you'll need to specify a lot more specifications than "8 channels, 12V or maybe more"
dreamy cipher
Sure. I guess the problem is I'm not sure of the full requirements yet but generally I overbuild things and so I would spec it for up to 16V on maybe 2 of 6 outputs and up to 5 on the others... that part's somewhat arbitrary. I've designed a mosfet board that switched a 300w TEC bundle off an adafruit trinket pro but I really don't know the nitty gritty details of the IC aspects of doing a STEMMA correctly if that makes sense. I'll probably crosspost over on help-with; thanks. If anyone wants to DM me to talk more or collaborate please do.
 ebon garnet
Put some bling into Collin's MP3 Feather. Using the 1x4 NeoKey QT board. Added the 4 button as a previous mode button
 ancient skiff
Finished print with this much filament left (the piece on the left)

Sooooo good though

 vestal salmon
For the ham radio operators, here is a touch Morse Code keyer run by the Feather RP2040. Two connections for touch the dot and dash. Two buttons, preprogrammed to send common messages, rotary encoder to change the keying rate and a toggle to control two different radio transmitters.

key detail. small PC pad grounded with 1 meg resistor.

Interior view. Feather is on a small proto board for ease in connections.

Would be nice to print in plastic, but the Radio Frequency signals from high power transmitters demand that all be shielded in aluminum cases
sacred timber
vestal salmon
Would be nice to print in plastic, but the Radio Frequency signals from high pow...
You can use aluminum foil on the inside of a chassis, with a spray adhesive.
vestal salmon
Maybe, but a few holes in an aluminum bud box is far simpler and probably not as toxic.
 slow sky
ancient skiff
Sooooo good though
slow sky
ancient skiff
Sooooo good though
This an open-source project?
I'd like to see about building one
ancient skiff
@slow sky soon! I'll be making a guide out of it with Adafruit in the next weeks.
It'll have PCB design files, 3d printable files, etc
slow sky
Oop
I'm excited, emote got sniped
ancient skiff
yeah, the name of the emoji hit a content filter. We like to keep the language all-ages here.
slow sky
I understand that, looking forward to the project
ancient skiff
I've had a heck of a fun time working on it!
 floral parcel


Lightsaber go woosh
It was my first time a solidering project went my way with out error and I didn't have to trouble shoot for 10 years
 narrow topaz
dreamy cipher
Something that would be very useful not only in the next iteration of this proje...
narrow topaz
dreamy cipher
Something that would be very useful not only in the next iteration of this proje...
something like this?

The SparkFun Qwiic Quad Relay is a unique power accessory board, used for switching 4 high powered devices from your Arduino or microcontroller using I2C.
dreamy cipher
yeah thats the idea. I'd prefer solid state though
@narrow topaz that's awfully bulky too... obviously mosfets are more difficult and take a little more technical ability but some basic nmosfets should be doable in a satisfactory form factor i think
ancient skiff
@floral parcel 😍
lean zodiac
I'm really curious how many amps you were wanting out of the board?
 cedar dew
Hi Guys. I've uploaded the stls and sketch to the following link - https://www.prusaprinters.org/prints/70434-tron-legacy-disc-display-with-base-and-electronics
Tron Legacy mini disc and display base
lean zodiac
well I may be putting in an order for a I2C controlled 4-channel MOSFET board >_> (assuming the thing works and I didn't do something quite silly)
dire meadow
upbeat geyser
A little math could convert the magnetometer readings to an angle, which you cou...
I believe @exotic sierra has some magnetic encoders in his shop
exotic sierra
Do I?
dire meadow
Oh wait
exotic sierra
I thought about carrying them but I never actually found one I liked to carry
upbeat geyser
The AS5162 is one possibility
But with a little trig, you can use an ordinary 2-axis linear sensor as a magnetic angle sensor too


 scenic siren
 cunning lava
Fancy!
 glad roost
cunning lava
glad roost
cunning lava
often freehand stuff looks better than I could do with a "clean" design, and it's much faster
lean zodiac
Waiting for my prototype boards and the parts, but my design for an i2c controlled 4 channel n-mosfet driver (sorry, you put a good idea in my head)
 dreamy cipher
@lean zodiac thanks for the schematic man!
lean zodiac
- not a man, 2. I'm probably gonna be selling it, but do plan on releasing the files as open-source hardware as soon as I'm sure it doesn't blow up
dreamy cipher
- apologies. 2. sounds good
lean zodiac
( also I'm stuck until August anyway, as the micro I'm using is back-ordered until then, which was one of the earliest I could find )
dreamy cipher
yikes. yeah seems like that's a common situation. I appreciate the feedback; I think it's a nice module to have at anyone's disposal
Honestly idk how smart this is but I'm in communication with a patent attorney about the magnetometer dial idea.... it's expensive obviously. I know basically nothing still about patent/intellectual property law but if anyone could point me in a useful direction I'd be appreciative... as in are there resources available to inventors who want to publish open source but just don't know how/make some type of revenue from their work? Thanks.
dreamy cipher
ive searched the uspto and didnt find anything remotely similar honestly
i know the basics of searching but just don't know the resources available to me as an inventor honestly. i have 2 or 3 other novel ideas i just can't get anywhere
i work at a smoke shop. i dont have 2 or 3 grand floating around esp after the pandemic lol
i have an idea for a waterproof spooling mechanism for wires....so imagine retractable earbuds for this project but waterproof
infinite waterproof rotary switches also dont exist
that I've seen or can find
lean zodiac
for infinite, you probably want "encoder" not "switch"
dreamy cipher
true
lean zodiac
https://www.mouser.com/datasheet/2/54/3315-776436.pdf is IP67 (no ingress of dust, protection against the effects of immersion in water between 1cm and 1m for 30 minutes)
 ruby basalt
with regard to the magnetometer dial reader, note that this device https://rochestergauges.com/product/jr-and-sr-r3d-dials-lp/ has been around for quite a while. Rotary Hall sensors are common. It's also patented https://patents.google.com/patent/US6564632B2/en

Rochester Gauges
Application The Rochester Remote Ready Dial, R3D® – LP, is a magnetically-driven, Hall Effect compatible dial. Dials are utilized on stationary applications where direct reading plus an electrical signal to a remote fuel level monitor may be required. Models are available to fit all Rochester Junior, Senior and Snap-Onliquid-level gauges. Roche...
A liquid level gauge assembly including a dial assembly having a shaped magnet and a removable magnetic detector with a magnetic sensor, preferably a Hall sensor. The dial assembly can provide both visual and electrical signal outputs of the liquid level measured by the gauge assembly. The shaped magnet has a variable thickness which, in c...
dreamy cipher
I know they use a series of halls for DC sin motors but that's a series of switches similar to the reed switch design i made
ruby basalt
Not sure if infinite waterproof is sufficiently different to merit a patent. It would take $$$ to write it so, IMO.
dreamy cipher
is a basic magnetometer module using hall effect or maybe EBE?
or is it literally a magnetic pin on a potentiometer nowadays?
ruby basalt
what you really want are these https://www.nve.com/lreSensors
I'll be using one of these https://www.nve.com/angleSensors in our own product. Note the choice if interfaces.
dreamy cipher
a thought... you could almost have a 3 dimensional dial in this regard. if it was a flat sided ball like a 20 sided die almost you could roll it around in a housing and get settings too... kinda niche and weird but maybe itll spur an idea
thanks for the info
ruby basalt
trackball? 😉
dreamy cipher
pretty much!
dreamy cipher
yeah
it'd be a weird feel. it would be really cool to have the die be suspended but defeats the concept of having a magnet suspended
you couldn't magnetically levitate it if it was a polar magnet that you needed to adjust the orientation of that is
 craggy wolf
@dreamy cipherOne of the requirements to obtain a patent is that it must not be obvious to a skilled practitioner in the trade.
For example, if you asked several engineers how to do what you are proposing, would any of them describe something similar.
Another requirement is a similar design must not have ever been openly published. Not simply that you can't find a similar patent.
ruby basalt
careful.. you can't suspend a magnet without active control. Basic physics theorem, Earnshaw's Theorem. q.v.https://www.kjmagnetics.com/blog.asp?p=electromagnetic-levitation
K&J Magnetics - Incredibly strong neodymium magnets at affordable prices. Large variety of stock rare earth magnets available.
dreamy cipher
i've never tried it and know very little about it i just want a floaty selection die lol. maybe considering that fact though levitating a die in such a manner would probably give you all the data you needed anyway for selections. the question would be if there have been experiments with machines that could compensate for someone fiddling with something you're actively balancing
ruby basalt
The short answer is yes. An active control would probably involve generating pulses of repelling fields. That implies use of coils, which implies that the coils are reacting to the motion of the levitated object by generating an induced voltage. Also a basic physics theorem, Lenz's Law.
The levitation problem has been solved in real life in, for example, levitating magnetic trains.
dreamy cipher
yeah, I've seen people levitate supercooled balls and whatnot and i know they use it in maglev...side note i know johnson controls is working on a maglev compressor for their york chillers... probably already in production. anyway this is an interesting concept i think. maybe I can come up with something clever to simulate the concept
maybe instead of levitating it you repel it against a housing and push it down to select
ruby basalt
Have fun. One of my grad sch. classmates wanted to show me how to to make a high-Tc superconductor in a microwave oven. Never took him up on it tho.
dreamy cipher
sounds like a wise choice haha
have them send pictures 😉
so let me know if this checks out... if the "cage" or housing the selection die was made of ferrous metal then a spherical magnet should always be attracted to it no matter the orientation, correct?
or even if there was a sufficiently large piece of ferrous metal at the center point where you would want attraction, correct? so in which case rather than repel a magnet with changing field just have a metal "attractor" to orient it
ruby basalt
Not sure I get the geometry, but a general result for inverse-square forces is that a particle within a surrounding shell subject to the same force experiences no force at all. A charged particle in a conducting hollow sphere suspends itself at the center. This is true for gravity as well, since it's an inverse-square force.
dreamy cipher
I'll try to draw up some cad to demonstrate the concept. if i'm understanding what youre saying that's equally interesting but I'm not convinced that's the case (that i'm understanding correctly lol)
dreamy cipher

effectively the sphere would be a 12 sided die in this case and the cage/housing would be ferrous or there would be a ferrous piece of metal where the smaller ball is floating above. the sensor would be at the bottom tracking the potted magnet in the die
you would depress the die and rotate it in the housing to select a new setting
it would be really cool if you induced a current into the die on each side where you potted a small led and it lit the die up in a different color depending on its orientation lol
could also just hook it to the MC though and change it that way
dreamy cipher

that would make more sense if you could get it to behave the way im describing because you could actually scroll it easier
 frosty topaz
dreamy cipher
it would be really cool if you induced a current into the die on each side where...
frosty topaz
dreamy cipher
it would be really cool if you induced a current into the die on each side where...
If you can get enough little coils in there, you could create small currents from the electromagnet if it's strong enough? Might need some research and experimentation, but that's basically how wireless charging works...
upbeat geyser
There's a video on youtube showing little wirelessly powered LEDs like that
 lucid bloom
I built a pi slackbot to control our ac at the makerspace. I made the pi part, my friend Josh designed an adapter to hook up the ac vent exhaust to an exhaust fan. He also added a heat sensitive switch to turn the exhaust fan on high when it gets over 104. We tested it twice and it works so far none of the hot bits read above 115 after a half hour of use. It will need some more testing before it can fulfill it's purpose of precooling the makerspace before meetups.


 tacit delta
only thing that makes me sad is that its not dual hose
 magic drum
I'll show my project in Wednesday, is there any adictional software I must download? Oh. I found a page with the information.
 cobalt dove
World's first hand-wired analog keyboard (macro pad) is complete! Goes well with my Riskeyboard 70 😄 https://gfycat.com/fluidsevereairedale

 ancient slate
Hi! I’m kinda new here (and new to electronics beyond simple e-textiles), but I recently made a light-up helmet with a Metro Mini and some Neopixels 🌟
 tacit delta
nice
sacred timber
ancient slate
Hi! I’m kinda new here (and new to electronics beyond simple e-textiles), but I ...
If you're new to electronics it'd be hard to tell from the project, looks pretty impressive. Great job!
ancient slate
Ah thanks!! I have experience with soft circuits but I’m wanting to figure out new ways to combine electronics with fashion/accessories.
Admittedly I struggle with electronics but it helps to document each of my projects in my own words. I enjoy the challenge haha — here’s more about the helmet if anyone’s curious 🥰 https://www.brittzay.com/blog/robot-unicorn-helmet-rgb-led

Brittzay
Introduction to RGB LED’s and implementing them into a basic project (in this case a rainbow unicorn helmet, because why not?)
sacred timber
Robot Unicorn Attack! Robot Unicorn Attack! Robot Unicorn Attack! (I believe this is how Zippy the Pinhead would handle that name.)
I like that you felt the need to provide a safety disclaimer... and your choice of paper mache to get you to the vacuum mold. Kinda classic.
...and I thought I recognised the accent. I'm up in the Wellington area (Kapiti coast). Hello across the Cook Strait!
ancient slate
Welp you can never be too careful with the safety disclaimers - especially on the internet haha
Wonderful to meet another kiwi on here!! Really happy to have found this server, a lot of it goes completely over my head but everyone seems so helpful 😊 looking forward to learning more!
sacred timber
ancient slate
Welp you can never be too careful with the safety disclaimers - especially on th...
You're I must say (with no negative intent) somewhat of a typical Kiwi: modest, which is a good thing. From watching your video I'm sure you'd be entirely capable of making a much more complicated electronics rig under your next project. Both Adafruit and Pimoroni have lots of cool hardware with relatively easy software libraries backing them up, as you've clearly already found. You did everything right, even used shrink wrap on your wire connections, a solderless breadboard for prototyping, you've got an engineer's brain as well as an artist's, so sky's the limit! I have a background in both engineering and the arts so I'm qualified to judge 😆
BTW, did you design all or some of the Wild South clothing? I've been looking for a jumper for my partner and there's a few that look very nice.
Ah, sorry, I answered my own question: "The following garments are styles I have designed, and/or have had a role in the product development." The Cotton Stripe Stitchy Knit and Bamboo Cotton Silk Cable Knit are among them...
ancient slate
I had some generous help from a family member who gave tips along the way, but I do appreciate hearing that haha.
The only thing I wasn’t so sure about was if resistors were required or not with the Neopixels? The resources I followed used them, but I still don’t know a whole lot. Planning on revising that for the next project.
(Welcome to DM me about Wild South, yes I design for them haha)
sacred timber
Well, we're both on the same time zone and it's waaay past bedtime for me, work tomorrow morning.
As for the NeoPixels, you're actually on the right server to get help with that kind of thing -- there should be Adafruit personnel around who can answer any of those questions, and they have their own forum as well where their techs are quite helpful (same with Pimoroni too).
Have a good night!
ancient slate
Appreciate it! Will look into it :)
 solar wadi
ancient slate
I had some generous help from a family member who gave tips along the way, but I...
solar wadi
ancient slate
I had some generous help from a family member who gave tips along the way, but I...
the Adafruit Neopixel Überguide might answer some questions on that: https://learn.adafruit.com/adafruit-neopixel-uberguide/best-practices
 thick wedge
RK84 Macro keypad extension. Running with a Pro Micro. 5 hot-swappable switches, a rotary encoder, and an OLED screen. Don't forget the neopixel RGB 😉 Just started developing the QMK firmware for it. The Custom PCB is "plugged in" to the keyboard via a 3D printed frame that slots into the USB port.

 rose phoenix
thick wedge
rose phoenix
thick wedge
And SA Laser novelties
Or GMK? Not really sure from this angle actually
Something Laser
 azure salmon

A few parts from my friend abroad.
2x esp32's
1x usb 2.0 host shield
1x digispark attiny85
i have a plan tho

Cyanide & Happiness has a Patreon! Become an Ultra Mega Pal today ► http://bit.ly/cnhpatreon
Join us to get behind the scenes video and bonus content ► https://www.youtube.com/channel/UCWXCrItCF6ZgXrdozUS-Idw/join
Subscribe to Explosm! ► http://bit.ly/13xgq7a
#comedy #cyanide&happiness #halfoff
ARE YOU TIRED OF PAYING FULL PRICE FOR THINGS??...
thick wedge
rose phoenix
Or GMK? Not really sure from this angle actually
GMK! 🙂
gusty shard
In the lab...
 rose phoenix
gusty shard
In the lab...
rose phoenix
gusty shard
In the lab...
In.. Dexter's lab?
 azure salmon
@normal estuaryhow do you wire those rotary switches
frosty topaz
Looks like perfboard connections in V1 and a PCB breakout for V2. Dunno if the PCB is custom or from someplace else?
 azure salmon
ok cool
 normal estuary
 normal estuary
Resistors are 10k
azure salmon
ahh ok
normal estuary
Yeah most of the rotary encoders are the same pinout.
azure salmon
ok something to mess with thanks
normal estuary
For proto 2, I made the PCB and is designed for TinyPICO. But Proto 2 isn’t working and I’m waiting on Proto 3 PCBs. They have simpler routing.
normal estuary
azure salmon
ok something to mess with thanks
I can create a schematic for Proto 1 and share my ESPHome yaml today after work.
azure salmon
thanks
 quaint oxide
Thanks for the Linsn LED video wall tutorial. I used it to rebuild this roadside traffic sign into Big Orange Dance Machine. https://mcm.org/big-orange-dance-machine/

The dance machine will make appearances at various public spaces across the Twin Cities in 2021.
gusty shard

 zinc anvil

Last project I did had the AdaFruit breakout for a gas sensor, made my life so much easier
lean zodiac
Those NeoKeys remind me of this thing I had made because the switches fall out too easily... Because no, I'm not gonna glue my switches in place...
 tacit delta
zinc anvil
tacit delta
zinc anvil
hmm that reminds me of that old 3d rendering of robot head
normal estuary
lean zodiac
Those NeoKeys remind me of this thing I had made because the switches fall out t...
Ah yes, good plate!
lean zodiac
the screws aren't really needed either, but they make it 100% stable instead of 80% stable
normal estuary
Yeah I much prefer having screws/standoffs for hotswap sockets
zinc anvil
tacit delta
hmm that reminds me of that old 3d rendering of robot head
Based on a comedy sketch by David Mitchell called "Birth of Cheesoid"
tacit delta
just looked at that quick
interesting
i couldnt find what i meant sadly. its quite old. 80s, maybe 70s, 3d render tech demo
it has nose like that, it goes into cup of water, it sucks it up and head turns transparent as it fills with water
it's be laughably easy to do now, but it wasnt back then
wary atlas
Took some help from the fine folks hanging around #help-with-circuitpython , but I now have a MiniMacroPad to use for work so I don't have to type out long things all the time! Big time saver. Just need to print a case!

 inland vale
Hi all, I'd like to share with you all a project that I've working for +2 years... (6 months ago a posted here a WIP version).
TL;DR: It is Bluetooth gamepad support for CircuitPython.
https://gitlab.com/ricardoquesada/bluepad32-circuitpython
If you have any questions, please, let me know. Happy to help!

 lapis jasper
@inland vale neat! I'd suggest email cpnews@adafruit.com about it too
inland vale
lapis jasper
<@!701149183024955432> neat! I'd suggest email cpnews@adafruit.com about it too
thanks. I'll do that 🙂
 cerulean dirge
Howdy folks! I hooked up a CO2 sensor, and I’m excited about it: https://cdn.discordapp.com/attachments/845457104085319700/866985608115257384/IMG_7144.mov
cerulean dirge
No? It’s still fine. Why do you ask?
tacit delta
oh i saw what i thought was smoke coming off right part
cerulean dirge
Ah. Nope - the auto exposure is definitely set weird from the non-diffused LEDs being in frame though.
tacit delta
lol ok thats good then


 hard prairie
I actually did something like that myself, but I used full breadboards both sides
wary atlas
Why not use a saw? XD
wary atlas
Oof... Well, at least you didn't slip and ruin the whole thing XD
azure salmon
for a guy that shattered his arm i have steady hands
azure salmon
i'm waiting for my last opperation but covid has delayed it
wary atlas
Oof...
wary atlas
So my grandpop has trouble staying on the line to sign his signature... So I made him this little guide plate! (Ignore the ugly print, need to tweak printer settings, but it'll work fine)

 native bridge
awww :)
wary atlas
It's amazing what a few grams of plastic can be so easily molded into these days
native bridge
yeah :D
i feel blessed with my Ender 3v2
it has rekindled all of my past hobbies
wary atlas
I love my Ender 3 Pro. But that didn't print this, I used my baby printer XD
native bridge
i wouldn't even be here doing electronics today if i hadn't gotten it just a few weeks ago
wary atlas
My baby printer with minor mods... Working on a mod for the interface so it's not hidden under the bed and isn't just a click wheel knob
 wary atlas
Mhmm. It's not amazing, but I love it
native bridge
yeah it's cute ^w^
wary atlas
And so portable!
 errant relic
wary atlas
My baby printer with minor mods... Working on a mod for the interface so it's no...
errant relic
wary atlas
My baby printer with minor mods... Working on a mod for the interface so it's no...
So have you experienced the extruder or arm hitting those paper clips yet? I have 2 of those with glass plates and I haven't found a good way to attach the clips.
wary atlas
errant relic
So have you experienced the extruder or arm hitting those paper clips yet? I hav...
Yeah, when I first put the glass in it was a problem. I just pulled the clips back towards the edge a bit, as pictured
 errant relic
wary atlas
Yeah, when I first put the glass in it was a problem. I just pulled the clips ba...
errant relic
wary atlas
Yeah, when I first put the glass in it was a problem. I just pulled the clips ba...
cool. good tip. I'll try that. Thanks!
wary atlas
No problem ^_^
wary atlas
I like glass XD might do that eventually
 feral granite
First thing I've ever made with a micro controller. It's the heart of Te Fiti from Moana. Printed the shell in translucent resin with neopixels, an itsybitsy, and a lipo on the inside.

 wary atlas
Ohh, very nice! Will that be part of a cosplay, or was it just because you felt like making it?
lean zodiac
quick! put that back where you found it!
wary atlas
lol
 drifting crater
lol mother nature is fond of electronics XD
wary atlas
XD
coarse fjord
So today I figured out how to get an app into and load from the web-based app loader for the Bangle.js https://www.adafruit.com/product/4811

Bangle.js is an open, hackable smartwatch that anyone can code for - and best of all it's open source so you don't have to worry about a server getting shut down and losing ...


I modified the simple thermometer app that takes a reading from the heat sensor, only it is in Celsius so I converted it to Fahrenheit for Americans and other people that don't use the Metric system (but its mainly just Americans, right?)
ancient skiff
behold XUT: The eXtremely Unergonomic Trackball (pronounced: zoot)

I saw https://www.adafruit.com/product/5060 and decided to see if I could make a finished mouse replacement out of it. My 3D modeling is adequate to make a box with some holes in it, but not to make a device that is at all pleasant to use. Oh well, lessons learned(?)

"'There is one who may claim it by right. For this assuredly is the palantír of Orthanc from the treasury of Elendil, set here by the Kings of Gondor. Now my hour ...
wary atlas
Might have been more ergonomic to have the buttons around the trackball -- left on the left, right on the right, center on top. Then you can lean your fingers over to left and right click
But also just simple holes with the same buttons
But it's a working thing, so success!
ancient skiff
@wary atlas indeed, that is a good idea
I'm not sure I'm going to experiment further, but I'll keep it in mind
wary atlas
Always good to have options, even if you don't explore them
frosty topaz
wary atlas
Might have been more ergonomic to have the buttons around the trackball -- left ...
Another option is to place the buttons near where the thumb would rest. You may have to design a wrist rest for it to make sense, though...
wary atlas
Indeed
coarse fjord
So I have been struggling to keep a good battery connection to these boards and a friend suggested JST connectors and I have been teaching myself how to make them with a lot of trial and error. If you look on the left that was my best effort to date. With each failed attempt, I would have to cut some wire. What started as a six inch lead ended up at one inch! Almost to the point of unusable. So I ordered 4 more battery holders from Digikey, and the one on the right also started out at 6 inches until I think I finally figured it out, went carefully and now have a nice, solid connection with long leads!

 formal hamlet
coarse fjord
So I have been struggling to keep a good battery connection to these boards and ...
formal hamlet
coarse fjord
So I have been struggling to keep a good battery connection to these boards and ...
Couldn't you solder in new leads and crimp new connectors?
Or splice new leads, you could add more life that way
coarse fjord
formal hamlet
Couldn't you solder in new leads and crimp new connectors?
I didn't have any appropriate wire and being chronically ill I have not had the spoons to set up soldering for a while. I hope when I feel better I can solder a couple more of the Game of Life kits
feral granite
wary atlas
Ohh, very nice! Will that be part of a cosplay, or was it just because you felt ...
Just made it, I am pretty competent at fabrication but am just diving into electronics so going through assorted tutorials, would like to maybe sell props in the future!
feral granite
ancient skiff
behold XUT: The eXtremely Unergonomic Trackball (pronounced: zoot)
I can totally see this being a a control box that someone would pick up with both hands. My wife use to work at a children's museum and they would build stuff like this for exhibits all the time.
wary atlas
feral granite
Just made it, I am pretty competent at fabrication but am just diving into elect...
You're off to a great start ^_^ I think fabrication and nailing aesthetics is the hard part, and you already have that down pat!
 solar yew
Posted my first ever video, made some weather changing LEDS with some adafruit libraries.. definitely awkward to be on camera but it's a start lol
formal hamlet
coarse fjord
I didn't have any appropriate wire and being chronically ill I have not had the ...
Bummer, hope you feel better
solar yew
 untold birch
the effect is really nice, will probably "take inspiration" from it :D
untold birch
the effect is really nice, will probably "take inspiration" from it :D
Thanks! There's a great adafruit neopixel animations library which I was using!
native bridge
Time to show off my box 
https://cdn.discordapp.com/attachments/816041342626431007/868679936825753650/PXL_20210721_044612208.jpg
humble beginnings
the 3D printed case with little allotments for all the electronics to be placed on :3

https://cdn.discordapp.com/attachments/816041342626431007/868680235485364224/PXL_20210723_120613942.jpg
the electronics installed using I2C technology so that only 4 shared wires are required to connect all the peripheries to the motherboard

https://cdn.discordapp.com/attachments/816041342626431007/868680360635007036/PXL_20210723_145900623.MP.jpg
a test program to ensure the screen is connected correctly

the finished product 
a tricorder sensory package for conducting science and discoveries with :D
 gilded bluff
We used a regular 3D printer to make a clay 3D printer. Platform based on kossel design. Extruder based on 3 years of head butting a wall... Instagram.com/themakerspace

 tacit delta
wow!
wary atlas
gilded bluff
We used a regular 3D printer to make a clay 3D printer. Platform based on kossel...
That's amazing! Is it using a regular slicer like Cura, or was special software needed? Is there a writeup or guide on the modifications?
normal estuary
My keyboard collection. I love me some Macropads.
 gilded bluff
wary atlas
That's amazing! Is it using a regular slicer like Cura, or was special software ...
gilded bluff
wary atlas
That's amazing! Is it using a regular slicer like Cura, or was special software ...
Yes just using cura, tuned the nozzle and filament thickness to suit the flow of clay
 plush gorge


Once again - THANK U ADAFRUIT!!
<3 <3 <3 Used the little charger to bring the cells in my Sphero RVR battery pack, back up a level where it'll charge & balance itself.
I swear, EVERY makers tool kit should half at least a half dozen of these little gems!!
wary atlas
gilded bluff
Yes just using cura, tuned the nozzle and filament thickness to suit the flow of...
Nice. I'm guessing the hard part was figuring out how to deliver the clay consistently to the nozzle? Does it actually heat the clay at all?
gilded bluff
wary atlas
Nice. I'm guessing the hard part was figuring out how to deliver the clay consis...
Exactly right, I started with the rich rap pastestruder years ago, moved to a motor driven a piston, then to compressed air with screw feed. No heating the clay, I don’t think it would be worth the effort, clay takes about 2 days to dry, just need to make sure you geometry suits the process and strength of “wet” clay
wary atlas
gilded bluff
Exactly right, I started with the rich rap pastestruder years ago, moved to a mo...
I would certainly love a write-up with as much detail as you can muster! So many things I'd love to print in clay... Sadly not enough time to do a tonne of experimenting to get it to work
 marble mantle
Next installment of my project to create a custom robot based on Zumo chassis, but with extra manipulators, AI camera, and programmable in Circuit Python
Code is easy, of course, but at least it shows that all hardware works as expected
The MCU, motor drivers, firmware, reflectance sensor array...
Thanks to @exotic sierra for his help with PCB assembly!
wary atlas
That would be a great companion in Left 4 Dead... Grabbin' pillz
marble mantle
I was thinking of a wine bottle, but it calls for a larger robot 🙂
wary atlas
Hehe, that's the next stage
 gentle bane
made these 50Wh battery sticks


And unlike VRUZEND, they work perfectly.


 native ingot
I do film photography, developing, and printing. B&W printing uses light-sensitive paper, but it only responds to light at <550nm wavelengths, so a red light (called a safelight) can be used to illuminate the workspace (darkroom) without affecting the paper.
My incandescent safelight bulb burned out and new ones are absurdly priced, but generic red lightbulbs aren't always safe for photo paper, so I figured I would try making my own. LEDs are pretty cheap and pretty bright, and I have done some PCB design, so I found a 2-pin constant-current LED driver and threw together this thing.

 gentle bane
That is awesome af
so is that a single module that will go with like, a row of them
or are you doing everything with just that one little thing in a box or something?
is intrigued
ur using now-tech to preserve a past art form.
native ingot
I wasn't sure how much power I needed, so I included options for 1 or 2 drivers (150 or 300 mA)
native ingot
That's the whole device
native ingot
It's the replacement safelight
gentle bane
yes I understand now
native ingot
Can plug into a standard USB port
And it's way brighter than the original incandescent bulb, with a tiny fraction of the power consumption
upbeat geyser
I wonder if it would be better to use a shorter wavelength (like 620nm) LED which would give more visibility for the same power (but the film may be more sensitive to it) or a longer wavelength one (like 660nm) which would be a safer wavelength but might require more brightness for the same visibility. I guess the response curve of the photo paper would be useful to determine something like that.
Looks like the old Ortho paper wouldn't care much
 native ingot
The paper is reported to have no sensitivity above 550nm, so as long as the emission spectrum doesn't cross below there, I think it's better to be shorter wavelength for better vision. Film can't be handled under any kind of light, though, so it's only an issue for paper.
upbeat geyser
Fuji Acros 100 panchromatic paper would care some
 native ingot
I'm using Ilford MG
Looks like I don't have the printed spectrogram
But it cuts off at 550
Will test this soon, hoping to get no fogging with 10 mins exposure
upbeat geyser
Oh yeah, that nosedives at 550 so you're good. LEDs are nice as they have a narrow band emission without residual light at other wavelengths
Aside from the typo, this is very encouraging
 native ingot
CD test is slightly concerning though, as it shows a slight green tail
I never did the CD test with my old bulb though
upbeat geyser
I wouldn't expect any green tail with a red LED, unless it's a phosphor-based LED
native ingot
This one's orange, nominally 617nm
And it's hard to tell how much of a tail there is
Not entirely sure how to read this graph (dotted line means ???) But it looks pretty safe to me
 upbeat geyser
I don't know either, but the dotted line could be "visual intensity", showing where the LED output lies in relation to the perception of its brightness.
If so, it would appear to be about 1/3 as bright as an LED at the peak of visual sensitive (a yellowish green color). Whereas a 660nm one would be about 1/10 as bright.
gentle bane
see
you people are talking about stuff that I have no clue about
That just does NOT happen outside this community.
looks all that up to like, learn it rn
gentle bane
fascinating
candid crescent
gentle bane
*looks all that up to like, learn it rn*
Good instincts! 👍
candid crescent
One fun fact related to that is that you're limited in the speed of data you can send in a fiber optic cable because if you try to send too many bits per second, it changes the color of the light too much... 😁
 glacial iris
Newbie here, is this where I can share info about my new weather station?

 grand rose
Is it connected somewhere ?
glacial iris
I have it connected to a local MQTT broker, which in turn is a part of my Home Assistant environment. I also upload the weather information to Weather Underground: https://www.wunderground.com/dashboard/pws/KCASANTA3711/graph/2021-07-27/2021-07-27/weekly
Weather Underground provides local & long-range weather forecasts, weather reports, maps & tropical weather conditions for locations worldwide.
 glacial iris


It uses a Raspberry Pi Zero W. It's powered by a solar 12V battery trickle charger, a 12V 8Ah SLA battery, a buck converter to bring it down to 5V.
wary atlas
Nice
glacial iris
I used KiCad to design a custom circuit board to connect to the 2 RJ-11 jacks coming down from the wind and rain sensors and the JST connector for the BME280 sensor card. This card uses the I2C interface. The wind direction is an analog voltage level, so I needed to add an MCP3008 analog to digital converter, and connect it to the SPI pins. The little E-Ink display is also an SPI device, so I needed to connect it to the CS1 GPIO pin and configure the driver to use that instead of CS0.
I chose the E-Ink display as it only requires power to update it. I wanted to be sure that an extended stretch of bad weather wouldn't let the battery run down. The solar panel is 20W, which seems to be plenty, though, and the battery ought to hold for a week by itself.
wary atlas
eInk is great for stuff like that, and even when it does update, it's pretty low draw
glacial iris
Exactly. I only update the display once per minute, enough to show that the system is alive. I think an OLED display would draw significantly more power.
wary atlas
Probably, even if it was only a relatively small number of active pixels at lowered brightness
glacial iris
I still need to build some kind of Kiosk display for Home Assistant, so the weather information is visible without being on the computer or phone. I haven't decided what that should be...
frosty topaz
For indoor or outdoor use?
glacial iris
For indoor use. This whole project began because I was frustrated at how poorly the remote temperature sensor for my LaCrosse weather station worked. Also, I wanted to see wind direction and speed. But then, this needed to be away from the house to be effective. So then, it needed to use WiFi to get the distance. So then... and down the rabbit hole!
I already have a Raspberry Pi with a HiFiBerry DAC board running Volumio to play music. That's using the Pi's 7" touch screen. I might go that way again for the kiosk, but as the weather station is only running a Pi Zero and the touch display only works with a Pi 3 or 4, that seems like overkill.
(Of course, this whole project seems like overkill! 🙂 )
frosty topaz
Just a bit. But isn't that what makes this so much fun?
glacial iris
Anything worth doing is worth overdoing.
frosty topaz
Since the main purpose of this is a simple display and not extensive logging and data analysis, a small display with buttons or a gesture sensor would probably be enough.
If you wanna get fancy, you could build a smart mirror and integrate it that way, too...
glacial iris
Oh? What's a smart mirror?
I do want a nicer display, so I can also use it to control Home Assistant switches.
frosty topaz

Adafruit Industries - Makers, hackers, artists, designers and engineers!
This post from OkupaTIC takes you through the journey of building a Pi based magic mirror. The results are awesome and they do a nice job of describing the process. Looking for projects to mess wit…

The idea is to stick a display behind a sheet of one-way glass/acrylic, and finish it off with your own framing or mounting of preference.
glacial iris
Ah, interesting. Maybe I could build one that has voice response, so I can ask it who the fairest in the land is...? 😆
glacial iris
BTW, love the XKCD cartoon in the mirror, much better than a fortune cookie!

 lean zodiac
Round one prototype!

got the wrong footprint for one part (and had it backwards anyway, but could still bodge-wire across it to test) + still don't have the micro (which I will hand-solder on once I get it)
horrible alignment too but
wary atlas
Very!
gentle bane
ikr


 cedar dew
Electronics test on my TRON legacy baton build
 sterile gazelle
glacial iris
For indoor use. This whole project began because I was frustrated at how poorly...
sterile gazelle
glacial iris
For indoor use. This whole project began because I was frustrated at how poorly...
I built a similar weather station, and am also pondering what to do for a local phone-less display. Smart mirrors come to mind, but I also have a couple of 1602LCD displays.
sterile gazelle
glacial iris
I used KiCad to design a custom circuit board to connect to the 2 RJ-11 jacks co...
I think I have the same weather station sensor kit, working with the analog voltage/resistance readings for wind direction was certainly interesting! The RJ11 jacks were a bit of a struggle for me, I ended up just using some phone cords with the ends chopped off. Dedicated board for those would be an awesome iteration
glacial iris
@sterile gazelle I have extra boards (had to order 5 minimum), or I could send you my KiCad files if you want to play with it. I started out trying to create solder traces on a perf board, but found it beyond tedious and difficult to get solder to flow where I wanted and not where I didn't...

I don't have a photo of the populated board that I actually used, unfortunately, but it was easy to put together. As you can see, the board is as long as a Pi Zero and about 2X as wide.
You can see my python code for the station at: https://github.com/darrylri/weather_station

GitHub
Code for weather station project. Contribute to darrylri/weather_station development by creating an account on GitHub.
wary atlas
Personally I would recommend an eInk display to keep power draw low, but if you want a high refresh display, a Sharp memory display might be a better option. They don't need to power a backlight, you can see them from ambient light alone, so they're lower power than a regular LCD.
normal estuary
More e-Inks
 wary atlas
Ohh, one with a backlight, that's cool!
lean elbow
Spent last night hacking around using the tone player code at https://learn.adafruit.com/adafruit-macropad-rp2040/macropad-tone as a starting point. This allows multiple keys to be pressed at once (using a stack to track the order that the keys were pressed), and lights up the currently playing key brighter than the others. Releasing the current note will fall back to the next pressed key in the stack, if there is one. I made a gist if anyone is interested (https://gist.github.com/apendley/801177211bb55c780847e885f38ec418), just grab the project bundle from the macropad learn guide and replace the code.py file.

Adafruit Learning System
Twelve buttons, an OLED, and rotary encoder - it's the MacroPad RP2040!
sterile gazelle
lean elbow
Spent last night hacking around using the tone player code at https://learn.adaf...
Nice! I was thinking about how I could use the speaker on the macropad, and my 2yo son will love pressing the keys to see it light up and hear it
lean elbow
sterile gazelle
Nice! I was thinking about how I could use the speaker on the macropad, and my 2...
Awesome! 😄
sterile gazelle
I currently have it setup as hotkeys, added Zoom, Google Meet, and Lightroom macros. Is there a channel for MacroPad or the AdaBoxes?
Would be cool to have a place to share macros
scenic siren
@lean elbow Interesting! If you'd like, you can submit it to the MacroPad library under the examples/ directory. It's different enough from the basic tone example that I wouldn't mind including it. You'll need to add our licensing bits to the top, but you would include your name as the author.
scenic siren
sterile gazelle
I currently have it setup as hotkeys, added Zoom, Google Meet, and Lightroom mac...
Here is as good a place as any to share your code. We don't have a specific channel.
lean elbow
scenic siren
<@!338136878828224512> Interesting! If you'd like, you can submit it to the Macr...
Oh okay! I'll try to do that in the next day or two!
scenic siren
lean elbow
Oh okay! I'll try to do that in the next day or two!
Great! Feel free to post any questions you have about the process in the #help-with-circuitpython channel or the #circuitpython-dev channel and someone (possibly me, but this leaves it open for others too) will be able to assist you.
lean elbow
scenic siren
Great! Feel free to post any questions you have about the process in the <#53736...
Will do, thank you! 🙏
 tidal ermine
hey all! i love the ingenuity behind all the products at adafruit, i've been piecing a little something together to solve something in my life.
i made a thing for parties where people can send messages to a phone number and have them appear on a big screen (https://github.com/souramoo/TextWall), using the twilio api and a webpage using socket.io and nodejs as a backend, and in the past it's always needed my laptop to be present. i've been invited to a wedding in nov and my dear friend who is the bride asked if i can provide the same there too - i'm a little nervous about leaving my laptop unattended, and so i thought i'd build a better solution. i got a raspberry pi zero w, and was going to use that to drive the screens instead cause then i don't need to worry if it gets stolen/lost.
eventually i ended up building myself a cheap multifunctional portable linux computer with a tiny screen and battery (very cyberpunk lol) so that i can use it for other projects too, and set it up so that it's always connected to cloudflare via argo tunnelling so i can ssh into it from my desktop wherever it is, and set it up so that it autoconnects to my phone's wifi hotspot if i'm out and about
still todo:
- trim down the gpio pins on the pi to get an even more slim profile between the rpi and the minitft hat
- pisugar2 battery pack arriving tomorrow!
- framebuffer based keyboard that i can use the joystick and buttons to operate so i can use the shell on the go from the device
- autolaunch chromium on the hdmi output when new screen connected and navigate to whatever the python ui directs it to
anyone got any other ideas for a cheap tiny auxillary linux machine? 🙂

(the final ui will aim to look something like https://static.wikia.nocookie.net/marvelcinematicuniverse/images/a/a0/TVA_TemPad.png/revision/latest/scale-to-width-down/1000?cb=20210619231047 lol)

 prisma sequoia
Can't really beat the rasppi products for form factor and support
formal hamlet
@tidal ermine yep, I love pi0w and pitft, great combination of products

I did something similar, loads of fun
tidal ermine
ooh cool! what did you use the buttons for? i'm coding up something to listen and then translate it into keypresses on the console, and using ncurses to build up a UI
formal hamlet
I used the buttons for moving the reticle, changing the scale, freeze frame, saving a png, adjusting emissivity correction, etc @tidal ermine
GitHub
DIY Thermal Camera using an MLX90640. Contribute to pfn/thermal-camera development by creating an account on GitHub.
 distant raft
A “SMART” BUILD PLATFORM FOR MANUAL PCB ASSEMBLY
https://hackaday.io/project/179878-pnpassist

The PnPAssist is an open source innovative CNC table that position the next SMT component with a proper orientation for you to make hand assembly a lot more fun and way more efficient.
PnPAssist is a numerical, precise positioning device that makes tedious and repetitive manual PCB assembly easier for you and prevents you from making mistakes.
...
tidal ermine
Pins shaved down, UI coded, battery pack added, let's go with my little cyberpunk auxillary computer
exotic sierra
Very cool
marble mantle
@distant raftI saw that on Twitter - very cool indeed!
tidal ermine

Wrote a python Daemon that listens to the joystick and buttons, and translates that into keypresses for the console :)
distant raft
marble mantle
<@!697041480593965106>I saw that on Twitter - very cool indeed!
Thank you. @marble mantle You can find the discord server link on project page. We are trying to make it better together
 versed lava
Made a case for my macropad. The files are on thingiverse if anyone wants to print one. Its 2 parts - a cover that replaces the part you press the key switches in to and an optional shell. https://www.thingiverse.com/thing:4922256 I'm working on a slimmer version that replaces the bottom plate with the shell and has optional angled feed.


This is a form fitting case I designed for the Adafruit Macropad. Its designed to be used with square keys but will probably work with regular key caps. It has 2 pieces:
- Cover/Key plate - A top plate that the key switches press in to before attaching them to the circuit board. This replaces the part that comes with the kit.
- Shell - A ...

 hard oriole
I found a keycap on thingiverse and made a set by boolean-ing out some shapes I made in illustrator.

Printing in orange is okay, but then all LED colors are orange 😁 Will look to do another batch in the future when I get a white filament that diffuses.
 versed lava
hard oriole
I found a keycap on thingiverse and made a set by boolean-ing out some shapes I ...
versed lava
hard oriole
I found a keycap on thingiverse and made a set by boolean-ing out some shapes I ...
nice, my next project is replacing the inside of the relegendables on mine with ones that have a slot for the LED to shine through.
 obtuse root
@hard oriole are you able to share your files and settings?
hard oriole
obtuse root
<@!612004384213172374> are you able to share your files and settings?
Sure will do. I haven't done that before, so I will have to check the spot on thingiverse to see the rules for sharing modified work. Source was: SA Keycaps by kaelruland on Thingiverse: https://www.thingiverse.com/thing:2178185 [SA_Row_3_1u v0] The print settings were: .2 layer height, PLA @ 205, custom support under the stems only. Printed upside down so that if the unsupported bottom printed ragged it would be on the top [less viewed].

A set of SA profile keycaps. There are enough files for a standard TKL board (no +/return keys yet)
Spacebar is 6.25u, mounts spaced at 50mm from center.
Three-mount keys have mounts spaced 12mm from center.
If you're using this models for a render please at least let me know..
@obtuse root and I scaled SA_Row_3_1u v0 in the ZED to about 60%.
obtuse root
Thanks!
versed lava
Added an option for the shell thats slimmer and has optional feet to let you angle the pad:

 versed lava
Ok, hardware finished!! Added the final piece - custom printed black caps with vinyl cut legends w/ transparent plastic to diffuse the led light. If anyone wants the stl for the printed part I can put it on thingiverse - they print on an FDM printer and replace the white part of the relegendable keycaps that adafruit sells.


 cloud meteor

 empty crag
I’ve been experimenting with the MacroPad and the NeoTrellis boards … managed to get a 2x2 (8x8 grid) of neotrellis hooked up to macro pad over i2c … using JP’s Live launcher example, I modified it to turn the neotrellis into a clip launcher and the 12 keys on macro pad for transport. Currently looking at using the 8-bit ADC stemma board to add a few faders. Currently all written in circuit python, but I’ll probably port it over to C after my initial prototype is complete. I’ll likely wind up writing a custom live remote script for it as well, as the launchpad mini doesn’t quite cover it all. When it’s a bit more put together, I’ll put code up on GitHub.
 versed lava
empty crag
I’ve been experimenting with the MacroPad and the NeoTrellis boards … managed to...
versed lava
empty crag
I’ve been experimenting with the MacroPad and the NeoTrellis boards … managed to...
Wow - I hadn't thought about doing this... I have a neotrellis lying around too
empty crag
versed lava
Wow - I hadn't thought about doing this... I have a neotrellis lying around too
Yeah, I saw JP’s demo and figured the neotrellis would make a better clip launcher, then figured some faders and additional encoders could be useful … full blown control surface, 🤷♂️
versed lava
empty crag
Yeah, I saw JP’s demo and figured the neotrellis would make a better clip launch...
Yeah - its hard not to keep adding. I've ordered one of those tiny i2c trackballs for mine. I think I'm going to try to add it to the side of the case and make an ergonomic mouse/macropad all-in-one
empty crag
versed lava
Yeah - its hard not to keep adding. I've ordered one of those tiny i2c trackbal...
Nice - don’t think I’ve seen a track ball, got a link?
versed lava

Chicago Electronic Distributors
A tiny, RGBW-illuminated, clickable Trackball Breakout that's perfect for adding navigation or control to your Raspberry Pi or Arduino projects. We've taken a trackball module from everyone's favourite fruit-flavoured phone and added a bunch of clever engineering to let you build old-school interaction into your projec
empty crag
For those interested, here’s the code repo for the macropad neotrellis launch grid project I’m working on https://github.com/zoul0813/adafruit-launchgrid
GitHub
MIDI Launchgrid built with Adafruit Macropad, NeoTrellis and more. - GitHub - zoul0813/adafruit-launchgrid: MIDI Launchgrid built with Adafruit Macropad, NeoTrellis and more.
lucid bloom
Finished upgrading my war driving pi to a pi 4. Parts include pijuice, berryimugps, buzzer, rgb led, USB wifi x2, USB Bluetooth. I wanted it done now so I hot knifed my old pi 3 case into a pi 4 case.
 gentle bane
2.2kw

 hard mantle
versed lava
Ok, hardware finished!! Added the final piece - custom printed black caps with ...
hard mantle
versed lava
Ok, hardware finished!! Added the final piece - custom printed black caps with ...
Please post to thingiverser. Thanks!
versed lava
hard mantle
Please post to thingiverser. Thanks!
Added the STL to https://www.thingiverse.com/thing:4922256

This is a form fitting case I designed for the Adafruit Macropad. Its designed to be used with square keys but will probably work with regular key caps.
Update: Added an STL for the relegendable keycap with slot. It replaces the opaque part of the relegendable keycaps they sell on Adafruit and other sites.
Both use the same cover/key plate.
Co...
versed lava
hard mantle
Please post to thingiverser. Thanks!
The legends are a little trickier since they aren't printable. What I did was found something that was easily cut-able and diffuse and used my craft cutter to cut black vinyl sticker with the slot, stuck the sticker on to the diffuse material and trimmed the edges
 strong bramble
Hey all! Using a Trinket M0 and Adafruit's USB foot pedal tutorial/3d files, I made Shoom—a foot-activated webcam to show off your sneakers.
tacit delta
lol interesting
slow sky
strong bramble
Hey all! Using a Trinket M0 and Adafruit's USB foot pedal tutorial/3d files, I m...
I love this
strong bramble
slow sky
I love this
thank you!
scenic siren
strong bramble
Hey all! Using a Trinket M0 and Adafruit's USB foot pedal tutorial/3d files, I m...
Ok, that's delightfully hilarious. (And thank you for presumably trimming the end of the video before posting it. 😄 )
strong bramble
oh and if any of you are as interested in dumb stuff as I am, here's how it all works: https://github.com/lanewinfield/shoom
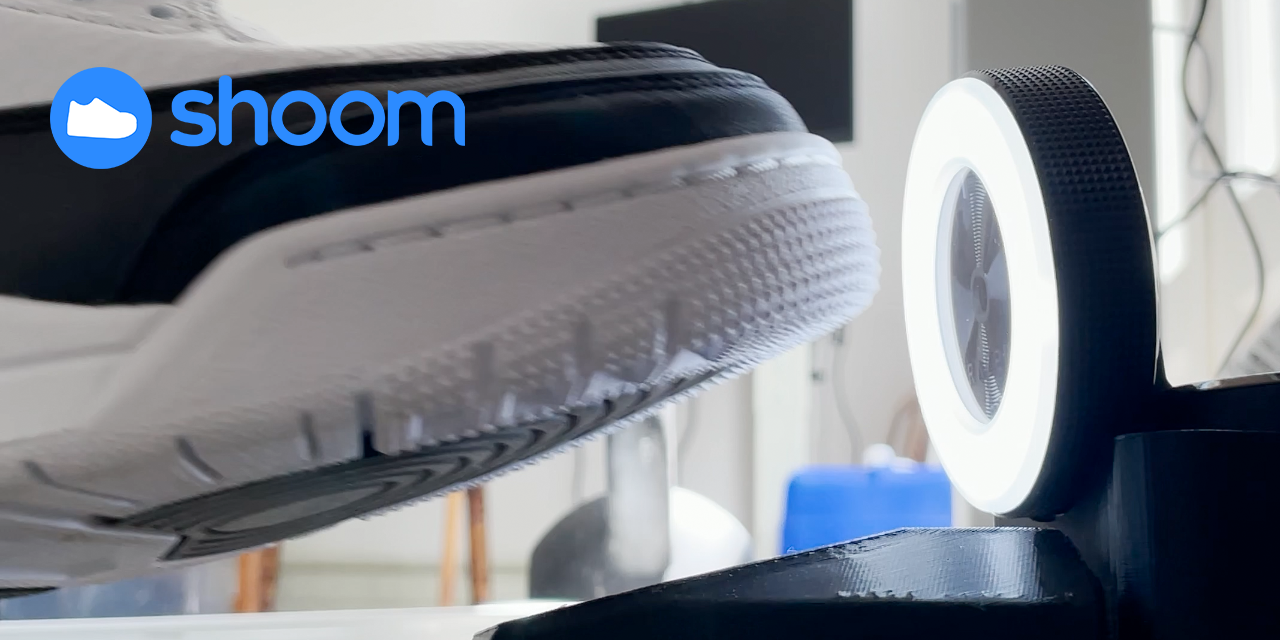
GitHub
a foot-activated webcam to show off your sneakers. Contribute to lanewinfield/shoom development by creating an account on GitHub.
scenic siren
strong bramble
oh and if any of you are as interested in dumb stuff as I am, here's how it all ...
I've passed this on to be added to the Python on Hardware newsletter that Adafruit produces. 🙂
strong bramble
scenic siren
I've passed this on to be added to the Python on Hardware newsletter that Adafru...
awesome!
 crystal parrot
I'm a retired electronic engineer. (Being retired is the best job I've had so far.) I had a 40 some year career designing and programming things that contained microprocessors. I don't have anything resent to show but I'm looking to get back into making gadgets just for fun.
I wrote an essay about the first thing I designed and built, a light-seeking robot, when I was around 12 years old in 1964. Nothing digital back then. It was all analog and it was inspired by a Carl & Jerry story I read in Popular Electronics. I still have that robot. You can see a picture of it and read the essay here: https://shavers.page/?p=39
Adafruit has some amazing things going on. Thanks for creating a fantastic company and all the info you put out in the world.

 dense yew
FeatherS2, using CircuitPython and a small handful of "libs" I wrote to interface easily with Atlas sensors (and NTP). This uses the Whiteboxes Hydroponics Kit, and measures nutrient solution Temp, pH, TDS, and EC (with Air Temp and RH coming)! I'll get the code on Gitlab in the not too distant future 😄 The kit comes with a feather huzzah, so I souped it up a bit with the S2 and the OLED shield. The NTP and Wifi bits are important as I'm planning on pushing the data to an IOT cloud of some kind (maybe just local ES, maybe an API somewhere)
 zinc hinge

GitHub
METAR Display for the Adafruit MacroPad. Contribute to flyinactor91/metarpad development by creating an account on GitHub.
I made a flight weather display with the MacroPad. It uses a driver running on the computer to fetch new data and update a JSON file on the CIRCUITPY drive which causes the MacroPad to refresh just like updating code.py
Has anyone found a good way of discovering the CIRCUITPY drive from Python code yet?
My method is using pathlib.Path with some common OS USB drive locations where code.py is in the drive's root. Tested on Mac, Windows, and RPi. Some insight with Linux distros would be helpful since I don't have any of them to test with right now
 solar wadi
zinc hinge
Has anyone found a good way of discovering the CIRCUITPY drive from Python code ...
solar wadi
zinc hinge
Has anyone found a good way of discovering the CIRCUITPY drive from Python code ...
I made a library/tool to find the full information on connected boards, including drives, serial ports, serial number... The drive part especially had to be platform-dependant and on linux I use psutil.disk_partitions() in particular to find the mounts.
The whole thing is here https://github.com/Neradoc/discotool, the platform stuff is in usbinfos_<platform>.py
You can use it as a library. Install it:
python3 -m pip install discotool-for-microcontrollers
And then something like that for example:
import discotool
for device in discotool.get_identified_devices():
  if "Macropad RP2040" in device["name"]:
    drive = device["volumes"][0]['mount_point']
    with fopen(os.path.join(drive,filename),"w") as fp:
      fp.write(filecontent)
Or use device["serial_num"] instead of the name to tie it to a specific device (you can read the serial number by just running discotool from the command line)
zinc hinge
That's pretty nifty. I'll give it a try


 bitter hazel
strong bramble
Hey all! Using a Trinket M0 and Adafruit's USB foot pedal tutorial/3d files, I m...
bitter hazel
strong bramble
Hey all! Using a Trinket M0 and Adafruit's USB foot pedal tutorial/3d files, I m...
i dont know why but i love this 👍
 tacit lake
Ha! Made a math game for kids on the macropad last night. https://github.com/omixen/macropad-math-game

GitHub
Math Game on Adafruit MacroPad built with CircuitPython - GitHub - omixen/macropad-math-game: Math Game on Adafruit MacroPad built with CircuitPython


 lusty siren
cerulean dirge
I'm proud of my first significant project from Adafruit parts:
lusty siren
cerulean dirge
I'm proud of my first significant project from Adafruit parts:
Looking good! First one down, many more to come, right?
cerulean dirge
Thanks! That's definitely the plan. This home automation stuff is really cool.
 devout verge
I’m working on a color picker for the macropad. RGB mode works well, HSL mode still has some issues.
versed lava
tacit lake
Ha! Made a math game for kids on the macropad last night. https://github.com/omi...
Threw it on my pad - turned out my top left key had a pin not seated properly but I fixed it and took a video!
tacit lake
versed lava
Threw it on my pad - turned out my top left key had a pin not seated properly bu...
Nice! Thanks for trying it out! 👍


 exotic sierra
Nice work
gentle bane
thank you


 gentle bane
 gentle bane
 sharp comet
this is not my project but I ran across it today and think it's a really cool idea. Combining together a virtual pet with a pomodoro timer. https://github.com/droxpopuli/pomodachi

GitHub
A Hardware Pomodoro Timer Virtual Pet. Contribute to droxpopuli/pomodachi development by creating an account on GitHub.
 hallow flower
There, I have upgraded my AdaBox Macropad with some box whites to test out, and the keycap that was missing from the adabox - fortunately I had planned an order shortly after so I could rectify it 😉

now my run/debug button shows proper adafruit spirit
I can definitely see how hot-swapping key switches can get addictive
didn't realize I needed a "switch puller" for best results, though. had to use the top "structural" pcb to kind of wiggle them loose - which is also why only the corners are upgraded to clicky whites.
maybe I should put the digikey cap on the lower-left corner which is "build"
oh man, where's the product suggestion room... an adafruit key cap that could replace my windows key would be perfect.
(but my main desktop keyboard, while having cherry mx browns, is so old that it lacks a Windows key, so I have my caps lock acting as the windows key, and right now, my secondary keyboard is actually a Lenovo rubber dome that feels pretty decent surprisingly, with reasonably small bezels, smaller than any of my other mechanical keyboards except maybe for a Model M2 which is why I'm using it.)
frosty topaz
hallow flower
didn't realize I needed a "switch puller" for best results, though. had to use t...
If you wiggle it side to side carefully enough, you might be able to pull the entire keyswitch plate off and pop switches off from behind. Just take care not to wiggle up and down, as that has a much higher risk of bending pins...
hallow flower
frosty topaz
If you wiggle it side to side carefully enough, you might be able to pull the en...
oh thanks for the advice. This is my first experience with these sockets and with bare switches actually
have a few homemade key cap pullers (wire whisk style) but no switch puller yet.
I can probably make one from some random metal bits, though, which is probably the safer bet. that or order a cheap one on amazon
frosty topaz
Yeah, the more keys there are, the harder it gets. The macropad can get away with it, but any keyboards larger than 4x4 or have a solid edge should definitely use a switch puller.
 whole cypress
I picked up a macropad, and wrote a quick bit of python to turn it into an element tracker for the board game Spirit Island.

(the missing keycap was a bit chewed up in packaging, they're sending some replacements)

Sorry for the vertical video! This is an element tracker I threw together for spirit island, using the Adafruit Macropad RP2040. It's ridiculous overkill for an element tracker, but was a really easy and fun project to throw together. Has all the features I'd pictured. With a bigger color screen I could do some crazier implementations, but t...
solar yew

The first 1000 people to use this link will get a free trial of Skillshare Premium Membership! https://skl.sh/zackfreedman05211
My most over-engineered project of all time is the a flashlight, laser, keystroke injection attack vector, current sensor, infrared thermometer, volatile organic compound sensor, and more. The only thing it's bad at is...
this is gold
i love it so much
upbeat geyser
Yay VFD!
solar yew
solar yew
https://youtu.be/sxfJOMjZeIs
Can it read terminal puzzles in fallout 3/4 and auto-solve them? 😄
cobalt dove
Oooh yeah! My white keycaps with transparent legends and black underset masks came out great!

This print is a brand new thing from my Keycap Playground: It uses the "underset mask" feature to add a 3rd material (equivalent of a triple-shot injection mould) underneath the top of the keycap that provides contrast for transparent legends. Without that mask the white PETG lets too much light through and makes it hard to see the transparent legends. It took 18 hours to print these (0.25mm nozzle) but it was totally worth it! I tested the light using the LEDs of the enclosure but I'll make a nice gif later 👍
versed lava
cobalt dove
This print is a brand new thing from my Keycap Playground: It uses the "underset...
this is great. can you post a closeup? Ive been printing my own bases for the relegendable keycaps and then using a vinyl cutter and some translucent plastic for the legends but those are square and wont work well on a more traditional keyboard
cobalt dove
versed lava
this is great. can you post a closeup? Ive been printing my own bases for the ...
Yeah I'll make a gif and post it shortly (when I'm done cleaning the house) 👍
It's bright out at the moment so maybe not the best time to record a keycap made for RGB LEDs though haha
versed lava
cobalt dove
It's bright out at the moment so maybe not the best time to record a keycap made...
im more curious aboht the texture of the cap with a .25 nozzle and fdm!
cobalt dove
versed lava
this is great. can you post a closeup? Ive been printing my own bases for the ...
Now that I've put some on the keyboard for testing I can see the underset mask needs some adjustment: https://gfycat.com/wellgroomedafraidbobwhite

My phone's camera doesn't have a macro lens
I'm going to re-print these to fix some issues
Mostly with the underset mask but there's an issue on the right side with the overhang on the second layer that I need to fix too
cobalt dove
@versed lava Here ya go: https://gfycat.com/admirablegratefularrowana (tried to capture the texture using the light)

As you can see--because I printed them on their sides--the keycap's layer lines run like this: || which should feel smooth on your fingers. No sanding required!
versed lava
cobalt dove
As you can see--because I printed them on their sides--the keycap's layer lines ...
yeah, that looks usable for sure. ill have to give it a go
cobalt dove
versed lava
yeah, that looks usable for sure. ill have to give it a go
Even though you don't need to sand it, printing on its side like this makes sanding easier if you want to go there. 320, 400, 600, then 800 grit gives keycaps a really nice texture IMHO. If you want that glass-like feel you can go all the way up to 20,000 😄
sharp comet
@warped siren 's staroids makes it's way to the Pew Pew M4 🚀 🪨

 warped siren
sharp comet
<@!352910176736772096> 's staroids makes it's way to the Pew Pew M4 🚀 🪨
warped siren
sharp comet
<@!352910176736772096> 's staroids makes it's way to the Pew Pew M4 🚀 🪨
neat!
versed lava
cobalt dove
Even though you don't need to sand it, printing on its side like this makes sand...
Hrmmm, I wonder if I went even smaller - 1.5 or 2mm nozzle - it would probably take a month to print a full keyboard - maybe I should spend a little time practicing my sanding!
cobalt dove
My wife was concerned that our daughter would lose the teeny tiny USB flash drive I bought her so I made a cover for it. She loves Naruto/Boruto 😁👍. Printing an improved version now with tighter bearing tolerances that also says, "NINJAS" on the right. On the bottom is the Fairy Tail logo with the text, "WIZARDS" 😄
 frosty topaz
versed lava
Hrmmm, I wonder if I went even smaller - 1.5 or 2mm nozzle - it would probably ...
frosty topaz
versed lava
Hrmmm, I wonder if I went even smaller - 1.5 or 2mm nozzle - it would probably ...
Don’t most people use resin printers for key caps lmao
versed lava
frosty topaz
Don’t most people use resin printers for key caps lmao
Yeah - I live in an open concept loft and won't put a resin printer in it. Way too toxic to have in a living space no matter how careful you are
 open nimbus
hey folks, I made a little game of life for the macropad https://github.com/stelly-dev/game_of_life_adafruit_macropad
It's probably not the best code since I'm just getting my feet wet with circuit python, but you can play/ pause and draw on the board


GitHub
A simple game of life toy for the adafruit macropad, written in circuit python - GitHub - stelly-dev/game_of_life_adafruit_macropad: A simple game of life toy for the adafruit macropad, written in ...
versed lava
open nimbus
hey folks, I made a little game of life for the macropad https://github.com/stel...
Looks like this needs the "adafruit_imageload" Library on top of the default ones the guide tells you to copy over - might want to add it to the readme
versed lava
open nimbus
hey folks, I made a little game of life for the macropad https://github.com/stel...
open nimbus
versed lava
Oops! Yep, thanks for the heads up! Just added it to the readme.
Would you happen to know if there's some kind of package manager for Circuit Python? Coming from nodejs I'm used to npm install to get all the dependencies, or should I just be bundling the libs with the project on github?
solar wadi
circup has a couple of options for installing the libraries automatically
- use
circup --autoto automatically install what is imported from code.py (or supply a file name) - use a
requirements.txtfile and callcircup install -r /path/to/requirements.txt
so you can include a requirements file with your project, using either the pypi names for the adafruit bundle Adafruit_CircuitPython_ImageLoad (making it installable with pip install -r for blinka) or the python module names (here it would be adafruit_imageload)
solar yew
House fire epic style 😎
 frosty topaz
solar yew
House fire epic style 😎
frosty topaz
solar yew
House fire epic style 😎
I’ve never set fire to anything with a usb cable. Ac cables, on the other hand…
marble mantle
Modern USB3 PD cables can help!
They can set fire to anything you want as easily as AC
 wary breach
I made a Majora's M4sk with the Monster M4sk, leather, and antlers. Still trying to get some custom eye code to work, but it's soooo pretty 🙂
 exotic sierra
Ohhhh
cunning lava
sharp comet
<@!352910176736772096> 's staroids makes it's way to the Pew Pew M4 🚀 🪨
Still didn't assemble the case? :)
Finally got proper keycaps for my low-profile CircuitPython keyboard.
 exotic sierra
Wow, looks great @cunning lava
cunning lava
I've been using it for almost a year now, as my main keyboard.
sharp comet
cunning lava
Still didn't assemble the case? :)
I tried but the screws were a bit too big for the holes in the case I could not tighten it all the way down.
I thought about 3D printing a case at one point, but I like the little characters on the silk screen honestly, it'd be a shame to cover them up.
cunning lava
@sharp comet they are self-tapping, with a bit more force they should fit
sharp comet
I applied as much force as I could, the screw ended up getting stripped.
cunning lava
:(
I guess the laser-cutting tolerances are worse than with my prototypes
you can also just glue toothpicks in those holes
or smaller screws and glue
sorry for that
cerulean dirge
I got a door sensor on an ESP8266 publishing over MQTT, and a raspberry pi subscriber to play a chime.
ancient skiff

I think this fine silicone-coated wire is my new favorite, but it unwinds so readily. I put together a little holder for it

you can easily unspool it as you need it

Silicone-sheathing wire is super-flexible and soft, and its also strong! Able to handle up to 200°C and up to 600V, it will do when PVC covered wire wimps out. We like this wire for ...
lusty siren
ancient skiff
I think this fine silicone-coated wire is my new favorite, but it unwinds so rea...
I should do that for some of mine. They're a mess
Also why does it decide an STL file is a text file and try to display it?
scenic siren
So much MESH.
lusty siren
It's really meshed up
scenic siren
Well played.
lean zodiac
everything is a text file if you try hard enough
ancient skiff
I did one for https://www.adafruit.com/product/4730 too. everything else on my desk is still a mess, but at least the wires are tidy now!

This stuff is called "wire-wrap wire" because it used to be used for wire-wrapping high-speed digital circuits on a special kind of contact board. It's pretty rare to see ...
 smoky swift
“Daddy, can you make my LEGO music box actually do something??”
Hopefully by the end of a weekend of soldering, CAD work, and 3D printing, this nest of snakes will be a working, self-contained unit. Pretty well got the code worked out, just have to replace the button with a Hall effect sensor and figure out how to run the neopixel sequence in parallel with the ringtone.

 severe scarab
I've been working on a high input count USB HID joystick library for CircuitPython, and I think (hope!) it's now stable and usable enough to share! It uses the new USB customization features in the 7.0.0-alpha to dynamically generate a Joystick descriptor with up to 8 axes, 128 buttons and 4 hat (POV) switches, and makes configuring GPIO pins and assigning them to Joystick functions a breeze. Full documentation is provided via Read the Docs, and there are a number of examples provided that demonstrate - among other things - using it with an MCP23017 GPIO expander, MCP3008 external ADC and capacitive touch inputs using an MPR121. I'm using it in my own arcade-style "cockpit" build, and thought others may find it useful as well.
GitHub
Turn a CircuitPython device into a joystick controller with lots of inputs. - GitHub - fasteddy516/CircuitPython_JoystickXL: Turn a CircuitPython device into a joystick controller with lots of inputs.
lusty siren
severe scarab
I've been working on a high input count USB HID joystick library for CircuitPyth...
Oooh, this is cool
@solar yew if I remember correctly was looking at building a high-quantity number of inputs joystick
slow sky
severe scarab
I've been working on a high input count USB HID joystick library for CircuitPyth...
Oh my God I have been looking for something like this
solar yew
thanks, bookmarked it, I kinda have prioritized other projects atm because I don't like the game enough to make a 400$ joystick for it 😄
lusty siren
I know the feeling. "This is cool. This is not $400 cool."
severe scarab
It's a slippery slope. My build started in 2015 when I discovered that my shiny new Saitek X55 stick/throttle wouldn't stay put on my desk (and weren't comfortable to use at desk height anyway), and it's been an endless cycle of "tinker with gaming chair for ages" followed by brief periods of actually using it for its intended purpose. I don't actually have any decent current pictures of the whole rig, but here's an old one. (Yes, it lives in the unfinished basement...)
 lusty siren
severe scarab
It's a slippery slope. My build started in 2015 when I discovered that my shiny...
lusty siren
severe scarab
It's a slippery slope. My build started in 2015 when I discovered that my shiny...
Why spend money to finish the basement when you could spend money on this sim?
severe scarab
Ha. Exactly. 😉 It has since been upgraded with additional 3D-printed control panels and neopixels, and the X55 got hacked up to replace the unhelpful generic labels with fancy backlit icons and a fingerprint scanner. The added controls are all using JoystickXL for USB HID comms back to the PC. The NeoPixels are driven from a separate Raspberry Pi.
 lusty siren
severe scarab
Ha. Exactly. 😉 It has since been upgraded with additional 3D-printed control...
lusty siren
severe scarab
Ha. Exactly. 😉 It has since been upgraded with additional 3D-printed control...
What do you use the fingerprint scanner for?
sacred timber
severe scarab
Ha. Exactly. 😉 It has since been upgraded with additional 3D-printed control...
Well, the project sounds more like a construction project, something you're building as a hobby, a journey, that has a side benefit of letting you play games on it. But your primary motivation is building things, which I totally understand.
severe scarab
lusty siren
What do you use the fingerprint scanner for?
There’s an FSR embedded in the seat that I use for occupancy detection. When you sit down, the neopixel by the fingerprint sensor flashes until you authenticate with it. Assuming your print is recognized, the rest of the chair lights up and the controls are activated.
lusty siren
severe scarab
There’s an FSR embedded in the seat that I use for occupancy detection. When yo...
No guests, then?
Feels sci-fi though. I love it
severe scarab
lusty siren
No guests, then?
I know a guy who can get past the auth-block when needed. 😉
lusty siren
severe scarab
I know a guy who can get past the auth-block when needed. 😉
You should make it have some intimidating auto voice and flash everything red when it fails. "UNAUTHORIZED USER DETECTED. VACATE IMMEDIATELY"
solar yew
I'd totally do it if I won the lottery thought (as in someone would do it and try to guess what I want 🤣 )
What's stopping me is really : idec tractor controls company would be like Ok 5000$ order minimum to make laser-etched tractor buttons.
- my project require a farming simulator mod
severe scarab
Farming Sims…! I never even thought to test JoystickXL with them - going to have to add that to the list.
severe scarab
lusty siren
You should make it have some intimidating auto voice and flash everything red wh...
I thought about that but - funny enough - I have always had a terrible time with fingerprint scanners recognizing mine. And since my gaming time is typically early in the morning when the kids are still asleep…let’s just say it’s not worth the risk.
lusty siren
severe scarab
I thought about that but - funny enough - I have always had a terrible time with...
Heh, yeah. Would be fun to have a switch for specifically to mess with people but that's work
upbeat geyser
Why not laser etch your own tractor buttons?
solar yew
Because I have no idea how that work and it would probably end up with 80 peoples wounded because of my clumsiness and damage to buildings around
 civic vale
I have a tractor (which I use to maintain the driveway, clear snow, misc. jobs in the woods) and every time I use it I think of it as a badly designed video game, with controls far more complex than needed. There are around thirteen different controls involved with just controlling it driving over good ground.
solar yew
severe scarab
Farming Sims…! I never even thought to test JoystickXL with them - going to hav...
The main difference is that switchs are required in my case and a key switch
key switch to start the engine like in a tractor 😄
blue if possible because I'm using new holland sidewinder as inspiration
upbeat geyser
Finding a blue keyswitch for a reasonable price is probably fairly straightforward. Finding a specific blue keyswitch is a whole 'nother can of worms.
solar yew
key switch of decent quality seems to start at 20ish$
upbeat geyser
These go on sale periodically for US$3-4 apiece https://www.goldmine-elec-products.com/prodinfo.asp?number=G25165

Alco heavy duty 2 position key lock switch has (on/off) SPST contact rated 4Amp @ 120VAC. Key can only be removed when switch contact is open (off position). Mounts in an oval 0.7" x 0.65" hole in panel. Front of lock switch is 0.943" square x 0.3" thick. Ove
I bought some as replacement units (and keys) for some REO/PMS lasers
solar yew
civic vale
I have a tractor (which I use to maintain the driveway, clear snow, misc. jobs i...
I already think that of an actual simulator, it's too realistic to my taste
like if you need seed you actually have to get a bag, pour it correctly, or get an elevator to put it on a truck, take it out open it on the right side, some will pill so you'll need a siloking or an excavator with a bucket to get it back etc
It's even worse with forestry so I use a lot of autoload
- they added a precision farming DLC so you actually have to sample your soil and get stuff like surefire to put ther correct amount of fertilizer/lime at the correct place to control ph/nitrogen
upbeat geyser
That sounds more like job training than recreation
solar yew
3rd PCB I have ever designed, it is a CH314a-based SPI/I2C EEPROM programmer with UART support.
 upbeat geyser
That's a really good-looking board!
gusty shard
Driving a solder iron today.

 solar wadi
@wary atlas I should post that here
(first protoype)

3D printed (flex) box


still needs some work to make the "labels" look good 😛
wary atlas
Ohhh, nice
solar wadi
has a night mode with a single red/orange low brightness LED indicating the youtbe/VLC mode
it sends keyboard shortcuts over bluetooth to the computer
and has an on-off switch
wary atlas
Nice. So you still need to have the window in focus, right?
solar wadi
yep
 slim finch
Night mode is something I really like! That's pretty great!
does your pc run a 'bluetooth listener' program in the background?
solar wadi
it's just normal bluetooth HID
slim finch
Ah nice! (ugh I need to learn how to write programs for that) Woo motivation to program more sensors! 😄
solar wadi
it's running Arduino, because I'm using a M0 bluefruit feather (though I did make a CP version) it's basically mashing together the demo code for Adafruit_BLE and Adafruit_NeoTrellis.
wary atlas
lol, mash
 little obsidian
This is--very much--an assemble-the-legos project (so far) but I'm pretty happy with how it turned out.
I've got a Treat & Train from PetSafe which takes 4 D-cell batteries. The D-cells last us ~3 months and I use D-cells for, quite literally, nothing else. The treat and train was a hand-me-down and the previous owner had planned to set it up with a wall-wart to avoid the conveyor-belt of batteries. Using their plans as inspiration I decided to turn it into a USB-rechargeable.
I justified it by:
- alkaline D-cells are last 4 months and aren't inexpensive
- 4 Rechargeable NiMH D-Cells are $20 and a charger is another $20
I started with verifying it will work with 5V instead of 6V by sacrificing a mini-USB cable and then i went and got a PowerBoost 1000 [1], a 6600 mAh battery [2], and (for good measure) a 5.2V micro usb wall wart [3]. The total came to $51 (I think) for those components, I justified that with "if i ever get rid of it i can harvest them all and turn other stuff into USB-recharables.
Janky photos for completeness attached
[1] https://www.adafruit.com/product/2465
[2] https://www.adafruit.com/product/353
[3] https://www.adafruit.com/product/1995

A photo of the Treat & Train in its natural habitat

Batteries being investigated by the dog

as an aside, enabling the discord threads thing for #show-and-tell would be kinda nice
smoky swift
smoky swift
“Daddy, can you make my LEGO music box actually do something??”
Hopefully by the...
Out of the prototype stage. Now I just need to clean up the code a bit.
 plush gorge


16S 30A LifePo4 pack with a puffy cell that I want to rebuild as a 11S battery pack for my E-bike.
Little nervous, any advice?
sacred timber
I would not under ANY circumstances have that inside my house. Extreme fire danger.
 tight agate
Better than lithium primaries, but not by much lol 😂
solar yew
plush gorge
Little nervous, any advice?
Only use it on a barge in front of these because they have like 200000 liters of fire extinguishing goodness
 solar yew
3rd ever PCB design, first with SMD. Improved on the cheap CH314a SPI/I2C programmers. Not sure if anything should be changed.

 snow mango
https://betterspigotdocs.blazify.rocks/ Since I personally hate Javadocs for spigot, I decided to create my own. Be warned that this early stages on heavily rely on contributors :) https://github.com/BlazifyOrg/BetterSpigotDocs
A modern and open source version of Spigot's documentation

GitHub
A modern and open source version of Spigot's documentation - GitHub - BlazifyOrg/BetterSpigotDocs: A modern and open source version of Spigot's documentation
lusty siren
plush gorge
Little nervous, any advice?
Personally, I wouldn't touch it. If one cell is bad, who knows what the other cells are like. And fiddling with batteries is a good way to start a fire.
And in the case of an e-bike, that'd be a fire you're riding.
solar wadi
which sounds awesome when you say it like that, but...
solar yew
snow mango
https://betterspigotdocs.blazify.rocks/ Since I personally hate Javadocs for spi...
erm, what does that have to do with electronics ?
or did you post on the wrong discord ?
I'm sure admincraft would be more interested
snow mango
solar yew
erm, what does that have to do with electronics ?
Pretty sure it’s not required to be related to electronics by say, but I am moving it to my own servers tonight, so I’ll post those too
Not sure tho
lusty siren
solar yew
erm, what does that have to do with electronics ?
This #show-and-tell channel isn't required to be electronics (just as the weekly Show and Tell show isn't). It can be anything that you've made and want to show and, well, tell about
solar yew
I see, thank for the clarification
versed lava
Ooh! In that case! I made my custom sneaker skates finally!

 vocal aurora
versed lava
vocal aurora
versed lava
Bought the vans and wanted to make skates then my partner bought me the plates and gift cerfiticates for the trucks, wheels, laces, etc
solar yew
I rented sneaker skates in Bushnell Park (Hartford CT) around 1979. ;)
lusty siren
versed lava
Ooh! In that case! I made my custom sneaker skates finally!
Those are awesome
I would worry about my ankles, though, if I were to wear them.
exotic sierra
lusty siren
Those are *awesome*
I would worry about my ankles, though, if I were to wear th...
Same
versed lava
lusty siren
Those are *awesome*
I would worry about my ankles, though, if I were to wear th...
My normal skates are jam skates which already have a lot less ankle support (for dancing) - I also do a circus apparatus that requires strong ankles - but yeah - these are for casual skating only!
 sharp bobcat
@median spoke It arrived in the mail this weekend. Thank you so much!!!! I was expecting a sticker, not this awesome little PCB. You rock.

 median spoke
sharp bobcat
<@!228322543507865601> It arrived in the mail this weekend. Thank you so much!!!...
median spoke
sharp bobcat
<@!228322543507865601> It arrived in the mail this weekend. Thank you so much!!!...
Glad you got it! The github repo has sample code to use it: https://github.com/gamblor21/SnT-Badge
formal hamlet
I also made my first pcb design recently, very basic though, just a cable breakout board
 sacred timber
I just posted a new video to the NZPRG YouTube Channel, showing my KR01 robot testing out a "roam" behaviour:
** Testing the Roam Behaviour on the KR01**
https://youtu.be/65TagAqW0PM

This is a test of a new "Roam" Behaviour on the KR01 robot, a discrete behaviour in a Behaviour-Based System. This uses a Subsumption Architecture implemented in Python, as part of the "kros-core" operating system.
The Roam Behaviour begins by waiting for three seconds and then setting the forward target velocity of the robot to SLOW. The robo...
 sturdy summit
Hi, wanted to share my raspberry pi based handheld mutantC v4. >> https://mutantc.gitlab.io/index.html
Here is a review video
https://youtu.be/BESuyftW3oY

Order any size color of PCB from PCBway starting from $5: https://pcbway.com/
Support this project: https://www.paypal.me/rahmanshaber
Build guide :
https://www.instructables.com/MutantC-V4-Modular-Feature-rich-Easy-to-Build-Hanh/
https://mutantc.gitlab.io/mutantC_V4.html
https://discord.gg/RbYJhYjH3Z
https://mutantc.gitlab.io/
https://git...


ohh forgot to share the features of mutantC
-It is fully open-source hardware. So you can Hack it as you wish.
- 4 inch IPS display, upto 4GB RAM, 2 HDMI out.
-Has native Serial and Ethernet port for server work.
-56 key customizable keyboard, 2 shoulder button for navigation.
-Have RTC, Buzzer, Vibration, LDR and IR Transmitter.
-Control your home appliances using mutant's IR Transmitter.
-Auto turn off Display when Display is covered, like when mutanC is on your pocket.
-Add Add-ons to get more features & functionality, see all from HERE.
-ThumbStick to have mouse support with left, right buttons.
-Gyro support using MPU6050 module or Pressure or Temp and Humidity support using BME280 module.
-Able to poweroff modules, Display, Add-ons using keyboard button.
-Full poweroff using OS and keyboard key.
-USB_C formfactor Nurolink/docking port with UART, I2C and Power.
-Read battery Power level and poweroff the device when battery is low.
-2 NeoPixel, one connected to ESP32-S2 and another connected Pi.
-18650 battery with charge and discharge protection .
-So little parts needed to make one. See the parts list > https://gitlab.com/mutantC/mutantc-v4/-/blob/master/parts_list
-You can use C Suite Application suite made for touch based device in this. This apps are suitable for small screens. See the C Suite > https://cubocore.org/
And here is the build guide if anyone wants to build it
https://www.instructables.com/MutantC-V4-Modular-Feature-rich-Easy-to-Build-Hanh/

Instructables
MutantC V4 - Easy to Build, Modular Handheld PC: A small Handheld PC with a physical 56 key keyboard, 4inch Display and Expansion header for add-on boards (Like Arduino Shield). Here we will discusses what you need to build one and show step by step guide. This device is very easy to make,…
lapis jasper
fyi threads are now enabled for this channel. Please use them to discuss the projects
 torpid jacinth

A button box made using the Adafruit M4 express micro controller.
I wanted extra buttons but mostly axis's while playing flight sims for easy use so decided to make this.
It uses a modified adafruit Gamepad circuitpython code to turn the M4 into a game controller allowing me to use them in game.
I also modified the HID settings for the m4 to allow me to use 6 axis's. Didn't need to do anything for the buttons as the default already allows for 16 buttons and Im only using 11.
The 2 safety buttons are only on for 4 clock cycles with an 0.05 second delay per frame. Ones your turn them off they give off the same button signal as I use them to turn on and off the engine of my plane which you do with the same button. The other is eject.
Many thanks again Amateur, danh and Neradoc for the help figuring out how to get the M4 to run the modified HID settings and some other small bugs that followed.
 torn elbow
12x12in 3d printed map of one of my favorite games, going to go into a shadowbox behind glass, over 100hrs of printing at 0.07mm layer height

Currently working on filling the layer lines with filler and the cracks between the sections too, the bottom left is smoothed the bottom right is not for comparison
plush gorge
Hay @solemn tulip & @lusty siren Thanks, but I found out that I was wrong, the cell isn't bad they're okay. Though, I am still looking into getting a charge bag/box big enough to put the entire thing into, for both charging & use in general.
lusty siren
plush gorge
Hay <@!574984938391076886> & <@!85813260359565312> Thanks, but I found out tha...
I'd say a puffy battery definitely isn't okay and still wouldn't touch it with a barge pole.
Some sort of safety bag is a good idea, though, if you intend on using it anyway.
plush gorge
lusty siren
I'd say a puffy battery definitely isn't okay and still wouldn't touch it with a...
Na, I thought it wasn't puffy when I was initially looking at it, but a few days later when i got the housing completely off & fully inspect the cell correctly, it was just the side only looked like it was puffy. I first looked at it when I had only opened one corner, & couldn't properly inspect & feel & put a ruler against it. It's flat as board.
sacred timber
lusty siren
I'd say a puffy battery definitely isn't okay and still wouldn't touch it with a...
I agree. A puffy battery is just one step away from exploding. I wouldn't have that in my house at all. This is what happens when a LiPo flares out inside a heavy leather bag: http://geology.heroy.smu.edu/dpa-www/robo/nbot/fire/nbot_fire_01.jpg

Out in the air it would have likely been much worse.
lusty siren
plush gorge
Na, I thought it wasn't puffy when I was initially looking at it, but a few days...
Looking at the pictures, yeah, I can see the casing could make it look puffy.
I'd check each cell to be sure, though, and make sure there's no puff.
plush gorge
lusty siren
Looking at the pictures, yeah, I can see the casing could make it look puffy.
I...
O' ya, I did.
 meager crag
I did my first photo run with a polar aligned astrophotography rig consisting of RPi4, adafruit stepper hat, nema17 with 100:1 planetary gear and ball head.
Oh, that code is for the other rig. Just need to change the time.sleep() to .270. bad pic

results of last nights run

Primitive but fun. 🙂
exotic sierra
I’ve been working diligently on a new product release and there are finally some available on my tindie shop. A super cool ESP32-S2 based RGB matrix display with Stemma connector: https://www.tindie.com/products/oakdevtech/pixelwing-esp32-s2-rgb-matrix/

Tindie
WiFi + RGB Matrix Display? A Win Win for your next project! Combining the power of ESP32-S2 and SK6812mini!
lucid bloom
I combined my pi bluetooth music visualizers with a nest hub. I can cast to the hub from my phone/laptop. The hub is paired to the pi and the pi is a bluetooth speaker. I customized alsa with 2 loopbacks, 1 for monitor/VT220 and then i used cava for the visualizer with 2 config files, one for each loopback. its a PI 4 8GB, VT220 and Nest Hub
https://youtu.be/bZ0xmHd2Vn0
software used:
https://github.com/lukasjapan/bt-speaker
https://github.com/karlstav/cava

PI 4 8GB, VT220, Nest Hub
I setup https://github.com/lukasjapan/bt-speaker
I customized alsa with 2 loopbacks, 1 for monitor/VT220 and then i used cava for the visualizer with 2 config files, one for each loopback.
https://github.com/karlstav/cava

GitHub
A simple Bluetooth Speaker Daemon for the Raspberry Pi 3 - GitHub - lukasjapan/bt-speaker: A simple Bluetooth Speaker Daemon for the Raspberry Pi 3

GitHub
Console-based Audio Visualizer for Alsa. Contribute to karlstav/cava development by creating an account on GitHub.
cunning lava
Finally got the Stage game library to work on Meowbit
 cobalt dove
Just finished a new Riskeyboard 70 for myself 😁 https://gfycat.com/firsthanduniformeasteuropeanshepherd
 obtuse root
Beautiful
scenic siren
cobalt dove
Just finished a new Riskeyboard 70 for myself 😁 https://gfycat.com/firsthandun...
That's lovely! The scrolling would destroy my focus though 😄
cobalt dove
scenic siren
That's lovely! The scrolling would destroy my focus though 😄
You don't even notice it after the first 10 minutes 😄
Though the plan is to not have it scroll all the time. That's just what I've got it doing for now until I get the firmware in order
scenic siren
cobalt dove
You don't even notice it after the first 10 minutes 😄
Do you have ADHD? 😉
cobalt dove
Here's "the plan":
- Make it display what layer you're on (e.g. when pressing the "Fun" and "More Fun" keys).
- Make it display the current mode, brightness, etc when changing settings.
- Make it application/context-aware so it can display relevant information from your computer. I plan to make it work with HID-IO so it can display stuff like gaming HUD info, active GIMP layer, Blender mode, a clock, that your doorbell is ringing, etc etc
cobalt dove
scenic siren
Do you have ADHD? 😉
No, but I do have ADD 😄
scenic siren
cobalt dove
No, but I do have ADD 😄
Fair enough. Then you at least partially get why I would definitely still notice it after 10 minutes. 😄
scenic siren
cobalt dove
Here's "the plan":
* Make it display what layer you're on (e.g. when pressing th...
This all sounds pretty neat though.
Kind of like what the Mac touchbar wanted to be.
cobalt dove
scenic siren
Kind of like what the Mac touchbar wanted to be.
Well this display is just a display. It doesn't do touch. I have a separate (secret) project for a touch-based thing 😄
scenic siren
cobalt dove
Well this display is *just* a display. It doesn't do touch. I have a separate ...
I was referring to it displaying relevant info.
It never really caught on, but your info sounds better than a lot of what the touchbar displays.
Rumor has it, they're ditching it. We'll see soon enough.
I think if you had more control over what it did, it might have caught on more. At least for some folks, the type of folks who like to configure things.
But that's my thoughts.
cobalt dove
scenic siren
I think if you had more control over what it did, it might have caught on more. ...
Yeah that's going to be the BIG difference between the Mac touchbar and this: This will be truly open source and it'll have an open standard way to interface with the keyboard (HID-IO). It also won't be the only keyboard to implement it 👍
scenic siren
Exactly! Much better plan, imo.
cobalt dove
Yeah, you want people to use your cool new tech in all their applications? Make it open source! Stabilize the API to use it and invite other manufacturers to participate.
gusty shard
Today in the lab

 late jackal
yay for programmable glowing mushrooms

 grizzled talon
I finally played around with Circuit Python, I've mainly been exclusively Arduino. Also put together this test hardware and combined/modified some example scripts. This is exciting stuff and I love how fast it is to update code with Circuit Python!

 vestal cove
grizzled talon
I finally played around with Circuit Python, I've mainly been exclusively Arduin...
vestal cove
grizzled talon
I finally played around with Circuit Python, I've mainly been exclusively Arduin...
Me too! That's the great thing about CP
https://www.instructables.com/Make-Your-Own-EDITH-Glasses/
My first major Python project

Instructables
Make Your Own Working E.D.I.T.H. Glasses: This project started about 3 or 4 months ago when I saw the movie Spiderman: Far From Home. I saw these glasses featured in the movie and I said, " I have to make these." Fast forward 3 months and here we are. I have more features on the w…
plush gorge

Project Tim Allen (MORE POWER) update 😀
I figured out, why try just charging the stock 36V 7.8Ah LiPo battery on my Swagtron EB-5 E-bike when I can just install the 2nd battery & just choose which battery to power my Ebike. :-)
That & I was finally able to find a DC - DC step down that can handle this much power.

The blue pack above is a 48V 20 or 30 Ah LifePo4.
So I'm hoping to either, triple or quadruple my bikes range. 😀 😀😍🤩
That is after I figure out how securely encase & mount that big (16kg) 35lb beast on my little e-bike. 😳
Lol, mind you the entire stock bike only weights 37lds.
 idle snow

This is the story of how I used TinyML/machine learning to help calm my dog's seperation anxiety. Let's see if we can get Clairette to stop barking!
Intro 0:00
How it Works 0:24
Testing It Out 1:12
I used the Adafruit Music Maker Feather to play audio messages back at my dog
 rugged oar
I'm working on creating a cyberdeck with a Blackberry BB Q10 keyboard. With that tiny a keyboard, naturally I wanted a tiny LCD as well. I chose what I had, an ST7735R 128×160 TFT LCD.
The LCD works fine with some older kernel(5.10.17+), though newer ones cause it to fail. I pinned the kernel and bootloader version to what worked with sudo apt-mark hold raspberrypi-bootloader raspberrypi-kernel (thanks to @sacred timber ) and then let other stuff of the os update and upgrade. This worked, though now getting the kernel headers (needed for driver development of the keyboard) via sudo apt-get install raspberrypi-kernel-headers didn't work because they point to a newer version of the headers and not the one of my kernel. So I installed 'rpi-source' , which gave me the correct headers for my kernel. Now the drivers build and I can insert them in the kernel as needed (as seen in image for BMP280 i2c device).
Once I get my hands on the BB Q10 board, I'll get to work on the driver for it. Hope it works out :)

 sharp comet
Digital Etch-A-Sketch case is coming along, first iteration is being printed now.
 exotic sierra
very nice @sharp comet
sharp comet
everything fits nicely 🎉
 tacit delta
thats cool
 inner egret
sharp comet
everything fits nicely 🎉
inner egret
sharp comet
everything fits nicely 🎉
Do you have a tutorial or something?
sharp comet
inner egret
Do you have a tutorial or something?
not yet, but all of it will be open sourced once finished. Possibly I'll publish a guide or more detailed tutorial as well
inner egret
Awesome!
lucid bloom
Gonna go on show and tell soon to show the latest iteration of my desk. It involves pi 4 8gb running pi os, pi 4 4gb running home assistant, vt220, nest hub, smartwatch and phone. It does some interesting things like music mode. I got a couple more things I'm working on before I'll be ready to demo it.
lucid bloom
The home assistant is what allows me to control the desk from my phone or watch or voice commands.

 civic vale
For the VT220, I'd definitely go with the light characters on a dark background for just text. If you used the VT220's features to make the individual characters have different backgrounds, you might be able to get a better effect on the first one (well, probably on the second as well, come to think of it).
lucid bloom
Hmmm I will check that background thing out to see if I can create more contrast
 willow rain
definitively the 2nd one
 late jackal
some progress with the programmable mushrooms 🙂
still have to figure out a good program for them, i'm thinking a 2D thing using their X/Y position to animate wave patterns through them, but possibly need more mushrooms for that to be really effective.
(made from a neopixel strand and a trinket)
todo: make the stems also light up, and diffuse the light more away from the LEDs
 upbeat geyser
Those are good looking mushrooms, what are you using for the mushrooms themselves?
late jackal
thanks! i cast them in the transparent silicone rubber 2 part epoxy stuff (cant remember its actual name but usually it's used for making moulds for casting things)
upbeat geyser
They came out really nice
late jackal
i've been fairly amazed at how well they light up, this neopixel strand works really well i think because the leds seem to have quite a wide angle on them
but of course i have to cut and solder each individual led out of the strand
 ionic chasm
Small effort. Huge psychological impact. Hehe.
It’s now generating random periods of sleep so the beeping comes on with g forces at unpredictable intervals
But I have to still do the math for I Kissed a Girl in kilohertz.
I took it for a (literal) test drive and it was the worst. It’s gonna be an amazing prank.
 native basalt
Oh boy do I have a story for a #sparky, Over the summer I added probably a total of at least 64 feet of neopixels to my room about half of which is shown in this photo
https://cdn.discordapp.com/attachments/810950401653735484/885210211541979196/IMG_4364.JPG
One day we had some bad storms and some power surges which somehow lead to one of my 5v power supplies and about 32' of my neopixels to be completely dead so now once they arrive I have the fun of rewiring half my room's lights 
 solar wadi
I'm working on a Macros library using classes as a kind of markup to mix different type of actions in a macro, to make richer macros without having to write a bunch of code, with the goal to make it generic enough to have it run (via small "driver" classes) on a Macropad, Keybow, Orthosnap, Neokeys, generic keypad module support, etc.
But first I made a version of the Macropad hotkeys application that uses the same principle:
https://github.com/Neradoc/Circuitpython_Hotkeys_Plus
@scenic siren you did express interest about it in the weekly meeting if you want to take a look ☝️
scenic siren
solar wadi
<@!330227457296957440> you did express interest about it in the weekly meeting i...
I saw you post it earlier, and I opened it up, but I'll be honest, my brain is apparently pretty fried this week, and it looked entirely too complicated for me to parse it right now. 😄 For what it's worth, PhilB (PaintYourDragon) who did the HotKeys project is in the middle of trying to make it work with consumercontrol at my request, and perhaps your solution is better. I haven't looked at his yet either for the same reason I'm not looking into yours right now though.
scenic siren
solar wadi
<@!330227457296957440> you did express interest about it in the weekly meeting i...
When I have a little time, I might ping you and have you walk me through the changes you made. But I can't brain it right now.
solar wadi
👍
rugged oar
My Tiny Cyberdeck project is coming along well on all fronts. Hopefully the Blackberry Q10 Keyboard will arrive before this weekend, and then I can get to writing a driver for it. I'm hoping this is how it looks. Keyboard and screen hinged together, powered by a raspberry pi zero w from below. For now, I'm happy with the thickness, it's around 3 cm in total, but without a battery as of yet. I have a chunky 6600 mAh battery but without any management. I'll look in to that later, maybe next iteration where I have a 'flatter' battery to put in its own 3d cage for a lower profile.

 grizzled talon
rugged oar
My Tiny Cyberdeck project is coming along well on all fronts. Hopefully the Blac...
grizzled talon
rugged oar
My Tiny Cyberdeck project is coming along well on all fronts. Hopefully the Blac...
There's actually already a compatible driver for both Arduino and Circuit Python I've been using. The driver libraries for the solder party bbq10 driver board also works with the LTTGO Driver board. Heres the Arduino Library: https://github.com/arturo182/arduino_bbq10kbd

GitHub
Contribute to arturo182/arduino_bbq10kbd development by creating an account on GitHub.
And heres the Circuit Python Library https://github.com/arturo182/arturo182_CircuitPython_BBQ10Keyboard

GitHub
Contribute to arturo182/arturo182_CircuitPython_BBQ10Keyboard development by creating an account on GitHub.
I think the Pi Zero has Circuit Python support, not sure, but you could interface with it via I2C.
Keep in mind the driver board runs on 3.3v, while the Pi would run on 5v I think.
inner egret
rugged oar
My Tiny Cyberdeck project is coming along well on all fronts. Hopefully the Blac...
What cad software did you use to design that?
rugged oar
grizzled talon
There's actually already a compatible driver for both Arduino and Circuit Python...
Thanks for the link.
Luckily, Arturo182 and I are both from Sweden, and he's been gracious enough to send me a keyboard, hence my design of it is based on his step files.
rugged oar
grizzled talon
I think the Pi Zero has Circuit Python support, not sure, but you could interfac...
I want to write a kernel driver for it. I do not wish to compile the kernel, just insert it when everything is done, similar to how fbtft devices enters late in to kernel space, but with insmod and cron (hence my need to have kernel headers from my previous post.)
I've looked in to their documentation, and I'll definitely be trying out some arduino connected keyboard for the same LCD. However, the end goal is to write kernel driver for the keyboard and use it to create custom linux images using yocto, buildroot, and elbe.
There is a tutorial on linux man page for a single button keyboard, and there is another driver for i2c based keyboard using Analog Devices' ADP5588. I'll be using those two for my driver instead.
rugged oar
inner egret
What cad software did you use to design that?
fusion 360.
rugged oar
I'm not going to print the previous one.
- It has too many parts to it, too much to go wrong plus the hinge will fail sooner or later. This one has only two parts, complex parts, but not many weak spots.
- It's very thick and keyboard in middle with pi below, it wasn't to my taste. This one is is half a cm thinner even at its widest point.
- This one's got camera, last one I couldn't put the camera anywhere to my liking with my constraints.

 upbeat geyser
Complex parts are good for 3D printing: injection molding that would be a beast.
rugged oar
You're very right. Injection moulding on hobby scale is just too hard to get in to.
frosty topaz
Well, it's honestly not as bad as you may imagine. You may be constricted by shot size or material options, but there's a pretty affordable DIY injection molding machine for $200~400, if you plan on selling stuff.

Formlabs
Learn about DIY injection molding and all the tools necessary to utilize plastic injection molding in-house using 3D printed molds.
native basalt

This is "Waveforms" by McKeegan Curran-Seijo on Vimeo, the home for high quality videos and the people who love them.
My recent project rewiring a CRT TV to my stereo making a crude music visualizer. I ordered a second one of these TV's off ebay that I'm going to turn into a portable bluetooth speaker
 polar crag
Some nice tasty spaghetti wiring

 crimson egret
I made a library for talking with inaturalist for circuitpython. In this example, is cycling the observations and the images for a particular user (my brother).
https://github.com/fede2cr/cpyinaturalist/raw/main/doc/imgs/funhouse.jpg
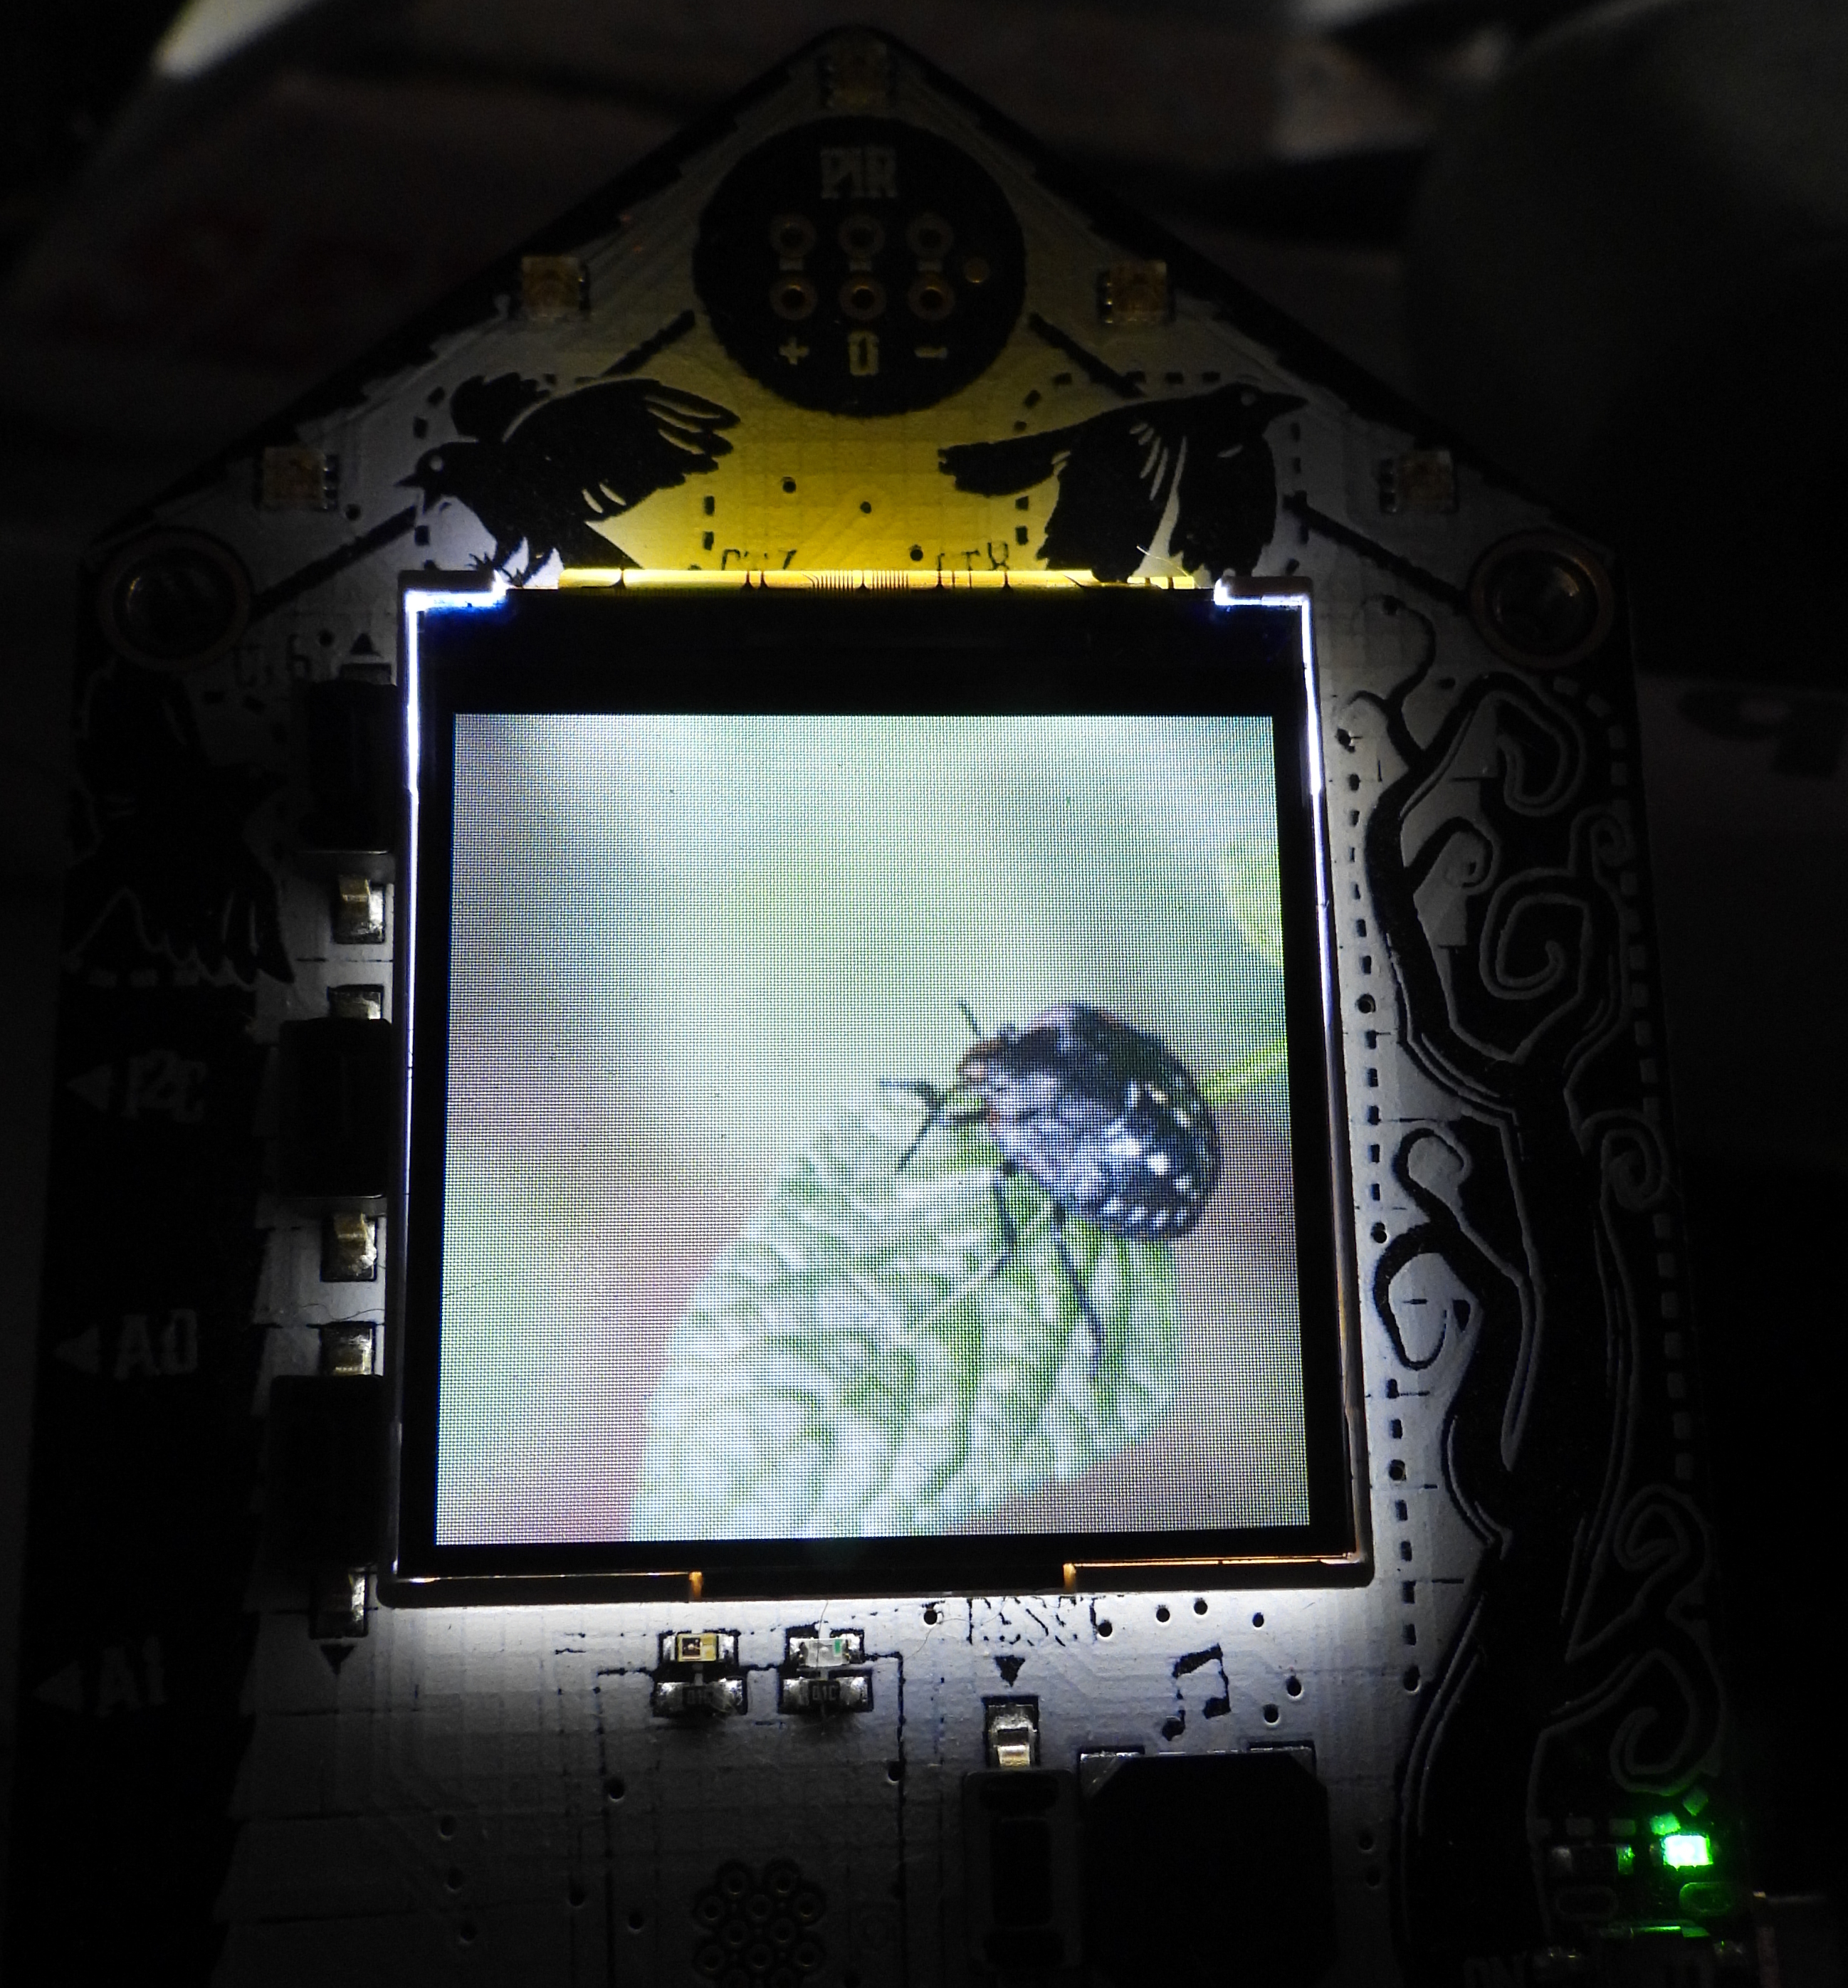 lean elbow
A proof of concept for an idea that I hacked together last night (sorry the video quality is not super great). When the rotary is turned on the MacroPad (running CircuitPython), it sends a packet (UART) over the Stemma port to a Feather M4 running Arduino, which then broadcasts that packet using a Radio FeatherWing. Then I have 2 "receivers", on the left (another Feather M4 running Arduino, and a Feather RP2040 running CircuitPython). that receive the signal and display the updated value on the connected OLEDs. I thought that it would take me all weekend to get this going, but it only took me about 3-4 hours thanks to the Feather/Featherwing ecosystem, which is flipping amazing!
exotic sierra
Wow nice!
 rare pasture
PC-9821 replica for Raspberry Pi CM4.

Obviously not very accurate because I didnt want to limit myself
Anywho, has space for two SSDs, DVD drive, CM4 carrier board, Pico PSU, and at least one PCIE card
I'm really excited to design more cases/devices like this
Please, tell me any suggestions,cc, etc. And especially suggestions for what I should try next, I'd love ideas for practicing.
 indigo lava
A lot of 3D printing and some fun with left over Adabox parts == my new “task lamp”
tacit delta
fancy!
indigo lava
now im trying to figure out if the speed of the animation is my bad coding or just how it be on Circuitpython
but i've reached the initial milestone of this project 🙂

 tender plover
@danh for the help, and others. 🙏
LAPA Studios Papercraft pdf,
TrinketM0,
Lots of solid core wires and jumpers, soldering and harnessing,
Colored tactile switches in the fingers: R, G, B,
Resistors in the tactile switch harness,
AdaFruit 5W LEDs one per ear,
Small Li-Ion battery included in the Adafruit NeoPixel Goggles pack,
Lots of time


 marble mantle
@tender ploverwow
 wet beacon
rare pasture
PC-9821 replica for Raspberry Pi CM4.
wet beacon
rare pasture
PC-9821 replica for Raspberry Pi CM4.
Is that based off of any particular model? It doesn't match any 9821 I've actually seen.
rare pasture
It's the first one on google images but with the second floppy drive removed and the DVD drive enlarged to a full 5.25 slot
It doesn't look like it because im lazy and carving holes for IO is hard
solar yew
Making one of those memory DIMM holders but this one can support large heatsinks such as DDR2 FBDIMM, RDIMM and those Corsair Vengeance series heatsinks.
 gusty shard
Today in the lab:
 upbeat geyser
Today in the lab:
 exotic sierra
Ohhhh
solar yew
dude takin his own xrays again
exotic sierra
playing around with making an ESP32-S2 mini feather

 sick pagoda
First SMD solder 
 marble mantle
very nice, especially for first time!
did you use paste and stencil or just the syringe?
sick pagoda
Just the syringe
Some areas have either too little or too much, think attempt number 2 will go better.
And abit more flux next time
frosty topaz
Honestly, it looks like you put a really good amount in the places where it matters most. I don't see much issue with quantity, as the only parts that look bulbous are on the resistor and capacitor pads.
sick pagoda
Jay not terrible, excited to try it out soon™ Already excited to work on V2 and not even sure if this one works yet 
 dry halo
Raspberry Pi 400 with Pimeroni Hyperpixel4 and Adafruit cyber deck wrapped in PLA, with travel cover.


Would anyone be interested in these? Pre-printed for a fee, or STLs ready to print?

Back is affixed with four M2 screws. Screw hole threads are included in the print.
Cover is friction fit.


 humble cape
demon core badgelife SAO going off to shenzhen tonight
 tacit delta
 tacit delta
not found?
rose phoenix
Made a little macropad out of the directional switch encoder that was put up on the store recently.
 feral granite
PicoPi CloudLight! As a kid I always had little kitschy trinkets that were special to me and wanted to display, so I made this for my niece so she can have a little display for her treasured items


 west zinc
feral granite
PicoPi CloudLight! As a kid I always had little kitschy trinkets that were speci...
west zinc
feral granite
PicoPi CloudLight! As a kid I always had little kitschy trinkets that were speci...
The felted Lars is nightmare fodder.
vestal cove
tacit delta
not found?
I unpublished for a little bit while I fixed an error. It's good now.
tacit delta
nice
cobalt dove
I really upped my silkscreen game on the latest Riskeyboard 70 prototype 😉 👍

The front has lots of tiny easter eggs as well 😄
 exotic sierra
Ohhh that’s nice
 narrow cobalt
holy, dang that's awesome
I feel like I've seen the kicad screenshots for this before on another server lol, so cool
cobalt dove
narrow cobalt
I feel like I've seen the kicad screenshots for this before on another server lo...
No, I've merely invaded your dreams 👍
narrow cobalt
cobalt dove
No, I've merely *invaded your dreams* 👍
ah ha there we go, a fellow money-burner keyboard enthusiast, eh?
 frosty topaz
Out of curiosity: what's the IR sensor for?
frosty topaz
And do you plan on sharing an STL for your signature maglev switches somewhere down the line, or just straight-up mass production?
cobalt dove
frosty topaz
Out of curiosity: what's the IR sensor for?
My Riskeyboard lets you turn any old remote control into a wireless macro pad! https://gfycat.com/marriedtediousaquaticleech
 cobalt dove
frosty topaz
And do you plan on sharing an STL for your signature maglev switches somewhere d...
cobalt dove
frosty topaz
And do you plan on sharing an STL for your signature maglev switches somewhere d...
Oh I'll share them... Once I have PCBs for sale 😄
frosty topaz
Can't wait! Gotta save up some burnable income...
cobalt dove
There will also be a license like, "If you make a keyboard with these you owe me a dollar or $0.10 whatever is greater but we can negotiate 👍"
narrow cobalt
? wait what lol, I was commenting on the buzzer footprint
frosty topaz
Who knows, automated filters be like that sometimes.
cobalt dove
Yeah the naughty word filter has lots of words that aren't actually that naughty hehe
narrow cobalt
but yes I want all the beeps and boops on the keyboard 👀
cobalt dove
The buzzer has yet to be used. I have some ideas as to how to use it but it's more of a future thing
Obviously you can use it to generate click and pop sounds but I already have something better for that... https://youtu.be/6hMOGKTudcg
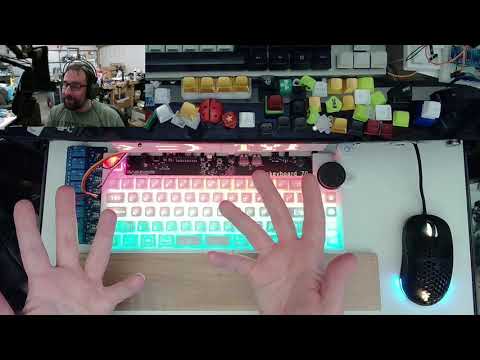
Keyboard: Custom Riskeyboard 70 analog hall effect with custom 3D printed magnetic separation switches (Void Switches), custom 3D printed magnetically-stabilized stabilizers, custom 3D printed case and top plate, custom 3D printed keycaps (made using my Keycap Playground), custom PCB (from scratch), custom firmware (written in Rust from scratch)...
Holy cow that video went over 1000 views‽
When did that happen? Last I looked it was like... 80 views haha
clicks analytics button
narrow cobalt
sounds like a tiny solenoid almost 😄
scenic siren
narrow cobalt
? wait what lol, I was commenting on the buzzer footprint
It was the repeated letters... It's meant to catch spammers, not folks excited about buzzers. But it's not smart enough to know the difference.
cobalt dove
 narrow cobalt
scenic siren
It was the repeated letters... It's meant to catch spammers, not folks excited a...
narrow cobalt
scenic siren
It was the repeated letters... It's meant to catch spammers, not folks excited a...
ah, gotcha 👍
cobalt dove
Ahh, it was the Lemurs that put my video over the top
 vestal cove
tacit delta
nice
vestal cove
tacit delta
nice
Thanks
 sullen salmon
Was really happy by the results of this project result:
(it's the spider dance btw)
 barren sluice

Taped up prototype for a thermometer/hygrometer/barometer housing. I plan on mounting the BME breakout sensor board in the center of the air column of the main shaft. The goal is to get as accurate as possible of a reading for ambient air temperature.
And I plan on putting screen over the top and bottom holes to prevent any friends from making a home in there as well as provide a wind break.
coarse fjord
I had these oscillators appear on 4 Conway's Game of life kits. A blinker which is the most common oscillator and a larger one I don't know the name of. Does anyone know?
 marble mantle
 west zinc
https://www.thingiverse.com/thing:2137976. I spotted a circuit playground on this banana keytar.
 coarse fjord
marble mantle
glider? https://en.m.wikipedia.org/wiki/Glider_(Conway%27s_Life)
coarse fjord
marble mantle
glider? https://en.m.wikipedia.org/wiki/Glider_(Conway%27s_Life)
Turns out it is a pulsar quadrant.
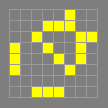
: pulsar quadrant (p3) This consists of a quarter of the outer part of
a pulsar stabilized by a cis fuse with two tails. This is
reminiscent of mold and jam. Found by Dave Buckingham in July
1973. See also two pulsar quadrants.
vestal cove
coarse fjord
Turns out it is a pulsar quadrant.
https://playgameoflife.com/lexicon/pulsar_q...
What's John Conway's Game of Life?
coarse fjord
vestal cove
What's *John Conway's Game of Life*?
It is a zero player game that simulates cellular automata with very simple rules that lead to a variety of complex patterns.
Adafruit sells a kit that will play this game on a 16 cell array of LEDs. You can connect multiple kits to make larger arrays. I have built 3, a maker friend gave me his, and I have one more kit inbuilt waiting for me to feel well enough to assemble it.
vestal cove
coarse fjord
It is a zero player game that simulates cellular automata with very simple rules...
OK. That sounds fun.... I guess
Very interesting
civic vale
Lot's more about "Conway's Game of Life" at https://en.wikipedia.org/wiki/Conway's_Game_of_Life including several great animations. For a true "Life", you need an infinite array. There are, however, edge conditions that do interesting things.
 vestal cove
OK
 gritty onyx
Thank you Adafruit for making this possible
https://www.youtube.com/watch?v=pCmGmLDWalE





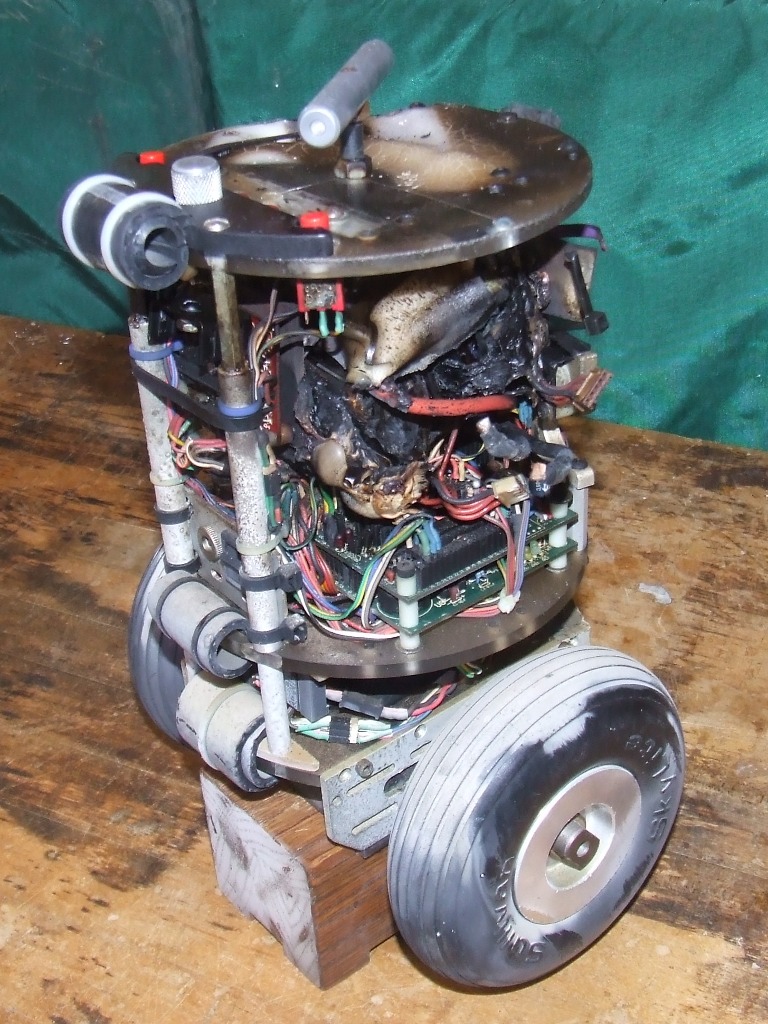


Using the RGB Matrix Hat with RTC
 white thicket


I'm making my smartglasses with a web based front end
they are built on bose frames
when i finish it, it'll be able to play spotify from my phone
i just gotta work out the spotify api in my own frontend
i really just need to make a good 3d printed shell
exotic sierra
Woah, neat!
lean elbow
This weekend's project was to tinker with mounting an ItsyBitsy nRF52840 onto one of these neat new IS31FL3741 LED matrices and write some scrolling marquee firmware that would allow me to use the BluefruitConnect app to change the message, advertising name, color, brightness, scroll speed, rotation, and font (including a font I made from the Stargate's Ancient language 😂). The female headers currently aren't connected electrically but rather used as a structural support (for example, I made a little "wing" with a magnet so that I can attach it to a fridge or other magnetic surface, and I'm playing with an idea for a "wing" to make it wearable). These matrixes are really cool and fun to play with. I'm really excited to get my hands on the new LED glasses 👀


Oh also of the settings are saved onto the 2MB flash chip, so if it loses power, it starts up again using the same settings that were previously saved.
hard oriole
I decoded the first 3 letters... and I'd like to solve the puzzle 😉
lean elbow
😂
I wanted to make (another) clock with a similar setup but I'm 2 horizontal pixels shy of being able to draw 4 numbers in Ancient 😢 Guess I'll have try using 2 side by side 🤷♂️
lean elbow
Hacked apart the buffered text demo for the IS31FL3741 to use 2 matrices side by side, taking advantage of the QT Py RP2040's 2 I2C ports so I didn't have to cut/solder jumpers on the second display
 uncut pine
Tiny tricorder next to 1/2 breadboard for size ref. ESP8266 ssd1306, BME280, MLX90614,
 rose phoenix
There's a Raspberry Pi Pico underneath the OLED screen, still messing around to see what Python can do for keyboards. Recently got an ender 3 so I printed the rotary encoder knob myself to be as low profile as I could.
 rugged oar
I've been trying to make this board for a while. It's a replacement for the zumo shield used on Polly's zumo robot. It has a lot of issues for rev 1, the soldering job is a mess, i couldn't find all resistors so I had to use larger packages and even use two in parallel to get closer to the resistor value I needed, the uploader is a really old tiva c board itself.
BUT, after a really hard week of two failed attempts, this one worked, LEDs work, UART works, I'll be testing i2c and spi next, then the motors.
lean elbow
Finally achieved my days-long dream of a clock using the ancients font as the clockface with 2 IS31FL3741 LED matrices 😂
Also on the off chance anyone is interested I published the Arduino source code https://github.com/apendley/IS31FL3741QT-ancients-clock
GitHub
Arduino firmware for a clock using 2 IS31FL3741QT LED matrices, a QT Py RP2040, and a DS3231 RTC - GitHub - apendley/IS31FL3741QT-ancients-clock: Arduino firmware for a clock using 2 IS31FL3741QT L...
grizzled talon
Here's a blackberry keyboard dock thing I'm designing for the Clue! This is an early prototype, I should have it done by next week though. I plan to make a guide and maybe a video tutorial. It's exciting stuff!

and yes, I'll make it magnetic lol
tacit delta
blackberry keyboard is the best one of all time
grizzled talon
tacit delta
blackberry keyboard is the best one of all time
I never used one until I needed one for a sat-phone project I was building. It was slow to get used to at first but I really enjoy typing on it now! I see why so many people loved typing with it.
 warped cobalt
I'm intreagued by bringing back of Blackberry keyb
grizzled talon
warped cobalt
I'm intreagued by bringing back of Blackberry keyb
Maybe I should or someone should design a bluetooth snap-on case for modern phones lol
warped cobalt
grizzled talon
Maybe I should or someone should design a bluetooth snap-on case for modern phon...
I just wondered that, lol
tacit delta
grizzled talon
I never used one until I needed one for a sat-phone project I was building. It w...
blackberry 8830. i still have it, and yeah its amazing
i miss it 😦 i have moto g power now
warped cobalt
I mean, I like the mechanical keybs I use for my phones, but for super portability. A Blackberry one, especially with BT 5.1 should be popular
grizzled talon
It's defiantly possible... I just ordered the bluetooth glasses driver board today so once I get it in the mail, I'll have to give it a shot lol
vestal cove
white thicket
That's pretty cool! I created something similar here: https://www.instructables.com/Make-Your-Own-EDITH-Glasses/
Instructables
Make Your Own E.D.I.T.H. Glasses: This project started about 3 or 4 months ago when I saw the movie Spiderman: Far From Home. I saw these glasses featured in the movie and I said, " I have to make these." Fast forward 3 months and here we are. I have more features on the w…
vestal cove
tacit delta
interesting project, just dont appeal on looks for me lol
Whose, mine or @white thicket 's?
tacit delta
edith glasses
tacit delta
do you see hologram and such with it?
vestal cove
Yeah, I'm adding that. A screen projects images through a Fresnel lens onto the glasses' lenses
tacit delta
interesting
white thicket
Thats awesome
vestal cove
white thicket
Thats awesome
Thanks
lean elbow
Spent the weekend working on my "Blood Board", a variation of the awesome OozeMaster 3000. This was super fun to build 😄
 cunning lava
 exotic sierra
cunning lava
exotic sierra
cunning lava
Looking good! I wish I had the determination to make my own keyboard
cunning lava
it gets simple after the fifth or sixth
frosty topaz
If only choc switches had more options in term of aesthetic keycaps...
I really like the "purple switches on the purple pcb" look though.
cunning lava
there are MBK keycaps coming out
if you don't want legends, there is a whole rainbow of them
with legends there are two grays, orange and black
and white
frosty topaz
I have seen those, and I have considered them, but I'm not even fully capable of touch-typing, so I'm kinda waiting for legended sets atm
(and money)
cunning lava
legends should ship by the end of the year
 vernal vigil
Eurorack synth wip - prototyping a new module:
 vernal vigil
hmm... can I post a link to a full size photo?
https://ny3oaw.dm.files.1drv.com/y4pJUEtg5vhuDfKOWIG46ML1CS_mLYQRHeooZYoBsvCkjkXR_Jf4mlB6kb_9BSoebC5GK__V7Wy-RTZTGvsDs3huWsHIOzBYbxFt8O7DaqNrfDXRaLAYa_cMfbpzFZkmQtNqvzbjq3lTaj6-_dmEo1ufeG5tXLu7-FxV_rAUGOJuXlnC-IvE4pBvf_adVj5os9HvBDhj3coTyLhEGKbq-oguw/004.JPG?psid=1


Yes, that's better.
In case anyone wants to figure out what kind of module it is. 🙂
lean elbow
Just got my glasses last night 👀
grizzled talon
I got the Glasses driver board yesterday and am in the process of making a smartwatch. I hacked the button (pin 4) so it can drive the NeoPixels. The neopixel ring emulates the hands on a clock (red is hour, blue is minute). It also updates/sets the time from BLE which is neat. I'm in the process of designing a case for it.
 grizzled talon
This is the code I have running, I just updated the code from the last watch I made from a year ago to work with this hardware. https://github.com/MichaelLacock/ML-Watch/blob/master/ML-Watch_OS_v0.3.1-v4.ino

GitHub
Contribute to MichaelLacock/ML-Watch development by creating an account on GitHub.
lean elbow
Nice!
lean elbow
👀