#show-and-tell
1 messages · Page 21 of 1
 desert timber
 wary atlas
But they're made of rust XD
 lucid bloom
This is my prototype to control the older computers with at or ps2 keyboards. It's an Arduino uno, sensor shield, 433mhz transmitter/reciever and the 4 wires to go into the power, ground, clock and data pins of the ps2 port. By control them I just mean safety shut them down. I am going to try to add more radio codes that it recognizes and then potentially run a program/key sequence

 azure salmon
you know what true friends are?
when you need a few resistors
and you walk away with a bucket of parts
wary atlas
Hehe, the best friends you can have are the ones who give you buckets of parts
 willow mist
I've been working with my colleagues on a wearable biometric sensor FeatherWing called EmotiBit for the past few years and I'm happy to announce that our Kickstarter is almost 500% of our goal! Love your feedback and support! ❤️ Please share if you know anyone who might dig open source biometrics with 100% user-ownership of the data. https://www.kickstarter.com/projects/emotibit/emotibit-0?ref=5baq67
wary atlas
Ohhh, the ultimate DIY FitBit!
willow mist
wary atlas
Ohhh, the ultimate DIY FitBit!
plus EDA/GSR, better body temperature measurements, and real transparent access to and ownership of the data 🙂
wary atlas
FitBit++++! It looks great, glad the campaign went so amazingly!
 devout verge
Cool! Is there CircuitPython support for the sensors?
willow mist
devout verge
Cool! Is there CircuitPython support for the sensors?
@devout verge not yet, though it's on our roadmap. We've been developing for the SAMD21 WiFi M0 and prototyping with the Huzzah32 to determine the engineering lift and tradeoffs to make it really stable and have decent battery life etc.
 sacred timber
willow mist
<@!544633081622167573> not yet, though it's on our roadmap. We've been developin...
sacred timber
willow mist
<@!544633081622167573> not yet, though it's on our roadmap. We've been developin...
Congratulations! I think it's great to get out the message that we the people ought to own our own data. 👏
 misty gorge
I am currently working on the CircuitPython library of Adafruit IO service and working on a feature that can send a data batch of values to the service. I'm surprised that it is not implemented in CircuitPython. So, I decided to fork the library and made one myself. While it is work in progress, this is the start of my contribution with CircuitPython libraries. https://github.com/adafruit/Adafruit_CircuitPython_AdafruitIO/pull/70

GitHub
This would allow CircuitPython to send a batch array of data to be created from all available devices to the Adafruit.IO service. I will require further testing in all of my CircuitPython devices i...
 sharp sapphire
I had some success porting the ez make oven demo to rpi with gui zero using the hdmi touch screens

used and active buzzer to get the beeps working properly.
 half night
On last week's show and tell I was lucky enough to get a few minutes to introduce a password safe program that runs on the Adafruit Neo Trinkey. The code is open source, and up at https://github.com/william-stearns/trinkeypass .
GitHub
Adafruit Neo Trinkey password safe. Contribute to william-stearns/trinkeypass development by creating an account on GitHub.
 cobalt badge
👋 I wrote a very lightweight Python library for controlling the RPi's hardware PWM pins. The other options I saw out there were too heavy for what I wanted (ex: pigpio needed a daemon to run) https://github.com/Pioreactor/rpi_hardware_pwm and on PyPI: https://pypi.org/project/rpi-hardware-pwm/

GitHub
Access the hardware PWM of a RaspberryPi. Contribute to Pioreactor/rpi_hardware_pwm development by creating an account on GitHub.

 digital silo
I just wanted to show off my quick 3d print and paint job that I did last night for my shot today.
Multivax!
wary atlas
I love it!
sharp sapphire
rad!
sacred timber
cobalt badge
👋 I wrote a very lightweight Python library for controlling the RPi's hardware ...
Interesting! Have you had a chance to test it much?
cobalt badge
sacred timber
Interesting! Have you had a chance to test it much?
Only on my local RPi3 - so far so good!
 tacit delta
awesome card
 junior agate
👀 where in MA?
lucid bloom
On the cape the plan is to open soon, we are trying to get at least half the museum automated before it opens
junior agate
@lucid bloom sweet, I'm somewhat near the cape. Would love to visit when it's open 🙂
lucid bloom
Right now we have a pi behaving as a usb keyboard to shutdown the gateway, tomorrow I'll be testing an Arduino behaving like a ps2 keyboard to shutdown the packard bell. The next step is adb keyboards. Any machine that can handle sudden power loss is on an rf outlet. We are trying to take good care of the machines by shutting them down properly so we don't end up with check disk or worse.
 whole brook
That feel when things just … work. 🥰 I’ll never have the world’s prettiest breadboards but Collin’s recent breadboard video was inspirational. 🙂


 dawn acorn
digital silo
I just wanted to show off my quick 3d print and paint job that I did last night ...
dawn acorn
digital silo
I just wanted to show off my quick 3d print and paint job that I did last night ...
Love it.
 night bronze
whole brook
That feel when things just … work. 🥰 I’ll never have the world’s prettiest brea...
night bronze
whole brook
That feel when things just … work. 🥰 I’ll never have the world’s prettiest brea...
From the looks of that breadboard, you're probably in the top 1% neatest ones I've seen! And it works too! Fantastic!!! 🎉

 distant eagle
Maybe a repeated question, How do I participate in the Show and Tell live stream?
BTW, Just uploaded the source code to my garage automation project using CircuitPython. In case you want to look under the hood, here you go. https://github.com/eddieespinal/ATMegaZero_Garage_Automation_Circuitpython

GitHub
Contribute to eddieespinal/ATMegaZero_Garage_Automation_Circuitpython development by creating an account on GitHub.
For this project.

 solar yew
@gusty shard Many operating systems now routinely offer screenshot capabilities.
 gusty shard
I meant "screenshots from a TFT FeatherWing".
 bitter rock
Cellular controlled Raspberry pi that takes environmental readings from a BME280 and overlays the readings onto time lapse photos. Pico monitoring 2 batteries and solar charger to toggle between them based on in/out voltages and charge levels. Will shut down PI when reaches low battery% and power it back up when solar/usb charging power is present. Runtime is around 19 hours fully charged before both batteries drained. Script testing complete while powered over USB. Now to test it over solar before soldering everything or getting a custom PCB.


 bitter rock
distant eagle
For this project.
bitter rock
distant eagle
For this project.
thats really cool!
distant eagle
bitter rock
thats really cool!
Thanks!
 dusk zinc
@gusty shard CircuitPython? https://learn.adafruit.com/saving-bitmap-screenshots-in-circuitpython
night bronze
distant eagle
Maybe a repeated question, How do I participate in the Show and Tell live stream...
To participate, join the #live-broadcast-chat channel a few minutes before the start of the stream. There will be a StreamYard link posted that you can join to share.
night bronze
distant eagle
BTW, Just uploaded the source code to my garage automation project using Circui...
That also looks like it would be really nice to share in the "Python for Microcontrollers" newsletter if you haven't sent it there. You can create a PR on this repo (https://github.com/adafruit/circuitpython-weekly-newsletter) to add it, or email "cpnews@adafruit.com"

GitHub
Community newsletter for Python on Microcontrollers. Please feel free to put your current news, projects, etc. as a PR or Issue. - adafruit/circuitpython-weekly-newsletter
distant eagle
night bronze
To participate, join the <#330406870256975873> channel a few minutes before the ...
Awesome!, thanks for sharing that info
night bronze
distant eagle
Awesome!, thanks for sharing that info
You're welcome! I and others who've seen it here appear to like it a good bit, and it's a really nice use of a number of resources that helped solve some "real world" problems for you!
gusty shard
Thanks @dusk zinc, that wasn't too bad.

 west zinc
Just made a pull request to incorporate the TinyLogicFriend logic analyzer driver into sigrok and PulseView. This will allow for a wide array of development boards to be used as a logic analyzer. https://github.com/sigrokproject/libsigrok/pull/137
So far, I've got .UF2 firmware files for three Adafruit Cortex M4 boards (Metro M4, Feather M4 and ItsyBitsy M4) to decode 100kHz I2C signals and up to 11 total channels. https://github.com/kmatch98/tinylogicfriend Right now to connect TinyLogicFriend to PulseView, it needs a custom TinyLogicFriend driver compiled into sigrok and PulseView (takes a decent amount of work to compile it). If this PR makes it through, it will make it so folks can just go download the latest PulseView to be able to use these boards as logic analyzers.

Many thanks @lapis jasper for the encouragement and support. Let's see where this leads. I hope this is useful to folks and especially hope that others with their own favorite boards will design and improve on the TinyLogicFriend firmware.
 languid nebula
west zinc
Just made a pull request to incorporate the TinyLogicFriend logic analyzer drive...
languid nebula
west zinc
Just made a pull request to incorporate the TinyLogicFriend logic analyzer drive...
Well done Kmatch, looking forward to use it
 wary atlas
Noice
 lapis jasper
west zinc
Many thanks <@!252717193496756235> for the encouragement and support. Let's see...
lapis jasper
west zinc
Many thanks <@!252717193496756235> for the encouragement and support. Let's see...
Great work on this!
tacit delta
nice
 icy sleet
We're pleased that @clear matrix agreed to be on Embedded to chat with us about her tutorials and international work. Here is her episode: https://embedded.fm/episodes/372
(Transcript will be available Sunday for those who would rather read that listen.)

Embedded
Anne Barela (@anne_engineer) spoke with us about working as an engineer in the US Foreign Service and writing tutorials for Adafruit . Anne has also written two books: Getting Started with Adafruit Trinket and Getting Started with Adafruit Circuit Playground Express . To see Anne’s writing on
 hollow pewter
Finally got the rgb matrix working in Rust by heavily modifying a different driver for a similar display.
It still needs some performance improvements. Someone submitted a PR to the original driver that utilized BCM instead which I'm going to take a look at 🎉
 exotic sierra
Did a little write up with the files for the unicorn light
Oak Development Technologies
In this quick guide, we'll show you how to easily make a Rainbow Unicorn Wall Light! All you need is a microcontroller, some ultra skinny neopixel strips from Adafruit, a 3D printer and two colors of filament. Let's get started!
 marble mantle
exotic sierra
Did a little write up with the files for the unicorn light
marble mantle
exotic sierra
Did a little write up with the files for the unicorn light
nice
so now you have an active tutorial section on the website?
Do you plan to put it on instructables or hackaday - it would attract more readers this way?
exotic sierra
I try to post tutorials when I get ideas for things
I will try to post it on hackaday
 supple mortar

Eink humidity tracker with Adafruit MagTag and Adafruit IO
 warped violet
I guess I'm done with this particular project, although not satisfyingly: https://www.wirewd.com/make/m4_apa102
AdaFruit has done a series of light painting tutorials. First, they did a tutorial with the NeoPixel strips and an Arduino . Then they upgraded it to the DotStar LEDs and used a Raspberry Pi . Then they downgraded the LEDs to the NeoPixels and switched to CircuitPython . And most recently…
This particular project, in use:
 night bronze
Ah yes, that familiar lament of "If only I had another K or 2 of ram... if only..."
 uneven ether
Used this circuit playground express to make a custom Mother’s Day card audio player that plays a custom message from our 10mo daughter. It uses the light sensor to activate when the card envelope opens.
wary atlas
Aww, that's adorable
half night
I've gotten the password safe program running on the Adafruit Magtag! The buttons navigate through the passwords stored on the drive, and "Select" sends the password back to the connected computer as if you'd typed them on a real keyboard. There's an unlock/lock feature for security. Many thanks to Gary for mailing me one to develop on when Adafruit was sold out.

GitHub
Adafruit Neo Trinkey password safe. Contribute to william-stearns/trinkeypass development by creating an account on GitHub.
 willow slate
Made a game stream co-host bot for fun and tech training while stuck at home this year. It now performs musical jigs… 🤖
 cold tangle
Haha that's awesome
wary atlas

 willow rain
half night
I've gotten the password safe program running on the Adafruit Magtag! The butto...
willow rain
half night
I've gotten the password safe program running on the Adafruit Magtag! The butto...
that looks really cool, and the ui looks pretty nice!
i personally would move the ui 1 pixel to the right, so the selected number has a 1 pixel of black on the left side.
but other than that, that is a pretty cool concept.
i wonder how does it generate the password
half night
willow rain
that looks really cool, and the ui looks pretty nice!
i personally would move th...
Completely agreed - the next version will push the text to the right.
half night
willow rain
that looks really cool, and the ui looks pretty nice!
i personally would move th...
The user stores the passwords as files on the Magtag/Neo Trinkey. The circuitpython script reads these files and pushes the passwords stored in them to the connected computer as keystrokes.
willow rain
that is actually pretty cool
 formal hamlet
Thermal camera Mashup of the mlx90640 and pi tft bonnets
 wary atlas
Small package, great power!
 robust valley
A drawing program made with pygame. We used it to work with the adafruit 8x8 dot star (apa102 2020size). It was fun, the boy and I worked on it together. Always wanted to clean up the code and add animations. Some of the board and dot star lines are commented out to work on windows.
GitHub
Updated PyDraw project to include definitions to compartmentalize, animation feature and file access - ShaunF4469/PyDraw_rev1.1
 wide musk
Hi all! I finally finished my Tricorder project! The last bit of code was to connect the PyPortal to MQTT and finally got that done last week. Here's the video if you're interested.

Some images contained in this video are copyright CBS Studios.
This project took over four years, mostly due to delays. Finally I have the object of my childhood dreams and I hope you can dream along with me!
Thank you notSpock (integration of the Moire GIF and IR Camera into the Clue) and CompaniaHill (created the Moire pattern GIF) and o...
wary atlas
The TOS Tricorder is a great size for packing full of goodies! Looks awesome :D
wide musk
Thanks!
dawn acorn
wide musk
Hi all! I finally finished my Tricorder project! The last bit of code was to con...
Great project! I'm working on my own version using a Pi Pico at the moment. Doesn't look as legit as yours does though!
wide musk
@dawn acorn Thanks! I can't wait to see yours! Where are you at in the project?
 mighty umbra
I'm starting to work on a simple modular robotics framework with a message router for CircuitPython.
from tasks.drive import Drive
from tasks.log import Log
from tasks.bno055 import BNO055
from tasks.gps import GPS

router = Router()
tasks = dict()

tasks["imu"] = BNO055(router)
tasks["gps"] = GPS(router)
tasks["drive"] = Drive(router)
tasks["log"] = Log(router)

print("Running")

while True:
    for task in tasks:
        tasks[task].run()
Well... I have a version 1 prototype completed. I'm now waiting for PCB V2 and then will need to reprint the bottom of my case to accommodate the mounting holes for the new version.
sacred timber
mighty umbra
I'm starting to work on a simple modular robotics framework with a message route...
Is this framework using asyncio, threads, or multiprocessing? I did something like this about a year ago, coming to Python as a longstanding Java programmer, and given the thread syntax in Python was AFAIK adopted from Java and looks very similar I thought I'd get multi-threaded behaviour. I sadly found that one of Python's failings is that it doesn't really do multi-threading at all. So I've been rewriting it using asyncio.
How do you get around each of your tasks blocking? Or in your design is that not a problem?
mighty umbra
sacred timber
Is this framework using asyncio, threads, or multiprocessing? I did something li...
Currently the tasks are run cooperatively so I just make sure they aren't blocking. I also can attach callbacks to topics that are run on a value change. I plan to use asyncio if that becomes better supported in circuitpython.
sacred timber
mighty umbra
Currently the tasks are run cooperatively so I just make sure they aren't blocki...
Ahh, yeah, I'm kinda waiting on that in CircuitPython or MicroPython as well. For the latter there's uasyncio from micropython-lib but it's not in the core distro yet. I've found asyncio quite a challenging library to work with.
mighty umbra
sacred timber
Ahh, yeah, I'm kinda waiting on that in CircuitPython or MicroPython as well. Fo...
It is definitely a different mindset from traditional multi-tasking. I've also played with generator co-routines which do work in CircuitPython.
wide musk
@dawn acorn cool! Willing to provide pics? PM me if you don't want it public. I love watching it come together. 😃
dawn acorn
wide musk
<@!352066738000756736> cool! Willing to provide pics? PM me if you don't want it...
Sure. Will paste some in here!


Trickiest bit was actually shortening the programming cable (halfway up, short black cable to the Pico). I had to cut most of the length off, strip and solder and heatshrink each wire then heatshrink the whole thing together.
Second version of the case after the first one was too small to cater for all the wires and especially the headers and Dupont plastic ends.

V1 of the PCB
sacred timber
dawn acorn
I've found those really short USB cables within a project (like yours, or a robot) quite a pain, and have gradually been swapping over to those little USB breakout boards and wiring together with Dupont connectors. I like that you're using the Pimoroni 11x7 display, that and the 5x5 RGB LED matrix are among my favorites for displaying status or other kinds of visual data. Nice job!
How are you doing your PC boards?
dawn acorn
For my sins, I am using Fritzing for the PCB. Because it's a simple board, comparatively.
Manufacturer was by the company that Fritzing links to from the software. V2 is being done by JLCPCB in China
sacred timber
dawn acorn
For my sins, I am using Fritzing for the PCB. Because it's a simple board, compa...
A few years ago I investigated Fritzing for a Eurorack synth module that I never ended up building, but I think things have been getting progressively easier. From some advice from a fellow roboticist I've recently downloaded KiCad but haven't tried a project yet. Everybody seems pretty happy with JLCPCB so I'll probably use them.
I don't mind the 8 Euros for Fritzing if it's better than KiCad.
dawn acorn
I was thinking OSHpark but they seemed expensive
sacred timber
I don't plan to make very many so I'm more focused on how good a job they do and how nice their silkscreening comes out.
dawn acorn
Yep.
sacred timber
I totally agree about that cable. Yesterday I managed to install N20 motors with encoders in a Zumo robot, and man, that was a fiddly enterprise. It's those things that take up a huge amount of time on a project.
dawn acorn
The place Fritzing links to is in the Netherlands. They did a good.job
sacred timber
I probably shouldn't post this because I didn't end up finishing it, but this was the design.
 dawn acorn
Bet that was fun to design
sacred timber
Yup.
But I'll probably modify it now so that it isn't just a Eurorack module, more a front end with a microcontroller "wire API" so it could be used for a variety of things. I'd likely also drop all the 1/8" jacks so it'd more just emulate most of the switches on an early microcomputer like an IMSAI or Altair.
The hardest thing at the time was figuring out who could do the front panel, which would have been printed powder coated aluminum. Nowadays I'd just have a silkscreened PC board as they look pretty nice and are roughly the same durability.
So were you programming the Pico in C/C++ or MicroPython? I'm guessing some flavor of Python because of the I2C devices. I'm just replacing an Itsy Bitsy M4 Express with the RP2040 equivalent so I can use MicroPython.
dawn acorn
Using CircuitPython
Which is difficult because there is no threading. Or interrupts
So it's all polled at the moment in terms of control logoc
Logic
wide musk
@dawn acorn that's amazing! Man, the nest of wires gives me flashbacks... But you are clever enough to get it done and get a PCB!
sacred timber
dawn acorn
Which is difficult because there is no threading. Or interrupts
Yeah, I've only in the past few years been spending any serious time with Python (for my robot hobby) and come to it as a professional Java programmer. It's bizarre to see what looks like almost identical Python syntax for the Java threading code, but I discovered rather too late that the syntax doesn't match the behaviour, that it's not actually multi-threading. Just pretend. Depending on your SBC or microcontroller board you can sometimes get hardware-level interrupts, but this isn't so clear at first.
wide musk
CPython is a nice language... Pretty easy to use but it definitely has its drawbacks. Once I got the mqtt module to work in the PyPortal, the touch screen is super slow to respond.
sacred timber
wide musk
CPython is a nice language... Pretty easy to use but it definitely has its drawb...
Because I'm porting a robot operating system from Python to a microcontroller it seems that MicroPython is really the only possibility, that CircuitPython would be a bit too limiting. Like I at least get uasyncio and some other libraries, and somebody has provided micropython-lib ports of others.
wary atlas
I'm lazy with cables and would have just shoved a long cable in XD what type of Tricorder are you going to make this project resemble, @dawn acorn ? A TNG one, or a custom model with TNG-era LCARS?
dawn acorn
Well... As much as i would dearly love it to resemble something like either... My 3d skills don't extend to hinges. So, it's kinda reminiscent of TOS era, but with an LCARS interface!
My main criteria was that it should be hand-sized. Which it is. So that's good at least 🤣
wary atlas
You could probably make a design that evokes post-TOS and pre-TNG! Something bigger than the TR-500 series we see in TNG, but not as big as the TOS tricorders
dawn acorn
Good call! Might need to do an "alternate" UI with, say, TOS fonts but a bit LCARSy
wary atlas
Yeah, it would make sense that LCARS would have evolved over time, not just been a static thing. Maybe take some inspiration from Enterprise for early pre-LCARS interfaces
dawn acorn
I need to find some decent screenshots! 😉
wary atlas
Good excuse to marathon all the shows, hehe
dawn acorn
Oh, okay. I'm in love: http://www.waxingmoondesign.com/MainPage.html
wary atlas
My MacBook Air refuses to play it XD
dawn acorn
Doh!
wary atlas
That's what I get for using an ancient computer, lol
wide musk
@dawn acorn you can 3D print most of the TOS Tricorder and use aluminum parts for the sides and faceplate. I have the "schematic" for those if you want them.
I bought the original aluminum parts from Russell Harrell but if you have a router and some flat bar, it's pretty easy.
dawn acorn
Aluminium is a problem for me. I lack the tools to cut and shape.
wary atlas
Time to build or buy a CNC, hehe
exotic sierra
So one LED needs reworked but this is kind of fun to look at

Not directly of course
wary atlas
lol, safety first
wary atlas
ah
exotic sierra
wide musk
@dawn acorn if you have woodworking tools, you can do small aluminum pieces. Just make sure you use carbide bits and take small amounts off at a time. I milled all my pieces with a regular router and router bits.
lucid bloom
I don't like to have to save the day cuz that means something went very wrong but that's why I built the freezer alarms at the food pantry. We got a new freezer a few weeks ago and it died a few days after we got it (before we loaded it), it got repaired then we started using it, I put the new pi alarm on it on Tuesday. It died again last night. I got the text from the alarm at 9pm. When I got there the freezer said it was 41, my sensor said 24, my sensor was right because everything was still frozen solid. About $1000 of food was relocated, I am very annoyed because a new freezer shouldn't die twice in it's first two weeks of use, if I didn't install the alarm we would have lost everything in there cuz now it's now almost 80 degrees inside that freezer.

 night bronze
Great call putting the alarm in there @lucid bloom. It's just like how people should ALWAYS get a home inspection before buying/closing, even in new construction.
lucid bloom
I have a total of 5 freezer alarms counting the new one and 2 fridge alarms because im not going to take any chances. They text with twilio and upload to adafruit IO. I get a text I check the data.
sometimes when an alarm is new it will go off because I did a guess for the initial conditions to set it off. in this case is was over 20f for 30 minutes (which should never happen because its normally around 0 and the defrost goes up to 15f)
night bronze
lucid bloom
I have a total of 5 freezer alarms counting the new one and 2 fridge alarms beca...
I don't blame you. If I remember from your original post, this has to do for a food pantry, right? In those cases, just like 1000$ worth of goods go a long way, losing 1000$ of food hurts a whole lot
lucid bloom
Yup for the food pantry, I do the monitoring and I made improvised sms based ordering system/number sign system/packing station and Salesforce. I have been squarely in charge of IT since covid started.
night bronze
That's very awesome of you to donate your time and skills to such a necessary cause
lucid bloom
I've been there a very long time, I've been slowly taking over the place. We have 2 pi 3bs and 8 pi zero ws. They let me do whatever that I say I can do. In the future I will migrate to a food ordering app or open source alternative, to do online preorders with scheduled pickups. We are pretty small if we get a lot more clients we will have to change how we currently operate which is basically how they have been operating for the last 25+ years.
 mellow rose
I had to resize the iris and change it so his eyes didn't roll up into his head, but this M4SK is great. I have the i2C light sensor and it'll be mounted in the frame, I just have to adjust the Arduino code to pull from that instead of the one attached to the SeeSaw.
wary atlas
spoopy
mellow rose
mellow rose
I had to resize the iris and change it so his eyes didn't roll up into his head,...
The picture is of the CEO of my company, and I have a 1:1 scale full size portrait ready for the final product ... the headshot alone was just a test. I also have my raspberry pi doing person detection with a webcam. I'm able to output XY coordinates from my python code, but I haven't decided how I want to send that over to the M4SK. Maybe output an interrupt from the pi, and make the pi an i2C device? that way the M4SK can detect the interrupt and go get the current XY location of the person to look at?
I wanted to do specific face detection, so when certain people are in the room, it locks in on them. Most of the time, his gaze will hop from person to person, and will track the person if they move around. Currently I have it aimed at "center mass", we'll see if that looks convincing.
The Pi, Camera (s?), PIR sensor, Light sensor (so the eyes dilate), and mic (for looking at loud noises) are all going to be embedded in the frame 🤞
mellow rose
mellow rose
I had to resize the iris and change it so his eyes didn't roll up into his head,...
Here's the full sized image that I had printed on posterboard ... large as life, I think it comes out to 3'-4' tall with frame?
 wary atlas
That's pretty epic!
mellow rose
Here's one of the circuit python based keyboards I'm currently working on.

And another one. This one is my favorite so far, mechanical keyboard with low profile gateron switches and low profile keycaps. The keyspacing on standard keyboards is 19mm but these keys are spaced 16mm apart. I don't really notice the difference but probably less finger travel? 🤷♂️
I assure you, it's very cute in person.

Last one (for tonight), I used CircuitPython, an arcade switch, an old playdoh container, and a Qt Py to make a USB-C 1 button keyboard. Press the button and it toggles your zoom audio mute/unmute. Press and hold the button, it unmutes, you talk, and when you let go it mutes again (push to talk). And the last function of this lil one button .... if you smash on it a bunch of times really quick, it rage quits the zoom meeting without confirmation. This was a ploy to get others excited about CircuitPython at my work (software engineer by trade).

I MAYBE spent an hour on the Doh! button.
night bronze
mellow rose
Last one (for tonight), I used CircuitPython, an arcade switch, an old playdoh c...
That's awesome. I love the rage-quit! "Watch what happens when I mash it repeatedly"
*click*
mellow rose
CircuitPython is freaking amazing ... it's like putty in my hands (da-dum-chhh)
wary atlas
groan.wav
mellow rose
_** rhatfield scampers off to play with this quarter's AdaBox ** _
wary atlas
continues building Adafruit cart
night bronze
wary atlas
*continues building Adafruit cart*
Hint: it never ends. ever
wary atlas
I gotta get all the free perks, then I can stop XD
night bronze
wary atlas
I gotta get all the free perks, then I can stop XD
Remember, if you make an account, you'll get a different StemmaQT board with each order! lol
wary atlas
I have an account :D Didn't realize the StemmaQT board changed!
night bronze
They don't want to keep sending you the same thing over and over - I guess unless you're into that sort of thing!
wary atlas
Heh. Is it just ANY of them, or specific ones?
night bronze
That I'm not sure
Adafruit Industries, Unique & fun DIY electronics and kits : Free - Tools Gift Certificates Arduino Cables Sensors LEDs Books Breakout Boards Power EL Wire/Tape/Panel Components & Parts LCDs & Displays Wearables Prototyping Raspberry Pi Wireless Young Engineers 3D printing NeoPixels Kits & Projects Robotics & CNC Accessories Cosplay/Costuming Ha...
wary atlas
Yeah, doesn't specify... guess I just need to order repeatedly, lol
night bronze
Empirical science!
wary atlas
Starting a GoFundMe to test the research XD
 civic vale
The algo as described on "Ask an Engineer" is the first time you hit that level, they randomly pick one (they have in stock) at random. The next time you hit that level, you get another. If you don't have an account, there's no state so every one is the first, you'll get dups. If you have an account, they remember which ones they've already sent you and select from the complement set.
wary atlas
Ahh, nice... Does that count ones you purchased as well? Or just the ones sent free?
gusty shard
So far I've got the AHT20 environmental sensor and the LIS30H 3dof accelerometer as freebies. I think they send mostly sensors, maybe IO expanders. Most of my orders are below $149. I have a growing collection of half-size permaproto boards. Oh, and a few of the black facemasks.
wary atlas
I need to figure out what to do with permaproto boards XD
gusty shard
Custom Eurorack modules, but so far it's just a dream.
wary atlas
Dreams can always become reality!
 tacit delta
i dont see any forbidden solder worm so seems fine
gusty shard
Beeped it out, seems okay.
wary atlas
beep boop!
gusty shard
Got a little hot on row 6.
 wary atlas
oop... well, it doesn't look THAT bad. You didn't burn off the whole pad, lol
gusty shard
stories I could tell...
wary atlas
same XD
One time I flubbed up so bad that I literally took all the pads off a board...
gusty shard
PWM random tune generator. It's working!
 wary atlas
huzzah!
 hazy mesa
Printed and ready to wire this up. So excited to finish this up this weekend!
 exotic sierra
These Fibonacci boards are super cool, and battery powered thanks to a board I make and sell 🙂 https://mobile.twitter.com/jasoncoon_/status/1393646269017600005

I have more Fibonacci64 Micro PCBs from @oshpark assembled, @adafruit QT Py's, @oakdevtech LiPo Power Packs, and @tapplastics black LED acrylic. Working on documentation, then I'll be submitting the listing to @tindie for approval soon!

 Twitter
·
sacred timber
Twitter
·
sacred timber
Perma-Proto boards are the duct tape of robotics!
 wary atlas
Do-anything, be-anything boards!
sacred timber
wary atlas
Do-anything, be-anything boards!
Those are some of the objects in my "obsolete" box, past experiments. Being in New Zealand things cost more and take more time to get here, so I seldom solder anything like a microcontroller to a board because I know I'm gonna change my mind soon. Sockets and Dupont connectors are my friend...
wary atlas
Sockets good! I put pins on a Pico to use on a breadboard so I don't have to solder to play with many different things
sacred timber
I also use the ones that are meant as Pi HATs because they handily break out most the 40 pins of the GPIO onto the board where I can get access to them. Not as good as the ones that break out all the pins, but Adafruit's all have sockets and such already. I suppose those little Pico Hat Hacker ones would do for that, and they're nice and small.
wary atlas
It would really suck to have to solder and de-solder if you wanted to experiment a lot with one microcontroller
sacred timber
I think I've already posted this photo, but I have an Itsy Bitsy socket on one of my robots and was happy to be able to swap out the M4 Express for the RP2040 version, no re-wiring required.
 wary atlas
Nice :D another benefit with all the pin compatible boards out there!
sacred timber
wary atlas
Nice :D another benefit with all the pin compatible boards out there!
Yeah, and the Itsy Bitsy is my favourite, lots of pins but still very small. If I was so courageous as to build a computer around a microcontroller rather than a Pi it'd be one of them, or maybe an Unexpected Maker's TinyPICO, since it can be programmed in MicroPython.
Life is too short to do a large project in C/C++...
wary atlas
Playing with the Pico and starting to learn CP, I think I might soon abandon Arduino altogether... It feels more efficient, plus there's just so much more power on the table!
2MB feels like I have a huge field to build in, instead of a broom closet
 ruby ledge
I'm finalizing my PNG display library for MCUs this weekend. Anyone with feature requests, please ask them now. If you would like to try it out before I flip the public/private switch, please let me know.
it supports most files and features

I patched zlib to not use malloc/free so that you can manage memory the way you want
I also made (zlib) internal Adler32 CRC checking optional which can speed up decoding
sacred timber
wary atlas
Playing with the Pico and starting to learn CP, I think I might soon abandon Ard...
Check out the TinyPICO, pretty cool little board with multiple language options.
 grand vessel
Hi, can I show off a little project?
sacred timber
grand vessel
Hi, can I show off a little project?
I think that's the name of this channel.
grand vessel
Then I shall.
wary atlas
Wait! gimme $5 first :P
grand vessel
Today one of my sons had his 12th birthday party. As a surprise entertainment, I created a bit of "mysterious alien technology", recovered from a crashed saucer, that when turned activated led the kids on a treasure hunt through our town, ending at pizza and cake.
Here's what the completed device looked like (it wasn't pretty, but that fit the theme):
completed wand / gromulan destructor

And here's one of the screens of it in operation:
clue 1 of 23

The GPS worked perfectly, and guided the kids from site to site, at some of which they were presented with quizzes or puzzles or challenges before being allowed to proceed.
wary atlas
Hehe, that's awesome
grand vessel
The 12 year olds proclaimed it "epic".
sacred timber
That's certainly one way to become a hero, congratulations!
night bronze
That is absolutely incredible @grand vessel! I love the creativity, the planning and the back-story, and I'm glad it played out so well for the audience.
That it ended at cake and pizza, well, that's the cherry on the sundae! Well done!
wary atlas

west zinc
grand vessel
Today one of my sons had his 12th birthday party. As a surprise entertainment, I...
Really cool. Glad you got through the GPS rounding errors to get it working. Looks like awesome fun!
exotic sierra
Ugh, dad goals. This is awesome
My son currently is excited whenever I make cool lights for his room
wary atlas
I hope to have children to make gadgets for some day
sacred timber
wary atlas
I hope to have children to make gadgets for some day
..or start a local club, then when your kids are of age they can join. One of the guys in the Dallas Personal Robotics Group (DPRG) started doing robotics when his son was of a certain age, got involved at his local school, then as he said "grew up with them" and took the whole group through to high school where they've been doing some amazing robotic FTC competitions (in Texas) and several of his students have gone on to robotics at university, others in tech-related fields. Cool guy and very inspiring. And very generous with his time. He's become a robotics expert over those years too and built some very cool robots.
But of course it doesn't have to robotics. Anything one's heart gets into works.
wary atlas
I'd love to be involved in something like that, but I'm not sure I'm equipped to lead such a program
mellow rose
Bravo @grand vessel , I hope I can (and plan to) provide my kid with such awesomeness. I made something tangentally associated ... For my brother's wedding gift I gave them a GPS box that led them to different clues around their honeymoon destination, "couples massage", "baseball game" and other things, each would give a "clue" then when it got there, would reveil what you should do... I've never been there, so everything was from google maps coordinates ... turns out they had to break into the kitchen of some restaurant to complete one of the tasks ... my brother loved that part.
sacred timber
wary atlas
I'd love to be involved in something like that, but I'm not sure I'm equipped to...
I'm guessing he wasn't when he started and got better at it. You gotta start somewhere. I've found that most people can and will rise to any challenge when their hearts are into it.
wary atlas
True... I need to get a job that allows me to donate time tho XD currently working full time with no real off time
grand vessel
My day job doesn't have many outlets for creativity, so I embrace projects with my kids when I can. We have collectively made some great halloween costumes (though with those, the kids help. today's project was a surprise for the birthday boy)
wary atlas
Yeah, my job is IT helpdesk... No creativity there. I work on projects during work hours if it's not too busy and I have time, and I don't have anything else to do... But currently I also do basically all the housework, so no real free time >~>
grand vessel
@west zinc GPS ended up being the star of the project. The LSM303 compass was worthless, and I never got the RFID breakout to work at all (though I may try again with a different microcontroller or rPi for another project in the future). Has anybody ever gotten the LSM303 to do anything useful?
@west zinc the accuracy and precision of the GPS with an external antenna was stunning.
@west zinc And the circuitpython libraries were super-useful, made it almost embarassingly easy once I solved the problem with floating point precision.
and with a hat tip to David Mamet, I am going to correct my own description of the project. The treasure hunt was not merely entertainment — it was also fun, since the kids were all key, active parts of the activity.
sacred timber
wary atlas
Yeah, my job is IT helpdesk... No creativity there. I work on projects during wo...
I won't describe my workload but I can only say that everyone I know has a full-on schedule. I've got house, family, full-time work, band, etc. I've always got a half-dozen projects that seem like they're all on hold, waiting for enough time. I'd just recommend finding even one or two hours per week to do your personal thing, if that's possible.
wary atlas
Yeah, trying to carve out project time where I can
sacred timber
Heh, and not like me spending too much time on chat... 😁
grand vessel
I find that deadlines help. They force me to complete projects, even if they're with fewer features than intended (and they almost always are).
wary atlas
I mostly chat wile doing other things XD
Deadlines would be pretty impossible for me with my project time being mostly during work... 'cuz one week I might get 6 hours out of the week where I can fiddle, the next I might get 0
And there's no rhyme or reason
sacred timber
wary atlas
I mostly chat wile doing other things XD
Same. I started the Personal Robotics server after ending up on Discord to follow the Unexpected Maker stuff Seon Rosenblum sells like the TinyPICO. I've ended up getting some of the DPRG members I know involved, and it's gradually coming along. I've ended up spending a lot more time than I've wanted but building a community takes effort. Today I think I've started a collaboration with one of the DPRG guys to develop the U armature and wheels of a Mars rover so it can be either 3D printed or milled in aluminum on CNC. That wouldn't have happened if I hadn't followed this cookie crumb trail...
We now have 44 members not including bots, and that's after only a couple of weeks. So going well. A fair bit of time investment, but I think in the long run worth it.
sacred timber
grand vessel
I find that deadlines help. They force me to complete projects, even if they're ...
Speaking of deadlines, I'd scheduled today to work out the bugs on my Python asyncio-based message bus system. So I will absent myself and try to get some work done! Ciao!
night bronze
sacred timber
..or start a local club, then when your kids are of age they can join. One of th...
I had no idea there was such a club around here. Though I should've figured it would be related to the maker space.
wary atlas
I'm hoping to find more time in the next few weeks -- nearly finished some housework things that are taking all my time
sacred timber
night bronze
I had no idea there was such a club around here. Though I should've figured it w...
Well, there's Discord channels for high school robot competitions like FTC but I was likewise surprised, which is why I started one up.
Anyone interested just DM me and I'll send an invite. No idea how Adafruit feels about me posting the link here.
wary atlas
I'm in too many servers DX
night bronze
sacred timber
Well, there's Discord channels for high school robot competitions like FTC but I...
I'm thinking my kids might be a bit too young still for DPRG for now, but will definitely keep it in mind over the next few years
sacred timber
night bronze
I'm thinking my kids might be a bit too young still for DPRG for now, but will d...
Yeah, I'm thinking there's a minimum average age (with exceptions of course) where the kinds of thinking just haven't quite got to the stage where it's possible to handle a lot of the rather complex analytical tasks involved. GUI programming notwithstanding. I'm not sure what age that is, but probably around 11 or so. But I don't teach kids so I don't pretend to really know.
...and speaking of deadlines, I said I was gonna leave, then my workstation froze up because I hit a Fusion website (grumble) and now I will go off into the hinterlands to try to fulfill my own deadline...
night bronze
Yeah, I'd guess 13 since it's in the makerspace, what with liability, etc. Though they do have some technology classes at school, and I've got a gadget or two around the house!
Good luck to you!
sacred timber
Thanks!
solar yew
Sun seeking solar panel
 distant frost
I just made some lego technic compatible mounts for various Feather boards, including the FeatherS2.

I posted the files to: https://www.thingiverse.com/thing:4860772

The boards can be mounted with either M2.4 screws, or 2-56 screws. Versions for each are available.
azure salmon
This is literally a esp32 based adBlocker

GitHub
Ad Blocking with an ESP32. Contribute to openesper/esper development by creating an account on GitHub.
 azure salmon
 azure salmon
i'm cursed freertos wont compile
gusty shard
QT Py i2s beep beep
 wary atlas
beep boop!
formal hamlet
Finally finished my thermal camera project

 wary atlas
And it's far more compact than my cellphone with a thermal camera XD
tacit delta
how good is that?
wary atlas
It looks like it's relatively low resolution, but you don't need a lot to get an idea of where your hotspots on a board are or coldspots on a hotplate
formal hamlet
@tacit delta it's pretty great, 32x24 and about 2-3fps
tacit delta
not too bad. how much overall?
doc i did want to get thermal camera phone but so expensive lol
wary atlas
Yeah, they're generally several hundred dollars and not really great as phones... While my phone with a thermal camera is much higher resolution [640x480] and like 5-15FPS, it's no longer usable as a phone due to the OS being very out of date, and it's not even that old of a phone. At least a Pi-based camera will last many years
tacit delta
yeah i was hoping for future cheap ebay sales
i dont care of its usage as phone when its $20 or something
hmm https://www.ebay.com/itm/353191022157?hash=item523bd34e4d:g:bAoAAOSwmQxfUSMu not too bad but still eh

eBay
Infrared image resolution: 32 32. Video format: mp4. 1 x User Manual. Image format: png. Storage temperature range: -20 ℃ to 60 ℃. if item is defect or wrong when it. from us, it is no possible for us to get the parcel.
130 dollars
wary atlas
Add-on cameras at least you can use for more than one device, so they can last longer. But the phones with cameras are like $300 used and old
tacit delta
i didnt find ANY on ebay now lol
either it still sells fast, or theres no more
that page LOL "includes two interfaces, android and usb-c"
wary atlas
smart....
tacit delta
You can now add affordable heat-vision to your project and with an Adafruit MLX90640 Thermal Camera Breakout. This sensor contains a 24x32 array of IR thermal sensors. When connected to your ...
show stuff cool cool cool and stepper.. umm
its item related, but video preview is funny
seems its JUST for camera alone. bit much on price for me still lol
wary atlas
Yes, they are pricey, even at a low resolution and framerate... but that's just the nature of the tech
And the stepper preview is just the preview of the new product video it was in, lol
tacit delta
looked into aliexpress
so many of em try to trick using cheap item price and huge shipping
wary atlas
yyyyeah....
tacit delta
nothing really good.
256 x 192 is best i found thats under 100
except shipping isnt great LOL
wary atlas
that's sadly a common thing. INCREDIBLE DEAL, only $12! only $179 shipping
wary atlas
C'est la vie
tacit delta
indeed
honestly id get phone usb camera
seems to be far better deal, and huge resolution.
for just little more, 140 usd shipped something from ebay
wary atlas
Gonna guess it's one of the models on Adafruit like item 4407
tacit delta
probably. i figured total of price and it was bit much for me
wary atlas
Budgets hard
tacit delta
and i suck with electrics lol
wary atlas
Practice makes perfect! We all start at level 0
tacit delta
lol yeah though hard time doing anything lately
wary atlas
Indeed
formal hamlet
@wary atlas there is no such thing as a thermal camera with 640x480 resolution
At least anything priced under $10000 usd
tacit delta
uh what
i linked to one. thats 140 usd
or does it cheat wirth one pixel and scanning area?
formal hamlet
It's not 640x480, the display may be, but the sensor isnt
tacit delta
hmm ok
tacit delta
ahh i see it now
formal hamlet
Overall price for my setup: $65 mlx90640, $17.50 pitft bonnet, $10 pi0w, $5 microsd, $1 stemmaqt cable
Roughly $100
formal hamlet
No electronics required, it's all plug together
Tft bonnet just plugs directly into the pi, and the camera plugins into the tft bonnet by a 4 wire cable
No soldering required if you get a pi0wh (+$4 for installed headers)
tacit delta
its powered directly by usb right? no battery?
formal hamlet
YeH, I didn't put together any battery setup, no bms
That would add like $15 bom cost which I don't want to deal with right now
Charging circuitry + lipo battery
tacit delta
maybe can get one of those usb chargers
old ones with say 1000 mAh
not enough for modern phones but plenty for that
formal hamlet
Yeah, I have a usb battery pack to power it
tacit delta
cool 🙂
found some old phone batteries lol
wonder how easy it is to use em
and charge
formal hamlet
Need a lipo charging circuit
tacit delta
true can always use that
some models had plug in chargers
i have old phone with batteries, but its pretty old, probably dead by now lol that is if i can even find chargers
formal hamlet
Charging circuitry is on the phone itself
I don't have the spare parts or readily want to disassemble an old phone for its charging circuit
tacit delta
yeah its in phone but..l.
theres wall plug chargers too 🙂
in least for phones with removable battery

eBay
CE/FCC/RoHS certified. Wifi antenna. Cable & Converter. Connecter: US Plug. Just compatible with 3.7 Volts Batteries, Not for 3.8V or 4.2V! Otherwise, the battery can not be filled. AC Adapter. Cell phone accessories.
that one still have batteries being sold for example. its small one, being 1aH
formal hamlet
Indeed
tacit delta
only question is how to use it lol
maybe buy 2 wall chargers and rip one apart lol
nahh
waste of money
formal hamlet
Yeah, irs something I don't want to worry about right now, maybe I'll look for a charging board on pololu or adafruit for rev2
tacit delta
if there was charger designed to use usb and not wall, could just ingerate stripped down one into it lol
wary atlas
formal hamlet
<@381566293368897537> there is no such thing as a thermal camera with 640x480 re...
Well, that's what the camera on the phone outputs for thermal, and what it says in reviews
 formal hamlet
It's not 640x480, again
It uses the flir lepton
That is 160x120 max in the latest generation
For a product that cheap, the camera used is likely the cheaper product at 80x60 @wary atlas
Flir lepton currently has a bom cost of $150 for the cheapest product
(Also, a product 5 years old likely has a much more inferior cheap to the low range available now, it's probably lower than 80x60 in the current bottom end product)
wary atlas
Ah, ok, dug into it -- it has an 80x60 thermal resolution, overlayed on a 640x480 camera. So the review didn't state it properly. And most spec sheets don't list actual thermal resolution, just the output file resolution
gusty shard
Now I can adjust tempo and phase. QTbleeps!
 wary atlas
Bleep bloop!
 wary atlas
oof
 hard oriole
I think the world might be ready for electronic music karaoke.🎧
gusty shard
I left the Stemma QT port open so I can attach sensors.
...more bloops than bleeps when the humidity goes up.
wary atlas
What about blops?
gusty shard
never between friends
wary atlas
:O
ruby ledge

PNGdec Arduino_GFX 2nd trial done🎉🎊
And it is much faster than Pngle, 133ms vs 939ms
 Twitter
·
Twitter
·
my (nearly finished) PNG decoder for embedded
ruby ledge

GitHub
Arduino PNG image decoder library. Contribute to bitbank2/PNGdec development by creating an account on GitHub.
you can now try it yourself
 native basalt
My Neopixel HexaLeafs made with a 3D printed frame and neopixels running off an arduino job
This also links to a python script running on my computer to change the patters via a GUI
marble mantle
Nice!
dawn acorn
New version of my PicoPicorder PCBs have come out nicely. 🙂
 sacred timber
dawn acorn
New version of my PicoPicorder PCBs have come out nicely. 🙂
sacred timber
dawn acorn
New version of my PicoPicorder PCBs have come out nicely. 🙂
What company manufactured the board? Does look like they came out nicely.
wary atlas
Mmm, smooth black, I like it
dawn acorn
sacred timber
What company manufactured the board? Does look like they came out nicely.
JLCPCB. Got here quite quickly, too
marble mantle
JLCPCB black is matte black, which looks really nice. Used it too for my projects
dawn acorn
Only took 9 days. Outstanding, considering it's China.
wary atlas
Holy crap, that is fast!
 weary canyon
I'm developing an open source microcontroller based game console series as a hobby and a learning project. The desktop version of the console (the eventual goal, but step by step on my learning curve) is based around the Teensy 4.1 module flashed with different firmware for their position in the system and different peripheral hardware for performing specific tasks. VGA signal generation, virtualised CPU architecture, mathematics coprocessing, etc.
This project, however has hit some snags due to personal matters happening in my life and until I get back in the swing of designing the graphics driver's interrupt logic and finishing that build, I will focus on a more simplified version of the task.
So I'm making a handheld version since I can get a simple screen output and I can implement my virtual CPU architecture on any microcontroller, so I picked a cheap, expansive option
The raspberry pi pico.
I'm using one of them for running game code, one for dealing with 3D transformations, and one to rasterise triangles for use with a 2.8" TFT and send its touch data back to the game code unit.


this is the mainboard as it currently stands. I don't have the last header soldered because I was being lazy and didn't want to have to cut traces just to test whether I'd messed something up on the bottom unit
anyway, the old screen design I was going to use was a 1.77" TFT with no touch input and I was sad...so I bought a 2.8" TFT with resistive touch because they were $10 cheaper than the capacitive touch, had the same number of touch input locations on the screen, are the same form factor and thus could be upgraded to the capacitive touch in theory, and most importantly were in stock. Now I'm just waiting for that to arrive so today is going to be a lot of reading datasheets and CAD.
I actually have a 3D printed case for the old screen that I can show for reference, just have to get the images to the computer (many distractions abound here)
oh I probably should show what I've done so far for the desktop variant since it's actually further along
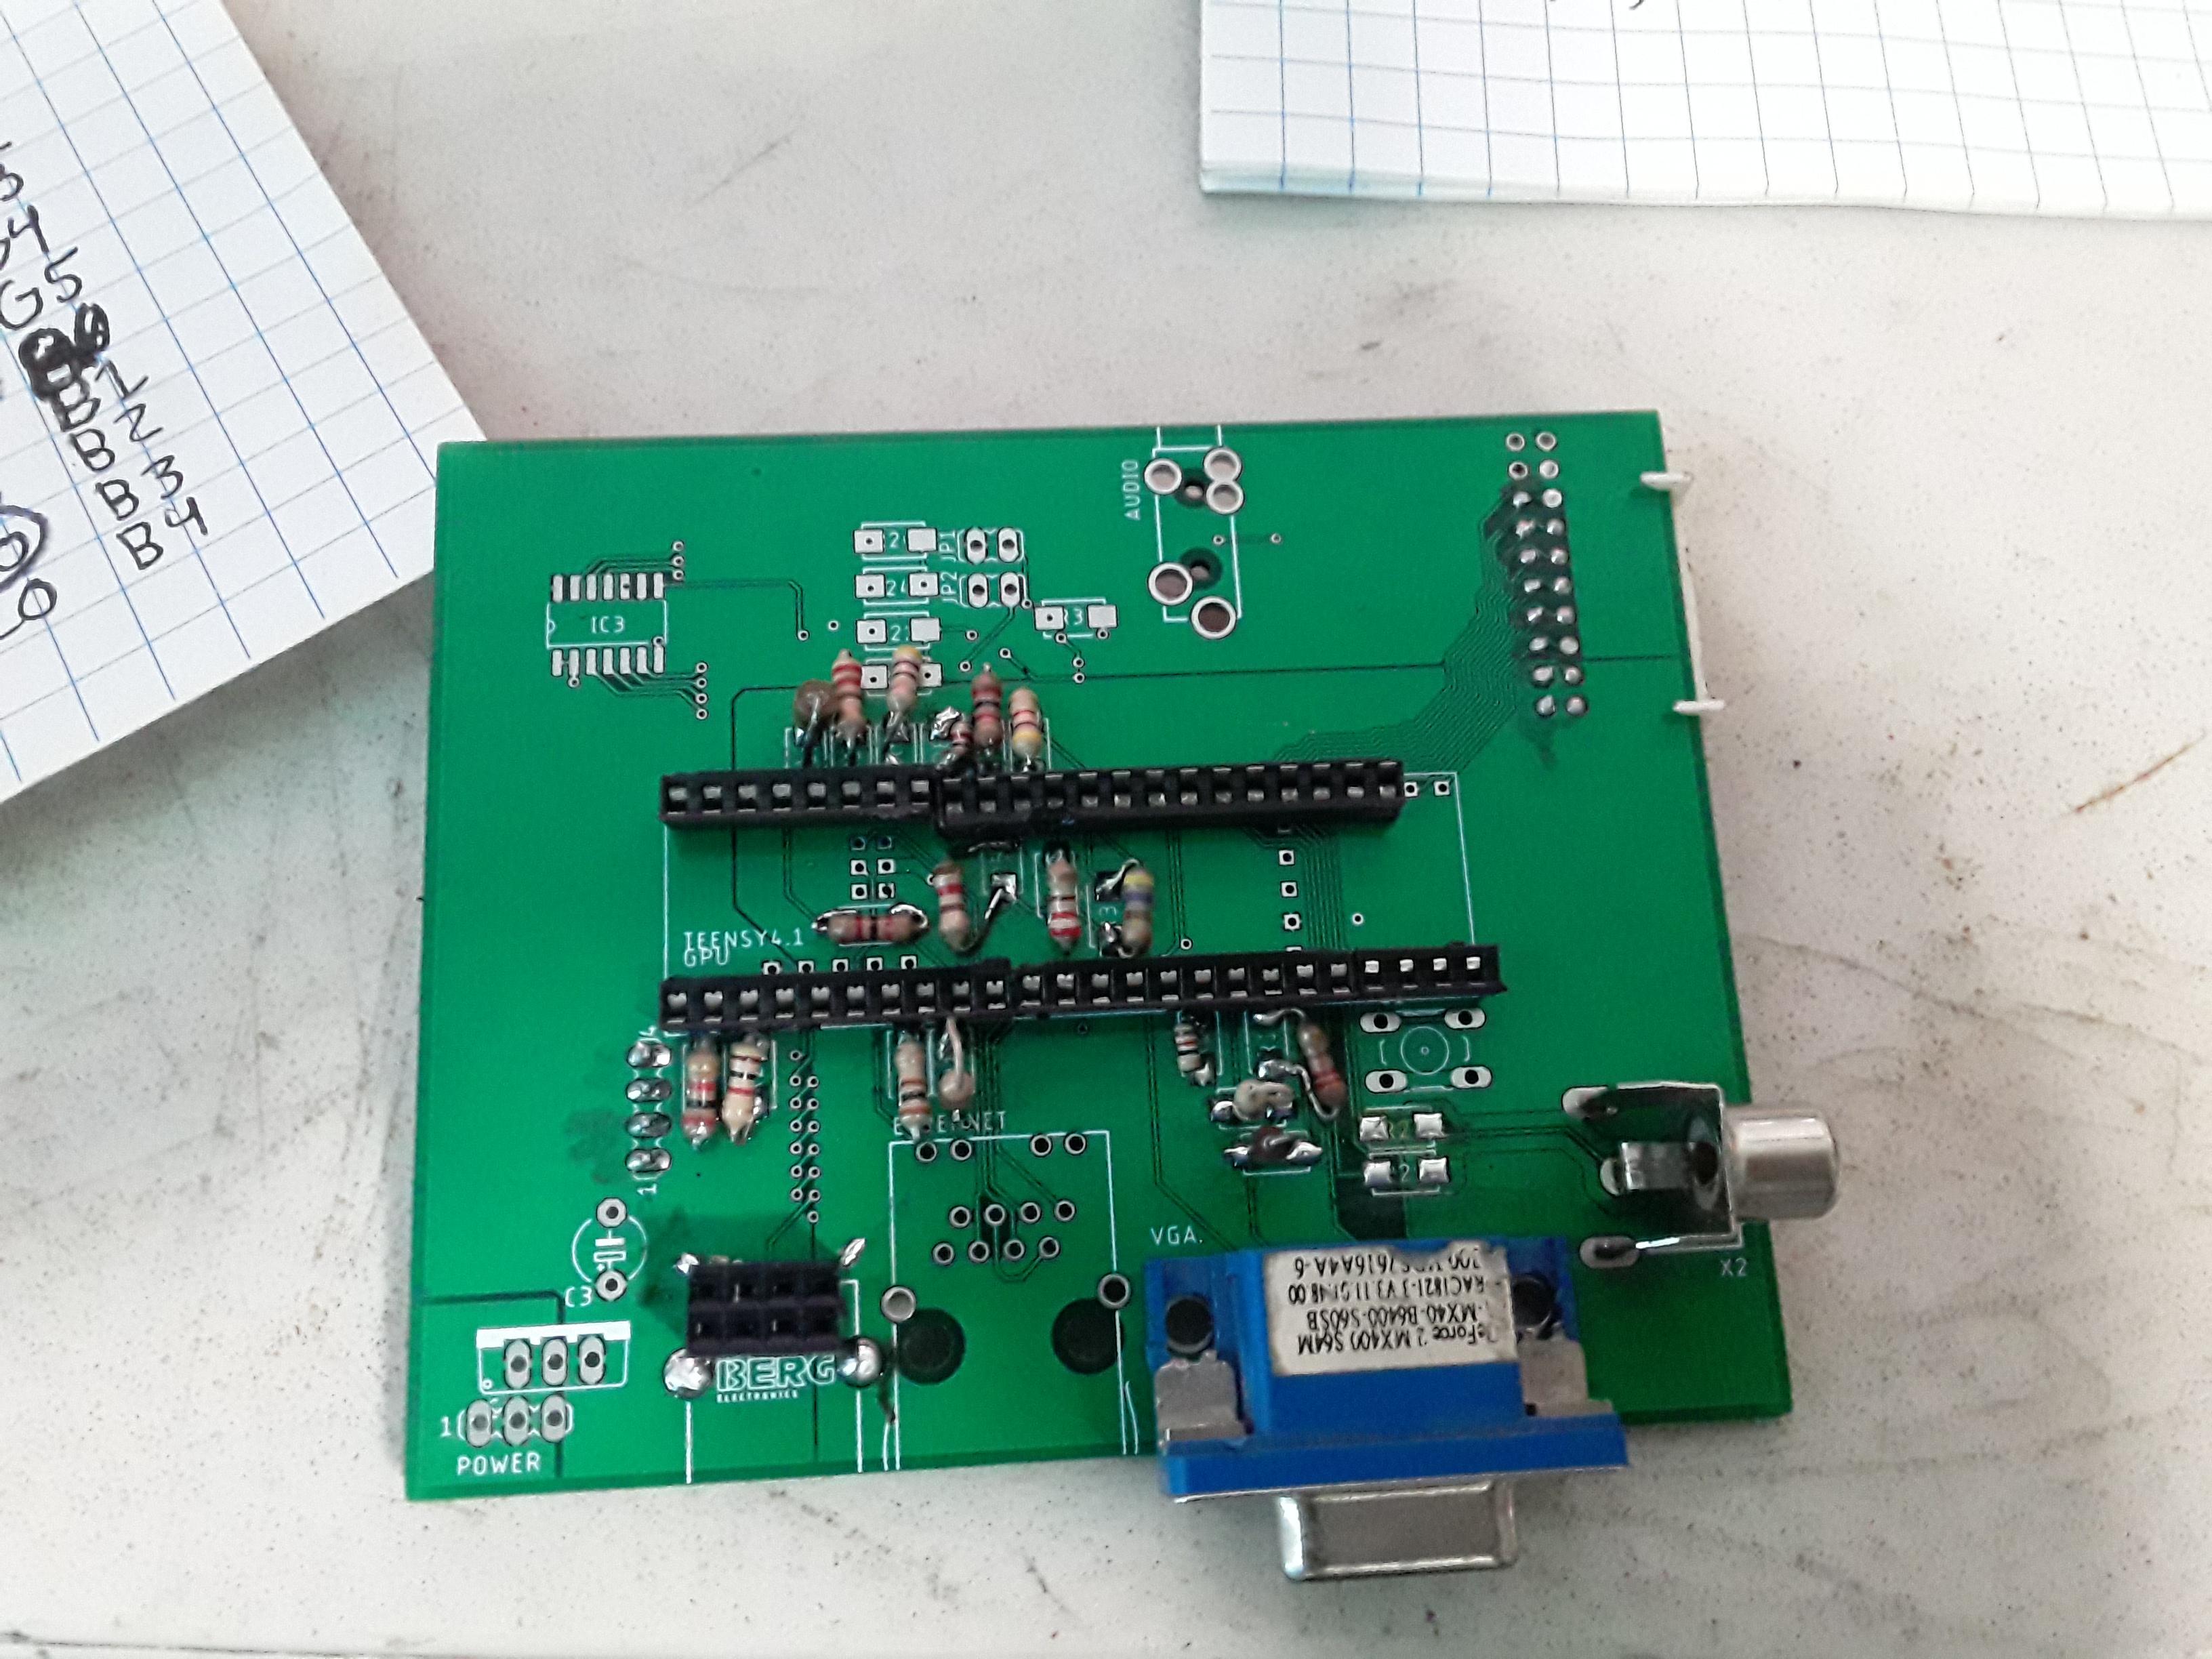
the mainboard that holds the Teensy and has a binary weighted DAC that was supposed to use SMD but a) I ran out of money and b) I ran out of space because I forgot to account for connector boundaries
so I made do with the resistors I had on hand
and yes, it's tested and with the right code does generate a VGA signal

no that's not a super short loop, it's just flashing at that rate, apologies if it's an issue
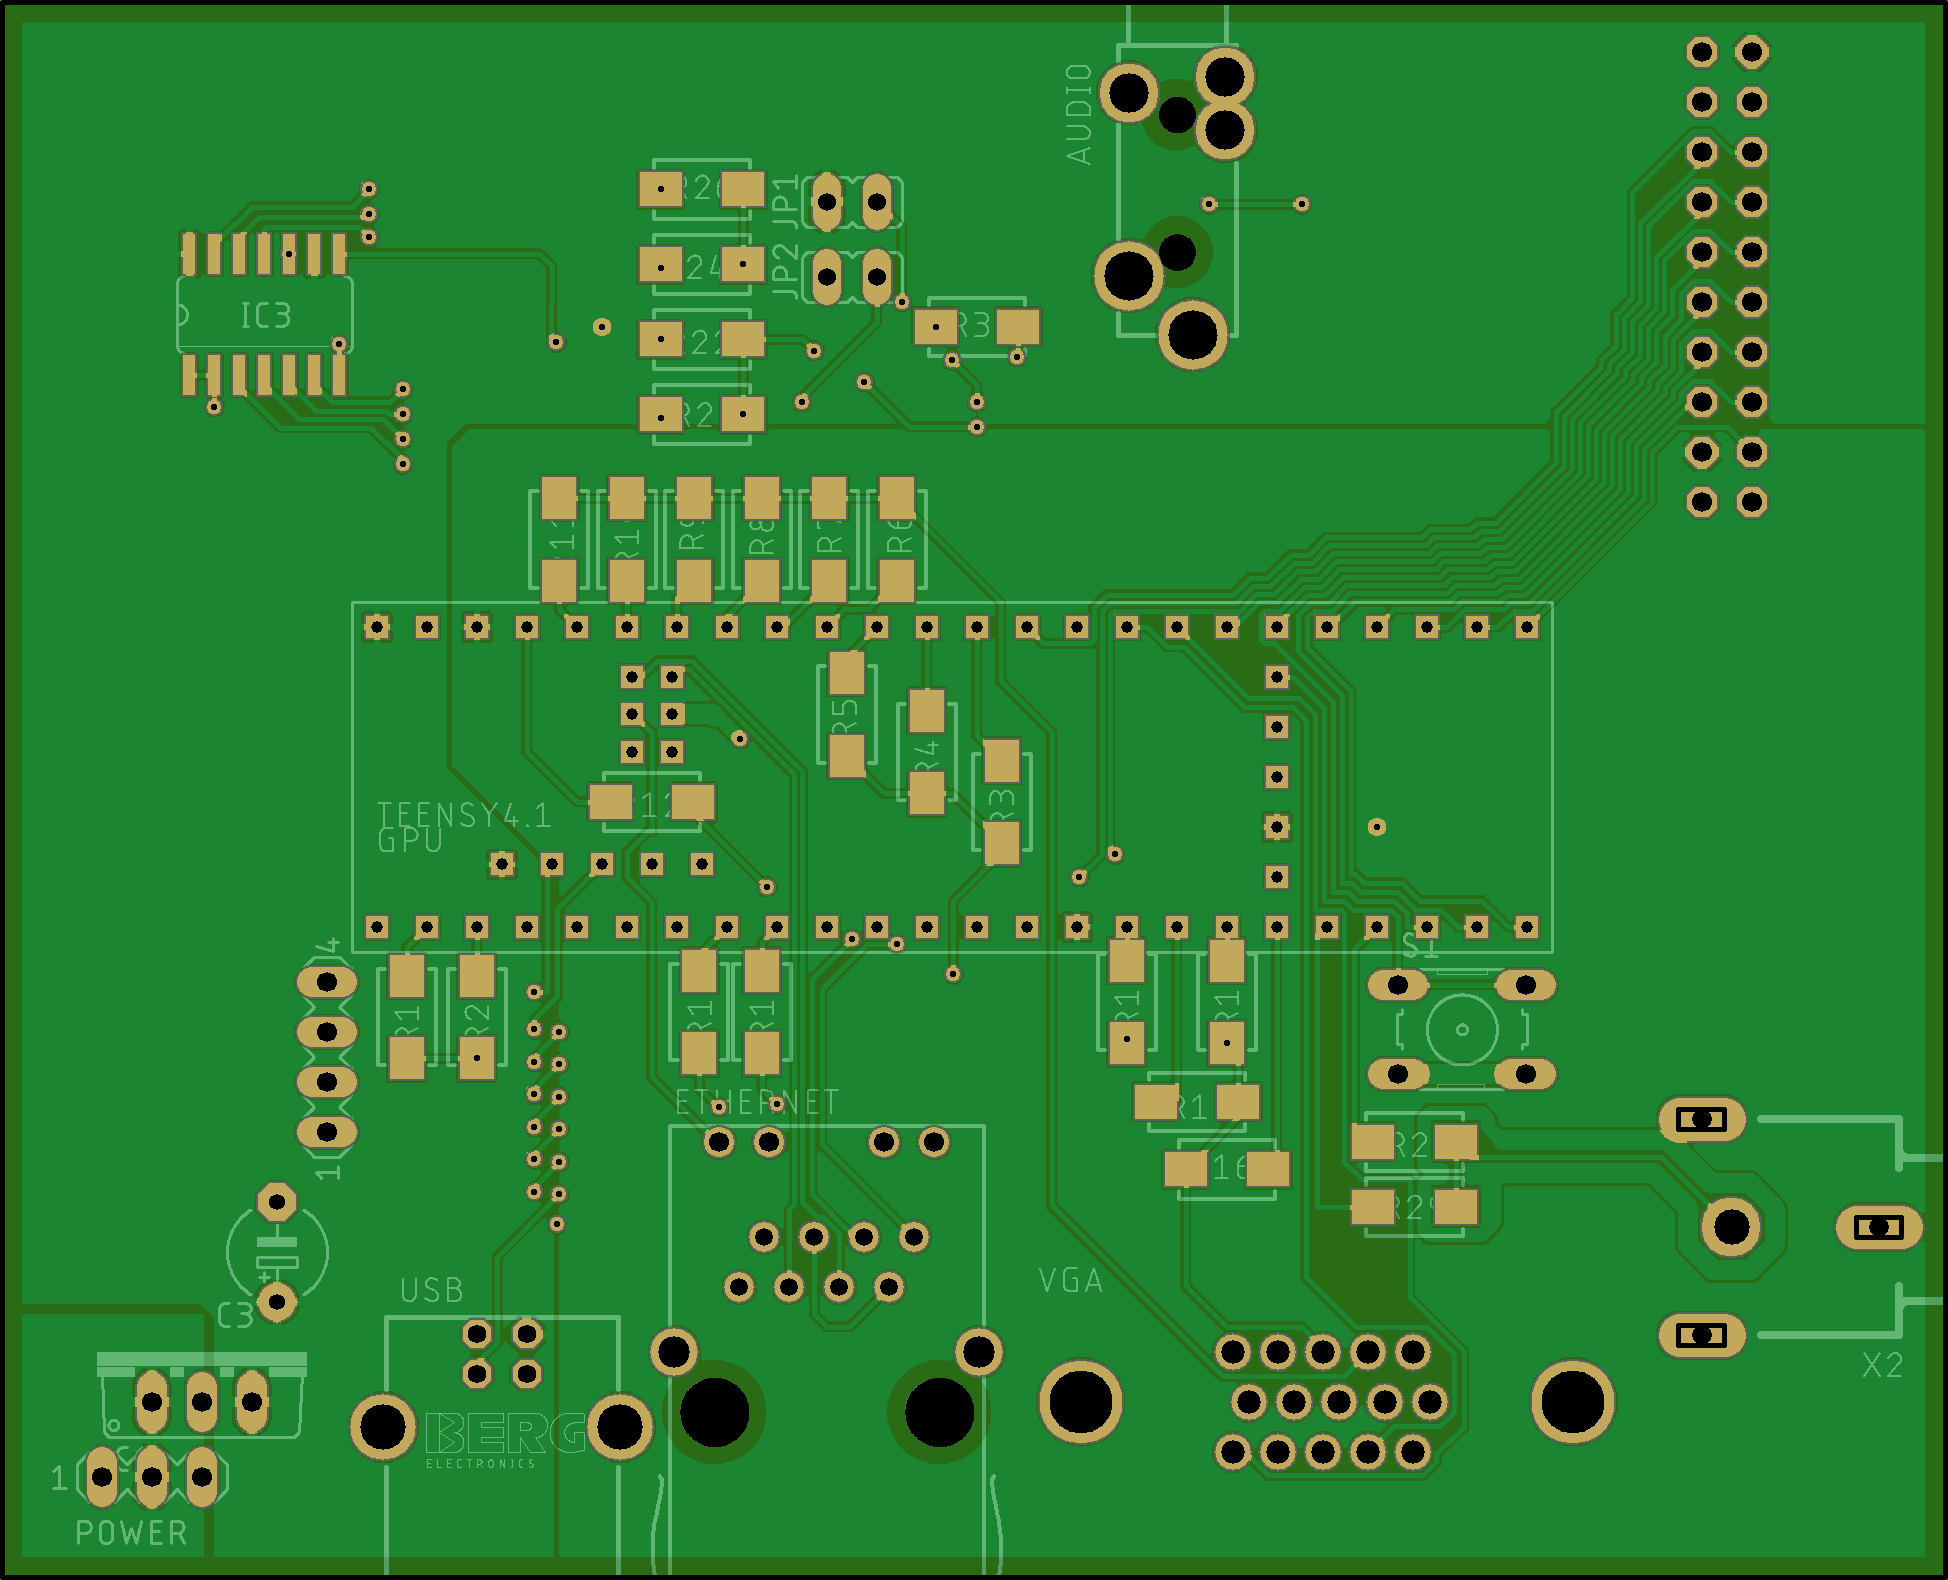

the board layout for anyone curious
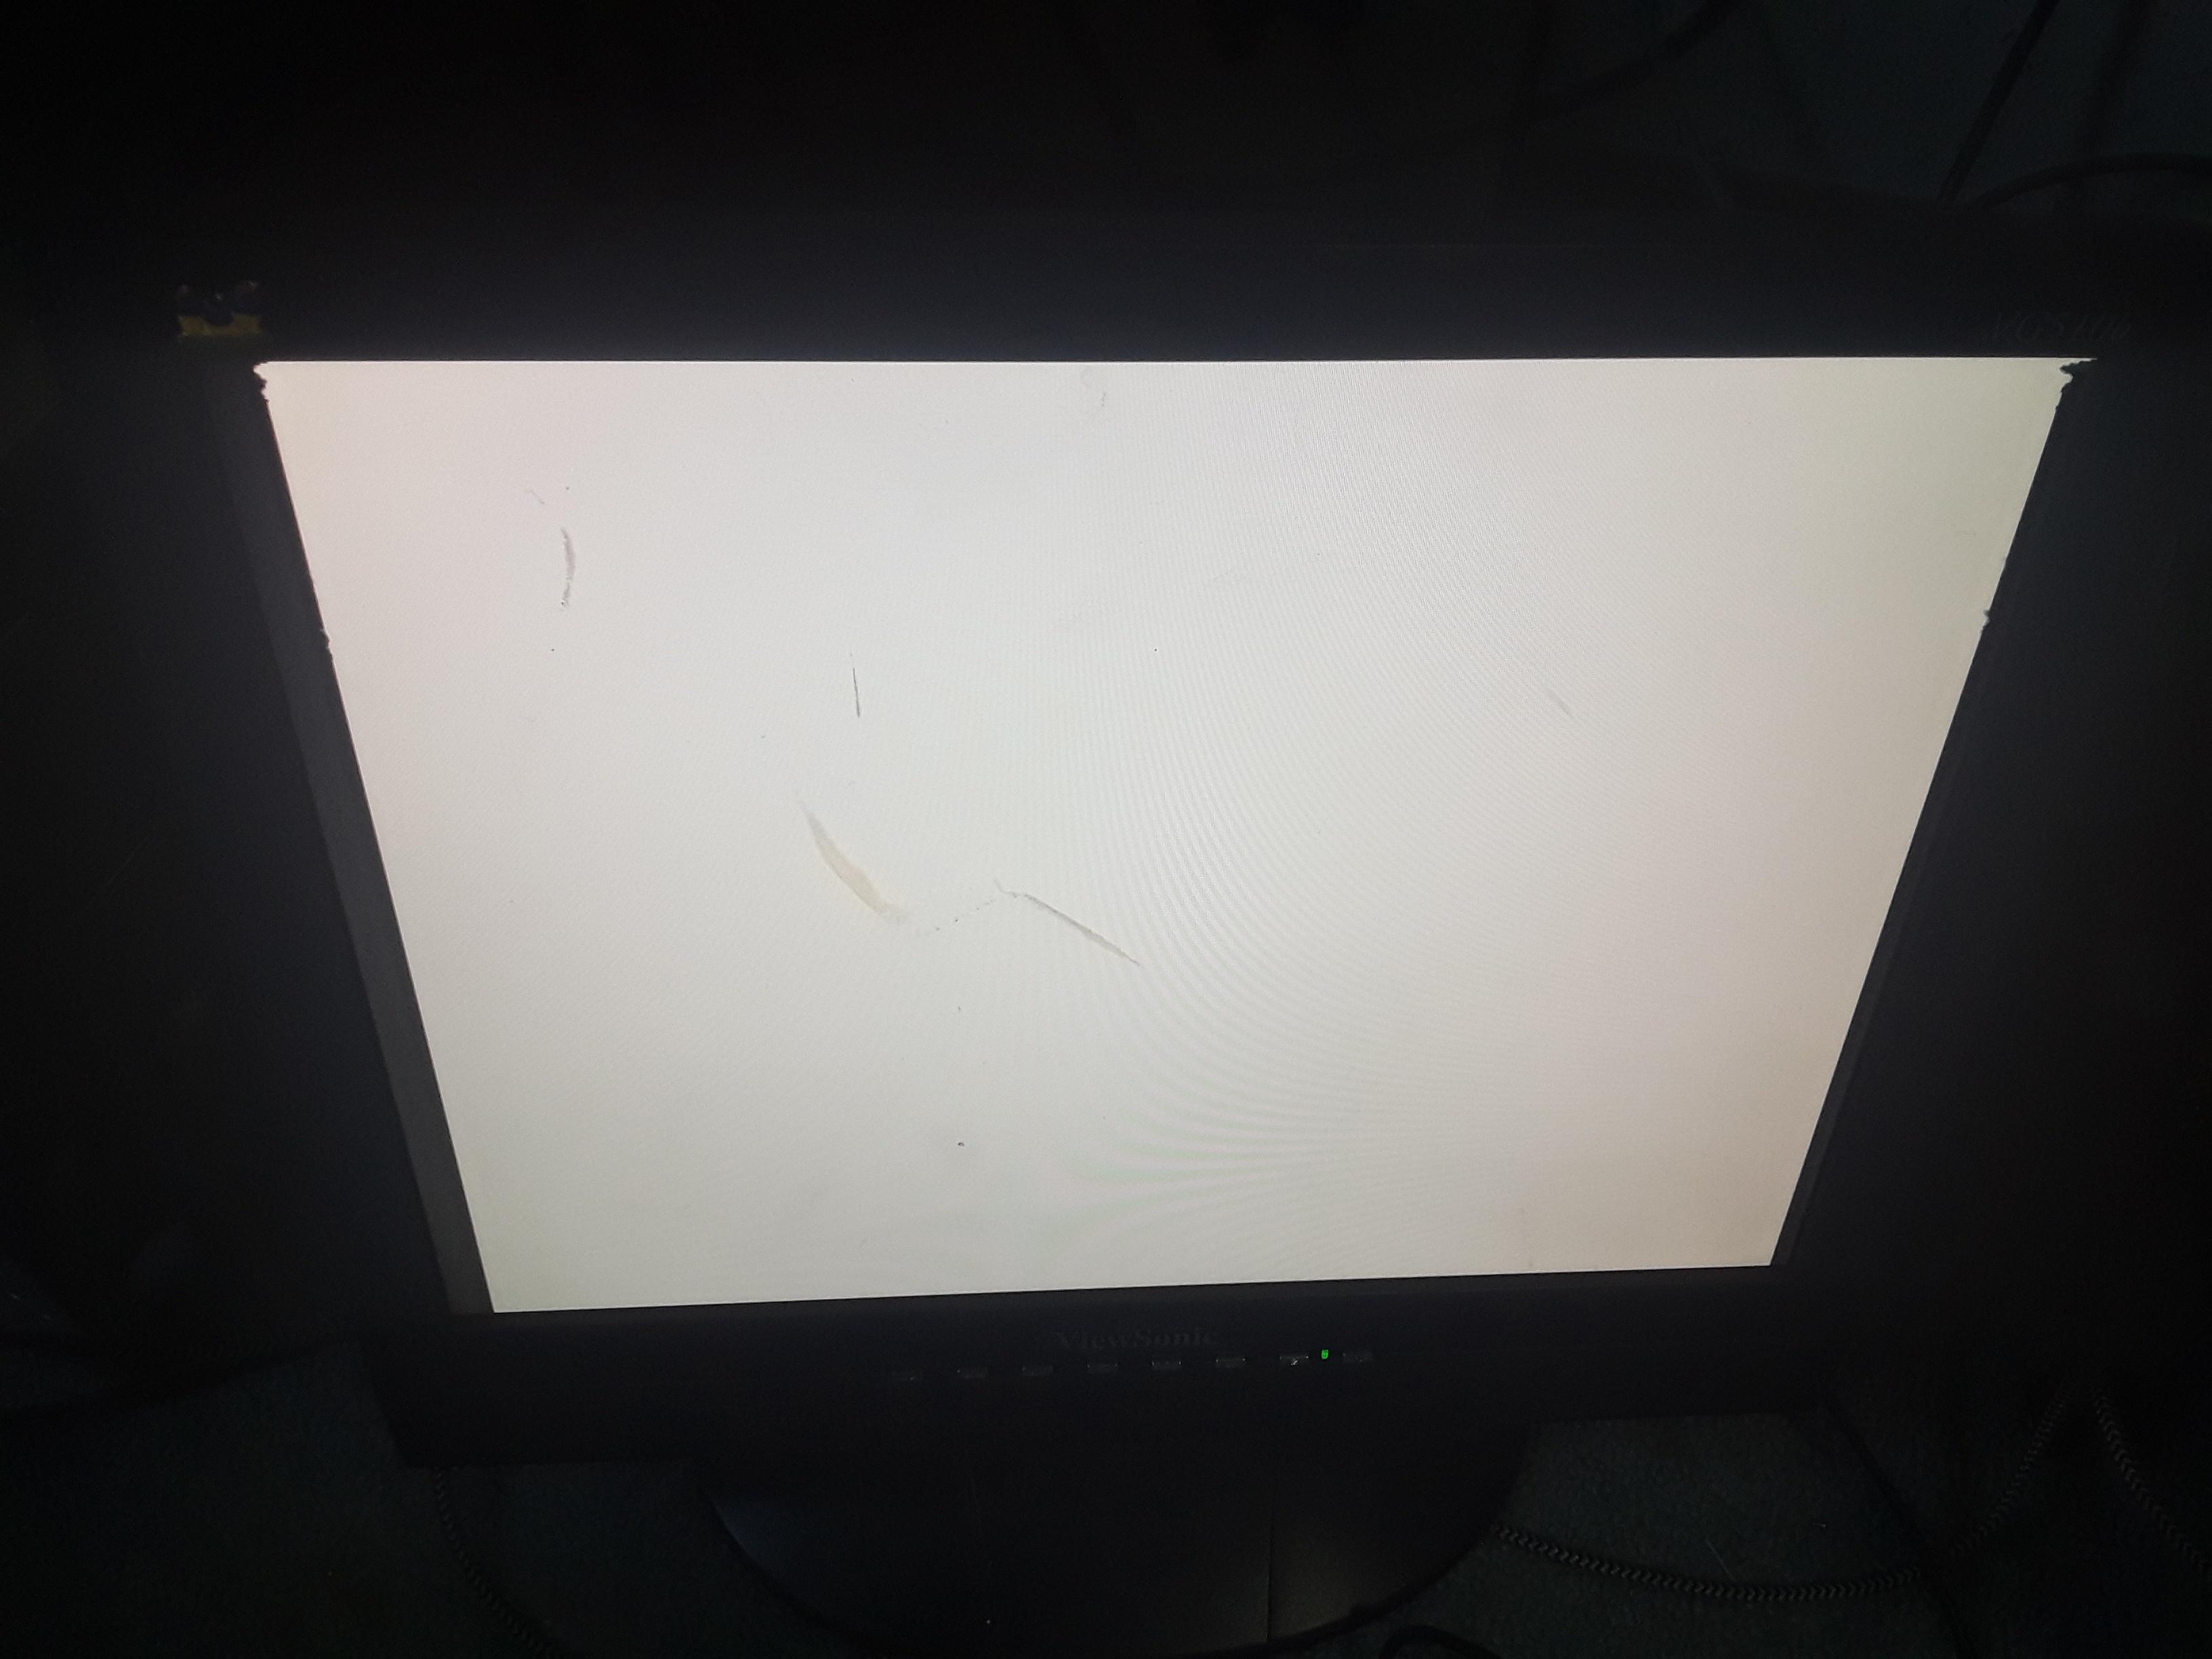
as you may be able to tell from this image, it has timing issues
so I need to develop a partial timing driver that triggers interrupts to clean that up
I have the pieces for it and I know what to do in theory, it's just taking that theory and putting it into logic can be a bit difficult to conceptualise
well, the logic isn't hard, it's framing it in a way that the chips I have will be able to implement it using their logic cells

old screen design

new one will basically be the same but scaled up
and probably with a brightness slider or something on it not sure
anyway, that's the current status, if anyone's interested in updates I'll post them here...if not that's fine, I'll still be working the project regardless...just means I don't have to break flow to take pictures 😉
(also still will be taking pictures, the updates will just come at milestones not during the process)

The unadultered board courtesy of JLCPCB for the curious... Very impressed with the price to quality ratio
well, not "courtesy of"...I payed for it...but not much
point is I'm going to be a return customer when I have even a little spare to get the next iteration of the board fabbed
until I've got my own board fabrication systems in-house, which could be a while...
and yes I majorly screwed up on the USB connector...I was tired, this was 3 days straight of reworking the traces until I liked how the board looked with a few hours of sleep here and there...
if you look very carefully, you can even see the division between the 5v and 3.3v sections of the board
hint: it cuts across the GPIO bus on the lower left
if you've only got one shot on board fabrication, you want to do it the best you can lol
every trace here was placed by hand in eagle because I don't like how messy the autorouter is
even did an experimental twisted pair of traces for the USB connection and I got so hung up on getting that right that I didn't even check what type of USB connector I placed on the board and it didn't click that square layout of pins would correlate to square usb...
anyway don't mean to hog the channel and I've got stuff to do
o/
 forest fulcrum
I made a sensing device for measuring CO2 concentrations in my culinary mushroom fruiting chamber. Data I gained from this allowed me to simplify the design of my fruiting room, where I'm now using passive hydroponically grown plants and an LED light instead of ultrasonic foggers and fans to raise the humidity and lower CO2. It consists of an Adafruit Clue board and a Adafruit SCD-30 - NDIR CO2 Temperature and Humidity Sensor, and a freebie usb battery pack. The laser is for entertaining my cat (I tape it onto the gnd and 3v when I use it). I've been reading how CO2 sensors might allow for good measurements of ventilation, so this might have broader uses. For the code I basically spliced together one of the samples for the Clue with one of the samples for the sensor. I've been calling this my "mycological tricorder". Once I'm done setting up my 3d printer kit I want to print an enclosure for it, but so far being held together by electrical tape is working.
 sacred timber
weary canyon
every trace here was placed by hand in eagle because I don't like how messy the ...
sacred timber
weary canyon
every trace here was placed by hand in eagle because I don't like how messy the ...
I'm curious to know how the RP2040's communicate with each other, if they do. Thanks! very cool project.
weary canyon
They are going to communicate via GPIO pins. Haven't done enough reading on them to know exactly how I'm connecting them but their entire header on the side with power have their pins overlapping so they match up electrically
And yes I'm aware of the bare metal on the underside that could be an issue for the surface mounted one, and I mitigated it with kapton tape
weary canyon
weary canyon
This shows how the header overlaps. The pads line up because I've merely rotated 180 degrees about the axis along the header. The second one isn't soldered because I was being lazy about cutting more traces on the proto board than I needed to in order to see if the overlapping pins would be a problem but so far no issues :)
This is a trick I learned when I was exploring chip stacking for when you only need a chip to have one side of its pins overlap (such as in some memory modules where everything that needs commoning together is on the same side)
It's even more beneficial here because now I have access to the tops of both modules (the third module will be on a separate board connected with a ribbon cable to select pins on the side of the second module that isn't connected to the first module (with power and various other things that need connecting to that common area coming through to the overlap area))
sacred timber
Ah, thanks. It sounds like you're just sending logic information back and forth, or are you using the GPIO pins in some way to bit-bang data?
 vale wasp
weary canyon
It's even more beneficial here because now I have access to the tops of both mod...
vale wasp
weary canyon
It's even more beneficial here because now I have access to the tops of both mod...
Just saying, SPI + DMA looks pretty nice on the rp2040 for communication 😋
weary canyon
Yeah I'm exploring all options I have but I haven't even touched the getting started guide... It's rather daunting
(it's pulled up, I just started skimming and realised I needed to be in the right headspace for it)
vale wasp
Would be super cool if you could make QSPI work, but Im not familiar enough to know if that peripheral can operate as a slave
sacred timber
weary canyon
(it's pulled up, I just started skimming and realised I needed to be in the righ...
Yeah, many cups of coffee, or that pre-work warmup or whatever. Yup. One of those tasks...
My ideal would be able to share actual Python objects across devices but so far that's just a dream (background music starts...)
weary canyon
So the plan is to make a virtual machine which abstracts memory transfer between modules into opcode calls that run efficient routines to access the various hardware interfaces of the machine (so I can implement easy cross compatibility and probably written in assembly for each chip the compatibility is written for by me or someone else)
I want this same system to be impelentable across a huge range of hardware
(so it can be used as a teaching tool for microcontroller programming, give someone the task of building one from scratch)
(with guidance of course)
sacred timber
I'll take the high road, you take the low road, somebody gets to Tipperary
weary canyon
I'm fluid. I'll take both roads depending on which is applicable to the task.
sacred timber
I've haven't tackled assembly in many years, not sure how I'd do. Got a little Nuvoton 8051 board but it's still sitting on my inventory shelf.
weary canyon
(high level design has its applications and low level design does as well, the contention should only be at the gray area where both can do it well at roughly the same amount of effort)
weary canyon
Oh apparently that isn't something I can say
sacred timber
Heh apparently
weary canyon
Reworded: I like to put myself through challenges to grow
sacred timber
I was almost fast enough to read it.
weary canyon
The word I used begins with "m"
And for the record I wasn't using it literally, it's just shorthand I use that's easy to convey
sacred timber
Likewise, but I'm desperately trying not to turn my existing multi-project project into a whole 'nuther level of effort. One approach of simplifying was to try (so far not so good) to have everything in one language, so CPython on the Pi, MicroPython on the microcontrollers. That of course raises its own issues, but assembly would be a whole project unto itself.
weary canyon
I design CPUs as therapy... Assembly just makes sense to me
sacred timber
But I certainly admire your effort. My last real assembly was 8080/Z80. I did enjoy it, even 4004 assembly was cool.
And there's still a lot of (new) 4051 devices around.
weary canyon
And by "design CPUs" I mean in minecraft and logisim... At the gate level
weary canyon
I'm not even a big fan of high level language for logic design lol
sacred timber
Well, I design and build small robots so there's plenty to keep me busy.
weary canyon
I'm unemployed and possibly unemployable so I'm trying to just do what I love with what little I can manage to have in excess
¯\_(ツ)_/¯
Such is life
sacred timber
Well, I'm sure we agree that finding something one can be passionate about and having the ability to express and explore is both healthy and important.
Assembly is a world unto itself but quite enjoyable. A friend of mine in robotics uses STM32s and programs them in assembly, and they do a heck of a lot more than any of my robots, because his mind and his math skills are pretty amazing.
weary canyon
I only managed to get where I did because my dad scraps electronics for his therapy and I do piecemeal work where I can to buy the things I can't get from that
sacred timber
Well, congratulations for being so productive under such strictures. Such is life as you say, we all have our trials, and it's good to find a way to keep moving, productive, keep one's mind active, stay positive.
My partner is Japanese and she has this thing called "challenge and support", where for every challenge there is a support. It's sometimes entirely counterintuitive, but I think she's right, you just have to sometimes search for the support, it's often not easy to find. But also: for every support there's a challenge too.
weary canyon
Constraints seemed to have merely bolstered my growth though so I'm thankful for them but I can't help but thinking that if I could manage to find a place to work that I don't come home regretting the choice to work at, I would have enough extra to do some really cool things with the knowledge I've gained...
sacred timber
Yes, certainly.
It's none of my business why you think you're unemployable, but I've myself gained many of my jobs via contacts and friends and inside information and connections that I've at times worked hard to cultivate. Perhaps there's someone you know who could work with you on cultivating some contacts so you could find suitable employment. It doesn't sound like you're lacking skills, and sometimes a friendly employer is willing to work around personal issues.
The ability to program in assembly itself is a valuable skill, and you can often work from home for a substantial portion of the week nowadays.
But I completely understand how hard it is to find a job. My partner has taken her difficulty/inability to find a job and now, her cancer treatments, as "challenges" and is pretty remarkable at finding her "supports". I'm one of them of course but she's very resourceful at staying mentally healthy under a lot of stressful circumstances.
She seems to be able to find "supports" in many things. It's not a bad lesson for me.
weary canyon
I am bipolar 1 and the swings I have are rapid, severe, and unpredictable
weary canyon
So it makes working for people who can't afford to have me out of service for a week with no notice very difficult.
sacred timber
And you probably can't work normally on meds.
weary canyon
No I can't even stay awake medicated minimally
sacred timber
Yeah
Perhaps you can find an employer who's willing to give you project work. Like contract work where you deliver milestones and a beta by a certain date, then prod and get paid the full commission,
weary canyon
That might work, but so far I haven't found any leads on that which don't require an associates at minimum
And yes, I've tried to do college both in standard and accelerated environments (did a stint at Full Sail) but it really didn't work out with my disorder
sacred timber
You'd likely need to have some percentage of contacts at least initially, and maybe weekly catchups over Zoom or at least email. What I've found is that it's extremely valuable to get some 80%-finished work under somebody's nose, and see if they bite.
weary canyon
Well I've got several projects that are about at the 30-40% finished mark, but most are just personal interest projects
And the ones that are more commercially oriented are closer to the 10-20% mark
sacred timber
In the early 90s I joined the IETF HTML Working Group email list as a volunteer, befriended a guy named Dan Connolly, who told me to go and learn the details of SGML, so I did. Dan became Tim Berners-Lee's right hand man and that basically bump-started my career. I did a lot of work learning SGML so that I'd be one of the few world experts in DTDs, and did work on XHTML. But I spent a lot of hours digging around, making friends, etc., but a great deal of it remotely and on various working groups.
That may be one way to gain contacts, as it worked for me. And it's largely asynchronous.
I think your current project sounds excellent as a learning tool, and the RP2040 is up-and-coming, so you're likely on the right path if you can figure out how to locate someone who'd be looking for that new set of skills.
weary canyon
The issue I'm running into is startup capital. So far I'm trading a lack of that for an increased time/effort expenditure. I won't be at the point of showcasing anything even remotely interesting to most people for a long time at this rate but at least I'm learning innovative ways to use things I've found laying around to save money hahaha
sacred timber
One of the guys in the SGML community is an Indian who's 100% blind, and he's pretty impressive in both his IT skills and his ability to work a room, making contacts, friends, etc. I think it's that networking skill that's really been his forte.
If you're trying to run your own business then yes, that's a big uphill climb, but you remain independent.
Several of my friends in the SGML community started their own business as consultants and have retired as consultants. They're hired for their brains.
weary canyon
Networking is definitely not the area I most excell at, and any iota of skill I have in that area is learned... People perplex me... Machines are simple...
sacred timber
And I can think that both of them have lead very "complicated" lives, if you catch my drift.
Yes, I understand the difficulty in dealing with people. It's difficult for everyone, more difficult if one has their own issues. I guess what I'm suggesting is that given you understand that, look at that as a "support" rather than a "challenge", say "thank you" to your former-disability, and figure out the best way to use your difference as a benefit.
That's basically my partner's "challenge and support" thing.
weary canyon
This is a good point... I often consult for free simply because I enjoy it...
sacred timber
Me too. I could get paid a lot for my consulting time but I enjoy helping people when I have some spare time.
And I'm not particularly motivated by money, more by things I enjoy. I've been lucky to get paid for (mostly) doing things I enjoy.
You've at least found a career area where your value isn't in interpersonal communications but in your ability to think. And produce outputs that can be sold.
weary canyon
And actually I just remembered... I actually do have one lead for a project like this through a friend I made online years ago... It's currently in the idea phase but I've already proven to him that I'm worth bringing onto the project by solving the first major hurdle he was facing
sacred timber
Sounds great!
I've always had a ton of fishhooks in the water and am constantly making new fishing rods.
weary canyon
I guess I kind of do network without thinking about it and these things come up occasionally...
sacred timber
Doing that homework and upfront work is how I've done it.
Yup
It sounds like you're already doing what I was doing, making friendly contacts etc.
Also: look for communities that you can become an active member of.
weary canyon
Thus far none have panned out to being self supportive but keeping on keeping on is the theme of the millennium
sacred timber
In most of the offices I've worked there's always a very significant percentage of people "on the spectrum", some a little some a lot.
I worked at the New Zealand weather service and we had a guy, a really nice, friendly very intelligent guy, a gentleman.
weary canyon
And every single time an opportunity has come by it has been a learning experience even when it turns out to be a flop
sacred timber
But he had some very significant issues. He couldn't attend meetings at all, just too stressful. We did everything we could to accommodate him, managed to get him reassigned under a much more cool-headed boss, got him sat next to some new Malaysian guy and they hit it off and became best mates, chatting like school girls. But we all looked out for him because he was a nice person and very valuable staff member (great mathematician), and we wanted him around.
weary canyon
These days I just go into such things with the expectation only of learning something from it but with hopes of more
sacred timber
Sure
weary canyon
Yeah I don't know for sure if I'm on the spectrum because even though my mom suspected it was the case I was never tested growing up for fear of a diagnosis bias and scapegoat
But I recently took a the AQ test answering as I would before I learned proper life skills and coping mechanisms and I got a 36
(which puts me in high probability for that along with the bipolar)
sacred timber
Well, I'm sorry for using the term, but I was just trying to say that this guy has been successful in spite of his personal difficulties because the team liked him, understood he had troubles, and were willing to work through those problems. Not all offices or employers are like that but they're out there.
weary canyon
And answering as I am now with my learned skills I scored a 31
I'm not offended by descriptions of what people are. It's good to have classifiers.
sacred timber
I wouldn't let test scores define you. Just keep your head together as best you can, keep learning, keep moving forward with new ideas.
None of those labels are really that important in the end, it's what you do in life.
weary canyon
Classification allows for better personal choices to accommodate the difference of perception and reasoning one might have from "the norm"
sacred timber
Certainly, but I'm just saying that those classifiers also can become limiters, but you don't need to let them. Blindness, cancer, and other issues can stop some people in their tracks, others figure out how to keep moving. A friend of mine had cancer in her 20s (the 80s) and turned her life around and has been a yoga instructor with a full career and YouTube videos etc. , i.e., turned that "challenge" into a "support".
I'm not trying to tell you what to do, please understand.
Just offer some ideas.
I find "the norm" rather dull and some of my best friends have had some pretty difficult personal issues, or had lived through them and became stronger people. Maybe that's why I was attracted to them, dunno. But there's huge value in being different, though that comes with its own set of difficulties, for sure. The world would be much worse off if we didn' have people whose outlook, perceptions, ideas came out of being different.
It's morning here and I've finished my breakfast, time for a shower and out to the market for groceries. So I gotta run.
If you see me online here and want to say hi, please do. I'd been interested in following your progress (on the project and elsewhere). The RP2040 is a cool avenue to learn stuff, particularly with its PIO.
...and if you end up sharing your assembly code (e.g., on github) I'd be keen to see what that looks like, sure I'd learn something, maybe try it myself 😱
weary canyon
Yeah I've got a github account that I put any code I deem worth sharing onto, I'll link it to you when things related to this project are up there
sacred timber
Nice chatting with you - hope to see you around sometime... 😄
weary canyon
I'll be around, adafruit is one of my favorite sites to window shop on so I'm sure the community will be something I keep coming back to
Only reason I will usually leave a community is if they tell me I'm not welcome or if someone makes me feel unwelcome but this server seems to run a pretty tight ship in that regard
And so far the former has only happened once... So I learned some sensitivity from it
(and the latter... Well too many times to count, there's a lot of nasty places on the internet)
ruby ledge

library is here: https://github.com/bitbank2/PNGdec
GitHub
Arduino PNG image decoder library. Contribute to bitbank2/PNGdec development by creating an account on GitHub.
gusty shard
Raspberry PI Pico, 3dof sensor, 12 Hz PWMOut. Tap the desk, it blows a raspberry at you.
weary canyon
Smd soldering tip complete, just gotta hook it up to a controller and run it through its paces

expecting a brownout and possibly a shower of sparks
(jk but not discounting it as a possibility)
if this doesn't work I need to save up and invest in a tube of thermally conductive epoxy because the only point that can fail is the tip retention system
which is also effectively a fusible link to ground on the heating element...just going to need to program in very liberal thermal error detection (since this thing should be able to heat pretty quickly and if it's dumping power but not heating up, there's something wrong or you're soldering to a ground pad)
either of which are things I'd want to trip the thermal error detection on because this is meant for light load
luckily I managed to find some fiberglass insulated wires for leading back to the controller 😄
don't want that melting on us now
also lots of kapton tape
I am a little worried about the electrical tape I used to keep the wires in line but c'est la vie
formal hamlet
Wow, you're gonna hand solder using that?
weary canyon
I'm going to put it in a carbon fiber tube I found on my old car antenna but until I have it thermally tested I don't want to encase it in something permanent
(will need to use some silicone or something to set it in place as the tube is slightly too large)
if I had silicone tape I could make a less permanent seal but lo and behold, no silicone tape
and I really don't want to use up that much kapton tape
and yes, for SMD it's definitely going to be better than using a chunky copper core tip that degrades and turns into this https://i.imgur.com/0yIRbpk.jpg
and if nothing else, I can re-electroplate the tip by hooking the ground of the whole system up to the cathode of my electroplating setup and dip it barely in
but I'm pretty sure electroplated iron core is going to be my friend for small scale stuff
plus, learning to solder individual pins instead of blobbing and using surface tension + gravity will probably save me solder in the long run
if nothing else it will be useful for removing solder bridges
hmmm....instead of silicone, I could wrap the thing in fiberglass cloth if I can manage to find the sheet I bought
then have that pack tight enough to hold the tube on
(with minimal adhesive on the end points to hold it all together)
weary canyon
okay, so it got hot enough to melt solder, but somewhere along the way the MOSFET is triggering
without input
soooo I need to probably use my external one with optoisolation since I have the ground on the thermistor commoned to the heating element
for now I'm thinking I'll manually trigger heating until I get the kinks worked out with the MOSFET
(Just using a 3D printer controller that's already programmed since I'm inside its temperature envelope, and I've tested this control software regulating heat before, so I don't think it's a software issue)
(that is, I've tested this actual instantiation of it on this hardware with other heat regulation tasks)
good news though is I've proven the concept
if I weren't relying on solder to hold things in place inside, I'd let it get hotter to see what happens
oh and it takes mere seconds before it gets that hot
but this is on 12v
I mean, I could disassemble the head and connect the heating wire separately from the thermistor's wiring entirely since I only did that to save wires and I have 4 wires coming through anyway
hard oriole

I made a quick animated temperature display on the Funhouse board from Adafruit. Uses libraries: simpleio, digitalio, displayio, imageload, display_shapes, ahtx0, display_text, bitmap_font, and dotstar.
weary canyon
Nice!
wary atlas
lol, that's awesome
hard oriole
Thx, I don't think that it was intended for this. But it clearly says "fun" right there on the house.
wary atlas
The intention is fun and hacker goodness!
lucid bloom
Got the tour selection stuff figured out for the computer museum home assistant. A motion sensor will trigger the adm31 tour selection program running off a pi. Enter a for automated s for self guided to start a tour. We are consistently making good progress but there is still a lot to do before it's open for tours.
This is one of the ha scripts that turns everything on in order
wary atlas
I want to take a tour! Looks like y'all have a lot of great examples!
lucid bloom
The automation really puts it over the top
Average person has trouble with the concept of home automation, apply it to something other than a home and they have no idea what's happening but they like it lol
wary atlas
Magic!
lucid bloom
I made some motion sensors, gonna install at least one this week to handle the lights and adm31. I have been testing/prototyping in the home assistant I have at my place
 wary atlas
Is that a PIR sensor?
lucid bloom
The cutest little one I have ever seen it has about a 10ft range
wary atlas
Hehe
exotic sierra
brick light with a samd21
 night bronze
I love museums where I want to be able to then tour the museum itself, and not just the pieces - the behind the scenes if you will! 🙂
wary atlas
There's an added level of coolness when a museum of old computers is automated because it was the dream of the 50s for machines to run themselves!
lucid bloom
There is a larger computer museum in the next state over where we have gotten a lot of computers from. Me personally I got an apple IIc+ and a vt220 from them I had a choice of white, orange or green crt. The museum is cool but where you really want to go is their warehouse. Once we are almost done with this museum we are going to call the guy in charge of the other museum to give him a vip tour and see if he is interested in some automation for his museum.
wary atlas
I wish I had a warehouse
lucid bloom
One way they make money is they rent out old hardware to tv shows/movies for period accurate equipment, they did mad men for example
I am hoping they rent out a serial terminal to someone, if they do I would be the recommended person to make it do whatever they want with a raspberry pi
wary atlas
Hehe, vt220 on a Pi is best experience
lucid bloom
I have a pi4 8gb on my desk with a monitor, touchscreen and vt220 attached. I use a program called ttyecho to inject commands into the serial interface so it appears on the terminal. I have an ir remote that can launch programs and I use it as a music visualizer.
 wary atlas
Mmm, that's sweet. I love using old things for new stuff! I'll get myself a vt terminal eventually...
lucid bloom
If you use python with it then print("\a") will make it beep
wary atlas
I NEED a vt terminal!
lucid bloom
wary atlas
I hope to get an amber terminal
lucid bloom
When you get one I would be happy to share how to set it up and how to use ttyecho. I use this hat which has an IR reciever built in. With ttyecho and a python program to handle the remote you can launch anything on the terminal with the press of a button
https://www.amazon.com/gp/aw/d/B076Q1QKSX
Amazon.com: WINOGNEER Serial Port Expansion Board RS232 for Raspberry Pi 3 Model B 2 B B+ GPIO UART Shield with IR Receive: Computers & Accessories
lucid bloom
this is the adm31 tour select program written in python
import os
import time
import curses
stdscr = curses.initscr()
curses.cbreak()
curses.noecho()

#beep x5
print("\a\a\a\a\a")
while True:
    stdscr = curses.initscr()
    with open('/home/pi/tourselect.txt',"r",encoding="utf8") as f:
        lines = f.readlines()
    line = 0
    for a in lines:
        # set x and y here
        stdscr.addstr(line, 0, a.rstrip())
        line = line +1

    char = stdscr.getkey()
    if char == 'A' or char == 'a':
        #beep x 1
        print("\a")
        curses.endwin()
        os.system("cat /home/pi/enjoy.txt")
        #webhook
        os.system("curl -X POST http://museum.local:8123/api/webhook/auto")
        break
    elif char == "S" or char == 's':
        #beep x 1
        print("\a")
        curses.endwin()
        os.system("cat /home/pi/enjoy.txt")
        #webhook
        os.system("curl -X POST http://museum.local:8123/api/webhook/self")
        break
    else:
        #beep x 3
        print("\a\a\a")
        stdscr.clear()
then you run it on the terminal with
sudo ttyecho -n /dev/ttyAMA0 "python3 /home/pi/tourselect.py"
I was doing prototyping for the adm31 on the vt220. there were 4 ways to read character input that worked on the vt220 that didnt work on the adm31, ended up using curses cuz that was the only one the adm31 likes
wary atlas
curses XD
formal hamlet
https://github.com/pfn/thermal-camera posted the instructions for building my thermal camera up on github

GitHub
DIY Thermal Camera using an MLX90640. Contribute to pfn/thermal-camera development by creating an account on GitHub.
 ancient skiff

In this project we're building a rig for installing heat set inserts. Use 3D printed parts and hardware to build a solder rig with smooth linear roller action! Make perfectly straight inserts with precision using a tip for installing inserts.
Learn guide: https://learn.adafruit.com/heat-set-rig/
Fusion 360 Share Link: https://a360.co/2H4439W
Pro...
I printed me one of these things and it works great 🙂
I'm particularly pleased with how the weight is balanced so that it stays in position. It's +-20 grams between the two sides, not enough to overcome the friction on its own. but when you raise/lower it via the handle it's soft like butter
tacit delta
nice!
i'd make it slightly postive?
ie it rises by default
if you somehow fall it will rise and not burn plastic or something
weary canyon

Working on the mounting plate for my new screen to put together the game console :D
I made a really useful module that creates with each pair along the x and y axes equidistant from each other and I used it to create the pegs, the holes in the pegs for the screws, and the convex hull of the plate with rounded corners
Am very proud of myself for the elegance of this implementation
Still a bit sloppy as far as the organization of the parameters being passed into each module along the pipeline but this is a total win for future projects because I also learned how to use objects to define a convex hull shape 😄
This is going to be very handy for future designs
Now I just need to do a mockup of the screen with a bit of tolerance to subtract from things
Then I can have the screen slide right into place and not put all of the load on the mounting screws
(since it will be supported all around with a sug but not tight fit)
And if the 2.8" TFTs with cap touch are the same profile it's a simple matter later to swap it out (with a slight firmware modification to only a single of the 3 onboard picos)
Anyway that's the progress, am taking a break and then I'll be back in there to get the design to a point I'm more proud to share and then I'll show more
formal hamlet
I hate how fillets and chamfers aren't a thing in openscad
I really want to use openscad more, but it looks less likely vs using freecad more
weary canyon
they're a thing...you just have to implement them yourself (or find a library for it)
lol
I might or might not have a thing about doing some stuff the hard way so I can understand how it's done

even a compound one 😉

just gotta understand a few geometry tasks
weary canyon
got the midsection of the screen mount redesigned and on that note it's time for bed o/
 weary canyon
one final tweak before bed to get the screen centered with a viewport that's one 3D printer layer thick and just the screen's viewable area

what the front looks like

with a screen in the case...ooooh ahhhh

okay I really must be going to bed
formal hamlet
weary canyon
they're a thing...you just have to implement them yourself (or find a library fo...
yeah, I'm not interested in computing them myself, I already hate doing that when my cad program is unable to chamfer or fillet certain edges -- the libraries I've found in the past haven't been great solutions, so hesitant on using those as well
weary canyon
yeah, it's not amazing, but I rarely need a chamfer that badly
formal hamlet
it's a finishing touch, makes edges much nicer and better to handle
weary canyon
I know what it's used for, I'm just mostly a prototyper
if I need a chamfer I can drop the model into blender and apply it there
ancient skiff
https://www.thingiverse.com/thing:4870461 I made a little tray/caddy to hold the Compute Module 4's IO board -- used freecad this time around, though I also love openscad despite its limitations.

This tray/caddy will hold the Raspberry Pi Compute Module 4 IO Board. The design minimizes material, at the expense of leaving some traces & components open on the bottom.
Use 4×M2.5 threaded inserts, such as https://www.mcmaster.com/94180A321/ and 4×M2.5 screws (6mm or 8mm length seem good) to secure the board to the tray.
Note that some HDMI c...
weary canyon
limitations are my element
weary canyon
The 6502 / 6507 / 2x128B RAM chip stack I was talking about the other day

It has seen better days...
Part of something of a functional art project showcasing interaction of various eras and capabilities of hardware just for the fun of it... This used to be part of a much larger board with I/O to make the 6502 stack have microcontroller functionality, then I was going to emulate a CPU accessing a bank of SMD SRAM chips I had found and a flash chip (pictured here on the left) for storage of ROM data... Only got partially complete before entropy enveloped my room from other projects and it ended up getting shoved into a box somewhere... But I found this piece of it and the good news is my bodged together multi-core 6502 with built in SRAM for the registers (how the CPUs would in theory communicate to allow the 6507 to select any bank of memory space accessible to the 6502 minus 256 bytes at the beginning where it will always read from the onboard RAM)
This would allow you to have the 6502 in control, set up the registers for the 6507, and let it rip on a block of data... The downside is that any output must be done over a terminal or with graphics commands piped through a PIA or similar... No thanks... I'll stick to the terminal...
The reason being that the memory sharing and dual CPU design is already taking advantage of the inverse phase of the 6502 to drive the 6507
Oh I just had a thought... I could partition half of the 6502's memory as inaccessible to the 6507 and use a separate data / address bus for each graphical and coprocessing section of the memory space, but during the main processing phase of the clock cycle, glue them in with some clever logic (probably just some bus transsciever trickery) and then you can access it all with the 6502
Which makes me think I could probably have the 6507 do the main processing and the 6502 do the graphical processing, but the catch is it is also capable of running those main processes and in fact would need to in order to bootload the 6507 to taking charge of those things
Anyway just another of my silly project ideas I thought someone might find interesting
oh wow I went off on a tangent mid-thought
the good news is that it's socketed
so I can pop it out and use it elsewhere
wary atlas
Quad-core 6502 system when? :P
weary canyon
Uhhh when I figure out the divide by 4timing distribution chip I got from a TI99?
wary atlas
lol
 drifting crater
At this rate you'll have a 6502 super computer! And then you can mine Bitcoin 🤪
weary canyon
At this rate that would take... Idk 3 decades
I don't think I'm going to find any more vic-20s at thrift shops for cheap
wary atlas
Only ASICs can mine BTC at this point, lol
weary canyon
I want to get into ASIC design... That would be fun
drifting crater
FPGAs!
weary canyon
I have an FPGA dev kit I need to figure out how to use...
drifting crater
wary atlas
Only ASICs can mine BTC at this point, lol
Well...if China bans Cryptocurrency mining then like 25% of the Bitcoin hash power would disappear
The other 50% would probably just relocate causing a huge dip in compute power for a bit
weary canyon
The support for it is next to nonexistent so I have a lot of reading to do
drifting crater
oh rip
weary canyon
I mean there's documentation... Sort of
It's a waxwing dev board based around the spartan 6 if anyone has any insight on where to point me for info
wary atlas
That sounds vaguely familiar
cold tangle
Using multiple 6502s in one system has been done before 😄
So it's definitely possible, I mean.
wary atlas
It would be hilarious of someone did like... 64 6502s
weary canyon
I have a general purpose chip programmer I think with jtag that I could use for the actual programming of the chip but that's only necessary if I can't get the USB programming to work
I actually wanted to implement a multi-core 6502 design in it at one point but I'm not sure if it will fit because I hadn't gotten that far... Also want to make a vga driver with it since it has R3G2B3 VGA output capability on the board
My problem is I could never figure out where to start on a project and I can't seem to get the examples to work anymore (they used to work fine when I first got the dev board)
Back when I got it I only vaguely understood vga signal generation so reversing the VGA example ended up being a bust
Turns out it's a simple enough task I could do it with discrete logic given enough patience
But at the time it mystified me
Well, given the right combination of patience, money, and scrap components
Because I've attempted it with just patience and scrap components before and while it is doable I do not have the patience yet
wary atlas
Old computers complicated
weary canyon
Nah old computers simple... New computers so complicated they have to be abstracted
wary atlas
I mean, building a modern PC is like Lego, lol
weary canyon
Yes because it has been abstracted to a commonly used set of standards...
cold tangle
Not if you're building it completely from scratch. 🙂
wary atlas
good luck building a Ryzen system from scratch :P
weary canyon
I do intend to design a full PC mobo from scratch eventually
Just for the fun
Though I probably will start around a scrap 386sx I have
Then work my way up to more modern things
wary atlas
I have a few 386 chips that need homes XD but there's a point where the architectures get so complex that I don't know if one person at home can do it
weary canyon
Hey if you're looking for someone to design a board for them I'd be more than happy
I need to learn kicad
I've already got a design on the docket for my sx so it would be a simple matter to rework it a bit for a regular 386
Or design it for the regular one and then add on the external logic required for the sx to interact with the regular 386 board's hardware layout
Probably would be easier
wary atlas
hmmm
weary canyon
And I'm definitely not offering to assemble it, just run the schematic and board layout
wary atlas
lol
weary canyon
Even if you don't use it I'll probably end up doing that in case I find some more 386's
Just more incentive to do it sooner if someone will use the design
wary atlas
I dunno when I might get to assembly, so many projects on my shelves XD
weary canyon
I feel it... I run through cycles with mine until I finish or abandon them
Usually repurposing their materials for new projects
In either case
But only because I had to force myself to use less new material because entropy quickly takes over
If I had more space to store things neatly I would just have shelves and shelves of projects I cycle through... Possibly enough to not get bored
Lol
Because there's always new scrap to dig through... Just have to know where to look for it
Then all I need to get things to look nice is boards from JLCPCB
wary atlas
Imagine having time to get bored :P
weary canyon
it's not about having time for it, it's about not having the focus to not get bored...it's a cycle
mighty umbra
I made a basic self hosted web IDE for CircuitPython. It can browse, edit, save, and run scripts.
 devout verge
Cool! How do you write files to the CIRCUITPY drive from the web?
mighty umbra
I use a WSGI app on an ESP32-S2, but it should also work with the Airlift or W5500 WSGI servers. I currently only write to the SD so I don't have to deal with remounting the internal drive and messing with USB storage
 prisma sequoia
Oh that's really cool. takes self hosted to another level
 hallow flower
Woohoo got my air quality display ported from the Clue to the FunHouse, including factoring out the Simple Text Display class from the Clue library, bolting on some reporting to Adafruit io, and replacing the proximity-based screen sleep with pir based screen sleep
https://gist.github.com/rpavlik/23e359fb5cf69b90f0868c18c5639b6f if anybody has one of those boards, the pm25 sensor, and possibly an scd30

Gist
air quality on clue. GitHub Gist: instantly share code, notes, and snippets.
I was pretty happy with how easy it was to just factor out the Simple Text Display thing by @scenic siren from the Clue library, it's a nice sweet spot between just print and portal base or display io, well suited to local sensors.
I could probably write an add-on for portal base to get data from sensor callbacks instead of json but I already had working Clue code 😁
hallow flower

There's not much to see besides the display, just some Adafruit boards chained along by Stemma QT cables
Yes my co2 level is higher than I'd like, though I also haven't tried the sensor outside recently to verify the calibration
Gonna probably get an ERV ventilator thing installed in the house once the kids can get vaccinated, for fresh air exchange without dumping all the heating/cooling energy out
I do like my particulate numbers though 😁
solar yew
Installing that equipment is employment for someone. ;)
gusty shard
Building a groovebox with a sixteen step sequencer. Feather-M4 with the 3.5" TFT FeatherWing.
 lucid bloom
The terminal tour selection is now motion activated based on certain conditions being met like all of the computers being off.
wary atlas
Awesome :D
lucid bloom
I made blinders for some the motion sensors to reduce their spread so we can cover what we want to cover rather than the full 110 degrees

 wary atlas
Ohhh, that's smart. Much better than just having a monodirectional sensor!
lucid bloom
5 lines of openscad, all I had to do was increase the diameter variable to increase the angle of detection. it fits right onto the lens, you take the lens off the sensor, add the blinder, put lens back on sensor.
diameter = 0;
difference(){
cylinder(d1=15.2, d2=15.2+diameter, 10, $fn=200);
translate([0,0,2.5])cylinder(d1=13.2, d2=13.2+diameter, 8, $fn=200);
cylinder(d1=11, d2=11, 2.5, $fn=200);
}
Simple good :D
sacred timber
You haven't had any issues with heat then? Even without blinders PIRs can run hot enough to melt the diffusers in my experience.
lucid bloom
Hasn't been an issue so far I'll keep any eye out for that.
solar yew
compiled ARM linux
 solar yew
I can't believe this actually worked
 solar yew
;)
Cross-compiling was designed to work correctly the first time.
If you want to build every binary with every new improvement on (almost) every day, gentoo was the way to do that, back in the day.
After two years of gentoo it began to seem like a lot of extra work added to my day.
But I was up to date. ;)
ruby ledge
Independently animating digits using my AnimatedGIF library. I just added this as an example sketch. Here it is running on the Adafruit PyPortal
https://youtu.be/TtygfU6LUC8
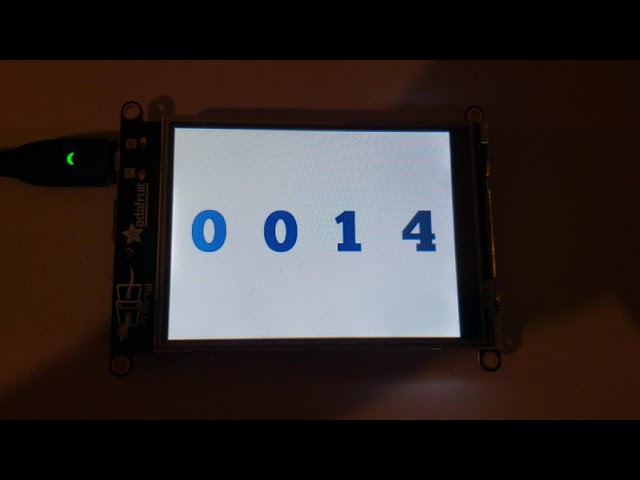 hallow flower
Now the folks who want to compile everything constantly use Arch.
They also get to file bugs that nobody else can repro because nobody else is running the latest everything....
solar yew
Oh it's arch now? I'm way outdated on that.
My friend who got me into gentoo told me two years down the road gentoo is only for developers (gee, thanks a lot, two years into it).
(they were a gentoo dev ;)
cold tangle
Isn't all of Linux only for developers? 😉
wary atlas
I guess Android phones are only for developers then :P
cold tangle
I don't know a lot of non-developers who use Linux... Linux is fine if you know a lot about computers and don't mind messing around with stuff, but most regular people don't care about any of that.
wary atlas
I've set a small handful of people up with Ubuntu for basic things like email and web surfing -- on old machines that can't run Windows well, Ubuntu runs smoother
cold tangle
Yeah if you can limit it to basic tasks like this I can imagine it will work OK. Fortunately my mom has an iPad now, so I have to do zero tech support haha.
solar yew
Let's see .. I started using Linux in 1994.
That's all I used, besides experiments in *BSD for .. ah about two years per OS, as side-projects.
Windows caught up but it took a long time for it to get there.
wary atlas
I use Linux for some things... but Windows is my jam
solar yew
I also ran MacOS X in 2002-2004 on one machine (new iMac G4) which then got a Linux install.
The iMac G4 developed a constant whine from the fan, after 6 mo. of ownership. Last Apple product I bought.
I'll stick with stuff I can open and fix. ;)
(I still have the magazine article describing how you would open the iMac G4 - heat pipe and all that kind of thing)
wary atlas
I was never huge on MacOS, but now I have a MacBook Pro and an old Air. Huge iPad fan
solar yew
I have one 23" diagonal LCD 1980x that just fits 85 columns of monospace text. ;)
wary atlas
hehe
solar yew
It's about 82 columns practical - I use some space for rio window handles (9front.org Plan 9 from Bell Labs).
I tried 1024x768 (oh I don't know 12" to 14" diagonal) and was getting like 62 columns.
The same display would have 80x25 IBM display card.
(I like very large fonts and a good distance seated from the displays I run)
I will use very wide xterms on occasion, mainly to cheat formatting (like using lynx www browser to render to TXT file from HTML source).
That way when it comes time to reformat paragraphs to long single lines of unwrapped text, I have fewer corrections to make before (re) publishing.
In one of my environments I have 2399 characters (or so) to work with, per line, with no line ending required at a shorter line length.
(I think it fails at around char 2499 though - don't remember).
Those are really long paragraphs. ;)
 sharp comet
ruby ledge
Independently animating digits using my AnimatedGIF library. I just added this a...
sharp comet
ruby ledge
Independently animating digits using my AnimatedGIF library. I just added this a...
Those are some awesome looking animations!
 magic nimbus
Been a few years. Did a magtag app for space weather. Would like to participate wednesday. https://github.com/mpechner/sunweather

GitHub
MagTag Space weather display. Contribute to mpechner/sunweather development by creating an account on GitHub.
 scenic siren
magic nimbus
Been a few years. Did a magtag app for space weather. Would like to participate...
scenic siren
magic nimbus
Been a few years. Did a magtag app for space weather. Would like to participate...
Nice! If you could upload a picture to your README, that would be great, as I'd like to see this included in the Python for Microcontrollers newsletter. As for participating, simply hang out in the #live-broadcast-chat channel around Show and Tell time, and wait for the StreamYard link to be posted. If you don't get in immediately, keep trying, folks will drop off as they finish to make room.
scenic siren
Thanks!
 half reef
can a prerecorded video be shown at show and tell? asking for the future
scenic siren
half reef
can a prerecorded video be shown at show and tell? asking for the future
We've had folks show vid/photos/etc before. I don't see why not.
half reef
i see
 cobalt dove
Adafruit fans will love this: I added an LED output port to my Riskeyboard 70 keyboard (PCB) so you can hook up external ws2811/ws2812 protocol stuff to the keyboard to keep everything in sync (or use the keyboard to control your Christmas lights! hehe): https://gfycat.com/dirtydismalgoitered

I used it to open the keeb portal once but I lost a few keycaps when the last chevron locked. Won't make that mistake again... https://gfycat.com/hairyornerybergerpicard
 wary atlas
hehe, I understood that reference
 rain escarp
Indeed.
wary atlas
That many NeoPixels right in front of my face might kill me tho XD
languid nebula
wary atlas
That many NeoPixels right in front of my face might kill me tho XD
Well you have 9 lives...
cobalt dove
My keyboard also features what could be the most historically significant keyboard accessory of the 21st century: https://gfycat.com/fewcomplicatedhuia
 wary atlas
languid nebula
Well you have 9 lives...
wary atlas
languid nebula
Well you have 9 lives...
I've used many already XD
wary atlas
cobalt dove
My keyboard also features what could be the most historically significant keyboa...
Just... how many millions do you want for this?
cobalt dove
wary atlas
Just... how many millions do you want for this?
If only there were chips available...
languid nebula
wary atlas
Just... how many millions do you want for this?
all in keyboards?
wary atlas
A keyboard with an Oreo holder is worth at least $400
cobalt dove
For reference, each switch costs about $0.04 in materials to make. It's $0.01 worth of (PETG) filament and $0.03 worth of magnets (3 $0.01 4x2mm N35 magnets per key)
I don't know if I'll be able to sell fully-assembled keyboards (because getting injection moulds made would cost hundreds of thousands of dollars) but I could definitely foresee selling PCB kits with magnets and stabilizer wires included 👍
It's 222 magnets for the switches + rotary encoder. I forget how many go into the case/plate which lets you do this: https://gfycat.com/easygoingcreepyfinnishspitz
 wary atlas
Sorcery!
cobalt dove
My keyboard also features a delicious analog hall effect rotary encoder: https://gfycat.com/unlinedfirstalabamamapturtle
 scenic siren
LED OREO.
cobalt dove
scenic siren
LED OREO.
Maybe in the next revision hehe
I also added an infrared receiver to my keyboard so you can turn any old remote control into a wireless macro pad! https://gfycat.com/marriedtediousaquaticleech
 solar yew
In the old folk's home you're going to have a lot of explaining to do to the other residents ;)
"What are you doing?" "Watching TV" "That's not TV!" .. like that.
 willow spruce
I used the Funhouse to create a security system for Barbie's Dreamhouse. This was me learning how to work in CircuitPython after mostly using C++ in the past, and trying to remember how to use Git. I appreciate any critique or feedback to improve my Pythonese.
https://github.com/zourn/Automated_Dreamhouse

GitHub
Barbie's Automated Dreamhouse. Contribute to zourn/Automated_Dreamhouse development by creating an account on GitHub.
 lost plume
Laser etching toner onto key caps for that sweet sweet custom macropad look

 astral mango
Just finishing this Nixie tube robot head guy but there’s some issue causing the 8x8 matrix eyes to intermittently crash. 🧐
magic nimbus
Hope to show tonight: https://github.com/mpechner/sunweather

GitHub
MagTag Space weather display. Contribute to mpechner/sunweather development by creating an account on GitHub.
grand vessel
If there's a cool project on Instructables that requires some 3d printed parts but I don't have a 3d printer, what's the best/cheapest way to have those printed for me?
warped violet
You probably wanted to ask on #help-with-3dprinting but I've sent stuff to Treatstock and they are reasonably inexpensive and not too much trouble. (You can see a whole lineup at https://all3dp.com/1/best-online-3d-printing-service-3d-print-services/)
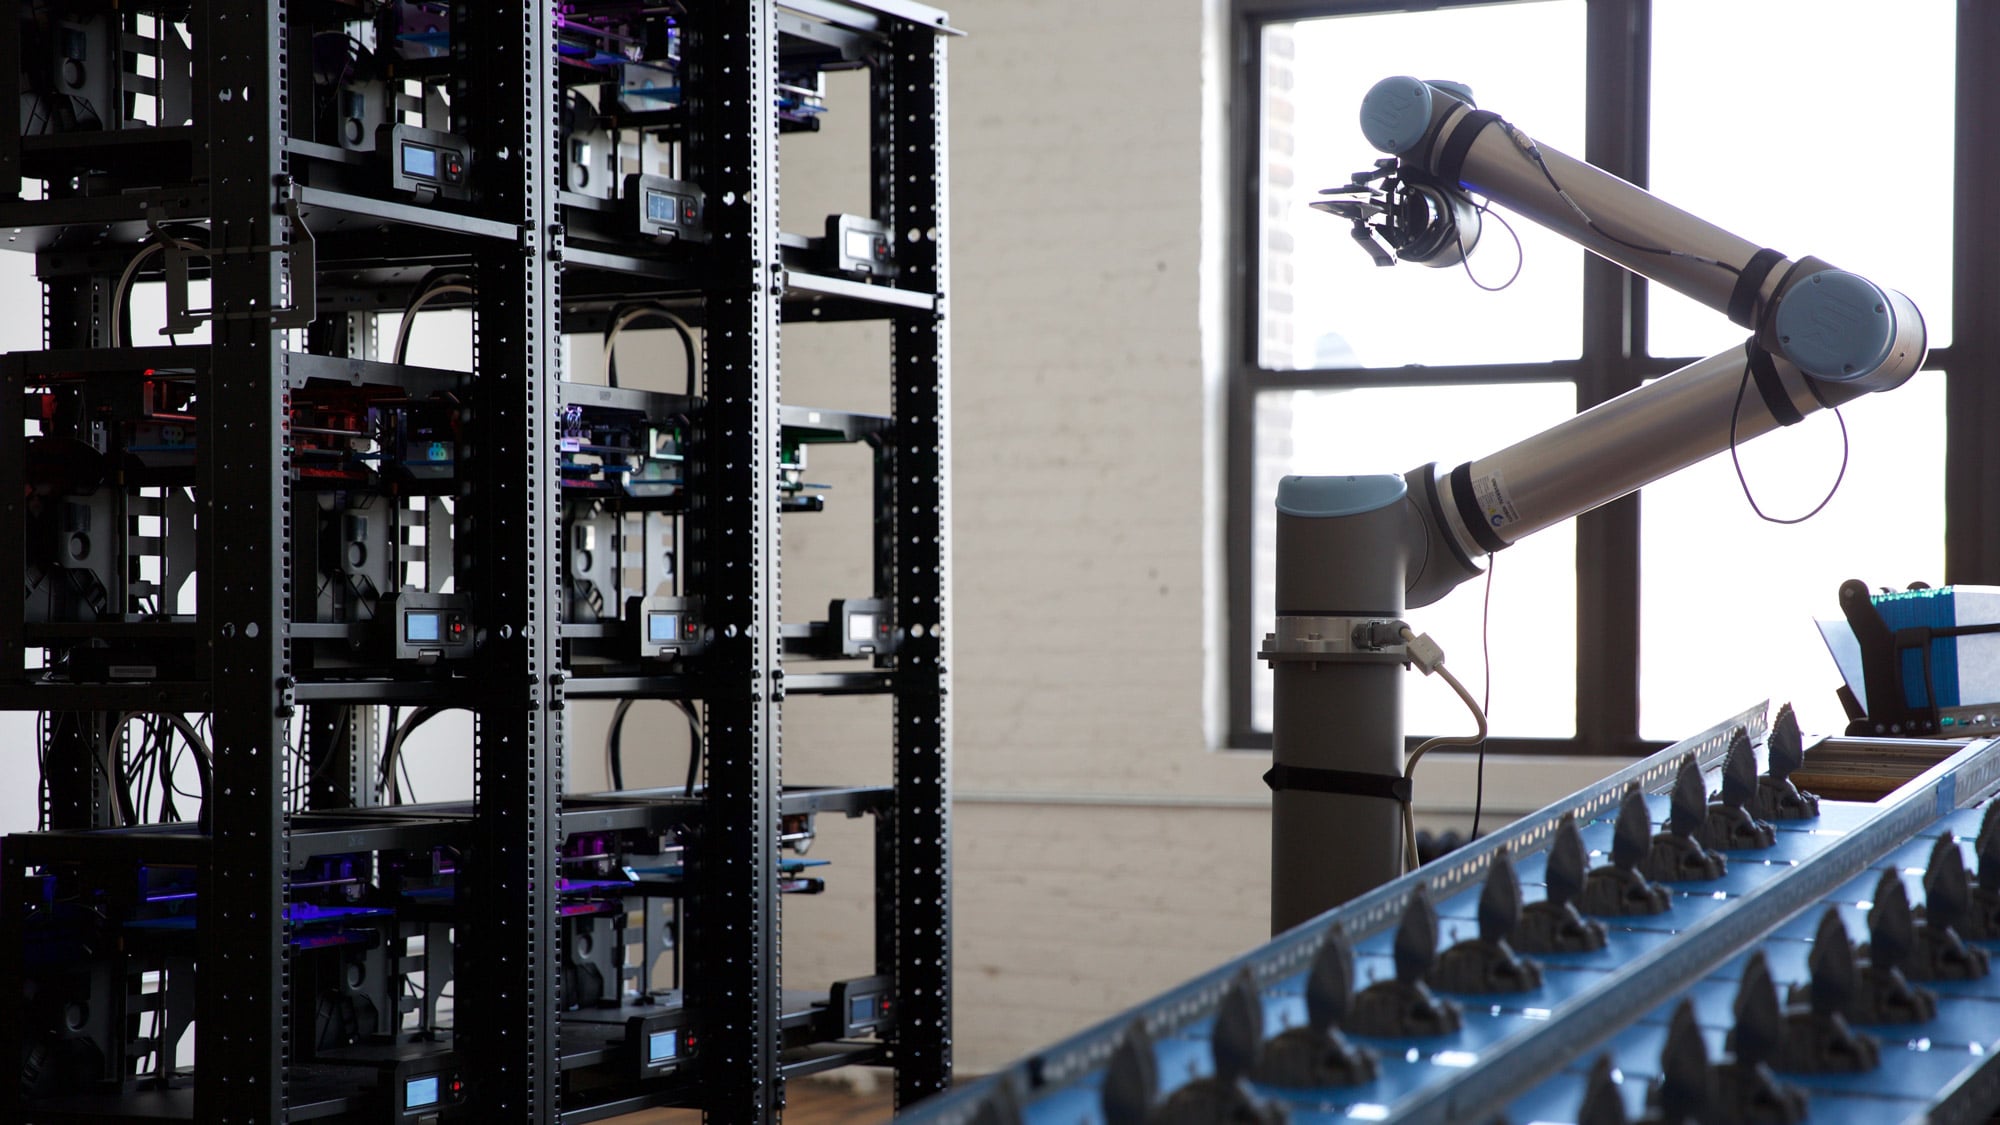
All3DP
What's the best 3D printing service for your project? Check out our guide to the best 3D printing services worldwide. Plus, how to choose the right 3D print service and how they calculate their prices.
grand vessel
Thank you.
 icy sonnet
It's only the beginning, but after a year and a half of planning I finally have the first module working in my physical build of Keep Talking and Nobody Explodes. At this rate, it might be ready for me to use as a classroom prop and fundraiser by 2023 or so  .
.
 wary atlas
Ohhh, that's something I've dreamed of doing! Are you going to make all the same modules as the video game, or just winging it?
gusty shard

GitHub
a somewhat musical thing. Contribute to rsbohn/briny-turbot development by creating an account on GitHub.
gusty shard
Demo (via VCV Rack)
icy sonnet
wary atlas
Ohhh, that's something I've dreamed of doing! Are you going to make all the same...
As close to the original manual as possible, though there are some minor visual differences planned (like Nixie tubes for Memory).
wary atlas
Mmm, Nixie tubes... drools
 static nova
Here is a 12 key macro keyboard I designed around the Pi Pico.

 ancient skiff
I need to make a new useless clock, so it will be inspired by Roman timekeeping ... https://en.wikipedia.org/wiki/Roman_timekeeping
In ancient Roman timekeeping, it is the XIIth hour of the day
In modern reckoning:
The hour lasts from 19:36:26 to 20:51:13.
The day lasts from 05:53:54 to 20:51:13.
The day is 14:57:19 long, and each hour is 1:14:46 long.
The time is 2021-06-04 20:25:33-05:00.
I have the math working, hopefully it'll adapt to CircuitPython! Now to figure out the type of display, I'm thinking edge-lit displays.
showing roman numerals of course 🙂
night bronze
How many segments (at the least) would a display need to have to be able to represent roman numerals? Sure, you can "cheat" and use a 14 segment display, but that seems too obvious
gusty shard
New color scheme. Added tempo and root note sliders.

 rose phoenix
Simple, minimal samd21 board, compatible with the QT Py but replaces the qwiic connector with 5 extra GPIO. PCB USB-C connector. This thing has no right to work as well as it does with 4 passives, a vreg and the mcu. No ESD but works for me!
 rose phoenix
Given that it's basically a fluff m0 in a different form factor, pretty sure you're right 😁
An evolution of the one with spi flash that are pro micro compatible, intended for use with CircuitPython of course

@cunning lava I am in fact using your bootloader, thanks for your help on that one!
 cunning lava
you're welcome
 dire meadow
@rose phoenix I’d like to know more about your boards. Have you posted them on hackaday?
rose phoenix
I have not, but perhaps I should.
There's a mix here. Two of them are STM32F0 series MCU, which are helpful because they allow crystalless USB and I've got one that's a very simple PCB USB Micro connector and the black one on the left. They both have a buffer IC that allows one of the outputs to reliably output 5V to control 5V devices, typically RGB LEDs more often than not. The others are SAMD21 + SPI Flash to allow for more expansive CircuitPython operation. They were originally designed for use with the KMK framework for keyboards on top of CircuitPython, but in fact work just as well with vanilla CircuitPython without the flash in many cases.
dire meadow
Can you share the schematics for the stm32 ones please? I’m very interested in no-additional-components™️ style pcb design
rose phoenix
dire meadow
Also, does F0 support circuitpython?
Nope! It does do QMK and Arduino though
dire meadow
Oh, QMK! Thought they only support f1 and f4 series MCUs
half night
The NeoTrinkey password safe has been updated! New features include: 1) multiple password collections, each protected by a pin, 2) ability to lock down the unit so the passwords can't be seen with CP 7.0A3, 3) drive is erased if >7 incorrect pins entered in a row, and 4) Drive is erased if both pads are pressed for more than 7 seconds. Code and docs at https://github.com/william-stearns/trinkeypass .
GitHub
Adafruit Neo Trinkey password safe. Contribute to william-stearns/trinkeypass development by creating an account on GitHub.
 shrewd zealot
My house has a Radon mitigation system which uses a fan to draw air from the basement drain tiles and exhaust above the roof of the house. The only indication the system is working is a low-tech, mineral oil based vacuum sensor.
I built a sensor with an UnexpectedMaker FeatherS2, Adafruit BME680, Adafruit MPRLS, and the Adafruit Featherwing Proto, running CircuitPython, to monitor the air pressure inside and outside of a radon removal system.
There are status LEDs for if the internal pressure is less than the external pressure. (i.e. vacuum is present = Green, No vacuum = Red). There is also a buzzer and a button to suppress the buzzer for 1 hour.
The data is fed to MQTT and visualized with Home Assistant.


 ruby ledge

It works 👀🎉!
Coming soon to the @Arduino Library Manager...
I'll enhance this demo sketch to display the extracted BMP files on a SPI LCD.
 Twitter
·
Twitter
·
 ruby ledge

 dawn fulcrum
Oh gosh. I got this rainbow plastic and I'm already in Love with the first print.

 solar yew
That's a lot of nice work!
Reminds me of a Raspberry Pi case (I can't tell for sure if that's what it already is).
And maybe a (paper cone) speaker mounting hole with tabs.
(and when Robert Plant sang keep a cool a me baby this design took him to heart ;)
dawn fulcrum
solar yew
(and when Robert Plant sang `keep a cool a me baby` this design took him to hear...
It holds a Furby :)

 hoary gust
Well I'm making a board for a upcoming project, it's a secret and I needed 60 GPIO pins, this is some of the PCB design, it just looks beautiful

 burnt wyvern
I was gonna upload this to a different server but i couldn't due to discord'd dumb 8MB limit without boosts, so why not here? This is a comparison between my GoPro Hero 3 and GoPro MAX both with the best settings enabled. No filters, no post-stabilization, nothing added to enhance the video.
also, these are filmed at the same time right next to each other
solar yew
dawn fulcrum
It holds a Furby :)
I would not have guessed. (Furby's are .. mobile?)
cobalt dove
Anyone here a fan of clicky keyboards? Muwahahaha! https://youtu.be/6hMOGKTudcg
(has 3D printed switches and stabilizers too! 😄 )

Now this is how you do clicky: Relays! There's nothing hooked up to them so they should last a really long time (millions of clicks!). 8-channel relay like this are usually around $5-10 each but in my testing I figured out that you really only need one but two does the job a bit better. Three is just 👌 (but totally unnecessary).
lucid bloom
I can control my pi4 8gb/VT220 with my new smartwatch. So far I only have a few options but I want to see how far I can take it. The way it works is by home assistant shell command to the pi combined with ttyecho to make it display on the terminal, on the watch side I'm using home slide. I also have an IR remote that controls the VT220


 languid nebula
lucid bloom
I can pass data to the shell commands and display it on the terminal.
languid nebula
lucid bloom
I can pass data to the shell commands and display it on the terminal.
is the music visualizer in ascii characters some kind of software or code?
lucid bloom

GitHub
Console-based Audio Visualizer for Alsa. Contribute to karlstav/cava development by creating an account on GitHub.
languid nebula
Oh wow
C 😦
Thanks I like it very much maybe I could added to CircuitPython. Thank you Very Much
 magic drum
hoary gust
Well I'm making a board for a upcoming project, it's a secret and I needed 60 GP...
magic drum
hoary gust
Well I'm making a board for a upcoming project, it's a secret and I needed 60 GP...
Indeed it looks beautiful!
hoary gust
magic drum
Indeed it looks beautiful!
Still need to add battery protection, charging circuit, monitor circuit, temperature & fan management system, some other GPIO stuff, make the optoisolater board and high voltage power distribution board that link with this but this is it so far, ty though
 magic drum
hoary gust
Still need to add battery protection, charging circuit, monitor circuit, tempera...
magic drum
hoary gust
Still need to add battery protection, charging circuit, monitor circuit, tempera...
I think you are having such a good time. Have fun!
ancient skiff

 ancient skiff
it's cute!
https://pypi.org/project/wwvb/0.0.2/ I just published some code, 2nd thing (I think) that I've published on pypi. very niche 🙂
cunning lava
no idea, need to program something to run on it first
I would expect 8h or so with low brightness
 elder token
What controller does it use?
cunning lava
samd21
wary atlas
Noice
 broken rain
Created some feather din rail mounts. https://www.thingiverse.com/thing:4885356


This is a remix of https://www.thingiverse.com/thing:2610621 that allows you to mount Adafruit Feather boards to a din rail.
 long vine
Thought I'd share my June program for my 420 pixel long house strip
Granted, we don't get a whole lot of nighttime this far north in June. So they're only on for 4h at night
cobalt dove
My multitouch-display-as-touch/macro pad thing is working out awesome! I've got it controlling my mouse and recognizing basic gestures. I've also got it playing arbitrary videos/gifs! Now I just need to get a second one... Muwahahaha!!! https://gfycat.com/colorlessminorbrontosaurus

The plan is to make it the ultimate wrist rest to pair with my analog hall effect keyboard (with 3D printed switches and stabs!): https://gfycat.com/alienatedflatcanvasback

(will replace that block of wood that currently serves as my wrist rest hehe)
exotic sierra
Oh wow cool! 🙂
dawn acorn
Blinkies!!! :-)
gusty shard
Arpeggiator de jour https://gist.github.com/rsbohn/3ebf1b41b94db77bf0c2a87bf55e5ca9
gusty shard

 junior dust
@median spoke Hey I thought this looked familiar, nice work! https://www.flickr.com/photos/adafruit/51247657003/
Explore adafruit's photos on Flickr. adafruit has uploaded 28861 photos to Flickr.
 median spoke
junior dust
<@!228322543507865601> Hey I thought this looked familiar, nice work! https://ww...
median spoke
junior dust
<@!228322543507865601> Hey I thought this looked familiar, nice work! https://ww...
Ha nice! That's a great picture. Thanks I'm still surprised how it turned out
junior dust
median spoke
Ha nice! That's a great picture. Thanks I'm still surprised how it turned out
Yea it looks awesome! I believe Andrew took those (He's the product photographer at adafruit HQ)
median spoke
cool, yeah I know how hard photographing lit LEDs can be. The photography nerd in my appreciates it 🙂
solar yew
Setting up a Pi Zero W as a IR keyboard controlled by a remote. Breadboard makes it easier for me to swap the resistor if needed. Was going to use an Arduino but could not find it, SSH makes maintenance easier. It is going to control what is displayed on my To-Do list sign that I put together with an old x86 netbook and a VGA monitor. The To-Do list netbook grabs the webpage from a web server (FreeBSD) on my VM server and displays it on the monitor mounted on the bookshelf next to my desk. It is always there for me to look at.

I can enter to-do items from any web device that can access the server
ruby ledge

ESP32-S2 driving 6 x ST7735 80x160 LCDs with a GIF animated sequence (160x480 x 49 frames)
exotic sierra
formal hamlet
My new 3d printer auto z offset setting sensor built from an fsr and a pico

https://youtu.be/Yuj6TY7PoTI in action

Automatically configure probe Z offset using an FSR and a pi Pico to act as an endstop.
What you're seeing here:
Home the Z axis
Place the sensor under the nozzle
Probe the nozzle to the sensor
Move the bltouch over the sensor
Probe the bltouch on the sensor
The difference in Z height is the Probe trigger offset with respect to the nozzle.
tacit delta
lol it suggested me adventures of mark twain after that video. not sure how to feel about that
awesome project though
 lean zodiac
I've been poking at contributing to the Rust HAL (hardware abstraction layer) crate for the RP2040, and some code and a mangled Feather RP2040 later and I've got using the QSPI pins as GPIO working: https://www.youtube.com/watch?v=cBrTki3PBQc 😄 (apologies to the Feather)
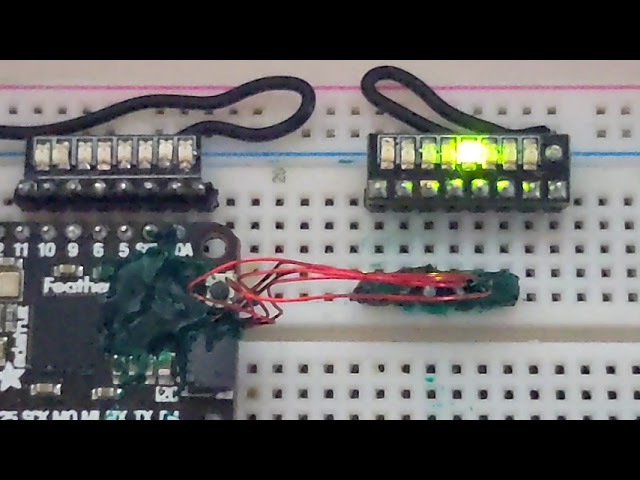 exotic sierra
Haha nice
 torn viper
lean zodiac
I've been poking at contributing to the Rust HAL (hardware abstraction layer) cr...
torn viper
lean zodiac
I've been poking at contributing to the Rust HAL (hardware abstraction layer) cr...
lmk if you ever want to contribute to atsamd-hal too
(for the atmel/microchip adafruit boards)
lean zodiac
torn viper
lmk if you ever want to contribute to atsamd-hal too
I'm actually basing the GPIO stuff on the atsamd stuff
torn viper
nice!
lean zodiac
I've not found anything lacking in the atsamd hal
solar yew
I'm sorry Dave, I can't do that .. just a minute .. just a minute .. Dave, it looks like I can do that. -HAL 9000
lean zodiac
huh, I might look into that
torn viper
we didn't have dma until recently and afaik it's pretty hard to run a dac without it
so that's why
our chatroom is here https://matrix.to/#/#atsamd-rs:matrix.org
You're invited to talk on Matrix
lean zodiac
not sure if/when I'll get around to even thinking about anything as I only have one me
torn viper
yeah I feel that
I'm the OG rust fanatic of this discord, but I have a job now and a lot less time
 void spoke
long vine
Thought I'd share my June program for my 420 pixel long house strip
void spoke
long vine
Thought I'd share my June program for my 420 pixel long house strip
Are those 12v Neopixels?
long vine
void spoke
Are those 12v Neopixels?
5V, they've got a 65W PSU and 3 individual cords, one for each 5m strip
420 pixels in total
software-side is performing sanity checks tho and shuts down if the total estimate current is higher than a value slightly below what the PSU can output
It's driven by a raspberry pi in my garage and sets the theme and on/off hours automatically based on holidays and season
formal hamlet
Very cool
cobalt dove
The new version of the Keycap Playground with snap-fit stems and Alps support is up! https://github.com/riskable/keycap_playground
GitHub
The Keycap Playground is a parametric OpenSCAD keycap generator made for generating keycaps of all shapes and sizes (and profiles) - riskable/keycap_playground
I want to see some crazy keycaps! https://gfycat.com/carefulangrybirdofparadise


 void spoke
@long vine very cool! Didnt think 5v would be that visable. Was going to do my soffits with 12v but the 5v dont look bad at all!
long vine
void spoke
<@170928079894609922> very cool! Didnt think 5v would be that visable. Was going...
just make sure you use thick and/or multiple cables for power delivery
void spoke
👍I used 3 wire thermostat wiring when doing larger LED runs. This is a shot of my under cabinet neopixels hooked up through a usb outlet on a wall switch.


@long vine
long vine
Fancy
 hollow cedar
lucid bloom
hollow cedar
lucid bloom
I discovered how to pass variables as part of google assistant voice commands. I have to go through ifttt to do it, it will open up a lot of new possibilities for advanced voice commands for my home assistants
wary atlas
Hehe, nice
lucid bloom
It will be nice for "show me (camera name)" and then it sends a snapshot of that camera as a notification to my watch and phone
wary atlas
I need to get my hands on a VT220 terminal...
lucid bloom
When you do I'll share the initial setup and some of the programs I've used and some of the ones I've made for it
wary atlas
Awesome, thanks :D
 upbeat geyser
I think I have a VT510 around here somewhere
wary atlas
VT510? :0
upbeat geyser
I even have the demo ROM for it
wary atlas
Ohhhh