#show-and-tell
1 messages · Page 13 of 1
 frosty tusk
 west dune
Thanks!
 cunning narwhal
I designed a power distribution and sensor measurement unit for this fast piece of carbon
We won the acceleration with 3.55 seconds, exit speed 120, electric overall, even electric+combustion overall at the FS Czech races
 unborn sphinx
sweet
 vernal ferry
These Adonit Jot Touch stylus ran out of juice and I lost its proprietary charger yeaars ago -- revived it!
frosty tusk
Handy dandy gif.
Claw for my crickit claw machine.
Never has there been such a perfect loop in gif history.
 grave shadow
unborn sphinx
grave shadow
unborn sphinx
I'd love that as a volume knob and output switcher
cunning narwhal
Are those mechanical key switches?

 pale crystal
@junior agate is there a writeup on that environment monitor somewhere?
 junior agate
@pale crystal Most likely by friday, Monday at the latest.
I'm building one with a Huzzah and a zero W
pale crystal
awesome, thanks!
 lunar root
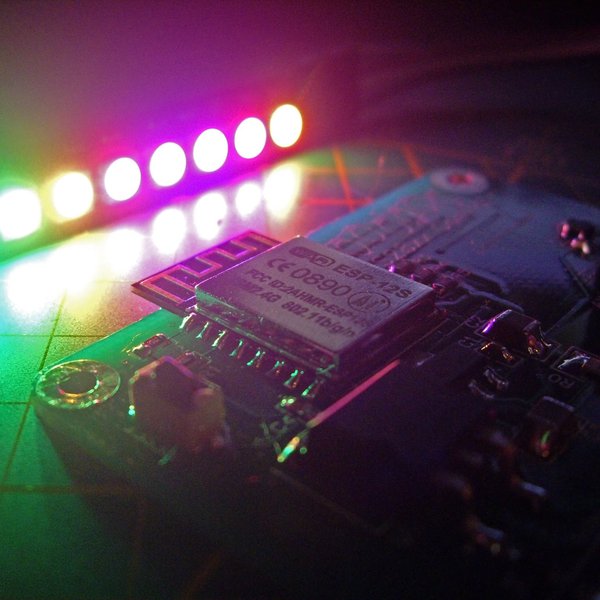
DotStar & NeoPixel Controller meant for putting a nice lightshow on any* individually addressable LED Strings, rings and/or strips.Hardware:The hardware of this project is based on custom made PCB with a Customized ESP8266 module. A OLED display and Rotary controller (https:/...
 cunning lava
A blinking barrette
junior agate
@cunning lava Kinda looks like the youtube logo
junior agate
@cunning lava not that I know of...ha
That's a nice heartbeat. You going to put a heartbeat sensor on it too?
cunning lava
no sensors, just blinky lights
 polar bough
@cunning lava what chip is that?
polar bough
its really cool. i love these little things
cunning lava
5 pins is all you need to drive 20 leds
polar bough
i just ordered a bunch of crap to try make some attiny85 wearables, hopefully w/ neopixels, hopefully running off CR2032
cunning lava
neopixels and cr2032 don't mix...
unborn sphinx
neopixels don't reliably work under about 3.7V, ideally 5V, and each subpixel draws 20mA while on
cunning lava
they were designed for interior lighting
polar bough
i've seen a few instructables lighting up to 20 pixels. so we shall see. they will be behind a 5v 500ma voltage regulator
unborn sphinx
 unborn sphinx
you're going to need at least 2 CR batteries to get the voltage you need, and then it's going to be a very short life but maybe that's fine
polar bough
the vr requires 7v, so I will be using 3
might try the bigger CR, not sure the number, but I think it's maybe double the mah
unborn sphinx
CR[diameter in millimeters][thickness in 0.1mms]
you're probably thinking of a CR25 something
unborn sphinx
those don't look too expensive
polar bough
Expensive is a relative term. The requirement is for under $2 for the entire thing. Although I'm not sure that includes batteries. Ease of replacement is also a question for the end user. We have a somewhat tight price point to work with on this project. CR2032 are so easy for people to find, I may end up with that and just tell them, well, you only get 2 hours, or whatever. I'm worried about discharge rate too, there could be some hacks I implement with my animations.
it's all in good fun, for sure.
$2 for the blinky bits only
Not the rest.
unborn sphinx
yea, CR2477 are a very weird size to replace; but looking at them on amazon there were 10 packs for under 10$
polar bough
obvs.
well, also once it's out the door, it's not our problem, in some sense, how the customer replaces the batteries, lol
kidding, of course.
unborn sphinx
by blinky bits do you mean the LEDs or the controller too
polar bough
a buck a battery isn't bad. i usually pay 30-40 cents for cr2032 in bulk
all the electronics, so it's minus the supporting structure and "art", wearables crap, yadda.
these are low volume craft fest things, so it's not critical, there is some wiggle of a buck
maybe two
tiny85 are $1.24 in bulk 😉
unborn sphinx
that seems high
yea, so just quickly I found atmega88s, 25 at .6468$ each
it's obsolete but they still have 5358 in stock
pale crystal
Cute snek
polar bough
Trinket Project. Nearly done. My first microprocessor project. #sparkly 😃 https://www.youtube.com/watch?v=E4cInxBIFsg

Art sculpture/prop with detachable 3d printed PLA base or 6 foot pvc pipe staff, 4 control buttons pick from 30 cuatomizable animations, hue change, speed ch...
You may also recognize some adafruit arcade buttons.
junior agate
@polar bough The placement of the arcade buttons is perfect 😄
polar bough
i struggled w/ a few designs and finally came upon the idea of a printed base, which also works when it is in staff mode
 distant frost
A fun little splat made with Octave.
 lusty siren
DigiBadge Mini R2 PCB layers
Clockwise from top left: "Top" (Where all the components are), Interior 1, Interior 2 (+3.3v), "Bottom" (Where the screen is)
If it weren't for the fact that half of the top side were taken up by a 2xAAA casing, I might be able to move things around and get it all on two layers. Was almost there, but the difference in price in PCBs is just... not worth it
 upbeat geyser
Is that an NFC loop, or oddly routed traces?
lusty siren
Oddly rounded traces
http://phoenixborntech.com/2018/08/18/digibadge-mini-r2-and-a-new-shop if you want to read the wordy parts about it
unborn sphinx
what did you design the PCB in?
also how's Tindie? I've seen it a couple times, are they good?
lusty siren
@karmic fjord would be the one to ask about that. I've not used them yet except to buy a kit from... Dastels. Seems pretty good, and is known.
I designed the PCBs in PCBWeb
 karmic fjord
Tindie works well. Nice site, i.e. store management, CRM, ful;fillment management, collection, payment, etc.
unborn sphinx
how does it work, is it like etsybay where they give you a shopfront and you ship out everything ordered from it, or like amazon where you provide stock and they handle all of that?
upbeat geyser
Saw an interesting article on online storefronts like that and how they enable bizarre "long tail" things: https://www.theatlantic.com/technology/archive/2018/08/the-charming-infinite-dystopia-of-contemporary-e-commerce/567452/
karmic fjord
More like etsy. You make a store, add products, get order notifications, pack it up & send it, mark it as shipped., get paid.
 solemn bolt
I've been adding new features to my bots. the twitch chat controlled battle bots are LIVE https://twitch.tv/theotherlonestar
 upbeat geyser
Toofer!
solemn bolt
Oh dang. That is some nice surface smoothing. Explain your process please.
polar bough
@solemn bolt yeah! This was my first attempt at finishing. I just made a random object to test techniques. It will end up being given to someone as an anonymouse gift/prank 😂
So its 0.25 pla from a lulzbot
I hand sanded with 150 grit dry while watching tv
Krylon spray primer + filler, sand dry with 220
X3 times, but probably 2 would be enough
Then a coat of krylon gold, wet sand with 400 and a final coat of gold
solemn bolt
Good work!
polar bough
Thr print was made upside down without supports, so the top of the teeth inside the valleys are a bit yuck. I tried filling with primer, but got bored and anxious to finish
Like ya do
Thanks!
I concluded, it is possible to finish nicely this way, but it's a bit of work and i will save for special projects.
I mean i saw online so its possible in theory but never done it until this project
 leaden frost
Some enterprising kid will want that to put under a pillow for the tooth fairy.
upbeat geyser
Once I realized that the pin assignments on the HT16K33 were purely arbitrary (unlike chips with onboard character generators), I rearranged them to make the PCB layout clean.
lusty siren
@upbeat geyser What are you making?
upbeat geyser
Back to the Future time circuits to go with my Flux Capacitor.
lusty siren
Oh, sweet
upbeat geyser
The first version, with a Maxim MAX6954 in a 40-pin DIP package, didn't go so well. I actually realized while designing the current version that I had inadvertently used the wrong LED displays (-12 pinout instead of -11 pinout), which was part of my problem.
Since I can drive 3 16-segment displays, along with 10 more 7-segment displays using more convenient multiplexing than the charlieplexing scheme the Maxim chip uses, and still scan a keyboard, with a 28-pin SOP package using the same HT16K33 chip several AdaFruit products use, I decided to give it a go.
lusty siren
I've used the HT16K33 for an 8x8 matrix before.
It's a really nice chip, and it's one of the easiest surface-mount chips I've soldered
polar bough
Awesome
upbeat geyser
Just need to find a source for the chips themselves. I was intrigued when AdaFruit said "This chip is rock solid", given the tweakiness of the Maxim chip.
polar bough
Do you diy your pcb or order them?
upbeat geyser
I've considered making my own PCBs, but I loathe drilling all the holes, so I farm them out.
polar bough
So cheap too
upbeat geyser
The prices out there for PCB fab these days are amazing.
lusty siren
I have an order for a 4-layer board from PCBWay that was only something like $70 for 10. Including shipping. For a 4-layer board!
Their 2-layer ones are super cheap. $5 for the boards, $20ish for shipping.
polar bough
Its funny how rectagle designs still rule even for hobby projects
I paid 2.20 per board for the trinket shields i designed. Whee!
upbeat geyser
I think this is the last DIY board I made, many moons ago.
lusty siren
Oh that looks fun
 strong phoenix
@upbeat geyser Holtek sells the bare chip on their website... http://holtekusa.com/displaydriver2.html
upbeat geyser
Hum. I'd looked at holtek.com and holtek.com.tw and not found a way to buy them. Good catch, thanks!
Yow, $17 shipping!
strong phoenix
yeah...not cheap. i never found them anywhere else either.
might actually end up cheaper to order one of the Adafruit boards and desolder. 😆
i never ended up ordering from Holtek. i thought i had burned out a chip on a Trellis, but it survived my reverse-polarity boneheadedness
 balmy shuttle
Someone suggested I drop by and show some progress as it's "ShowAndTell" 😃
Made my self a "CANBUS" Featherwing. I designed it to use THT components (apart from 2 capacitors on the underside) so that it was easier for any hobbyist to make and solder.
I use an Adafruit Feather 32u4 Bluefruit LE to make a BMW iDrive BLE HID Device. I will post some videos in the next few days
(I haven't clipped off component legs yet in the pics.)
I designed it in Fritzing based on an open source can shield design... I just squished it down to featherwing size, and then had the PCB made by PCBWay.com
Fritzing Screenshot
unborn sphinx
that's a very attractive board you've got there
a lot of hobby boards are so optimized that they don't have any visual character, but that one looks cool
balmy shuttle
Thanks 😃
From our convo the other day, I've so nearly got the cursor working exactly as I want. almost lol. But gonna make a video over the weekend of current progress anyways
upbeat geyser
That is a good-looking board. I like that the silkscreen documents the jumpers, too.
balmy shuttle
Thanks 😃
polar bough
My last board I forgot to do a clever silkscreen and every time i look at it i am sad 😦
obvious luchador mask missing on power jack holes😫
 rotund pawn
I see a gasmask
unborn sphinx
are you my motherboard
rotund pawn
👏
unborn sphinx
built in spotlight?
junior agate
@unborn sphinx Kiiiinda sortaaaa
more like a smoll interior house light!
there's a si7021 on that perma bonnet as well for temp/humid loggin. New Learn series 😃
unborn sphinx
ah, I figured your emoji meant the neopixel disk was on upside down
nice house btw, my mom would love it
junior agate
@unborn sphinx I'm planning on doing a small series of them
IO House: Building a Smart-Dollhouse/Gingerbread House...Lighting & Temperature, Home Security, Voice Automation, etc.
then you can interface them with a REAL house, just scale up 😄
polar bough
whoa! i've been thinking to add neopixel jewels to my cardboard art
it lights up really well!
i have a life size danbo and the eyes are perfect for the neopixel rings
are the windows just holes and/or do you intend to put some kind of diffuser material and what?
junior agate
They're just holes for now, I'm going to go to Blick Art after work and try to get some diffuser material.
polar bough
cool.
cooking parchment paper works ok, it's a bit fragile tho, and some have markings on them, but easy to find
 leaden orbit
put in my first PCB order! here's hoping i didnt screw anything up 🤞
I also 3D-printed a tester to try out a few different keys I have, and serves as a test for my being able to print a shroud for a completed pad 🙌
rotund pawn
@leaden orbit good job leaving enough space for keycaps 👍
strong phoenix
@lusty siren looks Badgetastic!!! 👏
lusty siren
Only issue so far, as I've mentioned in #general-tech is that I tried to use A7 to drive an LED
A7 is read-only on an ATMega328p
If I had read the manual...
strong phoenix
Haha. "In ATMega328p, LED tells A7 to be on."
lusty siren
Hah!
lusty siren
And to compare size of button with the previous version...
unborn sphinx
what would be needed to replace the double AA pack with a slim lithium?
boost regulator and a socket?
 fair vessel
looks great @lusty siren ! love the new buttons
unborn sphinx
so it is
lusty siren
The new R2 version has a boost regulator that accepts... 1.75-4.5 v
unborn sphinx
I'm way off my game... thought 2 AAs was 7V...
lusty siren
Programming would have to be adjusted to not super dplete the LiPo, though.
Heh, 1.5v each
Thanks, @fair vessel - I'M SO EXCITED ABOUT THE BUTTONS
They make a very satisfying click when pressed
 swift lagoon
I know right? Buttons are amazing!
 bright sky
Here's my latest 3D printing project https://www.instagram.com/p/BnAccPgAf9_/ a model volcano for a show I'm working on

Instagram
31 Likes, 6 Comments - Andrew Chalkley (@achalkley) on Instagram: “Science so secret it's done by monkeys! #3dprinting”
But I did eject my SD card too early on the first try #sparky https://www.instagram.com/p/BmcFp_XgQEs/

Instagram
15 Likes, 12 Comments - Andrew Chalkley (@achalkley) on Instagram: “Sadness #3dprinting”
 near cedar
Ouch 🤣
junior agate
disarming a cardboard smart home security system?
vernal ferry
@bright sky that looks so good!!!
@junior agate ooh waht is this a demonstration for :)?
junior agate
@vernal ferry The second installment in a series I'm working on

Learn all about home automation by building a cardboard smart-house, controlling its lights, and monitoring temperature!
In the first one, you assemble a cardboard smart-home and light it up/monitor its environment
In the second one, you protect it against intruders and hazardous gasses/particulate 😉
vernal ferry
@junior agate brilliant! Ive seen similar demos used in 'smart home' product placements and such too
DIY smarthome ;3
 vernal ferry
best doll houses ever!
junior agate
that's the 🥅
polar bough
The future post housing collapse 2.0 tinyhomes!
leaden frost
Those are mansions compared to some NYC closet sized apts.
 charred ibex
For fun .. prototype gesture controller for my basement lights. Sends MQTT to mosquitto to node red to mosquitto to OpenHab to 4 zwave controllers to turn off my basement lights. Daily use for over a year now I think. Need to print a full case at some point. Fun project and useful.
Obviously very basic circuit
Wave up to turn on wave down to turn off
leaden frost
@charred ibex Cool. What kind of sensor detects the hand movement?
charred ibex
It’s an APDS-9960, using the sparkfun breakout. It’s only so so reliable at picking up the swipe; certainly ok but would love a more reliable sensor (detection wise)
leaden frost
Yeah, DIY sensors are certainly not mil-spec accuracy. I've tried ultrasonic range sensors, PIR detectors, and capacitive touch, they all work but need a lot of calibration or fudging.
unborn sphinx
Multiple sensors might work better, both multifactor sensing and just having multiple of the same sensor to hopefully get a better false negative rate
west dune

This is a 4 hour time-lapse. The printer I am using is the Tevo Tarantula Lattice Cube: https://www.thingiverse.com/thing:1856832
lusty siren
That's the show. The tell is that it is very toasty.
leaden frost
and there be dragons?
west dune
I made a temperature and humidity clock

In this video,i will show you how to make a temperature and humidity clock. Parts: I2C lcd: https://www.aliexpress.com/item/LCD1602-I2C-LCD-1602-module-Blue-...
 oblique vale
Put together this piece for an office art project. 192 Neopixels and a PDM microphone driven by a Metro M0 with CircuitPython. https://www.youtube.com/watch?v=CVQaGWKwBbc

Using a Metro M0 microprocessor to drive 196 NeoPixels and a pdm microphone, coded with CircuitPython
Cycles between wingman and random modes. goes to sleep till it hears something and starts again. https://www.youtube.com/watch?v=HvpHNhLQIj4

After two minutes Wingman goes random for awhile
 ruby ledge
I've created a OTA (wireless) capable bootloader for the ATmega128RFA1. This project was just for me to learn about boot loaders, 802.15.4 and other aspects of an obsolete classroom PDA. I'm cleaning up the code and will release it shortly. In the mean time, I wrote a blog post about how I created it: http://bitbanksoftware.blogspot.com/2018/09/my-adventures-in-writing-ota-bootloader.html

This adventure begins with the acquisition of a low priced gadget from the secondhand market. The SMART Response XE was designed to be a cl...
polar bough
@oblique vale whats the backing structure and which pixels are you using?
oblique vale
@polar bough Used 15 8 NeoPixel Sticks, 1 24 NeoPixel Ring and a NeoPixel strip around the frame. Backing is just particle board from home depot and I cut up to fit.
polar bough
sweet!!!
 lucid bloom
I'll be sharing my freezer alarm/monitoring project tonight, I installed the first prototype yesterday and it seems to be working well. I am making a guide for this project
lucid bloom
The project including everything for install costs around $75 for a single freezer and $80 for a double door freezer
junior agate
@lucid bloom it uses pi AND adafruit io?
lucid bloom
Yes
lucid bloom
Python
junior agate
@lucid bloom if you dont mind, where did you get that reed switch fritzing component from? I've been looking everywhere for a door-sensor-like reed switch component
lucid bloom
Let me go check
junior agate
thanks! making a fritz. rn that uses it and the default reed switch object is literally an unenclosed reed switch
lucid bloom
i dont know where i got it from
lucid bloom
np
lucid bloom
@junior agate I am collecting data before I devise the temperature alarms
 woven relic
Leds anyone??
lusty siren
@woven relic I wonder what LED you to this
near cedar
Some bright idea I'm sure..
woven relic
@lusty siren I wanna say the Amazonians.
leaden orbit
test fit of my components! just waiting of the rest of the switches before soldering! hopefully it all works 🤞
 solar yew
No idea what that is but cool
unborn sphinx
it's a bunch of buttons on a stick
 woven relic
Could I have compressed these any tighter? Lol
unborn sphinx
certainly not much
woven relic
I couldnt make it any tighter without making a custom pcb honestly
solar yew
i got a good question,
a friend recently gave me a mint condition mac powerbook g4
it uses a risc cpu
it runs os x.. so linux,
did they have to specifically build games for this device?
i noticed even warcraft 3 runs smooth.
or was support dropped for games later?
upbeat geyser
OS X is built on BSD, not Linux.
unborn sphinx
BSD is closer to Unix, while linux is less directly related
At a deeper level though,unless you're using a virtualized language you do have to make specific builds for different instruction sets, there are some cases like x86_64 where it contains x86 as a subset so 32 bit binaries can execute on the processor without issue.
Then most software has a lot of dependencies in tye OS, such as how files are addressed or how you establish a window and draw to it, so even on the same processor you have to compile for each OS famil you want to support. In a good ecosystem the compiler handles a lot of that, but good coding practices make it even easier
Virtualized languages just need a VM for every instruction set and OS combination, but they werent common in the era before macbooks, namely because virtualization was very inefficient then, and computers didnt have enough spare power to justify the overhead of abstraction
upbeat geyser
I think the only widely used one was Pascal.
unborn sphinx
?
upbeat geyser
Pascal was an interesting language. It was created to teach compiler design, so it defined an easy-to-compile language (Pascal) and an easy-to-compile-to virtual machine code (P-code), so students could concentrate on the essentials.
junior agate
@upbeat geyser @unborn sphinx this convo would be better suited for #general-tech, though it is pretty great
 lapis jasper
I'll steal @eager pine and Kim's thunder and post this: https://www.youtube.com/watch?v=QLCUyJK0hVM&feature=youtu.be

For the latest in my Pet Projects experiments, I built an electric skateboard for my cat to ride. Put a treat into the throttle lever, and she pulls it to ge...
 eager pine
@lapis jasper tee hee! i'm trying to get Kim to go on show and tell today 😃
lapis jasper
ya!
 late ibex
The internet skylight (featuring Adafruit NeoPixel arrays!) https://32bits.io/#/internet-skylight/

thirty-two
 fiery plank
Anderson Power Poles
Nice!
 digital swift
@thirtywobits if you ever decide to do another iteration it may be worth looking into the 12V versions of the neopixels (GS8208 or WS2815)
 wise raft
I missed show an tell 😦
For some reason I thought it was at 5:00PM PST but all signs point to me being wrong
Oh well, maybe next week
 hidden saffron
The start of new projects always looks messy
22" touch screen board, with an RPi for a Table top board game system
Main reason will be for dnd with a back end web server so the DM can add in characters from a different computer
lapis jasper
@wise raft 4:30pst. 5 is ask an engineer
 tawny sundial
Watching the show/tell video... LOVE IT
west dune

Instructables.com
Arduino Temperature and Humidity Clock: In this instructable,i will show you how to build a Temperature and humidity clock,using I2C lcd on the Arduino Nano
 stark carbon
DIY solar panel in progress. I'm not very good at making this look neat . :P
 keen vortex
Guys, just leaving this here: "Backing up photos on the go with Raspberry Pi + Adafruit hardware" > http://www.movingelectrons.net/blog/2018/09/20/How-to-Backup-Photos-While-Traveling-Part-IV.html
 supple mortar
Fona + Metro Mini Portable Weather Station
unborn sphinx
looks like Stay Calm and Nobody Explodes prop, nice
supple mortar
It made it through the airport as checked baggage even !
 lime mulch
it's tough to see the yellow led blinking but it is as well
it notifies me for when one of my accounts is pinged
and lets me know which account has been pinged
(programmed using Node, and Arduino)
solar yew

I had my computer send morse code for events like those. I liked it while I had it because even with my back turned I knew what was going on.
lime mulch
i should learn morse code one of these days
im hard of hearing, so having the ear-piercing tones helps, and the flashes as a backup
solar yew
you can do short melodies to a similar purpose.
lime mulch
definitely. I'm planning on that, I'm just a horrible composer. I've got a few friends in the gamedev community who are great at it though
solar yew
The only one I did (like hand carved MIDI) was a few notes of Eidelweiss
lime mulch
i could probably make a little arduino midi keyboard and play a tune, and have it record the frequencies and lengths, but meh
solar yew
I put stuff on github now so if I do something fairly interesting at least the code is available to do it again sometime.
There's even the possibility I might remember what I did, that way. ;)_
lime mulch
some of my code is on github, a fair amount isn't. This might go up on the github, with a bit more polish though
this is barebones rn
solar yew
so what triggers it anyway
lime mulch
anytime i get a ping on this account, or on my other account (i maxed out the amount of servers i could join on this one)
solar yew
so something listens as if it were a regular discord client
I have had like three clients going at the same time for the same account
lime mulch
a selfbot does. technically theyre disallowed, but this isn't making any actual api requests, so even if i were outed as using one, nothing would really happen
especially since there's no malicious code (no spamming or anything)
solar yew
sounds like you could just shove all this into a raspberry pi case and let it sit in the corner, independent of your regular workstations.
lime mulch
it's just like a normal discord bot, but logs in using a user token, instead of a bot token
very possibly! I know i've got a pi around here somewhere
i've never set it up though
solar yew
they cost like 35 bux and you use raspbian on them. noobs is the setup thing.
lime mulch
looks like node has a raspi build. I'm guessing arduino does too, since you brought it up XP
let me see if i can find it
solar yew
I still don't understand how the arduino knows what's on discord though. ;)
lime mulch

this part
i've got a discord selfbot running, that checks for any pings on either of my accounts
solar yew
that's 'and then a miracle happens' level of explanation. ;)
lime mulch
i'm working on explaining XP
whenever i get a ping, the selfbot sends a single byte of data through COM3
the byte is either "n" or "o" (for "new" and "old" respectively)
When the arduino receives a byte, the serialEvent() fires and checks to see what the byte was
solar yew
COM3 yeah I heard you say that earlier -- missed that. that helps.
solar yew
so the sender is a regular host PC with a serial port? RS232 or USB?
lime mulch
port.write("o", function (err){
    if (err) return console.error("Error on write: ", err.message);
});
USB
it's my laptop
port is set to COM3
solar yew
How does the Arduino talk to the USB on the laptop?
lime mulch
the arduino is plugged into the USB port, and only receives data
no sending necessary
solar yew
Does the Arduino have a USB connection on the board? Is that like a 'Due'?
lime mulch
It's an Arduino Uno. I'm not super knowledgable about all this, it's sorta my entry to electrical engineering in any capacity
lime mulch
Not microUSB. I'm not sure what this type of port is called. one sec ill take a picture
 solar yew
That's USB 'B'.
lime mulch
ahhh
solar yew
I don't know exactly what it's for, but I had one on my line printer a while ago.
lime mulch
interesting
solar yew
You probably have a second MCU on that Uno that bridges USB to the main MCU of the Uno.
The SAMD does this internally, I believe.
The AVR doesn't so it needs a second bridge chip of some sort, to talk via USB.
I think you could definitely do all this with the raspberry pi.
I don't know how you could get the Arduino to monitor discord on its own. ;)
lime mulch
I think there are internet connected arduino? if so, there's a C api for Discord, i probably could
but i wanted to tie my Javascript in, since I'm most comfortable in Java and JS
lemme see if i can find my pi, i'm curious now 😄
lusty siren
@solar yew If I remember, the Uno uses a 16u2 (u4?) For USB communications.
solar yew

 plush gorge
I finished a JST plug cap to allow you to sand down your JST plugs a little so they're not quite so difficult to use. 😃
And the file is up on thingiverse if you want to print your own.

I know how much of a pain that it can be plugging & unplugging a JST plug. So I drew up a JST plug clip or cap. This allows you to sand the little bumps off of your JST plug so it's not quite so difficult to plug & unplug it. Enjoy & keep on making!
 eager stirrup
This picture if wicked old, but I'm surprised I haven't seen more of these jumpers around on breadboards:
unborn sphinx
that looks like a lot of fun
what's that board? I've never seen an arduible with two USB ports so maybe a funky pi?
lusty siren
@unborn sphinx doubt it is a Pi, might be some type of teensy.
@eager stirrup Those jumpers look like long headers bent into shape, likely home-done.
unborn sphinx
there's only a couple of places where it looks like the black bead on the jumper was cut off of a strip, and the bend radius are very consistent
the bead reminds me more of those test point things

Testing is an important step in board manufacturing. And it can be super tricky on a fully populated PCB. So how can you test connections when you have an assortment of components ...
also I just noticed that those are USB-A ports, interesting
so this is an arduino-like board for giving your circuits the ability to host USB devices such as mass storage drives
lime mulch
yea, i noticed that a bit ago. I was interested since I'd not seen USB-A ports like this before
unborn sphinx
VNC1L-1A USB 2.0 Host/Controller Interface Evaluation Board
the VDIP1 only has 1 USB-A port, but would definitely fit on a feather WINK WINK
 ionic cradle
new featherwing confirmed???? ?? ?? ? ? ??? ? ?!? ?!?!
unborn sphinx
I'm thinkin' thinks about it, but it would probably end up being a wingfeather. the VDIP series is designed to be an accessory device, controlled over SPI, but it seems capable of also being a main board
seems like the only thing that's special about the VDIP2 is it has a 40 pin GPIO rather than 24 on the VDIP1, and both of the USB hosts are populated while the VDIP1 has one unconnected
hmmm, the vinculum website where most of the resources are seems to be dead
There's probably an easier way to get a USB-A host port into the feather ecosystem
upbeat geyser
I'd probably go with https://www.sparkfun.com/products/9947

This new version corrects the pin out for the GPX and RESET pins. The SparkFun USB Host Shield contains all of the digital logic and analog circuitry neces
unborn sphinx
looks good, it needs an external 5V source or onboard 5V .5A boost regulator since VBUS isn't always present
eager stirrup
Good eye, definitely a VDIP2. I bought that many moons ago when I had a project in mind, then ended up switching to SD card because it was built onto a board. It's been sitting in a box for many moon! 😃
@lusty siren they definitely might be home brew, but best $7 I've spent for breadboarding. Well minus those handy 5v/3v3 breakout boards that take a DC jack, close call between those two 😛
 quasi vault
I made a live build of our at switch interface https://youtu.be/kPwT5a61wVU
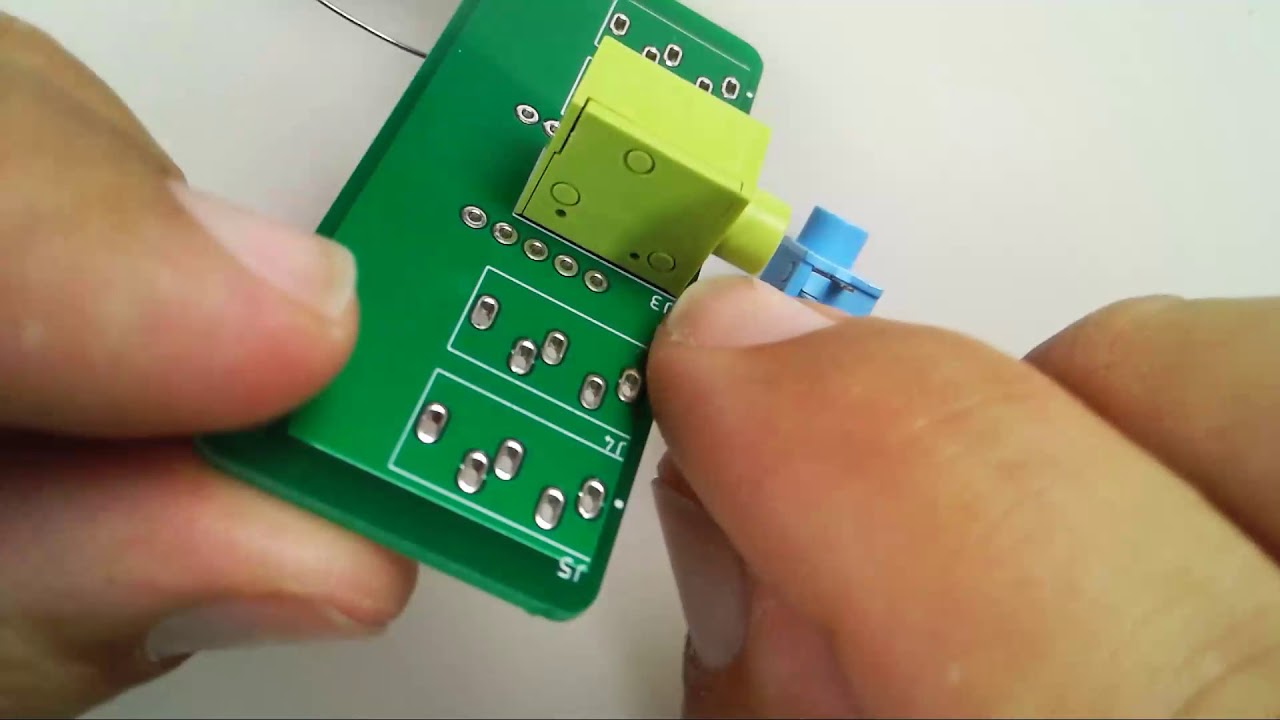
Raw video of building the KeySwitch Interface
 regal dagger
 prime star
So wondering if anyone can clue me in as to how to participate in the show and tell? Thanks.
solar yew
nephear, Adafruit has a Google+ page.
About half an hour before showtime, they post
something there, if memory serves -- and that's
how you get on the guest list.
Oddly enough this channel isn't used during the show. ;)
woven relic
Perfect Purple PCBs are the best! Tied only to the nice blue ones from @rustic stag
 warped cobalt
Something about you using blue doesn't seem too surprising
 lime parrot
I love purple pcbs, they're great
green feels, cheaper? In some way
I've been playing too much factorio.
hidden saffron
^mood
distant frost
I made a cool knock-off of my favorite type of mil-spec connector, the M38999. I did not think that the threads would work so well. See https://www.thingiverse.com/thing:3129731 for more details.

Connector mashup: Mil-spec M38999 and Molex 0/062 contacts
Inspired by the mil-spec 38999 series of connectors, this is a mashup of a shell size 15 M38999 connector plug and receptacle with the molex 0.062 contacts used in https://www.thingiverse.com/thing:2755931.
If you wan...
leaden frost
@distant frost My "favorite" mil-spec connector is the ones on top of a prc-77 radio, I think they were some kind of BNC connector and nicknamed knucklebusters - they were tough to get on and off in the cold and you would scrape your knuckles on the other connectors close by trying to pull them off.
distant frost
A lot of them have bayonet pins, but I though that printed bayonet pins were bound to be pretty weak, on account of having a small cross-section.
leaden frost
Is that a water resistant or waterproof enclosure you have there?
distant frost
No, I am not aiming that high right now. I do have some flexible filament that it might be possible to make gaskets with, but I have not tried that yet. So much of watertightness would depend on not having tiny gaps between the filaments, and that seems hard to achieve with complex shapes.
leaden frost
ah, thanks, maybe a can of the As-seen-on-TV spray leak sealer to coat the print.
warped cobalt
PRC-77 were designed solely to do while wearing gloves, preferably with plastic knuckle guards
Although, I often seen them replaced by regular BNC connectors, or the bigger one that is usually used for Ham & CB radio (Too tired to remember the name)
Although, for powerlines & such homemade camping stuff I seen at times, this would be awesome.
solar yew
 woven relic
Wooohoo!! I have the next 2 days off so that means work work work on my lightsaber!!! hopefully I can get a sneak peak into show n tell of it!
tawny sundial
Our CircuitPython/AdafruitIO SpookyHouse for Halloween is coming along great! It even has creepy sounds! No where near finished, but it's going good.
Here's a before picture! 😃
junior agate
@tawny sundial WOAH! thats awesome
When you're done, post up so we can blog about it 😃
tawny sundial
@junior agate Wow! My girls and I would be honored; I will definitely post up when it's fully done! I'll post another update soon, it looks amazing at night!
junior agate
it's like the IO Home, but spooky!
tawny sundial
Exactly! Wait until you see it with the decorations and stuff we made...
junior agate
here I was thinking holiday lights only applied to December holidays 😃
tawny sundial
haha, yes, holiday lights are almost always associated with Decemeber
junior agate
proximity sensor candy jar -> twitter? 😄
tawny sundial
Haha! That is so cool
 sturdy sluice
Thanks!
http://github.witchlights.com has the project code and such, and a link to the site with the pretty pictures

GitHub
Witch Lights - An interactive light art installation - jdimauro/witch-lights
upbeat geyser
I just put up the first of my Halloween lights (a neon jack-o-lantern in the attic window).
tawny sundial
@upbeat geyser PICTURES! 😄
upbeat geyser
The middle is covered by the window mullion, but it looks cool. I bent it myself, it's green phosphor tubing with a neon fill.
Here's the view from inside the attic.
ruby ledge
For my Adafruit nRF52 feather project, I needed a tiny Lipo battery to fit in the "Belly" of my project between the feather and the hat. I couldn't find any available batteries of that size+capacity, so I took a helicopter R/C and did some minor surgery. Luckily there were no explosions. https://photos.app.goo.gl/T96B8GX8mZFYurjf7

Google Photos
I used a very small spudging tool (plastic) to remove the tiny JST connector, carefully soldered new leads on and added some heat shrink tubing to protect them
woven relic
@ruby ledge I know where to get more of those if you want
ruby ledge
I got a good deal on a set of 4 from Amazon; I've got enough for now - thanks 😃
Do you know a place that sells them with the "correct" JST connector for Adafruit boards?
woven relic
hmmmm lemme compare to what i have for those batteries
I'll check once im done eating lunch
The little batteries Ive got use the same jst size as the jst on the Feathers, but i dont know if its the right polarity. I plugged one into a feather and it didnt turn on. it did get a bit warm though....
that looks like a super tiny jst connector @ruby ledge
ruby ledge
the helicopter battery comes with a super tiny JST connector stuck to the top. I removed it and soldered on a bigger JST (which fits the feather)
woven relic
ok! yeah the cells i have of the same size fit the jst on the feather. but i dont know if the polarity was correct for the feather
ruby ledge
I fried the charging circuit on a feather because the JST cables I bought had the polarity reversed. I triple check now
woven relic
ah
ruby ledge
easy enough to pop out the wires and reverse them
woven relic
then thats probably what just happened to the feather i tested on
ruby ledge
there doesn't seem to be a standard for the JST polarity, so you can get in trouble. I'm surprised the feather's charging circuit doesn't have reverse polarity protection
woven relic
yeah thats interesting
 opaque spruce
Hey uh, for the show and tell
For the show and tell stream, does it have to be electronics? I just have a super cool thing I'm making, and I really wanna show it! Its not an electronic though.
lusty siren
@opaque spruce Nope! People have shown off cosplay, crafts, and other things.
woven relic
My lightsaber is 50% cosplay and 80% electronics @lusty siren
opaque spruce
Doesnt add up mathematically, so, doesnt really make sense
woven relic
And I'm a big blue cat. Nothing I do makes sense
upbeat geyser
I posted my Halloween neon above, not much electronics to that, just a transformer.
woven relic
But that's still super cool!!
lusty siren
Transformers could be cosplay too
upbeat geyser
Good point. Robots in disguise.
plush gorge
Lol, YAAA! just got the email with my tracking info for my Adabox 009. 😄 @everyone
Thanks for all of your hard work & dedication Adafruit! You guys each & all ROCK!!

 muted crescent
I have never seen one like that before.
It is pretty cool now I am thinking about it.
sturdy sluice
I did some sketching based on the help and feedback from #world-maker-faire this year, is it appropriate to show here?
Cross section A-A for pluggable segmented modular Witch Lights
Having sensors embedded in the primary harness modules was elegant, but pluggable segments would allow me to branch off and even power separate LoRa Feather boards
The second word in that last sketch is "Nodes" and not "Nudes". I was always yelled at by my technical drawing instructors.
sturdy sluice
Versions 1-4 were designed in Solidworks and I'll be keeping it there for now. 😃
unborn sphinx
I'm not sure you ever explained what witch lights are
sturdy sluice
Oh! Sorry, I try to not take up all the space and sometimes overcorrect
I2NK
My goal for the Witch Lights was to create real magic. To enchant the forest at night, and guide people safely through the woods. The Witch Lights are installed along a dark, winding path through the woods. As you walk down the path at night, a bright faerie light goes zipp...
Motion sensitive faerie lights in the dark woods at night
45 meters of NeoPixels, 3D-printed modular waterproof wiring harness with custom sensor housings. Can be carried by one person and set up in an hour by two people.
6-8 hour battery life
And an extensible object oriented multi sprite C++ framework
Average SRAM usage: 9K
http://github.witchlights.com for documentation, code, 3D printable hardware, BOM, and instructions
GitHub
Witch Lights - An interactive light art installation - jdimauro/witch-lights
https://blog.adafruit.com/2017/07/27/witch-lights-neopixel-lights-in-the-woods-seen-at-liveatfirefly-festival/ is a nice write up but has the wrong name and links to the wrong Firefly festival
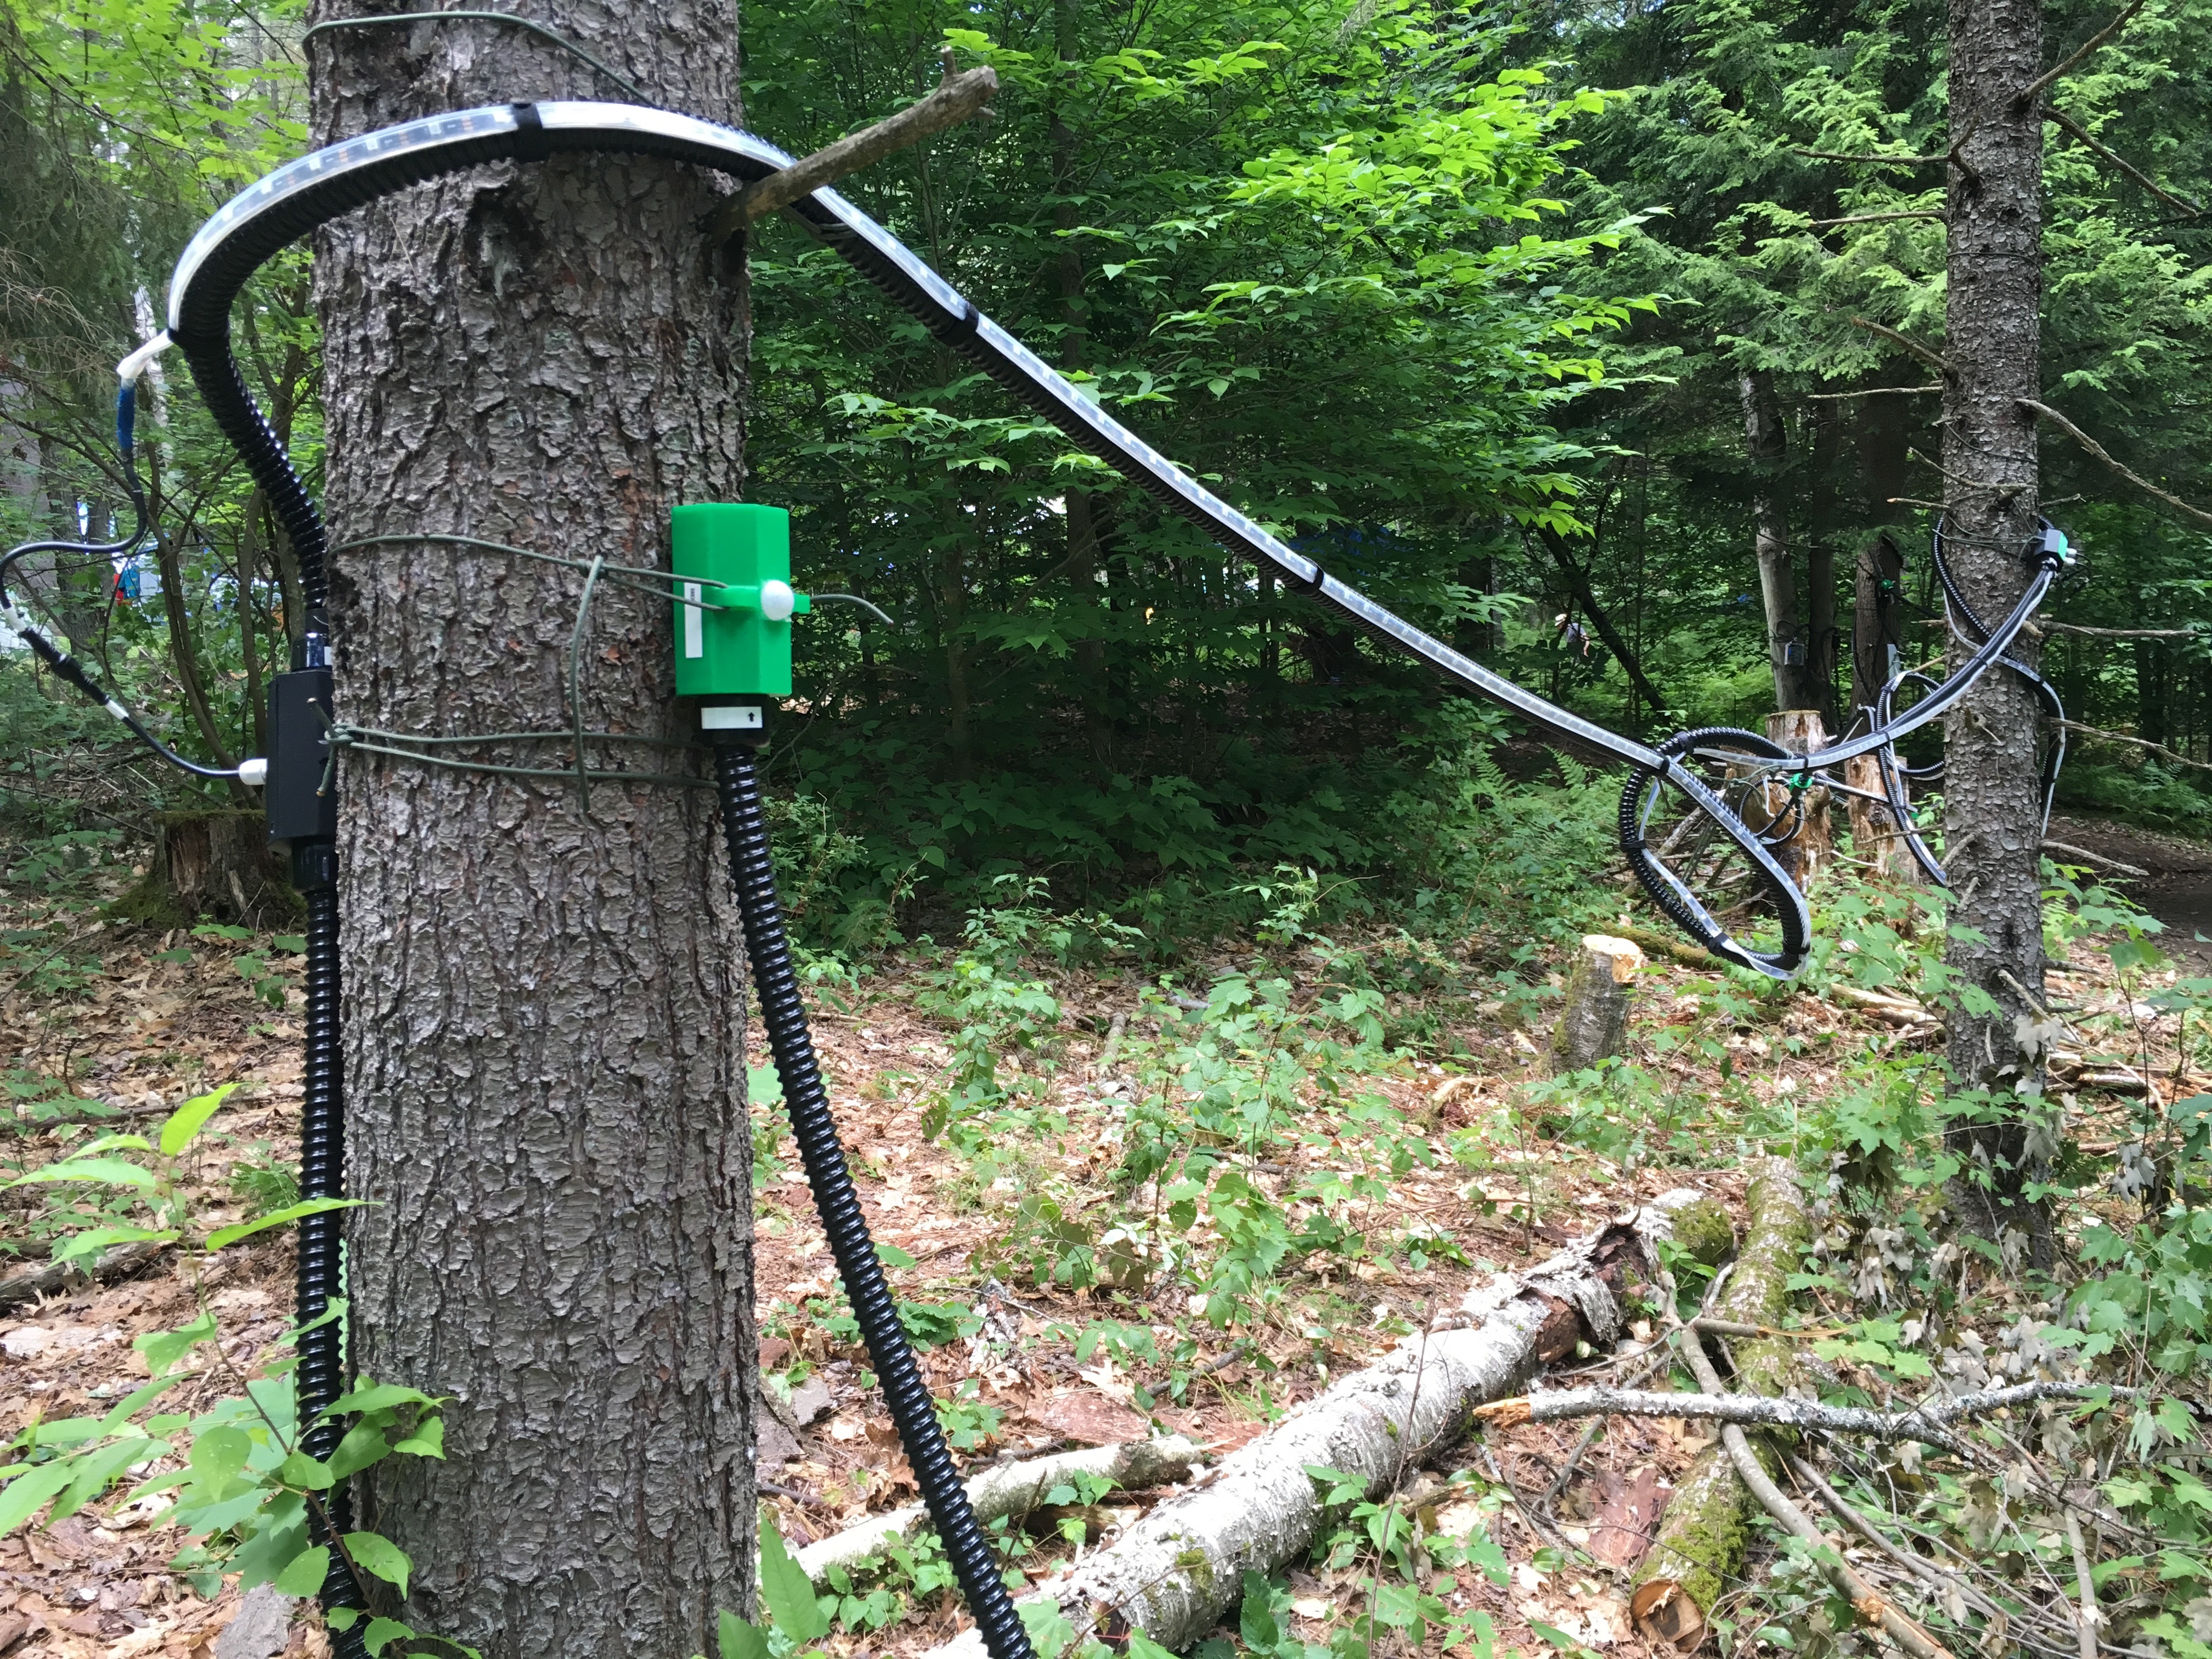
Adafruit Industries - Makers, hackers, artists, designers and engineers!
Seen at Firefly 2016 & 2017, Witch Lights are Joshua DiMauro’s modular installation of NeoPixel strips triggered by a PIR sensor. Simple but effective (especially at night in the woods!) …
Showed @scenic siren and the discord meet up at WMFNY18
The picture above shows a PIR sensor housing at the far end of a 30 meter harness
unborn sphinx
this is really cool
sturdy sluice
Thanks!
Video doesn’t show it right. :/ I’m using a 40ms-3ms refresh rate running many many small fades on the pixels, maximizing the sparkle-blur effect that’s usually annoying with NeoPixels
Anyone have experience taking high speed video of LED animation? ¯_(ツ)_/¯
Oh, and the sketches I posted above would be hardware design iteration 4. This is year 5 of development.
upbeat geyser
I've used my Casio Exilim FX-1 for high-speed video of various LED effects.
sturdy sluice
@upbeat geyser may I pick your brain? I’m selecting a good camera now and am curious what you think
upbeat geyser
My information is a little out of date by now (the Casio is an older camera), but sure.
sturdy sluice
What capture/playback speed should I look for? Like, what are the metrics that matter?
My last serious camera was a full manual Pentax with BW film I developed myself in 1997
unborn sphinx
just to mention it, depending on your needs a lot of the flagship phones, both android and iphone, have really solid high speed and cost the same as an entry level fancy camera
sturdy sluice
You’re right, the video shown above was taken on an iPhone X with a pro video app
unborn sphinx
have you played around with the highspeed?
unborn sphinx
try something simple like a coin flip in a well lit room
upbeat geyser
The Casio can manage 300fps at full resolution, and 600fps and 1200fps at reduced resolution. It also has a handy mode where it records video at an ordinary 30fps and can shift between that and 300fps on the fly.
The other popular consumer grade camera with high speed capability is a Sony RX100, which I know less about.
sturdy sluice
<neo>whoa</neo>
upbeat geyser
Useful data here: http://www.hispeedcams.com/hsc-camera-guide/
Buyers Guide for Hi Speed Slow Motion Cameras by Quality and Pricing. Frame Rates, Cost and Performance. We did the homework so you don't have to! Guide!
unborn sphinx
looks like iphone X can do 240FPS
like I said, depends on your needs
I think the galaxy S9 can do something like half a second of 600FPS
sturdy sluice
Yup just found the thing
Thank you!
I just spent $1000 cleaning up a house problem so I was not happy about maybe buying a camera too 😤
unborn sphinx
240FPS played back at 30FPS is 8x slowmo
sturdy sluice
Fantastic
I’m about to commemorate my grandfather in Boulder and wanted to get better video. Now I know.
Thanks again!
unborn sphinx
if you do have a budget, I recommend getting some kind of holder thing, I use a magnetic gorillapod with a spring clamp and it lets me hold the phone in a more stable posture, you can also get stuff like a handle with some joints and a weight that give you inertial motion dampening to smooth everything
there's also stuff like the DJI Osmo, a servo controlled gimbal stablizer, and there are cheap chinese knockoffs that have reasonable performance, but a lot of the times inertia and better posture is all you actually need
upbeat geyser
The other thing is that most cameras need a lot of light for decent high speed performance. Outdoors, it's rarely a problem, but indoors you might need additional light. An ordinary cheap clamp light and a bright bulb is sufficient. I've used both the high-power CFLs and ordinary BCA type photofloods with good results. Note that the CFLs can give strobing and color cast issues, depending on the conditions.
unborn sphinx
so can incandescents, if you manage to find one
upbeat geyser
The BCA is an incandescent. Nice cheap color corrected bulb, but only a 4-hour rated life.
If you can find an old Sun Gun at a yard sale, they're amazing for high-speed work, but the bulbs are little pricy.
unborn sphinx
a 4 hour life?
upbeat geyser
This is the bulb the Sun Gun uses (a whopping 20,000 lumens): https://www.1000bulbs.com/product/7257/STAG-1000229U.html
unborn sphinx
surely that's in jest?
upbeat geyser
Nope, that's the correct figure. Ordinary incandescents are run fairly cool (2700K) for long life, but they're pretty orange for photographic use. The BCA runs its filament really hot to get more brightness and efficiency and a better color temperature, at the expense of bulb life.
unborn sphinx
tungsten is silly... too bad it's really good in this usecase
upbeat geyser
They're really popular for use on movie sets, as they're the same size, shape, and base as ordinary incandescent bulbs, so they can be used in ordinary fixtures. They don't last long at all, but they're cheap enough to replace every shot.
unborn sphinx
and critically, tungsten has a really smooth light curve, where LED is lumpy and CFL is spikey
neat graph's yo
upbeat geyser
For affordable incandescent light with half-decent efficiency, reasonable bulb life, I'm fond of ordinary work site lights. https://www.homedepot.com/p/Southwire-500-Watt-Portable-Halogen-Work-Light-L20SW/205482818
unborn sphinx
I'd never considered before... Halogen is incandescent?
upbeat geyser
Older (halophosphor) fluorescents have a spectrum closer to the "LED" ones pictured, but the newer triphosphor ones (and trichromatic LED lights) have a spiky spectrum like the "Fluorescent" one there.
Yeah, halogen is also a tungsten filament heated to incandescence. The difference is that it's in a halogen atmosphere which returns tungsten to the filament, so the filament can be run at a higher (and more efficient) temperature without ruining the lifetime. They also need a quartz capsule to withstand the higher temperatures.
unborn sphinx
neat
sturdy sluice
I’m going to be shooting this video in like… darkness
The brightest the LEDs go is about 45%, and they fade out rapidly from there
So I’ll give my phone a shot but the result could be pretty dark
upbeat geyser
That's the problem with phone cameræ: they have tiny apertures.
They also have tiny (and therefore not particularly sensitive) sensors.
I do a fair amount of "available dark" photography.
unborn sphinx
imagine light as a hose, it's spraying a constant amount of water and you have say a waterwheel catching the water, if you make the waterwheel spin faster you will get less water in each bucket; and the amount of water is brightness
upbeat geyser
An old Canon Powershot G9 can be had fairly cheaply, and has pretty creditable low-light performance.
unborn sphinx
also helps to have bigger glass
upbeat geyser
Yeah, my standard low-light rig is a Nikon Df mated with a Tamron fixed-speed zoom. It's the bomb for concert photography.
unborn sphinx
in the metaphor, having a larger... I'm getting all the words confused, the front of the camera where the light comes in at first, which is different? from the aperture, and then there's the sensor size, it's all important
upbeat geyser
Cameras can trade off sensitivity for megapixels for a fixed sensor size too. Many people want MOAR MEGAPIXELS but I'm more interested in an effective ISO approaching a million.
There's also the Fuji trick of the dual-sensitivity sensor.
unborn sphinx
the light that can be taken in is first limited by the total area of the outermost lense, you definitely can't take in any more light than hits that lense, then there's the aperture the optic systm which changes the shape and size of the light beam; then the aperture is used to cut the light beam for various reasons, and finally on most cameras it hits the sensor; bigger sensor, bigger pixels on the sensor, more light hits each pixel, more water in the bucket.
Unless you're nikon and you have backscatter sensors where the light that fails to interact with the sensor gets reflected back to try it again
backscatter tends to cause fuzziness in low light because the reflected light doesn't always hit the pixel it came in from, but it gets a lot more low light sensitivity
upbeat geyser
There's a reason my friends refer to some of my lenses as "big honking light buckets". 😃
sturdy sluice
Yeah sensor size and aperture size are the things tripping me up on a phone for this.
I will experiment and report back. May rent a DSLR to test as well.
unborn sphinx
thought: there are lense kits for smartphones
sturdy sluice
There are, true
unborn sphinx

it'll definitely change the optics you're dealing with, it'll fisheye a bit, things will noticably bend
sturdy sluice
It’s also way cheaper than a new camera so might be worth a shot!
unborn sphinx
and, it's entirely possible there's one at your local walmart right now
unborn sphinx
speaking of, I don't own any food right now, bye
sturdy sluice
Bye!
 grizzled aspen
@sturdy sluice Yes it is
sturdy sluice
@grizzled aspen ta!
opaque spruce
Help!
Is the s&T at 7:30 Pm over?
I was late and want to join!
Please answer! I have to know!
unborn sphinx
gotta fill the show, set a reminder
 lusty root
I've been working on a hybrid devboard/game console design. There are still a few things to debug and I'll need a respin but I just got the LCD screen working and I wanted to share.
plush gorge
Isn't it the most awesome feeling to find that last needed part to get a project to work?
plush gorge
And here's the start of a different project that I'm working on:

I'm using some really cheap parts from stuff from my local dollar store to make a seriously powerful LED flash light!
Have a great night Adafruit!
vernal ferry
@karmic fjord here’s one of my leuchtturm pocket books I keep around. I note rarely on this one and stick flowers in. The pocket in the back and the elastic holds well!
karmic fjord
Cool. I just picked up my first Leuchturm. I’ve been using Rhodia lined A5s and dotpads for a while, nut wanted an A5 dotted notebook for bullet journaling, and Leuchturm is the defacto standard.
ruby ledge
My latest blog post about power optimization for the small 'maker' and how to work around the limits of development boards. https://bitbanksoftware.blogspot.com/2018/10/how-low-can-it-go-optimizing-for-power.html

Background The Arduino (and later the Raspberry Pi) have created a huge marketplace of kits, modules and discrete parts. Vendors all over t...
unborn sphinx
any chance you happen to have ultra-low power numbers for an M0 board?
@celest aurora it's this kind of sitaution where ARM Cortex is never going to beat AVR
ruby ledge
I haven't tested the M0 for low power
I have a "Blue Pill" board, but haven't used it for anything (yet)
I'm pretty sure it can go quite low on idle power, but it may need an external signal to wake up in a comparable mode
The AVR is nice in that it has the watchdog timer to wake you up and can still go down to 4uA in that sleep mode
solar yew
The blue pill is for the coppertops who don't want to wake up. ;)
upbeat geyser
For ultra-low power, my usual pick is the TI MSP430FR series.
plush gorge
Made up a minimalist case for the Hallowing that allows for the 400mAh LiPo but requires the nylon stand offs & screws that came with Adabox 009 over the weekend. 😃
Just have to print them to make sure that they'll print & fit properly, then I'll put them up on thingiverse n share with you all. 😃 I hope that you've had a terrific weekend & have an even better week. 😄
opaque spruce
When will the show and tell google plus post be up?
 sterile lodge
Assuming you mean the one where you announce that you want to share, it's been up for about 3 hours now.
supple mortar
This is a GPRS weather station using a Metro Mini and a Fona breakout board for data transmission.
vernal ferry
Built a feather m4 successfully with a qwiic connector.This board is a practice board for the bigger qfn package, going forward I’ll transplant the parts on a new footprint for my Color sensor project (using AMS’ as726x )
distant frost
So you laid out the PCB yourself? What design tools did you use?
vernal ferry
@distant frost not yet, doing a new layout after this semester of classes are over, just wanted to prove to myself that I can solder the components by hand and get it working. I rareeeely solder and need all the practice.
I used Eagle
 inland hatch
It's not much, but I finally got around to trying out some neopixels by putting lights under my bed and one of those long touch strips on either side of the bed to toggle it:
https://gfycat.com/NervousRegalAmurminnow
 solar yew
"Begins playing Barry white"
unborn sphinx
just keep in mind that blue light messes with your sleep
inland hatch
Yeah, but I'm a sucker for pretty blue lights.
upbeat geyser
Only messes with some peoples' sleep.
unborn sphinx
people with eyes
upbeat geyser
Nope. I grew up in Florida and can sleep just fine in full sun.
leaden frost
In the Army, you can sleep just fine in full sun, standing up, in full gear...
solar yew
(while speaking)
unborn sphinx
if Indiana Jones has taught us anything, people who talk in their sleep are <redacted>
 slim sierra
Cross-Platform Crypto SDK we just completed!
Supports—and was personally developed using—the Adafruit ESP32 & ESP8266 Feathers 🤓👍
https://blog.ark.io/c-sdk-is-now-available-for-ark-63711c63daa3

ARK.io | Blog
The latest addition to ARK’s vast Software Development Kit library is the C++ programming language. This integration brings the total…
 long vine
I've discovered that enamelled copper wire makes for a pretty conductor and lets you wrap cables up neatly. https://cdn.discordapp.com/attachments/492067074005401611/504485377952710667/IMG_20181024_035900.jpg

Work in progress. I put rgb LEDs in the top of some skull bottles, and one of those small cheap adafruit vibration sensors in the back. So they can glow different colors when you tap their forehead
 brazen leaf
anyone here?
 grave saddle
 cobalt dove
My bulk candy vending machine costume is coming along swimmingly! The 3D printed parts are all working as they should and so is the Arduino controller part. Now I just need to print more of the parts and figure out something cool to do for the costume (which is mostly just a box) and the buttons... https://youtu.be/pLiABk43j40

This is for my Halloween costume where I'll be a WORKING CANDY VENDING MACHINE! I designed and 3D printed the parts necessary to put together a NEMA17-powere...
cobalt dove
@unborn sphinx Yes I am!
With five different candies to choose from! It's sweet!
Why come to my house for candy when I can come to you? I'll bring candy to everyone! haha
cobalt dove
@vernal ferry Thanks 😃
 proper kindle
This battery came with the leads the wind way around and I let all the magic smoke out of my little charging board and burnt my fingers. Can I have a #Sparky pin now?
ruby ledge
@proper kindle I did the same to a nRF52 Feather. I bought the JST connectors from China and they had reverse polarity from the "Adafruit" standard. I'm still using that set of wires, but manually switching them each time I need to use them 😦
proper kindle
that is the exact model of feather i elected not to test it out on 😅
dodged that bullet
vernal ferry
which part went smokey @proper kindle
vernal ferry
which component on the board went kaput?
proper kindle
something near the jst plug. i cant tell which just by looking with my naked eye
actually, this one little 1002 component has some black marks on the solder
vernal ferry
Charger IC Lithium-Ion/Polymer SOT-23-5
proper kindle
I really dont want to try to fiddle with bits that small, but thanks
solar yew
you know what sucks
knowing how the universe bonds and works,
but being surrounded by people that think you are insane or don't socialize due to a large gap
😧
And so i lock myself up in a basement in pursuit of the next piece of code or great tech.
when they find me i will be dead inside already,
leaden frost
@solar yew You need to get outside. GO AND MAKE IT A GREAT DAY. my two cents.
hidden saffron
I forgot to get a final picture of this bike, but volunteering at a repair cafe the other day. Had a electric minibike come in, the throttle sensor wasn't working on it, standard 3 pin signal connector, + - S. Tried making a pull up and pull down pot work to set variable speed, which that didn't work, grounding out or applying full volts to signal didnt work. What I ended up doing was using the electronic brake as a throttle input, shorting out the + - and left signal floating, so now these kids have a all or nothing throttle with out brakes... oops
but hey at least it runs now
solar yew
I could use some advice,
how do you stop the ocean air stop killing hardware due to moisture?
hidden saffron
solar yew
problem is this hardware sits at a reception
this pc has now claimed 5 psu's and a few motherboards
using sealed hardware is also a fail due to the heat generation.
hidden saffron
is it a pc or...?
solar yew
normal old atx case
hidden saffron
What we used to do at a salt mine is just host everything server side and buy really cheap and old desktops for high risk areas, and just replace them regularly
solar yew
i have to seal it or eliminate the fans or run long cables so the hardware stays safe
@hidden saffron was thinking up the same
unborn sphinx
I got it
solar yew
i was just thinking now why not just put this all on a VM and give them a waterproof tablet with mouse and keyboard connected to otg
unborn sphinx
Put the pc in a box, use watercooling, put the radiator outside
solar yew
that could work
unborn sphinx
There are PSUs that dont need fans until like 500w consumption
There is a watercooled psu, its dumb and expensive
solar yew
i'm honestly thinking the VM to be the better and easier to maintain fix
unborn sphinx
Definitely
solar yew
no lies,
the ocean has no mercy apon our machine bretheren
unborn sphinx
There is probably a datacenter within 5 light nanoseconds of you that has inexpensive virtualization or colocation
Milliseconds
About a thousand miles
unborn sphinx
Its best to keep the server behind a thin client relatively close for latency reasons, while for almost anything else it can be anywhere in the world
I ran my IRC BNC in texas, over 2k miles away
upbeat geyser
We used to build sealed PCs for the Marines to use in the desert. We had custom housings with heat sink fins inside and outside. They worked, but they weighed 37 pounds. They were also the only computers that worked at all when the temperature got above about 135°F.
unborn sphinx
If you took two watercooling radiators and ran water between them, that could work, ad long as the cpu was cooled separately
 strong phoenix
borrow the mineral oil trick from the "my desk IS the computer" crowd?
unborn sphinx
Mineral oil is impressive in the short term, but a lot of work in the near term and 100% fatal in the long term
vernal ferry
AS7261, AS7262 ~ not working yet, probably a firmware thing with the SPI chip
hoping to bring the 61, 62, and 63 together eventually but trying to build each individually first
aand a trinket + spi flash + lipo charge circuit with all pins broken out of the samd21e
unborn sphinx
Trinket?
vernal ferry
@unborn sphinx the layout is based on a Trinket M0, just expanded it to have the other bits
unborn sphinx
Having recently spent a lot of time looking at the trinket M0, I dont see it. I see the parts
vernal ferry
right, but you can flash the Trinket M0 firmware and use it without having to pin mux
it isnt a trinket, but its circuit connections (aside from additions) are trinket
unborn sphinx
Thats much easier to accept
vernal ferry
thanks
unborn sphinx
Its a pretty board
 fallen light
https://www.thingiverse.com/thing:3105838
I wanted to share a mechanical keyboard I designed! All the files are available to make your own too, from the gerbers for the circuitboards, to the DXF and SVG files for the plates, and a Fusion360 file to change the case too.
This one uses laser cut acrylic faceplates too, so you can swap them out to get it way different look for a fraction of the price compared to keycaps.

This is a keyboard meant to be relatively easy to make with anybody that has a bit of skill soldering surface mount parts. It's a 40%, with an easy to use layout that works well for typists, but perhaps not designers or programmers. I've included the files to make your own fi...
fallen light
どういたしまして! I actually have a few more designs on my thingiverse page too, I have a little macropad that's in the shape of a gameboy cart. I really like designing keyboards, and my hope that is somebody also builds the things I've put out there for everybody.
proper kindle
FOOL ME ONCE, BATTERY CABLES
solar yew
with the ridge line up, and the connector away from you, red is on the left.
Thus the battery at the top of this photo has its polarity reversed. When it is plugged in, smoke.
I didn't realize it was necessary to check.
Keep one good one handy at all times, to allow quick comparison.
left is the same side of your body as your heart is. ;)
(that's your military left; your other left isn't important here)
upbeat geyser
That's why a lot of the AdaFruit equipment listings include verbiage like "Other batteries may have different voltage, chemistry, polarity or pinout."
solar yew
They (now?) have counterfeit coin cell batteries. I don't buy from unvetted sources.
upbeat geyser
The charger learn page has a more sternly worded version on a red background: " If you are soldering on a JST cable or using a non-Adafruit battery check the polarity of the wires going into the battery port. A backwards battery can destroy the charger! "
lusty root
@fallen light Very cool!
unborn sphinx
if you buy a lot of batteries you should build a polarity tester, put a JST connector on a board and use opposing LEDs in parallel, red and green
technically you don't need two LEDs, but two will reveal if the battery is too discharged to light LEDs while with one LED that state is ambiguous with reversed
 junior dust
@plush gorge nice work on your hallowing case.
plush gorge
Thank you @junior dust 😃
Now I just have to modify the back to accommodate a regular flat shaped LiPo. 😃
 nimble sapphire
unborn sphinx
nimble sapphire
unborn sphinx
Spoopy
 errant summit
Only the 2nd thing I've ever printed!, Glow in the Dark PLA, with silver vinyl facing (cricut), and the remixed case back that allows ease for the LiPoly battery. I'll have a lot of fun wearing this out today. https://www.thingiverse.com/thing:3129334

This is a very simple remix of the bottom part of the case for the amazing Hallowing, which allows the use of a battery.
You will find the Fusion 360 file as well as the STL in this bundle. Go to the original file to obtain the rest of the files.
cobalt dove
My working candy vending machine costume for Halloween! https://youtu.be/fOdHZflKeb8

It's using an MKS Gen 1.4 controller board (an Arduino meant for 3D printers) with TMC2130 stepper drivers (fancy!). For some reason only the first vending m...
proper kindle
I "finished" my little pumpkin robot.
https://youtu.be/1xv8LABlJY8

We were having a small gourd decoration contest at work, and I was looking for a way to overdo it. This is the end result of that. Sure, it's as unrefined as...
lapis jasper
@proper kindle that is awesome!
vernal ferry
@proper kindle Wow!
unborn sphinx
@proper kindle once the pumpkin flesh spoils, you could get a foam pumpkin decoration to keep it clothed, now's a good time to go find one at craft stores
real nice legs btw
actual size can be tough to judge on these amazon listings, even though they say it's 6" https://www.amazon.com/Halloween-Thanksgiving-Styrofoam-Importe-Par/dp/B01L7LBQEY
proper kindle
Yeah I think the real pumpkin flesh was done right after I recorded that.
unborn sphinx
ooo and for christmas you could put a foam snowman on it
proper kindle
It's like a little hermit crab
unborn sphinx
easter gets an egg, 4th of july gets a hotdog, a body for every celebration
proper kindle
Moving from one shell to another
west dune
Here is my mini apple lisa,what should i use it for?
It isn't perfect,but it's made by me,so i love it
unborn sphinx
use it to design a macintosh sibling
finally prove once and for not which one would be good enough to build the other
west dune
if anyone wants to see it "in action" here is a video: https://www.youtube.com/watch?v=d-UVmtYcyDw&feature=youtu.be

I made this mini apple lisa recration using a raspberry pi,a lcd screen and a 3D printed case.What do you think,tell me in the comments!
proper kindle
Star clock now controls an RGB led strip and stays synchronized with my dynamically colored twitch overlay. Very easy upgrade :)
Now to try to move the middle board into the clock body... Hmm...
 shy shale
Neat.
sturdy sluice
I’m in Boulder to install the Witch Lights on trails around the open space this week! On Thursday I’m installing for my Grandma’s birthday
I’ll be taking pictures and video
shy shale
Sweet, hope it all goes well!
long vine
A bit late but I made a small game using some glass skull bottles, vibration sensors, and neopixels. The kids trick or treating had a lot of fun with it.
https://www.youtube.com/watch?v=2CEkVmva93M

This year I've been learning more about circuitry and microcontrollers. I've started working with the ESP8266/32 units, and used that knowledge to make a mor...
shy shale
That is awesome!
 zinc chasm
Wire wrapping.
It's transformer/magnet wire not just bare copper.
MIDI!
The tool was a simple brass tube I drilled a hole in the end to feed the stripped wire into and then put it over the post and twisted.
ATMega, some 597s, some resistor networks, and a couple 220ohm resistors.
For the wire wrapped side I designed and printed the pinouts of the ICs and laminated. It made it sooooo much easier to connect the traces.
I also wound my own electromagnetic pick up on a sewing bobbin with a ceramic magnet on the back. I built a winding machine driven by a drill. The shaft the bobbin fit on had an arm that swung around with it and disconnected a brass switch I built. I programmed an arduino to increment a variable every time the contact broke and print to the serial monitor. I ended up with 7563 wraps before a broke the wire. Another winding machine with a tensioner mechanism is in the works.
 eternal maple
Nice work, @zinc chasm . Haven't seen a TS jack like that for many years!
zinc chasm
It's a switchcraft fully normalled TRS jack from audio patchbay torn out of a local radio station when they went digital. They are super nice and ended up with a lot of foil shielded two conductor hook up wire out of them too since they had like 6ft going to punch blocks.
vernal ferry
Not an official Adafruit product, just a design student project For packaging design class project I chose Adafruit as the company to design for. Here's a prototype of the packaging and some use case examples. The concept is a feather m4 starter kit, imagining it to be sold at Chapters/Indigo (Barnes and Noble equivalent here in Canada).
Belly Band
Layout and design is not final but pretty close.
Still working on the layout for this accessories box too
sturdy sluice
@vernal ferry Hi, went to industrial design school with friends who did packaging and identity work, and this is first rate work. What I'd love to see is your design process, sketches you didn't use, mockups, etc
vernal ferry
@sturdy sluice Thanks! And sure, I have a lot of sketches to digitize and plenty of failboxes to document. Will post stuff here after the finals, still preparing those for presentations next week.
sturdy sluice
My 1.5 year old niece seeing the Witch Lights for the first time
@vernal ferry I’m super interested! Have you set up a portfolio site yet?
vernal ferry
@sturdy sluice pending a big update ☺
hidden saffron
Whats all this noise about image processing and object detection?
 torn viper
My latest projects are bringing support for metro m4 and a dma abstraction to Rust
currently experiencing 568 compilation errors XD
I thought about posting in #help-with-projects but since I'm not actually expecting anyone to know how to help I decided to post here instead just to say I'm working on it
sturdy sluice
The Witch Lights are up in Boulder, CO! I finished the install Wednesday too late for Show and Tell, but it’s in time for Grandma’s birthday tomorrow
My niece approves
This was my test install to debug the power circuit and motion sensor problems: surprise! They’re separate bugs!
Following advice from this server, I’m recording at 60fps and using a 120 degree lens attachment with my tripod.
But the higher FPS probably doesn’t translate when uploaded to discord
Now the Witch Lights are here: Unity of Boulder Church
2855 Folsom St, Boulder, CO 80304
https://goo.gl/maps/TZwbvmEUBC52

And tonight I’m showing my Grandmother, and possibly my bio-mom.
But right now it’s snowing and I have got to drive over and make sure they’re ok. 😭
This has been show and tell
shy shale
I hope it's all okay.
sturdy sluice
It’s run for a week in the rain. So probably fine but I’ll die if I don’t check.
lapis jasper
@sturdy sluice looks awesome!
 spiral scaffold
I made this for our new facility, has around 500 Neopixels can be controlled over WiF! IT was not happy so had to put a pushbutton too 😛 Currently has 15 colors and 5 diff effects, hoping more employees will contribute to it. Front panel is 3mm acrylic, logo was designed on Adobe Illustrator and later etched on a laser cutter. Casing is made of wood(hand crafted)
sturdy sluice
sturdy sluice
@spiral scaffold nice, 500 pixels is a lot to power!
spiral scaffold
@sturdy sluice haha yeah! m0 handled it well. But had to use 5v 12amps supply
sturdy sluice
Fish eye lenses are fun
 scenic siren
@sturdy sluice They look amazing! great job with the vid!
sturdy sluice
Thank you!
solar yew
@torn viper If you drop in on the CircuitPython Weekly Meeting (Monday, 19:00 UTC) you can mention what you're working on, there.
There are YouTube recordings of all the meetings, so you can get an idea ahead of time as to the format.
torn viper
@solar yew thanks, but they're during school for me
solar yew
You could ask one of the regular attendees to post a brief summary for you -- the idea is that this meeting gets a lot of attention from those who know the hardware quite well.
@torn viper
torn viper
that's a good idea
I don't have any real hardware-specific questions at the moment, just wrangling samd51 support into a samd21 hal
torn viper
I lied, I have a bunch of hardware-specific questions XD
solar yew
haha
west dune
made this burner laser without any driver: https://www.youtube.com/watch?v=KcSZJwZJefg

Having some fun with a laser that i took from a dvd driver.It doesn't have any driver,it is powerd from two AA batteries.Will make a video soon about it Here...
solar yew
very cool
shy shale
That poor heat sink.
unborn sphinx
it was probably destined for the recycling bin, or worse the landfill
 dense crown
I don't know if this qualifies for a #sparky - but this happened to me on Friday: https://maker.limeblast.co.uk/2018/11/10/project-wildcat-has-been-delayed/

WIDTPFTZA
It is with no small amount of sadness that I have to report that, in the final stretches of the build of Wildcat, I've inadvertently managed to set my progress back for a few days. As mentioned in my previous post, the addition of a new member of the family
 signal loom
Just finished a wood cover for a notebook. I designed this to be able to flip around to the back so you have a sturdy surface to write on. May make one with engineering paper inside. Any thoughts?
shy shale
Is it laser cut?
solar yew
Very nice!
If you have access to a laser cutter you should laser a design on that bad boy
solar yew
👌
solar yew
hey, that's pretty good
signal loom
If ya want one, let me know. Hatching them for a craft show and for Etsy
eager stirrup
Just excited to receive colored headers!! No actual project to share currently 😄
unborn sphinx
nice colors, that's a good idea
eager stirrup
Oh that's awesome, didn't realize they had colored jumpers too, definitely going to have to score some of those. Feels like this will make life easier when prototyping a fairly hectic protoboard 😃
upbeat geyser
Who sells those?
upbeat geyser
Hmm, looks like Pololu and Tindie have 'em...
 leaden hull
Oh, colored headers, what a nice idea
plush gorge
Meet my little friend. 😃
eager stirrup
I ended up snagging the headers from eBay while I was snagging some other components, but I did see 3 sets of each color on Amazon for only $6.50 , and it includes blue! One color I wanted, dang it. 😃 https://www.amazon.com/HiLetgo-Header-Packed-Connector-Arduino/dp/B07FD3PFQW/ref=sr_1_1?ie=UTF8&qid=1542333377&sr=8-1&keywords=hiletgo+headers
 cerulean trout
Black plastic back to CD found in trash, metal bracket found in trash, drilled some holes, used exacto knife to trim more holes, mounted PIR sensor , CPX on standoffs. I need to mount more of these in toys with motors...
 upbeat geyser
Easy enough to add (subtract?) holes, as long as there's room available.
unborn sphinx
urge to make neotrellis clone that uses keyboard keys... rising...
it'd be factually worse in almost every way... which is hopefully why I'm not going to do that
lapis jasper
@unborn sphinx I'd take one
sturdy sluice
Hmmm. OK, so the lens attachments for my phone added some interesting doubling and blurring artifacts to the low-light NeoPixel videos, and I'm uncertain if I like it.
This is actually rather close to the visual effect you get in person, but does it look good?
vernal ferry
@unborn sphinx 😄 was thinking the same re : keyboard neotrellis, :B actually ordered clear keys and keycaps but prolly gonna make something mini... like 3x5
leaden frost
@sturdy sluice leds are tough to film or get on camera. The better videos and pictures are of neopixel a with the set brightness at 20-30 or in circuit python down to .1 or something. Recode and turn up brightness for regular use.
dense crown
I don't know if this is the type of thing you're looking for in this channel, but here's a project I build using a Feather Huzzah and Adafruit IO:
https://maker.limeblast.co.uk/2018/11/19/wildcat-is-live-and-angry/

WIDTPFTZA
This is the third post in the Wildcat saga, so if this is your first time reading this blog it might be worth catching up - to find out more about the antagonist of our story, start with Introducing Apricat, and to understand our approach to solving the problem (and
junior agate
@dense crown yep! and you posted it on #IOTuesday yay
solar yew
Good morning! Does anyone know if Show and Tell is happening later today? I finally have a day off at showtime and can share.
unborn sphinx
@solar yew it just started
solar yew
thanks I'm on as Jay 😃
 steel slate
hey hey 😮
 crimson egret
@solar yew A suggestion for the Pi running slow on OpenCV.
You could replace with a pi zero, with this amazing Movidius VPU, with this kit.

Google AIY Projects brings do-it-yourself artificial intelligence to your maker projects. The Google AIY Vision Kit lets you build an image recognition device that can see and ...
solar yew
let's see what the cat drug in
solar yew
additional moving picture - Trinket M0 Shift Register 7 Segment x 4 digits - one digit at a time - Arduino IDE
The idea is to display a complete single digit, then blank the entire display. Next, display another digit in a different column for the same time interval, followed by an entirely blank display.
Repeat until all four digits have been displayed once. Then repeat the entire sequence -- about 300 times per second.
At no point are more than seven segments lit at the same instant in time. ;)
 robust fiber
Put an intermediary SAMD10 chip to run as a display driver. Wanted to use the screen at a faster update rate with CircuitPython.
Runs over UART with all the display code/functions in the SAMD10. CircuitPython just has to send the variables over to run the display code.
Going to put this on a PCB and have a little LCD module that just uses 4 wires, I think it is quite good for some debugging/display purposes.
solar yew
Very nice looking display there. ;)
robust fiber
Its a ST7735 😃
hidden saffron
One sensor left to go! thanks everyone whos helped
 vernal ferry
@west dune nice!
solar yew
two shift registers (74HC595) driving 7 segment LED x 4 digits:
Each digit is painted, then the entire display is blank, then the next digit is painted, and so on -- 300x a second.
 merry escarp
Got a video?
solar yew
No, as the interesting things are mostly POV stuff (persistence of vision).
The project's firmware now displays any digit in any location, so I have messages like CAFE and 45A8 displayed.
By adding in a sufficient delay to the loop, the method of repainting becomes obvious.
When I remove that delay, after a while, it becomes difficult to imagine that this is how it is being done, as it just looks normal enough to think of it as a single process (turning them on permanently, using simple DC wiring).
The only real telltale is they are perceived as somewhat dimmer, when 'scanning/strobing' in this manner.
When it stops running it's very obvious as only one digit is lit up.
(shift registers are a form of memory)
https://learn.adafruit.com/adafruit-arduino-lesson-4-eight-leds
This article uses the same shift register I used (74HC595) with eight discrete LEDs.
upbeat geyser
I suppose you could slow down the scanning and film it to illustrate how it works.
merry escarp
When I was a baby my mom said a doctor upgraded my eyes with shutters. So I might be able to see the updates to the LCD/LED's.
solar yew
 undone pulsar
A 40bit io expander I made around a year ago.
I should have made an effort to make it smaller though
upbeat geyser
Looks like a good size to me. I only shrink things if I have a specific need to do so.
lusty siren
Personally, I'm almost always on the side of "I can make it smaller!"
upbeat geyser
Oh, I can make it smaller, but to me that's the hardware equivalent of optimization, in the sense that doing it prematurely may be ill-advised.
That said, when I realized I could hide the HT16K33 behind the display it was driving, I had to try it.
undone pulsar
In the project I was doing I wanted to make it expandable for the 320 gpio. Having 8 of these on a motherboard would have made it quite large.
Although I didn't even end up using it
vernal ferry
This is a display piece for a school project. It’s a trinket m0 plus a Charlieplex featherwing and an lis3dh sensor (schematic and components). @unborn sphinx thanks for the sanity check before I sent the board to production. #circuitpython-dev
Excited to cut with laser next week for v2 of the enclosure
unborn sphinx
Very nice, but I feel the need to pedant, thats definitely not a featherwing
10/10
stark carbon
CMOS Schmitt Trigger, with only 4 mosfet
And 3 ceramic capacitors (mostly just so it's stable long enough for me to read it, at high freq it should not be needed)
if you fed it's output back into it (with a resistor), it could also be a ram cell as it's non-inverting, just have a lower resistance pull-up or pull-down
Anyone find this interesting enough that I should make a schematic for it?
unborn sphinx
Just do it
vernal ferry
@unborn sphinx not claiming it is sorry, definitely not a featherwing.. it is however the exact pcb layout and circuit design of the charlieplex featherwing
have a bunch of other projects so was focused on getting something out, produced etc so i can focus on the actual layout design elements
still prefer DTP over pcb cad software wrt layout.
stark carbon
Probably only the middle cermic is needed
vernal ferry
kinda want to do an M4 version on a 4 layer pcb though 🤔 hmmmmmm
stark carbon
if the middle ceramic is made smaller it would be more sensitive to noise but should switch a tiny bit faster
it works because the combination of those two mosfet make a resistive cmos inverter which acts as an inverting schmitt trigger, but I added another pair of mosfet so it would mostly prevent floating output
vernal ferry
@robust fiber awesome! what runs on the samd10? I want to implement something like this on a project too!
 wet sequoia
hi, my arduino mega 2560 is malfunctioning, it gives a timeout error when i tr to upload and gives errors while burning the bootloader
everytime i insert the usb in the pc, the inbuilt led turns on, which means the bootloader is present
tx and rx leds dont turn on
ports are correct, drivers are correct
robust fiber
@vernal ferry I am running C code that I adapted
vernal ferry
@robust fiber cool! is this going to be open source?
 lunar venture
The logic is still external to the chassis
This is a combo of my ongoing GUI code and a love for trekkie-ness.
lunar venture
lunar venture
@solar yew that looks awesome
eternal maple
@lunar venture Excellent internal layout. Nicely done!
robust fiber
@vernal ferry Yep, definitely I'll release the code for it.
@vernal ferry I'll drop you a message once I have it definitely working on a PCB
vernal ferry
ooh awesome @robust fiber ! that'd be great, the samd10 is fairly inexpensive too
lunar venture
If anyone wants a circuit python gui I'm alpha testing mine, m4 and RGB screen needed .
vernal ferry
@lunar venture sign me upp which kinda screen?
lunar venture
@vernal ferry yay! What kinds do you have, (the code should be quite adaptable!🤞 ) I use an st7735r
But any displays supported by the adafuit cp RGB lib should work. (with a smidge of modification )
lusty siren
@lunar venture I have the Metro M4 and.... Many st7735 screens. I won't be available today. Probably not tomorrow (The final parts for my 3d printer mods are arriving today and tomorrow). But I have some time to test things out.
lunar venture
@lusty siren yay! Thank you😁. I think the best way to test bwould be to use... If you have gui project ideas you wanna try, things to do with one, I will facilitate however I can. I'll write up some hello world tutorials for yourself and @vernal ferry and get them to you two. And a little start up guide !
lusty siren
I don't have any gui-specific projects. What changes need to be made to the RGB library?
lusty siren
Sweet. If you do have to do RGB mods, I would recommend putting it into it's own library
lunar venture
It's is a discrete piece of code
lunar venture
I'll make some documentation between now and the weekend
 fiery rock
Here's a schematic i made for my Temp/Humidity display with date and time. :D
I'm not even 100% sure if I made this properly since I just drew this based off of the schematics in the Arduino project book.
ruby ledge
I just published a new blog post about optimizing nRF24 range using my simple range testing rig:

I'm working on a commercial project and I need a low power wireless interface to send data reliably in a crowded indoor environment. There a...
 jagged harbor
Not my project but can this be employed in an Adafruit MakeCode enabled hardware for games? https://makecode.com/_MaPaxJJ32Y6A
 whole island

Only transistor, resistor, mosfet, capacitor, led and jumpers!
Diy Christmas decorations
 reef parrot
I made a pi! https://cdn.discordapp.com/attachments/499419055967436801/520790002645598219/20181207_203320.jpg

I am using it to host my discord bot onto
reun very well ❤
whole island
👏
hidden saffron
Well Done! Did you get your scripts figured out?
long vine
Used some neopixels to make a chain of glowing baubles, then made a bluetooth piano app so they'd light up when I play notes
https://www.youtube.com/watch?v=0pBoZMuJYwA

Here's a little project I made with some old baubles. I recently started 3D printing, so I'm glad I got to involve a lot of that! Source code: https://github...
 slim thicket
LOL I just finished a project myself using lead-free solder so your iron being set to "molten lava" cracked me up. Nice work on the project! I'm anxious to get my hands on an ESP32.
reef parrot
I'm now hosting my Discord bot that plays Minecraft on a Raspberry Pi 3 Model B+ running Raspbian, it works very well and has not needed a Windows Update yet. https://cdn.discordapp.com/attachments/481344943038660608/520788887669440512/20181207_202844_HDR.jpg
 jagged harbor
I hope you don't mind if I post this at several places on this Discord site: Maybe good Christmas gift? https://youtu.be/ytmhmHOdb7Q
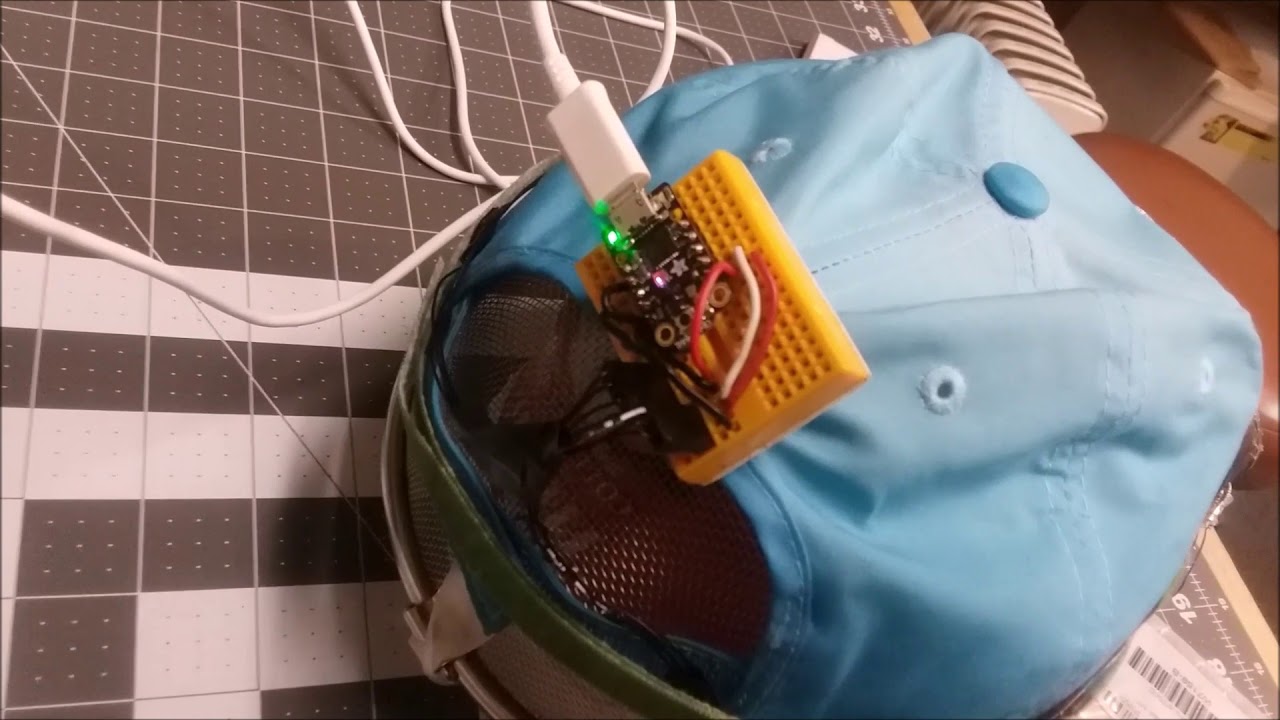
Here's a hat with googles and 12 x LED Neopixel light rings for fun, wearable lightshows! Click SHOW MORE below for links. The whole thing was programmed wit...
lunar venture
WOOOO WHOOOOO just got the gui code working on someone else's hardware. thank you @vernal ferry ! (DANCES IN IN FRONT OF LAPTOP)
vernal ferry
It's alliiive 🚀 !
lunar venture
It's awive!
 unborn sphinx
neopixels or dotstars?
 last pulsar
just regular white leds
unborn sphinx
oh, they look slightly red on my screen
last pulsar
because the rim is red
unborn sphinx
makes sense, looks nice
last pulsar
thanks!
 onyx glade
Great Job ! I remember an entertainer (juggler) in a show at Branson , Missouri had our local bike shop put sheet metal screws from the inside of the tire on his unicycle pointing out. With a plastic liner between inner tube and screw heads. Then he rode it juggling at Holiday on Ice Show !
One way to solder wires for Neopixel pendant on Barbie mannequin. ...https://youtu.be/O-f_mdVpPDo

Showing one way to solder connecting wires on pins for 7 unit LED ring which is worn as a pendant on Barbie mannequin . See other video for links to parts an...
cobalt dove
Something I'm working on for my Reddit Secret Santa: https://gfycat.com/UnfinishedExhaustedCrane

It uses an ESP32 that's connected to adafruit.io so she can control the sign over the Internet (e.g. via her phone). There's also touchpad buttons on the controller box in case the Internet is down or she just wants a quick way to turn it off/control the brightness/mode
Here's the adafruit.io dashboard I made for it: https://i.imgur.com/hAtoDZm.png
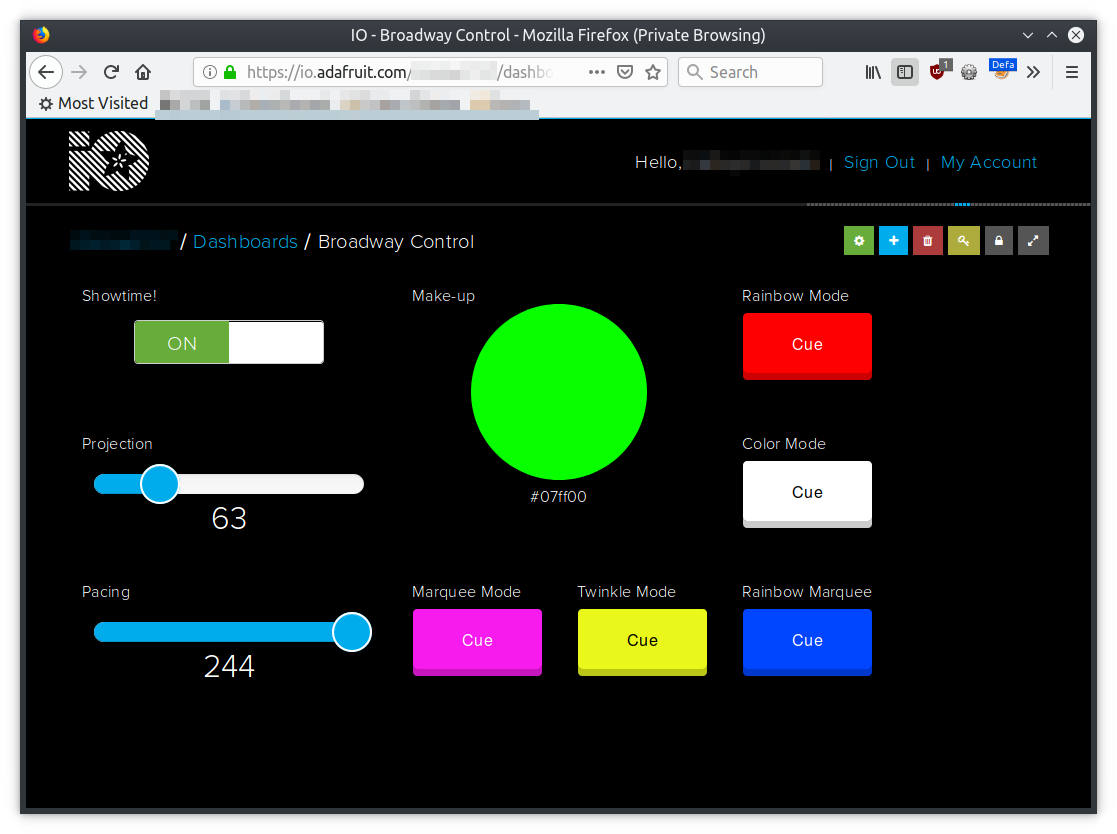


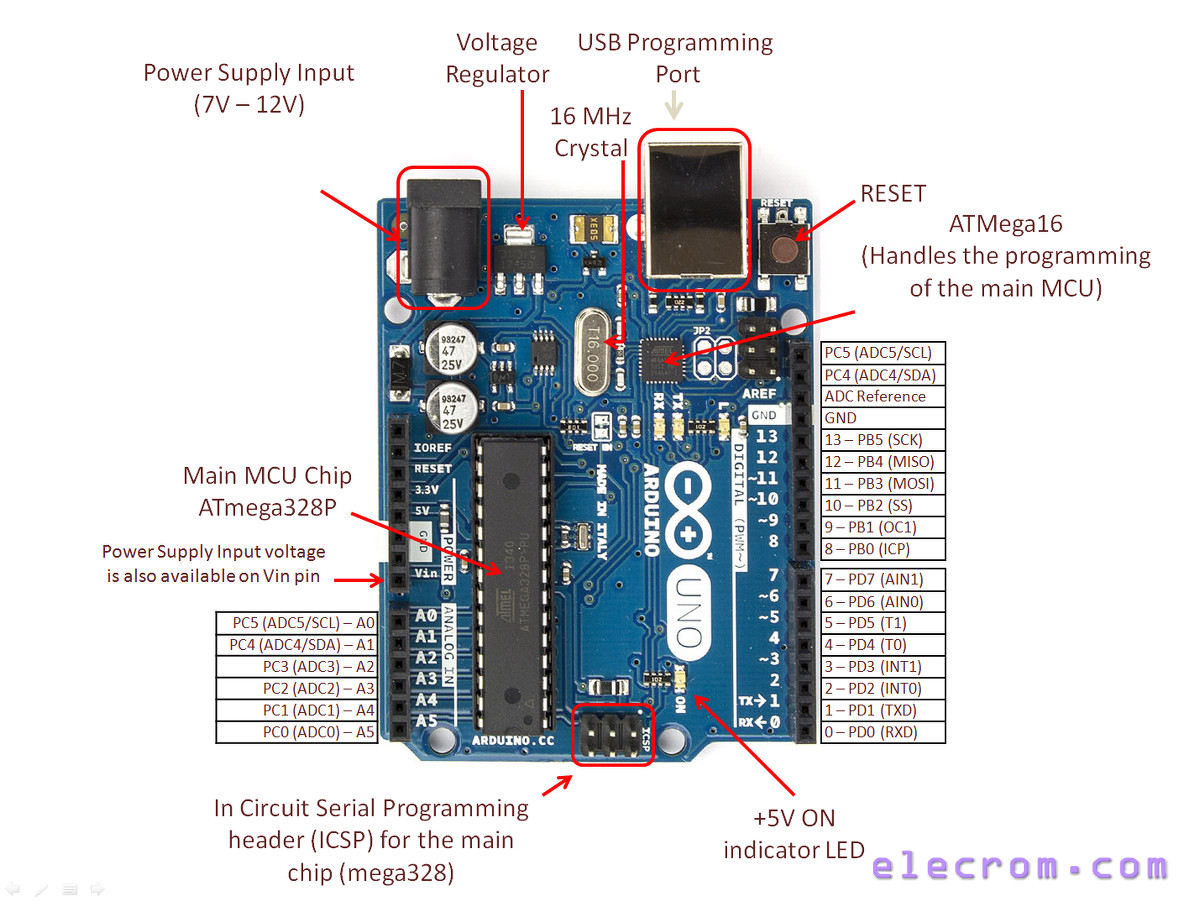





I intentionally tried to name things using Broadway lingo (she loves Broadway stuff; hence the sign). So "Projection" is brightness and "Pacing" controls the effect speed, hehe
The 3D-printed controller box has three touch buttons on it. The one that controls the mode has the Deathly Hallows symbol over it because she loves Harry Potter 😃
lusty siren
@cobalt dove The lingo is a nice touch
cobalt dove
@lusty siren Thanks 😃
lusty siren
Neopixels?
lusty siren
Well, those are one of the LEDs that Adafruit uses for neopixels
cobalt dove
@lusty siren Actually they use WS2812b
lusty siren
Also neopixels!