#3d-modeling
1 messages · Page 120 of 1
 keen tulip
Yeah.
 wintry vector
no wait he has one

or does the color setting override?
alternatively you could just retexture your hair and then just have maps. probably no reflections on hair so your metallic setting could just be set to 0
laziest fix is just to turn off metallic
no point in having a normal map if normal intensity is 0. You could just delete it to save space otherwise you're loading in an extra texture map for no reason
but your hair will probably look really simple
you're using toon shader anyway so its a stylistic choice at that point
wintry vector
keen tulip
Yeah.
turn roughness up too. Metallic down roughness up
@quaint jasper is smoothness on the unity shader just the inverse of roughness?
 quaint jasper
i believe so
wintry vector
@keen tulip yeah so im confident these sliders will determine if you fix the issue

put metallic at 0 unless your hair is literally metal
personally I would try turning up the normal map and seeing how it looks. Otherwise the texture might look a bit flat.
if you're not going to use it at all then just delete it
 spiral sigil
I am extremely proud of my log I 1000% accidently made

incase anyone wants to also maek log

 devout scroll
loggers
quaint jasper

 lofty river
Not Sure If im in the right channel but could someone help me, i recently bought a model with blendshapes on it and i put it in blender to add an outline but everytime i export it the blendshapes are missing. Does anyone know how i can fix this
quaint jasper
an outline how ?
lofty river
The problem is that the blendshapes disappear everytime i export the model
is there a way i can fix this?
lofty river
quaint jasper
an outline how ?
I use the solidify tool
quaint jasper
Can't apply modifiers on meshes that have shapekeys
GitHub
Join blender objects that contain modifiers and shape keys into a single object - GitHub - llealloo/blender-join-modifiers-and-shapes: Join blender objects that contain modifiers and shape keys int...
Make sure to read the instructions correctly
lofty river
Okay Thank you very much
 spice pewter


 visual vigil

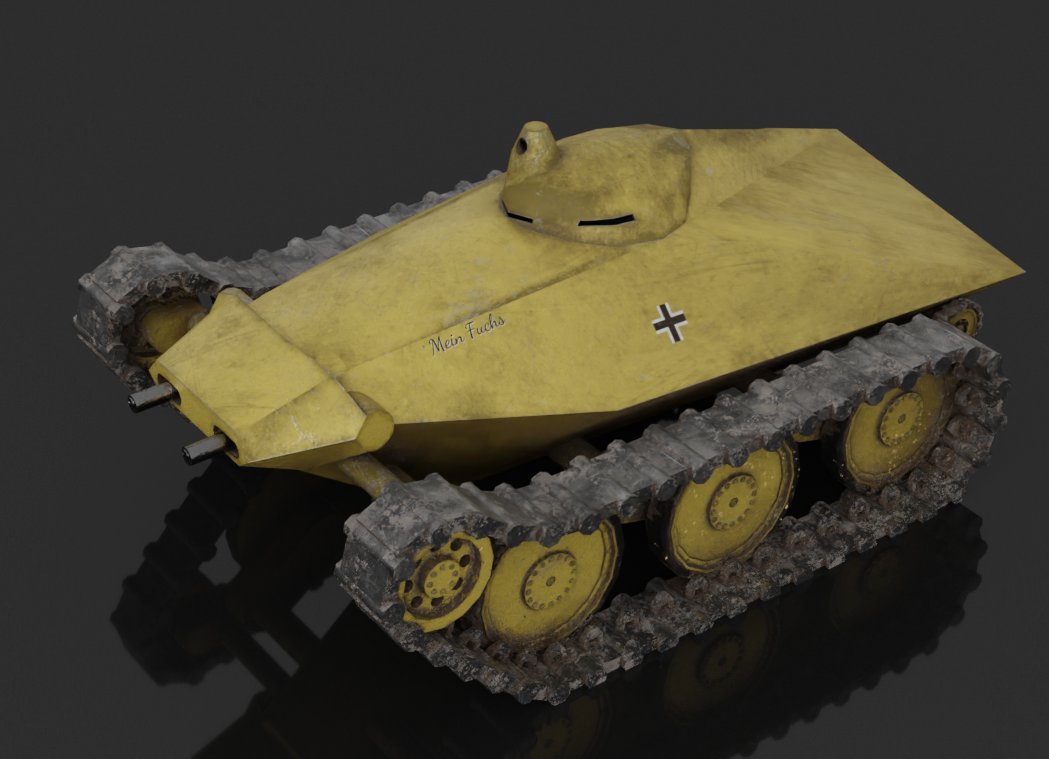
kleinpanzerkampfwagen texture / model fixup for @Cpl_Stefchap for #VRChat
Tankette Concept tank that never saw production during WW2, submitted by a german soldier during the war.

 Twitter
·
Twitter
·

 spiral sigil
pewpew
visual vigil
Halloween outfit commission of Little Red Riding Hooded Mercenary from #LobotomyCorporation for Krial for #VRChat
 Twitter
·
Twitter
·


 fiery steeple
Is there a way to save the pose position to the resting position?
 quaint jasper
Cats > Pose mode > Apply pose position as rest position
spiral sigil
How long did it take you to learn to sculpt, texture and rig your own vrc model from scratch
I want to get into this hobby
 surreal flame
I think with some YT tutorials you could start right away. Getting used to various quirks of Blender (if that's what you want to use) will take some time but practice is super important.
spiral sigil
I wouldn't personally go straight into making humanoid models in blender, as you won't have fundamental understanding of Blender and why things are done which will probably cause you to rage and then hate 3d modelling
so id start off modelling simple random things in blender just think up of something and there probably is a blender tutorial for it
surreal flame
Yeah agreed, start simple or it may become too much at once. I personally hate doing things for the sake of practice so I usually just jump in at the cost of frustration but I get results sooner.
 nova roost
 devout scroll
Might want to smooth shade that mask
nova roost
yes of course i will
i figured people'd be able to tell its a wip

gonna start baking now
 spiral sigil
I made a Front and Right-side view of a quad-prong hook (which are exactly the same), and I'm wondering how I would make it actually 3 dimensional

i am seeing a video that can do exactly what I need but aaa its in old blender and i cant find anything about where the specific menu was taken
 calm goblet
spiral sigil
i am seeing a video that can do exactly what I need but aaa its in old blender a...
calm goblet
spiral sigil
i am seeing a video that can do exactly what I need but aaa its in old blender a...
fill the faces, solidify, subdivide
that'll give you the shapes you want
after that you can just go over it with much lower resolution to trace the 3d shape
spiral sigil
how do I fill I saw that in a video but the thingies wereNT there
calm goblet
the other option would've been to use single verts to trace the main hooks and use a skin modifier, then extrude out the barbs
surreal flame
I also recommend using the mirror modifier.
calm goblet
yeah make 1, mirror it, then duplicate and rotate 90
surreal flame
Even better, mirror in X and Y.
spiral sigil
it isnt in the vertex tab
calm goblet
mirror in x and y wouldn't work
spiral sigil
is fill a setting in the mirror modifier?
surreal flame
Right I didn't realize.
calm goblet
are there voice channels in here? it'd be so much easier for me to just screenshare making one of these things and answering any questions you have
spiral sigil
no
calm goblet
hop in one of the ones in openvfx or vrctraders if you're in those?
just easier to show this kind of thing than explain it lol
spiral sigil
yeah sure give me a moment
spiral sigil
thank

 safe ferry
learning to sculpt 3d models, this one is not meant for vrchat but more to learn myself how to add detail

 hallow dove
how do i 1 add textures and 2 atlas textures
 quaint jasper
Why do you need atlases ?
hallow dove
i want to optimize it for quest
quaint jasper
And the model can't fit on a single texture ?
hallow dove
its a model from modelers resources but for some reason it came in 3 separate textures for the model
this thing wont work to install for some reason too
 quaint jasper
You tried the manual install ?
 quaint jasper
yeah i can see how it's a bit much for you then, you should download the material combiner addon standalone from shotariya
hallow dove
link?
quaint jasper
You're not on blender 3.0 right ?
hallow dove
how do i tell
quaint jasper
bottom right corner usually
quaint jasper
yeah, unsure it supports that specific version

GitHub
CHANGES
Blender 2.93 compatibility
Some minor fixes
hallow dove
is there any easy way to atlas them?
quaint jasper
try the above first

 past drum
sao im trying to finish sculpting my head by im unable to grab & pull in blender
quaint jasper
mind showing your screen ?
past drum
yeah
using my tablet to sculpt as well
command screen as well or whatever its called
here

 quaint jasper
in object mode yes
 craggy lintel
Hey guys
how does one unhide armature when its not unhiding like normal
this rarely happens to me and when it does its so obnoxious
its not any of the layers, i checked
-.-
unhiding in Outliner view isnt working either
someone help plz
this is stumping me and im annoyed af LOL
quaint jasper
make sure it's not hidden in pose mode
craggy lintel
Not hidden!
this happened to me before a long time ago
i forgot what i did to fix this bug
quaint jasper
mind showing your screen ?
 devout scroll
hallow dove
doesnt work
devout scroll
hallow dove
doesnt work
use the bake tab instead
quaint jasper
now show the rest of the window 
craggy lintel
 quaint jasper
devout scroll
the old atlassing method isn't very good
quaint jasper
devout scroll
the old atlassing method isn't very good
Franada had a good tutorial for the texture baking but youtube took it down, so unsure which to recommend
quaint jasper
craggy lintel
https://gyazo.com/b12ed3af146bb81d10bde7b44e2ab4ad
Is it showing in edit/pose mode ?
and what happens if you click . to focus on it
 quaint jasper
You have nothing in your other layers tho ?
devout scroll
quaint jasper
Franada had a good tutorial for the texture baking but youtube took it down, so ...
not sure either but i think baking is supposed to just bake out an atlas
hasn't worked very well for me, but i've done it manually a bunch of times
quaint jasper
Still need manual UV adjustment right ?
devout scroll
i don't think so? it's using uvpackmaster's free engine so it should pack itself pretty well
quaint jasper
I don't feel confident leaving newbies doing their own uv unwrapping
devout scroll
i haven't had a successful bake in a while tho
oh no no, i don't think you're supposed to
let me see
quaint jasper
i remember franada just moving the entire uv islands in corners and that was good enough
devout scroll
we found a bug with feilen that had to do with my usual setup so my bakes almost never worked
but let me try a new avatar


 nimble anchor
 spiral sigil
devout scroll
https://puu.sh/Im8pV/d797abab7c.png
spiral sigil
devout scroll
https://puu.sh/Im8pV/d797abab7c.png
epic seem game you got there
spiral sigil
nimble anchor
Am working on a model of Ada by Hushabye valley
noice i think i saw someone else a month ago work on it i forgot who it was
nimble anchor
 nimble anchor
spiral sigil
noice i think i saw someone else a month ago work on it i forgot who it was
nimble anchor
spiral sigil
noice i think i saw someone else a month ago work on it i forgot who it was
Yiss
quaint jasper
nimble anchor
Am working on a model of Ada by Hushabye valley
I suggest you look at the gret addon for your tail !
quaint jasper
devout scroll
https://puu.sh/Im8pV/d797abab7c.png
Excellent
nimble anchor
quaint jasper
I suggest you look at the gret addon for your tail !
The gret addon?
nimble anchor
quaint jasper
Yes, gret is the name
I’m hoping to get the tail to function a bit like this


Like a chonky but very long gecko tail
 quaint jasper
You'll have to do a lot of animating 
nimble anchor
Yup!
Already got her unique lil feeties modeled at least
Working on her hands and then gonna shape up her tail a bit more
nimble anchor
quaint jasper
You'll have to do a lot of animating <:sweat:668314662059638784>
Probably could be animation state toggles where she could sit on her own tail and it moves like a snake’s body to move around
quaint jasper
the setting it up won't be too difficult, it's the animating part that will
 nimble anchor
quaint jasper
the setting it up won't be too difficult, it's the animating part that will
nimble anchor
quaint jasper
the setting it up won't be too difficult, it's the animating part that will
I’ve animated stuff before. I don’t think it would be too difficult
Just time consuming @quaint jasper
At least a lot of her regular locomotion can be easily based on aliens xenomorphs
quaint jasper
At least you're enthusiastic about it
spiral sigil
Wow good job that’s actually really good keep up the good work
nimble anchor
 devout scroll
quaint jasper
Excellent
devout scroll
quaint jasper
Excellent
Yeah basically I can't really get it work. It's supposed to bake out an altas but I never had it work successfully so it's probably not worth recommending to newbies just yet
nimble anchor
quaint jasper
At least you're enthusiastic about it <:lulw:538055164679159858>
Defo enthusiastic
 zinc jolt
working on details for something I just got
nimble anchor
Another plus is experience with working with poiyomi cel shading and stenciling

Stenciling for getting things like eyelashes and eyebrows to render through hair
 nimble anchor
Like the bottom panel
 zinc jolt
one of my friends, Mr. Trap X, made an edit of this Roux36 Springtrap model and gave it highly detailed PBR mats
of which I'm baking textures of currently
quaint jasper
nimble anchor
Like the bottom panel
anime do be like that
zinc jolt
I was originally going to port it to VRChat with the optimized SFM Version ported by Chrome (Aka Robotic Soft on Twitter) but I decided to wait on it until I felt ready before I could release it on Trap X's birthday coming in about a week
so I wouldn't feel as rushed
 thorny ivy
How good of an idea is it for multiple parts of a model to use the same base texture but different material?
I'm usin' the outline functionality of Poiyomi's shader but the avatar's claws get inverted when usin' the same settin's as the body.
 thorny ivy
Might have the normals inverted in Blender but hard to tell.
zinc jolt
try to fix it
past drum
my grab tool isnt working at all
hallow dove
devout scroll
use the bake tab instead
how do i do that?
past drum
figured out my issue
@quaint jasper so it was something called sample bias under texture in brush
it was set to 0 so i set it to 1
quaint jasper
never heard of that one, glad you figured it out 
hallow dove
when i click it says no meshes found
 quaint jasper
Can you share the rest of your screen ?
 rain fjord
how do i delete edges without it also (or just) deleting the face?, it happens so often in Blender and it's really pissing me of
 foggy granite
rain fjord
how do i delete edges without it also (or just) deleting the face?, it happens s...
foggy granite
rain fjord
how do i delete edges without it also (or just) deleting the face?, it happens s...
Dissolve edges
Under the x or del menu
rain fjord
@foggy granite doesn't work
rain fjord
@quaint jasper here's my topology

 quaint jasper
rain fjord
<@!97980768323633152> here's my topology
quaint jasper
rain fjord
<@!97980768323633152> here's my topology
Your edges aren't connected it seems, so that wouldn't work
rain fjord
@quaint jasper aren't connected? i used the snap tool
quaint jasper
snap doesn't mean merged, just sharing the same physical space
zinc jolt
tried to
 thin shadow
why does using the knife tool to cut mesh always results in messing up the other blendshapes?

i already have the basis on active while using the knife tool
quaint jasper
You shouldn't be creating any new topology in other blendshapes
do it in basis and move it in the shapekeys
 cerulean heron
Can someone create Lobo from DC and NightWolf from Mk11 please
thin shadow
quaint jasper
do it in basis and move it in the shapekeys
that's exactly what i did
it keeps having those random vertices go into the origin when checking with other blendshapes
quaint jasper
Did you shape propagate the new vertices ?
thin shadow
quaint jasper
Did you shape propagate the new vertices ?
i dont know what is that yet. Im gonna do some experiment and check it out.
ok, now i know what that is and knows how it works.
Now it has become a dilemma
if i use the propogate, it will not follow like other blendshapes.
im trying to cut the eyelash mesh that has transparency
so using the propogate, it will not be "moving" like the other blendshape
ok so now i know how to sentence it in english:
how to cut a mesh while maintaining its blendshapes
 ripe notch
Idk if this would be a good spot for this but could I commission someone to make a couple wedding dresses for a vrc wedding? 👉🏼👈🏼
quaint jasper
ripe notch
Idk if this would be a good spot for this but could I commission someone to make...
devout scroll
hallow dove
when i click it says no meshes found
not sure, cats needs to detect your avatar somehow, try importing with the cats import button
thin shadow
thin shadow
ok so now i know how to sentence it in english:
how to cut a mesh while maintain...
I have found the solution:
Cut the mesh in edge selection. Only manipulate in edge mode.
hallow dove
devout scroll
not sure, cats needs to detect your avatar somehow, try importing with the cats ...
tried that and it didnt work

 radiant vortex
The inside of spring trap
 unkempt torrent
Texture is, obviously, raw meatloaf
zinc jolt
Nah
radiant vortex
Eyes balls obviously a fogged up light bulb
zinc jolt
unkempt torrent
Texture is, obviously, raw meatloaf
Guess again
radiant vortex
zinc jolt
Guess again
Jesus what were u typing a essay at first then deleted a lot
unkempt torrent
Nope... Meatloaf 😛
I think I've asked this before several months ago, but idly toying with it yet again so here it goes again in case anyone can help.
The model for the avatar I typically use comes with uvmaps and atlased textures. The textures are perfectly mapped and render properly in blender, unity, vrchat, etc. However, blender will not display (or allow me to edit) the UVMap in the UV Editor no matter what I do. I can Unwrap, which will create a new, persistently editable map, but lose the original mapping (and I can't position the new map as accurately as the original, so there's a considerable loss in quality if I do this).
Anyone have any idea why the original map won't show and/or how I can recover it for editing?
I think the original model was in XPS format.
devout scroll
Can you share your file?
That doesn't sound right at all
If it maps and displays, there's no way for it to not have a uvmap
unkempt torrent
It definitely has a UV map. There is a UV map listed, called "UVMap". I just can't see or edit it
The map itself does not display (the vertices) in the UV editor view, even though it functions properly
Give me a minute
pumkin has figured it out. For people who come here in the future searching for the answer to this problem that many people failed to solve since january: The UV map was far out in the distance, but functioned because UV maps repeat endlessly. You can find it by zooming out a lot until it shows up
devout scroll

spiral sigil
zinc jolt
Guys
 thorny ivy
Had an issue with an avatar's thumbs + fingers, last time I uploaded, they looked fine in a restin' pose (relaxed hands) but in a splayed pose (fingers off the buttons), they looked like bird talons with how they turned up at the ends with the thumb bendin' all kinds of weird.
I checked out the armature and noticed that the thumb bones started at 0 vs 1, would that cause the aforementioned?
unkempt torrent
Are they correctly assigned to the humanoid rig in unity?
I'm trying to fix some shading issues in my mirrored mesh. One thing I noticed was that the mirrored mesh, which is made of triangulated quads, is triangulated "the wrong way" after being mirrored (the mirrored diagonals do not match the direction of the diagonals) of the mesh it's attached to, but the original mesh's diagonals do). So I tried to fix this by using tris to quads and then triangulating again the right way. Mesh-wise this appears to work, however as soon as I convert tris to quads the shading breaks on all edges (loses continuity), even though the normals "appear" fine. I can use the weighted normals modifier to get smooth shading but it's a different result than the original shading. Any way to recover the original shading?

 scarlet laurel
how would I go about sharing my knowledge on model optimization in an impromptu 30 minute meetup?
spiral sigil
scarlet laurel
how would I go about sharing my knowledge on model optimization in an impromptu ...
Meetup with who? im confused
you could cover all your knowledge on it in a Youtube video maybe
scarlet laurel
me! I want to share my knowledge in a live demo
thanks, I don't have time to put together a video though
spiral sigil
Then id just stream it and upload raw footage for those who have the patience to watch it all
im not sure who you would be meeting with
I mean there is a community throughout the vrchat discords and moddeling stuffs but its not like we do meetings or anything
not that i know of at least
scarlet laurel
Well, if enough people were interested I could put up a doodle poll for people to pick some times that work for them
and then I would just do the event at whatever time that was
does this make sense?
spiral sigil
ye
id like to join but if its today then i cant talk at all because im supposed to be pretty sick sooo
spiral sigil
In a few hours sure i just have to make sure all my work is done for the day i missed
probably less
scarlet laurel
sure, PM me when youre ready 🙂
devout scroll
unkempt torrent
I'm trying to fix some shading issues in my mirrored mesh. One thing I noticed w...
are those verts joined?
you can try smoothing the normals on that bit a bunch
of you can try overlapping the original mesh on top of it and transferring the normals
unkempt torrent
They should be joined
 oak hatch
unkempt torrent
I'm trying to fix some shading issues in my mirrored mesh. One thing I noticed w...
oak hatch
unkempt torrent
I'm trying to fix some shading issues in my mirrored mesh. One thing I noticed w...
Have you tried to reset the normals? mirror and triangulate can both cause odd issues.
unkempt torrent
Well, in this case I converted tris to quads and the shading broke; no triangulation took place yet
What do you mean by reseting the normals?
Here's a more zoomed out view
 surreal flame
I got similar issues when I had rogue verts/edges/faces in the mesh.
unkempt torrent
Ok, give me a minute
Adding a weld modifier doesn't help
There are no visible non-overlapping vertices or edges
surreal flame
Selecting non-manifold verts could reveal some weird geometry as well.
surreal flame
What do you mean, only the edge loops?
surreal flame
Right. Well personally I'm out of ideas.
surreal flame
Unless you post the blend file or something I guess.
unkempt torrent
I'm only trying to fix minute shading discontinuities that appear at the point where this portion is adjacent to the rest of the arm
Majorly breaking everything seems like a bad way to do it
(It was not normals)
surreal flame
I would recommend sorting this out if possible because these things may come back to bite you later.
unkempt torrent
This has been there for months. In certain specific worlds with bad(?) lighting, the discontinuities are very visible, in others pretty much invisible
I thought it was going to be a UV problem (read above) but for these edge loops specifically they seem to match
I've recently set a common anchor for the light probes of all meshes but it didn't fix the problem, at least not entirely, and the normals had previously been averaged
That is, across meshes
Also not mipmapping, that would show as gaps, which is not the case...
devout scroll
smooth the normals on that area
or use something like abnormal (never used it) to manually rotate the normals
unkempt torrent
😄
unkempt torrent
Are you recommending smoothing the normals on the discontinuity with the original problem or to keep trying to do the triangulation thing and then smooth them?
devout scroll
you can try either
unkempt torrent
That's the thing, I'd already done that
devout scroll
since it's a flat piece (relatively) smoothing should just literally smooth it out
you can clear split normals
but that might not be desirable over the whole mesh
what i'd do is separate to new object, clear split normals, then join back if nothing else works
that seems to reset them
unkempt torrent
Wait, ok
I could have sworn that was not the case but showing split normals, they are indeed different on this seam
 devout scroll
can try merging normals too
unkempt torrent
Let me try normal things
spiral sigil
does that mean there are 2 vertices that are almost in the same exact location?
devout scroll
not necessarily, normals can be split despite verticies being joined
but you can merge normals the same way you can merge verticies
unkempt torrent
It's because the normal can be different for each face even if blender is representing the vertices as merged I think
This is taking a while because I'm having to do a bunch of seam related stuff on the rest of the mesh so everything will actually look coherent at the end
 next ravine
How to I take a already setup unity project with an avatar, and open the model and texture up in blender? I want to start using blenders 3D paint tool,
quaint jasper
You import the fbx avatar file from your files
unkempt torrent
quaint jasper
next ravine
How to I take a already setup unity project with an avatar, and open the model a...
Looks like someone had already answered you before, make sure to pay attention before posting in multiple channels
next ravine
quaint jasper
Looks like someone had already answered you before, make sure to pay attention b...
They did?
I never got pinged.
quaint jasper
not sure why anyone would need to ping you if you didn't ask 
next ravine
quaint jasper
not sure why anyone would need to ping you if you didn't ask <:RuuuThunk:6600085...
By default people normally ping me. And then I search for the ping in the search bar.
 midnight valley
I have a model in ZBrush that i'd like to bring over to blender. does anyone know how to export said model? it already has a texture map but the uv map seems to be missing?
quaint jasper
what file type are you exporting as ?
midnight valley
.ztl
ive never used zbrush before so im assuming the reason why the uv maps are missing is because they have to be assigned in zbrush first?
quaint jasper
No clue, but probably should try exporting as .fbx instead
midnight valley
ok. ill try it out
spiral sigil
yeah blender doesn't have support for .ztl w/o addons at least
 lament ruin
 devout scroll
oof
unkempt torrent
Is there a hassle-fee way to average normals from vertices in different meshes? I remember the last time I did that I temporarily copied a chunk from one mesh into the other, but that's the opposite of hassle-free
unkempt torrent
Data transfer modifier
devout scroll
you don't have to use a modifier
you can just use an operator to transfer data
so then you don't have to deal with shape key issues etc
unkempt torrent
Operator?
Fortunately I don't have shape keys in the target mesh and the modifier did do the job properly, but if you'd like to explain the operator method I might as well learn
unkempt torrent
huh
devout scroll
usually by buttons either in the ui or the menu
ignore the name, just search for average normals
or transfer data
or transfer normals
unkempt torrent
Yes, it seems to have the same functionality under transfer mesh data
devout scroll
generally there's operators that do the same things as their modifier counterparts
unkempt torrent
That's another thing that never came up all these months when people suggested modifiers for things 😄
devout scroll
modifiers are great if you want to keep them on
unkempt torrent
Right
devout scroll
but awful if you need to start applying them
unkempt torrent
Obviously we want to apply them for vrchat
devout scroll
yeah, in which case it's easier to use the operator
 quaint jasper
Cool matcap !
 glacial pecan
modeling a map in maya for my community. One of smaller details I just finished was a railing on the balcony area. Having a blast making it so far :D

Haven't made materials for it yet, just base colors so far to start creating a color palette
 spiral sigil
If anyone might be able to help with a weight painting problem im having I posted it in avatar-rigging.

 oak hatch
 supple lake
Some low poly character modeling tut I’m following, learning Blender as I go
supple lake
Some low poly character modeling tut I’m following, learning Blender as I go
Looks pretty darn good, keep up the good work!
foggy granite
supple lake
Some low poly character modeling tut I’m following, learning Blender as I go
Looks good buts that’s not low poly its closer to mid poly
spiral sigil
nimble anchor
Am working on a model of Ada by Hushabye valley
That looks like it's gonna be hella cool when it's done !
The art for it is cool too
zinc jolt
supple lake
Impressive job 👍
visual vigil
first time ever using #zbrush
Using the tool to add skin details and surface definement. Original mesh I paid for, I did not create it
 Twitter
·
visual vigil
foggy granite
Looks good buts that’s not low poly its closer to mid poly
Twitter
·
visual vigil
foggy granite
Looks good buts that’s not low poly its closer to mid poly
Naw nowadays that's low poly
foggy granite
Yeah
spiral sigil
nimble anchor
Like a chonky but very long gecko tail
oh god
who thought that was a good idea
foggy granite
visual vigil
Naw nowadays that's low poly
Whiles it still a head but in the long run it be mid poly
 bold urchin
For people who work in Blender but aren't having their file preview images being used by Windows (to make life easier when searching through folders), here's a fix I just found.
https://blenderartists.org/t/blend-files-not-using-preview-thumbnails-in-windows-explorer/643180/7
Can also find an equivalent idea here>
https://www.youtube.com/watch?v=Smc37pXUWZg
I've never had file previews in my 4 years working in Blender and my brain is just expanded from not knowing it was because this was a bug.

Blender Artists Community
THIS IS THE FIX This appears to be a bug in the Blender installer, but the fix is fairly simple. Open the Windows icon in the bottom left corner of your computer display and search for “command prompt” Right click on the result and select “run as administrator.” There will be a small window with a black background and a blinking cursor. Typ...
 supple lake
oak hatch
Looks pretty darn good, keep up the good work!
supple lake
oak hatch
Looks pretty darn good, keep up the good work!
Thanks! Really appreciate the compliment
supple lake
foggy granite
Looks good buts that’s not low poly its closer to mid poly
I don’t know it’s model from a rounded cube primitive, no kitbash here so I learn the concept of good topology without having to go back later and retopo a sculpted model
 thin shadow
what i recently learned in blender is that,
if you want to cut the mesh transparency, while maintaining blendshapes, cut it straight from edge to edge, no middle points.

the vertex in the middle will not have any blendshape data and it will go straight to origin point when testing with other blendshapes
devout scroll
what if you connect it to other edges?
you can press e to start cutting a new line before confirming your old ones
in general you want to connect your verts to edges
thin shadow
devout scroll
you can press e to start cutting a new line before confirming your old ones
but i thought e is extrude, k is knife ( i like to use default keybinds)
and the verts already connected to edges
devout scroll
thin shadow
but i thought e is extrude, k is knife ( i like to use default keybinds)
while in knife mode sometimes keys do other things, you can see that at the bottom of the screen
e starts a new cut while already cutting i think
spiral sigil
cutception


 spiral sigil
curious how the tail is going to end up getting connected and how its gonna do things in vrchat
is it just going to be a long chain of colliders and dynamic bones?
nimble anchor
 nimble anchor
spiral sigil
is it just going to be a long chain of colliders and dynamic bones?
nimble anchor
spiral sigil
is it just going to be a long chain of colliders and dynamic bones?
Most likely not or a combination
@spiral sigil probably animation state toggles
spiral sigil
ahhh okay
id love to see a video of you doing that once you finally get to that point
nimble anchor
Yiss
 languid fog
nimble anchor
languid fog
nimble anchor
looking nice, gl with that
fiery steeple
quaint jasper
Cats > Pose mode > Apply pose position as rest position
My goodness, didn't see this until now. Thanks very much, and my apologies. Don't get notified unless tagged
quaint jasper
foggy granite
nimble anchor
How long is that tail but also nice norms
supple lake
zinc jolt
Impressive job 👍
Thank u ser! been a bit distracted, getting back to it soon, so much more to do yet this one...
zinc jolt
That's alright
 twilit condor
What're some good resources for someone that wants to learn how to make their own avatar? ( youtube channels)
 solar ocean
foggy granite
twilit condor
What're some good resources for someone that wants to learn how to make their ow...
solar ocean
foggy granite
twilit condor
What're some good resources for someone that wants to learn how to make their ow...
YouTube and google
If you looking for tutorials or program that’s a different story
nimble anchor
spiral sigil
id love to see a video of you doing that once you finally get to that point
Also gonna make her tongue be puppetable
nimble anchor
foggy granite
How long is that tail but also nice norms
Tail length
 nimble anchor
foggy granite
How long is that tail but also nice norms
nimble anchor
foggy granite
How long is that tail but also nice norms
3 to 4 meters according to the measurements. So I’m making it just under 4 meters in length
spiral sigil
nimble anchor
Also gonna make her tongue be puppetable
luv it
foggy granite
nimble anchor
3 to 4 meters according to the measurements. So I’m making it just under 4 meter...
Jeez that’s ridiculous
 ashen stag
nimble anchor
<@456226577798135808> probably animation state toggles
ashen stag
nimble anchor
<@456226577798135808> probably animation state toggles
If the tail doesn't use FIK to be controlled I'm going to be so disappointed 😔
nimble anchor
ashen stag
If the tail doesn't use FIK to be controlled I'm going to be so disappointed 😔
Oh it’ll absolutely be using that
nimble anchor
@ashen stag however since the character herself is mute I might end up not putting lip syncing visemes on her at all, or end up making a mute version and a talking version
However, a talking version might not be a good idea because… well
 ashen stag
Honestly you should have the visemes because of the mouth yeah
Or at least be able to yawn emote or sonething
nimble anchor
 nimble anchor
ashen stag
Or at least be able to yawn emote or sonething
nimble anchor
ashen stag
Or at least be able to yawn emote or sonething
A yawn emote would be fantastic
Physically she’s basically a moe xenomorph

Lmao
twilit condor
How do I check the size of my avatar body in blender?
foggy granite
twilit condor
How do I check the size of my avatar body in blender?
Drag out this arrow

And it should be at the bottoms saying some like x,y,z dimensions
You should be looking at y
 stark ore
 alpine nimbus
Anyone know why applying the cloth modifier in blender would make my mesh go crazy:
 supple lake
Up very late just shaping the face, dissolved some edges in the back and added cuts a few other places. It’s not easy to see so keep moving around rotating pan in and out perspective and orthographic views, also toggling smooth shading with different materials and matcaps to get a better idea. Almost happy with it I guess, then it’s going to be the trick of extruding eyelid folds, inner eye, inside mouth and teeth. Will be happy if I finish just the eyes over the weekend.


 spiral sigil
I need to figure out how booth does their head and hair
I can't capture their style yet
 stark lotus
my sculpting tool on blender randomly stopped working. It lets me use the tool, but no changes are made as i click on the screen with any of the sculpting tools
foggy granite
spiral sigil
I need to figure out how booth does their head and hair
Booth like the website or you referencing a creator on the website
spiral sigil
web
 azure rain
it's a large multitude of individual creators
who probably all have slightly different techniques even if they're going for a anime style
foggy granite
Yeah I thought so
That's why I was confused with just straight up booth instead of a name of some creator
azure rain
technically Booth owners also own vroid so I suppose there's a couple of employees making avatars but not selling them
thorny ivy
How does this look for the base thumb bone weight paintin'?

Had to redo it and the rest of the thumb due to the original weight paintin' gettin' messed-up at some point.
Ain't sure how much the base bone moves in VRC so dunno if I need to adjust it much if at all.
stark lotus
my sculpting tool on blender randomly stopped working. It lets me use the tool, but no changes are made as i click on the screen with any of the sculpting tools
anyone know a fix? I don't velieve i made any changes, maybe an accidental shortcut?
spiral sigil
A lot of booths are heavily modified vroids, yes.
azure rain
apparently vroids also has its own category in the store now
stark lotus
ive been tryna figure this out for 2 hours, tweaking different settings and looking for shortcuts, googling people with similar issues from 5 years ago
literally nothing is working
restarting the program, my pc didnt work either
why cant i use the sculpt tools??
quaint jasper
show your screen ?
stark lotus
 devout scroll
do you have a blenshape selected

 quaint jasper
stark lotus
quaint jasper
stark lotus
Looks like you may have some modifiers causing this ?
 buoyant rain
nimble anchor
buoyant rain
nimble anchor
be good im mute like art work
Does anyone know how make shana character
 tacit gorge
hey, does anybody know that how these eboy avatars are created? i think its vroid, but the clothes and other models are not.
how could i make clothes like that?

like this
quaint jasper
Plenty of tutorials for either poly modelling, marvelous designer, sculpting and then texturing in blender/substance painter on youtube for beginners
thin shadow
tacit gorge
This exact particular avatar is not vroid, but it’s possible using vroid
supple lake
stark lotus
my sculpting tool on blender randomly stopped working. It lets me use the tool, ...
I know only that sculpt tools don’t work on the edge of mirrored objects, what would appear as the center line,
those u have to adjust manually in edit mode.
supple lake
 icy jungle
I would add another loop around the mouth
icy jungle
I would add another loop around the mouth
Yes agree, I’m following a tutorial for this, and many times the author leads me somewhere that only changes later as they change their mind I have to follow and redo a lot of things… I’m learning to be more familiar with Blender regardless so not complaining no one is perfect and overall it’s a really great tut I think. Will be adding more details, eyelid folds, inside lips, even a partial throat and tongue all part of the tutorial.
languid fog
tacit gorge
like this
This kinda of avatars are done by "Frankenstein" style, ppl who download free stuff (like cloths, hair and etc) and then merge everthing
tacit gorge
languid fog
This kinda of avatars are done by "Frankenstein" style, ppl who download free st...
where do they find assets like these?
languid fog
Steel, ripp avatars, free assets on Internet or you can buy some
languid fog
tacit gorge
where do they find assets like these?
85% of the avatars are done with this style, you have a lot on deviant art for example
thorny ivy
tacit gorge
where do they find assets like these?
Sketchfab is one site. Deviantart is another but never used it for model resources myself. Some asset/avatar creators release stuff for free so if you can find where they've posted, another good place to look.
thorny ivy
languid fog
Steel, ripp avatars, free assets on Internet or you can buy some
Stealin' and rippin' is not suggested due to possible repercussions. On top of that, ain't allowed to be promoted here from what I remember.
Theft is theft, plain as that.
Now, usin' a third-party model as a guide or template isn't uncommon. It helps when accuracy is a concern or ya wanna figure out how various aspects were done.
stark lotus
supple lake
I know only that sculpt tools don’t work on the edge of mirrored objects, what w...
its not mirrored, and it was working until it randomly stopped working
thats why one of the things is mostly adjusted properly and the other one is wonky
stark lotus
quaint jasper
Looks like you may have some modifiers causing this ?
i now have no modifiers and its still busted
the problem seems to be in the tool itself, because nothing is adjustable
i made a new sculpting project and everything works fine there, if that helps at all


i see no differences in my settings between the projects
im just hopign i dont have to restart
 foggy basin
HI - does anyone know if you can use the depthkit plug in from unity to VRchat?
calm goblet
tacit gorge
hey, does anybody know that how these eboy avatars are created? i think its vroi...
that's probably the easiest style to do cause the shader is doing all the work. some very minimal handpainting for some exaggerated folds and stuff
languid fog
thorny ivy
Stealin' and rippin' is _not_ suggested due to possible repercussions. On top of...
Ik it, i just saying that 85% of the avatars in game are made with it
And ofc it is not suggest, it is a commom sence
I dont even need to say it
quaint jasper
stark lotus
i see no differences in my settings between the projects
Can't you import your meshes in the new blender file ?
supple lake
stark lotus
thats why one of the things is mostly adjusted properly and the other one is won...
Yeah I don’t know, I had a problem with an add-on ZenUV just turning it on or off (checking or unchecking box in preferences) where it got stuck. It was a python incompatibility issue between versions so to use it I have to delete and reinstall from zip file every time.
stark lotus
yea i just restarted
importing my edited meshes gave me the same issue
so I just restarted
supple lake
stark lotus
yea i just restarted
Blender has useful sculpt tools but really for sculpting I think Z-brush is best, there’s a free version Z-brush Core Mini too.
Also, in the scene make sure the primitive is selectable, and then in object mode try selecting the object.
See where collection is checked, click the funnel shape icon above to add selectable to the object, what looks like material or socks in your scene. If the object isn’t selectable nothing will affect it when unselected

This was the early part of the tutorial I’m following, it’s to prevent selecting the reference images after alignment, also to prevent inadvertently changing other objects that are added later such as the eyes 👀 that are scaled down uv spheres in my tut
See in the top right corner my project follow from tutorial I have templates unselected so nothing happens when I click on them
 zinc jolt
How much is 20 thousand polygons?
foggy granite
zinc jolt
How much is 20 thousand polygons?
Good performance on PC
zinc jolt
Good
languid fog
well, the hardest part begins... ;-;
 foggy granite
languid fog
well, the hardest part begins... ;-;
foggy granite
languid fog
well, the hardest part begins... ;-;
Textures?
languid fog
foggy granite
Textures?
details like shadows, i so bad at it haha
languid fog
what do you mean?
foggy granite
languid fog
what do you mean?
Sorry for late reply
 spiral sigil
languid fog
details like shadows, i so bad at it haha
spiral sigil
languid fog
details like shadows, i so bad at it haha
I think you could use a gradient texture from white (top) to black (bottom) as a MatCap for a shader n that will automatically do shadow work in Unity
languid fog
foggy granite
Sorry for late reply
bleed
foggy granite
Alright
languid fog
spiral sigil
I think you could use a gradient texture from white (top) to black (bottom) as a...
yeah i could do it too, but i wanna learn how to do it by hand ik it is hard (and i suck at it) but eventually i will get it
still a thx btw
spiral sigil
np
 compact mulch


 covert rose
I broke my blender
whenever i sculpt
i can only see it
If i go into edit mode
Then go back
how i fix
supple lake
Ok, after a few more hours of fiddling I think I’m finally happy with the basic geometry. Adjusted the position of the eyes, and while refining the shape of the face also moving vertices as best I could (for minimal stretching).


Ready for the next without feeling I may have neglected anything before proceeding
 icy jungle
what about eye holes? need eyelids n stuff
quaint jasper
supple lake
Ok, after a few more hours of fiddling I think I’m finally happy with the basic ...
If you wanna go deep in fighting stretching, enable Mesh Analysis > Distortion in this menu
 supple lake
quaint jasper
If you wanna go deep in fighting stretching, enable Mesh Analysis > Distortion i...
supple lake
quaint jasper
If you wanna go deep in fighting stretching, enable Mesh Analysis > Distortion i...
Yeah I did that, the random selection for distortion showed the most info I thought, basically coloring the faces between selected range 5 to 45 degrees (adjustable…), but what really helped was just looking at it with smooth shading turned on, then the shadows could be seen any pulling around vertices
quaint jasper
You can also manually tweak normals per vertex if it still somehow doesn't look as good as you'd expect
supple lake
quaint jasper
You can also manually tweak normals per vertex if it still somehow doesn't look ...
I just wanted a reasonable balance what’s there so far, I’m comfortable moving ahead with the tutorial now. I know there’ll be more geometry added as I go, some very small areas inside eye and mouth openings, and a few more Control R cuts around the edges of the eyes/lips so that will def help and I can always go back to the face itself and edit more later (which I probably will…). It’s taken longer getting all of what I have tinkered into place a bit better than any step of the tut thus far so really ready to go to the next, eyelid folds. Tomorrow, I’m going to sleep now 
What helped also were a few additional references I found online, and even just feeling my own face while I was working. The orthographic front and side view templates don’t match up exactly and maybe I was trying to make them work a bit too much. The front view shows the jaw very squared and that just didn’t look right and was making it harder to match with the side view so I let it taper into the chin just a bit more than the front view and I think it’s a whole lot better. The height of the eyes, mouth, and chin also are a bit off from the templates and the author even mentions this several times and makes adjustments on the fly, I think I just went a bit further with the jaw line taper that looks more like an anime character to me anyway. Thanks 🙏 and Gn
 slender quartz
ven has a nub tail!


 oak hatch
I have a gift for y'all.

 zenith kettle
hey i don’t know if this is the right place to ask but does someone know a (free) frog model that looks like the picture below? (the colors dont matter)

 atomic hamlet
oak hatch
I have a gift for y'all.
atomic hamlet
oak hatch
I have a gift for y'all.
Thanks, I hate it.
languid fog
 oak hatch
atomic hamlet
Thanks, I hate it.
oak hatch
atomic hamlet
Thanks, I hate it.
It's going to be worse. The nose has dynbones, and the visemes are...

 limber bough
oak hatch
It's going to be worse. The nose has dynbones, and the visemes are...
limber bough
oak hatch
It's going to be worse. The nose has dynbones, and the visemes are...
Burn it with fire
Please it’s so cursed
It’s too well made
oak hatch
It's from Top Dylan, they do Miku art, and it's all about as cursed
supple lake
Added more cut lines through mouth/lips and extruded nostril opening, closed the hole with another face. And a bit more shaping…

Setting up for next, template in place for modeling the ear…

 craggy ice
quaint jasper
oak hatch
It's going to be worse. The nose has dynbones, and the visemes are...
craggy ice
quaint jasper
oak hatch
It's going to be worse. The nose has dynbones, and the visemes are...
That looks dope, love the crayon shading
oak hatch
quaint jasper
That looks dope, love the crayon shading
Did it mostly via matcap, but I may have to do something w/ the shading mask as well.
 naive bolt
im very new to 3d modeling and im coming up with ideas for my avatar
here im making a space girl with horns and tail
i want to animate the tail but i would like the planet to stick to the curve at the end, kind of like she is holding it
i want most of the tail to move freely but i want the end part to stay the same position holding the globe, is that possible (and would it look decent) or should i change the idea?

hmm it's probably gonna look funky..
visual vigil


 foggy granite
naive bolt
im very new to 3d modeling and im coming up with ideas for my avatar
here im ma...
foggy granite
naive bolt
im very new to 3d modeling and im coming up with ideas for my avatar
here im ma...
That is possible but I wouldn't worry too much since that would be don't in unity
naive bolt
foggy granite
That is possible but I wouldn't worry too much since that would be don't in unit...
I came up with an alternative idea that would make it less awkward. But im not sure if i will add it
I want to make one the same texture as like a devil tail, but at the end i could make a line of small planets in the shape of the tail. That way i can also add dynamics to the planets part as well.
 obsidian jungle
I have an avatar that has a robe that goes around 360, anyone know how to dynamic bone rig that?
past drum
so im in the process of making this avatar, and i want there to be a projection like image projecting the head, is there a shader anyone would reccomend?
quaint jasper
That's just transparency
standard shader can do that, also works with opacity on the texture alpha
past drum
thank you!
 fresh isle
Uh?
 solemn elm
I would put this in VRC since it's not even that high poly but I have the feeling that shaders would suck in game. So I'm just gonna stylize the one for VRC instead.
Anyone got any actual recommendations? I've tried using the high def render pipeline but its a mess to work with. Never got any actual explanations.
Just gonna stick to UE4 as seen in the boot below since that's real time.

also boot
 quaint jasper
Sick ! Marvelous or raw sculpting ? Or a mix of both ?
obsidian jungle
million dollar question because this doesn't exist in google nor youtube: does blender have a blade tool so I can cut the hand and create fingers?

 cobalt sierra
you can slice between vertices yeah
i can't ever remember how to do it, but you can

 supple lake
obsidian jungle
million dollar question because this doesn't exist in google nor youtube: does b...
supple lake
obsidian jungle
million dollar question because this doesn't exist in google nor youtube: does b...
Keyboard shortcut “K”, select cuts with left mouse button, then press return to cut.
obsidian jungle
supple lake
Keyboard shortcut “K”, select cuts with left mouse button, then press return to ...
and do you know how to fix this crap? i been stuck on it all day

its not red or anything in weight paint so i dont get it
supple lake
obsidian jungle
and do you know how to fix this crap? i been stuck on it all day
I don’t know what your trying to do? “k” cut only works in edit mode I think.
Looks like you have a lot going on there with the rigging visible. Maybe something was selected other than what you thought whatever you did last? I switch to wireframe often to see what I’m doing and make sure I’m not inadvertently selecting vertices. I didn’t intend.
If you want fingers, why not just make a new hand?
thin shadow
obsidian jungle
and do you know how to fix this crap? i been stuck on it all day
does this only happens when previewing blendshapes? when using knife tool, don't make new vertices in the middle of faces. cut straight from edge to edge.
obsidian jungle
thin shadow
does this only happens when previewing blendshapes? when using knife tool, don't...
Nope this only happened when i went into object mode/pose mode in general
thin shadow
also, your 3d cursor is not on the origin point
solemn elm
shift + c
obsidian jungle
nothing happens when i press K
 thorny ivy
@obsidian jungle you have to press k while in edit mode
thin shadow
obsidian jungle
nothing happens when i press K
or click on the knife icon on the left (2.8 and above)
rain fjord
do i not need to worry about optimizing my world as much as possible as long as my geometry and textures aren't to detailed?
quaint jasper
Geometry and textures are rarely what causes performance issues
So yes, absolutely
foggy granite
rain fjord
do i not need to worry about optimizing my world as much as possible as long as ...
I would worry more about the size of your textures than how detail they are
past drum
getting somewhere with this avatar finally! will be my first
 nimble anchor
So I’m making a joke model in the meantime while I make Ada
past drum
gotta reduce my vertices now :3
nimble anchor
This is the model I’m making


The joke model though, is that someone made a xenomorph version of her


So I thought, why not?
thorny ivy
Oh nice model
foggy granite
past drum
getting somewhere with this avatar finally! will be my first
Are you scuplting?
I'm just worried about that shoulder deformation
past drum
im not worreid about it @foggy granite yea, im gonna make it look good with the clothing, its a cyborg'
not aiming for it to be perfect too
foggy granite
Alright
obsidian jungle
supple lake
I don’t know what your trying to do? “k” cut only works in edit mode I think.
Lo...
not even in edit mode, doesnt show up at all. theres nowhere to find it as an option too
obsidian jungle
i set up the eyes, but for some reason it moves the head too
and whenever i do set up the eye test, this message shows up

 unique ledge
oooooh noice
obsidian jungle
thorny ivy
Ya'll got any tips for modelin' clothes? Usin' standard Blender features for the time bein' but results are wonky so far.


Main issue is the bust size, it eats up a lot of material and creates a notable gap around the sleeve area.

I've somewhat managed to fix it but geo ain't happy.
 frail shadow
thorny ivy
https://cdn.discordapp.com/attachments/862212820098875412/907667283063767160/unk...
frail shadow
thorny ivy
https://cdn.discordapp.com/attachments/862212820098875412/907667283063767160/unk...
looks like you have the collision size set too high, try turning down self collision and or try simulating the cloth without self collision
surreal flame
thorny ivy
Ya'll got any tips for modelin' clothes? Usin' standard Blender features for the...
I'd just select & duplicate the body mesh (portions that you want to be the clothes) into a new object, Alt-S to scale it along normals and edit away. That way you keep weights and shape.
spiral sigil
@spiral sigil

Getting more one sec


This is all I have saved on my phone.
ooi
spiral sigil
spiral sigil
id like to see the UV and textures on dis
I don’t have them on me rn as I’m about to head to a class. But when I can get back I can hop on my pc and get them. I know the katana and mask were textured in photoshop, and the sword was textured in z brush (that was my first time using z brush)
yeee
past drum
ok so i did a target weld, and im trying to sculpt, but the vertices on the two objects keep moving, im trying to make it be the hips, anyone able to help me out?
obsidian jungle
is there a channel for weigh paint
azure rain
Avatar rigging
solemn elm
quaint jasper
Geometry and textures are rarely what causes performance issues
can agree there.
 night plover
Do any of y'all use blender?
quaint jasper
The majority of people here do
night plover
Even tho I saved the edit to my mesh in edit mode, it reverts to its original form in object mode
I edited the mesh earlier today tho & it didn't give me this problem
surreal flame
night plover
Even tho I saved the edit to my mesh in edit mode, it reverts to its original fo...
You may have been editing a shape key.
night plover
Thx
spiral sigil
@past drum it sounds to me like it’s not welding a couple of vertices right? Make sure the polygons are facing the right way. They don’t like to weld if they’re not facing the same way. That solved the same issue for me 99% of the time


@spiral sigil here’s the textures
I don’t have the wire frame anymore for the sword, but the rest I do
I definitely could of done the katanas better but eh
Oh wow did you manually draw these yourself?
For the mask yes, the katanas I used other textures to make it look real, and the sword I did in zbrush
yeah thats ALOT of geometry for a katana
Yea, I over thought the wrap
I made it much harder on myself
now u know
Yep. I’m currently working on a baby centaur model. (Cause it’s funny) It’s going to be the first one I put in vr chat, so far that’s going much better
spiral sigil
spiral sigil
Yep. I’m currently working on a baby centaur model. (Cause it’s funny) It’s goin...
That inspires me to work on making my unicorn rigged to humanoid n like stand up
like bojac horseman or smth but not
Do it
visual vigil
 azure rain
do you have a picture showing off the wire frames
 azure rain
cool
visual vigil
the cables are less dense on the lower ones for obvious reasons
languid fog
Finally learning the basis of doing the shadows by hand, i having a lot of fun with it
 past drum
here i am trying to merge this so i can sculpt hips and butt :3
naive bolt
It’s my first 3d model attempt. I used i to shape the mouth but now i got a huge space here i cant merge with the mirror for some reason
past drum
heres the correct one hahaha
 foggy granite
naive bolt
It’s my first 3d model attempt. I used i to shape the mouth but now i got a huge...
foggy granite
naive bolt
It’s my first 3d model attempt. I used i to shape the mouth but now i got a huge...
Do you have clipping enabled on the modifier
foggy granite
Np
foggy granite
languid fog
Finally learning the basis of doing the shadows by hand, i having a lot of fun w...
Looking good so far
past drum
how can i merge objects? i snaped vertices together but when i sculpt it moves off of the object
does this

 quaint jasper
ctrl + J
foggy granite
Then remesh them
past drum
i hit remesh and my model collapsed on itself :3
 thick onyx
hello people, how my gonna import Roblox Studio OBJ to Unity without lossing it's texture or adding the texture back?
thorny ivy
thick onyx
hello people, how my gonna import Roblox Studio OBJ to Unity without lossing it'...
I believe there's an import textures option in Unity but I've only used FBX files myself. However, it may look different in terms of visuals so expect to experiment with shaders at least a little.
thick onyx
thorny ivy
I believe there's an import textures option in Unity but I've only used FBX file...
i know but i had no idea to import the textures, when importing the obj file that is located on folder with texture's, and it won't load the textures and try playing around and it won't work.
thorny ivy
thick onyx
i know but i had no idea to import the textures, when importing the obj file tha...
Have you searched up any Unity/VRChat tutorials at all? I and the others don't mind helping but knowledge of the basics goes a long way.
naive bolt
first model
this is so much fun tbh i've been hooked on learning for days xD

cant wait to finish my very own avatar
thick onyx
thorny ivy
Have you searched up any Unity/VRChat tutorials at all? I and the others don't m...
yes 43 times and i was in pain.
spiral sigil
Kingdom Key R (all my own mesh)

Paw print teeth instead of crown, and fishe keychain
 agile coral
Hey guys. I'm not great at modelling but I really enjoy splicing different models together to make unique new models. Where can I find a good (male) base model, please?
https://www.deviantart.com/kurusou/art/TDA-Male-base-511793162
This would have been ideal but the download link has been removed a long time ago apparently.
quaint jasper
Artstation has a lot of good model bases
agile coral
quaint jasper
Artstation has a lot of good model bases
Awesome, I'll give it a look. Thanks 👍
spiral sigil
Derivative modelling is definitely a good thing to learn as you'll end up doing that from your own bases someday and it's easier
Nice place to get started, make sure to double check it allows you to make edits in the terms or w/e
agile coral
For sure. Right now I'm also using Deviant Art for a good chunk and a lot of stuff from there is free usage. Hella fun. Can't wait to be walking around in my own avatar
foggy granite
Theirs a lot of shops but so far booth and gumroad got a good bit of assets and sketchfab is generally good for finding models to learn from
agile coral
Trying to do my first model at zero cost so mostly using free assets (and it's craaazy tough to find well-made free assets)
foggy granite
agile coral
Trying to do my first model at zero cost so mostly using free assets (and it's c...

i’ve made a time ago, this has been usefull to me in some ways and can be usefull to you.
here you have 5 male basemeshes that I use for sculpting, but you can use for anything
If you like it or feel like this have helped you in any way consider subscribing to my patreon in https://www.patreon.com/gostbento
if you are interested in commission...
Wait are you looking for something mores anime
agile coral
foggy granite
https://sketchfab.com/3d-models/stylized-male-base-mesh-free-5264bf0ed23045c5843...
Yoink! Grabbing that. Thank you!
foggy granite
Np
agile coral
Yeah I was going in the direction of anime, but now I know where to look
foggy granite
I see if I can find any
foggy granite
agile coral
Yeah I was going in the direction of anime, but now I know where to look
https://sketchfab.com/3d-models/bam-63ce7df4ad2b46a283da1b09ae0cfcb3 this an interesting one and more optimize

BAM_ Base Anime Male:
Made on request of others asking for a simpler model to work with. It is UV unwrapped so you can do you own texturing and uploaded in FBX format. Check out the partner model listed as BAF_Base Anime Female. Enjoy.
Update:
Do to limited uploads, I was able to create an updated slightly modified version as BAM 2 if anyone is ...
agile coral
Thank you kindly! 😁 These are great
foggy granite
Np happy to help
thin shadow
agile coral
Yeah I was going in the direction of anime, but now I know where to look
vroid
spiral sigil
she textured now

 hasty pasture
appears then leaves
 thorny ivy
Ya'll got any tips for makin' this look more natural? Good amount of muscle and fat but don't look right to me.


Arm lowered, looks fine this way.
surreal flame
thorny ivy
Ya'll got any tips for makin' this look more natural? Good amount of muscle and ...
It looks to me like you have too much of the shoulder weighted to the arm bone. I would redistribute weights so that the shoulder is mostly on the shoulder bone; keep in mind that the shoulder bone will move together with the arm in VRC using IK. Hard to say more without seeing the armature as well.
thorny ivy
surreal flame
It looks to me like you have too much of the shoulder weighted to the arm bone. ...
Good point, probably goin' into overkill territory by tryin' to fix up every last thin' I find at this point.

Looks like there might be too li'l weight paintin' though.
surreal flame
thorny ivy
Looks like there might be too li'l weight paintin' though.
I think the shoulder/arm joint should be further into the actual shoulder.
thorny ivy
surreal flame
I think the shoulder/arm joint should be further into the actual shoulder.
So move it inward and/or lower?
surreal flame
thorny ivy
So move it inward and/or lower?
With reference to the picture, to the right. Kind of like real shoulders work.
thorny ivy
Ah, that makes more sense.
surreal flame
thorny ivy
Ah, that makes more sense.
Alternatively you can just test it in VRC to see how it behaves to get a clearer idea.
past drum
omg i decided to use a base i found, and im trying to scale a cone and its not wanting to scale
I press S and its not moving at all
spiral sigil
spiral sigil
she textured now
That looks a hell of a lot like the key in this picture of Tyler Ninja Blevins

Hypotheitcally, if I were ever to make this version of Tyler, may I have the Key?
also if you had insight on what the name of the suit he is wearing, since I have no clue; but you may know because you know where your key is from

 spiral sigil
azure rain
model myself a star Lantern only uses 60 triangles and a 256 PBR texture set
spiral sigil
azure rain
model myself a star Lantern only uses 60 triangles and a 256 PBR texture set
I love that I want I want !!!!
can I have?
it looks like stardust
azure rain
was contemplating uploading it to sketchfab
azure rain
spiral sigil
I love that I want I want !!!!
https://sketchfab.com/3d-models/star-lantern-098d775b197f44fe91f8c6d3ab98c47c make sure to send me any screenshots what you do with the lantern

star Lantern - Download Free 3D model by simsora13 (@simsora13) [098d775]
azure rain
and if you wanted in different colors just Hue shift the texture in like image editing software
spiral sigil
yeee
 unreal owl
Hey, can anyone link me to the Avatars 3.0 download page?
quaint jasper

VRChat lets you create, publish, and explore virtual worlds with other people from around the world.
unreal owl
Oh thanks, I assumed it was gonna be in the documentation and it didn't tell you where to actually download it
 rigid coral
Looking for a second opinion I'm making a zombie stuffed animal avatar, and am wondering if this blob shape makes for convincing stuffing sticking out.
 spiral sigil
rigid coral
Looking for a second opinion I'm making a zombie stuffed animal avatar, and am w...
spiral sigil
rigid coral
Looking for a second opinion I'm making a zombie stuffed animal avatar, and am w...
is that just supposed to be a weird meaty tumor?
I couldn't really say how convincing it is unless its all textures n stuff but it seems ok
by no means do I have experience in making gore tho
rigid coral
Yeah lol, I feel like it's either gonna come together when it's textured or be very ugly. Thinking about just for dropping the idea and sticking to patches and stitches they seem alot easier
spiral sigil
I think it would be better if you were to make gushes INTO the skin
the area around the gash can be more exaggerated outwards becuz yknow but I think that would be better
 gusty shard
trying to do hair, is it ok like this? I want to add bones later for it to move a little. didn't want to do hair cards/planes
 quaint jasper
rigid coral
Looking for a second opinion I'm making a zombie stuffed animal avatar, and am w...
quaint jasper
rigid coral
Looking for a second opinion I'm making a zombie stuffed animal avatar, and am w...
You won't really know until it's shaded, but it will probably look nice
quaint jasper
gusty shard
trying to do hair, is it ok like this? I want to add bones later for it to move ...
yeah using meshes is fine, but i'd suggest learning the curve method instead
gusty shard
quaint jasper
yeah using meshes is fine, but i'd suggest learning the curve method instead
That's a relief. Curve method? Is that drawing a line then extruding along it?
quaint jasper
It's an automatic process, all you need to do is make the curve line, and the hair shape is created around it, it's a lot more procedural and customizable
and a lot less destructive workflow
azure rain

A tutorial on how to make hair in Blender 2.8 with curves, a method that is very simple and effective that I have been using for my character sculpts.
▼ Sculpting Uraraka Ochako:
Re-Sculpting My Old Art | Uraraka Ochako in 3D [My Hero Academia] | Can You Improve In Only 1 Year?!: https://www.youtube.com/watch?v=iYNdfef1Uog
▼ My Gumroad Store (...
like this method I just posted is how like basically all hair works on the vast majority of anime and furry avatars
oak hatch
Dakka Dakka Babeyyy
 naive bolt
what does "skin" do on object modifiers
visual vigil
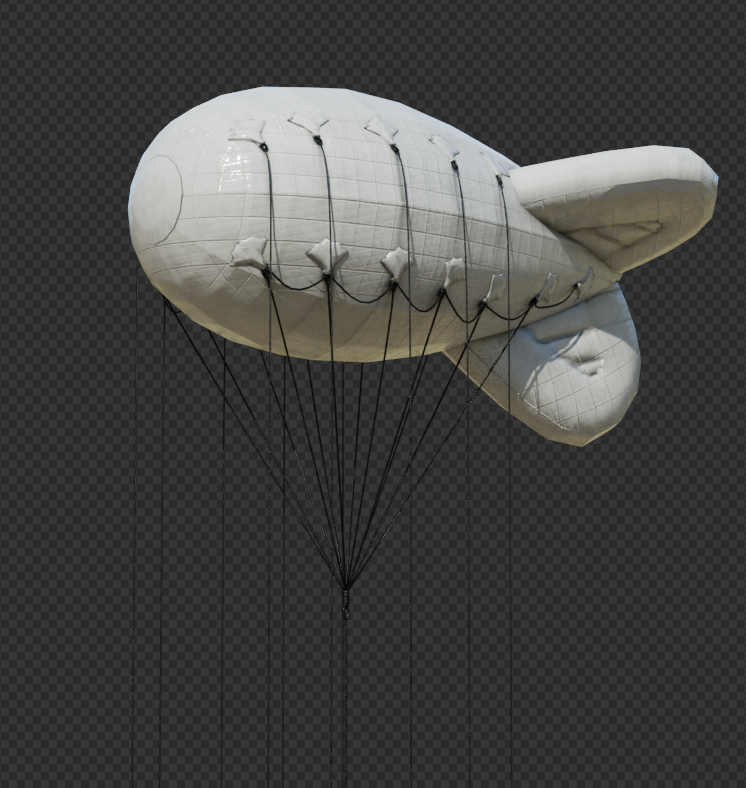
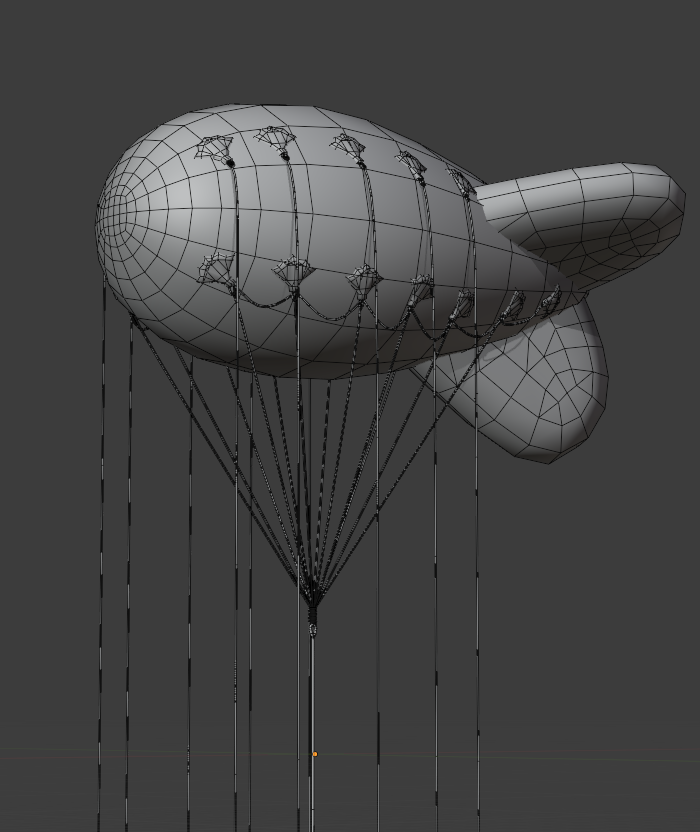
Barrage Balloon finished for BG asset
9k tri
It looks like a floating goldfish cracker
#3dart #WW2 #Blender3D
 Twitter
·
Twitter
·
 naive bolt
the snack that smiles back
quaint jasper
naive bolt
what does "skin" do on object modifiers
never heard of it
 naive bolt
ohh ok
 lean wave
Hi all
i'm having some blendshape hell at the moment
i'm using maya, i've set everything up including the 50+ blendshapes, i'm now working with the unity FBX directly
however it stores every blendshape as a model, so if i make any tweaks, i need to update every blendshape as well apparently!?
is there a way to avoid this
gusty shard
azure rain
like this method I just posted is how like basically all hair works on the vast...
ah nice! now to try and convert this into maya terminology/functions
azure rain

Create all styles of hair and fur by instancing spline primitives on your character mesh. For example, use spline curves for long or short hair, eyebrows, mustaches, and beards. You can also use spline curves to create grass, ropes, and other objects for landscapes. Select the character mesh or the faces of the mesh you want create hair or fur o...
gusty shard
thanks!
azure rain
hopefully that does the trick
devout scroll
quaint jasper
It might be like solidify, but extrudes in and out
bascislly.
you can make trees with it by extruding verts around
also crashed my blender a bunch of time because i never intended on adding it
i think if you add it to literally any regular model it will just freeze up because it creates a lot of geometry probably
quaint jasper
good to know thanks
spiral sigil
spiral sigil
That looks a hell of a lot like the key in this picture of Tyler Ninja Blevins
Because he's holding the kingdom key and I made Kingdom key RH (Rusk and Heart) like Kingdom Key D(arkness), it has keyblade of heart color theme, I used KK as the basis and gave it keyblade of heart color scheme, rusk fishe keychain and rusk pawprint cutout for teeth and then some other stylizations
His "suit" is the outfit from Kingdom Hearts 3

ahh okay
that makes much more sense thank you
spiral sigil
I didnt texture it like that but I did have it colored like KK and KK D for prototyping https://cdn.discordapp.com/attachments/891034691552026636/907619185465622538/unknown.png https://cdn.discordapp.com/attachments/891034691552026636/907618977587535912/unknown.png


To know if I captured the orignal aesthetic properly or not
with my own changes
i like my bolts
it also limited my color selection so i wouldnt add too many new colors if any
too many colors ruins things
oh their necklace thing is supposed to go into the key
Nope its just thematic design
sora's a king, but we havent really seen what of we theorize of kingdom hearts
so he gets crowns
lots of crowns
 compact acorn
Hey, im a little new to this vrchat stuff but am i naming the bones correctly?
 foggy granite
compact acorn
Hey, im a little new to this vrchat stuff but am i naming the bones correctly?
foggy granite
compact acorn
Hey, im a little new to this vrchat stuff but am i naming the bones correctly?
This shows the naming guild lines

Just don’t worry about the chat_ethan part
compact acorn
thx
foggy granite
You concern should be on the full circles the dotted circles are extra bones you can if you want. But they are not needed
 spiral sigil
i thought the dots were there to illustrate where the joins of the bones they are next to should be
foggy granite
spiral sigil
i thought the dots were there to illustrate where the joins of the bones they ar...
Probably but i avatars work fine with out some of the dotted
But I think it’s better to have all the bones
 faint minnow
yo can anyone help me rig a model
quaint jasper
Use mixamo
languid fog
ik there is a way to do this "tears" parts using texture but i dont know how to do it, do i need to use masks or alpha?

 plush token
Either or would work, personally I find using alphas are easier to handle and less destructive, rather than editing the alpha right on the texture.
surreal flame
AFAIK alpha does not work on Quest though.
plush token
surreal flame
AFAIK alpha does not work on Quest though.
True.
languid fog
surreal flame
AFAIK alpha does not work on Quest though.
So i need to use a mask for quest?
surreal flame
languid fog
So i need to use a mask for quest?
Sorry, what is this mask you're referring to?
languid fog
surreal flame
Sorry, what is this mask you're referring to?
Sorry, I got confused, I was studying about materials and modifiers recently hahahaha
There is a way to do transparency for quest?
surreal flame
languid fog
There is a way to do transparency for quest?
I have asked this question before and there doesn't seem to be. Due to the way Quest handles rendering it makes it very expensive apparently.
surreal flame
Yeah, I have made a bird avatar using tons of transparent cards and I can't port that to Quest now.
 median pike
languid fog
There is a way to do transparency for quest?
median pike
languid fog
There is a way to do transparency for quest?
nope
one of the reasons why my avatar looks so shit on quest
languid fog
f

 surreal flame
Yeah time to redo the entire avatar for Quest huh?
median pike
yeah probably
but like
I use haircards so much
so IDK if I want to sacrifice them
surreal flame
Quest does that for you so it's a moot point.
median pike
so I am honestly doubting if I even want to make a quest version
like sure I can have normal map fur
but that will never look as good as haircards
surreal flame
Might as well get rid of them altogether and just have flat colors. I mean Quest can't handle much of anything, people will be used to seeing cut down versions of everything.
Personally I'd rather have a flat but personalized avatar than show up as some unrelated random fallback.

 open scarab
🔪 tool all the things
surreal flame
You could probably grab and extrude some triangles to give some impression of fluffiness.
median pike
I could
but the original reason why I used haircards was to avoid doing exactly that
because making fur equivalent to haircards with actual geo will more than triple the polycount
surreal flame
Not if you don't go overboard with definition.
You can still use cards but you'll have to use them more sparsely. And without alpha.
median pike
but
using cards without alpha just looks like shti
defeats the whole point of them in my opinion
at that point I can make something like this

with geometry
and normal maps
and it will look a million times better
surreal flame
Normal mapping this kind of pattern on a flat surface could produce some neat results.
median pike
wait a minute
I thought Vrchat increaset the limits for quest
I thought under 20K would be poor and not very poor
surreal flame
It's poor according to the docs.
surreal flame
Maybe something else is in there? More than one mesh object?
 surreal flame
Is that the current SDK?
median pike
its 2018
surreal flame
Could've been revised since then.
median pike
but this change was already in place when 2018 was current SDK
I will try to upload it and see what the rating is actually in game
if its very poor this is bullshit and I am probably never making a quest avatar again lmao, I am not having fun
surreal flame
One of the few things I like about devices with limited power is that it makes people do things in a more smart and efficient way. Many people just throw polygons and dynamic bones at everything; I've already been to a room where someone's avatar made my headset lose tracking every five seconds and I was definitely NOT having fun. I'm definitely not running a potato computer either.
median pike
I understand that
I try my best to optimize avatars as much as I can. But the limitations for quest are just too much for me
its to the point where my creativity is completely limited
if I want something moderately complex I can forget about outlines, any longer tails or hair because they are just stiff, no transparency, ffs WOW in 2004 used transparency everywhere, its one of the main reasons why it aged so well graphically
surreal flame
Yeah personally I'm very glad I didn't give Facebook my money and went for a higher shelf.
devout scroll
upgrade to 2019 and latest sdk you boomer
languid fog
plush token
Either or would work, personally I find using alphas are easier to handle and le...
@surreal flame thx!!
 spiral sigil
languid fog
<@!339137238447292418> thx!!
spiral sigil
languid fog
<@!339137238447292418> thx!!
Those wings look very reminicent of Rare Dragon Wings in Animal Jam
 languid fog
kinda yeah
spiral sigil
gud vibe
languid fog
it is Zentreya wings
spiral sigil
ahh
 stark radish
median pike
if I want something moderately complex I can forget about outlines, any longer t...
stark radish
median pike
if I want something moderately complex I can forget about outlines, any longer t...
For outlines you can get a similar effect using matcap lit.
For longer tails or hair you "just" need to animate it. In 3.0 you can use AngularY and blendtrees to animate based on head movement (left to right) and 2 other parameters to animate when you artificially move forward/backward or strafe
azure rain

video 2 of making fake dynamics for quest
this time, i didnt struggle as much~
Join my Discord for premade fake dynamics for models:
https://discord.gg/JRhjx8d2Wt
The premade packages also include helpful tips and links for making your own.
 cyan plover
ok! question, anyone know how to make sharp corners more smooth? ive tried using all the tools i know off and none of them are doing what i need
cyan plover
oh! alright one sec, ill try!
uhh, where is edge selection?
i figured it out, but its kinda janky
theres no way to sand something down to a smooth edge, is there?
thorny ivy
cyan plover
theres no way to sand something down to a smooth edge, is there?
You can choose how many faces bevel makes. The higher the number, the smoother the bevel.
cyan plover
ohhhh, i see now
thorny ivy
You may have to open up the little menu in either the top or bottom-left corner with the tool select to fine-tune.
foggy granite
cyan plover
how many people here went to school for 3D modeling?
I say a very a small few a lot of us here is self taught and pick up as an hobby or to make some money
spiral sigil
for me I never went to school for it; just a hobby and if it turns into more in time that would be pog
calm goblet
cyan plover
how many people here went to school for 3D modeling?
these days a large portion of the games industry is self taught, at least on the art side, there's no point in shcool when you have better resources for free/cheap
cyan plover
well what resorces did you all use to teach yourselves? im having a hard time learning how to use unity/blender. i have the basics, but its just really overwhelming and idk where to start
calm goblet
currently the best blender resource would be grant abbitt for beginner stuff
then if you wanna get into doing characters you'll need to learn some anatomy, learning sculpting will help a lot, and either learning PBR texturing or handpainting or both
for anatomy there's "anatomy for sculptors" ebook and plenty of zbrush and traditional sculptors showing how things work
as for sculpting, grant abbitt will show you the tools in blender, then use zbrush and traditional sculptors for how to actually sculpt
retopo, just look into topology for animation and figure stuff out from that lol
stylized station has a lot of good handpainting videos, and watching how 2d painters work is useful as well
thorny ivy
Tieguaili actually went to gnomon
 rigid anvil
Tried searching in search for an answer but didn't find anything, do you guys think Combining meshes like outfits instead of having like 5 different meshes for 1 outfit is better performance wise but have blendshapes to hide each part instead?
like 1 outfit 5 meshes, or 1 mesh 5 blendshapes to hide stuff
calm goblet
thorny ivy
~~Tieguaili actually went to gnomon~~
i can't afford 300k/yr or whatever it is there for that
calm goblet
thorny ivy
~~hes working on VRC during lunchbreak in the studio!~~
studio? i'm freelance, bish
calm goblet
oh yeah i forgot about them
they have some actual good blender vids
too used to blender not having many properly good resources lmao
calm goblet
grant shows it as well
spiral sigil
Jesus Christ
I’ve been working on this for 7 hours straight now

I can’t figure out how to render the skin?
Every time I put body png (for the body) onto him and then click back on the shirt

It swaps textures
How do I lock them to specific layers
calm goblet
are you trying to use multiple UV sets on a single material or something?
supple lake


#Blender Now with subdivide toggled on/off while working. I abandoned the tutorial temporarily to do a quick ear study, shaping poly more (or less) eccentric until I was happy. A bit more adjusting cheekbone, brow, and areas surrounding the eye also
#3DModeling #3DCGデザイナー
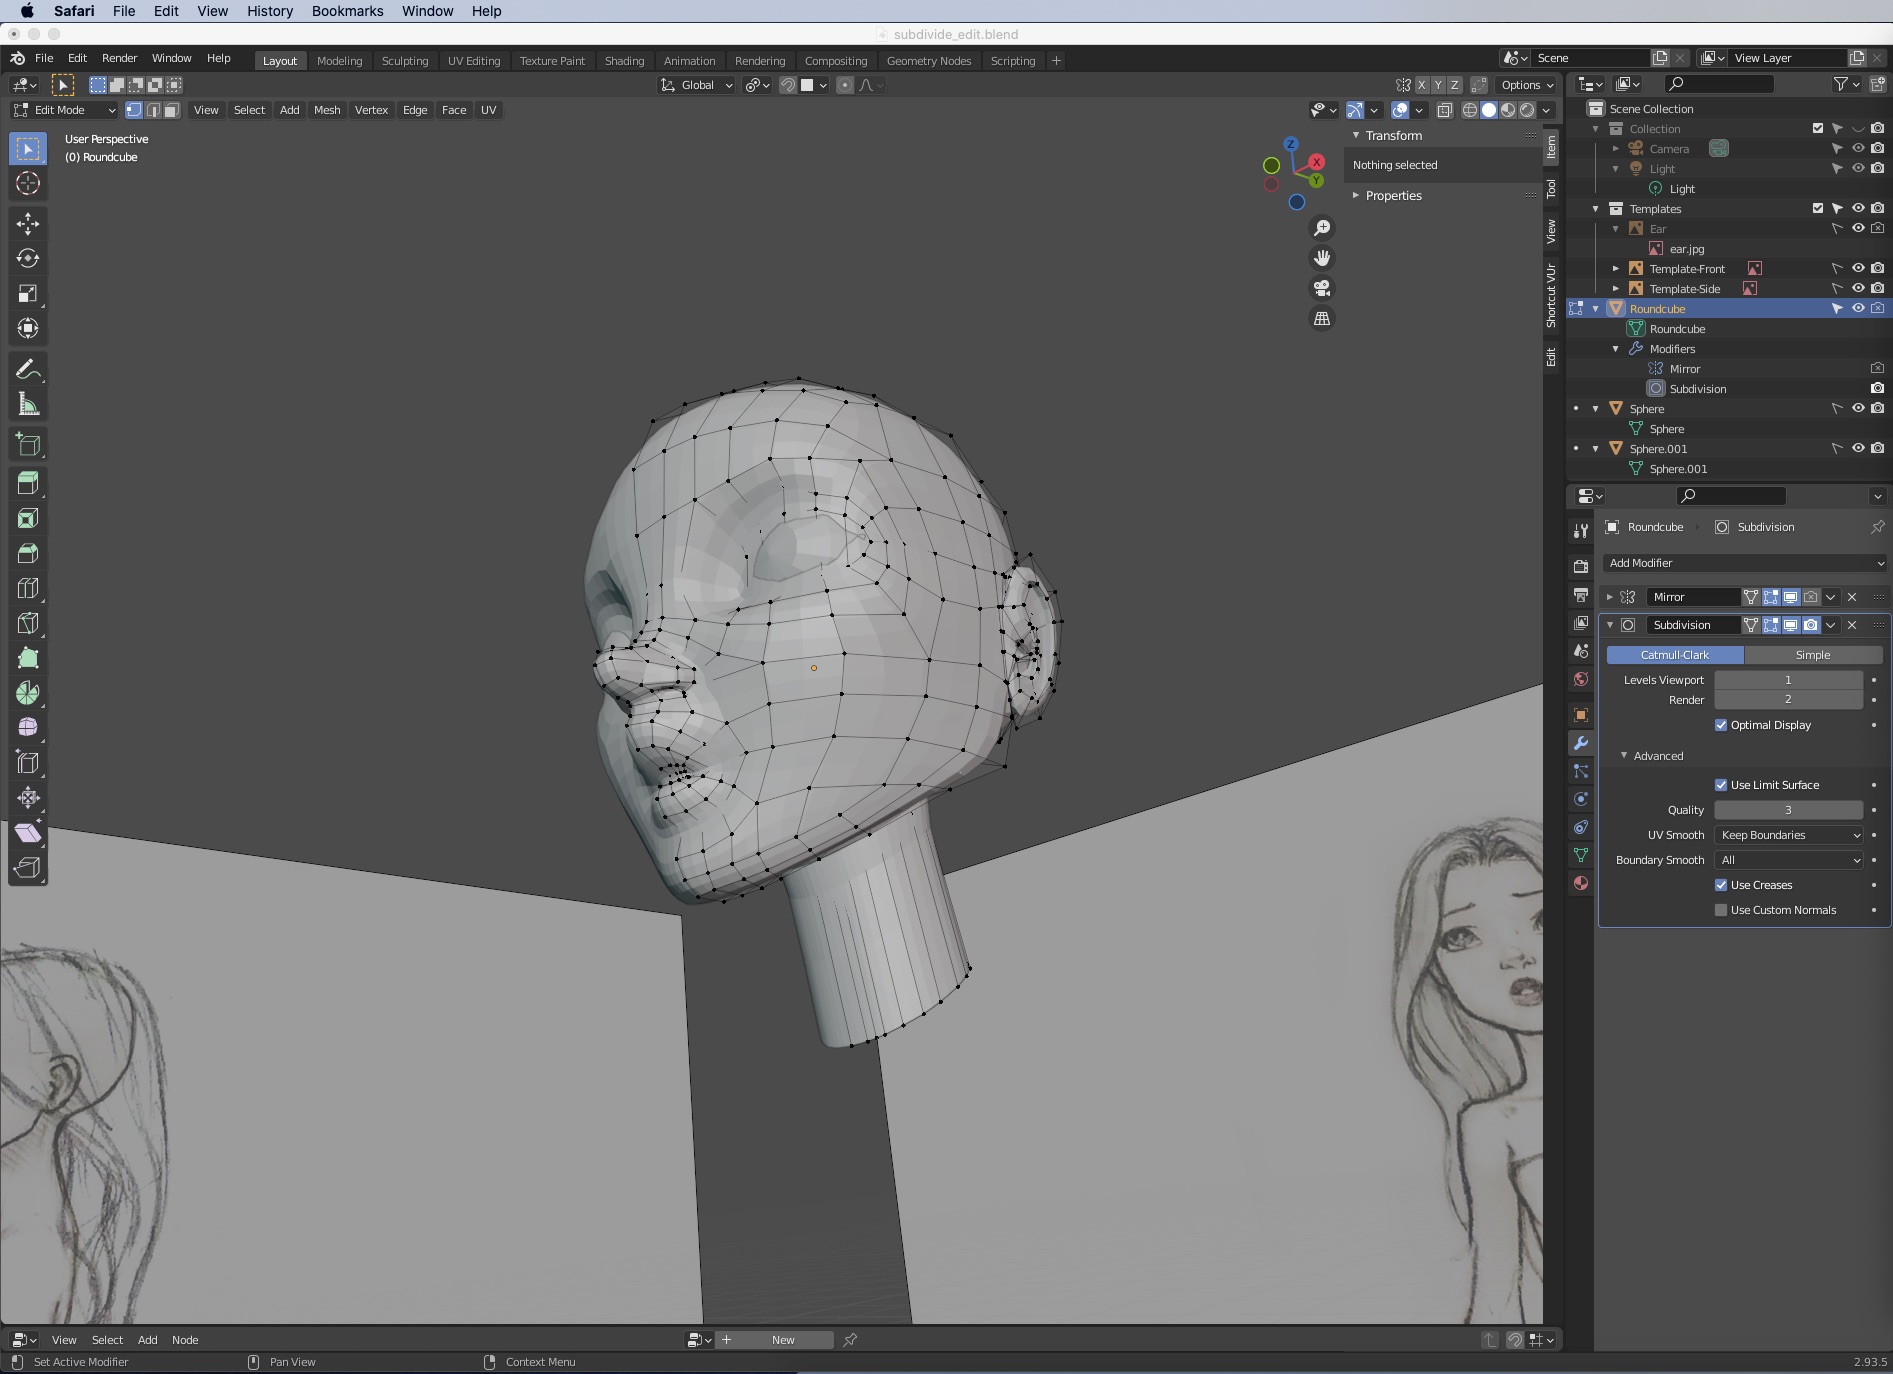 Twitter
·
Twitter
·


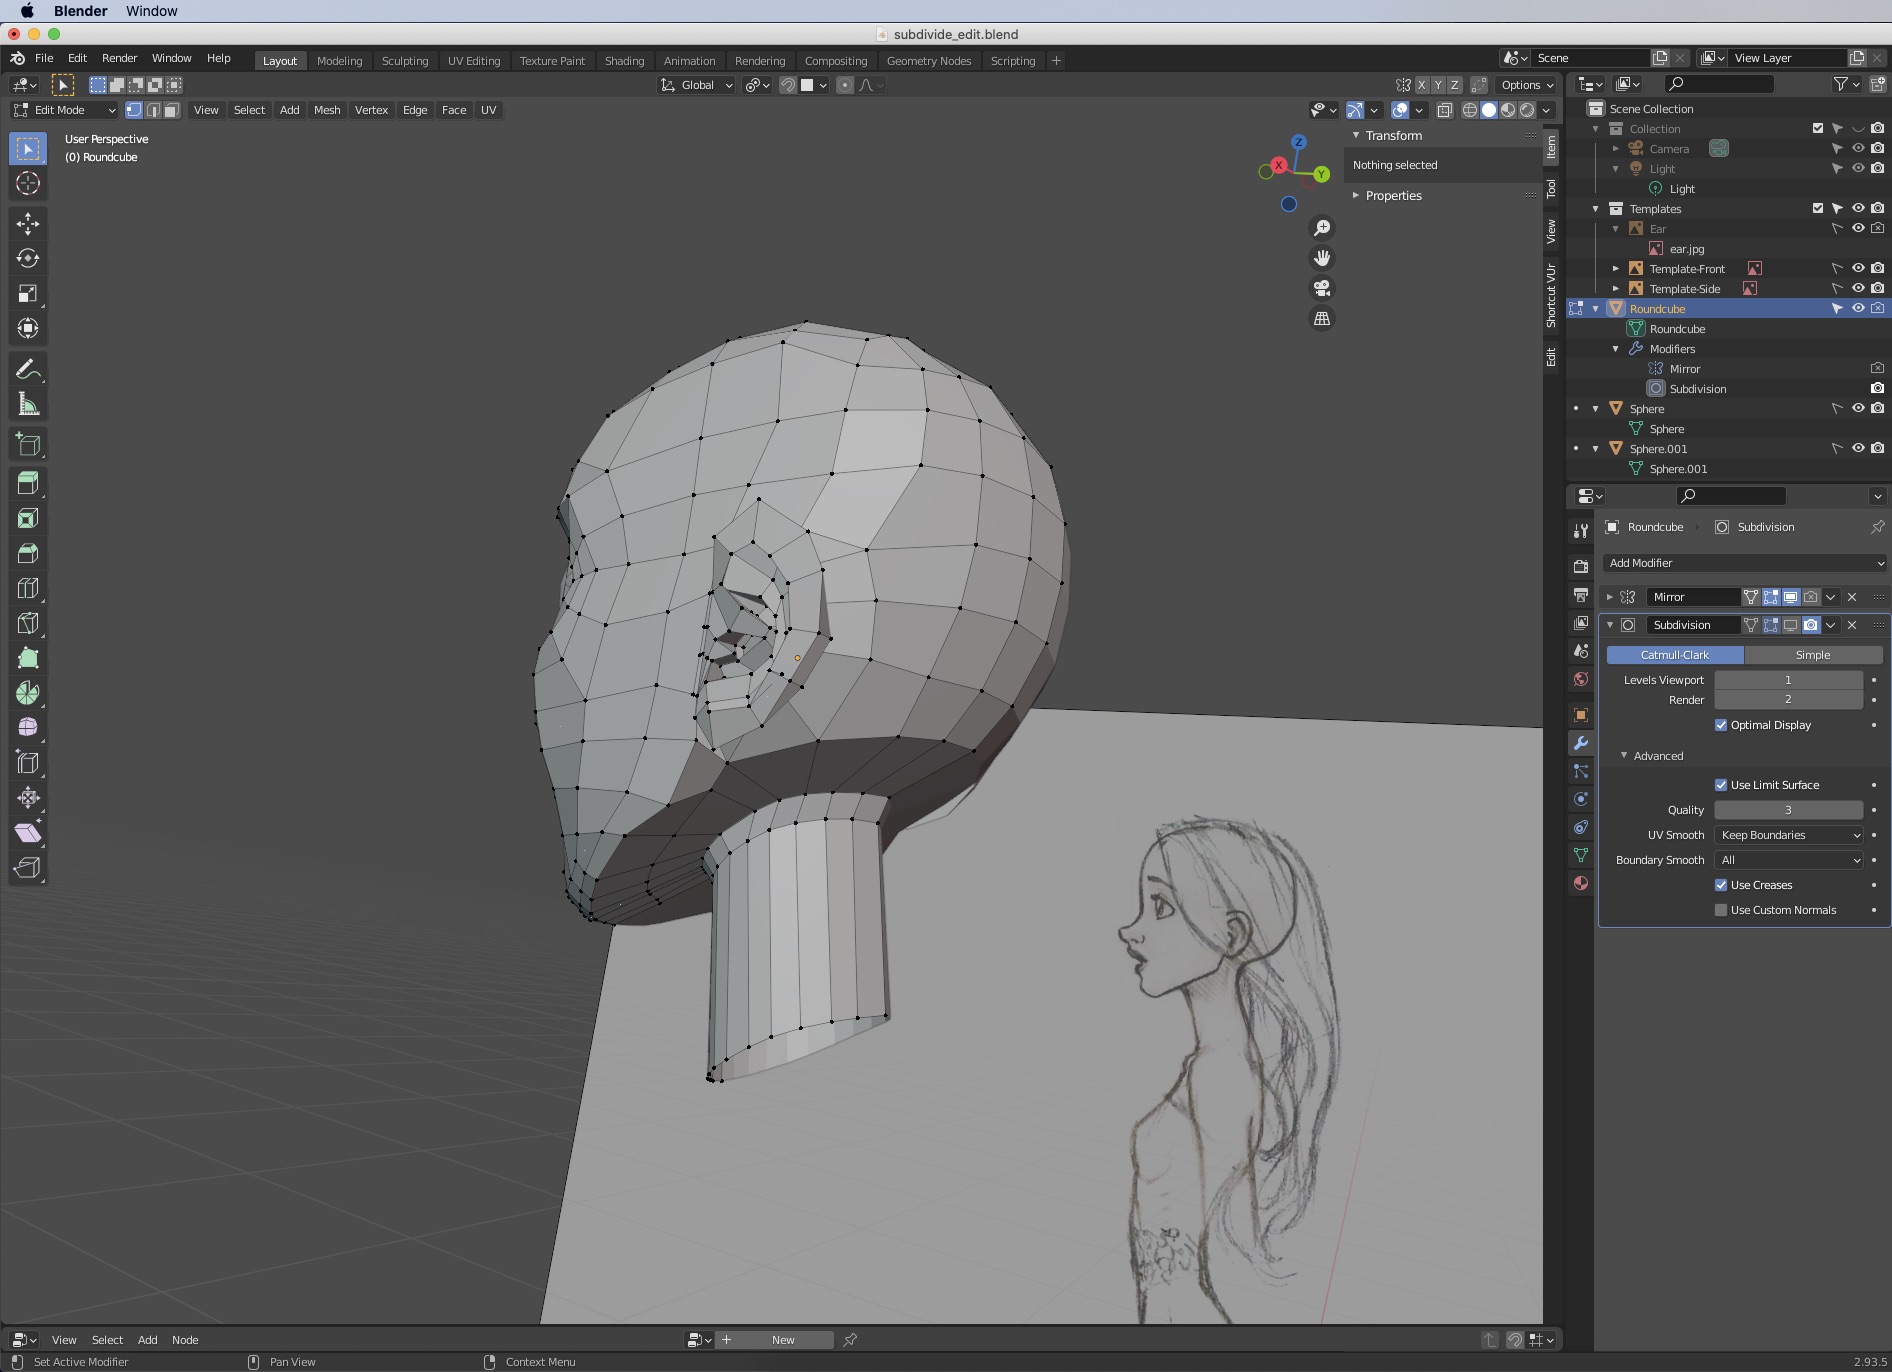
And a quick check in Object Mode with Smooth Shading and Subdivide turned on, the ears and nose especially I've been fine tuning a bit more. Next I'll attend to the eyes and mouth...
#Blender #CharacterDesign #GameDev #3DCGデザイナー
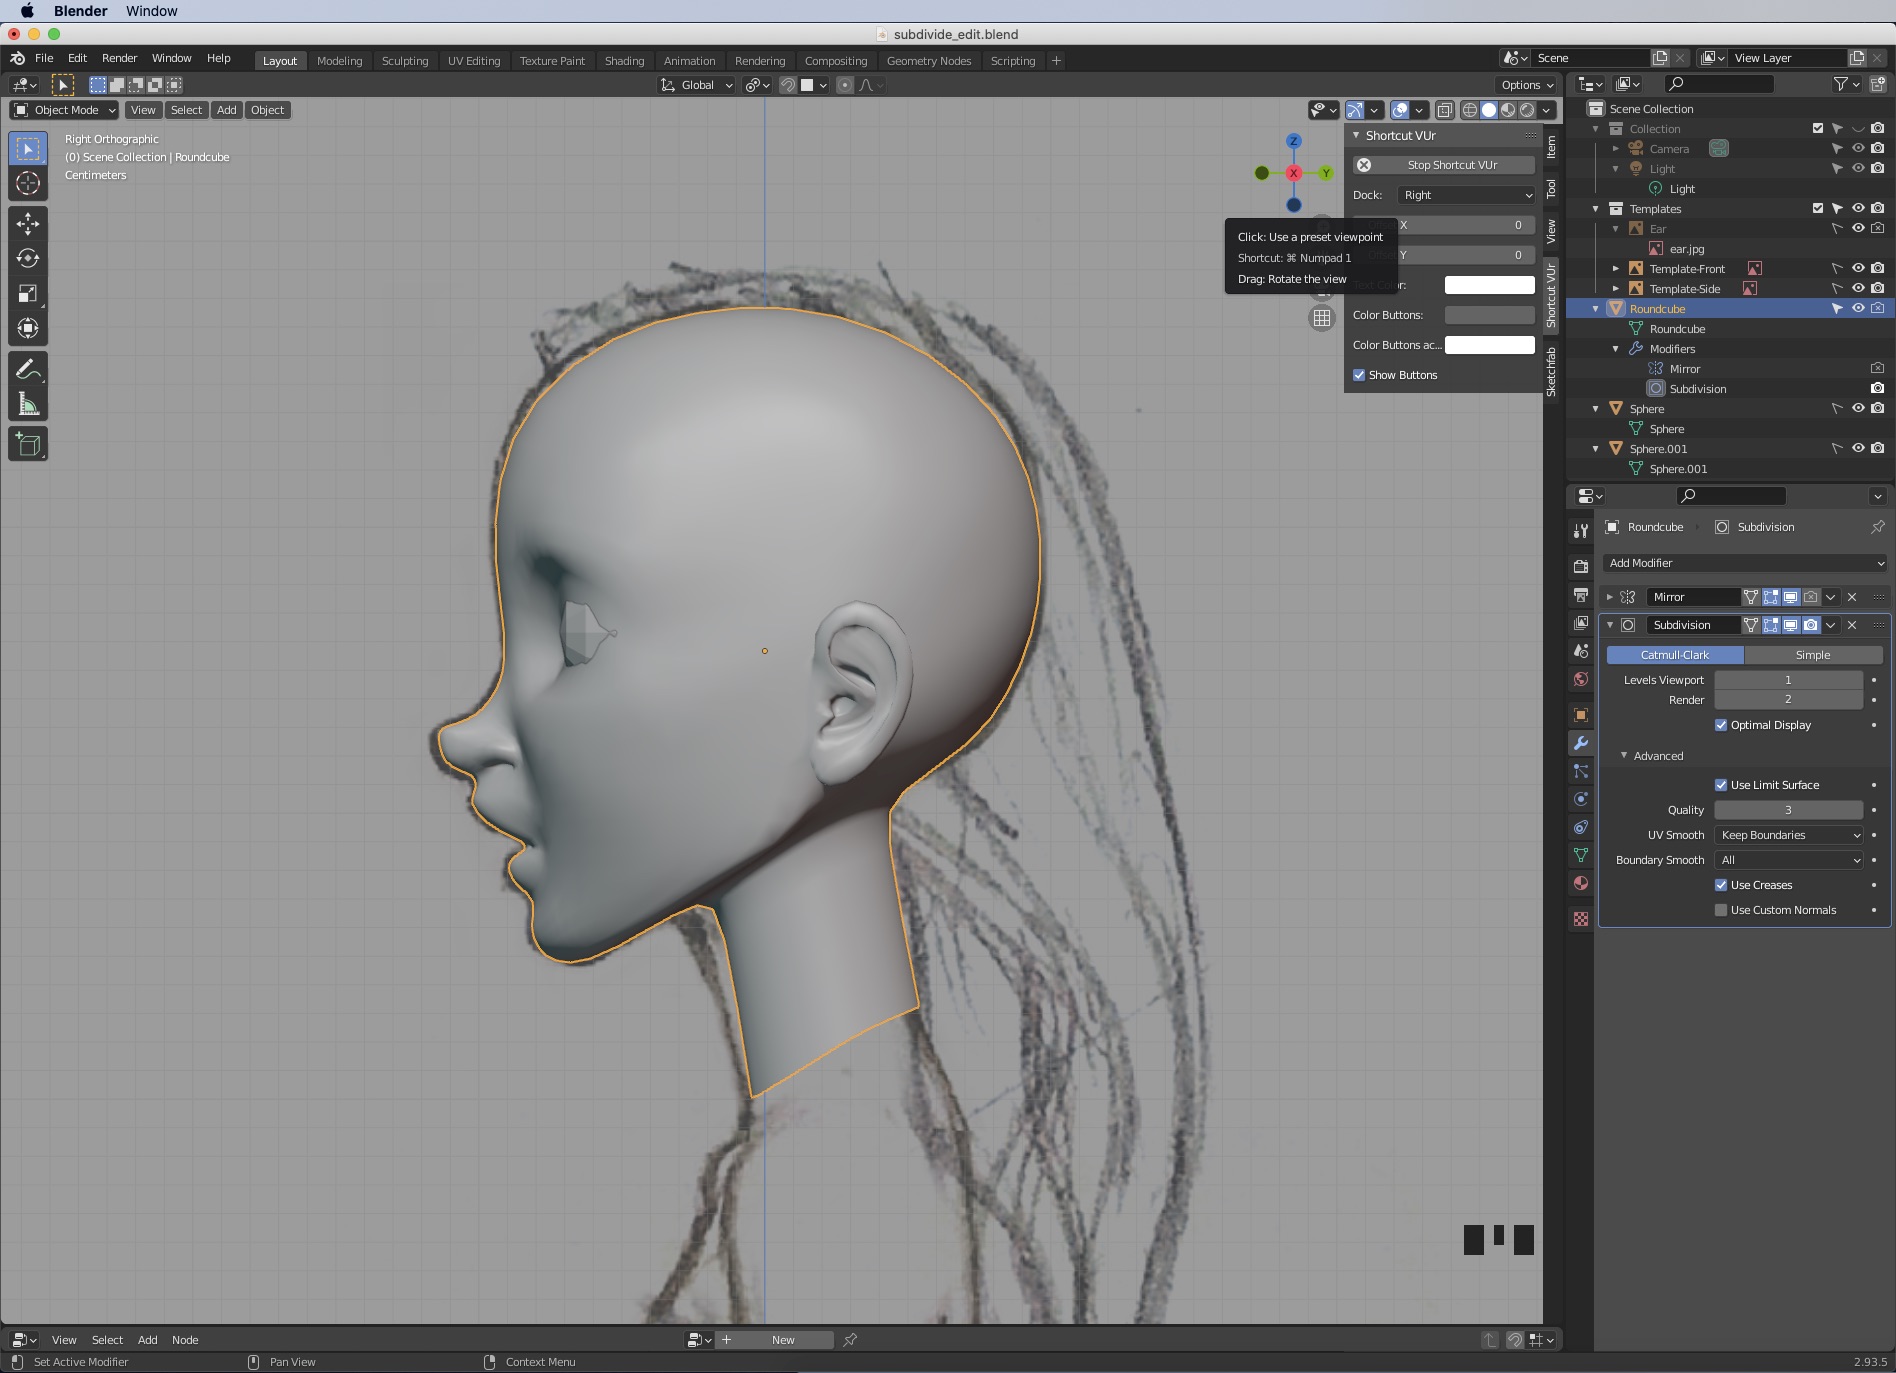 Twitter
·
Twitter
·

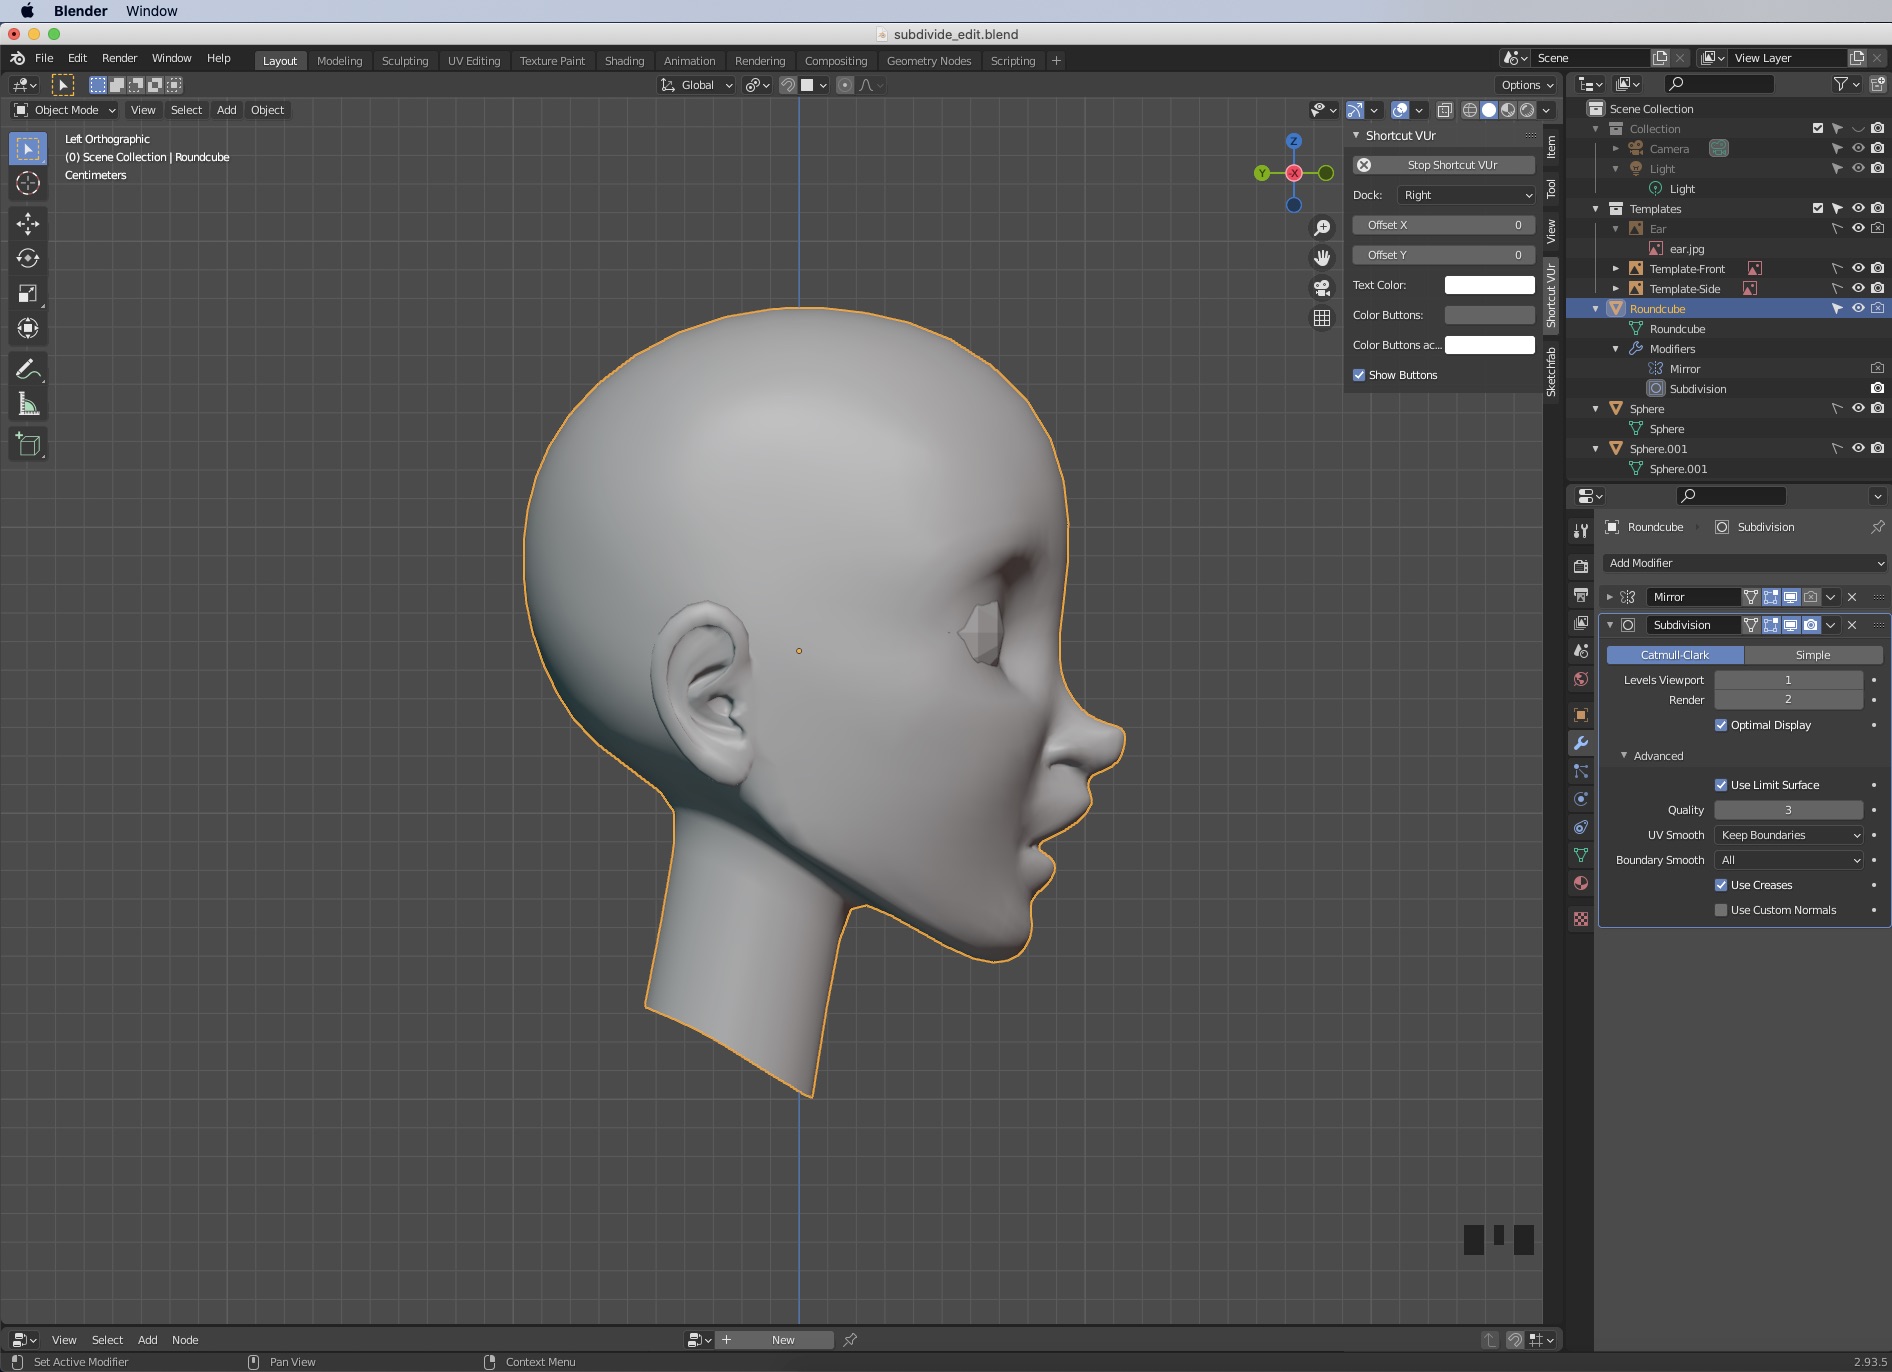

 long hatch
question, im new to blender and when i try to import a model its says invalid header. ;-; how would i go about not having this happen haha
quaint jasper
what file type are you trying to import ?
long hatch
fbx
quaint jasper
Any idea if it came from maya ?
long hatch
idk who that is i got it from sketchfab
thin shadow
that maybe the difference between fbx binary and fbx ASCII. Im not sure which one, but blender can only open one of them.
long hatch
am i able to change it?
quaint jasper
long hatch
am i able to change it?
You'd have to download the official fbx converter from autodesk and run your file through it
 solemn ruin
I love not knowing how to use blender
