#3d-modeling
1 messages · Page 110 of 1
 tardy rapids
though honestly, this issue is kind of a good thing. it made me look closer at all my shapekeys for the mouth
I got some really bad distortion happening in places
 runic nymph
distortion as in polies going everywhere and it looking like a hay stack? 
tardy rapids
Nah, there was a small group of polygons I added to fix some weird shading distortion I was getting on the upper chin
but I forgot to edit all the shapekeys to reflect it
tardy rapids
WOO
okay
I just copied the skinned mesh renderer from the new mesh to the old one
and that just works
thank god
I could NOT handle sitting around for another half hour copy pasting components
Never mind
didn't actually work
welp, here we go again
 tough plover
tardy rapids
I could NOT handle sitting around for another half hour copy pasting components
tough plover
tardy rapids
I could NOT handle sitting around for another half hour copy pasting components
that's why you use Pumkin's avatar tools to do it automatically
tardy rapids
This is pretty much my vibe when remaking an avatar because of something I only noticed was an issue once I loaded the avatar into the game
Composed by fizzd
Vocals, vocal arrangement, and mixing by Yeo (https://soundcloud.com/snackswithyeo)
Lyrics by fizzd & Winston Lee
Intro sample by Picto (https://soundcloud.com/itspicto)
Lyrics inspiration from Leong Wai Yin (https://www.facebook.com/LWYart/photos/a.1649337965317495/2538633923054557)
Art by Daniel Wong (https://www.instagram...
Well, once again, it's a good thing
turns out, avatar wasn't in t-pose
and the jaw bone was down, which explains why her face was so long
 glad agate
can someone help me with creating vertex groups? I wanna decimate my avatar in blender but I dont wanna mess it up.
runic nymph
you press the plus in the vertex groups list, name it, then go into edit mode on the mesh, select the verts you wish to be in it and press assign with that vertex group selected
glad agate
is it okay if i screen share and you tell me what to do?
runic nymph
can't do that right now, no
glad agate
hmm
glad agate
runic nymph
you press the plus in the vertex groups list, name it, then go into edit mode on...
I need to decimate my avatar, but it always messes something up ... people told me its because it decimated seams. I dont know which part of my model seams are or what even seams are in general. I dont even know how to put them into vertex groups.
runic nymph
seams are lines marked on the edges of the avatar that determines the way the mesh gets "unfolded" for textures to work, decimation changes the mesh, it gets "unfolded" differently now, but the texture stays the same, and that's why it no longer looks right
glad agate
how do I put them into vertex groups?
runic nymph
theyre marked as red lines on the mesh when you go into edit mode, you can select them and add them in like i described in the first message
glad agate
I have no red lines
 glad agate
yea but where are the red lines?
runic nymph
there are none, means its not using any custom seams, but there are still default seams
glad agate
where?
runic nymph
it doesn't look like the texture has much details, you could probably re-unwrap it after decimating
that would be easier
decimating the face and hands is not recommended, so that only leaves feet and hair after decimating the clothing, im not sure how well you can preserve those parts to work with the textures
i dont have much experience in decimating 😅
glad agate
runic nymph
decimating the face and hands is not recommended, so that only leaves feet and h...
the clothing was attached to the model by default
runic nymph
um, okay
 unique sigil
I need vrc_scenedescriptor or vrc_avatardescriptor but im not sure where to find those
Can anyone help me?
 ebon crater
Assuming you already have the SDK package installed, go to your avatar in the inspector panel and hit "Add Component", then search "VRC Avatar Descriptor"
For the scene descriptor, add it to an empty gameobject
If you need the SDK, you can find it here:
https://docs.vrchat.com/docs/setting-up-the-sdk
VRChat
Requirements We're going to need a couple things before we can get started. Current Version of Unity. We strongly recommend using Unity Hub, available on that page.VRChat SDK - See the Choosing your SDK page to see how to choose the correct SDK for your use. Step 0 - Installing Unity Check the Cur...
unique sigil
ebon crater
Assuming you already have the SDK package installed, go to your avatar in the in...
Oh ok ty i shall try that another time
tardy rapids
retopo suuuuuuucks
There's a model I made a while back, first one I ever made
actually super proud of it
BUT
I didn't know edge creases were a thing at the time
so I just used loop cuts to define edges in subdiv
so so far, starting with the shoes, I've gone from this

to this

I'll need to fix UVs later
but it's going well
tough plover
@tardy rapids after using subdiv, are you going to bake a normal map or try use it as-is?
tardy rapids
I already use subdiv, this was the result
this model WAS done, but
It came out as a bit of a mess, as you can see by the topology comparison
I'll need to completely redo the UVs, too. Which is 100% for the best.
I didn't even use UV seams. I made every detail a different material
100% unusable for VRC
tardy rapids
Around 78k tris
 foggy granite
That’s not a bad start
tardy rapids
Just fixing the shoes has me at 68k now
tardy rapids
I was hoping for some advice with texturing
When you all texture (anime-styled) models, how do you texture shading?
Where is it appropriate/where should it just be flat colors?
 thin shadow
tardy rapids
When you all texture (anime-styled) models, how do you texture shading?
thin shadow
tardy rapids
When you all texture (anime-styled) models, how do you texture shading?
a flat colored avatar may not look appealing,
because in vr, it doesnt give that illusion of volume and space.
in my case, in vroid, the template they gave already has those creases and shadows on the texture, i just have to recolor or redesign it.
however, in other cases, it may be good to bake with ambient occlusion included in the baking
 thorny ivy
Kaman, a trick I've figured out for making slopes/anything that gradually gets smaller/larger in one direction is start with basic shape (IE: rectangle), get it to roughly the length you want, and then add cuts/loops to reach the desired curve.
Might not be the cleanest but a solid way to get uniform shaping.
 neat viper
tardy rapids
When you all texture (anime-styled) models, how do you texture shading?
neat viper
tardy rapids
When you all texture (anime-styled) models, how do you texture shading?
vv much depends on the artstyle you're going for, i.e more realistic or toony - something like Poiyomi's shader or some other toon-like shader could def work with flat colors?
obv can work with a lot more than just flat colors too lol
neat viper
send a screenshot of the viewport? o:
 mellow cloud
blender is not opening now
its litarly doing nothing
@neat viper i broke blender
litarly
neat viper
Wait a bit, Blender can take a while to load
 neat viper
Close that tab, then launch Blender again
neat viper
not super sure, sorry - check to make sure that Blender isn't open in the background already?
mellow cloud
nope
someone must of slamed a slim jim into my laptop last night]
@neat viper accauly my laptops been acting up since this morning
so no suprise blender broke
thorny ivy
mellow cloud
<@!410315851871551488> accauly my laptops been acting up since this morning
Shut down, let it be for a bit, then restart.
Might help with whatever issues it's having right now. But if they persist, might wanna get it checked out.
foggy granite
What was taking up most of the poly count
 spiral sigil
Learned UV mapping and kinda how textures work in Blender, pogger champ?
 neat viper
nice! o:
spiral sigil
They're just basic blocks but honestly I'd eat them
I'm gonna try to give something simple like a minecraft player armature
spiral sigil
I watch these tutorials and it's either they start with using some human template and deleting 90% of the features while explaining nothing about why what's wherever, how to bones themselves work, and if they do take a slow manual approach it like, hardly works for some reason, probably because of there being different versions? I'll just wing it until I find a good solution on my own
foggy granite
Armature is funky finding tutorials
But if you looking for extremely simple rig you can use the rigfiy addon and spawn in the basic humanoid rig
thorny ivy
Totally redid the blade's mesh, was not happy with how it turned out. Too round and just weirdly-shaped to look good up-close. Took a entirely-different approach with making this version, think the results are infinitely better + way less geo overall.

@foggy granite Did some edge creasing too, how does it look this time around?
foggy granite
thorny ivy
<@!440731114307452928> Did some edge creasing too, how does it look this time ar...
Nice job it is looking more like common dark ages sword
 prime nexus
is there a way to make mesh disappear in a shapekey?
 obsidian nova
Not that I know of, but you could always just add an “active” off animation to your animation once you import it into Unity.
 azure rain
prime nexus
is there a way to make mesh disappear in a shapekey?
azure rain
prime nexus
is there a way to make mesh disappear in a shapekey?
doing that would still have it rendering the mesh
prime nexus
oof alright thanks
azure rain
and it would also be having to run you blendshape calculations on your props every frame whereas using an animation to turn off the mesh render actually has it no longer rendering
 unborn acorn
 unborn acorn
foggy granite
Should give him like a mini logo on his chest plate
unborn acorn
foggy granite
Should give him like a mini logo on his chest plate
planning to add more details later on
neat viper
vv cool! o:
unborn acorn
foggy granite
Any props planned
a sword
foggy granite
Sword and sheild combo would be nice
 foggy granite
I was getting kinda dark knight vubr so yeah that make sense
But yeah I’m interested and seeing how the props turn out
tardy rapids
What was the beginning and now is the end of the Emi retopo project is done; with the shoes completely finished and the UVs not just fixed, but completely improved.
 foggy granite
Nice
 split aspen


 tardy rapids
Decided to bake AO maps on the model I remade
tardy rapids
Final counts:
Polygons: 78k to 61k
Materials: 15+ to 4
Meshes: 8 to 1
Self-satisfaction: 3 to 9/10

I also added full blender IK in case I ever decide to use her for stuff in blender
 modest shell
i was making a blender edit and all my visemes are now exploding, do you guys know why this happened or how to fix it?
 quaint jasper
on your face ?
modest shell
no on all the body
 ionic summit
Do you guys know how to avoid that an object gets back to its original scale/position after I merge the armor with another one?
tardy rapids
Also got some eyebrows hidden away. Gotta see if I can get them to render over the hair and hat
 foggy granite
Hmm
ionic summit
Thanks, will try that!
tough plover
modest shell
i was making a blender edit and all my visemes are now exploding, do you guys kn...
if you changed some of the geometry, you most likely will fuck up the shape keys.
to fix issues of shape keys affecting parts of the mesh they should not, select the vertices that are moving but should not (like the body in this case), have the Basis shape key selected, and use Vertex > Propagate to Shapes
modest shell
normally i would agree but this wasn't a light movement ... it just made the model fully explode. every verteces were getting pulled in a direction very hard. I redone the model and it's not occuring anymore.
quaint jasper
If it was just the body then shape propagate would have solved it
It just means you edited the mesh that had shapekeys, and doing that is a nono
 zinc jolt
Hey guys
So basically I found something
It's 63,640 polygons total as well
Called Geist_max8
It's about $15 on sale
And it's by the creator of Five Nights at Freddy's, Scott Cawthon
foggy granite
What about it

Geist_max8 3D Model available on Turbo Squid, the world's leading provider of digital 3D models for visualization, films, television, and games.
zinc jolt
Yes
 limpid skiff
I am looking to hire a 3d artist experienced in making avatar clothes.
It is a complicated design but will be well drawn in a formal character sheet.
Please DM me if interested.
 sand sapphire
ionic summit
Do you guys know how to avoid that an object gets back to its original scale/pos...
sand sapphire
ionic summit
Do you guys know how to avoid that an object gets back to its original scale/pos...
When you make that change, there’s a small window on the bottom left corner of your screen (it will disappear if you click anywhere else so be careful of your movement) it will be a window that is specifically related to the most current change you did. It will have a box that says “apply transformations” and you can change that, when you do, there will be an immediate visual change to know you did it correctly
ionic summit
Will check that as well, thanks!
tough plover
limpid skiff
I am looking to hire a 3d artist experienced in making avatar clothes.
It is a c...
may be best to head over to VRC Traders linked in #community-servers-old for commission work
tardy rapids
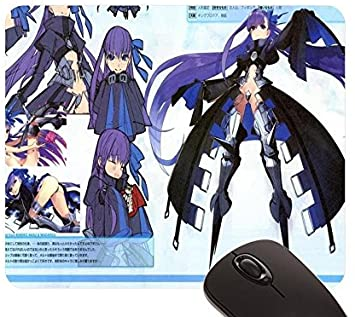
Well, filling out my portfolio. I now need help deciding who I should start with of these four
https://twitter.com/Kamanira/status/1406980833156767745

You thought my work couldn't get hornier without being NSFW?
YOU UNDERESTIMATE MY POWER WHILE CCC EXISTS

 Twitter
·
Twitter
·

 foggy granite
Them arms look fun
tardy rapids
Passionlip (Top left) will be a challenge due to the detailing on her hands (but much easier to weight)
BB (Top Right) should be relatively easy aside from her leggings
Meltryllis (Bottom Left) is the same as Passionlip, but her legs instead of the arms
Kingprotea (Bottom right) is just asymmetrical texture hell. Also really, REALLY big.
Like
Massive

Which I probably won't be able to translate into VRC, but still
foggy granite
Which one you planning on work on first
Top left seems to be the easy since you can just cut out the design of leggings or trace over it and put on top of leggings texture
tardy rapids
Yeah, that's the plan
and I mean hey
I won't need to do too much crazy hand-drawn texture stuff
the original models had hand-drawn textures because it was on PSP
but now that I've realized normal maps baked from sculpts exist...
Should make things easier
Yep, gonna start with Passionlip
Also AO maps
neat viper
This isn't the place to advertise services, I'd recommend looking into VRCTraders or https://ask.vrchat.com/c/commissions/world-commissions/34 instead c:
 unkempt lynx
👍
 haughty gate
Hello, lads, I am creating my first avatar and am just about ready to die. Any one have any idea why when I weight paint on a bone, patches of weight will appear on different bones even though I didn't interact with them at all? Anyone had this issue? I swear I have it every time I attempt this
 tardy rapids
haughty gate
Hello, lads, I am creating my first avatar and am just about ready to die. Any o...
tardy rapids
haughty gate
Hello, lads, I am creating my first avatar and am just about ready to die. Any o...
Unless you selected another bone, the weight should only be on the bone (which going by your screenshot, it's still weighted to that one bone)
Likely answer: your weight paint was slipping over to the other polygons by accident
tough plover
I think the issue is that they have X mirroring on, and are accidentally drawing over the hand on the other side of the body

causing it to be mirrored to this side
solution: select the area you're trying to weight paint in Edit mode (xray helps), then switch back to weight paint mode and enable vertex/face selection

that will limit your ability to weight paint to the part that you selected
haughty gate
tough plover
I think the issue is that they have X mirroring on, and are accidentally drawing...
The hands are actually separate objects and aren't being selected at the same time. I'm isolating one hand at a time. They aren't mirrored and X-mirroring is off in the weight-paint options. Thanks for the suggestion though - this shit is mind-numbing.
tardy rapids
So goddamn massive I had to pretty much take up the entire front of the chest and make unique topography. Goddamn.


This character
haughty gate
Damn my girls gonna have some back problems haha
neat viper
rule 3
haughty gate
Would you really count that as NSFW? It's just the topology of the model
tardy rapids
I don't see anything NSFW here.
neat viper
I definitely would count it as NSFW, the rule itself states that If you have to ask, it is probably NSFW.
tardy rapids
Eh, it's model topology. If I'd done something actually NSFW like having nipples slapped on, then yeah, 100%
 tight quartz
🤔 Reason for it to be doing this in Unity?
 quaint jasper
your normals are flipped
quaint jasper
edit mode, alt + N
quaint jasper

tight quartz
Ty. :3
 lime vector
Is there any way I can ask someone who is extremely knowledgeable in blender to help me understand issues I'm having with a model I have in blender? I really could use the help if anyone would like to be in a call
thorny ivy
lime vector
Is there any way I can ask someone who is extremely knowledgeable in blender to ...
Well, that depends on what said issues are. Different people know different things so giving us some basic info would help figure out who can actually give you a hand.
lime vector
thorny ivy
Well, that depends on what said issues are. Different people know different thin...
ok so I commissioned for a model which is finished. the only thing I need to do is set up for bones and facial tracking I'll be using for it. The issue is when I open the FBX file on blender, all the textures come out black, except for the skin and eyes. I don't really know how to fix texture issues. I was viewing it in viewport shading mode. and I tried to maybe adjust the alphas or whatever. but I noticed the material ball is black also.
it looks like this
thorny ivy
Hrm, that makes me think the textures might just be missing. Depending on how the maker set things up, Blender might not know where the textures are but know they do exist; hence the black.
Alternatively, the viewport color for the afflicted material might be set to black; seems to be an issue with imported models.
lime vector
oii... how can I apply them? the material balls are blank. and I try to do the open new image texture I dont think worked for me
the viewport color? ok lemme see
is that this area?
 thorny ivy
Honestly, I'd contact the maker and see if they can actually send you a proper package. Seems bad practice to make you go through all this effort for something you paid for.
lime vector
ok ok thank you, I will try contacting them. Thank you cinna
thorny ivy
Welcome! My knowledge is fairly limited when it comes to material-based stuff but yeah, just seems like bad form to send a semi-functional model.
lime vector
yeah, hopefully they can help fix the issue because I'm confident in rigging the rest of everything in unity and stuff. Learning blender and unity is just alot for me ;-;
quaint jasper
 lime vector
oh ok it says I'm missing some of those textures... I am gussing they didn't send me the texture files for the FBX file and only for the unity file
thank you, I'll ask them if they can send the missing files
 slim robin
Don't know if here is a better spot to ask this. Trying to export my model and rig from Blender using CATS but it's throwing this error. Not sure how to resolve.
 tough plover
slim robin
Don't know if here is a better spot to ask this. Trying to export my model and r...
tough plover
slim robin
Don't know if here is a better spot to ask this. Trying to export my model and r...
if you are using blender 2.93, don't
either use 2.92 (will need to grab it from the archive) or use 2.83
tardy rapids
wip of big booba lady from Fate

 still wadi
@lime vector sorry but seems like u got ripped off
@lime vector no proper modeler would give u an unfinished model or u just ordered something u had no idea about
still wadi
 spiral sigil
Hello
Wondering if anyone can help me
Does anyone know where to get the VCR_Avatar Descriptor? I want to add like weapons onto my avatar
Or is there some other type of way to do it?
tough plover
spiral sigil
Does anyone know where to get the VCR_Avatar Descriptor? I want to add like weap...
the avatar descriptor is required for uploading any avatar. you just need to have the VRChat SDK imported
for weapons, you would just drag them onto the hand in the hierarchy, and enable/disable the gameobject using animations
spiral sigil
tough plover
the avatar descriptor is required for uploading any avatar. you just need to hav...
The VRChat SDK importer has the VCR_Avatar Descriptor?
tough plover
the avatar descriptor component comes with the SDK, yes
spiral sigil
tough plover
for weapons, you would just drag them onto the hand in the hierarchy, and enable...
There’s like so much videos on YouTube and in their menu they have VCR_Avatar Descriptor
tough plover
it's VRC, not VCR...
spiral sigil
tough plover
the avatar descriptor component comes with the SDK, yes
Where can I get the SDK Importer
 echo hatch
Hm
spiral sigil
tough plover
it's VRC, not VCR...
Right sorry
tough plover
that's not what I said, I just said "VRChat SDK"
you get that from the vrchat website after logging in, in the "Downloads" section
spiral sigil
SDK2?
tough plover
make sure to download the 3.0 SDK for avatars
spiral sigil
This avatar uses SDK2
tough plover
there is nothing specific about a model that makes it SDK2 or SDK3
spiral sigil
So I download the 3 then
tough plover
first though, do you already have the 2.0 SDK in your project?
spiral sigil
No
tough plover
alright, then yes, download the 3.0
spiral sigil
Ok
I’ll see what happens, for now thank you
@tough plover this is what I’m looking for

 austere gorge
I have a small question in material viewer this occures in blender any reason this happens?
 tough plover
@spiral sigil also, move to #avatar-help
lime vector
still wadi
<@!293436820534984704> no proper modeler would give u an unfinished model or u j...
They responded and told me its because since it was on another blender program the textures will blacken and I have to manually load the textures but I don't think I've had that issue with other models before when using blender :c
foggy granite
Did they send it to you as fbx
Or obj
Because when you import those the textures automatically apply
still wadi
@lime vector even besides that is it rigged ? does it have facial emotes ?
lime vector
still wadi
<@!293436820534984704> even besides that is it rigged ? does it have facial emot...
it has emotes, I picked their non rigged option because I'm confident I can rig and add dynamic bones myself. They gave me the full unity package along with the FBX file with textures but I think I'm missing textures. I was just going to export it as a humanoid VRM and just throw it back into blender to make the facial keyshapes for my iphone tracker but I couldn't because they didn't add any bones so I can't change the rig type to humanoid. I assumed the package atleast came with bones and not rigged but I suppose that's a part of the rigged option.
They live in a different time zone for me so I have to wait 12 hours for responses unfortunately. I've been trying to figure out the texturing but I really just cant lol
still wadi
i see
foggy granite
So it’s a scenario where you’re hands are tie for now
lime vector
si si
foggy granite
I would so another scan of the model and note any other issues so we you get in contact with the commissioner he can fix it
lime vector
Yes thank you for the advice I appreciate it 💖
tardy rapids
Current plan is to pretty much just model the straps, shorts, and heels, and then just texture everything else onto the body, since most of it's a skin suit


Actually, might model the black parts of the clothes as part of the straps
foggy granite
Honestly, would it be better to have the hands as a toggle
And just activate it on and off when need
quaint jasper
still wadi
https://i.imgur.com/wM3mciz.png
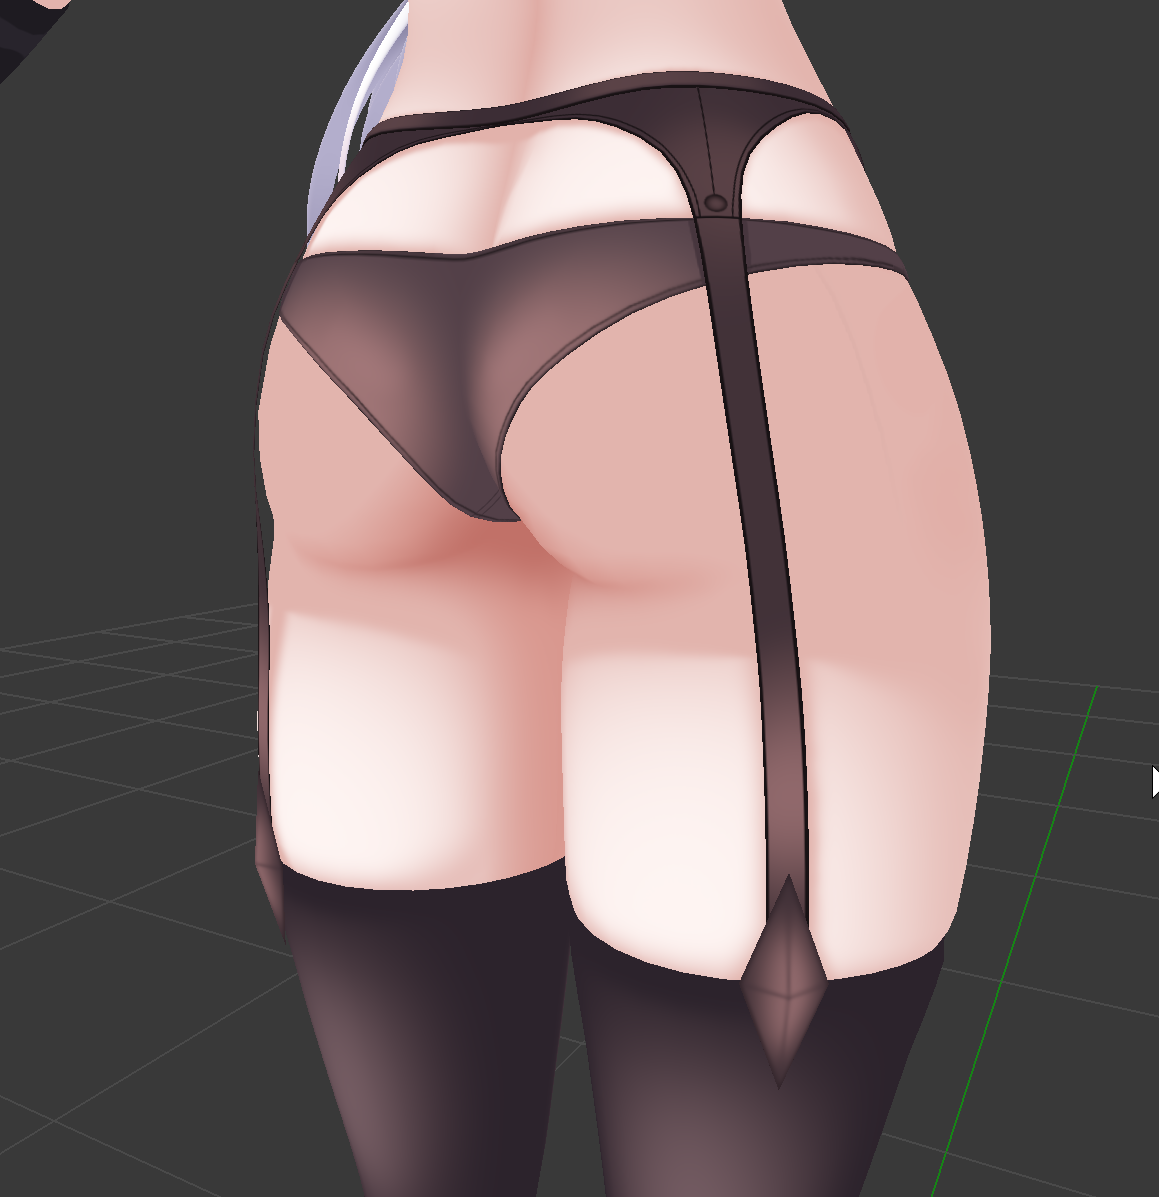
I don't think I understand that shading, where is the light meant to come from ?
foggy granite
i say its a decent start but been a while since made head
 still wadi
@quaint jasper oh here https://i.imgur.com/4obhmtI.png
 quaint jasper
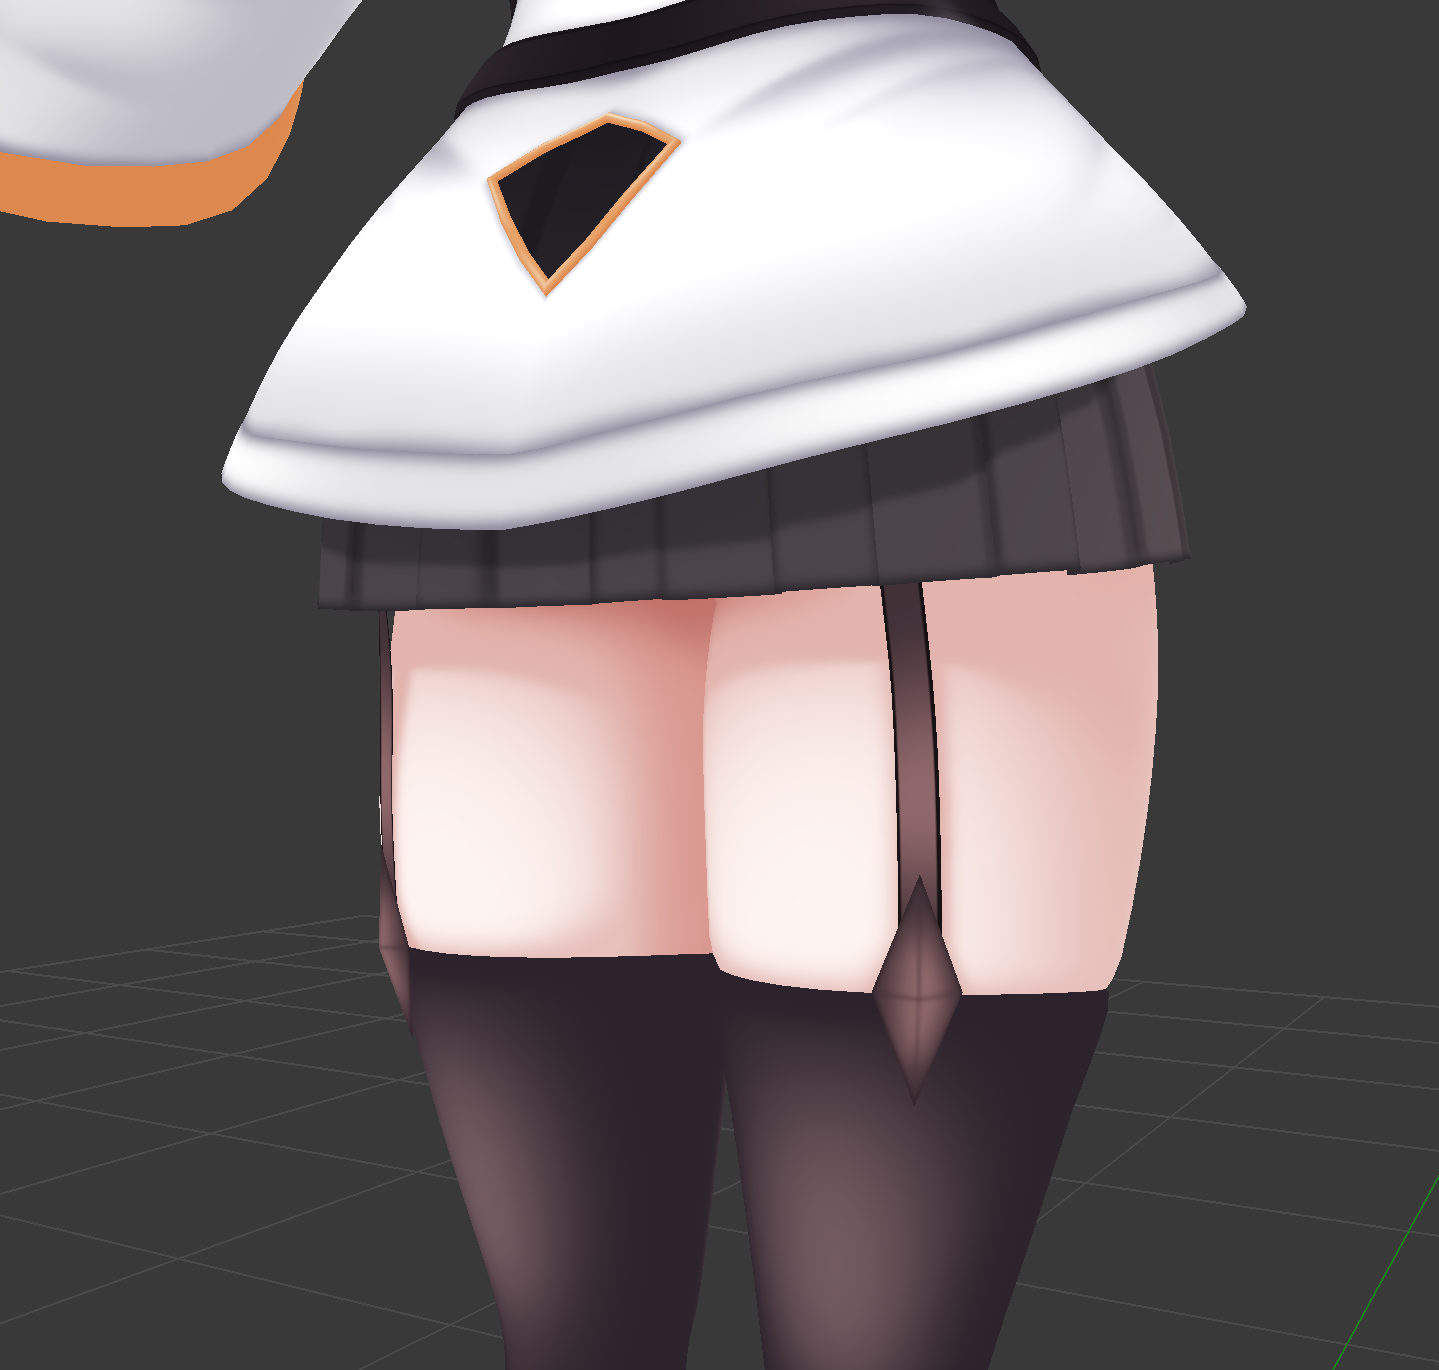
Ah, that was just to show the ass, got it
still wadi
u can delete if it's toomuch
quaint jasper
u do it
still wadi
no u
thx
u just needed some time to save it
i understand
wanna see whole model ?
quaint jasper
If it's clothed yeah
still wadi
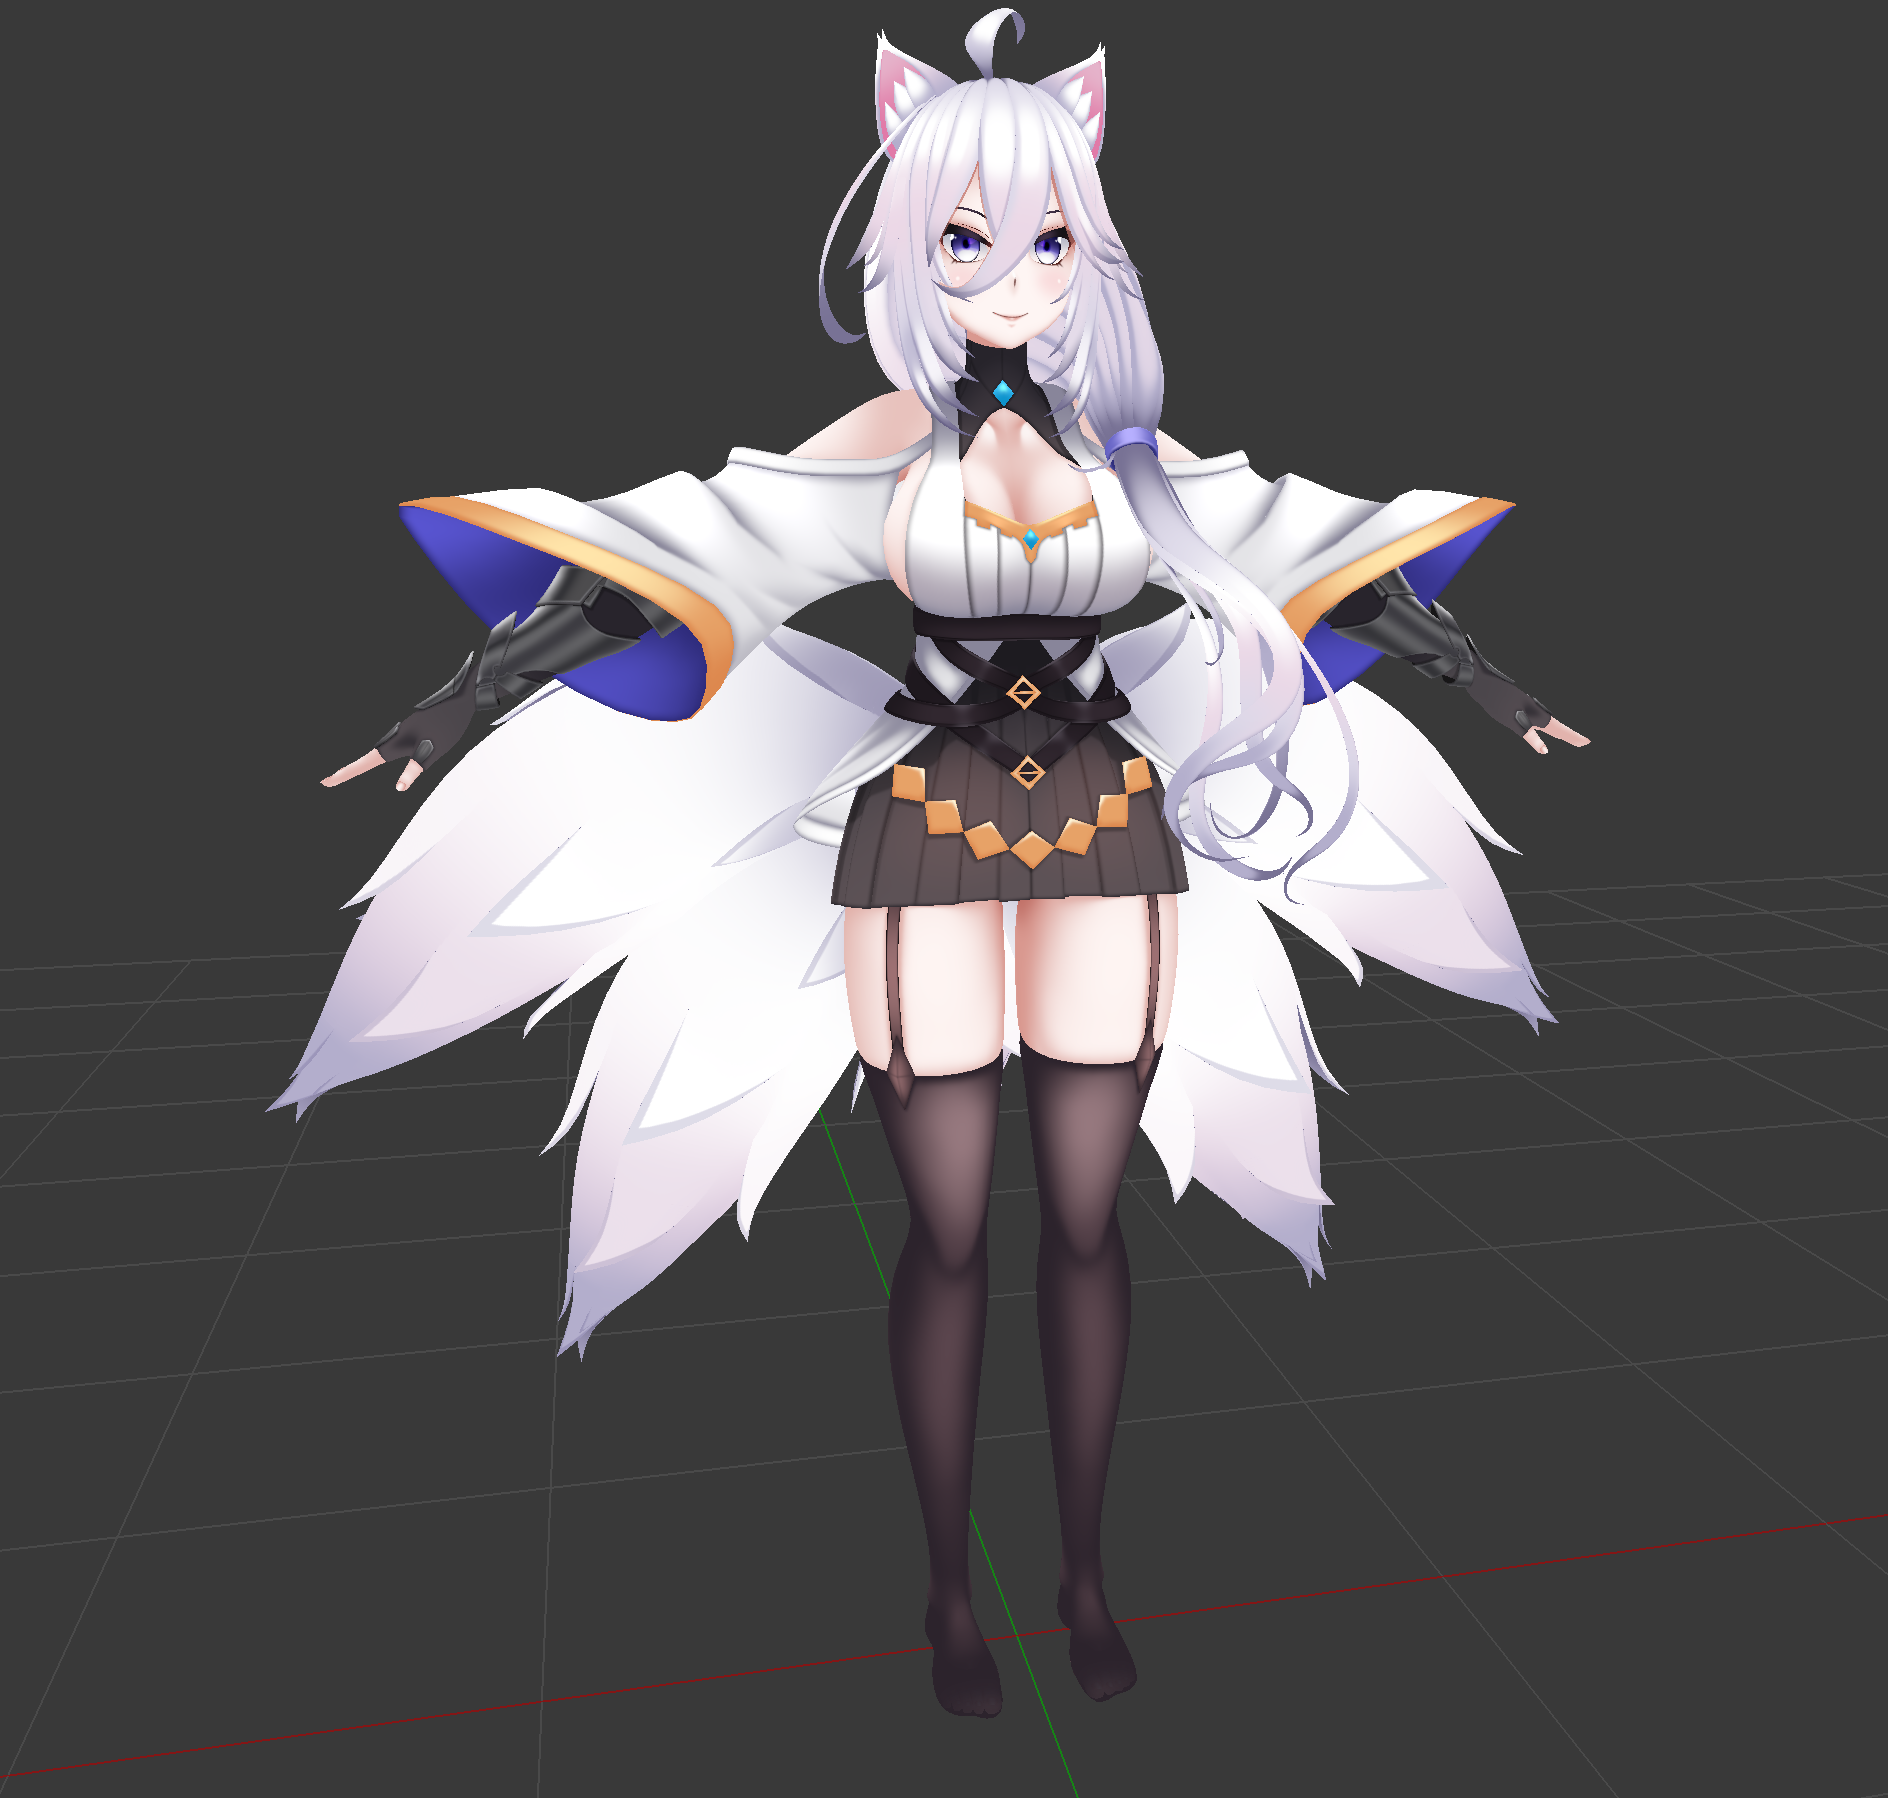 still wadi
tuft shadows ?
quaint jasper
the tiny hair spikes
still wadi
oh yea
quaint jasper
Neat
quaint jasper
Yeah i've seen those on your twitter, looks great, surprised you didn't get a lot more attention for that
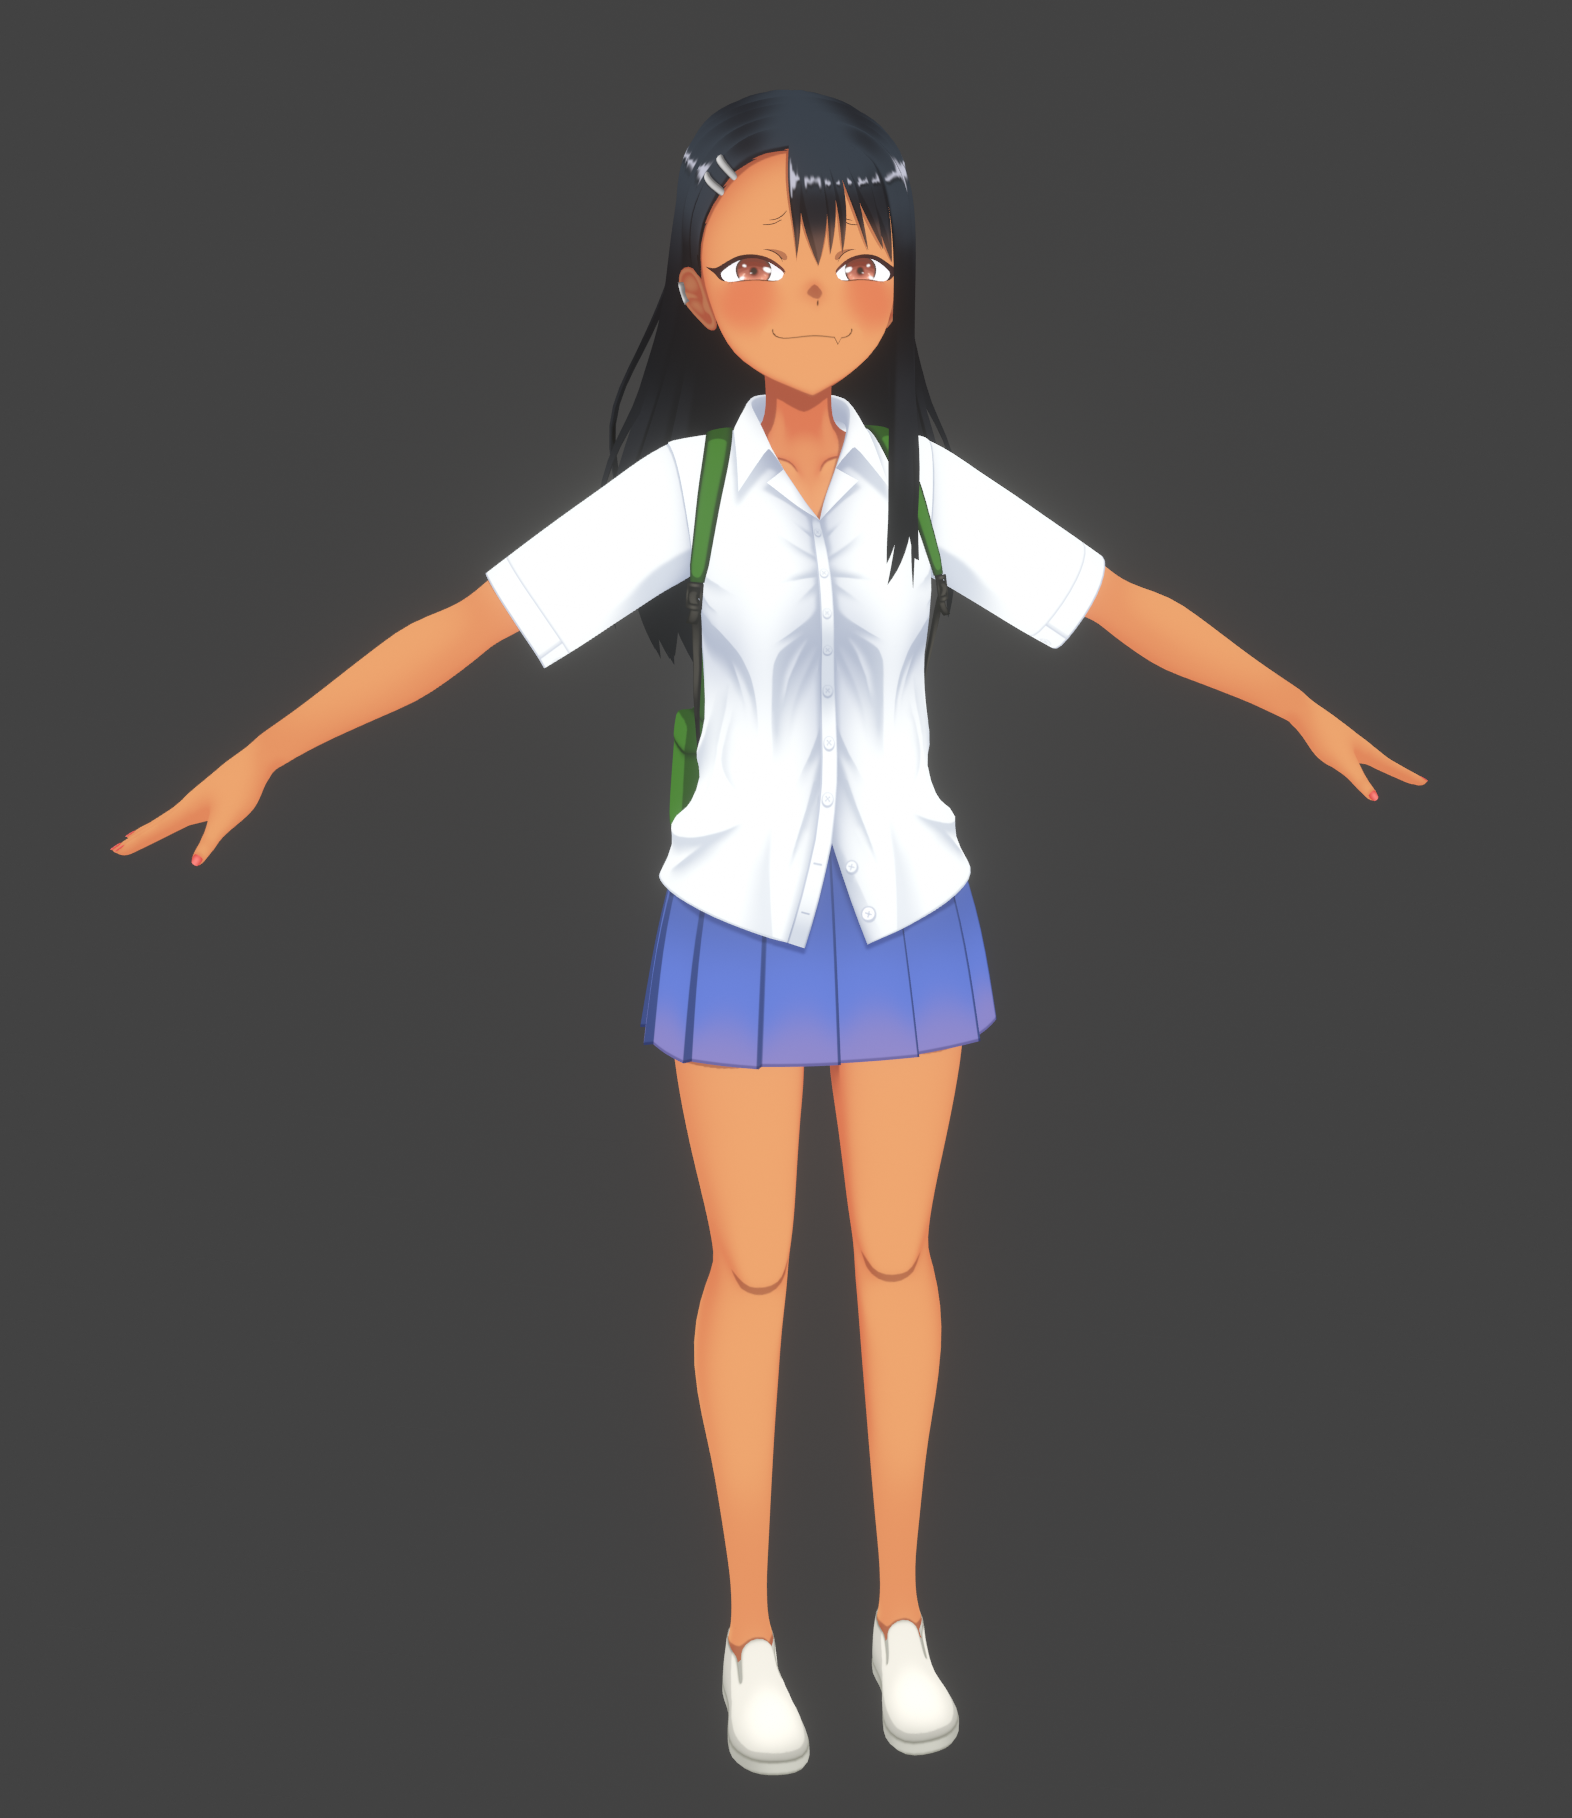 quaint jasper
yeah, i feel like you even posted it here
still wadi
hmm
still wadi
yee thanks
quaint jasper
I'm guessing you have no plan on making the MC as well ?
quaint jasper

 still wadi
ye ye
 foggy granite
At least it's not overly sized eyes
tardy rapids
someone say oversized eyes?
 foggy granite
Oh no
tardy rapids
Joke, the real update
 austere gorge
I managed to update an old model but due to the long time it took for me to update this model (was originally for sfm) I kinda want to try and get this in vrchat though i need to relearn bones and a small error i need to fix on the hair but im happy with the progress.
 austere gorge
well idk tbh i use a quest but run off PC vrchat. if i can get help fixing the problem in relearning the weights for the dress to go with the legs and the weird jank in the hair when i mirrored it. once i get it done for my personal use i may consider getting it working for quest. but not sure how much extra work that will require.
 lime marlin
Made eye generator in substance 😄

 foggy granite
Looks good should look even better once you get the texture on
And also I think some straps would be a nice addition
tardy rapids
Yeah, might add a strap at the top
tardy rapids
 tardy rapids
The current state

 languid fog
tardy rapids
**Forehead**
languid fog
tardy rapids
**Forehead**
Sometimes, the head is so fckn big that you cant even think on a way to do the hair properly
tardy rapids
More often than not for me, it's a case of there being too much hair and not being able to tell where the head ends
languid fog
Yeah
languid fog
tardy rapids
The current state
Looking good, just the hip is kinda weird
Dunno if it is the perspective
tardy rapids
Yeah, the hip is weird. Really flat.
Doesn't matter now though, it was just a placeholder until I did this.
 tardy rapids
slight shape change
 foggy granite
Where’s the change
tardy rapids
Bottom of the pants turn inwards a bit more sharply towards the center so there's less clipping
foggy granite
Oh I see it
tardy rapids
original model vs mine without the hands (with obviously super wip textures)

 merry vault
Sus Index

 quaint jasper
You're remaking an existing model side by side ?
tardy rapids
Yep
I'm pretty much just treating it as a reference like you would any reference art
tardy rapids
Well, you're not wrong.
But just for reference, I don't usually do this kind of '3D tracing'
It just comes down to there being 0 decent concept art of the character. Almost all concept art of Passionlip has different proportions
That said, I have done work without any proper references
The Emi model I did, and the Me!Me!Me! model I made were mostly interpretation
The Me!Me!Me! model was made using official concept art from Japan Animator Expo
The Emi model was made using screenshots from the 30 second animation TwistedGrim put out using the design
Of course I can't post either of these, because Me!Me!Me! is very much borderline NSFW, and the Emi video had its moments
thorny ivy
Ran into some issues with my avatar's chest geo.

She's well-endowed but the median looks... off with how it is currently.
Not sure how to make it feel natural.
tardy rapids
I'll be honest-- sometimes it looks more natural (if you're not looking too closely) if you make them clip into each other. Helps give them a more natural "squished together" look for clothing. At least in my experience.
 pallid merlin
I was wondering if someone could make me a avatar for free, should be simple
azure rain
unlikely to happen as Avatar making is pretty complicated and there's a couple of tools I can generate unique avatars easily you could use https://readyplayer.me/vrchat

Make custom full-body VRChat avatars from a photo with Ready Player Me avatar maker. Easy upload to VRChat – no Unity or Blender needed.
tough plover
pallid merlin
I was wondering if someone could make me a avatar for free, should be simple
nothing simple about avatar creation lol
only gets "simple" once you've been doing it for a long time
azure rain
and that gets more in the ballpark of just having lots of stuff you can glue together as far as "simple" avatars
tardy rapids
pallid merlin
I was wondering if someone could make me a avatar for free, should be simple
Head over to the VRCTraders discord and ask in the free avatar requests channel
The odds of someone taking the request if it has any level of complexity is low, but its better than nothing
After all, most people are there to make a living
 topaz reef
 tough plover
topaz reef
tough plover
topaz reef
very nice as always 👌
question, how are you doing the creasing? baked a normal map from a higher poly version with the details sculpted in? or are you using a brush/generator in substance
topaz reef
Baking yes
tough plover
alrighty, nice
 quaint jasper
How many poly does the low end up being ?
topaz reef
on the low 12k
tough plover
neato
quaint jasper
yeah for this much curve that's awesome
tough plover
did this with just a generator in substance, but I've also done baking before aswell

it's a bit harder to control this way though
so I may try to actually do it in blender and then import the normal map in substance
quaint jasper
It's more difficult to paint the normal ?
tough plover
it's not painted
it's like a noise texture projected in 3D
controlling the height
quaint jasper
Ok, so why not paint the normal directly in substance ?
tough plover
because I didn't know how to do that xD but now just thinking it through I think I got it figured out
I am still very new to substance
this is like my 4th project using it
I learn quickly
I could probably just create a new fill layer, disable all but height, and just use a soft brush to paint over a black mask

 tough plover
what are you using for these "renders"?
topaz reef
 tough plover
is this just in substance or?
topaz reef
tough plover
what are you using for these "renders"?
blender
tough plover
ah alright
topaz reef
idk how to use sb for that xD
quaint jasper
That's one large head
tough plover
I think it's just that the neck is short
topaz reef
😅 egg head
quaint jasper
yeah it looks great
 quaint jasper
Where the sharp edges at
 tardy rapids
any tips on how to change that?
tough plover
tardy rapids
Funnily enough, I do have creases on it
to make it smoother, try putting bevels on the top and bottom edges
spiral sigil
Anyone know how to create textures from scratch?
tough plover
spiral sigil
Anyone know how to create textures from scratch?
image editing program, or something better like Substance painter
make sure the thing you want to texture is already UV unwrapped though

 tough plover
no, it's very expensive, but it's free if you are a student
or even if you are not, you can just say you are a student
spiral sigil
Ah.
tough plover
👍
tardy rapids
I swear, these belts make everything look better

Just need to add to bit to the buckle
done
 tardy rapids
Oh god what have I done
the unwrap is boob shaped

A bit of strap detailing
NSFW filter
Most SFW one so far
o
k

I change the angle and show MORE BOOB
and its fine I guess
Discord filters am I right
anyways yeah
giving itmore of that "String attached to a strap" look
 thorny ivy
They secretly store her organs.
So much of the chest was enveloped, no other place to go.
On the other pole of the body, l e g g


 thorny ivy
I'll admit the base isn't mine, used Panda's, but I've put in a lot of work in altering it.
Haven't done a proper comparison in a long while though.


These pics alone should show just how much time and effort I've put in.
foggy granite
hmm
thorny ivy
The calves definitely had the most work done, can't look at any Panda avatar below the thighs because of how wrong the lower half looks to me now that I've noticed.
Used a combination of sculpting and bone rotating to align the leg more proper + give it a more natural shape as well.
Making significant changes to the toes as well. Making them larger, prepping them for claws, and also look more natural too. None of them even touched near the balls of the feet and looks just... disproportionately small.
Original model's toes.
 austere gorge
I'm having alittle issue with my model i have it converted to an FBX file for unity but now it removed my textures. I went to place textures back on it and not all of it goes back on the model not sure what happened here

 willow grotto
It's been a very long time since I last 3D modeled. I've been considering on getting back into it and wanted to give a try on anime-esque style! Any tips and critique anybody could provide me? Anything would be appreciated at this point, I'm struggling with the hair currently and can't seem to find a semi-decent technique for doing them.


 cobalt aurora
Sup guys, need a lil blender help
I got both my face and body from deviant art. I uploaded a few versions to vrchat and everything works fine.
Tho now that i try to merge the face and body mesh it messes up the textures (Applying eye texture to body or applying body texture to the face)
At first i though that this was a Blender bug so i tried it in unity and it doesnt apply the texture there correctly aswell.
If anyone knows what going on here, please send me a DM.
Thanks in advance!
tardy rapids
You probably had two materials that were named the same, one on each mesh
When you merged the meshes, one overwrite the other
tardy rapids
foggy granite
i just cant get over how ludicrous size them melons are
There is a story reason for her boobs being the size of a small planet, even if it is a bit weird. She's an AI. Her boobs are her recycling bin.
foggy granite
If that not some funky anime logic I don't know what is
tardy rapids
Her entire thing is kinda the destruction of data
She has an ability called "Trash and Crash"
foggy granite
Yeah that's fine it just gives me a quick chuckle every time I see them
tardy rapids
Where if she closes her hands together, everything in her field of view between her hands, regardless of size, strength, or distance, is compacted into a tiny cube
Think of it like crushing someone's head with your fingers, but it actually works
foggy granite
So she legit a combat recycling plant
foggy granite
The ideas people come up with never cease to amaze me
tardy rapids
Fate/Extra CCC was a particularly weird game
foggy granite
But don't seem dull if they coming up with them type of characters
Kamanira are gonna start working hands today
foggy granite
Alright
tardy rapids
Though, I'd really like to make Trash and Crash a thing using a shader
I've seen shaders do crazy things
Doubt it'd work though
Plus, I have no idea how to code shaders
foggy granite
Shaders are good looking but I have no clue about them ether
tardy rapids
Maybe if it was possible to make a shader affect everything only the user using it sees, and scales it down to a cube, it'd work. Not actually scaling though, just visually
foggy granite
Sounds like that would work a lot better in unity
tardy rapids
Well yeah, I mean for like
a VRC animation
If I wanted to do trash and crash in blender, I'd physically scale everything down
foggy granite
Yeah I see a mix of blendshapes and a lot of effects to get that to work
But besides that any shaders planned for body
foggy granite
Okay
tardy rapids
Doing some sculpting for normals


 tough plover
very nice 👌
tardy rapids
Okay, pretty much done the body. Just gotta do the upper straps, the pants textures, and some texture painting

then I'll finish up the head, do the hair, and then...
Hands
 oak notch
You're making progress, but don't beat yourself up whether you have to redo the face a few time
 tough plover
texture paint in blender is alright but substance is miles better lol
tardy rapids
I've always hand made UVs in an art program
oak notch
substance?
 tardy rapids
yeah, I can see that
tough plover
can do stuff like fabric textures in a few clicks
 tough plover
yea that's not gonna happen lol
their verification system is so bad, they like don't even check anything
you can send in a picture of a potato as your proof of enrollment and they will accept it
I've heard of a few people doing that
 wheat delta
now if Adobe actually made Substance part of Creative Cloud the package might be kinda worth it if you use it every day
 white moth
tardy rapids
I've always hand made UVs in an art program
white moth
tardy rapids
I've always hand made UVs in an art program
Oh god why would you do that to yourself. Blender is good for sketching things out, substance painter if you want a full layered photoshop/gimp level toolset to paint directly on models
 lone thorn
Hi, I'm very new to avatar creation and I'm working on my first kitbash model. I had to cut every piece in half to edit them in Blender, and now I'm at the point where I need to deal with some UVs that got messed up and mirroring to make it full, etc. I have no clue how to do this and would appreciate some guidance.
lone thorn
This is what I need help with. I really have no clue how to deal with UVs, and I'm very lost.
 quaint jasper
Why is half of the body missing ?
lone thorn
Because I had to edit it and it needs to get mirrored.
white moth
FYI there is a mirror edits toggle on edit mode to edit both sides of a model without needing to use a mirror modifier
lone thorn
I might know what you're talking about, but it didn't seem to do anything when I used it, so this is what I ended up doing. This is just how it is now, and I'd appreciate some one-on-one help since google and youtube tutorials haven't given me the information I need or understand.
 blissful ore
Anyone experienced with blender please give me a call or a message. Been trying to figure out how to change some shapes to put on a avatar but can't find out how it works.
Got a model from sketch fab and tried to make it fit in Unity but it breaks it and I have no clue on what to do when attaching it to my avatar actually
Just learned how to do clothes but this is way far out of my leage
white moth
lone thorn
I might know what you're talking about, but it didn't seem to do anything when I...
Yeah it can be finicky if the model is already slightly misaligned the mirror edit stops working as it does not find verts at the exact opposite location


 tardy rapids
 foggy granite
Oh a choker

 austere bolt
I made subway train model for world

 quaint jasper
Neat !
 tardy rapids
Final update for now. Taking a break because Burnout's starting to set in

 river tulip
Could anyone point me to start making things from scratch? A decent a tutorial video or tips?
 hardy salmon
river tulip
Could anyone point me to start making things from scratch? A decent a tutorial v...
hardy salmon
river tulip
Could anyone point me to start making things from scratch? A decent a tutorial v...
https://youtu.be/TPrnSACiTJ4 this is how I learned
Blender tutorial for beginners! The long awaited reboot of the popular donut tutorial, completely remade for Blender 2.8x. New videos will be uploaded every other day to this channel.
Get the shortcut pdf: https://mailchi.mp/ef5b15a32043/subscribe-to-the-newsletter
Follow me:
Twitter: https://...
river tulip
hardy salmon
https://youtu.be/TPrnSACiTJ4 this is how I learned
Thanks, I was shown this a few times before, I'm looking for more of character making.
tardy rapids
Gotta start to walk before you get running
foggy granite

YouTube
Want to make your own Anime style avatar? For Things like VRChat, Vtubing/streaming and game creation? Stick around, I'm going to let you in on all my secret...
foggy granite
@river tulip
river tulip
foggy granite
<@!655223715558195200>
Thanks
foggy granite
np

 toxic gate
 gritty zinc
Nice!!
foggy granite
gritty zinc
Atlas destroyer?
tardy rapids

I cancelled my Substance subscription, @Adobe you fuck up everything you touch 🖤
Twitter
·
 still wadi
i though this was channel for 3d modeling
not for some priviledged kids crying on twitter
spiral sigil
topaz reef
holy shite this is good is it for sale?
topaz reef
spiral sigil
holy shite this is good is it for sale?
i gonna put it for sell later i think
idk it yet
😅
tough plover
you could probably make some decent money selling your assets
spiral sigil
Its quality for sure trust me you can make some decent money if lots of your work is like that ^
tough plover
@spiral sigil+ in the discord search bar, type in "from: Q. has: image"
spiral sigil
very dapper
 dapper cobalt
still wadi
not for some priviledged kids crying on twitter
dapper cobalt
still wadi
not for some priviledged kids crying on twitter

tardy rapids
Eh, I just like piling on hate for Adobe
I'm not the person that wrote the tweet, I'd never spend a dime on Adobe in this day and age
I just remembered people talking about Substance yesterday, so I thought I'd drop this here to add to my reasons I wouldn't use it
 vivid crater
🤡
 heavy field
So I am very new to changing things on my own but are there any alternatives to substance painter or am I basically just stuck with that as my best option
 raven elk
Dude...why did you delete my posts again?
I was merely nice and ask you a question which is up for discussion with this topic and I'm willing to wait longer if anyone answer my question and quickly, you delete my post which none of you do not answer my question...Just stop deleting my post without answering will you?
foggy granite
heavy field
So I am very new to changing things on my own but are there any alternatives to ...

Quixel
Simple and quick creation of anything you can imagine. Create photorealistic, tileable, materials in seconds with powerful mixing and painting.
heavy field
🙌 thank you
foggy granite
np
 south hearth
does anyone know if you can export blender greasepencil to unity for a vrchat model?
 latent raptor
anyone have any idea why using 'fix model' or 'join meshes' in the CATS plugin causes my character's hair, ears, and other extra parts to disappear?

also for some reason throws the avi's tail up in the air
it appears pressing 'apply transformations' does the same thing
quaint jasper
south hearth
does anyone know if you can export blender greasepencil to unity for a vrchat mo...
You'd have to transform it into a mesh
latent raptor
Why does applying transforms make them fly away like that is the question 
quaint jasper
Can you screenshot the hierarchy ?
latent raptor
its an absolute mess, thats probably why
lone thorn
So last time I posted I didn't get any help. Trying again. I'd like to talk to someone one-on-one for guidance because google and youtube have not been helping. UVs are extremely confusing to me.
 quaint jasper
Did you apply a mirror modifier ?
lone thorn
I'm not doing that yet because the I want to fix what's broken before I make it worse. Also, when mirror modifier was mentioned no one explained how to do it
quaint jasper
Mirror modifier automatically copies what you do on the side that exists
You go to the modifier tab, select mirror, done
lone thorn
What is the modifier tab
quaint jasper
A great thing to google !
lone thorn
Wow, real help
quaint jasper
That'll help you a lot to learn the blender basics
Trying to make a custom model without know the most basic menus is going to be a severe handicap
It'll also make people not want to help you, which you seemed to struggle with
south hearth
quaint jasper
You'd have to transform it into a mesh
Thanks, i'll look how to do it
thorny ivy
We can provide help but don't think anyone here wants to hold your hand for the whole process.
But you really should at least have basic knowledge before attempting to make something as big as an avatar.
languid fog
Some anime anatomy study for today, still a lot of practice yet but a least it is the best topology i already have done tbh


credits to @taco1704, he have a lot of topology help study content, recommend taking a look on his twitter
gritty zinc
foggy granite
Atlas destroyer?
Yep
gritty zinc
@foggy granite more progress
 still wadi
@quaint jasper how dare u not helping all this people
quaint jasper
You know more than me lmao
still wadi
sorry was meant to be sarcastic
quaint jasper

still wadi
should've exaggerated it more
foggy granite
gritty zinc
<@!440731114307452928> more progress
Nice
 raw jetty
can anyone please help me, i went to sleep and my cats plugin was fine, i wake up and it looks like this, ive restarted bledner and nothing, i restarted my pc and nothing
 tough plover
raw jetty
can anyone please help me, i went to sleep and my cats plugin was fine, i wake u...
tough plover
raw jetty
can anyone please help me, i went to sleep and my cats plugin was fine, i wake u...
just enable the add-on again?
like you would enable any blender addon?
raw jetty
tough plover
like you would enable any blender addon?
enable it? do i do that in preferences
tough plover
yes
raw jetty
key maps?
raw jetty
tough plover
yes
i tried to reinstall the cats plugin and got this
 tough plover
make sure you are using the latest version of the CATS plugin
also, which version of blender are you using?
raw jetty
i was doing it wrong i was using keymaps not add ons, but i installed it and it went through but at the slider arrow there isnt all that is supposed to eb there
raw jetty
tough plover
also, which version of blender are you using?
2.83
tardy rapids
back to work for me
tardy rapids
Got the sleeves to work out

 foggy granite
Nice
 stray tulip
Someone has a tutorial or something on anime hair texturing? I'd like to learn a little~

 cobalt aurora
Sup guys, having a small issue, i cut this mesh apart some time ago, but had to stitch it back together using cats, tho now im running into the issue that eventhough i molded it back together it seems like these parts are still registering as seperate pieces, anyone a idea how to fix this?
 dapper cobalt
what does your hierarchy look like? did you just slam it in and click "fix model?" ....need more data
mellow cloud
can someone just tell me how to use avatar skin replace
 stray thistle
 tardy rapids
Looks real good
tardy rapids
dear God, I just loaded up the original model's arms

this is gonna be
hoo boy
Rigging? No problem, it's all mechanical joints
Actually modelling/texturing?
Oh boy
tardy rapids
Just realized I had Filmic on. Should really set that to default standard. Filmic vs standard

 tardy rapids
Face is pretty much done
 tardy rapids
Tiny update, but did some slight reshaping to the mouth and added the shines to the eyes

 merry tapir
tardy rapids
Looks real good
merry tapir
tardy rapids
Looks real good
I second that
gritty zinc
tardy rapids
Tiny update, but did some slight reshaping to the mouth and added the shines to ...
no hair?
 dusty heron
tardy rapids
Tiny update, but did some slight reshaping to the mouth and added the shines to ...
dusty heron
tardy rapids
Tiny update, but did some slight reshaping to the mouth and added the shines to ...
Eye shine makes it look so much better.
gritty zinc
 tardy rapids
gritty zinc
no hair?
tardy rapids
gritty zinc
no hair?
working on it
thorny ivy
Kamanira didn't like hair at first but hey, it grew on them.
foggy granite
Really
tardy rapids
Wireframe of the model so far
 quaint jasper
That's a lot of loops
tardy rapids
She does, in fact, have knees
 foggy granite
Yeah you should make that more define
still wadi
Any tracer mains ?
tardy rapids
I used to play Tracer back when I played OW
obsidian nova
I'm starting to re-topo a frankenstein base model I made early last year. I still can't believe how awful my topology was...
Before:

After:
 foggy granite
That's a huge improvement
obsidian nova
Thanks, Instant Meshes did most of the work for me; but the clean up job is still pretty time consuming.
foggy granite
What the poly count
obsidian nova
On the hand? 2015 polygons
foggy granite
Not bad
tardy rapids
Right now, I'm working on Passionlip's hair

It's got asymmetrical bangs, so I'll need to do some cleanup after I'm done to make them
foggy granite
Quick question why not try using curves to make hair
tardy rapids
Because I've never even once worked with them
foggy granite
Well always time to experiment I can tell you how to set them up
And also edit them
quaint jasper
You should definitely be using the time to learn better workflows
You'll end up with better looking results
tardy rapids
Well, was doing the hair with curves, and it looked fine until...

I turned sideways

Bezier curves in 3D are gonna be a pain, huh
foggy granite
im gonna tell you one thing you doing that completely wrong
tardy rapids
ahhhhhhh
okay, one, I completely forgot to turn them into Vector curves
two, how wrong am I doing this
 foggy granite
so spawn a path and a bezier curve
tardy rapids
So basically, when it becomes a mesh
it pretty much extrudes along that path to make the mesh, yeah?
as if the path was to be extruded into a mesh, kinda
you know what I mean
foggy granite
click on the path then to the tab that look like a rope and 2 squares which also is green
tardy rapids
yep
foggy granite
click on the geometry tab then bevel under object you should see bezier curve
click on it
tardy rapids
okay, added
foggy granite
then you should be able to change the shape of circle to modify how the stands look
and if you click on the path you can use alt+s to scale the hair up and down
tardy rapids
Okay, that's working
foggy granite
neat
latent raptor
alrighty, i have a tricky one here but its the last issue i can see on my avi's clothes
let me upload a gif

i cant turn my character's arm to have her hands upwards (a normal movement) without her clothes twisting and deforming like this
its most noticable at the wrists
yes, ive weight painted
quaint jasper
I don't think you weight painted correctly
Looks like it's affected by too many bones
latent raptor
maybe? i can check
one second
what bones would be affecting it too much? should the arm not effect the elbow at all
latent raptor
so this is Left Elbow painting

Left Arm painting

i should move that gradient up on the left arm?
when i separated them both a bit this is what i get

 quaint jasper
Yeah that arm is too low strength and forearm is too high
latent raptor
would .8 be a more suitable strength for the forearm?
quaint jasper
Also your twist bone may be making it worse
You can't have the same strength on the whole arm, but most of it should be red yes
latent raptor
maybe i should delete those given i removed the base on the arm
does this look a bit more correct?

oh wow thats much better
the twist bones definitely shouldnt be there given i removed the base's arms (mostly)
im not sure if you'd know how to mirror this onto the other arm?
quaint jasper
You would select that vertex group in the list, duplicate it and mirror, it's all options in the ^ symbol below the + and -
Assuming the mesh on the other side is symmetrical obviously
tardy rapids
Any idea why this pinching is happening?
 latent raptor
thanks for all the help. i think its all fixed up now :)
foggy granite
tardy rapids
Any idea why this pinching is happening?
Can you show me the curve

 foggy granite
It might be one of the sides one make it a tad bit bigger so it can unloop itself
 foggy granite
Wait go into edit mode and rotate it on the z axis by 90 degrees
See if that helps
mine geometry looks more uniform
 tardy rapids
rotate how. Doesn't let me rotate individual control points
foggy granite
Actually I don’t think that’s the issue I’m currently trying to replicate your geometry
tardy rapids
What you thinking?
foggy granite
No clue beside just remaking the hair again
white moth
tardy rapids
rotate how. Doesn't let me rotate individual control points
ctrl T will let you rotate individual control points
similarly control s will let you scale a single control point
why it's ctrl T instead of ctrl R: idk
foggy granite
is ctrl r even use for anything
languid fog
tardy rapids
Bezier curves in 3D are gonna be a pain, huh
I prefer using path curves
For hair
I think you can have more "freedom"
With them
white moth

A tutorial on how to make hair in Blender 2.8 with curves, a method that is very simple and effective that I have been using for my character sculpts.
▼ Sculpting Uraraka Ochako:
Re-Sculpting My Old Art | Uraraka Ochako in 3D [My Hero Academia] | Can You Improve In Only 1 Year?!: https://www.youtube.com/watch?v=iYNdfef1Uog
▼ My Gumroad Store (...
6 minute blender hair tutorial, works great for VRChat. I swear anyone can do it
 storm wren
ive been having a hard time with weight painting in blender and im just thinking of starting over bc its not turning out the way i want does anyone have any tips on what i should do and shouldnt? also how do i clear my previous weight paint lmao

 tardy rapids
 foggy granite
Oh you got it to work nice
quaint jasper
Still unsure why her head shape needs to be like that though
feels like you didn't take perspective and hair into account when looking at the shape of the other model
tardy rapids
Eh, I'm just going as close to the existing model as I can. That said, I will probably make some small changed
namely, the size of that forehead
Now, how do I lower the poly count on these paths?
Cause uh
quaint jasper
curve settings i'm pretty sure
foggy granite
you can delete some of hair vertex to low it
tardy rapids
Main issue is that there's WAY TOO MANY horizontal polys in the hair

With the hair, I'm at 74k
Without it, I'm at 38k
It's worth saying that this is the final mesh, for the body. Subdiv's already been applied at this point, hence the number of loops

 clear geyser
tardy rapids
Now, how do I lower the poly count on these paths?
clear geyser
tardy rapids
Now, how do I lower the poly count on these paths?
Change the resolution on both the path and the bezier circle you used for the hair shape
For lower poly count
tardy rapids
Thank you, that worked
tardy rapids
coming along well
 tardy rapids
Go to the VRCTraders Discord and post in the avatar commissions channel
 dreamy epoch
It's the 1st server in #community-servers-old
You need to have a verified phone number connected to your Discord account iirc in order to join it
white moth
storm wren
ive been having a hard time with weight painting in blender and im just thinking...
Go into edit mode, select all verts, highlight the vert group you want to clear weights on, and pick “remove” button below the list of vert groups. It will not vanish from the list but that group is now empty and fully blue again in weight paint mode
tough plover
@novel sonnet

I'll send the model for free, but a model isn't much without texturing lol
if you want textures done too, then I'll have to charge you a bit since that takes a bit longer
 stone mountain
Heya guys! I'm trying to commission someone to make me an avatar capable of doing ASL! I have a pretty decent amount of money I'm willing to spend on this as well! It just need to be able to do most gestures and be quest compatible! If anyone is able to, please send me a dm!
tough plover
stone mountain
Heya guys! I'm trying to commission someone to make me an avatar capable of doin...
for commission work like that, you may want to head over to VRC Traders in #community-servers-old
heck if anyone else wants that hat above ^ lemme know lol
gritty zinc
help
 foggy granite
That’s some good progess
 candid aspen
Do I need a certain version of blender for VRChat?
foggy granite
no
blender is a modeling program but cats addon works better with 2.83 if you planning on using it
candid aspen
Ok, thank you!
tough plover
foggy granite
blender is a modeling program but cats addon works better with 2.83 if you plann...
it got updated for 2.93 yesterday
foggy granite
Oh nice thx for the info
 upper salmon
im trying to find a 3d model for the valve index but all there are, are paid models ($35-50 CAD). Does anyone know where i can get any free valve index models?
 winged jewel
Blender

Shrink wrap'ed current body to test in full body

Unity scene of captured full-body


MMD animation

 foggy granite
Nice hair
 hollow ermine
Started work on something for shits and giggles
 tardy rapids
winged jewel
tardy rapids
winged jewel
Wait why are her THUMBS censored? Should I be concerned?
Also my GOD them hips
white moth
tardy rapids
Wait why are her THUMBS censored? Should I be concerned?
I have nothing to do with this conversation but I've been thinking about this for the last half hour.
We need answers, @winged jewel
winged jewel
tardy rapids
Wait why are her THUMBS censored? Should I be concerned?
Just wanted to try my WIP in VR, but I messed up the thumb on shrinkwrap that badly.
white moth
bahaha, ok
I was like "I know Japan has weird censor laws, but this one's new to me."
tardy rapids
winged jewel
Just wanted to try my WIP in VR, but I messed up the thumb on shrinkwrap that ba...
Ahhh, that makes sense.
merry vault
upper salmon
im trying to find a 3d model for the valve index but all there are, are paid mod...
I was working on one a year ago but I didn't finish it.


The thing is that Valve didn't release any official model of the full Index headset.
tardy rapids
hair
 tough plover
snazzy fedora anyone? https://gumroad.com/l/mVzLt

Gumroad
Feelin' dapper? Complete your look with this snazzy Fedora!Package includes:- Blender file- FBX - Substance file- Textures (Base, normals, AO, metallic gloss)
quaint jasper
i feel like it's missing the top crease
tough plover
it's there but it's not as pronounced
 tardy rapids
any tips on how to actually connect this to the head?

Gonna add the tied-back hair after I've figured that hair
white moth
tough plover
snazzy fedora anyone? https://gumroad.com/l/mVzLt
m'thanks
tardy rapids
Dang, no advice to be seen
 white moth
Bit too tall of a forehead? Unless it’s a stylistic choice.
thorny ivy
With a bit more knowledge this time around, decided to revisit one of the knives I've shared here before.
 zinc jolt
so good news
thorny ivy
Slapped on a toon shader for the handle, glossy for the metal, and added Crease lines instead of Sharp. Definitely think it looks a lot better now but not sure how to get rid of the odd shadow near the hilt + blade base.
zinc jolt
I got something cool
 thorny ivy
"Large Menace"
zinc jolt
indeed
thorny ivy
Different angle.
 unborn acorn
spooky lad has some progress

 viscid pine
hollow ermine
Started work on something for shits and giggles
viscid pine
hollow ermine
Started work on something for shits and giggles
funni
 unkempt torrent
How do I obtain the numerical values of the color of a vertex associated with a painted face in Blender? If I use the eyedropper in vertex paint mode the result is affected by lighting, which is silly
Ok, I can work around this by changing the lighting to flat in the shading menu
quaint jasper
unkempt torrent
How do I obtain the numerical values of the color of a vertex associated with a ...

Top right corner
unkempt torrent
Indeed, Ruubick, thankfully I had found it
I'm trying to figure out why importing and exporting the meshes from error's hud shader results in a broken (non funcioning) mesh and apparently that wasn't it
Exporting without any modifications, I should say
Ah, the reimported mesh seems to be projected into the "ceiling" of the camera perspective, which is never visible since wherever the camera is looking is "forward"
Somewhere the axis must be getting messed up
quaint jasper
wdym by non functioning mesh ?
unkempt torrent
It wasn't showing up as a replacement for the original mesh in the unity scene when using it with the shader it was intended for
I want to modify this mesh so I want to be able to import into blender and then export without making changes and get something that's exactly the same, as a baseline
I had to export it with -y forward instead of -z forward
white moth
unkempt torrent
How do I obtain the numerical values of the color of a vertex associated with a ...
If you are intending to use quest’s vertex color shaders be aware the shaders expect SRGB color space and blender saves in linear colorspce. Colors will come in faded in unity
I have not found a good work around for this
I mean I found a solution, just not a good one
 unkempt torrent
Error's HUD shader but it's probably a similar concept
I think the colors are going through properly

 daring pivot

join our twich stream if you wanna learn how to make dope avatars
👽👽👽👽👽👽👽👽👽
https://t.co/yKABbB2T2P
#NFTs
 Twitter
·
daring pivot
Twitter
·
daring pivot
✨
obsidian nova
It’s wild how easy texture painting looks here vs. in Blender. I really need to expand my horizons.
Also fantastic work.
unkempt torrent
Traced my latest shader troubles back to the vertex colors (again). Everything looks perfectly flat in blender, but the shader thinks they have different colors somehow
Infuriating
unkempt torrent
Think I fixed it. I set each color from hexadecimal in the "draw" tool of the vertex painting mode, then I didn't actually paint anything. Instead I switched to the Select tool, selected all the vertices I wanted to change, then went to the menu Paint > Set Vertex Colors (Shift+K in 2.8).
white moth
unkempt torrent
Think I fixed it. I set each color from hexadecimal in the "draw" tool of the ve...
Interesting solution. When you say the colors were off, do you mean they were faded in unity?
unkempt torrent
The shader interprets the colors as masks and some (but not all) of the vertices in each mesh were apparently off in unity, although everything looked ok in blender
You can see my screenshot in #shaders
To be clear, after using set vertex colors nothing changed visually in blender. It sure did fix everything though
 hollow ermine
Unrelated question:
Blender has a series of light emitters that you can use to light scenes when rendering, but how would one make a material on a mesh emit light? Follow-up question, how could I set something up to turn this light on and off via gesture controls?
obsidian nova
Emmision shader; crank it to 4000 percent…not sure if it works in Eevee though.
hollow ermine
So it is a shader thing. Got it
obsidian nova
Tbh though, that’s not the kind of thing you should be doing in Blender though. First, you should draw the emission map (stencil out the parts you’d like to glow) in Blender (or just like…photoshop); using your base UV layer as a guide.
Then, in Unity, choose a shader like Poyomi Toon or Standard Lite that supports emission. Drag the texture you created into the appropriate field. Good to go.
To toggle it on & off with a gesture is a whole other thing.
Follow this tutorial, but instead of animating the ‘Active’ state; animate the shader emission slider (should be found alongside the shapekeys).
READ THE DOCUMENTATION: https://docs.vrchat.com/docs/avatars-30
This tutorial goes over how to create a toggle for your avatar that enables and disables an object.
Music used: https://www.youtube.com/watch?v=hzGmbwS_Drs
 twin mortar
Posted in avatar 2.0 but figured to post here too


I have both substance painter and blender
quaint jasper
You just need to make an emission map
twin mortar
@quaint jasper I also wanted to add an effect where the yellow of the eye leave like a trail, sort of like so
 quaint jasper
That's way more complicated
twin mortar
Would that be possible with emissions as well, or is that also requiring shaders
quaint jasper
Probably a very specific particle system
twin mortar
oh I looked it up and there appears to be a trail effect built into unity, im gonna test if vrchat has support for it
theres another way to do it with particles actually called trails
thanks for the help
 vital drift
does anyone have a rigged cape model? i cant find any at all
 fallow isle
twin mortar
oh I looked it up and there appears to be a trail effect built into unity, im go...
fallow isle
twin mortar
oh I looked it up and there appears to be a trail effect built into unity, im go...
I'm not actually sure if trail renderers work on avatars, but particles can have trails. You can attach a particle system to the eye with an invisible particle, and give the particle system trails. You only need one particle at a time, so set lifetime to something with decent length (30 seconds would probably be fine) and limit particle count to 1. You can explore this option further and play with it; this is just a short explanation and suggestion.
fallow isle
Played the Little Witch In The Woods demo during Steam Next Fest, loved it, decided to make the hat and start making a witch/mage version of my personal avatar.
Very WIP. Plan to take it into ZBrush for sculpting. Will have visemes/blinking.

 undone widget
Is anyone makes custom avatars plz dm me
spiral sigil
Not the server for that if you're looking for custom avatars
Go to VRC Traders for commissions, #community-servers-old
undone widget
Oh ok thx bro
 peak narwhal
ok a little new can someone help me?
getting some weird things when i trying to use loose parts through the cats plugin it breaks the avatar in some places but not others and its getting confusing

 hazy falcon
 oblique gull
XJ9! ❤️
Nice model, haven't seen anybody with XJ9 in all my time playing.
Can't wait to see it finished!
Good luck and have fun! 😄
neat viper
Select the object in object mode, go to Edit mode with all faces you want to flip selected and press ALT and N, then Flip
 tame sinew
Okay that worked. Thanks!
quaint jasper


Recently @jendaviswilson and I started watching the anime #OddTaxi, but quickly realized how much we had both missed making things, so over the past few days she made Shirakawa and I made Odokawa. This was a super fun experience ! Pics taken in VRChat and renders in #b3d
 Twitter
·
Twitter
·


 thorny ivy
quaint jasper
https://twitter.com/Ruuubick_/status/1411052067112865793
thorny ivy
quaint jasper
https://twitter.com/Ruuubick_/status/1411052067112865793
What shaders did you use to achieve the psuedo-animated look?
thorny ivy
Alright, thanks.
Looking to achieve a similar effect so seems like that'd be a solid place to start.
I'm trying to copy the UV layout from one object to another for specific parts since they're suppose to be the exact same but Blender shoots me a weird message when I try to transfer UV layouts.

Unselected is the base I want to copy, selected is the current UV layout for the second object.
This is the error I get.

I don't know why it's expecting over double the current faces.
tough plover
they need to have the exact same amount of vertices
thorny ivy
I literally cloned the original though for the second object.
tough plover
did you make any changes to it?