#3d-modeling
1 messages · Page 96 of 1
 runic nymph
 devout scroll
there should be a bunch on the asset store and github
 hardy lake
got it, thank you!
 solemn blaze
guys i need help with Video Player TV if anyone got a link or something dm me plz
 winter plinth
@solemn blaze what do you need?
solemn blaze
a smiple tv video player
solemn blaze
winter plinth
<@!156135123459244032> what do you need?
.
i wanna add it on my world
winter plinth
what sdk?
devout scroll
wrong channel for it too
winter plinth
that is true
devout scroll
ask in #world-development
solemn blaze
ok thanks
 fallen snow
Hmm... I'm making a model for a world where these indicated sections of this table will drop out. I'd like to add a bit of a flange/depression around the seams (at least in the normal map), but I'm not sure what the best way to do this is. I could extend the polygons inwards, loop cut, and push downward with proportional editing, but extending inwards using the scale tool would result in an uneven width for the seam. Any tips on a better way to do this?
ooh, inset faces looks like what I want
 rigid anvil
Ran into this a while ago, never thought any of it since i rarely make shape keys but today is the day im trying to hide hair but i keep getting this error whenever i do anything pose mode related https://i.imgur.com/kCGQW8k.png i tried 2.83 2.9 and 2.91, i kinda refuse to use 2.79, since im sure stuff will break between those versions but yeah, i tried reinstalling catz multiple times, legit dont know what's wrong ;_;

I can't use any of catz pose mode tools pretty much ;_;
 quaint jasper
i'd suggest uninstalling everything and doing a clean install
going up and down in versions is only going to make it worse
also shapekeys are made in edit mode
rigid anvil
yeah but pose mode from shape key is what i was originally trying to do, since it makes it easy to just hide the hair, but yeah i'll try to remove it completely, probably will yeet my settings PepeHands
quaint jasper
pose to shapekey is in the armature modifier isn't it ?
 latent charm
Or just enter pose mode normally without using the button provided by cats which will give you no end of problems and confusion
latent charm
Copy the armature modifier, click apply as shape
latent charm
And yup, cats STILL clears all pose changes when exiting pose mode like that's something useful.
HINT: IT'S NOT 
rigid anvil
Well, it let me do it your way, thanks a lot, i did something wrong tho so the hair didn't reset but i just scaled it back to 1 manually
latent charm
Like I just complained about, cats throws a lot of extra little steps that it assumes you'd want (and often don't) such as clearing the pose state after applying the shape key.
Key-wise it's easy to clear, press a enough that all bones are selected then just do alt+s then alt+r then alt+g
(alt+transform key, so any one of r, g or s will clear the corresponding transform (scale, rotation, g-position)
rigid anvil
Oh neat that's honestly really useful O.o ill do that next time too thanks again guys ❤️
 storm bloom
Each time I move a vertex on the tongue, it keeps moving another on the bottom of the teeth for some reason, same happens in reverse. Tried splitting, separating and ripping, but it didn't seem to effect much. Anyone know what I can do?
 random parcel
for some reason the symmetry isnt working when I try to edit the shape of this model. Does anyone know how I fix this?
 visual vigil
does this look right? can it be improved? do tell https://cdn.discordapp.com/attachments/588136040817098885/781431471620620349/unknown.png
 quaint jasper
Are you asking for feedback on something specific ?
runic nymph
its easier to tell if something is wrong when its not orthographic
visual vigil
im asking how the face looks
its a human face morph
i wanna make sure it looks humany
 spiral sigil
Here are some wings i am working on xp
quaint jasper
i prefer the non human face personally
visual vigil
well i got a bunch of shit for it
so now i have to make a human face morph for it so i dont get targetted
runic nymph
dont listen to rubick, hes weird
visual vigil
hes not entirely wrong, the model and the textures were made for the original
but this is something i have to do
quaint jasper
You should hang out with better people instead 
runic nymph
both look alright tho
maybe the nose is a bit too wide in fish form but i feel like thats just me
visual vigil
its because its a snout
@quaint jasper sometimes the bad are in the good groups
its just how it is, cant always have a perfect safe space
quaint jasper
runic nymph
both look alright tho
maybe the nose is a bit too wide in fish form but i feel l...
He's making a catfish, they have the largest noses lmao
runic nymph
uh oh, a catfish
runic nymph
expect awful jokes coming your way
visual vigil
i mean
quaint jasper
The model looks great, fuck em
visual vigil
im well aware of the jokes? If im talking about putting a girls face on it?
my profile picture is a catfish afterall
my discord username is Darling
runic nymph

 foggy maple
latent charm
And yup, cats _STILL_ clears all pose changes when exiting pose mode like that's...
foggy maple
latent charm
And yup, cats _STILL_ clears all pose changes when exiting pose mode like that's...
Noone ever told me this, I will add that  is there anything else that could be improved?
 devout vault
i need help
runic nymph
dont we all
 obsidian nova
@visual vigil This avatar is fan-f*cking-tastic. The painting, the sculpting, the mesh, amazing job. Seriously.
Are you open for commissions? It would be great to get something like this done in the future.
visual vigil
@obsidian nova aha I paid someone else to make the mesh for me, I just did my own personalization changes and the textures
While I do make models, I'm not at this skill level yet
These are some of mine
 white moth
visual vigil
i wanna make sure it looks humany
white moth
visual vigil
i wanna make sure it looks humany
Probably a little biased but the original looks natural and the change just looks like a squished model
visual vigil
Well the original model was made with the snout, and textured for it
I need to have a human version so
@white moth

 wraith shore
@storm wren If you are making a building that the player can see from outside and then go into, you should have interior and exterior walls that face the proper directions. If the player won't be going inside, then whether the walls can be seen from the inside doesn't really matter
Don't have the two sets of wall faces sitting in the same space, either; space the faces so that the wall has thickness
 trim sorrel
Ah, more Juno stuff. Looks fine either way. The snout puts is less in the uncanny valley. Either way seems fine, whatever your preference is. If anything just adjusting the texture to bring the green down further on the humanoid nose, but that's purely opinion.
Someone bothering you again?
visual vigil
well i showed the model off whilei was working on it and got harrassed beccause its furry
so this is the comprimise, making a human face shapekey to switch on when around those people
i personally dont consider myself a furry
wraith shore
I'd say that it's because that seems more scalie, but I don't think all catfish have scales
wraith shore
Specific catfish have armor plates, but, I guess those are different from scales
visual vigil
one of the hardest fish to have a trophy / whatever it is when you kill one and mount it on a wall
because the skin will dry out
yeah nah my character was drawn by a friend
they based it on a few species of river catfish
no sturgeons
wraith shore
People need to get over the anti-furry attitude, though. Furries tend to be more inclusive and friendly than other groups, so that makes them better than the others, as far as I'm concerned
visual vigil
furries have their own gatekeeping, but its far less compared to non furries
theres a lot of creativity but also a lot of weirdity thats not too hard to find
which is why the stigmas of sexual deviants and repulsive degeneracy are around
wraith shore
That is what you were getting harassed about? I have interacted with actual humans with noses that wide
quaint jasper
would suggest hanging out with better people again
visual vigil
these people are parts of every group Ruu
quaint jasper
even if that means ditching good ones in bad groups
quaint jasper
i don't have any in my groups 
visual vigil
the entire body is basically human
specifically because i dont want the sterotype furry digi legs or claw hands
wraith shore
The deviant stuff is easier to find (mostly) because of the reduced judgement compounded by furries clumping into close communities
visual vigil
I dont consider myself a furry due to that kind of acceptance to things i personally feel are unacceptable
wraith shore
Nah, dawg; give'em limbs like a mudskipper or batfish and really freak people out
visual vigil
alas though, I have commissioned artwork of a snoutted catfish
and a human face one
so i guess the people bitching just allow me to express my model in more ways
so thats a up side
wraith shore
Does anyone paying attention in here have any experience with models from Guild Wars 2? The one I'm working on now is driving me crazy
trim sorrel
Never done so, GW2 models eh? I'd be interested in some of those hehe.
Nah Junos, it looks fine. Those models aren't my cup-o-tea but the time and effort put into them is impressive.
wraith shore
They are interesting; some of the solutions they came up with for reducing texture data are neat
The diffuse map that I got with it is obviously stitched, and the alpha channel contains both the specular intensity and opacity, which was fun to sort out
trim sorrel
Interesting, so are you exporting whatever character you have displayed basically?
wraith shore
Something like that. I was planning on skirting the details, but it seems that I have already caught a warning
visual vigil
not the first time ive heard the ALpha channel containing specular or AO or whatever else
wraith shore
Well, this wasn't and 'or' situation with the alpha channel; it contained both
visual vigil
seperate by xyz?
wraith shore
as far as I can tell, the lower few bits (digital bits, for clarification) contain the opacity, while the higher bits have the specular intensity
Interesting usage, but, I remembered reading that Blender's render engines use only half of the bit range of the blue channel in normal maps, which helped me figure out what was going on
Anyway, the part that is driving me crazy is that the also saved space by having certain symmetric patches of mesh share UV space. There are usually ways to get that situation to render properly, but I cannot get this to work at all
 cerulean chasm
hey there, posted this in #avatar-help but was told this would be a more appropriate place to ask!
hi guys!! very new to modeling avatars, i'm working on importing a gmod model i like into vrchat, and i've gotten as far as having it imported into blender
decompiled it with gmad.exe, then dumped the files from the .mdl into its actual models and materials- i was wondering if there's anyone experienced in this kind of thing around here who could give me a hand with where to go from here?
i have basically 0 experience with blender, and the tutorial i had been following is using a 2yr old version of blender so things don't really translate
quaint jasper
What issue are you have specifically ?
cerulean chasm
i'm honestly just not entirely sure where to go from here- i've imported my model as several different pieces (the body, head, and hair are all separated) and now i assume i have to go about attaching them and adding the textures in?
quaint jasper
yep
cerulean chasm
here's my blender window lmao
 warped merlin
oh, i know this model!
cerulean chasm
it's maxxy's improved scout, i've added him to ask for permission to upload it once it's finished but in the meantime i'm just gonna work away
see if i can get it into unity :)
i suppose i'll watch some basic blender tutorials
bc i can't even figure out how to like, "group" all of scout's bodyparts hehe
cerulean chasm
is cats an acronym? or is it literally an addon about cats
oop
found it
once i've installed an addon into blender can i delete the zip file? or do i need to keep it around
warped merlin
nah it's ok, just select a proper version
warped merlin
read some manuals ;D
quaint jasper
Welcome to the club
warped merlin
there is two stages:
- god i have no idea what i'm doing...
- god i have no idea what i'm doing and it works!
cerulean chasm
i'm excited for stage 2
warped merlin
;D
cerulean chasm
ok i guess now it's time to... add textures..???
cerulean chasm
what the hell are vmt files?
devout scroll
materials
cerulean chasm
half the materials line up with files that don't have vtfs, only vmts
can i import vmts directly into blender?
cerulean chasm
i think they're like, generic gmod assets?
i got no clue where this is referencing
devout scroll
eyes are generally done with shaders and not textures in source
devout scroll
find the eye texture somewhere
it's a shader but it still has a texture somewhere in engine
it's probably just white with an iris on top
you can probably leave eyes to last
cerulean chasm
right, gotcha
i have his like, torso in
can't get it to show though
decided to restart bc i did a bunch of shit i couldn't undo properly by accident, lmao
should i just import all of this and turn the visibility of some of it off?
devout scroll
dunno
visual vigil
@cerulean chasm C.omputer A.vatar T.ool S.ystem
cerulean chasm
@visual vigil thaaaat makes sense
visual vigil
yes he wanted to know what CATS stands for
visual vigil
pretty good improv right?
foggy maple
visual vigil
<@!124451327312003073> C.omputer A.vatar T.ool S.ystem
It's official now 😂 😂
visual vigil
👀
devout scroll
Yeah since cats hasn't worked on it for ages :^)
 merry vault
cerulean chasm
half the materials line up with files that don't have vtfs, only vmts
merry vault
cerulean chasm
half the materials line up with files that don't have vtfs, only vmts
VMTs contain material data that tells Source how to display textures.
VTF files are the actual textures themselves.
cerulean chasm
thank you!!
i still can't for the life of me figure out where models/shared is tbh
*models/player/shared
devout scroll
probably packed in one of the .vpk files
cerulean chasm
so difficult to figure out which smds to import 😭
WAIT if you import the .qc it just loads everything
omg
cerulean chasm
cannot for the life of me figure out what to do now though
cerulean chasm
how do i get this png to map onto the mesh...?
i cannot for the life of me figure out how
winter plinth
@cerulean chasm does it allign with the uv map?
cerulean chasm
yeah it certainly seems to
winter plinth
is the texture mapper under the hierarchy visible?
 young vault
(the material doesn't use an image texture)
cerulean chasm
it's kool
someone explained how to add the image texture via Use Nodes :)
progress!!!
cerulean chasm
:)
i just need to figure out the hands now, the sfm_hands.jpg file i have won't map onto them
devout scroll
either nodes or just click the circle next to base color in the material and pick image trxture
white moth
Does anyone know what causes Blender FBX export to scramble material index references? Whenever I edit a model my material swap animations start changing the wrong material slots. It's really annoying
spiral sigil
I have a question, Does anyone have an .fbx, .obj, etc of the raw player model i can download (without any textures)?
white moth
spiral sigil
I have a question, Does anyone have an .fbx, .obj, etc of the raw player model i...
Which model?
spiral sigil
the VRChat player model
white moth
They’re all different though?
white moth
So any unity humanoid? I mean I think the SDK has Unity Chan in there
Or y bot. It has an example avatar in there
spiral sigil
whats a humanoid
 unique galleon
a creature with 2 legs and 2 arms and a head.... looks like a human
oh yeah I coul dprobably find unity chan and look at her eyelid blendshapes too huh
 compact mulch
WIP avatar low poly. Just got my normal maps to bake https://gyazo.com/bdb7ac85db1eee690cb807c4ed94ef4b
unique galleon
Is there anywhere here I can go to grab unity chan or is getting it in the SDK the easiest way?
quaint jasper
I believe the Unity chan models are provided by Unity themselves on their website ? Maybe the japanese one
unique galleon
Ohh, okay thanks
 barren quiver
You can get them from https://unity-chan.com/

UNITY-CHAN! OFFICIAL WEBSITE
ユニティちゃん公式ウェブサイトです。ユニティちゃんの各種データダウンロードやイベント、最新情報などをお届けします。
white moth
Is there any way to visualize which verts are included in a shape key, so that I can clear verts that might be moving very slightly?
 ancient magnet
is that a fire hydrant?
spiral sigil
unique galleon
oh yeah I coul dprobably find unity chan and look at her eyelid blendshapes too ...
ok i can use a humanoid
cerulean chasm
yo, how do i check my avatar is the correct size in unity?
tutorial says less than 5x5x5
but i have no clue if my model is larger than that
unique galleon
Usually one meter in blender is one meter in unity be default, I think?
devout scroll
Yes but it depends on your export settings
When exporting if you set your units to FBX All then it will be 1 unit = 1 meter
cerulean chasm
yeah but i didn't really bother scaling my model before i exported it
i was told i should do that in unity instead
devout scroll
Yes and no
If you scale it in unity all your values will be multiplied for stuff
Which doesn't change anything but it makes it harder to change values for stuff like dynamic bones or whatever
In unity you can compare size with a cube, which is 1x1x1
Or download pumkin's avatar tools and use the scale avatar tool to see a ruler
But ideally you want to get it to a decent size in blender so you dont have to change much in unity
But you can totally just do it in unity if you don't want to
unique galleon
Self advertising you sly dog you
devout scroll
Alright then how about
cerulean chasm
oh my god these are great, thanks dude
how do i make that cube to compare to?
completely new to unity btw
devout scroll
"Download the tools pinned in the #avatars-2-general channel™️"
Right click in hierarchy, create, 3d object, cube
or something like that
but as I said if you just use my tools you can see a lineup wall behind your avatar to compare
cerulean chasm
how do i go about fixing this?
i have a couple problems i need to get in order but i'm gonna deal with em one by one
to think i thought i was near being able to upload D:
also: when i try to switch to android as my build target i get told "Switching to Android:AndroidPlayer is disabled"?
devout scroll
don't switch to android if you're not making a quest avatar
cerulean chasm
oh yeah no, i do want to get this working on quest too.
my polygon count is within the limits afaik
devout scroll
i recommend doing that at the very end
cerulean chasm
okey dokey
cerulean chasm
if that was an option i might have unticked it
i guess i could change things in blender and reimport relatively easily
 onyx crane
Any tips for achieving the look of vinyl figures in Blender (or substance painter)? It's just a half rough/half glossy setting, right? Or is there more to this look that I'm not seeing?
edit: nvm i found one! https://blender.stackexchange.com/questions/116195/how-to-create-a-vinyl-plastic-toy-shader

Blender Stack Exchange
How can I make one of the vinyl toy plastic material like this?
Video: https://www.youtube.com/watch?v=8Njl5hLmGs0
cerulean chasm
hey so
i just used CATS and texture atlasing to combine the materials on my model into 3 different ones before bringing into unity
as i'm trying to optimize for quest
(i originally had 7 materials)
however once i export and bring it into unity, it doesn't have any materials on it...??
are they not supposed to be embedded into the .fbx?
unique galleon
They won't show up in unity with the materials already there, but if you go into the model's files and drag the material onto the body, it'll apply that material to the body in unity
So you'll have to manually drag the three materials onto the body in the three different places each material affects, then I think just go into the materials' options and set the texture atlas they're using
@cerulean chasm ^
unique galleon
Things might have changed since I did anything here but from what I recall, select 'Location' in the top-right and choose 'use external materials' or some equivalent
Then you'll have to do the dragging mats from the project view materials
cerulean chasm
i did that, so now i have these 3 materials- should they not be like, not blank, though?
cerulean chasm
i am completely lost lmao
devout scroll
click material, assign texture
into albedo slot
realize it looks ugly
look up a toon shader
change material to said toon shader
cerulean chasm
but where do i find my textures? i sort of thought they were inside the fbx file- isn't that where CATS saves them when it combines via texture atlasing?
devout scroll
they can be in the fbx if you enable that in cats settings
otherwise just drag ans drop them into unity
they should be in the blender file folder
try this shader for the tf2 look, put in the values from the vmt
cerulean chasm
thanks!! would that shader work on quest by any chance? i know some don't
by blender file folder do u literally mean the blender install directory? or the project folder
ah! the project folder
found em
only two though, strange
devout scroll
no, only default vrc quest shaders work on quest
i recommend making a copy of your project for quest avatars
devout scroll
yes, but if you upload them to the same id they will be the same avatar
but the quest one will load only for quest users
cerulean chasm
are my unity packages supposed to like, disappear every time i restart the program?
i've had to install the vrchat sdk 3 times now lmao
unless they're hidden somewhere?
young vault
...are you opening up a new project or going to the old project?
winter plinth
ihni how to answer that lol
unique galleon
@cerulean chasm yeah, each project is a "save file" of all the work done on that project, which includes all files and everything
A new project is a completely new slate, a separate folder on your drive that houses a separate set of files and everything
So if you've had to install the SDK 3 times, that means you have 3 separate sets of basically the same thing, with all the SDK files + all the base Unity files needed to be able to hold a project
If you want to export 2 separate avatars from a single project file (which is fine to do, I have like 10 or more models on my old project), you make multiple different Scenes. A scene is a collection of objects but objects from one scene don't affect any of the objects on any other scene, so you can have 20 scenes, each with a different model and different settings
unique galleon
o/ there's significantly more to Unity than that but that's all you need to know in terms of VRC's SDK
cerulean chasm
i still cannot for the life of me figure out how to get my model into unity with textures on it 😭
i even reexported my model with textures embedded and nothing!!!
it's all grey!!
unique galleon
Maybe when I actually finish this blend shape bullshit I'll do it and re-teach myself so I can show you
unique galleon
Just remember that you don't want to do embedded textures unless someone else said something different...I've never used texture embedding
cerulean chasm
gotcha
some of the textures i combined with texture atlasing don't have pngs in my project folder though bizarrely
unique galleon
In that drop down I mentioned you should be able ot set it to use external textures, then it creates a folder (or maybe there already is one) named 'Materials' that's in the same part of your project as the model itself
cerulean chasm
i've actually managed to get my model into the game now!
however my visemes are fucked so i need to go back to blender and adjust it all
cerulean chasm
okay my visemes are seeeeriously fucked lmao
could rly appreciate some help from anyone with experience porting source models to vrchat! or just visemes in general tbh
 gleaming tinsel
idk if this goes here or not. but im impressed by all the work of the people on booth
but im wondering if there is any possibility to port clothes that are meant for vroid into normal avatars for vrchat that obviously are not vroid.
i don't really know if there is a term for this but i will really appreciate if someone can tell me if it is possible ><
 azure rain

modded a @yotsu_ashi #VRChat Avatar to match my fursona and have clothing from #VRoid so I could wear lots of outfits https://t.co/o259IhFxr9

 Twitter
·
Twitter
·


yes it's definitely doable as it's just a model format vrm the cat's plug-in can help import vrm's so you would basically go through the same workflow you would for putting on MMD clothing
@gleaming tinsel
 ashen forge
cat
gleaming tinsel
@azure rain have you bought some clothes in booth for it? owo
azure rain
currently all those examples are using free to download ones for the textures as VRoid clothing is basically the same dozen meshes retexture the whole bunch
gleaming tinsel
yeah actually that's what i was reading, they sell the textures, so.. if i only have the textures (aka image), how do i get an fbx for my current model? ;;
@azure rain
azure rain
you export avatars from VRoid and then import the vrm files and delete everything but the clothing and Armature
gleaming tinsel
oooh i see i see! thank you so much!
azure rain
and if you have an avatar with non-human proportions you can play around with Sliders in vroid to get a closer fit
gleaming tinsel
@azure rain oh i see i see, well i have a human avatar, so i guess i will not have as much problems, obviously it will need some adjustments, but... that-s part of learning right? im starting learning about this uwu
unique galleon
I have successfully put together a mostly okay blink but I still can't for the life of me process how to line the thick eyelashes up with the seam https://streamable.com/9sn1w7

This is a Chongyun model but it has no bones nor blend shapes
And literally the blinks are all I have left
white moth
No one asked, but in blender, select all verts -> Sort by Material -> Using Face. Makes the model have the same material order in unity as blender. Christ that took forever to figure out.
 wary swift
I got a question regarding UVmapping and painting a texture inside blender. I have unwraped the uvmap and would like to paint on different sections but without touching the sections around, is their a way to accomplish that ?
devout scroll
go into edit mode and select the faces you want to paint then in texture paint mode enable the mask thing with the button at the top of the 3d view, or press M
wary swift
thank you !
devout scroll
make sure to save your texture manually
as blender texture paint loves to make you lose your work
 vivid crater
2.8+ prompts you to save images before closing 🕺
devout scroll
yeah, especially when blender crashes
spam that alt+s as often as you can in the paint window
 native gorge
hey i dont know if this is the right place but im trying to build a map and im using blender to make the world (dont know if its a good idea or not) but when i import the world into the unity, the textures dont appear as they do in blender
 rare robin
wary swift
I got a question regarding UVmapping and painting a texture inside blender. I ha...
rare robin
wary swift
I got a question regarding UVmapping and painting a texture inside blender. I ha...
ALT+B also is very useful for restricting your view to a small section you want to work on. ALT+B once to drag a view box, ALT+B to reset.
rare robin
native gorge
hey i dont know if this is the right place but im trying to build a map and im ...
Are you using texture repeat in Blender? That will have to be re-entered in the shader in Unity.
native gorge
um i dont think so?
devout scroll
Yeah you gotta remake the material in unity
You're using a mapping node in your blender setup
native gorge
ah ok
devout scroll
 rare robin
devout scroll
Yeah you gotta remake the material in unity
rare robin
devout scroll
Yeah you gotta remake the material in unity
Oh right material, not shader. Thanks =b
devout scroll
See your scale is not 1,1,1 here so you'll have to play with the texture tiling value in unity on the material to match it
native gorge
another thing is that i get uv overlap errors ever though in blender there isnt any over lapping i can see
devout scroll
again, you're using a mapping node in blender instead of uving your mesh properly
but you can probably find a shader that can do a similar thing
alternatively just bake your blender materials to textures
native gorge
how do you do that?
devout scroll
you'll have to unwrap your meshes so they don't overlap
you can place down simple seams and unwrap or you can do something like smart uv project if you're lazy
then look up a baking tutorial
native gorge
ok
devout scroll
for that you'll create an empty image, select it in the shading workspace, then go to cycles render engine and bake tab, then bake
rare robin
Here, I very much like this guy's succinct videos: https://youtu.be/o0lTz25xcx0

So, you really like the way your procedural texture turned out and you want to save it to a image file like a normal texture? Not a problem!!! In the next 40 seconds, you'll know how to do all that and more!!! As always, hope it helps :)
Thumbnail Link: https://www.pinterest.com/pin/324751823126383064/
If you enjoyed this video, please don't f...
native gorge
thank you
devout scroll
Yeah, his videos are pretty good
native gorge
ok i baked it but it still says overlapping uvs
devout scroll
unwrap your meshes so they don't overlap
native gorge
i did do that it didnt work
i've looked at everything but nothing works. ive baked the textures, merged blocks, pretty much everything
 lapis pond
is there an easy way to texture atlas / a recommended guide?
cerulean chasm
hey, would anyone be willing to give me a hand learning weight painting? i need to add a jawbone to my model for visemes
and the impression i'm getting is that i need to weight paint his jaw onto the bone once i've added it?
devout scroll
visemes don't use bones
visemes are like keyframes for vertices
but you can make one with the help of a bone
 modern wraith
Does it matter what version of blender I use like it does with unity?
winter plinth
no
devout scroll
But there are some things to it
2.79 is outdated and not recommended to start with, 2.8 is good, 2.9 needs you to update the cats plugin to the dev version if you want to use that
but other than that it doesn't matter
winter plinth
ive never had to use cats much, so ive been using 2.44 mainly
modern wraith
a tutorial i found to get rid of neckfix is on unity 2.8, but the lowest version i can download is 2.83 - 2.83.9. Since i know nothing aboiut the program, i would like to have the easiest time having the most similar version of blender compared to the video using 2.80.. should i just get 2.83.0 or just get the most current version and get 2.83.9 and just learn that
devout scroll
they all should work the same after 2.8
modern wraith
ok so then should i get 2.9?
winter plinth
id stick to a 2.8 version
devout scroll
except if you use 2.9 go to cats update panel and install dev version
but 2.83 should be more stable
modern wraith
what is the cats update
devout scroll
cats is a plugin, if you want to get rid of neck fix (I'm guessing full body fix that cats adds) that's what you want
modern wraith


This tutorial first goes over my method for weight painting in Blender 2.8 (relevant to everyone, not just VRChat users) using a simple example of tweaking an arm's weights to leave a sharper elbow when it bends. It then proceeds to apply these techniques to create the weights between the head and neck bone (more advanced 3 rotation axis joint)....
thats the tutorial i found for it. once again, i know nothing about blender so i hope its ewasy enough to just follow along and copy
devout scroll
if you're doing it manually you can just use 2.83
modern wraith
ok. 2.83.9 or .0?
devout scroll
all versions after 2.8 should be very similar
modern wraith
ok
modern wraith
When setting up blender for the first time, im asked what shortcut i want. blender, blender 27X or industry compatible.
then asks if i should select with left / right (mouse buttons?)
then spacebar.. play /tools / search.
whats a good setup
winter plinth
my setup is usally to ignore that. but im sure theres some people that use that
modern wraith
well its the first thing i see when i open blender, so youre saying to leave it at default? blender / left / play?
winter plinth
click off of it and it should go away
modern wraith
oh whoops. i just hit next instead and it took my input lol.
well anyways, how do i upload a unity package into blender
winter plinth
no
modern wraith
?
winter plinth
im like 99% sure thats not the first thing you wanna do in blender lol
unless modded blender
modern wraith
what, accepting the unity / left / search option or importing a unity package to blender?
 clear geyser
You take the FBX from the Unity package and put that into blender
winter plinth
thats new, but i use 2.4 so iw ouldnt know what 2.8 is like most of the time unless i needed cats
modern wraith
@clear geyser thanks. im new to unity as well, so i found a guide that says i also ned the FBX exporter. Im getting everythign set up now
clear geyser
I've never needed an exporter but okay
winter plinth
interesting
modern wraith
wait
like i said, im new so if theres a better way then im all ears
i just want to export the unity avatar packge i have to blender.

Hi guys welcome
in this video i explained how to export from unity to blender...hope this video help...if it helps then like my video and subscribe for more videos
my patreon https://www.patreon.com/user?u=31203759&fan_landing=true
FBX Exporter https://www.mediafire.com/file/0qzedbc16b63x3f/UnityFBXExporter1_2_0.rar/file
if you still getting...
this video shows what i was talking about in the first 30 sec.
is he wrong
clear geyser
That's used for if you don't already have the FBX
modern wraith
oh ok
clear geyser
Like if you have a prefab or something
modern wraith
i dont know how to tell if i have the FBX. could you please tell me?
clear geyser
It tells you when you click on it in Unity
devout scroll
File > Import > fbx
You can right click the fbx in unity and show in explorer, it will open the folder it's in
modern wraith
then to go the other way, file, export?
modern wraith
so im clicking the fbx and then import but nothing happens
so import > name of file.fbx > click import in that file browser.. nothing happens
still have a cube
wait, i noticed i keep adding new armatures.
Oh!
i had to zoom in. the armature was super small and inside a cube
Do i need the cube?
modern wraith
ok cool
modern wraith
im having isues putting the model into weight painting mode. i clicked armature, the object data properties, chose pose position and set display as: stick. thn clicked the body and at the top left is pose mode. i should see weight paint in there but i dont. am i missing something?
devout scroll
put your Armature in pose mode then shift click your body and set that to weight paint mode
also make sure Edit > Lock object modes is unchecked
modern wraith
oh shift click worked. why is it important to uncheck the object lock?
while im in here weigtpainting, the shoulder spikes are an effect that grows and shrinks on my avatar in game. is there aneasy way to disable that?
hmm... another question i have is somewhere along the way, the stick pose I had is no longer visible even though i still hae it set to "display as: stick"
how do i get the stick frame to reappear
devout scroll
if you don't uncheck object lock you can't shift click multiple objects in different modes
modern wraith
Ok fair enough
modern wraith

is this even fixable?
I am following the tutorial to remove the neckfix as i was told that would reattach the head to the body but i just noticed that in the turorial, the neck has always been attached. When looking at the neck of this model, it looks like the neck and face match together in 3 seperate sections of different widths, and has a choker to cover it up.
 eternal ingot
im looking to start trying to model with blender
does anyone know a good place to start learning? tutorials?
clear geyser
eternal ingot
im looking to start trying to model with blender
does anyone know a good place t...
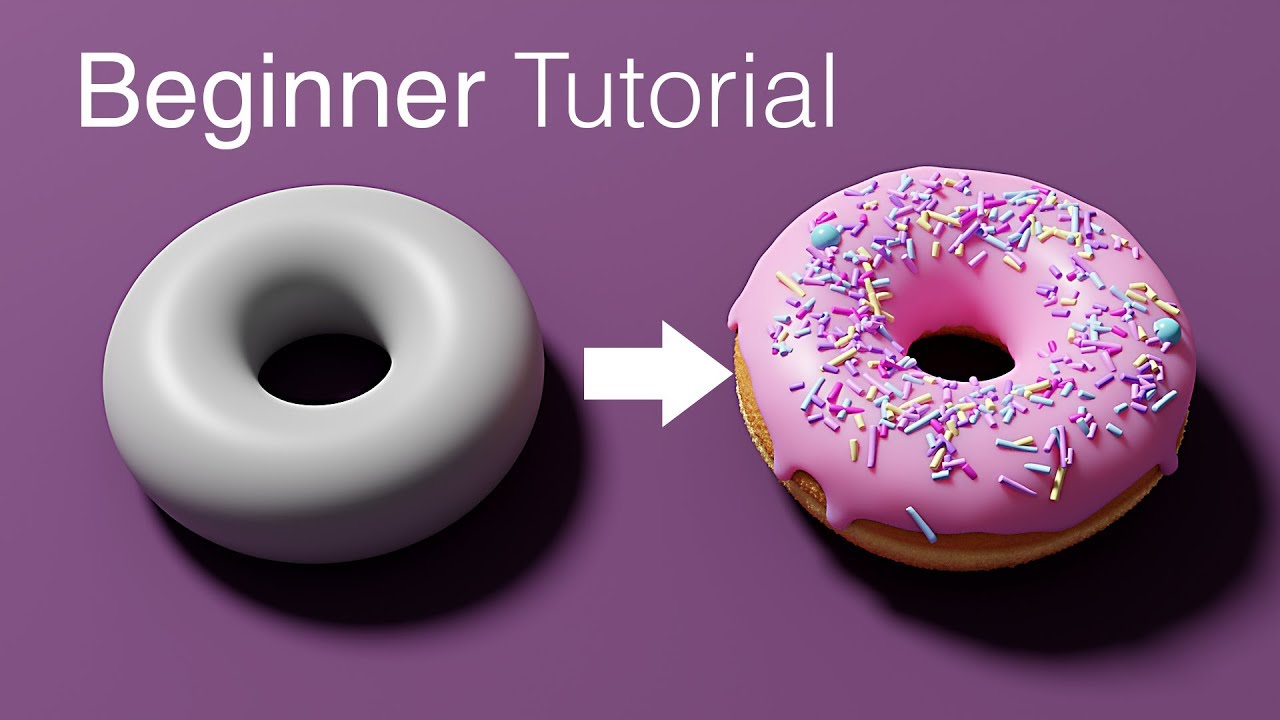
Blender tutorial for beginners! The long awaited reboot of the popular donut tutorial, completely remade for Blender 2.8x. New videos will be uploaded every other day to this channel.
Get the shortcut pdf: https://mailchi.mp/ef5b15a32043/subscribe-to-the-newsletter
Follow me:
Twitter: https://...
eternal ingot
thanks!
 silent depot
I wonder how many more models I could make before finally getting a quest 2 ^^
 silent cloud
i have never 3D modeled in my life until 2 days ago
(modeling my character in my pfp, if you're wondering  )
)
warped merlin
modern wraith
is this even fixable?
yes, but it's a #avatar-rigging problem, better to ask in that channel.
anyway, in short, move your neck bone up for a bit
also you need to re-paint it (i mean weight)
 indigo heron
Last thing to model is hair
pain
Everything is here from scratch using Blender and Marvelous Designer
Later will paint in Substance Painter, rig it and upload to VRchat for my friend 
 hallow bough
Is it possible to safely edit the mesh of a model with shapekeys already created? I had an attempt but it went quite badly.
devout scroll
as long as you don't add new vertices you shouldn't be having issues
and if you do you better add them onto stuff that doesn't move
hallow bough
Ahh yeah i must've started editing on a shapekey on accident. Second time worked! Thank you!
 lament pond
quaint jasper
lament pond
quaint jasper
Sleek base !
silent cloud
devout scroll
(but it looks more like a sculpt)
ive been wondering about that yeah! does rigging make a difference between sculpts and... however people do it normally?
like could i put it in an animation/vrchat? orr.. 
im a blender newbie for sure and i felt more comfortable sculpting around like clay cause ive had history with clay modeling, but i wonder if it makes a difference and ive been worried about that ahah
i mean sculpting has a lot more polys but i found out about decimate last night and got all giddy about it
azure rain
the bending of the model is a lot worse if you just take a straight sculpt because the triangles are all higgledy-piggledy randomly placed whereas a game-ready model has nice Edge Loops to everything so it bends nicely

I said the decimate modifier is dumb as a bag of rocks so it doesn't know which parts are important for bending which parts can be safely simplified
quaint jasper
The new decimate function in cats 2.9 from fenlen (i think that's the username) is super smart for avatars
azure rain

Mentioned before but, my 'instantly produce an optimized Quest avatar' changes for the CATS blender plugin now are in the dev version if you wanna try them out! May have some issues w/ blender 2.9x, still testing
 Twitter
·
Twitter
·


 silent cloud
yeea but is it for more humanoid body types? my character is more small and chibi-ish, so i rather making the model myself haha (plus i wanna put my own original species into vrchat, i think that would be cool!)
azure rain
body proportions doesn't affect it that much but you probably should make something with proper Edge flow anyway
silent cloud
ahh i cant wrap my brain around this whats edge flow :(!
i mean, i dont mind if my model is funky and wrinkly first time because i’ll learn more as i go but i wanna learn if it will work if i animate, or put it in vrchat and such
i havent even touched bones or anything past that yet especially unity!
if not thenn... im doing something wrong haha
i had animation in mind when i started making my model
azure rain
it'll function assuming there's enough triangles but it will look funky compared to a properly modeled for animation model
silent cloud
hmmm i see
azure rain

like here's an example of a low poly base mesh for a human that's designed for animation
silent cloud
ohh sick!! i have., no idea how to do that though.. yet
azure rain
no problem you're still learning
spiral sigil
edge flow is 👌
silent cloud
looks like its time to get into edge flow videos!
i had no idea where to start with blender tutorial videos lmfaodofir
azure rain

In this tutorial I'm going to show you my workflow in order to model a character base mesh in Blender. It could be used later on as a starting point for a sculpt. We are going to see how to arrange a good topology and how to make optimal decisions when needed during this process.
Round cube not working ?: https://www.youtube.com/watch?v=IarL30...
spiral sigil
grant abbitt is a good start for blender tutorials
very basic stuff
to a bit more advanced stuff
azure rain

This is part one of my free course to learning Blender 2.8. Create this fun scene and learn the interface, how to add objects, lighting, build objects, create atmosphere, render images and movies and lots more.
Part 1 https://youtu.be/7MRonzqYJgw
Part 2 https://youtu.be/L0AY61v6-M4
Part 3 https://youtu.be/WFzIbz2FN28
Part 4 https://youtu.be/OFm...
silent cloud
thank yall! :)_ _
silent cloud
just found out about retopology and im thinking of playing around with it since i already got started on my character sculpt, i think its better right?
sorry bout all these questions and stuff haha, im really invested in this now and theres no going back
spiral sigil
you either poly model with some subsurface modifier
or sculpt and then retopology
at least that's the 2 main ways of doing things from what I know
devout scroll
A popular workflow is to sculpt then do retopology
silent cloud
oooh! interesting!
devout scroll
Which is just modelling on top of the sculpt
silent cloud
good thing i dont have to redo the whole model, thats what i was worried about and that would have sucked cause i got the shapes out decently ahah
 zealous spruce
okay
so you see the ears/fins
i want to be able to change their colour without wipeing the texture away
@leaden mountain
 leaden mountain
zealous spruce
leaden mountain
zealous spruce
damn
 quick gull
Sorry to bother you guys but I spent some time on creating a custom character model and I'm kinda stuck now. The basic issue is that I have too many polygons after applying all modifiers.
Information which might be helpful:
- Model was created in Blender.
- I'm utilizing custom normals and the inverted hull method.
- I already textured it.
- I'm basically imitating the Gulity Gear style (by Arc System Works).
- I still have the lower poly mesh without the subdiv but would like to keep the detail.
What I would like to know?:
- Can I actually bake a normal map to keep the higher detail or would that clash with the custom normals or the texture maps?
- Other suggestions on how to approach this issue?
Thanks in advance.
quaint jasper
Custom normals also on the low poly ?
quick gull
Yes.
quaint jasper
How many poly are you at currently ?
quick gull
About 163 000 triangles.
quaint jasper
Do you have substance ?
quick gull
No, sry I don't since I'm more of a hobbyist.
latent charm
quick gull
Sorry to bother you guys but I spent some time on creating a custom character mo...
You could definitely bake a normal map to keep the detail. you'd likely have to be a little more careful overall to make sure the mesh normals and normal map properly work together once in unity to recreate the original normal vectors.
quick gull
@latent charm @quaint jasper Ok. I'll just have to give it try and see where it takes me. Thanks a lot. :3

 quaint jasper
Box is neat, but now the metal needs to get dirty as hell too !
spiral sigil
It's a WIP!
today I just worked on the box, tomorrow will probably be the metal grunge
 solar fossil
screws and rivets make all models look better
spiral sigil
 thorny ivy
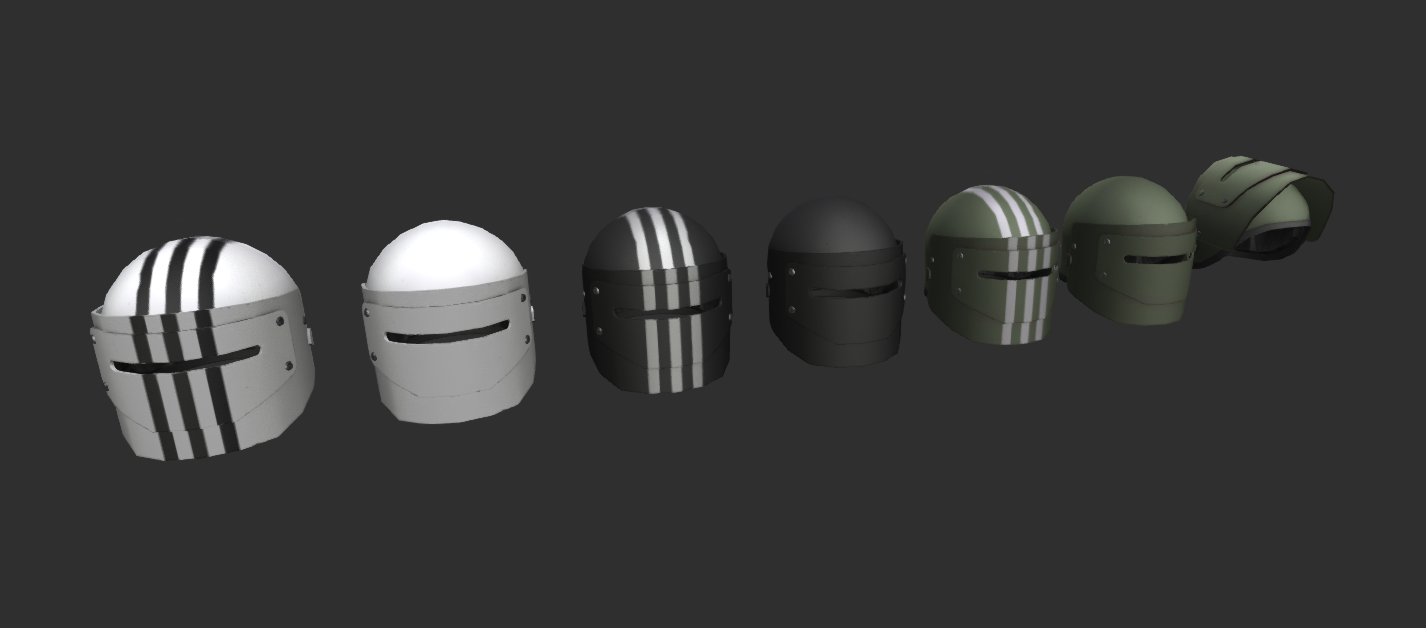
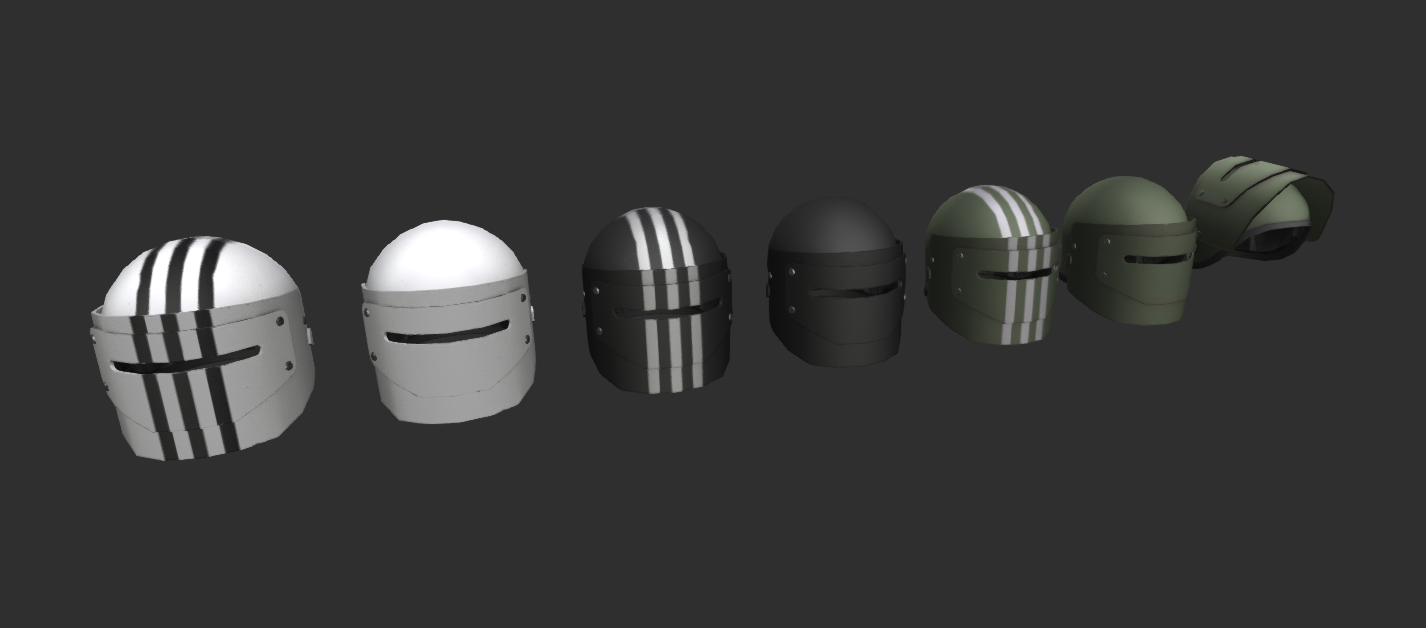
For some fun ctionality, I'd recommend having a way to toggle the visor's position.
It should be relatively easy to rig with a bone for the visor and then an emote which moves it.
spiral sigil
How do I fix this if it's on a ball that I've subdivided?
spiral sigil
yeah
was a little worried it'd stay like that when I imported
@runic nymph with smooth shading on, it still appears like it's made up of squares. bit confused
runic nymph

spiral sigil
am I gonna have to retopology or something dumb like that
spiral sigil
nope
young vault
Also check if auto-normals are on.
runic nymph
o yeah, auto smooth
young vault
That's the name of it. I was forgetting it
runic nymph
its in the object data properties (green triangle where you find shape keys and vertex groups)
under "Normals"
spiral sigil
auto-smooth is off
runic nymph
i just added a simple sphere, no matter with autosmooth on or off it looks fine, how did you scuff yours
young vault
Well, last thing it could be is the texture not being procedural
young vault
but why spheres are easy to make
The only thing is texturing/UVMapping, but, there's so many options to go for that take less than 5-10 minutes.
spiral sigil
runic nymph
did you select a vert and move it
spiral sigil
runic nymph
ye alright
select everything
press M and then select by distance
i hope it didnt have shape keys :^)
runic nymph
good, there you go
spiral sigil
thank you ghosto!!! sorry for not knowing nearly enough about blender
and thank you for your time, both of you!
runic nymph
youre learning, dont be sorry, punk
young vault
A sphere that looks like a rock with shape keys 
spiral sigil
i mean
runic nymph
aaah, its this guy
young vault
Ok, big rock. Sorry. lul
spiral sigil
yeh
runic nymph
whatchu doin with it
solar fossil
you got some weird looking rocks
spiral sigil
gonna make it a replacement head
young vault
But, don't worry about asking. Everyone's been inexperienced before.
spiral sigil
ahem ahem
runic nymph

young vault
"outsourced"
spiral sigil
"locally grown"
runic nymph
mhm
spiral sigil
worst part about this was my hazy memory and vaguely remembering it was a simple solution but not knowing what it was
runic nymph
np
 azure tulip
trying to create cute little fox forest for vrc. we shall see how this will go ✨
devout scroll
Looks good!
 nimble sigil
Anyone know how to fix this type of uv? Not sure whats happening ;-;
nimble sigil
Sorry,what exactly do you mean? Sould I add more seam?
young vault
What does it look like atm?
onyx crane
azure tulip
trying to create cute little fox forest for vrc. we shall see how this will go ...
I found this today and thought of your post. Not sure if it would help you but it has a lot of free .anims you can use as well https://assetstore.unity.com/packages/3d/characters/animals/toon-fox-183005
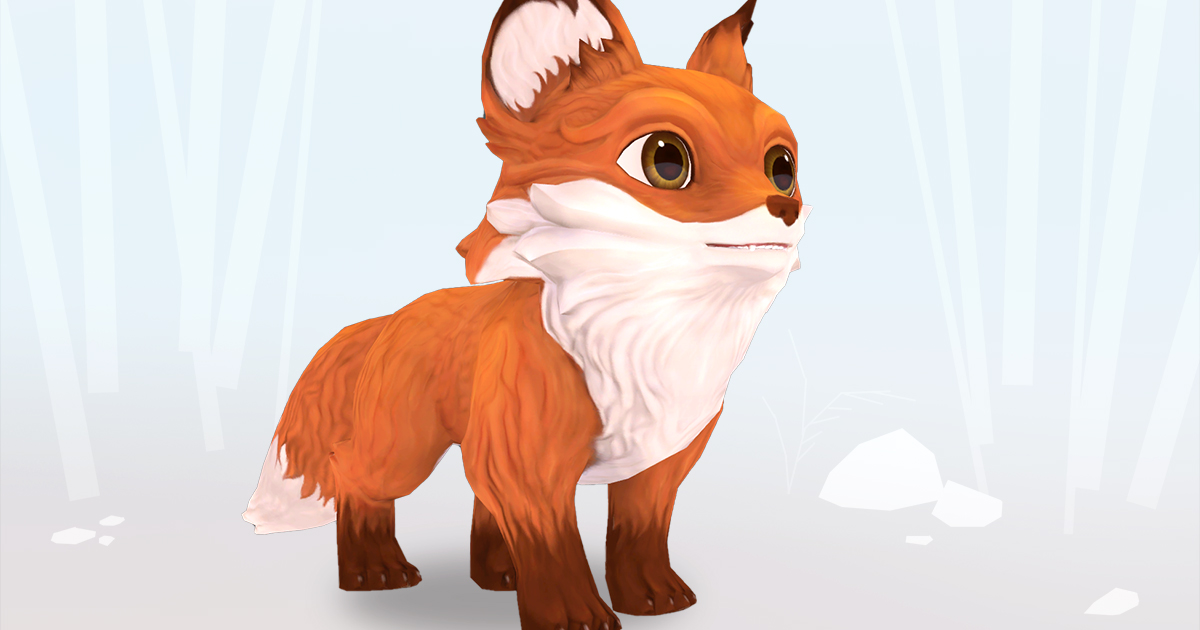
Elevate your workflow with the Toon Fox asset from Pxltiger. Find this & other Animals options on the Unity Asset Store.
nimble sigil
the mesh?
young vault
Yes
nimble sigil
the highlighted green part is what the uv is
ignore the awful topology, gonna fix it soon 😅
young vault
Should fix topology before unwrap it'll be easier
azure tulip
onyx crane
I found this today and thought of your post. Not sure if it would help you but i...
thanks. the rigs might be helpful in learning
young vault
Otherwise, I'd do diagonal seams on the crosssections or make a 4cut seam (split into north, south, west, east)
nimble sigil
Ah I see, thank you :D
 ripe tangle
well, for a first time 3D modelling since... 2013-2014, maybe, I guess this'll work as a bed. Of course, maybe after I modify it to have rounded corners.
clear geyser
Currently a minecraft bed 
ripe tangle
LUL
quaint jasper
you should try using blender 2.83
ripe tangle
Yeah, just haven't gotten around to updating it yet, so I make do with what I've got
 zenith kettle
can anyone tell me how this looks, i'm trying to improve on making models
mind you it's not finished yet and i will add a body and accessories
young vault
Pretty good! Eyes could use some work, specifically the eyelid. Ears could use some work, they look way too cartoony round compared to the face, easy fix with some irregularity in the ear (some dips on the outer region can look great). And I'm unsure about what happened at the bottom by the jaw, but, that looks like it'll unhinge or that the head is a puppet... which, I assume is not the intended design?
hardy lake
could somebody help me understand why substance painter is ruining my bake? trying to bake high poly to low poly
zenith kettle
young vault
Pretty good! Eyes could use some work, specifically the eyelid. Ears could use ...
it was the intended design of the jaw, indeed. and the eyelids are supposed to look like that but ill work on the ears, thanks for the advice
onyx crane
hardy lake
could somebody help me understand why substance painter is ruining my bake? tryi...
The high poly to low poly function is pretty finicky in my experience. Try messing around with the settings you have under "Common Parameters" (same place you go to choose your hp mesh) -- maybe your other parameters too like the settings for curvature, etc... if that doesn't get you good results maybe try baking in Blender instead and then reimporting your new bakes to SP
 strong basalt
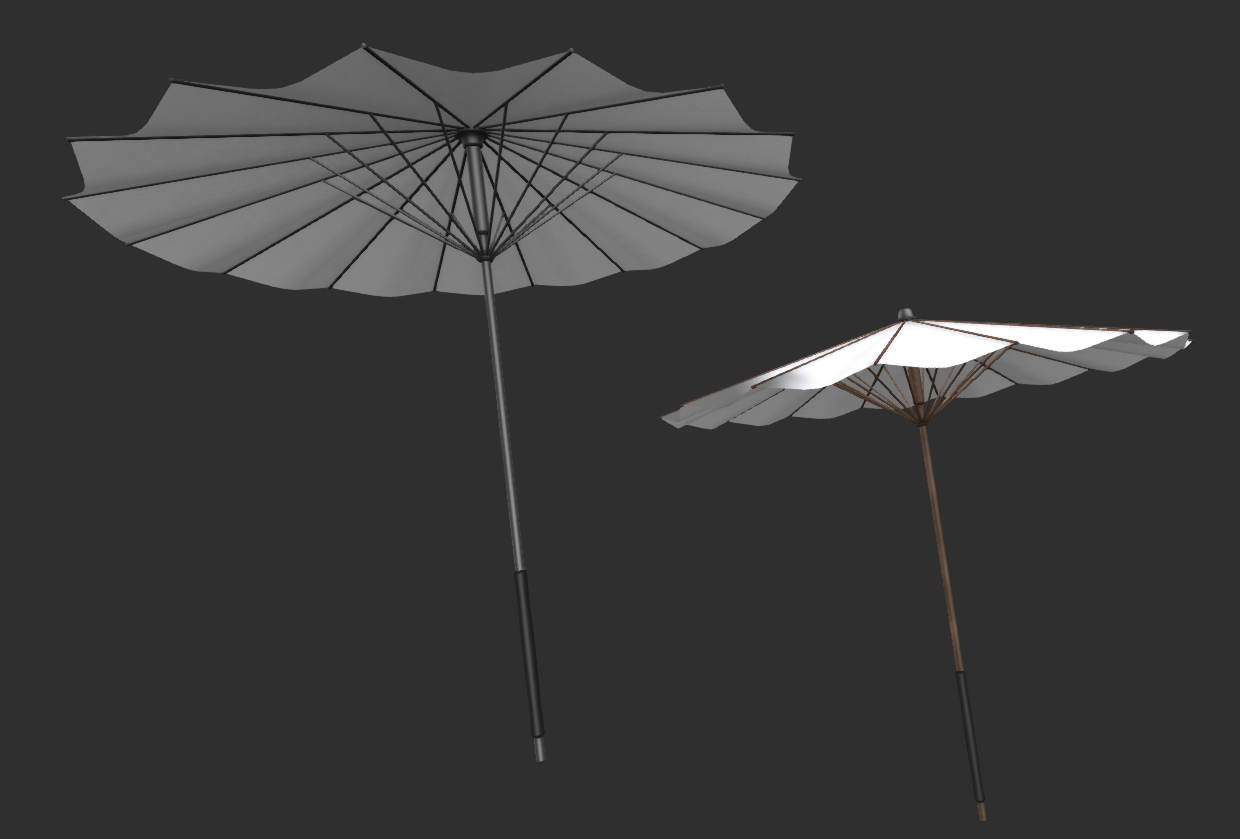
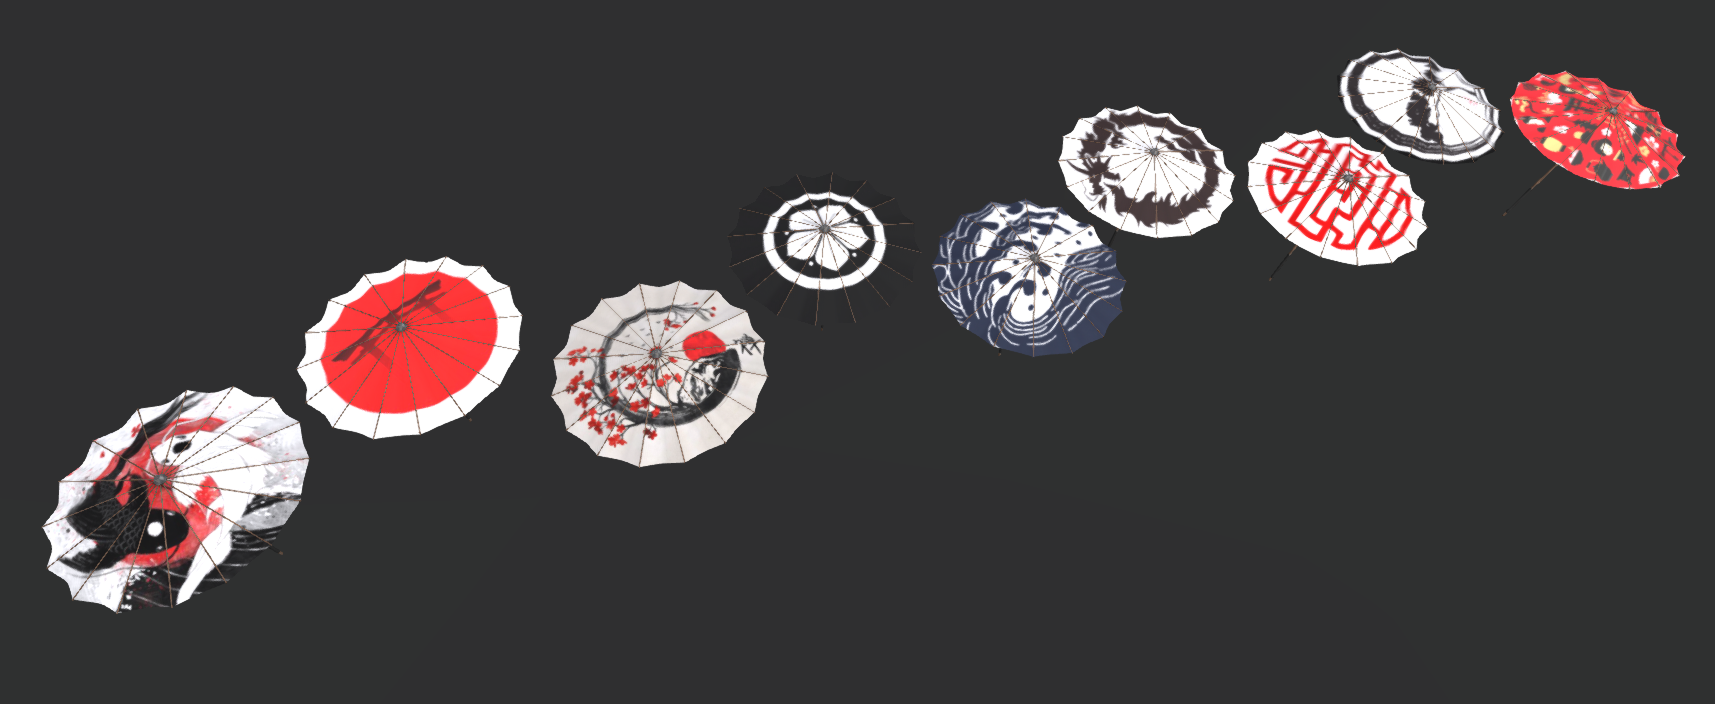
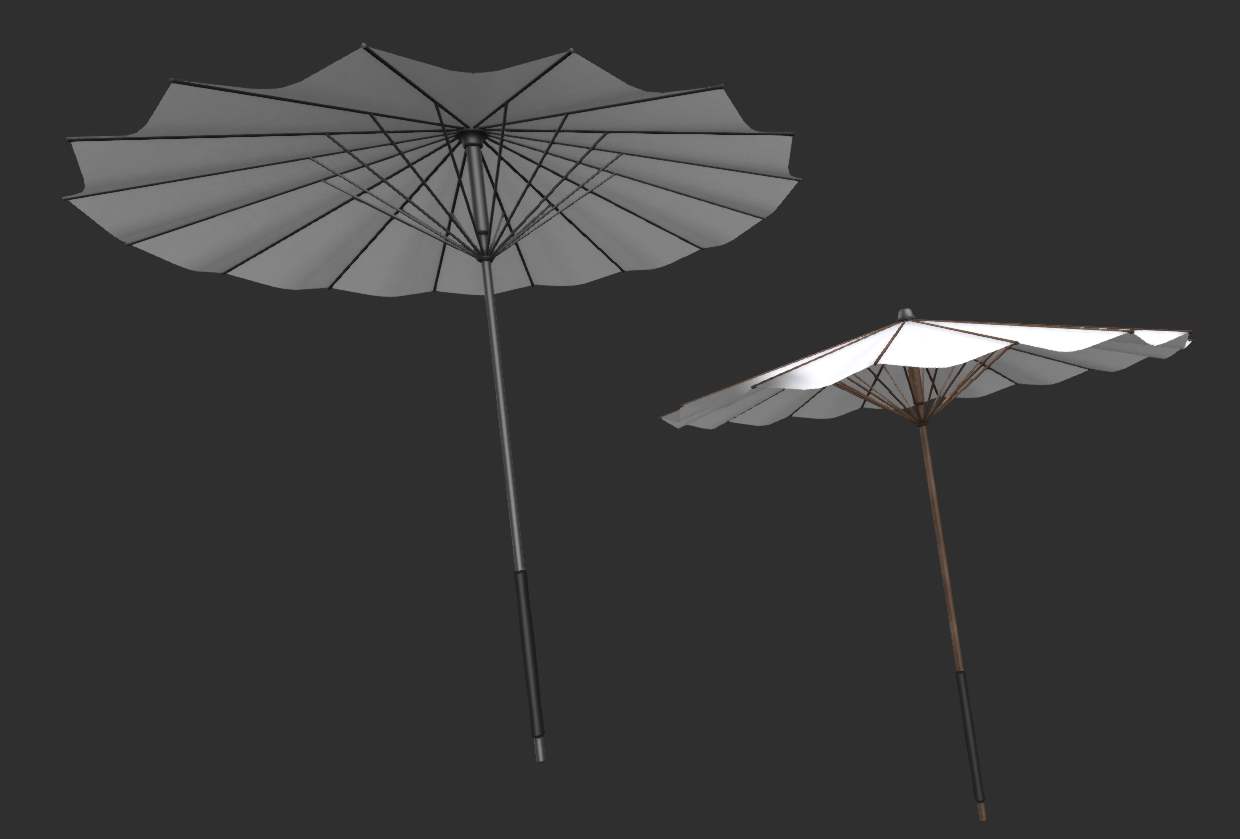
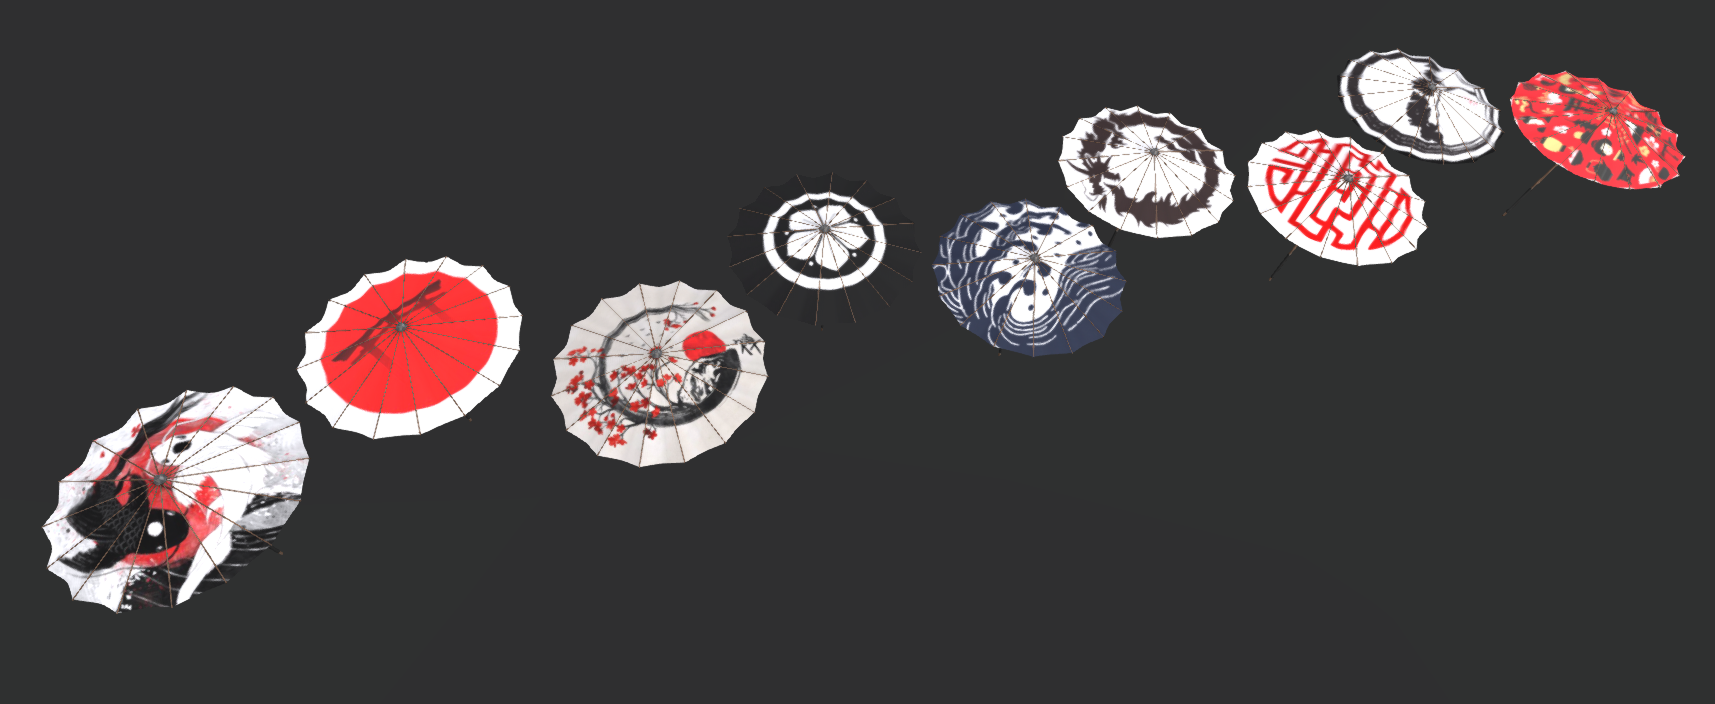
Oh, very nice umbrella you got out there buddy
ripe tangle
finally, some progress - it's relatively smoother now
also had to remake it from scratch because it wasn't working properly before
 tepid wagon
@hardy lake You need to separate shoelaces into their own objects for HP and LP versions of your model and in "Bake Mesh Maps" change "Match" option from "Always" to "By Mesh Name"
hardy lake
tepid wagon
<@!462039248250470410> You need to separate shoelaces into their own objects for...
Thank you, that helped!
 median pike
@hardy lake baking works by using a "cage" which is a shell around your mesh that tells the baking rays how far they should scan the highpoly, if these cages overlap with another part of the mesh they will bake that one on as well, so in this case the strings are getting baked on to the shoe because they are too close. The way to fix this is to explode your mesh and bake normals that way,

How to explode and bake the normal textures in Substance Painter
hope this helps
hardy lake
Got it, thank you :)
 meager harness
So here's the thing, I'm wanting to make a anthro horse/pony to be able to do vr with my pony oc, but to do that I'ma need to learn how to 3d model in blender and stuff like that. Can anyone direct me to a video or a channel that will teach me how do 3d model a anthro horse/pony
Something like this
devout scroll
same way as you'd model anything else but considering you don't know 3d it's way too ambitious for you
meager harness
What do you mean?
meager harness
devout scroll
same way as you'd model anything else but considering you don't know 3d it's way...
Can you bring me to a video or a channel that will teach me how to 3d model in blender
Or no
devout scroll
meager harness
Can you bring me to a video or a channel that will teach me how to 3d model in b...

Discussing the best places to learn Blender (2.9).
Links here: https://curtisholt.online/blog/the-best-places-to-learn-blender-links
CHAPTERS:
00:00 - Intro
00:39 - Should You Learn From 2.7?
01:30 - Starting from the Beginning
04:08 - Benefits of Paid Courses
05:47 - Where to Find Paid Courses
06:23 - CG Boost
07:57 - Udemy
08:38 -...
meager harness
Thanks
devout scroll
 onyx crane
Seconding Grant's course ^ Taught me a ton
 azure scroll
Does anyone know how set up mouth tracking even though it's in japanese?
runic nymph
cats plugin has translation
 short edge
 cerulean shoal
clean the edges and make it loop
do it in whatever way you can without making it look bad
 river trellis
obama prism helping with modeling now, nice
spiral sigil

 shy gale
hallo i a 13 year old vrchat modeler and the model isn't working?? can i get some help?
warped merlin
spiral sigil
https://i.gyazo.com/63fad998207a1e0a783614ae02f5fd84.jpg
https://i.gyazo.com/994...
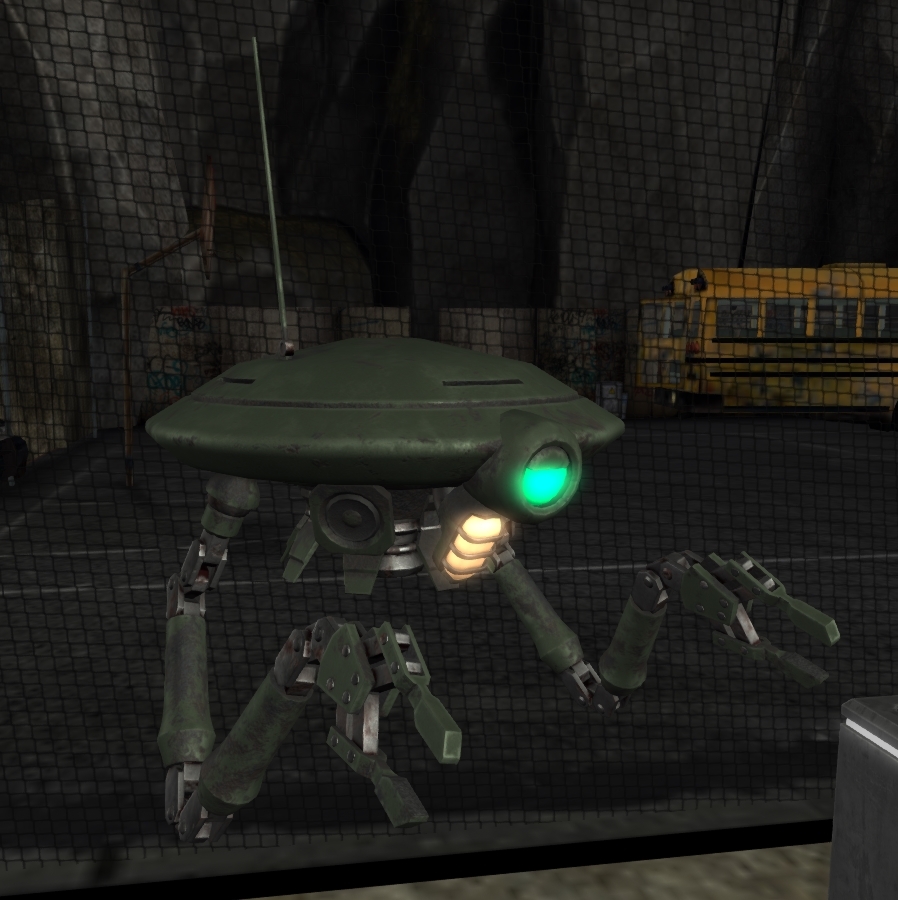
Is that a tau construction drone?
spiral sigil
@warped merlin It is just a fallout themed bot I came up with, but I can see the similarities.
thorny ivy
@spiral sigil It's far more Tau then anything remotely Fallout, too slender and compact.
Needs more bulk and "kibble", basically stuff which hints at what it does/how it functions.
Vents, exposed mechanisms, compartments, wires, antennas, etc.
Personally, I'd do a redesign using the following concept art as reference with the offical Mister Handy one for how the arms would be laid out more or less.
https://www.flickr.com/photos/47857688@N08/6877196071/in/album-72157629320774861/
https://www.flickr.com/photos/47857688@N08/6877195779/in/album-72157629320774861/
https://www.flickr.com/photos/47857688@N08/6877239981/in/album-72157629320774861/
https://www.flickr.com/photos/47857688@N08/6877236025/in/album-72157629320774861/
https://www.flickr.com/photos/47857688@N08/6877233903/in/album-72157629320774861/
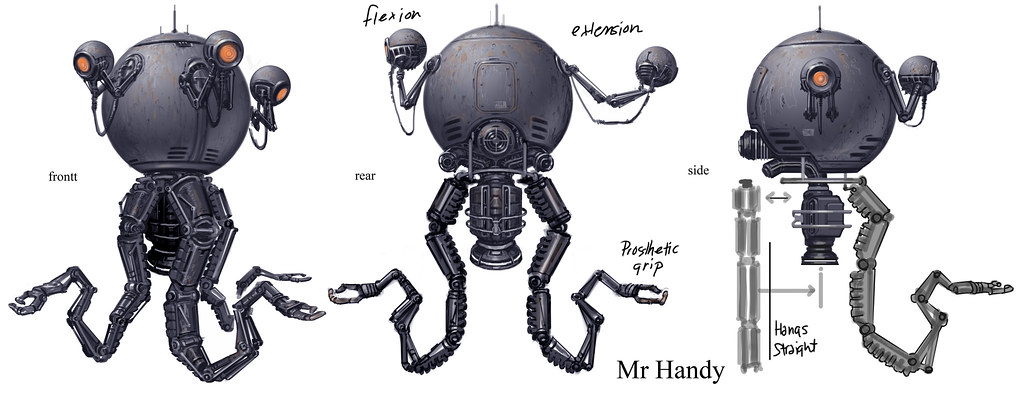
Explore Bethesda Blog's photos on Flickr. Bethesda Blog has uploaded 3378 photos to Flickr.
Explore Bethesda Blog's photos on Flickr. Bethesda Blog has uploaded 3378 photos to Flickr.
Explore Bethesda Blog's photos on Flickr. Bethesda Blog has uploaded 3378 photos to Flickr.
Explore Bethesda Blog's photos on Flickr. Bethesda Blog has uploaded 3378 photos to Flickr.
Explore Bethesda Blog's photos on Flickr. Bethesda Blog has uploaded 3378 photos to Flickr.
white moth
What's the easiest way to convert this to quads based on UV's? Normal Tri to Quad only results in sadness.
(yes I know it's unoptimized right now)
devout scroll
have you changed the angle on tris to quads
you can try one of the select similar options (shift+G)
select one diagonal then select similar
face angles seems to do a good job for me on a triangulated sphere
 sturdy lichen
I made this video to thank my friends
https://www.youtube.com/watch?v=41-UvnGIw3w

This is a thank you letter to some of my friendships. They are all very creative and cool people.
https://twitter.com/Lironhero/status/1335273440840970241
https://www.instagram.com/p/CIbHjwwjgY4/
ripe tangle
welp, I can't say I didn't try, but I might make it from scratch again, since this texture map is an absolute mess.
short edge
how do I make the visor a separate material so I can put a different texture on it
clear geyser
ripe tangle
welp, I can't say I didn't try, but I might make it from scratch again, since th...
Mark seams then unwrap
ripe tangle
finally, it's done - the lighting in the Blender Render's wonky, but if I put the texture in Shadeless, I can see that it's all how I wanted
974 Verts, 1749 Faces and 1994 Tris. Should be light.
I'll take this as a victory.
 deep dirge
why is this an ngon?
do you also need that many edges for a perfectly straight part of the model
and you uv unwrapping is just why? you need to add seams the the mesh and unwrap it after, even then, why is the texture that big? it wont look well as anything other than flat colors, and that could be done by just scaling down all the uvs by 0 and placing them around a 1x4 pixel image with those colors.
ripe tangle
...
deep dirge
that model should not be 2k polygons
ripe tangle
I haven't modelled in over 6 years. I cut corners with modifiers. Cut me some slack.
deep dirge
Ok, but its still super busted, and over done in areas.
just dissolve some edges
and refill faces, and it will be better
 primal narwhal
Personally as long as the model looks correct and the maker is happy with the details then the UV's really don't matter. Obviously it would be harder to add details and such later on as they are, but if the model is done and there isn't any plans to expand upon it then those work just as well, and prevent all the extra work of fixing it up and etc... if it's really unneeded.
white moth
Can blender select all quads that aren’t planes?
Unity keeps triangulating them along the wrong diagonal
 atomic hamlet
short edge
how do I make the visor a separate material so I can put a different texture on ...
atomic hamlet
short edge
how do I make the visor a separate material so I can put a different texture on ...
Select the faces you want to change, then apply a different material to them.
spiral sigil
 shy gale
the back of my models head is gone- how can i fix this?? (i fixed the face)
 chrome valve
Hey guys I’ve been looking for a download link for the avatar “polygon4932” for about an hour and a half now to no avail. Pretty new to the whole 3D model scene, would someone help a brotha out?
 haughty needle
This isnt strictly related to vrchat but i figured that since there are knowlegeable people here someone might be able to help me out: I want to smooth this edge out without affecting the bowl shape inside it, any good ideas for how to do that? Using sculpting is hard because the topography is pretty bad and causes stuff to deform.
quaint jasper
smooth option in edit mode
haughty needle
this is part of making 3d printable balljointed Kanna starting from a vrchat avatar for reference btw
gonna have a look that that, thanks 🙂
devout scroll
If you're doing 3d printing I heard of an addon called something like 3d printing toolkit that has some features like retopology for fixing meshes
haughty needle
@devout scroll Will have a look but likely its for making sure stuff is manifold, normals set correctly, removing internal geometry etc, things ive kept track of while working on this.
retopology might work if i set the mesh resolution low enough for the jaggies to be excluded but it might the also affect the shape of the bowl the joint is supposed to fit into.
devout scroll
Yeah, i've seen it recommended for making meshes manifold even outside of 3d printing
devout vault
wow you guys are so good
spiral sigil
how do i put a .mesh file into blender?
devout scroll
You can't without exporting it into a usable format
spiral sigil
is there a way to make it a .blend file in any way?
or any file that works with blender
devout scroll
depends on what it is
quaint jasper
If it can be used in the scene then it can be exported, if not then you can't do anything with it
spiral sigil
how do i put it in the scene
spiral sigil
you're talking about unity?
devout scroll
meshes can likely be stuck into mesh renderers but you'd need fbx exporter or something
devout scroll
try newer then i dunno
spiral sigil
ok
devout scroll
but to upload anything to vrchat you must use 2018.4.20f1 in the end
spiral sigil
alright
also what do i do with the file after i put it in the newer unity?
export it as another?
 halcyon fractal
so, I'm using blender, and I don't even know how to explain what is happening here, any way to fix it?
quaint jasper
your normals are facing the wrong way
select all in edit mode and Flip Normals in action menu
halcyon fractal
hmm, I just tried that and it changed nothing
spiral sigil
i'm using the latest
i found an addon that lets me put XNALARA files into blender, maybe that'll work
spiral sigil
it doesn't let me move the mouth in unity, does anyone know why?
spiral sigil
how can i move
runic nymph
move the bone
spiral sigil
where can i move the bone
runic nymph
in the armature
runic nymph

runic nymph
runic nymph
blue ones are normal maps, adds extra detail to model, most shaders have it
the black n white one named body_... looks like occlusion maps, adds extra lighting detail
runic nymph
if a shader supports it, you slot them into appropriate slots in the materials
spiral sigil
where
 spiral sigil
what's a mat
runic nymph
material
spiral sigil
hi, im having a issue with uploading an avatar... it goes to play mode and doesn't upload, what can i do?
runic nymph
you gotta name it and press upload in the "game" window
unless you removed it, it should be there
 quaint jasper
I will defend him at all costs 
vivid crater
@spiral sigil in the future, .mesh files can be imported into blender with xps tools
 outer hedge


 devout scroll
normals look completely messed up
or the texture is wrong
go to the mesh tab and try enabling/disabling auto smooth
it's the upside down triangle tab on the right side
spiral sigil
im not sure if this is the place to ask but, how do i make it so a gesture changes the material of my model in-game?
 glossy totem
Does anyone here use Blender 2.90 and know how to enable the 2D fallout setting from 2.8 so I can weight paint through the mesh?
warped merlin
isn't it same as 2.83?
glossy totem
The UI is a little different in 2.90, I can't find where it is or if it's been changed
warped merlin
2.91; steam
glossy totem
Cheers, I thought I tried that, I must have missed the projected button
thorny ivy
What's a good resolution for horn texture? I'm going for a very specific look and I want it to be clear what the horns are made of.
median pike
I hope you dont want them to be a separate material
thorny ivy
Well, in the prototyping stage atm so they might be for a while.
median pike
bad excuse
if its a "prototype" whatever that means
than why care about resolution at all?
thorny ivy
median pike
just make it right the first time because I can guarantee you wont ever get out of the "prototype" stage
thorny ivy
They're suppose to resemble cinnamon but if the texture's blurry, hard to tell what it's suppose to be.
median pike
add the UVs to youre main body material, Average out the scale and see what you can get away with without sacrificing too much of the original.
if other aspects of the character reinforce the cinnamon look you wont need to have super high res textures because the brain will just fill in the gaps
thorny ivy
Right. This is the first part I've made so far, wanted it to be in the general ballpark of how I envision the final product to look like.
Slapping on some generic horn texture wouldn't have looked right.
median pike
well here
make a new material and put ALLL of the stuff you want to add in to it
a single texture will me more than enough for everything
thorny ivy
720x500(ish) vs 1k.
I didn't upscale, just copy-pasted the original into a seamless texture.
median pike
I mean
if you want my opinion
the texture looks pretty bad
its very flat
AO bake would probably help a lot with that, and doesnt really remind me of cinnamon
and well, it looks like its getting stretched on lower res which means your UV maps are bad as well so I would work on unwrapping those properly before worrying about resolution. you should be able to have a good looking texture on a 512x512 resolution for something like this
thorny ivy
I fixed the stretching with the 1k version. As for the quality, well, not really easy to find a decent cinnamon stick texture. I found a picture online, snipped a part of it, and then went from there.
median pike
make your own
thorny ivy
I'm half-decent at 3D modeling but barely know how to do textures.
 marsh flax
GitHub
Scale your avatar to any size on the fly with a spin of the joystick! - Joshuarox100/VRC-Avatar-Scaling
white moth
thorny ivy
I'm half-decent at 3D modeling but barely know how to do textures.
Learn procedural texturing and have all the work done for you
thorny ivy
white moth
Learn procedural texturing and have all the work done for you
Any special programs for that or would GIMP suffice?
white moth
Blender.
Only blender :p
Blender can procedurally generate materials with nodes and bake them to the models as textures
Substance painter is also a specialized program for creating good materials
Gimp is a 2D program - good for final touches but bad for doing the brunt of the work. You want to paint directly on models not deal with seams
median pike
@thorny ivy also substance designer is super powerful for procedural textures
thorny ivy
median pike
<@!781969501297049640> also substance designer is super powerful for procedural ...
Is it free?
white moth
Yeeeah
Do it with blender
It’s nodes aren’t as user friendly but you can do the same stuff
Tho 200 bucks for the software isn’t that bad of a deal if it’s a one time payment 
Most art programs these days don’t even let you buy them
devout scroll
Depends on your needs
 sterile pebble
Does anybody know how to actually swap out cloths on an avatar in unity? I was given a unity package. No program I download on booth works.
white moth
sterile pebble
Does anybody know how to actually swap out cloths on an avatar in unity? I was g...
Answered this in the other channel you asked it in
 sinful oak

 spiral sigil
I guess i'm going to restart, but is there a good method of creating your own model from scratch, like I want to create a humanoid fox that resembles as a beast or some sort, if anyone is willing to help me please do so.
nimble sigil
Hi, Im super new to 3d modelling. I've been trying to model a robot bird for an assignment but I've hit a hurdle, i'm not quite sure how to model the head? I've been using a cylinder for the neck and body and its worked out well but i can't seem to figure out how to get the shape I need for the head, any help would be appreciated c: (using maya btw)
zenith kettle
hmm... idk maya unfortunately, i’d suggest blender
quaint jasper
@nimble sigil Try using spheres, remove the bottom half and them use proportional editing to shape it
 storm hound
anyone able to help me out?
i am trying to connect an object made in blender that i imported to a model in unity. but i can't seem to export it due to a root error i don't really know how to solve
quaint jasper
root error ?
storm hound
hummm nvm seems i solved it, apparently i wasn't highlighting it right.
sorry to bother, i mean hopefully i didn't mess up attaching the horn
ok apparently i still messed it up...and it shows up in luppet like this
quaint jasper
what you want is the mesh
not the bone
take the horn mesh in the armature and drop it below the head bone of the main armature
and delete whatever bone the horn used
@storm hound
runic nymph
yes
runic nymph
yeah, i guess
this sort of thing should be done in blender to minimise mesh count but that works too
storm hound
hummm ok i will export and give it a try, also i made the horn in blender and already decimated it
i want to thank you all so much. most of the people who i asked basically were telling me to start from unity 101...this was SO much more simpler i greatly appreciate it so much!
many of the things were telling me i need special compiler scripts...
runic nymph
on behalf of rubick ill say youre welcome
storm hound
hugs
runic nymph

 ripe yacht
Can someone here help me with a problem?
I want to create a chest for a model, but idk how to make it the best way.
It has holes can someone explain that to me, how to create it?
devout scroll
try grid fill
ripe yacht
well then its just flat
runic nymph
extrooode a ring, pull outwards, repeat
young vault
You smooth it out after filling it in
Can't polish a piece of iron that hasn't been made yet.
I guess you can polish the air that it's meant to be in, but, that doesn't really fix the problem of having an ugly piece of iron.
ripe yacht
How do i smooth that out?
Smoothing only bugs it out like idk what
it seems to roughen it up nothing more
ripe yacht
oh unsmooth is even worse that already was the smooth one
with unsmooth i mean flat or however its called
and smooth tool doesnt work..
young vault
How did you even do it
ripe yacht
even triangulating doesnt fix it
young vault
...show the mesh that you made?
ripe yacht
thats the side
devout scroll
sculpt it, go over it with smooth brush and inflate
if it's still ugly just subdivide the area you created once
 narrow forum
is this blender?
devout scroll
yes
narrow forum
easiest way is extrude, and modify the shape using proportional editing
don't even need to touch the sculpting tools if you want
devout scroll
sculpting is easier, but you can do proportional if you want yeah
young vault
For some people sculpting is easier.
narrow forum
im still not sure whats the best endcap, keeping it as a ngon or reducing it to a single vertex
devout scroll
single vertex will likely look sharp
and if you want ||nipples|| you gotta do a quad
narrow forum
you're right :V
devout scroll
alright, hang tight, I'll record a short video for you soon
ripe yacht
dont mean to push or anything but just so that i know, when will that be? around today or later?
devout scroll
in a few minutes
ripe yacht
will you dm it to me or upload it and send a link?
white moth
That looks like collapsed triangles
ripe yacht
if i knew how to fix that
devout scroll
Actually i'm having some trouble figuring out the best way to do it atm
But what I generally do is what I described above
You can do tris to quads then grid fill, then inflate and smooth in sculpt mode
You can select everything that looks weird and merge by distance as well just in case
The topology kinda sucks because there's a split down the middle, but it should still look okay
ripe yacht
ill try it later bcz im trying to spend some time with my gf rn little more than 1hour
yet howd i add yknow
ripe yacht
||nipples||
devout scroll
same thing except you select the edge loop with alt click, extrude, cancel with right click then scale in, repeat until you got what you want
except here you want to use normal orientation (open menu with ,) and pivot point set to normal (open menu with .)
alt+click to select edge loop
ripe yacht
maybe autosmooth was my problem