#3d-modeling
1 messages · Page 18 of 1
 tranquil tide

Specifically only it's signs with the name
To say
Arthur M. Anderson
On it instead


 hushed leaf
So what is the problem?
 tough plover
tranquil tide
To say
Arthur M. Anderson
On it instead
tough plover
tranquil tide
To say
Arthur M. Anderson
On it instead
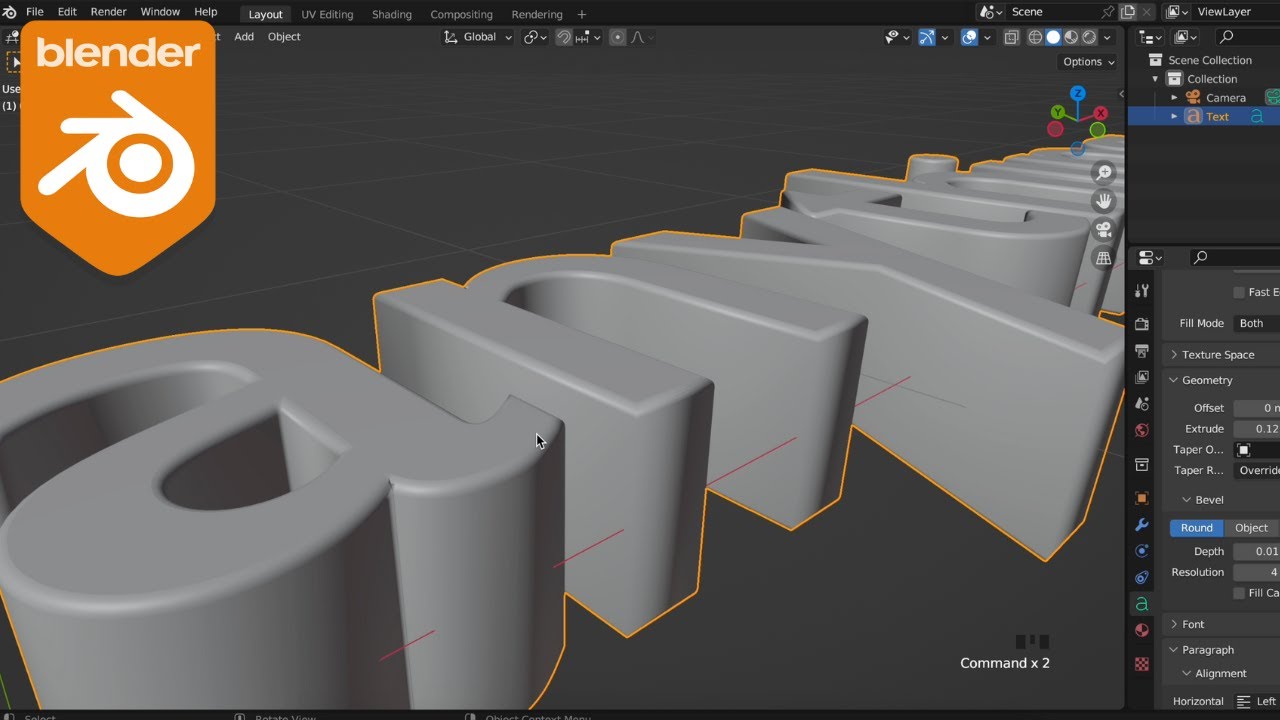
you don't really need to make it 3d for your use case, but this at least shows you how to make the text
hushed leaf
I assume that's the usual import .svg, extrude?
this is one of the first 3D things I ever did, but the process is a lot different now than it was in 3D studio (not Max, the DOS one)
tough plover
hushed leaf
I assume that's the usual import .svg, extrude?
no, blender can just conjure up text
hushed leaf
oh that's right, it can
clearly I haven't tried in a while
I tend to do 2D work in inkscape then 3D it
 faint bronze
just make it a texture?
 woeful cave
I need someone to teach me how to do muscles on furry vrchat avatars?
hushed leaf
"do muscles"?
 white sonnet
 hushed leaf
Shape Keys: Allow drag and drop within shape keys list. (0eed084cad)
Might be the single thing in Blender 5 I'm most excited about
 tawny spire
woeful cave
I need someone to teach me how to do muscles on furry vrchat avatars?
tawny spire
woeful cave
I need someone to teach me how to do muscles on furry vrchat avatars?
Hey I saw you’re looking for someone who can teach you how to do muscles on furry VRChat avatars. I’m actually a professional creator and I’ve worked a lot with avatar sculpting, body shaping, and stylized anatomy including muscular builds for furry models. If you want, I can walk you through the process step by step, explain the workflow, or even help you practice on your own model. No pressure at all just let me know what you’re aiming for and I’ll see how I can help!
 bitter fulcrum
Where would i ask if anybody has a model of a character? (Idm if rigged or not)
I really want a penny from rwby that isnt the mmd model 😭
hushed leaf
#1138520828556890214 probably
woeful cave
tawny spire
Hey I saw you’re looking for someone who can teach you how to do muscles on furr...
Yes definitely
 cosmic frost
thats so fuckin tuff. good job
 fair vigil
cosmic frost
thats so fuckin tuff. good job
fair vigil
cosmic frost
thats so fuckin tuff. good job
thank you 🙂↕️
cosmic frost
fair vigil
thank you 🙂↕️
yes yes you should be proud of it
 pine raft
@tame burrow
Let me grab some.
https://docs.blender.org/manual/en/latest/interface/window_system/introduction.html
https://youtu.be/kVcY7K-JA1Y?list=PLn3ukorJv4vv9_e-htADGsPX9TMaQpHV8
To start with.

#blender3d #gamedev #3danimation
Are you an absolute beginner to 3D? This is the free, complete course designed to teach you Blender 5 from scratch. By the end of this methodical series, you will create the entire fun 3D scene shown in the thumbnail!
In this video (Part 1), we look at the interface, covering the absolute fundamentals:
00:00:00...
This tutorial series is still WIP.
Consider using the Blender 3/4 tuturial series and using the interface explanations from the new 5 series.
 tame burrow
thank u ;;
pine raft
The key concepts for optimizing will be 'edge dissolve', 'circle select', 'loop select', 'loop cut', 'knife tool', and the camera controls. You can use Shift+~ to walk/fly (noclip).
The basic idea is that you find a loop that isn't too important, you select it, then dissolve it.
Dissolving deletes the loop and maintains connections of edges.
Therefore, instead of leaving a gap, it will use the other edges the edges you dissolved are connected to in order to decide the best edges to connect with. It rarely fails but it does generate something called an 'ngon'
tame burrow
very tempted to just get help for it tbh
idk if i have the energy to get it working myself lmao
pine raft
That's fine. Just giving this information here since it's useful for other beginners searching the text.
tame burrow
ye!
pine raft
So in 3D, all quads are secretly fake on the GPU, as the GPU only draws triangles. You don't really need to ever care about this as you'll want to focus on both triangles and quads, but 'ngons' are polygons with more than 4 sides.
tame burrow
yeah
pine raft
It's called 'n' gon because it's '(n)umber of sides' polygon.
tame burrow
never have ngons
tame burrow
ye
pine raft
That's how they render to the GPU.
And if you triangulate the ngon, you'll see the approximation of what Blender did.
And once you see it you'll see it everywhere.
Because in gamedev, ngons aren't actually evil.
Because they're just the same triangles in the model file, but in the editor they don't look like it.
The secret to using them is that they create dense triangles.
Where many points converge on a single point, which can make shading look really wierd.
So you can get away with it on flat faces.
Let me grab an example from a game where it's incredibly obvious they did exactly this.
A sword modelled by hand with cleaned topology manually.

A model with selective cleaning and ngons.

Yet it looks fine since the ngons are constrained to flat edges.
Notice how the cylinders have spiderwebs going from them? That's literally just what happens when you have an ngon and turn it into triangles using an algorithm.
Ngons are evil for tools that require loops though, such as loopcut, loop select, subdivision, armature deformation, that sort.
That's the difference.
Learn the basics of 3d models and their geometry. This information should help you when it comes to creating your own 3d models.
Looking for Blender 3d resources? Check out my website for links to assets, addons, discord, and more.
https://www.pzthree.com/
This video is great for explaining topology itself as a concept.
It's an exercise in keeping topology clean, but when you're optimizing, you can be way more destructive.
You can be as destructive as you want really as long as the outcome looks good. Many people get so destructive that they use a decimation modifier on their model and call it a day.
As an example. @tame burrow


That's decimate.
Many beginner artists run decimate just to get the model rendering on Quest.
I can't suggest it personally but if you're desperate, it's a solution.
tame burrow
some1s having a look at it
and said these tris arent too bad
and other stats arent too bad
so im like huh
pine raft
tame burrow
and said these tris arent too bad
It's not disgusting.
If that means anything.
We've all seen worse.
It's just something you can with enough patience hammer away at.
And get something incredibly optimized out of.
pine raft
That's fine. This information will be here if you ever feel the desire to try your hand at it.
tame burrow
so im super grateful for their help and for urs i truely appreciate u
pine raft
All it takes is watching and understanding some videos and throwing shit at the wall in the software and breaking it then reinstalling it until you figure it out.
:)
Oh and avoid the donut.
tame burrow
yeah atm i just want my beloved model in vrchat working and when i have more than negative spoons i can work on it seperately
pine raft
Youtube guide series, not useful.
pine raft
tame burrow
yeah atm i just want my beloved model in vrchat working and when i have more tha...
Very relatable! I get it completely.
Hope you can decompress well.
tame burrow
its like i need some1 to explain to me like im a 2 yr old but not let me figure out theyre treating me like a 2 year old yknow
like im slow processing but talking dumb to me makes me go 😠
pine raft
I actually thought I learnt best like that throughout elementary school but found that watching people work through things actually allows my brain puzzle solving to have a fieldday while I watch.
Lets me notice patterns in what they're doing.
Then upon hearing explanations of patterns it clicks.
Which if you want to see that 'speedmodels' and workflows are amazing.
pine raft
tame burrow
so if they rapid fire stuff i panic
Usually it's more about watching for patterns and pausing and using the < and > keys to go frame by frame if I really want to see something specific.
Learning the workflow -> learning specifics is my favorite way to learn.
tame burrow
luckily at the jewellery school im starting at soon
pine raft
Or in other words, watching someone work, then learning the details of each.
pine raft
tame burrow
so if they rapid fire stuff i panic
Here's a speedmodel with a highly modified Blender distro from a professional.
https://youtu.be/JYscTeWfCVM
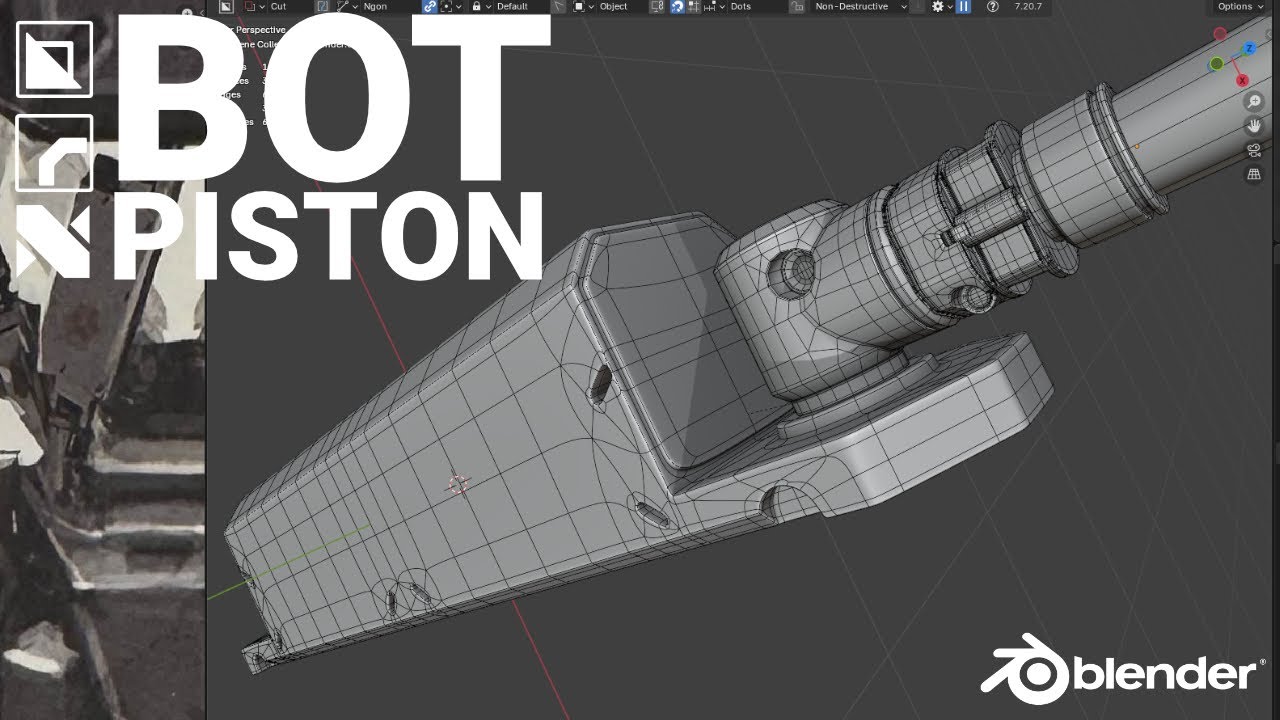
A playlist on the series is also available.
https://youtube.com/playlist?list=PL0RqAjByAphFVYnNNKEIjWtRGIZWK0dn1&si=bjj_xc28UzS2DLq7
The midsection required a little more work so here we are early morning getting in there and modeling those missing pistons. The support chassis for them also needed refinement so we got in there and also leveled...
It'll be overwhelming.
But instead of focusing on every detail, consider trying to specifically watch just the process of going from nothing to something.
It isn't about you learning how to do it by watching it, but seeing the steps he's going through, maybe looking for patterns inbetween, and learning that models don't just immediately become pretty.
And that there's alot of inbetween where it's all just problemsolving skills.
I watch this kind of stuff for fun personally as this is my special interest.
tame burrow
mines video game lore i forget in 10 mins
 silent mason
Can someone make me a FREE custom n from murder drones avatar IF YOU WATCHED THE SERIES DM ME REMEMBER FOR FREE
 carmine pagoda
silent mason
Can someone make me a FREE custom n from murder drones avatar IF YOU WATCHED THE...
carmine pagoda
silent mason
Can someone make me a FREE custom n from murder drones avatar IF YOU WATCHED THE...
All you’re gonna get is scammers man, you could look for one in https://discord.com/channels/189511567539306508/1138520828556890214 but aside from that people probably aren’t gonna make you one for free.
 magic perch
carmine pagoda
All you’re gonna get is scammers man, you could look for one in https://discord....
magic perch
carmine pagoda
All you’re gonna get is scammers man, you could look for one in https://discord....
Well I don't think anyone gonna scam for free lol
carmine pagoda
magic perch
Well I don't think anyone gonna scam for free lol
Of course, but they hear the “can I get an avatar” and start foaming at the mouth. Better to not even ask.
 unique galleon
silent mason
Can someone make me a FREE custom n from murder drones avatar IF YOU WATCHED THE...
unique galleon
silent mason
Can someone make me a FREE custom n from murder drones avatar IF YOU WATCHED THE...
No
 limpid gazelle
do i apply subdivision surf modifier to the finalized base mesh of the body of the model before rigging/weight painting?
hushed leaf
I'd do it as soon as you're done modeling, so yeah, before weight paint
limpid gazelle
hushed leaf
I'd do it as soon as you're done modeling, so yeah, before weight paint
tyty

 rain oracle
Jesus Christ man 😭
 magic thistle
magic thistle
magic thistle
 naive bolt


 west jungle
 onyx shale
Charlie, the Eater of Souls
onyx shale
Charlie, the Eater of Souls
seriously cool

 devout coyote
Yo is there a way to make his eyes eternally closed

 keen sierra
Yes
keen sierra
Set the blink blendshape to 100 and disable blinking in the descriptor
devout coyote
In unity?
Sorry I’m new to this 💔
And also how do I put a unity project into blender or an avatar
 balmy tartan
baby steps
hushed leaf
devout coyote
And also how do I put a unity project into blender or an avatar
you look in your Unity project to find the model file, usually a .fbx, then you import that into Blender.
devout coyote
hushed leaf
you look in your Unity project to find the model file, usually a .fbx, then you ...
What do I do if there are multiple fax?
Fb
Fox
Fbx
devout coyote
lol
 hushed leaf
that would be quite strange, but it does happen sometimes.
yeah those are probably .fbx files - look at them outside Unity to see filenames
devout coyote
There is different versions of the avatar for some reason
hushed leaf
that often happens too
 hushed leaf
No idea without having that project myself, but I'd guess you want the quest one if you use quest, otherwise not that one.
hushed leaf
what about them?
devout coyote
keen sierra
Set the blink blendshape to 100 and disable blinking in the descriptor
This
hushed leaf
in Unity, find the Skinned Mesh Renderer that's the face, and in the inspector is a list of Blendshapes
 unique galleon
That’s blender…
balmy tartan
 devout coyote
bruh I’m restarted 😂
unique galleon
You might wanna find yourself some tutorials so you can more easily understand the basics 😅
devout coyote
Ive been trying they all are so vague 💔
hushed leaf
I'd suggest basic VRChat avatar creation tutorials, and this: https://creators.vrchat.com/avatars/creating-your-first-avatar
VRChat has tens of millions of avatars, and anyone can create them! This page explains how you can create your first VRChat avatar. There are two ways to create an avatar:
#avatar-help is a good place to ask questions about that.
devout coyote
K
Is there something I need to turn on so the blendshape sliders sync with the avatar?
devout coyote
Huh
balmy tartan
your skipping steps just get your head around unity then worry about your oc
devout coyote
Ok
keen sierra
devout coyote
The settings you changed there are for how fast the avatar will look at new targets (other people) as in appearing more or less shy/confident. They do not control the eyelids and those are also not blendshape sliders. The blendshape sliders are on the mesh (body) itself, not on the avatar root (where you are).
unique galleon
Is there a certain trick or modifier that’ll make weaving string lights around/through things more easy? I guess you can probably pull it off with a curve? 🤔
I know you can use a curve to array the light bulbs so I think I don’t actually need any help 😅
tough plover
unique galleon
I know you can use a curve to array the light bulbs so I think I don’t actually ...
could use some basic geometry nodes to do that
there's definitely many tutorials about doing stuff like that
fair vigil
Last Son of Alcatraz WIP. Texture edit of Superman from "Superman Returns" (ds/dsi)

 snow wyvern
she is not done yet


 rain oracle
fair vigil
Last Son of Alcatraz WIP. Texture edit of Superman from "Superman Returns" (ds/d...
rain oracle
fair vigil
Last Son of Alcatraz WIP. Texture edit of Superman from "Superman Returns" (ds/d...
Do you plan to try and make the full horned serpent since you made the head?
 karmic stirrup
Not sure if anyone saw this, but could this be potentially used to create the FT shapekeys for an avi in blender?

GitHub
LiveLinkFace ARKit Receiver is a Blender add-on that receives facial tracking data sent from the Live Link Face app on iPhone and automatically applies it to Shape Keys in Blender. - shun126/liveli...
hushed leaf
karmic stirrup
Not sure if anyone saw this, but could this be potentially used to create the FT...
The way I read that is that it can activate existing shape keys, not create new ones.
fair vigil
rain oracle
Do you plan to try and make the full horned serpent since you made the head?
im unsure- my current objective is to make nixonverse specific models- but i imagine the horned serpent wouldn't be too hard
rain oracle
I watched wendigoons video on monument mythos a few days ago and was baffled by how Insane the series actually is
 green fox
Is there any way to fix this mesh having this weird dark area? I'm not entirely sure what caused it but what I've found so far is that it's visible in both blender and unity and while it shows a jagged edge it doesn't follow the vertices of the body. I'm in blender 4.5.4 and the only other thing I could think to check was the face orientations based on searching but I didn't see any flipped faces.
Edit: It partially follows the body vertices but offset for some reason.


 hushed leaf
Looks like normals - unless you have custom normals there you could select the faces and in the normals menu (alt+n) do "reset vectors"
green fox
hushed leaf
Looks like normals - unless you have custom normals there you could select the f...
Hell yeah thx that fixed it
hushed leaf
excellent
 sand delta
to fix this outfit,should i modify the weight paint of my mini short or the avi ?
 hushed leaf
I'd probably fix the clothing
sand delta
you mean sculpting it a litle bit ?
hushed leaf
if needed, sure.
 toxic iron
Thank you so so so much
 foggy plank
@lime hornet
 sonic silo
sand delta
to fix this outfit,should i modify the weight paint of my mini short or the avi ...
sonic silo
sand delta
to fix this outfit,should i modify the weight paint of my mini short or the avi ...
It's nice
Currently on this
Is it good
 hushed leaf
weird, that's twice now I've had blender hang when drag-moving a shapekey
 rugged quartz
Can someone help me with my vrchat model for mobile
hushed leaf
rugged quartz
Can someone help me with my vrchat model for mobile
Probably, if you ask more specific questions
rugged quartz
Ummmm can people do it for free I don't have money for it
hushed leaf
no. but maybe you could get help in the free section of the VRC Traders discord.
I wouldn't expect much though, people rarely like to work for free.
hushed leaf
hushed leaf
weird, that's twice now I've had blender hang when drag-moving a shapekey
argh - not just moving them, just clicked on one and it hugn.
 terse flame
just gonna leave this here:

 winter iron
terse flame
just gonna leave this here:
winter iron
terse flame
just gonna leave this here:
Did you make a cardboard version?
 modest halo
hey diven
cardboard version of what are you asking about a cardboard mock up of the object in your unity hierarchy a cardboard prop version of the weapon beam a cardboard version someone mentioned earlier or something else entirely
terse flame
winter iron
Did you make a cardboard version?
Yes, and it works, i put it on my gumroad for free
winter iron
terse flame
Yes, and it works, i put it on my gumroad for free
you beat me to it lmao
I was going to do that
 jagged moat
modest halo
cardboard version of what are you asking about a cardboard mock up of the object...
jagged moat
modest halo
cardboard version of what are you asking about a cardboard mock up of the object...
this chatbot needs repairs wtf did I read
toxic iron
Is there a good way to preview the shading VRChat has in Blender?
tough plover
toxic iron
Is there a good way to preview the shading VRChat has in Blender?
"the shading VRChat has" doesn't really mean anything. the way avatars are shaded depend on what shaders they are using, same for things in a world, and both of those things depend on how the world is lit
toxic iron
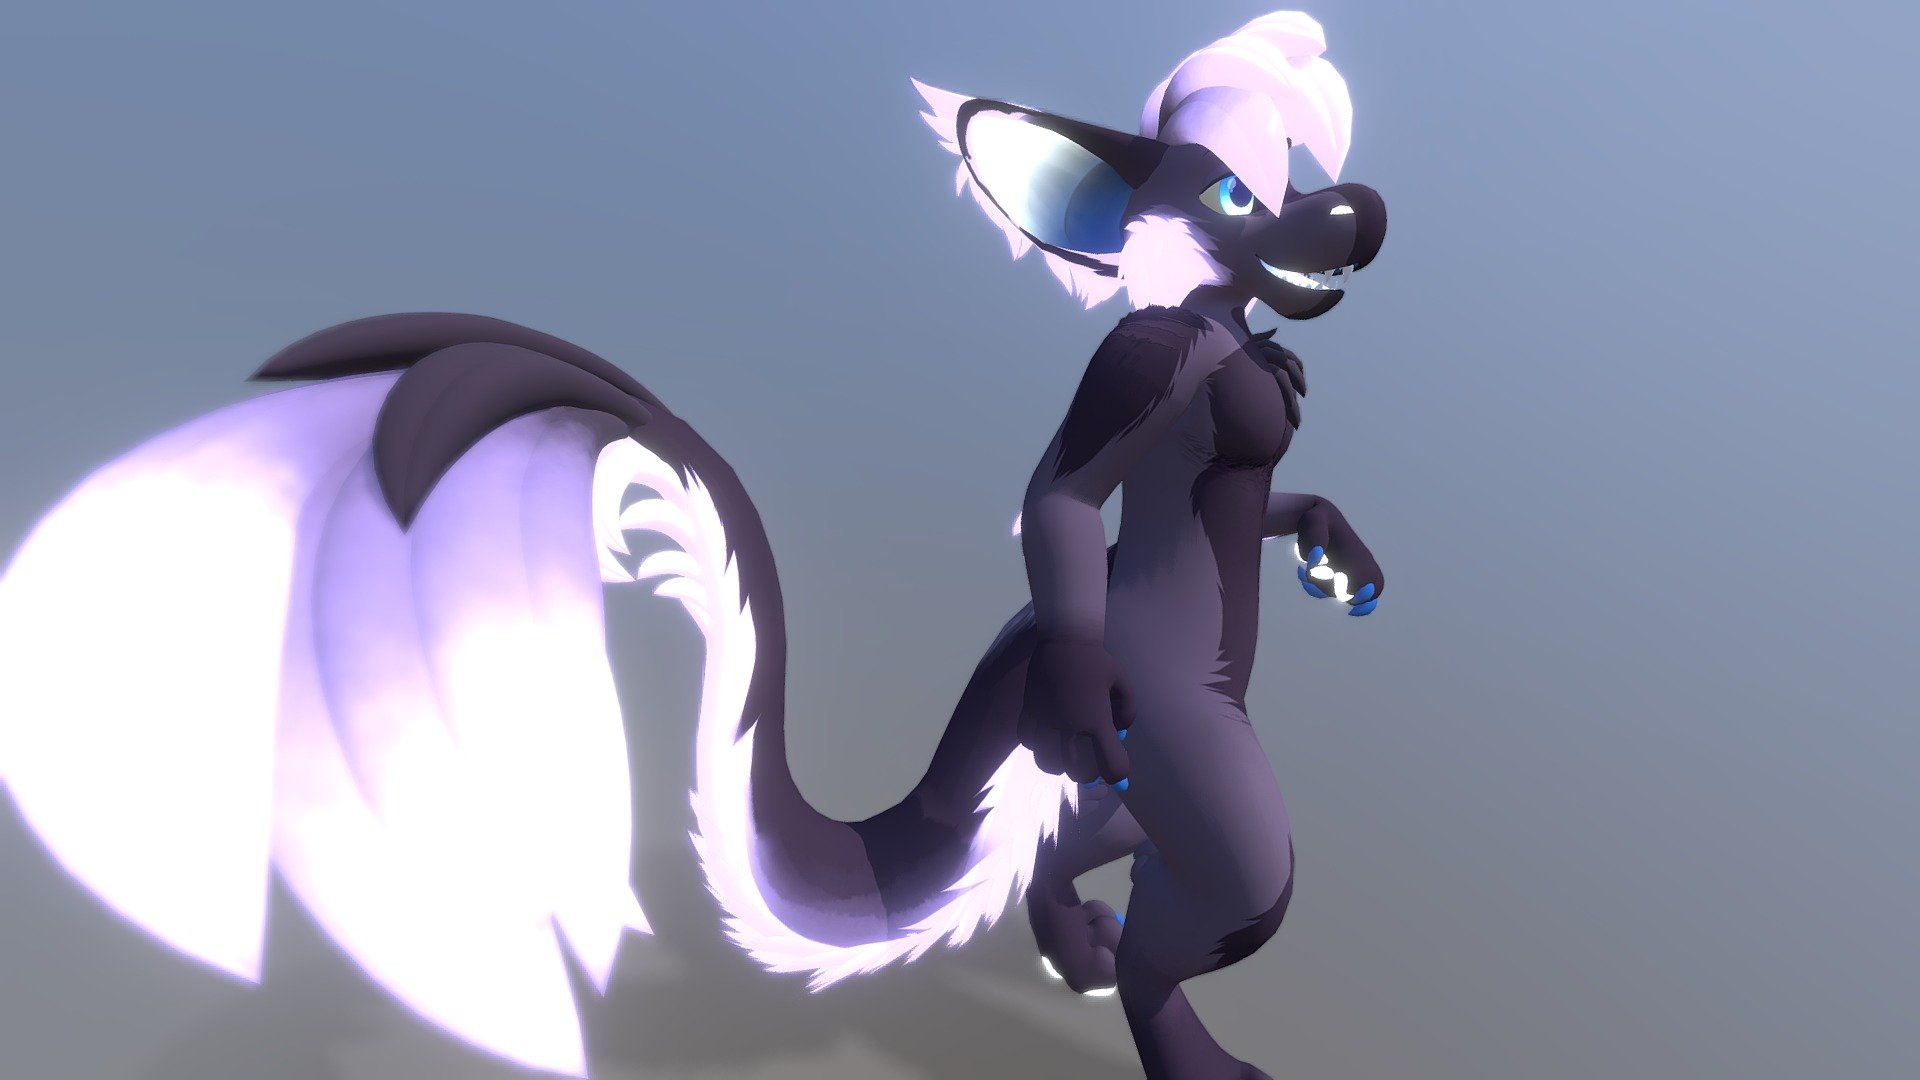
An avatar made for Draken as a commission, made to be used in VRChat! - Draken VRChat Avatar - 3D model by Meelo
I have the geometry of the fur tufts done similarly
But I just can't make it look the same otherwise
 swift jolt
toxic iron
Is there a good way to preview the shading VRChat has in Blender?
swift jolt
toxic iron
Is there a good way to preview the shading VRChat has in Blender?
No because vrchat has no specific shading.
magic thistle
hushed leaf
Merge by distance works for vertices, not necessarily faces.
 cobalt tiger
for funsies
 tender juniper

 paper isle
Things are getting strange good thing I watched stranger things. May be delayed as have a few projects but things sure are strange.
 jagged moat
paper isle
Things are getting strange good thing I watched stranger things. May be delayed ...
jagged moat
paper isle
Things are getting strange good thing I watched stranger things. May be delayed ...
This thing.... it's stranger than the others
 jagged moat
paper isle
https://tenor.com/view/stranger-things3-sad-crying-happy-ending-hopper-gif-14500...
jagged moat
paper isle
https://tenor.com/view/stranger-things3-sad-crying-happy-ending-hopper-gif-14500...
I don't think you could have posted a more relevant gif as a response XD
magic thistle
hushed leaf
what's the problem though?
 sleek quarry
magic thistle
sleek quarry
magic thistle
i think you have to merge them in edge/vertex select mode
also make sure you are selecting in xray view so you are getting everything, or just hit select all
sleek quarry
hushed leaf
what's the problem though?
accidental doubling up of faces i assume
it happens to me a lot because im bad at blender lol
hushed leaf
could just delete them
 tender snow
having trouble getting the eyebrows to look like eyebrows rn

 mystic moth
Christmas Reindeer Pickle!
Midjourney inspo image vs my Blender recreation: procedural pickle material, hair particle system for furry ears, geonodes and curves for light strings, antlers via drawn curves).
 mystic moth
Christmas Reindeer Pickle!
Midjourney inspo image vs my Blender recreation: pro...
mystic moth
mystic moth
Christmas Reindeer Pickle!
Midjourney inspo image vs my Blender recreation: pro...
Btw, this was the theme for last Sunday's 1 Hour, 1 Object 3d creative sesh. Ping me if you want to join a bunch of friendly 3D artists for weekly 3d practice every Sunday on Discord, 10am (PST). All skill levels welcome, any 3D app (incl. Unity) is 👍 – make some new friends, learn and get better at 3D. 💪
 obsidian flame
Modular combat armor built to survive lightsabers blasters and betrayal
This armor was not made in a factory It was rebuilt after every battle Each plate carries damage upgrades and memories of wars fought in silence
No Force powers No destiny
Just skill tech and the will to stand when others fall
In a galaxy ruled by legends
this armor belongs to someone who chose survival
 hasty loom

 pearl swan
Hello! I've done stuff in blender a lot in the past, but I never fully delved into the 3d modeling world. I finally took it upon myself to begin to learn some polygonal modeling, but I'm a bit lost in where to start. It seems everyone has their own modeling style and I'm curious where many of you started and how you got to that point. I can somewhat make a female torso from scratch right now (thanks to youtube vids) but still got to learn the rest of the body. Just looking for fellow modelers to talk to about this stuff.
keen sierra
Honestly I was so impatient, I went straight to zbrush and modeled a foot. I ended up liking it and went from there. I kept working on it, retopoligizing etc, not taking it too seriously and edited the proportions a million times.
hushed leaf
I started modeling so long ago with tools that no longer exist, so I have no idea how people start now other than by watching tutorial videos like The Donut Tutorial.
balmy tartan
make a cup thats how i started
carmine pagoda
Don’t do this, but I jumped immediately into trying to make a person with tutorials
Then kind of brute forced my way from there i’m still not a good modeler. I just can kind of do it.
hushed leaf
Starting with real world objects that are more flat than organic shapes is a good way to get going. Like a cup.
pearl swan
keen sierra
Honestly I was so impatient, I went straight to zbrush and modeled a foot. I end...
Haha started with the foot? Do some people start from the feet and model up?
pearl swan
carmine pagoda
Don’t do this, but I jumped immediately into trying to make a person with tutori...
It’s too late.. XD
pearl swan
hushed leaf
Starting with real world objects that are more flat than organic shapes is a goo...
Alright, I haven’t done too much object modeling, at least with good topology flow. I’ll give it a try.
 opal sigil
I want to find a really good 3D artist who can follow a character right down to the last strand of hair, is there anyone who knows one?
winter iron
opal sigil
I want to find a really good 3D artist who can follow a character right down to ...
this isnt a commission server
go to vrctraders
 hard hull
need suggestions for designs to put on these custom socks i made :3

 steady zealot
hard hull
need suggestions for designs to put on these custom socks i made :3
steady zealot
hard hull
need suggestions for designs to put on these custom socks i made :3
Nineties arcade floor pattern
hard hull
steady zealot
Nineties arcade floor pattern
I was thinking just that!
Or SpongeBob flowers :3
pine raft
carmine pagoda
Then kind of brute forced my way from there i’m still not a good modeler. I just...
Learn proper SubD fundementals and you'll rapidly improve.
A playlist on the series is also available.
https://youtube.com/playlist?list=PL0RqAjByAphFVYnNNKEIjWtRGIZWK0dn1&si=bjj_xc28UzS2DLq7
The midsection required a little more work so here we are early morning getting in there and modeling those missing pistons. The support chassis for them also needed refinement so we got in there and also leveled...
 gilded brook
Hello everybody, I'm hoping somebody in here could help me. This isn't VRC related but it is 3d-modeling related since I'm working within Blender. A friend of mines cat was murdered(her cats name is Luna) and I wanted to learn some new things while building her something nice. I've been attempting to place a moon texture with her cat on top of the moon texture. I've almost achieved my goal. However, I'm using UV Project from the camera for the cat image and it seems to project through the object and leaves a reverse image on the rear of the object. How can I prevent this "reverse image" from occurring on the rear surface?
Just some clarification, I have a disconnected Image Texture node that would provide the moons color. The color is unnecessary for what I'm doing so I've left it disconnected in these images. That node will ultimately be deleted.

 hushed leaf
By rear of the object you mean the back side of the sphere, not the back sides of the faces, right?
Select only the faces you want to use the UV project function on. Unwrap the back-sides differently.
gilded brook
hushed leaf
By rear of the object you mean the back side of the sphere, not the back sides o...
Yes, I mean the back side of the sphere.
gilded brook
hushed leaf
By rear of the object you mean the back side of the sphere, not the back sides o...
I appreciate the input. I'll see what I can do. I'm still learning.
hushed leaf
of course 🙂
gilded brook
I removed the UV Project, added a Texture Coordinate node, and added a Mapping node. The image looks pretty acceptable after tweaking it. Actually, I couldn't figure out your recommendation. I made changes in the UV but never saw any changes to the projection.
 onyx shale
Wendigo WIP 👻


 hushed leaf
explain what situation is shown in this image^ in #avatar-help unless you specifically want help modeling.
 blissful swift
hushed leaf
explain what situation is shown in this image^ in <#730948173379535022> unless y...
blissful swift
hushed leaf
explain what situation is shown in this image^ in <#730948173379535022> unless y...
Oh thanks
 peak smelt
does anyone know the easiest way to make a chain for my avatar
pine raft
peak smelt
does anyone know the easiest way to make a chain for my avatar
2 methods.
Create a thin plane. This'll be your 'baker', it should be as if a chain was laid out on a table and straightened. Just a plane.
Ontop of this plane, model one segment of your chain with Subdivision Surface.
Essentially you're modelling this, but horizontally.

An array modifier can help if needed.
After that, look into 'normal baking' and 'transparency baking'. The idea is that this segment is a repeating texture that you'll then later use to make a flat planar necklace around your character's neck, but this'll be the texture. It'll use cutout transparency (also referred to as onebitalpha or threshold alpha) to get the chain look itself.
You can either use software such as Substance Painter to handle the texturing process of the base-color if you'd like one, or you can use a matcap and not have a basecolor.
Matcaps are done via a shader on your avatar.
This is known as 'Alphacards' in gamedev.
Keep in mind, alpha cards do not work on the Quest due to lack of transparency shader support, but it saves 60k polygons, so it's rather worth it.
The Yakuza developers use this method for example.

The other method is a simple array curve around your character with a intentionally lowpoly chain.


Here's how they do the 3D looking chain. Just a normalmap and alpha texture on a curved plane.
Extremely convincing.
 keen sierra
im in a modeling mood
 hushed leaf
keen sierra
im in a modeling mood
hushed leaf
keen sierra
im in a modeling mood
ooh, I love it already
keen sierra
really digging the snout so far
 hushed leaf
yeah this is great
 ancient tangle
hello, I'm learning to 3D model, but I'd like to ask someone who is more experienced than me for some feedback on my meshes
I'm mostly doing low poly stuff + trying to make them as optimised as possible !
I made these flowers today, and was wondering if there were any improvements I could make
I'm using blender 5.0.1
hushed leaf
those are cute, looks pretty good to me
ancient tangle
thank you so much :) !
 true quarry
Since 3 side views ref sheets are the norm for creating VRChat avatars, are they hard to draw?
I mean, I am going to bring this gal to life

 ancient tangle
I'm making a retro fridge, does all the modelling look correct? I'm just sort of trying to apply new things I've learned :') can I reduce the poly count in any way?
this is my statistics on the object
 hushed leaf
looks pretty reasonable to me
jagged moat
ancient tangle
I'm making a retro fridge, does all the modelling look correct? I'm just sort of...
Looks good, I wouldn't bother triangulating manually unless the triangulate modifier is causing you issues as working with quads makes modifying your model a lot easier.
hushed leaf
Yeah, I'd agree with that too, I really only do it to help with flexing stuff when weight painting
ancient tangle
jagged moat
Looks good, I wouldn't bother triangulating manually unless the triangulate modi...
gotcha! I mostly do it out of habit, and these models aren't intended to deform or anything! I'm not planning to edit them any more either, so do u reckon it'd be alright?
ancient tangle
hushed leaf
Yeah, I'd agree with that too, I really only do it to help with flexing stuff wh...
this sounds silly - as I'm just starting out - but what is weight painting?
jagged moat
ancient tangle
gotcha! I mostly do it out of habit, and these models aren't intended to deform ...
Yeah, it shouldn't cause any issues 👍
hushed leaf
ancient tangle
this sounds silly - as I'm just starting out - but what is weight painting?
it's a way to add weights to mesh using a painting interface.
The weight on a given vertex tells it how much it moves with a bone.
ancient tangle
jagged moat
Yeah, it shouldn't cause any issues 👍
amazing thanks so much, I'm still getting my head around all the best practices haha
ohh I think I get u! so like, some parts are heavier and some parts are lighter and move more?
I shall also look into this 😃 👍
do you guys have any reccommendations on concepts i.e 3D modelling tht I should look up? or just any resources in general are super appreciated
jagged moat
ancient tangle
do you guys have any reccommendations on concepts i.e 3D modelling tht I should ...
I guess your next step would be texturing, personally I use Substance Painter as it has a lot of great tools but the pricing can be very steep and you have to deal with Adobe which is never fun.
I'd recommend checking out some alternatives to get started as I've heard the competition has gotten pretty good
I think Quixel mixer is one but you'd have to search around for some others
pine raft
ancient tangle
ohh I think I get u! so like, some parts are heavier and some parts are lighter ...
Rather, 'weightpainting' is just the name.
What you're truly doing is painting a per-vertex map where every vertex in the group has an 'influence' variable from 0 to 1.
Armatures work via influence maps of the same name as the bone, where each influence map (weightpaint) tells the bone how much to transform each vertex per bone.
Where a value of 1 is 'move with the bone fully' and a value of 0.5 is 'use half of the bone's position and add it to the vertex position'
 viscid birch
The "weight" in the name just comes from the math name. It's a weighted average
ancient tangle
you guys are so kind thank you so much for explaining all of this to me
this explanation is super helpful thank you <3 :3
ancient tangle
jagged moat
I guess your next step would be texturing, personally I use Substance Painter as...
YAY yes yes ! I've done some practice with UV unwrapping, and I've got the Clip Studio 3D workspace which works fabulously
pine raft
Substance Painter is popular due to it being a procedural workspace mixed with a painting workspace.
Or in other words, it allows you to nondestructively stack edits per-layer which have parameters to change how they behave.
"Ambient Occlusion' nodes for example, to make a layer automatically only appear in crevices.
Then a 'dirt' node muliplied over the ambient occlusion to make it appear dirty.
Alternatives exist and aren't even that bad, but don't currently compete with Substance on the exact same playingfield.
ancient tangle
that's so so cool, I'll absolutely look into this, for the project I'm working on, we are planning to play around with ambient occlusion for certain environment features. I don't mind paying for a software especially if it's a good one!
pine raft
Substance used to not be an Adobe application but unfortunately took the devil's money, so now it's an app of the evil Adobe™ corporation with a subscription only fee....
or so they want you to think.
A part of their deal with Adobe was being able to offer a perpetual license per year.
200 USD for each year's software version.
It's listed on Steam.
pine raft
They just can't advertise it, lmao.
ancient tangle
omg
thank you so much for the info!
BOO adobe..... I'm glad that they are able to offer that though omg
I'm in europe so the price works out a bit cheaper !
pine raft
I'm under the impression 2025's version has a bug in it though that was fixed in the 2026 release, they don't do LTS for perpetuals.
So, I suggest avoiding Substance Painter 2025 on Steam as the bug is fairly major.
If required, temporarily use the subscription and wait for the 2026 release on Steam.
Should be around March I think?
If you purchase the Standalone perpetual version, you will get free feature updates until March 2026. After that date, you will get to keep this version like any other game or software you buy on Steam.
Unmetered access to the Substance 3D Assets platform and generative AI features are only available through Adobe and are not included in the Steam version.``` as listed on their page.fabulous thank u!
for now, I'm using clip studio to texture my objects, but when I want to do some fancy things I'll have a play around with it!
I will wait til the new one comes out and see what ppl think :3
hushed leaf
Also ArmorPaint is getting to be kinda usable, it's still a bit crashy but I've done some actual work with it.
You can get it for free if you build it from source yourself. They have instructions, it's not too hard.
hushed leaf
yep
 empty fox
ancient tangle
is it on github etc?
empty fox
ancient tangle
is it on github etc?
It is on Github, but you will have to compile it yourself unless you want to donate to them
Although I can see that there are a whole lot of forks with precompiled binaries
ancient tangle
tysm! I will probably just purchase outright but I don't mind compiling from github either :3
hushed leaf
Having used it, I'd strongly suggest trying first, you may not like the workflow, and it may not actually be stable for you 🙂
(I've only tried it on Linux though, if you use something else maybe it crashes less?)
unique galleon
empty fox
It is on Github, but you will have to compile it yourself unless you want to don...
I don’t understand here- I asked chatgpt if I can compile armorpaint like a month ago and it said its copyright licenses refuse the right to be compiled and used
So either you’re suggesting people break the law or chatgpt made that up
balmy tartan
Your using ai that's your issue
unique galleon
balmy tartan
Your using ai that's your issue
Feel free to offer actual advice instead of just starting a shit conversation nobody wants to have for the millionth time 👌
balmy tartan
Huh
unique galleon
I double checked the repo and see what I missed, I just wish people would offer actual advice instead of only responding “ai bad”
If that’s all you have to say just don’t respond fr
balmy tartan
It gives you a step by step instructions

Well kinda but I can type out what you need to do step by step if you want
unique galleon
balmy tartan
It gives you a step by step instructions
Yeah that’s what I meant by see what I missed 😂
Guess if I find time this week I’ll make this my project lol
 orchid phoenix
unique galleon
So either you’re suggesting people break the law or chatgpt made that up
orchid phoenix
unique galleon
So either you’re suggesting people break the law or chatgpt made that up
chatgpt made that up
fish found in ocean
hushed leaf
ChatGPT made that up as far as I can tell. The code is available on github with a "zlib/libpng" license and you can grab it, so you can build and use it.
 fair inlet
unique galleon
So either you’re suggesting people break the law or chatgpt made that up
fair inlet
unique galleon
So either you’re suggesting people break the law or chatgpt made that up
You are learning why you should not blindly trust ai
I've had it hallucinate people entirely for stuff ive asked about
hushed leaf
I had some issue at work I had to debug the other day where a LLM completely hallucinated data due to a misconfigured prompt - took the data people all day to fix it. When I get to redesign it (soon), no LLM will be involved at all.
it was just outright making stuff up - I don't know how we could possibly rely on such a thing.
balmy tartan
Marriage goals get married make a AP
cobalt tiger
Work in progress!

 full ice
I've thought about adding something like the wires that the Banuk Shamans have in Horizon Zero Dawn to an avatar. Had to learn the path tool and then something I'd never heard about Geometry Nodes. Getting there for this one avatar, just have to figure out where I want them all to be, and then actually get it usable in VRchat.


 gaunt kayak
Question, does anybody know how to model in VR?
hushed leaf
haha
the answer is still yes
wait, do you mean model for use in VR, or model something in VR?
gaunt kayak
hushed leaf
wait, do you mean model *for* use in VR, or model something *in* VR?
Like making an avatar
hushed leaf
Yes, many many people around here do
gaunt kayak
hushed leaf
Yes, many many people around here do
Are you one of those people?
hushed leaf
again, just ask your questions if you have them
gaunt kayak
hushed leaf
again, just ask your questions if you have them
You didn’t answer it though…
hushed leaf
then you want to go over to the VRC Traders discord, you'll get scammers messaging you around here
(likely in the next few minutes)
gaunt kayak
hushed leaf
then you want to go over to the VRC Traders discord, you'll get scammers messagi...
Could I have a link?
hushed leaf
it's in #1204490664637890580
gaunt kayak
Thank you
hushed leaf
pro tip: don't randomly friend people who aren't actually your friends
full ice
full ice
I've thought about adding something like the wires that the Banuk Shamans have i...
I think the stitched look looks better? It's just harder to get right
 ancient tangle
hello again! does anyone here have any reference videos, websites or resources on making and modelling low poly/optimised 3D characters?
I've currently got:
-
Crashsune Academy's video series https://youtube.com/playlist?list=PLcaQc6eQjXCxWXmn5jxE_GTOft9ZxChu1&si=qFa9jchrmz6xyx5z
-
Sketchfab (website)
-
Models Resource
-
Grant Abbit's videos

 full raft
 sour notch
Wouldn't it be better to just create a big cylinder and adding a Brick material with height map?
fair inlet
Wonder what the stats are for that
full ice
Figured out I can use Shrink Wrap modifier for the path so I don't have to manually move every point of the path down to the body mesh and have it be all wacky. It's so much faster this way, a ridiculous increase in speed to do, but I don't know if it's better. It looks more artificial than how I was doing it. If it's emulating weaving the stuff into the skin, that's not a good thing I think. May just have to not care or do minor adjustments later to make it less uniform. Image order is New, Old, New, Old


 ancient tangle
hallo! if anyone here is an expert or is experienced in making 3D character models, I have some questions if thats ok, I'd really appreciate the help thank you
ancient tangle
thank u,! I'm starting to get into modelling 3D characters, but I want to model them using a specific type of topology, and can't seem to find any tutorials on it

low poly for mobile game character
texture size : 256*256 - Mobile game character - 3D model by MichelleYang513 (@vita513)
oops!
was posting links too fast

The Models Resource
these 2, the way the faces are built is how I'm aiming to construct my models
but I can't seem to find any tutorial videos on it
does anyone know how to build characters faces this way, or what the optimum way of doing it would be?
 cursive rune
is there anyone good with added clothing to a model and uv fixes in blender please @ me if you do i need help?
hushed leaf
also just ask your questions
cursive rune
i need someone to help me finish up my model pretty much
hushed leaf
Right but what do you need help with?
cursive rune
i need help with getting a body suite and a crop top to parent onto the model so that it moves together
ancient tangle

Wasn't too happy with my old Vtuber design so I made a new one!
Since she's meant to have decent mobility to work with vtubing, I did take a few liberties with details in the mesh that you wouldn't normally find on low poly models.
Still need to do texturing!
Original Concept and Model: Me (Priichu)
Modeled in Blender
Twitter: https://...
ancient tangle
ancient tangle
does anyone know how to build characters faces this way, or what the optimum way...
I found what I was looking for ! this stylised character model tutorial is really great for this specific look
it took some time to find the right one but I think this one's really good
hushed leaf
Add an armature modifier to the clothing mesh and drag it to be a child of the armature object. Then weight paint.
cursive rune
hushed leaf
Add an armature modifier to the clothing mesh and drag it to be a child of the a...
ok ill try this
 livid pine
I just started modeling my first avatar yesterday and I'm following this popular tutorial, but they don't really explain very well why they do certain things
after switching on the subdivision modifier and smooth shading, does it matter what the model looks like without the modifier at all or should I be worried if it looks all crinkled without the modifier?
Also when modeling the arms in A/T pose, I probably can't reference what my own arms look like in that pose right?
Like its probably kinda impossible to try to go for how real life bones and muscles behave when the model moves, so how should the different parts of the arms be positioned?
Where does the ellbow in A pose point? How is the kind of squished cylinder of the forearm positioned so it looks good in motion?
Can anyone reccomend a different tutorial series where the creator goes into more depth regarding good modeling practies and why they're used?
hushed leaf
re: subdivsion modifier, you can apply it, then it'll actually modifier the mesh and it'll look like when enabled. You'll need to do this at some point if you want this to be an avatar. Ideally before you start making shape keys.
carmine pagoda
Anybody know any good spots to look around for free 3 D models?
hushed leaf
turbosquid, sketchfab, gumroad/jinxxy/etc.
carmine pagoda
hushed leaf
turbosquid, sketchfab, gumroad/jinxxy/etc.
Alr, thanks
hushed leaf
be prepared to deal with super high poly and general weirdness
 lime smelt
how do I put textures on this?

 safe jetty
Do you guys typically separate a room's floors and ceilings from the walls when modeling for worlds or attempt to keep it "whole"?
hushed leaf
safe jetty
Do you guys typically separate a room's floors and ceilings from the walls when ...
I do, since it's a lot easier to work on a room when the ceiling is off.
hushed leaf
lime smelt
how do I put textures on this?
Textures go in materials, materials go on mesh parts or in those material slots in the inspector in this image
ancient tangle
carmine pagoda
Anybody know any good spots to look around for free 3 D models?
The Models Resource is also great
working on my first ever scene! it's a little isometric room, and I've tried to model everything relatively low poly, are there any glaring issues I might not be seeing as a beginner?
 ancient tangle
hi does anyone know how to model this car? I tried my best but it doesn't really look like it 😭 I'm also having some weirdness with rendering


 hushed leaf
looks like a decent start
ancient tangle
thank you!
I think I might start again and try to copy the shapes a bit more closely, I learned a lot from this model though :3
 devout orchid
watch some tutorial on how to place reference images as a backround in view, proportions look weird
winter iron
devout orchid
watch some tutorial on how to place reference images as a backround in view, pro...
Just drag in the image file while in object mode
winter iron
ancient tangle
hi does anyone know how to model this car? I tried my best but it doesn't really...
Wheel placement is funny
The front wheels are in the middle of the engine bay and the rear wheels are directly in between the back door and trunk
ancient tangle
ooh gotcha thanks so much will look at my references and make adjustments 👍
winter iron
ancient tangle
ooh gotcha thanks so much will look at my references and make adjustments 👍
Just take the side profile image and drag it into the blender window
While in object mode
It should create a quad with the image on it
ancient tangle
yeah, honestly my hubris took over and i was like :3 I can totally make this without using a reference image and well it ended up looking like Mr Incredible's car from the incredibles lol
I'm gonna remake the model with the ref images onscreen this time haha
winter iron
Just trace the image in blender lol
ancient tangle
so so true I'll do that + remake it
winter iron
Id recommend doing the middle of the body then extruding the windshield half up
ancient tangle
like make this bottom part first, then add the windshield?
 winter iron
Ye
 grave raptor
ancient tangle
hi does anyone know how to model this car? I tried my best but it doesn't really...
grave raptor
ancient tangle
hi does anyone know how to model this car? I tried my best but it doesn't really...
Hey! I can help you with that, check dm
ancient tangle
^ sorry I don't add people I don't know n would feel more comfortable talking here
grave raptor
ancient tangle
hi does anyone know how to model this car? I tried my best but it doesn't really...
No worries I saw that post can we discuss the post about it ?
ancient tangle
I'm following a tutorial now so I think I'm good ty
grave raptor
ancient tangle
I'm following a tutorial now so I think I'm good ty
oKie dokie
jagged moat
Sounds like a scam nglll
 cursive birch
WIP of my sona model, im gonna commission a friend to remake the head (ARKit blendshapes are my worst enemy) but this is what i got so far with his ref


this is my first time making a high-poly model from scratch so his topo isnt the best in some areas but overall very proud of myself :>
hushed leaf
use an emulator like gesture manager or avatars 3.0 emulator, then in the 'Game' view, you can grab it with the mouse.
or move the avatar around using the Scene view and observe them moving with the avatar
 wise veldt
yeah they aren't moving when i do that
i added one to the hair on my miku and it remains stiff
hushed leaf
you'll probably get more help in #avatar-help , as it's not a modeling question
wise veldt
thanks

 waxen ivy
Are there any other good places to find 3d modelers besides VRCTraders?
 muted girder
Does anyone have some tips on modeling hair? I am trying to make Rose's hair but cant seem to get it right
-# sobs
ANY HELP APPRECIATED!!!
-# also I have tried curves but it didn't work out well


 candid cloud
 jovial seal
i made a gundams weapon.
jovial seal
i made a gundams weapon.
Live laugh love gundam
 queen panther
 pine raft
I'm really bad at modelling foliage so I decided to make a WIP tree generator in Geometry nodes. The actual curves are generally artist authored but then displaced to look natural and alpha cards are placed by Geometry Nodes. Honestly? I don't think it looks that bad.
 viscid birch
pine raft
I'm really bad at modelling foliage so I decided to make a WIP tree generator in...
viscid birch
pine raft
I'm really bad at modelling foliage so I decided to make a WIP tree generator in...
That looks super nice! Do the branches use curves? I was playing with Blender 5's Curve to Tube modifier and thinking I should try it for bark
pine raft
viscid birch
That looks super nice! Do the branches use curves? I was playing with Blender 5'...
The trunk/branches itself uses curves, yes. Simple poly curves.
 cursive birch
WIP of my sona model, im gonna commission a friend to remake the head (ARKit ble...
cursive birch
cursive birch
WIP of my sona model, im gonna commission a friend to remake the head (ARKit ble...
fully rigged and textured his base body and clothes, now im just waiting on the head and he'll be done


 inland scarab
Sone 😭 😭 🙏 I'm crine...
You is NOT fooling anybody 😔
 exotic obsidian
clanker detected
 quick thunder
W larp bro, stay in school
 feral portal
Oh hell nah ai generated slop
exotic obsidian
Poor guy only has 4 fingers on his left hand 😔
exotic obsidian
What
 ruby timber
Prove this is real and send me the fbx
Also, notice how one recognizes it as ai, that must mean no human can ever make something look as good
I see
What software? You should ask it to make it an actual file so you can import it to unity
exotic obsidian
Yeah it's not an actual model
Even if it was, it wouldn't be something you made, you just asked a computer to do it
My points still stand
balmy tartan
you posted this into a 3d modeling chat meaning you have used blender to make something in 3D this isnt ask a question to ai and post it here chat
 oak hatch
huhuhuhuu

10k tris at lowpoly, 46 at high, world asset for a VIP lounge
24m around, 15m tall
orchid phoenix
omg face reveal.. are you ten years old
unique galleon
So where’d you get that mirror selfie from earlier that’s not yours?
 queen elm
you dumbass
 plain glen
What the fuck am I reading
unique galleon
Oh fuck man bf vs bff 😔
queen elm
is being friends with a person = pedophilia
unique galleon
Thanks carlos lmao I’m too tired
queen elm
unique galleon
Thanks carlos lmao I’m too tired
delete your message now
we don't want him wrongly banned
unique galleon
I guess that’s important yes

 maiden oriole
Why are you sharing a 14 year old's face here then? Don't share pictures of minors especially not without consent.
I'm not even gonna touch upon the fact you're feeding a kid's photo to genAI 
exotic obsidian
I thought it was just another AI user but now it's just flat-out weird and suspicious
unique galleon
Imagine being 14 and bff with a 19yo, I can’t 😂
 balmy tartan
SUS
rain oracle
 pine raft
Reminder, VRC artists. Modularize and Greybox early for reused peices and 'hero rooms' that are highly unique will have more time to dedicate to them versus excess time wasted on areas of rooms that don't need bespoke modelling.
I overpreach it but it's important!
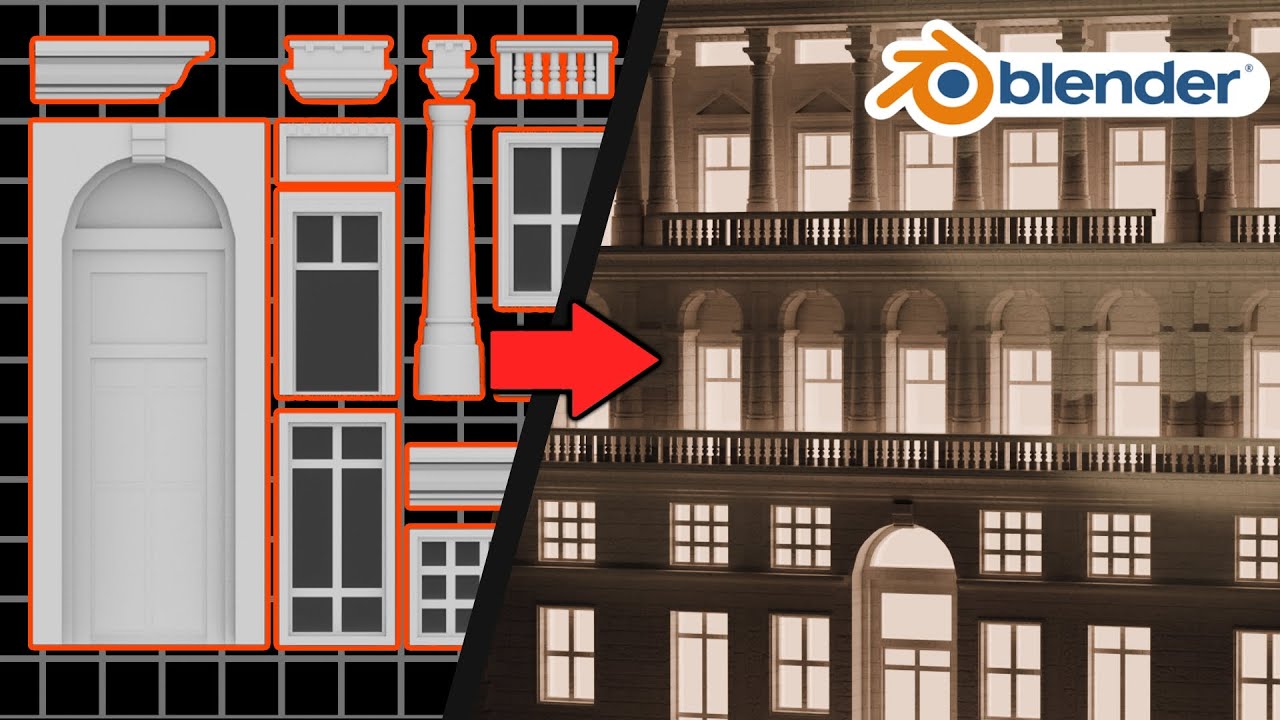
In this video I will show you how you can use modular assets to create almost anything you want. I will also show you how you can use these assets inside of your game engine of choice.
Assets can be dowloaded for free through my donation page. Feel free to leave a donation, it helps a lot.
https://www.buymeacoffee.com/terlizzi7k6
See you all ...
Modular elements shouldn't be finished models early on. They should be modules, things to revisit and only was modelled in 2 minutes tops per module just to communicate what will eventually be modelled to replace the module.
exotic obsidian
#avatar-general message Trying to cook..

I'll probably have to do some topology adjustments later on, but so far I feel like the shape's decent
 hollow merlin
fat isnt a negative thing. also how in any world is that fat? it's clown suit clothes, they're supposed to be rounded
 royal canyon
Are you saying clowns are fat
Sorry i dont mean to sound like he is fat, he just didnt match my image of a buffed gym bro
exotic obsidian
Yeah the character's jester outfit is a bit puffy, that's why it looks like that
 lofty river
Does anyone know what I’m doing wrong with the mouth? (First is without the subdivision modifier applied and the is with it applied)

 winter iron
"Wrong"?
lofty river
winter iron
"Wrong"?
Sorry should have specified, the corners of the mouths are wrinkled up and I’m not sure how to fix it.
winter iron
Smooth brush in sculpt mode
lofty river
winter iron
Smooth brush in sculpt mode
Tysm
 molten jolt
anyone know how to quickly delete these clipping back faces?

nvm some wierd artifact from SKkeeper, just gonna redo the modifiers
 thin shadow
molten jolt
anyone know how to quickly delete these clipping back faces?
thin shadow
molten jolt
anyone know how to quickly delete these clipping back faces?
mesh > cleanup > merge by distance
 boreal saddle
 devout snow
pine raft
devout snow
pine raft
Great model!
lofty river
I’m not sure if anyone knows but like I’m not sure how I’m supposed to unwrap my character, like I mean I know how like I know what to do but the way my character is all parts of it were separate then combined with control + J I got thought rigging and weight paint easy peasy but now I have no clue what to do :(
 pine raft
lofty river
I’m not sure if anyone knows but like I’m not sure how I’m supposed to unwrap my...
pine raft
lofty river
I’m not sure if anyone knows but like I’m not sure how I’m supposed to unwrap my...
Take a look at some UV Unwrap examples of characters if you need assistance, but generally I don't like to cut down the middle myself.
You'll want to delete any 'interior faces'.
Or in the very least, make it tiny on the UV.
lofty river
pine raft
Take a look at some UV Unwrap examples of characters if you need assistance, but...
Thank you!!
 dreamy canopy
anyone here use material combiner? I'm having an issue where it's using my normal map instead of the albedo on this specific texture. any ideas?
 pine raft
dreamy canopy
anyone here use material combiner? I'm having an issue where it's using my norma...
pine raft
dreamy canopy
anyone here use material combiner? I'm having an issue where it's using my norma...
Material Combiner is actually something I really dislike because of how it handles 'separate maps.'
My suggestion personally to atlas is just manually doing it, but I can understand if that sounds hard.
The way I do it is just scale by halving the size and then moving it up to a quadrant.
hushed leaf
I feel like that tool could work so well but just doesn't
And I haven't decided I want to fix it
 midnight furnace
Trying to sculpt a head from scratch… it took me like 15-20 minutes. Thank you YouTube tutorials🙏

 ancient tangle
making frosting for a cake I've nodelled in blender, and I'm looking at this as a reference but I can't seem to reverse engineer how they did it https://sketchfab.com/3d-models/candy-covered-cake-draft-170683a4e5c54b0e9e202064fb53f52a

Yummy cake draft made as a daily practice for XYZ School - Candy-covered cake draft - Download Free 3D model by Rixael
does anyone know how to achieve this look for the frosting?
faint bronze
ancient tangle
making frosting for a cake I've nodelled in blender, and I'm looking at this as ...
Looks like they actually modeled the frosting. I'd draw the shape over the base cake itself. IDK what it's called in Blender, but in Maya you make the cake mesh "live" and then you "quad draw" on top of it. Then I'd work on making it push out a bit. Might want to see if extruding out a teenie bit works for you. Then you can make all the edges more smoothed out, so it's more curved along them.
Alternatively, just draw the frosting on in Substance Painter with a height map, then it can be converted into a normal map upon export.
jagged moat
ancient tangle
does anyone know how to achieve this look for the frosting?
kinda just looks like a smooth material on a mesh
ancient tangle
hi! i managed to figure it out
this was my process:
to make low poly cake frosting without using modifiers or fluid simulation
-
make the general shape of the frosting on the top of the cake, then extrude downwards.
-
turn on propotional editing and scale down the effect area
-
adjust the vertices until they make a wobbly line around your mesh
-
on the parts of the wobbly line that curve downwards, straighten up 3-5 of the vertices on the bottom edge
-
extrude some long faces downwards, then a shorter face to make the tip of the droplet. do as many as you like all the way around your object.
-
select just the bottom edge of the mesh, and extrude inwards using proportional scaling (press S to scale then hold down Shift and press Z twice) until the faces reach the edge of the cake/your object, hiding them inside the object a little bit.
-
create a loop cut in the newly extruded region, and then use alt + s to scale along normals to give the frosting some roundness
hushed leaf
that looks pretty decent
ancient tangle
thanks so much! :)
ancient tangle
is this ok topology for filling in the faces on my horse?

it's just gonna be a 2D object (cookie on top of the cake)
winter iron
ancient tangle
is this ok topology for filling in the faces on my horse?
could save on some edges by
 ancient tangle
ooh thank u that's a good idea
faint bronze
ancient tangle
it's just gonna be a 2D object (cookie on top of the cake)
Why not just paint the horse on the cake then?
hushed leaf
that's what I'd probably do. With a bit of height in the normal map.
 hushed leaf
ahhh
 arctic cobalt
.. Blender ain't for the weak
 orchid phoenix
arctic cobalt
.. Blender ain't for the weak
orchid phoenix
arctic cobalt
.. Blender ain't for the weak
rectangle 🔥🔥🔥🔥
 winged sinew
can someone help? theres an extra face in unity but in blender its not there and i cant find it

 hushed leaf
alt+h to unhide stuff?
winged sinew
nothing happens :c
 stone pine
three things you could check would be pose mode in blender to see if it moves with any of the bones, check shape keys, or merge verts by distance
winged sinew
nothing
stone pine
hm well it looks like it should show up on the uv editor based on how the texture looks on it
should be able to hunt it down from there
winged sinew
i couldnt find it on there, im just going to re-model it :c
faint bronze
winged sinew
can someone help? theres an extra face in unity but in blender its not there and...
is it rigged to something? it could be a vertice that isn't weight painted / has 0 weight?
 inner rampart
Hello, I've been trying to fix an issue where blendshapes greatly mismatch between blender and unity and I have no idea why they are breaking in this way
also volume warning: I forgot to mute audio and recorded while in VC
hushed leaf
you should probably set "apply scalings" to "FBX All" when exporting.
also I missed what you were doing to update the avatar in the scene?
inner rampart
hushed leaf
also I missed what you were doing to update the avatar in the scene?
I deleted and replaced the fbx to reload the changes-- just showing that I actually imported and used the model I just exported in the clip
hushed leaf
ohh I see, it was a little quick, I didn't catch that
inner rampart
hushed leaf
you should probably set "apply scalings" to "FBX All" when exporting.
Tried this, no difference
I'm noticing if I use a tool to copy the blendshapes to another identical mesh they break horribly....
This wasn't happening before
hushed leaf
yeah that's strange, I just did that yesterday and it worked fine
inner rampart
I did a lot of gymnastics with the blendshapes to add a blendshape to this mesh while preserving clothes toggles and getting old blendshapes to respond to the new blendshape
But it looks fine in blender, but doesn't seem to be fine
With all blendshapes at 0 I just created a new shape from mix, set it to the new basis, and then reimported the model and now it's behaving a little different in unity, so maybe comparison to the basis is breaking?
Adding a new shape key and creating a new shape key from mix even when all blendshapes are at 0 creates different blendshapes
It should not do this
yeah somethings deeply broken in blender I think
this is when opening the blend file in 4.3 as apposed to 3.6

. . . It's still behaving so broken though
inner rampart
Thank you, I'll give it a try when I get time again
inner rampart
tough plover
that worked! thank you
 hollow wasp
Finally learning how to hand place diamonds effectively

 spring shell
How would I go about making all 8 bones the same size?
 devout orchid
easiest would be make big one then subdivide with 7 cuts
lofty river
I feel bad for asking for help again but I have no clue what to do. I thought I had fixed this but apparently not. If anyone know how I can make my characters head not do… whatever this is. I would be grateful again. Hopefully this will be my last time asking for help sorry guys 😭🙏 after this onto shape keys and clothing
stone pine
Looks like it's weighted to another bone based on how it warps. Make sure in weight painting mode to check all the bones in the armature to see what is weighted to which bone or in pose mode see what moves with each bone
 glossy raft
I'm trying to make blendshapes on a model and I'm having trouble with mapping textures, did Ctrl+J and even made an image containing both textures only for Blender to shrink it
 lofty river
stone pine
Looks like it's weighted to another bone based on how it warps. Make sure in wei...
lofty river
stone pine
Looks like it's weighted to another bone based on how it warps. Make sure in wei...
Thanks!
lofty river
It worked!!!! :D
tough plover
glossy raft
I'm trying to make blendshapes on a model and I'm having trouble with mapping te...
if joining meshes is messing with your UVs, then that means the UV maps are named differently between the two meshes
UVMap is the default name, prob wise to just stick to that
glossy raft
they're all named under UVMap but the thing was for some reason it wouldn't show the 2nd texture, so I made one that involved the 2nd texture and it did that
glossy raft
cause right now, it just looks like this
 glossy raft
wait nvm, I figured it out
 signal crown
Hello everyone
 terse spire
glossy raft
cause right now, it just looks like this
terse spire
glossy raft
cause right now, it just looks like this
angel dust 👀
heyo! Just got into 3D modeling (on blender) for 3D printing and VRChat avatar making and wanted to meet a few friendly avatar makers for tips, "support", constructive criticism and feedback as I make progress 👉👈
I'm a questie and have interest in making both furry and human models from scratch!
currently using blender 3.3.1 due to that being the version in the only somewhat in depth vrchat model making tutorial on YouTube I could find '3'
just add me if you wanna chat :D
terse spire
anyone got any tips on how to do the fur on the cheeks? New to blender and not sure how to tackle this task yet. also if anyone knows how to get rid of the pink lines i did them to mark things but i cant get them off now 😭
 glossy raft
terse spire
angel dust 👀
glossy raft
terse spire
angel dust 👀
yee
tough plover
terse spire
anyone got any tips on how to do the fur on the cheeks? New to blender and not s...
the pink lines are edge creases
terse spire
tough plover
the pink lines are edge creases
aaaa thank you for the name, was able to find em remove them
cobalt tiger
Recent Scratch work. fem head uses Amelia tex from Sivka, The rest from scratch


Excludes penguin
hushed leaf
terse spire
heyo! Just got into 3D modeling (on blender) for 3D printing and VRChat avatar m...
FYI there's no real reason not to just use the latest Blender.
terse spire
hushed leaf
FYI there's no real reason not to just use the latest Blender.
when looking i saw a bunch of people commenting on CATS and how it is finnicky with the latest versions but at the same time, as stated above, using 3.3.1 due to that being the version in the only somewhat in depth vrchat model making tutorial on YouTube I could find. Plan on switching versions after i finish making my first avi based off that tutorial so i can get the basics down.
hushed leaf
you don't need cats 🙂
balmy tartan
If really really need it you can use the unofficial cats it's supported on blender 5
 kind drum
terse spire
anyone got any tips on how to do the fur on the cheeks? New to blender and not s...
kind drum
terse spire
anyone got any tips on how to do the fur on the cheeks? New to blender and not s...
Yup, curves are your friends

Quick tip for creating stylized hair in Blender: use curves! You can easily scale and rotate curve points for a fast way to create hair or any stylized curves.
hushed leaf
also note that cats plugin seems to be deprecated, there's a version that works with blender 5+, but it's due to be replaced with a new tool.
jovial seal
i just want the hand to open and close normaaally for god sake
 hushed leaf
you seem to have extra bones there
jovial seal
This is exactly how the vrchat test avatar has it done
hushed leaf
there's no need for the metacarpal bones
jovial seal
i had it on 3
hushed leaf
oh interesting
jovial seal
but looked like craap
just testing this now out of desperation
also what judges where the feet trackers will be placed
is it the distance between the head and wrist bones?
hushed leaf
feet trackers?
jovial seal
for fbt
hushed leaf
oh, I'd think it'd be on the foot bone? not entirely sure
jovial seal
it isnt
most definately is not
because i had to shorten this chaaracters legs and lengthen his arms to fix it not being in his knee
jovial seal
Is there an easy way to create vrchat hands?
 fallow osprey
jovial seal
Is there an easy way to create vrchat hands?
fallow osprey
jovial seal
Is there an easy way to create vrchat hands?
Flat cylinder for palm, make one finger using another cylinder with extra geo for joints and copy paste it for the other 3 fingers. Then make a fat version for the thumb and rotate it down slightly
Anyways slightly off-topic, but I started concepting a hard sci-fi combat spaceship


 jovial seal
fallow osprey
Flat cylinder for palm, make one finger using another cylinder with extra geo fo...
jovial seal
fallow osprey
Flat cylinder for palm, make one finger using another cylinder with extra geo fo...
the hands are here arent closing properl
keen sierra
Whatever that means
All I see is a picture of an open hand. How could one give advice to an invisible problem
fallow osprey
jovial seal
the hands are here arent closing properl
Show it
jovial seal
It just looks really bad in vrchat
 keen sierra
No advice without pictures
unique galleon
There is a picture doe
keen sierra
It's not a vrc picture where we can see what "hands aren't closing properly" means. The blender side looks fine at first glance
hushed leaf
yeah I've been wondering what the problem looks like too
swift jolt
 fair vigil
anyone happen to have an idea as to how one would go about moddeling the actual skull part of this helmet? i've been stuck for quite a while on it. Im not planning for a full skull, just the front and a bit of the sides (like a mask)

 swift jolt
The skull part looks the easiest to model ngl
 rancid moat
@fair vigil Cool design. For skull helmets like this, starting from a base head mesh and sculpting the bone structure first usually saves a lot of time before cutting it into a mask. If you want another pair of eyes on it, I’d be happy to take a look.
 autumn token
im noob to blender, is there a way to detach the emblem family,,,like in unity i want to be able to change the material but without affecting the rest
 hushed leaf
autumn token
im noob to blender, is there a way to detach the emblem family,,,like in unity i...
hushed leaf
autumn token
im noob to blender, is there a way to detach the emblem family,,,like in unity i...
edit the mesh, select the faces in question, apply a new material to them.
hushed leaf
okay?
hushed leaf
if it's not a separate mesh object then you'd have to separate it. Edit the mesh object, select the faces you want separated then hit 'p' to "part" it out.
autumn token
 hushed leaf
either method ends up being roughly the same for performance.
Edit "Gear" as that's the mesh object.
autumn token
can u step by step im french and never used blender that much
hushed leaf
that is literally step by step
autumn token
oh okok lemme see
hushed leaf
I always suggest basic blender tutorials, such as "the donut tutorial"
 hushed leaf
unlik removes it from a collection, not sure what you're trying to do here.
rancid moat
autumn token
Yes, you can. In Blender, select the mesh → go to Edit Mode → select the part you want (like the emblem) → press P → Selection to separate it into a new object. After that you can change the material without affecting the rest of the model.
hushed leaf
... so what I said.
good job.
I suspect this person is a bot or scammer, they also just tried to friend me, we've never had any interaction before.
hushed leaf
uh huh.
autumn token
im tryna select the whole thing put it keeps forgetting one side
 rancid moat
hushed leaf
good job.
rancid moat
hushed leaf
good job.
No oooo I'm not a bot or scammers
hushed leaf
autumn token
im tryna select the whole thing put it keeps forgetting one side
'l' will possibly help you select all "linked" parts
or in the select menu, "select more"
rancid moat
autumn token
im tryna select the whole thing put it keeps forgetting one side
Go to Edit Mode, hover the mouse over the emblem and press L (Select Linked). It should select the whole piece. If it still misses parts, make sure they’re connected or try Alt+Click on the edge loop.
autumn token
yeah i did it haha thanks mate
hushed leaf
cool
rancid moat
autumn token
yeah i did it haha thanks mate
Cool 😎
winged sinew
why is my mesh ugly? 😭
 winged sinew
yeah
hushed leaf
if so, it's weird normals, edit it, select faces, and in the normals menu (alt+n), reset vectors
don't do this if you have custom face/edge normals or something
winged sinew
yeah that did nothing to fix it 😭
hushed leaf
does it look wonky in the solid color mode?
 hushed leaf
yeah that really looks like weird normals
obviously I can't see the topology without wireframe on but that's what it looks like
you may have to put some sharps there or seperate those parts a bit
winged sinew

 hushed leaf
... what is the difference between these two images? Just the left one is edit mode and the right object?
hmm, make sure your face orientation is correct - you can turn on the overlay to show that under "view overlays" at the upper right
(red side = inside)
winged sinew
hushed leaf
... what is the difference between these two images? Just the left one is edit ...
sorry, im reallt new to blender so im just sending whatever might help 😭
hushed leaf
yep, just making sure I know what you're showing 🙂
winged sinew
so, i deleted the affected area, in edit mode its gone but in object mode its there? it fixed the issue but now i dont know where these faces came from

 hushed leaf
in edit mode, alt+h to unhide hidden parts
winged sinew
i did that and nothing changed
hushed leaf
are you editing a shape key perhaps?
hushed leaf
.. was that it?
winged sinew
i completely forgot my shapekeys that was the problem
hushed leaf
ahhh, yep, been there too
 fleet parrot
For those usin substance painter, are there any plugins or things i could install that'll make it better or easier between unity and substance?
I jus installed it now and wanna get a good head start
hushed leaf
what do you need to be better?
I think the only thing I'd suggest is figuring out how you want to export textures - Poiyomi's export template is a great place to start, it's available in their docs.
fleet parrot
Just anything thats useful to have that i dont wanna regret getting much later, like have in advance
Poiyomi's export template, would i find that on their website?
hushed leaf
But really, it's entirely up to you how you want your textures, possibly depending on which shaders you use.
Yes
fleet parrot
I mean, only poiyomi ig
 thorn sundial
fallow osprey
Anyways slightly off-topic, but I started concepting a hard sci-fi combat spaces...
thorn sundial
fallow osprey
Anyways slightly off-topic, but I started concepting a hard sci-fi combat spaces...
Reminds me of the savages series by Frost on YouTube, very cool!
fallow osprey
thorn sundial
Reminds me of the savages series by Frost on YouTube, very cool!
Thanks! And since then I've been redesigning it and learning how to make fully procedural planets
 thorn sundial
Oh awesome! I always love seeing what other folks can create with blender and the like
steady zealot
Made a plushy version of my avatar :3


 swift jolt

 gaunt raft

 late elk
how do i 3d model? all i got is a cube
 ocean crystal
Make a donut
jagged moat
late elk
how do i 3d model? all i got is a cube
I agree, make a donut 👍
https://www.youtube.com/watch?v=z-Xl9tGqH14

The complete Beginner Donut Tutorial, uploaded in one video :)
All Links🔗: https://www.blenderguru.com/tutorials/blender-donut-v5-tutorial
The Blender Guru Beginners Academy: https://academy.blenderguru.com/join
Poliigon: http://www.poliigon.com High-quality Models, Textures, HDRIs
=== Chapter Marks ✂️===
0:00 Part 1 The Basics
28:16...
balmy tartan
I agree make a cup
 umbral tartan
I agree make the entirety of aincrad from sao
unique galleon
Someone’s already doin that to a degree 
steady zealot
late elk
how do i 3d model? all i got is a cube

Blender Tutorial series for 100% absolute beginners, teaching how to use the most common tools. Learn the fundamentals while building a Minecraft and Fantasy Sword project.
Join CG Fast Track PREMIUM MEMBERSHIP: https://www.cgfasttrack.com/subscribe?utm_source=youtube&utm_medium=link&utm_campaign=BFT4&el=BFT4-youtube
FREE Download files: http...
This is a good set of tutorials
fleet parrot
Any useful plugins to have for a first timer using blender for, really Any important process mainly around fbx and models?
 agile crown
making techwear pants
 agile crown
fleet parrot
Any useful plugins to have for a first timer using blender for, really Any impor...
agile crown
fleet parrot
Any useful plugins to have for a first timer using blender for, really Any impor...
basic blender without plugins isnt bad at the start
i personaly use autorigpro for characters
fleet parrot
agile crown
basic blender without plugins isnt bad at the start
i personaly use autorigpro f...
What does, that do?
agile crown
fleet parrot
What does, that do?
gets proper settings for bones
and makes it easier to change things
fleet parrot
agile crown
gets proper settings for bones
Wai, could it also Make bones for an armature by chance? Like if a model is missing finger bones in its armature list
agile crown
fleet parrot
Wai, could it also Make bones for an armature by chance? Like if a model is miss...
it can generate the whole body armature with rig
fleet parrot
agile crown
it can generate the whole body armature with rig
Oooh ima need to fiind that, could it do just specific parts tho?
 jagged halo
jagged halo
jagged halo
Nvm i have to cancel it i got more important stuff to work on :/
 reef mason
My newly modeled oc Echo :3
 late glacier
agile crown
making techwear pants
late glacier
agile crown
making techwear pants
Omg I love these!
My character wears tech wear pants!
agile crown
late glacier
Omg I love these!
My character wears tech wear pants!
glad to hear you like it
i will make them as a pack for sell most likely
 viral sierra
can anyone help me with blender i figured some things out but i still need help if you can please dm me
hushed leaf
Just ask here
viral sierra
every time i try to export the avatar from blender into unity this keeps popping up
 hushed leaf
a) that cats is so ancient you can't use it anymore
b) you don't need cats to export a FBX
file -> export -> export FBX. Set "apply scalings" to "FBX All" and uncheck the option about leaf bones under "armature"
viral sierra
ngl i dontn understand that
hushed leaf
which part? Click the "file menu" then select "export", then... etc.
viral sierra
all of it it took me a weel to figure out i had to export the files then another week to figure out how to mold them to my body
viral sierra
hushed leaf
a) that cats is so ancient you can't use it anymore
b) you don't need cats to ex...
but ium using blender 3.5
hushed leaf
okay, if you want to I guess.
You still don't need cats for this
(your error message says you're using Blender 3.6 btw)
late glacier
agile crown
glad to hear you like it
i will make them as a pack for sell most likely
Omg absolutelyyyy!
 mellow valley
im having a slight issue with blender sculpting. i usually use the draw brush to fill in clothes areas that clip or dont fit. when i try the same brush on the shoes it does the opposite that is it tears the boots. anyone have any idea how i can fix this please?
mellow valley
nvm i figured pressing ctrl and moving the brush kinda works
hushed leaf
usually ctrl + a brush inverts whatever it does
steady zealot
mellow valley
im having a slight issue with blender sculpting. i usually use the draw brush to...
if ctrl is fixing it, your normals may be facing the wrong direction on the mesh.
 slender raptor

 mellow valley
I've graduated from sculpting custom clothes to fit on my base model and its all thanks to most of the admins here, that i ever opened blender in the first place. im now feeling confident enough to get to the part where i make those clothes move with my avatar's body parts with no clipping; allegedly weight painting. if anyone has any advice what or how i should do please let me know. you dont have to be detailed much i can research so long as im informed
ocean crystal
mellow valley
I've graduated from sculpting custom clothes to fit on my base model and its all...
It's one of those things that practice helps a lot. Just watch some videos on the basics and then start doing it. Also ties directly into armature/rigging and it's geometry, so knowing some of that can help
hushed leaf
heeyyyy what's this, Blender 5.1 has some new FBX exporter
oh nope, that's an importer
probably been there a while and I didn't notice, I just mis-clicked.
empty fox
hushed leaf
heeyyyy what's this, Blender 5.1 has some new FBX exporter
It did fix a pretty major issue with the exporter though, it wouldn't export custom normals.
hushed leaf
oh very nice!
empty fox
Or well, Unity and Blender wouldn't agree on the format the custom normals were exported as
You could always export from 5.0 to 4.0.1 and then to fbx and it would work in Unity
lofty river
Does anyone know what this error means and how I can fix it? I was trying to export my finished model as a FBX
 hushed leaf
did you add some sort of FBX add-on?
ah it does say core though so that might be the included one
if so, nope, no idea, you didn't do anything really weird, right?
lofty river
hushed leaf
if so, nope, no idea, you didn't do anything really weird, right?
Nope, only add on I had was the skkeeper add on that lets me apply my subdivision modifier after I do my shape keys
 unreal bolt
molten jolt
anyone know how to quickly delete these clipping back faces?
unreal bolt
molten jolt
anyone know how to quickly delete these clipping back faces?
You can select all in edit mode hit shift N, it should face the normals out
 real badge
I'm having a hard time making something coherent

 mellow valley
im having issues with blender weight painting. its been a week marathon and im still to find a tutorial that explains perfectly how to weight paint clothes. ive even invested in addons that should automate this like Voxel Heat Diffuse which did a remarkable job in merging the clothes to the avatar, but there is still issues of clipping around the pelvis area when i move. the effective option ive find is deleting the mesh underneath the clothes, but i thought maybe i should consult here before doing so.
hushed leaf
oh, you posted in two places 🙁
well, let's continue here, it's more appropriate.
(see my reply in the other one though)
mellow valley
hushed leaf
oh, you posted in two places 🙁
OMG all i used the remesh addon for a cleaner wireframe you were right! without even opening weight painting and it worked like magic no CLIPPING!! thank you so much
 @hushed leaf
hushed leaf
Yeah - very often you have to purposely design the topology with the deformations you intend to use in mind
Glad that worked out!
 crystal sun
Soo, im recreating the set for the Million Pound Drop, there's the prograss so far, any advice i should follow? (+reference included)


 real badge
i would just shade smooth by angle byt it looks great
crystal sun
real badge
i would just shade smooth by angle byt it looks great
thakns
swift jolt
Bionicle oc im working on

 unique galleon
shit that’s rad as fuck
 wild spear
Glaze
 vital ridge
mellow valley
im having issues with blender weight painting. its been a week marathon and im s...
vital ridge
mellow valley
im having issues with blender weight painting. its been a week marathon and im s...
I believe it's based on where you want the cloth to hang or to stay still
I could be wrong I am not a blender expert I am also learning (I personally hate blender with a burning passion)
hushed leaf
aww, I love Blender
 cobalt willow
👉 👈


 visual nacelle
Um I know this is a strange request and I'm not sure where to ask this but. Does anyone make custom assets for vrchat?
ocean crystal
visual nacelle
Um I know this is a strange request and I'm not sure where to ask this but. Does...
If you're looking for someone to do paid work, there is a discord server called VRCTraders you can find in #1204490664637890580. They have all kinds of creators there that can help you and try to weed out any scammers that are a huge problem online. Also, if anyone is DM'ing you about this, be very cautious, as that's a red flag for scammer behavior.
 gilded roost
can someone help me import my 3d model
hushed leaf
Assuming Blender here, usually it's just: file -> import -> pick the file type
gilded roost
can someone help me do blender first time too
 pine meteor
gilded roost
can someone help me do blender first time too
pine meteor
gilded roost
can someone help me do blender first time too
Youtube, how to Blender
gilded roost
ok
hushed leaf
I'm sure we can answer specific questions, but yeah, tutorials help here. Such as "The Donut Tutorial" - I hear there's an updated one.
gilded roost
can someone call and help me do the steps on doing this bs
hushed leaf
yeah I wouldn't do that without being paid
unique galleon
tutoring is harder than doing it for you
because we only move at the pace of your understanding
gilded roost
my brain is soo cooked
hushed leaf
take a break, do something else, come back later. It helps.
gilded roost
bruh
unique galleon
believe it or not this one move is repeatedly used throughout this entire industry, from noobs to pros, and is proven to work ^^
everyone has to do it at some point lol
I think about all my work for days before I do it, and take breaks in between for the same
gilded roost
i am aslmost done but the thing is i need togles bruh
mellow valley
anyone knows why this keep happening whenever i enter play mode?


sorry it's the other way round with the images
hushed leaf
that's a question for#avatar-help, but my first guess is that you've got some shape keys being applied at runtime by an animation.
 hot monolith
hushed leaf
hot monolith
hushed leaf
hmm... I'd be tempted to do something subtle, like if you make a specific gesture, then the rotation of your wrist causes the wings to move around
for ease of cosplay
 wind umbra
I need someone who can make me a vaporeon onesie for nova and nardo and other models for me
hushed leaf
wind umbra
I need someone who can make me a vaporeon onesie for nova and nardo and other mo...
try the VRC Traders discord to commission people, you'll just get scammers DMing you here.
wind umbra
hushed leaf
try the VRC Traders discord to commission people, you'll just get scammers DMing...
how can i join that?
hushed leaf
there's a link somewhere in #1204490664637890580
wind umbra
hushed leaf
there's a link somewhere in <#1204490664637890580>
i cant find it
unique galleon
wind umbra
i cant find it
pine raft
fallow osprey
More of a seam and texturing question but I've noticed that some of my models have these white lines at the seams when viewed from far away. Any clue what's causing this?
tough plover
fallow osprey
More of a seam and texturing question but I've noticed that some of my models ha...
this happens when your textures don't have enough texture padding around the UV islands.
what did you use to create your textures?
fallow osprey
tough plover
this happens when your textures don't have enough texture padding around the UV ...
Ucupaint in blender. I usually select 3px offset
But ig I could do it again with more padding
tough plover
fallow osprey
Ucupaint in blender. I usually select 3px offset
that is much too little
for a 2048px tex, do like 16
or unlimited padding, if ucupaint lets you
fallow osprey
Ok awesome sauce I'll look into it : )
Thank you for the info
Because usually I see the texture is covering the UV islands where I want them, so I was a bit surprised to hear that
tough plover
fallow osprey
Because usually I see the texture is covering the UV islands where I want them, ...
during the mipmapping process, lower res versions of the texture are generated by averaging neighboring pixels. if pixels outside of the islands are very different colors, in this case white, then some of that color will blend into pixels inside the islands
fallow osprey
tough plover
during the mipmapping process, lower res versions of the texture are generated b...
Ahhh ok, so it's basically unity causing it as it ports it into the game
tough plover
fallow osprey
Ahhh ok, so it's basically unity causing it as it ports it into the game
when the texture is imported into unity
and in case you were considering it, never turn off mipmaps
fallow osprey
Gotcha, you've been really helpful thank you ^_^
tough plover
np ^^
unique galleon

Get HotBox v1.0: https://www.patreon.com/posts/hotbox-1-0-trim-135959755
Wood texture I used: https://texture.ninja/category/Wood/2?texture=Wood-6895.jpg
My review of hotspot UV plugins in Blender: https://www.rileyb3d.com/blog-posts/trim-sheet-hotspotting-dreamuv-vs-zenuv
Install Dream UV: https://github.com/leukbaars/DreamUV
Watch some Ble...
 azure rain
unique galleon
https://www.youtube.com/watch?v=46_SwvRJzUE
azure rain
unique galleon
https://www.youtube.com/watch?v=46_SwvRJzUE
yeah that's a very helpful add-on
 meager basin
unique galleon
https://www.youtube.com/watch?v=46_SwvRJzUE
meager basin
unique galleon
https://www.youtube.com/watch?v=46_SwvRJzUE
thanks for this ❤️
 agile gate
i want to get into making like more low poly models but im a beginner. If anyone has some tips on modeling or even texturing thatd be great 🥹
devout orchid
there are two main valid techniques, namely box modeling, where you subdivide and morph a cube (sphere, single vertex whatever) and the other is sculpting high-poly mess and then retopologizing it. highly depends on your goals, skill set and style. like, anime is box modeling most of the time since theyre kinda genric+2d references, and furries id guess mostly retopo cause shape is more complex so figuring it out before attempting to optimise makes sense
@agile gate
 small slate
ah yes, a model im never gonna finish

 pine rain
could anyone help me out?
I'm not sure why this hard shadow shape is here (plz @ me I might not see your message)

 hushed leaf
first see if it's flipped faces. if not, go into edit mode, select the faces, and in the mesh->normals menu, reset vectors
pine rain
hushed leaf
first see if it's flipped faces. if not, go into edit mode, select the faces, a...
It was flipped thank you, idk how that happened
swift jolt
Il soo happy i figured out how to use unity terrain


 unique galleon
looks great!
real badge
Those are some nice bridges i have to say
pine raft
swift jolt
Il soo happy i figured out how to use unity terrain
Bridges look great. Consider using something like Gaea or World Machine for the heightmap.
azure rain
playing around with using the bevel Shader in blender for baking quick window/door textures
https://media.discordapp.net/attachments/434541435841413120/1504001973723205754/image.png?ex=6a05667d&is=6a0414fd&hm=7a639ef2f9774b8fd9cecdd4eb3f7181dcd162ae99758ceb2334a32508ce846b&=&format=webp&quality=lossless
 swift jolt
pine raft
Bridges look great. Consider using something like Gaea or World Machine for the ...
swift jolt
pine raft
Bridges look great. Consider using something like Gaea or World Machine for the ...
No, that would look too real for the vibe im going for + practicing terrain sculpting never hurts
And thanks
azure rain
https://media.discordapp.net/attachments/552626267820916737/1504232906715959407/image.png?ex=6a063d90&is=6a04ec10&hm=a5c18679ef16cfcbee34b4adaa966b56361e5f735b1b15ca9feb9c6f9706d78c&=&format=webp&quality=lossless 3D modeling some generic stores
 jagged moat
thems is some big brick
azure rain
 unique galleon
you’re texturing in like exactly the style of what I need to do 👀
I have the general shape but don’t really know where I’m supposed to start, but it’s an apartment building so it’s quite similar to those pics 😂 https://cdn.discordapp.com/attachments/1244517425563828226/1484721648639676621/image.png?ex=6a05ca89&is=6a047909&hm=e4f28f4475d1d9a6034b4e6e6be0a80bb926ade6bf4619155ab8f73772c50838&
 swift jolt

i uploaded the world to vrchat as a test... aparently its only like 4MBs for the whole square kilometer map
azure rain
unique galleon
I have the general shape but don’t really know where I’m supposed to start, but ...
https://www.youtube.com/watch?v=Ja9yffN8uYc this might be handy for you when you get to the architectural detailing
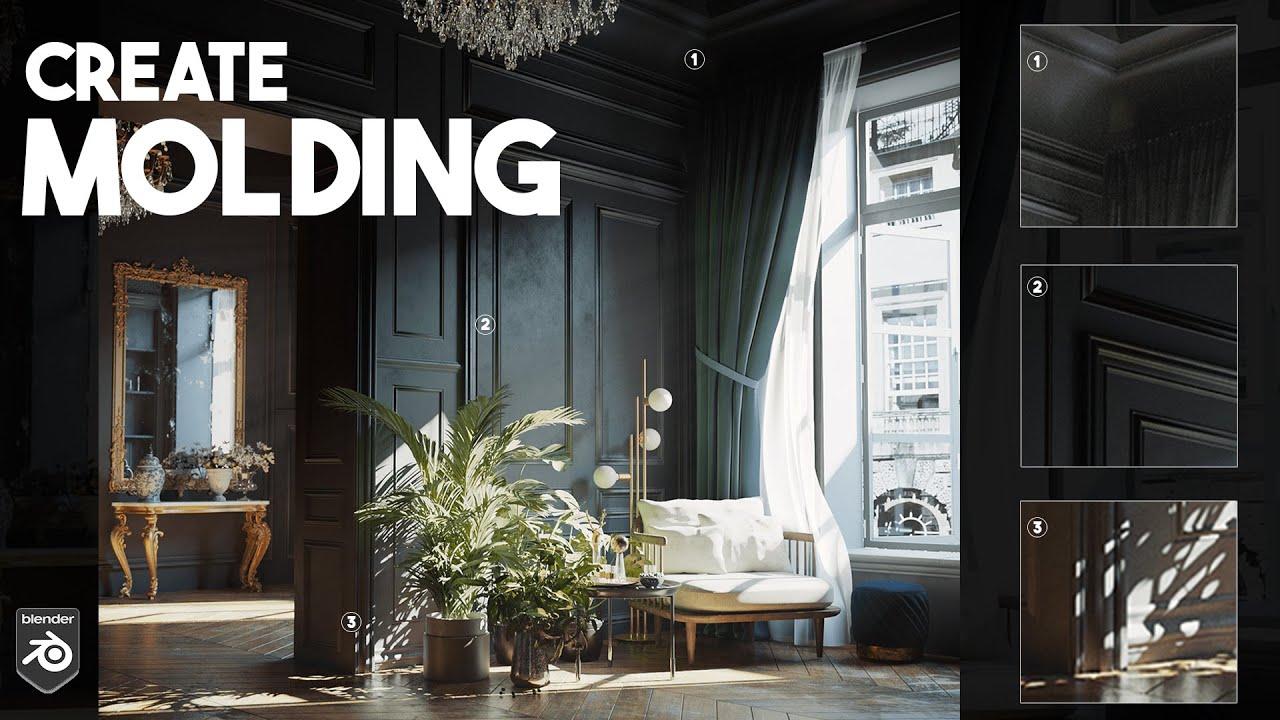
🚀 Check out my Blender Classic interior Tutorial 🚀 Beginner & Intermediate Level → https://youtu.be/HnTt-yIKygM
In this Video, I will show you how to quickly create various profiles or moldings in blender with 3 Different methods.
➤ Download Blender 3D
https://www.blender.org/
____________________________________________________...
azure rain
swift jolt
is that like Unity terrain or just a mesh out of blender for the landscape
swift jolt
azure rain
is that like Unity terrain or just a mesh out of blender for the landscape
unity terrain
blender terrain would be harder to texture well with my self made limitations
unique galleon
azure rain
https://www.youtube.com/watch?v=Ja9yffN8uYc this might be handy for you when you...
great tutorial but what's with the random flash to cats in between segments? Is this a new form of brainrot?
azure rain
progress on an architectural trim sheet
https://media.discordapp.net/attachments/1249587070280798209/1504388829006528542/image.png?ex=6a06cec7&is=6a057d47&hm=7e3da557ee3ae0f6e37fd2170ff0bf6326daa93f602dc138faf5ed6beb25a9f6&=&format=webp&quality=lossless
 steady zealot
azure rain
progress on an architectural trim sheet
https://media.discordapp.net/attachments...
steady zealot
azure rain
progress on an architectural trim sheet
https://media.discordapp.net/attachments...
 swift jolt
Trees
 azure rain
literally took a picture of some of my houses architectural trim to put it on my trim sheet and testing it with a door
https://media.discordapp.net/attachments/434541435841413120/1504572009928069170/image.png?ex=6a077960&is=6a0627e0&hm=5dc8f375d0e3bd868c99b5c8fd166c4c959767259a01dc894bdcb8a8d174bada&=&format=webp&quality=lossless
 cobalt willow
Sashley 😁

 waxen mango
Can anyone help me make a fortnite map
azure rain
waxen mango
Can anyone help me make a fortnite map
did you clarify a little more what you mean about that
waxen mango
azure rain
did you clarify a little more what you mean about that
Like the the sfx plus idk in some world you can ragdoll when death so I wanna make it like that
azure rain
made a quick little asset Zoo of all the different aspect ratios rectangles that perfectly one-to-one fit on a ultimate trim sheet so I can quickly start building using these various pre-made pieces https://media.discordapp.net/attachments/434541435841413120/1504875895221915859/image.png?ex=6a089464&is=6a0742e4&hm=0d609f8f38f95142debc7757df5fa410ca5fe449178f0959b341c018e97ccc78&=&format=webp&quality=lossless
 waxen mango
azure rain
made a quick little asset Zoo of all the different aspect ratios rectangles th...
waxen mango
azure rain
made a quick little asset Zoo of all the different aspect ratios rectangles th...
Ooop
azure rain
waxen mango
Ooop
examples from Sunset Overdrive of the kind of thing you can make with that kind of texture


 unique galleon
this was very informative for me so I’m dropping here, related to the content rainwolf’s been sharing! https://youtu.be/ga89MuH_ubk?si=ryamkzb3ikgLC9Df

Join my discord: https://discord.gg/HtMFFtrE5Z
Learn how to create seamless trim sheets from scratch in blender for you game assets.
This method flows well into Godot, Unreal and Unity Game Engine as it is one of the most effective ways to texture you assets.
Texture Atlas Video: https://www.youtube.com/watch?v=4qXjS5LfuWc
If you like this co...
azure rain
unique galleon
this was very informative for me so I’m dropping here, related to the content ra...
thanks for that link as that's honestly the best doesn't take forever tutorial for a trim sheet
unique galleon
azure rain
thanks for that link as that's honestly the best doesn't take forever tutorial ...
you’re welcome!! I’m happy I found it because now I have a quick and easy process to follow as a starting point :3
azure rain
unique galleon
you’re welcome!! I’m happy I found it because now I have a quick and easy proces...
hope it goes well for you https://gdcvault.com/play/1022324/The-Ultimate-Trim-Texturing-Techniques

For a relatively small team of environment artists to create the huge open world of Sunset Overdrive, we needed new ways to streamline the production of art assets while still pushing the visual quality to the next level. The Ultimate Trim became...
azure rain
 reef mason
Finally working on a 3.0 version of my personal OC, love my lil demon jester  ❤️
❤️


 azure rain
@unique galleonhttps://fixupx.com/quaternius/status/2057212770836152591?s=20 really useful pack that released today that's trimsheet based that has a free build




Do you need 300+ modular city assets to build a city in Godot, Unity and Unreal?
︀︀(even has fake window interior shader!)
︀︀
︀︀The Downtown City MegaKit is out right now!
︀︀quaternius.com/packs/downtowncitymegakit.html
︀︀
︀︀#gamedev
 FixupX
·
hushed leaf
FixupX
·
hushed leaf
ooh
pine raft
azure rain
<@142373886065901568>https://fixupx.com/quaternius/status/2057212770836152591?s=...
There really needs to be a better way to snap modular kits together and pick them from a palette in Unity.
azure rain
pine raft
There really needs to be a better way to snap modular kits together and pick the...
yeah definitely as It could probably be made a lot more faster by a proper editor tool
 vestal sun
Hey guys! Quick Question, I'm modeling a character for the first time. Is the hair always so dense on verticles?? or is this gonna be a problem later down the line?
 tough plover
vestal sun
Hey guys! Quick Question, I'm modeling a character for the first time. Is the ha...
tough plover
vestal sun
Hey guys! Quick Question, I'm modeling a character for the first time. Is the ha...
this does feel quite dense. a lot of the wavy shape could be done with a simple normal map
and you could cut down your poly count by like 80%
vestal sun
tough plover
this does feel quite dense. a lot of the wavy shape could be done with a simple ...
ohh! I haven't gotten to normal maps yet, but then my suspicions are correct. feels like it'd be a bit heavy, and the person teaching this course has already made a bunch of questionable decisions in their model x'D I'll keep an eye out for normals when i get to a comfortable point :D Thank you! ♥
tough plover
vestal sun
ohh! I haven't gotten to normal maps yet, but then my suspicions are correct. fe...
is this tutorial specifically teaching you how to make models for games, or is it more for renders?
for renders, you typically care less about poly count, and more about if it will subdivide smoothly. for games, you do care more about things like poly count, and you'll typically want to bake details down to a normal map/AO map/etc if you want to keep it low poly but preserve the detail you put work into
unique galleon
important distinction that makes half the tutorials out there moot lol
tough plover
either way, your topology looks very clean, so you could probably just take off the subdivision, and if you want it to look a little smoother, bake the normals from a copy of the mesh with the subdivision still there.
vestal sun
It's called "Ultimate character creation in Blender: From beginner to pro" This is what they say you learn(screenshot), and in the description it's worded as " In the end, when all of that is done, we will be able to pose our character and we will be ready to use our human character for animation purposes!" So I suppose it's mostly for Rendering.
Since this is my first course though, I'm not too regretful about getting it, because it really got me in the swing of things. I'm definitely going to make sure to look at tutorials geared towards games though, considering i was meaning to put this in VRChat x'D

I'll make sure to look into Normal baking when i make the hair for a VRC avatar :D
hushed leaf
I suck at normal baking. Not even once have I actually been satisfied with my work.
vestal sun
that doesnt instill much hope x'D
tough plover
vestal sun
It's called "Ultimate character creation in Blender: From beginner to pro" This ...
I will just say that baking normals for hair might be tricky with all of the mesh intersections and whatnot. so instead, it's probably good to just have a normal map that has some strands that you can just tile
but for the face/body, should be just fine
and if you have access to substance painter, do your baking there
 night harbor
Been trying to study 3d modeling and texturing uwaaa


 azure rain
night harbor
Been trying to study 3d modeling and texturing uwaaa
azure rain
night harbor
Been trying to study 3d modeling and texturing uwaaa
so so good honestly looks like you would be fantastic at making good looking Quest compatible avatars
 dense sluice
night harbor
Been trying to study 3d modeling and texturing uwaaa
dense sluice
night harbor
Been trying to study 3d modeling and texturing uwaaa
What program for texturing do you use?
night harbor
dense sluice
What program for texturing do you use?
Substance Painter :3
night harbor
azure rain
so so good honestly looks like you would be fantastic at making good looking Qu...
oh thanks!
dense sluice
night harbor
Substance Painter :3
Sweet, i cant use substance for the life of me with handpainted stuff
Never understood how to do it in that program
night harbor
if it makes you feel better
...i used to do textures on Clip Studio Paint and i had to guess where are the right places to paint on
dense sluice
Yeah thats rough, old school style
night harbor
dense sluice
Never understood how to do it in that program
to be honest, i just think that it's like an ordinary art program if I'm gonna do handpainted textures
dense sluice
night harbor
to be honest, i just think that it's like an ordinary art program if I'm gonna d...
It also doesnt help that ive never actually drawn 2d art before
I dont know how to blend in substance and stuff
dense sluice
night harbor
ah, fair. You can still practice
Sorry i got another question 💀, which brushes do you use? Do you got your own or are they just standard
night harbor
dense sluice
Sorry i got another question 💀, which brushes do you use? Do you got your own o...
oh, it's just a brush given by Substance itself
i forgot the name of it but when i typed in to search for a brush ("Air"), i scrolled down and saw a brush that looks like it's used for oilpainting
also, i dont mind questions being asked, i like it when people are curious about what tools i use to make pieces
dense sluice
I gotchu, thanks for the answer
azure rain
night harbor
Substance Painter :3
out of curiosity for the baked on lighting you hand paint do you eyeball that or use like the substance painter baked stylized lighting as a base
night harbor
i didnt baked anything actually
i just eyeball the shadows
as if im doing 2d handpainting artworks
 woven ibex
wha
 wispy gull
2nd
 little horizon
@spiral sigil blender rigging and weight painting tutorials if they are worth pinning

Hey guys. This is a quick tutorial on creating a simple, but rather effective character rig in blender. Hope it helps some of you out! Read FAQ below: Follow...

Quick intro and guide to skinning/weight painting. this video is meant for those with a basic understanding of Blender
 spiral sigil
@little horizon wouldn't those be better in #avatar-rigging ?
little horizon
I was assuming avatar rigging was more on the unity side of things but actually yeah they might be better in rigging
rigging channel will be alot more popular than this one i think anyway
 silent vine
https://puu.sh/yFaKg.png https://puu.sh/yFMKn.png https://puu.sh/yFMJA.png I found a hole in my leg and fixed it up but now it's got this weird thing growing out of it when ingame... anyone know what I did wrong? https://puu.sh/yFPWl.jpg


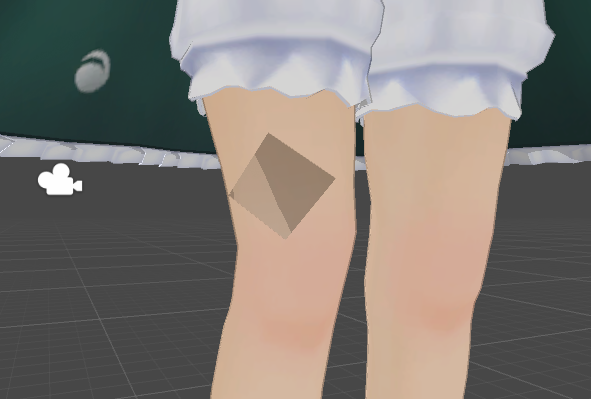
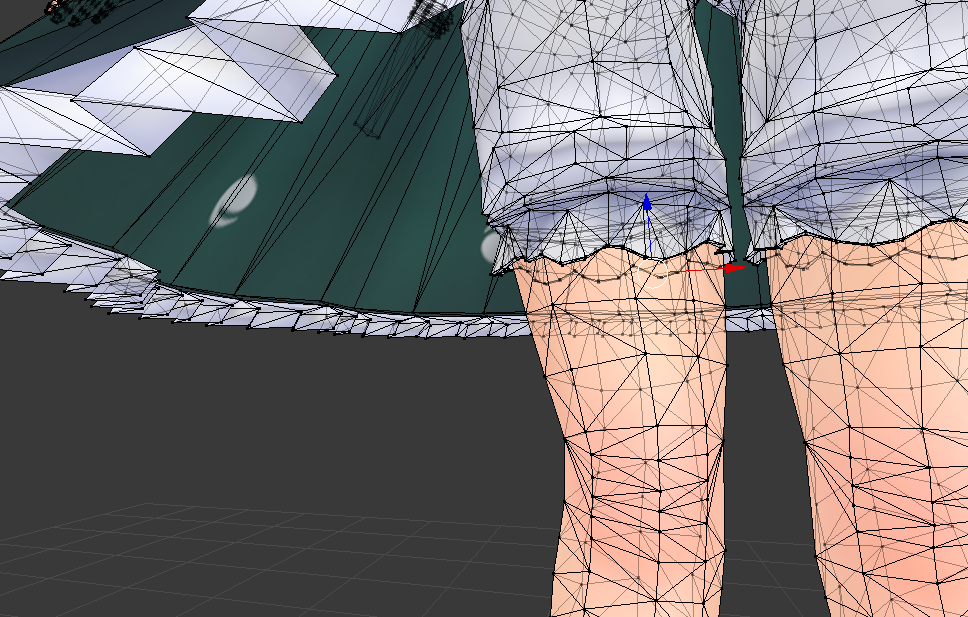

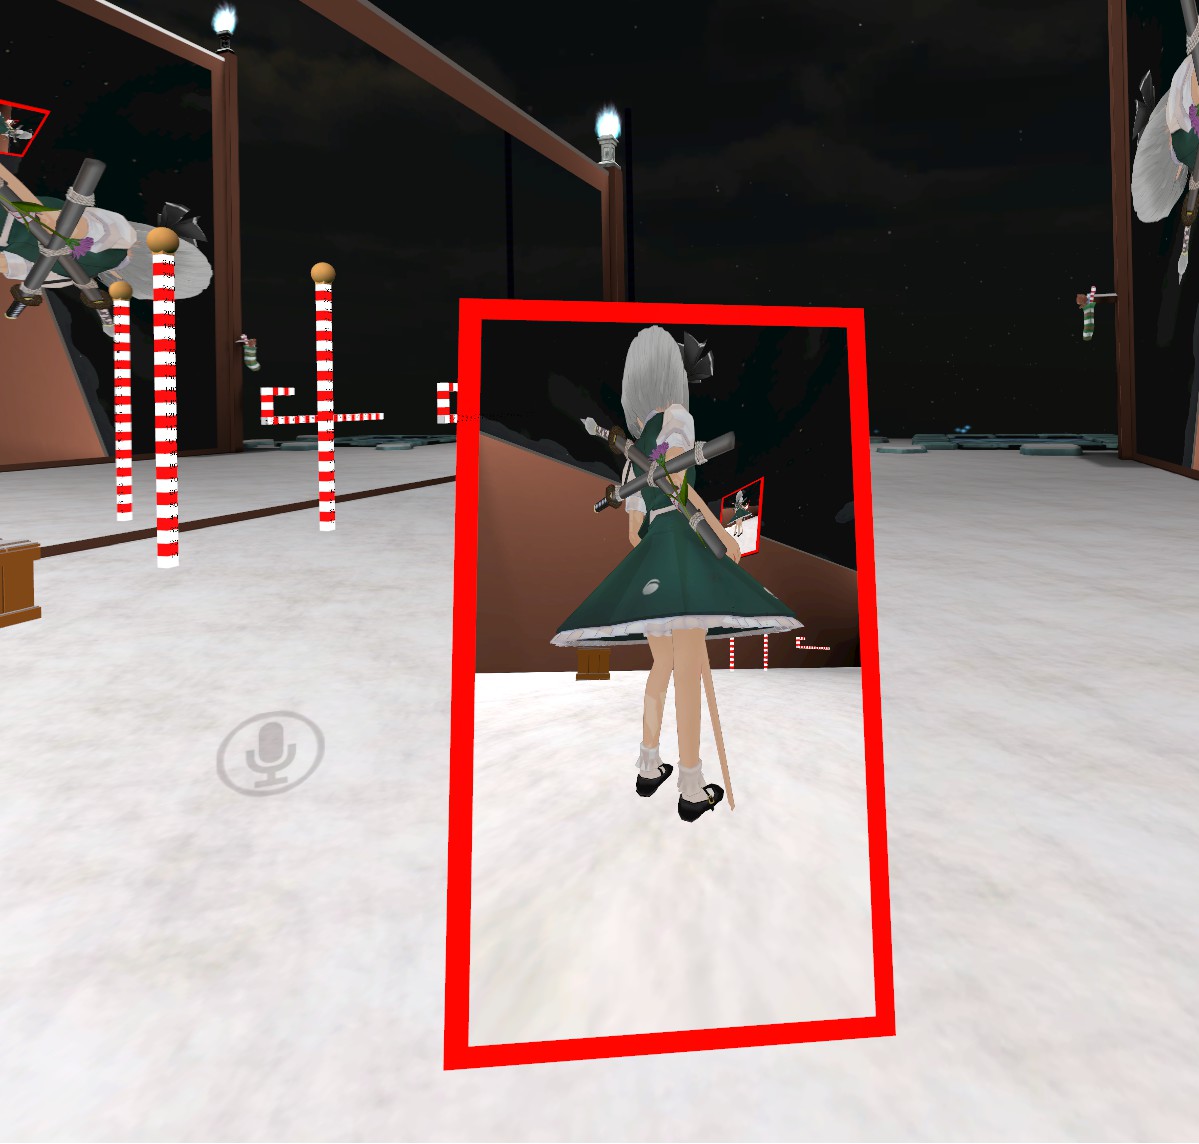
 autumn yarrow
Does anyone know why Im getting my textures like this after baking ?
http://prntscr.com/hnjfih

 latent charm
@silent vine That region you've had to create doesn't have any UV data, you'll need to create the UVs and put them in place.
@autumn yarrow Gonna need to see a bit more than that to know what's going wrong. What material are you trying to bake from?
autumn yarrow
I followed this guide: https://youtu.be/XB0XaaFfAxQ?t=17m41s
Created TextureAtlas, did the UV mapping, packed islands and after that bake. Did I miss anything ?
VRChat Community Discord: https://vrchat.net/discord Download VRChat! http://store.steampowered.com/app/438100/VRChat/ mmd_tools GitHub: https://github.com/p...
latent charm
Youtube's being a prat on this system, what bake mode did it say to use?
silent vine
@latent charm https://puu.sh/yGq6J.png I think this is what you mean? it seems to be fine to me
 autumn yarrow
Textures
latent charm
OH, might be flipped normals.
Select all, ctrl+n should sort it out.
Hmm, try changing the view mode in the UV window so it's not showing the alpha channel? @autumn yarrow
latent charm
Bottom of the UV window area, a set of buttons where three of them are red, green and blue circles.
autumn yarrow
So I select second one ?