#3d-modeling
1 messages · Page 4 of 1
 tough plover
 honest schooner
okay, thanks
tough plover
honest schooner
okay, thanks

the whole chest piece would be rigged to that green bone at the bottom
there is one flaw with this though
the fact that there's multiple bones in the spine means that it can "crumple"
or like
make it so that the top of the big box goes up/down relative to the height of the chest
to fix that, there's two ways I can think of
1: separate the body into multiple pieces, one for the hips/spine/chest. each one would be weighed 100% to their respective bone
2: continuing on my original idea, you would have all of the weights for the lower part weighed to the bone at the hips. then, the target at the neck would also be a bone, and you would weigh the entire top part to that bone. put an Aim constraint on both of the bones (the one at the hips and the neck), targetting each other
that way, they would always face each other (be parallel), but would be able to move up/down relative to one another, essentially stretching/squishing the entire torso piece uniformly without bending
honest schooner
okay. I got you. Thanks. I'll look into it.
 spiral sigil
im trying to texture paint this hair but when i try and paint on one side, nothing happens
i was following along with this https://youtu.be/BqWYgrXw7Jk but it doesnt tell me anything about texture painting so then https://youtu.be/WjS_zNQNVlw i was watching this


A tutorial on how to make hair in Blender 2.8 with curves, a method that is very simple and effective that I have been using for my character sculpts.
▼ Sculpting Uraraka Ochako:
Re-Sculpting My Old Art | Uraraka Ochako in 3D [My Hero Academia] | Can You Improve In Only 1 Year?!: https://www.youtube.com/watch?v=iYNdfef1Uog
▼ My Gumroad Store (...

Download this file: https://grantabbitt.gumroad.com/l/vlznc
Grants Learn Blender fast short course: https://www.gamedev.tv/p/low-poly-landscapes/?coupon_code=GRANT&affcode=45216_9b6dqwx2
Grant's Character Course: https://www.gamedev.tv/p/blender-character-creator-2/?coupon_code=GRABBITT&affcode=45216_9b6dqwx2
Grant’s new Drawing course: https:/...
 solid minnow
Making a mermaid version of a model I previously got.


 spiral sigil
I am curious, are skinned meshs more performance intensive compared to static meshs by just existing, or only when manipulated by an armature?
Additionally, does performance impact vary if a skinned mesh was being manipulated by a player in vrchat compared to that avatar being used as a asset in a vrc world with an animation constantly playing?
tough plover
spiral sigil
I am curious, are skinned meshs more performance intensive compared to static me...
skinned meshes are more performance intensive by nature, whether or not they are affected by an armature or by blendshapes
it doesn't matter how you drive the armature, whether it be by IK or animations, it's all the same
spiral sigil
mmm okay thats interesting
on a similar note, are blendshapes the same in that it only matters how many there are and how much geometry they are influcing at once, and not if its moving them at the time or not?
tough plover
spiral sigil
on a similar note, are blendshapes the same in that it only matters how many the...
having blendshapes on a mesh (none active) will increase the file size and vram usage of the mesh. an active blendshape requires the CPU to calculate the new position of every vertex on that mesh
this has to be done for every active blendshapes
which is why having a bunch of active blendshapes is bad
spiral sigil
ah and active is any value above 0?
tough plover
yes
spiral sigil
alralr
tough plover
every active blendshapes incurs a CPU cost
spiral sigil
this will save me alot of time understanding differences in benchmark data
assuming its not done wrong
spiral sigil
probably last related question:
Objects with shaders that support transparency(and is being used), does their performance cost only increase when the object its applied to has more dense geometry? Also if its applied to a mesh with backface culling, and the viewer in unity/vrc is looking at the frontfaces, will the performance be identical to that same mesh without backface culling?
I specify the user viewing it in unity because im not certain if unity optimizes it during runtime and changes performance outcome
 cerulean thicket
hey guys, I'm pretty new to unity and started editing avatars recently

for some reason, the avatar I just edited only has 1 gesture
other avatar gestures work just fine
tough plover
what do you mean "only has 1 gesture"?
also, that is the Gesture controller, the one responsible for finger movement. if you're looking for facial expressions, that would be in the FX controller
cerulean thicket
tough plover
also, that is the Gesture controller, the one responsible for finger movement. i...
not the facial expressions, the gesture itself
it only makes one no matter what I press on my controller
tough plover
do you have gestures turned off in game?
 rocky shoal
I
spiral sigil
How difficult is blender scripting to get into? im trying to make a very specific model generator for perf tests
I want to create something that could for a given mesh:
-lets you choose # of materials (e.g. 10)
-lets you choose resolution of texture you want each material to have in Diffuse (e.g. 1024px by 1024px)
-automatically assigns each material 1/(# of materials)% faces of a given mesh (e.g. for 10 materials total, one material would be given 10% of the total faces on mesh obj)
Apologies for asking about alot today normally I dont do this
actually now thinking about this I might be able to devise something with geometry nodes im gonna update back on that
 spare kiln
 quaint jasper
spiral sigil
How difficult is blender scripting to get into? im trying to make a very specif...
quaint jasper
spiral sigil
How difficult is blender scripting to get into? im trying to make a very specif...
It's Python on top of a very annoying API
spiral sigil
quaint jasper
It's Python on top of a very annoying API
Im learning python already so thats good
when I get home ill first try geometry nodes but if i cant figure it out that way then i guess its gonna be python documentation reading time
 tidal maple
Hello there I am brand new to making avatars and models and I really don't have a clue one where to start do you have any tips or tips on where to go
spiral sigil
tidal maple
Hello there I am brand new to making avatars and models and I really don't have ...
youtube, also I know a few discords that u might be interested in
sometimes its nice to get professional guidance too but in my experience you cant let yourself overrely on them or else you will hurt your own art skills developing
this might be different for learning in art schools where you can always talk to professional professor but when your mostly on yourown u gotta be able to work mostly on ur own
this again is my own thought process other people might have different ideas but at the end of the day u got to get motivated enough to practice art often
to improve in time
tidal maple
spiral sigil
youtube, also I know a few discords that u might be interested in
Thank you hopefully will help a lot the problem I've been kind of like frustrated on is that like bit of like thing I've done trying to figure it out has been really vague skipping over like the beginning stuff if that makes sense like you already have at least some prior knowledge and I don't.... I'll continue looking around but thank you
spiral sigil
tidal maple
Thank you hopefully will help a lot the problem I've been kind of like frustrate...
you can never have enough fundamentals haha
n e v e r 👀
if I was truely a master of fundamentals my drawings would be immesenly better
i am far-ish frum
tidal maple
It's probably because you know small brain but to meet some like they're typing like a doctor would talk you understand it but at the same time you don't have a clue what they're talking about
spiral sigil
Gotta get used to that acedemic language bro
tidal maple
I don't even know any of it I know the difference between like a png and a docs but that's probably as far as it goes
spiral sigil
what
tidal maple
exactly
 gentle cradle
what version of blender should i use for modeling my avatar?
spiral sigil
gentle cradle
what version of blender should i use for modeling my avatar?
there isnt any requirement for using recent versions, although any versions below 2.8 will have the old UI and no geometry nodes
so I reccomend just using the latest stable, which is the version of blender on steam afaik
autoupdates for you on steam so I suggest that
gentle cradle
ok thank you so much
spiral sigil
np
tidal maple
Hello my friends I am in desperate need of help I'm using blender along with unity and I have searched the internet for help and I found anything that can do so but I'm trying to make a plus size model for a friend and a single place I look says you get little items and that's how you make it but I cannot find that items like that for this person it is is customized and there oc so I need help please
spiral sigil
tidal maple
Hello my friends I am in desperate need of help I'm using blender along with uni...
I sometimes do my runon sentences but man this is incoherent
tidal maple
sorry frustration does that
spiral sigil
its oka
spiral sigil
hm im starting to think its not possible to create and assign materials by their mesh islands
I would have to create hundreds of materials manually? haha no pls
why is this so limited what node could I possibly put before this so I can make it replace materials depending on mesh island or face id
 spiral sigil
smells like python time
 versed glacier
is this like the proper way to uh? do the thing

 gritty quarry
no thank youuu
 obsidian nova
versed glacier
is this like the proper way to uh? do the thing
obsidian nova
versed glacier
is this like the proper way to uh? do the thing
Depends what you’re making, but generally, yes.
spiral sigil
Hay all I hate to ask this but I'm really stuck on something and I have no knowledge of blender or unity so if someone here wants to help please send me a dm if u can it would be amazing help thank u
obsidian nova
Youtube is your best bet. It's unlikely that you'll find anyone who wants to help you for free.
Here is the god-list for VRChat tutorials and assets:
https://github.com/madjin/awesome-vrchat
GitHub
One-stop shop for people interested in developing content for VRchat - GitHub - madjin/awesome-vrchat: One-stop shop for people interested in developing content for VRchat
tough plover
spiral sigil
Hay all I hate to ask this but I'm really stuck on something and I have no knowl...
if you have a question, ask the question. don't ask for people to DM you, you will get far less answers that way
 earnest night
versed glacier
is this like the proper way to uh? do the thing
earnest night
versed glacier
is this like the proper way to uh? do the thing
...Not really. I assume this is a knee patch. You're generating 5 N-gons. What you want is 4 quads where the edge loops change. You need a circle around the knee, and quads to follow the topology.

Another example

 halcyon matrix


2-1 has tris/quad mix but other then that its a good cheet cheat for good topology. mixing some tris into creases and nooks is okay (not preferred) but in general you should stay away from mixing too much.
tough plover
using tris/ngons when doing subdivision is fine since it'll result in either 3 or 5 quads
earnest night
For rigging and animation on skeletal meshes, the topology won't be smooth when you have straight lines going right into an n-gon or tri. It needs to be smooth quads all the way around, with loops that make sense.
tough plover
again, if you subdivide it it's fine

it's all quads
this is just a bad thrown together example, but it gets the point across
halcyon matrix
true. just dont go overboard with polycount.
tough plover
yea, when subdividing always make sure your base mesh is very low poly
halcyon matrix
vrc target is like 75k in total, clothes and acessories included. ofc you can go over that but you will be hidden by most users. quest in particular (think limit is like, 20k for quest?)
tough plover
this image is a good example. if your mesh looks like the one on the right, one level of subdiv gets you in a perfect place

that image literally has tris on the feet
 azure rain
and if you look at video game models triangles are used in helpful places especially on mobile quality models
spiral sigil
oh boy python api scripting is probably going to be the most difficult yet
any yall artists here know enough of that to make custom addons to add to ur workflow?
spiral sigil
dude I cant even get importing to work right lol why does the outdated documentation have to be more useful than current
spiral sigil
the console says everything I do in blender this is revolutionary
this is miles more helpful then docs
 proven sorrel
Hey everyone! I need some help modifying an avatar. I want to do a head swap with 2 of my models but I don’t know how at all and it seems kinda complicated. Also tryna convert these models to quests versions after the fact.
 harsh saddle
proven sorrel
Hey everyone! I need some help modifying an avatar. I want to do a head swap wit...
harsh saddle
proven sorrel
Hey everyone! I need some help modifying an avatar. I want to do a head swap wit...
It's mostly just a matter of weight painting. Delete the head from the one, stick the head from the other on and scale ti appropriately then select the model, shift-select the rig, parent with empty groups, and then weight the new geometry to the head. https://www.youtube.com/watch?v=4fICQmBEt4Y

I've been meaning to update this video for a very VERY long time. But, we're finally here. Everything you need to know in order to start painting weight layers onto your character!!! Hope it helps :)
Female Body Model Link:
https://www.youtube.com/watch?v=_XfvLpLyulI
If you enjoyed this video, please don't forget to like and subscribe!
You ca...
Publishing to Quest is mostly just a matter of keeping the model below 20k tris and using the VRChat shaders
 tulip ice
 versed glacier
Its my first time making photorealistic stuff (made the behind the scenes for studio setup too) its still WIP

 harsh saddle
Looks good. If you're going for photorealism, you probably want some normals on the wine cork/wrapper and on the soda lid and the edges are a little blurry (denoising, maybe?) You probably also want some surface imperfections on the glass/plastic bottle but it's definitely a good start.
versed glacier
im not 100% sure what you mean by imperfections as in studio photography i dont really see any imperfections on the glass on real life pictures. maybe little frostyness but thats it
harsh saddle
versed glacier
im not 100% sure what you mean by imperfections as in studio photography i dont ...
Not necessarily imperfections in the glass but things like smudges/fingerprints. You'd want to keep them pretty subtle as you'd likely wipe down a bottle after handling it for a photoshoot but you might not completely eradicate all of them and if you wiped the bottle down, there may be a hint of the cloth leaving a mark. It should be nearly imperceptible as if it was clearly visible, they'd probably go back in and wipe it down again but having a small hint of that would make the surface look less artificial. It looks alright for the wine and the beer but the sheen on the soda bottle looks too regular. The reflections are also maybe a bit artificial? Most of the time, you're going to have the reflection of a person taking the photo but even if it's automated and there is no human in the studio when the picture is being taken, you're still going to have some sort of camera.
 south saddle
versed glacier
Its my first time making photorealistic stuff (made the behind the scenes for st...
south saddle
versed glacier
Its my first time making photorealistic stuff (made the behind the scenes for st...
and for define not the coke bottle you want to add a bit of Translucent rim lighting, to show it not just solid in side and light can pass through.

 swift jolt

okay i will die making this map
there are no good cruise ship maps. so i guese i have to make it myself
 open kettle

 spiral sigil
so i cant seem to figure out why 1 material is solid when it has a texture on it..
swift jolt
spiral sigil
so i cant seem to figure out why 1 material is solid when it has a texture on it...
is the model its on unwrapped?
swift jolt

 gritty veldt
Anyone know why blender likes exporting models with 100, 100, 100 scale?
 spiral sigil
gritty veldt
Anyone know why blender likes exporting models with 100, 100, 100 scale?
spiral sigil
gritty veldt
Anyone know why blender likes exporting models with 100, 100, 100 scale?
i think its an export setting actually to change scale, check dat menu
 tough plover
gritty veldt
All Local -> FBX All
tough plover
gritty veldt
All Local -> FBX All
correct
 warped linden
Hey, does anybody have a backpack asset
 magic badge


 fleet turtle
coming soon 20 piece high quality nugget
 fleet turtle
there was this 80 piece

 heavy sonnet
delicious
spiral sigil
i think the shadows look cursed becsuse no orange or redbouncelight
just black shadows with no color at all
almost feels more like rocks as it is now, those would be some seriously crunchy nuggets
 prisma tinsel


 tough plover
 sharp grove
is there a way to stop substance from doing things like this?
sharp grove
is there a way to stop substance from doing things like this?
- what do the UVs look like
- are you on Tangent Wrap, Tangent Planar or UV
- are the UVs mirrored (overlapping UVs for left and right)
sharp grove
tough plover
- what do the UVs look like
- are you on Tangent Wrap, Tangent Planar or UV
- ar...
i had substance auto unwrap it so they get the job done but uh, yknow
tried wrap and uv, neither worked
nope
tough plover
yea, don't rely on auto unwrapping
even quick and dirty unwraps in blender tend to come out better
sharp grove
yeah, it's just something i haven't been able to take the time to learn 100% yet
planar seems to do a better job at fixing it but yknow, band aids
harsh saddle
Manual unwrapping isn't that scary, you basically just have to mark seams in areas that will allow Blender (or whatever you're using) to split the model into flat strips. There's a bit more to it if you want everything to be lined up perfectly for texturing in Photoshop but that's usually enough for using 3D texture paint.
 mental hazel
how could i put a shadow on emission shaders if possible?

 cerulean shoal
manually texture shading
 copper kettle
can someone help me fix the error in blender when i try to import my modle for vr chat
sharp grove
harsh saddle
Manual unwrapping isn't that scary, you basically just have to mark seams in are...
i know that, but almost all uv maps i make turn out shit when painted lol
harsh saddle
If your seams are in sensible places, they should be better than the automatic output, anyway.
sharp grove
that's the thing, a lot of what you're saying is kinda like "how to draw an owl"
i know of seams, what uv mapping actually is, but most of my attempts haven't turned out great because it's still something i need to learn properly, and it's one of those things that for me is more "try and get a feel for it with each attempt" rather than "watch some videos or follow some guides and suddenly become decent at it"
you can say if my seams are sensible and all that then it'll turn out fine, but that's easier said than done
hence me relying on the automated option while i try to learn it with more practice-y models that i don't want to upload to vrchat or use anywhere, because it's giving better results for now than my manual attempts
harsh saddle
sharp grove
that's the thing, a lot of what you're saying is kinda like "how to draw an owl"...
It takes some practice to get the hang of UV seams but just putting them in the general area you see if you look up UV seams should produce better results than the automatic tools which slice the model up pretty much at random, basically just putting them on the sides of the model and in out of the way places. I like to think of it a bit like butchering. If you were to trying to cut a human into flat strips, where would you make your cuts? A bit morbid, I know, but that's a good general approach. If you look at this article and scroll down a bit, you can just use that general placement for your seams https://3dtotal.com/tutorials/t/human-anatomy-uv-coordinates-setup-for-texturing-dylan-swan-character

3dtotal
One of a wide range of 3D and CG art tutorials on this and other creative tools on 3dtotal.com.
sharp grove
i'll take a look at that, thanks
i didn't really think of just looking up other examples lol
 zinc moon
Looking for the best 3d modeling engine, thoughts??
 thin shadow
Blender
harsh saddle
You can do anything you would need to do in VRChat in any of the major 3, Max, Maya, or Blender, but Blender is free and thus has the largest library of free resources. The only reason to pay money for the others is specific production pipelines that aren't really relevant to VRChat. They'll still work but you'll be spending a lot of money for little to no benefit and even if you were to find a way to acquire them in other ways, the smaller user base is going to make it harder to find tutorials without investing in courses.
 ashen forge
Working on modeling a VRCat for a lil project
 spiral sigil
fleet turtle
coming soon 20 piece high quality nugget
spiral sigil
fleet turtle
coming soon 20 piece high quality nugget
ngl, thought it was 💩
mental hazel
if i wanted to change the weight paint on a mixamo rig in blender, how would i do that?
 pure dagger
Weight paint mode
mental hazel
i select the armature and there is no weight paint mode
tough plover
mental hazel
i select the armature and there is no weight paint mode
weight painting is for meshes, not armatures
you can select an armature then shift click a mesh in order to go to weight paint mode and be able to select/pose bones
 river geode
Heya, I'm trying to do some model edits but when I import all blendshapes disassociate as different objects like this

I'm using Maya since I was trained on it and it's more intuitive for me.
I figured maybe it was a weirdness with some sort of pipeline so I exported the model and all the Blendshapes to an FBX and imported them with blender.
Everything is completely unpacked, even the armature is unparented. So I re-parented everything and then Blender Crashed
basically, how the heck can I unpack/repack these models for edits
 low halo
Anyone else not able to open Blender due to an error with steam? It's saying "Invalid app configuration" Tried uninstalling and re installing, as well as restarting my laptop but no luck.
tough plover
how about you just download blender from the website?
low halo
Yeah I went ahead and did just that thank you! ✨
 teal totem
hey people do you have a guide to do clothing for vrchat avatars? in Blender
i only want to export a clothing piece from blender but first i need it to fit my model but i don't have any clue how to do this, and i don't know if there are extra steps or something i am missing off
 harsh saddle
teal totem
hey people do you have a guide to do clothing for vrchat avatars? in Blender
i o...
harsh saddle
teal totem
hey people do you have a guide to do clothing for vrchat avatars? in Blender
i o...
You can fit it in sculpt mode or edit mode by using the grab and inflate tools (in sculpt mode) or selecting and moving vertices (in edit mode). Unless this clothing will be toggleable, you probably want to delete the faces of the body underneath it to lower the poly count and avoid clipping..
teal totem
harsh saddle
You can fit it in sculpt mode or edit mode by using the grab and inflate tools (...
my plan is to only export the clothing adjusted to the body shape
harsh saddle
teal totem
my plan is to only export the clothing adjusted to the body shape
Okay, then yeah, sculpt mode or edit mode will do it but there isn't an automatic tool for fitting as far as I'm aware. Tools like that do exist but not for how you have your clothing set up and I'm not sure if Blender has that functionality. I guess you could try a shrinkwrap modifier but I'd just do it manually.
teal totem
okay so i will try
 pearl quiver
Is there any base female base models
without a head only the body
Free to use?
I saw a few but they did cost 20 usd with tax
I just mostly want to test out unity skills before i buy a model
harsh saddle
Sketchfab has free base models but I think they all have heads. You can remove the head yourself, though.
 hushed star
@pearl quiver https://sweetsamanthavr.gumroad.com/l/sweetfemalebase?layout=profile&recommended_by=library

Gumroad
This base is a re-sculpt of teabeepea's female base with permission from teabeepea, it has been re-sculpted, weight painting has been improved, finger and toe nails have been added, the base has a new uv map and body textures, the bones have been improved and a vast number of minor tweaks as well have been made.There are two versions of the base...
 visual python
Hi, y'all. So, I'm having an issue with the CATS plugin where I go to Fix Model and it messes up my materials. Has something changed with the plugin where I need to do something with the materials first, or....? I'm just really confused.


 spare mauve
visual python
Hi, y'all. So, I'm having an issue with the CATS plugin where I go to Fix Model ...
spare mauve
visual python
Hi, y'all. So, I'm having an issue with the CATS plugin where I go to Fix Model ...
I highly advice not to use cats to fix models. Its unreliable and for me personally it always brought more problems then it fixed. if you do decide to fix models though you can disable what it "fixes" including materials
Next to the fix button there should be a little cogwheel for settings on what it should include/ignore
visual python
Yeah, I found that option, I unticked the Fix Materials option and, as far as I can tell, it seems to be working as normal.
spare mauve
Nice
Its always a diceroll with fix model, I am afraid of using it personally lol. And I always make a backup when I do. which is adviced anyways
visual python
spare mauve
Its always a diceroll with fix model, I am afraid of using it personally lol. An...
Yeah, I also always make a backup of every step, just in case the worst happens
 red glade
Hello i wanted to make a furry pallet/headswap within a blendshape. or would it be better to just make seperate models at that point?
tough plover
red glade
Hello i wanted to make a furry pallet/headswap within a blendshape. or would it ...
you should make a separate model
red glade
Allright thanks!
Im also kinda new to furrsuit/furry stuff so if i say anything incorrectly on the topic mybad 😅
 night holly
I am getting so frustrated with this
how do i make an object toggleable in the radial menu
 potent path

 still wadi
@potent path what's yo budget
teal totem
visual python
Hi, y'all. So, I'm having an issue with the CATS plugin where I go to Fix Model ...
i had this problem but when i click "fix model" my clothing is not moving with the body
i don't know what i did wrong
harsh saddle
teal totem
i had this problem but when i click "fix model" my clothing is not moving with t...
I've heard people have mixed results using CATS but is your clothing even weighted to the rig?
teal totem
harsh saddle
I've heard people have mixed results using CATS but is your clothing even weight...
no idea 😦 how i check this?
 hearty chasm
teal totem
no idea 😦 how i check this?
hearty chasm
teal totem
no idea 😦 how i check this?
I can help you out
teal totem
for now i am just adjusting the clothing size to my model
harsh saddle
teal totem
no idea 😦 how i check this?
I've been meaning to update this video for a very VERY long time. But, we're finally here. Everything you need to know in order to start painting weight layers onto your character!!! Hope it helps :)
Female Body Model Link:
https://www.youtube.com/watch?v=_XfvLpLyulI
If you enjoyed this video, please don't forget to like and subscribe!
You ca...
Objects need to be weight painted to move with the rig
teal totem
okay
and how do i get circular edges?
i have read bevel do it
but i don't see any different
because i edited my mesh with sculptor a some cloth borders looks geometrical
hearty chasm
teal totem
because i edited my mesh with sculptor a some cloth borders looks geometrical
Dm
harsh saddle
If I understand what you're looking for, bevel should do it but when you apply the bevel, there are different options. You might want more segments to your bevel to get a more rounded profile.
 teal totem
harsh saddle
https://www.youtube.com/watch?v=4fICQmBEt4Y
teal totem
harsh saddle
https://www.youtube.com/watch?v=4fICQmBEt4Y
i have check my clothing and for now the color is yellow, orange ...
harsh saddle
teal totem
i want to smooth this kind of border
I think at this point you would have to add loop cuts between all of the edge loops and then scale them out manually. Beveling might not work so well in that situation.
teal totem
harsh saddle
I think at this point you would have to add loop cuts between all of the edge lo...
in any case is just underwear so i think i won't adjust it more, is not gonna be full visible
harsh saddle
teal totem
i have check my clothing and for now the color is yellow, orange ...
Okay, then it does have some level of weight paint, can you check the modifier panel to make sure it has an armature modifier and that it's assigned to the armature of your character

 harsh saddle
That's really weird weight paint, that means that whole top is weighted to one bone which is almost certainly not what you want and yeah, there is no armature modifier ther so you would need to add one to get it to respond to the armature moving.
If you click add modifier, one of the options is armature, then you just need to select the armature.
I don't know where you got this character but it's a bit of a mess from what I can see.
teal totem
okay i understand what you say, but let me explain, in this case i am using my model as a reference to adjust the clothing, then i will export only the clothing to unity (because this will be a toggleable cloth) do i need to adjust weights too in this case?
the fbx file will be this outfit , no body
sorry for not explaining this beforehand
harsh saddle
You still need weights if you want the clothing to ultimately move with your character or else it will just stay stationary. You can parent the clothing to certain bones but then it won't respond to other bones so the top will just stay stuck to the chest in a t pose and won't react to the arms moving.
teal totem
harsh saddle
I don't know where you got this character but it's a bit of a mess from what I c...
the clothing is from a game
a game where you can make anime characters, so i made the clothing there
and imported with a special plugin
i splited the mesh by materials
harsh saddle
Then if it is weighted, which it seeems to be kind of, it's not weighted to your specific character so I would either reweight it or transfer the weights from the character if the character's weights are good.
 harsh saddle
AH, well, you have a bit of a job ahead of you. Unless you just didn;t select any other vertex groups. The weights are all tied to different vertex groups. Watch that video if you haven't, it should clear a lot of this up
harsh saddle
So is the character you're planning on putting this clothing on weighted properly and this is just a stand in? Why not bring that character into Blender and fit the clothing to them directly? It would be simpler.
teal totem
no
is the same model
and i don't know why is not weighed correctly
because in game it moves right
harsh saddle
It probably is weighted correctly, then, you're just only looking at the vertex group for the end of the tail.
teal totem
ah maybe is that
that + i am noob with blender lol
yeah you are right
is well weighted
lucky of me
harsh saddle
It's a somewhat advanced topic so you'd be better off watching a video or two than trying to figure it all out yourself and making a bunch of mistakes you need to fix. Also, you said you separated everything by material, you should really join everything to a single model unless it needs to be toggled separately so the top should all be one model.
teal totem
harsh saddle
It's a somewhat advanced topic so you'd be better off watching a video or two th...
the plan is to assign every part in unity to my model
teal totem
harsh saddle
It's a somewhat advanced topic so you'd be better off watching a video or two th...
the case is i am here asking because every tutorial i followed didn't work
they used cats
harsh saddle
teal totem
the plan is to assign every part in unity to my model
Separating a mesh into that many parts will lower your performance/performance rank which isn't strictly forbidden on PC if that's all you care about but it's not ideal
 dire comet
How do I make the ears mesh/bones move closer together? I did it on another character just by hitting buttons randomly, and I can't seem to find it again LOL
 teal totem
harsh saddle
Separating a mesh into that many parts will lower your performance/performance r...
teal totem
harsh saddle
Separating a mesh into that many parts will lower your performance/performance r...
if i join all meshes into one? Will i can move every single part in unity?
 harsh saddle
teal totem
if i join all meshes into one? Will i can move every single part in unity?
harsh saddle
teal totem
if i join all meshes into one? Will i can move every single part in unity?
That's what weight painting is for, it tells the model what bones should move what parts of the model for every vertex.
 harsh saddle
You should still keep every part you need to toggle as a separate object but you don't need separate parts of the same clothing item as separate objects.
They probably have different names for the UV maps. That can cause issues with merging. I'll show you how to fix that when I have some time, give me an hour or so.
teal totem
nope is the same name i have checked
i saw some tutorial where they change to the same name
but it didn't work for me
okay Krampus
harsh saddle
teal totem
but it didn't work for me
Ctrl+Z to separate your model back to separate objects, is this the same in all of the objects?
 harsh saddle
Though you also have some weird modifiers that might be affecting things, the mmd bone order and outline modifier I haven't seen before so that might be causing issues. Generally models will retain their UVs properly if the UV maps have the same name. You can have 100 different objects on your model if you just want it to show on PC, it just won't perform as well.
harsh saddle
I don't know, they might be doing something. I've never seen them so I don't know.
Cool, so long as it still looks and does what you want.
 harsh saddle
You don't apply vertex groups. What are you trying to accomplish?
teal totem
clothing movement
teal totem
harsh saddle
You don't apply vertex groups. What are you trying to accomplish?
the armature you said before right?
harsh saddle
teal totem
the armature you said before right?
You need to add an armature modifier to the clothing object
harsh saddle
And select the armature in the field within that modifier
teal totem

i selected the body armature, is that correct?
i can't manage to move the cloth, it stays static
harsh saddle
teal totem
You want to have the modifier on the object you want to deform to the armature and you need to have the armature selected in the object field.
teal totem
okay i did but is not moving as desired
harsh saddle
teal totem
okay i did but is not moving as desired
It might be that the names of the vertex groups don't match the names of the bones in the armature. That's likely it if the clothing comes from a different game than the model that came with the armature. You'd have to either rename the bones or rename the vertex groups and since the model is already using the vertex groups associated with the current bones, you'd probably want to rename the vertex groups on the clothing to match the bone names of the armature.
Or you can just delete all of the vertex groups on the clothing and transfer weights from the body.
teal totem
harsh saddle
It might be that the names of the vertex groups don't match the names of the bon...
okay go it i will look for a tutorial
maybe transfer weights is more simple
harsh saddle
teal totem
okay go it i will look for a tutorial
Yeah, it's pretty simple. You just select the body, select the clothing, then go into weight paint mode and then at the top go to weights -> transfer weights, though there's a setinng you need to set in there that I would have to look at so it might be good to watch a tutorial.
Make sure you set this setting like this so it transfers all the weights and not just the selected vertex group
 tough plover
should also set Vertex mapping to Nearest Face Interpolated
 dapper plaza
the sharpest buns on the planet!
 teal totem
harsh saddle
Yeah, it's pretty simple. You just select the body, select the clothing, then go...
teal totem
harsh saddle
Yeah, it's pretty simple. You just select the body, select the clothing, then go...
weight paint is done, it seems it's right but still not moving
 harsh saddle
teal totem
weight paint is done, it seems it's right but still not moving
harsh saddle
teal totem
weight paint is done, it seems it's right but still not moving
So you transferred the weights and the correct armature is assigned in the modifier panel? You have multiple armatures in the scene so make sure the right one is assigned in the modifier.
teal totem
ah okay let me check
harsh saddle
And make sure you're moving the right armature as well.
teal totem
should i destroy the clothing armature?
harsh saddle
teal totem
should i destroy the clothing armature?
If nothing is using that armature then it probably doesn't need to exist.
 harsh saddle
teal totem
but after transfering weights look what happened
harsh saddle
teal totem
but after transfering weights look what happened
I guess now you've got to check the weights on the body. You didn't accidentally do it backwards and transfer the weights of the clothing to the body?
teal totem
maybe...
i had some bugs
let me load again
not really
this happens when i assign the armature in modifiers
i applied rest pose mode and i think is fixed

ummm i would like to fix this kind of streching

it seems i need to paint more
harsh saddle
teal totem
ummm i would like to fix this kind of streching
I'm not real sure what I'm looking at, is that the pelvis? But yeah, it can help to pose the model and then go back and adjust the weights
teal totem
harsh saddle
I'm not real sure what I'm looking at, is that the pelvis? But yeah, it can help...
yep is the pelvis
i have some weird streching on limbs
harsh saddle
Weight transfer is a good starting point but it kind of suctions the clothing to the body which doesn't work great for loosely-hanging areas so you might need to tone down some of the weighting there.
 harsh saddle
teal totem
i see blue parts on hips vertex
harsh saddle
teal totem
i see blue parts on hips vertex
You can use the blur tool for little spots like that. Yeah, if you want the model to react less to the moving of that bone, you would want to bring it closer to the blue.
 harsh saddle
teal totem
almost there lol
harsh saddle
teal totem
almost there lol
The underwear should probably only be lightly weighted to the leg but you'll get a feel for it with time. It takes a little experimentation.
teal totem
yeah
i need to paint more vertex group that use the underwear
i was only painting hips, but legs are involved too
harsh saddle
You can also separate the models temporarily for weight painting. That can make things easier when you have geometry in front of other geometry. Then you just join them back together at the end.
teal totem
okay
teal totem
harsh saddle
You can also separate the models temporarily for weight painting. That can make ...
Do you recommend to make an atlas when exporting an outfit?
the problem is atlas meshing my textures
i am using blender 3.3 with CATS dev version

 paper wraith
teal totem
the problem is atlas meshing my textures
paper wraith
teal totem
the problem is atlas meshing my textures
Your UVs probably have different names on your meshes, so it kinda screws it up
Make sure that you have the same name on every UV map on your meshes, since it might be in Japanese on some part and in English on another

 teal totem
same name
paper wraith
that's before atlasing?
paper wraith
as far as I know CATS might have issues with newer Blender versions, but I can't say that for sure
I use 2.93.11 and it 
teal totem
my model has 0 textures when importing to blender
tried exporting with embed textures
tough plover
teal totem
my model has 0 textures when importing to blender
in general, never expect embeded textures to work
you should also do it manually
teal totem
any way to export the new textures i edited in blender?
because some of them are fixed in blender (weird non-colour parts)
tough plover
teal totem
any way to export the new textures i edited in blender?
yes, in the texture viewer you can click Image > Save as
and save it whereever you want
teal totem
okay let me check
my bad, what i need is the material, because it seems those have more textures applied
i edited the material shader
tough plover
materials do not carry over in any way, they are set up differently in every program
blender shaders cannot be brought to unity
 tough plover
what do your shader nodes in blender look like
teal totem
tough plover
what do your shader nodes in blender look like
where can i check?
tough plover
shading tab
 tough plover
that is a wacky shading setup
tough plover
I'm just wondering how much of the look is done by the shader and how much comes from the actual image textures
if the textures have the correct look already then you can just import those and put them in the right slots in the shader in unity
teal totem
UMM
wait
look


those are the textures created when i imported my model
as you see flower is white
but it should be light pink
tough plover
yea, so the shader is adding that pink color
you will either need to edit the textures manually to look the way you want, or you can use blender to bake the "final" output from the shader to a new texture
look up "blender texture baking"
tough plover
look up tutorials
one thing though, when you go to do the baking, remember to uncheck "Indirect" and "Direct", and only check "Diffuse"
so that only the color from the material is baked and not any external lighting
teal totem
okay
visual python
Okay, so I'm having a new issue with my avatar in Blender. When I try to combine the materials into an atlas, this happens to my model. I tried doing these steps(#avatar-help message) for my avatar that Thulen dropped in chat yesterday (or maybe the day before, i cant remember), but even after unpacking the libraries, it does this. I don't know understand why it's messing up the textures like this.

This is the atlas that it gives me, wth xD
 teal totem
i have a pluggin installed in Blender that allowed me to bake all from just a simple button
 visual python
Ooh, which plugin is it? Right now, I'm using CATS... err, trying to 😅
 visual python
Ah, mine is a VRoid model, d'ya think it'll still work?
teal totem
i don't know but maybe is an auto bake operation, so you can try but save a backup
visual python
Alright, lemme go grab the addon and I'll give it a try.
visual python
teal totem
i don't know but maybe is an auto bake operation, so you can try but save a back...
Haha, okay, nope, that doesn't work either xD
My issue still stands ;w;
teal totem
what's your problem?
visual python
Not being able to bake the materials into a single atlas properly
visual python
How did you fix it?
visual python
It might be CATS being buggy if you're using a newer version, I think
What version of Blender are you using?
visual python
Ah, I'm using 3.1.2, so that shouldnt be the core of the issue
Im also using CATS dev version
hmm
Lemme try asking about my issue in the CATS discord, maybe they'll come up with a solution for us both 😅
spiral sigil
i suggest using material combiner in the optimization tab of CATS
visual python
spiral sigil
i suggest using material combiner in the optimization tab of CATS
That's what I'm using for the atlasing
But it comes out looking wrong, and I don't know why
pure dagger
@teal totem you need to unpack your textures first, save your file as a .blend and goto file external data and choose one of the options
 north sandal
I'm trying to merge armatures of a jacket to add it to my model, but when they merge the jacket itself becomes monocoloured


before and after
 steady zealot
north sandal
I'm trying to merge armatures of a jacket to add it to my model, but when they m...
steady zealot
north sandal
I'm trying to merge armatures of a jacket to add it to my model, but when they m...
Before you merge the meshes, make sure the UV layers are named the exact same things
mental hazel
im making an rpg
and i can't seem to figure out what art style the models should be
think of Hylics, most of the game was made with clay
so what about my game being abstract?
 gloomy grove
what do the characters perceive (like what is their view of the external world from their own mind)? what is the story like? sad, epic, heroic, funny, ect a dark and brooding story could have a dark and cloudy feel, or you could juxtapose it with a vibrant backdrop.. Sketchbook!
markers!~
mental hazel
well the music is swing related, so gloomy with a side of vibe?
like vaporwave kinda
i can dm u the music i have so far
(if you want)
 hushed gyro
Any tips for making the finer details (sculpting, geo-nodes, something else)?

 quaint jasper
That should be done with a normal map imo, sculpting it sounds excruciating
hushed gyro
I'll try that, thanks.
tough plover
hushed gyro
Any tips for making the finer details (sculpting, geo-nodes, something else)?
you could sculpt it using Multires and some fancy brushes/alphas, and then bake it to a normal map
either that, or take it to Substance painter and find smart materials that automate some of it
the result would be a normal map either way
hushed gyro
tough plover
you could sculpt it using Multires and some fancy brushes/alphas, and then bake ...
I'll look into using the multires modifier, thanks.
tough plover
hushed gyro
I'll look into using the multires modifier, thanks.
Multires is basically a way to sculpt on a higher resolution version of the mesh, while still having the base mesh underneath. if you enable Sculpt base mesh, it'll affect the base mesh while you sculpt on the high res one. you can switch between different levels of subdivision on the fly for when you need to sculpt larger/smaller detail

 old solstice
harsh saddle
old solstice
harsh saddle
 toxic flame
In the top right in Blender, there are some different spheres for the render modes, you want to switch it to wireframe.
That model isn't going to animate very well, it at least needs edges at the points of articulation like the elbows
toxic flame
harsh saddle
That model isn't going to animate very well, it at least needs edges at the poin...
ye
spiral sigil
anyone have any video reccomendations to get into 3d modeling for worlds and avatars?
Please I really want to get into making my own avatars and worlds
harsh saddle
spiral sigil
anyone have any video reccomendations to get into 3d modeling for worlds and ava...
Seems like everybody these days starts with the donut series, it makes for a good overview of a lot of different Blender functions.
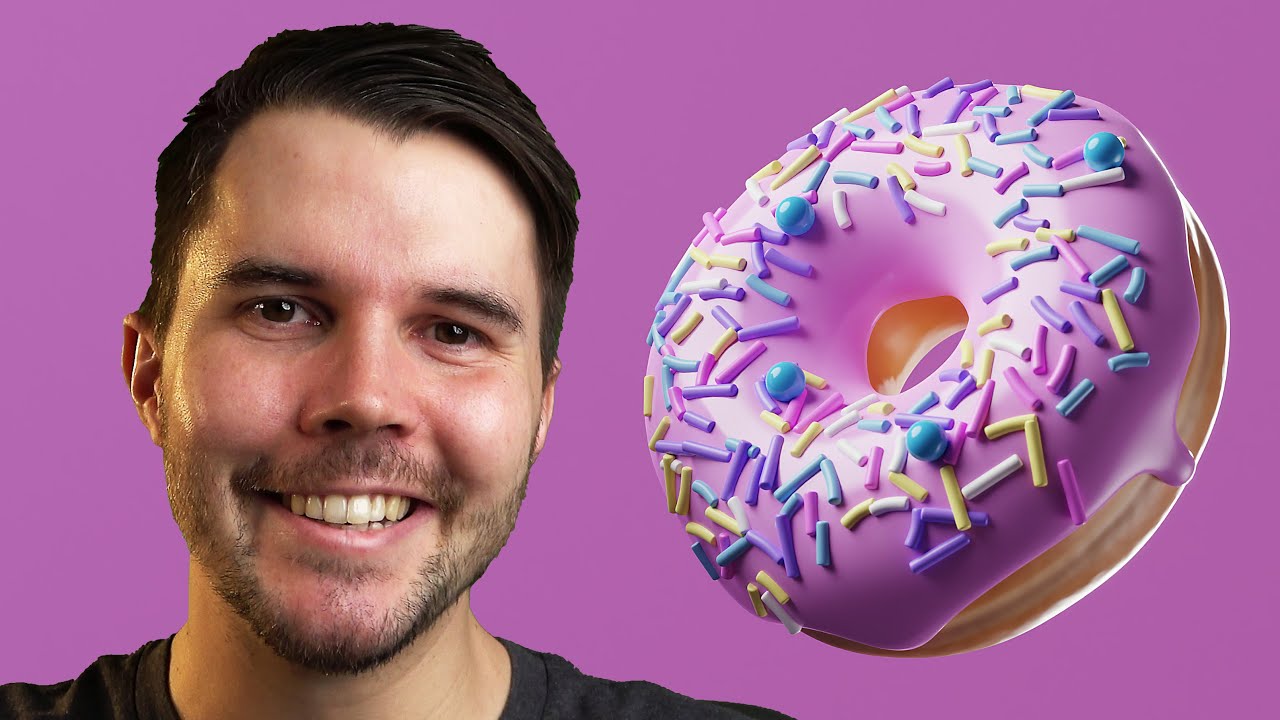
Blender tutorial series showing you how to use the most common features, like modelling, lighting, materials, geometry nodes and rendering - whilst making a donut.
Download the Blender Shortcut Hotkey PDF: https://www.dropbox.com/s/jg4fs4i8zw5bxt7/Blender 3.0 Shortcuts v1.2.pdf?dl=0
Google Doc version: https://docs.google.com/document/d/1...
spiral sigil
ik im probably dumb asf for this but which one do i click
 harsh saddle
Beyond that, things diverge a bit depending on what you want to do and how you want to do it. You can create a character using the same tools as you would to create a chair but my process tends to be very sculpting heavy and it's what I would tend to recommend to people for making characters. Landscapes also tend to be more sculpting heavy, though you can also generate some of that stuff using modifiers which is kind of its own thing. So you might want to focus on one thing for a bit before learning other stuff and certain elements will transfer from one type of modeling to another.
I use General, personally. Sculpting might be useful for doing that but the others don't really apply to anything you'd create for VRChat
Also note that unless you want your worlds to be vey simple or take years to complete, it's perfectly acceptable to use the asset store and sites like Sketchfab. Your modeling skills should fill in the gaps of what is available to you. You don't need to be making your own sink or refrigerator, there are hundreds of those out there for very little money that you can modify or retexture if necessary.
mental hazel
i need more concepts for characters
i usually go like
concept-body proportions-then how to give them a good silhouette
harsh saddle
mental hazel
i need more concepts for characters
i usually go like
concept-body proportions-t...
Have you looked into AI? It's a pretty great tool for generating concepts.
mental hazel
harsh saddle
Have you looked into AI? It's a pretty great tool for generating concepts.
you have caught my intrest
and so has this

so
dapper
harsh saddle
Double hats, so fancy. It takes a bit of practice to get a hang of refining your prompts, you might also want to throw in an artist name or two if you like a certain artist's style.
harsh saddle
The power of Stable Diffusion really opens up if you get it running locally and are able to use img2img and different models. I described your character in a prompt, used a few more tags and generated using the Elden Ring model. Then, I used img2img to refine the output using the results I liked as an initialization image.

I recommend using this app if you have a decent (preferably Nvidia) graphics card. It's not the best app out there but it is quite simple to use. https://nmkd.itch.io/t2i-gui

itch.io
Generate AI images on your own GPU for free
Anyone can feel free to use that image if they want to make a character, just let me know because I want to see how it came out.
spiral sigil
harsh saddle
Seems like everybody these days starts with the donut series, it makes for a goo...
is this a good donut
 harsh saddle
spiral sigil
is this a good donut
harsh saddle
spiral sigil
is this a good donut
Looks good but where are the sprinkles? My understanding was that there would be sprinkles
spiral sigil
not even half way done
i have no clue how this is going to play into making avatars and shii but yeah
harsh saddle
It covers navigating the scene, selecting and moving vertices in edit mode and using the sculpting brushes which are pretty much all the tools you use for making pretty much anything, after that it's just putting in the work, though there are certainly other tutorials that can supplement these tools
spiral sigil
is applying the spirnkles and all that really that important to learning rather than just a donut ?
harsh saddle
spiral sigil
is applying the spirnkles and all that really that important to learning rather ...
Well, first you need to get through texturing which is essential to making characters. The sprinkles themselves use geometry nodes which is handy to know for certain things but do you need to know how to use them to make characters? Not really.
spiral sigil
harsh saddle
Well, first you need to get through texturing which is essential to making chara...
and texturing is with the sprinkles ?
harsh saddle
spiral sigil
and texturing is with the sprinkles ?
No, the texturing is everything up to the sprinkles so if you're determined to save 30 minutes to not learn a tool that can save you hours of work down the line, the only lesson that is optional is the last.
 median pike
spiral sigil
is applying the spirnkles and all that really that important to learning rather ...
median pike
spiral sigil
is applying the spirnkles and all that really that important to learning rather ...
Just go trough the whole tutorial man
It will take your a few months to properly get the hang of everything that goes into avatar making
median pike
There's many variables to making avatars. Depending on your workflow you might not need to learn everything. But it's better to know more than less
This is the knowledge set I recommend for character making:
Drawing experience
Knowledge in anatomy
Knowledge in perspective
Basic camera controls and navigation in blender
Polymodeling
Sculpting
Retopology
Rigging
Uv unwrapping
High to low poly baking
Texturing
Basic shader knowledge
Setting up IK chains for potential animations, also drivers
Shape key knowledge
Understanding these concepts:
Normals, normal maps, shading, gimbal lock, topology flow and reflowing, triangulation and probably some other things I am forgetting
Of course you don't need to know all of this to make your first character. But the amount of knowledge that's useful is very vast
harsh saddle
I can't draw to save my life and I think I make decent avatars but the rest is pretty essential. I did come in with years of digital and physical sculpting experience which helped but I've never been big on 2D art, especially drawing.
I could also never polymodel a decent character but you need a lot of the same tools to retopologize a sculpt.
median pike
Well it's not essential obviously
But 2D knowledge helps immensely with 3D
And yeah it's a very subjective list. That's just the knowledge sets I consider essential
harsh saddle
I'm generally in agreement and even the stuff I wouldn't consider essential still helps. I'm also not a top level avatar creator and have a lot to learn still.
 glad steeple
I dont think the donut tutorial is a good introduction to character art, you do alot of stuff youll basically never use again. i suppose for learning the ropes & shortcuts its nice.
tough plover
yea, it's a very basic tutorial mainly useful to learn the basics of blender
it's a good starting point
glad steeple
It is a starting point
mental hazel
the creature

 solar fossil
spiral sigil
i have no clue how this is going to play into making avatars and shii but yeah
solar fossil
spiral sigil
i have no clue how this is going to play into making avatars and shii but yeah
Wait, that is actually a great idea!
Make a donut avatar, hair is made out of the glaze and sprinkles
tough plover
.-.
solar fossil
:^)
spiral sigil
anyone know what's causing this? doesn't show up in blender but only vr chat
 solar fossil
Does it show in unity?
Could maybe be a triangulation issue, or unity lowering the texture resolution
@spiral sigil
A pretty good tutorial on making heads
https://youtu.be/fQZ7TEdFdMU
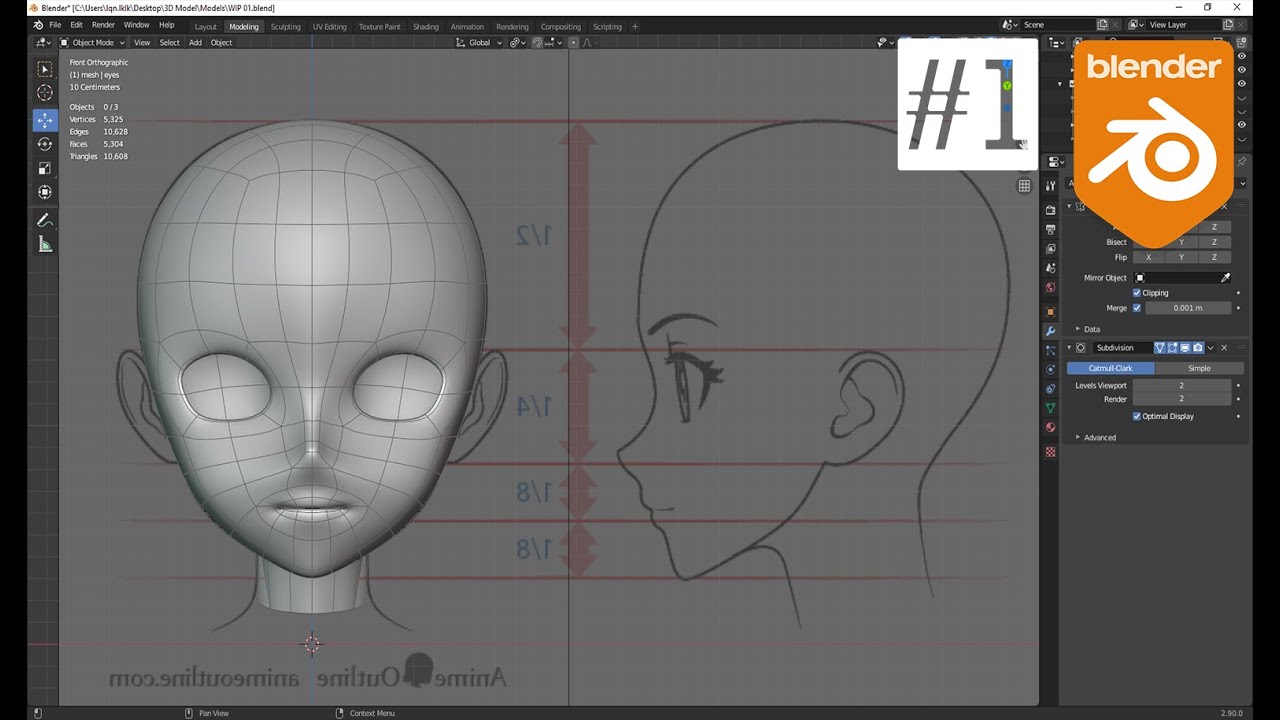
Blender 2.9: Anime Girl Head Modeling In 30 Minutes WIP #1
You can play your favorite music and enjoy :)
Next video for eyes and ears :D
Hope you like it!
Link Discord: https://discord.gg/pe9sjYVzkM
Link Donate Paypal: https://paypal.me/nhijquang
Link Donate Momo: https://nhantien.momo.vn/0Uq2AiMUhIf
Link reference: https://www.animeoutline....
tough plover
spiral sigil
does not show up in unity
does it show up in play mode when using Lyuma's emulator?
could be a blendshape triggered by an animation
spiral sigil
tough plover
does it show up in play mode when using Lyuma's emulator?
gonna give that a try
spiral sigil
tough plover
does it show up in play mode when using Lyuma's emulator?
it appears using that which is odd? there is no animation playing atm from what i can see
tough plover
make sure there is no controller in your avatar's Animator
and then check in play mode again
if it still does it, remove your FX controller, test again
isolate the problem
spiral sigil
tough plover
make sure there is no controller in your avatar's Animator
gone and vanished from existence. but still appears

 tough plover
then it could be a messed up basis layer
go in blender, add a new shape key in object mode, and set it to 1
check if the issue happens
 arctic sparrow
Hi guys, do you have any resources or tutorials that guide you thru the process of reducing a model's poly count? I've seen cats and the like but I would like to know if there is some flow or technique people use
tough plover
arctic sparrow
Hi guys, do you have any resources or tutorials that guide you thru the process ...
there are 3 main ways:
- decimating
- dissolving loops
- retopo
for a recent quest conversion, I did all 3
the entire body was retopo'd, the face got a bunch of loops dissolved, and the hair was decimated
retopo takes the longest amount of time, but can yield better results and you have more control
dissolving loops is faster than a retopo but slower than decimation. it's a lot cleaner than decimating
decimating is the very quick and dirty approach, but you don't have much control, and it'll ruin the topology
in any case, knowing how to bake textures from one UV to another and from a high poly mesh to a low poly is crucial
CATS bake and Polytool both use decimation to quickly take the poly count down, but results is quite bad topology. by then baking the original textures down to the decimated version, you can retain most of the detail of the original mesh
one important consideration is shape keys. decimating and dissolving loops will preserve shape keys, but a retopo is essentially making an entirely new mesh, so shape keys will have to be re-made
azure rain
tough plover
one important consideration is shape keys. decimating and dissolving loops will ...
which I take it is why the body was retopo'd & the face had it Edge loops dissolved so you didn't have to redo the blend shapes
tough plover
precisely
I retopo'd the body to capture most of the shape with as few polys as possible, dissolved as much as I could in the face before it looked blocky, and then decimated the hair last to get it exactly to 10k
arctic sparrow
I wouldn't say I'm that familiar or good with character modeling in general, I'm no artist, nor I have much blender experience other than retouches or armature merging. But I will take a look at those terms. Thanks!
azure rain

Did this video help you? Consider sending me a tip on Ko-fi! https://ko-fi.com/sippbox
Making optimized Quest models is hard. But it doesn't have to be! With recently updated polygon limits and fallback avatars, it's a better time than ever to create something that represents you to Quest users! Hopefully this tutorial will help you out!
0:00 ...
this video shows both dissolving Edge loops and the decimate modifier
arctic sparrow
awesome! Thank you
harsh saddle
The only parts of the body that really need clean topology are where the model will be moving which is why ReadyPlayerMe could get away with bad topology for so long. Unless you have FBT, the torso won't be doing a lot of bending or twisting, same with the upper and lower legs and arms but the elbows, knees, wrists, hands, and face are going to be much less forgiving when it comes to bad topology.
Of course it's better so have clean topology everywhere so it works well with more points of FBT articulation and it also improves shading.


 tough plover
really depends on what you want
you could grab the files for the default robot avatar, should be part of the SDK or in the documentation
tough plover
 fringe leaf
that looks awesome, but with that amount of detail those could be entire furniture pieces lol. what's the stats on those?
fringe leaf
tough plover
that looks awesome, but with that amount of detail those could be entire furnitu...
some are 200 poly some are 400
its all normal maps
tough plover
good shit 👍
fringe leaf
well just checked some are 1200 lol
tough plover
aha xD
fringe leaf
but thats not too bad
tough plover
far better than a lot of stuff I've seen
I still start fuming when I remember someone made a ring with 36K polys
and put it up for sale
fringe leaf
and i see tons or areas to reduce poly easily
 fringe leaf
tough plover
I still start fuming when I remember someone made a *ring* with 36K polys
fringe leaf
tough plover
I still start fuming when I remember someone made a *ring* with 36K polys
36k !! for a ring
fringe leaf
it is very clean 🙂
tough plover
fringe leaf
36k !! for a ring
yea it's insane, it had mountains and everything inside of it
but you don't need 36K polys for that
fringe leaf
ye true, although i personally dunno paralax much
tough plover
if you want to cringe start reading from there
continues a bit below #3d-modeling message
I get that people want to make stuff that looks neat, and I understand if people don't care about stats if it's just a little fun project for themselves, but the fact that they are distributing it and actively contributing to VRC avatars being very poorly optimized is shameful
fringe leaf
thats a halo planet ring used as a ring
tough plover
I wouldn't be surprised if the transparent layer used a fucking grabpass lol
fringe leaf
tough plover
I get that people want to make stuff that looks neat, and I understand if people...
ye my personal concept project,, hell the concepts for these3 rings were 30 mil poly 😛
but am glad when i put these on gumroad they will be down to below 1000 even for the complex ones and below 500 for simpler onesz
i even went to the trouble of creating 41 different texture sets , i couldve only made 5 if i made it have like 3 materials
tough plover
fringe leaf
how many mats is this?
2?
(could prob be 1 but I understand if it's 2)
fringe leaf
1
tough plover
epic
fringe leaf
ikr only one mat call 😄
tough plover
for once someone who knows what the hell they're doing .-.
fringe leaf
it takes time tbf man i have worked in the vfx industry for 3 yrs haha
not that vfx ppl care abt optimisation 😛
tough plover
speaking of optimization, my best optimization job so far lol https://twitter.com/RolltheredDev/status/1594829416730960100?s=20&t=Ypnu7I20VzhkJzQW2ckQxw


 fringe leaf
buildings with 67 million poly straight for render
fringe leaf
tough plover
speaking of optimization, my best optimization job so far lol https://twitter.co...
that is CLEAN
tough plover
fringe leaf
it takes time tbf man i have worked in the vfx industry for 3 yrs haha
awesome, I've never worked in the industry and never went to school for this, I just learnt it on my own over the course of 2 years
tough plover
fringe leaf
that is CLEAN
ty, but for full transparency the original model isn't mine, I just did the optimization for it
fringe leaf
tough plover
awesome, I've never worked in the industry and never went to school for this, I ...
oh yea dont worry i studied microbiology.. i just fell into it due to need money and its covid
tough plover
retopo entire body, dissolve loops in face, decimated hair, bake everything individually, bake final textures
the model still supports full face/eye tracking too
fringe leaf
https://darcow.gumroad.com/
heres my gumroad.. these arent THAT optimized but still not 34k poly bad, and have a few materials caz ppl prefer changable mats
 fringe leaf
haha am glad they are posted 😄 i really wanna make good quality not pc breaking assets
really fun making them
tough plover
I might poke you for some insight on your workflow later if you don't mind
fringe leaf
poke away 🙂
tough plover
like how you go about modeling certain things etc
tough plover
fringe leaf
poke away 🙂

 tough plover
neato
fringe leaf
and my own name hidden inside somehere
tough plover
those characters would be a good usecase for a separate UV + detail tex/normal
unwrap those straight pieces as large collums in a new UV, and use that UV channel for your detail textures
fringe leaf
yea the uvs for them are straight strips
was easy to just make the chatacters after in photoshop
mental hazel
how am i gonna pull off the curvy brim on the hat though
 spiral sigil
tough plover
check if the issue happens
spiral sigil
tough plover
check if the issue happens
heyo we did that but we are unable to fix it
 mental hazel
how am i gonna pull this off
tough plover
pull what off
mental hazel
the brim of that hat
teal totem
do you know any way to remove those triangles?

when i join my 2 meshes i can't get rid of this
 bright steppe
Substance3D free for education nowwwww
 harsh saddle
mental hazel
the brim of that hat
harsh saddle
mental hazel
the brim of that hat
Make a round brim and then adjust it with the grab brush in sculpt mode or soft selection in edit mode
tough plover
or model the hat using subdivision, and just move a few verts
azure rain
tough plover
speaking of optimization, my best optimization job so far lol https://twitter.co...
you did a very good job with that
tough plover
ty ^^
azure rain
given the stats for it it looks like you could run it on the quest
azure rain
Cool
 steep crown
Within unity how do u get a blendshape to be set over 100, it always just sets back to 100 in vrc
mental hazel
the brim is done
now to model the curve on that hat
harsh saddle
steep crown
Within unity how do u get a blendshape to be set over 100, it always just sets b...
I've had that issue as well but I just set it to over 100 is Blender and then do a new shape from mix
steep crown
Aw I was hoping I didn’t need to touch blender for that
spiral sigil
teal totem
do you know any way to remove those triangles?
How did you joint
teal totem
it's fixed don't worry
spiral sigil
Hey so I have the grand capitalistic idea if someone with Blender or 3D modeling knowledge could possibly help. I have this species that Ive been wanting into vrchat for a while. They are called taurins (Which I can show pictures for and stuff if anyone dms me). Its something I know alot of people would enjoy. I wanna be able to make them because its something Ive dreamed of and I hope someone could share this dream with me too. Of course we will have breaks and what not and 50% of the profit will be shared as well (so like if the avatar was $100 USD then you'd get $50 USD)
Just an idea I had and would love to collab on peeps with. Dm me if your interested
harsh saddle
Seems like something avatars could just do and get all of the money aside from needing the concept. Maybe the concept is great enough to justify the profit-sharing but I would want to see some evidence that enough people want to have this avatar to justify that. I believe characters like the Primagen already had a following and people buying the art before people started making avatars from them, if you had something like that established and could partner with an avatar creator to make the official avatar version, then you might have something but otherwise most creators are probably just going to want to do their own thing.
 pure dome
Hello guys, may ask for help on something please? I want someone one day to like give me a tutorial by streaming their screen to me or something so I could get one on one help making an avatar. I know that would be a lot and I respect if no one would do that. It would really really mean a lot to me if someone could do this for me. Again, like I said no one has to but I would really appreciate it. I really need help making something because I'm having a lot of trouble. If anyone is willing to help me (which I'm not expecting anyone to because I know it sounds like a lot, I just really need help) please directly message me in DMS
tough plover
pure dome
Hello guys, may ask for help on something please? I want someone one day to like...
you should watch the 3 videos here in order to get the basics down'
this is assuming you already have a model you're trying to upload
pure dome
hey can you send me the videos please? Sorry I feel dumb it's just there's a lot of channels and I don't know where they would be at
azure rain

YouTube
pure dome
thank you I really appreciate it
 valid sun
https://cdn.discordapp.com/attachments/926128961484886046/1044785579101016104/221122_objects1.jpg
https://cdn.discordapp.com/attachments/926128961484886046/1044785579423973456/221122_objects2.jpg


Started working on various props for building worlds.
I like the idea of making a world that evolves over time, bare frames, construction props, tools and such, literally "in development" at first.
tough plover
is the mesh on that fence modeled or is it cutout? if not, do you plan on doing so?
valid sun
I plan to bake the cutout to an alpha texture.
For now it was rendered using a mesh deform modifier on a simplified cloth plane.
Real fun to play with the drape c=
tough plover
gotcha. alternatively, if the mesh didn't have any of the holes in it, you could just UV unwrap it as a single, perfect grid and tile an alpha texture over it
no baking needed
valid sun
Yeah that's what I mean, I've got the holes setup in a grid fashion that I can turn it into an alpha texture later.
 harsh saddle
Sounds like a fun idea to evolve the world over time
 thorn gulch
 spiral sigil
what is a normal size for a house?
solar fossil
Usually about the size of a house
 silent roost
Thanks Bahka!
spiral sigil
solar fossil
Usually about the size of a house
That was so helpful! i meant like scale.
Bc rn its too big i think
 azure rain
spiral sigil
what is a normal size for a house?
azure rain
spiral sigil
what is a normal size for a house?
the default blender cube is 2 m tall so 1& half or two of those would be about the height of one floor
spiral sigil
A nanachi is about 1m tall. I'd say about 3-4 nanachis
 jagged moat
anything but metric
azure rain
Unity uses metric for everything
 balmy basalt
im going to try and 3d model this
 azure rain

VRoid Studio is a 3D character maker that lets you use your imagination to easily create your own original characters. By making your 2D characters able to move in a 3D space and usable in anime and game production, your creative range will greatly expand. The VRoid Project has started with the hope that many creators will have fun exploring the...
red glade
Nearly finished a new fit for ma avi. Qeustion what is the best way of achieving a proper "Sim" on the skirt. Is there an amount of bones i should be aiming for?

 mild bramble
first time doing anime style, feels good

 wispy verge
its exact
spiral sigil
azure rain
the default blender cube is 2 m tall so 1& half or two of those would be abou...
I see. also i shouldnt start with the bottom floor of the house.
 fresh isle
mild bramble
first time doing anime style, feels good
fresh isle
mild bramble
first time doing anime style, feels good
hisuka
balmy basalt
here is a wip of a vr chat model im making


 quaint jasper
balmy basalt
hair
quaint jasper
balmy basalt
hair
I would highly suggest you go and look at Rainhet's tutorial on avatar making. It's extremely beginner friendly!
tough plover
red glade
Nearly finished a new fit for ma avi. Qeustion what is the best way of achieving...
if it's low poly enough (~200 verts), you could use an actual unity cloth sim. otherwise, you would do bone chains with physbones. as for how many bones/bone chains, that depends. typically, you could get pretty decent results by weight painting the skirt mostly to the legs, and having a couple extra bones purely for adding movement
red glade
tough plover
if it's low poly enough (~200 verts), you could use an actual unity cloth sim. o...
Yea thats what i was thinking, Allright thanks for the other option
obsidian nova
red glade
Nearly finished a new fit for ma avi. Qeustion what is the best way of achieving...
I’ve always struggled with that. I would aim for 12 bone chains of 3-4 bones each.
red glade
obsidian nova
I’ve always struggled with that. I would aim for 12 bone chains of 3-4 bones eac...
Sjeesh thats mad
Thats allot of bones
tough plover
yea that's quite a bit
obsidian nova
2 to 4 phys bone Colliders on the thighs to stop clipping.
if there’s a better way to be doing it by all means let me know.
valid sun
More props in the works, walkways, queue fences, a family of boxes.


After this I think I just need hand tools, ceiling fixtures and mannequins to start setting up a little exhibit.
wispy verge

 spiral sigil
 opaque solar
https://tenor.com/view/saul-goodman-3d-gif-gif-25953606
opaque solar
https://tenor.com/view/saul-goodman-3d-gif-gif-25953606
plottwist, they were a furry since the beginning
opaque solar
Better Rawr Saul
spiral sigil
opaque solar
Better Rawr Saul
Join the dark side Bartholomew
opaque solar
It is a path to many unnatural ability
 rocky jolt
(heavy wip, still blocking stuff out lol)
 spiral sigil
rocky jolt
(heavy wip, still blocking stuff out lol)
spiral sigil
rocky jolt
(heavy wip, still blocking stuff out lol)
That looks super cool
 teal basin
Anyone here updated a Prefab avatar? I recently purchased a prefab avatar and did some changes to the FBX of the Avatar in Blender. I exported the FBX but I need to know how to replace the Old FBX of the prefab without it breaking.
thin shadow
-delete the fbx in the project folder
-import the updated fbx, using the same filename
-do the import setting routine again
teal basin
thin shadow
-delete the fbx in the project folder
-import the updated fbx, using the same fi...
By Do the import settings you mean reimport?
I'l try that but not sure on that last part.
thin shadow
Things like legacy blend shape normal, enable read write, humanoid rigging setup, material settings, etc
teal basin
Uhh. Il try to figure that out.. To be honest I got no idea for about half of that.
Eh.... well. Model wont appear in the scene its invisible?
thin shadow
Could be any other factor. If done right, the scene is supposed to automatically look for the fbx in the project folder
 jagged cape
how to make the letters look like that in blender
 still wadi
in unity project folder right click on the fbx, show in explorer, it's gonna open you folder with the files and replace the fbx inside with the edited one, just drag and drop and hit replace. then go back to unity and should be all good. no need to delete and re set up anything. @teal basin
 celest sleet
 solid minnow
Some stylized eyes after studying the weirdcore aesthetic. Couldn't find what I was looking for on the web so I just made these myself.
 thin shadow
still wadi
in unity project folder right click on the fbx, show in explorer, it's gonna ope...
thin shadow
still wadi
in unity project folder right click on the fbx, show in explorer, it's gonna ope...
Replacing the fbx while unity is still open?
jagged moat
Holding back the urge to start texturing knowing I'll slow down on making models is killing me
 rocky jolt
and so begins the interior
 still wadi
@thin shadow yes ? you heard it first time ? been doing like that for years no problem whatso ever
thin shadow
Well, i guess it's workflow improvement. Thank you.
 azure crag
balmy basalt
hair
azure crag
balmy basalt
hair
You should take advantage of the model modifications in blender like voxel remeshing and union, then maybe you can sculpt the fine details (but this is usually enough if all you want is a dummy thick twitter avatar oc)
 waxen dune
How tf do I download the sdk
azure crag
You go to the community helper web page and go to download in the left tab. Click on the sdk you want
solid minnow
So I imported by eyes to Unity and the texturing is messed up? What in the world happened?!
 hushed gyro
Before I go any further, does this look like convincing tree bark? (clay strip + crease brush)
 quaint jasper
Yeah that looks great!
red glade
Redoing the weight painting. Any tips on the chest part. not really sure how i should achieve it
 jagged moat
It's amazing what you can turn cubes into


 gentle sonnet
First time making something like this, I don't think I'm doin too terrible with learning blender. All so I can have my own avatar...


 jagged moat
gentle sonnet
First time making something like this, I don't think I'm doin too terrible with ...
jagged moat
gentle sonnet
First time making something like this, I don't think I'm doin too terrible with ...
I rate that! Had a couple attempts myself and never been that good xd
gentle sonnet
jagged moat
It's amazing what you can turn cubes into
Well, your cube transformation is awesome
jagged moat
ah thanks!
gentle sonnet
jagged moat
I rate that! Had a couple attempts myself and never been that good xd
I'm following some videos... all that's my progress after 4 days
jagged moat
gentle sonnet
I'm following some videos... all that's my progress after 4 days
Good work on keeping up with it for that long, ik most people give up after the first day
gentle sonnet
lol first day is just learning the power of the cube.
jagged moat
All hail the cube
gentle sonnet
XD
harsh saddle
There are some proportion issues but they're not too bad and the long fingers could be considered a stylistic choice. Main issue is the edgeflow in the upper chest, you've got some stretched faces and some little slivers when you're aiming for as many square faces as possible.
gentle sonnet
takes hand... swipes it over head....
tough plover
gentle sonnet
First time making something like this, I don't think I'm doin too terrible with ...
like Krampus said, the flow on the chest could be improved a bit. since you seem to be modeling this with subdivision, do you plan on doing a retopo afterwards?
harsh saddle
There is no perfect way to model every body but generally something like this where all of the polygons are roughly 1:1 squares
 gentle sonnet
lol this is my 4th day!
lol
I have no idea what I'm doin next im just following some videos an winging it
tough plover
if you're doing a high poly sculpt and then a retopo, the actual topology on the high poly doesn't matter much since you're going to redo it during the retopo. if you plan on this mesh being the final one, then I would recommend ensuring you add a minimal amount of extra loops, since every face you create when using subdivision will become 4 faces after applying the subdivision
nonetheless, great progress for 4 days
gentle sonnet
I will certainly screen shot all that yall said an look into it though

 gentle sonnet
ooo so i did the chest all kinds of wonky
tough plover
yeaa
harsh saddle
Yeah, most of the topology is pretty reasonable, it's just this area where things get a little messy but nothing that can't be refined.
 tough plover
btw, that first one looks like this after baking
 gentle sonnet
me see says blind man
tough plover
"baking" in this case is the process of first creating a high poly mesh without much care for poly count or topology, and then "projecting" those details onto a low poly mesh. in your high poly, you create all of the small details like muscles, creases, folds, etc. after that, you do a re-topology (retopo), which is the process of building a good mesh around the high poly to maintain the shape while also having good edge flow and poly count. after baking, you end up with a "normal map" that you apply to your low poly mesh to give the "illusion" of all of the detail your high poly had

this workflow is only one of the multiple you can choose to use. different workflows work best for different kinds of models
gentle sonnet
it seems I'm about to jump off the blender cliff so to speak... lol
harsh saddle
Just do all of your sculpting in sculpt mode, box modeling is for crazy people.
tough plover
there is a lot to learn, but it is very rewarding once you are able to show off what you've made
gentle sonnet
heck all I've done so far is in layout. haven't even touch modeling or sculpting
 proud jewel
Yo what's uuup
harsh saddle
gentle sonnet
heck all I've done so far is in layout. haven't even touch modeling or sculpting
Layout is the only view you really need. The others might have some value but I just change up the panels depending on what I need at the time.
gentle sonnet
👍
harsh saddle
It kills me when I open a blend file and they have 5 different tiny viewports open.
tough plover
lmao
 opaque coral
how to fix this without hitting fixmodel

cuz then i have to seporate it again and nothing changes
 ionic oar
Does anyone have any tips on how too make stuff like this fit the body nicely ?
Im messing with skulpt and stuff but just wondering what other people's approach is (edited)
 harsh saddle
ionic oar
Does anyone have any tips on how too make stuff like this fit the body nicely ? ...
harsh saddle
ionic oar
Does anyone have any tips on how too make stuff like this fit the body nicely ? ...
Move it out using edit mode or the grab brush in sculpt mode. If it isn't a toggle and you don't plan to show the feet, just delete the faces that aren't going to be shown.
ionic oar
harsh saddle
Move it out using edit mode or the grab brush in sculpt mode. If it isn't a togg...
Sorry i mean the rim of the skirt
To fit the body shape
harsh saddle
Sorry, I thought I was looking at a shoe, hard to tell that zoomed in. Same advice regardless.
 waxen niche
I've got fully rigged .fbx files.
How hard is it to make an avatar out of them?
tough plover
waxen niche
I've got fully rigged .fbx files.
How hard is it to make an avatar out of them?
the videos here should cover everything https://www.youtube.com/@vrchatlearningchannel8185
YouTube
don't skip the terminology
waxen niche
Thank you
 strange oak
opaque coral
how to fix this without hitting fixmodel
strange oak
opaque coral
how to fix this without hitting fixmodel
dont use cats at all Lol
spiral sigil
tough plover
"baking" in this case is the process of first creating a high poly mesh without ...
Why do you have so many screenshots of Rishi
I gotta ask sacred ilu
tough plover
because im proud of how that model turned out
spiral sigil
ionic oar
Does anyone have any tips on how too make stuff like this fit the body nicely ? ...
Grab tool on sculpt
tough plover
ionic oar
Does anyone have any tips on how too make stuff like this fit the body nicely ? ...
for more complex fittings, consider using the Mesh deform modifier
you essentially build a "cage" mesh around your object, bind it to the clothing mesh with the Mesh deform modifier, and then you can re-shape the cage mesh to reshape the clothes
you can also enable X mirror to deform it symmetrically
one issue with Mesh deform is that if the poly count of the cage changes, it breaks
what you can do to fix that is to do your re-shaping on a shape key on the cage mesh
that way, you can unbind/rebind and then re-enable the shape key
ionic oar
tough plover
you essentially build a "cage" mesh around your object, bind it to the clothing ...
I'm gunna give that a go when I'm home, thanks dude
Okay to message you when I try if I run Into any issues?
tough plover
eh yea sure, I doubt many people here know about using mesh deform anyways
usually I always recommend asking question in servers rather than DMs because a lot more people can answer
but I also don't like misinformation being spread if people don't really know what they're talking about
 bright grove
I am not home unfortunately, but I’m planning to practice a little modeling using block bench

My goal is to practice a little bit of basics while also getting ideas on how I should model a wearable item for my upcoming map

The idea is to recreate this headset and the remote first
 craggy crown
sorry fi this isn't the place to ask but what do i do if i get this error?

 bronze solar
It is caused by old version cat plugins with blender version after 2.9.
You need update cats plugin.
 hazy dawn
hey could someone help me fix a problem with a model im pretty new and have no clue what im doing here
 harsh saddle
I don't know if any of us can fix any possible problem but maybe if you were more specific.
harsh saddle
Pretty much just reference, you can also buy or download a base mesh and either use that as reference or just use it as is, just make sure you do all the legal stuff legally.
hazy dawn
yeah i figured out how to do it at least partially
man iv been underestimating myself a lot i think
 analog frost
Can someone help me with a blender issue? I have spikes that i'm attaching to the tail of this avatar. But when I join the mesh, it doesn't maintain relative positioning in unity
I think it's not moving with the bones, but IDK what the issue is.
harsh saddle
analog frost
Can someone help me with a blender issue? I have spikes that i'm attaching to th...
The spikes need to be weighted to the tail bone
analog frost
thanks
tough plover
analog frost
Can someone help me with a blender issue? I have spikes that i'm attaching to th...
there is also a lot of the spikes that aren't visible, you should delete those faces
 fickle swallow
how do i fix this?
things i tried
adding normals to material (pants texture)
recalculating normals on mesh
changing the shade smooth, auto smooth, and flat
removing the mesh and adding a new proper mesh
please help


 cursive estuary
hazy dawn
hey could someone help me fix a problem with a model im pretty new and have no c...
cursive estuary
hazy dawn
hey could someone help me fix a problem with a model im pretty new and have no c...
um, what do you want a different head?
send me the model file in dms
just export it to obj
or blend
:)
cursive estuary
fickle swallow
how do i fix this?
things i tried
adding normals to material (pants texture)
rec...
dm me the blend file?
tough plover
@fickle swallow can you enable "Face orientation" in blender and take a screenshot
fickle swallow
cursive estuary
dm me the blend file?
Once I get back home?
 thorn mango
Anyone know how to link the vrc account to unity and know how to import avatars u have into u unity
harsh saddle
thorn mango
Anyone know how to link the vrc account to unity and know how to import avatars ...
You do all of that in the avatar sdk control panel so import that and it should be pretty straightforward from there
thorn mango
harsh saddle
You do all of that in the avatar sdk control panel so import that and it should ...
Where is the sdk panel?
harsh saddle
If you've imported the avatar sdk, there should be a tab at the top that says VRChat or something, if you open that up, one of the options is control panel
 keen bone
I opened my glb file in an online gltf viewer and thhe camera angle is ant view and i am looking up in between the legs, how do i fix the camera angle? I set the origin to be at the base of the character near the feet
harsh saddle
Hard to say without knowing the program, maybe download Blender?
keen bone
I am using blender. Then i export the glb file. It works on some glb file viewers like babylon. Some, i can only see the foot and no matter how much i scroll out, it wont zoom out
fickle swallow
tough plover
<@607998586851950593> can you enable "Face orientation" in blender and take a sc...
this is what it looks like (and yes, the arms are also affected)
 harsh saddle
keen bone
I am using blender. Then i export the glb file. It works on some glb file viewer...
harsh saddle
keen bone
I am using blender. Then i export the glb file. It works on some glb file viewer...
Why are you using a glb viewer to view your model if you have blender?
keen bone
Because i want to show it to my friend who doesnt have blender
keen bone
He is not knowledgeable of computers. He only has a phone
harsh saddle
Maybe just show him some pictures? It's hard to give you advice on how to use a glb viewer unless we've used it ourselves and I think most of us just open stuff in Blender
keen bone
Ok good idea
spiral sigil
does anyone know how to fix 1d textures? this has happened a lot and it's annoying
 harsh saddle
You need to unwrap the model better, right now that face is incredibly slim in the uv space
fickle swallow
fickle swallow
this is what it looks like (and yes, the arms are also affected)
FIXED, had to flip normals for some reason and it fixed it for some reason
thorn mango
Yo how do i do the sdk thing for unity?
 ruby rivet
thorn mango
Yo how do i do the sdk thing for unity?
ruby rivet
thorn mango
Yo how do i do the sdk thing for unity?
download the vrc creator companion, it handle a lot of stuff for you, including that
obsidian nova
Some pastel keyboards I made a while ago; based on Dalle2 generations.

A new world I'm working on. Combination of CCO sketchfab assets and custom models based on real-life objects.
 obsidian nova
Has anyone found a really good old school chonky computer model. The ones above are okay, but the normals/topology is really whack; resulting in weird lightbaking.
 winged flax
what’s the pipeline like for making game textures? I wanted to make player model textures but I don’t even know how most people do it
obsidian nova
Depends what you mean by "player model textures"
Are you talking about skin, eyes, hair, clothing or an entire character?
Are you talking about re-texturing an existing base-model?
winged flax
The entire character, but since I want to make a dog, it would be the body
winged flax
obsidian nova
Are you talking about re-texturing an existing base-model?
No, creating a new model
obsidian nova
What I would do, since you're a beginner, follow this tutorial:
https://www.youtube.com/watch?v=bDaKprTiy_U&t=2553s

watch the previous video if you have no idea how we got this base texture.
Hoi there class, today we’re going to add some dimension to this model with Texture painting. I know it sounds scary, but trust me, anyone can do this if you just follow my lead. Rain Sensei will teach you well.
Working in blender 2.9
winged flax
I see
obsidian nova
Before this, you might want to follow her other videos on modelling, rigging etc.
winged flax
I’ll have to take a look at some tutorials
I’d like to try to go for a PS2ish look for my model
obsidian nova
Texture painting in Blender is good for that.
Professionally, most people use Substance Painter for texturing; but it's 140$
winged flax
Is SP abobe?
I may have a license for it, my school has Adobe creative cloud and it might include substance painter
I’ll need to check though
obsidian nova
Yep. Btw, 3D models have several texture maps, it's not just color:
- Albedo (or base color)
- Roughness
- Metallic
- Ambient Occlusion/AO (dynamic shadows in creases)
- Emission (lights)
- Normals (textures that influence how your model interacts with lighting, best described as fake detail maps).
winged flax
I know, most of which you draw is the albedo, while the rest is handled with the assistance of software
obsidian nova
Exactly. You won't need all of these for a PS2 look, probably only the Albedo and Emissions
winged flax
I’m not going for a super realistic look, more of a cartoonish look, so I could only use some of those
I know that before you start drawing the texture, you need to map out your model’s uvs
Basically a 2d reflection of the model’s surfaces
 keen bone
 jagged moat
boob 2 big
keen bone
I know, i purposely made it like that. Is that not allowed? Is it too much? I have another question. How do i make things in blender opaque. Because I imported a very basic vroid character with shorts and tshirt, and it looks good on blender. And then i import it as fbx. And when I open that fbx in blender, it is transparent. So i go to materials and then i choose opaque instead of alpha blend, but it still shows transparent on the tshirt. But the arms and legs are opaque. How do i make the tshirt opaque too?
harsh saddle
Is the shirt another material? Big boobas are permitted in VRChat (see any public lobby) but the shape is a bit odd on those
ruby rivet
whats the least painful way to make a texture atlas?
azure rain
obsidian nova
Think of it like this:
that is a very helpful tweet
tough plover
ruby rivet
whats the least painful way to make a texture atlas?
if you're atlasing 4 textures together you can just put them all in a 2x2 grid using an image editor and then move the UV's to match
ruby rivet
gotcha, thanks
 clear geyser
ruby rivet
whats the least painful way to make a texture atlas?
clear geyser
ruby rivet
whats the least painful way to make a texture atlas?
I like to use baking. You make a second UV map, give all of your materials a second image to bake to, move all of the UV islands to where you want them to be and bake the diffuse color. You avoid having to line things up and you have control over what things have more or less detail by making their islands bigger or smaller. This video is long but I think he clearly explains each step https://youtu.be/73REcZVWMhA

A simple tutorial on Texture Atlasing/Texture Baking using Blender 2.8+.
Links in Video:
Pumkins Tools: https://github.com/rurre/PumkinsAvatarTools/releases/tag/0.9.5b
=TIME STAMPS=
0:00 - Intro
0:08 - Disclaimer
0:30 - Combine Your Meshes
0:42 - Removing Leftover UVMaps
1:04 - Removing Unused Materials
1:17 - Creating Baking UVMap
1:40 - ...
azure rain
and that can result in more efficient vram usage than just stacking tiles
tough plover
^ that is what I normally recommend doing, but is a little more involved
ruby rivet
right, ill take a look at this then, thanks for the help
keen bone
is it easy to remove the head of a vroid and attach my own 3D head that I created? or is it easy to add things or subtract things to the vroid 3d so that at least I edited it and can say that I made it(partially)?
 latent spade
Looking for someone to make me a really simple textured asset in blender and possibly substance painter for one of my upcoming for sale avatars. Id be willing to pay for your time. Please DM me if you’re able to help


 trail knoll
does anyone know where i can get a 3d model of a fighter pilot?
keen bone
epic marketplace
trail knoll
link? i cant find that
keen bone
https:/ /www.unrealengine.com/marketplace/en-US/product/jet-fighter-military-vehicle why do want a fighter pilot? Oh i thought you wanted the plane. The model is the plane
spiral sigil
i started a new movie styled mario remake since i thought the old one didn't look as good, but i don't know why i chose to do that now


the bottom one is the old one, and the top one is the new
i might as well just continue with the old one since it's way less rushed [and fix some of the textures too]
 tawny pollen
okay, who here wants to have my 16K upscaled Ink Bendy texture?
keen bone
If i change the textures on the 3D file, and put my picture on the 3D file, and edit the color, put tattoos, change the hair color, but the 3D mesh I did not touch, would that be considered as my creation, or not because I did not even edit the 3D mesh, I just painted over the textures?
tough plover
keen bone
If i change the textures on the 3D file, and put my picture on the 3D file, and ...
no, you only did a retexture
you need to credit the author of the model
keen bone
Ok, the author is vroid. Ok i have to edit the 3d mesh, right?
tough plover
if it's from VRoid then you don't "have" to give credit since it's free to use, but it's still a good idea to mention it
if you modify it it's still an edit of the vroid model
keen bone
Ok. Because i was hoping to make it into an NFT for a video game
keen bone
I am thankful actually for vrchat because i found vroid because of vrchat. Ok i will not mix vrchat with nfts
craggy crown
bronze solar
It is caused by old version cat plugins with blender version after 2.9.
You need...
i did this but it still does it
azure rain
also make sure to check VRoid terms of service to see if it prohibits nfts
keen bone
"Can you sell VRoid studio models?
You can sell the model data exported from VRoid Studio. You can edit and use the model data exported from VRoid Studio using software other than VRoid Studio. You can sell the data created by modifying preset items, as long as those preset items have no special clauses written in the license."
harsh saddle
You don't want to sell me NFTs, you want to go home and reconsider your life choices.
No one even wants NFTs anymore, the market has been dead for months
keen bone
I am not selling you NFTs. Did I tell you buy my NFTs. No. Now please respect my decision as I respect yours
azure rain
well we are on the VR chat Discord so yeah folks are going to be disapproving of nfts
keen bone
Ok i will leave
thorn mango
i need some help is this quest? https://www.deviantart.com/ashleyvr/art/Halo-Reach-Male-and-Female-3D-model-VRchat-892198987
ruby rivet
clear geyser
I like to use baking. You make a second UV map, give all of your materials a sec...
just wanted to say this ended up being a huge help ❤️
clear geyser
ruby rivet
just wanted to say this ended up being a huge help ❤️
Glad to hear 😄
ruby rivet
another texturing related question, does it particularly matter if you use a height map vs a normal map on the finished model? from what i can tell theres not a huge difference
thorn mango
Why is it doing this?
spiral sigil
Is there a way to prevent backface curling on a single face? in unity? I want both sides to render instead of one side being transparent
quaint jasper
spiral sigil
Is there a way to prevent backface curling on a single face? in unity? I want bo...
Can't duplicate and flip that face ?
spiral sigil
quaint jasper
Can't duplicate and flip that face ?
i have potted plants in my world, and i have single sided leaves are rotated in lots of directions, and duplicating each leaf and flipping it is very time consuming and i dont want to do that.
quaint jasper
Just select the leaves, Shift + D, Alt + N > Flip normals, done
spiral sigil
quaint jasper
Just select the leaves, Shift + D, Alt + N > Flip normals, done
unless you mean blender?
@quaint jasper i did it in blender and it worked! thank you for the tip, i couldnt find it anywhere online.
thin shadow
Would that contribute to z-fighting
spiral sigil
thin shadow
Would that contribute to z-fighting
my leaves are not doing that, but if they did i can just move the duplicate extremely slightly
quaint jasper
thin shadow
Would that contribute to z-fighting
No, since the normal orientation is different
solar fossil
Wouldn't it be better to use shader that doesn't cull backfaces?
azure rain
no because then it would be rendering all those backfaces you're never going to see just to show one extra face
thorn mango
Anyone know any free female avis thst are good for beginners and is quest
azure rain
thorn mango
Anyone know any free female avis thst are good for beginners and is quest

■■オキュラスクエストを想定した2A-7の軽量化版です■■ ――――――――――――――――――――――――――― 3Dのキャラ素材としてご使用ください。 ワールドで使ったり、シェーダーで使ったりして、それを再配布しても問題ありません。 こちらは クリエイティブ・コモンズ・ライセンス の 「CC BY 4.0」です。 (簡単に言うと原作者のクレジット記載さえあれば、何をしてもOK) ワールド作成の賑やかし、ペデスタル、メッシュの改造して再配布などVR創作活動にご利用しても問題ありません。 「CC BY 4.0」の詳細はこちらのサイト参照
thorn mango
Help!
 harsh saddle
thorn mango
Help!
harsh saddle
thorn mango
Help!
Looks like your materials got messed up, either fix that or just replace them
tough plover
looks like someone either forgot to import the required shader or the VRCSDK
thorn mango
harsh saddle
Looks like your materials got messed up, either fix that or just replace them
i did that now tthe pannel wont show
harsh saddle
You likely have console errors
 tepid knot
This is kinda stupid lol but I can't figure out how to map the model I'm working on, I wanna try to raise the mesh to match the bold black sections on this suit concept
 harsh saddle
You want to raise the mesh? I don't understand.
tepid knot
I don't really know how to explain it
I want to raise parts of the mesh or create a new part to attach to the model but I don't really know how to do that
harsh saddle
You want to extrude it out from the body? You can just select those faces and press E to extrude the separate it with the P key
harsh saddle
How do you select faces? I explicitly covered every other button press required
tepid knot
harsh saddle
How do you select faces? I explicitly covered every other button press required
yeah my mistake I meant how do you select faces
harsh saddle
tepid knot
yeah my mistake I meant how do you select faces
In edit mode, you can select them by clicking, press B to box select, C to circle select, there are a lot of ways. I would recommend watching some beginner Blender tutorials, you're going to need a lot more foundational knowledge to do what you're trying to do. The Blender donut tutorial is popular but there are a lot of options out there
tepid knot
harsh saddle
In edit mode, you can select them by clicking, press B to box select, C to circl...
Grazie I'll see if I can find some! Thank you!!
analog frost
nvm lol
hushed gyro
quaint jasper
Yeah that looks great!
Thanks! I'll keep working on it.

 spark phoenix
just got blender looked at blender tutorial/introduction papers and still have no fucking clue on what im doing
anyone got youtube links/tutorials that can help
spiral sigil
mario
 quaint jasper
spark phoenix
just got blender looked at blender tutorial/introduction papers and still have n...
quaint jasper
spark phoenix
just got blender looked at blender tutorial/introduction papers and still have n...
Follow Rainhet's avatar tutorial, good intro to Blender and its tools
spark phoenix
quaint jasper
Follow Rainhet's avatar tutorial, good intro to Blender and its tools
ok thanks
hazy dawn
guys im trying to model fur for my avatar but im pretty new to this and i could use some tips and or guidance to make it look actually good
 tranquil tiger
Is there a benefit to atlasing textures without combining meshes, since the number of material slots would still be the same?
 white moth
tranquil tiger
Is there a benefit to atlasing textures without combining meshes, since the numb...
white moth
tranquil tiger
Is there a benefit to atlasing textures without combining meshes, since the numb...
No real difference. Not better or worse.
 jade cargo
Hello ! I wanted to ask something about how Unity to VRChat models get processed, so first my current setup on the fbx (1), Legacy Blendshape Off (I'll explain why), All on Import , Optimize Mesh On (off on the picture as I was trying to see if it change something)
So I'm working on an Avatar and it have some blendshape to change the aspect of the body, morphology etc, turning on Legacy Blendshape on will remove the normals of all the blendshapes, and so the problem I have with that is the body look flat even with some curves done with blendshape, I tried to mitigate this and make normalmap in blender baking thoses two version with flat and it work but it would mean I need to make a shader to blend the normals with different shapes (2)
Tho if I disable the Legacy blendshape, I'm having Zero issue in unity, I tried on a standard scene, and also tried on my world project, which have the exact same settings as the one uploaded, and when it comes to VRChat, the avatar have thoses shading issues on the legs (3), I tried to twist, activate blendshapes etc, the normals doesn't get affected on unity, only in vrc.
So my question was, while having Legacy turned off, why the way the model react on lighting is different from Unity, does something happen during the building process ?


 tranquil tiger
Thanks!
white moth
jade cargo
Hello ! I wanted to ask something about how Unity to VRChat models get processed...
When “legacy blend shape normals” is turned on, normals will be calculated from the “smoothing angle” value, so try editing that after enabling it?
Once we progress past the point where Unity broke non-legacy blend shape normals, maybe VRChat will allow them again
They are botched in 2019 unity
jade cargo
I'll check after dinner ^^
I heard it's been broken in unity for a while yeah, a lot of complains on the unity forums
 merry cedar
If there are any new modellers who are struggling to find a good tutorial i suggest you look up rainhet chaneru. She's currently making an updated version of her avatar making series. She also has an older series from a few years ago. https://www.youtube.com/@RainhetChaneru
 jade cargo
white moth
When “legacy blend shape normals” is turned on, normals will be calculated from ...
jade cargo
white moth
When “legacy blend shape normals” is turned on, normals will be calculated from ...
So as I was expecting, the Legacy mode doesn't compute the normals for blendshapes, and so that's why I thought applying a normalmap that bake what it should normally do


