#3d-modeling
1 messages · Page 3 of 1
 spiral sigil
it essentially means its just viewing the texture with no material settings
material settings are irrelevant
spiral sigil
u have much more pain for yourself@to work through
 keen dune
ye
spiral sigil
good on u for starting so early
dont give up ull be ahead of so many people before they ever got to start 3D
keen dune
thanks man.
spiral sigil
be the best the best there ever was
 gleaming cobalt
How do I import a model I made in unity into blender,
spiral sigil
gleaming cobalt
How do I import a model I made in unity into blender,
How to export a 3D model from the Unity Engine to Blender, 3DS Max, or a 3D program of your choice! I show you how to export the model by using the FBX exporter from the Unity Package Manager and use that within your programs!
🔥 INSANE UNITY SAVINGS 🔥
🕹️Unity Lightning MEGABUNDLES: https://bit.ly/UnityLightningDeals
🔥 INSANE HUMBLE SAVINGS: ht...
i just googled that
gleaming cobalt
spiral sigil
https://youtu.be/-voE4FrU0Ms
ty :)
spiral sigil
gleaming cobalt
ty :)
i reccomend you model in Blender though, Unity is a game engine
you made a map with probuilder or something?

 quaint jasper
Sick design !
 pure dagger
 lament pond
https://cdn.discordapp.com/attachments/515673984197459971/1026720673801973800/un...
lament pond
https://cdn.discordapp.com/attachments/515673984197459971/1026720673801973800/un...
Hey i know you
 covert bloom
Anyone here can create a avatar for me? My laptop dont have suport for 3D modeling
 tough plover
covert bloom
Anyone here can create a avatar for me? My laptop dont have suport for 3D modeli...
tough plover
covert bloom
Anyone here can create a avatar for me? My laptop dont have suport for 3D modeli...
your laptop doesn't need to "support" 3D modeling, not really how this works. blender is fairly light, it can run on my 7th gen i5 laptop with integrated graphics
avatar creation takes a lot of time and work, so you better be prepared to pay if you want someone to make an avatar for you
do you have a budget? references?
pure dagger
covert bloom
Anyone here can create a avatar for me? My laptop dont have suport for 3D modeli...
Id recommend joining the vrc traders discord
 magic badge
Some proper renders of a model I made recently.


 pure dagger
Love the mask
magic badge
🐺
I have made 3 version with differing subdivision counts. I am practicing proper optimization while also not losing much quality.
pure dagger
Hear me out, find one vertex thats your favorite, delete everything else, boom quest avatar ready
magic badge
Double checking I have perfected all of my skills. Currently trying to find a new company to work for as my current contract ends in november.
pure dagger
I wish i knew how to work for companies like that\
magic badge
Contract work is stressful.
I only have done hard surface modeling for this company which I am good at. But my true passion lies in characters and enviroments.
I was going to apply as a modeler for the VRC team but situations at the time plus my contract prevented me. Now the position is gone sadly. I will wait.
This may be an accidental repost. Here is a render I did with my models.
I only had the sans modeled at the start. I was tasked on such short notice I only had an hour to do it if I wanted my render to be used. The Hall start to finish including rendering, modeling, And texturing took me only an hour and 10 minutes. Not my best work.
But certainly good speed modeling practice.
 pure dagger
Spooktality avatar is finished
 keen dune
I am so fricking close, i dont even want to think about having to do phys bone

 hushed leaf
pure dagger
Spooktality avatar is finished
hushed leaf
pure dagger
Spooktality avatar is finished
That's clever
keen dune
Lets go look at how nice this looks
 pure dagger
hushed leaf
That's clever
pure dagger
hushed leaf
That's clever
Thank you I figured its a skeleton so it's gotta be spooky
spiral sigil
Does anyone know where I could find a 3D model of Jacket from Hotline Miami? I’m trying to make a Quest avatar of him and I don’t wanna have to make my own model.
 harsh saddle
spiral sigil
Does anyone know where I could find a 3D model of Jacket from Hotline Miami? I’m...
harsh saddle
spiral sigil
Does anyone know where I could find a 3D model of Jacket from Hotline Miami? I’m...
Never played it but it looks like sketchfab has the base body and another with the rooster head so you'd just have to kitbash it together.
spiral sigil
harsh saddle
Never played it but it looks like sketchfab has the base body and another with t...
I have no idea what that means.
harsh saddle
spiral sigil
I have no idea what that means.
It means taking a part from one model and sticking it on another. That might be as simple as it's going to get unless one of the models there works for your needs.
spiral sigil
Oh ok
I’m also looking for a model of the tape recorder he uses in Payday 2
Which might be harder to find
harsh saddle
spiral sigil
Which might be harder to find
Yeah, there are some tape recorders on Sketchfab but if you want an exact replica, you might need to commission it or get lucky to find it.
spiral sigil
harsh saddle
Yeah, there are some tape recorders on Sketchfab but if you want an exact replic...
How do I make a Quest avatar with sound and particles?
 junior hare
so ive deduced this issue with this model's eyebrows/pupils down to a z-clipping issue, how would i go about fixing this?
 harsh saddle
spiral sigil
How do I make a Quest avatar with sound and particles?
harsh saddle
spiral sigil
How do I make a Quest avatar with sound and particles?
For particle systems, just parent a particle system to the avatar but note that you can only have 2 and having any will give the avatar a poor quality rating so it won't be displayed by default. Quest avatars can't have audio sources.
harsh saddle
junior hare
so ive deduced this issue with this model's eyebrows/pupils down to a z-clipping...
move them on the z-axis.
spiral sigil
harsh saddle
For particle systems, just parent a particle system to the avatar but note that ...
Then why have I seen multiple avatars with audio that works on Quest?
junior hare
harsh saddle
move them on the z-axis.
by how much? and would it affect other shape keys?
harsh saddle
spiral sigil
Then why have I seen multiple avatars with audio that works on Quest?
There are sometimes hacks that can be used but I think a lot of those have been patched so they won't work for new avatars and the old ones that have them tend to get removed after they get noticed.
harsh saddle
junior hare
by how much? and would it affect other shape keys?
By enough to stop the z-fighting, you just have to play with it. If you move them using a shape key and then apply that shape key to the basis, it shouldn't affect your other shape keys.
junior hare
not sure what you mean by that second part. i was just going to select the relevant parts of the mesh in blender and slightly move them along the Z. would that not achieve the same effect?
harsh saddle
junior hare
not sure what you mean by that second part. i was just going to select the relev...
You could try it. What messes up shape keys is a bit of a mystery to me, sometimes it will, sometimes it won't. If you make a change as a shape key, there is a little arrow near that panel that allows you to apply the shape key to the basis, basically altering the base shape. I've found that generally doesn't mess up other shape keys but it might not be necessary.
junior hare
so save my change as a shape key, then apply to basis? (provided my first process doesnt already fix it without issue)
harsh saddle
junior hare
so save my change as a shape key, then apply to basis? (provided my first proces...
Yup
 merry trout
So im working on both my first face made in blender and also im trying to make it vrchat compatible. Problem is how ived done the eyes is conflicting with vrchat, basically im using UV Warp to move the pupils, i know theres a way to do something similiar to uv warp in unity but it seems very difficult, i could just make the pupils a 3d model but then i couldnt do thinks like cutting it off a certain point so it doesnt poke out. Maybe there is a way to do that both works in blender and vrchat if anyone knows?
https://i.gyazo.com/a21571c2309c746f9b99be5283f803c5.mp4
i may have came up with a idea to do the spherical eyes but keep my style of eyes but i am tired and will try it later
junior hare
update on the z-clipping problem
so unless i remove the problem mesh, or move it an unrealistic distance away, the problem still appears. HOWEVER
for some reason, the main camera in unity does not render this issue, only the scene camera (the 3d viewport) does
main camera

3d viewport

this is wack
harsh saddle
You could publish and see how they look in VRChat. PC generally doesn't have too many issues with z-fighting but Quest has a lot.
junior hare
im gonna do that before futzing with it any further
harsh saddle
I think there are also ways to get the shader to ignore the depth buffer and always render on top so that might be a question for #shaders
junior hare
yeah, messing with the ZTest option proved some results, so ill ask there. using poi pro shader. thanks
junior hare
harsh saddle
You could publish and see how they look in VRChat. PC generally doesn't have too...
lmao vrc has no issues, its PURELY a unity editor camera thing.
 harsh saddle
I bet there would be some issues on Quest but PC is pretty good about minimizing z-fighting.
junior hare
im not building this avi for quest anyways (at least rn, it has 24 mesh renderers) so one less thing for me to worry about
harsh saddle
Ah, then you're good.
junior hare
thanks for the help btw
 latent mirage
junior hare
latent mirage
junior hare
so cute of a avatar...
junior hare
eheh thanks
booth is a wonderful place
canonically she'd kick your ass in 20 different ways but i dont want to clutter this chat
 muted raven

moooove over I've got some interesting optimized developments going on here


Should I add frillssssss???? 

 digital jolt
muted raven
Should I add frillssssss???? <:vrcTupSmug:907460633069490216>
digital jolt
muted raven
Should I add frillssssss???? <:vrcTupSmug:907460633069490216>
Yes!!
 oak hatch
So,  quest avatar. With toggleable clothing styles, drink, glow stick, seasonal props, facial expressions, and bone based visemes, and a few other things.

I'm tempted to cram a PVP system in there, for giggles.
 tight quartz
How do I apply the Cloth modifier.
 harsh saddle
tight quartz
How do I apply the Cloth modifier.
harsh saddle
tight quartz
How do I apply the Cloth modifier.
 tight quartz
Thank you. :)
 swift jolt
fast little world i modeld today. now i gotta figure out how to unity again


fast little world i modeld today. now i gotta figure out how to unity again


 bleak agate
is there someone who can teach me how to make my own avatars 😅
quaint jasper
bleak agate
is there someone who can teach me how to make my own avatars 😅

Rain sensei here, ask me as many questions as you need, we’re making a head out of a cube.
btw that cube was 2m by 2m I had a slip up don't fight me.
I'm using blender 2.9
I’m sure you’ve seen a lot of people who get perfect circles and start pulling here and pushing there, and in no time they’ve got a pretty face. That’s sculpting, if you want...
 boreal goblet
how did tou do that
 glad steeple
boreal goblet
how did tou do that
glad steeple
boreal goblet
how did tou do that
blender?
boreal goblet
but how
glad steeple
Mouse and keyboard on a PC with the software Blender & Gimp
 stark shale
in blender is there a way to extrude a face along a path like I can do in solidworks?
harsh saddle
stark shale
in blender is there a way to extrude a face along a path like I can do in solidw...
Yeah, I haven't done it but I knoe there are tutorials for extruding along a path.
tough plover
stark shale
in blender is there a way to extrude a face along a path like I can do in solidw...
multiple ways, you could use something like a curve modifier
 mental hazel
how do i make this all one face
 harsh saddle
mental hazel
how do i make this all one face
harsh saddle
mental hazel
how do i make this all one face
I think you can select all of those edges, hit delete and then "dissolve edges"
mental hazel
thank you once again, Krampus
 azure rain
I would point out it would get turned into a bunch of triangles again once it actually gets into Unity
harsh saddle
Yeah, Unity will triangulate everything regardless. Not sure if it would do a better or worse job with one big ngon than a bunch of quad slivers.
Shouldn't be a huge problem so long as everything is flat
mental hazel
hm
then could there be a way to align them so they are all straight?
harsh saddle
mental hazel
hm
then could there be a way to align them so they are all straight?
Not sure there is an easy way, you could dissolve all the edges then use the knife tool to make nice parallel slices but you'd still have a lot of extra verts on the perimeter to clean up. I'd probably start with a quad plane, extrude it and then scale the edges to match the silhouette if you want to make it nice but you'll have to do a lot of little adjustments to make it fit the silhouette closely.
You could also start with a plane that covers the entire shape, then make edge loops and adjust them to approximate the shape, then make more edge loops between those edge loops to interpolate. Similar process to the second option but maybe more efficient.
Blender has a remesher but I haven't found it to be very successful for this application, there might be other remeshing tools that work better.
lament pond
 harsh saddle
This 3d? If so, you've managed to really get it looking like a drawing. If not, it still looks good.
 void lintel
when you are testing your weight painting and suddenly Blender turns Spooptober mode

 grizzled linden
Hey i was wondering if anyone in here knows why this is happening in CATS in Blender :)

 thin shadow
grizzled linden
Hey i was wondering if anyone in here knows why this is happening in CATS in Ble...
thin shadow
grizzled linden
Hey i was wondering if anyone in here knows why this is happening in CATS in Ble...
try with 2.93.x, cats does not support 3.x.x yet
grizzled linden
how do i make the colored one into a ball? (unity)

 obsidian nova
mental hazel
how do i make this all one face
obsidian nova
mental hazel
how do i make this all one face
Oh man, this is not how you would model this; if that’s your goal.
If that’s what you’re trying to do, you don’t need it to be all one face, you need it to be a grid-mesh.
Try the retopo modifier in the modifier tab (wrench tab).
mental hazel
i dont see the retopo modifier
 empty fox
thin shadow
try with 2.93.x, cats does not support 3.x.x yet
empty fox
thin shadow
try with 2.93.x, cats does not support 3.x.x yet
It does actually, but only the hidden dev version on their discord (it is on their github, but I have not found anyway to get to it without the link in their FAQ, which is what I am linking to) #703190726447595581 message
 gilded helm
I'm looking for someone that would be interested in creating a custom world (paid) please let me know asap! Trying to get quotes
harsh saddle
mental hazel
i dont see the retopo modifier
I think he means the remesher modifier. I've never gotten that to work for this application but you can try it.
Making it a grid would basically mean not having all the cuts be horizontal but having some vertical cuts as well which would give you cleaner topology, Not sure if that's necessary if it's just a flat plane but I guess its best practices


 sharp grove
is there an easy way for me to blend the normals between 2 unconnected edge loops? i managed to get a nice result with set from faces in one area, but not in another
yeah it's strange, i have places where set from faces works nicely, but other places where it doesn't
 brave swift
how do i fix this


 lament pond
harsh saddle
This 3d? If so, you've managed to really get it looking like a drawing. If not, ...
lament pond
harsh saddle
This 3d? If so, you've managed to really get it looking like a drawing. If not, ...
Sorry for the late reply, yeah it is 3D xD. Thanks
spiral sigil
just a question i have, how long did it take you to get to the point you're at now with 3D modeling.
it seems like such a daunting thing but I'm really curious.
not directed at anyone in particular just a general question
harsh saddle
spiral sigil
just a question i have, how long did it take you to get to the point you're at n...
Like 16 years of doing it very, very occasionally. If you do it daily and use good resources, I'm sure you can pick it up much more quickly. I've seen people make major improvements in a year.
spiral sigil
thats a long ass time.
i see a lot of people saying things like "if you take 30% of the time you spend playing video games learning unity or blender instead you'll understand the program in a month"
harsh saddle
spiral sigil
thats a long ass time.
i see a lot of people saying things like "if you take 30...
You can understand how to use Blender fairly quickly, just like you can understand how to use a pencil quite quickly. Using it to make art is another matter. You can progress quite quickly if you're consistent but you're not going to be a master sculptor in a month or even a year.
spiral sigil
oh i just mean understanding the features. that's the biggest hurdle for me.
I'm extremely bad with the technical stuff.
today is a day as good as any to start learning
I've already made the doughnut not i gotta think of bigger projects
azure rain
spiral sigil
I've already made the doughnut not i gotta think of bigger projects
maybe try making a couch
spiral sigil
oooooh that should be neat
harsh saddle
You can learn how all of the tools you'll need to use work in a few videos. Personally, I do all of my base work by taking a cube, subdividing it, applying that modifier, then I go into sculpt mode and turn on dynotopo and do 95% of my work creating the model using the grab, clay, crease, and inflate tools, occasionally snake hook to drag out the body from the neck and the limbs. Then, once that's done, I retopologize which just involves creating a plane and extruding it, moving the vertices, and occasionally using the knife tool and adding loop cuts. There aren't a lot of tools you need to learn to do that but it's learning to use them effectively that takes time.
That's mostly for organic modeling which is what I tend to focus on but there isn't much more to know for hard surface. You will probably want to learn how to inset and bevel, maybe boolean but you don't need to use a lot of exotic tools.
spiral sigil
harsh saddle
That's mostly for organic modeling which is what I tend to focus on but there is...
this is the bit i struggle with
harsh saddle

Digital sculpting gets a lot more fun when you use Blender's adaptive sculpting tool, dynamic toplogy. It creates geometry out of thin air and this video covers all the tools and settings to make it work the way you want.
Need a sculpting tablet? Here's a great tablet for beginners: https://amzn.to/2u0piqO
#sirpinkbeard #Blender2.8 #3dmodeling...
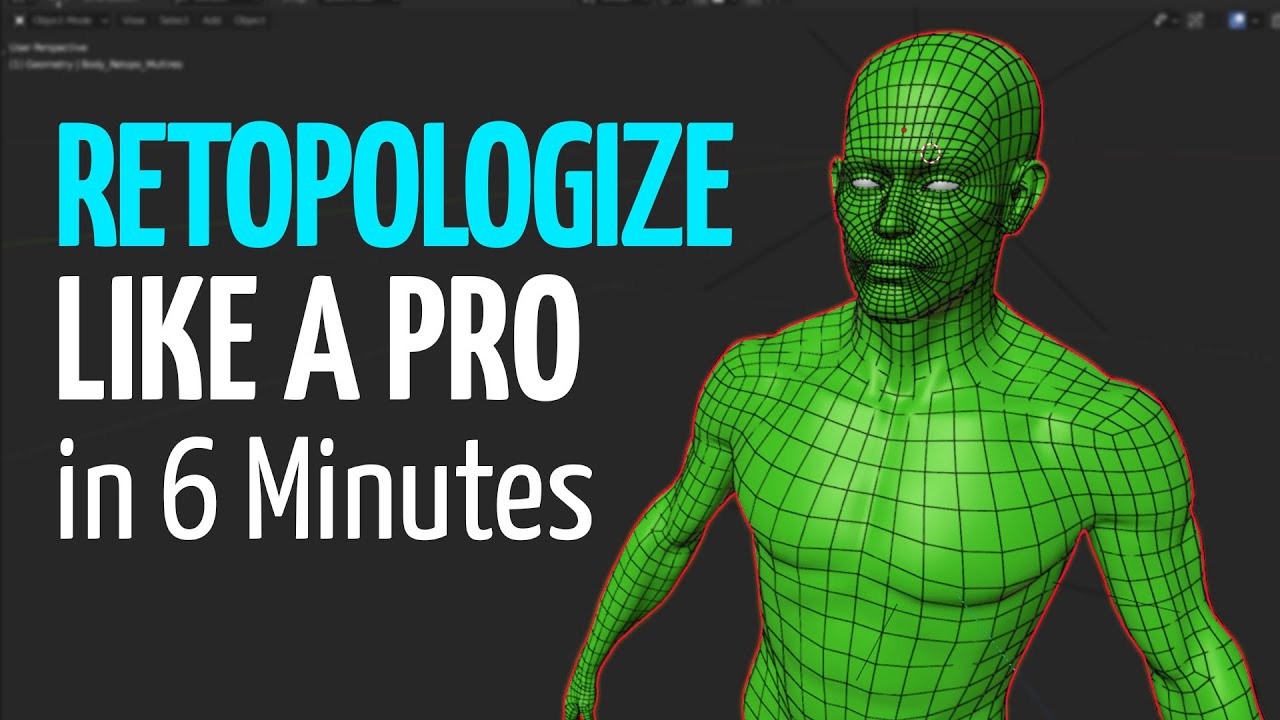
Retopologize anything in Blender. In 6 minutes you'll learn Blender modeling, retopology, edge flow and more tips and tricks to create perfect topology for your 3d models. Retopology doesn't need to be hard or confusing.
My Automatic Retopology Plugin:
https://exoside.com/quadremesher/
Softwrap 2 Plugin:
https://blendermarket.com/products/soft...
azure rain
spiral sigil
oooooh that should be neat
yeah I figured that would be a little more complicated then the donut but not overwhelmingly so and you could play around with cloth simulation
harsh saddle
Those two videos cover pretty much everything you need to know.
spiral sigil
azure rain
yeah I figured that would be a little more complicated then the donut but not ov...
cloth sim is something I've always wanted to try but never went out of my way to figure out how
will get to that next time i use blender
thanks for the advice : )
azure rain

In this Blender 2.8 tutorial I will teach you how to do simple cloth simulations in just a few minutes.
Cool Add-ons for Blender:
Human Generator:
https://bit.ly/3rBjJXy
Massive Cars And Vehicles Add-On:
https://bit.ly/3cuWF8N
1100 Textures in Blender:
https://bit.ly/2QEJ7yN
Flip Fluids Simulation Addon:
https://bit.ly/2Pbu5QR
HDRI Maker A...

Hello my finely-feathered friends. In this beginner tutorial, we go through the process of making a pillow, using Blender's cloth simulation.
If you are feeling generous, and you have money coming out of your ears, feel free to donate a little to help me keep these and other tutorials coming--head to my Patreon link below. Be well and happy!
...
harsh saddle
Cloth simulation is useful but kind of specialized. You can also do all of that with the sculpting tools but cloth sim is good for doing it more realistically and more quickly.
spiral sigil
bookmarking both of those
harsh saddle
The renaissance masters did cloth sim with a hammer and a chisel so we don't need those damn simulations ||but they can help for that particular application||
spiral sigil
harsh saddle
Cloth simulation is useful but kind of specialized. You can also do all of that ...
yeah i can imagine sculpting all those lines and creases takes ages
harsh saddle
There are a thousand features you can learn for specific applications but I would focus more of your efforts on the fundamentals of modeling and sculpting vs things that are only useful for specific applications.
spiral sigil
ill try to make many small projects that vary in how u go about making them
the couch is probably the next thing I'll do but i might try like a miniature version of my room after
harsh saddle
Adding creases to a pillow with the sculpt tools doesn't really take that long if you know what you're doing, trying to create realistic draping cloth would be a bit more demanding.
azure rain
spiral sigil
the couch is probably the next thing I'll do but i might try like a miniature ve...
yeah trying like your real-world room would give you lots of objects to look at to try to make
like definitely plenty of hard surface modeling to play with to make your computer case
harsh saddle
Most of these things are also dependent on good fundamentals to begin with. You could spend days mastering fur simulation (which won't transfer to Unity anyway) but if your dog or cat model that has the fur on it is bad, it's still going to look bad.
spiral sigil
harsh saddle
Most of these things are also dependent on good fundamentals to begin with. You ...
im honestly not looking to learn unity in that way, just want to use it as the final step when porting the model into games like bonelab or vrchat
harsh saddle
spiral sigil
im honestly not looking to learn unity in that way, just want to use it as the f...
I wasn't referring to Unity, that's a thing in Blender. The idea is to use Blender, right? My point is that you can't just expect to not know how to model and throw a simulation on it and have it look good. That'll work for a sheet but pretty much nothing else. You're better off learning the fundamentals of modeling than learning how to use a bunch of specialized tools you'll only use for a small fraction of objects you want to create. Cloth sim is useful but if you want a couch that really looks good, you need to do base modeling properly and then just using the cloth sim for the final details.
It's okay to dabble in that stuff but if you're spending most of your time learning about a bunch of exotic features, you're going to take a lot more time in learning how to accomplish the basic foundations that every model needs to look good.
pure dagger
a bit of retexturing
 pure dagger

 red glade
maelstrom design 🕺
 tight quartz
How do I get these Dots on face selection?
 tough plover
tight quartz
How do I get these Dots on face selection?
tough plover
tight quartz
How do I get these Dots on face selection?
you see that when in X ray mode
tight quartz
tough plover
you see that when in X ray mode
I am aware of that, Is that only in Wireframe mode?
tough plover
no, any mode
magic badge
Still a work in progress.
 spiral sigil
Ooo lovely
 versed glacier
Im trying to apply geometry nodes but it says evaluated geometry does not contain curves when its clearny made out of them.( trying to make hair)
any tips?
 analog frost
Is it possible to extract Ambient Occlusion maps from a material in blender? I need the AO maps in png format
azure rain
does the blender material even have ambient occlusion in the first place?
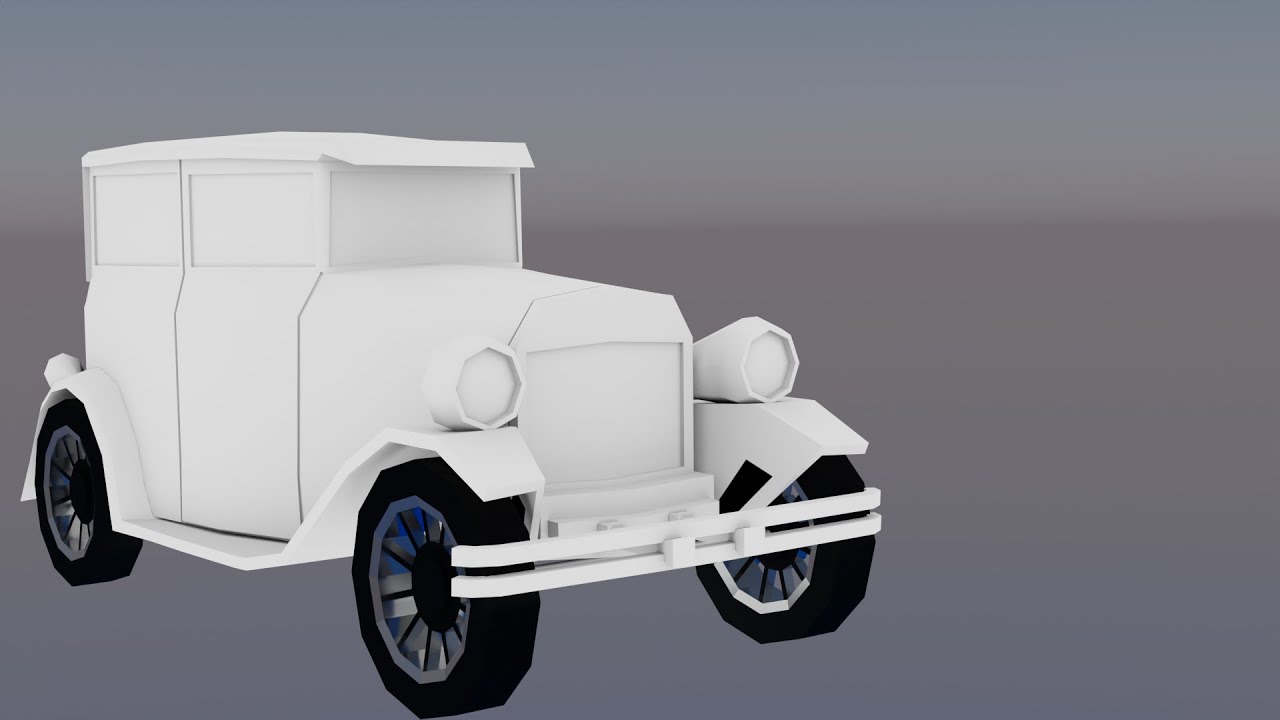
Baking A Game Ready Ambeient Occusion Map In Blender
In this video, you will learn how to bake an ambient occlusion map in blender for any game asset.
I also cover some of the pit falls and issues youll will come across.
We hope you have enjoyed this video, if you have like and subscribe. Let us know in the comments what you would like to s...
analog frost
figured it out
azure rain
cool
 teal raft
I have a model I did in Blender, and baked textures. Everything looks great there. But when I export the FBX its textures are tiling like this. Anyone know why that is?
 teal raft
I fixed it. I baked the textures with the SimpleBake plugin so I just decided to go ahead and do that with the mesh too. I don't know what the difference is and why it makes one, but things look correct now so I'll just bake the textures and mesh with SimpleBake from now on.
 rich grove
is it possible to downgrade a project from blender 2.93 to 2.83
 formal bridge
No, .blend files from newer versions of blender arent compatible with older versions. Your best bet is either installing 2.83 or exporting the 2.93 files to a usable format IE fbx, obj and then importing them into 2.83
 steady zealot

Made this as a joke, and now you can have it! For all your digital no-budget cosplay needs! - Cardboard Buster Sword - 3D model by Entorix
 loud pivot


 signal fable
I'm trying to find documentation on Blender scripting, since I'm trying to optimize a set of models that all need to be fixed in the same way
every body segment is parented directly to its corresponding bone, instead of having vertex groups, so I'm trying to create an automatic process that checks the bone each mesh is parented to, and creates a respective vertex group for it
 solar fossil
Hand cannon done lets gooo!
 patent current
anyone know the world mb limit
 patent current
oh.. oh hell yes
thin shadow
The limit is the decision of players when they look at the world size
patent current
time to model my entire house
harsh saddle
A reasonably-szied house can easily be under 100 MB if it's optimized unless you live in a palace or something.


 somber elk
 manic spade
putting together a cute toy
manic spade
putting together a cute toy
that looks sick asf!!! good work!!
patent current
harsh saddle
A reasonably-szied house can easily be under 100 MB if it's optimized unless you...
would i need to add colliders or something or can i keep it as it?
somber elk
tfw you spent hours working on a model just for blender to crash and you lost all your progress, i had almost finished it too..
i'm back to square one with how much progress i lost
empty fox
somber elk
tfw you spent hours working on a model just for blender to crash and you lost al...
Blender got autosaving
manic spade
somber elk
that looks sick asf!!! good work!!
ty
harsh saddle
patent current
would i need to add colliders or something or can i keep it as it?
You at least need a ground collider if you want to not fall through the ground endlessly. The rest is negotiable.
If you want to collide with it, give it a collider. Box is usually fine
somber elk
empty fox
Blender got autosaving
how find use i want stuff bak >:(
harsh saddle
somber elk
how find use i want stuff bak >:(

Though I don't recommend depending on it. Just get in the habit of hitting Ctrl S every 15 minutes or so and occasionally saving out a new version so you have old versions to restore if something gets messed up
somber elk
ill try that
patent current
harsh saddle
You at least need a ground collider if you want to not fall through the ground e...
Thanks
 snow estuary
me omw to get commissions:
 harsh saddle
snow estuary
me omw to get commissions:
harsh saddle
snow estuary
me omw to get commissions:
I don't think the thumb is the longest finger but you've got 5 fingers so that's a solid start.
somber elk
harsh saddle
I don't think the thumb is the longest finger but you've got 5 fingers so that's...
i dunno man how else am i supposed to give a thinbs up
 devout creek

pose mirror doesn't actually mirror properly does anyone know how to fix i forgot the method
steady zealot
devout creek
pose mirror doesn't actually mirror properly does anyone know how to fix i forgo...
make sure the bones are all named symmetrically. In other words, the bone on the left has to be named the same as the bone on the right with a matching, but opposite suffix, like _L and _R
So for example "UpperArm_L" and "UpperArm_R"
 small marten
snow estuary
me omw to get commissions:
small marten
snow estuary
me omw to get commissions:
Idk if I'm late but I'm not an expert either, but make sure both fingers r the same cuz the finger next to the thumb is thinner than the others but its guud so far
magic badge
Finished.

 lost trench
damn thats cool
 full willow


 pearl swan
I'm not sure where you'd ask modeling questions but does anyone have experience fitting gloves on avatars?
harsh saddle
pearl swan
I'm not sure where you'd ask modeling questions but does anyone have experience ...
Pretty much just like fitting anything, if you don't need it as a toggle, delete as many faces beneath the gloves as possible to avoid clipping and used edit or sculpt mode to fit the glove to the hand. If you need it to be a toggle then you can't do this as easily so you might want to give it a little more space around the glove to minimize clipping. Then just transfer weights from the hand to the glove in weight paint mode. You'll wan to do that part before you delete any of the faces.
somber elk
harsh saddle
Pretty much just like fitting anything, if you don't need it as a toggle, delete...
omg krampus my beloved how are you
 tranquil jackal
Would anybody have a good tutorial on modeling a base for your avatar?
somber elk
i have a question, i accidently made it so that whenever i try to change something it snaps instead of growing if that makes sense

so it either goes that high or that high but down
it snaps to that
i don't know how i did it
i have done it a few tiems on accident
how do i return to the precise movement
i think i figured out it was the little magnet icon
harsh saddle
somber elk
omg krampus my beloved how are you
I'm alright
It is indeed the magnet and you can make it snap to lots of different things. I don't use it too often, though, If I need a specific value, I just enter that in the tool menu.
magic badge
 tight quartz
Why is the book cover shining like It's a light source >:(
 tough plover
tight quartz
Why is the book cover shining like It's a light source >:(
tough plover
tight quartz
Why is the book cover shining like It's a light source >:(
did you turn up the emission on it?
also why are you plugging the alpha into the mix shader? there's nothing else connected
tight quartz
tough plover
also why are you plugging the alpha into the mix shader? there's nothing else co...
I am new to shading, I saw some tutorial about it. 🤷♂️
And for Emission
 tough plover
does it have a second material for the sign part?
 loud panther
Where is the actual light placed
tight quartz
loud panther
Where is the actual light placed
The image itself. 🤷♂️
 harsh saddle
Are you sure that isn't just the light bouncing off the book and onto the plane below? Is the plane below reflective?
somber elk

lightsaber work so far
dinner break gonna chillax
i'm planning on making a little podium that i can spawn in front of me in vr chat
that has multiple lightsabers there
no purpose yet
but just for the sake of it look cool as fuck
podium is gonna be rocks prolly
tight quartz
harsh saddle
Are you sure that isn't just the light bouncing off the book and onto the plane ...
Not 100% sure. Can take a look at it later.
 somber elk
i finished up the basic model, just needs a bit of refining
 steep crown
idk if this is the right place, but any of yall know how to fix this? ive tried weight painting it but that didn't do anything
only does it when i press play in unity btw
 harsh saddle
steep crown
idk if this is the right place, but any of yall know how to fix this? ive tried ...
harsh saddle
steep crown
idk if this is the right place, but any of yall know how to fix this? ive tried ...
I'm not sure what I'm even looking at. Is this a hand?
steep crown
its the end of the sleeve
harsh saddle
steep crown
its the end of the sleeve
Okay nd how is it supposed to look?
steep crown
not with that sharp point

this is a better photo
same spot on both sleeves btw
also this is how its suppose to look
 harsh saddle
Are you doing anything exotic with the avatar? Special expressions, animations? If this isn't showing up in Blender, I would say it's more of a question for #avatar-help
steep crown
its definately through the mesh
i moved a specific bone and this happened

it seems that that specific point is linked to the upperarm
harsh saddle
steep crown
Well if points are moving with bones that shouldn't move them, that sounds like weights. If you pose that bone like that and then go into weight paint mode and go through all your vertex groups, none of them show any weight there?
You should just be able to paint that point with a 0 weight 1 strength brush and it will go down
steep crown
so uh, how do i pose it
harsh saddle
By moving the bone that is affecting that part of the mesh
steep crown
explain it like ive never used blender before
cause i have no clue on what i need to press on for that
harsh saddle
You've already done it, you moved the bone and it moves that point, now you just need to go into weight paint (it's in the upper left).
You good up to that point?
steep crown
that was in unity though
i have no idea how to do it within blender
in unity it was as simple as selecting it within the hierarchy but with blender it only moves the rig itself
harsh saddle
Okay, well you have to go into pose mode first, that's also in the upper left where object mode and edit more are and then you can select and move the bones.
steep crown
thanks
... it seems that i can't even access that
which is now really confusing me
also i mean the specific point
i didn't explain that well, the hand of which is the bone with the issue, isn't within the article of clothing meaning its not there in the actual rih
rig
however it is there within the weights
harsh saddle
steep crown
rig
Well if it's impacting the mesh, it must be rigged to it somehow.
steep crown
I dunno how a single vertice would be rigged to it

 late glacier
Haha skeleton bone go brrrrrr
 somber elk
 somber elk
this is how i'm going to present it in vrchat

 fair oasis
Gumroad
HelloI made an Odradek Sensor from a game Death Stranding.Textured, Rigged, Animated. - 1 Material- 5 Emotes- 3 Head Stages- MoveableInculde:Unity Package -Animations-Controller-Textures-Materials (Standard and Poiyomi 8+)-Instruction Setup sheet-Expression Parameter Table-Expressions MenusFor Vrchat Setup you need the SDK3https://vrchat.com/hom...

 thin shadow
Could be face orientation facing the wrong way
pure dagger
Finished my halloween costume!
 somber elk
thin shadow
Could be face orientation facing the wrong way
somber elk
thin shadow
Could be face orientation facing the wrong way
how would i fix that?
pure dagger
somber elk
how would i fix that?
go into edit mode, select all by pressing a, goto mesh on the top left, normals, and recalculate outside
somber elk
in blender?
pure dagger
ye
harsh saddle
You can also flip individual faces by selecting them and then going to mesh -> normals -> flip normals but that should work.
somber elk
ight heading to blender right now
 ocean salmon
Creating a model of the world Neverhood

 sharp grove
does anyone here with experience in substance painter mind helping me out with a baking issue?
i baked a high poly mesh into a low poly but i've got artifacts in places, probably from where retopoflow didn't surround the high poly mesh properly, and i'm wondering if i can manually clean it up
tough plover
sharp grove
i baked a high poly mesh into a low poly but i've got artifacts in places, proba...
did you try messing with the baking settings?
sharp grove
not yet no
tough plover
should try messing with the max and min ray distance
sharp grove
i've pretty much only just bought substance lol
i'm loving it though
alright, thanks
okay that actually worked great lol
sharp grove
tough plover
should try messing with the max and min ray distance
thank you!
i wasn't expecting to have such good results i expected it to start affecting the normals i wanted to keep
tough plover
for more challenging geometry, consider using a Cage mesh
sharp grove
one thing i'm a bit worried about is that i almost always manually model my heads and don't sculpt them (the model atm has no head), when i go back to blender and finish the head then bring it back, is there a way to stop it from making the normals on the head funky? or should i just keep messing with the values until it works
tough plover
also, baking in blender at first might be a better option, since you can more quickly iterate modifying the meshes/UVs
sharp grove
that's a good idea
it's frustrating because i'm sick of finding 10 minute long videos
with a web cam and the entire history of 3D graphics before they actually tell you how to do the thing
oh and a sponsor from skillshare where they suggest a blender modelling course
only reason why i didn't do it in blender first lol
tough plover
you could split off the head to its own mesh for now
or another material
the mesh you paint on doesn't exactly need to be the same as the "final" one
sharp grove
i can try to
tough plover
it can be an exploded version, can have separated pieces, etc
sharp grove
i really don't have enough experience in this program to know what the best option would actually be
 fallow fable
Anyone here do anime 3D modeling? I'm so tired of my current setup and just wondering if there is anything better to use.
That is, for drawing an anime texture onto 3D parts
Is there like some specific blender program someone might recommend or, another program specifically for drawing onto 3D objects?
There is a layer plugin for blender but I can't get it to work in flat lighting
tough plover
fallow fable
Anyone here do anime 3D modeling? I'm so tired of my current setup and just wond...
Substance painter is typically the go-to application for texturing
for anime models though, using custom normals can actually be a way to get the lighting to look even better
 violet wigeon
hey so I was wondering if someone can make a avatar for me I already have the resources but I just need someone to put the pieces together like the shirt pants and glasses and hairstyle and it's a Splatoon Avatar that I want and I already have all the resources I just need the bones to and have the stuff be on the player model and have the colors there and everything and I can do the rest of the work like uploading it also don't worry about my English I always suck that fucking doing lawn sentences
and I had a little bit experience with modeling by only did it in sfm
because I only need to put the character together piece by piece
violet wigeon
Also the textures are already on the models And the only color change I really need is on the hair eyebrows and the eye color And on the pants there is a white line I want that to be changed to neon green Same thing for the hair eyebrows but the Iris is Hazel
And I'm looking for someone to do it for free since I already have all the resources
And I don't need the model to be uploaded into vrchat I can just do that myself and I can export the model out of blender myself
tough plover
violet wigeon
And I'm looking for someone to do it for free since I already have all the resou...
this is not a reason for asking for someone to do it for free, putting it together and fixing weight painting is time consuming in itself
violet wigeon
tough plover
this is not a reason for asking for someone to do it for free, putting it togeth...
No I don't need the waist painting to be fixed though the waist painting is fine
tough plover
the fact you don't know what weight painting is is another reason why you should be offering compensation. you're paying for the skills that you're avoiding learning yourself
I'm not trying to be rude or anything, but you can't expect anyone to do it for free
especially without knowing the exact amount of work required
you might think that everything is just "ready to go", but this is not Lego. there are a lot more intricacies
violet wigeon
Yeah and I understand that I'm just giving directions of what needs to be done with the model And waste painting is where you put the waste painting on the model like in certain spots where it stretches at so that way it don't stress the textures or whatever shit and also it's made where the model don't get the stored it or whatever you use the model for
And plus I understand that modeling is a pain in the ass as well
Model and has never been a easy task
tough plover
that's not what weight painting is at all, but anyways. because you understand that modeling work can be a pain, isn't that just another reason to pay someone to do it?
violet wigeon
Well there is some people that do do it for free and plus I'm not having someone to make the model completely from scratch
tough plover
those people are either being very generous or don't know how to value their time. it's not about having to make stuff from scratch or not (you should always pay for that), it's about someone else having to put in the time to do the work so that you don't have to. this is a totally fine thing to do, as long as whoever's doing the work gets compensated appropriately
 heavy parcel
violet wigeon
Well there is some people that do do it for free and plus I'm not having someone...
heavy parcel
violet wigeon
Well there is some people that do do it for free and plus I'm not having someone...
Do you own a vehicle?
If you do, then you'd know how much a service costs, even though they don't make the parts, they charge for the time to put them in.
Same concept fits here, where even if you have all the parts, you'd still be asking someone to put in the time to put it together.
violet wigeon
heavy parcel
Do you own a vehicle?
If you do, then you'd know how much a service costs, even ...
Well yeah a vehicle is more important than 3D models It's the everyday transport of course you're going to have to pay for it not trying to be a dick
heavy parcel
And some people make their wage off 3d models
spiral sigil
tough plover
those people are either being *very* generous or don't know how to value their t...
it's better to just ignore these ppl tbh
grizzled linden
how do i make the larger arms fit with the smaller set of arms (holy sh** that was a weird sentence xD) any ideas? im open for anything
 fallow fable
tough plover
for anime models though, using custom normals can actually be a way to get the l...
fallow fable
tough plover
for anime models though, using custom normals can actually be a way to get the l...
the whole point for me is to not use any lighting at all
no elp
pure dagger
grizzled linden
how do i make the larger arms fit with the smaller set of arms (holy sh** that w...
Youu have to remove parts of the mesh
somber elk
 grizzled linden
pure dagger
Youu have to remove parts of the mesh
grizzled linden
pure dagger
Youu have to remove parts of the mesh
how?
spiral sigil
grizzled linden
how do i make the larger arms fit with the smaller set of arms (holy sh** that w...
you may want to go in edit mode and grab the hands with the proportional tool and also symmetry on x axis enabled
grizzled linden
well i got it to work, but in unity the shaders i use comes up with an error that says "too old" even tho i used them this morning?"
spiral sigil
I never saw this error in unity lol can you show the error message maybe?
 grizzled linden
spiral sigil
I never saw this error in unity lol can you show the error message maybe?
grizzled linden
spiral sigil
I never saw this error in unity lol can you show the error message maybe?
hope you can see it
spiral sigil
some assets are conflicting you have 2 Dynamic bones in the project and some animator seems broken but those errors are just warning it shouldnt prevent you from uploading your avatar to vrchat
grizzled linden
can somone explain how to fix this? since it doesnt fix when pressing "auto fix"
 harsh saddle
grizzled linden
can somone explain how to fix this? since it doesnt fix when pressing "auto fix"
harsh saddle
grizzled linden
can somone explain how to fix this? since it doesnt fix when pressing "auto fix"
Click the texture(s) in the project tab and look at the inspector. Either disable mipmaps (what I do) or enable streaming mipmaps
spiral sigil
harsh saddle
Click the texture(s) in the project tab and look at the inspector. Either disabl...
never disable mipmaps unless there is a good reason for this.
harsh saddle
There seems to be a fair amount of debate as to when and if to use mipmaps. I would like to understand them better the discussion of them seems sparse and technical. I experimented with them once and liked how things looked better without them and my worlds perform well without them so 🤷 . It seems like best practices would be to use them in some places and not in others. As to when those times are, I'm still not real clear on that.
spiral sigil
mipmaps looks better when you are far away and are cheap to compute, they also free up the GPU memory and bandwidth. The only reason to disable mipmaps is for UI elements or orthographic view where the camera can't zoom in or out.
here you can clearly see the visual difference


 neon kelp
ok, I have been working on my first avatar for a while now and most stuff is done. weight painting, blend shapes, etc. I just don't know were to start with the textures and shaders. like what is even needed? any tips and/or ideas?
 spiral sigil
neon kelp
ok, I have been working on my first avatar for a while now and most stuff is don...
spiral sigil
neon kelp
ok, I have been working on my first avatar for a while now and most stuff is don...
You now have to UV unwrap your model before texturing
neon kelp
I have made a UV map as well, I was thinking stuff more along the line of what details I should actually draw on the texture, do I need to paint shadows or do i rely on shaders for them?
somber elk
neon kelp
I have made a UV map as well, I was thinking stuff more along the line of what d...
shaders
spiral sigil
fr shaders for anime because it often looks wrong without them
although some anime models can do with diffuse shading but it depends
spiral sigil
neon kelp
I have made a UV map as well, I was thinking stuff more along the line of what d...
Personally I wouldn't rely on shaders only. You can paint some shadows and lighting effect directly on the mesh
oh you mean baked shadows
I would look at how some hololive 3d models do baked shadows and highlights to get a more precise idea
of how to draw on tex
for example here you can see between the fingers and under the arms they painted a darker skin to simulate the ambient occlusion

(also on the neck)
Hairs lighting is also directly paint on the texture
mm yes blue ao
kool
@neon kelp are you aiming towards a soft or harsh shading style
neon kelp
spiral sigil
for example here you can see between the fingers and under the arms they painted...
i think i wanna go for something like this
so those are "baked shadows" as someone called it?
spiral sigil
to me its more AO than shadows
we say baked because you can 'bake' lightmaps with lightsources in a technical process
but your actually going to draw this in
neon kelp
just to recap a little, best way to go about this is looking at references and get inspiration (copy) from that and the no shaders?
spiral sigil
imo if you can sucessfully copy for learning sake then do it as long as you dont ever post it anywhere like artstation even if u credit original author
the originality part can come later once u even know what ur doing
tough plover
neon kelp
just to recap a little, best way to go about this is looking at references and g...
you always need a shader
tough plover
but you don't always need shadows, if that's what you asking
in this case I would still use them though
otherwise you will look always flat lit and it will look odd
spiral sigil
neon kelp
when i say copy i mean look at it draw exactly the same
yeah thats fine you need to learn what brush hardness is used for certain strokes and what colors work best and what layering effects make etc etc
neon kelp
ok, i think i have some grasp of what needs to be done now at least
spiral sigil
if your texturing in blender you will absolutely need to use the setting where you manually change brush hardness/softness curve and how to use blending effects without layers
becuase blender has no layers its just one layer the texture
u need addon for that or something like substance painter or 3dcoat
tough plover
substance painter is the way to go if you want to be a bit more serious about texturing
you can get it for free with the student program
neon kelp
i got access to substance painter so that is a non problem for me
spiral sigil
Armor Paint isnt that bad too! and way less expansive
honest subscriptions come later
suk it adobe
also Blender + Krita is a good workflow if you dont want to spend any money ^^
there is many options u will learn about them inevitably and end up choosing one
neon kelp
thanx everyone anyway, realy helped talking to ya
grizzled linden
can anyone tell me why my mesh wont be attached to my bones? i click "objects -> parent -> Automatic weights" like what am i doing wrong?
 spiral sigil
Asking in general out of curiosity: When you model an anime character's head (including neck), what specific parts, shapes or planes do you polymodel first, and do you work with subsurf?
im interested because it seems alot of people start in completely different ways
pure dagger
Made the grimoire from Helluva boss

 somber elk
 somber elk
pure dagger
Made the grimoire from Helluva boss
somber elk
pure dagger
Made the grimoire from Helluva boss
that looks sick asf
how do you give it an invisible background?
tough plover
somber elk
how do you give it an invisible background?
if you do renders in blender, just enable "Transparent" under Film
pure dagger
somber elk
that looks sick asf
thankies uwu
somber elk
no matter what i do
darth vaders lightsaber renders like this in unity


when it's clearly not meant to do that
@harsh saddle my beloved
i require assistance if you're available
and i have tried recalculating the oustide
hell i tried recalculating the inside too
harsh saddle
somber elk
<@334006467805839372> my beloved
It's hard to see exactly what're going on but sometimes recalculating doesn't do exactly what you want. In that case, you can turn on backface culling in the solid view in Blender and then in edit mode go to mesh->flip normals to flip the normals of individual faces.
 somber elk
harsh saddle
It's hard to see exactly what're going on but sometimes recalculating doesn't do...
somber elk
harsh saddle
It's hard to see exactly what're going on but sometimes recalculating doesn't do...
will do boss, love you
somber elk
I HAVE a quewstion
so
when i spawn in my lightsaber models
i go from 100fps to an easy 50
is this bc it's loading too many seperate parts?
if so shuold i just combine a lot of the parts together
if that's not it, why does it run so slow
pure dagger
somber elk
I HAVE a quewstion
Whats the poly count
and how many materials do you have
pure dagger
in blender check your statistics while everything is selected
somber elk
like 5 or 6
somber elk
pure dagger
in blender check your statistics while everything is selected
bet will do
somber elk
pure dagger
in blender check your statistics while everything is selected
where is statistics
pure dagger
 pure dagger
My guy
somber elk
am i in trouble
somber elk
s
pure dagger
screenshot
somber elk
 pure dagger
Now in edit mode
somber elk
 somber elk
how do i do that sorry
pure dagger
Youll have to do alot of it manually
somber elk
i'm still relatively new to blender
pure dagger
Go into edge mode and delete some of the edges around the circles
somber elk
and i have just been making i didnt' realise there was so much to it
pure dagger
I cant really explain it
I can offer to fix it but it will be ~30$ if you wanna do it your self my best advice is to google and youtube how to decimate/unsubdivide
somber elk
don't got 30 bucks
plus i need to learn it eventually may as well do it now
thank you for the offer though
pure dagger
Good luck
somber elk
pure dagger
I can offer to fix it but it will be ~30$ if you wanna do it your self my best a...
i'll wing it 😎
fuck it i'm gonna remake it
kachow
pure dagger
Best bet tbh
somber elk
yea this looks like a hell hole of work
plus i did it once and it only took me a few days
i can do it within a couple hours now
that's my self expectation right there 
somber elk
procastinating remaking it i am
i think i just realised the bets way to do
i got this
@pure dagger bets way to remove some poly shitters off this?
 pure dagger
somber elk
<@142866907530264576> bets way to remove some poly shitters off this?
pure dagger
somber elk
<@142866907530264576> bets way to remove some poly shitters off this?
use edge select and disolve most of the circular ones
 somber elk
pure dagger
use edge select and disolve most of the circular ones
somber elk
pure dagger
use edge select and disolve most of the circular ones
will do!
pure dagger
somber elk
and how would one fix whatever the fuck you coall this
Idk what im looking at
 pure dagger
do you want to remove the rectangles entirely?
pure dagger
It doesnt
somber elk
uhhgh
let me show you what i want it to look like
low res pic go br

but i want it to have that shape cut out
and everything stays smooth circular
@pure dagger
somber elk
anyone please help
i want the creases to go away

that little shit of shading on the left side of each pill shape is going to be the death of me
please someone :c
forget it i redid it and got rid of it
spiral sigil
i think you can do something with weighted normals modifier to work around bad topology
but there is definitely a good topology way of doing what you want
 pulsar bluff
Didn't know where else to post this, but for an anthropomorphic model so far, does this look okay for someones first time attempting an avi from scratch?^^"

 fiery pawn
just makin a nice uv map, nothing strange at all.
 harsh saddle
@somber elk You generally only need a lot of faces where you want to have actual detail. You'll want cylinders to have maybe 16 faces around their perimeter to look decently smooth when smooth shading is enabled but you don't need horizontal edges looks like that unless you actually need to add more elements in those areas. See how these look exactly the same?

Well, the one on the left has 64 faces and the one on the right has 33,000. You don't get any value from adding more faces to a smooth cylinder like that.

Now if I wanted to extrude out some of those faces to make knobs and buttons, then it would make sense to have more faces but you only want to have dense geometry where it's actually necessary.
 trim berry
Anyone know why substance painter is making blue colors a light purple color? Its happening when I try to color the eyes on the batmiune.
reposted in here bc its a better place to ask
spiral sigil
harsh saddle
<@886055120738078782> You generally only need a lot of faces where you want to h...
And here you have a cylinder that looks like it's a cube and a cube that looks like a cylinder ^^
 spiral sigil
in this example "looks" is a strong word lol
pure dagger
harsh saddle
Well, the one on the left has 64 faces and the one on the right has 33,000. You ...
When you have more poly gons like this all it does is makes everyone lag, optimize your avatars people!
harsh saddle
Everyone should just make Quest-compatible avatars 😌
somber elk
harsh saddle
Everyone should just make Quest-compatible avatars 😌
i dont know how to im sorry :(
it sais mine ain’t quest compatible
pure dagger
youtube
 hollow ermine
The Bloc Martins
 harsh saddle
somber elk
i dont know how to im sorry :(
harsh saddle
somber elk
i dont know how to im sorry :(
The builder should tell you why unless you just haven't published it for Quest.
somber elk
boy am i glad i did backface culling before hand

whenever i export it as fbx it basically doubles the poly ocunt on it
is it bc of subsurface rendering?>
it was
 daring plover
Anyone here i can ask blender help?

 gritty kettle
nvm forget it
 ancient jackal
Hey so I’m planning of starting to make models on blender
do y’all know a good tutorial video?
 ashen forge
Finished this yesterday for Spookality, yippie! https://sketchfab.com/3d-models/naren-the-ringleader-7992f4c3ea464f168023be7e5431aad9

Naren The Ringleader - 3D model by TrixxedHeart
Weightpainting is a bit wonky in some areas, but :p
 frail timber

My personal homeworld‚ in the works․
 jolly lake
how should i go about making eyelids for a model with elliptical eyes
(in blender, for vrchat)
spiral sigil
Spawn a circle primitive
Fill faces
Poke face
Extrude out more loops as needed or insert faces (because you can't cut loops into triangles)
Stretch entire shape into ellipse
Oh eyelids I'm not sur
Show character
jolly lake
I already got off my pc so I can't get any screenshots
I've already got a solution anyways that's a little jank but works fine considering how fast blinking is, I'd love to hear a better solution later though
for now I'm going to bed though
harsh saddle
Yeah, blinks can be pretty wonky and still look fine for how fast they got by.
spiral sigil
I would look for models of similar style that look to do proper blinking and try to replicate what they do on your model if u want better solution
pulsar bluff
pulsar bluff
Didn't know where else to post this, but for an anthropomorphic model so far, do...
Update to a previous post i made. I know it doesn't have thumbs, i just need to relax rn and take a bit to chill :p
 jolly lake
harsh saddle
Yeah, blinks can be pretty wonky and still look fine for how fast they got by.
jolly lake
harsh saddle
Yeah, blinks can be pretty wonky and still look fine for how fast they got by.
a little goofy
 jolly lake
pulsar bluff
Update to a previous post i made. I know it doesn't have thumbs, i just need to ...
jolly lake
pulsar bluff
Update to a previous post i made. I know it doesn't have thumbs, i just need to ...
literal cat paws as hands looking pretty good
 shy thistle
pulling my hair out trying to figure out why the head is see through help
 harsh saddle
jolly lake
a little goofy
harsh saddle
jolly lake
a little goofy
Try pulling the lids out further even if they stretch a bit oddly so they don't clip
harsh saddle
shy thistle
pulling my hair out trying to figure out why the head is see through help
Check the material and see if its set to alpha blend. Change that to opaque.
shy thistle
harsh saddle
Check the material and see if its set to alpha blend. Change that to opaque.
thank you!
jolly lake
harsh saddle
Try pulling the lids out further even if they stretch a bit oddly so they don't ...
 red glade


Working on a new fit for ma boi. p happy with how its lookin already
Just not sure what i wanna do for the uhm upper body
azure rain
jolly lake
cool now it works
 gray skiff
Hola amigos, I apologize if this has been asked many a time but my search queries have left me empty handed.
I've got a Base model that has toggles to increase various sizes of the model (think, bigger booba). If I've attached clothing to said model in Blender/Unity, would the clothes break in game, or extend in tandem with the model?
azure rain
the clothing would not know to get bigger with the boob slider without you setting that up
pure dagger
Made a halloween bucket with some candy for the vrc traders prop contest/halloween party, Its free on my gumroad

 spiral sigil
I'm bad at this here's a worm, made mostly with the skin modifier, love making these so much

 stray patrol
spiral sigil
I'm bad at this here's a worm, made mostly with the skin modifier, love making t...
stray patrol
spiral sigil
I'm bad at this here's a worm, made mostly with the skin modifier, love making t...
Looks pretty nice!
spiral sigil
Thank you, it's colors are FF8888, FF88FF, and 8888FF
solar fossil
That's a lot of 8
gray skiff
What's up homies, I'm looking sculpt what amounts to children's clothes onto this big mommy milker behemoth. However the thought occurred to me that while I might be able to get the sculpts patched together, the textures themselves are going to look very distorted upon applications. Would that indeed be the case? Would test but am locked in the wage cage for the rest of the day.
 tough plover
gray skiff
What's up homies, I'm looking sculpt what amounts to children's clothes onto thi...
tough plover
gray skiff
What's up homies, I'm looking sculpt what amounts to children's clothes onto thi...
fitting clothing that was made for different models with different topology will be hit or miss. you will likely end up with a lot of clipping
as for actually fitting it, I would suggest using the Mesh Deform modifier
you can essentially make a new mesh that wraps around the clothing, and use it to deform the clothing.
on the deform mesh, I recommend enabling X symmetry and also doing the reshaping on a shape key. this is because adding cuts to the deform mesh breaks the modifier, and so you would need to redo everything. doing it on a shape key means you can simply unbind/rebind and re-enable the shape key
gray skiff
Thanks brotha, there's a very nice tutorial on YT and this tool looks to be a lot more streamlined for this than the ol' sculpteroni, and I'll run this on a shape key as well. With that said, would you by chance know if there is a resource or a repository of tutorials for fitting... unique body shapes? The one's I'm pinging on YT are more or less like snapping in matching lego's haha.
Also big thank you sir @tough plover !
tough plover
for "unique body shapes" you're almost better off making your own clothing from scratch for that specific model
gray skiff
Oh dang hahaha, and here I am thinking "yeah this'll kitbash just fine" 🙈
Thank you for the guidance mane, I'll dip my toes into the creation side of things!
jolly lake
solar fossil
That's a lot of 8
8 is half of F so yeah
 bold oar
can anyone help me with why this is happening? i seperated this Y bot so i can hide some of the body parts individually but now he's all jagged like this and it shows this way in unity as well

 quaint jasper
Make sure there's no duplicates
 zinc mantle
Hello everyone i juste download unity and i want to start making my oc but i want to start from nothing modeling every outfit and I don't really know what to use and all... If someone have some time to lose and try to help me out with some information...
quaint jasper
Unity is not a modelling program, Blender is
zinc mantle
Ok I was looking at the same time
quaint jasper
https://youtu.be/5JA0f8ZgIw0
Great tutorial to follow along to learn the basics
Rain sensei here, ask me as many questions as you need, we’re making a head out of a cube.
btw that cube was 2m by 2m I had a slip up don't fight me.
I'm using blender 2.9
I’m sure you’ve seen a lot of people who get perfect circles and start pulling here and pushing there, and in no time they’ve got a pretty face. That’s sculpting, if you want...
 split dragon
i'm looking to make cutouts for these holes in the actual mesh (since quest can't do transparent cutouts), and i'm working in blender. Does anyone know a good way I could use the alpha map cutoff to actually cut out the mesh?
(or do i have to manually do it with the knife tool?
 harsh saddle
I think you'd have to use the knife tool. I guess you could do something like importing that into illustrator or another vector program, doing an image trace, then importing that as an SVG, extruding it, then using that for a boolean but that's gonna make for some real stank topology. Regardless, you're going to end up adding a lot of faces to try and do this accurately. One option might be to just put the knee texture behind the rips. You'd lose the depth but without adding a lot of additional geometry and you might be able to fake a little depth with a normal map.
tough plover
split dragon
i'm looking to make cutouts for these holes in the actual mesh (since quest can'...
you could just combine the texture and the body texture in an image editing program
so you just have the skin texture showing through where there's normally alpha
split dragon
tough plover
you could just combine the texture and the body texture in an image editing prog...
good call.
do you happen to know a way to do it through blender?i don tthink the uv's match up perfectly....
harsh saddle
split dragon
good call.
do you happen to know a way to do it through blender?i don tthink the...
I'd do it in GIMP or Photoshop. Just line them up or clone stamp it and then layer the texture with the alpha over it.
You could also projection paint it in Blender using the body texture as a stencil and then combine the textures in Photoshop.
split dragon
harsh saddle
You could also projection paint it in Blender using the body texture as a stenci...
That would work tysm
red glade

Just gotta make the tactical rig 🙂
Made the uhm mechanix gloves also.

I will redo the fishnet as i found a better way
 naive atlas
pure dagger
Made a halloween bucket with some candy for the vrc traders prop contest/hallowe...
naive atlas
pure dagger
Made a halloween bucket with some candy for the vrc traders prop contest/hallowe...
ill def put this in my world thank u very much 🙂 happy Halloween
pure dagger
naive atlas
ill def put this in my world thank u very much 🙂 happy Halloween
Link me!
naive atlas
huh
naive atlas
i will dont worry
naive atlas
pure dagger
And give credits to my gum road 👉👈
ill show u in a sec
spiral sigil
Another worm
 naive atlas
pure dagger
And give credits to my gum road 👉👈
naive atlas
pure dagger
And give credits to my gum road 👉👈
 pure dagger
I appreciate it, but you couldve just put it on a small card or something 👉 👈
naive atlas
all good ,i like it ,so more the size they see it
 opaque solar
Do anyone have a method or tutorial on how to make a realistic cloth folds or wrinkle in blender?
harsh saddle
opaque solar
Do anyone have a method or tutorial on how to make a realistic cloth folds or wr...
There is a cloth brush in the sculpt tools you can look into but often you'll just want to use a cloth modifier and then apply that modifier.
opaque solar
Thx
quaint jasper
You'd have to edit the mesh in Blender, in edit mode, put your cursor over one of the vertices, press L, and then Alt + S to scale outward, hopefully that solves it !
lament pond
Wip

 amber spruce
Hey guys, if I'm putting boots on an avatar that will never be removed, can I just delete the foot mesh and leave a non manifold edge at the ankle? Or will this cause me issues down the line and I should 100% cap that off with a face?
tough plover
amber spruce
Hey guys, if I'm putting boots on an avatar that will never be removed, can I ju...
this isn't 3d printing, you don't need your meshes to be manifold
you can absolutely just remove the ankle by just deleting the faces
amber spruce
Hell yeah brother, I love easy solutions
 fallow pewter
Would this be an appropriate channel to ask a question about substance painter for modeling?
azure rain
honestly you're in a decent spot
 glad fiber
wip , power shoes before retopo

 fresh isle
Start on a bug body of sorts


 tame sinew
What's a good way to make some desert terrain? I know there's the terrain in unity, but it's not exact enough for dunes and what not.
pure dagger
tame sinew
What's a good way to make some desert terrain? I know there's the terrain in uni...
A.N.T.S landscape is a good plugin for blender it creates landscapes, Its kind acomplex so id watch a tutorial first
spiral sigil
tame sinew
What's a good way to make some desert terrain? I know there's the terrain in uni...
you could def do this with terrain

might need some good textures though
tame sinew
spiral sigil
you could def do this with terrain
The only problem that I'm seeing is flattening the terrain, which I don't know how I would do that
I'm thinking polybrush, but that doesn't have a set height option...
 tame sinew
That’s for regular terrain in Unity. I don’t know if I can convert the mesh from blender into a terrain in Unity
spiral sigil
OH that's different
I don't thiiiink you can do that
it looks like you can use a converter to make a mesh a unity terrain object
but the ones I'm seeing cost $$$
if you were doing it all in blender, but wanted the detail / tree painting you can do something similar using particle systems and weight painting
 cerulean kiln
so i was making something in blender and exported it as a fbx but in unity there were broken faces. i fixed it by exporting as obj but when i put the obj file into unity, all the materials were gone and it only had the 1 "default" material. wtf?
when i put the same obj file back into blender it still has all the materials. so something in unity is messing it up?
nvm i got it
versed glacier
So as people have told me. using boolean is a sin and game engines (dont like it?) how would i make these holes on the ship with this topology without boolean


 versed glacier
i think my brain just fried
what if thesres that edge loop going around in that area..
 versed glacier
tough plover
versed glacier
tough plover
oh wait that edge loop was useless i dissolved it but i cant comperhend how did you do that hole XD because when extruding or insetting the faces they like to go to center so how did you get to stay on the top side of the wall?
tough plover
versed glacier
oh wait that edge loop was useless i dissolved it but i cant comperhend how did ...
I added loop cuts and dissolved the ones I didn't need
one sec
versed glacier
im still learning topology stuff so my brain is little mushy when coming into problems like this
<,< what did you press to cover those holes with faces so fast jesus
versed glacier
damn you just made my life so much easier
tough plover
needs to be the edge between the ones you're filling between
 versed glacier
oh yeah they were created when i extruded to get the outer rim of the railing of the ship
tough plover
you can dissolve loops using alt + click to select them (or ctrl + click to select every edge between two points) and ctrl + X to dissolve the edge
versed glacier
oh.. right that loop doesnt seem to make sense anymore after the extrude was done
tough plover
mhm
versed glacier
man i have so much to learn.. i just cant see the bigger picture
versed glacier
tough plover
mhm
https://i.gyazo.com/0173e6d386be06df46ca7662bd9e70f6.mp4 so this would be acceptable result?
tough plover
yea that looks pretty good
versed glacier
tough plover
yea that looks pretty good
you seem really advanced. you have any recommendations where to learn topology for hard modeling and organic? and good practices for them
tough plover
for organic stuff you can find references for how your loops should flow
I'm not as advanced with hard surface but I know there's a lot of tutorials for it
versed glacier
gotcha well thanks for help 😄 now i gotta go figure out how to do this but with arches XD need to bore the window holes into the hull with arches
tame sinew
spiral sigil
if you were doing it all in blender, but wanted the detail / tree painting you c...
How does this look for some sand dunes? If it helps I'm gonna be making a Tatooine City with some stuff outside of it.
https://gyazo.com/75ad89fa3e952d17c09a3b0fdc38276a
 spiral sigil
I'm not a dune expert but I'd like at some references if you're stuck
tame sinew
I think it works well enough. I'm gonna try to convert it into a terrain in unity to flatten out the middle, then scale it as much as I need to in order to get enough buildings in
spiral sigil
I know they have these rad ridges
 tame sinew
Yeah, sadly I couldn’t get those ridges without it looking worst off
harsh saddle
I'd just model it in Blender, especially if you don't need to use stuff like speedtree. The pinch brush would work well for that.
spiral sigil
yeah, if you don't need the terrain features which it doesn't sound like you do
harsh saddle
Yeah, there are other ways to do grass and trees but terrain is a good option if you need a lot of them and you need them to perform well. For a desert, I'd just sculpt it.
red glade
tacticool camoflage (shit stains)

Gotta make the tactical rig. Annoyingly im not sure how i would approach it
 prime zenith
I know there is a lot of experienced people here, so I want to ask about this issue. I already had 2 experienced people try to help me with no success.
I have a matcap problem as on the image - the matcap gets "pinched" on a certain edge loop, but I cannot pinpoint how to fix this. Any ideas ?

Also pls do not worry about the high poly count - I will optimise this later, I am just stuck on this specific issue right now
versed glacier
prime zenith
Also pls do not worry about the high poly count - I will optimise this later, I ...
im gonna be honest with you but i have slight feeling that the ammount of edges you have on that is the reason for that. theres so many it looks "smooth" and then theres that 1 edge line thats out of place.
also try playing with the auto smoothing angle
first try playing with the smoothing angle if that doesnnt work. try dissolving the edge loops around the area where it does the thing to make it more flat
prime zenith
versed glacier
first try playing with the smoothing angle if that doesnnt work. try dissolving ...
I am trying changing the smoothing angle, does not do much. I also dissolved some edges around the are and there is not really a change either
tough plover
what the hell, what is the poly count on those
prime zenith
I did dissolve lot of the edge loops and created some ngons down the shoe, but it does not solve the problem at all


 fringe leaf
The new Halloween costume I made 😄 looks so cute


 mild talon
Finished the hand rig 🌸
 jolly lake
master hand avatar
spiral sigil
mild talon
Finished the hand rig 🌸
wowow good job
amber spruce
Anyone know any good tutorials on making clothes? Struggling to find videos that aren't showing fabric stimulation shortcuts
 gentle solar

 mild talon
amber spruce
Anyone know any good tutorials on making clothes? Struggling to find videos that...
mild talon
amber spruce
Anyone know any good tutorials on making clothes? Struggling to find videos that...

LetMeGoogleThat.com
For all those people that find it more convenient to bother you with their question than to google it for themselves.
Anything is good on the subject if you don't know what to do
But if you need high quality, go for Marvellous Designer, not Blender
versed glacier
https://i.gyazo.com/06ca8a1cb20fcf2ecd5b29d66f5909dc.mp4 Im making this comfy type night scene inspired by someone who did it aswell any opinions? its still WIP
red glade
spoopy
 gray skiff
Waddup gangstas, apologies in advance if this has been asked before but I'm not too certain on the verbiage to run a search query in the Disc
How would I go about making clothes react to proportion sliders within VRChat?
For instance, there are sliders that increase certain parts of the body, which when used will clip through clothes that are set into place.
azure rain
basically you would have to make blendshapes for the clothing to move as well and then hook up the animations in unity to control both blendshapes at the same time
if you're having a body under the clothing
gray skiff
That's a good idea, thank you sir! I think I'm just gonna spend some time getting the ideal proportions down in Blender with the provided blendshapes. Unfortunately, the proportion sliders in game aren't 1:1 with the blendshapes so I'mma have to do some eyeballing.
Thanks mane!
azure rain
hope your clothing stuff goes okay
spiral sigil
Just triple checking but when it comes to peformance impacts of textures, its pretty much all about the area right
I have made a very odd ratio texture of 528 x 2,276 that has only 20% more area of square 1024x1024, and it gives roughly double resolution for my model
and it is still squares its not warping on checkerboard pattern btw
harsh saddle
More specifically, it's about how many pixels your UV islands are covering, so if using a different resolution or mapping allows you to utilize the UV space more efficiently, then that can also have an impact.
You can have a 4k texture but if your UVs are only able to make use of 50% of the space, then you're still going to have limited resolution in your texture.
spiral sigil
how does unity handle processing empty and covered UV space when rendering textures
harsh saddle
I'm not sure but I'd imagine it treats it all the same. If there is no transparency, it's still looking at the black space and if there is transparency, it needs to know what areas are transparent so I don't think it ignores any space.
spiral sigil
mm okay thanks
something interesting I found on unity docs is it says to reduce UV islands and seams for performance

never expands on that thought though
harsh saddle
I could be mistaken, that's just my assumption. if it prefers to have fewer islands then maybe it is processing where your UVs are.
 fluid ice
been working on meshes and for some reason the texture for this cylinder is on the inside and the outside is transparent. 💀
 spiral sigil
fluid ice
been working on meshes and for some reason the texture for this cylinder is on t...
spiral sigil
fluid ice
been working on meshes and for some reason the texture for this cylinder is on t...
select the faces that are backwards and do alt+N recalc outside and it should fix
pov still trying to slap paint onto metal until it looks good
 fluid ice
spiral sigil
select the faces that are backwards and do alt+N recalc outside and it should fi...
fluid ice
spiral sigil
select the faces that are backwards and do alt+N recalc outside and it should fi...
oh wow that worked. thank you! ^^
fluid ice
spiral sigil
pov still trying to slap paint onto metal until it looks good
ooh nice! 👀
mental hazel
how would i make a effect like the medievil magic swords blade?
like where it cycles between royal blue and black
https://youtu.be/JEzRiKtsjtU
you might not be able to see it very well

And how's the weather mate? -- Watch live at http://www.twitch.tv/joesguy
mental hazel
how would i pull this off?
 somber zodiac
^ That can be done with poiyomi I believe, A simple scrolling gradient over the blade of the sword at a specific direction to get it to flash like that. You would open up the poiyomi shader, apply the normal sword texture under the main section, then go under special effects> Emission 1> and apply your gradient, turn on scrolling emissions and change the color to blue. then you would set the scroll direction. Alternatively you can have a particle system that has a shape ontop of the mesh of the sword, with a velocity over time in the direction of the emission you want, then you change the color of said emission either through a color over time option, or an animation which swaps it between two colors. The first option would only be pc compatible the second is quest compatible. But particles are heavier on computing power.
 lean hemlock
im unable to quick decimate my avatar with cats, blender shows visually that it happened, decimate modifier still shows 390k poly and blender also, anyway to fix that without deleting the shapekeys?
somber zodiac
Decimate, quite literally changes the vertex point orders as well as vertex groups associated with said shape keys. so by definition reducing the poly count in a non-subdivision method, will require you to remap out the shape keys on the model. There is a way around this using something called shapekey transfer, This is done by having 1 model with the LOD you require and the old mesh with the shape keys
https://github.com/fblah/ShapeKeyTransferBlender may help you
GitHub
Addon for transferring Shape Keys in Blender. Contribute to fblah/ShapeKeyTransferBlender development by creating an account on GitHub.
^ Worth noting that using this method, you can also learn to rig things that may give you automatic bone weighting errors, due to manifold meshes being wrong
tough plover
@lean hemlock don't use the decimation modifier, use the decimate operation in edit mode. do it on a new shape key
it will preserve your shape keys
if you have good topology, I recommend dissolving a bunch of loops rather than decimation
spiral sigil
I'm curious because I can't find the answer in documentation or fourm posts: How does unity during a game treat an 8k texture that has been told to be read as a 2k texture
like if the actual texture is 8k POT square, and yknow change the reading res to 2k, would the filesize still be large because you still need the 8k to make the 2k
tough plover
spiral sigil
I'm curious because I can't find the answer in documentation or fourm posts: Ho...
when you import something in unity, it makes a copy of it and keeps it stored somewhere else. it's essentially re-encoding the entire asset and putting in a format that Unity can more easily use
tough plover
if you set a texture to 2k from 8k in the import settings, it makes a 2k version and stores it
spiral sigil
so where is it stored is my question then
tough plover
under Library
spiral sigil
no like uh when your in a game like vrchat
tough plover
in VRAM
spiral sigil
so other players will have to load in both
tough plover
no, only the 2K one
the "imported" version is the one Unity actually uses and that goes into the asset bundle
it gets re-encoded into a better format like DXT or BC7
spiral sigil
oh okay so the 8k wont be seen in other players vram at all?
tough plover
correct
but again, as long as you set it to 2k in the import settings of the texture
there are very few cases where you should have 8k textures at all
spiral sigil
yeah I ask cuz cobruh is trying to make a texture below 1mb and the origial texture is like 8k
or 16k
he changes it up when he says it and i havent seen pictures
but he makes it read at like 2k or 1k or something
tough plover
having the source texture 8k means that it takes a lot longer for Unity to actually create the new imported texture
so there's no point really
 tulip ice
Has anyone had issues with models made in nomad sculpt? Seems like any of them I use as an avatar are on the ground in front of me in game. Even if I’m using the same process as non-nomad stuff
manic spade
made a paper birch for a first tree

no subsurface in unity because i dont feel like writing the shader
spiral sigil
manic spade
made a paper birch for a first tree
looks actually really nice, how did you do it if I may ask
pure dagger
fluid ice
been working on meshes and for some reason the texture for this cylinder is on t...
flip your normals
or change your blend mode
mild talon
running from having to fix the rigging anymore
tulip ice
 manic spade
spiral sigil
looks actually really nice, how did you do it if I may ask
manic spade
spiral sigil
looks actually really nice, how did you do it if I may ask
speedtree and fixed the normals for the leaves in maya
magic badge
🐺
 red glade
magic badge
🐺
red glade
magic badge
🐺
Skellebro
 tough plover
 jovial seal
you could just enable X mirror and select one side and move it
jovial seal
what on earth is that lmao
anyone know whats causing this seam with the mirror modifier?

they are merging
tough plover
make sure you delete the other half of the model entirely when you use the mirror modifier
jovial seal
yeh thanks i just kinda janked my way around it using a backup and merge by dist
omw im mad at myself
i sent like 4 or 3 hours of my life modelling this for no reason cause i cant even rig it due to no alt button
lets go

 woeful summit
oak hatch
gun.
woeful summit
oak hatch
gun.
Needs charging handle and breakdown pins, but otherwise, good job
I might include a safety other then the blade trigger safety in the trigger
If anyone want help with realistic firearm proportions on their model builds, hit me up because I can give some pointers, I play world of guns Verry often, watch forgotten weapons like it’s gospel, and have visited the cody firearms museum a good few times
oak hatch
woeful summit
Needs charging handle and breakdown pins, but otherwise, good job
yeye, I still haven't detailed out the charging handle, takedown pins, gotta change how the stock links up with the upper, and "borrow" the AWCY" folding brace model as a basis for the brace.
It's based LOOSELY off the FCU X01 PDW.
Sorta, TMP9 meets FCU X01 kinda vibe.
woeful summit
oak hatch
yeye, I still haven't detailed out the charging handle, takedown pins, gotta cha...
Could probably move over the buffer tube and nut model of the M16 for that one
Actually, probably not, the stock of the M16 could be too long…
oak hatch
No buffer toob, direct blowback/roller delayed
stock is gonna be folding, so M16 style config is nogo
Also, looks like this will be around 5-8ktris, which is high, but not awful
I could murder it down to lower, but then I risk it looking pretty anky.
*janky
woeful summit
Roller delayed blowback… why not lever delayed or recoil recoil delayed?
woeful summit
oak hatch
stock is gonna be folding, so M16 style config is nogo
What about the folding version of the collapsable M249 stock
Might look good, and it’s a little shorter
 woeful summit
Ahhh, yeah, that could fine
oak hatch
I just have to work out how to also have room for the ejection when folded, might do a clever trick or two.
I'll also have a MP5C telescoping type thing as an option, for a 6" bbl version.
Make it obscenely compact.
woeful summit
oak hatch
I just have to work out how to also have room for the ejection when folded, migh...
Well, you might not need to if you flip the hinge so the stock hinges to the left instead of the right of the gun
woeful summit
You deffinitely sound like a good guy who could help with my dream, I just wish I had more experience in 3D modeling to do it
oak hatch
gonna make this PDW, finish up the pistol model I have, a few optics, a few accessories (afg, comp/brake and suppressor), and maybe a MADS unit.
woeful summit
Nice
oak hatch
Cause who doesn't love an underslung superposed caselite multipurpose 37mm smart munitions launcher?
woeful summit
Hehehe
oak hatch
[thoomp]]
woeful summit
I would like to make a firearms museum within VR chat one day
oak hatch
There was an artist who did that with voxel art, IIRC
TBH, I'm likely to make a world with my guns/tech in it as a sales pitch type deal.
woeful summit
Nice
oak hatch
Eventually, lmao.
After I make Oiel2.0
And more hardware. So much more hardware.
Like, if/when I can, I want to make a world where you can use a loading press to load your own bullets, then load the mag wth those bullets, then load the gun witht he mag, and hit the gun range.
some day
woeful summit
I will say this, if you make your gun so the shells eject at a 30-40 degree angle to the top right of the gun, it would likely not have any issues ejecting folded on the right side
oak hatch

MFW someone double-charges a rund and the gun KBs and kills them in VR
ye, I'll plot it out. worst case ontario, I can angle the hinge so it clears it, a la...I think AKM?
Forgot if the sidefold AKM does that or if it's a different gun.
woeful summit
oak hatch
Forgot if the sidefold AKM does that or if it's a different gun.
Theres diffrent side folders for the AK out there, a crap ton
But the one on the 5.45x39 russian krinkov in particular seems to not be that bad to model
Theres underfolders too, but although compact, those tend to be uncomfortable LoL, especially lacking a cheek rest for a proper cheek weld
oak hatch
woeful summit
Theres underfolders too, but although compact, those tend to be uncomfortable Lo...
yeah nah, no underfolders for this boyo. I've got a prety decent ish idea of how I want this to look; after that is the 6.5mmTC rifle body, and then a billion billion accessories.
woeful summit
Hehehe
oak hatch
And then working out how to standardize the UVs in my art style so that I can atlas/stack UV stuff reliably.
And then making a shader.
YAY
I want to emulate the way a lot of japanese artists paint guns.
woeful summit
Well, hey, at least you don’t have to make a realistic internal animation LoL
oak hatch
About that.
woeful summit
👀
woeful summit
Ok, that’s cool
oak hatch
but you will be able to do things like press-checks and chamber checks.
woeful summit
Nice
oak hatch
cause these guns are going onto Oiel2.0 with my avatar PVP system and gun manip setups.
MFW I'm still trying to make this thing Good Rated
woeful summit
That’s gonna be awsome
oak hatch
2 guns, damage models, custom IK stuff, extra gear and attachments...@_@
woeful summit
Soo… what if we were going to make a firearms museum that included internal model animations…
Within VR chat
woeful summit
It could be like a ride that explains how firearms work, and what rifling does
That sounds verry fun actually
Heres the hard part tho
Quest compatibility
neon kelp
i have made some progress!


 young owl
oak hatch
young owl
oak hatch
What is it? Kinda looks like a heavily modified glock with some cool-but-illegal accessories. Looks frickin sick. But what is it?
 strong cobalt
Gun
oak hatch
young owl
What is it? Kinda looks like a heavily modified glock with some cool-but-illega...
Hegao Arms HDW-10. Fictional sci-fi select fire 10"bbl folding stock, detent delayed blowback 10mm PDW/SMG.
Will also have a Compact variant (6"bbl, telescoping stock).
It's built around the FCU of the Hegao Arms HP-10, uses the same mags and FCU, same grip geometry.
Behold, I designed a working gun, for a sci-fi setting.
young owl
Ooh. Thanks for the clarification!
oak hatch
young owl
Ooh. Thanks for the clarification!
No worries. Gave me a reason to nerd out, always a good time for that.
young owl
Fair enough.
I love guns. Used to go shooting with my sad when I was younger, but haven't gone since.


 long depot
tulip ice
Working on everyone’s favorite racist
long depot
tulip ice
Working on everyone’s favorite racist
who is that supposed to be?
tulip ice
Lovecraft
long depot
I see...
red glade
Hello! a small qeustion is there a way i could make a convincing buzzcut/fade thats lowpoly

Because just having it bald feels... off
long depot
just tell ppl u got male baldness, bam problem solved!
tough plover
red glade
Hello! a small qeustion is there a way i could make a convincing buzzcut/fade th...
could just texture it on
red glade
tough plover
could just texture it on
Thats what i orignally was thinking, Not sure how i would achieve said effect
Id reckon there are some uhm, Hair/stubble brushes
 median pike
I cant think of anything besides texturing it
 turbid tide
Anybody got a single weed leaf 3d model I can use?
red glade
You'd reckon you could make it yourself right! Simply cut it out and you can fractal it if needed @turbid tide
red glade
@tough plover @median pike Here's something

Dont ever have me cut your hair cuz yo **** will be crooked butttt
Decent fade id say
median pike
yeah looks pretty damn good
red glade
Thx 🙂
 karmic haven
wish i knew how to make a bad ass avi
spiral sigil
 south wolf
i actually did make one but it looked kinda cartoony
south wolf
i actually did make one but it looked kinda cartoony
hey its good you can see the issues with your own work its a very important trait to have as an artist
red glade
south wolf
very nice
🙏
 median marten
I done a headswap on one of my models but in game the head is a little too large how would i go about unmerging the head armature from the rest of the body to resize
 full hornet
How do I separate the eye meshes on avatars in blender?
My character design has heterochromia and the model Im using uses one texture and uv to color both eyes
tough plover
full hornet
How do I separate the eye meshes on avatars in blender?
you wouldn't separate the meshes for that, you would unstack the UVs
 honest schooner
i thought it was gonna be easy to work on this but then i realized "holy shit the entire body is a box"

how would someone rig this
tough plover
honest schooner
how would someone rig this
that depends how you want it to move
honest schooner
do you rig the entire spine with the body?
tough plover
if you want it to stay perfectly solid, that might be a bit trickier if you want it to look right
I would just recommend adding a few loops to make it bend
honest schooner
tough plover
if you want it to stay perfectly solid, that might be a bit trickier if you want...
I want it to be perfectly solid because that's literally how they would move theoretically
because i don't know how you'd bend a block of metal, so how do you rig this?
head?
spine?
head might work.
wait no that's a bad idea.
tough plover
if you rig everything to the head, it will move with the head. the issue is that it will "detatch" at the hips
like it will move away from the legs
honest schooner
hips/chest?
tough plover
hips would make it move properly with the legs, but it would "detatch" at the neck
my suggestion; create a separate bone for that whole part, parented to the hips. then, in Unity, add an Aim constraint to make it "look" at a target object located at the base of the neck
honest schooner
so rig everything to the hips
tough plover
to a separate bone parented to the hips
because you want to be able to move that bone separately
honest schooner
oh okay