#avatar-rigging
1 messages · Page 14 of 1
 nocturne quiver
 cerulean temple
sometimes i have a hard time sleeping cause ill think about the solution to my problem
and then i try it and it doesn't work
nocturne quiver
so i figured everything out
it's basically completely rigged except for one damn thing 😭
if i put the hand out and bring it towards me a little bit with the wrist pointed up it deforms pretty bad and i cant figure out why

 placid trail
That’s tough
nocturne quiver
😭
nocturne quiver
haven't tried this out yet but in case anyone needs some help with weight painting: https://youtu.be/rG82fogtuCg?si=XhMJ-6yCmI4YO3mR
Hey everyone new Blender 2.8 tutorial! In the 5 minutes you'll never have to wonder how to weight paint ever again! Hope it helps you guys and don't be afraid to leave comments and questions below if you have them!
Song: [Chill]aKu - Love Shine
https://soundcloud.com/akuofficial
If you enjoy...
placid trail
I’ll check it out
placid trail
That’s an excellent video
nocturne quiver
it really is
also ithink i fixed my problem, it didnt actually have anything to do with weightpainting lol
i'll have to check in vr later, but basically i just moved the bones around in the humanoid rig settings in unity
nocturne quiver
ummm i just closed blender for now but i think so
i had around 250 but the avatar doesnt have anything that needs dynamics
placid trail
The video had the dude with just like 12 or something
nocturne quiver
im not sure why that is tbh
that doesnt seem normal lol
it might be because he's not rigging for vrchat
placid trail
Gotcha
placid trail
What’s the separate function again?
For armature
I wanna delete some unwanted armature pretty much
nocturne quiver
placid trail
I wanna delete some unwanted armature pretty much
just p
placid trail
Ok
 river ingot
nocturne quiver
if i put the hand out and bring it towards me a little bit with the wrist pointe...
river ingot
nocturne quiver
if i put the hand out and bring it towards me a little bit with the wrist pointe...
You could do some sculpting on it, and add more to the left side of that hand on the bottom maybe. unless its bent backwards towards the wrist, then it could be like a weightpainting issue. But you may need to add more polygons to it to make it bend perfectly.
 astral warren
Does anyone know why some avatars have ther feet IK shuffle around when they stop walking and some do not? I've ruled it down to bones, not controllers
placid trail
I can’t seem to click on any of the individual bones when I weight paint. I do the ctrl+left click, but it doesn’t seem to select anything
river ingot
astral warren
Does anyone know why some avatars have ther feet IK shuffle around when they sto...
sounds more like an animation, and how long it plays for during locomotion and idle, which is usually dropped into the avatar descriptor unless u leave it as default. SDK has default versions of it in its folders u can modify
astral warren
river ingot
sounds more like an animation, and how long it plays for during locomotion and i...
it's not an animation, i uploaded it with no custom playable layers
river ingot
then its a default animation problem possibly.
astral warren
river ingot
then its a default animation problem possibly.
I've ruled out animations, it's not animations, because another avatar with the default animation stack doesn't do this.
 modern crystal
thanks for the parenting tutorial! Itll be very useful in the future, but it still doesn’t help the link issue, I want both ends close to each other link without one bone having to look off
nocturne quiver
placid trail
I can’t seem to click on any of the individual bones when I weight paint. I do t...
when you're weight painting you're gonna click through the different vertex groups in this tab to see where all the weights have been assigned, from what i can tell the bones don't really matter much unless you're selecting them to auto assign, in which case i just go in and shift click everything in the hierarchy on the right
 river ingot
astral warren
I've ruled out animations, it's not animations, because another avatar with the ...
river ingot
astral warren
I've ruled out animations, it's not animations, because another avatar with the ...
nvm, I went through all the proxies, theres the speed you can multiply it by how fast he's walking but the duration would be on another animation thats not listed in sdk where I'm used to finding the proxies. I checked the controllers and couldnt find "walk" which is one of the proxies, or "run" or "strafe' so it may be on another controller folder I haven't gotten into yet, or they wouldn't exist.
placid trail
nocturne quiver
when you're weight painting you're gonna click through the different vertex grou...
Ight. I’ll check it out in the morrow
Or I’ll catch myself playing BG3
 pale pumice
placid trail
I can’t seem to click on any of the individual bones when I weight paint. I do t...
pale pumice
placid trail
I can’t seem to click on any of the individual bones when I weight paint. I do t...
Got an armature modifier on the mesh you've selected?
oh damn I was scrolled up, sorry.
 mental hamlet
Is there any way to shorten the physbone?

when I change the endpoint it just creates a new thing
pale pumice
It can only go as short as the actual bone is
river ingot
mental hamlet
Is there any way to shorten the physbone?
In blender, you can modify the bones length.
You can adjust the radius in unity..
mental hamlet
I see! thank you
nocturne quiver
update: i finally fixed the hands just now!!!
mental hamlet
mental hamlet
Is there any way to shorten the physbone?
I still need help with this if anyone can enlighten me in some way. I shortened the bones in Blender, they are now so short that they don't even leave the model. But imported in unity nothing changed? They are still super long for no reason
I understand correctly that the white line+radius are the grabbable parts in the game? So technically players can grab the "air" around my avatar if I don't shorten them no?


 fervent mantle
mental hamlet
I still need help with this if anyone can enlighten me in some way. I shortened ...
fervent mantle
mental hamlet
I still need help with this if anyone can enlighten me in some way. I shortened ...
did you turn off leaf bones in blender
mental hamlet
fervent mantle
did you turn off leaf bones in blender
no, I tried turning them off but then those specific bones won't animate anymore
the white line doesn't even appear if I uncheck it
fervent mantle
well you need at least two bones in a chain to add physbones
so i would either subdivide the ones you have or add a small bone at the root and reparent
that way you can turn off leaf bones and still have enough to animate
mental hamlet
Alright I will give that a try, thanks alot! 
 robust crescent
add tiny endlength its a free 'bone' to move stuff , when its just one (doesnt count as a transform)
way easier to find a radius that fits - then adding one blender

only one bone ends at the green arrow / middle ish of whatever its going to move
mental hamlet
I see! I will try both things and see what I prefer, but I still have two questions.
So the white lines (bones and radius) are the interactive parts in the game? And also couldn't I just add a physbone component to the chest bone and just put the Multi Child Type on ignore and add the rest to "Ignore Transforms" ?
 steady hinge
is there any way to fix this? i'd like to keep the skeleton connected


 limber tulip
Looks like the wrist is also weighted to the whole arm, try removing that influence
steady hinge
should i just make it the bottom half?
steady hinge
limber tulip
Looks like the wrist is also weighted to the whole arm, try removing that influe...
i tried just using the bottomw half, and now its a whole different kinda weird

ok so i found out the weight paint was suuuuper weird but i fixed the right side and it still looks strange
i was kinda trying to go for like a minecraft feel where it bends in the middle
could it be that i should lower the weight paint overall? cuz right now its one on the joints

if anyone wants to take a look at it,
 hasty cloud
i dont know why but when i try configuring the humanoid rig of my custom avatar in unity, it automatically deforms it. I remember when it didn't do that before, so idk if i did something wrong, or if i pressed something, but it just deforms it before i do anything
the first pic is the actual model, the second pic is right after i press "configure" in the rig tab


 arctic sundial
Well, the bones dont seem assigned right
It tries to display bones where they theoretically go
hasty cloud
yeah but even then, is it supposed to deform it like so?
arctic sundial
Assign the bones correctly into the slot
 balmy delta
steady hinge
balmy delta
steady hinge
there is no vertices that are actually able to bend
hasty cloud
i tried before, i didnt do all the bones, but the ones i assigned didnt have effect at all
hasty cloud
i see
steady hinge
balmy delta
there is no vertices that are actually able to bend
i assume this is also for the legs because they are static in vr chat, at this point i wouldn't even mind if it was like that, im just trying to fix the damn arms
 balmy delta
steady hinge
i assume this is also for the legs because they are static in vr chat, at this p...
balmy delta
steady hinge
i assume this is also for the legs because they are static in vr chat, at this p...
you would need extra vertices in the middle of the limb so it can actually bend there because rn all that arm is is just a solid square
 steady hinge
alright, i'll try and do research on how to add verticies, since the models directly imported from roblox, thanks!
balmy delta
steady hinge
alright, i'll try and do research on how to add verticies, since the models dire...
you can just import the r15 version of the body
arctic sundial
loop cut
steady hinge
arctic sundial
*loop cut*
the problem i had with that was it only made one dot

for some reason it didn't go around the arm
arctic sundial
Thats due to the weird topology
Try removing the triangular edges first so you have squares on all sides
Worst case go into xray mode, view straight and cut with knife (a for horizontal guide)
balmy delta
to be fair
roblox models are incredibly awful when it comes to an actual usable mesh
 quiet fern
also did you got rid of extra vertices while importing to blender? because there are some (which I noticed after a while)
balmy delta
none of the vertices are actually connected
arctic sundial
Ew
steady hinge
yeah i thought this would be super easy
balmy delta
no
steady hinge
but clearly not
balmy delta
every roblox model with bendable limbs use a mesh that was made from scratch
steady hinge
because currently, my only other option is a super buggy, unoptimized, mess that is an mmd model
like, suuuuuper bad
 balmy delta
the best you can do is make a very jank humanoid rig with no bendable limbs
robust crescent
2 cubes, merge at middle , it can now bend..somewhat (can remove the face that faces eachother, explaining in text  bleh)
bleh)
balmy delta
robust crescent
2 cubes, merge at middle , it can now bend..somewhat (can remove the face that f...
roblox meshes are broken into a bunch of random pieces because the vertices arent connected together so this wouldnt work too well either
steady hinge
yeah i wish there was an actual tutorial that wasn't just "Steal this mmd model and put your stuff over it!"
quiet fern
@steady hinge If you're fine with replacing body mesh with mine I can send you the files

extra vertices are deleted & edges are fixed
i forgot that the vertex groups are kinda messed up tho while I was tryin to make the rig humanoid ._.
steady hinge
yeah like i just wanted it to be semi simple
minecraft has it down with two optimized models that you just replace the skin for
quiet fern
welp, at least the plugin makes some good attempt at exporting r6 & r15
steady hinge
yeah, ig thats true
god i don't even know how to do the dege cutting jesus christ this is the second time i've had to scrap an entire model
😓
quiet fern
I've send you files on dm @steady hinge hope that'll help with next attempt
 queen granite
should i mention this here too? #avatar-quest message
since this is about rigging and bones i'm not sure
 faint cypress
Does anyone have the humanoid rig template armature?
 golden kernel
I'm curious about the same thing, I didn't see an updated optimal rig for fbt
steady hinge
im gonna semi try to salvage this, but how do i make a new dot on here?>
 robust crescent
golden kernel
I'm curious about the same thing, I didn't see an updated optimal rig for fbt
robust crescent
golden kernel
I'm curious about the same thing, I didn't see an updated optimal rig for fbt
you can always just grab it from mixamo , its pretty proportioned - i use it often to check how bad some of the avatars are X / Y bot , it works with fbt easy , otherwise this one is used often in here have no issues with that one either


mostly to avoid bendy legs gotto straighten em
golden kernel
robust crescent
This is super helpful, thank you so much!
steady hinge
steady hinge
im gonna semi try to salvage this, but how do i make a new dot on here?>
Sorry, i meant a vertice
cuz im trying to get rid of these damn lines, but idk how
 robust crescent
tab toggle edit / object mode, if you accidentally made a hole you can use fill - hit f after selecting (uv might be wierd)

 slow trout
have you tried just dissolving the edge
in edit mode click the edge dot or face you want to dissolve, right click then select dissolve

 steady hinge
slow trout
have you tried just dissolving the edge
steady hinge
slow trout
have you tried just dissolving the edge
it worked for a lotta the edges, except for the top for some reason!
 steady hinge
i tried just uploading it, and the body and legs work, but the arms just...?
 slow trout
steady hinge
it worked for a lotta the edges, except for the top for some reason!
slow trout
steady hinge
it worked for a lotta the edges, except for the top for some reason!
have you tried converting tris to quads as well?
can just click (alt J) in edit mode
slow trout
steady hinge
i tried just uploading it, and the body and legs work, but the arms just...?
is probably a bone issue, either redo them or check to see if the bones are parented right and also rotated right
And ik It's a bit harsh to say, but if you don't know know how to do that just look it up lol, can get most answers that way, I like this server tho since there's always little issues that can be hard to look up the answer for, but my best form of advice for avi editing and making, is try just looking up the issue first cause A, you might learn some cool new thing's, and B there tends to be videos on the common issue you may have so a visual guide can help a lot
I'm just saying this in hopes it helps ya in future issues

tis the thing I do lol
 patent ether
How should I rig my model because of the neck? ( The model isn't finished btw but i just wanna know what i should do for when it's finished )

 hasty cloud
does unity automatically assign weights to the rigged model or does it use the weight painting data of blender
 brazen island
2nd ofc.
balmy delta
patent ether
How should I rig my model because of the neck? ( The model isn't finished btw bu...
the 90 degree joint behind the head is also the head
patent ether
balmy delta
the 90 degree joint behind the head is also the head
ah ok thanks
steady hinge
slow trout
And ik It's a bit harsh to say, but if you don't know know how to do that just l...
yeah the only issue i run into, is looking up what i need because im still learning the terms but im trying to watch more videos
after semi just going the lazy route, the only real issue i have now is the head body moves way farther back then the head for some reason
 slow trout
steady hinge
yeah the only issue i run into, is looking up what i need because im still learn...
slow trout
steady hinge
yeah the only issue i run into, is looking up what i need because im still learn...
check out this channel

YouTube
Join my journey to pay for rent with 3D modeling
(this is my second channel btw)
0 Subscribers (10/10/2020)
1000 Subscribers (26/10/2020)
10000 Subscribers (15/10/2021)
20000 Subscribers (4/5/2023)
she makes really helpful new user vids for just getting started
slow trout
steady hinge
after semi just going the lazy route, the only real issue i have now is the head...
can either be two things, your camera pov isn't set up right, or the head mesh isn't weight painted properly
steady hinge
slow trout
can either be two things, your camera pov isn't set up right, or the head mesh i...
yeah i think i just need to mess with the pov because the head looks fine?
 steady hinge
yeah idk i've been messing with the view pov with barely any luck
 river ingot
steady hinge
yeah idk i've been messing with the view pov with barely any luck
river ingot
steady hinge
yeah idk i've been messing with the view pov with barely any luck
Looks okay to me. The arms are a little far from the body is hte only thing i see wrong with it..
balmy delta
Considering the fact none of it can actually bend I see nothing wrong with it
river ingot
pov..you could lower the dot to where the nose would be, or..below he glasses.
 fading verge
Is there a smart way to fix tears like this in Blender?
 brazen island
merge, fill, merge by distance
fading verge
I was just about to comment that I got it, but thank you for the help anyway. Hopefully someone else gets help from this aswell! 
 silent fulcrum
Should my models be in A pose or T pose, which is better to use?
hasty cloud
t-pose 100%
silent fulcrum
thanks
brazen island
@silent fulcrum a pose better for clothes modelling
silent fulcrum
brazen island
<@212369083117600769> a pose better for clothes modelling
??? Ok so, What is T pose going to be used for? Also i have to use T pose for clothing because of the addon I'm using.
hasty cloud
silent fulcrum
??? Ok so, What is T pose going to be used for? Also i have to use T pose for cl...
i said tpose since vrchat requires it for like trackings and stuff, but a pose would be better for clothing
silent fulcrum
hasty cloud
i said tpose since vrchat requires it for like trackings and stuff, but a pose w...
Ok, that helps thanks!
hasty cloud
np
brazen island
@silent fulcrum an A pose considered now more or less a standard for modelling stuff, so rigging is done in A pose as well since you cant change poses until the model is rigged🤔. unity/vrc does not require tpose, it can just enforce it, but A posed avatar can be uploaded just fine.
silent fulcrum
brazen island
<@212369083117600769> an A pose considered now more or less a standard for model...
Ok
brazen island
then again, a pose is better for cloth, so if its body made separately, body can be made and rigged first in t pose which is easier to work with, then reposed to an a to make cloth. so anything goes.
silent fulcrum
brazen island
then again, a pose is better for cloth, so if its body made separately, body can...
LOL ya'll killing me.
pale pumice
A pose is such a pain
 outer lance
t pose is so much easier for weight painting imo
hasty cloud
outer lance
t pose is so much easier for weight painting imo
agreed
however, a pose is better for shoulder weight painting tbh
 languid zealot
can anyone tell me the naming for a vrchat humanoid rig's hand bones? I'm having some trouble with only the index finger being bendable in gestures and my only guess is the naming
 balmy delta
languid zealot
can anyone tell me the naming for a vrchat humanoid rig's hand bones? I'm havin...
balmy delta
languid zealot
can anyone tell me the naming for a vrchat humanoid rig's hand bones? I'm havin...
The names dont entirely matter
Since in unity you put the bones in the slots when changing to humanoid rig
languid zealot
i've never seen any slots 😦
i import the rig, set it to humanoid, and nothing else appears ui-wise
languid zealot
balmy delta
The names dont entirely matter
.
balmy delta
languid zealot
i import the rig, set it to humanoid, and nothing else appears ui-wise
You click configure
languid zealot
oh my god thank you
balmy delta
Which asks you to save if you havent already
Then opens a menu for you to edit
 humble cedar
Hi, I have an issue with the rotation constraint used to create twist bones in the forearm. In the video, you can see the problem: it's locked on the Y-axis, but when moved, it also rotates and breaks when raising or lowering the hand. It works well in Blender applying the rotation constraint with the same parameters. I've tried searching forums, but I haven't found much information. Does anyone know how to fix this?
 slow trout
why are you using a rotation constraint on the hand? are you wanting more than one arm/hand kind of avatar?
slow trout
humble cedar
Hi, I have an issue with the rotation constraint used to create twist bones in t...

slow trout
slow trout
why are you using a rotation constraint on the hand? are you wanting more than o...
if not then just use a normal bone set up going from left arm-left elbow-left wrist and then each finger bone named respectfully
river ingot
languid zealot
can anyone tell me the naming for a vrchat humanoid rig's hand bones? I'm havin...
 river ingot
humble cedar
Hi, I have an issue with the rotation constraint used to create twist bones in t...
river ingot
humble cedar
Hi, I have an issue with the rotation constraint used to create twist bones in t...

Adjust the numbers accordingly for the hand constraints, they work great via unity too.
 weary kettle
(not my picture)

hi ive been tryihng to find
where this is for the past 10 min or so
and i cant find this page at all
brazen island
@weary kettle select model in assets - import settings (inspector, right panel) - rig - humanoid - configure
weary kettle
brazen island
<@412003238213320706> select model in assets - import settings (inspector, right...
thanks
weary kettle
brazen island
<@412003238213320706> select model in assets - import settings (inspector, right...
mmh i came back to this later because i was busy with other things. but i dont see any of that in the inspector panel
brazen island

 weary kettle
my model was never fbx to begin with
trying to make it fbx was just too complicated
my guess is the non prefab version is probaly in one of my folders so ill look this
hasty cloud
you know you can look up a tutorial on youtube...
weary kettle
hasty cloud
you know you can look up a tutorial on youtube...
thanks for the non useful response. what do you think i did for so long before asking. Im not dumb. i asked here because nothing the videos showed appeared on my screen
thats logic enough
when your research amounts to nothing. you ask others
hasty cloud
ur struggling on how to make a file fbx, just convert it or export it as an fbx
also sorry
hasty cloud
could be a rigging issue, im not the best at explaining it tho...
hasty cloud
i think i figured out why, the bones for your forearms r too long
The elbow joint isn't bending at the right spot, you can tell from your model that the joint is bending a bit higher into the upper arm
 loud barn
how would i go about rigging an avatar with four arms? I thought about parenting the main arms to the bottom arms but it ends up weighting oddly in pose mode, i want the main arms to move with the lower, any ideas what i might be doing wrong? I tried using both connected and offset but when i move the forearm bone it breaks the lower arms
 split wing
first time working with rigging anything really, just working with a few tutorials and a dream, so would this work? or have i missed something
sure hope i didn't (probably has)

 trim nexus
split wing
first time working with rigging anything really, just working with a few tutoria...
trim nexus
split wing
first time working with rigging anything really, just working with a few tutoria...
why are the legs all twisty
untwist
brazen island
@loud barn in unity you use rotation constraints on each and every bone from one set to another. pc only.
loud barn
brazen island
<@1064789634632122399> in unity you use rotation constraints on each and every b...
thank you!
river ingot
loud barn
how would i go about rigging an avatar with four arms? I thought about parenting...

The Character I am using is My OC Starlight but a little Chubbly version
mental hamlet
hey, if I put two chest colliders like this only 1 of the 2 capsules shows up when I paste them as Collider into my hair

did I do something wrong?
I thought when I make an empty game object under the Chest and put these two collider components they should work as one
brazen island
just make two objects. physbone references the object itself and grabs the first fitting component on it, my guess
mental hamlet
yeah I can make two objects but then they count as 2 colliders, and I try to not go over 8 since I want my avatar to be rated green still
but if there is no other way then I have to I guess!
brazen island
i mean two colliders is two colliders, its two object it needs to count collision with. if it was possible to evade thatd be a bug🤷♂️
mental hamlet
yeah for some reason I thought it could kinda work like the physbone itself where it has so many objects all in one if that makes sense
but okay thanks for the explanation!
 wise brook
Im having an issue In game where if i move my avis head her chest moves as well how do i fix that?
 whole furnace
Is there something about physbones that could cause the wrong parts of the mesh to move? Because I've double checked all my weight paints and everything is correct in blender.
split wing
okay so
after some messing around this HOPEFULLY looks good
but how do i unnasign those hair bones from being incorrectly connected to stuff like the jaw and eyes (and what to i do to impliment the physbones for that hair
 river ingot
whole furnace
Is there something about physbones that could cause the wrong parts of the mesh ...
river ingot
whole furnace
Is there something about physbones that could cause the wrong parts of the mesh ...
that would be weightpaintings fault
river ingot
wise brook
Im having an issue In game where if i move my avis head her chest moves as well ...
weightpainting
split wing
anyone know why my arms are doing this?

 arctic sundial
Whats unclear?
 azure cradle
in the rigging everything looks normal
I converted a pmx model to fbx
I don't f see it
sorry if it's japanese I'm also pissed why is it in japanese
arctic sundial
Aside from the fact that i cant read japanese, what about the neck?
azure cradle
that's the neck
arctic sundial
Hit apply AND re-dragged the fbx into your scene if you changed anything there?
 robust crescent
This fbx need to go back to blender , so many dummy bones names all wierd (cats can translate em)
azure cradle
robust crescent
This fbx need to go back to blender , so many dummy bones <:ratl:109002594508106...
how?
I don't know too much the Cats
robust crescent
probably some tutorial out there , need blender+cats version that works with whatever blender you going to use , import pmx or fbx into it, hit translate, 'fix' will remove all useless bones (rare cases it wont like it , not seen a pmx fail with it)
 arctic sundial
Jesus christ xD
robust crescent
pmxs like to have wierd bones straight up in blender, fix should remove em (blender 4.0 + cats likely fail) these are all useless
 arctic sundial
I cant even tell you what caused all your bones to make babies
I decimate manually so ye
Why does it have those though if theyre useless
azure cradle
robust crescent
pmxs like to have wierd bones straight up in blender, fix should remove em (blen...
does 3.6.2 Blender works?
arctic sundial
I use 3.6 with the dev version of cats, that works
 arctic sundial
azure cradle
arctic sundial
azure cradle
I swear today I'm not lucky

 arctic sundial
Looks alright as is. I assume the funky bones are zero weights bones
Maybe not join meshes
Your pick tho
azure cradle
I prefer not join meshes
arctic sundial
Connect bones could also give you a meh-moment
 arctic sundial
Check the bone hierarchy to make sure you wont get the same issue as before
Then export
 somber cliff
Can somebody help? I'm trying to attach this vroid tail to the hips of my character (it is originally connected to the head) but when I uploaded it to vrc, it still registered as being attached to his head. I don't think I did this right, in the picture I moved the tail to be under the hips...

I feel like I'm missing something.
azure cradle
arctic sundial
Check the bone hierarchy to make sure you wont get the same issue as before
It's fine now
but the thing is I don't know what I put in the viseme
even tho it's already translated
robust crescent
cats default when translated - then just create visemes , in unity set it default then auto detect it should input them all

before

after

(something like that, older cats/manually have different name like vrc.v_xxx)
split wing
so i think everything's mostly ready, but how do i get hair physbones set up? new to the whole rigging thing, so be patient with me
 gray cave
yall how do i fix this lol
im trying to weight paint fix the mesh issues but this happened, the armature is symmetrized properly but when i use it to rotate the mesh's arms, the mesh moves both arms from the same point. the mesh has a mirror modifier on it too, so im just more confused as to why it's doing this

nvm i think it just mapped the weight paint mirror weirdly, it fixes itself if i start adjusting the weight paint on the right side
 gray cave
ok new question : will a 4-fingered hand still work with finger tracking? or will this be very buggy
 river ingot
gray cave
ok new question : will a 4-fingered hand still work with finger tracking? or wil...
river ingot
gray cave
ok new question : will a 4-fingered hand still work with finger tracking? or wil...
I think someone said you could have 3 earlier.
river ingot
gray cave
nvm i think it just mapped the weight paint mirror weirdly, it fixes itself if i...
Looks like you have the left shoulder bone weighed to the left upper arm, AND right upper arm. That's the cause of that. The right lower arm/hand is probably weighed to something besides the right lower arm bone and tarsels etc. If you run through the vertic bone list on the right then it'll usually light up the vertices that are weighed to each bone as you go down the list. That will reveal what is messing up the right arm.

This is one of those little tricks that goes a really long way. Took me a while to figure this one out, but it comes in real handy when rigging - Hope it helps :)
Female Body Model Link:
https://www.youtube.com/watch?v=_XfvLpLyulI
If you enjoyed this video, please don't forget to like and subscribe!
You can find my entire Blender 2.8 Speed Tu...
That might help u speed up a bit.
gray cave
river ingot
That might help u speed up a bit.
thank you very much this is all very useful info :0 appreciate it
river ingot
split wing
so i think everything's mostly ready, but how do i get hair physbones set up? ne...
When you click on your avatar,

Click on add component, then type in phys bone and it'll show up..
split wing
river ingot
When you click on your avatar,
the mesh itself in the scene or in the asset viewer?
river ingot
I usually click on the mesh in the scene and it'll pull this up. Theres also the heirarchy which should do the same thing
split wing
alright, thanks, i'm not at my pc rn but i'll test when i get back
 half stirrup
split wing
so i think everything's mostly ready, but how do i get hair physbones set up? ne...
half stirrup
split wing
so i think everything's mostly ready, but how do i get hair physbones set up? ne...
I think you're better off looking for a tutorial but tldr:
Look for the hair root in your avatar hierarchy, click on it and in the inspector add component, pshy bone and from there you mess around with the settings. That's the simolest way
azure cradle
robust crescent
cats default when translated - then just create visemes , in unity set it defaul...
Thanks
 spark pollen
.
mental hamlet
My model had no hip bone for some reason so I made my own, is there an easy way to apply weightpainting to only a specific bone?
everything else is already weightpainted
 lost remnant
can anyone help me with rigging im new to making avatars and i cant understand rigging
 upper yoke
Has anyone made a guide or example for setting up FinalIK for digitigrade legs? (I've been fiddling with the stubbed version it for a few hours and haven't figured it out 😅 )
 hollow quartz
mental hamlet
My model had no hip bone for some reason so I made my own, is there an easy way ...
hollow quartz
mental hamlet
My model had no hip bone for some reason so I made my own, is there an easy way ...
That's usually how weightpainting works. Select the armature, then the geometry, then go to weight painting mode. Select the hip bone and paint the area that would normally be controlled by the hips
hollow quartz
mental hamlet
everything else is already weightpainted
a lot of things would be parented to a hip bone. I'm surprised your model didnt have one? Are you sure it wasn't super small?
did you do all the parenting?
pale pumice
upper yoke
Has anyone made a guide or example for setting up FinalIK for digitigrade legs? ...
Ooh I'm very curious if someone's made that work too. I'd bet you'd need the full version to do it though.
mental hamlet
hollow quartz
That's usually how weightpainting works. Select the armature, then the geometry,...
hey, Yeah I painted it myself but I wanted to know how to let Blender paint it automatically? I am sure I saw it somewhere in a video but I cannot find it anymore and the info on the internet just tells me how to do it for all the bones but not specific ones. And yeah the rig was super tiny
hollow quartz
You could paint with automatic weights but honestly you'd need to edit it yourself anyways
 crimson kernel
What am I supposed to do if their are no shoulders on a rig 

because uhh looks fine but nope..
 mental hamlet
hollow quartz
You could paint with automatic weights but honestly you'd need to edit it yourse...
mental hamlet
hollow quartz
You could paint with automatic weights but honestly you'd need to edit it yourse...
that's fine, I wanted to see how much different it would be compared to my own weightpaint. Do you know how to do that for a specific bone?
crimson kernel
I don't know what it wants from me T^T
fervent mantle
crimson kernel
I don't know what it wants from me T^T
you need shoulders, which you'll have to add and weight paint in blender
 river ingot
crimson kernel
What am I supposed to do if their are no shoulders on a rig <:vrcSkull:585749770...
river ingot
crimson kernel
What am I supposed to do if their are no shoulders on a rig <:vrcSkull:585749770...
extend a bone from upper arm towards neck, and name it shoulder heh..
in blender
fervent mantle
☝️
crimson kernel
river ingot
extend a bone from upper arm towards neck, and name it shoulder heh..
tysm
balmy delta
fervent mantle
you need shoulders, which you'll have to add and weight paint in blender
You dont necessarily need to weight paint
fervent mantle
balmy delta
You dont necessarily need to weight paint
I guess, its just gonna make your arm movement fucky if you lift your arms
balmy delta
fervent mantle
I guess, its just gonna make your arm movement fucky if you lift your arms
Not entirely
fervent mantle
They definitely help make for better movement
 balmy delta
Ye
upper yoke
pale pumice
Ooh I'm very curious if someone's made that work too. I'd bet you'd need the fu...
I sorta got it working. the tracking isn't 1:1 with the planti foot (the cubes), but I've also got more default looking tracking on other leg, and might be able to make it toggleable for FBT users. I'm using LimbIK component, which only has 3 bone slots and other IK components (FABRIK and CCD) can do an unlimited number of bones, but don't have roll control and require setting up rotation limits (which are going to be even harder to figure out without the editor gui :/ ). But to get the calf to bend, I'm copying rotations from the planti skeleton (I might try an aim constraint)
pale pumice
I need to download this and slow-mo it
huh this is actually pretty decent. there's a few parts where the joints move too far (e.g. knee when running) but overall it's good
huh it lags a little, is that normal with using FIK?
lost remnant
almost done
 river ingot
pale pumice
huh this is actually pretty decent. there's a few parts where the joints move t...
river ingot
pale pumice
huh this is actually pretty decent. there's a few parts where the joints move t...
you can put constraints on the bone movements in the rigging section
upper yoke
river ingot
you can put constraints on the bone movements in the rigging section
I haven't tried that yet because the problem is the digi bones actually moving too far, not the planti ones, and the digibones don't move in the mechanim avatar editor.
river ingot
upper yoke
I haven't tried that yet because the problem is the digi bones actually moving t...
If you put constraints into the fbx via blender, then import to unity, they won't import with the fbx Ive heard. Your using some items I've never heard of before on here so your on a higher level than the average creator on here. There is one person who I know is college educated enough to answer such a question, he may be on another section on this channel, Sacred. He hasnt been on this channel lately but he's still around somewhere.
 keen fulcrum
anyone know how to fix keyframing rotation on humanoid rig is not supported?
river ingot
I had trouble with that too, and figured it out this year. The best trick is to put constraints on the rigging for the shoulder so they don't go too far down, and too far up. If you move your arm, you can tell how far up and down you can move your arm and modify the numbers accordingly.
upper yoke
river ingot
If you put constraints into the fbx via blender, then import to unity, they won'...
Yeah, Blender's constraints & Unity's don't have a lot of overlap. Even Blender's rotation, position, scale, and look at constraints behave really differently. I'm just setting up the constraints in Unity for this.
pale pumice
river ingot
you can put constraints on the bone movements in the rigging section
yeah but only the humanoid ones, which isn't what looks like it moves too much
Blender's constraints are really nice. but they wont' go into Unity, where all you get is really basic stuff, unfortunately.
 lost remnant
fervent mantle
https://tenor.com/view/rogered-gif-10809167
lost remnant
fervent mantle
https://tenor.com/view/rogered-gif-10809167
roger roger

 tender garden
hey , ive been trying to rig this clothing asset so i can put it on my avatar but the bones from the arms keep affecting parts of the cloak near the chest, does anyone know how to fix that?

 turbid zodiac
tender garden
hey , ive been trying to rig this clothing asset so i can put it on my avatar bu...
turbid zodiac
tender garden
hey , ive been trying to rig this clothing asset so i can put it on my avatar bu...
You'll need to do some weight painting! Have you done it before?
tender garden
nope , this is my first time rigging anything
i managed to get it to only attach to the right parts now but now physbones break it completely
turbid zodiac
Usually when you rig something, you'll have automatic weights set based on how far it is from the bones
Weight painting is just refining what's been done
tender garden
yea i used parent with envelope weights
turbid zodiac
Expect pain and confusion throughout the process, but there are lots of guides that can help get the basics down
I'm still learning this, it can sometimes be fun but this is definitely my least favorite part of modeling
tender garden
yea my brain is already having a stroke
nothing in my thousand hours of unity could have prepared me for this .-.
turbid zodiac
Lmao get ready to spend hours refining the weight painting
💡 Download The FREE GameDev Tools Here: 👉 https://buvesa.com/free
✔️ Free GameDev E-book
✔️ Free Game Design Document
✔️ Free Platformer Course (UE5)
▬▬▬▬▬▬▬▬▬▬▬▬▬▬▬▬▬▬▬▬▬▬▬▬▬
🏆 Join My Premium UE5 Course (The Unreal Vault) 🏆
👉 Link: https://buvesa.com/course
🗸 Full GameDev proces
🗸 Level design
🗸 Boss Fights
▬▬▬▬▬▬▬▬▬▬▬▬▬▬▬▬▬▬▬▬▬▬▬▬▬
📱 ...
The blender documentation's good to look at as well
tender garden
oh god this is gonna be awful lmao
turbid zodiac
To make things easier, you can go into edit mode and hide certain parts
river ingot
tender garden
hey , ive been trying to rig this clothing asset so i can put it on my avatar bu...
I advise adjusting the rigging settings for the arm to limit them going too far against the body etc. 2. It's better if the chest is not weighed with the arm, and to let the arm rather hide inside the chest when brought down to the avatars side. 3. check the shoulders too, sometimes their part of that contraption of weightpainting there.
pale pumice
tender garden
oh god this is gonna be awful lmao
very 🙂
tender garden
(ended up giving up because the entire vrchat sdk died so hard every single one of my 80+ projects can no longer upload)
 robust flare
Does anyone have insight on how to fix the fingers rolling like this?

 hybrid lion
Looks potentially like a bone roll issue if it's not zeroed out before exporting the fbx into Unity. I believe that can sometimes cause issues with the IK as it rotates bones into the "expected" position.
Check in blender if you can. If it's a non-zero value of considerable size, that might be it.
 vestal condor
so watching videos on weight painting and most of them showing them move the bones as they work to see results as they go.
if I do that, how do I put it back to tpose
hybrid lion
Aren't they usually in a combination of pose mode and weight painting mode? If you end pose mode it should return back to the rest pose (which ideally would be your T or A pose)
vestal condor
end pose mode with cats?
robust flare
hybrid lion
Looks potentially like a bone roll issue if it's not zeroed out before exporting...
They are zero'd. I'm guessing it's the rest position of the hands that need adjustment.
Appreciate the response.
slow trout
I checked the weight paint in blender and everything seems to be fine, but in unity it's stretched out as if it isn't weight painted?
 slow trout
nvm, I figured it out, the new mesh I fixed got parented to all the other blend shapes somehow so I just propagated the finger and it's fixed now lol

river ingot
robust flare
Appreciate the response.
It could be the animation/idle proxy. You can adjust the angle that the fingers/bones will be pointing on those, then drop them into the proper slots in the bottom of the avatar descriptor in unity.
vestal condor
I remember seeing this in a video and I cant find it now. how do you redo automatic weights for specific bones?
hasty cloud
if i were to mirror a model of a wing with its armature all bone weighted in blender, how would i do that... cuz i just cannot remember how..
hasty cloud
tender garden
yea i used parent with envelope weights
why would you...
tender garden
its easier
hasty cloud
may i introduce u to automatic weight?
hasty cloud
interesting, it usually works like a charm
but at least we both know how painfull it is to weight paint
fervent mantle
So for some reason whenever i try to clean up weight painting on my model it does this, I try to clear some weight on one side it adds to the other and doesn't clear the side i need it to, I have no modifiers other than armature


nvm I fixed by adding it to a new project
river ingot
vestal condor
I remember seeing this in a video and I cant find it now. how do you redo automa...

Hi everyone! In about 10 seconds you'll understand everything you need to know about Blender 2.8's automatic weight paint feature!
If you enjoyed this video, please don't forget to like and subscribe for more content!
You can find my entire Blender 2.8 Speed Tutorial series playlist here:
https://www.youtube.com/watch?v=f6vgICNCVxQ&list=PLZpD...
 thorn wasp
Should neck bones be connected to chest bones, or can they be unattached?
What's the best way to prevent chest bones shrinking downwards?
 solid otter
does anyone know if metaballs can work on a model? :0
https://www.youtube.com/watch?v=kuLUqNNlN4g
like the effect thats done here
wanted my avatar to have clouds, or if theres a way to make rig clouds into jiggling with physbones?
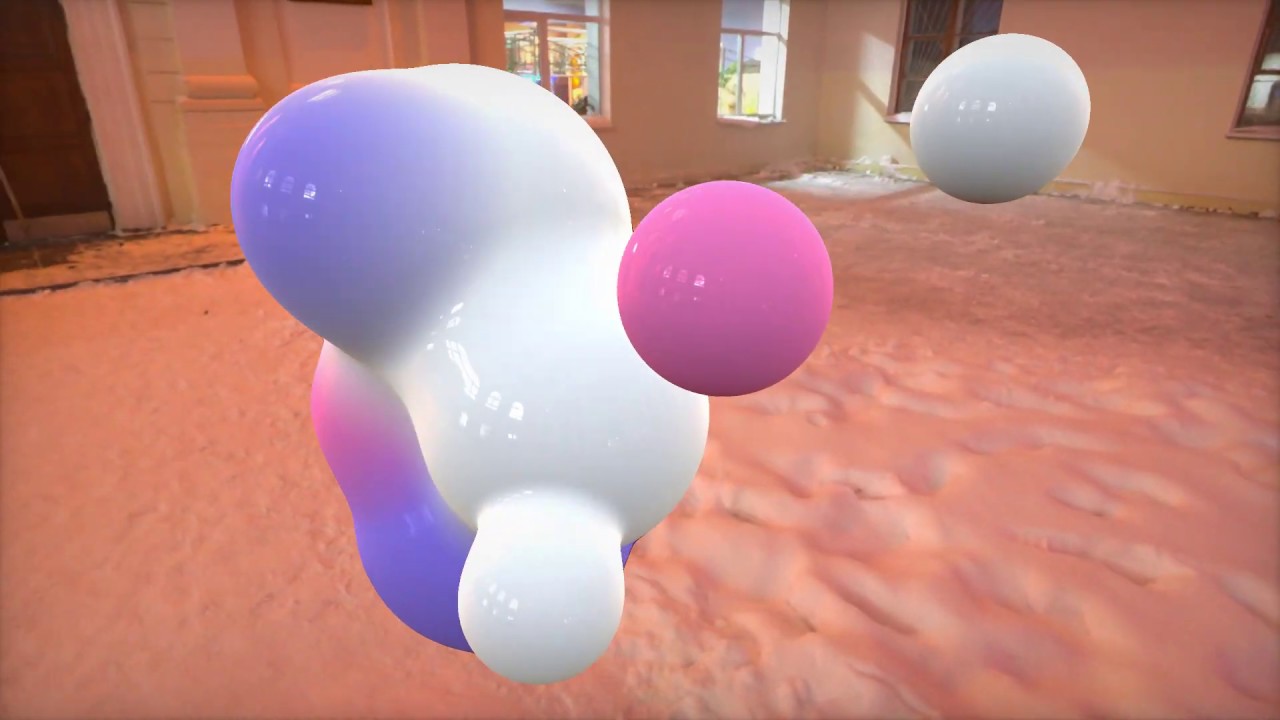
https://github.com/ya7gisa0/Unity-Metaballs
https://github.com/ya7gisa0/Unity-Raymarching-Android
Feel free to modify my code for your projects. Happy coding!
not sure if anyone got an idea for that, prolly would be a way better choice tho
river ingot
solid otter
does anyone know if metaballs can work on a model? :0
https://www.youtube.com/wa...
I haven't seen programming for vrchat/unity for that yet. you could add jiggling to it, sure, but it would then require a more complex animation to put together where you would maybe use blender to form different versions of the ball to make them conjoined etc etc..
solid otter
river ingot
I haven't seen programming for vrchat/unity for that yet. you could add jiggling...
oo do you know a way to make standalone objects jiggle in place then? :0
these are my refs n i have no idea how to add jiggle physics to em that would also make sure that the 1st one won't clip through its container

 river ingot
a single bone, plus an end bone (end bone can be real small) Then apply physbone to the main bone.
You could also apply collliders to the two bones so they'll have effects when they collide..
solid otter
o dayum is it that simple
is there a special pattern I gotta weight paint or would that just be the surrounding bone areas?
solid otter
river ingot
You could also apply collliders to the two bones so they'll have effects when th...
colliders so that nothing clips?
solid otter
oo gotcha
thanks👌
 slow bone
Hello, this is my first time using Unity and I don't know what's going on here. I didn't make the T pose for this model, but I thought it would work anyway, can someone help me?
I fixed a bit the last one but the fingers are the real problem
I think I just have to make her in T pose but I want to know if there is another option
 cold cliff
I'm having a situation where in desktop mode my avatar's eyes are fine, but in VR mode, one eye is fine but the other points BACKWARDS, into my head (but still rotates)........ any ideas?
cold cliff
I messed with settings and now the second eye is upside-down instead of backwards.....
ok I just kept messing with hard-coded offsets and it's now just magically working. whatever
river ingot
slow bone
Hello, this is my first time using Unity and I don't know what's going on here. ...
That's not the scene for t-pose, thats teh rigging screen where it lets you test the bone movements and adjust the constraints on how far the bones will move etc. when u hit save/done then it'll return to the normal screen that shows it in t-pose. The tab on the left "mapping" on the other hand will go to the bone labeling scene that should be in tpose..and has a "force t-pose" button u can press.
river ingot
cold cliff
I'm having a situation where in desktop mode my avatar's eyes are fine, but in V...
in avatar descriptor you can individually adjust the eyes so they function properly.
slow bone
river ingot
That's not the scene for t-pose, thats teh rigging screen where it lets you test...
I know that, I just said my model isn't in T pose on default
river ingot
you adjust that in blender
 heavy pendant
I’ve never rigged anything before and drew out how I was going to rig my avatar model, does anyone think this will be ok?
 balmy delta
heavy pendant
I’ve never rigged anything before and drew out how I was going to rig my avatar ...
balmy delta
heavy pendant
I’ve never rigged anything before and drew out how I was going to rig my avatar ...
it will yell at you that its not in tpose but its alright
the main issue is where the view point will be as if its at the avatar's eyes then your arms will be constantly up in the air
heavy pendant
the viewpoint will be lower, will that be an issue for the head?
balmy delta
not at all
heavy pendant
ok! thank you! this is currently what i rigged is it alright if a little bit of it goes out of the model?

 balmy delta
why is the orange dot at the neck
heavy pendant
i dont know, thats where i originaly started extruding
is there a way to duplicate the bones to the other side?
balmy delta
you need the bones to already exist and then just symmetrise
heavy pendant
how do i symmetrise?
heavy pendant
Nvm I got it!
river ingot

 frank jetty
Does VrCC handle rigs from maya at all? Or should I brush off blender?
pale pumice
heavy pendant
i dont know, thats where i originaly started extruding
The orange dot is the object's origin - it should be at 0,0,0 for avatars - you'll want to select the Armature object (all of them really) and ctrl+a, apply all transforms
pale pumice
frank jetty
Does VrCC handle rigs from maya at all? Or should I brush off blender?
I know people who work in maya, it should be fine if you can export an FBX with the coordinate system Unity requires (+Y up)
cold cliff
river ingot
in avatar descriptor you can individually adjust the eyes so they function prope...
I did, and the result worked right in the editor, and in desktop mode, but one of the eyes would flip only in VR
frank jetty
pale pumice
I know people who work in maya, it should be fine if you can export an FBX with ...
Awesome sounds good tyty!
fading verge
Does anyone know the process of attaching clothes to avatars within blender? Unity has tools made by the wonderful community that helps to automatically assign the clothing bones to the avatar bones. Is there an equivalent in Blender? I imported the .fbx of my character and clothes but I'm stuck at how to actually attach them.
arctic sundial
Have a go with CATS blender plugin then. However, do read the versioning tips as for example it aint ready for blender 4 yet
river ingot
fading verge
Does anyone know the process of attaching clothes to avatars within blender? Uni...
Do you mean the part where you merge the clothes mesh with the body mesh via cats? Or the part where you would weight paint the clothes to the body so the clothes moves along with the body movements? Cats plugin has the merging options on it that help for that part. The weight painting, theres a trick to copying the weightpaints of the body vertices that the clothes will be covering up, and applying them to the clothes.
fading verge
Ooo thank you both @arctic sundial @river ingot ! I think the CATS plugin is just what I needed. Cheers~~
 sly mirage

help pls @_@ i need a straigh forward instructions or tutorial on how to get rig of animation data animations rigs and get all meshs into 1 body mesh under the base rig. (not the animation rig. currently this blend has a animation rig a and the base bone armarture is circled blue n red up top i need all the meshs under that that rig. and the red and orange bad rig completely gone
balmy delta
you go and add the bone in the menu below the second image
 spring pendant
Anyone know how to fix this?


 river ingot
yah, go to the drop down menu section to the bottom of the green red body. Then in that section, it will show the parts in RED that need to be fixed. There is a way to click on those particular drop down menus for each particular bone, then with your full attention, you must master the ability of scrolling down the list of bones that comes with your uploaded avatar, and select the one that matches the words on the left. Some times we name our bones differently than whats on the left, so you can edit the name of your bones to make it simplier. Or you can stick with step 1.
 balmy vapor
The bones are not aligned with the mesh, causing deformation issues. How to fix properly?
pale pumice
balmy vapor
The bones are not aligned with the mesh, causing deformation issues. How to fix ...
edit armature, re-align bones?
not quite sure if it needs to be more than that
balmy vapor
pale pumice
edit armature, re-align bones?
ok but the bones are literally like... the foreland.L is on pny.L. as if the weight painting was set to the wrong bones almost.
you know anyone who can fix this?
pale pumice
not quite sure I understand what's wrong yet?
you can certainly rename vertex groups on the mesh if they're named wrong
i.e. they match to bones by name
 golden bane
river ingot
yah, go to the drop down menu section to the bottom of the green red body. Then ...
golden bane
river ingot
yah, go to the drop down menu section to the bottom of the green red body. Then ...
I've already done that. Obviously I wouldn't have been able to test the model in VRC without the missing bones being resolved. But unless it's normal for one's arm to grow out of one's head, something is still bugged.
 stiff rover
 river ingot
balmy vapor
ok but the bones are literally like... the foreland.L is on pny.L. as if the wei...
river ingot
balmy vapor
ok but the bones are literally like... the foreland.L is on pny.L. as if the wei...
That sounds like it would require automated weight painting, and or a complete rework of the weightpainting for each bone. There are lots of people on here who offer comissions who can fix that..
 amber cosmos
is there a way to get more detailed information on this error? i tried moving the hip bone in line with the upper legs per Kung's 2020 fbt video but the error message persists
 pale pumice
amber cosmos
is there a way to get more detailed information on this error? i tried moving th...
pale pumice
amber cosmos
is there a way to get more detailed information on this error? i tried moving th...
is your hip bone upside-down? Maybe share a pic of your armature?
amber cosmos
pale pumice
is your hip bone upside-down? Maybe share a pic of your armature?
even though the error message still says the angle is 0.6, moving the hip bone back fixed the problem in game so i suppose alls well that ends well
amber cosmos
the armature is a little bit.... different than most
ive looked into why its like this and its because it was made in a program that doesnt work like blender and i would have to redo a whole bunch of stuff from scratch to convert it to a normal looking armature, so i just deal with this as best i can
left images is the hip spine and top legs isolated, right is the armature as a whole

 pale pumice
what fun.
lost remnant
amber cosmos
the armature is a little bit.... different than most
ive looked into why its li...
Its like the droid I got 💀
amber cosmos
from what i was able to learn its because it was made with a program that does things that blender doesnt support, but at the same time unity has no problem with it
if i want to make it work in blender idhave to break and redo all the animations and components that use the armature as is
so far its less work to just deal with the wierd bones whenver something comes up in blender
pale pumice
Do you know which program?
amber cosmos
it says Maya
https://projects.blender.org/blender/blender-addons/issues/53620#1225926
this was the thread i found that seems to provide a good explanation of whats going on

Blender Projects
This has been there for a very long time. Whenever importing FBX with skeleton/armature from other apps, many times It's completely screwed - bones are rotated in wrong directions and rotations are wrong. Looks like coordinate systems are not converted correctly.
In this case - perfectly normal...
pale pumice
yeah that's what I figured you'd say - I've seen this before but didn't connect things
amber cosmos
Maya/FBX bone is always displayed connecting two bone joints. In other words, the Maya visual of the bone segment is not dependent on the bone/joint local axis orientation or bone scaling in any way. It's basically just an arrow pointing to a child joint.
Blender always displays bone segments towards the +Y local bone axis.
this is helpful at least in making sense of the madness
pale pumice
yeah
amber cosmos
apparently some guy made a tool to fix it but im hesitant to mess around
pale pumice
it's really silly, this stuff should just work these days, but here we are
amber cosmos

Boosty.to
New update for Blender Next with many fixed bugs and Spline IK support
its 14 dollars
id be more willing to spend money on it if i was confident id know what to do with it when i had it but i dont understand this at all so ill wait
pale pumice
yep, agreed
amber cosmos
idk the documentation seems pretty confident that it makes it easy im gonna put a pin in it
or idk if it's documentation
who knows
the blurb on his blog suggests its as simple as importing it and then exporting it
pale pumice
it ought to be that simple, yeah
(based on my understanding of the problem)
Blender was SO young the last time I worked with Maya at all
amber cosmos
maybe ill take one for the team and buy it hehe
amber cosmos
unrelated question
this avatar (im using a schematic becasue we saw what the armature looks like in blender)
has two physbones components for thigh jiggle. and thats neat! but it's worth not two physbone components neat.
i assume it needs two physbone components because each thigh bone is connected to a player controlled bone
but is there a clever way i can parent these into another component, or are they off to the chopping block?

like maybe i could have a unified jiggle bone and then put parent constraints on the the two thigh bones
pale pumice
I suspect that'd make them move weird. Though you could try making the root bone immobile with all of the curve options in the physbone component
 shrewd trout
Hi, so I'm new to avatar creation and I had a question about the facial rigging I haven't been able to find an answer to. I've always heard that bone/joint-based facial rigs are preferred in games, but VRC only uses blendshapes, right? Is there a reason for that? Is it more performant to use blendshapes over joints now for expressions and visemes?
pale pumice
best you can get in vrchat is jawbone movement when speaking
can't really answer the rest
shrewd trout
pale pumice
can't really answer the rest
No, that's helpful! Thank you. I didn't know if bones were even an option from the documentation and I prefer working with blendshapes, anyway.
fervent mantle
shrewd trout
Hi, so I'm new to avatar creation and I had a question about the facial rigging ...
Technically you can animate all of your face properties with a facial rig and use that with viseme parameters for talking and animate facial expressions as you normally would just using bones, if done right it can help lower avatar size
 marble echo
hey does anyone know how to parent two different rigs? wanting to attach a bell i rigged to a avatar in blender
marble echo

im thinking that attaching it to the chest bone is prob the best way to go but i dont know how to parent the two things together
shrewd trout
fervent mantle
Technically you can animate all of your face properties with a facial rig and us...
It's kind of the same way game characters and Metahumans work, right? I'm not at all familiar with the process, so I'm missing steps between "skin rig/make shapes" and "bones drive visemes" haha! I'm gonna look into it. Thank you!!
arctic sundial
marble echo
im thinking that attaching it to the chest bone is prob the best way to go but i...
Ctrl j to "join" armatures (make sure your transforms are zeroed out and that you join the bell to the avatar, not the other way around) then set the parent bone from the avi rig to the bell one and dont forget to set the armature modifier to the avatar now as there is no longer a standalone bell armature.
 hot turtle
I'm having some problem with my impostor, it looks like every single separation (arm and forearm for example, that are loose on the impostor as well other members) are "down sized" for a single pixel, looks like every bone is down sized to 0.1 and you can only see a pixel or every arm/leg/head/body moving
for some reason the avatar tail haven't this problem
was something like it reported before?
lol

 scenic cliff
so I was referred here and will just post the same message in hopes someone can help: so I am currently trying to learn how to weight paint, and I've weight painted my avatars hands about 4 times and they continuously look terrible in game. What exactly am I doing wrong? I'll just post what one finger looks like since I dont wanna spam with multiple pics
 balmy delta
Theres not exactly a right or wrong way to weightpaint
But you can try this video

I've been meaning to update this video for a very VERY long time. But, we're finally here. Everything you need to know in order to start painting weight layers onto your character!!! Hope it helps :)
Female Body Model Link:
https://www.youtube.com/watch?v=_XfvLpLyulI
You can find my entire Blender 2.8 Speed Tutorial series here:
https://www....
river ingot
scenic cliff
so I was referred here and will just post the same message in hopes someone can ...
The bones could be edited, and moved around so their directly in the middle of the fingers to start. The mesh of the hand looks a bit jagged on a few fingers. you may need to reset them via pose mode, then when they look straight, set as default pose. 3.) You could resculpt the fingers a little bit to make them straighter too, like the ring finger maybe. Or just pull and tug via edit mode on the vertices. 4.)The root of each finger is too far beyond the root of the fingers. They should be aligned with the base of each finger, not so far into the palm.
patent ether
Dose anyone know how i can rig my model avatar becuse of how the neck works?

 balmy delta
patent ether
Dose anyone know how i can rig my model avatar becuse of how the neck works?
balmy delta
patent ether
Dose anyone know how i can rig my model avatar becuse of how the neck works?
the horizontal neck piece is part of the head
 silver hawk
I'm having some issues with my Avatars eyes, i thought i added the bones correctly but they do not move as i expected in unity :,)
I have not messed around with getting all eyes to move (That's another thing i gotta find out lmao) because i just want to get one pair to work for now..
Here's how it's set up rn
 patent ether
balmy delta
the horizontal neck piece is part of the head
patent ether
balmy delta
the horizontal neck piece is part of the head
Ok but then how am i suppose to rig that?
balmy delta
patent ether
Ok but then how am i suppose to rig that?
just put a head bone like normal then weightpaint it to that bone
patent ether
balmy delta
just put a head bone like normal then weightpaint it to that bone
mmm ok ty
 warped flower
does inverse kinematics work with vrchat?
 fierce rose
Couldn't move your limbs ingame without it
warped flower
I meant, if adding my own inverse kinematics will hold the same affects in vrchat?
I'd appreciate your candor and patience with me
pale pumice
warped flower
I meant, if adding my own inverse kinematics will hold the same affects in vrcha...
You can use Final IK in Unity, but if you're thinking of doing stuff with IK in Blender, then nope.
vestal condor
is there a way to move weights from a bone to it's parent? I want to delete bones that aren't necessary.
arctic sundial
CATS has a button to do exactly that
warped flower
pale pumice
You can use Final IK in Unity, but if you're thinking of doing stuff with IK in ...
Thank you!
I was going to work on some ik in blender, I see that’s a no, have a good one!
warped flower
arctic sundial
CATS has a button to do exactly that
Cats isn’t updated to 4.0 yet sadly
brazen island
still to find out what usefull for us been added in 3-4 blenders
warped flower
vestal condor
is there a way to move weights from a bone to it's parent? I want to delete bone...
There is, I reckon Royal Skies may have a plug in or a tutorial for it, his tutorials are super straightforward
brazen island
only thing i found is unintuitive modifier and geometry nodes search in 4.0
warped flower
Yea, geometry nodes can be quite useful though, especially with the repeating zones
arctic sundial
warped flower
Cats isn’t updated to 4.0 yet sadly
Why ping me for this comment? Maybe the guy who asked isnt using blender 4 🤔🤔🤔
warped flower
vestal condor
is there a way to move weights from a bone to it's parent? I want to delete bone...
Yes you can!
This is one of those little tricks that goes a really long way. Took me a while to figure this one out, but it comes in real handy when rigging - Hope it helps :)
Female Body Model Link:
https://www.youtube.com/watch?v=_XfvLpLyulI
If you enjoyed this video, please don't forget to like and subscribe!
You can find my entire Blender 2.8 Speed Tu...

Blender Stack Exchange
I have an armature with a lot of bones that each have some weight paint on a part part of the body, I want to delete pretty much all the bones and transfer their weight to their parent bone.
I cant...
warped flower
arctic sundial
Why ping me for this comment? Maybe the guy who asked isnt using blender 4 🤔🤔�...
….. so anyways
warped flower
vestal condor
is there a way to move weights from a bone to it's parent? I want to delete bone...
There’s a couple ways you can go about it
The cats plugin is certainly recommended and relevant towards avatar development within vrchat’s standard workflow
https://github.com/absolute-quantum/cats-blender-plugin
This should be the plug in link

GitHub
:smiley_cat: A tool designed to shorten steps needed to import and optimize models into VRChat. Compatible models are: MMD, XNALara, Mixamo, DAZ/Poser, Blender Rigify, Sims 2, Motion Builder, 3DS M...
To use the plugin, simply download it and install it into your Blender installation then, open up Blender and go to the Add-ons tab, it should be under the edit in the top left, and select preferences. Under the Import-Export section, you should see an entry for the Cat Blender Plugin, enable the plugin and restart Blender!
If you can’t find it in your preferences, you can also search it
astral warren
I noticed if you set your hips to "Armature" in bone config instead of your real hips, it doesn't seem to create any problem with animating your avatar - are there any downsides to this?
fading verge
I was re rigging this skirt to make it have less bones, but I mess up somewhere and now one part of the skirt trim is not getting picked up when I move the bones
Never mind! I just didn't expand the weight painting far enough

 balmy vapor
what to do when multiple bones in a tail happens to be in same place?
 drowsy plinth
Yo, stupid question time. Google is failing me hard on this one. Is it possible to display the values the game sees for GestureLeft/Right and GestureLeft/RightWeight from my Index controllers in Unity?
I'm having a weird issue where some of my blend-trees based on the left/right weight values are not behaving as expected, and it would be really useful to see what numbers the engine is seeing in real time to troubleshoot
 simple verge
not sure if this is the right channel to ask, but i have a character that has animation recorded for it using an avatar, and while on a human it looks fine, as the character the head is turned to one side a bit. can't figure out why! there's some sliders in avatar configure to adjust things like how the neck is turned, but none of this seems to actually affect it.
drowsy plinth
brazen island
<@207651338664804352> radial menu - debug console
thanks, i'll give that a shot. Suggestions on which channel i should bring any follow ups on this subject to?
brazen island
@drowsy plinth you can always use #avatar-help for any avatar creation questions
drowsy plinth
thanks!
 frank palm
How does one make an avatar that should move robotically? It needs a chest bone but the chest bone should not move any of it's parts. Since Unity's Humanoid Rig requires to have a chest bone I can't just simply make a spine that is parented directly to the shoulders.
 balmy delta
just dont add weight painting to it
or do the opposite and make both the spine and chest share an identical weightpaint
 rare moon
frank palm
How does one make an avatar that should move robotically? It needs a chest bone ...
rare moon
frank palm
How does one make an avatar that should move robotically? It needs a chest bone ...
you don't have to weight paint it, but beware that the bone above it will be moved from that transform's position. If you do not want a chest bone, i would disconnect the neck bone from the chest bone (keep them parented, just not connected) and move the chest bone to the exact same position as the neck bone.
frank palm
rare moon
you don't have to weight paint it, but beware that the bone above it will be mov...
Thank you. The disconnection and a bone in the same position did the trick. 👏
patent ether
Dose anyone know a really good tutorial on how to rig a vr chat avatar?
 vague dagger
yeah sure
patent ether
brazen island
<@817056763429257236> take mixamo, fix the rest
but dosen't the model need a rig for mixamo to work?
brazen island
@patent ether no, it rigs itself any humanoid
theres also accurig but mixamos rig itself is more vrc compatible
patent ether
brazen island
theres also accurig but mixamos rig itself is more vrc compatible
allright i'll try it
@brazen island and you said I didn't need a rig....
 brazen island
you dont. maybe if you already have an aramature you need to remove it first
patent ether
brazen island
you dont. maybe if you already have an aramature you need to remove it first
well I just checked and it dosen't
brazen island
patent ether
well I just checked and it dosen't
huh guess hevc cannot be embedded?
patent ether
brazen island
How is this suppose to help?
brazen island
I honestly dont know how to answer to that. If rigging an armatureless model in one minute doesnt help, I have nothing.
patent ether
brazen island
I honestly dont know how to answer to that. If rigging an armatureless model in ...
all you did was show a model in belnder and then put it into mixamo....
patent ether
brazen island
and you want what
To know what to do???
balmy vapor
how come vrchat needs a chest bone but not a spine bone?
balmy vapor
im confused then
brazen island

thats without the upper chest. fingers are optional everything else is not
uh, feet/toes probly optional as well
 past bay
I'm getting bowing legs and I've figured out it is because my knees and legs and slightly not flat, how would I flatten them?


they are pointed slightly inward

causes my legs ingame to do this

the knee also decides to lock out if I go to any side

 atomic temple
That's awesome
brazen island
bone roll
past bay
brazen island
bone roll
Where can I find that?
brazen island
"blender bone roll" in google, its accesible from at least two places
past bay
brazen island
"blender bone roll" in google, its accesible from at least two places
Alright, thank you for your help
past bay
brazen island
"blender bone roll" in google, its accesible from at least two places
I did that and the problem still persists
Do you have any other fixes?
brazen island
it is on zero now?
past bay
brazen island
it is on zero now?
yes
 leaden swan
i am trying to add bones to the beak on my penguin avatar but for the life of me i cant get it to work properly can someone help?
fading verge
Need some help with this guy, please. Everything seems to look right but I ain't sure what to do.


 balmy delta
fading verge
Need some help with this guy, please. Everything *seems* to look right but I ain...
balmy delta
fading verge
Need some help with this guy, please. Everything *seems* to look right but I ain...
drag in a new fbx
 dusty heart
The Mesh that is selected doesn't move with the arm and I don't know how to attach it, Can someone help me.
The mesh does not have its own rigg and it is apart of the body mesh, its just not assigned to a bone
 arctic sundial
Weight paint it to the lower arm.
 fringe knoll
Hello, I was hoping someone would have some input on this; im trying to add some physbones to these headwings so I added 2 bones in blender and weight painted the bones to the mesh. in pose mode in blender the wing's mesh moves with each of the bones as intended but when i exported it to unity and add a physbone script there is no motion at all. did i miss a step in blender?
brazen island
move the bone outside of playmode. mesh moves - should work
fringe knoll
brazen island
move the bone outside of playmode. mesh moves - should work
I figured it out, forgot sometimes physbones are weird and if you dont add an end point it thinks the length of the bone is 0. i just created and empty game object, positioned it at the end of the bone then parented it to each bone.
brazen island
theres end point length parameter or smth for such cases. ye, for unity bone is only its position/rotation, it has no idea about its length unless theres a child
 harsh cloak
Hm.. Say i'm trying to rig up some animations to control bones positions, and i've got it in Gestures with a proper layer mask
why would a blend tree not be able to move said bones in play mode even if individually playing the animations works when not using a blend tree or setting the params
brazen island
is it generic (non humanoid) bones
harsh cloak
no
specifically, i'm trying to set up a ventriloquism system using a fake head bone
said fake bone is what i've set as the "head" bone for the model. there is a duplicate which houses the model weights for the head and is rotation-constrained to the fake headbone (which is the voice source)
theoretically it should be possible to just move this bone using a gesture FX animator controller layer
 sleek galleon

 winter heart
any tips to make the eyes not clip through the face? I want this avatar to have eye movement but even slightly turning the eye bones causes clipping

 mental hamlet
Hey, since a few weeks I am stuck with a problem about hand gestures.
I want to have face expressions connected to my right hand gestures, while my left hand should not change my expressions.
But my left hand should still work as intended, meaning when I make a fist with my rl hand it should be a fist in game.
After many fails and tries and guides I could never make it work, right now I am stuck with my expressions working with my right hand, but my left hand is moving together with my right one? I make a fist with only my right hand and it transforms my left hand into a fist as well for some reason.
Please if anyone could help me that would be amazing ❤️
this is my Animator Controller which is selected when I upload my avatar
 pale pumice
you'd probably have to show some of those transitions, not much useful in that image
 bleak plover
does this look correct?
 fading verge
can a single mesh be properly rigged?
or does each part need to be separate
rigging is a huge blind spot in my blender experience
brazen island
yes a single mesh can be properly rigged, it uses vertex groups that tell to each vertex in it to follow some bone to some extent. in fact you must have separate meshes only for stuff you toggle on/off ingame, everything else should be one mesh and as few materials as possible.
fading verge
unnamed rigs be like (i'm very stupid at rigging)

 arctic sundial
good grace
 steady loom
yo, does anyone know why Final IK might be drifting for the local user, but appears to be perfeft dor remote users?
fading verge
how make mesh deform to rig ~w~
arctic sundial
Weight paint it
arctic sundial
youtube has plenty tutorials. parenting with automatic weights will give you a good base to start
fading verge
ehhh didnt work
arctic sundial
I'm not going to beg you for details
fading verge
there we go ouch
 arctic sundial
Well, i said it will give you a good base. I never said it will be perfect. You will always have to touch it up after any automated process
fading verge
yeah fair
arctic sundial
It looks like the arms are different meshes than the body though
Same with the head
So parent them to the armature the same way
fading verge
actually gonna be merging them together once done so
 lone mural
hi yall!!! im super new to blender and all this. Im trying to make a naga avatar for myself. (A snake with an anthro torso (picture for example)) and i couldnt find any tutorials on how to rig the bones for the tail, or how to have it selected in unity
 balmy delta
lone mural
hi yall!!! im super new to blender and all this. Im trying to make a naga ...
balmy delta
lone mural
hi yall!!! im super new to blender and all this. Im trying to make a naga ...
rig it like a regular humanoid avatar except the leg bones have no weights and the entire tail is a long chain of bones
after which in unity you just have a floor collider plane and add the tail sway as an animation in the fx layer
 narrow vortex
Or just, make the tail physbones and super sensitive to movement
Did that with my snake guy personally
narrow vortex
balmy delta
rig it like a regular humanoid avatar except the leg bones have no weights and t...
either way the set up in blender is this ^
lone mural
balmy delta
rig it like a regular humanoid avatar except the leg bones have no weights and t...
so just make legs bones, connected to nothing that have no weight?
balmy delta
the only thing about the whole rig is you are required to at least have the bones there
they dont need to actually affect the model
lone mural
okay thats what i was wondering, i really appreciate it!!
narrow vortex
lone mural
so just make legs bones, connected to nothing that have no weight?
Leg bones that are connected to where the hip would be, but don’t have any weights, yep
balmy delta
the tail sway is really up to your personal choice
I just suggest it so when moving it looks less like you are just dragging along a tail
lone mural
is it okay if i dm you about this? i originally thought about just haing it drag along
but now im finding out you can have it animated :0
balmy delta
in the physbone component just enable is animated
after you just have an animation that just turns the tail left and right
lone mural
that sounds very easy but i literally have no idea how to do any of that
again i started like last night
balmy delta
•°-VRCHAT AVATAR SDK DOWNLOAD -- https://vrchat.com/home/download
This tutorial does require the general basic knowledge of Unity, but if you need a step by step, explanation, do not be afraid to personally DM me! My Dm's are ALWAYS opened ! (If I don't respond, don't be scared to spam me, I have a bad habit of mentally replying)
Had requests f...
you just use the locomotion layer parameters instead of a toggle
lone mural
wha
lone mural
balmy delta
https://www.youtube.com/watch?v=FYeEy9_JBcE
that moves so fast
balmy delta
then make it slower?
lone mural
balmy delta
then make it slower?
i mean the video!!
 wintry maple
why am i only able to select the bones by clicking this little thing at the top?? never seen this before and its very unconvenient
 pale pumice
wintry maple
why am i only able to select the bones by clicking this little thing at the top...
pale pumice
wintry maple
why am i only able to select the bones by clicking this little thing at the top...
which blender version?
wintry maple
it was 4.0
pale pumice
'cause in 4.0+ you have to ctrl+shift click bones, in <4 you have to ctrl+click them.
pale pumice
that one got me too when they updated
lone mural
how would i do a tongue flicking animation?
pale pumice
got tongue bones?
trim nexus
are twist bones like this any good or should I swap it out for the normal rig
 pale pumice
trim nexus
are twist bones like this any good or should I swap it out for the normal rig
pale pumice
trim nexus
are twist bones like this any good or should I swap it out for the normal rig
which is the twist bone? it's hard to see what you're referring to here.
fading verge
how to get a tail to flex properly
pale pumice
that seems very vague and open-ended. Maybe show what you have for model + bones now?

 pale pumice
probably smooth out the weight painting
fading verge
probably just a weight paint deal but i frankly dont know how weight painting works, at all
pale pumice
it's pretty simple really - for each vertex, there's a 0-1 which says how much it moves along with the bone.
fading verge
zero seems to be less resistant, up to 1 which is very resistant...
but no setup seems to fix the issue
balmy delta
multiple bones can be affecting the same vertices

 bright geyser
can some one help me with bones that do this?
 fading verge
https://www.youtube.com/watch?app=desktop&v=SCWZr-It1bE
I'm trying to do this bone-by-bone weight viewing but it isn't working
💡 Download The FREE GameDev Tools Here: 👉 https://buvesa.com/free
✔️ Free GameDev E-book
✔️ Free Game Design Document
✔️ Free Platformer Course (UE5)
▬▬▬▬▬▬▬▬▬▬▬▬▬▬▬▬▬▬▬▬▬▬▬▬▬
🏆 Join My Premium UE5 Course (The Unreal Vault) 🏆
👉 Link: https://buvesa.com/course
🗸 Full GameDev proces
🗸 Level design
🗸 Boss Fights
▬▬▬▬▬▬▬▬▬▬▬▬▬▬▬▬▬▬▬▬▬▬▬▬▬
📱 ...
pale pumice
Which blender are you using?
in 3 you ctrl+click a bone but in 4 you ctrl+shift+click bones
pale pumice
weird - you've got an armature modifier and you selected the armature, then the mesh, then went to weight paint mode?
fading verge
pale pumice
and you don't have masking on? top-left, little icons, or `1` to toggle
i dont think so?
trim nexus
pale pumice
which is the twist bone? it's hard to see what you're referring to here.
these two

the ones not in the normal reference for VRC avatars
 pale pumice
not sure what's going on with your upper arm there, but they don't seem unreasonable otherwise
trim nexus
pale pumice
not sure what's going on with your upper arm there, but they don't seem unreason...
the guard piece?
pale pumice
looks like you have two upper arm bones? Or is the second one the twist bone and the main one doesn't go all the way to the elbow?
trim nexus
 pale pumice
now that I look back at the original message, is that what you're asking about?
usually a twist bone is not actually part of the path from shoulder to elbow, I wouldn't be surprised if that confuses Unity, but in theory it should work
trim nexus
this is just how these models come so I was wondering yeah
other than being a little shorter than my normal arm, they seem to work fine
pale pumice
yeah haven't seen it this way for vrchat but it seems like it should work
trim nexus
thanks
bright geyser
the right hand despite being seperated from the left it still moves when i move the left hand even when i got rid of parenting

 molten pond
Something with mirroring maybe?
fading verge
Clearly i kinda suck at weight painting lol

 nocturne ivy
aaaaaaaaa
narrow vortex
bright geyser
the right hand despite being seperated from the left it still moves when i move ...
Check the vertex groups. If the vertexes on the right arm also have weights from the left it’ll move when either bone moves
Also your parenting is wrong, those dotted lines show you how the bones are parented, and the entire left arm is parented to the hip/base
narrow vortex
bright geyser
can some one help me with bones that do this?
This too looks like a weight painting/vertex group issue, not a bone parenting one
 rancid dust
is it possible to import the hand mesh (already separated, but in the same fbx) as a different fbx and connect it to the main armature (without importing another armature for the hands)
 hasty cloud
rancid dust
is it possible to import the hand mesh (already separated, but in the same fbx) ...
hasty cloud
rancid dust
is it possible to import the hand mesh (already separated, but in the same fbx) ...
I might be dumb, but I'd say no, cuz I already tried once. From personal experience, Unity doesn't recognize the fact that a different mesh from a different fbx file is actually weight painted to the armature you are trying to connect your mesh to. Unity basically sees it as a fbx file containing a mesh that doesn't have anything to do with the main armature of your avatar. BUT like i said, im not sure, maybe there's a way.
 pseudo meteor
Hey, I'm working on my first VRChat avatar. I'm confident in my modelling ability but I'm not very good at rigging. Is there anything I should look out for during the modelling process that won't mess with the rest of the pipeline?
pale pumice
hasty cloud
I might be dumb, but I'd say no, cuz I already tried once. From personal experie...
that roughly fits my understanding too
river ingot
rancid dust
is it possible to import the hand mesh (already separated, but in the same fbx) ...
Your making that sound complicated, are you saying that you want to import a hand mesh that has its own fbx, and add it to your main fbx. Then connect it with the main armature? If so You could A.) Use the hands armature tha your replacing for the new hand mesh, and weight paint it onto the hand+fingers. or B.) Use Cats plugin to merge the bone/mesh of the new hand to the main armature (which is a lot easier) Using B.) it will also add a bone to the hand mesh which will be used to join it to the arm bone, which you may need to identify as what your joining the hand fbx to etc etc. Or just merge it, then delete the new bone after it does the merging.
rancid dust
river ingot
Your making that sound complicated, are you saying that you want to import a han...
I’m saying I want the hand mesh to be a separate mesh from the rest because I have to compress the body for quest but the compression messes up the fingers 😔 but sadly I don’t think it’s possible to do it the way I want and I just need to figure it out the hard way
 dreamy heron
Hi hiiiiii
So I’m new to blender and I made a model for myself. However when I brought the model over to Unity, the head just slightly looks down. Like the character looks depressed cuz it’s looking down.
I think My armature in my avatar’s is messed up but I’m not sure exactly how to fix it ?
(Sorry for the bad quality screenshot, discord doesn’t work on my PC)
 river ingot
dreamy heron
Hi hiiiiii
So I’m new to blender and I made a model for myself. However when I b...
river ingot
dreamy heron
Hi hiiiiii
So I’m new to blender and I made a model for myself. However when I b...
That should be able to be fixed in blender, in pose mode. While in T-pose it should default be set to look straight. the arms aren't extended from her sides either which is also required for t-pose mode
dreamy heron
river ingot
That should be able to be fixed in blender, in pose mode. While in T-pose it sho...
Ah sorry, the model is positioned like that due to being in Play Mode / Using Gesture Manager
But the model itself, the fBX, it is set in a TPose mode
river ingot
oh, gesture manager has different poses it sets them in, like idle, standing, etc etc. it is also where you can edit the proxy positions to your preference and added in at the avatar descriptor.
river ingot
rancid dust
I’m saying I want the hand mesh to be a separate mesh from the rest because I ha...
Your lucky I worked on this over the weekend, and forgot to post it up.

Brief tutorial on how to modfiy/edit your meshes to lower the pixel count when you can't bake or compress the mesh via other faster processessings.
dreamy heron
river ingot
oh, gesture manager has different poses it sets them in, like idle, standing, et...
What do you mean by “Proxy Positions”?
river ingot
roh, in the sdk there are sample folders with them labeled as proxies. all default animations, positions etc are hidden in those folders.
rancid dust
river ingot
Your lucky I worked on this over the weekend, and forgot to post it up.
Thank u this helps a lot
dreamy heron
Oh I see thank you
lone mural
how do i rig a model?
 torpid burrow
is this ok

my avatar is a slight bit off centred anyone know an easy way to recenter it all?

im really struggling to figure out why this isnt symmetrizing correctly
i have no idea why this isnt symmetrical
i mirrored it all
ididnt do any of the symmetry by hand
lone mural

Help please!!!!! im beginning to rig the tail and i dont know how to rig the lower part... i was thinking of just dragging my hip bone all the way down so it doesnt move... I just dont want my tail dragging unrealistically far behind my body so it just looks like my torso is floating..


thats what i mean
balmy delta
lone mural
Just make that part not be affected by the physbone?
lone mural
balmy delta
Just make that part not be affected by the physbone?
i may be stupid
river ingot
usually instead of legs and feet, the hip bone could be extruded several times into linked extensions to the end of the tail..
river ingot
torpid burrow
my avatar is a slight bit off centred anyone know an easy way to recenter it all...
looks okay except the shoulders are higher than the arms..
arctic sundial
I'd make the hip as normal and then extrude however many joints you want for the tail. I assume you want some physics to apply to the first bone of the tail (1 below hip) but not the "space drag" thing - so lets remember how physbones have actual graph settings that would allow you to make the root of the tail stiffer and the rest gradually more movable
cold cliff
there's no way around the "four bone weights per vertex" limit, is there?
 uncut breach
It's a Unity limitation
cold cliff
it isn't, you can disable it in the project settings... but, I'm assuming that VRChat itself is set to use the 4-bone setting
brazen island
its unity project limitation and you cannot set settings for vrchat's main unity project, yes.
 calm totem
I know this is fairly old but can I dm u as I also have some issues as well
 hoary compass
In Unity 2019, I used to be able to go into Play Mode, enter an animation (e.g., Prone), edit something Blender, overwrite the fbx, and the changes would immediately reflect. This was good for testing weight painting.
Since 2022, it doesn't seem to work anymore, and I have to exit and reenter Play mode to get the new weights to reflect.
Is there a setting or something I can change?
hasty cloud
hoary compass
In Unity 2019, I used to be able to go into Play Mode, enter an animation (e.g.,...
that wouldve been so much better...
now if i wanna do a modification, i have to fukin restart the damn thing
hoary compass
It's so annoying ( つ Д `)
 rose wagon
Wait what's different?
You can't do that anymore?
I just switched recently so I guess I'll be finding out
 proper thunder
My avatar has an extra lower pair of arms, should I have the second pair rigged with it's own bones, or figure out how to make each side of arms share similar deformations to the same skeleton arm?
I'm pretty sure the lower pair is the thing preventing my rig being classified as humanoid.
pale pumice
Rig the second set, and you can use constraints to have them duplicate the primary set's movements.
(if you want)
 bold stag
anyone got a yt tut on how to rig the , ears , hoodie and hair so it has physbone compatibility
 pale pumice
basically make bones to move the parts you want, and in the case of hair, use a common root bone. Otherwise this is just like any other rigging.
bold stag
pale pumice
basically make bones to move the parts you want, and in the case of hair, use a ...
didnt think it would be
alright then thanks
pale pumice
yeah really nothing to it, physbones are really just bone chains with the script applied in Unity.
 pure onyx
can anyone help me with weighting skirts/dresses without physbones please
pale pumice
pure onyx
can anyone help me with weighting skirts/dresses without physbones please
Did you have a specific question?
pure onyx
idk if this looks ok now but i want it to bend more properly
 pure onyx
pale pumice
Did you have a specific question?
pure onyx
pale pumice
Did you have a specific question?
if that makes sense
pale pumice
I'm not sure what I'm looking at, but probably the answer to "bend more properly" is better weight painting 🙂
pure onyx
pale pumice
I'm not sure what I'm looking at, but probably the answer to "bend more properly...
thats the skirt bending
pure onyx
pale pumice
I'm not sure what I'm looking at, but probably the answer to "bend more properly...
 pale pumice
can you show the whole avatar? It's hard to make out what part this is
pure onyx
pale pumice
can you show the whole avatar? It's hard to make out what part this is
skirt my guy
 pale pumice
yeah I know you said that several times
pale pumice
ah! now i can actually see what is going on here, thanks
pale pumice
Yeah I'd bet on just "weight painting" based on that
pure onyx
pale pumice
Yeah I'd bet on just "weight painting" based on that
can i have some help i dont mind payingjust a little
like 5 dollars
pale pumice
sorry, not interested
pure onyx
pale pumice
sorry, not interested
in helping in general?
pale pumice
I'm happy to help if I can in here, but I'm not looking for a commission
pure onyx
pale pumice
I'm happy to help if I can in here, but I'm not looking for a commission
ah ok can u help me with the weight paint then
its as much as i can do
pale pumice
I can't tell you how best to weight paint it from here
pale pumice
?
pale pumice
read what I said. You'll have to paint it so it looks how you want it to look
pure onyx
pale pumice
read what I said. You'll have to paint it so it looks how you want it to look
i got that but i did the best i can im not great with weights
pale pumice
yep, practice
pure onyx
ah ok
pale pumice
it's not easy
hasty cloud
pure onyx
im good with so much but except weight paint
i'd say the same goes for most people when it comes to weight painting lol
pale pumice
haha absolutely
 pale pumice
hard surfaces are a lot easier though, likely most of the parts have the same weight
hasty cloud
well ill be honest, the model was already weight painted (thank GOD), however i do have to modify some of its components to be separable like some bits of the arms and then add bones to them
pale pumice
the flexy parts in the joints though...
hasty cloud
pale pumice
hard surfaces are a lot easier though, likely most of the parts have the same we...
i'd agree, untill all the parts have been joined together...
pale pumice
I tend to join at the end
hasty cloud
yes but ive once worked with a model...
that had armor bits that were all joined at the begining...
and the worst part
i had to restart the armature
pale pumice
hmm
hasty cloud
i have a avatar that had armored wings, and i wanted to have it so that the plates moved as well
it was hell...
pale pumice
ahh yep, that'd be fun.
hasty cloud
hasty cloud
Speaking of armatures and such... is there a way i can straighten out these bones..? i got the model and it came with its pose set like this...
sadly, the rest pose is also like this
pale pumice
yeah you can just re-pose it and apply the armature modifier to all the meshes, then save the new pose as the rest pose, and add new armature modifiers
hasty cloud
oh boy so basically guessing...
river ingot
cats has an easier way to get to pose mode.
hasty cloud
river ingot
cats has an easier way to get to pose mode.
do tell me!
pale pumice
Yeah that does work sometimes
river ingot
pure onyx
ik
You could also add in physbones to the skirt, and have physbones on the thighs so when the dress bones collide with the leg bones they'll react. You can also add gravity and responsiveness to hitting the legs via physbones.
on another note, you may need to add more bones to the skirt too make it that good..
pale pumice
river ingot
You could also add in physbones to the skirt, and have physbones on the thighs s...
they specifically said without physbones though. I'd have done what you said too
river ingot
ur right they did, but it is the best way.
pale pumice
agreed
river ingot
maybe just colliders then haha..
otherwise i thikn the front of the skirt would clip through the thighs without the colliders. And or, move the skirt so its attached to the legs instead of blossomed out at the hips like that.
pale pumice
yeah, or it'll move kinda funny just going with the legs
hasty cloud
lol
pale pumice
but if you're at your physbone limit, well...
hasty cloud
thats what i suggested for a solution without physbones
river ingot
make it a tight fitting miniskirt would be a good option 😄
 hasty cloud
river ingot
hasty cloud
river ingot
oml this is a lifesaver lol
river ingot
Just dont use "fix model"
hasty cloud
river ingot
Just dont use "fix model"
oh- why?
robust crescent
rare cases model wont like it, most of the time no issue
you will see if you try - what ive seen - uv merged with diferent names = you now have a wierdly colored one , removed bones it still need (this is why fix have a bunch of settings you can change)
hasty cloud
robust crescent
you will see if you try - what ive seen - uv merged with diferent names = you no...
huh.. interesting
robust crescent
see it maybe once every 80~ model ive converted its rare
hasty cloud
how the heck do i instal cats
i downloaded it
how do i put it in blender
nvm i figured out
hasty cloud
question: how can i move a bone without moving the model itself...
it seems that everytime i try moving a bone in edit mode and then going in pose mode, the model's weight connected to the bone will move as well
how can i prevent that?
pale pumice
you can do it in edit mode if you're editing the rest position. Otherwise that's the point of weighting, to move mesh with the bones
hasty cloud
i mean yeah, but wouldn't it be better if the weights didn't move while in edit mode? and then leave all of the weight moving to when in pose mode??
also yea moving bones in edit mode despite being in the rest position still moves the weights
river ingot
Weight painting is applied to the mesh pixels/faces etc. You can have a mesh on the leg be weightpainted to the right arm bone, and that mesh will move when the right arm moves. of course this happens to newbies who unknowingly weight paint the right arm, while the leg is visible on the other end of the arm thus weighing both meshs at the same time. (an example, not related to the problem)
hasty cloud
that wasnt what i was having trouble with tho
river ingot
okay, to resolve the problem of mesh moving with bones after you've moved them, you can A.) Zero out all weights to that bone on the mesh. or B.)delete the bone, then make a new one to replace it.
Personally, I've moved around finger bones, arm bones, shoulder bones and the meshes never moved around on me while I was editing/moving them around, so I'm not sure how exactly your doing the problem.
hasty cloud
i fixed the problem
yea it was very weird, the model's bones moved the parts, but when i checked the bone weight, none of them were red
so it was moving without the bone weight..
tho i fixed it already
ty tho
pale pumice
Just delete the vertex group with the same name as the bone.
hasty cloud
pale pumice
Just delete the vertex group with the same name as the bone.
there wasnt any vertex groups lol
despite that, the mesh was moving
pale pumice
huh
 pseudo trout
OK so for some reason
i weight painted a single bone to some fan blades
but when i rotate the bone, the blades dont spin
river ingot
pseudo trout
OK so for some reason
are you spinning the bone the right direction? are they all weightpainted in red?
pseudo trout
 pseudo trout
river ingot
are you spinning the bone the right direction? are they all weightpainted in re...
pseudo trout
river ingot
are you spinning the bone the right direction? are they all weightpainted in re...
think so
uncut breach
does the mesh have an armature modifier
uncut breach
it'll need that for pose mode in blender to work properly
pseudo trout
how do i add it
pseudo trout
uncut breach
it'll need that for pose mode in blender to work properly
cuz im not sure how to do that
hasty cloud
wait- im just realizing that blender is now in 4.0-
im still using 3.6 lmfao
wtf am i doing
pseudo trout
no point in upgrading
i just have the version that was the newest when i downloaded it
i dont use the steam version
hasty cloud
theres a steam version?!
bro im living under a rock
ur telling me that blender is on steam?
pseudo trout
yeah
hasty cloud
omfg how did i never know that
lol
this is the first time knowing blender was on steam
pseudo trout
i still need help :/
hasty cloud
did you add a armature modifier?
hasty cloud
see the icon that looks like a wrench
pseudo trout
on the blade object?
hasty cloud
no
pseudo trout
 hasty cloud
YES
pseudo trout
what kind
hasty cloud
press armature
pseudo trout
yeah?
hasty cloud
show me what you see
 pseudo trout
alright
hasty cloud
show me what happened
 pseudo trout
uhuh
pseudo trout
yeah
hasty cloud
shift + click your armature
pseudo trout
mhm
hasty cloud
ctrl p
pseudo trout
there are multipole options
hasty cloud
do you mind redoing the bone weighting?
pseudo trout
 hasty cloud
if it works this time?
pseudo trout
hasty cloud
do you mind redoing the bone weighting?
nah
pseudo trout
yeah?
hasty cloud
click your armature
shift + click your blade
and go in weight painting mode
select your bone while holding ctrl
and show me what you see
pseudo trout
 hasty cloud
try and see if it works
pseudo trout
yeah it works
hasty cloud
nice
pseudo trout
So
this is actually for my avatar
i need the fan blades to be spinning constantly
how would i do that
pseudo trout
well no shit bro
hasty cloud
lmao
pseudo trout
i dont know HOW to do that
hasty cloud
well
pseudo trout
oh sweet jesus its gargantuan


