#visual-fx
1 messages · Page 7 of 1
trying to generate a grid visual here, but getting this horrible effect when moving the camera or zooming out, what should I do? I imagine it would be fine if it was a texture, but Im using instanced meshes to make it dynamic so that I can change grid spacing https://gyazo.com/06a8c73b26f77eb20155d08719cf2e74

its basically this isnt it

but I dont know how to solve it here
what is producing the grid?
in your checkerboard screenshot the moire pattern is solved by texture mipping
if you are generating this grid by other means you likely will not be able to take advantage of this
TAA/TSR can potentially prevent this as well, depending on what you're rendering
yeah I thought so since its instanced meshes as I said and theyre very thin, maybe world aligned texture is best then
in fact if I remember rightly unreal editors grid itself is just a texture right
yes. world-aligned texture is fine as long as the texture has mips
which it should if its size is a power of 2 and you haven't disabled mip generation
lowkey losing my mind now trying to make a grid texture at a power of 2 size with 10 squares
another problem, why does it only look clean in unlit? the material itself is unlit anyway, and anti aliasing doesnt make a difference either way https://gyazo.com/88b7c482d32991345dbd91939f4df922

Hi everyone, I'm trying to use a video as a "Game Over" screen in my game. I'm using a widget blueprint for this ofc, but I canNOT figure out how to play one video after another, and have them both actually play, using the widget blueprint logic
I've seen some guides and tutorials but for some reason, none of them are working for me. Anyone who can help me out? I'm using the standard media player in UE5.3
Does a post-processing volume apply to objects in the volume, or cameras in the volume?
Cameras
Hey guys. Do you have any tips on how I can prevent the particles from lagging behind here? I'm using Local Space for the niagara system, but since the particles have some lifetime, they remain in place until they die if the weapon moves.
So ... I've been checking out the new "Advanced Portal FX" bundle that's free right now on fab.com, and I've noticed that they're doing a lot of cool stuff that's actually all materials-based. They've got a bunch of systems full of emitters that just spawn one mesh-rendered particle and then use material parameters to create their cool effects.
That's awesome, and I've got the rough idea that instanced mesh particles are probably more performant than individual mesh renders, but is this ... like ... "the way" for this sort of thing? I'm thinking from my perspective as a teacher - is this is a good practice for VFX, or - if you went into a project knowing you're going to do this, would there be a better way of going about making low-cost instanced meshes for this?
Hello, Wondering if anyone can help me find a way to do array look-ups in niagara without using loop. Here is an image of what i am working with for my scratch module. The idea is, I have fires in my level that are filling my 'Position Array' then each particle is checking its distance to those locations and if its within the 'Push Distance' then it add some extra velocity. The math end works when i pass in a single position. I basically just need the array management end working since i cant loop. i don't think my solution is valid since its not working the array could potentially be changing if that matters so a static 'get' wouldnt really work well.

Hello , I'm wondering if anyone has any idea how to fix this issue im enountering. I'm trying to have the particles bounce on the floor and then stay there for a bit. It looks like it should work just fine in the system view but in the sequencer the particles seem to bounce early in the opposite direction from my velocity. I figured if I offset the position high enough it doesn't give me the same problem but then it isn't the look I'm going for. My thoughts are maybe when I set my Niagara System close enough to the actor the particles may be bouncing off the actor's mesh ? I'm trying to have the actor looks like it disintegrating and leaving dust on the floor behind so I need the dust to spawn very close to the actor. I haven't seen any option in the collision node that would allow me to bypass the collision on the actor's mesh. I'm fairly new to this so any advice would be appreciated ! Here's a video of the problem and one to show what I want it to look like.
Is your goal to have the black ball stay in place and disintegrate instead of being spread around? Maybe you can turn off the collision of your black ball once it’s been hit so the parties don’t bump into it. Sorry if that’s not what you’re asking about!
Its exactly that I just didnt know how to turn off the collision on the actor , I found a fix by turning off the collision preset on the black balls since I'm only setting it up in the sequencer ! This is the final result.
If anyone's got advice on how to make it better im all ears 🙂
is there is any video to teach how to make uv mapping for vfx or to make it for panning ?
Is there a way to visualize color grading areas in unreal? Just temporarily paint the scene like "THESE are the highlights, THESE are the midtones, THESE are the shadows"
I know I could just completely fuck up my color grade settings to achieve that manually, but I don't wanna do that if I can avoid it
Anyone here using the 'Write to Niagara Data Channel (Batch)' i cannot get it to batch send a location but it works when i use it without the batch call, but i need multiple positions being sent.
New VFX/Tech Art Newsletter is out!
📃Read online: https://simonschreibt.de/?na=view&id=36
✋Subscribe: https://simonschreibt.de/newsletter

For someone with no fx experience. How should I start making my rock spell(rocks float out of ground, clump up, throw). Should I create it in blender and export to ue or just start from ue and do Niagara and what not? I’m not sure what the workflow for this would be
If you’re still on here this many years later can you tell me how to make this lol
What would be the best way to make the spline within unreal loop?
How can I make my game look like it

(Flat colours with outlines on objects and lines on sharp edges)
It sounds easy like just a wireframe but only on sharp edges but idk how
Look up Cell Shading
👋 Hello everyone!
I'm a Unreal Engine VFX artist available for freelance or contract work. I specialize in real-time effects using Niagara, custom shaders/materials, and particle systems. I can help bring your project to life with optimized VFX for gameplay, cinematics, environments, UI, and more.
If you’re looking for high-quality visuals and reliable delivery, feel free to DM me for my portfolio and rates!
there might be a cheaing way
(add an actor, and then a bunch of smoke systems component tied to the shape of it)
Hello, does anyone know how I should make this hairlike flowing energy effect?

 Hello, I'm a bit new to UE as a whole, especially when it comes to performance and VFX, I just don't know what's ok and what's not.
I'm looking to make tracers in a map, but not as actual bullets, more like background things, I'm talking a LOT of them (AAA shooting at planes in the sky for visual effect)
If I use actual bullets with movers and physics, there's just no way this can work. How can I approach this in a reasonable way?
Virtual textures!! (I believe)
I’m somewhat new as well but have you ever played a source game
The skybox is actually a physical room projected onto a virtual texture
This should be what you desire
As long as you can handle everything on the gpu you should be fine, maybe research how to do that if this is fruitless
Look into whatever helldivers 2 is doing
how can i set this? I've created SkeletalMesh parameters in all namespaces and nothing ever shows up here

ok seems like i just wanna do this

no idea what that dropdown is supposed to do. unreal engine experience
New VFX/Tech Art Newsletter is out!
📃Read online: https://simonschreibt.de/?na=view&id=37
✋Subscribe: https://simonschreibt.de/newsletter

Hi! 🙂
I would like to do some distortion effect, but i ve a problem with the edges. its capturing the screen and transforming and of course, after the end of the screen it has no data, so its making a cut. My questing is: Is it possible to take the endpixels of that edge and make some kind of transition transform to match the pixels behind?
Thx for any answer 🙏

Does anyone have any tips or guides on changing vfx for spells? I'm brand new to modding and trying to make my own unique visuals spell pack mod for oblivion remastered.
I have been cooking https://www.youtube.com/watch?v=auk953joDyI

This tutorial will show you how to bake any animation into a 'Vertex Animation Texture' and then how to get that animation into Unreal Engine, all without paying ANYTHING. Yes, free is a really good price.
OpenVAT Github:
https://github.com/sharpen3d/openvat/blob/...
lil question regarding the Auto exposure "Low Percent" and "High Percent". both comments for these settings are the same. what should i expect when changing these values? when i dial in random values i dont see anything changing.
best regards
They're clipping points for values that won't be considered when computing the desired exposure, use the r.EyeAdaptation.VisualizeDebugType 1 cvar with the HDR Eye Adaptation visualizer to see which areas fall in those regions. There's usually no reason to change them from the defaults
clipping point is probably the wrong way to describe it, more like its shrinking the range, but basically if you have small emissive lights in view, it will keep the auto-exposure from trying to adjust to accommodate them, it helps keep the exposure level more stable by excluding the extremes
ok thanks, i am currently trying to dial in auto exposure with my day and night cycle and wanted to understand this thing
@grim briar what i dont yet understand is this: what is the target of eye adaption? does autoexposure try to achieve a neutral grey by averaging all pixels on screen?
i alway have this problem: in the night auto exposure wants to make the image to bright, during the day the sky is blown out because of the shadows that make auto exposure making the image as well brighter.
also, playing around with low and high percent while having the eye adapation visualization open makes 0 sense to me
eg., increasing both makes eye adapation go high, but the "low pct" can never be >= "high pct" and vice versa or else it resets or so.
bot changing one or the other doesn't matter at all, both lead to the same result somehow
set your compensation with a curve asset, thats how I deal with this
so manual compensation across the day [0, 24),
No
In the post process volume you can provide a curve asset that sets the exposure compensation based on the view luminance
you don't do it by time of day
ah. uh how does this curve work?
though you can set it by time of day if you want, but it will only work outdoors
its pretty intuitive, you're given a target EV100 on the X axis and you provide the compensation on the Y axis
also it updates in realtime so if you just assign the curve to your PP volume then mess with it you should be able to figure it out
x axis in this curve is the exposure from unreal and y axis is what my manual compensation?
its a bias, its just added to the value produced by the curve. I usually set my curve up to require a 0 manual exposure when outdoors then I use the fixed value compensation in local volumes
@cyan agate Example
This is slightly over-exposed during daytime, slightly under-exposed at night
That's with a 10 lux directional light, if you're using a higher intensity directional light you'll need a different curve
my directional light goes from nearly 0 up to 64
why
thats what it ended up, with the sky, custom fog and skylight intensity
now i have to find a way to compensate correctly
I don't ever change the intensity of the directional light personally, seems like a bad idea
? how else would i change the sun light? 😄
but I'm using the SkyAtmosphere which sets the intensity/color based on the altitude automatically
ah yeah, i dont use the skyatmo
Why would you need to? Like what's it accomplish?
okay yeah that makes sense
i use very old school only the skylight, directional light, fog and the skylight with realtime capture enabled
okay, so i added my own curve now. what i dont understand is the x-axis value yet.
why do i need negative values on the x-axis?
its the average scene ev100, if you open the eye adaptation visualizer there should be some text on the screen that says average scene ev100, that's the x-axis
ah ok
thank you
is the value the final value calculated from the auto exposure which i must base my on curve?
not sure I understand the question
i see the average ev100 is changing when i change post process settings. so my assumption is that i compensate the final value of autoexposure with my curve
as I understand it the average scene ev100 is calculated, then the compensation is applied from the curve based on that value
fwiw there are docs for this: https://dev.epicgames.com/documentation/en-us/unreal-engine/auto-exposure-in-unreal-engine#exposurecompensationcurve
I would also suggest using curves for local exposure if you're using that, can help a lot with environments that are a mix of dark interiors and bright exteriors
really helps to make exposure transitions virtually seamless, even in really difficult cases
yes, i read all of them already
i need to talk to humans to learn better 😄
yeah regarding transition from interior to exterior i must find a few solutions as well.
i only had major success with baked lighting (stationary skylight)
yeah you saved my life, thank you. now day and night are very balanced i think (in terms of exposure)
here i skip through a day in 1 hour intervals manually (by pressing a button)
No problem honestly happy to see someone actually taking auto-exposure seriously for a change 🙂
yeah its not so easy to work with it i think. as you can see i have strange directional light values, but the other things are matching. i do use real world intensities for street lamps but that is just during the night
hello 🙂
I m using a 2dgrid gas emitter for an aura. I m spawning particles on a skeletal mesh (triangles) and use this as a source for the 2dgrid emitter. This is set up in the niagara system, outside i use the actual mesh for putting it in the front, but somehow the aura is showing some weird gap between the aura and the mesh. You have any idea how I can solve this?

Dude that's amazing.
Hey folks!
I'm using a Volumetric Setup for a Storm Cloud system I'm making, I'm getting the Right results, however The clouds are extremely Grainy
Looking for help with this problem.
it seems to like Extremely Low values like .00006
the Multiplier before the Noise node seems to help with shape.


Does stacking post fx reduce performance? I'm using chameleon and for some reason the "radial blur func" does not enable or disable effects, so I can only set it to 0 and augment it* later
ppl can fix this. error.
i think it because i wan5t to set variable in emiter space. how to fix this?

Is there a way to hard set a heterogenous volume to ALWAYS sort in front of the others? It would appear that even if I set translucent sort order, and move sort order offset to extremely high negative values for the one I want in front and really high positive values for the ones I wan behind (the purple sand storm) there will always be a sort order pop when the centroid of the heterogenous volume moves further away than the sandstorm pivot/centroid. Bounds scale also doesn't work~-~ any ideas?
Hi all
I'm quite familiar with Unreal Engine and decently with VR dev.
I want to make a standalone VR experience with heavy VFX (Particle Systems) and high quality visuals.
This will be for the Meta quest 2, 3 and 3s.
Imagine I'm trying to make a "creation of the universe" "big bang" kinda experience.
Clouds, smoke, post processing, glow and glare, explosions.
Not much game logic or interactions needed.
What UE version would be best for this - what tools and resources can I use to optimise the hell out of the app to make it as stunning as possible.
Like which are more performant - Particle Systems or Niagara Systems?
Textures and materials bug out randomly in 5.5.4 has this happened to you?

all the time 🥲 For me it usually works to reopen them and save them again and the previes image will pop back
Is there a way to get the physical material from the collision event in Niagara?
Right now I need to check with a line trace on collision event and I would really love to handle this inside niagara.
I'm looking to spawn in the same system an impact effect from the collision event. Currently this is done using BP to spawn the impact effect.
Wanted to ask if there is a decent way to do subframe motion blur effect on a 2d plane/texture
Imagine you have a dot as a 2d sprite, is there a way to make it have multiple motion blur like lines for lets say 4 movements in a single frame?
the example with the dot is only to simplify things, its not something for the ribbon, it has to be a 2d sprite

depends a lot on specifics. there are many ways.
the specific is that i want it to be a 2d image not rotating, not transforming, just smearing many times during a single frame. doesnt really matter how exactly pretty much anything would work
If i have a NS that is infinite such as Moths or fireflies - what is the best way to kill them after the player reaches a point where they are no longer needed
Hi guys! Are there any Houdini users here who have set up instancing in UE 5.6? As in the screenshots I'm attempting to replace the Houdini-native mesh with something in engine, but the mesh here is not interchangeable. Is this a new UE update, or something in the HDA blocking the switch? If anybody has had any experience with this advice is much appreciated!


i can anyone help me with the sequencer and the movie render queue, i have a sequence, and when i export it to a video mp4, for the first 10 sec, all object are not working as programed, but the cine camera actor is working>
note that everything the the viewport is correct but not in the export,
can anyone help me?
Is it possible to modify the roughness output via a post proc?
Hello, “Are there any Niagara users” in the room?! I'm trying to figure out how to fix the pivot point of the particles on the torch, depending on the rotation. Here, vertically, no problem, but if I rotate the torch, it shifts!

Does the Niagara actor child of the wood and where it is placed if child
@warm lichen Hello, Yes, I forgot to mention that.
Yes, it is a child of a static mesh in a BP.
And it is also connected to a mesh socket.
Did you tried by just putting it under the wood mesh in level, that does that work or not
@warm lichen Nan, whether he's a child or not, it doesn't work. But I think I understand, the pivot is in the center here, whereas I think it should be at the bottom of the flames.

Yes put the pivot at bottom of the flame and make sure your socket is at correct point
Hey guys so I been working on a project with a team and we use perforce. one person made a wind sim using unreal's wind effect to move the cloth but when I get latest changes and press play the cloth seem to move correctly only for few seconds and then goes out like the wind has stopped blowing do you know what could be causing it or possible ways to fix it?
ask the person who made this about the files and folders that are ignored by source control and then compare those with your ones and see how he customized the engine.
gochu I will ask if it has something to do with perforce rather than UE but do you know if there cold be anything inside of engine that could be causing wind issue ?because I had something similar even in personal projects where I would set up the wind and it would look good until I would press play and then wind would just go out but the gravity stay
that last thing you mentioned is the problem, which is difficult to find.
Got this to fracture and use my trace that i have but is there anyway to have the frame be static while i can disrupt the inside ?

emm, is that a number ofACTIVE RUNNING NIAGARA instances?

is there a way to see where are they being simulated?
omg yes it was xD I don't know why my system wasnt dying out
Hi there !
I have a simple question about materials and sprites in Niagara: When I use a texture with alpha made in Photoshop or Substance Designer, the sprite in niagara isn't smooth like the texture, does anybody know why ? (first pic is how it looks in Niagara and second is the texture)


any shader/PP i could use to mimic wet surfaces? My overlay mat doesnt work on many meshes with nanite... so i need me a work around
have ya edited any values? contrast, saturation, etc? (there are no dumb questions except this one - i mean my question just to be sure)
Well I'm not sure lemme check
This is the mat I use tho


But even when Using a simple mat where i just link the base texture to Emissive color and Opacity the same thing happens


Honestly checks out, as far as I know that's just the nature of emmissive - the slightly translucent is gonna seem less so as it brightens
You could try clamping... Yeah... Yeah! Try a clamp node
Damn, I'm quite new to UE5 and getting my hands on it, I'm starting to have good logic and can breakdown VFX I see and try to replicate it but I still lack some good material making knowledge so I always get confused when something happens lmao
So I should clamp before linking to the emissive output ? I understand but then I can't get some bright effects right ?
i'm garbage with materials, too D:
I usually just fuck around till i find out
Yeah so do I lmao
New VFX/Tech Art Newsletter is out!
📃Read online: https://simonschreibt.de/?na=view&id=38
✋Subscribe: https://simonschreibt.de/newsletter

Has anyone here ever made a post process effect that is like a hallucinogenic? I'm trying to achieve some melty, color blending type visuals and I'm not sure where to start.
Chromatic aberration & I’ve distortion might be good places to start
yeah I'm already using some of that but I was hoping to push it further with some ghosting or something
Hi, I am having trouble with importing videos to Unreal. My idea was to create VFX on transparent background in After Effects and import it as a video with alpha, so I can play it in Unreal. Is it even possible in UE5.3?
How many frames? Is the camera locked down in the game? Need more info
When in the Texture viewer, set the mode to Grayscale. It then has a higher bit-depth and the banding shoud be gone
The video is 50 fps, camera is locked (although what does it change?) I exported as .mov Apple ProRes 4444 with Alpha. UE says a4phh is ’non standard, skipping’
For using videos UE only accepts a certain format iirc. I’d say your best bet is to read this (or find a video) it’s not a simple drag and drop endeavor unfortunately. https://dev.epicgames.com/documentation/en-us/unreal-engine/play-a-video-file-in-unreal-engine

Epic Games Developer
Illustrates how you can play a video file inside a level on a Static Mesh with the File Media Source asset.
Yeah I’ve read this and followed but it’s not an issue with displaying, it’s unreal not liking the format of the video..so sad
Alpha is supposedly supported but only certain file formats work. Also they need to be in a specific directory.
& this?

Epic Games Developer
Technical information regarding Media Framework in Unreal Engine 5.
Omg I looked at that page like ten times but only now saw the codecs area in project settings..thank you, I’ll try that
The mode in the compression settings ?
yesss


oh lol. ah because it has an alpha channel. maybe try another setting that doesnt have compression. maxybe HDR or smth
Hmmm every compression mode seems to have this result in materials
Even when its looking smooth in texture viewer
hmmm very weird. did you create this texture in 16bit?
Idk lemme check, I tried both in PS and Krita but didnt look at the bit parameters
Oh I'm in 8bit
because if not, maybe a solution could be to remake the texture with a higher bitdepth (maybe just set 16bit in PS and blur it a bit) and then dont use the alpha channel. Import it as a grayscale texture and use one of the RGB nodes in the shader
What does the bitdepth change again ?
more value steps, so better gradients
Oh this texture I got from a tutorial tho, but this one I made in SD
left is 16b and right is 8b the banding shows a bit more


Indeed
Whats weird to me is that the text is this one, and appears like so in texture viewer

But when used in a mat it has the bandings

hmm yeah i just tested in in UE and its the same

smooth gradient tho but the edges are a bit abrupt
added a cheap contrast node with 0.01 I guess that does it :D

Lmao it doesnt change anything for me
Just plugged the rgb into a cheap contrast ?
yehh after saving it in PS with 16b and grayscale compression.
only the R channel but i think that doesn´t realy matter
Okay it's better just have to add an alpha channel

I never understand why some of my ps files have no alpha channel ugh
weird xd but glad u got it!
Hey! Quick question, Does the chaos cloth system interreact with the water buoyancy system? I am trying to get basically a piece of cloth to float down a river, but they don't seem to be talking to each other.
Just btw. You should always be exporting your textures packed or only in one channel for masks like this and use the R channel as alpha. Else you are sending through unnecessary data. Eg 4x for rgba or 1x for R and if you have multiple sprites on screen these will eat your Vram.
Hello, I was wondering if someone would be able to help me with this WPO issue of mine
My goal is to create a fish shader, that will move the mesh in a wave imitating the swimming motion. I've succeeded with the motion that I want, and isolated it to the Y-axis, but the issue is that I can't find how to set up the shader, so it can work independent of the meshes rotation in the world. Now, as you can see in the second image, it breaks if rotated.
I've tried having the TransformPosition in the end, and feeeding a subtraction of the new/old positions, which resulted in a large offset from the origin, but with success in the rotation goal.


Watch this video.
https://youtu.be/f0op34diYdo

Project Files: https://www.patreon.com/posts/96188513 .
In this tutorial, I am going to show you how to crate and export an animated static mesh from blender to unreal engine and create a animated butterfly mesh particle effect. Here, even though we are using a static mesh, the butterfly particle meshes will have the wings flapping animations a...
I'm aware of this method! However it's not as procedural or customizable as doing it all in the shader
in shader it is more complex you will need to use quaternions for rotation, which takes too much instructions count.
but doable?
what?
is it still doable performing this sine wave displacement in shader only? independent of mesh rotation in level?
yes it is possible but you will need to rotate the absolute vertex position according to mesh rotation, and you can do that with quaternions
alright, understand, thanks a lot! apprecipate your help
Yeah I knew about it a little but always forget to do it thanks for the reminder ! I'm using channel packing from now on 🙂
About channel packing, How do I add an Alpha channel that works in photoshop when it's just RGB in the channel window (When I just add another channel, it doesn't work as an alpha channel)
Like here I had only the RGB Channels so I added the Alpha 1 channel but when exporting the texture into UE, said Alpha channel is all black

If you export as targa your alpha will be included, might have to expand the export settings
"save as copy" then pick the drop down
Put the transform at the end but also invert it so local space to world space. Think of it as taking what youve done in local space, and then putting that into world space. Also probably replace the world position node with local position? Experiment more with it, im feeling foggy asf so I cant think the correct code but you dont need some quaternions baloney, youre on then right track haha
.
Come to think of it, the wave logic altogether doesnt make sense,
The steps are:
- Make a gradient down the fish using local position
- Apply a sine wave to the gradient
- multiply this wave with another gradient to control falloff of the waggling
- calculate offset side by side (so waggleSine * strength * (1,0,0) maybe?)
- transform to world space
Yours definitely needs a rewrite. I remember fucking up my fish the first time I tried this same method 🥴
Multiply vertex position by sine wave (there is a node for sine waves). Convert to local space or object space, so it works with rotating mesh.

An Unreal Engine material tutorial to be able to create a dynamic object space gradient using math nodes, and then using that gradient to map a texture to the object in local space.
If you want to learn more about Materials in Unreal Engine check out my new course here:
https://tharlevfx.gumroad.com/l/ue5materialspart1
If you have any questio...
New VFX/Tech Art Newsletter is out!
📃Read online: https://simonschreibt.de/?na=view&id=39
✋Subscribe: https://simonschreibt.de/newsletter

Hello!
I'm trying to use curve atlas for sampling color in my material (I'm trying to set scalar param from bp, that is used as a "curve time" input in the material). But for some reason the whole curve atlas thing works only if the curves in it are 0-1. I have multiple of them, and they are all 0-1440. Is there a way to use curves like these?


As far as I know a curve atlas only samples the 0-1 range of the curve, so you have to have the curve in that range for it to show up there. If you want to sample a curve using numbers from 0-1440, you could just divide the original number by 1440 and sample the 0-1 curve with that; it should give the same result.
Thank you very much for your answer. Sorry I havent mentioned that I'm aware of that solution. Do you think it would be faster if I sample color from curve in BP, and pass it to dynamic material? Oh and do that for 5 different curves/vectors.
Or If I normalize all the curves, make atlas, and pass only 1 float value to material scalar param.
Sry if that question sounds to vague xD I'm just thinking that running the whole sampling on gpu, and passing only one scalar to material is faster.
rn I'm doing this in BP (this function executes every 0.02 seconds):

It's more performant to sample an atlas in the material.
Finally got it, thanks 💗
This is the stuff tysm 🩷
you need to rotate the final output by the rotation of the thing
You're implicitly unrotating world position into local position, you need to rotate it back again after modifying it to get back into world coordinates for the offset output
I’ve already got it on deck thank you so much!’

itch.io
A Collection of SDF Shape Material Functions for Unreal Engine.
it should be pinned i think.
I'm trying to animate spline form. Made 2 keys with different spline form and positions but it's not animating. Spline always stays in the last position even in the previous key. I've also tried to attach spline to the bow and characters finger also made keys and it works properly but only the first time, after compiling it goes crazy and not in a proper location. Have no idea what's wrong other objects animate as they should

Does anyone know, why I can't rename my Emitter? (the emitter is a single file, not placed in a system)

I believe the emitter always takes the name of the asset. Are the names the same after closing and reopening?
So I've been wracking my brain for a few hours trying to figure out a way to replicate this screen distortion effect without a scene capture 2d component and I'm not sure if it's possible. But I really want to incorporate something like this into my game, I just can't afford the performance hit from the Scene Capture. Anyone have any ideas?
(Where's that example from btw?)
I bought it from fab: https://www.fab.com/listings/80e30e93-2b9b-4138-b2b5-59e347db2cba

Fab.com
Dynamic screen distortion effect.Introduction video: https://youtu.be/bdxotEc_ewMTry before buy (small demo): Google DriveHow-to Video: YouTubeFeatures:Dynamic screen distortion effect;6 different styles for post processing;Many customizable parameters (look for it in Material Instances) allow you to customize the FX appearance as you want;Ease ...
It's a really nice effect, but it has a huge performance hit in larger levels.
Hmmm, I could be wrong but for persistent trails like that you'll definitely need a render target (so scene capture 2d iirc)
If you don't need persistent trails & just want screen distortion you can maybe use the Scene Color node in a material.
Darn, yeah that's what I thought. I already have chromatic aberration and saturation adjustments but the trails give a really good psychedelic feeling which is what I need.
Yeah, I think anyway you cut it you're going to need a virutal type camera 🙁
hm, no. i just remaned a emitter-file, opened it and the name did not update.
thanks to @karmic mist we found it out: you need to restart unreal!
all good, thanks for taking a look :)
This is why we need a previous frame node 🙏🙏🙏🙏🙏🙏🙏
So many use cases
Yeah it’s kinda crazy that doesn’t exist
Works for me, not sure why it doesn't for you.
Hmm.. maybe because I'm in 5.5.4 and you in a version where it's fixed?
Thanks for testing!
New VFX/Tech Art Newsletter is out!
📃Read online: https://simonschreibt.de/?na=view&id=41
✋Subscribe: https://simonschreibt.de/newsletter

I’ve got a Niagara system spawning particles from a sword tip socket.
Right now the velocity always goes world up,(I tried setting local and world on emitter) but I want it to follow the sword’s rotation.
What’s the best way to make the velocity use the socket’s orientation?


Is rotation mode set to local?

Yep

Then my guess is that your system isn't attached to the sword, and thereby not inheriting its rotation.
I have socket mesh location which spawns the particles from the tip of the sword using attach parent. so it defo attached to sword mesh.


Can you show a video of the issue?
Sure here you go
It looks like the rotation is working correctly, just that the effect is oriented the wrong way. During the sword swing you can see the fountain is no longer spraying up but sideways. What is the orientation of the sword mesh?
sorry what part do you want to see? do you mean this
I think you might just need to set the Location Type to the default value, Keep Relative Offset.

Ohh that was it! thank you so much!!
New VFX/Tech Art Newsletter is out!
📃Read online: https://simonschreibt.de/?na=view&id=42
✋Subscribe: https://simonschreibt.de/newsletter

Hello, after adding Settings to the game, I've noticed that deactivated Cascade (UE 4.27) particles get reactivated after changing Effects quality. Does anyone have any solution to handle this?
@frigid oar run like a chicken, panchoot
@frigid oar कहीं न भागने का मतलब है कि आप हमेशा असफल रहे
How do you guys deal with large amounts of bullet/projectile tracers? I need a very busy scene and am looking for ways to optimise. Niagara aside (feels too heavy performance-wise), what else is there? I experimented with tracer ISM combined with material WPO offset, this works great, just wondering if I'm missing anything. How do AAAs deal with this problem pls?
AAAs just push whatever they can because they must, not giving much care. Niagara is perfect for it, your evaluation of it as feels to heavy performance-wise is errorous.
Thanks for sharing
Hey all! I have a fish jumping out of water particle, i am looking to get it to spawn randomly over a water area, any idea how i may do that with a blueprint?
hello, lil question. can i achieve a decent and subtle dof which is not too expensive for gameplay purposes with the post process settings or is it better to use a post process material with a custom blur material?
it should be always enabled and blur out the horizon a bit, based on 3 values: blurNear, blurFar and maxDistance at which blurFar is basicly active.
a bit like the old call of duty games blur or i think gta 5 has it.
hey people, i've been searching for some good information on quartz clocks since it's not very well documented, do any of you know where i can find some? or am i just missing something
you've played with unreal's dof already?
yes, but somehow i am either too dumb for the parameters given or i cannot achieve what i need
making one comparable to unreal's in performance+quality in post process is likely possible but uphill. You're doing it in C++/USF land or you're using UserSceneTextures to do downsampling
what are you having trouble achieving?
i want only depth of field at 1000m distance, where at 0m distance i have no blur at all. obviously beyond 1000m the blur must scale correctly but i want that whatever intensity value i use scales the blur at 1000m
lemme get examples

here you can see in the distance the subtle blur. this blur amplifies the feeling of real fog/haze. only the blur amount changes with weather changes
eg., here with foggy weather the blur is stronger

but the distance is still the same
the nature of the circle of confusion is that far-field coc drops very quickly with focal distance

unless you're focusing right in your face you will get near-zero far-field blur
if you want blurry fog go get Screen Space Fog Scattering on fab and don't worry about DoF 😄
if you want to try to make this work with unreal's dof, try setting the focal distance very very short. like start with 100cm and work backwards
using unreals DOF i also get this noise, noticable on the silhouette of buildings. is that normal?
and use like 0.8 aperture, very low values
edge issues are common in dof
are you on epic quality?
yes
yeah that's uggo and i do not think you have any levers for a fix
if Screen Space Fog Scattering can't do what you want then yes i would do it in post process. for far-field DOF you can do it in a single material pass though a downsample or two could still help your performance. (near-field really requires downsampling to do efficiently because the radius is much bigger)
but again, for blurry fog, SSFS is a great tool and is absolutely built for that job
ok. now i have another problem. perhaps you know wether i can even fix it or must edit engine source code. i have sorting issues with translucency.
i have a custom post process fog. its set to "Scene Color Before DOF"
All my translucency then has to be set to "After DOF" but that obviously doesnt work with DOF then anymore. what do i have to do to fix this?
no magical bullet here. find a way to sequence things in an order that works for your needs
uh yeah, thats the only combination i found works but perhaps there is something i overlooked
translucent materials are trouble when they're not "mostly translucent" or "mostly opaque". it's in between where you get into trouble
mostly translucent -> after dof, dont write depth/velocity
mostly opaque -> before dof, do write depth/velocity
in between -> going to look bad either way
what i found is that these materials work totally fine when i calculate the fog manually on each material
but that doesnt take into account the DOF then
yeah, dof cares about depth so anything that's not writing depth is either going to be not dofed or dofed incorrectly, your choice
that's why the in-betweeny translucent stuff is a mess
if you can make your glass mostly-opaque and have it write depth + go before dof, fantastic
if it's almost entirely see-through, likely also okay, the artifacts will be low contrast
ok, thank you. i again fell into the rabbit hole and it looks like i cannot get the correct pass order
i would like to replace the exponential height fog shader and use my own fog shader and set the variables and still use the volumetric fog. i tried integrating my own code into the engine but i must admit this is above my knowledge, have no idea how to set the shader variables and how all the things are referenced
yeah honestly haven't done that myself either
perhaps you have nothing to do and we both can implement our own fogs..together? 😄
looking for a while already for someone
i already did a good bit but unreals shader language is foreign to me still
and not well documented
not documented period 😛 i would just look at existing examples
nice, i would hit you up in your dms then?
Try this console command, "r.depthoffieldquality 5" I'm not sure about the spelling. It may help.
thanks, but i noticed i cannot use DOF anyways right now because of my post process fog
Hi guys, I'm not sure if this is the right channel to ask, but does anyone know how to create a fog shader for top-down games? What I want is like the fog is surrounded only outside of the movable area, I've been trying to look for solution but it's quite hard for me to do it myself if anyone could help this out I would really appreciated.. here's the reference what I'm trying to achieve: https://kvachev.com/blog/posts/fog-for-topdown-games/

This fog looks almost like volumetrics but takes almost no time to render
I am encountering an issue where the WorldPositionOffset is not working when importing custom meshes into unreal, it only works as intended on unreal native shapes.
I tried exporting a sphere from maya and houdini, with the same results no matter the export settings.
I also exported the sphere from unreal into houdini and then re-exported it and once back in unreal it has the same issues.
I tried every export/import option between programs but nothing changed the result.
I also matched every attribute I could read from the default unreal sphere in houdini to another sphere before export.
The issue is the same in unreal 5.6 and 5.5 - I also tried the same setup in another computer.
Anyone know what the issue is?

not sure but i know like blender has unreal presets/plugins to make the migration easier
so probably just about getting all the settings to align with unreals demands on that one
Hey thanks for the suggestion, I tried that with a blender sphere but the result is same.
I've seen a few forum posts having the same problem so it might just be a UE5+ issue
Well I'm stupid, its only in the preview where it doesn't work. Inside a level it works as intended
Hello, 👋
I see you had the same problem that I'm having now back in May.
I wonder if you ever solved this?
Hello! Unfortunately not, I honestly have just been working around it by having materials be translucent when I'm editing particle systems and then changing it to masked once it's closed, no crashes or errors seem to come up in build
I've been meaning to more of a deep dive but since I had a work around it's never been high enough on my priority to figure out
(I had a friend suggest it could be something funky with my operating system not playing nice)
Wait, so it doesn't crash if the particles are seen in game, just in the editor? 😆
for me yes, and it only crashes editor for me if I am actively editing the particle system with niagara, if it's closed, I make the material masked and then drag it into the scene to play I don't seem to crash
And I don't suppose you've tried upgrading to 5.6, eh?
Can't right now with my current project, but probably will eventually
Alright well, this workaround is good enough for me. Sorry for bugging you but thanks so much for the tip!
no problemo (hope it works for you too)
the 'blur' is usually to do with how light not only illuminates (which is the only thing ue's vol fog does by default) small particles in the air but scatters between them creating this 'blooming' look.
for a screenspace effect that emulates this behavior which @tough basin also mentioned
https://www.fab.com/listings/a670ac7b-392f-4ce0-ab5f-87a441d5ebb7
sometimes this kind of soft look is also caused by the properties of your camera lens (see 'mist filters'). in that case you can combine shallow dof with local exposure's 'detail strength', i usually set it to slightly lower than 1 (0.9~0.99) even when not going for that mist filter like look since no lens in existence is made of perfectly smooth surfaces

Fab.com
Exclusive 10% discount can be found HERE.Used in such great projects as:Clair Obscur: Expedition 33Esoterica - Firefly (music video)Talos Principle: ReawakenedLushfoil Photography SimThe Last Camp (short film)And many more!Showcase Trailer | Support Discord | DocumentationScreen Space Fog Scattering (SSFS) is a new post process shader that enhan...
generally you don't want to do that kind of extreme bokeh dof during gameplay since the performance will be awful. these are the settings i use if i have to add dof during gameplay (also see r.DepthOfFieldQuality=1 as you should be able to get away with it if using these settings), looks much cleaner vs. default on epic, good perf improvements, you will however either have to use cinematic or suffer the quality hit on high / epic if you want full bokeh dof

or you could use the default cinematic settings for cutscenes and these for gameplay
world materials (glass, water, etc) - before dof
effects, if semi-occluded or layered (volumetric, sparks, etc) - after dof
effects, if not occluded by anything - after motion blur
if using tsr:
r.MotionBlur.AllowExternalVelocityFlatten=0 on pc, 1 on consoles
yeah, some kind of blur 🙂
but i cannot get the order as i need with the post process fog unfortunately
it really is a combination of light scattering by particles + lens properties in most cases , just simplifying it down to 'blur' isn't really going to get you far. but which isn't the end of the world if you're not looking for something super realistic super next gen loll
order?
i already forgot what was the problem with "before dof" for translucent materials, i think some ordering or tonemapping was off then. i cannot remember.
yeah, nothing super realistic, just enough for fast gameplay. its for a racing game, thus people wont see any details anways.
yes, order of postprocess material fog, translucency (with fog math in it) and then dof of unreal OR postprocess blur.
lemme see for a sec
this assuming you're not using depth driven blur through a post process mat and you're just using ssfs, which is what i'm doing for my project
no ssfs
although, this thing is using a blur + fog right?
one way or another it is blurring the scene texture i assume. and that has no problems with translucency?
or is it just adding on top of unreals exponential heightfog?
it runs before dof. so if your goal is to basically copy what ssfs does without paying for the plugin you could try using scene color before dof for your ppm and compositing the blur on top of scenecolor
compositing and not 100% blurring btw, see the material functions with "blend_" in front of them
i'd honestly just suggest getting ssfs if you can its great loll
at the end of the day i have to integrate my fog completely into unreal engine anways. because of the post process fog i cannot get the volumetric fog and epic games decided to couple exponential heightfog and the volumetric fog together which is my show stopper.
and when i have that integrated one day, when i have the time, or someone flies by helping me at the last bit i am stuck at, then i dont have this DOF trouble anyways.
oh so you have a reason to use after dof for world materials that use separate translucency? not sure if this would work if you're accessing the depth buffer but i have a slight blur on image edges to simulate the characteristics of the camera lens, i'm doing it through a ppm that uses scene color before bloom
this i'd also recommend in your case. it's what i do all the time and also to suppress sorting artifacts
sec
this is what i get with "before DOF"

sorting issues
or some other problem, i really dont know what it is
here is a bit of the background peaking above the translucency (for comparison)

oh wow
you have to know that i have to cutoff the fog at farclip so it does not affect the skysphere, which created this problem... i just noticed.
i have no idea how to solve this
it really depends on what your post process fog thing is doing then, honestly i still suggest just getting ssfs since it's the safest way to inject a scattering shader and never breaks anything in my experience
priority is to have a working fog
a custom fog
the scattering and DOF is totally irrelevant how now 🙂
so scattering sim doesn't matter for now, and you just want to have a decoupled vol fog solution that doesn't depend on exponential height fog

Epic Games Developer
An overview of locally placed volumes to create height-based fog effects in Unreal Engine.
my fog is way more complex and does more things than the exponential heightfog, thus it shall replace it in this project. except for the volumetric part it exceeds the exp heightfog.
they only work with exponential heightfog as well
i need the volumetric fog at the end of the day for the thousands of street lights/car headlights and ambient lights my game has.
so i need the global volumetric fog solution the exponential heightfog would implement, but with my fog replacing the exponential fog part.
when i put translucency after DOF and calculate the fog manually on the translucency it works without any problems

but yeah, no DOF in the future possible 🙂
https://dev.epicgames.com/documentation/en-us/unreal-engine/sky-atmosphere-component-in-unreal-engine ? i'm still trying to wrap my head around what exactly you're trying to do but if what you want is decoupling the art direction knobs regarding atmospheric scattering from the exponential height fog this should do

Epic Games Developer
A physically-based sky and atmosphere rendering system with time-of-day features and ground-to-space view transitions featuring aerial perspective in Un...
if you want that 'thick fog look' a lot of older games have you can do it through a sky atmosphere with extreme values too
You can get large bokeh performantly if you downsample, which i expect is what Unreal's built-in DOF does under the hood
and which you can now do in materials using UserSceneTextures
it does via r.DOF.Gather.ResolutionDivisor . it's set to 2 on up to epic and on cinematic it's 1, so the downsampling is more extreme if you're not using cinematic but also affects quality
but even then large bokeh in my experience is too demanding for use in gameplay, well depends on how fast your camera moves and how heavy your scene is and everything but
yeah, "performant" is relatively speaking here
being an 'extreme performance comes first so make approximations wherever you can' person i personally stand for gaussian dof during gameplay and bokeh during cutscenes loll
I am just a beginner and when going to do in modeling mode the menu bar is not showing . The plug in is enabled and restarted multiple times also changed to modeling mode . What shoud i do..?
switch to a different mode, then switch back yo modeling mode, the modeling tab should be on your left viewport, unless its undocked somewhere
I have a very weird Problem with a deffered decal material and a texture which is clipping farther than it should be able to.

I am creating a material which in the center is just a SphereMask with a lower harndess and outside there should be this "cirular" texture.
At normal scale it works perfectly, but problems arise when scaling it down.

This is my material setup, im taking the radius and dividing the texture coordinate (set to center by dividing with 0.5, 0.5 ) and then adding 0.5, 0.5 again to get right texture position again. Then i clamp it to not have repeating patterns when the radius becomes smaller, problem is, lines start showing up inm that case. Any idea on how to fix this? Been trying to fix it for multiple hours now.

I checked texture, tried setting clamping and wrapping etc. Nothing worked
Need to edit your texture so the pixels along the border are translucent
Oh wow thank you! Did not know it was such an easy fix
Hello i am trying to spawn sprites with using Static Mesh Location on Niagara System. Since the triangles or vertexs density is not fixed at all seems weird. Is there any way to fix that? I tried all the choices in that node but couldnt solve. I want to spread the sparks evenly in the mesh.

Uniform distribution needs to be enabled on the mesh.
it was really the solution. Thank you!
has anyone had good experiences with an asset for explosions in space? think the spheroid Cowboy Bebop/anime explosions
most assets work as if there is an atmosphere
anyone knows how set thee visibility of only the box to zero but not the clouds if its possible

Hey guys! Do you know if there's any documentation for Rigid Mesh Collision Query? I've seen it in the talk (https://youtu.be/PikR41luBws?si=-aJjJnTJymZ0hEFq&t=1590), but can't figure out how to use it for my purposes. Any help would be appreciated

In this presentation, Technical Artist Xiao Yue will walk through how to leverage the sim stage and some advanced data interfaces in Niagara to create various physics simulations. This includes exploring particle-based constraints and grid-based fluid effects. She’ll also share some exciting updates on the Niagara Fluids plugin.
Hello! Is there a way to have a text appear on this with materials?

You have a few ways
- you can add a text render component
- make it a widget and with C++ draw it into a render target
Btw, really nice texture
Is it your own or you got it from somewhere?
thank you. I will try it out.
The line art is mix from pinterest and drawing on top of it. Making in substance painter.
New VFX/Tech Art Newsletter is out!
📃Read online: https://simonschreibt.de/?na=view&id=43
✋Subscribe: https://simonschreibt.de/newsletter

For those familiar with Niagara Data Channels: I'm setting up bullet impact FX and have everything working great! I'm wondering if there's any big difference in having all impact FX be handled inside of one Niagara system (with around 12 emitters that may or not fire based on the surface type from the NDC), or if I should split it up into multiple Niagara systems instead. Aka is one big system loading every time an island is activated preferred over a few smaller ones?
what material settings should i do for a fx with hardware ray tracing on?

anyone know how i can make this effect in ue5?
i want to use it for the players camera during specific events
also that link is massive
In case the embed doesn’t work
I have an electrified aura effect applied to a mesh that id like to animate as if it were "turning on". anyone have any suggestions for a good way to go about that? I'm fairly new to UE so i'm unsure of what type of tutorial to look for.
could go with something simple like having the mesh hidden, then driving the emissive super high for a couple frames before settling to its normal level. or could go with a fast reverse-dissolve sort of thing to reveal the mesh that has the effect.
open to any suggestions anyone might have
Cant think of anything other than motion blur with massive intensity
I'd use an overlay material
Add it when charging, remove when it's not needed
You can add it to any mesh and not worry about having to include that effect in every material
I guess you could do niagara too, but I'm very new to niagara 😄
lol same here. the mesh also has a niagara particle effect on it. i added a material parameter to the material that lets me animate its visibility in the sequencer, but its not affecting the niagara system.. still trying to figure out how to get that mixed in as well.
ill see what I can find about overlay materials, thanks for the tip
are there any City Sample experts that can explain how to control the building interior lighting?
I've isolated a single Instanced Static Mesh and the associated materials. Acutal interior lighting circled in the attached. I assume it must be some emissive for the interior but can't seem to locate it when I open any of the materials.

As I recall you basically can't without modifying the material or the textures, the interiors are stored in an HDR texture array, trivial to just add a multiplier before the emissive output though
Thanks
i have a fog effect in my scene and would like it to pick up light from an emissive material applied to a mesh. is that possible?
I saw a trick recently where you can fake this effect using an MPC to store the position of the emission and then use that on the fog material to create a glow around that position.
A handy way to cheaply fake lighting on particles in UE5: Use a sphere mask in world space. Add a Vector3 to the Object Position node to offset it wherever you need #gamedev #VFX #realtimeVFX #UnrealEngine #UnrealEngine5

i ended up faking it with a rec light and shuffling light channels around. but ill take a look at this, thanks!
How can I make a "Low bitrate" or "Youtube Compression" post proccess material?
the simple version of this would be implementing a posterizer/palettizer, and reduce screen percentage to below 100%
the more sophisticated? look up jam2go's video on datamoshing
there's also a datamoshing plugin on fab
I tried posterizer multiple times, but it just looks artifical and bad
I would like something more like youtube compression
like i said, see the video on datamoshing
you probably can't do it in post process material alone because compression artifacts are temporal
Thank you, I looked at that long time ago but couldn't find a tutorial except buying some plugin.
barring a very steep preference for money over time i would buy the plugin
if you want to learn to write custom render passes it'd be a good exercise but if you just want the feature you'll save yourself a few days' work
You are allowed to post on freelance jobs ,it's super easy
I sent you a link about it
No matter what I try, this ribbon here will NOT fade out.
This is despite its lifetime being less than the time below,
This is despite the opacity fading to zero,
this is despite other elements having the exact same settings fading out.
What is going on here? ;(

I'm wondering what I should check
What's the initial color in Initialize Particle?

I tried turning the alpha to 0.0 here but no luck D:
just makes the whole alpha invisible
Can you show a video of the issue? In the initial screenshot it looks like the ribbon is fading out on one end, so I'm not sure what the issue is or what your goal is
Your current opacity curve is indexed over the normalized age of the particles. This means that the ribbon will be fully opaque at one end and transparent at the other. If you want the whole ribbon to fade out at once you need to use a different index, like the age of the emitter. If you want to combine these you can multiply them.
New VFX/Tech Art Newsletter is out!
📃Read online: https://simonschreibt.de/?na=view&id=44
✋Subscribe: https://simonschreibt.de/newsletter

thank you again twads. changing the opacity curve to the age of the emitter (and then stretching out the curve so it doesn't fade too quickly) has done wonders 💯
Oooh, nice. I was working on something similar, but had been using grids so it made everything a lot more complex. How did you do it?
I store some cutaway information in the vertex colours alpha channel and at the material level I parse which faces to hide based on the vertex alpha.
I was going for an Izoi kind of thing, but ended up feeling like I didn't like it in the end
Oooh, tricksy 🙂 I like it!
Thanks! It still needs some optimizing at the camera level to make sure I'm not always updating the colours when I rotate around the rooms but its definitley been a fun challenge to figure out
My main issue was that if you were going to cut doors/windows in walls, you'd want the walls to be a single static mesh and do a runtime boolean, or you're going to have a bunch of wall sections (which I have now) and then you have the issue of updating wall connectivity
I already solved that 😛
are you saving the alpha value on the vertices of the wall where doors and windows are placed
Oh? do you cut or kit 🙂
I mean I could PCG a wall, but still it gets too complex for my tastes 🙂
the window/portal cutouts actually use a slightly different system. entirely shader based where I put a UCanvas on the wall section. Since my walls are in theory just lines between the grid a single canvas texture represents both sides of the wall. my windows and doors paint a white rectangle that makes up their shape on this canvas which is used to discard pixels
of course the caveat is no collision updates for doors
and there needs to be some loose guidelines for door/window meshes to avoid ugly gaps showing
Looks good man, good job
this is the next challenge ive given myself
I never would have thought to do that, I've been doing CSG based editing
I suspect basements will be an entirely new can of worms
i think the canvas would be realy expensive if you want many rooms, why not to save the data of doors and windows that are going to be attached to the wall and then opacity mask those parts of the wall by reading that data from the wall
that could be a better solution I'll have to benchmark and see how much performance I'm eating with the canvases
So are your walls in sections still?
its 1 procedural mesh component that renders every wall on the lot
are you writting canvases to texture and read them in material
Doesn't procedural mesh give up UE lighting features?
I'm anti-lumen 😛
PMC or DynamicMesh?
PMC. haven't gotten comfortable with the API difference
Yes
each wall section has a little texture for its canvas
so its a bunch of smaller textures
rather then a giant one
I've been using a ton of ISM's for mine.. basically like a voxel grid, but for wall connectivity
thats how I started but then I wanted to be as close to the sims as possible 😭
But I don't like it 😉 I think your approach looks great if you're not wanting UE5 lighting crap
Yeah, it definitely has the sims vibe to it
But yeah, different floors and stuff 😉 that'll be fun
I'm probably going a modular-snap route instead
Seems like a lot of people like the building in Enshrouded, so I'll head in that direction
there is one thing related to the way i mentioned if you want to save data on mesh would be that your vertices for the wall would be in grid like 4 by 4 wall will gave 32 vertices, 16 on one side and 16 on other side.
i got a couple of kinks to work out with the existing functionality I have so far since I added wall cutaways and some optimization culling of faces
I've been finding more and more base-building variations 🙂
for the basement I've been trying out a custom render pass
which has its own challenges
I think you're on the right track though, looks really sims-y
I spent far too much time on my ISM approach.. trying to figure out wall sizes and the like.. eek
and while I don't have it showcased yet, each grid cell can adhere to elevation independently

here is a sneak peek at some landscaping tools that are stil very much WIP and jank. I've backlogged them to focus on the actual architecture part 😛


Thats awesome! gives me colony sim vibes
Yeah, I think for this I'm going to focus on the interior stuff and have some modular snap based building for the rooms themselves.. maybe just enter room prefabs
I'm also a sucker for wasting time on organization so I've begun prepping some asset factories for how I plan to organize my buy/build catalogue

Hahaha.. yeah, I made myself a bunch of editor toolsets for data handling
I think UE's editor scripting and stuff is just awesome
I plan to also do an interior only mode 
being able to build little scenes like this at runtime would be fun and yours looks like its already close to that

Here's what mine looks like

This is what I'm going for

Mostly so I can just use a ton of asset packs for keeping things interesting
I mean, it won't be visually coherent, but thats part of the game itself
I'm too busy to make a full game so I'm just building this as a plugin and hoping someone else will make more sims games
there are no hard shadows here therefor it looks cool and in the upper one there were hard shadows
And my "topside"

Going to be mainly underground but figured I need a more chaotic topside
What 🙀 whole factory under the ground
Yeah, its just shitty lighting for testing, you can edit that but it helps to enable ceilings
Its a bunker complex you live in
Going for a vibe similar to BigMediumSmall's "industrial zone" assets
This pack just got bigger again.
To wrap up the last day of the launch sale, we added a new Unreal 5 demo scene to this pack.
Look at how we build stuff in Unreal using this pack, rip it apart, and use it in your scenes.
Just a note!
It is not a game level but rather a showcase of what is possible with these assets.
This set is massive, and...
Something like a more brutalist version of that
and less industrial 🙂
I've become fascinated with how to create really large architectural structures in Unreal
Most of my stuff is going to be a mix of Houdini and asset packs 🙂
Not an artist after all.. so got to make do
Yeah Bro that makes sense to use some asset packs for this, As having such big system underground takes too much time for indeis to make
I'm going to houdini a bunch of building systems.. I guess similar to their project titan
But using assets is really the only way I can manage
does anyone know any tutorial about turning character animation into vfx (like ghost or phantom )
Do You want to leave a trail of ghost forms? Transform into ghost? Or just make the character looking ghost like?
i want my caharacter with animation looking like ghost
but with vfx
not material
like turn animation into a particle
Have You seen that (quite old but if thats something You are up to I'm sure You will be able to adapt this technique)?
https://www.youtube.com/watch?v=syVSRDQxrZU

In this demo, Chris Murphy covers the fundamentals of Niagara, Unreal Engine's new VFX system, and extends what begins as simple functionality into an advanced character disintegration effect. This presentation acts as a primer for new developers looking to create effects in Unreal Engine and provides a demonstration of the kind of advanced syst...
Trying to decide how to make an object's color gradually shift between 2 specific colors. My leading plan was to set up a Material with parameters involving those 2 colors and a 0 to 1 Lerp parameter. From there I was going to set up an Abs (Sine (Total Time)) on the Event Tick.
Unless: anyone want to suggest another way to make an oscillating function?
there's a time node in the material graph
you don't want to have to change that parameter on tick
that is more complicated and slower
I can look for it
Time node in Material editor looks helpful! I set up a couple of materials with it: 1 that "Flashes" between colors, ie: A Continous oscillation that flows from 1 to others, and another material that "Blinks" in a Discrete manner ie: Just alternates between the 2 colors with no gradual lerp.
Hello everyone. Does anyone here made Missile Smoke trail effect using Niagara or cascade in UE5.4+ ?
I have not but it's not a hard task.
Hi everyone, I'm a beginner at unreal and would appreciate help. Currently trying to set up a way to make a material appear more opaque if it's in shadow by a directional light (the only light source in the level). Seems like I can't check in the material graph itself whether or not the fragment is being shaded or not, so I was trying to see if I could somehow read the shadow map from the directional light an use a post process volume to overwrite the pixels on the mesh to see more opaque by multiplying it with the color of the material. Issue is that I don't know how to read this shadow map. Does anyone know anything about this?
When creating VFX for cutscenes, what is the way the industry usually tries to compile a list, PowerPoint presentation, or Excel spreadsheet with a timecode. I need to do something like that myself, but I want to make sure I am doing it right.
Hello! I am a programmer looking for some help, I want to make a texture SubUV/Flip book, that contains the numbers and maybe a few characters like ! of a font I am using , so I can then use it in niagara to write numbers. I don't know how to create that flip book, which program to use or anything really, could use some guidance!
Any image editor will work. The main thing is to keep the frames in a consistently sized grid.
Hello everyone, i am trying to create a fluid simulation on a 2DrenderTarget to re use it has a normal map or vector of force to create Interactive Water or Snow etc can anyone help me with this ?
The niagara fluids plugin has an interactive shallow water system. As for snow I like this tutorial series. https://www.kodeco.com/5760-creating-snow-trails-in-unreal-engine-4

kodeco.com
In this Unreal Engine 4 tutorial, you will learn how to create deformable snow trails using a scene capture and render targets
Hey 🙂
I'm having trouble getting the water body interaction to work in my own map (Unreal 5.5).
When I make a test-map and just place a river, everything works perfectly fine (see GIF1). I placed another character and made it play a run anim to test the interaction without having to move myself into the water.
But when I place a river in my game map, place the same player character with the same anim, I don't see the water interaction (GIF2). And I have no idea why. Difficult to debug, because the water plugins are all written in c++.
Does anyone has an idea how to get the water interaction to work or what's required? II tried setting water tags in the component but again: It's the same player character. The issue must be in the map itself.


"Solution": This setting must be enabled.
IT WAS! I unchecked it, restarted, checked it again --> works now.

has anyone ever seen a scaleable rendertarget solution for stuff like water or tracks on ground in unreal?
I want it so the rendertarget is attached to thr player and everything shifts the opposite way as thr player moves, could be used for so many things yet i csnt find a working one
check out the tutorials in that link
any Niagara artists wanna collab on some plasma from a Wraith FX? I'm working on a halo starry night remake and need a good plasma ball with a smoke trail

Can you one give me advice how I would go about creating the led teeth on my mask design

Either a broad mask and multiplying a small "LED" like mask with lots of tiling to it. Then multiplying that with a color value and then adding that to the Emissive pin on your material. I might missed some multiplys with some add or overlay or lerp, but I think you can guestimate it.
The broad mask just being the teeth in general.
Well looking to hire a VFX artist for this then
anyone used this? https://www.fab.com/listings/ff0ac933-a621-4541-9efc-24f09c6a39e2 I use it purely for outlines and Im trying to use custom depth pass to disable the outline on specific objects, and I can tell it "works", but what since its an outline, the outline still renders because its around the mesh, so the mesh itself being a stencil doesnt fully remove it, I dont know what to do or if thats even possible to fix

the outline is around the model, so the model being the stencil doesnt work
the cel shader should just ignore these models entirely, but I have no idea how
damn
Weird!
Why does the Water River Body Volumes don't end up in the shader complexity view? They are for sure not "for free".
And why does my test plane with a simple, OPAQUE "Single Water Layer"-Material burn red, while he river stays green?
This must be a bug of having water bodies not being part of the shader complexity view mode, right?

Ok this is driving me nuts. Beginning of day 3 of working on my held torch. Not constant but at least 10 hours and I have come to the point where I need a genius to come through for me. My torch is a pickupable and for how the torch functions i need the fire to stay on the torch blueprint. I will not go over everything i did as I do not want to descorage help from any one but damn this should not be that hard. The behavior i want is to be able to press a button while holding it to turn it off and on, The problem is that even if set to auto activate the torch still turns off when I pick it up. I have tested the emitter in every way I know tried everything I know and have found but no matter what I do I can not turn it on while holding the torch. Any help would be great. Thanks
I just realized what it is. When I pick up the object I destroy it hence it is not working
I just dont know how to fix it lol
Are you not able to not destroy the torch?
so with my pickup system I am destroying the item before hand and replacing it with an instance that allows me to have many different items so I cant put any of the turn on the fire logic within the pickup and my pickup system destroys the object on the ground which is the actual blueprint I am using and just swaps the mesh in the instance. So I essentially am not even holding my blueprint for the torch but just the static instance. So I stuck as to when and where I should call the stick(main static mesh that the rest are instanced from) but I want to be able to put the stick places and leave it on fire(that logic is already working) I strictly just need to be able to turn the fire on and essentially leave the fire in the torch blueprint so it can follow the torch. I should probably just make a different pick up for the torch only?
What do you mean by instance? An instance of a blueprint?
So when the torch is "picked up" it's acutally creating this other blueprint, setting its mesh component internally to the torch mesh, and then destroying the original torch blueprint correct?
yup. Then once it is picked up it is only referencing the "stick"
Ok, yeah making a child of your picked-up, functional blueprint for the added torch logic makes sense, though I wonder if in the long term unifying the pick-up blueprint and the picked-up blueprint would be a better design choice. It creates design complexity since they're supposed to be the "same" object, and the way it functions now forces you to implement similar logic in different places.
So it is all one thing. I am picking up an instance of the same system its just when I have it is referenced as the "stick" I have tried so many ways to try to remedy it and truth be told i have spent to much time on it. I am going to just throw the fire on the "stick " on my character. Get a boolean from the torch blueprint to see if I am holding it and allow it to just be turned off and on from the character. I have already done all all of that except the Boolean
I just did it with a trigger box on the torch. If the character is holding the torch the trigger box will allow the input
Not the best way to go about it but if it works it works. It sounds like the core problem is that you're getting an unexpected result when picking up a torch. If you would like help with that feel free to reply.
Yeah i still have the same issue to have good control over it. So the torch bp is in the level. Once picked up it is destroyed and then referenced to as the "stick" once held by the player. If I call the torch in the player it always returns false because its now the stick
And if I just even try to check a boolean from the torch it fails
Hi everyone! I'm developing VFX assets in Real Engine 5. I'd really appreciate any recommendations on how to improve them. I'd be happy to discuss it. 🙂

@grim briar do you know wether i can access the current and target eye adaption value in c++?
I don't know, sorry, my blind guess would be that you can't
You'd have to read it back from the GPU, it might be possible to do that through Niagara
but there would be latency
ok damn. my use case is that i set the eye adpation speed to very high values and wait until it reaches the target eye adaption value and then reset to default settings. eg. to change the whole lighting scenario instantly.
Hi everyone,
I'm trying to achieve a specific tentacle-like spherical effect around a character (see reference).
I’m not entirely sure how to approach this. My initial thought was to generate a mesh in Houdini and then drive the motion with a material, but I don't know if that's the most efficient workflow for this.
If anyone has a video, some tips, or a starting point to recommend, I’d really appreciate it! I'm currently a bit stuck on this.
Thanks!

That is one of correct approaches. You can proceed
You could also use some Niagara effects to make ribbons and then apply some basic tube mesh that also uses some material WPO animations to make it chaotic. But overall, there's a lot going on there, so if you go the Niagara route, you'll likely be looking at a 5-10 separate emitters for all the little nuances
But it depends on how that screenshot is animated, like if the tendril things are swirling around and stuff like that
Thanks a lot for your tips i'll look after these ! In the meantime i've found the original reference on youtube and it seems to be like a fluid simulation like blood or so ! I'm still thinking about whether to do it upstream in Houdini or whether to manage to do it all as you say with WPO etc.
https://youtu.be/T5sTIkFyR8k?t=103

- 콜라보 한정 SSR 야토노카미(夜刀神) 예고 CG│阴阳师×京极夏彦
- 음양사 x 교고쿠 나쓰히코 콜라보
"인간의 마음은, 항상 즐거움을 선사하지"
한 번, 두 번, 세 번, 의식은 끝났다!
남자는 야도신(夜刀神...
That could be done with layers of ribbons. In the materials, you'd use a dissolve-like effect(animated noise alphas) to undulate it and cause the ripples and whatnot. Pretty cool looking animation though, I'll have to check it out on my PC to see the details better
Trying to fluid sim that would be a nightmare to art direct, but it could be done. That's something you'd throw at a fast GPU based simulator like Embergen so that you could iterate quickly
Yes, I also think it would be a nightmare, having already tried this approach haha. I'll look into doing all this using ribbon layers, material and WPO management then ! Let's make that easy at first x)
Thanks again for the outside perspective, it helps me a lot!
And yes, the animation is really cool, I was blown away haha.
looks like there's 3 main aspects to it. Spherical Particles, Spherical Ribbons, and Dust/Volume FX. I would handle the particle sim first to create the bulk of the shape in niagara, then duplicate that and cut down most of the particles and use that as your ribbon emitter. Then, I'd do the volume stuff in Houdini, and import it back into Unreal as a heterogeneous volume
And one thing I forgot to mention about the ribbon part is that obviously you'd anchor some points like the start/end or start/midpoint/end, depending on if you shape them to meet at the top or if they wrap the full dome
trying to decide if I wanna be more heavy handed with the air distortion
feel like you can't really see it
How is everyone doing ship wakes in a ocean environment for cinematic use? Are you using UE tools or plugins or bringing that from outside 3d tools, like Houdini? I can not seem to get realistic water fx inside of UE. Any good resources or tutorials showing that stuff? Thanks!
Theres some good (albeit pricey) plugins out there for cinematics
Fluid ninja is good and can be used for cinematics
Fluid flux
And there is one specifically for rendered cinematics but your ripples may vary depending on how you’re intending to art direct
any ideas on how to have a mesh particle align to the emitter. so if the emitter spawns on slope or something the mesh orientates correctly
hey its my first time playing with chaos stuff.
i want to make an explosive barrel, ive already fractured it and I used FS_Master_Field (copy) and tweaked its variables, its kinda working but im wondering if thats how its supposed to do
Just thought I'd share my interview regarding the state of HDR in the industry:
https://wccftech.com/the-hdr-gaming-interview-veteran-developer-explains-its-sad-state-and-how-hes-coming-to-its-rescue/
there's some technical comments about Unreal Engine too.
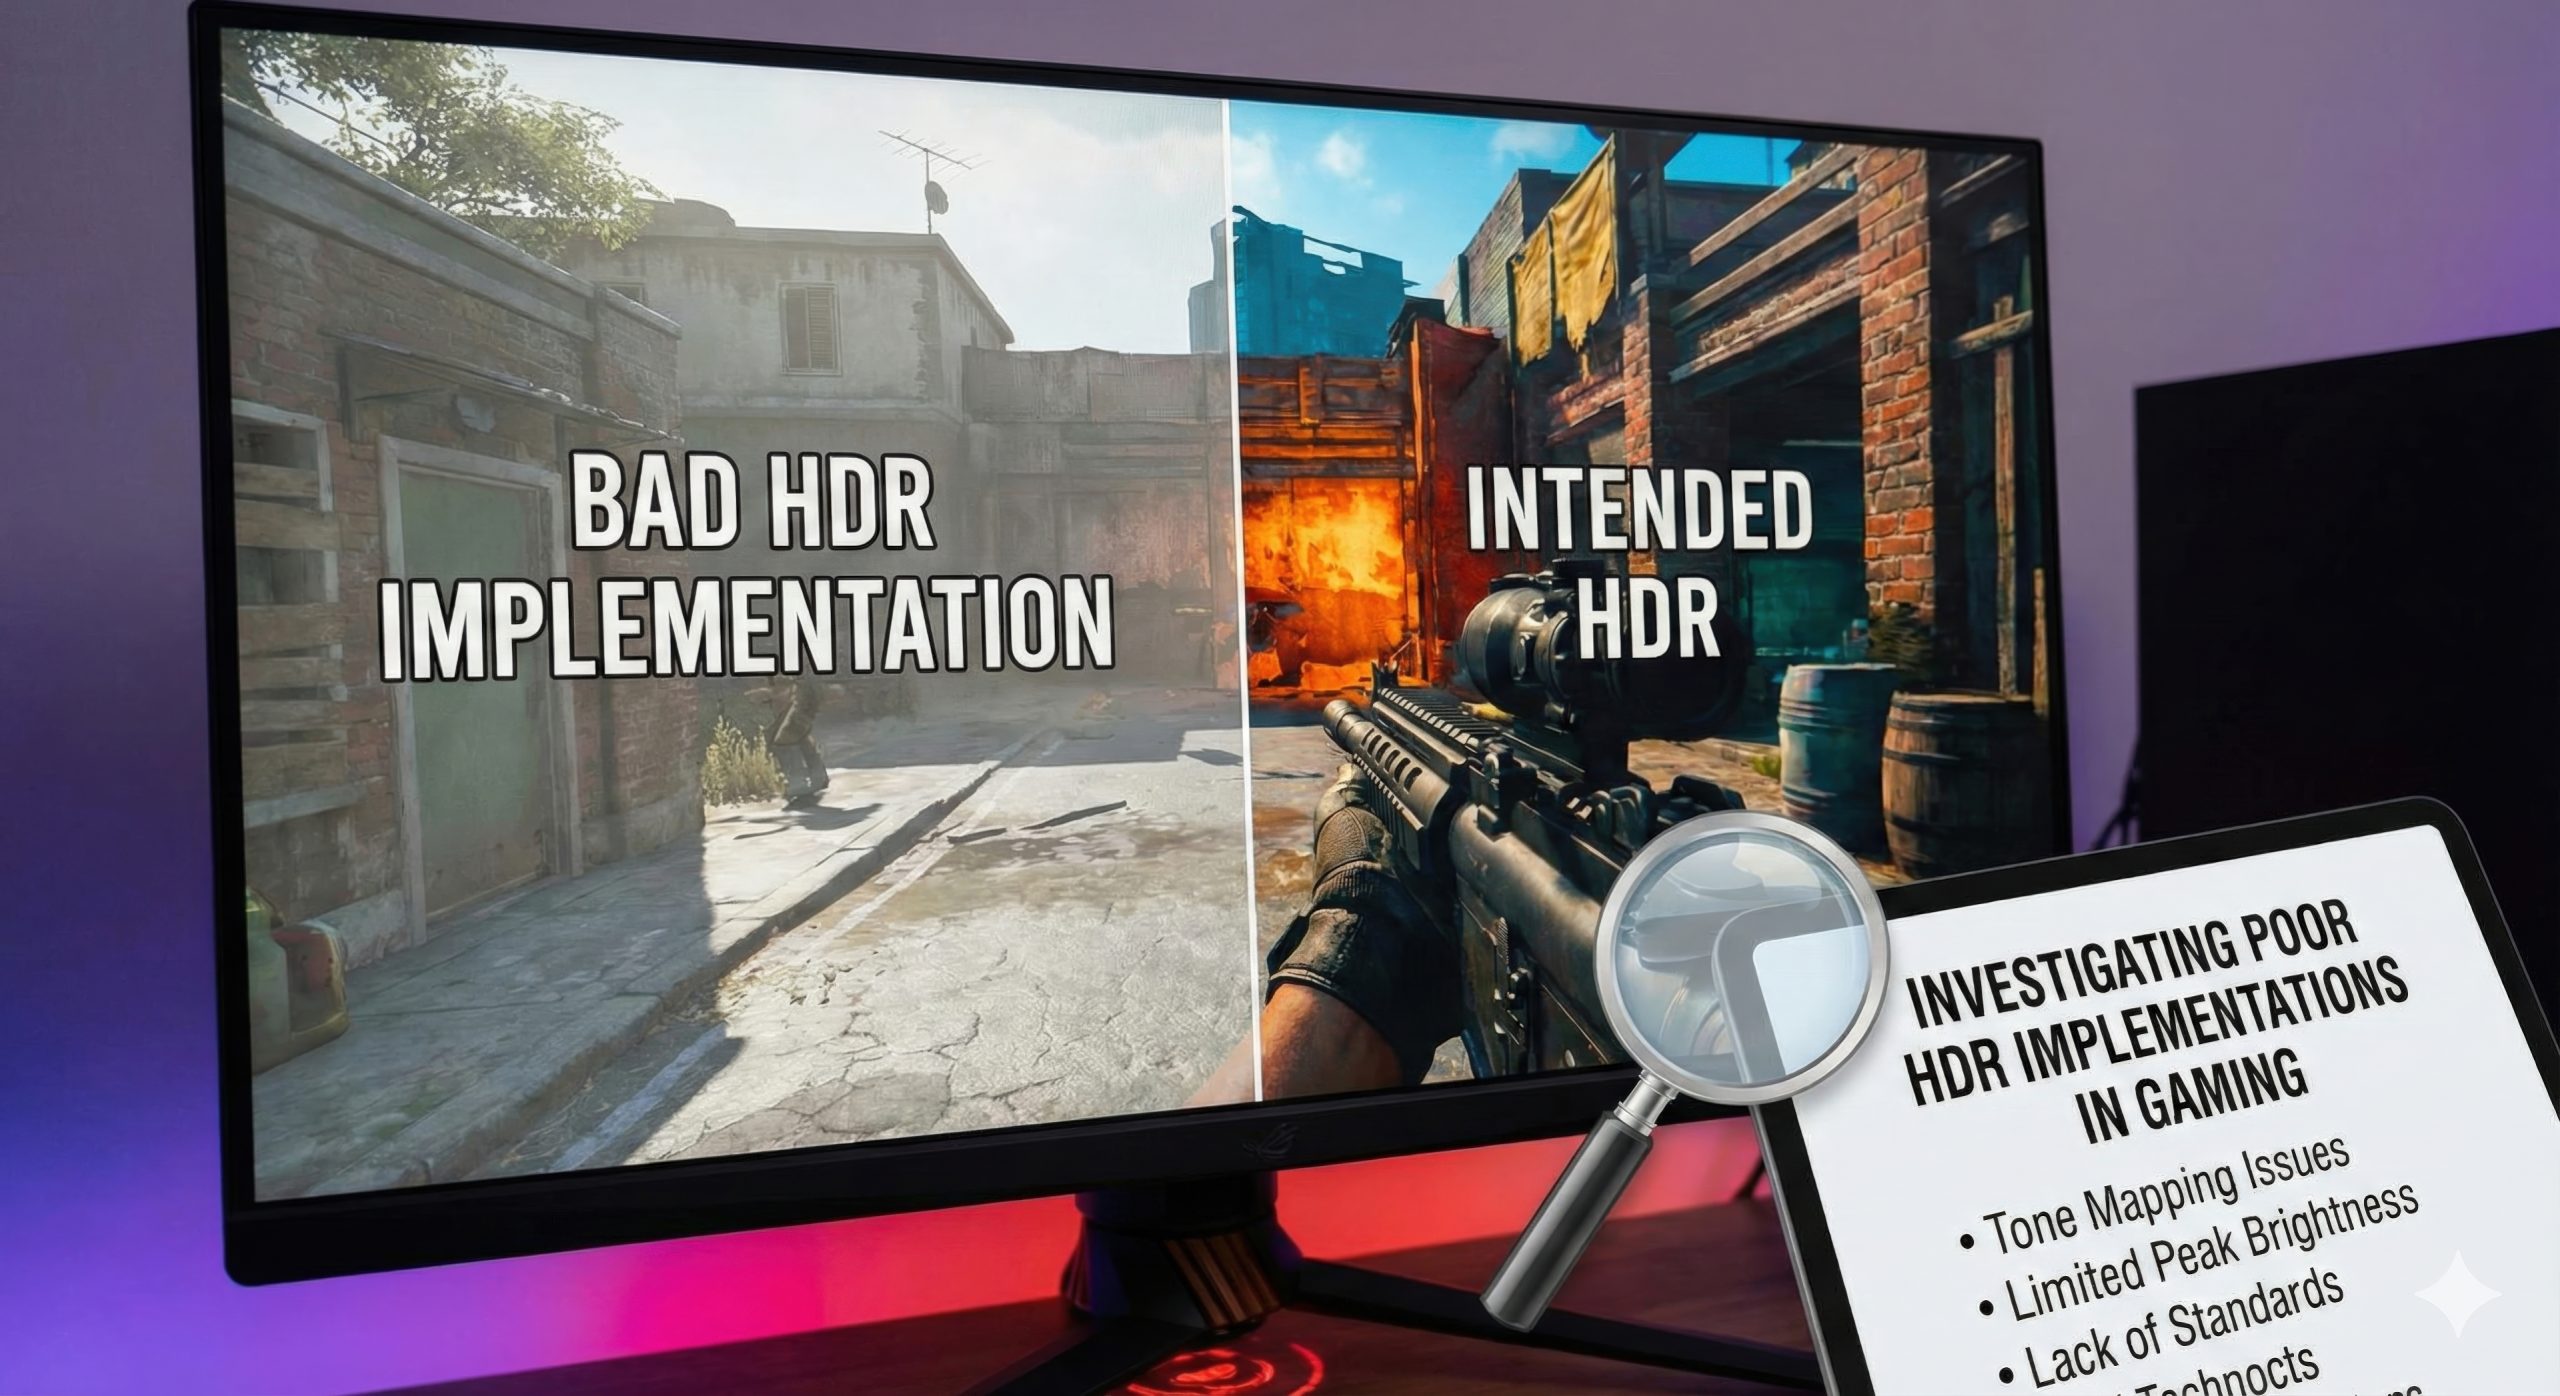
Wccftech
We interviewed Remedy graphics programmer Filippo Tarpini to discuss the sad state of HDR gaming and his tireless efforts to improve it.
hello fellow devs , i want to ask for directions and inputs too
i have a laser system that reflect off surfaces , the traces are already done and working fine
but i am thinking about the VFX for this , is there a way to have single niagara system and i feed it many points and it connect them with ribbons or lines
i tried searching on youtube but couldn't find some one doing it this way , but i feel there must be since i remember someone in the past did a lighting effect and the lighting branches and so on but i don't quite remember the video name or if it was all in one system
Hi everyone, did anyone knows how to change the Ambient Occlusion in a post processe material to recreate the same shadow effect of the game Tunic ? I tried to juste Power or multiply the Ambient Occlusion Path but its pixelated and note rendering good…


heads-up, there's a fresh article on the new 'Access Contexts' system in Niagara Data Channels (replaces NDC Search Parameters in 5.7)!: https://dev.epicgames.com/community/learning/knowledge-base/6mKa/niagara-data-channels-update-new-access-contexts-in-unreal-engine-5-7 I hope it's helpful!

Epic Games Developer
This document covers various updates to the Niagara VFX Data Channels feature as of the 5.7 Unreal Engine release.
hey, anyone knows how to fix sharpening that flash screen its like strobe in movement? No matter it is Unreal or DLSS plugin
yo can anyone help me with vfx
i am making a game with samurai attack animations
and i want to make good vfx using the niagra effects
hello kevin
something Ive noticed when trying to start an isometric shooter: I want to make it "2D" but still use 3d models for characters as Im not a 2d animator, but I cant find any way to replicate the camera angle
with 2d assets you can create this "impossible" perspective shown on the left, but with a 3d camera you get skewed ground no matter what, not to mention this messes with movement visually
if I make the camera face straight down, then you only see the tops, and not the walls at all
so how do you solve this? maybe Im stupid but I just cannot work out how these games are designed


- render 3d models to 2d sprites
- use longer shot angles or orthographic camera to reduce perspective effect
- 3d objects do not need to be at realistic angles, just the ones that make them do what you want in front of the camera
some options
orthographic camera removes all perspective and gets you the equivalent of 2D
no thats already extremely low fov, pretty much orthographic. the camera is at an angle, so this will just happen
no you can still angle an ortho camera
thats ortho

what Im talking about is I think a style choice which is simply not possible with a 3d camera and thats just how they drew the sprites
to be honest I dont know what Im doing anymore
floor perpendicular to camera
characters tilted to get the perspective you want
3d objects do not need to be at realistic angles, just the ones that make them do what you want in front of the camera

yes I tried that, then he spins wrong and I cant fix it
also would mean "gravity" isnt possible, not that thats priority but still
in fact I was asking about this in blueprint channel
cant pivot him at that angle for some reason
hmm that seems alright


It looks good
thanks, still figuring out how these types of games are designed https://gyazo.com/24c66b40520f979476608002930ecd7c

(dont mind the ugly placeholder textures)
ah that reminds me, no one managed to get lights working in orthographic right (ue4)
Id like to at least find a way to make fake lights or something, like just a circle that makes everything under it brighter at least
I've a brand new issue where my post process settings are completely different when i build and test said build... I can't replicate this when testing from my editor and i'm a lil' stumped. Nothing "edits" my post process settings so i'm not even sure exactly what i could share to get assistance...
Any ideas?
the brightness of the screen just keeps'on increasing, despite my PP volume actor having limits on the exposure and bounds set to infinite. It's almost as though my PP volume isn't exporting with the game
Trying to set up additional render passes with PathTracing after reading the documentation
https://dev.epicgames.com/documentation/en-us/unreal-engine/path-tracer-in-unreal-engine?application_version=5.6
see
Rendering Lighting Components with MRQ
But you cannot add a Post Process Volume to a Actor Blueprint, only a Post Process component!
What am I missing?

Epic Games Developer
Learn about the Path Tracer and how you can use it to render high quality images for final shots and ground truth comparisons against the real-time rend...
Perhaps someone with more knowledge than I in the realm of FX can help here. I'm currently using an enemy object pool in which I move them to a spawner when active then back to the pool when killed. When killed it ragdolls then gets a snapshot to hold the pose before returning to the pool. I am spawning a dummy corpse actor that can be walked on to take it's place. The goal is to have a Niagara system on the corpse actor use the skeletal mesh component to spawn a single particle that captures the skeletal mesh pose and effectively replaces it. The issue is, so much has changed in 5.7 that all previous documentation is outdated and useless (including and AI assistance, which it terrible) would anyone be able to tell me what I would need to add and set in my particle system to accomplish this? I already have it set up with a single particle spawn with infinite lifetime, a skeletal mesh sampler on particle update module, linked to a user parameter, and a skeletal mesh component renderer in the renderer module.
Hi everyone!
I’m trying to optimize a post-process effect using User Scene Texture
The issue is that WorldPosition seem to break when the User Scene Texture resolution doesn’t match the viewport ScreenPercentage.
If I set ScreenPercentage to the same value as the User Scene Texture divisor, everything works correctly.
Is this a known limitation of User Scene Textures, or is there a correct way to reconstruct WorldPosition in this case?
did my solution here not work for you? #graphics message
Who can help me with this project based on agreement.
super newbie question... in paragon starter assets, there are a lot of rectangular vfx that seem like they're intended to be played in camera space for a vignette/edge of the screen type effect. how do I actually go about using these assets (or others) to play vfx in camera space?
Look into Camera lens effect
thanks, this is just what I was looking for!
it seems like these effects are mesh-driven though. how would I account for variable resolutions with this sort of thing?
you mean like 1080p vs 4k, or do you mean aspect ratios? former dont worry about it, latter you need to get the aspect ratio through the bp nodes and pass that into the particle system with user params in the lens effect bps that youll make(the user params youll probably need to set that up and edit the P system yourself if it isnt already), but i guess if its cascade (i beleve all the paragon stuff was cascade) you could also potentially get away with scaling the p system.

Hey, I just started with Niagara and I have a randomized size sprite. I want to create a ribbon trail for the sprite. So far so good this works fine. But now I want to scale the ribbon dynamically to the sprites size that got randomized in the Particle Initialization. I cant seem to find how to forward the particles information though. Could someone give me a hint?
Thanks for the help 🙂

you can use** spawn particles from other emitter** module by not using events and you will get almost all properties of the other emitter particles in there, and that also works with GPU.
I will try that. Thanks 🙂
https://youtu.be/uefvEuoujfE?si=J9UYP_Kk6qPRbLFW
Check out my latest project

This is the sequel to part one. TurboCharged Dreams is a Science Fiction Action Film About a Shapeshifting Cyborg! A cyborg that can transform into a Lamborghini
Part 1 Available Here:
https://www.youtube.com/watch?v=MNZRR32tkl4
Subscribe & Share
This is a story about:
⚡ Freedom
🏎️ Speed
🤖 Identity
❤️ Love in a world that want...
did anyone know why my LightFunction doesnt work when i put a TextureCoord in my material ??
unless someone want to remake the pack in unreal, seems kinda pointless to post a unity fx pack in an unreal discord, no?
is there a way to drive chaos geometry fragments position to niagara? Im using Chaos Data Interface to spawn my particles but i can only drive the break/trail and collision data, as soon as my fragments collide with the ground theres no more trail or collision data being fed into Niagara
Hey guys, does anyone know if you can get rid off the particle limit for emitters working on the cpu in the viewport? I tried to increase the max amount with the console variable FX.MaxCPUParticlesPerEmitter but it did not work for me. In the Niagara preview window or if I switch to GPU it works just fine. I am relatively new to Unreal and Niagara. Thanks in advance.
i think there is no limitation on particles count, never had this problem, may be change your scene scalability settings to cinematic that will affect all the viewports in editor.
I will check this out, thanks for your help
It worked 🥳
anyone know how I could create, basically exactly this? manually created this effect with a load of transparent cubes, but I think Ill be needing a material or something instead https://gyazo.com/0b128845fc39c46e8fb9cc357843ee61

You will have to do some math (LLM can help with that part), but:
- Make a translucent material
- Given the camera vector, camera position, scene depth, and bounding box of the smoke object, determine the length of the line segment from the camera to the background intersecting the smoke object
- Discretize that length
- Set the opacity to some multiple of that length
so if the
length is 0, opacity 0,
length 1, opacity 0.1,
length 49, opacity 0.1,
length 50, opacity 0.2,
etc
if the fog is not axis-aligned you will need to do a bit of legwork to get the bounding box
"length of the line" is actually going to be "manhattan length of the line along the object's axes" (which if the object is axis-aligned, is just the sum of the segment dimension lengths)
I created two niagara systems and everytime i reload the editor i have to open them up and rebuild in order for them to work in game, any idea what might be causing this?
not sure where to ask so i am trying at different channels but does anyone know how could i make something like these screens (anamorphic screens) in unreal i am not talking about anamorphic lenses but rather a screen in unreal

I have a text animation that has an impactful lock up at the end of the animation. I want to add a electric effect over the top of the text as it snaps into position, what is the best way to achieve this? Both the electricity vfx and the sequencer timing. Essentially this, but in UE5, and on metal text. https://www.youtube.com/watch?v=AaZWdbUxHi0

Inspired by the sonic trailer titles, i wanted to make something similar using only after effects with minimal amount of plugins.
Using saber we are able to create most of this effects in a pretty simple and quick way, hope you found this tutorial useful!
#aftereffects #tutorial #motiongraphics
tutorial saber glow plugin energy
Hey I'm just getting started in unreal engine for particle emission, is there anyone who can point me in the right direction like a tutorial, personal tips, or send a discord for me to find commssions in the future?
Basically I'm just beginning in unreal engine and I'm not sure where to point my work. All of my experience in VFX/Particle emission have taken place in roblox but I want to take it professionally now
Unreal have totally different system for VFX then other softwares in market.
you need to have basic understanding of the programing logic and general unreal workflows.
As you said you are just beginning in unreal engine then it mean if you just go directly to VFX in there, it is like going to hell.
There are many channels on YouTube that show you how to create different VFX in unreal engine.
One great channel would be CGHow
I appreciate you for guiding me!
Do you have some past work I can look at?
you mean VFX i made
Yeah
Also wherever I look I don’t see vfx job listings or commissions, is it called something else like art?
not posted any thing online yet, but having too much on my disk
Oh alright, I was hoping to looking at some for motivation
there are VFX jobs in #salary-jobs and #freelance-jobs , everymonth there are 3 to 6 jobs in there of VFX.
So it’s harder to get and find jobs as a vfx artist?
I can’t even find anything for it on unreal
Does it go as visual arts & design?
i personally work on technical side of it, but people give it many names.
What do you go by
And wdym by technical? Hlsl?
Technical i mean how the whole niagara system works under the hood, and HLSL is just like writing code instead of nodes in niagara, which is not that difficult to consider as technical, but i did that also.
So basically you don’t only do vfx you do many things? Are you telling me it’s not really possible to only do vfx in unreal because of everything you’ll have to learn?
it depends on things. you can do lot of cool stuff in niagara without knowing other unreal parts. but the game industry needs the connection between game code and VFX, to make the VFX dynamically fit the game instructions. But on Movie side. it doesn't need such complexity.
What I’m trying to say is i want to be lead in vfx for games and movies. Can I focus on vfx entirely on both sides? Will I need to learn how to code? If so which language do you prefer, I was going to go with hlsl but you spoke of it like it’s sort of its own thing
Yes HlSL is a dummy programing language if considered in unreal Niagara. It is all the Math and technical solutions to something which make the system more complex. You can also look at the VFX made from beginner to advanced if someone want to know how the system works. in Epic Content Example Project
If you have a little programing knowledge. You know HlSL already.
Ok so should I lock in on vfx and hlsl then?
yes that will grasp you how the system flow works.
you can practice your HLSL as web GL on this website, both are almost similar.
https://www.shadertoy.com/
Thank you i really appreciate you, I’m still a little lost but I’m closer to where i need to be 🙏🏾
How do you make the furthest environment little blurry using PP?
you can use depth of field, or do something like a kawase blur in a post process material
negative sharpen might work too
hihi! does anyone know how something like this is done? id just like to know how to get an object or player visible through another object

now that I think about it, this might be an inverted mesh(?)
Not sure if this is the right spot for this question, But im using the water plugin and having an issue with it doing this.. and was wondering how to fix it
Hey guys, Im trying to get some good camera shots of my Niagara system but there seems to be some slight blurring on the character's arms as the systems move behind them. I assume its something to do with the materials being translucent and not working well with the Focal length?(So I might ask in Cinematics as well) Anyone seen this before or know how to fix it?

I am having a similar problem
on the render I made some comands to fix some issues like blur issues, with the high quality blur, but it appeared this other one

this happened once I added some particles for smoke
the blur got cut like this and I don't know why
for this, I had a "similar" issue, where the farest objects had serrated edges
this
I fixed those serrated edges by using some configurations exporting the render

this config fixed this latest bug, maybe it helps you...
but I have no idea of how I can fix this
ok I think I've got it... it was about the DoF of the particle shader
I just made it before render and now it looks like it works better. I'll confirm when the render finishes 🙂
I specialize in a wide range of technical and creative projects including VFX, 2D design, coding, game development, project architecture, mod development, 3D modeling, and game asset creation. I work with Unity and Unreal Engine and have experience building and improving systems for different types of games, from indie projects to larger-scale concepts.
My skills include:
VFX creation (real-time and cinematic effects)
2D art, UI/UX elements, and animations
Game programming and scripting
Game architecture and system design
Modding and custom content for existing games
3D modeling, texturing, and asset optimization
Level design and environment building
Debugging, optimization, and performance improvements
Hello i create gaming graphics and illustrations
if anyone is interested in getting work done feel free to message me privately.
Is there a node or equation to allow me to manipulate my material lights angle so that the lit parts look rounder like in the first image made in Blender, the value that determines it in Blender is the two sun lights "angles" set to 120 so I'm wondering how I could replicate that effect in Unreal


Hey, I'm a 3d sculptor, helps to create amazing ready to print 3d models. Do you commission artists?
say i have a glass cockpit of a craft, how or is it possible to go about making it so the widget is rendered into the glass material of the mesh? .. the reason i don't like how things are currently because i want to use the widgets curvature (world space) but i dont want to suffer the sizing/position/font legibility issues
this the best i can get it but i just feel like it still not legible enough

and the other reason its problematic is that as the physics pawn accelerates it pushs the widget further out
Can you disable tick or only reduce tick amount?
you should be able to do both with blueprints in the class defaults panel

I know that. Wondering if it has its own tick which it does
what do you mean? if you set the tick interval there, then within the event graph, anything hooked up to event tick will fire at the rate you defined
Open the particle. I assume the particle runs on tick.
oh you're talking about a particle system, my bad.
and yeah you can adjust it here

click on the blue node within the niagara system graph and it's right there. just check the fixed tick delta time and set it
Hey folks, im adding a dynamic dof effect to my project and I was wondering why my weapons are super blurry but my arms aren't, the only discernable difference is that one is using an opaque substrate material and the arms are using a transparent substate material. TIA.

in material attributes you have thing called translucency pass, hope it helps

Oh no sorry, the clear plastic is fine, i don't want the gun to be blurry
don't really have a good way of doing that afaik
May be possible if you write your own blur post process using User Scene Textures
does the first-person rendering mode help you here? does it have a separate DOF pass from everything else?
I don't think its done in a separate pass, but I may be wrong. There is additional gbuffer data stored for first person meshes that I think could be used to remove their contribution to DOF, but I don't know if there's any exposed way to actually do this
I might just have to lose the feature for now then. Thankyou!
Anyone know of any content creators / YouTubers / whatevers that are covering how each of the VFX in the new Niagara Effects pack work? (Link for reference https://www.unrealengine.com/en-US/news/discover-over-50-free-niagara-systems-ready-to-use-in-unreal-engine-5-7)
I don't know anything about VFX, but would like to learn, and it would be awesome to learn from this as the example as there are quite a few VFX in there that, if adjusted, seem like they could cover a wide range of circumstances.
why is motion blur so blocky?

Does VDB compression make them less taxing on the GPU? I heard about ZibraVDB, sounded like it could help me a lot.
from my experience, its much more optimal to blend between HoudiniCache and NiagaraFluidSims, another plus is that you can add logic that modify your volume like bullets trails in CS through smoke granade or something
I have a cascade particle that looks great, but disappears when the settings are set to low (in packaged only, no change in PIE).
The detail mode bitmask is set to include low, yet the issue persists. Any other ideas what might be occurring?
Hi all,
Is there a way to make instances of niagara systems?
Just like you can make material instances.
I'm making bubbles and It would be cool to have a few parameter presets for the different types of bubbles.
is there some tutorial on how big studios handle exposure comp for VFX in day vs night scenes? (PBL)
u can apply values from postprocess like autoexposure. In day night cycle I would start with multiplying InvertedEyeAdaptation with emissive values in your masterVFXsprite material
i already do that. i multiple eyeadaptation inverse with emsisive
but just a question. in bright scenes (20k+ lux), my sword trails looks dim unless i bump up the emissive to like 5 (still better than bumping it up to 100000 though)
but in dark scenes, it looks bright.
is that normal?
am i misunderstanding something about vfx in that it should read similarly in all scenes?
also @fervent quest does this matter if my material is unlit?
the emissive pin does the same thing in lit/unlit
the emissive value correlates linearly with brightness in candelas. i forget the conversion but it's in the epic documentation
if you want a color to have roughly the same brightness after tonemapping, putting it through InverseEyeAdaptation should do it, but this can only account for exposure and not anything else you're doing in the color grading
Using additive blend mode ensures that you don't have eg black fire darkening the scene instead of brightening it or merely being washed out
my trail is translucent, not additive
why not
but in darker scene in my PBL (2000 lux) my trail looks very bright, but on higher (30k+ lux), looks normal/slightly dim. what am i doing wrong?
I already use eyeadaptationinverse
trail material (translucent, with eyeadaptationinverse)
1st screenshot is my grey trail with Sun Light Intensity (using UDS) with 20k lux
2nd is the same trail with sun light intensity 2k lux


the color values you're getting look the same, it's just that the average post-tonemapping color of your dark scene is dark and the average post-tonemapping color of your bright scene is bright
you could double check that in an image editor but it looks like it's working as expected
if your post-tonemapping scene color is too bright for FX to pop that's an art direction question and you may want to leave some headroom in your exposure for extra bright things
the other way to communicate brightness is through bloom
this is weird, because I used another material and I don't this stark of a difference. can i post a screenshot with that as well?
or maybe it's just me being paranoid
this is another material
notice how its actually much brighter in the case of higher lux PBL (the 20k one), and its decently dark in the dark one


fyi this material doesnt evfen have eye adaptation inverse, so how is it working????
what the heck is going on with the motion blur?

use an unlit material
you sure it's motion blur? Looks more like volumetric fog
nope
it's motion blur
i don't use volumetric fog in this scene
it happens when i move my camera too fast
no idea, sorry
why does local fog volumes dissapear when you move up close? Im using them to fake bloom on some areas on my map
far away and then up close


any way i can make them not fade away when i move my cam closer?
oop nvm i see now they got a r.localfogvolume.globalstartdistance command
I know its kinda stupid to fake bloom from windows like this but i cant find a way to successfully do it any other way. Yall know some method that can just be localized like this?
a transparent card that implements a cheap bloom could do it
or you could implement a true multi-pass bloom, filtered by custom stencil, using UserSceneTextures
Oo that could be cool
Will think about those options in the future
This is just an art study so I might just do this for the sake of efficiency but if I ever need to optimize, I will for sure check it out
Hello! How would I go about creating those thick, fluffy, stylized clouds that you can see on the picture, i tried working with VDB files but that was just terrible, i also tried creating my own cloud material but that is something im not that great at (im more experienced with the coding side of things). If anyone could give me some direction on where to start that would be amazing, thanks in advance!

ive managed to spawn in greyboxed "clouds", im not sure if this a step in the right direction however.

Anybody have an idea about how to make the water pan/move in the waterline pro assets? I need stationary ships to have the illusion of moving without having to script them around the map on an endless loop
Hello everybody, hope you're well ! I've done a simple Mirror in my game to reflect the Moonlight Rays but I've got a problem with the VFX I'm using : like you can see in the video, One of the VFX spawned is only visible from a certain angle, which greatly impacts the readability of the puzzle itself... Does anybody knows why ? Thx in advance !
Hello everybody, does anyone have an idea ?
yeah you have to increase BoundingBox in emitter settings, its beeing culled by Niagara

Look the up ^
Yeah I found it after looking on google for a while, thx !
Thx to you too !
For those who wants a good healing vfx: https://www.fab.com/listings/ac060547-5b42-4f15-b472-e1bea7cc3a8a

Fab.com
VIRTUAL FX PACK – Magical Healing VFX------------------------------------------------------TUTORIAL VIDEO -----> https://youtu.be/DZtQjljPavUDOCUMENTATION LINK -----> https://lilyzgames.com/VIRTUALFXPACKMagicalHealingEffect.pdf------------------------------------------------------Bring your characters back from the brink with a polished ...
#1054845218723209226 , not here
if any one has some free building assets and such that would like to be showcased in the final of this let me know

Ideas on how to make a whipped cream coming out of a can effect?

vertex animation texture if baked fluid simulation is ok, if its real time feature no idea
Ooo thanks! It's to show stuff oozing down and settling upon itself in real time, making soft icecream, it's totally ok if it always comes out the same way.
Not familiar with vertex animation texture, but i get it'd apply well?
I was fiddling with 3d ribbon particles for now

you need to make a simulation then use a VAT addon to bake the textures and then make a advanced material for the textures, but its kinda advanced
but theire are other way bit easier tbh
you could do it a bit more manually if you setup the uv straight to shrink the tip in the wpo and make it appear along u axis something like that
like the roots in god of war same technique
Hey i'm having an issue with the NIAGARA FLUID system specifically shallow water, i usually could just set up a Tag with the word "collider" and it would should a ripple effect when my character walks through it but now it's not working and i don't know why, i rebuilt the engine and i tried a new map that was not open world, please help.
An easy, but slightly inefficient way, would be to just extrude a star shape along a spline. In the material, you could use some WPO to randomize the waviness of the tips of the star to give it that ruffled effect
Can someone help me? ^
Is there any way to halt a niagara system loop so it auto-destroyed rather than having to manually destroy it? The latter just causes the system to disappear, which is obviously not desired
I’m not sure, but I would probably just respawn it when I need it again.
Not sure how that's even relevant to the problem
Fr
Then do you want to delete it without using BP, just in the Niagara system itself?
Well I just want the system to end so it can naturally auto-destroy, destroying the system directly just causes the system to disappear entirely, which I'm not sure why anyone would want that in most cases
Aaghhh
But there's no function to tell the system to simply end/stop looping
Got what you are trying to get
For example, you have particles moving
If the system dies in BP before it ends
The particle gets killed really fast
And bad
Is that?
Yeah, just, poof, they're instantly gone, which looks terrible
Yee
Got it
Go to your emitter
Emitter State
Inactive response
Complete(Let Particles Finish then Kill Emitter)
In Emitter State
Use a user parameter in Loop Duration
Add a max life parameter
Add then by a Scrath Pad
The loop duration
And the max particle life
Export it to your BP
And then once it reaches that, you can delete it
And done
Fixed.
(max particle life + Loop duration)
Well, you can skip the part of adding the life and loop duration
You can just add the node called
Spawn Emitter at Location
And enable the Boolean called: Auto Destroy
It will enable this condition there
I'm not sure how that would work with systems with an indeterminate duration (like, say, a flamethrower)
It won’t work
If you use any kind of infinite loop, you won’t be able to kill it in that way
That's really stupid
What
It just beggars belief that you can't just arbitrarily tell the whole system to stop and die naturally
You can, but not in the conventional way
You will have to use scratch pad
And export those attributes to your BP
Wait, do you want to kill it in a certain time?
Or just within a certain duration? Key input
I mean, it changes or is it always the same life?
I'm talking systems that need to be able to last an arbitrary amount of time and then die naturally, like, say, a flamethrower or a projectile
Yes, scratch pad
Or if I went too advanced you can just do this:
loop Durarion mode: Fixed
Loop duration: here the time you wish to keep your particles alive
If it’s not what you are looking for, then Niagara + BP is what you need to do
...oh I figured out a pretty simple workaround, set everything in the system to multiple loops, use a "LoopCount" parameter bound to loop count with an extremely high loop count value, and then set it to zero via the BP when it needs to end
Even if the emitter is mid-loop it ends anyway
Can someone help me with this? I don’t know why my Niagara fluid stop reacting to the collider tag.
UE version? Logic screen?
hey thanks for the reply, i worked it out. i think some changes were made in UE5.7 and all i had to do was grab the emitter from Grid 2d sw (Shallow water) but i was grabbing it from Shallow water (Wake) and yeah it's all good now.
Hii Everyone!! I´m new to FX , I want to know if anyone can guide me. I want to create some kind of runes that light up with time (maybe I can control the time it takes to light up and if it starts from bottom to top, or left to right etc. ) and that I can change the runes but use the same material or something just to try different shapes.
I´m not sure if it´s better to do it with materials, Niagara , UMG or something else? and how I´ve been searching in youtube but I didn´t find any guide.

Send me a message by DM, I can teach you how to make this tomorrow.
Good evening everyone,
I’m trying to create a simple firework effect using events in Niagara, but I’m running into an issue and can’t figure out what’s wrong.
Here is my setup:
Parent emitter
Spawn Burst: 8 particles
Velocity From Point (to shoot particles outward)
Module: Generate Death Event
Child (“son”) emitter
Spawn Burst: 80 particles
Velocity From Point (to create the firework explosion)
Event Handler: Receive Death Event from the parent emitter
My goal is simple:
Each of the 8 particles in the parent emitter should trigger a firework explosion when it dies, so I expect 8 fireworks (each one made of 80 particles).
However, what I actually get is only one firework, instead of eight.
I’ve checked several things but still cannot find the problem.
Does anyone know what might be causing this?
Any help would be greatly appreciated. Thank you very much!
Does anyone know if the niagara light renderer can cast shadows?
it cant
hey ya, can i get some help with VFX collision? i got this stylized smoke and i want it to be able to detect the car mesh its going through, so its a more "realistic" looking smoke
VFX collision is a little bit costly. But you can use CPU or GPU collisions for that, usually uses the sprite size for it.
i want to create a blood splash fx how do i create the texture
running into some blockers on getting spawn rate emitters to work with Niagara Data Channels. Has anyone achieved that ?
Hello Everyone
I am trying to migrate my assets from unreal 5.7 to 5.6.. But the whole folder is empty after importing
Does anyone knows how to migrate assets from 5.7 to 5.6?
Depends on the assets, some really can't be downgraded. You can always export the meshes and remake the materials though
Hello guys, inside my niagara VFX, I'm trying to avoid the billboard in my sprite render, cause I don't want my sprite face constantly the camera
I've tried to change the "Alignment" and "Facing mode" but they still face the camera.
How can I solve it?
Thank you 🙈

you need to set sprite facing mode
there's a module for it should be easy to find
(in particle spawn)
YEAH IT WORKS 🥹
Is there some way to create a fog effect that is only being created on the outside buildings? So far all I can find are ways to change the fog value when you enter/exit an area with a blueprint. But the very obvious problem with this is that if you look out the windows of the building, the fog is completely gone until you exit the building and is not being rendered on the outside only.
Some workarounds I found is placing a bunch of cubes around the outside, and applying a fog material with this, but the fog looks kinda bad using materials only.
Right now I'm using something from fab called UltraVolumetrics which adds winds etc. but I struggle to seperate indoors and outdoors. I've spendt days/weeks scanning the entire internet without any luck, I'm starting to wonder if this is even possible?
TLDR: I'm looking to achieve fog on the outside, but not on the inside, while still being able to see the fog outside from the inside.

Is there some way to create a fog effect
Hey! Does anyone know why SkyAtmosphere does not work with a skysphere in the same level ?
New VFX/Tech Art Newsletter is out!
📃Read online: https://simonschreibt.de/?na=view&id=45
✋Subscribe: https://simonschreibt.de/newsletter

Hi! Which tutorial or course would you recommend for Niagara VFX to start with?
I think those are a good start
https://www.youtube.com/watch?v=Wxx_2ZLoKbI
https://www.youtube.com/watch?v=hnUQiwJweeg
https://www.udemy.com/course/ue4-vfx-for-games-beginner-to-intermediate/?couponCode=KEEPLEARNING
I didn't personally watch this but the creator itself is pretty good so I'm sure this list would be as good https://www.youtube.com/watch?v=04k9JDx-KTM&list=PLUi8nuTUEtTshYxpmR7brPE3tV7JsO0VP
there is also VFXApprentice but it's subscription based
very early WIP porting WaveWorks 2 into UE 5.7 with support for the built in water plugins (adding WW FFT/wave sim as an option for the wave assets for water)

good timing, I came here for something related to water too
does anyone know how to recreate this water waves/ripples effect seen in many 2d games? Id assume some sort of procedural mesh or something, but I have no idea how to actually set that up


only managed to do it with skeletal meshes before and that was rough
not sure if some can help .. i have came up with this strategy which is some what of a experiment to create a full deformable world using voxel plugin..
what you are looking at is 2 voxel worlds.. World A = Terrian, World B = Ocean, so techincally even the water is deformable/destructible..
but what i am curious about is can the material of the water world be set to collide with the base world (which is the planet/surface) and how would you do it?


i dont know.. maybe i am not asking the correct question here.. so it collides already with the foam .. nm
gonna have my whole game world visible only in particles like in scanner sombre. anyone try anything similar and have ideas?
‘Ello! If anyone has some ideas I’d appreciate it 🙏
I want to do an almost portal effect WITHOUT any render targets
Basically I want a box with a window in it, and when you look you can see what’s on the other side but if you go to the other side of the box it’s solid
Been looking into stencil buffers and a bit on object masking with another geo, but doesn’t seem to be quite what I want
(Side note I want the box to be able to move around as well so can’t just be world dependent)
Any ideas appreciated, thank ya!
Water 2D shader
Yeah that's going to be an absolute nightmare to pull off without render targets. You can easily do it with RTs and control the RT camera capture relative to the player camera, to pull off the viewing from different angles
Masking (dont necessarily need a stencil buffer) is basically the only way to do this without a render target
neither is going to work well with lumen
What you guys think? I am creating the leaves of Ghost of Tsushima
maybe a silly question, but is there a convenient way to display a trail for instantaneous movement as if something had moved from point A to point B really fast?
i.e, I have a trail VFX NS that I like a lot, I have an instantaneous effect happening with two points, is there a way to spawn the trail using those points without having an actor physically move between them?
I'm trying to learn real time VFX in ue5, does anyone have a good tutorial I could follow?
So wait, you mean like some kind of anime flash-step thing where they teleport from point A to B? And you want to have some trail effects happen between those two points? You could probably just make some splines between some of the major bones and then burst spawn some particles from them(with a thick random radius around the splines to hide the fact they're coming from splines)
I think flash-step is the right term, like what you'd see in shows like DBZ? I'd probably need to see some example of what your aiming for to really give any advice though
hey guys, how do I make this colored fog Post Proc not affect the sky material? I was trying to use the Scene Depth & make the fog turn off at a distance so that it doesn't change the sky color. The colored fog uses a Color Curve gradient. the Scene Depth is unplugged at the moment because I couldn't figure out what to do with it.


If I was to make a slash effect, would I use a flipbook?
Or just pan a noise texture along a crescent
Depends on how you want to art direct it. Also depends on whether you want to pay the cost of more texture samples or more compute(assuming computational noise and not texture based noise. The noise node has various options that tell which they use in the tooltip)
I was actually thinking texture based noise
That works fine. You can do some UV panning and masking with it or you could use a flip book to surgically art direct it. It's one of those things that you'll probably heavily iterate on to get everything the way you want
Alright, thank you very much
anyone knows if its possible to render custom depth (stencil) at full res even if you set screen percentage to be less than 100%
the effect it is used for needs to happen after tonemapper so if i downscale the res with tsr on game overall looks good but the effect gets insanely pixelated
Hello guys, I've tried to package the game in development version, but I had this error in VFX
Invalid input type found while attempting initialize new rapid iteration parameters
on
NS_Rain>>WindForce>>Input Name: Module.Physics Field
I've solved it just removing the Wind Force module, but I don't understand the reason why for this error build, cause in Niagara I don't have any errors.
Somebody know the reason why?
Thank you (modificato)giovedì 28 maggio 2026 12:44

So I'm curious, anyone have experience using layered POM on particles? Like a vortex effect or something with swirling clouds? Also first >:D
Now that would be a pain in the ass. Even rotating a pom decals gives me headaches.
I was thinking it could work if maybe they were layered in the material itself somehow. Like multiple rotating height map layers. Not sure how I would mask something like that though.
Layered POM? That's a weird concept. POM is already raymarching. How would one layer that?
Like multiple height map layers of clouds rotating independently
A channel just for us
I asked this under blueprints, but maybe here is better
Hey guys in the content example project, in the effects map there is a "2.8 beam emitter with nois" example. Would it be possible to have this beam arch between my to vive motion controlers? I see in the particle system there is a start and end point, but how would i define that through BP?
also do i make a blueprint just for the beam, or do i put it under my player pawn?
@tidal forum : That is what I use to spawn a particle emitter with source and target
Maybe that works for you to manipulate the target/source point
Visual FX guys, need your advice. So I want to create an actor that creates a glitch effect (probably post process(?)) that can be moved around in the level
@rapid thistle you're better off with simple bump offset for that
What do you guys use for bullet tracer particle collision? I'm talking about tracers that are on the bullets (like in real life), so they move along the line trace (like a projectile). Actor collision is pretty heavy right? I've thought about using a kill box and setting it's dimensions based on the line trace end point. Just checking if anyone has tips.
In other words, I'm using a line trace and trying to fake the tracer movement (without them going through things)
now all I needis my rainbow name as a moderator for this channel :p
@versed aspen thanks I will look for that
I wonder if anyone here has any good ideas on implementing sprite glow for lights
I'm specifically interested in soft fading
When the light becomes partly obscured, the glow sprite should either deform or fade entirely
i think that fft bloom does pretty much that
Bloom is not an option
Bloom is a bad solution - it will not create nice glow for lights that have less than ~5 bright pixels exposed
Once you get down to a handful of bright pixels, bloom starts to be erratic
I should've clarified, I need glow to work for very distant lights as well. It is absolutely possible that there will be less than 1 truly bright pixel on screen due to distance
But the lights may be heavily focused, so the glow would be visible even 1000 m away
Correct me if I'm wrong though
Here's an example of a real photo with the effect
The glow does not diminish for far lights, despite them being smaller than a single pixel
Yeah, I need to recreate the light glow effect from lights facing the camera
I already did it in the past, but that solution was unsatisfactory
I'm a noob, so i dont know how you would do it, but cant you scale them based on distance to camera?
then bloom could still work, or am i misunderstanding?
@tidal forum There are two levels to the question. 1 is making them render minimum size at any distance (can be solved how you described or in other ways), 2 is making sure they interact with geometry correctly
These light glow effects have to cull and not render properly
For example, if light is halfway-concealed behind a wall
The glow will still exist, but it will be at half intensity
And third, there's also effects of directionality
well then.. i wish you luck sir 😃
Sprites suck
So I'm gonna try something way different
Satisfy the "must be seen from far away" by a sprite, but mostly rely on mesh-based glow
Or better yet... scale the mesh effect with distance
So at far distances it's still visible
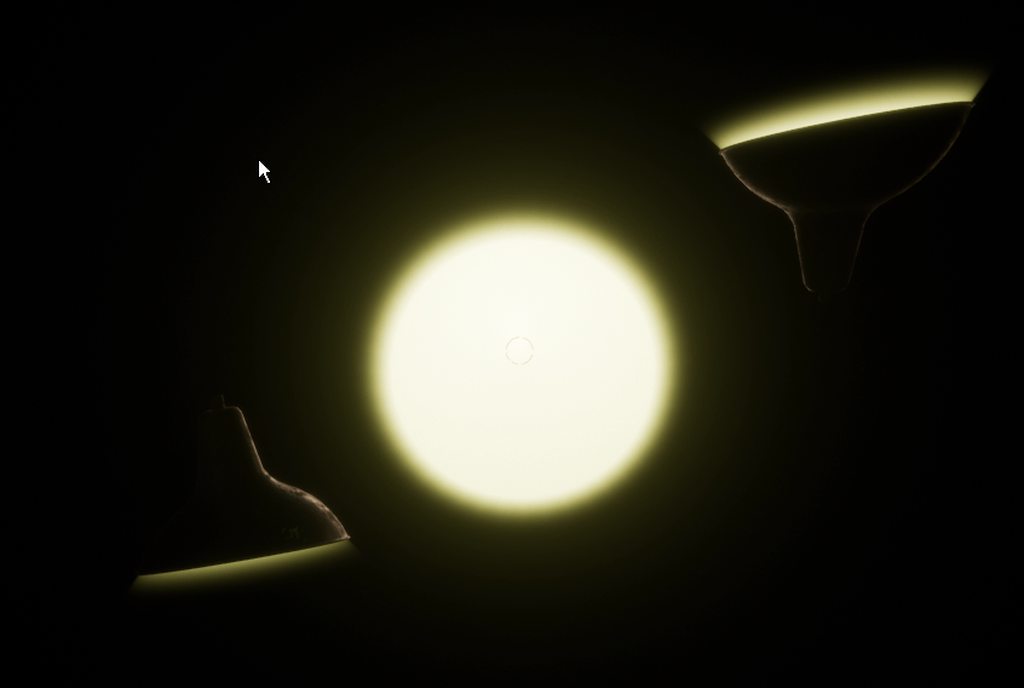
There seems to be a point at which rendering the small lamp becomes unstable
I guess I need to increase its bounding box
But bloating keeps the light visible
@calm hemlock modify the TAA shader to use a longer history and bloom should be more stable for distant lights.
there is actually a parameter now I think, r.temporalaa something something
@tame vault Thing is, there are hidden limits here
Our game involves moving vehicles and you spend your time in a moving vehicle
So not everything gonna work
There's already some tricks in place which modify normals for some objects to remove TAA flickering
If the light's going to be less than 1 pixel, you need to get more old school with your flares and not rely on physically based techniques. Use an emissive billboard with depth fade so there's no hard edge, maybe pairing it with a bit of volumetric fog on the light to make sure it looks 'full'.
@rapid thistle Emissive billboard isn't fully satisfactory
Anything physically based won't work with less than 1 pixel and volumetric fog has its range limit
There is no partial occlusion for sprites (sprite radius) in UE4, so either you accept that it will look odd or have weird "visible/invisible" problem
So I went ahead with mesh-based glow with some screenspace size adjustment
Well what you showed was a single long tunnel, it would certainly work for that
It isn't satisfactory
Billboards is what I've used before
But it's a bit finnicky to get billboards to be direction-dependant (see picture with lamps above)
And they don't do partial occlusion (mesh-based solution doesn't do that either, but mesh-based solution doesn't clip into mesh when you look at it sideways - no additional bias needed)
Oh wow, it's so dark I didn't even know what that was at first glance
Billboards will clip into mesh as you rotate camera without additional bias. Disable depth test & use depth fade -> now the billboards don't get culled and render all together
Yeah, sorry 😄
Problem with billboards is that when you have depth test enabled, they will clip into geometry (this can be solved by adding a depth bias - it works OK). If you disable depth test, they work correctly (depth fade based or no depth fade at all), but they don't get culled
In other words...
You're looking down the tunnel and every billboard is rendering, even concealed by geometry
yeah you would probably need to make volumes that turn them on depending on where the player is
Not feasable for us
Also I ended up with some wasted pixels with billboard based solution
So here's the same picture as above, but this is based on billboards
The anisotropic effect is relatively important up-close (not as important for far away)
These are tunnel lighting lights - there's one more set of lights (traffic lights), I'm considering mesh-based solution for those as well
hello everyone,
i need to make ship wake behind ships in ocean, can anyone help or suggest anything?
@merry berry Need more information. Are the ships moving on predetermined paths or they can move freely?
yes predetermined path.