#animation
1 messages · Page 167 of 1
I'm having an issue where my animations are slowing down anytime i have a frame drop. I'm still running over 100fps, and I consistently hit my cap of 120. but if and when i do have frame drops, the animations slow down. any idea why that is?
Does everything else slows down?
the animations are the only thing i have noticed
sound plays at proper speed
the sound from the anim notifys
What about everything else, as in literally anything in the game, except audio?
nothing as far as i can tell. i dont have anything in it that is triggering or playing when the drops happen. my particle systems dont lag as far as i can see, just animations. like combat, running. everything
and when it happens, its only for a second or two
feels like the game is playing in slow motion
i would record and show it, but i cant get it to happen consistently. I' dhave to record for like 30 minutes
no, only animation BP
In Event Blueprint Update Animation, how do I replicate a variable from server to clients? There seems to be nothing like Switch Has Authority available
I have a simple bool variable which is supposed to tell all clients whether an attack animation should be blended in, but I don't know how to set it just on the server side (with follow-up replication)
Hello, can someone share with me a good camera shake for movement ? for a first person game
Where can I go to learn how to design a solid melee system. I have the technical ability but I don't know how to make a fun combat system.
Anyone has ever used Control rig for character eyes look at target?
There isn't a LookAt node in the CR node editor
using the Aim node produces inferior results compared to the standard ABP LookAt node:

In the example above I moved the target straight up. Distance to both eyes is identical. Nevertheless my character goes derp

Nevermind. Fixed it. Had bullshit hooked up to one of my nodes I use to limit the eyes rotation 😄
Should I use FK or IK for 1st person viewport animations? (hands reloading and eating food etc) - I've seen people say both so wasn't sure which to pick (I've barely animated before)
does anyone know if there is a bug in 4.27 with the PHAT tool? I'm making a physics asset for a character but I can't keep the knees from bending forward. it looks like it doesn't respect the direction of the constraint anymore. I works fine with older physics assets and I'm using the same values and orientations for the new assets but i don't get the same behavior with assets generated in this build. super frustrating.
It really doesn't matter. An IK set up would likely be alot faster to animate with in this case.
looking for mocap of bachata dance animation.
So I know there's the Hire-a-free lancer, tried to go through it, but i'm just looking to hire someone to teach me unreal any suggestions on how to post for that?
Hi everyone,
I have an airplane basic mesh with pan animation, and I want the floor and clouds to follow the direction of the plane to give the movement illusion by keeping the plane in fixed position.
I have used an animated texture for the floor, and volumetric clouds with wind direction parameter. I programmed the texture movement and wind direction to follow the forward vector of the airplane.
When the airplane stay in place it’s ok, but when it’s moving, you can see the clouds have a bad behavior.
Here a video : https://youtu.be/s0mt5a9gADM
I know it’s not the usual way to use volumetric clouds, but have you some tips and tricks to catch the result I’m looking for ?
Thank you for your help !

Let’s share this someone I need him to ask stupid questions
Maybe a paid channel for questions
?
I tried the hire for freelance instructions but it asked for "permanent" job questions
but it's all good, i'll ask my stupid questions somewhere
hi 
So i made an animation, looks like this
https://cdn.discordapp.com/attachments/847253861403197471/904856268865437786/djjGOBIedP.mp4
I want to DISABLE root motion in ue
so that my characters feet slide weirdly over the ground.
Because i want to add my own motion to the movement, mine is linear and way better for gameplay
i don't really care about slidy feet, i want neat gameplay
But i have no idea how to disable the root motion 
It's either with root motion - my camera does weird shit-
Or without root motion, and the root bone gets completely ignored, and doesn't even count towards the animation...
https://cdn.discordapp.com/attachments/847253861403197471/904857018173632542/uFhaN6Crtq.mp4
i just want my character to stand still, do the animation, and the feet slide over the ground.
You made the animation yourself, right?
sure
I don't know whatever weird thing that's stopping you from removing any keyframes to the root bones.
because then my character does a step forward... I need to compensate for it
otherwise the animation by itself is just
https://cdn.discordapp.com/attachments/847253861403197471/904857944582156338/dkAQHG8KJn.mp4
Can't you just compensate it yourself in Blender?
Remove the pelvis translation or something.
i could - but thing is there's like 10 different IK parts that are animated on that axis, and i would have to go in and fix each and every single one of them - just because unreal engine won't leave the animation alone, and i wanted to ask here first if there's a way to just let the animation be an animation
Is it possible to fire a Construction Script from Sequencer on specific frames only? (ie as an Event) I know I can set it up to re-run on every frame, but generally I just need to run a Construction Script at the beginning of each sequence shot. Thanks!
Construction Script always executed when the actor spawned.
Hi @ashen junco In my case the actor is possessable so it's already spawned/executed.
Then you could copy your Construction Script nodes to a custom event, and execute it in Sequencer.
@ashen junco That's my current approach, but given the nature of the script (it adds several mesh instances) I also need to add a lot of clean up code. I think the construction script takes care of that by itself so I was hoping there was a way to fire it as a sort of event
hello is it possible to make bone rotate with camera view? for example i want the head to rotate where my mouse/camera view is looking but still retain it's animation.
Yes, it's possible.
do you happen to know tutorial for that?
I have an animation that appears fine, in blender, in ue4 editor, but once in game, the anim is slightly off and the characters arms go through their stomache (doesn't happen in the blender/ue4 editor)
can anyone think of why this might be happening, the anims look almost right in game, and I've never had this issue before
i have the same issue with that last time and found that it's about scaling issue, scaling might worth to check. just in case
Thanks I'll check that out 👌
How can I mirror a Quaternion variable in control rig?
there is mirror for vector but i can't find mirror for quaternion or rotator


I want to mirror the rotation in X axis
Doesn't seem to be related to scale, not sure where else to look tbh
Is it a montage?
I don't think regular animations really exist on a "this is what's playing" field
e.g. imagine if you were running while reloading. that would be two animations at once
you can define events to fire in a state machine if that helps
no, a regular state machine with many states
no, sorry
yeah i thought about that issue, maybe is there a way to get all active states (as an array) in a state machine?
seems like the easiest way is the set event on state method
I'm not sure what your usecase is though


It resized and skews it for some reason
Does anyone know if there is a way to emit events via control rig that can be picked up by gameplay components?
For a contextual example, If I'm using Control Rig in order to do foot IK, I would like to emit a sound effect when my foot reaches the desired effector position. I can evaluate all of this inside of a rig-graph, but I don't appear to have any way to "do anything" with that data. At the moment it appears the only way to do this would be to essentially do these calculations twice (Once inside RigGraph to do the IK positioning, and once in a normal blueprint or C++ in order to activate the event) but this seems incredibly wasteful.
Any ideas?
Hey, does anyone know why my Blendspace 2D is not playing turning animations, it does IDLE/Forward/Fast but even though I have all the animations setup for left turn and such. It does not register the turns when the animation is played. I have setup the blueprint and setup the direction and speed variables and put them into the statemachine. It would seem they are not working. Anyone have any ideas what could be causing it.
Does anyone know if Live Link is possible to replicate? I saw that if I use an Apply to client node it animates for the single client, but then idk how to replicate to all clients, or animate is as server and show animation to every client.
Hello, Is there anyone who knows how to export complex rig Maya to UE4 ? I have experienced about importing rigs but for some reason I am having trouble now.
@whole harness You can put audio in animations, and time it with the feet.

Im trying to avoid this and do it procedurally, as tie-ing it explicitly to the animations means the sound effects will trigger too early/late when traversing anything other than flat ground
@west bronze double check your animation and make sure the scale matches the rig.
@indigo minnow I just watch the animBP in runtime.
I have a weird issue. I have a skeletal mesh that I want to make a control rig for.
When I move bones (with IK, etc.) the bones move properly, but the mesh itself stays in place (as if it wasn't bound to the bones).
But normal animations work properly.
And
I can open the skeleton asset and move bones around and there it works.
Anyone encountered this before?
In control rig

in the skeletal mesh asset

Have you tried checking "Propagate to Children"?
yeah, didnt help
ANybody able to get Metahuman control rigs to work additievely ontop of animations? They just override them in my case.
THis happened to me today. Somehow it was animating the rig itself
So noobish animation question.
I downloaded a modular character with 4 skeletal meshes (head,torso, hands, legs).
And a pre-built skeletal mesh where everything is combined.
I'm not sure how to put the four together to make the one
The solution was to ensure that IK toggles were correct. It was treating it as if it was just joint based. so would not behave correctly
@sharp cedar
what do you mean by "IK toggles"?
I may have misread your question. Seems like it just isn't propagating to other skeletons for it. hmmM.
@tropic basin
You have a character with different meshes.
there is something like "set base pose" BP node that tells additional meshes to mimic the "base" one.
can you send a screenshot of you rig so far with details tabs?
Not much of a rig

🙂
but I found something more interesting... Only some bones are broken
I can move a head with IK, but not legs
I've only ever used singular meshed characters with stuff attached to sockets. Im not sure how to actually combine them physically. I assume I use that base pose node to get them all ruuning on the same animBP after I somehow assemble the body?
yeha
yeah
You assemble the body by simply adding all the body parts as new skeletal meshes
with the same location / rotation
So they will look normally
and they all animate in sync
I dont have any project with a modular character at hand to make a screenshot
Ok. Thats what was confusing me, cuz the pre built example is one single mesh.
So its just a bad example
hmm.. maybe there is a way to combine them 🙂 UE has a lot of features

found some old project
All use the same skeleton, head is the "base"
everything else is parented to it
and put in place to match the shape
Ok
And I set that on each of the children to match the head
yeah
And they all work off the same anim BP
It doesn't have to be a head. But it makes sense for the master pose to be something you wont change often 😛
now that I think about it.. I think I watched one of the training stream or soemthing and there were showing modular characters in fortnite.. maybe you can merge skeletal meshes now
but my approach also works 🙂
I'll look for the stream. Never hurts to know more than one way..
I tutor unreal and someone wanted to use a meta human. I then discovered they come in peices, so now I'm working on this..
If I have a head with morph targets and a body with the same skeleton without morph targets set as the master pose component for the head, would it still be possible to play animations with those morph targets on the head?
Hey all, so I was recently given the opportunity to make some mocap animations. After sorting through them all in blender, I'm having trouble exporting them for use in Unreal. Whenever I try to import the fbx into Unreal, it tosses up an error saying "Mesh contains root bone but animation doesn't contain the root track". So I tried renaming the root in the animation to 'root' and it imports, but the animation doesn't play, it's just a t-pose. Re-naming the other bones doesn't seem to work either. I've made sure my skeleton is re-targeted correctly, and I've tried exporting the animation every which way but can't seem to get it right.
here's a copy of one of the base blender files
MIX RIGHT AND LEFT HAND ANIMATIONS (blend by bone right and left side?)
Hi. How do I blend two first person animations where the base animation is a hand carrying a gun using two hands but right hand has a socket for the weapon to be attached, the left hand is either position by the animation itself or using a LeftHandIK attached to a socket on the weapon. Since you can detach or separate this arm using the IK, I assume that I can use another FPS animations like holding a flashlight using the left hand by using a blend by bool? like I will blend the right and left clavicle?
I aiming for drawing a flashlight or throwing a grenade or eating something on the left hand side while carrying the gun on the right side.
Thank you
I think you could get away with some simple slot setup, with left and right arm applied independently.
ow yeah, I will try that one, so i need to use a montage to assign a slot? Can I dynamically change the slot on certain situations, lets say I throw something with the left hand and after that it uses the base animation of two hands holding the weapon?
Currently my setup blends first person animations as upperbody slot to a full body mesh for the lower body anims, blended at the level of the spine.
Thank you
Ive made a blendspace from a idle animation to grab animation on hand, the hand also rotates around. I want that rotation to be other way, say if it is clockwise i want it to go anti clock wise, any suggestions?
Hi! Any good tutorial/notes to animate a spaceship banking when the ship is turning? I want it to bank/roll quick a start, and go back to position when releasing…
I have an animation BP which has a walk->run transition with speed > 200 - my character movement comp "max speed" is set to 200. Despite this, the character does like these really short spurts of the run animation
Is this expected behavior and I should add a bit of tolerance there, or am I doing something wrong somewhere else?
Is it set to loop?
The run animation? Yeah it would loop when it's in the run state in the state machine
I changed the transition to check speed > 201 which fixes it, but just wondering if there's some setup for it other than this :)
I'm using blender to rig my character to make my animation. But for some reason I can't get the mesh to attach correctly. I don't suppose anyone here has worked with blender and might know what I'm missing here?

Ran into something I havent experienced before. Weapon place is using IK to a bone and is flawless, except for when I sprint. When I sprint the weapon moves to the side and floats in the air but mimics the movement. Any ideas?
Are the weights fine?
Yeah Id say thats possibly a weighting proble
Can you lerp anim montages to transition smoothly from idle to walk to sprint?
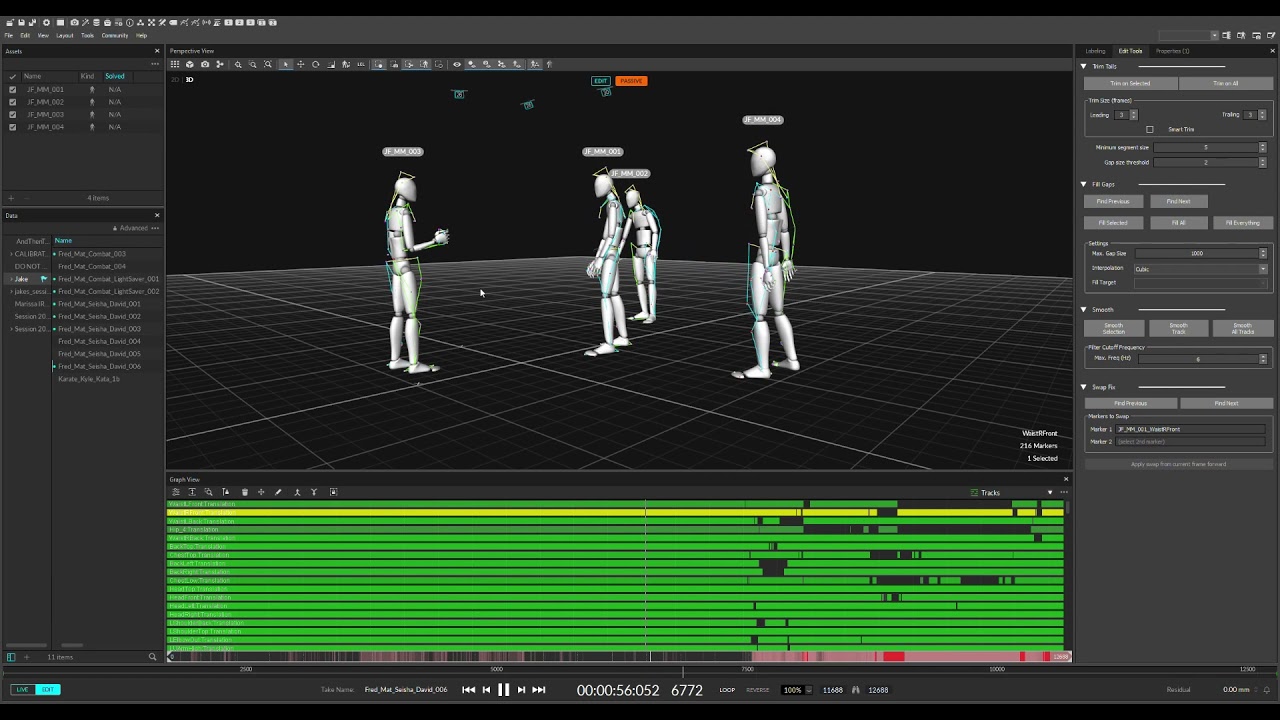
Improved fight scene to test tracking for 16 camera Optitrack Volume for metahuman fight scene workflow test.
Raw data, no clean up!
i have a two part question. can i manipulate the mesh of my character in UE4 to fit my character or maybe even set the collision? or do all these mesh problems need to be ironed out before i import into UE4? everything fits fine until i get to animation


Skeletal Skinned meshes can't be edited in UnrealEd. As for collisions, it depends on the physics asset set up in UnrealEd, using a bunch of capsule/box bodies (with constrains if necessary).
Although the animation problem you mentioned is still unclear to me.
is there a way to like make the default UE4 char hold onto an object? and then give it some basic animations while just using UE4? and if so what is that called?
and if it does exist is there a good resource for exploring it?
If it's fixed, cinematic animation, that's up to your DCC tool's constraints.
If it's a gameplay animation, you can make a character holding an object by attaching an object (referenced as Actor, not to be confused with UObject) to the character's socket/bone.
That isn't always the case, however. First person anims that require more detail on the animation would have better results with premade anim constraints as opposed to just stop at attaching the weapon mesh to a socket
is it not something I can do with control rig?
is there a way to parent a static mesh actor into a skeletalmeshactor
i have an already shaded in unreal scene and need to be able to bring in new updated animations to a skeleton rig, but just want to do the parenting for what is under each bone in unreal
dont need it to be bound or anything just a simple parent should work
look at attach to socket, that is what it is there for. 🙂
https://docs.unrealengine.com/4.27/en-US/WorkingWithContent/Types/SkeletalMeshes/Sockets/
I can't for the life of me work out why my animBP isn't working. It must be connected to some degree as the Idle pose is working. But no idea why nothing else is. Anyone know what might be causing this?

does anyone know of any free FP arm meshes that have FPS animations? I've been using the mannequin arms from the FPS template but it only fires and doesn't have reloading or anything else.
if there aren't any free ones, does anyone know of any good ones that cost money?
shootergame has some
yeah I think i'll just do that. I don't want to use the gun though so I was hoping there would be a free "gun + arms + anims" out there. Maybe some day epic will make one free from the marketplace.
i exported a mesh, and this seems to be the only thing i am having problems with...
when i import it into blender its all messed up. anyone got any idea's? or any information they can relay me to?

You want to play rootmotion stuff via montage
we have a sword attack that takes over the control of the player, we play this in our FullBodySlot on the animgraph
then we have basic sword swings where player can move, we play this as a montage on the upperbody slot.
@frozen lava ^
k thx

i successfully imported 3 characters but the fourth is giving me issues, its messes up all the others but it has the same exact bones

Try crosschecking the FBX in Blender.
Hey guys, I'm having serious issues importing an FBX animation from UE into Blender. What arrives in Blender is completely jumbled and doesn't add up to what I see in UE. I've checked every little detail a million times by now - frame rates (25fps) match and I reset UE's FBX exporter to default just to be sure. But things just don't match up.
I'm using UE 4.27 by the way.
I've recreated the entire animation in Blender, using the same relative animations and of course things line up with the UE render spot on. But I'd like to be able to export my animation from UE and have it show up in Blender correctly, without having to painstakingly recreate everything. Any idea where the error could lie? I'm pretty certain it's on UE's side, because Houdini has the same issues upon import.
And here's the weirdest thing - the first two FBX exports I did from UE where completely fine - matching my animation perfectly. But since then something must've changed, even though I'm almost certain I didn't make any changes that would have an effect on the way UE exports the FBX file (as I said, I reset it to the default).
Have you tried putting the FBX through Autodesk FBX Converter 2013?
Hi, thanks for the suggestion. Just to double check, is that one free?
Yes, it's free, partially abandonware.
Got you. I'll try that.
The funny thing is that the export worked fine initially. But with other shots (that have similar camera setups) it suddenly was all off.
Probably UE's FBX SDK itself less compatible with other DCC tools. My issue is that the FBX refused to load in Blender at all until I put it through the converter.
Nope, it loads properly for me, every time.
In Houdini as well.
It's just off - all of a sudden.
You're exporting straight from Sequencer, right?
tbh I never export anything from Sequencer - mainly meshes and anim sequences.
Can you export an animated sequence without using Sequencer?
IIRC animation sequence asset itself can be exported on its own.
Got you. But since I do most of my animating inside the Sequence, I think I'm stuck with it.
Can't you convert control rig anims in sequencer to an anim sequence asset?
Probably. Never done it 😅
Yes, you can.
I do it all the time to finalise control rig anims.
Besides I personally still prefer animating in Blender because of constraints
OMG! I was just brushing my teeth and had an idea! 😅
I initially only clicked on my reference geo and the camera before exporting the FBX.
However, for some reason I must have started to select all of the nulls of my camera rig as well when exporting.
So I exported my baked camera animation which was then made a child of all the nulls I had set up to rig it. This is why everything was off!
By just clicking on my cam (whose animation will get baked as a child of all the nulls) and the ref geo, things are working again.
My world is back to normal! 🥳
So bottom line, FBX export from UE is actually very usable for direct import into Blender.
Hey guys, I've searched quite a bit today but can't seem to find anything on this. Trying to SET an anim montage's blend out time with blueprint. I can GET it using get default blend out time, but there is no set default blend out time? Some people have said there's a "montage stop" node out there but I can't find it. Anyone able to point me in the right direction?? Thanks!
I have this problem when im in animation blend space dragging animations to the coordinate no matter how carefully I click to select, it randomly just opens the animation sequence and I have no idea how to get back
Anyone know how to search all animations in my project (100+) for any that are using a particular notify?
Heyyyyyyyyyy
I'm making a game for a jam with my friend
he's the artist and made this beautiful croco-boy

but the animations are imported this way:


example
Do you animating it with Blender?
The bones are okay, the way they should be, the mesh is all over the place for some reason
yeah!
But we made another model that have similar animations and it's all okay
but both models are okay in blender
It's going to be either incorrect unit scaling, and/or mismatch bone orientation
Might worth mentioning to him/her that unit scaling has to be 0.01 in Blender, if he/she wasn't aware about it.
Hey guys, does anyone know where I can get animations of pokemons? I am making a pokemon game but don't know how to animate... like charmander scratching etc...
Make it yourself, I guess.
Pokemons don't adhere to typical animal rigs, so there won't be any (legal) assortment of ready to use packs.
@ashen junco know of any illegal packs then? 😆 . but in all honesty damn... This is gonna be a pain if I am going to implement over 100 pokemon and each one has over 15ish animations. 😢 and i dont know how to animate lol
Of course not lmao
Well, Pokemons are too specific for unique characters, regardless of the popularity it maybe. And I'm not going to question how you obtained the models in the first place.
@ashen junco There is a whole free website on any old style game 3d meshes called models-resource, so I get it from there. but i have no clue about the animations lol
Yeah, that site is a hub for ripped assets. Definitely not legal.
You're on your own now. Learn some animation or go home. k thx bye
Just abiding by #rules no. 5
"Learn some animation or go home. K thx bye" seems kinda rude, but alright lol
@ashen junco I didn't ask for pirated goods btw, I was just asking if you knew any tutorials or knew any online sources that were legal to use.
quick question, i currently have my character set up to use state machine to attack with 1 animation for attack. I now want to use a comob attack system using a montage, Does this mean i wont be able to use the state machine anymore as it doesnt allow me to plug in a montage to the attack? Thanks
You don't specify anything about tutorials :P
I jest. You could start off with animating tutorials for Blender, and practicing from it.
Using state machine for attack anims is less optimal BTW.
@ashen junco can you think of a more efficient way of me animating? cause I don't really want to animate over 100 pokemon each with 15 different moves. like if u know any tricks such as reusing skeletons or something idk
Depends on your rig, but I know pokemons are unique, each with different proportions and what not.
yeah i thought so. i will probably just use the State machine for movement and jumping etc and just work out the attacks through the BP. sound good?
Do blendspace go inside animation state machine? I'm having a hard time understanding state machines
Well normally games with lots of animations share rigs between similar creatures. Going to pokemon for example, eevee, rapidash, bulbasaur, etc. Are quadrupedal so they could share the same rig, machoke, mankey, geodude (you just ignore the legs), graveler, etc. also can. Onix, ekans, dratini, etc. Also can. In short you need to make some base skeletons, like that humanoid, snake-like, quadrupedal, etc. And then you just share animations between many creatures. That cuts s good part of the work you would have to do
But I think your scope is too huge if you are a single guy that doesn't know how to animate
I would recommend you to think more of 10 creatures and do a small fighting game (If the thing you want is pokemons being controlled in real time) than doing a full pokemon game with hundreds of creatures and animations. And if what you are looking to do is a simple traditional pokemon game you don't need pokemon in 3D you just need rpg maker and pokemon essentials to do your fan game
That smells like retargeting error, check the skeleton of that alligator, in your bone tree on the top left should be a button that says show retargeting options, then at the right of your bones. Ideally if all your skeletons are similar you'll want your child bones (everything but the root, pelvis and ik bones) to be set in skeleton. The root and ik bones (if you have them) set to animation, and the pelvis set to animation or animation scaled whatever works best in your case

Describes how retargeted animations can be used with multiple Skeletal Meshes, allowing you to share animations.
there's the documentation of retargeting if you need more info, btw retargeting is not only when you retsrget manually an animation it works also when you share a rig
@potent thunder the animating is a lot easier than i thought, i already did 5 models so far... Im going to teach some friends so that they can do it for me and im back on track lol
try https://www.models-resource.com/ I don't know if they have much for animation, but it's where I would start if I were looking for pokemon stuff
The #1 source for video game models on the internet!
I have a tobi eye tracker does anyone know would it be possible to use it to do face capture within unreal with it? Id love to be able to use it for face rigging
Just a preface, this is a ripped asset hub, with legality obviously not within the safe zone.
how would one go about animating a weapon inside unreal engine? I basically just want the weapon to extend for this animation, I assume it's just like normal animation with bones, but are there any videos demonstrating it? Also, I kind of need to keep it separate from the character, as the character and weapons can change.
I'd recommend to do it in Blender instead, as there's yet to be a convenient constraint system with Control Rig animating in Sequencer.
And you'd rely a lot with constraint when it comes to animating a character holding something.
thank you, I'll look into it and see what I can learn. 🙂
Most weapons I've seen, have the weapon animated separately and just the mechanical parts, like the barrel going backwarss, the trigger being pressed. But no recoil at all (check in unreal marketplace a weapon pack called black weapons pack or whatever if you dm or @ me, I'll share the link later when I get home.) And then all the recoil and reloading and stuff is animated on the character, and then all you need to do is use a socket and trigger the correct animations on both at the same time.
That way it would be easier to animate them in unreal too.
In blender you would need to create a child of constraint to the deform bone
awesome. I'll have a look at it!
I'm learning about constraints now, pretty interesting stuff.
Hey guys, i forgot how to control power of livelink frames in animbp.
tried this way, no effect

Is there a simple way to import baked camera animations from blender for fps weapons?
Hi , can someone help me fix this ?

...what's wrong?
so this is basically an hand IK , when my character is near a wall he put his hand onto it , but right now the only hand that works its the right one
and when I play , the left arm just looks like this

I'm not sure how you set up your IK logic in the ALS AnimBP, but maybe something to do with the IK transform or axis?
can I send you the link of the video I was watching ?
@ashen junco I closed the engine and re-opened it , the line its now working but the same issue remains
What can cause those two transforms being different? This is the transform of the spine bone. As it is different from the reference transform, animation doesn't look identical and it's kinda broken.

There is no modifier or any additional thing in the animation asset.
why i cant stop my looping montage any way?
I want to subdivide a skeletal mesh (polys are too visible on marketplace asset) exported from UE to Blender and then imported back to UE. I get the animations working on subdivided skeletal mesh but the root bone area gets messed up somehow. On original mesh the root bone shows as red but on reimported subdivided mesh it is white just like every other bone. At the root bone location a small area of the mesh is stretched down to the ground. When posed normally without animation the stretch is not there and subdivision looks fine. Does anyone know which settings I should use on both ends to make sure what goes out and comes back in is 100% matched?

if Im making an animation for unreal
where should my keyframes start and end?
should I set the start to 0 and end to 16 instead
Has anyone had the problem after you retarget to another skeleton, the asset will no longer save? I assigned the current SK_M_1_Head to a new skeleton that is compatible and now it will no longer save?

Does anyone use ThreeDPoseTracker in unreal/Blender?
Can anyone point me in the right direction to find a decent and free/lowcost animation resource site/subscription?
anyone know of any good guides on how to do strafing blendshapes that dont have the 180/-180 dithering issue? ive found a couple solutions from googling but i havent been able to get any of them to work, all of them pretty much reference stuff i dont know how to use yet.. the consensus seems to be either use cached poses which i cant get working or have forward and backward blendspaces which i cant get working either, but again these are solutions ive only found in half-explained forum answers
How do you typically make simple animation interactive objects (windows, levers etc.)?
I suppose a blueprint or code fires their animation, but what is the setup of such objects in terms of animation. Bones or an actor of separate objects with their own pivots?
Can I retarget the skeleton of a blendspace?
won't let me change my blendspace skeleton
anyone in here know a way to make my character smoothly come back to looking at the enemy here?
Hey everyone, anyone else having issues with the "Edit with FK Control Rig" on certain animations? It works perfectly for some but for most of my mocap animations (from Rokoko), they are completely messed up.
Problem is happening on 4.26 and 4.27. What's even weired is that when I export the animation from the sequence (create linked animation sequence) the exported animation looks correct. Just the preview is messed up, which makes editing impossible.
Any help would be greatly appreciated 🙂

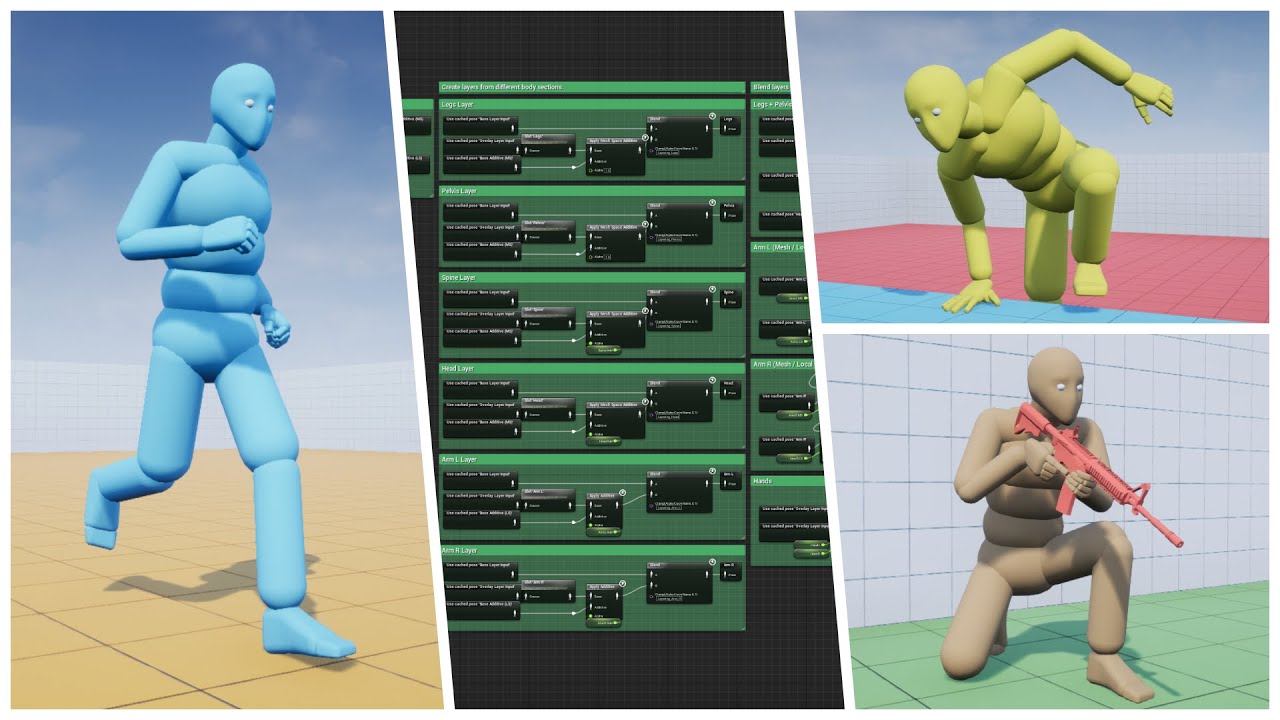
I'm learning the animation system in UE4, so far it is quite clear to me how to set up a basic locomotion, with blend spaces, animation blueprints, and layered blend per bone to mix several animations (like running but holding a gun with the top skeleton part). What is not clear is how to blend "one shot" animations with this system, for example while you run pointing a gun, play the shot recoil animation but still having the legs moving independently, I saw that kind of animation is usually called in the event graph of an animation blueprint through a montage, but I'm still missing some pieces, is there any good resource to go deeper on the subject? Even paid if necessary
anyone know how to debug animation issues that only happen in a stand-alone version of the game?
Can I record, and load this in some kind of sequence player and see what was happening in animgraph / blueprint,
or can I attach the editor debug preview thing to a stand-alone game instance somehow?
If I want to animate a plane sliding from the side of a cube, I can keyframe the location but I don't want to keyframe the scale of the plane, what are my options? Should I look into creating a material with opacity masking? or is there a much simpler approach?
I would lookat matinee or timelines there you can include transform properties, like translation, rotation and scale.
Thanks. Yes, I will be creating the keyframes for translation. It is not clear to me how to make the plane gradually appear (being revealed as it is sliding from inside the box). In fact, it is the same problem as if I simply want a plane to gradually appear from a portal window.
Not sure if this is the correct section and might be a very broad question! but does anyone have any guidance or links how to set up my fully low poly textured model into Unreal so its game ready ?....
Yeah, that's too broad of a question.
Google might have the answer for whatever's unexplained in your mind right now.
Does anyone have some rough vampire blood sucking animations I can use to prototype?
I can horse trade if you like.
Had some shelved neck fetish anims, maybe could be repurposed into vampire 🤔
@ashen junco I have some GAS c++ code I can share.
Or trade rather. I just need a rough animation for the front and back bloodsucking so i can start exploring combat.
General question. Is it good practice to use saved cache pose. Could anyone tell me why and if possible explain a better solution if there is one
I would use a combination of translation keyframes with matinee/sequenceer, and use that to drive a material using opacity interpolation with time/or simply the opacity value as a parameter with a dynamic material instance. 🙂
Anyone knows what can affect your animation to be played at different height from the original's mesh height location?
my First Person Arm mesh at idle is correct height, once moving, the animation will be playing at higher height
anytime i change the original height, the animation height is affected too
with my debug, the bone is indeed change height location when idle and playing run animation.
but i still can't find anywhere to fix the height animation. Any tips?
I think it require multiply and math?
Hi
I Used Als Character for my Own Character.
And when My Character Interacting With The Box so Character Hands Ik Enable and Character Rotation Mode Switching to Looking Direction (For Changing Movement Mode )And occurring This Situation (in Video).
""" But I do not want the character Rotation change when I Change Movement Mode .... """
I Looked Inside Als Animation Blueprint To See Where Character Base Rotation Change When I Change Movement Mode But I Cant Find ...
If I Manually Change Character Controller Rotation From Box Class then inputs are Disassemble ...
How Can I Fix This ??
I need to talk to someone who does mocap at home. I'm typically available 7am-12pm every day and Wednesdays and Saturdays 8pm-12pm eastern time. DM me and we can schedule a time to chat.
Has anyone figured out how to get UnrealInsights (stand-alone) to gather "Animation Insights" when attached to a stand-alone game process? I have the Trace Filtering options available for Animation, but it doesn't seem to capture the Animation data... I could understand if the stand-alone UnrealInsights lacks the functionality to show the Animation Insights, but I would expect when I launch Animation Insights in editor and drop the trace in, that it'd work, but still no Animation Data.
I can only seem to get Animation Insights to work when gathering from within the editor game instances.
Thanks. That is what I ended up doing. I was hoping that there is a simpler solution. Using the opacity mask for a material works, but it requires more work if a mesh has more than one material as I will have to carefully keyframe all the different material parameter collection variables.
Hey all, I'm relatively new to animation in UE, and I'm looking for some help. I'm trying to trigger an animation montage in an AI character blueprint, and for some reason the animation doesn't play at all. It doesn't even complete, as nothing triggers off of the on completion node.
The animation I'm using is from a marketplace pack, so I'm not sure if that's the problem. It uses the default UE skeleton.
I'm also a rookie with animations in UE, but it sounds like you need to setup an animation slot. I can't point to a specific tutorial, but you can find a lot about full body and half body slots with animation montages.
This is true, but also not.
You could gain access to the material dynamically, and change all their opacity dynamically without hard coding each material, we do exactly this for appearing/dissappearing effects to apply to any mesh, including static and skeletal without knowing beforehand which material resides in which slot.
Also means your material instances need to be consistent if you want to apply this effect, or you could go a step even further and inspect the material, get the texture and apply it to a temporeary material instance, then set the opactiy on this ( which is what we do as adding opacity to all materials will become troublesome )
So you know, you are solving an issue one way, but there are always others. We do this in a combination of C++ (to prep the material) and BP to lerp and apply the setting using tick) 🙂 SO you know. many many different ways to solve this
Hey Guys I have a challenge here. I am new to animation and have the paragon countess and I want her like hiding up on say a platform and then poof into a cloud of smoke then reappear poofing out of the cloud of smoke at another spot. How do I do that or is there a tutorial somewhere. kinda like a teleportation thing but want a fairly realistic poof of smoke when she dissapears and reappears

#unreal #unrealengine #ue4 #indie #gamedev #gamedesign
A little change of pace from the rpg series, lets do another magic ability! had a request for teleportation, and it sounded super fun, so we'll go over how to get our teleport target location, lerp our character to it, and also go over some camera tricks to give us a better view and a little...

Download Project File Patreon: https://goo.gl/jD94ge
Free Textures : https://drive.google.com/file/d/19Cg6eMdLfY4Rw2di9wkkO99QQV7YD-26/view?usp=sharing
Hello Everyone in this tutorial I will show you how to make an invisibility effect. So Basically our character mesh will dissolve into an invisible/stealth mesh. We are achieving this by using ...
Hey Guys....is there a way to have root motion animations focus on actor while it's playing?
Example playing an attack animation with root motion that moves towards the player
yeah, go watch UE live streams about animation, https://www.youtube.com/watch?v=i9aNx1X-Wm8 and there is a stream of videos called 'Getting the Animations Results You Want'
@misty dagger thank you very much!
Hi. Please help me figure out the problem. When exporting a sekelet from blender to the engine, the second bones after the root are collapsed. The skeleton is not what it should be. The reason for this behavior and how to fix it is a mystery to me.
Blender model

Engine skeleton

If the collapsed bones are moved, then they can be seen

I'm following a YT tutorial and in the montage screen it has this window but I can't seem to open/find it in my project

What's the best way to import a rigid body animation?
If you mean prebaked rigid body anims, then the best way would be exporting it as an alembic cache data.
Does anybody know anywhere where I can hire people to do dinosaur animation
#hire-a-freelancer or any other freelancer services like Fiverr.
How can I make blending animations less awkward? I’m trying to blender some upper body first person anims but my characters back always looks stiff
Hey guys! How are fps/tps animation syncs solved in multiplayer games? I'm thinking of like a roadhog hook, where the hook is nicely attached to the TPS body of a roadhog (POV of another player) but when you control the character (POV Roadhog) your FPS hand model is attached to the rope accurately, and its not coming out from his waist. Is it just handled differently on server / client, so the player doesnt see the tps animation, others dont see the fps animation and it happens two times at the same time, but everyone sees the different attachments?
Hello, I have a Sequence with a Curtains in it and a WindDirectionalSource, The curtains move to the wind in Simulation mode, but how do i activate them in the Sequencer?
Hey all, I'm still trying to iron out why my animation montage isn't playing. The event is firing and everything, however when I check the BP, I'm getting no progression past the play montage node. No completion, no interrupts, nothing. Any advice would be greatly appreciated.
Alright, I finally figured out the problem. I was using a marketplace animation (one of the free packs), and the skeletons weren't compatible. I retargeted the animation, and all is working now.
I was wondering if there was any tricks for this, it's a bit of a specific issue
i have a montage that i play, and when it plays the characters movement stops, i was wondering if i could get it so while this montage plays if the player is on a moving platform, the player would stay on the platform while playing the montage
((please ping me if you have a solution))
how to make left and right smooth

Kinda sounds like what i had, but not sure. for me always loading the level worked.

You probably want to look on your state machine transitions, or your blend space.
Though I feel like this is definitely more of an issue with the state machine transition in your anim BP.
im using blendspace
the problem is when i go right the direction value is 90 but when i suddenly go left the direction value became -90
thats why it snap the blendspace
I think your state machine / anim BP don't have an idle state, and just letting the blendspace do the dirty work, thus the snapping.
Look at the third person BP template. In its state machine, there's a separate idle state that triggers when character velocity is below 10.
i actually did not use velocity
just use acceleration


maybe because of this
ill try use velocity
Yeah, you should definitely check out the third person BP template for reference.
actually im copying my BP from third person
i just modify it for my need
and third person is orient to movement so its different from my case
Okay, apologies, I was thinking something else. I crosschecked through the TP anim BP, the idle wasn't separated. mb
i fixed it, using interpolation time in the blendspace
Oh right, forgot those existed 😅
whats the difference betweeen taking an in-place animation, and adding keyframes on the root to move its translation forward versus just using a root motion animation? Is it the same thing? Which 1 is better for multiplayer?
This is really cool could you send me the video?
Is there any good tutorials for rigging weapons to the UE Manequinn?
hey! sorry moving a question I did at #blueprint here:
has anyone here subclasses from the default UE4 Play Niagara Particle Effect notify class? I'm tryin to have a similar notify where I can preview the effect in an animation montage, but I want to be able to chose between 2 VFX based on a boolean from the pawn who is playing that montage.
Hello,
How can I move my keyframes a bit? I need to animate a little part in front, but I cannot find where to move all the keyframes at once, or how to lengthen my animation total duration.

try holding ctrl or shift and click them all
that should select them all and then you can drag
somehow that is not working
i can drag and adjust all the individual keyframes if i go all the way in
hmm not sure then
I am trying to get the animation setup for a wolf and I wanted it to use a turning animation when the character is turning, I had made the blendspace for it but it still wont play the turn anim. I am not sure as to why its not working but here is what I had for the event graph, any help would be great

this is still broken, i've tried root motion, making the level always loaded, and setting the player location on tick when the montage is playing, but no luck
Is there a feature in Unreal or maybe a plugin that allows to see ONLY the active channels of a rig? I dont need to see all the other translations, rotations, etc. 🤔🤔💭💭

I was reading trough the Manual jsut an hour ago, saw this, maybe it helps

Does anyone have this issue when you animate something static (let's say a stick) in blender through simple keyframes (not armature) and export it, the animations don't match inside of UE? I don't know what I am doing wrong?!
Is there a good method to edit the data for specific key frames of a widget animation in code? I have an animation that changes the color of some text but I want to change the color animation values at run time while keeping all the other animation data (timing, curves) consistent.
Hey !
I have done a Control Rig on my Skeleton which works fine.
However, I can't figure out how I can edit an existing animation with my Control Rig, or start a new Animation Sequence using this RIG and a specific pose (right now it uses only the defaut pose).
Anyone can help me ?
Hello, Can someone help me with this problem - Im exporting my animation from motionbuilder IK bones are constrain but when I import animation into ue4 its like this

im also plot all, before export
I think this is not it 😦 I wanted to just visually isolate some channels so I don't have to scroll to the ENTIRE skeleton just to key the fingers
Similar to how after-effects just lets you see 1 single channel at time.

Hey guys, in today's video, I'm going to be showing you how to turn in place. In this, if the player moves their camera, the character will rotate to follow it playing smooth animations to display the character turning in place.
Re-Targeted Animations: https://drive.google.com/file/d/1kAT1qROHKzIi__WxBe7XKVJCNcTnLHrh/view?usp=sharing
Mixamo Ani...
that's what i used, it works great
guys why do i always get this error when importing mannequin from Blender?

Im using the mr manequin plugin
I have not m ade any changes to the skeleton
Just added something to the mesh and added the new parts to the vertex groups
Try comparing the exported FBX armature with the vanilla mannequin first.
For some reason, i think all of the Vertex groups are now fucked up on this mesh
@ashen junco
Im not sure how that happened, i literally added two tiny modifications to its back and then added those to the correct groups

I need to now try and emulate the vertex groups on the original but on this mesh -_-
Well
I imported a fresh Mr Mannequin mesh and armature, joined those components to it. Added them to the vertex groups
Exported using the plugin
and i still have the same shit
I guess the Mr Mannequin plugin for Blender has fucked up vertex groups?

Has anyone encountered a problem with Movie Render Queue ignoring elements on sequencer if use spatial/temporal sampling instead of realtime TAA? Basically it seems to happen if I have one actor on sequencer, but with multiple transform tracks on it doing different things instead of everything keyed on the one same transform "portion". Seems like it renders only the very last portion and ignores everything before. Works with realtime TAA on though, with spatial/temporal sampling overriding this the actor just disappears
Any tips for manipulating the XYZ Location of an entire animation's ctrl at once in sequencer? I baked a control rig onto it, but when I try to select all the keys, only the frame that i'm on changes...

feel like theres a correct way of doing this, but I was able to get my results manually by moving keys in the Sequencer Curves tab
Anyone able to help with questions about notifies, curves, and/or montage slots?
well what's the problem?
I'm reverse engineering ALS and they use a lot of curves and montage slots especially. But I need to figure out which exact animation asset or montage is related to a particular curve or slot. I haven't been able to find a way to do this without just text searching the asset files... and that doesnt even seem to work for montage slots. Is there a better way to do that?
sorry, i don't know, never worked with ALS
It's not ALS specific, that's just the particular anim bp I'm looking at
If you wanted to find all of the animations and montages that use Curve X, how would you do it?
I'd use find references i guess, but I'm not sure for a curve
Right, I expected reference search to work, but it looks like curves aren't references, you just refer to them by name and the engine does the lookup at runtime I guess
But I can't find anyone else asking this question, so maybe most people probably just dont have to deal with this normally
Not even a curve asset, just a curve in an animation
My blueprint reads the value of Curve X from the current pose, and that value comes from at least one animation used to create the current pose
well a curve asset can be checked, but those sound like their apart of something so I don't know
the Anim Curves window doesn't help at all?
hello ! anybody knows why my skeleton in sequence doesnt recognize my control rig ?i cant bake animation to my control rig
anyone know is it bug or not
when i create curve compression setting and change the codec to uniform indexable, the engine will crash (Version 4.27.1)
How do I make a montage additive/blend on a base animation?
Basically I have this aimoffset with the character head and arms to follow control rotation and I want the reload or melee montages to be played in the same offset direction. Currently it forces the aim offset to the neutral position then returns it when the montage is over.
Hi guys I want to use the "Play SLot Animation as Dynamic Montage" Node to play a one-shot animation. As I understand the docu this is exactly what the node is meant for. Unfortunately my animation will play in an infinite loop when using this. Googleing the topic revealed, that the node shouldnt even be capeable of looping infinitely 😄

This is how I apply the anim on the anim graph:

Unplugging the "Montage Set Next Section" Node helped. But I dont really understand why xD
NVM, I found a solution. For anyone wondering, the aim offset should be applied after the montage slot so the montage follows the aim offset.
Context?
Blender
How is that particular link even relate to Unreal Engine and this particular channel?
I mean u can use to make realistic hair tho
And fbx transfer to unreal engine
Not really. Blender shaders are not directly compatible with Unreal shaders. The material used for hair groom assets is different than Blender's hair materials. Even hair cards material is kinda different in Unreal.
And it's not related to animation stuff.
Also strand based hairs in Blender can't be exported as FBX - it has to be in Alembic format for Groom to work.
Ok then ima delete the link
Hello people, i came across things like ue5 motion wraping, and also advanced locomotion system v4 then some motion matching plugin from marketplace and moviet. Can someone explain me the difference?
It seams both are changing the animations according to directions and key pressing time etc
While i saw that moviet has extra with speed from material
I don't know about Moviet or whatever that is, but in short:
Motion Warping: Aligning root motion to desired location.
ALS V4: It's what it says on the tin - template for advanced system for bipedal character locomotion.
https://www.youtube.com/watch?v=ru1--3wP-F8
Motion Matching: Using simpler motion capture data and predicted movement to make adaptive motion on the fly.
https://www.youtube.com/watch?v=KSTn3ePDt50
Well, as the saying goes, "If you love something, set it free"...So I did. Please enjoy the biggest update yet :)
Store Page - https://www.unrealengine.com/marketplace/advanced-locomotion-system-v1
Discord - https://discord.gg/wYYMHFu
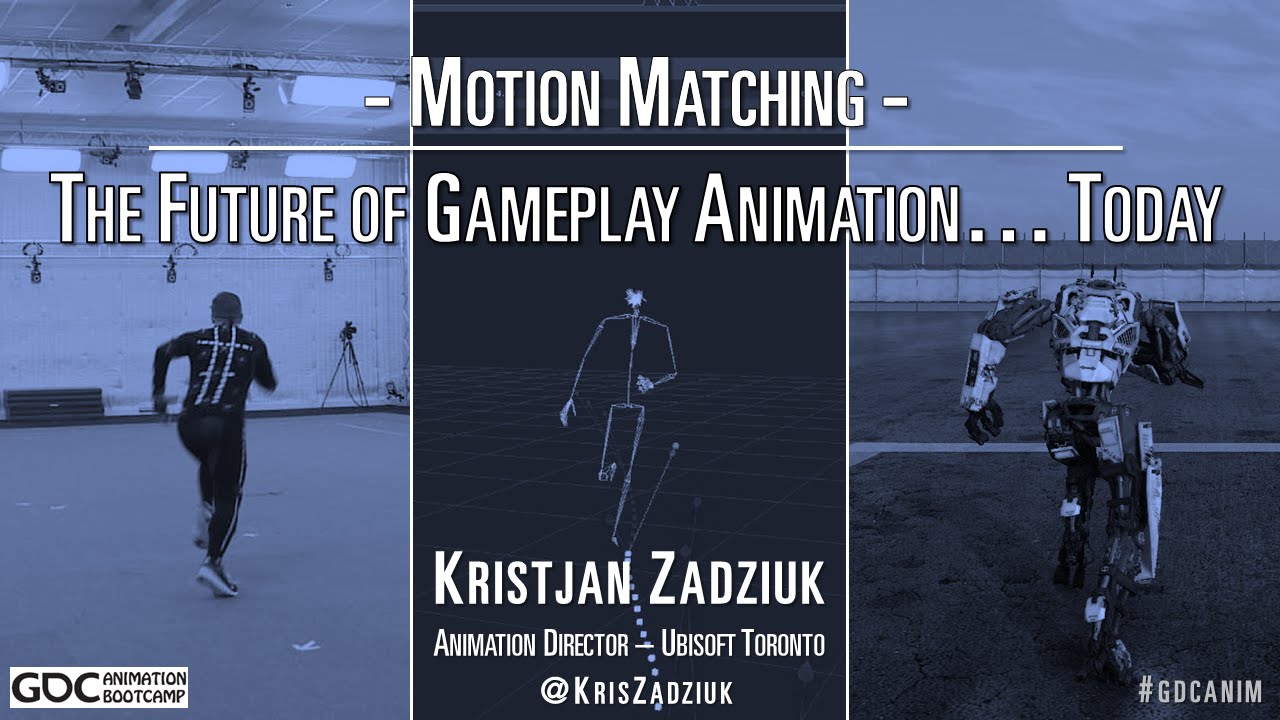
Game animation has come into its own in recent years, forcing animators to wield a unique blend of art, design and technical prowess.
From GDC 2016's Animation Bootcamp.
Ubisoft is always looking to innovate especially in the field of animation, with time consuming data creation, lengthy implementation and the rising costs of high quality char...
If i heard correct then epic said that the echo's hand reached door via motion wraping or i get it wrong?
I don't know why after that i felt like it was some kind of motion marching as first video before this year was motion marching
Also does that mean that motion matching is perfomace friendly??
I think it's combination of motion warping and full body IK.
Motion warping to bring Echo in place, and full body IK to put her hand onto the door.
Does it means that echo will place hand on the side of the door or alike situation itself , procedurally ? Or devs must manually put something like event marker for it
Honestly, i am unable to find the direct comparison of different methods theirs pros and cons compared to the default animation features
I don't think it does that sort of thing. I think it's just about bending an existing animation into a slightly new location.
Although with Full Body IK you could do that yourself
hey so. I'm making a game character in blender to put into ue5, looking at shape keys for the first time to fix joints deforming a little weird, will the drivers on my shape keys in blenders translate to them as morph targets in unreal?
No. You have to make it again in Unreal with purely anim BP or animBP + Control Rig
@ashen junco thank you
Did you know that doing an export then import back an animation onto the targeted skeleton works better than "duplicate and retarget" function ?
"Duplicate and retarget" will use the Base Pose of the skeleton while exporting the asset and importing it back seems to not use the base pose ??
Here is the expemple.
The black mesh uses the original animation
The white mesh uses duplicate and retarget function (but his base pose is different from the black mesh)
For the yellow mesh I exported the animation from the black mesh and imported it back selecting the yellow skeleton (his base pose is the same as the white mesh)
Here is the result :


The white has is arms a little raised due to the base pose being different
Can someone explain ? If its just better why would we use duplicate and retarget ?
You can only do what you're describing if their skeleton's are identical
That's why the retarget exists
Duplicate and retarget (or hard retargeting as I'd like to call it) is used if the skeletons are not the same, as in the hierarchy of bones.
Ah yes you mean its only working because all my meshes use the same skeleton 🧐 Seems really fair and logical
Yep!
Or in ALS case, want to base the animation for shorter characters, because ALS anims were made for 180 cm humanoids in mind. It was a problem for me with soft retargeting, because the first priority is shorter Japanese women, with 160 cm average in eight
I am new to blender and want to use Epics "Send to Unreal" plugin to send blender data to unreal. I exported a skeleton mesh with default settings to fbx. I imported the fbx to blender and make few changed to mesh. When use "send to unreal" a error comes up:

I tried "apply" and "clear" transforms on root in object mode, this will remove the error, but then the mesh in ue4 is rotated/located not correctly any more
Someone has a idea what part do I miss? I think exporting from UE4, import fbx in blender and then "send to unreal" with skeleton meshes should work fine.
if you're using a skeleton mesh that's human - use the mr mannequin tools, i highly recommend them
if the mesh is rotated in unreal, you gotta fuck around with the fbx export rotations
so i'm trying to have a multi layered idle animation...
Like 2 different animations that have a different length layered above each other to give my idle more depth and complexity.
How do i do that? Can i work around the blendspace somehow? 

deleting the "idle" dot and blending between idle & blendspace doesn't work either, because it's no smooth blend, it's either 0 or 1

I have 2 non humanoid skeletons and I'd like to retarget one to another. How do I do that if there's no 1st skeleton to pick as a rig source for 2nd?

I'm making some first person animations in Blender. I have a weapon and a pair of arms that I made a rig and some animations for. I was able to import the arms + rig into UE4 as a skeletal mesh, but now I need to "attach" the weapon to the arms and have it move with the arms in the animation. I (think I) would like to keep the arms and weapon separate, and not have a different arms rig for each weapon.
I was thinking of making a "weapon anchor" bone for each hand, and then using a socket on either bone to attach the weapon(s) to the hands. Does that sound like a sane way to go about it?
Yep I have weapons socket in each hand. To it I have for each item transform - how it should be attached. also I plan to add additive animation for fingers - how much open they should be
Cool. I was thinking of making bones separate from the hands to anchor the weapon to, that way I can do things like have the character throw/let go of the weapon/item as part of some of the animations. That should work right?
for example, if the character were to toss and then catch a grenade, I'd have the anchor bone move away from the hand when throwing, and then back into it when catching
I use projectiles for that. But for initial throw you can manipulate the bone
nah I mean like for an idle/equip animation, where the character casually tosses an item upward and catches it
like in the equip animation here,12 seconds in: https://youtu.be/PWhu9OjMSNU?t=12
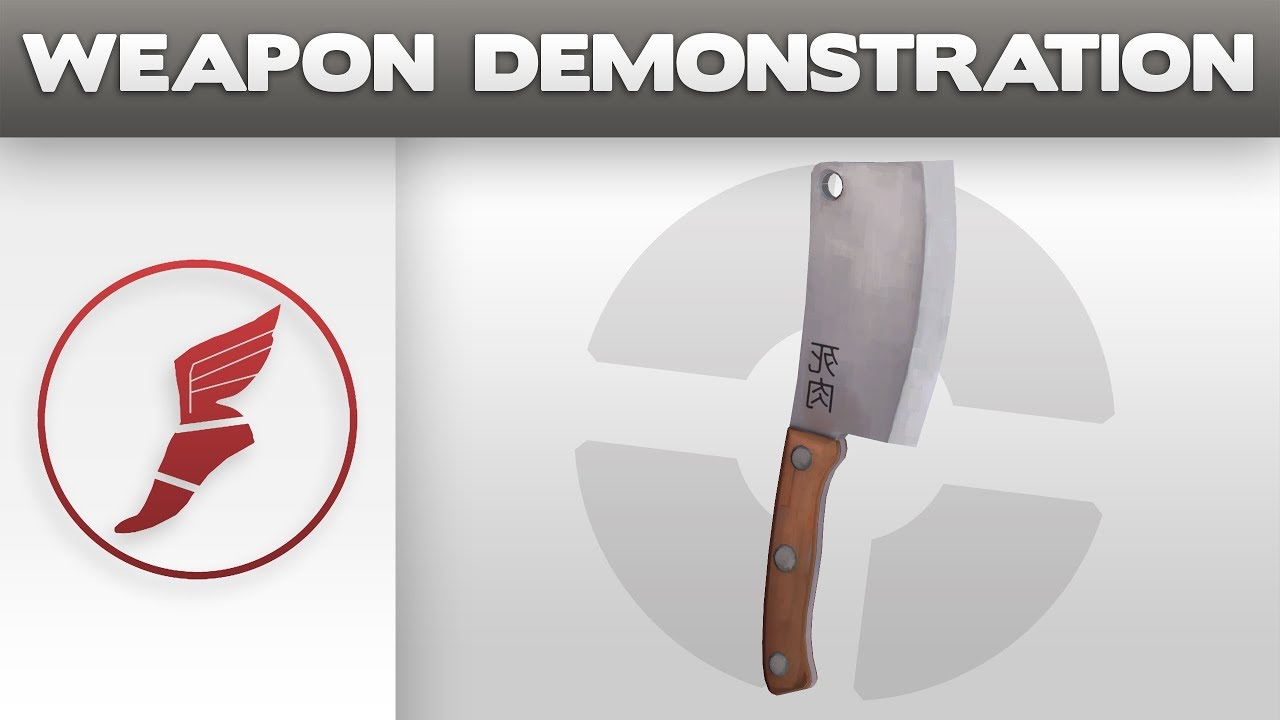
A video demonstrating the Flying Guillotine.
http://wiki.teamfortress.com/wiki/Flying_Guillotine
Damage
Base Damage: 50 (100%)
Mini-Crit: 68
Critical hit: 150
Bleed Damage: 4 damage per tick, 8 damage per second for 5 seconds (40 damage total)
Mini-Crit Bleed Damage: 5.40 damage per tick, 10.8 damage per second for 5 seconds (54 damage total)
...
You can do it by putting an item bone on their hand
Or attach it to the root
If you're animating it in Blender or whatever it doesn't matter if it's attached to the hand because you can constrain it to a separate object.
Same is true of control rig I guess!
yeah that's what I'm going with. I just wanted to ask about it here since I haven't come across tutorials that go about it that way.
ty
I generally use an item_r bone because It's what I've seen on unreal rigs
That is attached to the hand
👌
I guess in some ways it's probably better to have it on the arm in case you're doing masking of body parts
halp

srsly is control rig usable at all in 4.26? Every time I try to animate this it just glitches
hey guys, i have a door which opens and closes when i get close. It does this nice and smoothly the first time but everytime after that it moves instantly to be open or close. Any idea what is causing this? i can post a screenshot if needed
yeah, hard to guess without seeing the bp mockup

have you tried using the play from start input instead?
Can you make animations within ue4?
sort of
Wdym?
well what kind of animations are we talking about?
Where abouts is the play fron start Conrad. would it replace the overlap thing? thanks in advance
on your timeline node, it's the one right below what you currently have plugged into it
that was it haha thanks again, im glad it was something Simple 😄
me too 🙂
Player animations (if thats what your talking about)
I dont believe many are using unreal to animate character, control rig theoretically makes it possible but ive not had great success in finding a pipeline that isnt faster than the conventional use of 3d software
And there are other kinds of animations such as use with timeline, materials, and physics
im guessing i had a error on the blend spaces somewhere?
i exported the mannequin skeleton to link it to my mesh on Blender, however all I got is a .copy file
what can I do with that?
it should be an fbx that exports from Unreal
i got the .fbx only when exporting the static mesh. only the bones it gave me that
so you exported the mannequin skeletal mesh from Unreal, got the fbx, brought that into blender and in blender you now have the mesh and rig right?
yep
okay, so then you took something you made in blender, skinned that to the bones from the export, and are now exporting a .copy file? can you export a .fbx?
no no no

this option gives me an .copy file
btw, i managed by exporting the mesh too, i was just curious what can i do with this type of file, as there is nothing on the internet with my search keywords
ahh, hang on, i don't normally try it that way
oh
nvm then, well yes, i would say you need to export the mesh file so that the rig comes along
the skeleton is not quite the same thing
do Unreal weight the IK_bones in mesh?
strangely i can not see the reference on Blender but when I remove the mesh and parent it to my mesh I can access them on paint
no, i don't believe so, I've not for my needs
i think that goes for twist bones as well
and a .copy sounds useless, but maybe there's a reason it gets made

nice! i also tried export the .copy which says its an unreal text file, i opened it in notepad and there is a bunch of info, one thing that was interesting was seeing all the anim notifies associated
Hey all, I just noticed that alembic hair grooms disappear when i set the Lit mode to Path Tracing
is there anyway to set the hair grooms to render in path tracing? or is it only rtx?
really basic question, but how do I add an animation that I have to an animation BP so that I can call it in the graph?
i am unsure if this helps
but is the animation retargeted to the right skeleton?
if not it will not appear for that skeleton
is "mesh space ref pose " costlier than "Local space ref pose" ?
or are they pre cached poses that have no real runtime cost?
I've actually figured it out. I just needed to retarget that animation
an unrelated question, though: How can I set the amount of time that an animation in my anim BP should take based on a variable?
Play rate, I guess?
the only thing I could do to get it to kinda work was (animation duration in seconds * (1/duration variable))
hello all, i have a question about animation library.
currenty i'm try to use the Structure blueprint to add all the animation inside and plan to use them in Anim graph BP, but i found out aniamtion sequence ourput can't use it there.
if any way i can use animation seq variable there in animation graph?
many thanks
Heya here, not entirely UE-related, but could some be kind enough to convert a .mb file to a .fbx file? Client mailed me a model but I can't open it... I'd be incredibly thankful 
Hi.. in my project I use a random sequence player node to play various hit events.. I created a blend poses by bool node the false pose is the locomotion animations and the true is the random sequence player node with 3 different hit animations. I connected the Boolean value to a variable called is player being hit... in the character blueprint I added a collision box and connected the begin and end overlap event so the begin is setting the bool value true and the end is setting to false. It works fine but my problem is that the random sequence player node sometimes triggers more than one animation sequence at the time. All of my anim sequences has a moaning sound to it and sometime I can hear all 3 triggering at the same time.. is there a way to set the random sequence player so it only triggers one animation when the begin overlap event triggers??
Is there anyone with experience can suggest the best option to create a Car Crash in Slow Motion?
It's the cliche "car flip-and-stuff-flies-in-slowmotion" shot.
I would like to do it with real physics and a slowed down world. But I think maybe just animating everything by hand is easier? Any suggestions? 🙂
Got some issues with some animation sharing. We're using the same skeleton across the board here - the animation - aka the pose here, has originally been made with the mannequin, but if you look at the female model, her shoulders are being offset into an odd position
https://cdn.discordapp.com/attachments/483256906698326028/909807914666065961/unknown.png
What we would expect it to do would be to have the shoulders be position like the one on the left here. - There's no rotation going on or anything with the pose at all... Any ideas as to why this is happening ?
https://cdn.discordapp.com/attachments/483256906698326028/909808172510871552/unknown.png


https://youtu.be/FdtTthV_sXI?t=1268
Maybe this helps
Download Unreal Engine and go make something incredible! Getting started is easy -- You can download the latest version for free here: https://www.unrealengine.com/en-US/solutions/film-television?utm_source=video&utm_medium=influencer&utm_campaign=pwnisher&utm_content=ue4_internal
Watch the virtual music video: https://youtu.be/aIPOSYaKibM
Cons...
Okay so - Yeah we already did what he's doing at the timestamp and still end up with the result above 😦
im using Modeling Cloth addon in blender and when I press Sew Lines im getting this error

any ideas?
Does anyone have any info or videos I can look at about matching a pre-vis animation from a DCC to the layout of a scene in Unreal? I'm working on a project with some large scenery and complex sets, I need a solid way to make sure every character is lined up they way they would be in my unlit renders in Blender after importing everything over to UE, despite that some of it will be on a landscape mesh
Hi. I am trying change skeleton for SM from Mixamo to the UE4 default one. Here I opened Mixamo fbx in Blender, using Mixamo Converter plugin I changed bones names, then I imported fbx to UE4, assigned UE4 skeleton and this happened. Maybe it is common and easy problem, like clicking additional option during import. Or is there a better way to replace Mixamo skeleton to UE4 one?
This is a weirder question, but I'm messing around with the first person template and made some animations in blender using the standard unreal mannequin rather than the first person one (first person is just the arms of the standard), and the animation broke when exported into unreal. Is there any way to fix this?
@flint canopy broke how?
If they are not the same skeletal mesh then it likely wont be compatible, you can try retargetting based on bone names
Broke in a way that you’d normally see with using animations with different skeletal meshes
I tried retargeting it but I don’t think the bones have the same names. Is there any way I can change the names in engine?
How can I scrub through an animation during runtime by clicking and dragging, for example opening a book by click dragging the cover or a door, or any other animations?
I'm following this Tutorial https://www.youtube.com/watch?v=dldkRHDw17g&t=305s
I'm using a animation I edited however when I go to click True at 7:20-7:30 it does nothing, however if I plug in a vanilla attack animation it works. Any ideas on what I'm missing?
Hello guys! It's DevSquad, and welcome to a new video. Want to create a character with melee combat but not sure where to start?
This is a beginner friendly video, teaching advanced topics on how to setup an attack that deals damage and kills enemies.
You'll cover all the knowledge ranging from working with animation blueprints, setting up a s...
Question: The armature in this animation doesnt move the index finger, but the weights from this part of the finger are moving, why could this be?

This is a fairly simple question but how do I play an animation on game start?
Begin Play > Play Animation
thx man
Any tips on how to more easily test stuff in the animation BP editor? I'm working on making my NPC characters rotate their heads towards the player (or whatever they want to look at), but it's a bit of a pain when you need to calculate the look at rotations and such based on actors which don't exist in the editing view so have to go into PIE to test it
Maybe making a debug gizmo in Anim BP? It's easy to do in Control Rig, but not sure about adding gizmos in anim BP.
I'm not sure how you'd even do that in there but yeah I guess it's an idea 🤔
For time being I made a debug level which just puts the npc into the desired state immediately which makes it a little bit less of a hassle
Also- is there some way to interp or blend or something a specific bone? Basically I'd like my character's head to use a given rotation (I have this working), but when it does certain animations it should keep the animation's head facing
I can do the calculation for the head rotation in the event graph, but in order to detect which animation is currently playing I'm not quite sure how to do that so that it would allow it to blend nicely
I have it set up like this, which works, but if the animation changes to some other state than NormalIdle, the head will immediately snap in/out

Hmm actually maybe I'm overthinking this... using that State Weight node as the Alpha makes it work quite smoothly, except when it uses my montage slot so just need to find out how to blend that I guess :)
There seems to be a Is Playing Slot Animation node but that seems to require you to specify which animation you want to check against, and it doesn't give a weight either...
@vernal rain set looking at actor to false when playing montage?
or add a new bool
Yeah I might need to add something like that I guess
would be handy if I could just get a weight from it directly similar to the state weight
hey everyone, how do I bake out a modifier from blender to unreal? like wave modifier fx.
Depends on what you're doing here, since you're posting on #animation and not #graphics.
If it's the latter, I could've just answer "apply the modifier, done."
sorry i was not sure which category.. well i just want a place with a wave modifier with about 400 frames going into unreal
if I apply it, it just stands still?
I'm not sure how Wave modifier works, but is there any reason not to make the waves with World Position Offset in material?
Convert your click/drag to some sort of a float alpha, then use that to drive Time in the animation. Won't line up perfectly.
Already answered it while ago in #blueprint. It was crosspost.
I've had all my characters rigged with Unreal control rig. My artist has a small amount of experience animating in blender. should they stick with blender, or could he do the animations in engine?
https://www.youtube.com/watch?v=HLLIxOrvolc
I found this video showing creating a walk cycle entirely in engine. This seems really good as it would also let the designers tweak animations very quickly themselves. and it seems like you can easily see how the animation reacts with IK too.
Are there any serious downsides of sticking in engine, or reasons to stick with blender for animation?
This is my first test with the new control rigs in Unreal Engine4. I'm using the Sequencer to animate, but there is a lot of missing feature commonly use in other program.
The process is little more complicate than Blender but you can still use to create simple animations.
If you want this rig, please let me know.
#ue4 #animation #controlrig
Hello! So I am making a game in Unreal and it's my first game. I've been watching a lot of YouTube videos and reading all of the documentation I can find on animation but it's still very tricky.
Here's what I need. I am making a character that shoots a bow but can't get the bow to animate. If possible I need someone to help me.
If I'm in the wrong channel please direct me to the right one. Thanks 🙂
I suggest you should stick with animating in Blender, as animating with Control Rig in its current state is rather limited. But it is serviceable for anims that don't rely much on constraints, e.g. moving held object.
As for specifically walk cycles, animating in-editor with CR is fine.
It's basically just like animating firearms, and matter of syncing the weapon anims and the character anims.
Usually bows are done with bones all over the string, and some on the arc to bend when pulled.
@ashen junco what do you mean by "moving held object"? Like holding a cup?
or a gun?
So if I have an animation for the bow already, how would I play it when I click my attack button? It already plays the animation for the character when I click so I've got that I just need to make the bow move.
Yes. Often times this can be achieved with constraints, something that the editor's animating tool doesn't have.
Would animation framerate make a big difference in games?
Visual quality and performance wise
You could also get the weapon skelmesh and, depending on your setup, give it the attack anim montage.
Depends on your game's art direction.
That's good. Glad I'm doing something right. 😂 I do have an animation montages that I am trying to use, I just can't figure out where to call it. In which blueprint do I tell it to play the animation.
Im thinking of having the style close to dishonored 1
Basic shapes with watercolor like textures
But i dont want it to feel cartoony either
Do animations in games work the same way as in animation films?
Then animating in 30 FPS seems to be more fitting. Unreal will give interpolation in between frames, unless you told it not to, so it would hold up well in 60 FPS.
Yes and no.
For one thing, you have to make sure your gameplay anims loop seamlessly (first keyframe and last keyframe at the very end has to be at the exact same pose).
Sometimes you could have parts that could be just simulated with in-game physics (like skirts, vest overhangs, dangling bits, hairs, etc) for more interactivity.
There's also a whole slew of technical animation tricks and stuff.
If you have 40 animations (iron sights, hip, crouching, etc..) and you want to control those motions with a mouse, do you have to do a blend sequence for each, or can you make one blend sequence and reuse with different animations?
I am following this tutorial from UE: https://docs.unrealengine.com/4.27/en-US/AnimatingObjects/SkeletalMeshAnimation/AnimHowTo/AimOffset/
Using an Aim Offset, a character aims a weapon in the direction of your mouse or controller.
Why would a bow have more than 1 string bone? I do mine by 5 bones in bow and 1 for string at nock point
Handle, midpointx2, tipx2, string nock
Dangling physics 😛
Oh for unstrung?
Yeah, that sorta thing.
First time doing this so I'm very unsure about this. I created a rug in Blender with an animation to lift/fold it (to reveal things under the rug). I exported it to .fbx, imported in UE4 with a skeletal mesh (which I think is required?). Mesh and material came over fine but I see no animation, despite telling Blender to export it. Would anyone be able to point me in the right direction?
Have you make sure to enable Import Animation when you're importing the mesh to Unreal?
Yyyyyyes.. I think so. I'll delete and re-import to be sure.
confirmed, import animation is enabled
Okay, maybe try crosschecking it, by importing the FBX back to Blender.
Maybe it's the case of the action doesn't get exported somehow.
Ahhhhh so .. this is weird. The animation was created by using a curve modifier on a plane and moving the curve over time. I don't really want to import the curve into UE4 ...
Looks like using bake animation doesn't capture this modifier
Well that's the problem then.
You could use the "chained morph target" trick, which is what Epic used to make the water droplet effect in Infiltrator demo, but not sure how to pull that off in Blender.
gotta import it as a skeletal mesh first so it creates the skeleton, then import it again as an animation so you can specify the skeleton
I think.. what may be the problem is that the mesh itself is not animated
In other games, that can be easily done with a regular skeletal mesh animation.
i think any animated mesh needs a skeleton, and when you export the mesh/skeleton/animation from wherever, it needs to be baked onto the skeleton
maybe it is possible to do non-skeleton animations in unreal?
And by regular skeletal mesh animation, you roll the rug with them bones.
yep. it's a bit long-winded, but the curve would need to drive the bones, which drive the mesh
It's possible, as alembic data cache, but stuff that simple, could've solved with simpler skeletal animation.
I have it currently imported as a skeletal mesh. How might I then import it again as an animation so you can specify the skeleton ? When I import again (at a different location because unreal complains that it's already there) there's no option to import it as an animation

If I check skeletal mesh I can then specify the skeleton previously created but that just re-creates the same mesh I already have, still with no animation
Or did I just create something in Blender I can't feasibly import
when you import an sk, and leave skeleton blank, it will make one, but only if it finds the skeleton (bones) that you've made
I was so proud of this. first time animating anything in blender
yeah, that

well you're not far, just need to learn bone/skin method
It did create the skeleton
oh yeah, picture?
ah, there's no bones
Give it armature, and fold the rug with bones in the armature.
That is something you do in Blender, which you did not.
alright then, bone time
phrasing
Ok, I'll see if I can figure it out with google-fu so i don't flood this with dumb questions
great, i dont rig in blender
I believe them bones are me~
i think this is a good step to learning it though
just give me code, i love the code
sorry, no code, just bones and transforms
{
   bone();
}```I'm offensive and I found this animator.
go drunk you're home
step 1, google: "blender what is an armature"
perhaps.... https://www.youtube.com/watch?v=IAiTYaiZmY0
I searched for: blender simple rig snake
Looks promising!
Ok, might be a bad time to ask a question since I'm only 7 minutes in. But I've added my bones. The bones now drive the mesh. So should my curve modifier drive the bones? Doesn't seem like bones like modifiers
Orrrr can I not use my curve modifier now
Might as well fold it with them bones.
bones it is
Mesh isn't really conforming to the bones very well .. there should be plenty of edges on the mesh to allow it to rotate as much as the bones are

Hey, what does a character capsule typically look like when a player goes from "hanging off a ledge" to "standing up on ledge" ?
In my head, I imagine the capsule kind of "pops" to the standing location after the getup anim is complete, but I'm not certain if that's right.
Is it possible bones closer to the tip of the chain are affecting mesh near the base of the chain too much?
Seems like it. Guessing that has something to do with the weights?
Yeah the falloff of the weights of each bone would affect it in the way I am imagining. Like if you select a bone near the tip and see if it has a strong weight influence farther down on the mesh.
I am also assuming in the rest pose, the bones are basically touching the mesh, not floating above.
Correct. Looking at the weights now and it definitely seems like some bones have influence quite a ways down the mesh. Seeing if I can tweak it
This process doesn't feel right
It looks so much worse than the beautiful curve modifier looked
The falloff influence doesn't look wrong to me, though.
I had to do some tweaks .. like for every bend I did at one end, I had to bend some bones in the opposite direction on the other end to get the mesh in the correct position.

Ah yeah that's an issue. I just came back from a character rig with lots of arbitrary weighting.
But I wouldn't know how to "perfectly" set to falloff of the bones on such a mesh. It definitely doesn't seem like something that could be done easily with Blender's native tools.
I'm ok with doing it this clunky way, as long as I can make it look.. better than this
the rug should roll up, not flop over
but if I add a ton of keyframes in there to influence the behavior it looks janky, like cgi from the 80's
I mean, not roll as in make it an actual roll. But like I had with the curve modifier https://cdn.discordapp.com/attachments/221798806713401345/910595126831742976/2021-11-17_13-19-35.mov
that was the perfect behavior i was looking for
the effect of grabbing one end and pulling it towards the other
Ah I see. I would use Spline IK on the bones to conform to a curve, but the curve itself would need to be animated a different way than that video. Basically its rest position of the curve would need to be the same as your bone chain. And you'd animate the curve points with Hook controllers.
But that does not solve the issue of making a "perfect" falloff of bones on the mesh.
I think I'm just striving to do too much with my lack of experience here. I'll just flop the rug over and be satisfied enough with it.
and then stick to code where i belong
So, this is usually not recommended because it's way slower than bones, but if it's just the one rug, I BELIEVE unreal supports alembic caches with per-vertex animation.
So IN THEORY, you could export the curve deformed mesh as an .abc file and import it into unreal.
😆 well unreal crashed trying to import the abc
Oh yeah.... it does that...
Is only the mesh object exporting? Unreal gets a little weird with .abc curves from my limited groom experience.
Idk, I kinda bailed on the abc front. Seemed like not the right way to do it. I'm just trying to ge the flopping rug to work at the moment. Exported ok, imported ok. But the mesh doesn't seem to appear in the animation
nailed it
the magical vanishing rug
it's a feature
dang, that's progress though
kinda just feels like failure after failure, honestly
well before you didnt have any animated mesh at all
in engine that is
i would test it again, but use wireframe mode, it looks like the entire skeleton moves somewhere
maybe to 0,0,0?
😆
okay...
Now think hard: When you animated the rug, did you also shrink it 100x too small?
im assuming you did not mess with scale when making the animation..
Nope
Didn't touch scale
I typically need to scale FBX imports by a factor of 100. But not sure why the base mesh is different than the anim skeleton
Wild guess tells me the small one is actually correct
Yeah.. seems to me they'd both be wrong
because you imported it in as a skeleton and then again as animation yeah?
Nah, imported in one go
I know blender likes to export all its weird "takes" and "actions." When it came in, was it many many assets, or just about 4 like this:

well i see that no skeleton was chosen on import
preserve local transforms is worth trying
when it comes to animation files, i tend to delete them if they dont come in right and try it all over again until its good, then never touch it again
I'm stumped
not knowing blender, it's tough to pinpoint. worklfow im familiar with would be to make the model (clean transforms), setup the rig (this would be all animating bones and root bone at 0,0,0), skin mesh to rig, adjust weights (don't need weights on root bone), animate bones/keyframing, bake keys to rig, export as fbx with animation and constraints, import to unreal as skeletal mesh with no skeleton so it makes one, then import again as animation (which removes skeletal mesh option) specify the skeleton, cross all fingers
That sounds like what I've done. I'll try again with a fresh file and just see if i can get ANYTHING to work
i understand, honestly, i wish vertex animation data could come in just like that (alembic), might be best to try it again. but look, send me the mesh file if/when you give up, ill try it on my end and if it works ill send it over to you
all this because this morning I thought "i need more places to hide things. how about under a rug?"
thats what i said about turning the lock dial too
hehehehe, yeah that was good
This one's problem was solved (on this discord) by apparently naming "Armature" to something else?? But I'm pretty sure I've left a few rigs named "armature" in the past. Although I usually put all rigs under a "Master" Empty
Just created a new blender file and threw together a crude animation. confirmed in unreal the mesh is normal sized, the anim is tiny
gotta walk away from this for a little bit, my head is hurting
well i dont use blender regardless, ill see what i can do
Thank you. I'm probably just exporting it wrong. Just can't wrap my head around why the mesh would be normal sized and the anim is itty bitty
this has some interesting info on the matter that sounds unintuitive but apparent just what blender could be doing
talk a walk tho
and regarding that link, i do see an armature node coming in when I import, and lo and behold, it has a scale of 100
Yes I just confirmed. Got a tiny anim when it was named "Armature." Anim was correctly scaled when renamed to "Barmature"
I unknowingly avoided this in the past by putting all meshes and armatures as children of a master "Empty" null.
I'm also seeing the scale of your "rug" which is 100x200x1
transforms should be cleared/frozen (whatever blender would call it) before rigging/skinning/animating
In blender it's "Apply Scale" (Ctrl + A)
yes
gotcha
@cosmic rain works for me, hope it works for you
anyone got a guide of doing animations on ue5 (in editor?)
Animation doesn't seem to do anything .. gonna try messing with the import parameters
ah .. so this might be a ue5 thing .. i opened up ue4.26 and it seems to work
ah, that makes sense, i dont use ue5 for many reasons. I did test it in 4.26, and it worked fine in the animation viewer. I would assume there's no difference though, but can't argue with the results
Params could still be different between the two, I'm checking now. Only using ue5 because I didn't wanna deal with the conversion later
😆 so i imported it into 4.26 and migrated it to ue5 and now it works
sigh. what a long way to go for this. Thank you for your help
yeah, next time just slide the carpet with a timeline
Noooo that's not my visionnnn
yo smarties
I attached a piece of cloth by making it a skeletal mesh and attaching that to my character mesh. I am dismembering a body part from my character, by hiding it. Problem is that the attached skeletal mesh goes invisible also. What to do?
Is there any way to rename bones in physics asset to attach it to another model with another skeleton? Or tip to qiuck copy/paste rigid bodyes from old asset to new.
are you trying to use a skeleton from one rig to be used by another different skeleton?
Hey so I made a custom model and rigged it with mixamo and when I import the files needed into unreal and try to use them they're tiny as heck... do I scale up the model in blender then re rig or is it something else potentially?
that's unusual, I'm not familiar with mixamo, but if it's too small you could adjust the scale in the software you made it in. You can also try adjusting the import scale under the import settings (you do not need to import it again - check the skeletal mesh asset) I've never adjusted scale this way though
Alright
I am trying to bind a part to body through "set skeletal mesh -> set master pose component". As i understand i need at least one match by name in the bone list. But if i rename bone in part mesh then my physicall asset of this part stop working.
so the mesh you are trying to bind, that is a child of the skeletal mesh (assuming character mesh) and then you linked in from the dropdown? The set master pose component sort of needs name, but it should just be the mesh, the only odd bit is the pointer to the bone.
how are you renaming the bone and why do you need to?
in the any 3d editor like maya/blender
forget it, i am going to recreate physical asset manually
sounds good, that's doable
sounds like piece of cr...routine
the change of bone name means the skeleton has been modified. cant rename bones if you want to use the same skeleton already in the engine. You could of course retarget the new skeleton. When importing a skeleton the physics assets does get created by default vs making one from scratch
I dont need default phasset. It does not have constraint and etc.
Well it seems there was possibility to export phasset as text, edit it in the note and import. But in the actual version this functionality was broken.
nice
well the one that is breaking for you probably has a reference error to the bone that is no longer named what it was
So i parented a root bone that controls the loc and rotation of the gun to a the right ik hand, and i exported for animation. The issue is, is that whenever i change the animation asset to the exported animation, the gun shrinks in scale, i'm not sure whats wrong. I'm also not sure if this is a blender or unreal issue.


from earlier today, sounds like a blender issue. I dont recall the fix as i dont use blender, something to do with the root bone not being named armature that blender automatically adds a root bone on top of the root and this messes with scale, you'd need to look more into this, seems to be common with skeletal rigs from belnder to unreal
alrighty, ill check it out, thx!
So you basically got it, i remembered after reading your message that you cannot name it Armature if exporting to unreal so i just renamed it to ScarSkelly and it worked, Thanks mate! @rustic plume
hey awesome, thanks too, good to know as a couple other ppl today had the same issue, seems simple enough!
Hi. Questions about control rig fall in this msg channel?
Yes.
im following a tutorial but am having issues with my projectile. it is going through objects whereas on the tutorial it isnt. can someone help me sort out my collision? Thanks
Ask in either #blueprint OR #legacy-physics.
(Please do not crosspost to both)
no problem thanks
thanks
hey, is uefy the only way to get rigify rigs from blender to work properly in unreal? for retargeting etc
I am trying to figure out what is the best practice about rigging for control rig. I must admit, I am not a rigger but I am trying to deal with it. On the left all the rotations are zeroed out of the bones. On the right they are not. The distribute rotation BP seems to have similar results, but I don't know about a simple IK. What are some things to take in consideration when rigging? Thanks

I personally avoid Rigify as much as possible, due to how bloody painful it is to use
Auto Rig Pro and Mr Mannequin Tools are your better bet.
haven't heard of those, will check them out
I'm animating this flower with pivot painter using the blender plug in, looks fine in preview but in the level, if it's not at 0,0,0 it distorts... Cannot figure out why
Okay, Sorted, had to subtract the world position from the pivot position...
When my pawn switches weapons, I change the Animation BP that it is using. Is the the correct way to do this, or should I fit it all into one BP?
Please post it in #work-in-progress (if it's WIP) or #released (if it's a completed UE thing). Don't crosspost to both.
Thanks for understanding.
So whats the best free alternative to blender?
Hi Everyone, sorry if i post here but we urgently need a 3D Character Animator Position in our team, i already posted the job in the right channel but didn't receive yet applications, if you are interested please refer to this post: #freelance-jobs message
Thank you
hey did you ever figure this out?
..sorry I know this is super old
I can't find any info about this
I'd assume the animation logic is the same regardless of weapon, after all this is where the locomotion lives, if it's merely because different weapons require different animations when being used (as opposed to locomotion), then montages would be better suited since you can have attacks take precedence via slots. Each montage would need to call the same anim notifies if those are being used. Based on the weapon, it would set what those montages would be. Again, this is under the condition that locomotion is the same regardless
If you have no one noticed your job vacancy, consider putting it on job board sites, not bumping it here.
https://www.youtube.com/watch?v=1L_gq8Ao-mI
Hi, I try to apply root motion, but found it reduce movement rapidly. Please take a look and tell me if you think what can be wrong.

I did these on applying the animation montage:
- set movement mode to fly, to enable Z-axis root motion when it's needed.
- Set gravity scale = 0.0f, so the character shouldn't fall during animation.
And I restore previous changes after the montage completes.
Can you tell me why the root motion move much less than non-root motion?
I'm trying to learn about the different methods of combo attacks and such, I know there are a few if not many I just don't know what they are called. Can anyone list them off, Afterwards I can research them
I already know about animation Montage. As for Blocking animations, for example In a sword fight I want to have a block animation based on the direction that a hit is coming in at or has already happened. If a strike comes down vertically the block will be horizontal, and if the strike comes in horizontally the block will be vertical. Are there any methods to achieve this before impact or after?

Hey does anyone know why UE 4.26 has some kind of offset when trimming animations?
I have my timeline at frame 10 but when I right click it says "remove frames 0 to 12"
this is about anim montages, you'd be using slots to determine which montage plays. As for direction, that's simply defining which montage to use (therefore which animation to use) for the given circumstance
you know courses just for gameplay animation?
I personally self taught, but I think you could get away with taking all purpose animating courses, as there's not much difference from animating for gameplay and linear media.
I mean more on the node setup, animBP and event graph and all the logic and setup
Oh, I don't think there's much about that specifically, though I wager Unreal Online Learning has some.
https://www.unrealengine.com/en-US/onlinelearning-courses
Unreal Engine
Unreal Online Learning is a free learning platform that offers hands-on video courses and guided learning paths.
Is there any way to just make like a pack of skeletal meshes without a player character?
Why not pack them in an actor with a bunch of skelmesh components?
Sorry I am rather new to Unreal, I right now am making sort of view scenes, not real games, and I have a animation pack and a modular character. The character and all parts have the same skeleton, but I want to load the parts I need into a scene and then apply a animation clip to the whole group so they look cohesive. I could do it by just applying the animation clip to all the components, but just trying for a quicker method.
You can look at parenting to a skeletal mesh, then use SetMasterPoseComponent, this way you only animate one skeletal mesh ( the parent ), and the others will follow along, like clothing, hair, etc..
oh thanks, that is what I need, will look into it
I really have to get better at understanding blueprints. The last time I tried just setting up a blueprint to change eye color on key press nothing happened, still don't know what I missed.
for "inanimate" objects, like holding something in the hands for example, like weapons or anything that does not really require any vertex deformation but needs to follow the skeleton you can look at using sockets, and attach static meshes to those sockets, typically those sockets are lniked to bones in the skeleton.
Ya I know about sockets, I plan to do that for some objects, but I have a large set of body parts I am just trying to link up that use the same skeleton.
I don't even really want this to be a character, it's more a NPC you could say, just playings in a scene space while the camera flies around, so I am trying to keep the overall code simple if I can help it
post your issue and what you have tried, or some screenshots of your blueprint in #blueprint if you want.
Maybe later, I am redoing that project anyways. If I can't fix I will post
Thanks for info on the SetMasterPose though, that should fix my biggest issue.
from the looks it's a very simple blueprint too
One more odd question, but say you have two skeletons, almost exactly the same, but one skeleton had say two extra bones for say a ponytail. Would there be any way to still drive them if you had to load it as a second skeletal mesh? Or would it be better to just go back and add the two bones to the original skeleton and update it?
You can add bones to an existing skeleton, and other meshes that don't use the additional bones still use the same bone. If that's what you mean.
Just make sure the change doesn't destruct the bone name hierarchy.
So if I have a skeletal meshes that go spine -> neck -> head -> Jaw, and another with the same but an added ponytail bone, the assets will work together as long as the second skeletal mesh isn't spine -> neck -> head -> Ponytail / Jaw ?
No, actually make sure the name hierarchy isn't mess around.
Spine -> Neck -> Head -> Ponytail / Jaw is fine
Spine -> Neck -> Jaw -> Head is not
So even if in the original Jaw is the first bone, having ponytail as the first bone in the head won't break it?

Sequencer in Unreal Engine 4.26 has had some great new improvements focused on skeletal animation. Animation clips can now be blended together more accurately by specifying which bone to match between animation clips. Visual debugging tools have been added that show root motion and skeletons, ensuring accurate blending. Skeletal animation can no...
based on this video, all animation can now be done in ue4?
Yes and no.
what do you mean ?
how would someone do a character animation from A-Z? including hair/clothes
isn't all that done in ue4 ?
I personally doing it in Blender.
And no, not the blender you used to make juice.
But Blender 3D can make a model of a juice.
Glad you mentioned :)). I saw some great features in this ue4 video, does blender have them all? such as the intuitive animation from 2:00 mark, where you can animate more freely?
I'd say this, animating in-editor with Control Rig is pretty bonkers, and for basic montages, it's fine. However, my main gripe with it is the lack of bone constraints. This is difficult for me to animate characters holding something, e.g. weapons, because I would have to manually match the hand position, frame by frame, accounting for in between frame interpolation.
Please see the #instructions to post on #volunteer-projects . Do not post job vacancy on other channels, per #rules no. 8.
<@&213101288538374145> Job vacancy outside job boards channels.
Can't get it to show me the skelly as an option any ideas?

oh shit, my fault
just answered this in bp before here, tick off show compatible skeleton
Please remove it and post on job board @white jewel
That could cause a heap of issues.
You have to set the retarget settings in both the source skeleton and your target skeleton (NOT the skeletal mesh)
understandable, they appear to be the same skeleton though
It still had to have the retarget settings defined, for safety reasons.
i getcha, i've been needing to this and haven't had any, understandably i could see there being issues that arise, especially if subtle modifications to the skeleton are present
Dumb question, but can I just keyframe joints in sequencer w/o any control rig?
yeah i dont believe so wait maybe
No.
Skelmesh bones are not exposed to cinematics, so you have to do it with Control Rig.
I only want my door to open when it detects my player (who has the tag player) as it was triggering off my projectile but now it wont open. i have given my character the tag Player but no good.. thanks

sorry about that
https://www.youtube.com/watch?v=1L_gq8Ao-mI
hi, I did all these in C++ as well. The root motion just didn't move equal distance and height as it did in non-root motion state. Do you have any idea about why?
I did these on applying the animation montage:
- set movement mode to fly, to enable Z-axis root motion when it's needed.
- Set gravity scale = 0.0f, so the character shouldn't fall during animation.
And I restore previous changes after the montage completes.
Can you tell me why the root motion move much less than non-root motion?
I change movement mode into Fly, because that's said only then the Z axis root motion will be applied. And also I set gravity scale to ZERO. But it just won't work in the same manner.
i have similar issue as well
Glad I'm not alone, you know. And what's more chaotic, not every asset trigger this issue.
I'm thinking of going curve approach
not finding other way
here it moves about half the speed
curve approach on ... translation?
yeah, it might make sense... it just make me feel bad when something happen and sometimes it doesn't.
Translation itself looks very problematic. I'm thinking of recreating curves from scratch
I tried that solution as you said sometimes works and sometimes doesn't
from another tool like blender?
no in UE4. Might take approach like blender tho
well i am trying create a low poly realistic tree on blender i am not sure will the face too much with "low poly"

this is my first time develop of it so ..i am not sure of it
this is more of a blender question I guess but do any of you know why there'd be a second model showing up in my render animation? trying to put together a demo reel of all the anims I've made for my WIP game
I am having an issue with rigging.
All I want to do is make these hands bigger (thicker).
I export the HandSkel as FBX, then open Blender.
Change the model (slightly), then export FBX.
But... when I bring it in to UE4, and attach the standard Skeleton to it, it tells me there are too many bones.
Where did these extra bones come from?
How do I get rid of them, or stop them from appearing?

this is the hand in Blender. It does not have anything with 'end' in the name

Make sure to disable leaf bones on export
thank you so much. did not see that in the settings.
Hope this works. 🙂
It is still creating a bone for the object name.
'realistic_hand_r_ue4'
the other parts ar cleared up. Thank you
Oh right, Blender has to have the rig named as Armature, else it'll make a new root bone.
so if I change 'realistic_hand_r_ue4' to 'Armature' It should work?
does it matter if it's A or a?
I did it all lower case.
It WORKED!
thank you so much.
Thank You
hey, do UAnimNotifyState properly call NotifyEnd when the montage is stopped?
For example if I want to play particle for a duration, but I stop the montage in the middle, does it stop the particle effect?
Hey hoodieGuy
Can you recommend some good tutorials on Blender/UE4.
I am still having some issue with weight painting.
It seems the weights I paint, are not the same in UE4.
I paint, and test with PoseMode, and it looks correct.
But in UE4 I am getting pieces of the geometry getting 100% effect, when I know it has ZERO in Blender.
painted in blender

messed up in UE4
🤕
So I did a test.
I export out of UE4 the skeleton Mesh (pink color), Then reimport it back in, and it works fine.
I export out of UE4 the skeleton Mesh, then bring it into Blender. I do nothing to it, just export it as FBX, then import it back into UE4, now the weights are off, because there is destruction in the knuckles.
I did nothing to to it. I just to see where the issue is coming from. Apparently there is something changing when it exports.
Ideas?
I am new at Blender, if you didnt know
sounds like a useful tool. 🤦♂️
right... I have a rigged model.
the fingers are too short, though, so I just want to make the fingers longer. I figured just take it into blender and make some adjustments.... But now I realized that just taking the same model I exported out of UE4, doing nothing to it, and exporting it out of Blender, gives me messed up geometry.
There has to be a setting I am missing. There are way too many people using blender, for this to be a common issue.
If you can not truest what you export, it's not a good tool. This cant be the case.
fwiw, skeletal mesh is the hardest pipeline. I'll get problems and I don't use Blender, of which I cannot find answers for either
Someone mentioned in voice chat the other day that they had a clever way to reduce all the unreal mannequins in you project down to one. It involved moving them all into the same folder then deleting the duplicates. Does anyone remember who talked about this or if anyone knows what I am talking about?
I was not in VC, but I think what you're talking about is replacing references when deleting. I could be mistaken as skeletal mesh data like skeletons are more volatile than textures or static mesh geometry.
That was just what I was looking for. Thanks a ton.
i love animation 🙂
Hello, I'm having an issue with animation montages, I added many animations to a montage, but when I play them in the editor at some point only a T pose is shown on the mannequin.
I attached some images to show the problem, right before ending the section "Third", the animation goes into a T pose and stops playing, if I play again it just starts from the beginning of the first section of the montage
If i play the section in the game everything works fine, is it a bug with the version of unreal? I'm using 4.26.


hey @past fulcrum
its a common bug, load a different animation or close and open again

when applying animation of "walking" to a skeletalmesh can i do it in C++ or is blueprint only????
@ me for to respond 😄
It should be in your anim BP (which is different from actor BP)
i mean i dont have to program the animation & attachment in c++ do i?
im just asking because my game is in C++ but i dont know if the animation side is BP only
Nah, from anim BP, you could cast the owner actor, and then get the velocity from it, to drive the state machine transition and the blendspace.
there are functions such as play animation or play montage which can be called code side, but since you're talking about walking, that's specifically in the anim bp
You should also check the third person C++ template for reference.
ahh okai but its usually best to do it in BP for ease etc
again, bp in this case is not normal blueprints, it is the animation blueprints, which sounds similar, but are not
okaidokie, ty for the help 😄
Still having trouble with figuring out multiple skeletal meshes and animation overlapping, maybe I just need to retarget
So basically I have a base skeleton with the usual options like hip, spine, head, etc. I then have a second skeleton that is almost exactly the same but has a tail and ears, sort of like a transformation, but trying to play stuff from the base skeleton onto the second skeleton isn't working. Do I have to setup any type of rig connection? I was hoping I could then just have the ears and tail running on physics.
of course I could just go back to the base skeleton, add the tail and hair bones, and load that in as just all a single skeleton even on the one in which the ears and tail won't show, but I heard I wouldn't have to be that consistent as long as names and positions and such matched
i think with retargeting you can match up similar enough rigs and you get a few "free" slots for the types of bones you're wanting as variation. I think it would be better to have the all-encompassing rig from the get go and just skin what is appropriate for each character.
An alternative would be to "tack it on" and call it good enough, especially if animation isn't a factor (you mention simulate physics)
I tried but it doesn't help
yeah, and it works, the problem is only in the editor and I need to be able to see the animation properly to add some notifies to it
I think I will just try to go with the all emcompassing rig, just will be a lot more work on the back end, which I wanted to avoid.
and the animation itself plays fine when viewed?
Not when moving from one to the other
yeah, the animation works fine by itself, it's only in the montage
I tried duplicating it but it's the same problem
nvm, I just deleted a section and added it again and it worked
Anyone familiar with / have used Brekel Body with LiveLink?
I'm tryin to get some things working with the live streamed mocap data and it's giving me fits.
I.E. : I can't seem to get a decent retarget working on any skeleton.
It stretches and squashes everything beyond recognition (and not in the comically/grotesque way, but just flat weird polys moving around at some insane scale).
Animations only work as additive.. wtf. Can someone help me out as to why this may be? They are ALS animations


removing the first two frames fixes it ..but now I am left with 2 frames missing and it looks like trash
🙂
can I get some help on handling backward movement in blendspaces?
If I interpolate the direction, it stutters. Also, how do I have a smooth transition between forwards and backwards
Are there any Blender GuRus in here.
I need help exporting from Blender and Importing to UE4 a hand rig.
these are 2 things I learned. Change the parent name to 'armature' and untick "Leaf Bones", but my geometry is still coming in with messed up weights.

these ar emy current export settings. Am I missing something?
only deform bones?
unchecked? Is default. Should that be checked?
To see what works, I just export FBX from UE4, then bring it into blender, and export out of Blender as FBX, and bring into UE4. no changes made to the mesh or the rig, or the painted weights, and it comes into UE4 messed up.
Other people helped with telling me about the first 2 issues, that I marked above, but there is still an issue. At least now it imports with no list of errors and pop-up windows, but it still has messed up weights.
try checking it I mean
What even are conduit states? I'm trying to switch from idle to one of two movements, and trying to do idle ---?not idle?--- > conduit ---?weapons drawn?---> armed movement, back with the same checks, but it's not quite working
How about the unit scale?
Might be unrelated, but I have a hunch the weight is lost in improper unit scaling.
Anyone know how root motion works? I have "Enable root motion from everything" in my Animation Blueprint, but my pawn isn't using root motion when the animation is played
the animation has root motion extracted
it means it will not ignore the keyed positions of the Root bone for the rig
so.. does the animation in question have root animation?
It has root animation
and in the animation when I tick "enable root motion" it zeros out in the preview
root motion from the montages work just fine, but not from animations called in the animation blueprint
than im afraid i dont know
You can play 1 montage per skel mesh or can you overlap them for different slots?
I think you can overlap many by slots.
to be more clear:
What it seems is happening, is that UE4 is getting confused by the wrist having no weight. There is no bone there to assign weight to.
The rig (standard UE4) has weights only pained on the fingers.
none on the palm section or wrist.
When I swap the new mesh in there, it is taking any vert that is below 1, and assigning it to 1 influence.
So the mesh (in blender) fades from red to dark blue, from the punching knuckles to the wrist. Anything that is ZERO is fine.
anything with 0.0001 goes to 1.
The natural hand mush have a fall off, but UE4 sees it as just 100%


Each finger works because it has an area that says 'this is my area', but the writs has no vertGroup to fade in/out of.
Hey all - rando question:. Is there a way to bake sequencer (control rig, for example) animations down to animation sequence?
Right click on the control rig track, you should have the option to bake it into anim sequence.
Sweet - thanks!
@ashen junco - haha! - I just saw (and liked) your emoji/blueprints comment quoted in another discord (Asher's Tech Art)
Hello every body, I have a big problem. All my animation imports (from blender 2.93) looks atrocious. It's look like the animation is melting, moving without any logic (but look very well on Blender)
I import fbx manually, and today I've tried "Send to Unreal AddOn" but it's worse (Animation is so destroyed it doesn't look like anything)
I didn't have these problems until recently, does anyone have any idea what's going on?

(legs, fingers, shoulders, every look like it slowly move appart randomly)
VRoid model?
I just get the face, the rest is from me and the rig too
Oh, okay.
I know several VRoid to UE things, but you're using custom rig?
Though I also don't use Send to Unreal plugin - I just have my own workflow from Blender to UE
If I show all the bones, my rig is pretty complex
