#animation
1 messages · Page 46 of 1
Typically, your idle would NOT be additive and would serve as the base pose. Then all the assets in the AO would be set to Mesh Space Additive
if its not set to additive it will tell me "Invalid additive type"
even when there are no animation sequences on the grid
AAT_NONE is coming up (non-additive)
where are you seeing this?
wait hold on. maybe my approach is wrong. is AO strictly for third person fullbody mesh?
because im using first person arms. im seeing that when trying to add the idle anim to the grid of AimOffset blueprint. the grid is empty with such settings

Like i said before, the idle should not be in there

what should be there then instead? I thought that you would put idle in the middle, then right-/left and up/down on the grid logically. I used some yt tutorial for thsi
Typically, your idle is a base animation in a different part of your graph, and the AO is added to the graph and contains a series of static poses which define the direction you're trying to achieve
you could make an AO out of a series of idle animations, but then what are you going to add to? An additive needs a base from which to generate the deltas
The idle lives elsewhere in the ABP and then passes through the AO node in the ABP
okay
it still doesnt explain why i cant add second additive animation to the AimOffset blueprint even when both of them have all the right settings
and they are not idle anims


Epic Developer Community
An Aim Offset is a type of Blend Space that uses additive poses, typically for creating aim-spaces.
ill take a look
For your animation samples to work with an Aim Offset, ensure your animations are additive, and that the Additive Anim Type is set to Mesh Space. This is required because Aim Offsets only accept animations that are additive.

have you tried deleting your AO and remaking it? 😅
I took the ao__right one first and then the up one and it worked reverse way 
im just done with unreal engine
¯_(ツ)_/¯
Huh - well. I suppose good luck? I don't know your relative coding experience, but unreal doesn't make access to it's curve values exactly simple. I would, if someone asked me to do this, use the python sdk for fbx to convert the anim file to fbx, as that is probably the path of least resistance.
You've been able to do it for a while using the Composure package - I think.
converting unity anims to unreal
It actually might be!
Are you sure you have a license to use those animations Tyran?
omg
Animations are copyrighted.
gonna ask once more - hope that's okay! im using a spring controller on this bag and it's working okay, but when i squat it gets really jittery.
Has anyone experienced this before?
I often feel like im just arbitrarily tweaking numbers on the stiffness and dampening settings. is it possible having multiple filter channels affects this?

Hmm - is it possible that the pouch collider starts intersecting with the leg collider?
Oh, this is just a spring controller.
i was wondering if it might have to do with the physics but i don’t really have those on
It's definitely doing something weird.
Like, the characters arm is right through his own stomach.
So that's... also not great.
ah yeah that’s a different problem - the arm is clipping because the start pose i made for the motion capture is wonky and i haven’t applied the modify bones yet
it’s realtime mocap but dw i know how the fix the arm at least! 😂
its attatched to the spine bone just above the pelvis


Huh, OK. Are you testing with the live mocap?
i am!
well the problem is this rig is going to be used for live mocap
yea, all bones have scale of 1
OK! That's good! Always good to check!

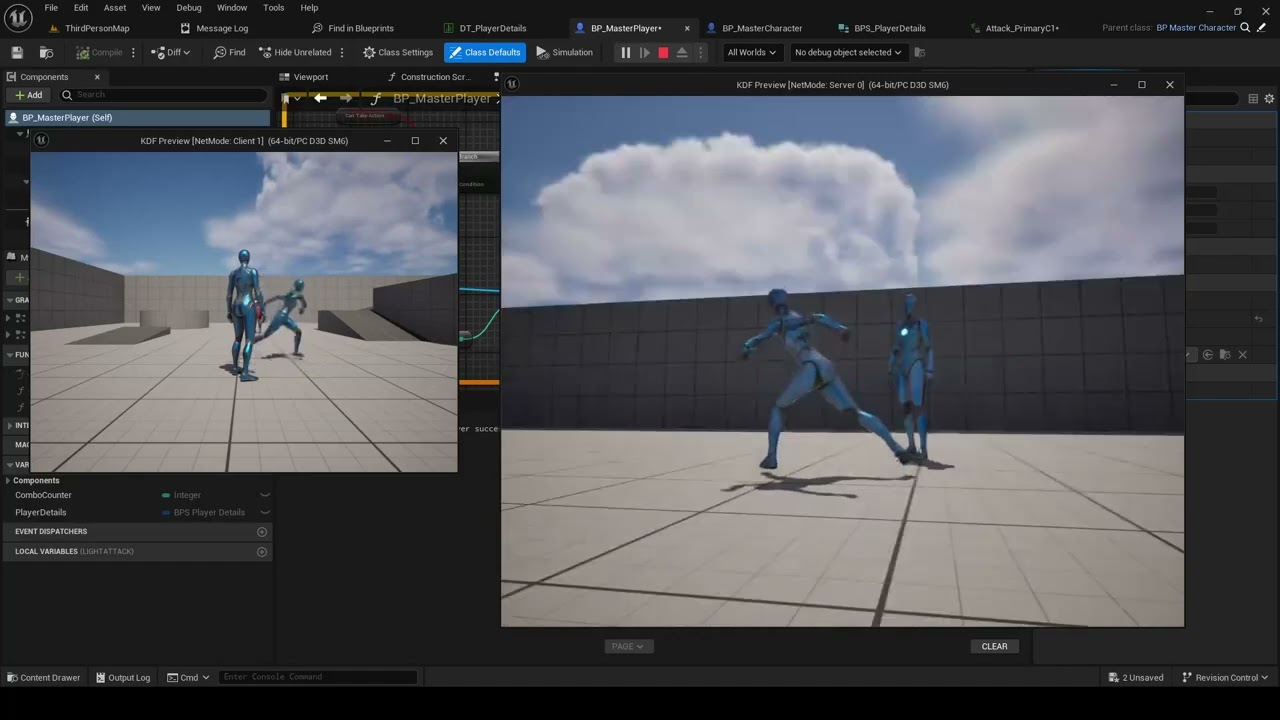
so the same jitter happens when using a retargetted mixamo animation! https://www.dropbox.com/scl/fi/qjwhcsdv21ix87nkyiml9/2024-05-28-17-01-35.mkv?rlkey=jqtcl4hlk9koyhhzz8kbn12o1&st=wi2g02or&dl=0

OK, well I'd count that as a win.
So it's probably the spring settings somehow?
Your graph is too pixelated to read, but I would delete it and rebuild it.
Also - I would consider using physics for that kind of floppy thing, if you don't have a lot of characters on screen at once. It will give you more believable results.
thanks! i'll give it a shot. i wouldn't mind doing physics on it, i just have no idea how to set that up. i originally tried googling it but everything i found felt vauge
alternatively i didn't know the right terms to search for
I think the unreal documentation for it is pretty complete:

Epic Developer Community
Describes the RigidBody node and how it can be used as a lightweight physics simulation inside Animation Blueprints.
ah yay!!
i'll look into this thank you @nimble torrent i think i was looking up the wrong stuff
any one have a good video recordation for setting up smooth transitions?
I remember in unity I could have a run to backstep and an idle to backstep with different transition times. the even had graph to show the smoothness of the animation curve.
were is the unreal equivalent ?

right now im just naping into place
the transition will have the settings to set up blend times and the interpolation type: https://dev.epicgames.com/documentation/en-us/unreal-engine/transition-rules-in-unreal-engine?application_version=5.3


Epic Developer Community
Blend between states in your State Machine using Transitions in Unreal Engine.
thanks , i will give that a read
ok now I need to find the setting to let the back step use root motion so the player does not snap back into place lol , but its bed time
Hello, I'm a professional 3d artist who creates designs using software like Maya, blender, Zbrush, and 3ds max. I'm good at working with STL files for 3d printing. I would love to partner with you.
Did you need a custom 3d model, miniature model, Warhammer Star war lightsaber, space, gunship Game asset, Game evrionment, Game development or a 3d model of any kind of object with a wonderful STL file for printing
for partnerships/advertising work you should read the #rules and use the appropriate channels.
Anyone know why setting the animations to the skeleton would completely fling some of the bones out of their original location? Like this


setting the animations to the skeleton
What do you mean by this?
bones/sockets are fine till the skeleton is animated. Then they're flung way up top
OK, but what is the process of 'setting the animations to the skeleton'? The phrasing on that is very odd.
Did you make these animations for this specific skeleton?
Did you import them from blender?
Did you make them yourself?
they're stock and work for others
When you say 'work for others' what do you mean?
But you didn't make them yourself. OK. Did you retarget them to work with the skeleton you're currently using?
i'm messing around and following directions. I don't have the same result. Did a bunch of googling but couldn't find a replication of my issue
OK, so what's probably happened is that you've assigned some animations to a skeleton they were not created for, and this is not generally how you're supposed to work with animations made for other skeletons.
Typically, you retarget those animations onto the skeleton that you are working with.
If you didn't do that process, it's likely that the animations you're trying to use are going to display incorrectly.
kk. I'll prob just delete it all and try again to see if I borked a step. Was just curious if it was a simple issue I overlooked. Thank you 🙂
Hello guys i have client only anim notify which is referenced by animation files which are included in server builds, i dont want to that notify included in server build can you guys help me? What is causing this situation? Thank you
Do animation addtive layer tracks work correctly in UE 5.3.2? I'm trying to adjust some animations to correct hands placements, but it seems as if the addtivie layer tracks data is shared between animations, because after I adjust hand positions in one animations, it becomes off again in an animation I've adjusted previously. Also I remember back in 4.27 there was an option to "apply" the additive layer tracks (there was like a tick button near + key button), is it gone in 5.3.2? I've also tried to "submit" these additive layers tracks by creating a new asset from preview mesh (in anim sequence editor), but again it seems even after creating a new anim sequence with my adjusted hands positions, those positions still saved a bit wrong

Hey Everybody, i having a hard time finishing this rig, the last part is drinving me nutz. at the moment its a combination betweet rotation, aim and position contraints. but the rotation contraint is moving "to fast" is it possible to override the rotation value by a certain percent? or maybe the way ive done it is not the right one?

I am quite new to the animation side of UE5, anyone know why this jittering on the picked up item might be happening?
Hi guys we are working on a flagship game project, currently on revenue sharing
We are 35 total in team and are looking for ANIMATORS and 3D riggers
Dm me for details
If anyone here is working with blender>unreal can you please enlighten me. I'm having a really hard time making root motion work no matter how I retarget my root. If I name the rig armature then I get the 2 roots error in unreal and if not it still doesn't work at all. No matter what I do, retargetting just won't make the root of the unreal skeleton move
Hey I need help, I've been using this video and it's going good so far but I'm using the default unity movement, not the one from his video, is there a way I can get the inputs of my movement. https://www.youtube.com/watch?v=br8ODEhftR8&list=PLV98WIslM9wsUZQZUPWLluhVqiddJhuoo&index=6
Hi All and welcome back to the Channel! In this video we will continue improving with our combat system by making our character rotate towards the input direction when attacking.
If you are new to the channel and like the content please like and subscribe :) And as always let me know in the comments if you have any questions!
If you want to p...
I'm up to the part where I need to do the get movement input but I don't have one.
I'm using the default unreal movement inputs.
I've seen this kind of error caused by a frame delay. So some value, either your camera or your animations, is delayed by a frame or two.
I suspect this is happening because you're controlling your camera with a animated skeleton and also controlling the animated skeleton with the camera.
So that loop causes one side or the other to drag behind.
Naming the rig 'Armature' is supposed to remove the possible second root from Blender. Do you mean that you still have two root objects after doing that?
I would need to see your hierarchy and your constraint graph to be able to help with this. A video of the undesired behavior would not be bad either. I can see the connection detaching from the bucket, but it's unclear what's going on.
Yes
I somehow resolved it though. Did quite a bit of looking and found this

I would double check the scale on your root on the skeleton you imported from blender.
It solved it for me but saddly I encountered yet another issue. The Retargeter animation looks HORRIBLE. Like I have set the bones properly and it still looks absolutely nothing like the original
Just because you might be surprised to find a very large scale on it.
Which, if you do - you should resolve because it causes problems in all of the rest of unreal.
I set the units to 0.01 and then scared by 100 and applied
Isn't that how you do that?
That sounds familiar - but I still always check.
Should I check within blender or unreal? Sorry my head I a bit of a mess today. I have been trying to resolve all those issues all day today
On blender it seems to all be 1.000
does anyone know how to change cost bias of AnimNotifyState_OverrideBaseBiasCost in runtime? Trying to do this in Tick() but PoseSearch seems doesnt see any changes
I have never used these tracks, but googling around it looks like they have been persistently broken in various ways in unreal 5. My guess is, Epic doesn't use them internally anymore, as they can edit the animations in Sequencer using the Control Rig.
That's probably why it's still broken.
You might consider adopting that workflow, as it is more flexible than even a working version of the additive tracks.
I would check in Unreal. Just to make sure.
Sorry, I've personally never heard of that one. What is OverrideBaseBiasCost? Is that something you created or is that an unreal Anim Notify State?
It seems to be fine (?)
It's the scale I see on the "Approx Size" inside the skeletal mesh right?
this is epic's AnimNotifyState from MotionMatching which I'm trying to inherit and modify
That's not where I'd check. I'd open the Skeleton file, click on the root, and look in the details panel personally.
can you suggest me a good tutorial on that topic? I've heard that you can now "animate" in UE, but I haven't found a good tutorial showing how can I adjust some gameplay-suitable animations instead of actually creating some animations for sequencer
All right! Sorry, I don't know anything about that system right now. Have you looked at the C++ for that notify state?
This right?

That is what I would check, yeah.
no worries, yes I tried to override their code, but encountered their limitations it seems...
Seems to be 1 also
I'm at a loss at this point. And even though now most of the stuff works the retargetting won't at all
You recreated quinn in blender?
Why?
Not even the automatic retarget. The manual one won't even help it match. Automatic gives me the same root error over and over
Just the mesh
I am trying to see if I can match a new skeletal mesh with a retarget
In the near future I need to make a different character that will most likely have its own skeleton different from unreal's
So I'm experimenting kinda
The automatic retarget inside of unreal engine 5.4 gives me these errors over and over making the animation not appear at all on Manny/quinn

I don't have a good one off the top of my head. I haven't been entirely enthusiastic about the quality of a lot of animation related youtube videos recently.
I think this is a capitalization error.
Your root is called 'Root' not 'root'.
Could thst be the case? I can try but yesterday I recall I did that once and it didn't work at all
I mean no harm done, I will check
I'm also increasingly confused why you're retargeting quinn onto quinn?
But you have fun.
Good luck!
@nimble torrent You there, I need help if that's ok.
Hi All and welcome back to the Channel! In this video we will continue improving with our combat system by making our character rotate towards the input direction when attacking.
If you are new to the channel and like the content please like and subscribe :) And as always let me know in the comments if you have any questions!
If you want to p...
I used this video in order to sort out my combat as it has the exact type of movement I want for my combat.
Well I didn't wanna make a whole new mesh that's why I used her mesh. But the skeleton itself is different. It's a custom rig made inside of blender
Problem is, I'm missing a piece and might need to ask if someone can help me because I didn't follow this guys instructions exactly and am using it from other works.
Nah just tried, renaming Root to root didn't do anything. Same exact error in fact
OK, well you're trying to use the automatic retargeter, so... what happens when you try to do it manually?
You said you're missing input values? What kind? For what?
Movement inputs, these were the ones in his videos, I'm using the default ones in unreal.

In unity?
You're making a unity project?
This... might not be the best server for assistance then.
Unreal sorry.
goddammit, I made a mistake, I am so sorry
It's OK.
So you're using the Enhanced Input Actions and the tutorial isn't, or is it the other way around, you're using raw keyboard inputs, and they're using Enhance Input Actions?
This
Everything has been set up (I think) properly
Yet it just won't match
(Ignore the activate windows thingie, it's the pc they have at work lol)

Wrong image wait
This is what I am using.

I'm using the default unreal input movement.
I mean, that's not manual. Your retargeter there is set to auto generate the Retargeter. That's possibly where the problem is coming from.
Oh, OK. Well, those are from the template projects. But OK, so what is the problem? What are you missing?
Is it? Wait how do I check that
Everyone on YouTube seems to be doing it this way
I need the get movement inputs.

When you say 'Get the movement inputs' what do you mean? You appear to already have IA_Move and IA_Jump.
Are those not the movement inputs you need?
Hang on, I'm trying something with the default inputs in the template project.
Oh manually I meant like make a new IK rig from my blender imported rig and then use the ik Retargeter
Not an actual blueprint for retargetting
I suspect that making a retarget asset might help you solve your problems.
(changing it to mannequin gives me tons of errors)
That doesn't surprise me.
I will give that a try. Gosh I wish the automatic way just worked for me
No idea where to even start or why it isn't working
Me neither!
Like, with mixamo it worked perfectly
Yes, but that's because Mixamo is a known quantity. Your rig is new and custom, and probably needs custom settings.
I believe I need the inputs of the right and forward vector.
OK, but every transform, every object, has a right and forward vector.
I guess I mean the movement right and forward.
OK... are you sure? Because IA_Move, which is in the image you linked, clearly shows that you don't get a rotation out of that, you get two float values representing the direction that your player is pushing the analog sticks on their controller.
Now you can get a rotation from 'Get Control Rotation', which is a high level abstraction function that represents the movement of the camera.
I'm not sure if that would work for what you're trying to do.
Look, I'm sorry, I'm trying my best but I'm not very good at this.
Everyone starts as a newbie. What are you trying to do here though? Like - what are you going to use these controls for?
I'm trying to make my game character move like in the following video. https://youtu.be/br8ODEhftR8?si=l5rF1G844zkWDgdw&t=1256
Hi All and welcome back to the Channel! In this video we will continue improving with our combat system by making our character rotate towards the input direction when attacking.
If you are new to the channel and like the content please like and subscribe :) And as always let me know in the comments if you have any questions!
If you want to p...
OK! Neat!
You have a third person character you want to be able to attack in the direction of your movement input.
Yeah, that's exactly what I want, I'm almost there but my code for my movement is the template for unreal whereas his is different.
Ok, I managed to sort the code, now the problem is that the character is still moving in a straight line
Is it because I'm using a montage or something?
Possibly? It looks like the person in the video is using motion warping.
Are you using that?
It says I have it installed on here?
Installed doesn't mean being used.
I would watch the video for the part where the person implements that.
Oh maybe I didn't put that in, thanks for telling me, I forgot!
I don't see any point he puts it in the video?
OK, sorry. Must have mis-heard him.
I'm not going to watch the video to confirm though. I have other things to do today.
Ok understood.
HOLY SHIT, I DID IT!
Hurrah!
Can't wait for motion matching to stabilize, and for Epic to release the animation database they're working on. I just spent the day testing with the mannequin and Lyra animations. Pretty cool stuff.
Does anyone knows a good tutorial to create a IK/FK control rig in unreal ?
I'm trying to adapt the ue5 rig to a ue4 skeleton, but the spine is giving me trouble. and it looks very complex, so i'm trying to find a learning solution so I can build my own.
I'm on the struggle buss right now looking for some quick start guide on animation instances in C++ using the thread safe side of it, does anyone have any suggestions?
If you find one, let me know. That sounds rare!
what would be the best way to add UI animation on an object for example i have a function that takes out the phone and puts it back i want to make UI animation of a lockscreen appearing and dissapiearing when either taking phone out or putting it back
You could use 3D Widgets? Put them in front of your phone screen and do the animation in the ui editor.
I have a question. my anim montage stopped working when 'Aim?' is true. how can I fix this?

im guessing its because of this offset and layer blend per bone nodes.
Does it... work when 'aim?' is false?
it doesnt seem to be working even after its set to false it looks like. it doesnt matter if i play 'Play Anim Montage', 'Play Montage' or 'Play Animation'. all of them return nothing
When you say 'return nothing' does that mean that the animation doesn't play?
We don't see a slot node in that image.
So I would not expect a montage to play.
its using Upperbody slot but Upperbody slot is inserted into the animgraph and its feeding
it doesnt play the montage yes
the thing is i add the widget and select my Widget blueprint but widget is not appearing on the screen


it should look like this
guess it doesnt work with animgraph sigh
I would ask - have you confirmed that the slot node that you have in the upper portion of your graph - is that set to the correct slot?


Well - the slot we can see there uses 'DefaultSlot'.
So if you're playing to 'UpperBody' and you don't have another slot node hidden somewhere - then your montage will not be added to the graph.
I tried both, Default and Upper and they failed to play
Interesting, the slot name is 'DefaultSlot' not 'Default', so that may be your problem.

I haven't seen anything about widgets being used as materials. I would try adding the widget as a component.
There are lots of examples of how to do this with healthbars, but few for visual displays like this.
Yes, as you can see, the name is 'DefaultSlot' not 'Default'.
Now, you can of course use another slot if you'd like - but you have to add a node for that into your graph.
whats the difference tho? DefaultSlot would work the same way imo
It would! It's only for organization purposes.
also I cannot get the Upperbody slot in the node graph so unsure what im doing wrong here
i can just get the DefaultSlot
i think i gave a bad photo for you , i added widget as a component but its not showing i can only see transform arrows nothing else
You can change which slot the slot node points to in the Details panel.
It's a bit strange that they don't let you drop them in directly, but that's... that's just Unreal for you.
even changing to fullbody does nothing
im out of ideas here
is it possible that eventgraph anim states override the montages?
Montages only work when they are played into the correct slot, and the graph has a slot node active to receive them.
Sure, it's trivially easy for a montage to be played into a part of the graph that is deactivated or inaccessible.
I would recommend doing the normal debug routine of removing as many possible counfounding elements as possible.
I would remove everything except a single idle animation and a slot node.
like I have a aim state for when the player has the weapon equipped and has clicked M2 button. It goes to Idle aim animation state. but the montage is for firing.
And I'd work on that until I confirmed that I had montages working.
Then I would add other things back in.
im thinking my aim state overrides the firing montage.
That's how I would, personally, debug an issue like this.
any idea why some sequence nodes inside unreal are green, others are brown colored nodes? and for firing, would you use a montage?
for aim idle weapon state, you would use obviously a state, right?
I don't know why they're different colors, using a montage for firing is fine - it's not the only way of doing it, but it's fine, I wouldn't use a state machine for idle - I would just use a sequence.
the sequence would have to be conditional. you mean blend layers via bool node then?
green means the animation sequence is set to additive and brown means it is not additive (at least from what iv noticed)
Ah! Good to know! Thanks!
interesting. I had a weapon aim state working with the brown node but not the green one.
I'm not sure what you mean by this.
Conditional how? You would only want to play it when the character was holding a weapon?
lets say i have a aim function. I press right-click once and i set boolean called 'Aim?' to true. It is also reflecting in MannyAnimBP. to get the weapon aim animation working I would have to have a branch checking if aiming is set to true or not.
only way to achieve that would be via layer blend by bool i think
That does sound like a reasonable way of doing it.
There are two types of blends in your graph. You have 'Blend by bool' and 'Layered Blend Per Bone' and they are different.

They are not the same kind of blend.
but like
im wondering if my approach is right
instead of simply creating a state machine with condition
Locomotion -> Aim
I think I cant use AimOffset if I use Locomotion -> Aim statemachine
I believe you can, but I wouldn't do it that way.
I'm also making a shooter and right now I have an aim state(based on weapon type) within my locomotion state machine and since I have a few different aim offsets I just have those offsets blended within the state itself. now to be fair I'm still new at this my self and I'm not 100% sure this is "best practice" but for what I'm doing its worked the best so far
My blend space is broken I'm not sure if it's the max and min values or what I'm new to unreal and following this tutorial https:// youtu.be/WcDj4uZygyE?
si=R33dALzporU5abiR please could someone
help me
This is a video of what’s happening
video is private it says

That's an indication that the problem isn't your assets - it's your graph or your code.
I used Play Animation and it worked right now but funnily enough its going back to no animation at all when its complete.
The effect here is wild. I wouldn't recommend posting these as shorts, because shorts can't be scrubbed, and often you need to scrub videos of problems to figure out what's going on.
It does look like you're pushing the animations beyond 100%?
I'm not sure how you're doing that, but that's what it looks like.
what would be a way to call widget animation to play on object but not on the viewport
What do you mean scrub ? @nimble torrent
Drag the current time bar back and forth across the video timeline to rewatch a section of the video multiple times.
This is not accessible on Shorts, which insist on playing all the way through.
Oh ok thank you but what do you recommend I do I’ve tried again and again and I still have no clue what’s causing it
Well, what happens if you try making a new blendspace with those animations?
What happens if you remove one of the animations?
What happens if you change the active blend range?
What happens if you change the positions of the animations on the timeline?
I'd try all of those, and see what happens.
Ok thank you
hi all - anyone have experience with simulated physics on a rig causing a bone to just fall to the floor like this? https://www.dropbox.com/scl/fi/it6urd5gff6k6fyxi4mce/2024-05-29-11-35-57.mkv?rlkey=ii28z7mt8a4jj2rk0lv9ppq4u&st=kdfw6nd9&dl=0

i figured it would remain attatched to the hip haha
Yeah, you need a constraint.
gotcha - following that guide you sent me yesterday and its been a big help!
👍
are they constraints set in the physics asset editor or constraint nodes in an anim bp?
Physics editor.
should i also be adjusting all capsules to fit the bones perfectly?
The physics editor is very awkward to work with.
its been so confusing and daunting haha
No, you want them to match the mesh as well as you can without having them overlap each other.
Yeah, it's not great. It was never really built to be a construction tool, they built it to edit havoc physics imported from maya. So the UI has always been not great.
Sorry to ask again @nimble torrent but I’ve read through documentation and can’t figure out where I can change the active blend range
that makes sense - it feels like its separate from how youd handle everything else in ue
Sorry, 'active blend range' is not a good name for it. I meant the 'Minimum Axis Value' and the 'Maximum Axis Value'.

When you created your blendspace, what did you set those too?
Also - wow, blendspaces have gotten better since I used them last. They have whole subgraphs? Amazing.
@nimble torrent you seem to be the best at answering questions around here or at least pointing us in the right direction . Iv had a problem with trying to get ainim montages working on my weapon models.
now im pretty sure its not my code because the sound effects play at the correct time , so i think that the montage is being called correctly.
iv tried playing with the blend times (as its a very short animation)
Im guessing its something to do with how iv set up the anim graph or the actual skeleton it self
or im missing a step entirely but i just dont know
OK.
So, couple of questions:
-
What is the animation that your weapon model is doing?
-
Does your weapon model have it's own animation blueprint?
Oh, and 3. Are those sounds triggered by animation notifies or are they triggered independently?
i am doing a manual operation of a hammer cock on a revolver
2 yes they have their own animation blueprints
3 i had to look at this one so the sound effect is being called in the animation sequence the montage is using , but in the blueprint i am calling the montage
OK, that's interesting. It's very unusual for an animation notify to play without the animation also playing.
That's really odd.
Is that what's happening?
The hammer of the revolver is not moving, but the sound is playing?
Also - does your weapons animation blueprint have a slot node for montages?
OK so i just realized i had the blend per bone set to "none " so i set it to root and it worked fine so should have guessed it was something simple but its been giving me a head ach for the last week
Aha!
Nice!
That's how it goes!
All problems appear simple once you've solved them.
haha right ? jeez
it can be compared with c++ raw code inside unreal or blueprint scripting. you think its so hard and confusing but once you realize how it works you wonder why you even worried in first place
Eyup!
yikes these constraints are way more confusing than i thought haha
Yes. They're awful.
They suck so bad.
It's worth it to learn how they work, but they're also the worst.
its confusing how to even make them or identify them as separate from their colliders which is crazy
Yep!
so the cones are constraints

Yes, those are constraints.
You can see that your book doesn't have one, which is why it falls to the floor.

You can also see that your leg constraints are probably not ideal either, as the knees can bend side to side, and your right leg looks like the constraints are pointing the wrong direction.
i noticed that!
fortunately the leg wont really need constraints as im using this for live mocap
unless i need them for collision with the book
That's true, but ragdolling from live mocap could be a funny gag.
The colliders should be enough.
gah you're so right
so when i click the generate constrtaints on the book, nothing appears
You can make them manually.
Beginner question: I have locomotion setup, as well as combat animations etc. I am trying to incorporate a skeletal mesh for my main character which has a unique skeleton. I have the retargeter setup and it works correctly.
When you retarget an animation, it seems like it creates a new animation for you. Is there a way to have multiple skeletal meshes that all use the same animation asset?
If I end up with say ten unique skeletons, and I have 100 animations, I'm trying to avoid needing to have 10x100 animation as well as recreating the various blueprints which relate to them.
It does seem to be the case. Was really hoping that someone here may have played around with it lol
For some reason creating a constraint manually isn't working. I've been right clicking the books physics body, selecting create constraint, but nothing happens
I don't think that's the way you do it.
do i click two bones then create a constraint between them?
I think you click two physics bodies and create a constraint between them.
Hurrah!
you're the best squish
👍
is the windwalker echo setup using separate physics assets for everything to run simulation without collision?

Not sure what the windwalker echo setup is?
its a free character setup unreal released for reference purposes
like a "heres how we do it" kind of thing
Probably not then? You can enable and disable collision between physics colliders by clicking on both colliders and right clicking:

interesting!
In the animation graph you can specify the asset, so it's certainly possible to do it that way.
I just don't know if there's any advantage other than organization to doing so.
I suppose being able to disable them at different distances might be useful?
yeah that could be it. either way i think im on the right track now at least
i def prefer working with the spring component or even anim dynamics but its good to test this out as well
hi! im currently trying to blend animations -- a tutorial says to link up the foot position and enters a different screen.. but i cannot find this screen anywhere, i have a feeling it is "edit in sequencer" but when i click it, a small grey box appears and nothing happens? 😅 not sure what to do

When you say 'blend animations' do you mean 'blend animations at runtime' or do you mean 'blend animations offline and create a new animation'?
 uhhhh
uhhhh
What is your goal? What are you trying to do?
im just trying to put my walk, trot, and run into a blend

(and idle, at the bottom)
Ah, ok that's a blendspace.
Nice.
And why do you need to open something in sequencer?
You have your blendspace open. Are you unable to work in there?
So the video im looking at shows this screen, in order to change the feet… somehow? But i cant find where to open this ahah

Hey, nice. Prismatica. He makes good stuff.
Everything works, i just cant enter the sequencer.. or whatever this screen is lol
Yessss
Ah, OK. That's not sequencer. That's just the regular animation viewer.
OH
(the names are very similar, technically it's the "Animation Sequence Viewer" which is not 'The Sequencer'... because Unreal)
You can open that window by double clicking on any of the animation sequences.
oh i see hahaha, so to do whats shown in the video do i just… open up the normal trot animation thing?
In your asset browser.
That doesn't surprise me, because those timeline things are added manually.
(or are added procedurally through the animation modifiers system, but that's maybe a bit advanced right now)
You can see four things in that image from Prismatica's video, none of which appear automatically. There are sync points, animation notifies, animation notify states, and an animation curve.
All those those have to be created manually if you're going to use them.
I don't know what he's doing in that video, I haven't watched it, so I don't know if they're necessary.
i see! it was to make sure the feet link up when switching animations. thank you so much for the help!! im gonna try and continue this now aahah
Good luck!
thanks! 
so are collision in animation set to block by default?
im having a good laugh at how different this is from unreal's typical physics setup
I think so, yeah.

im starting to think i should retreat to using the spring with some pose drivers to prevent clipping
Pose drivers are a good option, particularly for complicated areas like the hips. Something else which may be of interest to you is this set up using a spherical pose reader in control rig: https://www.youtube.com/live/6s8rCGtmCSA?si=RHUXcCuaZtN2Y5GF

Another way to drive corrective joints and costuming is with Control Rig! In this live tutorial we are going to setup some character accessories to respond ...
Oh neat I'll check that out! Thank you
Yeah! Pose drivers are good!
You could use a pose driver with a little spring on it too.
In your case, your bag is clipping because the physics capsule for the bag appears much too small, same with (I think, hard to say from this angle) the capsule for the thighs might also be too narrow.
physics colliders can be more than just capsules right? A box might be a more suitable/accurate shape in this case
I think they can, yeah.
Hi, i have issue with CR bp again, i still don't fully understand what Axis in Basic IK for, and i have an issue, prob. coz of that, it is for sure not animation issue, i have point in world and my arm placed there with Basic IK? and i get this strange bug in some anims, elbow is strangly rotated, but i have not touched it other than Basic IK.

So... the axis values are a bit weird.
To solve a two-bone ik, you construct a triangle out of the limb.
The axis values are about which direction the triangle is pointing.
And they're mostly useful if you have an unusual or non-standard orientation of your bones.
They should normally be fine.
The problem with your elbow is that, for your elbow to be solved correctly, in a IK system, you typically include something called a 'pole vector target'.
Which is a separate node that controls the elbow.
Now, you're putting in a pole vector in your example - but you're putting in the head for some reason.
And then subtracting an enormous amount from all of the values.
Making the results likely to be very strange.
I have a question on left hand IK used to attach a hand to a weapon. A lot of tutorials get a relative offset from hand_r and the socket on the weapon. This is getting it from world space and updating what seems like on every tick. When its done this way, the hand is basically just being updated every frame right?
Yes, it is.
Is that the only way? Is there any way to "lock" the hand on the weapon and it just follow the weapon?
To what end? What would that do?
not have to manually update it to a position every frame
I mean, it's not manual. You've written a program to do it.
The program does it.
So, it's automatic.
every frame it has to get the socket transforms and create a relative transform and then update the location.
I want to know if it is possible to not have to get the transforms and do that.
Uh... hypothetically it is possible to constrain a hand to a gun in a way that does not require you to do the specific operations you're talking about.
But that would not really do much in terms of optimization, if that's your concern.
It was yes
For every bone, for every active animation in the whole graph, you do a full matrix multiplication - and that's just for bones.
Then every vertex takes every bone that it's weighted to, and does a position lerp.
You're doing that kind of math hundred to millions of times per frame.
Computers are really fast these days.
Right. I need to quit trying to optimize early
Yeah, this is probably not somewhere you'll get a lot of utility out of optimizing.
If you could procedurally generate all animations versus using baked animations, would there be a performance difference?
Unfortunately the answer to that is an unsatisfying 'it depends!'.
It depends on how you procedurally animate the characters, and it depends on how you used the baked animations.
Hmm ok. I seen a YT video and then started thinking about thing in my project. Really neat video in case you want to watch it. https://www.youtube.com/watch?v=w78U3TwrI2Q&t=39s

A general overview of the performance of Control Rig in Unreal Engine 5 for procedural animations. This is not a detailed analysis, but a general look at how control rig impacts performance, and how to improve it.
Ignore the absolute numbers, as this is running in the Editor, with other tabs open and so on; the focus is on the comparison when ...
I am having a fighting game type of tekken in Unreal 5
My question is, should I set the different sizes of the characters in Blender or in Unreal?
lets say they have exatcly the same* proportions (distance between joints)
so
if I just leave the same size in Blender
with the same rig (as they have same proportions)
and later in their BP_Character I set a different scale depending if is big or small (with some logic that detect it)
in this way I am saving time with the rigging (I just have to model over the rig everytime) and with the retargeting
as ALL animations (300 or more) will work for ALL them
because retargeting takes like 15 min everytime (and freeze a little UE)
*is a little more complex, there is like 2 types of proportions but 5 sizes, but I hope you got my point.
this sounds like the right way to go about it - if all characters have the same rig (same amount of bones and bone names), you should be able to set ONE base skeleton (even if you have two different proportions of the same rig) and animations should be able to play on all skeletons
unreal has a built in skeleton system that allows you to set the animation’s source SK (the rig the animation was authored in) and it should be able to retarget animations even to the characters with the different skeleton proportions
you’ll just need to check your retarget settings in the skeleton viewer
Thanks!
Exatcly, my workflow is to either:
- export Mannequin rig and using Pose mode in Blender I re-pose the bones to fit the character shape, then "Set rest pose" etc, then "Transfer weights" from the mannequin to my Char. So my Char get the native Unreal rig (being in T POSE doesnt matter, as I set a custom pose in the retarget settings)
- using Auto Rig Pro with UE settings (to get enough spine bones)
when you say re-pose, are you translating or just rotating the bones?
sorry I mean in "Pose mode" not in "edit mode"
it works great, I translate, rotate and scale
the mannequin mesh end up being something weird but it doesnt matter
I have a colored collection of the bones that can be adapted

that is one workflow, but the artist on my team get lost with bones so I explored another one, simpler, using Auto Rig Pro
a Blender addon that can create a rig with weights, like a Mixamo in Blender
I am still researching it, it works, but I get a warning (not error) in the IK_"yellow" file that the retarget needs, but everything works fine so far
Hey guys! I have a small question, does control rig have atan2 and RInterpTo alternatives? Because I couldn't find any
It has an interpolate function, but not RInterp I don't think.
As for atan2, I've never used that one! What would you use it for in rigging?
Hey guys, pulling my hair out. Has the Pose By Name node been removed? I can't find it anywhere in the list of nodes in the anim bp. I have an older project and if I copy the node from that project it pastes over fine and I'm able to drive the pose, but where has this node gone and why can't i find it?
Hah - yes, this still exists, and it's still bananas how you have to create it.
This is the thing where you can specify a point in an animation to evaluate, right?
i have a static pose asset and i just want to set to that pose
like for a seated character, i have a seated pose and i want that to be the base pose
so with this pose

just to get to this


It's one of two weird conversion things.
You can also do this with a sequence to convert it to a time controlled animation.
omg i just remember how i did it before. Drag the static pose into the graph and then click this

Yep.
I don't know, it's also how you get single frame animation nodes:

You have to drop a sequence in, and convert it.
I don't know why it's setup like that...
Decisions.
Were.
Made.
gosh 😅 . ok, thanks
Did you figure this out? Also seeing the same issue in 5.3 where the "modify curve node" with a curve set to 1, with a blend alpha of 1 is resulting in 0.41666667
For context, the exact same logic in 5.2 works as expected and gives a curve result of 1
Thanks for explaining! I am using Head bone to just make a point in space to make it easier(i dont know any other ways), about "pole vector target" node i haven't heard of, so that's why i don't use it, i will go and check it out now, thanks!
Btw i can't find "pole vector target"
Do you mean "pole vector space"?
Hi, anyone here that could recommend me a good rig with IK of the UE5 manny for Blender?
Weirdly, it's distance-to-camera based 🤔
Okay, it's linked to Update Rate Optimization on the Skeletal Mesh Component. For some reason in 5.3 this is messing with modify curve values
Hi, how to blend character position into the level sequence? I mean for player to move to the level sequence's start transform while starting playing it
Binding just teleports it
Does anyone know if there's a way to make functions in Control Rig that can be used by several different rigs? Can you either inherit from other rigs, or make a function library of some sort?
Hello fellas, is there a way to know if a "Animation State" in the AnimationBlueprint gets interrupted? UE 5.4 states that there is a "OnStateInterrupt"-Event (see picture) which I couldn't find yet. It seems like it is a new functionality since UE 5.3. Does anyone how to use that event?

I don't mean pole vector space. I mean the vector called 'pole vector'. Now - there's two ways of putting that in. 'Position' which means that they calculate the pole vector based off of the subtracting a point from the the vector of the line between the top and bottom of the IK triangle, or 'direction' which uses a vector directly.
I can't remember which one you have it set too.
My recommendation would be to get and store your elbows translation before it's effected by the IK, set the IK to 'position', and put the elbows animated transform into 'Pole Vector'.
That's how I'd do it.
It uses the animated position of the elbow to keep things relatively close to how they were originally.
Yes, you can make function libraries. Epic has one they use on their mannequin rigs.
I would guess this refers to the transition interrupts that can trigger if a higher priority state becomes accessible during a transition.
Okey, i will do that now
I'd use the control rig inside unreal, myself. It's not bad.
This is bizarre. Good to know though. Thanks Sam.
Nope, it still breaks
Do i need to get global or local space for pole vector?
You need whatever space your IK is functioning in.


Possibly? I don't know what 'Get Elbow Check' is or does.
But hypothetically you are storing the elbow value and putting into the pole target. I suspect that your 'pole vector space' being the right arm for some reason is likely not going to let this work though.
Not sure why it's setup like that. You probably want that to be root space or component space.
It is just to make it go and set Elbow Location only one time
I wouldn't do that necessarily. I would use the animated position that frame.
But you do you.
I have to go, so good luck.
Okey, you too, thanks!
Hey, I have an odd error with my exported animation.
It lasts the exact same time as it does in blender at 60 fps, but has twice as many total frames
try changing the sample rate
in ue import settings
How do I change, retime, export, fix an Animation Sequence that's 25 FPS to be remade to 30 FPS so I can use it in a montage with others?

I think the same thing I mentioned above would work. Just change the sample rate and reimport. the framerate should update automatically.
I think that would work.
Does anyone have an idea as to why my animation becomes increasingly more unstable as I move/turn?
Worked for me, thanks!
has anyone had their groom bindings stop working after updating from 5.3 to 5.4? all of my "small" grooms, like bangs and ponytails no longer work
5.3:
5.4:
i have tried: reimporting the assets, rebuilding the groom bindings, deleting my entire DDC, confirming i have skin cache on, confirming my meshes use skin cache, turned on recompute tangents
it seems to only happen on my small grooms with < 100 guides but i cant be sure
The groom binding builder code changed a lot between 5.3 and 5.4 from looking at the source but I have no idea what's wrong
I haven't tried that yet but I know what you mean. The terminology here is a little bit misleading if you are right since "On State Interrupt" means to me soemthing else then "Tranisiton Interrupt".
But I will try that. Thanks for answering me.
It does sound like there should be something specifically called 'On State Interrupt' but I went for a look and I can't find anything.
If you find it - let me know. Always good to know things.
If I do, I will! 😁
That's an interesting one. There's no obvious thing that would do that. Are you using root motion anywhere? What does your graph look like.
no root motion that I know of and here's anim graph, event graph and the bp threadsafe thingy


Right off the bat - could be that spine rotation stuff.
What happens if you disable all that?
I've already tried disconnecting all the procedural stuff
Does the accumulation of shenanigans stop?
nothing changes
What happens if you disconnect absolutely everything and play only one idle animation?
Does that stop the shananigans?
That seems like it might be a fruitful area of investigation. : )
yeah...idk what could cause this lol
Yeah, that's weird!
I'd check your pawn to see what's going on.
I might consider checking the actual translation values of your skeletal mesh component.
To see if those are going up and down, or if something else is happening.
will do, thanks!
does anyone know why my feet are so out of whack here in my retargeter

Could the left leg be assigned to the right and vice-versa?
that fixed the crossing but theyre still kind fo crazy looking
They do look a little... off balance!
he looks pretty good by default, and when i overlayed them in the retargeter they legs matched pretty well but when the animation gets played it goes way off :/

I can't remember exactly how to do it, but I believe the default pose for the retarget is also important.
The default pose for the mannequins is 'A', your character is in 'T', so I would look up 'How I do I change my starting retarget pose in unreal 5' as a place to start.
yaaaa unfortunatley ive already done that lol, the feets still seem to want to do their own thing
very odd stuff considering how simple retargeting is in general

This is probably a really stupid question but I am using the new modular control rig and cant figure out how to get to the BP tab to setup the actual functionality/code of the rig, like footplacement, etc. The default control rigs open right to the BP graph, but the modular ones dont do that
I believe the idea with the modular control rig is that the modules handle all of that, and you don't actually do that.
heres a better image showing my issue, the graph doesnt exist, and I cant make a new one


(the modules are not entirely working for most people)
oh, that seems odd
Doesn't it?
It's very strange.
So far, in the month or so I've been hanging out in this chat there has been precisely zero people coming in to talk about their functioning modular control rig.
yeah, i figured it was a new way to setup the rig
Every single time it comes up - it doesn't work.
5.4 has been really rough, i feel like almost every "improvement" is broken
It's certainly not been smooth sailing.
I personally do not understand why modular control rigs exist. They make no sense to me.
i figured it was a nice way to setup a rig
Control Rig modules, that exist inside a control rig graph, that allow for customization but handle a lot of the complexity under the hood? Yes! Good! That would be great!
But a fully separate system that is designed to build little black boxes that don't communicate very well - that seems weird to me.
thats what i thought it was at first and got excited
so weird
The cynic in me says that they created the system specifically for screenshots and investors.
But that might not be true. Maybe they're using it internally. I can't say. It doesn't feel cooked though.
the modular control rig inherits from the normal CR, so im not sure why they removed that functionality
They kind of didn't. You have full access to the graph... when you're building a new module.
It's when you're using the modules to create a control rig that you don't appear to have access.
You can create custom modules!
And do whatever you want in there.
oooh so its module based now
But when you're using them, and they're working together, you can't.
hm but no one has gotten the custom modules working?
I think people have, but the story of the modular rig isn't "You'll create your own modules" it's "You can put together a control rig in five seconds. Look how fast this is!"
How do you even create modules? C++ only?
And from a practical perspective, there are very few video games where constructing your own library of modules would be a worthwhile endeavour.
No, I think you can make them in blueprints. I haven't done it myself. I've edited one, but I don't have the engine open.
Like, most games would only have a couple of rigs? If you can build a rig module, you can build a rig - so why build it as a module?
And if you do want modularity, there's still the problem of communication - so anyone wanting to share functionality would probably benefit more from a blueprint library of control rig functions over a collection of custom modules.
I could be understanding modules wrong, but it seems like a way to containerize your code so you have a module for foot placement IK, one for look at IK, etc
and then reuse those across rigs?
Yeah, I think that's the idea.
But I don't see a benefit from isolating them into modular black boxes.
Rather than creating a library of functions to create or evaluate them.
From a practical perspective on a development team - the black boxes model only makes it harder? If you're heavily investing into the control rig / sequencer animation pipeline - you need a rigger anyways?
I just can't find the use-case.
seems to be geared towards indie and artists
or cases where you have a ton of different skeletons and want to share functionality
id argue that modules are cleaner and faster than a bpfl
True, and it's hard to overestimate the value of speed.
But they don't work for most skeletons. You have to carefully design your characters to work with the modules - which does kind of eliminate the speed advantage.
If they were completely bullet-proof and robust, I think there would be an argument for their use in the fairly narrow circumstances of:
- your team does not have a rigger
- your team has decided to animate in unreal
- your team has multiple characters they need to animate
- all of these characters require fully custom rigs
Even though @nimble torrent tried to help me, I am curious what other people know about this topic (in my previous question)!
@Squishy: I tried the "Transition Interrupt" way but I do not understand how to use it. Furthermore I think that it won't help me with my problem since I need a way to recognize an interruption within the animation's state, whilst "Transition Interrupt" (even if I could bring it to work) might only be tracking an interruption within the transition itself.
So to simplify my question: Does anyone know how I can recognize an interruption of an animation state (within the AnimBlueprint)? The interruption gets triggered by a montage and I currently need a way to know when a specific animation state get's interrupted.
Ah, yeah. Transition interrupts would only trigger during the transition into the state.
No problem, it was interesting to know and try though.
Could you describe what circumstances you need to know when you lose the state though?
Sure, so currently I am developing a 3rd-person game in which a player can run around in a 3D world and fight with weapons.
Description of the current case: There is a case in which the player will trigger I certain animation to get equipped with a weapon into the players hand. After the equipment, the player's AnimationBlueprint switches into a new StateMachine from "basic locomotion" to "battle locomotion" (see "Screenshot_StateMachines01" for reference). The transition from "locomotion" to "battle locomotion" happens after the "equip" animation is done within the "locomotion"-StateMachine.
The reason behind doing it this way: The player should be able to "walk/run" while the character gets equipped. This is as far as I know only possible with AnimBP and this worked fine in UE 5.2 and the "Animation State"-Events, but since 5.3 the engine recommends to not use this way anymore... instead, the engine recommends to use the state's "anim node function" instead (see "Screenshot_AnimationState01"). I already tried to use that way, but using those thread safe functions hinder me to trigger certain events/functions in the Player's Blueprint that I need to trigger (see "Screenshot_AnimationState02")!
What should happen within the EquipAnimation: The weapon get's attached at a certain point within the equip animation and many other things happen at the end too. That was all possible with the "Animation State"-Events. Now I use the "Skeleton-Notifier" or "AnimNotifier" instead which doe the same work but have a critical side-effect: Notifier do not trigger when the animation gets interrupted, before the notifier got triggered!!! (as far as I know).
The core problem: Now it can happen that the player gets interrupted through e.g a projectile in middle of that equip-animation. In this case I would like to do all the tasks that usually would have been done through out the animation.
That's why I need something like "OnStateInterrupt"


P.S.: English is not my main language so be patient with me. Also, I hope my message is not too long but I was not able to describe my situation any better than that.
You did good! Thank you for being thorough.
Hmm - equipping and unequipping weapons is always a bit of a mess. I thought it might be something like this though.
I'm in the middle of something, but I will try to come back with an idea in about 45 minutes or so.
That would be awesome! 🤩 But it would be no problem if not, so don't push yourself too far!
Got done faster than I thought.
So, here's my thoughts:
The player switching weapons is a very important state change. This should not rely on the animation system, as it can be unreliable. The state change should be handled by the inventory system or the pawn and not rely on the animation system.
I would recommend not using State Notifies or Anim Notifies. I would recommend using exclusively the pawn/inventory systems own logic to do this, and the weapon switching animation should reflect the change in state, and not control it.
This leaves you with a problem - how do you determine when to change the visibility of the weapons?
I would immediately spawn the new weapon as soon as the player triggers the weapon change. I would spawn the weapon invisible, and start counting down to when they should be displayed. The time to when they should be displayed would be set to how long the switch weapon animation is, but would not be dependent on it. It's just a countdown. This countdown could be custom per weapon, or it could be standard - it depends on your game.
At the end of the countdown, regardless of what has happened in the animation system, I would make the new weapon visible, and hide and/or remove the old weapon.
Doing it this way avoids all possible shenanigans from the animation system. Even if interrupted, or deactivated somehow - they will still switch their weapon when the countdown ends.
(in a real implementation of this, it would probably be several countdowns, one for 'time until you can use the weapon', one for 'time until the new weapon is visible' and one for 'time until the old weapon should be hidden' - but all of them should be mechanically independent of the animation system)
Note: It is possible using the 'Anim Modifiers' system, and 'Anim Metadata' to embed metadata onto a set of animations, which could be used to control the timers. This is quite elaborate, but would avoid game designers needing to update the timing data when the animations are updated, while retaining the independence of the pawn/inventory system from the animation system.
Very interesting! Hmm... yeah that makes sense. Now that you say it, the way I implemented the "un-/equip weapon" was really messy, even though it worked so far. Which is why I was so intent to find a "best practice" way to do it! Which it seems I got today. Thank you very much for your time and effort!
I need to think this through a bit more and test some further things but I've got a good idea on how to accomplish what you wrote and still leave my AnimationBlueprint's StateMachines how it's structured (with minor changes).
👍
I have one animation.
This one animation has four swing animations. So it is a combo.
I perfectly split it up into four swing animations.
So I have four separate swing animation files.
I set their respective montages to have 0.0 blend in and out times.
In the Behavior Tree, I set them up so it plays one right after another.


However, what I'm seeing is that for one split moment (probably like a single frame) during montage transitions, it looks like it flickers to a default pose or something.
I want the montage transitions to be completely seamless.
I could combine this into one montage with the four animations together, which works.
But the reason I want to split it up is that I want the enemy to be able to rotate towards the player in between attack swings. Otherwise with one long montage, the enemy will keep swinging even after the player moves to the side.

I'm wondering if the 0.0 blend in/out times are correct?

add a tiny blend between the two
you should also be able to rotate your character while it is swinging
There's no way to just edit a timeline?
I can't just drag that end result to where I want?
In the Anim Sequence Viewer? No.
If you want to make an animation longer, you'll have to use the sequencer.
Its kind of eye opening how difficult it is to edit animations inside unreal lol.
But I also think something about my project is bugged, as I can't remove frames either
Why couldn't you update the enemies rotation during one behavior state? It's been a while since I did anything with behavior tree - but those are pretty flexible iirc.
The animations are pretty locked down, yeah.
The expected pipeline is importing fbx files from outside that come from Maya, Max, or Blender.
So, for most unreal projects, if they want the animation to be longer - they do it in another program.
makes sense as to why that's the case, Unreal was never intended to be an animation software I suppose
The one animation I have is actually one continuous animation that has four swings
So I cut them up into four animations. If I have any sort of delay in-between then it would look weird, since the animation is supposed to be one long continuous motion
This is the animation: https://youtu.be/x4gOCJoPUQ8?t=17

Link to marketplace: https://unrealengine.com/marketplace/en-US/slug/bossy-enemy-animation-pack
Ultra realistic animation pack for souls-like games, slow mini boss/boss enemies.
Music: Hellblade Senuas Sacrifice - Gramr (Alternate version)
Video made by me
Right, I get it - but if you had it as a single animation, couldn't you still correct the turning?
I don't see why you could do that between animations and couldn't do that during an animation.
Hmm.. like adding an AnimNotify called AN_LookAt
That rotates the character playing the animation?
I mean... I'd do it with a curve?
I'd add a curve (let's say it's called 'CanAdjustAimingRotation') to the animation. I'd ramp it up to 1.0 during periods where I want the character to rotate, and ramp it back down to 0.0 during periods where I want them to commit to an attack.
Then, in my attack behavior tree node, I would read that curve's value, and depending on the value, I would either update the rotation or not update the rotation.
My way gives you the ability to ease in and out of the rotation corrections.
I understand what you mean..
By curves you mean this?

Yep!
And this can be programmatically set? Like if the enemy is playing the combo attacking animation, and the player moves 180 behind the enemy.. then you can set the curve to like.. 180?
I wouldn't do it like that.
Instead, I would constrain the curve between 0.0 and 1.0, and I would add keys to it myself in the anim sequence viewer (you can do it by right clicking on the curve after you've added it), and I would add those keys in the places in the animation where I want the character to update the rotation.
Then, in the behavior tree node, I would calculate where the player is every frame, and I would calculate the desired rotation every frame, and read the value of the curve every frame, and then I would update the rotation of the boss every frame, but I would scale how much of the rotation correction I apply based on the curve value.
So at a curve value of 1, I would make the boss face the player.
And at a curve value of 0, I would leave the bosses rotation alone.
Does that make sense?
I see. So like in the curve in the animation... you have values between 0 and 1
1 = should rotate to face target
0 = should not rotate
The animation does not actually update the rotation
Then somewhere else, like the behavior tree, that's when you read the curve and rotate appropriately based on the values
Yeah!
Very professional technique
I'll definitely try this out but I'll have to do a bunch of research and testing on these curves first though
Thank you.
Best of luck!
It's the same principle as adding layers of animation over other keyframes or motion-capture data. You'll have to set up constraints for it as well so that if the target is 180 degrees behind the enemy they don't snap their spine backwards, pivot at superspeed without matching footwork, or turn the opposite direction as the sword stroke. For example if the enemy is about to do a powerful swing from their right to left, you don't want them to take the shortest rotational path if the player is standing to their right hand side, they should follow through with the swing and continue in a counter-clockwise motion except with extra rotation in the same direction to make sword hit the player in a natural way
Mmhmm! There's a lot of subtlety to when you want the character to be able to track the player, how much, and from where.
When I switch from montage root motion extraction to 'ignore root motion' when montage ended playing, the character skeleton shifts a little bit to the back. Any suggestions how to fix that?
I switching root motion modes so I can move character normally during some inactive parts of the animation and when there are some charges/dashes I am enabling it. Still blending isn't good at some moments
So as a follow up to yesterday, it looks like in 5.3 when using UpdateRateOptimization on anim instances, the curve interpolation (even just on regular blend mode NOT weighted mode which was broken in 5.3 and fixed in 5.4) isn't blending between the previous curve value and the new one. For example, if I modify the curve in the anim graph to a value of 1, and then do the same again on the next anim update it should be a value of 1 as we're interpolating between 1 and 1. However, it appears it might be deciding to interpolate from the default curve value (which for curves afaik is always 0) and the new evaluated value.
Obviously the easiest way to fix this is to disable UpdateRateOptimization on the skeletal mesh component as it will evaluate properly each frame, but this obviously results in less optimization (thank you captain obvious).
I'm just about to run a test where I have a skeletal mesh with URO enabled and a modify curve set to 1 in the anim graph in a blank 5.3 project to reproduce the issue, and then try again in 5.4 to see the behaviour has changed.
If anyone has found any solution to this at all in 5.3, it would be great to know!
Note: Even when setting a meta-curve (which defaults to a static value of 1) on the running animation (instead of doing modify curve value = 1) it results in the same interpolation issue, despite a static 1 value on the animation meta-curve!
Hey guys anyone good when it comes to state machines not firing the events below, it doesn't seem to go past my idle/walk/run onto my other functions, the idle/walk/run has 0 effect code wise as with or without the code it isn't firing the events after.
Bump
I can confirm that this animation curve issue is exclusive to 5.3, it's not present in 5.2 or 5.4
when using Animation Notify System blueprint, is it possible to receive the character that is the source of executing the ANS?

You can get owner of the mesh component
ah makes sense, thanks!
Ah! Very good to know! So it's specifically a bug in 5.3. Can you afford to upgrade or are you going to be stuck with it?
Aiming to upgrade, but not until 5.4 has been patched a little bit more (currently has a lot of issues from what I hear, including simple things like spline meshes in construction scripts being broken 😬 )
Yeah, I'm surprised at how long they're going without patching some of the more obvious stuff.
For sure! But yeah, ideally want to upgrade for things like parallelised rendering thread, improved cook times, improved shader compile times etc from the 5.4 release notes 😅 Just hoping they sort out the glaring issues in hotfixes rather than waiting for 5.5!
Eeyup!
--> When my character is growing, why isn't my Physics asset growing with it? for example if i simulate tail physics, the tail remains small, and body grows normally...
Hi, I am trying to create some animations for a bought asset (one of "Toon RTS Units" pack from PolygonBlacksmith), I am trying to use the Modular control righ, the problem is that the models do not use the standard mannekin skeleton, for example, there is only one spine bone, and I am not able to set up the Modular Control rig. I have tried animating using the FK Control Rig, but it is really tedious to have to rotate every part, or having to reposition the feet if I want to move the pelvis forward or backward but no the feet, etc.
Is there any tutorial or way to setup a non standard skeleton using the Modular control rig? Or should I try to export the models to blender and try to change the skeleton, the thing is, I am not experienced at all rigging or weight painting, that is why I bought the asset in the first place.
Growing is not a standard feature of the engine, so that's going to depend on how your implemented it.
Heya! There isn't what I'd call a lot of really comprehensive stuff on how to build Control Rigs.
This is not bad, but it is outdated, as it predates the ability to generate controls in the construction script:

Until recently, creating character motion was the domain of expensive third party DCC apps. With the release of 4.26, Unreal Engine introduces further refinements to Control Rig: our suite of in editor rigging and animation tools. Whether you are authoring traditional style animation assets via keyframes or driving characters procedurally at run...
Kamila Bianchi's videos are also pretty good, and more up to date, but aren't arranged in any particular order.

Sharing my initial thoughts and ideas on how to create a Full Body Rig using Unreal 5 Control Rig.
[00:00] Creating a Control Rig from Mixamo Character
[01:47] FK Leg
[05:30] IK Leg and Compute Pole Vector
[12:05] Switch IK FK
[17:45] Hide Controls automatically
[20:42] FK & IK Arm
[30:09] Spine - FK & SplineIK
[36:00] Neck and Head FK
[39:35] C...
Thank you for the help, I was checking one video from Smart Poly where he set ups a control rig for a T-Rex, it seems I will have to do it the old way instead of using the new Modular workflow.
hmm thats a general answer 😅 when setting scale of capsule, actor, mesh, nothing scales up the physics asset ... it stays the same size as it is on begin play
Really? That's interesting! Scaling the actor doesn't change the physics asset? That's weird!
I'll ask here since it's animation what it breaks this.
The SK Mesh changes the pivot point position when I play an animation (or animation blueprint). The pivot is correctly centered, as you can see in the second image. Why does this happen?


Does the pivot point move. Like it's translation values actually change, or does the visual of the mesh move?
No, the pivot point doesn't move. Here's a gif that may help debug the problem.

OK, so that's not the pivot changing, that's the root of the character.
So the animation has the root in a spot you don't want.
Did you create these animations yourself?
The one crouching is the one that comes in the starter pack. The one that is standing we created it. It works in all the characters we made, except in this one.
Which is considerable bigger. Not sure if that could be the problem.
Same proportions, but bigger.
don't know how to help your problem but that's a dope mesh
I'll tell that to our 3D model artist! Glad you like it.
Ah, OK. So this is probably a retargeting problem.
If this character is physically larger, then the same offset from the pelvis to the root would result it it being placed like this - with the legs through the floor.
You need to check your retarget settings.
Specifically on the pelvis I think.
I love you.
Got it working?
Yes. It was indeed the pelvis retargeting option. I changed the pelvi's to Animation Scaled and now it works fine!
Thank you!
Hurrah!
when it comes to IK Rigs
is it possible to change their skeleton to another skeleton after using them for retargeting?
Got a question. Here is my AI. I want him to have turning animations, whenever he turns, how should I make them? Should I have him rotate in the animation or will that fuck it up?

That's a complicated question!
There are a variety of ways of handling turning in your game, and how you do it is dependent on the kind of movements the character will do.
Stand and turn animations are actually fairly rare. Protagonists seldom have them because they need to react so quickly that they often turn instantly, and for non player characters, they're often combined with a common set of animations called 'starts and stops'.
Hello, for me its the first time setting up a custom animation blueprint and I'm kind of confused, why its not really working. The cast to BP_TestKerapac keeps failing could someone give me a hint? It feels weird that the owning actor is a SkeletalMeshActor in this case.

Hello! I am getting started with editing ABP. I made a 2D blendspace for locomotion and it looks good in preview, but I have discovered that the default third person template ABP only accepts a single variable for its blending. Is there a way to override that behavior on an inherited ABP? I have the blendspace overridden in the child but it's still only using a single velocity value.
You're running into a bit of a problem with the way that the Animation Blueprint viewer window is setup. In the window you're looking at, that version of your character model is a Skeleton Mesh actor - so it's always going to fail that test.
If you play the game itself, and your character is a BP_TestKerpac, it should pass.
You can't change the graph in a child animation BP, only variables. You can create a copy of an existing animation BP, and make your change in there.
That sounds like it could get out of hand
It could!
Is it possible to controll the rate (speed) at which an animation plays by a variable? I want my run animation to be 0 and freeze at the current frame when the character is at 0 velocity, and if the velocity is say 400, i want the playback speed to be 1 or 100%.
How Lyra uses root motions animations without montages to adapt them to multiplayer?
You can use blendspace for that
So you can interpolate between idle and movement animations by pawn speed
Thanks for the tip!
I realized i can just bind to a variable, worked pretty well! 🙂

Does anyone know where I can get a premade/fully built IK Rig and/or IK Retargeter for the standard UE5 Manny/Quins? I have one for UE4 and want to retarget animations between them.

my anim montages will not play for some reason and i checked that everything is fine
i added the slot node in the anim graph and created a new anim montage and touched nothing in it
and the play montage node is fine too
Can i make montage to blend out only upperbody slot but other slot should not blend?
why does my retargeting looks like crap? 🥹
have tried multiple different ways, even changed and added bones to the other model. these are two very different skeletons of the same animal that I'm trying to retarget. the original one (left) has way more bones and has a different pose than the one I'm trying to put animations on (right)
any tips will be appreciated
The jittering has to be some kind of IK error.
I definitely feel like the you're losing some information on the neck and the spine, but it's mostly OKish. The arm jitter is the real problem, right?
Yes, you can use the Layered Blend Per Bone node and cached poses to do this fairly easily.
yeah, I have to figure that out
one thing is that one skeleton is way bigger than the other
and poses don't exactly match
I'll look into IK
or pay someone to do it lol
That should be OK, Unreal's retargeting is pretty good at handling scale changes.
mm.. good
Both of those should have presets in the retargeter, shouldn't they?
If everything were fine, they would be playing. To test, you could create a new animation BP, with just one sequence and one slot node, and use the 'Play Animation As Dynamic Montage' node to try playing a montage to that slot specifically.
If that doesn't work, then something might be wrong on a larger scale, but the likely source of your problem is that somewhere you have a slot mismatch.
anyone knows how i can fix this ?
Hellooooo again 🫠 tried researching but no answers... when pressing the button to activate an animation montage in-game, it wont play. heres the blueprint (in the avatar base).
it was working briefly before when the montage was just a play anim node (but would freeze, so i replaced it with the montage and now it wont play at all)
i have no idea what to change here :,,) any help is appreciated

( i do see there was a similar question above, but unsure what it means)
i fixed it but it was weird. i packaged my game and it worked then i went back into the editor to see if it worked and it did. idk it was weird but its fixed now
editor was tweakin
That is weird!
Do you have a slot node in your animation BP?
i do not! i have seen some things about needing that but i have no idea what to put or where to put it  my anim BP just has the state machine, then addditive poses, then output
You need a slot node, at least one.
Montages play into a 'slot' on the character, and those nodes enter the graph through slot nodes.
You need a corresponding node connected into your graph to play a montage.
You can just put one at the end, just before the pose output. It will pass through the input pose unchanged unless there is a montage playing in the slot.
ooh, so, for example. if i had multiple actions under different keyboard buttons, i can just use the same slot for all of them?
You could do that, yes.
i seee~ let me try and add this node lol
It will be called 'DefaultSlot' in the list of nodes, but you can change which slot it is in the properties of the node.
AH it worked! thank you so much, now i just have one err.. pretty funny problem. let me record it
the additive poses change back to default LOL
is this because the slot is placed after these? should i put it in between the additive poses and the state machine?
I don't understand, sorry?
You could try it!
A montage node will just replace the pose that enters it's node with the montage animation. So if you have post processing you want to keep, then you need to make sure to put the slot node at the correct point in the graph to keep them.
AH it worked! i see now
ooooh gotcha. thank you !!
👍
also, i have another question.
for a different montage - (example, sit) how would i make it play until the player moves?
so, stand->sit anim, then the actual sit anim, then back to walk.
(i apologise for all the questions lately, btw! 😭 i am by no means experienced in blueprints)
Hmm... so there's a lot of ways of doing that. I probably wouldn't use a montage, personally. You can make a montage segment loop, so you could have the sit-down, loop, stand-up in one montage.
It could work. You need to look up how to control montage segments to do it that way.
would doing it via state machine be better ooor?
However, if it's this four legged critter, and they can sit in multiple places - I might include it as a state in the state machine.
Yeah.
 all the animations are set up in the state machine!, buuut im unsure on how to actually activate it in the first place, since i cant put the variables/action mappings into the anim bp
Sure you can! Why can't you?
you can!?
Yeah! Animation BP's have variables and stuff like any other BP.
do i need to put anything in the avatar base for this? or is everything just in the anim bp
And you can read data from the pawn by using 'Get Owning Actor' and then casting to your main BP class.
cause i think i need to use the action mapping thing somewhere...
So you could have a variable on your main BP called 'IsSitting', which could be a boolean. You could turn it on when they press the 'sit' button, and turn it off when they press it a second time.
And then, in the animation BP, you could reach out and get that variable from the main BP.
And use that to drive the state transitions.
i do have an IsSitting variable, but im not able to drag it into the anim bp state machine, unlike the avatar base
oh wait like a true/false thing?
Well, OK. So they're two different classes. Your animation BP and your main 'avatar BP'. They're separate. I don't know what your animation BP looks like, but it probably has values from the avatar BP used in it somewhere.
Like velocity to control movement.
You can access the 'isSitting' variable the same kind of way.
so the state machine is set up with the is sitting variable, but do i need anything in the avatar base to make it actually work? is this enough?

Well, yes. Because you're just setting it to false.
And you're not setting it to true.
So it will always be false.
Which will probably result in the character not sitting.
ahah yeah, it doesnt work
What you probably want to do is toggle it. There are a variety of ways of doing it, but the easiest way is to set it to the opposite of itself.
So if you get IsSitting and use the 'NOT boolean' node to invert the value, and then put that into Set.
Every time you press the button it will become the opposite value.
So when they're sitting it will turn off, and when they're standing it will turn on.
ahh it worked ! but now my character begins the sit animation every time i move (after sitting once)
i think i did something wrong 
Can you show the graph again?
(also, you probably want to put a 'set IsSitting to false' node into the part of your Avatar BP that reads movement values, so that when the player starts to move, 'IsSitting' becomes false, so they don't try to sit down again when they stop moving)

That's good!
yay! so something is wrong with the state machine?
No, I don't think so.
oh hm
I think the problem is probably caused by what I mention here:
The issue is that if you tell the character to sit, and then move, they still have 'IsSitting' set to true.
So they will try to sit again when they stop moving.
ahh i see i see, where would i put that? by the player movement?
Yeah, in whatever part of whatever code you're using that reads movement values.
If the player is providing a movement input, set IsSitting to false.
would this be in the event graph?
It would be wherever you're doing it.
i didnt make the event graph movement unfortunately, only the state machine, so im unsure how it works
i think it might be this...

It's probably in the main event graph of the Avatar BP, but whoever made the graph could probably answer that question better.
That seems like a pretty good place to put it, you could try putting it after the Add Movement Input nodes.
Though it's possible that they are always called every frame. I'm not sure.
i see, so how do i add a "false"(?) node? theres some set nodes here for other movement.. (which i do not understand at all haha) but would it be similar to this?

This appears to be a toggle for a sprint system. I don't think that this is the right place to put it.
You add a 'false' node, by just putting in the the 'Set' node for IsSitting, and leaving the boolean value unchecked.
That will set it to false.
ah sorry! i meant the setup of it overall, like using the SET- ahh
okay one second
oh dear, now the sit isnt working at all hahah, why must nodes be so hard

So that's probably caused by those nodes constantly evaluating. Hmm.
I know how I'd solve this, but with your current level of knowledge, I suspect that this might be very confusing for you.
if youre able to screenshot some blueprints i can try and follow it perhaps? 😅
I don't have access to unreal right now.
So, what you want to do is to check how fast the character is moving. If the character is moving more than a small amount, then you want to set IsSitting to false.
oh! i do have a get movement speed variable already
I would also make sure that you can't actually exit the sitting state in the state machine until IsSitting is false.
I don't know what rules you setup for the sitting states, but it sounds like they transition out of the sitting state independent of that value.
So I'd make sure that you can only exit that state when IsSitting is false.
ah so for transition out, currently i have a speed greater than 0

Yeah, I would probably have that rely on IsSitting, personally.
And I would set the 'IsSitting' value in the Tick update event of the main Avatar BP.
I would test the characters current speed against a small value, and if we're higher than that, then set IsSitting to false.
gotcha! how do i get a false node within the anim bp? since i cant actually grab it from the variable list... is it something thatd be in the property access thing?
That's how I'd do it.
ooh hm
So, I wouldn't do this in the animation blueprint.
Generally, you don't want to have objects setting other objects values.
That's generally not a great idea from an organization perspective.
would that cause issues with the idle?
i have it like idle 0, walk 200, trot 400 and run 800 (speed)
Each object should, usually, keep their own information organized.
I don't believe so, because you don't want to play the idle while they're sitting.
You want to play the sitting state.
ahhh okok so
And I would cancel the sitting state at a speed of 1 or something.
Very very low.
 in the.. event graph? the tick thing. this?

Yes
ooh so greater than 1? instead of 0?
Something like that.
gotcha, im very confused about the tick thing
i didnt realise this would be such a big thing to sort out ahaha
Sadly, this is one of those things that you really can do in under a minute if you know how to do it.
But if you have very little understanding of blueprints - then yes, it seems quite complicated.
ahh yeah, that makes sense
Conceptually, it's exceedingly simple.
"Are you moving? If you're moving, you can't be sitting."
should i keep these or get rid?

Yes.
ah! yeah i see
yes get rid or yes keep hahaha
Yes, get rid of them.
Do you know what a branch node does in Blueprints?
ive seeen it being used, i can try haha
You're probably going to have to watch a few introductory blueprint tutorials if you want to keep doing this kind of work.
Otherwise, this is going to continue to be really difficult.
oh noo this was the last anim.. and supposedly the hardest
for the bow animation, i do have this.. is it of any help?

A branch node represents an 'if statement'.
If the input is true, it does the 'true' branch, and if it's false it does the 'false' branch.
oh wait no cause its a montage 
So in your example there of 'Bow', it checks "Are you busy?" and then if you're not busy (if busy == false), then you can bow and play the montage.
yess
So for your test, you're trying to ask "Are you moving?"
So you have to check if your Move Speed value is above 0 (or above 1, I would use a non zero value because computers can be a bit weird about fully zero values).
Do you know how to check if a value is above another value?
uhhhh ive done the get velocity thing.. but i dont think thats the same
I thought you said you had a variable called 'Move Speed'.
i do yes yes
but thats in the state machine  not in the event graph
OK, well - unfortunately you have two event graphs. You have your animation BP's event graph and your Avatar BPs event graph.
So, if you want to find out how fast the character is moving, that 'Move Speed' value is set somewhere.
I'd go find where it's set, and how they're setting it, and I'd use that method to get the value in the Avatar BP, where you want to check if the character is moving, so you can change the IsSitting value.

Cool, so in your Avatar Base BP, you're already inside that BP, so you can just call Get Velocity directly, and then get the Vector Length in the same way, and then you have a value that is the same as Move Speed.
Do you know how to compare that to another value?
Because that's what you have to do, to see if it's above 1.
i dont think i do unf
All right, in computer programming, we use the > and < symbols for this kind of comparison test.
i see, so i do this in the avatar or in the anim?
So 10 > 9, and 5 < 6.
I recommend putting this test in your Avatar Bp on the tick.
oki
So it is run every frame.
i just have this, lol

Cool, well, you have almost everything you need there.
ahh yay!
The one thing you don't have is the comparison node. Grab the 'Return Value' pin off of the Vector Length node (the green one) and drag it out. Then type in '>'. This should let you create a node that is called 'Greater than' or something similar.
oh the greater than thingy! gotcha

Yep!
So you can see that node takes two float values, and creates a boolean value.
You can plug that boolean value into the 'Branch' node's 'Condition' pin.
So then, the Branch node will only evaluate the True branch when the character is moving.
gotcha >:D

Yep, now one more thing. Plug the 'Set' node into the true pin, and the 'Branch' nodes input pin into the end of the nodes coming off of Tick.

I would also disconnect the 'Is Sitting' Get nod from it's Set node.
Because that won't do anything.
You're getting and setting the variable to itself.
So that will have no effect.
You want to Set 'IsSitting' to false.
yesyes my bad, i misread the last part of your sentence. here we go

ahhh it mostly worked !!! GAH, okay so
after sitting, when i move with wasd or whatever, the avatar moves but the (begin to sit, from standing) ainim still plays, after that the player clips back into walking (as it should)
so there is an extra stand->sit anim being played somehow
How do you transition into the start sitting state?
just this

So the character does not have a 'stand up' state.
They transition directly into movement?
yep
oh i could do a blend space perhaps. we didnt want it to be like, super slow for players to stand up once sat down
OK, well - here's my guess as to what is happening.
On the frame that the player presses the control stick, the value of the velocity goes up a minuscule amount. This triggers the transition into the movement state, and then immediately out of the movement state and back into the sitting state.
Then the Avatar BP ticks, and sets sitting to false.
oooh
But it's already too late, because we've already exited and then re-entered the sitting state.
Now, there are a variety of ways of avoiding this, but we're getting toward the hour and a half mark, and I would again reiterate the suggestion to control the exit from the sitting state with the IsSitting variable.
And not the way you were doing it with the Move Speed variable.
hi is it possible to play with control rig controls inside of an animation blueprint? was hoping i could test some bone rotations with it paired with some anim dynamics nodes rather than playing animations
So, I would have the exit from the IsSitting state be NOT isSitting.
AAAH it worked !
Hurrah!
thank you SO MUCH for all the help, i appreciate it so so much 
👍
and perfect timing too, LOL i have a meeting in five minutes~ thanks again! hopefully all this animation stuff will be done for a while haha