#animation
1 messages · Page 40 of 1
They won't, not right away.
What you could do is rig a character in blender, then retarget onto the mannequin rig.
If you want to use the mannequin rig for your game?
Or you can make your own custom rig, and use that as your game rig.
Oh!
Looks like someone clever might have solved your problem!

Gumroad
Mr Mannequin has raised his standards! Don’t believe me? Check the video! Watch that in 2k or 4k though as Blender footage gets murdered by YouTubes downscaling.Mr Mannequins Tools is a Blender add-on that exports animations and weighted meshes that are directly compatible with the third person mannequin in Unreal Engine, without re-targeting an...
I am not connected with them, and have not used these tools, but this might do it!
@nimble torrent Sorry, I was having lunch.
I'll check that that out, thank you!
If everything fails, I think will just create a custom rig and make all my animations with that, and use that in the end, instead of the unreal rig.
@somber glen You might also want to consider checking out https://epicgamesext.github.io/BlenderTools/send2ue/introduction/quickstart.html
Specifically developed by Epic to make using Blender less painful. There are some export/import options that maybe can help?
I will check that out too! Thank you for sharing 
On unreal engine when i came to animation mode for character's control rig parts pivot size sooooo big and i cant not give pose to my char ever u had this issue?
is there a better way to handle animation and their transitions? i keep checking aganist lots of stuff and it bugs alot

someone knows a good documentation to start with control rig? not that modular one, cant seem to do anything else then animating with it
How did you animate that? Is there a tutorial I can follow?
Kinda curious, is there some idea for doing stuff like accurate finger placement based on the dimensions of the mesh we're attaching the hand to?
Accurate arms/hands I understand with IK and static mesh sockets. But doing IK for each of the fingers too? And having to add all those sockets on each mesh? And then a different character comes along with long fingers and you have to do it all over again...
There has to be a better way, right?
you can certainly simplify the state machine you have here a few things you could do:
- locomotion assets can be encapsulated into a blend space and belnded with a speed variable https://dev.epicgames.com/documentation/en-us/unreal-engine/blend-spaces-in-unreal-engine
- you can use state aliases to simplify and reduce the number of transitions you need https://dev.epicgames.com/documentation/en-us/unreal-engine/state-machines-in-unreal-engine#statealias
- locomotion starts/stops can be tricky but again you could put them into one state and have conditions for when there is a speed change and then play the appropriate transition based on the speed. Although I would say the mid locomotion transitions seem a bit excessive.

Epic Developer Community
Blend Spaces are graphs where you can plot any number of animations to be blended between based on the values of multiple inputs.

Epic Developer Community
Create logic-based branching animation by using State Machines.
Hey all I have a question when it comes to animating revolvers , what is the best way ?
for context I am trying to make a horror shooter with single action firearm's and base the actions on player inputs ( cock the hammer/pull the bolt back /leaver etc. I have a proto type mostly working but right now I have 6 different animations based on the rotation of the cylinder resetting it at the reload (so I didn't have to make 6 reload animations) iv toyed with the idea of using an animation blueprint and dynamically rotating the bone per input OR back to my question, is there another better way ? I am still new at this any advice will be apprciated
The official documentation: https://dev.epicgames.com/documentation/en-us/unreal-engine/control-rig-in-unreal-engine

Epic Developer Community
Rig and Animate characters in real-time using Control Rig.
Huh... State Aliases are new from when I was doing a lot of animation graph work. Interesting. Gonna have to think about those.
I mean... in most games, in most cases, people are not going to be able to see the reload for the individual chambers, so... it largely doesn't matter what you do for those.
If you're doing a first person shooter, where you can see the cylinders, then using a single animation and controlling the rotation of the cylinder bone procedurally based on ammo count seems like the best option.
they're quite recent and very useful, like a smarter conduit
Yeah, I do kind of wonder why they didn't just add that functionality to conduits.
'Cause that was kind of what Conduits were for.
Hey all!
I have a custom mesh that has an identical skeleton to manny.
All of Manny's animations work perfectly well on this mesh, however, if I attempt to have this mesh animated via the same anim bp, it simply won't work - it remains in A pose. When I use this same anim bp on Manny, it works fine.
I can't get any animation blueprints to work on this mesh, despite the slew of Manny animations I have on-hand that work when applied directly. What could be the problem? Any ideas?
That's interesting.
A question!
By 'an identical skeleton' do you mean 'a skeleton with the same names and positions of bones, but a different skeleton asset' or do you mean 'the same skeleton asset'?
Literally the same skeleton, skeleton asset, etc. For example, if I go to manny and navigate to Manny's skeleton, I arrive at the same skeleton if I do so on the custom mesh
Huh, OK.
In the anim BP I can also see, when using the custom mesh, that the animation blueprint nodes aren't "running" like they do normally, and otherwise appear fine when I use manny as the preview mesh
Oooh! What are you attaching the animation BP to? Where is it contained?
(also the Apply To Asset button disappears when using custom mesh if that makes sense snese)
Like - are you making a new character BP?
Yeah I have a Character with the skeletal mesh component and there I have this ABP set (I'm not sure if that answers your question)
OK, but it's a new character. You're not just replacing the mesh in the Manny character?
Correct
OK, I don't have unreal open, but I would check in the graph in the animation BP to see if they cast to the third person character.
Because your new character would not pass that cast.
I will triple check but I've been using this customized anim instance on this separate character weeks now and only now does it break when introducing our new custom sk mesh asset
OK. What happens if you disconnect all of their animation graph stuff, and just connect a sequence directly to the output?
Like - temporarily break the whole thing, just pipe one animation into the output.
Because if that doesn't work it means there's some kind of asset mismatch.
Good idea, let me try that
Yeah that doesn't work.... it's weird though when I use that same animation and apply it directly (instead of anaimation blueprint), it works just fine
That is interesting. What happens if you make a new animation instance?
Does that work?
I'm testing in both the preview mesh, but also assigning them right on the skeletal mesh within the custom character blueprint
OK, well - clearly there's something up with your character mesh. I'm not sure what it might be, but it certainly seems like something's up with it.
What about copying and pasting the Manny mesh, and try assigning that?
Does that work?
(trying to eliminate options, this will eliminate the possibility that only the Manny mesh alone works).
Yeah all the animation blueprints work when the Manny mesh is being used
Ah okay let me check
Again - sounds silly, I know, but it's just eliminating possibilities.
A lot of debugging technical problems is just doing random shit and seeing what happens.
Yeah tell me about it lol
Yes a copied Manny works
OK. Can I see your mesh and hierarchy in the skeleton view?
No trouble!
Looking at the skelly now, here has a VH_BaseMale bone that.... shouldn't be there and is likely an issue
Aha!
But doesn't help explain why the anims work....
I think it does.
Oh yeah???
The animation player is matching bone to bone, but the animation blueprint uses a different evaluation path.
Amazing....!
Did you do this in Blender?
OK, if you get the blender file, all you have to do to get rid of that extra bone is name the Armature object in the blender scene to 'Armature'.
If you do that, Unreal will discard the bone on import.
i really hope there's a blender side fix for this in the future 😅
Blenders decision to make bones always exist as pseudo objects inside another object was certainly a decision.
A decision was made.
Like, to be fair, it was in 1994 - but that one could maybe deal with a look at.
yeah hard to predict what would have been optimal for game engines 30 years later haha
im holding out hope for the rigging overhaul
I really hope, if they do it, they do it like Control Rig.
Control Rig is the best setup I've seen for rigging.
i agree, the forwards and backwards solve is awesome
and the ability to avoid dependency cycles. makes it very animator friendly lol if i just want a control to do a thing then have that affect something earlier in the process, it usually just works ™️
Yeah! Control over the order of evaluation is huuuuge.
I think people are going to do a lot of very cool things with the interaction callback as well.
is that the event that's called when the user interacts with a control?
Mmhmm!
Hello there !
We're trying to use baked Face animation on MetaHuman characters, without RigLogic since it is not supported on Android.
It works, but there are glitches with LODs, completely deforming the face as the animation is played.
Forcing LOD-0 is not an option, as we need to optimize performances.
Does anyone have a trick to fix baked animation and LODs ?
When you say completely deforming how do you mean?
I expect that the lower lods having less bones means that the bones of the face will be positioned differently, so when you play an animation on the face it will return the remaining bones to the animated position which could result in some odd poses.
I wonder if you could have the face still be curve driven and use a pose driver rather than the RIgLogic Node. Unless pose driver is also not supported?
https://dev.epicgames.com/documentation/en-us/unreal-engine/pose-driver-in-unreal-engine

Epic Developer Community
Describes how to use the Pose Driver to drive Pose Asset or Curve values based on a bone's movement.

Epic Developer Community
Describes the Animation Pose Asset which can be used to drive animation through weighted curve data.
I mean something like that (no, it's not a beard) :

oh dear, are you able to determine what the bones are doing in that situation?
According to the animator, some bones are "tied to bad roots".
He tried to delete the bad root bones and it fixed the distortions without any bad artifacting, but then after a restart his changes were removed
I will tell him about Pose Driver and see where that leads us.
Thanks for your help
does anyone know why it wont let me size this capsule any smaller
hard to be sure, the quality is a little pixelated, but my guess is that your character has scale on the root bone. Could you check and see in your skeleton if the root has a scale of 100?
where can i see the scale of the root bone?

ah yeah, is that the root bone?

Great. So the scale of 50 there is likely your problem. I expect the physics objects are having to compensate for the scale by being 50 times smaller than standard and therefore cant get smaller than a certain size.
Is this character exported from Blender?

yes
Cool. So @nimble torrent often links this video as an example of how to correctly export from Blender to Unreal to fix scaling issues: https://www.youtube.com/watch?v=YbWfoyf4MqI&t=1039s
I would recommend following along and reexporting your character so that they have the correct root scale in Unreal.

In this video I will show you how to correctly export a character from Blender to Unreal Engine 5.
Common mistakes include issues with the scale of the root, joint orientations and differences between bones and joints. In this video I will talk about everything you need to know to correctly export rigged characters that follow Unreal Engine sta...
ohh okay
thank you so much
no problem. Feel free to reach out if you're still encountering issues
THANKS THE ISSUE IS FIXED YAYYYY
Woo 🎉

idk if this is related but..


it goes crazy when i render the image
nvm
it was the rigid bodies
Maybe a dumbass question, but what is the point of using the ue5 skeleton for games and all that if you dont have mouth and eye bones and stuff? You cant animate the face at all, and you cant change the heirarchy of the ue5 skeleton or everything gets fucked up lol. Am I better off making my own custom skeleton?
With IK bone can we animate any bone at runtime? What else can we do to animate at runtime?
My character needs to sit on chair, exercise with dumbells, and gym machines, and many other small things.
Should i do all these animations, or i can do most of them using IK bone?
Yup control rig lets you animate anything in runtime. It is usually used for dynamic situations where it's harder to animate every situation by hand.
Have you looked at metahumans?
im using ue4 does ue5 have any improvements in this? or its basically the same?
thanks
I'm currently working on a custom rig in ue5, I'd say it's pretty good. I'm not sure about ue4 though.
Thats TOO many bones lol.
Lol agreed. I removed some of the helper bones in maya and retargeted the manniquinn anims to my new skeleton.
I guess I could just retarget or whatever, but It feels cleaner to just have a whole separate skeletal mesh lol
You could base your new mesh on metahuman or manniquinn
new skeleton i mean
With metahuman the body and head are two separate skeletameshes that are attached together
It is possible to edit those two parts indepedently of each other
hmmm. I guess I will just have to do much more research on what would be the best option. I dont need a lot of bones or anything lol. Just a simple face rig for dialogue in my game
You can add bones to a skeleton, provided the rest of your skeleton matches, and then constrain a mesh to another mesh using the 'Copy Pose From Mesh' node in the animation blueprint.
So, for heads, it's not uncommon to have a skeletal mesh that animates the body, then the head mesh with the root, pelvis, spine, neck and head bones of the 'main' skeleton, and then a bunch of additional facial bones.
Or, you can do the face using morphs.
That's how you add extra bones for widgets and doodads too. If your character has a belt pouch or a backpack - you can add a bone for that, and use anim dynamics or physics to give it secondary motion.
Hey guys, does anyone know how to mirror animations that don't have humanoid skeletons with bones labeled right or left? What I'm trying to do is mirror a gun skeletal mesh so the animations used for the right hand gun work with the one on the left. I don't have any arms, just two floating guns. A mirror animation data table won't work I don't think because that just flips the right and left bones, but since these are gun meshes they don't have them.
Here's an example of what I mean:
How are you animating the mesh?
Does the gun have it's own bones?
Yeah, the guns are skeletal meshes and I just animate them moving around
When you say 'just animate them moving around' do you mean that they have their own bones, or are you animating the mesh itself somehow?
did you try the mirror data table?
actually a simpler way, if you have root motion locomotion anims, you don't need the event track, just put the animation track use the Slot like FullBody or LowerBody as set up in AnimBP. you could move on the terrain and with fall state when dropping in your animBP. The key is AnimBP set up
you mean your guns don't have skeletons?
I think that would only work if the skeletal meshes have right and left bones right?
No they do, it's just bones like trigger or magazine, etc
Not like arm right or something
How are they placed relative to the camera?
Like, are the skeletal meshes at the character root, and animated into position, or do they have an offset, and they animate relative to that?
Same as in the video I attached, just right and left of the camera
OK, but are they animated into position from the root of the character, or are they placed there in the blueprint and animate relative to an offset?
I ask, because the answer is going to be super specific.
i see, i'm not sure yet, but you could try the mirror data table though, see if it works?
They have an offset, and then jsut animate relative to that
This is technically how they look from out of the first person view (ignore the arms, they aren't visible )

That will invert the object causing it to appear flipped.
Sorry to bother, just wanted to follow up and advise that this was the issue and it's all fixed, is working great! So THANK YOU again! So much appreciated
Hurrah!!
I'm really glad to hear that!
Ooh I think that actually worked, thank you!
👍
Anyone wants to teach control rig? in return i teach motion matching
Does anyone know what I did wrong here?
I've animated my custom control rig in sequencer. Afterwards I added FK controls for the fingers and now they look like this without any keyframes. The controls are in the right place, but the fingers seem to have a life of their own.

And this is the FK setup

Trying to import a very simple mesh and armature in an FBX from Blender into 5.3. When I do, it doesn't seem to pick up the armature. What might be wrong?
Hey Guys!
Im wondering if you guys know if there is any workflow course in Unreal on how to Rig, animate and such?
Currently Im working in Blender but I would love to move most of my workflow to Unreal.
If you guys have links ? suggestions ? Tips ? Pliz let me know

Discover the game-changing power of Ozone Story Tech. Join us as we talk through integrating seamless animation collaboration across various applications. Dive into the captivating Like! animated short, which showcases stunning emotions in stylized characters as our character Dee engages with Social Media for the first time.
Imagine a future o...
I remember this video being quite insightful: https://youtu.be/FgJ1stTScxI?si=L27WC1-kCcRvUiNN
Also comes with a link to handy hotkeys and preferences in the video description.

With Unreal Engine 5.0, rigging and animating in-engine became a real possibility. UE 5.1 has taken another step forward, so artists don't have to hop back and forth between various DCCs. Learn about the recent changes to the Control Rigs and animation tools via real-life examples.
Learn more about recommended Hotkeys & Preferences: https://dev...
that's bizarre, do they look the same in the control rig viewport?
No they looked just fine there and transformed correctly with the control.
I assume I messed something up with the Initial or Offset transforms of those controls, so I'm attempting to redo them from scratch, will see if that helps.
🙏
Also when I checked the bone hierarchy only the 2nd fingerbones (so thumb_r_02 etc.) were offset in this weird way. The first fingerbones worked just fine.
Must be human error I thought
If all else fails I'll just make a horror game.
Hm. Just doing a single control already messes with the pose in sequencer. I've added just the FK control for the Thumb_01 bone this time, but same result. The Initial transform of the control is all 0, the Offset I have set using "Set Offset Transform From Closest Bone". In the CR editor it behaves as expected. In sequencer it does not, the entire thumb jumps waaay out there.


Oh
Guys please don't be like me and do your finger FK controls before your arm/hand FK controls. 🤦♂️
For anyone looking to do body horror games, feel free to do exactly that.
Oh lol glad you figured out what was causing it
if i made a blendspace how will i know that starting and stop animation to select? this was my issue thats why i went to this chaotic mode.
Did you have the armature selected when you exported your fbx?
i have been trying motion matching (with replication) with lyra animation pack, but there seems to be a problem when spamming A and D keys repeatedly the owing client seems to predict the pose correctly while the other client seems to be stuck with just one animation (while the mesh is moving) please refer the above video and help me diagnose the problem
no dm help
Huh! That's interesting behavior!
Sorry, don't know how to fix it, but if you figure it out, let me know.
Morning everyone. This seems like an odd edge case, but I need help figuring out how to go about it. TLDR; is it possible to blend between blendspaces?
With blend nodes sure!
The issue I'm having is the walking animations get confused as to which to use the feet just kinda shuffle instead of walk (it doesn't know which to use) it also plays havoc with my animnotifies and doubles the footstep audio.
Have you tried using sync markers/groups to match the foot placements?
The double audio thing can be avoided by setting the blendspace to only use notifies of the highest weighted anim
The BS are setup to use the highest weighted, but I think those are only for the animations referenced within each blendspace itself. I think the blend node with an alpha set in between is what's causes the double footsteps. I'll have to look into sync markers/groups. Not familiar with those.
They're worth looking up! This is the kind of thing they were designed to do!
Seems like the ticket, based on quick research. The question - is do I have to add the makers for every animation that's in the blendspace? If I do, it's not big deal as I already have notifies for them, so it'll just be a matter of adding the left and right foot markers at those same locations, but was just curious as that will be a bit tedious.
All animations that you intend to synchronize!
is there a way to force my animbp variables to update? i am getting data from char in the update but sometimes its not exactly the same or there is some frame delay between the state change and button press and unpress how can i handel this issue
Are you using the regular "BlueprintUpdateAnimation" or "BlueprintThreadSafeUpdateAnimation"?
Also the tick order of your components plays a large role in this, too. If your SkelMeshComponent ticks before your MovementComponent you'll always fetch the last frame's velocity for example.
for those values that are causing the issue normal one , mm how do i handle the compoenent tick thing ? iam fetching data from controller , and a state manage component
(you can change which component ticks first if they are similar kinds of actors by using AddTickPrerequisiteActor/Component)
that was UI reply before i post XD
and the other issue? will using the non threadsafe update cause sth ?
I think Controllers tick before the actors they possess? I am not sure about this though and not sure about the implications of adding a controller as tick prerequisite
Is the state manage component on the same character as the SkelMeshComponent you're fetching it from?
As for the threadsafe: it depends, don't think it will help you in your case though
Another alternative that often just works out of the box is to move those "sensitive" variables and the anim logic that needs them into a Post Process Animation Blueprint. That way it will always be after every other component on the actor.
But depends on your use case.
well yes the state manager is in the character
Yeah so what you could do is just call "AddTickPrerequisiteComponent" in your character BP to make the SkelMeshComp tick after your state manager
idk what is a pp animation bp ? is it sth built in ?
ok one min let me try this first and for controlelr it always ticks before char so iam fine with that right ?
It's an additional animation blueprint that you can configure per SkelMesh asset. As mentioned, it will be executed in post process after your main ABP has finished.
As I said, not sure about this and not sure what happens if you force it to tick before your actor.
A bit awkward that an ABP would need info from the controller tho!
Curious what that might be
well iam very bad with animation stuff and anim bp idk how else i could handle these stuff
¯_(ツ)_/¯
this didnt fix the issue
Then I'm gonna need more concrete info 😄
ok what info do you need? ican stream for you if you want ofc

a more clear one

Thanks, I was about to get up and go get my magnifying glass 🔎
Ok that looks relatively normal to me, aside from fetching the input via controller I guess. It's more common to check the characters MovementComponent's velocity instead. For example, in a cutscene you can press forward and that will set your "Has Movement Input" to true. So you'll start moonwalking mid-cutscene.
But anyways, so those states and stance enums are delayed you say?
iam guessing that this the issue coz this is what seems to be happening
noted 👍 will change it later ig
i can show you the transition conditions for the 3 animations ?
They worked like a charm! Thanks for the help.
Before that, can you show me how you called "AddTickPrerequisiteComponent"?


where do i set it ?
What you have is you're telling your Actor to tick after your StateManager
Which I am not even sure how that would work
Yeah, I'm surprised that compiled.
You tell one component to tick after the other.
In this case, your mesh after your state manager.
so like this ?

well that fixed one transition the other transition is still happening
The one that checks for "Has Movement Input"?
nvm this its still happnein both
no no both are still happening
I understand, but what do you think why this might be happening?
Can you post your state machine and describe which transitions are unwanted?
when i unpress cntr and my movmemnt input it should awlways go to the alias to coruchidle what is happening is it goes to crouc hto jogging sometimes (still detecting that i have movement input but no crouch press) or the stop crouch move which is still detectin that there is a cntr press but no movement input)

those are the 3 transition conditions


I suspect we might have a case of "works as designed" here 😄
I'd honestly go and refactor the Controller's "Has Movement Input" and use the MovementComponent instead first. That maybe is a roadblock for us right now.
ok what should i do ?
Instead of controller, use the character's MovementComponent.Velocity to set that bool
I.e. Velocity > 0,0,0
And then also add the MovementComponent as a tick prerequisite
ok one min
yea thats better ig ty this fixed those 2 issues thx for helping
What is the general approach to handle sockets on different sized characters? They're using the same skeleton though.
There are SkelMesh sockets
Instead of on the skeleton they're defined per skeletal mesh
Noice.
Is there a nicer way to drive control rigs via curve values? Currently I do this, but I suspect I'd have to create rig after rig after rig. If possible I'd like to move everything into a single post-process control rig and drive each feature of the rig via curves.
Any ideas?

Couldn't you create one control rig with multiple curves? Why are you making one per curve?
Yes that's what I'm wondering, so it would be a manual thing on the CR? How would I apply the value as an alpha within the CR?
What do you mean by 'alpha within the CR'?
You can drive a float value with the value of a curve?

You can read the curve value inside the control rig.
If I make a character in blender and import it into unreal with animations and then later make a new animation I also want to add, how do I reimport the character without deleting everything?
You can actually have many files referencing the same skeleton.
I made this but now made a extra animation if I do Reimport the new animation doesnt show

Including multiple meshes and multiple animations!
ah so I should just import a new file with just the new animation?
How are you separating the animations in blender?
I have the actions that take care of that

atm I just exported the mesh + armature which gave the above image
but I now made the Rocket_attack I want to add
but im open for suggestions
OK, personally I have never arranged things that way - where they're all separate actions like that in one file. I'm not sure which file you would reimport to acquire the new animation.
You could try going into the editor preferences and forcing the import dialog to re-display when you reimport the mesh.

So you can re-select the 'import animation' option.
That might work!
Genuinely not sure though, as I've always exported a separate FBX per animation sequence.
ah so you have idle.blender attack.blender files for each animation?
Yeah, historically.
Though I usually used Maya, and Maya doesn't have Blender's cool action system, so there wasn't really an alternative.
Oh right there's just a plain "Weight" on almost every node huh, thanks!
👍
ok managed to fix it
blender has an option to export per action
so did similar to your maya workflow
but I can keep my animations in the actions
👍
Any clue why I cannot select a curve for my float variable MainhandIK_Alpha? It does exist on the Skeleton and the ABP is using that skeleton, too 🤔


Could be the periods?
Doesn't seem to be the case, TestCurveHello doesn't work either :/
Weird
Yup, every time I changed something.
Do you not see any curves?
And, why are you trying to enter them into the control rig that way?
Why not use the Get Curve Value node?
I'm confused by what you're trying to do, and how you're trying to do it.
The dropdown is greyed out, can't even select it.
I was just curious why the CR node works to get the curve value but the ABP option on the CR node doesn't 🤔 Would have preferred to do it in the ABP
Not sure! Sorry!
Thanks though, I'll make use of the node you've suggested 👍
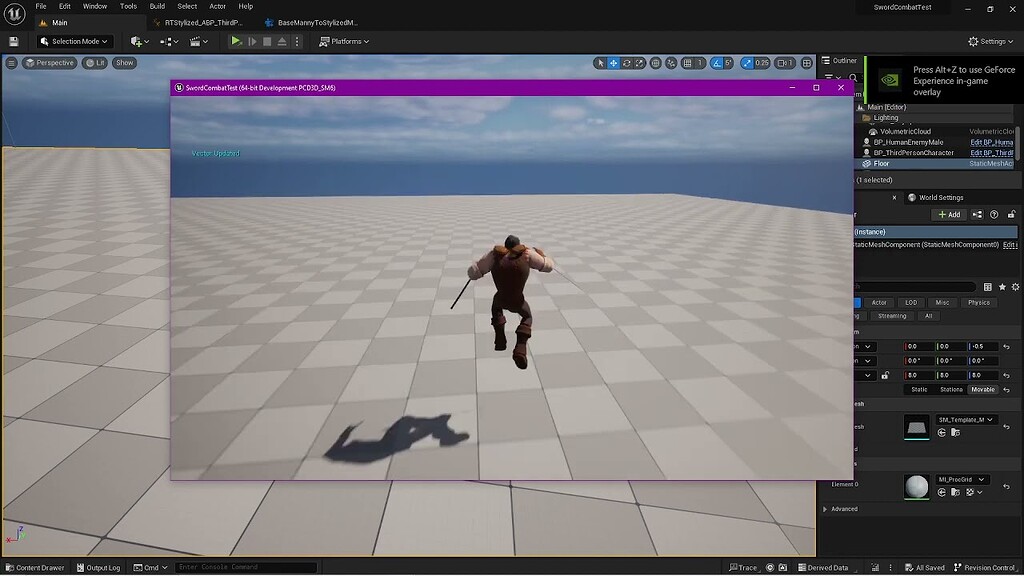
Anyone know what's causing this hilarious, but unfortunately undesirable behavior?
All I did was start a fresh third person template project, open the BP_ThirdPerson blueprint and swap the Quinn mesh for this custom mesh. The run animation is fine when I preview it on the mesh, as is the jump animation. The character's foot is also responding to IK correction on a slope. I compared the weight painting between Quinn and my mesh and didn't find any obvious disparities.
Is there some property attached to the mesh that the default animation blueprint needs?
Does your mesh have the foot ik bone hierarchy?
Specifically - these ones:

Looks like it does, but the symbols are different. I unset them as Deform bones when I exported, so they didn't get included in auto-weighting. Maybe that's causing it to import them as controls instead of bones or something....I'll try fixing that.
They can't be controls, controls only exist inside Control Rigs.
Do you see them in the skeleton hierarchy inside Unreal when you open the mesh?
Yeah, you can see them in the first video clip. They have a dot next to them instead of a bone icon though.
Interesting. When you show the bones - do you see them there?
Typically, when we see this problem, and we see it a lot - you're I think the fifth person in three or four days with this issue.
Typically, it's caused by not having these bones and needing to create them as virtual bones
Yeah, they don't show up. I bet it's because I set them as non-deform. I'll try changing that.
👍
Otherwise, I'll be forced to make a game about skiing.
The dot means that the bones exist in the skeleton asset but are culled/removed on this particular skeletal mesh.
I think you're on the right track about the non-deform setting.
https://forums.unrealengine.com/t/physics-for-my-landing-animation-break-in-standalone-game/1246725
I have this problem. Can anybody please help me to solve it?
Epic Developer Community Forums
Hey guys, having a problem where the physics on my additive landing animation break but only when played in the standalone version (it works properly in the viewport). I have linked a video down below. If it helps I am using the default landing animation that comes with the mannequin but retargeted it to my skeleton. Any help would be appreciate...
Got it. Thanks. Fixed that issue....now onto my longy legs problem....guessing this is a stride warping thing or something
Long legs? In the third person template? I don't think there are any warping nodes in the third person ABP, have you added some?
I think I found the culprit...

They switched from using floats to doubles in BP & control rig with UE5 but forgot to adjust this
Huh~!
I am... surprised that has not caused other shenanigans!
Maybe I'm the only one trying to use those lol
I feel that way about skew.
I'm tempted to try to put skew into control rig, maybe as an option - to change how the hierarchy evaluates.
But I suspect that would be somewhat challenging.
I'm unfamiliar with that, what kind of effect would that achieve?
My mistake. I thought it did. I didn't add any stride warping, but this character is short, so the control rig seems to be doing crazy stuff with his legs. It goes to normal if I disconnect the Control Rig from the animgraph.
This is the difference:
I have a visual example up there.
Unreal applies non-uniform scale really weird and it makes some cartoony kinds of rigging non-viable.
Ohh gotcha, didn't know there was even more "I need to be different from other 3D software!!" stuff aside from X being forward.
Is that visual example made in sequencer? I wonder if one could achieve this with sequencer's parent constraints 🤔
I really need help
No, the visual example is just spawning two boxes and parenting them.
I don't think that sequencer would evaluate hierarchy different.
That would be a truly surreal decision if they did.
Does exactly the same thing happen?
And, did you build your animation BP and character yourself or are you copying Manny?
yeah literally the same problem
How exact are we talking? Same mesh?
I am using the default third person character but changed the skeleton mesh and animation class
So it's your own animation blueprint you made from scratch?

OK. So where did it come from?
default manny animation class I just changed the animations
OK.
So if you unplug everything except just a run animation, and you play the game - do you still get something weird happening with the legs when you jump?
Like - unplug everything.
Plug in a single sequence.
That is an idle or a run.
everything works perfectly in the editor but landing animation does not work properly in standalone
And just test that.
OK, so that means that the problem is probably not physics.
I don't know what it is, but it's somewhere in the animation graph.
So - you have a bit of a task ahead of you, you have to figure out where the problem is in the graph.
but why in the editor it works perfectly I just don't get it
okay thanks for your time I will try to figure out
Do you know if this bug happens in your build or just in the editor play window?
it happens in the packaged project
That's good! At least that's consistent!
😅 good
Anyone know if motion matching does not work with montage assets?
@barren fiber ?
?
Do you know if motion matching can use montages?
sequences only
A bit. Do you have any specific questions?
this whole shit is breaking my neck
What are you trying to do?
(control the neck?)
hands
What are you trying to do with them?
oh its big
you tryn to learn motion matching?
we could exchange knowledge
Nah, don't need it for my stuff.
Sorry.
I might be able to help if you have specific control rig questions.
I've come to the conclusion that motion matching is still quite buggy, and befitting of the exprimental status. Starting and stopping PIE or exiting and starting the engine back up gives different results 😛
Yeah, that doesn't really surprise me.
It'll be interesting to see what happens when they release the example files.
indeed
I spent the better part fo a day going through my nodes and anim blueprints just to remember it's experimental
sigh
it works pretty well
but its hard to understand for sure
it is more than just plug and play this is what people come to conclusion after they watched 2 or 3 Videos on it on youtube
they are pretty misleading
it works fine for mostly everything, except when you're getting into a directional roll, where you need to take movement away from the player.
temporarily
i give you one tip
its called root motion
so if you understand how animations work in theory and what that is your roll is going to be alright
if yall find me someone that explains me control rig properly i will with the help of the <@&213101288538374145> 's host a deep dive into its system and how to make use of it, official in a stream on that server no where to be found on youtube
I understand root motion, however, playing the normal animation even with root motion ticked on doesn't move the character, just plays the animation
So I need a more creative way to accomplish the effect
A montage however, will move the root
but a montage is not working in the Pose file
Dive deeper, check for bools, stay persistent and be creative.
hi there - for some reason my imported skeleton has a few bones that are unmovable / grayed out. is there a fix for this?

Greyed out bones represent bones which are in your skeleton but have no skinning information, so they wont move any part of your model.
If they have a little grey circle next to them that means they're in the skeleton asset but not the current skeletal mesh.
gotcha! thanks so much!!
has anyone had an issue with auto retargetted animations crashing? Everytime I try to open my retargetted animations, they crash with an assert failed, array out of bounds error
Yeah, this is a bug that has come up more than once.
So far, we don't know the specifics of what causes it, nor do we have a good fix.
It has been reported to Epic, so hopefully we'll get a bugfix with the next update.
Ok awesome! Glad it wasn’t something dumb I did😂. Thanks for the response!
Wish I had better news! If you figure it out, come back and tell us!
Nah it’s ok! Just glad to have an answer!
Yea, one way around it is having a project for retargetting and then exporting the animation fbx files, and importing them manually.
Quick question. I have a sequence with around 60 actors performing the same animation (walking/marching) but I want to extend and loop all of them. How do I do this without individually tweaking every single one?
The looping is just a checkbox on the animation asset. Not sure what you mean by the 'extend' part
It's a mixamo animation that resets it's position when finished even when I check the loop. I have to alt-drag and manually loop in order for the character to keep moving.
I am using UE 5.4 with latest Motion Matching for locomotion, I want my character to sit on chair as smooth as possible, how can I do that?
Hi i got the weirdest error i have ever saw.. i am using a metahuman head, and the live link face mocap to record a few face animation.. after i finish the process and open the anim sequence the face animation plays automaticly.. and if i move the timeline i can only controll the neck movement.. but the face anim plays once tan it stops.. even if i put it on a sequencer the same thing happening..
You shouldn't
How can I make it?
experience
Sitting animations can be deceptively difficult because you need the character to end up in an ideal location but you can approach the chair from any angle. You also need to consider how the character is going to align with the chair, if their collision needs to be disabled for the interaction so that the root could align with the chair to get an accurate placement. I'm not sure if it's the smoothest way, but one approach might be making your sit animation, playing it as a montage and looking into something like motion warping to modify the root motion of the animation to align the character to a target point on the chair.
This isn't very helpful.
It's true! They're complicated. They're not quite as bad as doors but they're not something you can do without thinking.
Doors are the devil.
The only thing that's worse are ladders.
Truly
Then someone makes a bench and suddenly you can get into your sit pose from the back 🥴
Alternatively, take the animal crossing approach and the character leaps into the air and lerps into place landing their butt on the furniture or the ground alike
An under appreciated approach to many things!
if one just started unreal after motion matching came out with the everybody is going to tell me how energy, we a lost cause
That ones an interesting one. I don't know anything about how that's setup, but from the sound of it, your mocap is probably split into two parts. Does the sequence you're looking at have any events in an event track?
you can go help him if you feel like it, but im realistic
This is a good temporary workaround! Thank's rastodm!
Migrating seems to still hold onto data that can crash the engine. havent had issues exporting / importing.
I'm trying to think how I'd go about doing a motion matching setup for a chair, and it's not cheap. You'd need to have the characters relative angle and position to the chair tagged in your animations, and then just a lot of coverage of approaching the chair and sitting and getting up. It would be pretty expensive. Unless my game was really invested in dynamic sitting - it does kind of make more sense to constrain the characters approach angle like a traditional Smart Object.
right
Yea seems like its a best use case for locomotion mainly
Yeah - but it's very good for that!
@nimble torrent Yea I'll probably check it out once they release the sample project, thought it was supposed to be end of april?
Yeah, I'm looking forward to playing around with it.
They mentioned June in a recent livestream.
Hopefully the delay just means more polish
I'm a bit confused though, Werent they using the locomotion setup from Lyra in Fortnite before, But now they say Motion Matching was tested in it?
Agreed, it doesn't seem like the problem that motion matching was designed to solve. If anything I imagine you'd handle the motion matching a bit like the traversal examples. Which behaved a lot like montages in the end.
I'm just imagining some kind of tactical sitting mechanic.
you need to come up with your own solution to have interactable objects, map vectors to animations configure entrance point vectors along your chair automate movement to the nearest point and start your sequence when point was reached
Extreme sitting!!
pretty simple overall, but a lot to code
Would be a stellar musical chairs game
8 animations sitting down, 2 or just one to get up
I'd buy it
lol yea i would if i was musically inclined lol
Is using Legacy->Blendspace1D risky for next versions of UE? Because Legacy feels like being Deprecated and I don't know if they remove it
should be fine, easy to fix if it happens. but judging by legacy inputs and them still being popularily used in market place packages still id say its safe
I am used to using Blender for animation, but is it possible to animate more rigid armatures (like pixar lamp for example) just inside unreal? Can you setup hierarchies to support that?
The answer to that is 'Yes, but!'
You're almost certainly better off creating the skeleton in something like Blender, and then animating in Unreal.
You can create the skeleton in unreal as well, but the tools for that are very new, and not very tested.
And as furhter background, I have things like animated turrets that unfold and start rotating. That kind of thing.
Ah, ok.
Yeah, so you're probably still better off creating the skeletons and assigning weight painting in Blender (even with the omnipresent issues of alignment and scale when transferring between programs), and then building a control rig in unreal, and animating in there.
If you want to animate in Unreal.
I guess at that point I might stick with animating in blender and then just sucking it up and dealing with the import issues.
Thanks for the help!
You're welcome! I would recommend checking out Control Rig! It's really cool!
But... so is Blender.
Yeah, I will. Is that new to 5.4?
Control Rig? No, it was originally released in I think 4.something.
It has gotten continuous updates since though.
Control rig is insane, can confirm
Got it. I have been in c++ land for a long time and am now starting to get back into the visual side.
👍
Would things like constraints be blender side or control rig side?
Both. However in unreal you can use those constraints at runtime too
Yeah, Control Rig is very impressive from a rigging perspective. Very flexible and well designed.
Seriously hoping other software copy their ideas.
Does anyone know why virtual bones (eg ik_foot_root) get distorted when baking an animation sequence to a control rig?
not sure but did notice issues with SKM_Manny, Manny.Simple and both quinns seem to bake to cntrl rig ok
ah interesting, ive only tried manny. will try with quinn now
right clavicle/shoulder was popping bad with Manny.
I started a brand new lyra project to sanity check and baked an idle animation sequence to control rig, saved it with no changes. In the right image you see the altered virtual bones

Strange, unfortunately im not sure
when i set a static mesh on my "head skeleton" with 0 collisions on or whatever
it messis wth the animation ?
he start to freeze float :;/?
if i dont have it on it works as intended
have anyone encountered this ?

This is actually exactly what I did! Don’t want to mess up main!
Hey Im trying to figure out why a transition animation is not working i debugged it and it should play a sequence in the transmition but its nots! when can Enter Transition is ON the animation wont play but will move to next state when its NOT it will actually play the animation!


Can confirm that baking to Meta Human Control Rig has the exact same result
Does anyone understand how to use this control rig node correctly? The "MirrorAxis" parameter does not behave like any axis parameter I've seen

Seems pretty straightforward but
They pipe the mirror axis into a transform multiply node as scale??

What actually happens to the transform for that bone though? Like, the shape of the bone is defined by it's children. Are they in the correct place?
Ah, they're using it as a flip matrix. If you want to flip something over the X axis, you can scale something by '-1' on the x.
This will work, but your bones have to have that inverted relationship already.
If they don't, this kind of mirroring will not work.
I.e. left side bones would have to face +X and right side bones would have to face -X?
Yeah, kind of.
So a rotation matrix consists of three vectors that are pointing along the axis.
When you multiply matrices together they affect multiple axis simultaneously.
Your best bet to understand it intuitively is to try giving the parent of an object a negative scale on one or the other axis.
So, I think you need a conduit node between the transitions and the entrance to the state machine.
Otherwise, I think it will always try one of them first.
is there a way that i can use root motion from a specific animation sequence in anim bp? i dont want to use root motion from all sequnces and i cant use motnages in bp
I was always bad at matrices :/
Would these be the right bone orientations to allow scale mirroring?


Possibly! I always end up just having to give it a try.
Hey Squishy thank you for the response, Im reading unreals state machine documentary rn, what do you mean by a conduit node
The Transform becomes static and has a distorted Rotation and Location.
Here is a side by side of the effects. The top animation sequence has been baked to a control rigged and then saved. THe bottom is a duplicate of the same animation made before baking.

So your control rig would need to be setup to support those bones. The design for them is used in stride manipulation and IK setups. Basically, you constrain the Ik foot bones to the real foot bones during animation, and then during animation playback you can use them as IK targets.
What it seems like has happened is that the Control Rig does not constrain the bones properly.
Should be easy enough to add that in.
It's two nodes.
Hey thank you im at it right now!
Ah amazing @nimble torrent ! Thank you for the support ❤️ Quite new to it all but im sure I can figure it out with some googling now that you've isolated the issue.
I guess I assumed the Lyra project would be setup with all this in mind 😅
Oh okay I understand now, thanks. They expect you to put a -1 in wherever you want to actually flip the axis and leave it at 1 if you do not.
Mmhmm!
👍
I've never used Lyra, but it is sort of surprising if they include a Control Rig and this feature isn't supported.
Exactly! If anyone knows an Epic Games insider give them a nudge about this pls 😂
I completely missed that that node is calculating in global space! After I copied the function and switched to local space the controls are mirroring exactly as I need them. Thanks so much!
👍
Is there any way to pressure the developers to offer more information about the modular control system? I've some questions, but all I get here are cynical responses, "Better get used to it, it's the UE way" etc. But I don't think there's any way to figure it out or fix it. For example, I've an annoying problem when I set up the legs: for some reason the module places the control for the pole vector on the side, which destroys my pose. It's fine if I place the control at the front of the knee, but there's no way to edit the rig so that it remembers the correct position of the pole vector. I get the impression that Epic Games staff are just ignoring the forum where people have already asked questions about the modular rig requirements.
I don't know if they're ignoring them necessarily. The modular control rigs are weird, and do not do the thing they advertised that they would do. They're not plug and play, and they don't work with every character.
Which is... kind of how they were advertised.
are you saying they were advertised as something which is meant not to work?
Why did I see in all those 5.4 presentations modular control rig if it is something that doesn't work? It doesn't make sense.
I have seen maybe a dozen people come through here in the last month with some variation of 'The modular control rig is broken / doesn't work / turns my character into spaghetti.' and precisely nobody who has said 'I have this fully functional modular control rig. Let's talk about doing animations with it!'
Not one.
I know, but why? Is there a way we can advocate for better product? I mean, they even plan to charge it now, so? If I buy a car, is it a broken car?
and how come the community is not already raging over this?
I mean - it's the first version with this feature, so it's kind of expected to be a bit unstable and rocky, but this has been particularly bad.
exactly.
to me, this doesn't seem like a buggy product but bad designed product.
My personal opinion is that it was kind of a silly project to begin with, and they would have been much better served by expanding the available nodes and education resources for the main control rig system.
Modular control rig has one selling point - it's plug and play.
and I am surprised why us users are so accepting of this obvious pink elephant in the room.
And that part of it... just doesn't work for most custom characters.
I can say 'yet'. Like - maybe at some point in the future they will make it work for more characters, but I don't see an easy way for them to do that without making it more complex to interact with... but the only selling point is simplicity...
So I admit, I'm a bit confused by its existence.
I can make it work if they explain how to unlock or customize moduls. I hear that you actually should make your own modules and this unlocks some of the locked functionality and gives you look under the hood and set it up for your needs.
but this was never mentioned in the documentation
You can already make your own modules. When you make a new control rig, there's an option to create a normal control rig or a module.
I also think you can open the graphs.
But again - if you're doing that... just make a normal control rig!
The only benefit to the modular system is that it's easy.
I think this would be unreasonable to just make my normal control rig if the modular one already solves 90% of my needs. To build a rig from scratch just to fix my 10% needs seems unreasonable waste of time
The only thing that makes sense for me, as a reason behind this project, is that it's the first part of a larger system. They're adding the ability to define skeletons in unreal (it's very basic and experimental) and weight paint them (it's even more basic, and more experimental) so this might be the first part of a toolset they're building for full character creation in unreal.
I guess most people are "ok" with some bugs since they're not paying big license fees and it's practically "open source"
Most of the time there are workarounds to achieve what you want
The other alternative is that it was created exclusively for marketing purposes. They're really cool looking videos. If it worked like that - it'd be neat!
I thought the modular control rig is a feature coming from UEFN? 😮
Seems like it would fit there
I think this is not alternative, this is how it is, and I feel like a monkey in a zoo who is surprised by a nice candy.
I still don't get UEFN either.
I think it was developed together with UEFN team
and as I understood, for them this is the priority - to work with UEFN assets.
but funny thing is, it is not easy to understand why something works with one SM, and not the other. I was looking bone per bone, orientation, naming, etc. And for mannequin, it just works, and for my character, this stupid error happens.
I was looking forward to modular CR kind of, but I am kind of suspicious now that they expect you to make "modules" for everything. I would've preferred they kept the plain CR graph on top of the modules
Like, what about overarching proxy controls? Those will be a b... to implement
I think it is probably meant to be tweaked in the way if you need something custom, make your own module by using the existing module as a starting point and set it up as you need according to your character
I don't really get the use case beyond "This is my first game."
That's not to say 'This is my first game' isn't a valid use-case. It is! That's an important thing to support.
But I don't really see a use for modular rigs beyond that.
they can be used in the film industry.
I can find tons of user cases for previz, etc.
the bottleneck of previz is that you can't move your characters in UE.
Is it? Weird.
I mean - you can just constrain your character to a default one.
Or, for your previz company, just pick a naming convention and hierarchy, and bind everything to that.
if you do realistic, human proportions yes. But if you make cartoony characters, forget about constraining the character
I know tons of productions with cartoon characters who would embrace UE in their pipeline, but not if it doesn't work.
I guess? I mean, that's a reasonably niche possible use case "Previz for cartoony films."
And of course, if you've got money - you can just make a custom control rig for your characters. It's not that hard. It's not as fast as a possible working version of the modular one, but it's a couple of hours at most.
only in France you have hundreeds of hours of animation every year which needs previs, approval, etc. In a few years, they could all become clients of Epic Games.
I know there are some childrens' cartoons currently being made in Unreal.
yes
I mean... I guess? I just can't imagine a scenario where the cost of rigging is make or break for a project.
and pipeline is complicated because they usually animate in maya. But if you would have everything ready in Unreal, at least in planning phase, it would make things so much smoother and more accessable to teams.
It's always such a minor expense in the total cost of a project.
you still need a proper rig for the final animation, of course. But for the optimisation cost, you don't need to rig everything you see in the shot. There are a lot of ways how to optimize, if you have working tools, not half baked modular rigs with sparse documentation. Anyway. I hope Epic Games is aware and ready to attack these problems. If I see them in Annecy this year, I will have a lot of questions.
For example, it would be really cool if the modular rig can be saved as a regular controller rig. That way I could use the most of it and if I run into minor problems, I can just fix it.
Yeah, mugen was saying something similar. It's weird how segmented they've made them.
My personal opinion is that they would have been much more useful if they had just been a collection of assembly / evaluation nodes for the regular control graph.
Totally I was actually imagining that this is how they designed it
It's less visually compelling, but just having to slot in four or five nodes into a control rig graph would take about the same amount of time, but also provide you a way of customizing them, and adding additional controls over top.
Yeah! Me too! It's very weird.
Or at least... like... provide that as an option?
But even if they would add simply right-click turn into regular rig
Like - you could design a system where you could either construct things using the modular assembly system OR plug them into a regular graph.
They could be dual purpose.
That's another good idea!
I mean, I could imagine some ninjas from here would probably be able to write a python code for that
I think it's not as easy as blueprints since we're talking about a different VM here. Not sure how much of that is exposed
Probably not much is exposed. Even ChatGPT suggests ‘write a feature request’ 😅
I think it would be faster to write the feature in C++ and make a PR instead of waiting for Epic to move
You mean write a plugin?
Yeah or that
I wish I have time to learn that
Hello everyone. I was working on getting my enemy character working for a small project and when the animation plays, the enemy turns and attacks in a different direction. I noticed that it happens when I use behavior trees but not with simple blueprints though there is a delay with changing from the attack to run animation. I thought of asking in the ai section but I figured it might be better here since I think it could be a mesh issue. I made the enemy mesh but rigged it and got animations through mixamo. I tried adding a root bone to it and still no luck. Any suggestions as to what might be the issue?
To pick up on the previous statements about control rig being awesome:
I was annoyed that you can't mirror poses easily in sequencer, so I just built that functionality straight into my control rig and it works like a charm.

Yes, I am aware I forgot to connect the second pin on the right, I just fixed it... :p
Not sure how this would work with modular control rig, if at all.
when i set a static mesh on my "head skeleton" with 0 collisions on or whatever
it messis wth the animation ?
he start to freeze float :;/?
if i dont have it on it works as intended
have anyone encountered this ?
anyone pls :/
I just removed the applying additive and now it works perfectly


Hi, at GDC 2024, Epic announced that, alongside the 5.4 version, they would be releasing 500 AAA Mocap animations. Does anyone know when they will become available?
Nice!
Can you show the code for you doing this?
Both?
No description provided
ok well this is the equippment face
im just chaning the mesh of the asset
however even if i start the game with the asset on it bugges


and also here u can se the blendspace working
its like its crashing with the skeleton mesh and making it freeze or something
That can't be your actual code, because that's just a generic set mesh function.
Where are you actually calling that function from?
Your inventory maybe.
yeah but well thats not the issue since even if i start with a asset on its the same
Interesting.
annoying aff
What's curious is that it's not immediate.
yeah and it looses after a while
In your first video, he takes two steps with the hat on, and then freezes.
and then gets stuck again
When you debug the instance in the blueprint, do you see parts of the graph turning on and off?
Not in the blendspace alone, I mean in the animation blueprint itself.
Though sure - what's your theory?


What's this then?
Oh, yeah, you don't have to do it that way.
You're running your animation BP a dozen times.

You should probably use a Master Pose Component, if your meshes are simple, or use custom small animation BP's that only use the 'Copy Pose From Mesh' node.
i mean im on a test level with only the player and i got loads

Then you don't need an animation BP assigned to any of your meshes.
hm
use custom mode `?
that dident help
What did you do?
on all my skeletal meshed components i changed the animation mode to < Use custom mode
that removed all isntances of the anim bp so only 1 is playing now
wich is better
OK, I don't know what the difference between Master Pose and Leader Pose are.
I've never heard of 'Leader Pose'.
OK.

So now when you debug it and select the instance - what do you see happen to the graph during the periods of time that it's frozen?
and this is when i apply a static mesh O.o.
nothing changes its still playing as it should
when i select the isntance*
Interesting, so the animation bp preview window and the game window disagree about what is happening?

You see the character animating normally in the preview window, but not in the game?
Oh! You got a bunch of errors.
What are the errors?
It looks like you're trying to access something that is reading as null.
But I can't read the text, it's too blurry.
aye but thats unreleated thats with my Widget thingi since mp server/client playing on same cpu
so its not that just havent resolved that one

do you mean i should acctualy se him moving on the previw screen also?
i am there
i can se the X move along the blendspace
thats what im usually looking at
Right, but importantly you don't see the character move.
This is starting to smell like a networking problem.
oh i had the server instance not the client
now i see it moving
ohhh

or now u see its freezing in the preview also
what dose that mean ?
that ts related to the bs ?
Well, it's interesting, if you pull out of that specific blendspace and look at the wider animation graph - do you see anything strange happening there?
The node doesn't cut off, which is what I would expect it to do if the character were to freeze.
And curiously they don't t-pose or do anything that indicates they're referencing a bad animation or something.
Freezing in that pose is an unusual behavior.
yeah
nmothing unusual in the graph
i mean all ive got is a idle, walk ,run
all im using
rest is montages
Hmmm - OK!
Here's my idea! Unplug the whole graph and just plug in a single walk cycle.
So the character walks indefinitely.
ok
Then test it. What happens if you put on the hat?
also freezes
Aha!
Now that's interesting.
So that implies that the problem is not inside the graph.
That's good to know!
What about unplugging the mesh swap?
What happens if you do that?
That code you showed us, unplug that.
im not even using the swap code this time
now im just starting with or without it directly on the component
yeah

OK, that's interesting.
your on to something atleast
If your mesh set to 'static', 'stationary' or 'movable'?
now i made the static a child of my "helmet skeletal"component that used "Custom blend mode" anbd no parent socket
but same
movable
no
What if you make it invisible?
i have constraints on the Collision component
root component
but that shoiuldent matter
ok testing
turning off invisible
and all works
wtf
Wow that's weird.
so there must be the static mesh colliding with the skeletal mesh somehow or something ?
Wait - to clarify, you turned off visibility and it worked?

Turning off visibility wouldn't affect collision, so it's probably not a collision problem.
aye
Nothing immediately jumps out. It could be a render problem, but the animation previewer stops.
So that doesn't make sense.
Because the hat isn't there in the animation preview window, so... if there were some kind of weird material problem it wouldn't affect the animation preview window.
OK, what about deleting the hat static mesh, and adding it again?
the mesh or comonent ?
ok
Hide the hat, add a box to the head socket.
Does that work?
A new box component.
deleting adding new did nothing
ok testing
now im not using the head socket even ive set it as a child of a helmet skeletal mesh
wich is using the head socket* my bad

however if i just use the skeletal mesh asset instead of the static mesh it works (that how i originally wanted it) but i dont know if u can change the offsett of the skeletal mesh
Hello, I'm having trouble importing non uniform scale animation to Unreal from blender.
Oh no!
i have both skeletal / static helmet mesh so i can choose wich one (depending on what assets i have)
I animated the model using aligned scale inheritance, but the behaviour is extremely unreliable
was the idea atleast
First and last frame look fine, but the issue is with the inbetween frames.
Unreal and Blender disagree about what non-uniform scale means on a fundamental level.
Yes, which I sorted out.
All right, good luck.
OK, what happens if you parent the helmet static mesh directly to the body?
Here's 2 bones.

And you don't have the intermediary skeletal mesh there.

So it works!
Now here's how they scale.

the weird thing the weapon/offhand i use static mesh exactly same way and that works
By all means Blender scales the hierarchy exactly as Unreal does.
only with weapon/offhand
Not true unfortunately.
It can superficially appear that way under very specific circumstances, when the children do not move.
But no, they disagree about what non-uniform-scale means in a hierarchy.
It is completely different.
I changed the scale inheritance
OK, good luck.

This setting is the method used by Unreal.
And it WORKS, since a single frame will export identically as it is in blender.
If you need a single frame, then it counts as working.
The problem is that if I bake down an animation, the movement doesn't look right.
My guess is, there's something going on with how the Leader Pose component is working with the empty helmet skeletal mesh asset.
I'm not sure exactly what it is, but it looks like something is messing up.
hmm
u wouldent know how to change a skeletal mesh transform size or pivot point ?
that would solve everything
@nimble torrent
I mean, that's going to depend on how the skeletal mesh was created. Typically, for a customization system like this, the skeletal meshes will be created with some parts of the body's skeleton attached. So a shirt might have the pelvis, spine, and shoulders of the character in them.
For a hat, usually you would have the root, pelvis, spine, neck, and head bones in it's skeleton.
aye thats what i thought...
thank you very much
so its not an "easy fix" really
Noooo, but you probably should set them up correctly anyway.
well the thing is
or well
oh well thanks for help either way ill solve it eventually!
Good luck!
@nimble torrent It's a really tricky matter... It seems that the core issue is a difference of exported bone transform
Yeah, it's going to do that.
I would be shocked if it were possible to get this to work.
I think I have a theory.
But a very, very convoluted way that would only work technically
@nimble torrent So for starters... animate the non uniform transform as intended, but export that animation with the scale values not as bone transformation, but as custom parameters.
In unreal, assign each of these parameters to the corresponding bone as scale.
Blender would just preview it, then export the information it wants instead of exporting the animation itself.
Maybe? You would really need to have whatever you're doing in unreal though to make it worth the complexity - and it still wouldn't work if you added anything else into the hierarchy in unreal.
If you want to put a hat on your character - you can't.
I have a very odd question. The active ragdoll in UE5 is not very good so would it be possible to just use jiggle bones to replicate the same look and effect? Like to create a wiggly character (similar to something like human fall flat the game)? If anyone knows the answer Id very much appreciate it
It's mostly curiosity, I'll be frank. I'm aware though that in most scenarios, a specialised hierarchy is better for exporting non uniform scale (Flat with a location offset on the next bone to emulate parenting, that stuff.)
I wanted to see if it was doable more than anything.
@nimble torrent Update.
It's impossible and frankly infuriating to attempt to export the animationns properly, BUT I have managed to setup a rig with a hierarchy and the capability for non uniform scaling.
Nice job!
Yeah, it's pretty simple if a litle mind numbing. I'll keep this workflow stashed for later.
hey guys
does anyone know of a node that makes another control follow another control?
What do you mean by 'follow'?
Hi all. (paid debugging session with a bounty. 50 euros per hour if solved.)
I'm looking for an advanced cinematic animations engineer or someone of the kind who has experience and deep understanding about Metahumans, facial animation, morph targets, level sequences and animation montages.
The issue is about handling transitions between montages and level sequences smoothly with a ton of custom animation assets that have not been built with the best game dev practices in mind.
Drop me a message if you happen to be interested.:)
can anyone tell me how can i fix this ?
i want animation to switch fast but not like this
That's a parent constraint
I'm not sure if this is the right channel for this, but here it goes.
I've exported the Mannequin into Blender and used UE2Rigify to convert its rig to a Rigify one, all good till I wanted to curl the fingers. I can't find a way to do so properly, and when I go to edit the metarig it doesn't let me change the finger's rig type (it doesn't show anything rigify-related in the Bone props tab)
has anyone dabbled with this at all? can't seem figure it out
Np, keen to hear how you get on
What do they do instead of curl properly?
They do nothing. It's my first time using Rigify so maybe I'm missing something, but I dont see any other control for the finger other than this one

I've never used it either I'm afraid, so I won't be much help.
Why specifically are you using Rigify?
well the import to Blender by default doesn't have IK and I would have to make it myself, and the UE2Rigify rig has IK and such
Ah, fair!
I'm pretty new in animation so I'm not aware if there are other alternatives for ue+blender tho
Well - you can animate inside Unreal these days. The Control Rig in Unreal is pretty good!
It's got IK, and it has the advantage of not requiring you to switch between packages.
yeah that's what I was using at first, but I found more comfortable Blender's honestly
That's fair. It's still pretty early as far as animation tools go.
I've used the UE2Rigify addon, it's quite good if a little complicated to get working!
I think if you're doing something simple like adjusting some fingers then I think following Squishy's advice and adjusting them in the engine with control rig will be the path of least resistance.
That said, I don't know about that finger curve property, I dont think that will give you the result you need. Typically, by default the finger curls on a Rigify rig are controlled by scaling these controls. Unless you enable the FK fingers in the side panel.

ohhhhhhhhhhh that's what I was missing lmao
nice, thank you very much, i just wanted to move them so they grabbed a handle, but rotating them manually is horrible ahahah
thanks again
np 👍
and thank you Squishy too lol, if you hadn't asked that maybe I wouldn't have mentioned that I was trying to use the curve control 
I thiiiiink those properties are usually driven by something in the rig, and you can use them to export custom data with your animation so it will show up in the engine as a data curve. I think. I've never actually managed to export custom curve data from Blender successfully 😅
damn xD
while we are at it, how do you set up the units when exporting the mannequin fbx? because I've tried with 1 and 0.01 but both ways I have to change it again 1/100 before converting to Rigify or the rig will be minuscule
I think ue 2 rigify should have settings to handle this, have you watched Epic's playlist about ue 2 rigify? In any case @nimble torrent kindly shared this video previously which addresses Blender to UE scaling: https://youtu.be/YbWfoyf4MqI?si=P3T1B9sK7qUwbtqR
In this video I will show you how to correctly export a character from Blender to Unreal Engine 5.
Common mistakes include issues with the scale of the root, joint orientations and differences between bones and joints. In this video I will talk about everything you need to know to correctly export rigged characters that follow Unreal Engine sta...
hm I just checked the plugin one in the docs, I'll check this out, thanks again 🙂
https://youtube.com/playlist?list=PLZlv_N0_O1gZfQaN9qXynWllL7bzX8H3t&si=Lr71Pbqxm7_d5qwY
https://youtube.com/playlist?list=PLZlv_N0_O1gaxZDBH0-8A_C3OyhyLsJcE&si=GHSv6gqOMIiFvIPU
UE to rigify has it's own set of videos, annoyingly not in a playlist haha edit: there is a playlist
YouTube
Send to Unreal is an addon that exports FBX files from Blender and remotely imports them into Unreal Engine. In this video, you will learn how to get up and ...


YouTube
UE to Rigify is a Blender addon that uses constraints defined by visual nodes to drive any rig and its animation with the Rigify modular rigging system. In t...


There were also three livestreams in this format: https://www.youtube.com/live/c3_xUMQ6hhs?si=Pv_mFBPUBHIK9fRN

Blender is getting more powerful by the day, and to improve the Blender to Unreal Engine workflow we're developing a "Send to Unreal" add-on for Blender. Epi...
I cannot get my metahuman's head to re-attach to the body, after using the new retargeter in 5.4. Anyone else with this issue ? I have tried using curves, sockets, and all my old tricks but no luck
Have you used the Copy Pose from Mesh node in the ABP? I think this is typically used across metahuman and fortnite for modular characters
@viscid willow ah! That is a great idea, I will let you know if it works
@bleak egret Can I ask, which version of Blender and the Engine are you using?
This is kind of ablender question but it pertains to Ue5 so asking it here lol. What would be the best way to make an animation in blender for the ue5 skeleton? Should I just import it and create a rig for it in there or what? Should I just animate in engine? (doesnt feel as nice as animating in blender to me)
A single animation? Probably in the engine.
If you're making a whole game - probably make your own skeleton.
If you're, for some reason, using the unreal skeleton and making a whole game, choose whatever is most comfortable. You have thousands of hours of work ahead of you, do anything you can to make that easier.
this ☝️ and if you're gonna go with the ue5 skeleton, be meticulous about getting the settings correct for a clean export/import
Hi; I have a setup where a single C++ class (character) has logic to determine a point in space. I then have two separate BP characters implemented from that parent class. These children have different skeletal mesh (same bone names!), different AnimBP, and different control rigs. The AnimBP and control rig are basically copies of each other, designed to do aim at logic.
For one child character, this works perfectly fine. The lower right arm points as intended. For the other child character, it doesn't work at all. The arm points to a strange offset.
Does anyone have any idea why that might be happening? Is it my blender skeleton? A bug?
I guess thats a good point, if I am makingm y own animations I dont need to use the ue5 skeleton anyway. thanks guys. gonna do more research, cause I have heard that not using the ue5 skeleton is like shootin yourself in the foot
The ue5 skeleton is handy because it's gonna be pretty compatible with any marketplace content, but then again retargeting is your friend and can help solve any compatibility issues. So a custom skeleton is just as valid IMO, particularly because the engine is so flexible about how you animate characters.
How are you calculating the point in space?
Do you have a debug option for showing the point position?
The first thing you need to confirm is whether the point is correct and the IK is bad, or if the point is bad, and the IK is working.
I found out it must be in my skeletal mesh data coming from blender. I tested it with some third party skeletal setups and they all worked
@nimble torrent
Ah! Good old Blender Import Problems!
Good times!
(did you check the scale on the root bone? that's often a source of trouble)
I'll check that out too
Man I wasted so much time looking for an error that was just that single blender export mesh lol
anyone work with als refactored here?
in my project , the als character blueprint has the play montage function
but my ono character, which is inherited from als character only has play animation


What do you mean by 'only has'? Do you mean that it has one in the graph, or do you mean that you cannot call 'Play Montage' in your child BP?
i cannot play montage
like It doesnt even contain the blueprint
which seems to be a latent blueprint in the main character bp btw
did that answer the question?
Not really. When you say 'I cannot play montage' there's a bunch of different things that might mean:
- You use the play montage node, but the montage does not play in the animation blueprint.
- A blueprint you bought / acquired / downloaded does not have the montage node in it's graph.
- You cannot add a montage node to a blueprint.
- Some combination of the above.
I cannot add it, when i search its not there
Play Montage is an async node, Play Animation is not
That's interesting! I didn't know that.
also its play montage not play anim montag btw
Async nodes can only be called from the Event Graph
ah i see
that was it!!!!!!!!!!
thank you so much guys 😄
Awesome
Nice job iVcente!
No problem, man. I already had my own time wondering the same thing for hours 😅
lol yeah ngl been at it all day
Prob not the best place to ask but does any one know how to export a metahuman face skeletal mesh from unreal into maya?
I've asked the metahuman channel but got no response.
I know there is a plugin for maya that lets you import from quixel bridge to maya but that process is too complex and the result is hard to edit if you wanna do edits your metahuman.
I was able to find a nice tutorial for editing the body and I'm looking to see if there's something similar for the face:

I recently had to delete some faces on a MetaHuman body and bring that skeletal mesh back into Unreal. Along the way I ran into some issues and thought I would share the solutions.
Hi, is it possible to show or update an animation blueprint in the level editor viewport? Like let's say I have a few characters/skeletal meshes, one is set to a Sitting state, in gameplay the Animation Blueprint will change its state to sitting. But I have no way to accurately place the character sitting down in the level when they're in their default standing pose
If not, what's a good workflow for this then? Changing the skeletal mesh's source to be anim asset when placing, then swapping it back to the anim blueprint?
ok i figured out how to kinda jank it by sitting the animation mode in construct to be anim asset and then using Override Animation Data to just set preview poses depending, then on beginplay setting it back to animbp. it's ok for now.
Hello, does anyone know what is that sphere around the bone? Is it something I need to downscale in Blender?
https://cdn.discordapp.com/attachments/846520322642411570/1237928411326976120/image.png?ex=663d6e2c&is=663c1cac&hm=319a5b18d955aa6b80dd355a2c30a51cfa1f1082bf1b5d6e5e99a529f4720ccf&

Looks like the bone scale is something other than 1,1,1?
Or possible conversion error blender to ue units?
Yeah this ☝️ sorry to say that sphere is the bone, but it's very big
How can I fix it? I Blender there is nothing like that sphere

The bone you have selected, is that the root bone?
You mean in here?
Because on this screenshot I selected the whole model