#animation
1 messages · Page 18 of 1
Experiment, look through the documents, look through the forum, and watch some more videos. You'll get it
Yeah the IK Retargeter doesn't give us enough control over the Pelvis
it's an issue I'm constantly having trouble with
am i supposed to make my own IK retargetter for the mannequin or use the default one that comes already in UE
If the Skeletons match I would use the one they made
You can swap the skeletons out on them
yea they 100% match only the proportions and scale is smaller
Any good resources on quadrupedcontrol rig ik footing?
I'm a fan of this tutorial: https://youtu.be/mrXs8xLAr3k

How to make quadruped (4 legs) IK in UE4 using Control Rig and FBIK plugin.
Prev parts: https://youtu.be/jfYZymr1svs and https://youtu.be/GTOs4XwzcME
AnimBP for the Wolf: https://inugames.artstation.com/store/kzbB/
I tried that one but didn't seem to work, or could not follow set by step. I am trying to do this in ue5, so I think the control rig is different. have you had luck doing this in UE5? maybe I am doing something wrong. On the first step where you set of the key items the for each does not accept my rig element key variable.
There's likely some differences for UE5. I'll dig a bit.
When retargeting my character's skeleton I made in Blender to the UE5 mannequin, I get this issue where the mesh's proportions shrink but the skeleton itself moving looks correct. This only happens when previewing an animation that the UE5 mannequin uses.


Either your Bone Orientation is incorrect between them, Your Bone Heirarchy was changed for the purpose of animating on a control rig in blender, or your reference poses don't match.
I've seen it before and I'm pretty sure it's one of those.
I would import the animation with the character rather then importing it onto that one...open both up and compare both Heirarchy, Reference Pose, and Bone Orientation
Those are the 3 things that are Essential to maintaining compatibility.
If any of those are different the animation will not come over onto that skeleton properly
It's common place for people making animations for a skeleton to re-order the hierarchy of the skeleton for the sake of simplicity animating. I've personally dealt with animators doing this and it's very aggravating when you get the animation and it's incompatible.
btw 800k+ is pretty dense for a character mesh lol
I've seen Photogrammetry models with simpler topology
If I had to guess @hard acorn I would assume that you re-parented some things on your skeleton while animating
That will automatically render the animation incompatible
You'll probably have to retarget the animation back to the original skeleton.
for animating in place. If a character is doing a jump
Should I ever move the rootbone?
Never get a clear awnser on this
Fun thing about Jumps, yes you will want to animate in place and not move the root bone because you don't want root motion to influence your programmatic jump. You also don't want to animate the character leaving the root/capsule behind. So a way you can approach this is to record your Gameplay Jump and animate to that capsule motion, and when it comes time to export you counter that Gameplay Jump motion using an animation layer to export your in place animation. This way you have an accurate representation of how your jump moves in game but you can also export the correct in place animation.
Ofcourse you will also want to split the jump into the relevant sections, start, loop, end for variable jump heights etc.
Thankyou for the writeup.
Your explanation went really in depth. It's hard to find info on this, just making assumptions.
howdy would yall be able to explain why the right hand, although set up like the left isnt in the same position? both are translated forward and the Ik works on only the left

I'm not sure there's any reason why this shouldnt work in UE5. What do you mean by Rig Element variable?
whats the fastest way to edit an animation to make it look like its holding a gun?
blend an animation of holding a gun onto the bones you want, im not an expert id give you the steps if i could but if you have a blendspace for run and jump blend the holding gun animation onto it.
@astral roost it sounds weird but dont put the holding gun animation in the blendspace itself
is there a better way to get the default character into t-pose
ill give it ago now, just had to get hold of better 8 point movements as mine limited, now gotta make those 8 points hold a gun, can i just drop the holding gun in and move it aorund the grpah yeha
see a video on control rigs but it seams like a chore
settings it as your reference pose should work let me load up and see if i can find how I thought I saw it a bit ago @willow fern
you shouldnt need the control rig if your animating outside @astral roost unless you want to do things like ik for climbing
I would suggest similar to what Almusfallow suggested, building your hold pose as a separate arm/upperbody animation that you can layer onto your character is very much a recommended approach because otherwise you would be building a locomotion set for each item you want the character to hold in your game.
okay
@willow fern are you using a control rig?
are you doing anything with arrays? It looks as if something is not assigned quite right, and in my experience is usually because of a rogue array element
so made a copy of the pose i like the top of to put on the legs
Thats exactly where my minds is at but I cant seem to find where. @viscid willow
these anim sucks xD


you would want to layer it in the anim graph with a layered blend per bone node
that's frustrating, have you tried printing your array elements to debug what's in there?
I have not ill give that a go
@willow fern are you trying to reset the base pose when importing? youd be able to do that by =this i think
https://mocaponline.com/blogs/mocap-news/a-pose-or-t-pose-conversion-ue4-retarget-manager but with your own assets

MoCap Online
“A” POSE OR “T” POSE - THE UE4 RETARGET MANAGER Some of our older current packs come with a default original Epic “T” pose for the humanoid “Retarget Manager”. This is different from the newer “A” pose from Epic. Since when they were created many users asked if we could provide a “T” that they were already using, we
couldnt find what I was looking for so I looked it up
this will work for ue5?

well i fixed him walking fowards and back, but now when i walk he enters the run anim
not sure why, i got walking speed set to 300 run at 600
soon as i press w it enters the run anim instead of the walk anim
Anyone notice the root is messed up after re-targeted from ue4 skel to the new metahuman skeleton? most all the anims re-targeted fine however some he floats, I can plant the character down by adding a -6 in Z key in the anim sequence themselve but it still floats like its on water on surfaces up and down up and down. and thats not how they were in ue4 or prior to re-targeting
@viscid willow how would you print to screen from control rig? doesnt seem to be the same type of print
@astral roost whats your initial value?
for what?
speed
walk speed 300, run 900

2 things happening, when i press w (foward) from idle it goes straight into run anim then when i press left shift it just runs faster, instead of going from idle, to walk then shift to run

yeah tbh the debug print is a bit weird and only seems to be available in the control rig viewport
oh also try debug printing your stuff as well @astral roost print the speed when pressed and when not
right @viscid willow i guess ill have to look up how I think I saw you can get a list in a tab but idk so many tuts i get lost
howed i do that
right click and type print screen

string lol
the colors wont match but it should fix that for you
Thank you for the response! I'll definitely take a look at what you've suggested, I'm new to this so I've been running into constant problems such as the 800k triangles lol
@hard acorn the red boys 800k?
yeah, I clearly did something wrong at some point lol
if u need help decreasing it ill be on tomorrow earlier. ill probably sit in the support and feedback vc trying to fix my control rig and hoping a professional drifts by like an angel
@hard acorn
Thanks! For this issue I'll take a look at it myself, this character was put together poorly. I plan on redoing it later
np lmk you know where to find me lol
Seems to have happened after recent patch character floating off the ground
Doesn't happen with normal skeletons, only the new skeleton lol.
before anyone says globally scaled retargeting oh yes it is. As its not all anims lol. and my root motion works.
retargeting is busted even T posing or A posing legacy skeleton then T or A posing a meta human, stuffs all outta whack, so you gotta manually fix it. But at issue i doubt has anything to do with this. if i physically move my root down and apply that curve, it will sit on the ground but float.
This is what its supposed to do,
Not super into hacking it up and just setting the root down with a curve or re-importing with altered Z translation either because i feel like thats not even the heart of the issue when more than half my anims don't have this issue, and they never had this problem before the new skeleton
Yeah but ue4 to metahuman even in Zero'd out Tposes is still borked the hands go nuts and we have issues like my video above. It's a damn mess. In 5.0 with the original ue5 skeleton that the metahuman was originally using none of this was an issue
Then they had to go an add a crap ton more bones making them cost more performance to use etc and you can rarely get a clean re-target off from anims made with a simple skeleton
That slack in the pelvis you mentioned is interesting though I usually don't globally scale my pelvis when retargeting but may do that and see if it brings it down on effected anims, what's weird is it doesn't do it on all of em

can someone tell me how i get this yellow line?
https://photos.app.goo.gl/MUbViE8KHjU8Pe4D8
here i dont have it:
https://photos.app.goo.gl/9hQKEdvjsKVCnvy28
it hase something to do with attributes but i can't finde anything

Google Photos

Google Photos
hello guys iam faceing this issue where my metahuman head is detached iam useing actor core animation with livelink face motion if anyone know how to fit it it will be really helpful

@half onyx attaching it to a socket and copying its values.

Epic Developer Community Forums
You need to create your socket in the player skeletal mesh by right-clicking the bone you want the mesh (palm usually works best) to attach too, then to be able to align the weapon (or any mesh) find the socket in the list (under the bone you selected) and right-click the socket and select “Add Preview Asset” and select the weapon mesh. You wil...
as I answered to someone else. make your walk run and jump in a blendspace then blend an external animation on top for posing with the weapon
im not an expert on maya but I would assume as long as you pose the guns on the asset and the socket is following it should look the same. maybe im not following. but you can edit the guns position along the socket per model or even do as you said and align a socket on the gun itself.
if the socket is in the hand as long as you pose the gun relative to the animation it should follow based on that
Generally with props you would want the model/rig to have it's origin at a point of contact which would make sense for a character to hold it. So in the case of a gun the grip should be the origin, and something like a mug the handle would be the origin. But it gets a little tricky because it's feasible that a simple prop like a mug may also be used frequently in set dressing so it would then be more beneficial to have the origin at the base of the prop.
So taking some time to evaluate your pivots/sockets for props is worthwhile.
Does it need to be the skeletal mesh that is dropped on the ground? One solution could be that dropped assets are not the same as the held assets and can be static mesh versions of your animated skeletal meshes, I would think that would be somewhat easier in terms of collision. That version could have a more centered origin.
Failing that you could have your beacon emit from a socket like you mentioned, and I would assume you'd need to be configuring hit boxes per asset so if it requires an offset from a non-centered origin like you mentioned then that just might be part of the initial set up for the asset.
It becomes a lot to track but if you can keep the assets organised then I agree there are a lot of pros, and the static mesh can always be centered at the origin before rigging so if you want to get the static mesh version in your maya scene you could unbind the skinning and have your static mesh again. I would also suggest, for each weapon, ensuring the skel mesh and static mesh end up in the same folder in your UE project so they're easy to find.
Did you ever figure this out?
Yeah It's just something I discovered when trying to retarget a larger animal to a smaller animal. It took a lot of experimenting to get things to look and work properly and even then the animations still needed some modification afterwards
Yeah, I mean it's cool what they are trying to do with the retarget tool but they should really consider making an Ai based model for handling that.
I think an Ai model would be much better at retargeting, but idk maybe it would be a difficult task even for an Ai model
When importing a skeletal mesh to unreal, everything imports fine, except for the animations which are seemingly completely ignored. Anyone have any idea why?
I did, yeah. In my case, I was trying to drive the blend alpha for the montage using an anim curve in the montage itself. The problem was that the anim curve value gets affected by the blend alpha the same way the pose does, and it's a snowball effect where if the montage keeps playing back to back then the value read from the anim curve keeps dropping. If it sounds like a similar issue you're having, I did find a solution for it. Involves a little cpp
Thanks for the reply 🙂 actually I finally got it in my end. Some anims I'd made added the curve by default so their curve values were overriding the ones I wanted. All sorted.
I have simple blendspace for enemy ai animation. There is ilde/walk/run depending on speed axis value. But I want to make that ai have multiple idle animations for variation. How do that?
You could do it with a state machine inside of a state machine. In your idle state, put another state machine that handles the variations
I'm using lyra locomotion, but I don't know how to make the feet follow the top animation so it looks like it's skiing. Halp¿¿¿
Total noob question. Going thru Jobutsu's excellent tutorial on retargeting the IKRig to use with Mixamo animations.
I have the IKRig open and going thru the process of selecting bones in Hierarchy and creating new 'Retarget Chains'.
But I don't fully understand what is happening.
Could someone explain, in layman terms, exactly why the retargeting process is necessary and what is being accomplished?
Am I correct in interpreting 'Rig' as a mapping between 2 different skeleton or bone systems?
You have two skeletons, ones hierarchy starts with names (for example) B_Root, B_Spline1, B_Spline2 etc. Skeleton nr. 2 have bones hierarchy starting like Root, Spline_01, Spline_02. Animation is an information of transform changes of every bone every frame, so one animation would work for one skeleton but not for the other because ther names or overall hierarchy is doesn't match each other; Retargeting is just setting up information where bone from one skeleton is in the other, so animation knows with bone to move in different skeleton.
Did you look at my videos I clipped and posted? You ever see that floating? It's not like back in 4.xx where it would just hover it literally bobs up and down. I've disabled my IK rig too to see if that has anything to do with it but no changes. Adjusting root translation will get it on the floor but it still bobs up and down. In all previews it doesn't bob up n down the feet are planted as they should be
When I get home I may try swapping my retargeted root to pelvis on an affected anim see what happens
It's hard to say, are you sure it's not the foot IK pulling at it or that maybe for some reason your root bone is actually the thing moving up and down?
It can be difficult solving issues with large differences in Anatomy during the Retargeting process.
I hate to say it but retargeting is much easier with CC4 and iClone8
It's actually rather good at it
Worth doing a trial of the software
I think they give you a 30 day trial
I'll force a root lock on an anim and check. I feel like its, but if I alter root translation and then root lock it pops back up above ground lol
Ue4 to metahuman is honestly a ton of work.
if you enable root motion or force root lock and it moves down then it's the root if it doesn't then it's the pelvis
you can also select the bone in the hierarchy and just look under details.
There is a bug though where sometimes it locks up and gets stuck on a value and won't update again until you close it and re-open the animation
Yeah it does that when you manually enter transforms in the retargeter to making poses
Then the value will never update again
The last time I tried the UE4 To UE5 template retargeter I had no issues with it what so ever....even on root motion animations that the older one in 5.0 struggled with
When I position right hand with IK and then try to run montage hand is always trying to go position of anim montage. How can I run montage when keep ik positining
split them up using a mask is one way
In 5.0 it was beauty its going from ue4 skel to the new skel . Transforms outta what even zero'd out T poses don't match lol In 5.1
Mainly in the hands though
What is masking, is it a node?
Fingers have been a problem since it's official launch though
Layered Blend Per Bone
the masks you create on the Skeletal Mesh
My montage animation using hand_r and my ik also on hand_r
can I still use?
It's worse now xD
If you still want the animation data for the hand then you need to make sure your setting the IK after the Montage
in that case the Slot should be positioned before the Two-Bone IK
I have a work around anyways, I'll try what you've suggested I really don't wanna alter root translation that seems like a bandaid for the actual problem
We'll that's news to me because I've not encountered any issues with it and that's without changing any of the settings. I don't use it religiously though, I often take my animations outside of Unreal to Retarget and modify them.
I prefer to use iClone to Retarget them and then I'll fix any issues in there before exporting them.
Well the fingers smashed up n a piano look is gone, but they do have transform issues making 1-1 retargeting difficult I believe it's confirmed as a bug already though
I wouldn't doubt it UE5 is still chalk full of bugs
If a game was released in such a state it would be an outrage
Full steam ahead though the new tech is amazing, just gotta problem solve new features I suppose
Annoying spending several days chasing one small issue at times though.
yeah
I've spent just as much time trying to solve logic that was directly related to UE5 bugs then I have actually spent doing anything in UE5 since it was released
But most of the bad ones are gone now
In 5.2 I think it will become more of an annoyance and less of an obstacle.
It could very well be IK but with my traces disabled issue persists. Off that it only effects about 80% of my anims and not others. Leads me to think it happened during the retarget process. All the root motion works perfect etc fixed the poses then I just retargeted in bulk
Disconnect IK
it should be as simple as that to rule that out or not
I did it was the first thing I did went into anim BP and disconnected my linked anim graph that hosts it
I didn't notice any IK goal issues in the retargeter either limb stretching etc
If in doubt just start disconnecting logic one by one, or better yet just drag that animation out into the scene and simulate it
If it's the animation it will show up on the raw animation
if not it's logic related
Ye it's the animations
Ok in that case simply open up the animation and pause it....select the root and scrub to it to the time at which it messes up
if the root doesn't reflect the issue select the Pelvis
scrub through some more
the X, Y, Z of the bone will show the issue
That's about as much as I can help you
You may just need to modify the animation
it's not as difficult as you might think
It should be my state machine is very simple, it's permanently up on off the ground, and shows that the root is 0 xD except it's really translated weird and up about 6.3 units
especially since UE5 manny already has an advanced control rig for doing this
Are you sure your character in the Char BP isn't simply hovering up off the bottom of the Capsule?
Yup cause other anims don't have the issue
I checked capsule but I can check it against an anim that floats
I'm going to take the rest of the day off, this is the first time in nearly a month I've had a couple of hours to myself
I'll double check but feet were in line with the bottom of the capsule
Yeah no worries you've given me some ideas of some things to check in relation to the pelvis, which I appreciate
Well if nothing I've suggested is the problem then I literally can't help you because the only 3 things I know that would cause floating is
1: The Pelvis is too high up during the animation
2: The Root has a Z offset
3: The Skeletal Mesh isn't set right in the Char BP
It's either one or 2
Then you'll need to either modify your IK Retargeter settings, or you'll need to modify the animation
It's that weird bobbing up and down lol it's like the feet don't actually ever plant
Even if I pull the root down with a key
If the ground is too far away Fook IK won't help
It's like trying to place your foot on the ground below a cliff while standing on the cliff....if your leg isn't long enough it won't reach
Or reimport with different root translation which is the same fix without the key in the sequence
Not if it's not the root
if it's the Pelvis it won't have any effect
In fact it might just mean your character goes below the ground instead of hovering off it
So if I'm moving the root down to get it to look right and it's really the pelvis has the issue then it'll Bob up n down anyways
Another retargeting question. Does it matter if the pose of your source and target rigs don't match exactly before performing a Retarget using IKRetargeter? Including the fingers?
All you'll do is offset the problem
causing a different issue altogether
Yeah
You want the poses perfect to get clean retargeting
it will effect the translation of the bones
a 90 degree rotation on one will be translated as a 90 degree rotation on the other....which is why you want them both to start from the same location
Unreal doesn't use any Intelligent Ai algorithms...it's basic math
that's 1+1 = 2 is basically what drives Animation in Unreal
But may need to mess with fingers if they end up with weird offset cause of the current bug, but it depends on what skel to what skel, if it's the old simple skel to the metahuman you'll have to pay extra attention
Alright well that's it for me for the day, I'm out
Thanks man take care I'll let you know if the pelvis was the culprit all along
Also before you pull your hair out you'll notice that the fingers will all be offset in one direction at first just by copying a pose, then when you T pose and zero out the metahumans hands they are now in a different direction than the ue4 manny, so you basically gotta correct it cause even though their transforms are zero it'll still be off. You'll see what I mean if that's what your doing anyways
The good news is you only need to match the poses once haha
Hey, is there a alternative IK retarget pose or IK Rig that I could use to get better results for ue4->ue5 mannequin retargeting?
One more retargeting issue. Just the shoulders on my target UE5 IK rig are drooping. Only seems to affect some animations. Unable to solve so far...
Thanks!
Read above johnconnor mentioned retargeting in external software
@crystal imp yeah its the pelvis in these anims, Im not sure how i didn't notice the legs stretching downwards looking for ground disabling the Control rig node, i guess all i was looking for was to see if floating went away. So now the mission to lower the pelvis during retargeting.
Yeah the problem is I'm not sure you can, I believe at one point I was able to get decent results if I set Root as Root and Pelvis to Globally Scaled but that was for retargeting between a Wolf and a Raccoon
Pelvis is still my retargeted root when doing this or no?
I'll have to add a pelvis to my IKrigs for retargeting. I've never had to put it as a chain before. What I don't get is on the ue4 skel, the anims are fine everything works perfectly, it's the anims from Frank climax that are having pelvis issues
Smells like a bug to me
I tried lowering the pelvis with a key in the anim does nothing lol.
It's almost like it doesn't detect the ground plain and floats up and down with ik on or off
But doesn't end up in a perpetual falling state either
Retargeting options for the pelvis bone was set to animation scaled too
@crystal imp guess I'll look into cc4 and iclone import the skels in with the anims I wanna retarget and pray for the best lol. Massive PITA
My other options is throw the new skeleton in the trash can and re-rig 35 sets of armor to the ue4 skeleton. Shame on us for using their new stuff to develop the game with lol
Cause we don't have these issues with ue4 skel none what do ever. Only reason we switched is all the armor is made for meta humans and we wanted to use them as a base character to build off of.
@crystal imp adding the pelvis, as a chain the globally scaling it fixes the issue, aslong as its left as the the retargeted root and as animation scaled in the retargeting settings on the skeleton, Only thing is re-targeting borks my Virtual bones i use for IK ill just delete them and put them back on
Well, Fix one problem create another, My virtual bones wont go where they need to now for some reason xD
easy fix though they need a chain now
Edit** must have virtual bones deleted when retargeting then put them back on after retargeting so they work correctly if using them for IK on metahumans
Alright so my Foot trace IK has an issue aswell, So this was a combination of two issues, Not having pelvis globally scaled. And now i gotta figure out why my simple foot IK is making the character float up and down.
twas false hope, Still having pelvis too high issues
The Virtual Bone bug has been there since Beta....they are aware of it's existence and either haven't found a way to solve it or they just don't care....simply exporting the animation and Re-importing it fixes the Virtual Bones
trying some different retargeting settings, If i dont use my control rig, everything is good,
If i use my control rig in the anim BP it floats up and down
I was the one that figured that out and made a video on it some time after the Official release
Don't know what to tell you, your probably not constraining your IK Bones
that's not a bug
if it's your IK bones you have to re-constrain them
ye its pulling the legs down slightly, even though its on the ground
Ironically Unreal doesn't support IK Bone Constraints even though it's such a staple of game development that their new Pose Warping features require it......
It's about the Stupidest thing ever
and makes absolutely no sense
especially since people have made Plugins to do it for you
i check it against their IK stuff, and ue4 ik doesnt bother it lol. So it seems like im running circles here.
No, I'm 70% sure that it's IK bones
only about 3% of game developers even know what they are....much less how they work
It's quite simple actually....your supposed to lock them to your feet and hands during the animation process
when additives offset your feet or hands the IK bones are normally left untouched....giving you a reference for where they should be
i feel like its cause the meta human is smaller than the ue4 skel too, bone structure wise lol. so intering to retarget dunno man, tryna figure it out. I dont even know how to go about constraining them, It seems like they are locked to the hands and feet, The virtual bones are made based off Root/Foot_l/Foot_R
since the new skelly doesnt have IK bones lol
had to use VR bones
If your trying to use MetaHumans....they removed the IK bones from them
don't ask me why but it was obviously intentional
ye its a metahuman with VR bones for IK lol
That method has issues as far as I'm aware
oh their documentation is like oh yeah Virtual bones great stuff can be used for IK, Whilst yes it works cause it needs something to trace against
We get the ol bobbing in water effects
Starting to feel like taking a month to just re-rig and leave meta humans alone is by far a better solution
yeah can't help you there but Foot IK systems normally require IK bones
like it works, It just bobs up n down
Ill see if anyone has wrote anything about this. cause other than that, your suggestions did fix it, its just the foot IK stuff has issues
xD i hope they read this stuff too lol
keep others from spending 20-30 hours
on what should be a relatively simple process
I've never heard of someone simply using virtual bones for foot Ik, so Idk. Honestly virtual bones have been around for a while so the fact that it's not common practice to do that should say something
Run it in slomo
type Slomo .1
into the command console and see what it's doing
if it looks like the feet are sticking then it may be likely that you need to use a different approach
Are you using the BasicIK control rig with the Template?
its tugging the legs down a bit, gets the character on the ground plane in the preview port, and bobs up n down turn it off, anim looks proper, and with pelvis globally scaled and adjusting my mesh in the capsule slightly it all sits perfect
its like pushing my pelvis up
yeah same method, as their basic foot trace just not the template but exactly the same, only difference is the VR bones
no control rig for basic foot IK


weird lol
You know inside of the Control Rig you can make bones right?
the problem I'm seeing is that for things to work properly in Control Rig the starting positions need to match.
where your left foot starts is where that virtual bone should reside
if it doesn't share the exact position and rotation of the left foot then it won't work properly
same with IK bones

i had pelvis to skeleton in RTG settings, was borking it a bit, but thats what it looks like inside the control rig
you have to export them and Re-import from new source to fix them
Ye i deleted the bones and added em again
it won't fix it
re-launching the editor will break them again last time I checked
it's an engine bug that is related to cached animation data
the only way I know to actually fix it is to remove cached animation data linking it to the original animation
and the only way I know to do that is to export it.....and re-import from new source

yeah it will....but as soon as you re-launch the engine it will break them again
trust me I struggled with that for 2 months non-stop before I figured out it was as simple as re-importing them
Well, doing 600 anims that i do use will take a bit, lol we have alot of different weapon types all with their own move sets,
Think i should ditch VR bones and add bones? in the control rig?
That's what's so bad about that bug....simply restarting the engine will break it again....and if you don't know this then you will be confused
that makes sense lol
there is a total of 2.8k anims but alot can be removed i just leave them there as its still pretty active and stuff is changing here and there.
Nothing more confusing and frustrating then fixing it...restarting it the next day....only to find things are broken again
Yeah idk, you can try the bone method I suppose
wish they left IK bones on there, but hey we got metacarpals that do nothing
mocap doesnt even use em for most mocap suits and gloves lol
just copy and paste the bone transforms to them from the feet
All those extra bones help keep the shape of the mesh during deformation
if weighted properly i suppose,
the UE5 Skeleton is actually superior to normal skeletons because it allows poses that would normally cause serious issues on other skeletons
It does make it significantly more difficult to work with
but those corrective bones aren't supposed to be keyframed during animation
just there for the skin weights i imagine for the rigging process.
yeah
i dont notice much of a difference, however we dont have any serious mocap or anything
also they have some kind of Pose tool that uses them I believe
they were on my hit list for the skel mesh lods for bone reduction if they were going to hurt performance actually xD
I don't believe they do
I think they only effect performance if there are keyed frames for them on your animations
thats not too bad, i don't use the head rig anyways, only NPC
Well I'm going home
Thanks for the insights, Ill try a different method for foot IK hopefully it all gets resolved
yeah, the IK bone method is the only one I ever use really. I've never had a serious need to try any other method so Idk what a good alternative solution would be other then maybe make versions of the skeletons with the actual bones on them...but even then you need to constrain them for all the animations....so idk man...anyway I'm out
@crystal imp wew its fixed! actually this time. All i had to do was re-fresh the Control rig after a fresh re-start of the engine. I really really appreciate you sharing your trouble shooting knowledge.

Hi guys, Its been 3 days now that I try to retarget the default Quinn animation to the 'Erika Archer' from Mixamo but still having issues.
I copied the entire anim blueprint from the ThirdPerson template, I created an IKRig for Erika, added Full Body IK, then I created an IKRetargeter to retarget animations from Quinn/Manny to this mixamo chracter and be able to use as the default player char. But for some reason, the animation MM_Land that I export from my Retargeter is incorrect, in fact my character is facing down, I watch like almost 10h of different videos, tried everything that I could, tried to add a Root bone form blender to the Mixamo char, tried using some plugin with Blender to add the root bone as well and I skip the rest.., Really if someone could help me that would be really appreciated, I would really like to fully understand this process, and understand where my problem comes from.. Thanks!
Did you configure the pose in the retargeter to be more of a t pose?
@old basin that sounds like the animation isnt playin out long enough when its called. say u press button it gives you 5 seconds when the whole anim is 30.
any screenshots are helpful
Hi, I'm just trying to catch up on the conversation you had today. Is the issue that you needed to run IK on your character's legs, but you didn't have IK bones built into the skeleton, so the solution then became to make virtual bones for the Leg IK and run it that way? Is that correct?
I'm very curious what the issue was and how it was fixed 😅
that sounds interesting, @viscid willow thank you for your help before, i figured it out
In a nut shell, ue4 skeleton to metahuman skeleton, needs pelvis as animation scaled in retarget options should be widely known, then retarget chains for the pelvis must be added (something epic leaves out). Then set the pelvis to globally scaled like you would the root in the IK retargeter. Once your done retargeting you can add Virtual bones to use as IK bones. Here is where another issue arises, even in the IK rig it'll show those new bones, and it does technically work however you must refresh the skeletal hierachy after adding the bones then it will sit perfectly on the ground and not send the IK trace outta whack like it was doing without refreshing the hierarchy, I was under the impression since preview has shown me the bones and they appeared to be following their transforms correctly it was all good. Boy was I wrong, it had a translation issue. And as for the pelvis being the cause of floating way above the ground johnconnor had mentioned the pelvis being an issue, after attempting to force the pelvis down, I just globally scaled it along with the root in the IK retargeter and all is well in the universe now.
fantastic! glad to help 🦇
In regards to pelvis being animation scaled I had that set like that before hand but I did try anything and everything lol but the core of the problem is explained lol
If you don't refresh the rig hierarchy it'll just Bob up and down and act like the pelvis shot up and keep trying to pull the legs down even if it's through the floor.
Haha so it was 2 things creating my problem. No pelvis chain mapping set to globally scaled and a non refreshed control rig. The pelvis is interesting though that never bothered the ue4 manny but I suppose since the two skeletons are very different it needed some extra help
Translation issue or transform who knows, all I can really say is the sequences and preview lied haha. So I didn't even think to refresh the rig, whole problem was likely my fault anyways.
thanks for explaining, it's always handy to know the quirks, you never know what might come up.
I probably won't be the only one who will run into this scenario with people shifting into the new skeleton, needing to get IK going, and if it wasn't for johnconnor mentioning the pelvis I wouldnt have even created a chain mapping for it since I was under the impression it was fine as being set to the retargeted root. I also left it as the retargeted root too just added the chain mapping and globally scaled it
Hi!, anyone knows why my animation is moving like that?, I take it from mixamo
How to simulate animation ?
Its a rootmotion animation
I did but as A-pose, since the Manequinn was in that position
Does anyone has already implemented the manequinn animation to a mixamo character and use it as the default player character? If so please tell, so we could make a call
Hello guys! I am trying to export this animation sequence which I recorded in vr as an fbx file. But the exported fbx does not contain any animations

what am I doing wrong?
I am subdividing this in blender so as to import it in ue4 to use it as a road for splines. But changes are not appearing. Can someone please help?

Solved this problem. TY all 🙂
Does anyone knows why the Landing animation looks weird (note that I hold W key while jumping and landing) ?? I can't figure out
Glad you figured it out.
It's likely the case that you either don't have a landing animation setup, or it's not firing, or for some reason it's blending out of it too soon after it starts.
I Do have a Landing animation, I can see it while debugging the ABP. Could it be related to incorrect bone settings for the full body IK for Left leg and Right leg in IKRig ?
It's possible that you could be turning IK back on too soon or your not turning it off during jumps to begin with. That wouldn't be the first thing I checked though
I wish Animation Debugging was more like Behavior Tree Debugging where you can step forward and back.
or just having the ability to step through it at all would be a big help
Weird, cause I literraly copied the entire ABP from Third person char, just replaced with my own retargeted animations
Yeah but copying and pasting doesn't carry default values
Sure, But I went through all nodes, states, transitions etc and copied carefully all settings
If there were any default values that were important you would need to re-copy those onto the variables
It's easy to overlook stuff on transitional rules
3 days man, trust me, they are copied correctly (hopefully haha)
Well I offered some suggestions, I can't tell why your landing isn't correct it could be due to a number of factors, try disconnecting the Control Rig to see if it still does it.
Using metahumans, how do I go about fixing this hunched animation form on the right? The construction script inside the character is copying the pose from the base skel mesh and for some reason it's hunching over. Everything is to large or long. HElp!


All my other animations work great. I'm just starting to use the Advanced Locomotion System and want to put my metahuman as the player character. Do I really need to retarget everything or is there a simple fix

What is is called when the foot movement looks real. I mean when left and right foot turn with the proper foot and start with the right one as well. And how do I make a system that does that?
The tutorial does not show him adding each node and making the system. It shows the end product and he goes over it and explains what is happening. I tried to look at the nodes he is using and recreate it. Now i could be using the wrong nodes but i dont see any other options. rig element variable is used at the first section when he is assigning tmp bones with their real bone counterparts with the "for each". I am surprised there is no ue5 Quadruped ik resources out there.
Right, did you happen to watch his other tutorials for Biped IK? Because that is explained pretty much node by node and this is the same setup in practice, only now there are four legs. Looping through the four legs can certainly be done in the way that is done there, the nodes are a little different for item collections now
hmm didn't know there was another tutorial. I will check that out thanks for the info. still not 100% if that would translate to ue5, but worth a shot. Wonder if building it in ue4 and migrating to ue5 would work? I am still new to control rig.
It would probably be more beneficial to build in ue5 by translating the nodes, i'm just thinking compatibility might be an issue. For example the "Items" node is now called "Collection from Items" in ue5.
To me it's not surprising at all that quadruped animation resources are scarce, quadrupeds are hard and most people don't tackle them for that reason 😅
There are a couple of neat little rig ideas I found a while ago here:
https://fxtwitter.com/piotrekb89/status/1371503167658205184?s=20
https://fxtwitter.com/piotrekb89/status/1371256851929698309?s=20


Orientation warping for quadruped with @UnrealEngine
control rig. #UE4 #UnrealEngine #gamedev #gamedevelopment #indiedev #MadeWithUnreal #Procedural #ProceduralAnimation #animation #controlrig #UE4Study #anim
Control Rig BP in comment.
Speed warping for quadruped with @UnrealEngine control rig. #UE4 #UnrealEngine #gamedev #gamedevelopment #indiedev #MadeWithUnreal #Procedural #ProceduralAnimation #animation #controlrig #UE4Study #anim
thanks, i will update you in the future how my adventure goes. 😄
Hello, how are you? I wanna share a frelance job post for short animation video. How can I do that?
Hi guys
I see that I can set slot only in Animation Montages. And that one slot will be set for all animations in that montage sections.
Can I set on one slot for the first animation and other slot for the second animation in the Anim Montage?
you can have different animations in different slots in a montage, but montage sections are across all slots, this is likely for timing reasons. e.g.

I have upperbody animation in first slot, full body animation in second slot
How do I switch to second slot after first animation ends playing?
Anim notify I guess?
possibly, I would think it would be easier to play one montage then another in this case since the idea of having to sequences in one montage would mostly be to get the animations to play in sync, I'm thinking if you had an arm only animation but you want some additives to play on the body you could sychronise those.
I will try to do that. ChatGPT too warning me that there could be visual artifacts or animation popping with slot switch
hey guys, has anyone edited their animation using additive layer tracks?
The effect from the additive layer disappears when i play in standalone, and exporting the animation to fbx from unreal doesn't appear to save the additive keys either
How can I re-assign the skeleton of a skeletal mesh. Things I've Tried:
- Re-Assigning Skeleton: Crashes with unable to merge skeleton bones
- deleting skeleton and physics asset of skeletal mesh and replacing with Mannequinn versions.
Is this something IK Retargeting can help with? I thought that was just for animations so haven't dug too deep.
XY Problem: I need to get a skeletal mesh from the asset store to be a part of my modular character Quinn/Manny
Is this something that can only be done in an external editor - of which if I don't have the source files i'm SOL?
@old basin i cant download things bc of my security settings, but snipping tool does videos if u wanna use that to show us
@nova turtle the easiest way would be to yes do it in another program such as blender and copy the weights from the skeleton to yours. there is an option for this im not sure its the best. You should be able to drag the mesh onto the viewport then export selected. which should give you the files necessary to import into blender.
Ik retargeting works as well, id suggest looking into it unless but Id consider it more advanced myself
speaking of retargeting. got these meshes from the humble bundle a while ago. seem to have a lot of little 'features' like this. I spent a bit of time messing with the retargeting settings but nothing seems to help. ideally would like to avoid editing the animations directly, but that's probably unavoidable.
also is there any official info from Epic as to why retargeting unweighted bones doesn't work (or doesn't work well)?
I am trying to follow this tutorial regarding procedural animation, and I can't seem to get past the first 10 minutes right where they start doing the "Basic IK" node setup.
I try and do the exact same setup that they have in the video, and all I get is this (screenshot below).
I've scoured Google and all the Reddit and AnswerHub posts I could possibly find, and not a single one has been able to help me in any way.
Any help from anyone who has ever messed with Control Rig stuff would be much appreciated.
https://youtu.be/vKiqs_h1WXM

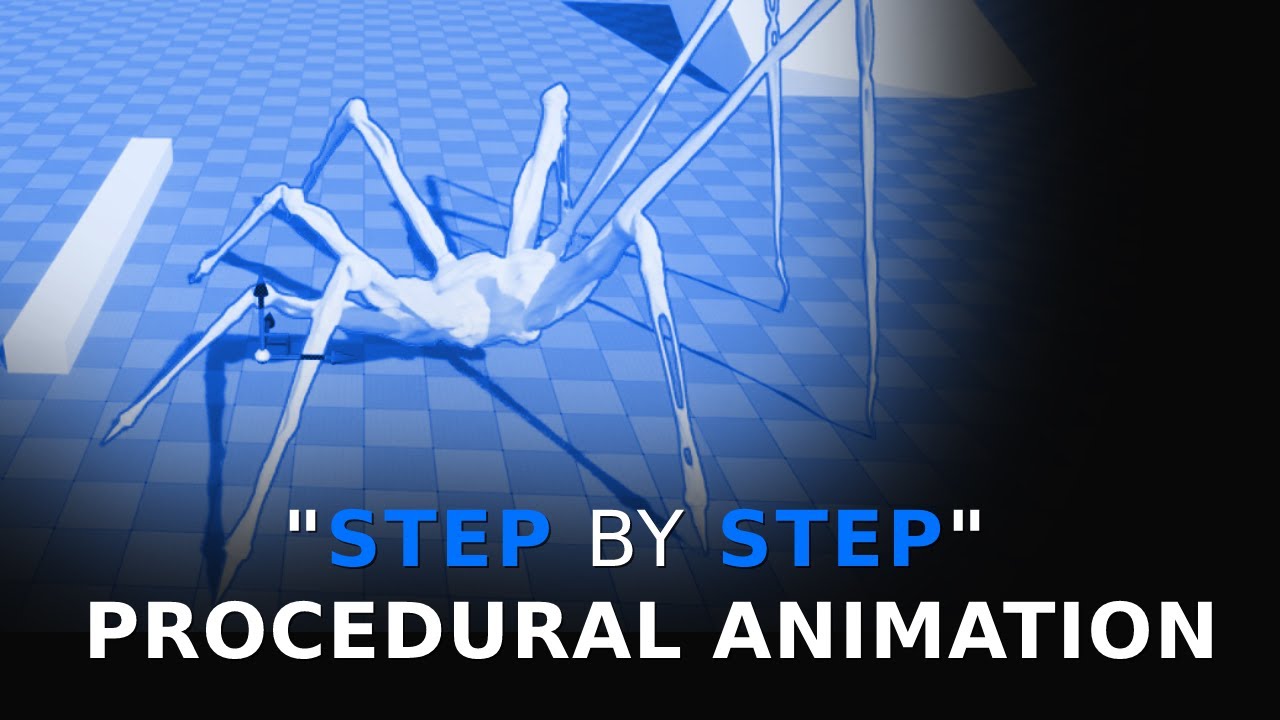
Free download of the spider model: https://twitter.com/LincolnMargison
More coming soon, subscribe, follow, all that jazz.
(node setup)

I think for the most part what ive seen from epic is just to the granular stuff yourself like that. in that case its probably like limiting effect radius but im sure u know that. with a control rig you can obviously edit anim and with an ik rig you can set limits. i think they just leave it to us.
are you sure you are not supposed to be getting your control transform not the bone one? ill take a look at the vid in a second.
your around 821 in the vid im guessing?
lol I answered the wrong person in those last two messages
Hey guys, how do you share animation between different metahuman faces?
yeah, that sounds right
@blissful quarry have you tried copying it to the new folder and replacing the skeleton it uses?
@white ledge you went through the hassle of setting the axises right?
yeah I definitely did
tried orienting the bones in all sorts of ways in Blender, but nothing worked
which is weird, because regular IK stuff in animation blueprints work totally fine
so either control rig's IK calculations work entirely differently, or there's some property or detail I'm missing in the node
@white ledge is your effector set to your ok outside the rig? his is set to foot so im wondering if yours is also like that
ik*
yeah
I tried setting it to other bones, but it had similar effects
maybe I can try orienting the foot bone differently
I'll try that tomorrow
lmk lmk
since it seems that iphone is the best for lipsync mocap....i know there are a few other android workaround, but what would be the absolute lowest iphone that would do the job well, like if i wanted to find a preowned one for those purpose only? i'm very experience with android products and features, especially samsung, and am absolute noob when it comes to iphone products
I think its 12th gen and up when it comes to advanced detection of geometry. but im not sure if that is used in the apps like livelink
what's interesting is, it keeps saying for iphone because of the 'true depth/face id' need
but the s22/s23/zfolds also have something similar
so i wonder is this feature issue, or a vendor requirement
Hey man, do you know if larger sequence file sizes with the new skeletons have an effect on performance? Im trying to find any documentation about animation memory, what it is and how it works kinda thing.
I have problem with Rewind Debugger, I it stopes working at times and i dont know why. When it stop working it just says "Debug Target Actor" and i cant chose any actors to debug..
Try pulling up the size map on it from right clicking it in the content browser then change the mode in the list to the right to Memory
I've never tried that on a sequence but I assume it will show you the memory footprint just like anything else
It's also a good way to see what all is getting loaded into memory with your asset and how much memory it consumes of the total to help you reduce un-necessary memory allocation
I've not tried it on a sequence either lol I use it for everything else when I'm doing asset production or environment work though. Just wondering if it loads up in ram more than anything. Maybe if I drag the character BP out into the level I can check that and see the animation memory footprint. I'm not sure if the number of anims a skeleton has effects that either or only what's in the anim BP lol
Aside from possibly consuming to much memory just loading things do have a small impact on performance since it does require CPU but as far as performance whether it impacts FPS or not depends on if your CPU heavy or GPU heavy. If your Game is GPU heavy then normally you have breathing room on the CPU where you can add more load too it without worrying about it impacting the actual FPS
I know people use Sequencer to control their cameras so I don't think it has a significant performance impact
Hey, forgive the absolute beginner question here, but is it possible to add bones/weights in Control Rig to a 'skeletal mesh' that is essentially just a static mesh on import? Or does the skeletal structure need to be built externally?
I'm hoping to create a procedural rig for geometric shapes based on their dimensions and I don't really want to rig them all manually externally. Perhaps hopeful thinking? 😄
A simple yes/no will suffice, but would love any pointers towards particular videos or tutorials which explain this process if it is indeed possible.
Thanks!
I try to make the GPU as much as possible, and keep material slots to a minimum aswell as collision, keep that main thread as clear as possible lol. Was something I was thinking about this morning, maybe get some high level insights into it
Control Rig lets you add Unweighted bones but they will only exist in the Control Rig
There is no way as far as I know to add weighted bones to a skeleton inside Unreal
They do have some experimental Skeletal Mesh Modeling Tools in 5.2 I believe
so maybe it will be added...I seen it in the plugins folder but didn't look into it
Damn, okay. Perhaps one day 🥲
Interesting, thank you!
Yeah you have to enable the plugin yourself, which is why I haven't looked into it yet
I personally can't wait for these, I love the modelling tools and geoscript. The new features coming and being added to the existing tool set are going to be tasty.
Yeah idk man, Performance is something you just have to watch. Since hardware is constantly changing it's normally a good idea if you want to target low-end hardware to target the lowest popular side of things...like for a GPU it was the 1080 but it probably makes more sense for Low-end games now to start targeting the 2080
Unless your making a mobile platform game
or perhaps the 2060 idk really
xD we focus on next gen hardware, however my current package build will run on a laptop with a 1650 all be at 35-60fps in 1080p, BPPs/nanite is super juicy
Not too concerned about ancient or really weak cards honestly it won't be long before every has atleast a 2060 or so
nice, yeah I keep forgetting people still use 1080p
Yeah min spec 1080p they can run stuff xD
I've been using 1440p for so long
Me too, rn on a 3070 on epic settings it's about 80-120fps in 2k. The 4090 in 4k without hardware ray tracing or wpo on foliage gets a little better than that even so I'm pleased, but it's still early so everything subject to change anyways
Yeah, it's funny I wanted the 4090 pretty bad when it first came out but I couldn't get it....they are finally available now and I don't care to spend the money on it....
It's hard to profile with since it's such a beast so I end up using my 3070 a majority of the time lol
I don't know...maybe they have to play these stupid games with consumers to keep the prices up...but I think they would make more sales if they made them more readily available
Well I wouldn't worry too much about little things like that, best bet is to become familiar with the Session Frontend
It will allow you to see how much of a hit your getting on the CPU from the Sequences
You'll have to dig through all the branches to find it though...Idk what a sequence would fall under in there
I need to evolve my abilities and learn more currently I go off of MS still learning
I don't think there is really a better measurement.
I don't know how it scales across differing hardware though
I was meaning my render thread to profile on since the MS is significantly lower on the 4090 lol so it doesn't scale well I don't think
a 12 ms hit on a 3080 might be a 24 ms hit on a 2080 idk
Yeah it's why I generally stick to a mid grade 3070 gives me a good idea of who can run it etc
I guess the only way to really get a good feel for it is too test it on two different machines. I imagine over time you'll get a general ideal for the difference between hardware
The only reason I don't want to upgrade to the 4090 aside from my electric bill doubling and my computer turning into a space heater...is that I don't want to have to buy a new motherboard, CPU case, and Power Supply.....all to accommodate the upgrade.
At this point I feel that if I upgrade I may as well build an entirely new computer...because if I get a new motherboard I'm going to want the latest gen and that will require me to buy all new ram as well and probably a processor idk.
yeah not a bad idea
Yeah I went from a z390 chip set to the z790 to use the new i9-13900kf. And to use ddr5 ram, it really was necessary because at the time I was using modeling operations on megascans nanite meshes. I needed the juice on tap to do it in real time,
So I could deform them to fit together to build megaassemblies without lots of overdraw etc
I'm actually wondering if at this point It almost makes sense to wait for next gen
Probably the next stuff will be even crazier lol
I just needed to work efficiently so I did it
And have a beast gpu to render and capture video of the game etc
Yeah...because I don't want to end up dropping like 4-6k on an entirely new setup only to have it outdated a year later
Something tells me it'll be good for 5-6 years
Idk when the next gpu's will drop
New hardware especially with nanite/lumen in 4k can finally run 4k over 100fps.
We'll the thing is Nvidia is really pushing these GPU's and the latest 13k series from intel requires a new board....and new ram
I have a 12900k Intel now
Situation based anyways
Yeah that's still a really fast cpu
We probably shouldn't talk about hardware too much in here, they get a bit of anxiety about people discussing this stuff in the wrong channels lol
Yeah fair xD
Yeah which is why upgrading is difficult for me right now
Hardware and anim optimization hand n hand lol
I have to ask myself if spending all that money would actually be worth the performance gains
Not so much even 3080s and 3090s n stuff are monsters too and plenty of sauce
I wouldn't use a 3090 for 4k max settings though.
Virtual textures ❤️
Not just in Unreal Engine
I like to do Photogrammetry from time to time and it consumes a lot
the more complex the set, the more VRam it requires
Mocap anims are cpu heavy too live link n stuff when streaming in too I heard
You probably get 25% more performance on your 13900ks over the 12900k or would it be a bit more?
Don't know they are fairly similiar in speeds
When I upgraded from my AMD to the 12900k It was faster....but at single tasks....If I had something heavy running I will actually lose the ability to browse the internet....that never happened on my old AMD
I see
Alright well I got to get to work
Besides it's only a matter of time before they complain that we shouldn't be discussing Hardware in the Animation channel
Me too! Thanks for the conversation
For sure
If I want to IK-Retarget animations from a T-Pose skeletal mesh to UE5 Quinn, whose skeletal mesh is in A-Pose, do I have to match the pose of the retarget source, or can I retarget the animations in either A-Pose or T-Pose as long as the pose is accurately matched in the Retargeter? Is there a constraint that I must always match the pose of the retarget source?
Hey quick question. When animating a character with a weapon (sword for example), does the weapon have to be a skeletal mesh?
I'm very new to animation so I wanted to know how y'all envision the animation sequence. I'm trying to create a slash attack that looks pretty in my head but it looks like I'm unsheating the weapon. I'll share a clip but please take with a grain of salt and give me some feedback
hey there
has anyone ever encountered this problem?
both hands have separate animation trees because they can do different stuff at the same time
but when I try to blend body and the arms together from shoulders they both work in the editor preview but not in the game itself
in the game only blend 0 works and blend 1 does nothing (you can see the left hand's shadow dangle behind instead of holding the phone)
when I switch left and right then only the left one works and the right one dangles behind


blend mask instead of blend filter didn't solve it
Hello, I am trying to add jumping to my character, I am using 3 states, so going from going to, looping and going down from the jump. When the player gets down from the jump the going down state it keeps looping the end of the landing animation.

I unticked the loop but that doesn't seem to change anything.
if you attach a socket to a bone does it inherit the full transform of the bone including scale, rotation, and location?

it's in a loop, break the connection from end to idle?
but the end_loop should be connected to idle/run to transition is it not?
So I tried removing the loop jump and end jump states but somehow their animations still go off after compiling and playing, if someone doesn't mind joining vc and maybe looking would be massively appreciated.

Can someone help me understand why these animations break like this in a blend space? They are perfectly fine on their own, but any kind of blending disconnects the joint seen in the video
It could be that some of your bones are flipped 180 or 360 in one of your animation clips. It would looks fins on its own but could be that it's trying to blend two transform values that are flipped around. If that is the case you can try run an euler filter on your animation in your animation software.
Hm, that does seem like a likely candidate, even though its authored using quaternions on those bones which I thought would prevent such issues? Thanks for the advice!
Ok I rotated the IK bones to be facing the same way as the leg bone, and the effect is more or less the same
(that tiny little black dot on the top left corner of the preview is literally the second leg part lol)


the IK works the same as usual in Blender
the control rig just doesn't like it for some reason
@viscid willow hey, tried out that video to assist with the other one. It helped out a lot, i got the majority of the movement down. Honestly surprised how easy it was, granted most of the issue was lack of using/understanding this tool. I skipped the weird 'for each' thing with that odd variable type. I just assigned everything by hand to get past that (probably not much more complicated anyways). I also had to mess with what bones to use, as it uses a more complex skeleton. Now the foot ik works and adjusts its placement level to the floor, effecting the pelvis and chest correctly.
only issue is i cant figure out the foot rotation to hit normal. my brain thinks i know how to solve it, but a lot of the code in bp is not the same in control rig. also the interpolate values didn't seem to work. wonder if you have any insight on that. or what i could be not understanding from the vid.
I mean worse case the rotation does not happen, and most people wont notice unless they are paying close attention. Thanks for the help as always.
@white ledge ill hop in a vc in about an hour if u wanna join me ill look at it theN?
np
im round @white ledge
I am terrible at blender so any input is appreciated.
In blender I have a model from someone else that uses a metarig to control. If I export and import to unreal, none of the bones are rigged and all the morphs are lost.
Am I missing something?
Is import even possible with this type of rig?
Is there a way to easily duplicate and mirror a socket you attack to a skeleton bone? Say I want to make a socket that goes in the right hand but I want to duplicate it and add it to the left hand so it is in the same orientation but for that hand
I found I can get the details of the socket and just reverse it for the most part and it seems to work but I'd like to be precise and quick if possible
@cedar zodiac should be a mirror option right on have you tried duping it? Im guessing you already tried that
Uhhh I was able to ctrl d it, but it kind of put it in an odd position lemme pull it up and double check
gotcha
yeah sorry got a weird error on launch im trying to fix after I moved my BP_Character got distracted by it one sec
so this is all I see really don't see any kind of mirror options been googling around no luck

dupe it then change the socket link bone to the opposite

left:first pic
right:second

@cedar zodiac does that sound like an ok solution?
IT seems to be behind where it should be

mind you I've already adjusted the socket and am trying to replicate that on the other side. I was able to math it out but was wondering if there is an easier way to get it to replicate
making a blueprint that attaches sockets to bones is what I did so I could make the sword swing on hip, maybe something like that?
yeah I'll look into it The rotation seems to be fine its the location that needs adjustment
Thank you
I'm trying to setup hand animations on a single skeletal mesh (full body vr mesh) and I'm struggling with how to make the animations for each hand work with one another. I have separate animations for both the left and right hand, and independently of one another they each work, but when I try to make them both work at the same time on the mesh, that's when I run into issues. If I try to use the blend node to combine them both, it only applies each animation at 50%. Does anyone know how I can make it so each animation always applies at 100%?
@slate lagoon screenshots help a lot
im not an expert but I did something similar the other day


The LH Function is basically the exact same thing as this one, with different animations of course
nvm wrong page
lol oof, and ok so your trying to blend an anim for the fingers? do you think control rig might be better? then you can use poses like this to do what you want while also adding the ability to control each finger granularly

Save bone poses and states to reference in your Control Rig graph.
I can point you in the direction of an amazing tutorial for easy control rig setup and help u in vc if u need tho im not the best myself
@slate lagoon
I appreciate it, I'll read up on that
this was supposed to be a simple placeholder while I worked on my game's combat system. I had no idea combining two animations would be so difficult lol.
slippery slope aint it?
facts
Hello, has anyone ever had this wrist problem with retargeting UE5 Manny animation to the paragon Twinblast character please ?


I want to put a basic window blind with animation to ue and I got one model that already has some bone in as a vertex group which I then set keyframes for but when I put it to ue there's no animation just a static mesh. What do I need to do?

I'm glad progress is happening
Are you using an aim node, use the hit normal as an Aim Direction? That would be a way to do it.
Also which interpolate values are you referring to?
how do i add a mesh as a preview prop for control rig animation?
i seriously cannot find a single way to add a preview mesh to a control rig in the same way i can with animations.
Does anyone know what this is?

so could i add to my rig a controller that would represent a held weapon
i mean for back/forward solve
so if i understand control rigs correctly... I could create keyposes for my respective melee weapon idles stances?
and instead of playing an idle animation
i somehow tell the anim bp to use "whatever weapon idle pose" ?
I believe so. You could use the "slots" stuff to tell it to only apply it to the upper body (if that's what you want it to do). And you can use a variable to track the weapon type in use and have it use that to switch to a particular animation state, e.g. the "sword" idle animation, or the "hammer" idle animation
im already doing that
i switch an animation source based on moveset. 1h, 2h, etc etc.
so its weapon type > animations
You could probably leverage pose caches to simply things
thats what i suspect
im not sure to what use yet
i mean to drive parts of it with key poses from a control rig
That way you only have to manage all the idle animations in one place then use the resulting cache
Hmm lemme re-read to make sure I understand
currently i separate all the movesets inside the animation state
but my own solution is irrelevant to what i was wondering
mainly if i could somehow switch control rig key poses
Ohhhh hang on
Are you asking if you can have something about how the control rig is positioned or configured influence what the animation bp is doing?
E.g. "if the hand is closer to the chest than the leg, switch to this animation for the torso"?
Sure
I have a character with 1h and 2h weapons.
Im thinking i could save a key pose in the control rig, for the respective idle poses.
And then use the control rig to switch between the idles, rather than changing the animation source.
disregard typical anim graph and anim state machine solutions (atleast in the classical sense)
I think I'm still not understanding. The control rig doesn't save poses itself, does it?
i believe it can...
It's just the system that lets you manipulate the skeleton
im trying to find out 🙂
control rig is a lot of things if i understand it correctly
I mean poses and animations are their own assets
From what I understand, the control rig gives you more "controlled" ways of modifying the skeleton bones' positions/rotations for the purposes of creating animations/poses
this is what im trying to figure out 🙂
my question is poor because i dont understand what to ask
Like with making feet conform to the surface you're standing on
no not like IK... or maybe.
IK is a part of it
for leg solver IK yes
but let me say something different
im looking for ways to do the following
take one swing animation
feed a value into it so the swing arc is dynamically altered based on the value.
people usually tell me "control rig". and im trying to figure out why or how.
Like using a lower hand position for the duration of the animation.
As if the value represent weight of weapon.
Oh so like if the hand is lower, telling the bp that the weapon must be heavier so it should make the swing slower?
more like the weapon has Weight. The Weight value is used by the game to procedurally alter how it is held, during idle. and where the hand moves during a swing
like the difference would be in the angle of the arm

im not too keen on physical animations, i dont know them and cannot account for their network quality.
i guess a better question is..
can control rig be used for runtime animation or is it only used to support creating animation assets ?
Yeah, I think that's what forward solvers are
The feet on the ground thing is an example of it
I'm not an expert, so I would definitely fact check this, but I think control rigs and IK rigs are the same kinda thing, but IK rigs are just way more simplified and refined for a particular purpose, whereas control rigs are the generic version
this antenna forexample is how i envision the use of control rig for changing bones during animation.

at current time: 11:48 it shows how the antenna reacts to some stimuli.
https://youtu.be/y2WzNvJZk0E?t=708

Until recently, creating character motion was the domain of expensive third party DCC apps. With the release of 4.26, Unreal Engine introduces further refinements to Control Rig: our suite of in editor rigging and animation tools. Whether you are authoring traditional style animation assets via keyframes or driving characters procedurally at run...
but im looking through this video before doing anything else now 😄
The problem with physics over a network, is that the initial state and the series of states the underlying machine may go through are not inherently the same. So the physics formulas might be deterministic, but they aren't necessarily working with the same data and timing on both machines
So what you need is something deterministic that doesn't care about timing and can manage it's only initial values
In other words, a curve
You can manipulate that curve depending on something like a "weight" value
And that sounds like something I think would be managed through a forward solver
That's just my guess though
i think you might've hit the nail here
if i can take my swing animations and just apply an IK that changes the arm position based on a value... it sounds more specific 🙂
and is probably what im looking for.
the antenna isnt physics however.

Gotcha
thanks for the chat about it
i think starting at the end and just look at what i actually want to change, with weight, helps me realize the method.
Currently having a closer look at the Animation flow in Lyra. I wonder, if there's a way to easily find, which animations get played in a specific slot? The Reference Viewer, which often is very useful does not help, since slots are not stored as assets.
How could I apply perlin noise as an offset to a rotation in control rig? I know how to do it in C++ to a scene component but can't quite reason about the nodes in control rig
I'm trying to shake the chest of this fellow 🙂

Are you suppose to be able to bake animations from the control rig on virtual bones? I tried making my changes but when I add the animation to the AnimBP my bones transform does not change.
anyone have any ideas why my clothsim is ignoring collision? I tried a bunch of solutions I could find online, but nothing worked

I'm guessing it probably has to do with the mixamo rig I used
How can I rotate a quaternion by a vector in control rig? I am trying to add a rotation offset to a bone by the pawn's acceleration
[glTF import + morph target]
Hello everyone!
I have a slight problem getting morph targets to import.
I exported a .gltf file from Blender containing a "shape key" (morph target).
I can see the morph target data and the meshes.extras.targetNames in the file, but when I import it into UE5.1.1 there are no morph targets associated with the skeletal mesh. (Yes, import morph targets was enabled)
Is it not yet working in the gltf importer, or am I missing some requirement?
Like if it needs to contain an animation or something referencing the morph target...?
It works when exporting an .fbx, but not using the .gltf format.
hi i have a flashlight animation but id like to rotate the arm / hands depending on where the player is looking. how do i go about doing so?
How do I import an animation from Blender to UE?
first person?
yes
ok, do it exactly the same way as if the flashlight was a gun
how so?
when i try to transform bone it goes all over the place and glitches out
ok well
just find an animation that does it for you
if you only have a flashlight, dont bother with intricate solutions
i have a flashlight holding animation but i need to figure out how to rotate the arms depending on where the player is looking to make the animation right
you dont rotate the arms in first person
you rotate the character
you could literally just attach your flash light to the camera
and have no arms
if you are refering to up and down, thats achieved by bending the spine for a "true first person"
otherwise its just arms attached to a camera
its multiplayer and im trying to not rotate the character as it looks weird like that
Hi there. I'm a bit stumped on this and I'm not really sure how to properly ask this question. I have a couple of child actors set as components in a blueprint. They are all the same actor class. What I am wanting to do is to be able to use a bp node to play an animation on a single one of the the actors. But since they're components, a simple play animation from an actor wont work. I found this dropdown list in the components details, but I can't find how to call on the "Anim to Play" in the animation data with a blueprint node.


Does anyone know what replaced "from rotator" in control rig in unreal engine 5?

Not sure if this is the chat for this or it should be in another. But im having what I'm guessing is a simple issue, but I cant figure out what I'm missing. I've got a character all hooked up with their mesh skeleton and so on. And did a little bit of cloth painting and set up their physics asset in the first image. But then any time I use them in game the cloth moves but seems to totally ignore the physics asset, as in the second image. Is there some connection I'm missing to make the assets talk to each other correctly?


For spin animation (in place) what's the proper way? I was using a roator bone to rotate character, but when I need to rotate back to start it gets kind of wonky interpolation back into place.
its just animation right?
anyone by chance made an tool to combine several 1-frame animations into one animation sequence?
UE already has that. Composite animations are what they're called if I recall correctly.
glTF is using the same option window than FBX format, this is why you see the morph options.
However, morph animation import is available only in 5.3 for glTF. In 5.3 we also introduce a different set of custom import settings for glTF.
Does anyone know why a Control Rig mesh is shrunk and not working in packaged build in Unreal 5.0.3?
it works fine in the editor
Hi, I am trying to attach left hand to weapon and have same view as my blender pose animation but its never same, any idea?
Just want to say thanks for working on the gltf stuff. I don't need to do any weird scaling settings in Blender like I have to with fbx. Still a few issues, but excited that y'all keep working on it 🙂
How can I have a bone in control rig always pointing upwards in world space?
I thought this would have done it but its not adjusting in real-time as I rotate the component during play:

Do vertex animation also update the collision of the mesh similar to regular animation?
https://cdn.discordapp.com/attachments/1102695611578462330/1105950750145785896/image.png
Why does my mesh and rig end up like this after exporting it from Blender?

For the life of me I can not figure out how to have a bone in anim BP or control rig just always aiming up in world space
how can I do that?
Yeah animation a character would use for an attack.
i forgot the topic
what would be the best way to add a crouch additive to my animations using control rig? I looked at the basic foot IK example in the third person project but I'm not sure how I would do the same for crouch. Would it just be a line trace and set the Z of the control to an offset of the hit result of the line trace?
is there any reference to make crouch walk animations using control rig?
Can someone tell me how you get linked layers like in this image from Epic? When I add a linked layer it's pink, not purple, so I must be doing something different:

I get purple for animation graphs, but they are doing something else.
has anyone ever run into an issue where UE physics asset takes up larger collision area than it's visual size? I've always had this issue with my models and I have to set everything up by testing each capsule in simulation 
hey guys, can someone, please, explain me, how to add an animation, which i download from mixamo.com to a regular Manny mesh ?
thank you!
i cant find a video tutor about this
Anyone happen to know where to get free arm animations for first person melee (swords, spears, etc.)?
You should use RetargetIk
https://youtu.be/wO3LJet6pIc

Hello guys, in this quick and simple tutorial we are going to retarget animations from Mixamo into Unreal Engine. It can be used in any Epic skeleton, or into any skeleton for any character that you like, in Unreal Engine 5.
Follow me on Twitter: https://twitter.com/GorkaGames
Subscribe to the channel: https://www.youtube.com/channel/UCv_n9oioN...
are there any good tutorials for creating keyframe poses and then interpolating between them from within unreal engine?
he's cape it's a part of him now
the bones transformation are affecting the cape . make sure the bone weight paint isnt affecting the cape.
or something with hierarchy but ye it counts it as one mesh wich it shouldn't be (im from cinema)
My problem is, my character moves when he falls to the ground. It also runs crooked when running. He runs looking to the right.
he's just having a rough day
anyone know why collision doesn't work on this mixamo rig I imported from Blender to UE?

the issue lies in the mixamo rig itself, auto rig pro collision works fine
anyone know why when I assign a skel mesh to a contol rig it's super small?
Not sure if this is what you are looking for, it's not a tutorial but I found this to be a great video that got me started animating in Unreal: https://youtu.be/FgJ1stTScxI

With Unreal Engine 5.0, rigging and animating in-engine became a real possibility. UE 5.1 has taken another step forward, so artists don't have to hop back and forth between various DCCs. Learn about the recent changes to the Control Rigs and animation tools via real-life examples.
Learn more about recommended Hotkeys & Preferences: https://dev...
Could someone point me in the direction on how to create first person melee animations such as a sword swinging?
Does anybody knows why the hell is this happening??????
you can use blender or unreal
First you got to know how to animate, so search about the 12 principles of animations
Then how to do 3D animation
Then start looking at rigging and animation on unreal videos from youtube
Then you look how it is with blender
Then you decide what suits you best
Then you put in the work
use Chat GPT for further instrunctions
easiest part by far
If I were you (mainly because I’m not patient enough to hand animate from scratch), I would start with grabbing some free animation from mixamo.com, and then retarget that animation to your final character. You can also modify those animations if you need, that just takes a little more work in unreal.
I am definitely not patient enough haha, so thanks this will probably be what I end up doing, it is surprisingly hard to find free first person animations.
Cool, also check in marketplace for a pack called MCO basics, that's another free pack you can try (I don't recall how much melee moves in that one). If you need retargeting help, I have a tutorial you can use: https://youtu.be/I84ROixEK3c
Whoever can help me with this i'll be very thankfull
Thanks for your help, will check them out!
Hey man, i follow your youtube channel, saw one of your rigging tutorials to set up my ik in this video, do you have any idea what is happening with my rotation?
This video here
UE5 has a "Manny Retarget Pose" for a retarget file, is there anyway to copy/paste/export this as a pose asset?
Or even to do it manually... is there anyway to see the current rotation of each bone?
I can't seem to find a way to open the skeleton window in the retargeter
@viscid willow I made some more progress. Did some finer tuning on the general control rig to more naturally transition animations at different angles. I also tried messing with that aim node for the foot ik rotation. I got it to rotate to the hit normal if the incline faces the side of the foot. Some reason it does not rotate to the hit normal if the foot faces the incline. It just ignores it.
Cool thanks for following! I saw the video, not sure really… it’s fine fwd, but goes whack backwards?
Im having an issue with my character only wanting to spin one way. even if I try to turn it a few degrees one way it decides to turn the entire way around to get to the point I set it to
it just started doing it

There seems to be a memory leak when binding a variable to an anim sequence player. Does anyone know how binding works exactly? Is it a call to a function that gets the variable as reference? It almost seems like the binding is a constant Get function and copies each Get, instead of replacing the variable.
also, the binding gives the pin the Pre-Event Graph description
Hey everyone 🙂
I'm very new to animations and i'm looking for some help regarding retargeting or more precisely, setting the default pose. I've read that, to get a better result, the pose of the source and the target mesh should overlap. Now in my case, the height of the source and the target mesh are quite different. Does that mean i need to, temporarely, scale the target mesh to achieve overlapping and then revert the scaling to have relative correct proportions? I'm not quite sure what the correct workflow is.
Thank you in advance for your help.

Is there any way to have the Show Sample Names to be enabled by default when opening a blend space? IMHO this should actually be the default so you can see which animations are used.
How can I retarget Ik? 😦

When i import an fbx object with an animation i get 5/6 items with the name action_001 and action_005
Why is that and why cant it just not be 1 animation or something?
anybody bought any big anim prefab packs off marketplace you recommend?
tons of options and as far as i can see no way to sort by rating
Has anyone treid messing around with the Pose Search / Motion Matching plugin in the new 5.2? It's had some improvements and I'm having some success, but I only seen to be able to get it to run in the Editor and not in a stand alone game. Anybody got any insight?
when I play in New Editor Window (Pie) then all is fine it works, but when i play in standalone game then there is no change

someone can help?
just after editing the animation, playing the Standalone Game, the change I made can't be seen
I've been struggling with this for a long time
When you import your character, there is a box under Advanced Settings that reads 'Import Morph Targets'
Theres quite a few YouTube videos that you can find; You're looking for 'Animation Retargeting in UE5"
Bones and Morph Targets 🙌🏾
Hello all and thank you in advance for your help.
This may be one of the easier questions that I have asked in the last couple of years, here we go:
I need to do this exact thing in Unreal 5.
Can anyone point me to a video or instruct me as to how I can accomplish this?

Thank you in advance for your help!
How to add virtual bone in unreal engine 5?
Unreal does not allow for this kind of editing and I would think that might be troublesome in Unity too if you want to update that head mesh and have it automatically update. I wonder if you could instead use animation rigging to constrain the appropriate head bones to the body bones rather than alter the joint hierarchy. But anyway, about Unreal ...
I suggest you look into the Copy Pose from Mesh node: https://docs.unrealengine.com/5.2/en-US/copy-a-pose-in-unreal-engine/
I believe this is how metahuman heads are attached to their corresponding body, and requires you to have a matching skeleton from the root, through to your attachment points. so in your case your head skeletal mesh would require root>hips>spine>chest>neck>head as well as your clavicles too for the node to work and the mesh to follow.
There's a bit of an explanation in this livestream (timestamped) that I think would be beneficial to understand: https://www.youtube.com/live/5O-nTNMB19Y?feature=share&t=1262
But yeah IIRC copy pose from mesh is the go to for modular characters in Unreal.

Shows how you can copy the pose from one Skeletal Mesh to another Skeletal Mesh using the Copy Pose From Mesh Animation Blueprint node.

This week we’ll be sitting down with two of our own incredible animators who helped shape the Lyra Starter Game as we know it, and walk through the process o...
In your skeleton or skeletal mesh editor right click the bone you want as a parent and navigate to Add Virtual Bone and select the Target bone you want the virtual bone to follow:

Ahh yeah thanks found it. but I can't see it in control rig hierachy =(. Trying to do Foot Ik atm
@viscid willow thx
Nvm, just gotta re-import the hierachy...
Control rig doesnt have Virtual Bones exactly, Control rig just calls them bones, but they only exits in the control rig
but yes you can use virtual bones from your skeleton in your control rig too
Do you think I can use this as replacement for Ik_foot_r and Ik_foot_l for basic foot ik?
my foot Ik ain't budging right now, and I'm trying to find a way to do foot ik without having to re-animate all the foot ik across all the animations
Virtual bones? Yes definitely
That is kinda the beauty of virtual bones is that it saves you from that reimport issue, and the data you need as far as IK bones are concerned is easily available
Hi, Was wondering if this is possible if i set my AI to Max Walk Speed of 600 and then have a Blend Space of Max Value 600 (600 = Run, 300 Walk, 0 Idle) Is there a way to make the blending between 0 and 300 smooth atm, The character just kinda of plays the walk animation in super slow motion whilst sliding along the ground if the speed value is say 100. Where as I am trying to achieve an effect of the AI gets faster the more it follows the player
and how do you access and edit csgo models?
also there's a scene of a midget and ct's running, I guess that's a garry mod thing

lmao
I’ll look at it. Ty. I have a few games shipped with how I did it in Unity. It works perfectly and exactly how I’d like it to. It’s a shame I can’t do this in unreal. You guys saw In my video it takes less than a minute and in unreal I have to perform just short of rituals of witchcraft just to do it. In 2023, It’s stupid.
I don’t know what a csgo model is. All you have to do is import your model with morph targets checked
Anyone able to explain how to answer my question please? 😉
Why do I get this when importing an animation? did the guy change the skeleton while making the animation?

"Hi, Was wondering if this is possible if i set my AI to Max Walk Speed of 600 and then have a Blend Space of Max Value 600 (600 = Run, 300 Walk, 0 Idle) Is there a way to make the blending between 0 and 300 smooth atm, The character just kinda of plays the walk animation in super slow motion whilst sliding along the ground if the speed value is say 100. Where as I am trying to achieve an effect of the AI gets faster the more it follows the player"
If you have a "flying" AI Character then it doesnt make a difference slowly increasing the max walk speed over time but if your AI Has legs and a walking animation, Do i need a animation for IDLE->CREEP(100 SPEED)->CREEP FASTER (200)->WALK(300) ->WALK FASTER(400)->WALK EVEN FASTER(500)-> RUNNING(600)
the guy said he used the same exact skeleton...
it's from counter strike global offensive, original models are being edited/modded
if youre trying to mod stuff, i dont think unreal exports FBX files with morph targets on them.
you need the original max or maya file in order for it to work
thats a sign that the skeleton has been changed
Alright then it's his fault I guess
whoever did that should always test his work on his end before delivering anything to you
True
I get you, but it's a matter of how the engine works, and particularly with skeletons. Unreal is very particular about how skeletal meshes are set up and because of that things like this are done through anim blueprints rather than manipulating game objects in a hierarchy.
I wouldn't say it's witchcraft or stupid to set up a character this way, anim blueprints and blueprints in general are as fundamental to Unreal as GameObjects are to Unity. The flexibility and extensibility afforded through the UE animation system and tools is extremely powerful and developer friendly when used to its potential.
I have to say I feel the opposite about Unity's animation system, I'm using it currently on a project and finding mecanim to be severely limited in its functionality 😅
Hi everyone. Have you encountered this problem? can't import alembic into unreal anymore. I change nothing, but Whatever I do i get same message

It's like I've been deprived of alembic in unreal at all for some reason

The way I setup my characters in previous titles, in Unity, the games are already shipped. The character customization is done. its right, its excellent, and it got the job done and my company was paid. You're trying to make a moot point by now.
If Unreal can't do what I need it to do in the way that I am trying to do it, then that's the answer and an acceptable one at that.
There's always a more efficient way than having to code something all the effing time. Artists and Animators arent into math and programming and the culture is slow to recognize this fact.
If the 90% artists in the industry liked math, we wouldn't need help programming all the time.
If I knew how to program to begin with, I wouldn't be in the animation chat looking for technical animation solutions.
Mechanim does suck - to a point - which is why I'm back in Unreal. Unreal is flawed too, which is why every 3-8 months, they update it to a new version.
If you go back and watch the video, it took less than 1 minute to do what I did regardless if its looked at as right or wrong. What I did in Unity is what I need. today.
Last night I created a workaround and its not even where i need it to be.
We're having the wrong argument.
Sure.
All I'll say is being a bit technical is a massive benefit in games, especially if you're an animator in games. You don't have to like math, but it sure helps.
And there is absolutely a way to achieve what you want to do with your character head and body meshes in unreal.
@merry wyvern battz already pointed you in the right direction, just an additional note, unreal has several ways to do what you want https://docs.unrealengine.com/5.1/en-US/modular-characters-in-unreal-engine/#comparisonchart
MetaHumans use LeaderPoseComponent (which is still refered to as MasterPoseComponent in the docs, but got renamed)
Thanks for clarifying, I thought it was something like Copy Pose
i'm not entirely sure tho, i've only worked with the metahumans from the city sample demo (and they use master/leader pose component)
or maybe a mix of both 🤷 seems they only use leader pose (they have a copy pose node in the anim graph, which is however unused)
That's for the metahuman heads, is that right?
I'm getting 0 everytime I call GetCurveValue inside my anim BP.
The animation is connected directly to the Final Animation Pose node of the Anim Graph.
Enable Update Rate Optimizations is set to false,
Update Joints from Animation is set to true,
Visibility Based Anim Tick Option set to Always Tick Pose and Refresh Bones,
Set Allow Anim Curve Evaluation is true.
Can someone tell me what I'm missing here?
Why do I keep getting zeroes?
hi so I'm trying to do a lock on system created similar to the once seen in a games like dark souls and I created a blend space for the directional movement. I then went and tried to implement jump into the state machine, how ever when idling to jump I get this weird glitch where the character seems to rotate and then do the jump. don't really know what's causing this. If anyone could offer some help that would be really appreciative, if not its all good thanks
That's a weird one. So it's not present when moving, but it is during idle? My guess would be your animation poses are somehow flipped on some axis between the jump and idle? But then again you would probably see the same behaviour in locomotion. How are you authoring your animation sequences? And how are you implementing the jump in the abp?
I'm implementing it by just checking if the character is jumping off of the idle/walk state
In that case it seems to me it must be an issue with the animation sequences.
Are you authoring in Blender?
no im not authoring in blender but I mean I could just not use the jumps at all and that would honestly solv the problem
Does anyone know why Murdock's AnimBlueprint is broken when running?
This beautiful Interior is done in Unreal 5.1. The Engine always maintains realism and neatness. to look amazing . I think the concept of the interior is good for the eyes. The view makes you think every time. This room is reflecting its sentiments correctly. And telling that you are connected to it somewhere. We only succeed when we can include...
Not to nitpick but you have a weird thing going on with the reflection of the curtain at 0:36
Eya, got a question for yall. So I'm part of a small team creating a game. Our programmers already have logic set up to work with our existing animBP, but I still wanted to add animations. How would this be done? As Ideally I would like to just keep the existing skeletal mesh we already have (it uses the same skeletal mesh anyways)
Much appreciated :). Will prob be an ez fix im betting. We're all still rookies at working in Unreal
omg im stupid
someone can help?
I need to set this "is attacking?" to be true when i press "left mouse button" using enhance inputs, how do i do that? I've been searching a lot and haven't find anything

How do I export this to Unreal Engine. everytime I try it does some weird stuff like duplicates, adds physics to random parts and a load of waffle. It doesn't have a rig, its just keyframed movement. Not sure why it's so difficult

someone know why?
hi all, is there a way to show only the curves of selected controls in the sequencer curves in Unreal Engine 5..? thank you in advance
When adding sound to an animation, is it possible to add them to an anime blend
can anyone help with getting the blender tools plugin for unreal working?
https://github.com/EpicGames/BlenderTools/issues/607
With the help of someone there, we've narrowed down that my python RPC server probably isn't running, but no idea why or how to fix it
Additionally, i'm wondering if anyone could send me a rigged and animated blend file that i can use to learn from. Doesn't matter what it is, as long as it can be imported into unreal. I need a working example to figure out what i'm doing wrong, my own skeleton seems to come without the animations
hello! I'm trying to export one of my skeletal mesh assets to FBX but for some reason I have one asset that never includes the mesh in the export only just skeletal data. I can't figure out what is causing it. (using unreal 5.1) the settings work fine for other assets that are skinned just not this one

make sure to select them both before exporting
https://discord.com/channels/187217643009212416/780559951663857724 If you're looking to hire people, post in the job board
Thanks but I'm the one being hired😅... I make metahumans for myself but I don't know what to charge for them
the job board has places to offer your services too
I know but what does a metahuman cost?
doesn't seem to work unfortunately ! I checked if it had clothing data but can't think why else it is not exporting the mesh, the export settings has worked for other skeletal meshes fine
thats between you and your client, people dont usually post prices upfront
@small spoke do you think $100 is too much for this?
I think rather than trying to sell completed assets, you should use them in a portfolio to demonstrate your capabilities
And instead, sell your services in creating bespoke assets. Make whatever the client needs for their project. Individual needs vary widely
Does it import, as a skeletal mesh?
that could be why
I fixed it, I was just being a moron and didn't group all the models into one in Maya 💀
got it in now 👍 :)

ahhh yee, at least its all good now 🙂
Does anyone know how to fix blur when objects are spinning during gameplay and preview? Everything is blurry

Below is What it looks like normally, above is what it looks like when activating a spinning blueprint

Do you have a post processing volume with motion blur turned on at the moment?
I do Not
Any idea how to fix this when i press direction to jump on the top if i rotate my camera it doesn't jump on the top even if i press back jump front jump it do the same anim
@quick spire I'm simply using blank template lighting, sky atmosphere, and directional lighting
Hi I use this function for any level sequencer so sometimes my level sequence don't have these tag problem is they keep warning after end play on editor
I use "get bound object function" to get tag but can get only character and get more warning log 😦
question is anyway to check these tag before really add binding ? thx


I made my Cavalry animation. All works great in Blendy. But the moment i take it to unreal, the animation, only the animation is without scale. Scale is like super small. I dont know why. The mesh itself is the proper scale though. What is causing this?
Hello, guys, what's the best way to play on hit-reaction animation? Right now, I've created several Hit-reaction anim montages, but when I play it on-hit, it interrupts attack montage. But I need to fire both at one moment. Or would it better to create physical-animation on hit reaction?
You could make the hit reactions Additive
And don't create anim montages?
my first animation video
Montages can be additive, you will just need to make sure the sequence settings are set to additive for your hit reaction animations and play them on a different slot to your other montages you use for things like attacks. E.g.

Thank you will try!
UPD: It works! Thank you again @viscid willow
Fabulous, glad to help
Here is my setup for my firing montage for my player. For some reason, it doesn't appear to be playing the full animation, only like the first frame. Other montages are working just fine. I only have one skeleton in the game, so it isn't some skeleton mismatch. ABP is assigned to the skeletal mesh. Any ideas?


So found out the issue. It's a short montage (8 frames), had to mess with the blending in/out part of the montage asset. Had to reduce the time. Guess it was spending more time on the actual blending than playing the montage.
Which makes sense.
Hello. Can you bake an animation sequence of a virtual bone through the level sequencer. I have tried using the control rig in my level sequencer to rotate a vehicle wheel and then create animation sequence from it but it does not seem to work correctly.
can anyone help with getting the blender tools plugin for unreal working?
https://github.com/EpicGames/BlenderTools/issues/607
With the help of someone there, we've narrowed down that my python RPC server probably isn't running, but no idea why or how to fix it
Additionally, i'm wondering if anyone could send me a rigged and animated blend file that i can use to learn from. Doesn't matter what it is, as long as it can be imported into unreal. I need a working example to figure out what i'm doing wrong, my own skeleton seems to come without the animations
Hi animator guys, I'm attempting to replace the skeletal class in Lyra with that of my own. I have succeeded in completely rebuilding a working system with no errors. The one, very glaring, show stopping issue, is that my pelvis seems to stick to the ground. The guy locomotes, his hand looks as though it is spatially correct, his feet move, he jumps, etc.. But his pelvis is stuck on the floor. Any pros out there that can help me out with this jam?
hey, any idea why my animation curve are getting renamed in ue5.2?
I had a curve called Rot(yaw) but now it's renamed to Rot_yaw_ and I can't change it back, everytime I try to rename, the engine crashes
generally always looking for 2D colorist and 3D character modelers so if anyone is interested please send me a dm
Hey guys, how would you go about having a visual representation of spawning a custom hitbox(just a cube which is not attached to a socket basically) in anim montages. I would want to have an animnotify(state?) which spawns the hitbox and despawns it when it ends. The thing i cannot figure out is how to have it be visually represented in the anim montage editor.
anyone know why i would not be able to access the Predict Ground Movement Pivot Location in my Thread Safe graph?

cant seem to access any of the libraries, DistanceMatchToTarget in the AnimDistanceMatchingLibrary is not available either
wont let me copy them in either so guessing some setting is wrong
Animation Character Movement is not in my list even without context, possible need to include module for the library?
says its in AnimationLocomotionLibraryRuntime module but i dont see Lyra loading that directly
my first was way worse so I'd say pretty good 
you should look into flight and how wings work to keep improving on it, the wings and body shouldn't be moving up & down in sync
https://youtu.be/BAUirTdHu28
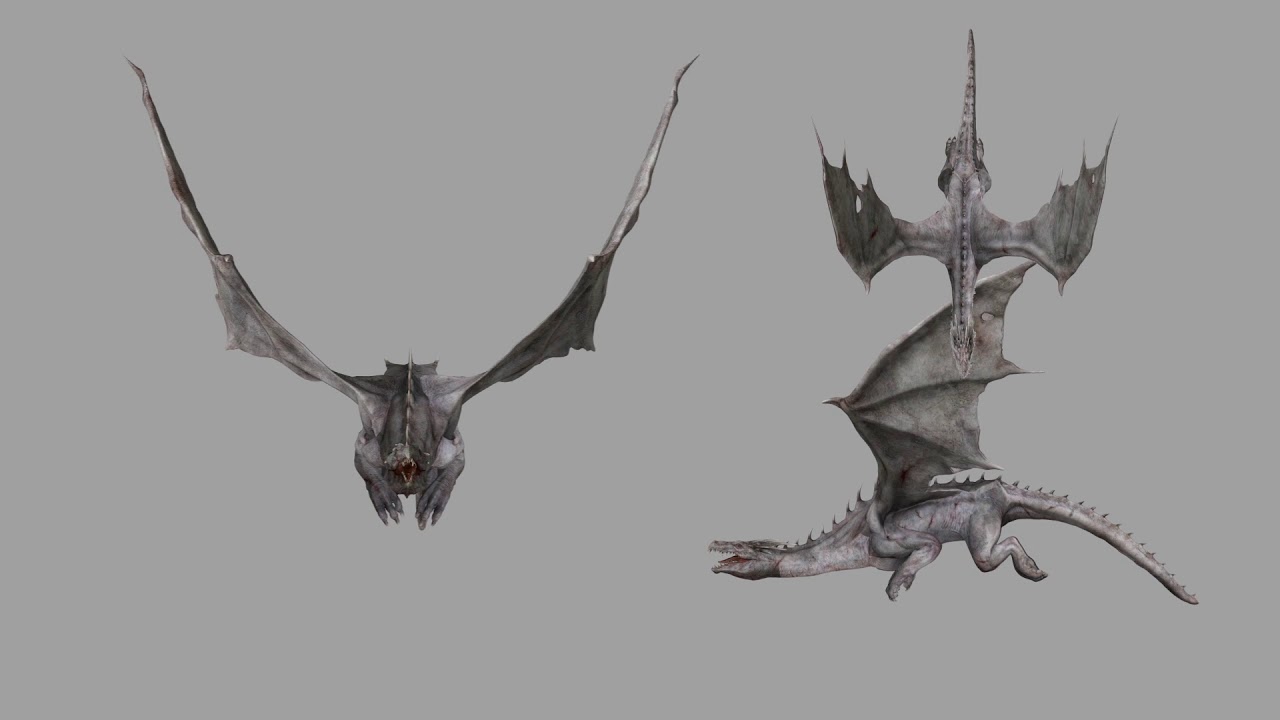
Does anyone have a good tutorial on control rig posing? Free or paid I dont care. I just want something that explains how to use control rig caching to rig poses and apply them to a static mesh.
Hello. May not be able to reply till tomorrow due to it being late, but does anyone have any idea on how I can go about animating my metahuman picking an object off a shelf. This is for a cinematic, so it needs to look fairly natural. Thank you 🙂
Depends on how much you're looking to spend. If you want to keep it cheap, use a prefabricated animation you purchase off the marketplace that is somewhat similar to the final output you desire, then modify the animation in control rig to match exactly what you want it to be. If, on the other hand, you want to get a little more expensive with it, Unreal Engine has excellent animation capture software to where you can put together your own animations using an IPhone, or a steam Index VR control Rig. The more money you want to spend, the easier it is to create the animation, and the better it will look with less effort.
If you don't want to spend any money, you can use the control rig that comes with the metahuman to manually rig the animation. It will look as good as the amount of time you're willing to invest into it. Any animations you create in control rig can be baked and saved, and applied when you want them.
Does anyone here know the easiest way to edit a skeleton's reference pose? I tried exporting the skeletal mesh to blender and setting the pose there, but I get a ton of issues trying to re-import it (saying bone hierarchy has changed, when all I did was rotate a bone). I'm hoping someone has a trick for easily doing this in 5.1.1. This is for use with the "live retarget" feature, which doesn't seem to work with the "edit retarget base pose" button found in the IK retargeter
noobie here. Been working on my blueprint skills in recent months. Got a pretty good idea on basic stuff. Pretty happy with myself in general. I doubled back to expand my characters animations. I tried unsuccessfuly to incorporate a kick montage on my metahuman. I figurd well, Maybe i did something wrong with the retargeting when I set it up a couple months back. So this is what I did to test what was going wrong.
1.Made a new project.
2. Imported the animation
3. Successfully retargeted the animation montage from UE4 to UE5 mannequin
4. Added a input for the gamepad.
5. Put that in the BP and used played Montage.
and somehow, even though the retargeting looked right. The foot is like....broken. And im lost. Mind you, this is still better than it looked on my metahuman. The legs werent even moving. So Ill explore that next. Im just looking for some insight to what i did wrong here maybe to continue to expand my understanding.
I had an issue like that when retargeting because I had missed an IK bone. You might want to double check that in your IK Rig you have a "chain" for each IK bone that contains only that bone (if you have them in your skeleton that is)
My issue above - needed Animation Locomotion Library 😎
But, wouldnt that have been obvious at the point that i exported the animation during the retargeting process? Heres the montage, looking okay.
Im under the impression(noob brain) that if it looks right in the montage, It should look right when I use it. Or is that not necessarily true?
Try disabling/disconnecting the Control Rig IK in the Anim Graph and play and see if that fixes it
I'm fairly new as well so I could be wrong, but I believe when I encountered this it looked OK in the montage but at runtime the character tried to bind it's IK bones to the ground, and because they were retargeted wrong I got a bunch of weird warping issues. It could be something like that
Okay, off I go. Thanks for the direction folks. I thought the control rig was behind me for this first project 😦 dealing with the bones and the rig has been my least favorite part so far. But, all part of the deal though. Thanks again folks!
Hey guys! I have a question regarding Chaos simulations and I don't know if this is the right channel. Can't seem to find a more suitable one tho.
Either way, my problem is fairly simple.. but can't find a solution. At all.
I have a geometry collection (fractured piece of mesh) using which I am making this worm dig out animation. But no matter what mass I type on in or density in phys. material, the pieces fly like they are made of paper. Is there a way of actually setting the physics properties without messing with the gravity? I must be missing something as this seems like a pretty trivial thing to me.
(btw. is this even a valid way of making something like a dig out animation?)
Thanks a lot!
Hey guys, I need help with a rotation-computation problem. So in short, I have a armature for a character with nine bones (spine, neck, head, shoulderR, elbowR, wristR, shoulderL, elbowL, wristL). For each bone, I have a system (it's an ai-based system) that outputs directional vectors for each bone. I want to animate my character according to these directional vectors. The way I do this is by using a Transform (Modify) Bone node and setting the relevant variable in C++ as the directional vectors come from python. The node rotation are set to component space. The question is then how to convert my directional vectors to rotational vectors that Unreal can understand. I've also included a python script below for how I am able to achieve this in blender. Any help would be appreciate. I have some other code for trying to do the conversion but just haven't had luck getting it right, so would love to hear what I should be doing at an abstract level or if you know in pseudo-code, that would be great too 😂
def get_bone_vec(dir_vec, idx):
    return Vector(
        (dir_vec[idx * 3 + 0], -dir_vec[idx * 3 + 2], -dir_vec[idx * 3 + 1])
    )

def animate(frame: int):
    obj = bpy.data.objects['Armature']
    bones = obj.pose.bones
    shoulder_vec = Vector(bones["elbow.R"].head - bones["elbow.L"].head)
    for bone_name in bone_info.keys():
        if bone_name == "Head":
            continue

        bone = get_bone_vec(dir_vec[frame], bone_info[bone_name])
        bone = bone @ bones[bone_name].matrix
        rot = Vector((0, 1, 0)).rotation_difference(bone)

        bones[bone_name].rotation_quaternion = (
            bones[bone_name].rotation_quaternion @ rot
        )
        bones[bone_name].keyframe_insert(
            data_path="rotation_quaternion", frame=frame
        )
        bpy.context.view_layer.update()
PS. idk if this is the right channel but it looks like it should be? lemme know otherwise

I purchased an asset that is rigged to the ue4 mannequin. I got it working in ue5 to walk around and jump. However I want to use mixamo animations on this custom model. And I really going to have to buy the retarget plug-in to get these animations working… I’m at a loss for what to do.
No you can retarget animations without any sort of purchases plugins : see docs for example https://docs.unrealengine.com/4.26/en-US/AnimatingObjects/SkeletalMeshAnimation/AnimationRetargeting/
There’s also many YouTube videos if you just search for it
Describes how retargeted animations can be used with multiple Skeletal Meshes, allowing you to share animations.
Can Access Properties in an Anim Graph not see functions that return enums?
Some of the mixamo animations do not work. Some others do. Now I can’t get the anim montage to play… idk what to do honestly this is crazy exhausting.
So I have my animation blueprint and I can walk around no problem. But no montage will play.
Things I import from blender are coming in 100x smaller than they should
https://i.imgur.com/mg7pe4M.png
Google has lots of results on this, all github issues from years ago, marked resolved, yet its happening now with latest versions of blender and unreal
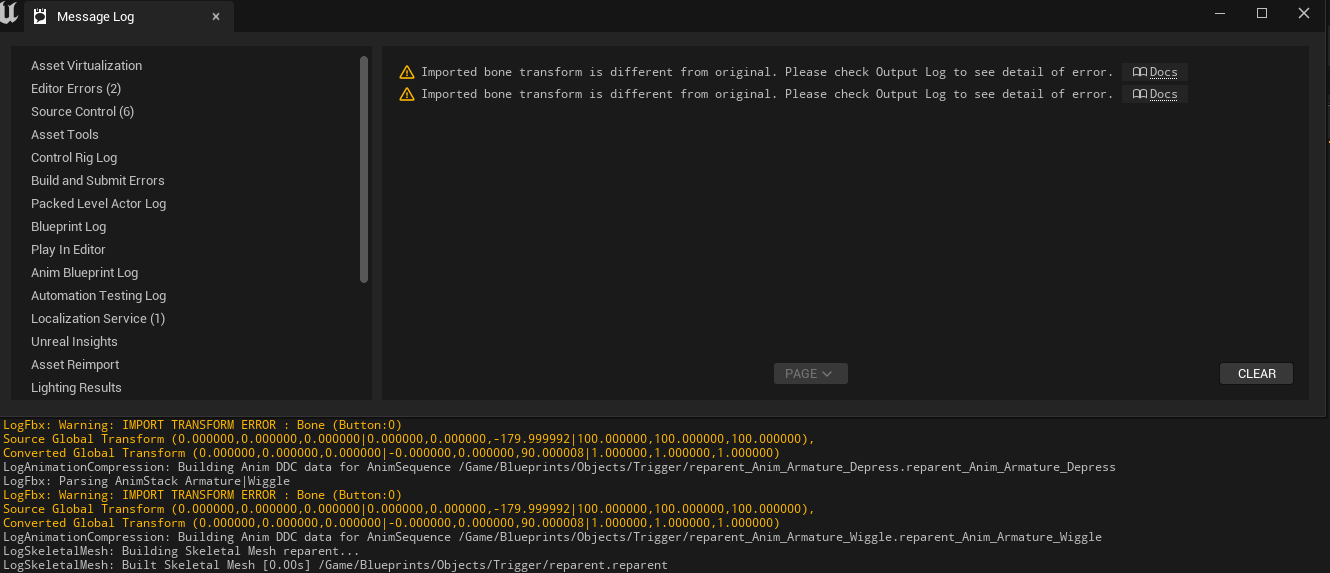
I've tried every idea on this page:
https://unrealcommunity.wiki/blender-fbx-pipeline-qw16qyxh
none of them changed the problem, the armature is coming in at 1% size
This document discusses Blender specific FBX pipeline issues. The UE4 FBX pipeline in general is covered by Epic's documentation in FBX Content Pipeline. FBX files can be used to exchange data both...
From what I remember, I did have the same problem with animated meshes coming in too small (I even first thought they were missing). Quite some time ago now, but the solution for me was to set Unit Scale in Blender to 0.01. While with Static meshes, this seems to get corrected somewhere during export/import process??, for the skeletal meshes this is not the case. As said, that's quite some time ago now, but in general, for every new Blender project for UE, the first thing I do is set Unit Scale 0.01. Never had problems since then
Is it possible to export a chaos fracture simulation from Unreal to a .abc or something?
If anyone has any suggestions on how to resolve this
Hi guys! In ue4 there was an option on the AimOffset node to expose the aim offset to use as a pin. I can't find it in ue5, is it still available?
Any idea how to make the rifle from my back Disappear when i select rifle?
Thank you @slate lagoon for the advice yesterday 🙂
how can I rotate a rotate like 45 degrees because its offset. and whenever I shoot and play the animation, it offsets the gun and then back
Hi !
Does anyone has an idea of how to handle this warning / error ?
LogAnimDistanceMatchingLibrary: Warning: Unable to adjust playrate for animation with no root motion delta (Trot_Armature_ArmatureAction_002).
hello idk where to ask this so just posting this here
does anyone use cascadeur for animation and is it worth it ?
Hi, could someone tell me if they are experiencing this issue too or if I'm doing something wrong, I have an linked animation interface with 3 different layers (Locomotion, UpperBody, Ik) and I put these in my main instance and instead of having the logic in my main instance, the base logic is in different bp. so in my main instance I'm using the Layer and then setting the Instance Class https://docs.unrealengine.com/5.2/en-US/using-animation-blueprint-linking-in-unreal-engine/ from here it says that can be used as the default override.
my issue is when I create a new anim bp (weapon layer) that only overrides the UpperBody, and link that anim class layer to my main instance, it overrides the other 2 default overrides (Locomotion, and IK), which are basically empty in the new (weapon layer) graph
Illustrates how you can dynamically switch between subsections of an Animation Graph.

(img isn't from my project, just what I'm referring to when I say Instance Class
Is there something I need to do so that If I'm using an linked animation interface with multiple layer, and only need to override only one of those layers, it won't override the ones that I haven't implemented?
Guys where do i enable bCaptureEveryFrame
Hi we are using 4.27, any tips how to solve this error. we have imported the skeleton tho

what is wrong with my vault motion wraping
Hey guys I have an issue with the animations.. suddenly for no reason that's apparent to me.. all the animations stopped working and no amount of retargeting helps. the only marker of this happening is when I imported a new character but used the same skeleton. in UE 5.1.1
can I have multiple "main" state machines in the same animation blueprint that run in parallel or can i only nest state machines inside of each other? Basically I would like to have independent states for different parts of the body so the arms could be in state A and the legs might transition from state B to state C without the arms state changing
Anyone here familiar with getting rootmotion animations to work with in the level sequencer on a character with an animation blue print? I can't seem to get the root to move in the sequencer, i've tried just about everything from checking "Root motion from everything" The root motion applys if no Anim Blueprint is applied but once its applied, it stops working.
please why does the axis do a weird flip? This is exported from iclone.
hey everyone, i have a question about retargeting. I setup an IK retargeter sucessfully and was able to retarget some animations
is it possible to make the mesh i retargeted into the child of the retarget parent?
like make it a compatible skeleton, so i don't need to retarget the animations individually
If you're asking if you can have one skeleton with multiple meshes and have one set of animations that work with the skeleton and all it's meshes - Then yes, this is possible
does anyone have experience importing a vroid model into UE5?
Can I not create new animation sequences directly in the editor?

I just wanted to add a simple sitting pose to my character, figured I would try Unreals supposedly new animation tools to create it - but it looks like I have to create the anim sequence in my DCC & import it?
Hi, can someone help me with this problem? I try to make blending between start - stop. Any tips how i can make it smooth?


Can i somehow follow frames in both animations? Start and Stop? And make transition on that? I dont want make it hard-transit with notification, because it makes smooth only on perfect frame ;D
Hello everyone, I was wondering how to create these "thread safe" calls in unreal engine Animation Blueprints?


Have you looked at Lyra? They use distance matching and sync markers to sync up their animations when transitioning from start to stop and vice versa.
Yep i know, but i using Root Motion system and sync markers is completly broke
Its skipping frames so my character is teleporting
(or i didnt know how to use it) 😄
Hmmm...any reason why you're using root motion for locomotion?
Nope, google says is better then i use it 😄
Hmm distance matching should be work on root motion, i need to research and try
Eh, I disagree. There are some cons to using root motion to drive your locomotion. Let's say you have a sprint animation, but you want the character to sprint faster. Well with root motion you can't simply change the max walk speed, you have to change the speed of the sprint animation since the animation drives movement.
Distance matching is built to use root motion animations. You don't have to use root motion animations, but you can. If you do, remember to check the "Force Root Lock" check box on your locomotion animations, so the character movement component can drive the movement instead of the animations.
If speaking of the programming view point, yes, root motion hurts a lot. I working on it a few months and it is hard to learn, but finally i make my own "movement component" from scratch.
And here is what you wrote about

Hmmm well if you're going to continue using root motion to drive your locomotion, then you're going to have to play with the blend times until you find something that looks good. That's the only thing I know.
i will try do something similar, maybe distance matching have some kind of possibilities
working only on blend times is look not perfect, still is "jump frame" between animations
Distance matching will solve it. Play around with Lyra, and see how the character blends into starts and stops. The only thing is using distance matching would be a complete change to what you're doing now; you'd have to abandon the movement component you made. If you're far into development, this could be an issue.
My entire movement component is almost 1:1 was Lyra content has 😄
except for the root motion fixes.
Hello guys I have animation of my character and when animation ends my character will be back on place where it started animation 😄 and i just want see my character on place where animations ends
any suggestions?

Those are anim layers. So when you say movement component, you don't actually mean a component; you're saying you referenced the anim instance and anim layer ABPs in Lyra. There's a difference.
Yes but it inherits from the Character Movement Component (CMC), which is a class that already exists in the engine.
So you just want to see the end of the animation?
Thanks for help 🙂 😄
in UE5.1, I can't add additive keyframes, it is greyed out. any ideas?

AnimBP's aren't a specialty of mine but the project I'm working on is starting to require more than the crude setup I've made. Other than a basic walk, all the animations are driven by montages (default and upperbody).
The issue I'm encountering is being able to do multiple things for example, the character can sit on a sofa which currently just plays a sitting montage (default slot) but if I want to then play something like a drink animation on the upper body slot, this stops the sitting montage. I understand why this happens but does any have an advise on the best way to go?
I would assume I would need to create other slots such as lower body which would allow me to play an upper body and lower body montage? If this is the case, are their any examples of how best to set something like this up?
This is my current setup so any suggestions on how to improve it would be great.

ANybody knows what does it mean? LogAnimation: Warning: Found non valid position track for Boss_Attack_Running_Simple_RM2, 107 frames, instead of 63. Chopping!
Hi, any idea why my aim offset isn't being previewed correctly?

Got the preview skeleton set ... the anim with frame 0 in the graph
got it 🙂
Should probably look into anim layers. Here's a link. In short, your anim layers would be responsible for playing different animations based on what AnimBPs are linked. For example, you can have your base locomotion AnimBP that has a upper body anim layer and a lower body anim layer. When no AnimBPs are linked, your base locomotion plays. When you sit on a couch, link the couch AnimBP, which has a sit animation playing on the lower body anim layer, and unlink it when you're done. When you drink, link the drink AnimBP, which has a drink animation playing on the upper body, and unlink it when you're done. If you want to do both, I think you would have to do a little bit more work because, I think, you can have only one AnimBP linked at a time. I could be wrong though. I know in one of the articles, Epic mentioned doing something similar for Fortnite, so vehicle anims can play on the lower body and weapon anims on the upper body.
You can look at Lyra for an example setup, too.
https://docs.unrealengine.com/5.0/en-US/animation-blueprint-linking-in-unreal-engine/

Modularize your Animation Blueprint logic by using Animation Blueprint Linking and Templates.
Thank you, I'll take a look.
In UE4 when you were retargeting animations, before exporting the animations you could add prefix to the new animations. In UE5, with the IKRetargeter, once you press the "Export Selected Animations", you choose the path, and after that, the animations are exported without asking. I can't find how to add the prefix. Anyone knows where's the option to add such prefix?

if you select them all in the content browser and use the context menu to launch the retargeting, it'll show you a prompt with prefix/suffix settings (idk if there's any way to do it within the retargeter)
I'll try that. Thanks!
(negative z) root motion seems to put my character in a falling state, even when flying, is there any way to avoid that? nvm it's a race condition where the movement mode get's reset from flying to default
hi guys i got a question, do you need sync markers on the last frame of the animation if frame 1 already has one?

FYI: This is for foot placement
Anyone used the ML Deformer yet? The documentation states that a target mesh is optional but doesn't tell you what you lose/gain by using them or not
i'm using Use Animation Asset Mode, set Animation data and play animation but finish of animation end up T pose
how could i fix it stay end sequence?
Hi @cerulean cedar, if you go to the skeleton tree tab on the left, you can select a bone - once selected, the +Key button should get selectable
My punching animation looks goofy. It spins the character and twists its legs everytime.
I used a retargeted Mixamo animation. How to fix?


looks fine in montage
Adding some ik stuff at the very end of my anim bp (left hand IK for touching gun at a socket), there seems to be a lag for the hand following the effector location. Happens with FABRIK, but also observe this testing with Two Bone IK. And the effect is more visible with lower frame rate (testing with t.maxfps) - it looks like calculations are not completely done within the same frame??
I've an issue importing animations that involve bone scale into UE - they import okay but the scaling usually gets messed up on child bones. Anyone know how to fix this?

This seems to be caused by child bones not inheriting the parent's scale in the animation. I guess no one knows why that might happen?
can we use IKRig in the Level Sequencer or only ControlRig?
Does anyone have an opinion on animating in UE instead of blender?
a good ik controlled rig in blender is imho better to make animations from scratch
editing existing ones, i feel like i have to do it in UE as i haven't succeed yet to get the animation from the UE FBX export on my blender rig
gottcha
if solving the UE > blender export, would you consider blender in that case?