#enfusion_model
1 messages · Page 29 of 1
 brisk grotto
If you want only part of it hidden you need a clipping mask, look at base game ones for examples
 gray inlet
Anyone know why my model might be "glowing" like this? It almost seems like the AO is white instead of black. I'm not generating a BSP (outdoor structure), not sure if that matters.

 delicate condor
gray inlet
Anyone know why my model might be "glowing" like this? It almost seems like the ...
delicate condor
gray inlet
Anyone know why my model might be "glowing" like this? It almost seems like the ...
looks like its pretty massive building?
and you are looking at it from afar right?
does it look the same up close and closer to ground level?
gray inlet
delicate condor
does it look the same up close and closer to ground level?
Ya it does. With another massive building it doesn't happen. I feel like I'm forgetting to tick one of the 1 million+ checkboxes.
 fluid dragon
what could be the reason that the weapon is bouncing on the ground ?
 fallow pond
wrong collision mesh
 spare coral
any website reccomendations for 3d models that i can use to make addons e.g. vehicles, weapons and buildings etc. (I cba making them all / have limited skill when it comes to blender)
My DM's are open so feel free to message me, any and all assistance is appreciated.
fluid dragon
fallow pond
wrong collision mesh
ty was a wrong collider in the magazine xob
 wary inlet
spare coral
any website reccomendations for 3d models that i can use to make addons e.g. veh...
wary inlet
spare coral
any website reccomendations for 3d models that i can use to make addons e.g. veh...
CG trader gives you the best quality for price in my experience, dont expect everything to be perfect out of the box however
 signal gull
I asked question yesterday on the texture channel with no response, so maybe that was incorrect channel: is it possible to scale decal above 10x? I've created custom decal with custom texture, which I'd like to be 35m. I see that the texture stops scaling with the decal after 10x (10m). Any workaround?
 odd goblet
signal gull
I asked question yesterday on the texture channel with no response, so maybe tha...
odd goblet
signal gull
I asked question yesterday on the texture channel with no response, so maybe tha...
depending on what you're making, i'd look at how BI does their runway markings. for the larger parts they used a lot of meshes and road entities instead of decals. if you really need it to be a decal though, maybe you could try splitting the texture across multiple decals and lining them up together?
signal gull
odd goblet
depending on what you're making, i'd look at how BI does their runway markings. ...
Sounds logical. I’ll take a look, thanks
 upper idol
anyone have a few mins to go over weight painting with me? i have voxel using corrective smooth but still having issues any help would be a huge help and greatly appreciated!
 coarse heart
gray inlet
Anyone know why my model might be "glowing" like this? It almost seems like the ...
coarse heart
gray inlet
Anyone know why my model might be "glowing" like this? It almost seems like the ...
Oh source, my beloved, confused it for a hammer preview, lmao. Looks like an inverted normals.
 white plover
any one know how modular vests work so i can have mag puches radios ect all as sperate items that people can grab on there own and attach to a vest?
cant seam to find anything on it
brisk grotto
white plover
any one know how modular vests work so i can have mag puches radios ect all as s...
Not base game, you’d need to look at how other mods made theirs like RHS
white plover
brisk grotto
Not base game, you’d need to look at how other mods made theirs like RHS
rip how would i go about seeing how its done elsewhere just loading there mods up in workbench ?
gray inlet
coarse heart
Oh source, my beloved, confused it for a hammer preview, lmao. Looks like an inv...
Haha ya its a rip from Gmod. Ya I'll check the normals again, fairly certain it was good though.
 calm rune
gray inlet
Haha ya its a rip from Gmod. Ya I'll check the normals again, fairly certain it ...
calm rune
gray inlet
Haha ya its a rip from Gmod. Ya I'll check the normals again, fairly certain it ...
Did you just admit ripping an asset from another game and trying to inject it into Enfusion? LOL

gray inlet
It's a bastardized map that has been duplicated and modified by thousands of people. Chill brah.
calm rune
gray inlet
It's a bastardized map that has been duplicated and modified by thousands of peo...
No need to tell me to chill. I’d recommend removing whatever assets you ripped before you get banned from the workshop completely. BI doesn’t tolerate that Gmod/roblox mentality over here.
gray inlet
cool bud
calm rune
Anyway, don’t take me serious. It’s fine. Goat will pay you a visit in a couple hours when he clocks in. Then you’ll see how little they tolerate it.
 sly bridge
gray inlet
It's a bastardized map that has been duplicated and modified by thousands of peo...
sly bridge
gray inlet
It's a bastardized map that has been duplicated and modified by thousands of peo...
that’s not an excuse and iT doesn’t mean you own any of it. You need to own the IP rights for you to upload anything on the existing workshop
delicate condor
gray inlet
It's a bastardized map that has been duplicated and modified by thousands of peo...
We have 0 tolerance for that kind of things, so best to heed that advice you were given. If that thing lands on the workshop you will be banned permanently from modding.
 frosty fjord
If anyones on can i get some help with making a animation? I'm brand new to this...
nvm i think i sent this to the wrong channel..

 midnight path
made a cool tool to help people visualize stuff when tuning vehicles,
can adjust Engine, Placejka lateral, Placejka Longitudinal, and Suspension characteristics.
Adjusting values moves the graphs so you can visually see how changing values effects the overall output
Has basic descriptions of what values are and how they work.

Longitudinal and Lateral tabs are for Placejka values
calm rune
upper idol
Hey does anyone use voxel corrective smooth baker for your weights?
I do sometimes
upper idol
calm rune
I do sometimes
do you remove weight from any particular vertex groups before your after. The collar of my jackey seems to have a slight stretching maybe just lmk your process if you get a min! Thanks Vergy
and isnt the corrective smooth modifier supposed to remove itself ince you run corrective smooth baker?
calm rune
upper idol
do you remove weight from any particular vertex groups before your after. The co...
Transfer weights from the basebody to your model. Then use the corrective smooth baker. Once the process is complete just apply the modifier.
It will not be perfect. You may have to go in a tweak a few things but it does give a good final result.
 main ravine
is one meter in enfusion one meter in blender?
calm rune
main ravine
is one meter in enfusion one meter in blender?
Yes
delicate condor
midnight path
made a cool tool to help people visualize stuff when tuning vehicles,
can adjust...
delicate condor
midnight path
made a cool tool to help people visualize stuff when tuning vehicles,
can adjust...
can you add short description into the message so the pin gives a bit more info on what it does
main ravine
calm rune
Yes
Tysm, now ik why the 40mm is made look like tank shells lmao
upper idol
calm rune
It will not be perfect. You may have to go in a tweak a few things but it does g...
yea im having some issues with the collar like neck line and the between the legs like gooch area lmao
everything else is looking good
 pure walrus
IT IS NECESSARY TO PUT EVERY ACCESSORY ON THE ENTIRE VEST, WHAT I WANT IS TO EXPORT IT JUST AS IT IS, I WILL ADD SPACE LATER
 urban palm
pure walrus
IT IS NECESSARY TO PUT EVERY ACCESSORY ON THE ENTIRE VEST, WHAT I WANT IS TO EXP...
urban palm
pure walrus
IT IS NECESSARY TO PUT EVERY ACCESSORY ON THE ENTIRE VEST, WHAT I WANT IS TO EXP...
What
 ocean kiln
Does anyone have an idea of how I could fix it?
The model looks fine until it’s worn.
 sly bridge
vetices weights
ocean kiln
Thanks
brisk grotto
pure walrus
IT IS NECESSARY TO PUT EVERY ACCESSORY ON THE ENTIRE VEST, WHAT I WANT IS TO EXP...
No it’s not, you can have a vest that’s just its own model no slots etc to deal with
 fading stirrup
Hello.
What's the best way to get headwear to line up in game, as when in blender, it lines up on the body that I got from the GitHub files and it lines up on the Quebec Skeleton. But in game, it doesn't stay on the head.
 surreal ore
fading stirrup
Hello.
What's the best way to get headwear to line up in game, as when in blend...
surreal ore
fading stirrup
Hello.
What's the best way to get headwear to line up in game, as when in blend...
Wtf is the Quebec Skeleton?
 last hill
fading stirrup
Hello.
What's the best way to get headwear to line up in game, as when in blend...
last hill
fading stirrup
Hello.
What's the best way to get headwear to line up in game, as when in blend...
Did you follow the helmet weighting tutorial and weight paint the helmet to the sample skeleton bones, then check import skinning and hierarchy on the xob import options tab?
pure walrus
brisk grotto
No it’s not, you can have a vest that’s just its own model no slots etc to deal ...
No, no I could, it's just that I had a vest with a magazine holder, I wanted to put all those accessories together and add the weight, it just needs to be compacted with the bone according to what they say for vests it's spine5
fading stirrup
last hill
Did you follow the helmet weighting tutorial and weight paint the helmet to the ...
Yes to import skinning. Hierarchy, no, what do I need to do there?
Thank you in advance.
fading stirrup
surreal ore
Wtf is the Quebec Skeleton?
According to the video that I watched the normal skeleton is broken but the Quebec is on point.
 calm rune
fading stirrup
According to the video that I watched the normal skeleton is broken but the Queb...
calm rune
fading stirrup
According to the video that I watched the normal skeleton is broken but the Queb...
That video is 3 years old. The skeleton he uses is obsolete. Use the skeleton BI provides in the GitHub samples.
Tbh that series is kind of outdated.
There’s even a head model template in the GitHub samples which has all the head sizes combined for proper fitting of head gear
fading stirrup
calm rune
There’s even a head model template in the GitHub samples which has all the head ...
Thank you.
Is there a better video to watch?
calm rune
fading stirrup
Thank you.
Is there a better video to watch?
Not that I know of. I would just open up the head template provided in the GitHub samples. Import your model and fit it to that head. Then weightpaint it and then apply it to the skeleton. If you fit it on the head Template it should already be lined up perfectly with the skeleton.
last hill
calm rune
Not that I know of. I would just open up the head template provided in the GitHu...
Realised he was using the old school videos but was already back at work lol. Makes it hard when old videos have so many recommendations due to the old volume of views and linkage.
 burnt surge
Is there any tutorial or description where im able to use the morphs values for clothes like pants and jacket? Got them defined in the model and i can change them in the .xob but i cant find where i can use these to get stuff working properly.. like my boots dont fit with the pants now and the belt is still on surface.. any idea?


 fading stirrup
calm rune
Not that I know of. I would just open up the head template provided in the GitHu...
fading stirrup
calm rune
Not that I know of. I would just open up the head template provided in the GitHu...
Thank you.
frosty fjord
Anyone on that could give me some pointers? I'm stuck on trying to get a model to spawn in the arsenal.
 worn plover
burnt surge
Is there any tutorial or description where im able to use the morphs values for ...
worn plover
burnt surge
Is there any tutorial or description where im able to use the morphs values for ...
i played around with this for trying to roll sleeves up and down. no matter what you are morphing the verts will still be weighted the same. so if the morp moves the verts too far away the resulting bone weights will look pretty goofy. but if all you are doing is gathering towards center volume like in your picture you probably be able to get away with it. i just called the morph via script.
 snow pasture
Is there a way to make it so the player cant see the helmet model when there in first person?
im having this issue
 brisk grotto
snow pasture
Is there a way to make it so the player cant see the helmet model when there in ...
brisk grotto
snow pasture
Is there a way to make it so the player cant see the helmet model when there in ...
On the material you need to tick the option to enable user alpha bias
 hot viper
Having trouble with a turret im importing, the colliders are not parenting to the right bone i want, Its a UTM; I am weighting it 100% through relations. Am I limited to only the root bone?
 main mantle
hot viper
Having trouble with a turret im importing, the colliders are not parenting to th...
main mantle
hot viper
Having trouble with a turret im importing, the colliders are not parenting to th...
no, you can use other bones too
snow pasture
Dont you love when you get an error trying to export when you have models merged
 night sage
Hello, can Enfusion handle this topo mess? Or its better to get rid of these edges?


 snow pasture
anyone know why this would be happening when trying to make a full body suit. i even have it correctly weighted
 calm rune
snow pasture
anyone know why this would be happening when trying to make a full body suit. i ...
calm rune
snow pasture
anyone know why this would be happening when trying to make a full body suit. i ...
It is 100% not correctly weighted
snow pasture
No I forgot to disable leaf bones
 noble ravine
night sage
Hello, can Enfusion handle this topo mess? Or its better to get rid of these edg...
noble ravine
night sage
Hello, can Enfusion handle this topo mess? Or its better to get rid of these edg...
maybe is redundant geo. Normal map will do better
night sage
noble ravine
maybe is redundant geo. Normal map will do better
I merge the vertex in that bend... and its a cad model before import to Blender.
 sly bridge
night sage
Hello, can Enfusion handle this topo mess? Or its better to get rid of these edg...
sly bridge
night sage
Hello, can Enfusion handle this topo mess? Or its better to get rid of these edg...
very small triangles mihht create issues. It used to be that small triangles were disregarded (so there would be gaps) the workaround being to import the mesh at 10x scale and scale it down locally. That i think it was fixed since 1.1
delicate condor
Imo such detailed tiny bend does not really serve any purpose for game model
 topaz willow
Is there a guide on building creation on the Biki? I couldn't find one, unless I overlooked it
 plush torrent
night sage
Hello, can Enfusion handle this topo mess? Or its better to get rid of these edg...
plush torrent
night sage
Hello, can Enfusion handle this topo mess? Or its better to get rid of these edg...

I render cad models for marketing purposes every day and of all the ways to bring in Solidworks CAD models into Blender this is by far the most streamlined way in my opinion.
This method is great for simple models and models that have thousands of parts.
You can find the plugin over at https://gumroad.com/l/stepper
Models used in this video...
night sage
plush torrent
https://www.youtube.com/watch?v=69UFYxp7qNQ
Stepper is not good for final production. Im using it only for fast previews. Some CADs has advanced meshing tools. But def interesting tutorial. Thx


 brisk grotto
topaz willow
Is there a guide on building creation on the Biki? I couldn't find one, unless I...
brisk grotto
topaz willow
Is there a guide on building creation on the Biki? I couldn't find one, unless I...
No there isn't mostly the same principle as the other enfusion model stuff. Essentially import your building as one fbx, doors, props etc on their own to socket in is best practice.
 lapis perch
Thanks to your post, I figured out how it works, and here's a quick guide for beginners on how to avoid the same situation I got into (the entire setup is in emat) @crystal kestrel


 dense wren
anybody good with coliders?
fallow pond
if you have question about them than ask
signal gull
How do I properly define the snap points? I created them like in the Bohemia wiki weapon/prop creation, using empty object, calling it snap_[name of my snap object] and selecting together with the object I want to export, but this seems to ignore the points, like they never existed. Any additional settings I have to set?
Does the name of the snap point matter? Can I use custom names or are they somehow pre-defined and won't work if not named properly?
brisk grotto
signal gull
How do I properly define the snap points? I created them like in the Bohemia wik...
Are you exporting as a standard FBX or are you using their blender plugin?
signal gull
brisk grotto
Are you exporting as a standard FBX or are you using their blender plugin?
I'm using standard blender export. Made sure that I also export empty and custom properties
Should I use the plugin instead?
brisk grotto
signal gull
Should I use the plugin instead?
Yeah try with that, their plugin is better for sanitising stuff the way their engine expects it for import
signal gull
signal gull
How do I properly define the snap points? I created them like in the Bohemia wik...
I found the solution, so for a future reference, if anyone has the same problem: Check the import settings of the .xob. Export skinning option must be checked
 urban trench
my cockpit wont show as it show in blender like a glass shader did someone know how to fix this ?

 mighty bronze
urban trench
my cockpit wont show as it show in blender like a glass shader did someone know ...
mighty bronze
urban trench
my cockpit wont show as it show in blender like a glass shader did someone know ...
- Make sure its using MatPBRGlass instead of Basic. (Usually top of material properties)
- Make sure youre applying your opacity map with the right _suffix
I think _A is for opacity (or one specifically for opacity)
 sage lance
Why do props generally use both a UCL (or UBX) "PropView" and UTM "FireGeo" collider rather than just using a single UTM "PropFireView" collider?
 brisk grotto
sage lance
Why do props generally use both a UCL (or UBX) "PropView" and UTM "FireGeo" coll...
brisk grotto
sage lance
Why do props generally use both a UCL (or UBX) "PropView" and UTM "FireGeo" coll...
Because it's a performance thing, better to have the simple collider for view and basic simulation, only need more complex and accurate ones when dealing with the fire, penetration etc
 bitter grove
does anyone know if its possible to be able to place buildables on a custom terrain covering? like a terrain top covering a tunnel
mighty bronze
urban trench
my cockpit wont show as it show in blender like a glass shader did someone know ...
incase you haven't gotten to it yet this is what I mean by change the material's class
 delicate condor
urban trench
my cockpit wont show as it show in blender like a glass shader did someone know ...
delicate condor
urban trench
my cockpit wont show as it show in blender like a glass shader did someone know ...
can you DM me the source for your model?
delicate condor
please no crossposting same thing on multiple channels. Youll have to pick one that seems to fit best to your question and delete the rest
 covert fog
delicate condor
please no crossposting same thing on multiple channels. Youll have to pick one t...
covert fog
delicate condor
please no crossposting same thing on multiple channels. Youll have to pick one t...
But I don't know which one. I need an answer asap!
delicate condor
covert fog
But I don't know which one. I need an answer asap!
people answer at their convenience, not to appease your hurry.
also its in the #rules
so im not asking
covert fog
delicate condor
people answer at their convenience, not to appease your hurry.
Sure thing. But can you at least tell me where my question fits?
delicate condor
my guess would be #enfusion_configuration would be the best
unless someone there can suggest a better channel
covert fog
delicate condor
my guess would be <#976159689668722718> would be the best
Thank you
 sleek forum
Is there a way to make static dead bodies out of vanilla characters? How to freeze their pose in a certain position?
 sonic tree
maybe loop anim and make character immortal
delicate condor
there are static dead state animations
sonic tree
good to know
 storm copper
So ihave copied scrim idea from vanilla to the helmet, and scrim stil renders in face what im i doing wrong ? I have generated Opacity map as TEXFMT_BC4 (80), no clue what else is needed ?


Maybe im missing here something ?


 fierce kraken
storm copper
Maybe im missing here something ?
fierce kraken
storm copper
Maybe im missing here something ?
^
storm copper
fierce kraken
Is "Allow User Alpha Bias" Ticked?
Yea it is
fierce kraken
@storm copper Maybe set cull to none, idk if that would do anything but its set to none on the vanilla version.
I see you've done that. Ignore me.
It looks like if the Alpha Mul is set higher than 1 the scrim is visible.
storm copper
fierce kraken
It looks like if the Alpha Mul is set higher than 1 the scrim is visible.
Not at pc anymore but i belive i do mul over 1 scrim becomes transperent
 main shoal
Anyone know what bone would a belt be best weighted to?
 cedar wolf
is there a tutorial i can follow so i can mod my own clothing items into the game? like boots and shirts?
fallow pond
making those assets it pretty universal today
storm copper
fierce kraken
<@282700646468157440> ~~Maybe set cull to none, idk if that would do anything bu...
Manged to get it work just duplicated original scrim and edited it, worked just fine than making one from scratch
dense wren
is there anybody that can help me with UV's plz
 sly bridge
dense wren
is there anybody that can help me with UV's plz
sly bridge
dense wren
is there anybody that can help me with UV's plz
there is a single main rule for UVs - have an UV split where you have a hard edge. Second one is to keep deformations low
not sure what specific help you need
dense wren
Well I'm at the point where I'm texturing and stuff and I have nonidea how to lmao that and want to separate areas for different textures
fierce kraken
dense wren
Well I'm at the point where I'm texturing and stuff and I have nonidea how to lm...
I use Quixel Mixer and GIMP (both free) for all my texture work, to get different textures on the same UV image use Material ID's, I use Tex Tools for this (free blender addon). There are tons of videos on youtube about UV tips but its one of those things you get better at by doing, and doing them always sucks (in my opinion). I've yet to meet someone who likes doing UV's.
mighty bronze
not seeing any replies
or updates from y ouabout getting this fixed
did you check face orientation on your PIP mesh to make sure its acing the character?
Also I'e been checking this daily not sure why I got sent back in time a couple days
 merry rivet
dense wren
Well I'm at the point where I'm texturing and stuff and I have nonidea how to lm...
merry rivet
dense wren
Well I'm at the point where I'm texturing and stuff and I have nonidea how to lm...
I've send you a pm
sly bridge
fierce kraken
I use Quixel Mixer and GIMP (both free) for all my texture work, to get differen...
nothing against GIMP, might want to give affinity a try, it is the closest thing to PhotoShop while also beeing 100% free (minus if you wanna use any of the AI thing)
sly bridge
dense wren
Well I'm at the point where I'm texturing and stuff and I have nonidea how to lm...
depends on what you mean by separatation. Supstance Painter for instance can do it in multiple ways (based on topology, specific mask, vertex paint etc)
dense wren
Substance painter is that all thing you gotta pay for or?
sly bridge
dense wren
Substance painter is that all thing you gotta pay for or?
yeah it is.
for 3d texturing the options are painter(paid), mari(paid), 3dcoat(paid), armorpaint (free) and quixel mixer (also free but abandoned by quixel/epic) edit - also instaMat(free)
dense wren
Ok so in your opinion witch one would you recommend
delicate condor
Anu program you learn to use would work.
brisk grotto
Personally I’d always suggest substance but it’s not cheap
dense wren
Yeaaaaa thats the only downside lol
 astral hull
brisk grotto
Personally I’d always suggest substance but it’s not cheap
astral hull
brisk grotto
Personally I’d always suggest substance but it’s not cheap
$20 a month isn’t bad for what it offers
Especially if you do a lot of models
dense wren
That's alot for me, thats 2400$ I can spend on sum eles lol
astral hull
If you can prove you are a student I think there’s a free one
astral hull
dense wren
That's alot for me, thats 2400$ I can spend on sum eles lol
$240*
brisk grotto
astral hull
$20 a month isn’t bad for what it offers
Way overpriced since our corporate overlords Adobe took it on
astral hull
U used to be able to buy photoshop…. Yeah
astral hull
brisk grotto
Way overpriced since our corporate overlords Adobe took it on
I paid for it on and off the past few years, I’ll pay for a month , do a bunch of models and then turn it off
dense wren
astral hull
$240*
shit you right
snow pasture
Anyone know why when i vertex paint a left shoulder and a right shoulder, the right shoulder is perfectly fine but the left shoulder is all messed up
idk if my bones are messed up or something
 fallow pond
I just bought a steam key... for 150
dense wren
does anybody know how to scale Wood material to make it smaller?
 dense wren
nvm got it lol, new question how do i add roughness to the texture i already have downloaded
dense wren
mans got hacked
i think im doin this wrong lol
would it be possable to get help for a min?
 delicate condor
dense wren
i think im doin this wrong lol
would it be possable to get help for a min?
delicate condor
dense wren
i think im doin this wrong lol
would it be possable to get help for a min?
No crossposting thx.
mighty bronze
sly bridge
nothing against GIMP, might want to give affinity a try, it is the closest thing...
oh my fuck this makes reticle design/alignment so much easier than photopea
-# photopea made me wanna hurt some1
-# my lawyer has informed me to make sure its known that last part is a joke
sly bridge
astral hull
U used to be able to buy photoshop…. Yeah
you can still buy substance painter via steam vs subscription via adobe. it is 195euro for a single pay
sly bridge
dense wren
Ok so in your opinion witch one would you recommend
i use painter.
for free, i would focus on armorpaint or instaMat. Mixer development has been halted and a last version has been released with no further updates planned
dense wren
sly bridge
you can still buy substance painter via steam vs subscription via adobe. it is 1...
Good to know
dense wren
delicate condor
No crossposting thx.
Wym? Are they not for the same thing?
delicate condor
dense wren
Wym? Are they not for the same thing?
different channels
as in to keep answers/conversation of same thing in one place
dense wren
Ok I'm not trying to argue or anything just genuinely curious but are models and texture channels not for the same thing?
delicate condor
dense wren
Ok I'm not trying to argue or anything just genuinely curious but are models and...
one is for model making, the other for textures etc related specifically. There is certainly some things that fit both channels. The main thing is not to post on both/many channels but pick which ever feels like fits best
its also in our #rules
dense wren
Yeah, no I got that. I was just curious. I'll go in and text in one channel. It'd be about textures or something like that. And I can go and get sent to another channel by somebody just confusing at times lol aspeshaly if ya dont use this discord much
But I got ya won't happen agian lol
sage lance
I've created a BSP model and some portals for my building, but I'm getting this error log when I export despite the Enfusion Tool's MQA Overlay reporting that my model has no issues in Blender. Any ideas on how I can locate and resolve these issues? Also, what the hell is an orphaned fragment? And how can a 4 vertex plane possibly have 32 of them?


I should add that I did not crete the PRTs using sockets. I couldn't get it to work, which I assume is due to the arch shape of the gate entrances. So I just created a plane, scaled it around the gate entry ways in the BSP, gave them the PRT prefix, and generated them
 final merlin
You have to choose BSP in the Medel Quality Assurance. I don't think your BSP Mesh is right and Blender doesn't say it because you are checking for Portal quality.
 final merlin
sage lance
I should add that I did not crete the PRTs using sockets. I couldn't get it to w...
final merlin
sage lance
I should add that I did not crete the PRTs using sockets. I couldn't get it to w...
You have to scale the Portal in Object Mode, not in the Edit Mode of Blender. Then it should not leak anymore.
Just create a Plain, scale it in object mode and then assign or create a Portal Material for example "PRT_90x142_A_EM_"
 sage lance
final merlin
You have to scale the Portal in Object Mode, not in the Edit Mode of Blender. Th...
sage lance
final merlin
You have to scale the Portal in Object Mode, not in the Edit Mode of Blender. Th...
Didnt solve it unfortunately
midnight path
can we get a dedicated Enfusion_Vehicle channel?
final merlin
sage lance
Didnt solve it unfortunately
I think you need to fix your BSP Mesh first.
https://community.bistudio.com/wiki/Arma_Reforger:FBX_Import#Portals_&_BSP_Geometry
sage lance
final merlin
I think you need to fix your BSP Mesh first.
https://community.bistudio.com/wiki...
So I went back and improved it using the wiki (thought the BSP mesh was good initially, but it was sort of bugged due to how complex it was and how I went about it). I've got it down to 180 "faces that were incident with selected split plane", yet there are no split planes in the model from what I can tell. And just 1 orphaned fragment (I am attempting just one portal, PRT_gate_02, for now rather than two). The issue now is that I cant lower the figure any further despite everything I try. No amount of cleaning or simplifying the mesh is improving either issue anymore. Do you know what the issue could be? Also, thanks for your help so far

 surreal ore
sage lance
So I went back and improved it using the wiki (thought the BSP mesh was good ini...
surreal ore
sage lance
So I went back and improved it using the wiki (thought the BSP mesh was good ini...
I'd assume the top is what is causing all of the issues.
sage lance
surreal ore
I'd assume the top is what is causing all of the issues.
Not my beautiful windows frames!
surreal ore
windows, including frames are meant to be prefabs of their own, attached to the building using the slot manager.
sage lance
Yeah... im assuming that and the gate arches are the primary culprits. I dont want to get rid of them bc those are the main reason im doing this BSP (for the lighting)
surreal ore
I would still guess they they aren't the culprit and it's in fact the top thats causing the issues.
There aren't 180 faces in the arches.
The only portion that has that many faces is the top.
Your windows and frames should be their own prefabs, that would include the option to be breakable and such.
sage lance
Should I get rid of the frame and just leave a giant rectangular hole. Im trying to do what they did on the wiki and some videos I found, but these were just the window I guess
 sage lance
surreal ore
There aren't 180 faces in the arches.
sage lance
surreal ore
There aren't 180 faces in the arches.
Does it actually mean there are 180 faces? Bc I have looked at this thing for like 12 plus hrs and I cant find any split planes. And the research I did seems to suggest that Enfusion may calculate the split planes differently than how blender does, which would explain why the MQA overlay tool in blender isnt detecting them
sage lance
surreal ore
Look at any of the base game buildings
Thats what I started off with actually, but everything appears in terms of sockets. I dont know how to view the literal light portal planes, assuming thats possible
 surreal ore
sage lance
Does it actually mean there are 180 faces? Bc I have looked at this thing for li...
surreal ore
sage lance
Does it actually mean there are 180 faces? Bc I have looked at this thing for li...
That's exactly what happens. I would assume those frames are so small that it's doing some odd calculations when you import.
Regardless, as I've said. Your windows and frames should be their own prefab.
sage lance
surreal ore
Regardless, as I've said. Your windows and frames should be their own prefab.
But they would not get their own BSP, right?
surreal ore
Make the top into a single big window without frames and I bet you don't have import problems
Well 4 big windows
sage lance
surreal ore
Make the top into a single big window without frames and I bet you don't have im...
While I have you, what about the gate arches? Is this acceptable for a BSP model or is this screwing it. Bc I cant find any video or info on anything but square doors/windows. The square in the image is the PRT for the gate arch
 surreal ore
I would assume it's fine but it may not be. Never done arches before
dense wren
sage lance
So I went back and improved it using the wiki (thought the BSP mesh was good ini...
Have you tried a clean mesh addon?
dense wren
sage lance
Also i think it said sum about the gate in this Pic
No idea what orphaned fragment would be tho
sage lance
dense wren
Have you tried a clean mesh addon?
Ive managed to get it working. Still get the error msg "AreaPortal 'PRT_Gate_02' (0) doesn't have vertices assigned! Check the model, it's leaking.", but no more orphaned fragements and split planes. Problem was that some faces were not planar (or at least there was a number of pesky vertecies that were ever so slightly off). Had to litterarly go to every single set of verts and ctrl + s + 0 across every axis to get everything to line up
However, now im trying to get the boxvol to work, and of course, its being difficult upon export. No errors. Just not working... or not exporting. Cant rly tell
dense wren
Yea that happens to me sometimes when I try to export sometimes and with the prt_gate_02 you know how you can assign textures to specific vertices or faces? Maybe you have to do sum like that or sum didn't get applied? But when I was doing my underground bunker I had like 13k vertices and I used that mesh cleaner or clean mesh add on and not I got like lol under 1500 but kept the look of the mesh
dense wren
sage lance
However, now im trying to get the boxvol to work, and of course, its being diffi...
Go figure its a lil bit of a terd tbh I use a different addon when it comes to doing that lol
sage lance
dense wren
Go figure its a lil bit of a terd tbh I use a different addon when it comes to d...
Yes. This has been nothing short of fucking horrible to attempt and figure out. Wouldn't have been so bad if my damn building didn't have such a complex shape
dense wren
Lmfao I feel that
dense wren
sage lance
Yes. This has been nothing short of fucking horrible to attempt and figure out. ...
Pmed ya
sage lance
So ive confirmed that my building’s BOXVOL is being exported with the model into Enfusion. However, whenever I add the base house prob to the prefab, it refuses to automatically connect to the BOXVOL and I have absolutely not idea why. Does anyone know what the source of my issue is?


 surreal ore
sage lance
So ive confirmed that my building’s BOXVOL is being exported with the model into...
surreal ore
sage lance
So ive confirmed that my building’s BOXVOL is being exported with the model into...
Did you assign it a material named "dummyvolume" in Blender?
sage lance
surreal ore
Did you assign it a material named "dummyvolume" in Blender?
Yes. Can be seen in image 3
surreal ore
I'm on my phone those images are too small lol.
sage lance
Yeah same here. I was just about to go to bed
But any help tmrw would be extremely appreciated. This model is rly fucking with me
surreal ore
I may or may not have time tomorrow but I'm always around
I'm at work just clocked back in from break otherwise I'd help more.
Portal volumes and box volumes are a little different though.
One requires a material with a specific name and the other requires a specific material.
The box volumes requires one with a specific name not a specific material.
It them must be changed after importing to workbench
sage lance
Yeah, the boxvol automatically had the correct dummy material assigned. I created the PRT_Gate material and then took the one your referencing, copy and pasted it into a mat light source emat type or something along those lines
brisk grotto
tripple check in Blender, is it convex?
sage lance
brisk grotto
tripple check in Blender, is it convex?
Yes. It’s a cube
sage lance
brisk grotto
tripple check in Blender, is it convex?
Could it be that my model’s utm collider mesh is not closed? The underside of the foundation doesn’t have a face. I’ve read that the BOXVOL interacts with the colliders, so I’m wondering if the mesh being open is preventing Enfusion from recognizing the BOXVOL model
I would add a face to close the mesh and test it, but the model’s design makes it a little difficult. Since the wall and floors are already loose and overlapping (intersecting faces and loose parts) and the vertex count needs improvement, I’m redoing the collider. That being said, I don’t know if it will solve my BOXVOL issue
final merlin
I tested what the Boxvol needs to show up in Enfusion.
I created a mesh and the Boxvol, nothing else. I didn't assign any dummy material. Just exported it to Enfusion.
In Enfusion I dropped the .xob File in to Arland and added the ProbeHouse_Base as a child of the .xob file. The Boxvol showed up as a "shadow" on the mesh.
In conclusion, the boxvol needs nearly nothing to be visible in Enfusion.
Maybe you didn't set up your Testworld? Did you try to drop your building in to Arland?

 sage lance
final merlin
I tested what the Boxvol needs to show up in Enfusion.
I created a mesh and the ...
sage lance
final merlin
I tested what the Boxvol needs to show up in Enfusion.
I created a mesh and the ...
I solved it; the issue was incredibly stupid. I have two versions of my model. The original/backup I used for texturing. And the new one Im creating the BSP with. Well, the prefab switched from the new .xob back to the original at some point and I just didn't notice bc the models are identical
final merlin
sage lance
I solved it; the issue was incredibly stupid. I have two versions of my model. T...
Happy little mistake 
sage lance
final merlin
Happy little mistake <:meowheart:981465942842302494>
Though, any chance you know why this is happening? Ive done all the suggests from before, but Im getting the orphaned fragements error again (I think the .xob switch is why I stopped getting it in the first place, which caused me to assume that I fixed it earlier). I've done everything: S+x-/y-/z-axis =0 for each set of aligned vertecy, ensured that my vertecies and edges are all connected, went through the walls of my model to confirm there are no edges connecting the exterior and interior walls other than the entry way, reduced the vertex count, checked normals, examined the BSP debug info in the world editor, centered my portals along the entry way, ensured proper materials, etc. Nothings worked. Subsequently, the portals arent working properly, which is preventing the probe from working properly. Causing my buildings lighting to appear all weirdly shaded black.


 final merlin
It happens for me if the Portals don't touch the BSP Mesh (picture). I get the same error as you do. If i snap the portal back onto the BSP Mesh, the errors disappear.
Even if one PRT is not touching the BSP Mesh, Enfusion says, all Portals are leaking.
 sage lance
final merlin
It happens for me if the Portals don't touch the BSP Mesh (picture). I get the s...
sage lance
final merlin
It happens for me if the Portals don't touch the BSP Mesh (picture). I get the s...
But mine is square in the middle of the entry way in the BSP. 


That second part is good to know though. Didn't know that
Ive also got the portals up against the face of the portal volume. I know the portal volume is optional, but Ive got thin roof with holes in it (in the lod, not the bsp). So I thought it would be a good idea to do. Problem occurs with or without the portal volume though
 final merlin
For my bulding the BSP is smaller than my LOD Mesh. See the first picture. The Portals are not inside the BSP, they are touching face to face with the BSP Mesh.

 sage lance
I thought the portals were supposed to be slightly bigger than the BSP mesh? But ill give it a try
final merlin
They are. look at the wierd lines on the second picture at the right window. That's the size of the portal. Blender doesn't know what face it should show, because the two faces are touching each other.
 sage lance
final merlin
They are. look at the wierd lines on the second picture at the right window. Tha...
sage lance
final merlin
They are. look at the wierd lines on the second picture at the right window. Tha...
Still no luck. Im just trying anything at this point. Managed to get it down to one orphaned fragment somehow due to this weird positioning of the PRTs by the portal volume's automated PRT placement. I have no idea why it put the PRTs up in the air like that or how it reduced the orphan count


But obviously the PRT is not useable in that position
final merlin
I have no idea what an orphan is 🙁
But move the portals to the center, so the holes of you BSP are covered by the Portals
final merlin
sage lance
Still no luck. Im just trying anything at this point. Managed to get it down to ...
Maybe move your BSP walls to the size of your BoxVOL.
For me the Boxvol and the BSP have the same X and Y size.
sage lance
I’ll give it a try in the morning. But if that doesn’t work, I’m going to try and see if someone is willing to take a look at a copy of my blend file. I dunno what else to do at this point
 umbral tartan
How do I rig it properly so leaves are not connected with opposite leg (leaves from leg are rigging to right leg)
 brisk grotto
umbral tartan
How do I rig it properly so leaves are not connected with opposite leg (leaves f...
brisk grotto
umbral tartan
How do I rig it properly so leaves are not connected with opposite leg (leaves f...
you'd have to manually play with weights and add/remove them from specific bones
 bitter beacon
umbral tartan
How do I rig it properly so leaves are not connected with opposite leg (leaves f...
bitter beacon
umbral tartan
How do I rig it properly so leaves are not connected with opposite leg (leaves f...
You could always use edit mode and select the leaf cards and assign weight rather than trying to paint manually so it doesn’t bleed from one side to the other
Or separate by parts and do it piece by piece
 lethal frigate
blender update broke the plugin for materials , i reverted back to 4.0 and its also not working
is there anything that can be done about it?
brisk grotto
lethal frigate
blender update broke the plugin for materials , i reverted back to 4.0 and its a...
Just stick to 4.5 LTS blender and it should all work?
lethal frigate
cant select it in betas page
brisk grotto
lethal frigate
cant select it in betas page
Download it direct rather than from Steam
The last LTS release of the Blender 4.x series, supported until July 2027.
lethal frigate
i got it now but the material tab is empty cant select any material type
night sage
Is version 4.5 the only one recommended for Reforger modding?
im still at 3.6 🫣 also still have not Reforger 🫣 🫣 🫣
sage lance
sage lance
I’ll give it a try in the morning. But if that doesn’t work, I’m going to try an...
FUCK YES! Finally fixed it. It wans't a problem with the previously placed portals, the BSP mesh, or any other mesh. The problem was that my windows did not have portals inserted in them unlike my door frames. I was going to do the window portals after fixing the door portals, which is why I never noticed. I didn't know that all openings (window/door frames) required a portal to fill the space prior to exporting the BSP to Enfusion. Otherwise, none of the other portals will work despite being correctly assembled in Blender. This is why the error log kept reporting that each portal had 2 "orphaned fragments": the two window openings that didn't yet have portals


BI, your wiki on the subject is incredibly lacking and shit. No explanation of common error logs or their terminology. No mention that all openings require a portal before export. Wtf!?
bitter beacon
sage lance
BI, your wiki on the subject is incredibly lacking and shit. No explanation of c...
that's most of the wiki lol the majority of it hasn't been updated in 2 years lol
bitter beacon
lethal frigate
i got it now but the material tab is empty cant select any material type
common just reselect the file path of your materials
brisk grotto
night sage
Is version 4.5 the only one recommended for Reforger modding?
They say to use LTS, and the most stable current one I know for sure the plugin is ok with is 4.5
sage lance
brisk grotto
They say to use LTS, and the most stable current one I know for sure the plugin ...
I use v5.0.1 with no problems with Enfusion tools, including the materials. Though I only use it for LODs, colliders, and some other mesh types. Not animating or texturing
 sour forge
Can anyone help me rig a hat and set up the LOD so that it behaves like a Vanilla Russian Helmer. I've had it working, then go to change something and it sits 10 feet above the character, or it does a number of other things that I cannot seem to solve.
Its weighted to the head bone, armature parented to the skeleton. idk what to do at this point
burnt surge
sour forge
Its weighted to the head bone, armature parented to the skeleton. idk what to do...
While export to FBX select checkbox "Selected Objects" and deselect "Add leaf Bones"
While import .xob select the checkbox "Export Skinning" and reimport, if you did all right it should work then 🍻
And if its still not working, follow this tutorial: https://youtu.be/dUNN_KeyjkQ?is=CKDeX1Wm1pR6uW6w
sour forge
burnt surge
While export to FBX select checkbox "Selected Objects" and deselect "Add leaf Bo...
Thanks 🙏
Will look into this
sage lance
Does anyone know how to solve this shading issue with the roof thats resulting from the BOXVOLs? I tried experimenting with my two roof BOXVOLs' LERP value in the import settings and increasing the thickness of my roof in LOD0 to no avail. If the LERP value is too high, the exterior's shading is bugged and the interior is good (check images). If too low, the exterior is good but the interior has no shading.


Do I need to cut the BOXVOLs with planes based on the shape of the roof?
 fluid moat
anyone know why in Arma Reforger tool i see my object face inverted ?


 sage lance
fluid moat
anyone know why in Arma Reforger tool i see my object face inverted ?
sage lance
fluid moat
anyone know why in Arma Reforger tool i see my object face inverted ?
Your normals are inverted. In blender, Edit Mode --> Select all faces that are inverted --> Alt+N --> Flip
To see what direction your normals are faced, enable "Face Orientation" in Viewport Overlays (top right of your screen)
 fluid moat
thanks 🙂
sage lance
fluid moat
thanks 🙂
np
sour forge
burnt surge
While export to FBX select checkbox "Selected Objects" and deselect "Add leaf Bo...
i cant with this lol


 gaunt bane
sage lance
Does anyone know how to solve this shading issue with the roof thats resulting f...
gaunt bane
sage lance
Does anyone know how to solve this shading issue with the roof thats resulting f...
Intersect the volume boxes with primitive planes. You can insert them so that that sit in between the outside of the roof and the inside ceiling. You have to join the cutting plane with the box vol to be one object (max 4 planes per volume)
sage lance
gaunt bane
Intersect the volume boxes with primitive planes. You can insert them so that th...
Did it earlier; didn't work. Fixed it after a while. Only had one roof material with "Disable interior probe" unchecked. Did not realize that materials for the exterior need a separate material from the interior w/ this setting enabled
 wanton tinsel
Hi, guys. Do you know why my model gets black color using default PBR material when placeholder gets real red color?


I'm really confused
sonic tree
im really confused about your system
 cloud rampart
wanton tinsel
Hi, guys. Do you know why my model gets black color using default PBR material w...
cloud rampart
wanton tinsel
Hi, guys. Do you know why my model gets black color using default PBR material w...
Vertex color
wanton tinsel
cloud rampart
Vertex color
I mean, for some reason my model isn't displaying the red color
cloud rampart
wanton tinsel
I mean, for some reason my model isn't displaying the red color
You need to go here on blender and leave it empty (Click on - )
 wanton tinsel
cloud rampart
You need to go here on blender and leave it empty (Click on - )
wanton tinsel
cloud rampart
You need to go here on blender and leave it empty (Click on - )
Oh, thanks
 alpine pebble
Is it possible to trigger LOD states through actions? Rather than distance from the model. For instance, if I turn out, the model LOD will change.
brisk grotto
alpine pebble
Is it possible to trigger LOD states through actions? Rather than distance from ...
Don't think so, the engine just changes LOD based on a mixture of performance, distance etc. All you can do is increase or decrease how quickly it does that (LOD factors)
alpine pebble
Ah gotcha thank you.
 pulsar sandal
Any good tutorials on making props / buildings in blender?
As far as extracting from blender and importing in workbench
 deep trout
Hey everyone! I’m seeing this weird mesh stretching on my hoodie whenever the arms move. The armpit seems to be pulling too much from the upper back. Any advice on how to paint the weights in this area to keep the torso stable while the arm is raised?
 fallow pond
deep trout
Hey everyone! I’m seeing this weird mesh stretching on my hoodie whenever the ar...
fallow pond
deep trout
Hey everyone! I’m seeing this weird mesh stretching on my hoodie whenever the ar...
depends on how you weight painted it and toplogy of the mesh
deep trout
I inherited the weights from the "Character_Weights_Template" sample directly onto my hoodie.
surreal ore
You'll still need to manually paint some things to get a good result
Transferring isn't a fix all
sage lance
How do I tone down the level of light exposure in my windows and doorway? Its blinding

So much so that Im betting you didn't see the soldier pressed up against the window frame on the roof
 surreal ore
Something to do with the portals material iirc
sage lance
surreal ore
Something to do with the portals material iirc
Yea ive tryied messing around with it but its not doing much. Maybe I need to reload the scripts after modifying it
calm rune
deep trout
Hey everyone! I’m seeing this weird mesh stretching on my hoodie whenever the ar...
Look at the vertex groups that include Arms and Spine. Your culprit will be in one of those.
 fickle vigil
sage lance
How do I tone down the level of light exposure in my windows and doorway? Its bl...
fickle vigil
sage lance
How do I tone down the level of light exposure in my windows and doorway? Its bl...
Try some tweaks to probe settings like HDR. I never found that the portal materials did much if anything at all.
sage lance
fickle vigil
Try some tweaks to probe settings like HDR. I never found that the portal materi...
I did mess around with the probe a bit. HDR settings didn’t do much of anything. The brightness LV (or something along those lines, Im not able to look at it atm), was the only thing that improved it. However, it brightens up the entire interior, which practically removes all of the interior shading
I’m gonna try adding the glass to see if that helps (doubt it). Unless there’s another setting to mess with, the only other potential fix I can think of is to create a separate building model for the windows so it can have its own probe
fickle vigil
Wonder if thers any diag menu options that would let you see vanilla portal info. I know there are some but not sure if any of the options ive used would help
sage lance
fickle vigil
Wonder if thers any diag menu options that would let you see vanilla portal info...
There is, but it just show positioning and material info
fickle vigil
Would be nice if the lerp values did more softening of the transition. Seems like they mostly just move the cutoff point between int and ext
 ember blaze

I can’t remember where the supply settings are on a vehicle (if I want to add more supplies to the load capacity).... Anyone??
 shut bloom
sage lance
How do I tone down the level of light exposure in my windows and doorway? Its bl...
shut bloom
sage lance
How do I tone down the level of light exposure in my windows and doorway? Its bl...
That intensity is due to you having Portals and BSP but not a correctly set up Interior Probe. I had to double-check since it's been a while. In the Probe, you can enable HDR Modifications and control the Visible White and Black Percentile, which will help decrease the intensity.
sage lance
shut bloom
That intensity is due to you having Portals and BSP but not a correctly set up I...
I used the base house probe. Then I copied and pasted the warehouse probe values into it, how could I have not see it up correctly? I attached it as a child prefab and it’s connecting to the boxvols
sage lance
shut bloom
That intensity is due to you having Portals and BSP but not a correctly set up I...
k. After getting home and checking, I can see what you mean. But I already had that enabled and set to 73 and 67 (the warehouse), so thats not the issue
I should also mention that the exposure gets worse with distance. At a certain distance away (like 10-15 ft), it instantly transitions from normal to blinding
 hybrid mountain
ember blaze
I can’t remember where the supply settings are on a vehicle (if I want to add mo...
hybrid mountain
ember blaze
I can’t remember where the supply settings are on a vehicle (if I want to add mo...
wrong channel, #enfusion_configuration is a better one for this.
Supplies are stored in the slot manager iirc, so basically look at a UH-1 Transport and see it's slot manager, slots named "SupplyStorage" each are prefabs configured to store a certain amount of supplies. You can add more of those to a model via additional slots, or change the definition within that prefab alltogether. There should be a resource component on the main vehicle which helps coordinate the supply storage slots.
shut bloom
sage lance
k. After getting home and checking, I can see what you mean. But I already had t...
As said been a while. Could be allot of different small things. Ill have a check again later if I dont forget.
Things that could have a impact are.
- The normal Orientation of the Portals in the Model.
- The Portal .emat.
- As mentioned the Probe settings(but you got yours correct most likely).
- The Boxvol does not have the correct Material assigned to it( unlikely but because it wouldnt work atall of it did, but better to double check)
- Some general problem from your Portals in the model. (Maybe light bleeding etc / should throw errors though.)
- Missing the BSP Model.( idk if the Auto generation still works for Portals, but you should make the BSP yourself.)
As said if I dont forget I will check my stuff again later. Maybe this already helps you find the Problem though 😄
sage lance
shut bloom
As said been a while. Could be allot of different small things. Ill have a check...
Rly appreciate your help! I think i've got most of this right tho. Portal normals are def good, portal emats are correct, probe apepars working, boxvol got dummy emat, 5 is possible but not getting any errors (other than a 1 face not being coplanar that I got to go back and fix. But this was occurring before I accidently caused that. Plus, not a yellow error), and creating the BSP model was created by hand
sage lance
shut bloom
As said been a while. Could be allot of different small things. Ill have a check...
I'm starting to think this isn't an issue with my model or probe settings but a limitation of the BSP lightmapping system (or Enfusion's implementation of it). I'm noticing the exact same effect in interiors of the mineshaft and sawmill. What's weirder is that the light exposure is even worse when its cloudy outside. The player's distance from and viewing angle of the window are definitely factors in whether this overexposure effect occurs. You can see in the image at the sawmill that the exposure is bad in both the upper and lower windows. However, its def way worse in the upper window b/c you cant even see the character model pressed up against it whereas you can at least make out the bush and fence through the lower window.

That said, maybe my model does have some issue. On my model, the severity of the exposure does not change depending on whether the window is facing the sun or not. It's equally as bad on either window set despite the character model being in the shade on one side but not the other. However, on the sawmill, the exposure is gone when the character on the roof is positioned next to the windows on the other side of the building, in which he is in the shade.
shut bloom
sage lance
I'm starting to think this isn't an issue with my model or probe settings but a ...
Ill check my Buildings later. Weird thing is that your doors also have this extreme overexpo. Do you have 1 or multiple boxvols? Probably multiple due to the shape of the building.
Also is this on your own map or on a BI map?
sage lance
shut bloom
Ill check my Buildings later. Weird thing is that your doors also have this extr...
Multiple. Shape of the building, the arches and doors being on differing x-axis position, and the decor exterior of the building, make it impossible to use just one. I have them overlapping with eachother, but that shouldn't be a problem from what ive read and watched

Ignore "SPHVOL_04". That was just a test to see if the sphere volume would be better for the arches than the BOXVOLs; it wasn't and isn't being used
shut bloom
sage lance
Ignore "SPHVOL_04". That was just a test to see if the sphere volume would be be...
You might have missed it. Did you test this on a BI map or on your own?
sage lance
shut bloom
You might have missed it. Did you test this on a BI map or on your own?
Kolguyev
shut bloom
sage lance
Kolguyev
Hmmm. Ther is a thing called Portal Volumes, it is mentioned in the biki. Are you using those aswell?
Idk if they still exist or if Iam mixing things up but they are seperste from the BoxVol.
sage lance
shut bloom
Hmmm. Ther is a thing called Portal Volumes, it is mentioned in the biki. Are yo...
Yeah I tried them
No dice
I guess I should also mention that my boxvols are aligned with the faces of my portals, but that shouldn't be a problem, right? Initially had them bigger than the portals and BSP, but I think the issue occur then as well. That was a day or two ago

Sry for the edits, its late for me
shut bloom
sage lance
Yeah I tried them
Portals have to be slightly bigger then the hole. Also portals should not Z fight like that. It will cause problems and bleeding if they are fighting with the Boxvol.
sage lance
shut bloom
Portals have to be slightly bigger then the hole. Also portals should not Z figh...
The "hole" for the BSP, right? If so, that already good. I will try extending the BOXVOLs just a little bit beyond the portals
shut bloom
Also no clue if Normals on the BSP are relevant I always do no smooth Normals for them.
sage lance
shut bloom
Also no clue if Normals on the BSP are relevant I always do no smooth Normals fo...
I dont think it should be considering that all faces should be coplanar
shut bloom
sage lance
The "hole" for the BSP, right? If so, that already good. I will try extending th...
Yes also unsure if the Portals need to be outisde or inside the Boxvol. I think they need to be outside with the normal facing towards the Boxvol.
sage lance
Ill give it a try but im nearly positive I had the windows and archway boxvols extending beyond the portals earlier today
shut bloom
sage lance
Ill give it a try but im nearly positive I had the windows and archway boxvols e...
Iam quite sure the portals need to be outside of boxvol.. and normals facing in. As said ill check later for you.
sage lance
shut bloom
Iam quite sure the portals need to be outside of boxvol.. and normals facing in....
Yea, no dice unfortunately with the BOXVOL modifications; can confirm it imported correctly too. Boxvol normals are also all good. The red part on the roof in the above image is just a cutting plane for the boxvol; normals are correctly oriented for it (otherwise the underside of my roof and the brick would have no shading while the exterior parts would be pitch black)
If you have any other ideas, pls let me know. But i've got to get off for the night
ember blaze
hybrid mountain
wrong channel, <#976159689668722718> is a better one for this.
Supplies are sto...
Posted here, as its was a "model" that had it! Might need a road map for this disord! 😉
 shell hedge
Exposure compensation in Reforger samples a couple points on your screen, not the whole screen
There is a mask of it somewhere in the data
If those areas are all dark then brightness goes up to 100
sage lance
shell hedge
There is a mask of it somewhere in the data
A mask? Any idea on what it may be called?
sage lance
One of these?
 shut bloom
sage lance
Yea, no dice unfortunately with the BOXVOL modifications; can confirm it importe...
shut bloom
sage lance
Yea, no dice unfortunately with the BOXVOL modifications; can confirm it importe...
So I checked again. The Portals are outside the BoxVolume and the Portal Volumes, and facing inside. (picture 1)
Iam also quite sure that some of the overexposure from the lighting from Portals is expected, and you can adjust it by raising the white Amount in the probe and the Black Amount under HDR. I was able to reduce the overexposure for the Wood cutters shed by just raising the White and Black Amount. (picture 2).


If that still does not give you any better results you can DM me and I can try to help you 1:1.
sage lance
shut bloom
So I checked again. The Portals are outside the BoxVolume and the Portal Volumes...
I had noticed some minor improvements in with the white and black amounts, but it was at the cost of how I wanted my interior shading to appear. Though Ill fiddle around with it a bit more to see if I can produce a more optimal result
sage lance
shut bloom
If that still does not give you any better results you can DM me and I can try t...
Thx! Rly appreciate it
sage lance
shut bloom
So I checked again. The Portals are outside the BoxVolume and the Portal Volumes...
Well, it does totally fix it when I set both to the max, but ah... haha

 shut bloom
Do you still have the Portal Volumes or did you throw them out after testing? also how do those Portal Volumes look like if you still have them.
sage lance
shut bloom
Do you still have the Portal Volumes or did you throw them out after testing? al...
Tried them several times. Threw them out. They were generated on the arch doorway portals once, the upper window portals another time, and then all portals for the third time. First time, portal volume streched across the between the arches up to the top roof, but did not intersect the side roofs (did not extend beyond the upper windows). Second time, window portal volume automatically placed itself in the foundation rather than the windows so I moved it up to the windows. Third attempt, portal volume extended to econompass entire model, with some portals inside the portal volume (def not correct but just did it to test). Btw, whenever I created a portal volume, applied the portal volume, then parented the portals to the portal volume, the portals would always shift up the z-axis (in blender) outside their intended hole in the BSP; is that normal?
They made no diff. This should be what the first attempt looked like from a few days ago
 shell hedge
sage lance
One of these?
shell hedge
sage lance
One of these?
4th one

 mighty bronze
pulsar sandal
mighty bronze
pulsar sandal
Gr8 cropping
There is also bi wiki tutorials on place able props.
Not sure about using said items
fickle vigil
Is there some method I could use to grab accurate measurements of a 3d area in game and export it to use as a scale reference in blender? Could a poly line or something be used to trace an area then exported?
brisk grotto
fickle vigil
Is there some method I could use to grab accurate measurements of a 3d area in g...
No proper accurate method that I know of, map makers may know a way. Worst case I've measured by character height in the past. We know characters are 1.8m/6ft so stack them if it's not too big 💀
fickle vigil
Ah damn. I need to measurements of a pretty large area, maybe 1000 character size🤣 trial and error it is
brisk grotto
May be worth asking in #enfusion_terrain
calm rune
brisk grotto
No proper accurate method that I know of, map makers may know a way. Worst case ...
Height: 179cm/5'8"
Width: 49.1cm/1'6"

Character is actually smoll
brisk grotto
Character ref from sample gits 1.8?
 calm rune
brisk grotto
Character ref from sample gits 1.8?
calm rune
brisk grotto
Character ref from sample gits 1.8?
Your line is down to far and the feet of the character isn't exactly resting on the floor.
 brisk grotto
Ok so shave a few cm off still closer 1.8
brisk grotto
I meant 5ft 9 earlier, thats what 1.8 is IDK why I thought 6ft
calm rune
Wish he was 6'. I find when you scale weapons properly they look big when he holds them in game. Reason is, is that he himself is small lol
Makes me laugh when people want super baggy clothing. Like why you tryna make this dude wear an XL when he clearly wears a size medium lol
fallow pond
5.8 is not 5'8"
fallow pond
(1790mm / 25.4) / 12 = *W * and *R *
(R x 12 ) = D
W+D = 5' 10 7/16"
calm rune
fallow pond
5.8 is not 5'8"
No but 5'8" is 5'8" LOL
fallow pond
1767 = 1790
mighty bronze
fickle vigil
Is there some method I could use to grab accurate measurements of a 3d area in g...
Only thing I can think is take tiny object and put it on oneside.
Take tiny object and put it on other side
Math out on the xyz coordinate, hopefully its flat
 copper jungle
I hope someone has an idea why the texture of my model appears transparent on a few objects.
For example, the outer visible parts of the cap are transparent, while the inner parts, which are separate objects, are not.
When I look at the outer shape, it seems transparent, even though the face orientation of the inner object is incorrect in the screenshot.
I have checked the face orientation in Blender multiple times, and everything appears correct there.
Could it be that the face orientation are switched during the export? If yes, how can I prevent it?
 brisk grotto
copper jungle
I hope someone has an idea why the texture of my model appears transparent on a ...
brisk grotto
copper jungle
I hope someone has an idea why the texture of my model appears transparent on a ...
Try using Blender 4.5 LTS with the official plugin, it should import clean as long as your face orientation was correct in blender
pulsar sandal
mighty bronze
There is also bi wiki tutorials on place able props.
Not sure about using said ...
Just seein this. Ended up getting help from someone I’ll try to @ him. End result is beautiful
 fickle vigil
mighty bronze
Only thing I can think is take tiny object and put it on oneside.
Take tiny obje...
fickle vigil
mighty bronze
Only thing I can think is take tiny object and put it on oneside.
Take tiny obje...
its like a large concave area so think im just gonna have to do it the hard way🙃 I dont think it will work for my case since im working on a read-only map but i see an option to "send terrain to blender". Cant find where to set the file path for it but maybe it will help someone in the future
mighty bronze
fickle vigil
its like a large concave area so think im just gonna have to do it the hard way�...
If not your map, then you won't have access to the terrain.
If its uniform concave you can maybe still map out rough XYZ dimensions.
Just need more tiny objects
fickle vigil
I shall use many tiny cubes
mighty bronze
This might be fucking stupid
And take some time
But you could take a few objects with like 1 or .5 meter spacing
Ctrl + down arrow to force them down
Then copy XYZ coordinates to blender
fickle vigil
hmmm ill def give that a shot
mighty bronze
For enfusion uses meters, and blender default is meters
You may need to reorintate everything since there's a possibility it'll be 2000 meters off center in blender
Tbh I've used a pretty similar idea (using tiny cargo containers) to verify the FOV on an optic once
fickle vigil
ill prob just make the object then trial and error until i get it right. Its a facility to replace an existing underground mine system so shouldnt be too much of a PIA
btw star, love the uzi and cpw. Thanks for those🤘
mighty bronze
Thanks I'll probably update them in like 2 years
odd goblet
fickle vigil
Is there some method I could use to grab accurate measurements of a 3d area in g...
there is actually a measure tool in the world editor that might be handy
 urban palm
fickle vigil
Is there some method I could use to grab accurate measurements of a 3d area in g...
urban palm
fickle vigil
Is there some method I could use to grab accurate measurements of a 3d area in g...
What are you trying to achieve? Ground cover object?
fickle vigil
urban palm
What are you trying to achieve? Ground cover object?
There’s a sprawling underground mine shaft system on a terrain I’m about to run on my server. I was going to replace the mines with a backrooms facility I’m making. Was just curious if there was some system baked into enfusion where I could create something like a polyline then export to use as a reference. Just gonna eyeball it until I get it right
urban palm
fickle vigil
There’s a sprawling underground mine shaft system on a terrain I’m about to run ...
Export your map into asc then import it to blender
fickle vigil
Not my map
urban palm
If you cut out the terrain, you should be able to easily work off of that
ahh
That measure tool around it would probably be your best bet then
You are trying to make a terrain cover object, right?
fickle vigil
No it’s just an object. A building basically
brisk grotto
Back in A3 I once made a big measuring stick, made a cube 1m, turned it into an array & added correctly scaled measurement markers along it, slapped it next to the building I wanted to measure and profit
brisk grotto
Dont cross post in different channels, you've already asked in #enfusion_texture and someones responded trying to help....
No it's 100% that channel and someone did try help you, you never replied to them
 junior robin
Anyone know how to remove the First person view of the helmet?dk if i have worded this wrong but for some reason i can see my helmet and its straps/pec mic in first person.
brisk grotto
junior robin
Anyone know how to remove the First person view of the helmet?dk if i have worde...
On your material tick the enable user alpha bias
copper jungle
brisk grotto
Try using Blender 4.5 LTS with the official plugin, it should import clean as lo...
it dosn't work with 4.5 LTS. The official bohemia add in are installed and the net api is enabled in the workbench. Any other ideas?
brisk grotto
copper jungle
it dosn't work with 4.5 LTS. The official bohemia add in are installed and the n...
Somethings wrong with either your set up or model because it works fine for others including me
copper jungle
brisk grotto
Somethings wrong with either your set up or model because it works fine for othe...
I checked all faces and it is that all faces are have the wrong orientation
brisk grotto
In Blender or in workbench?
copper jungle
in workbench
brisk grotto
Up for pinging me your model to see if I can spot any issues/check how it imports for me?
copper jungle
in blender all orientations are fine. I hope that the "white" surface is the right one....?
brisk grotto
copper jungle
in blender all orientations are fine. I hope that the "white" surface is the rig...
Easiest way to check is turn on backface culling
If you can see through it with that turned on they're the wrong way
 brisk grotto
Tick backface cullong on here and you'll know for sure
 copper jungle
i checked the backface and it looks ok
 brisk grotto
And you are on 4.5 LTS exporting as FBX with BI's tool?
 copper jungle
Damn it, no... I didn't notice there was an additional export section.
brisk grotto
Use their one, it sets specific settings their engine expects
copper jungle
 brisk grotto
yeah you'll need to go through and fix those, it's pointing out things aren't set up the way it expects
copper jungle
I will do. Thx a lot for yout time 🙂
 sacred sonnet
howdy, im trying to import an object into reforger, ive got it in, it shows it has a collider, object is static, ATM machine, however im still able to walk through it, for the life of me, i cant figure out what im doing wrong, what preset layer it needs or anything like that, im new to this, teaching myself things as i go. if anyone is able to help out, would really appreciate that.
Cheers
mighty bronze
sacred sonnet
howdy, im trying to import an object into reforger, ive got it in, it shows it h...
K but what kind of collider
https://community.bistudio.com/wiki/Arma_Reforger:Collision_Layer
tbh maybe just a default collider if you're using that
if you're not sure which collider than that might explain why it no work
pulsar sandal
sacred sonnet
howdy, im trying to import an object into reforger, ive got it in, it shows it h...
There’s 2 settings in the atm properties to check that make it collidablew
sacred sonnet
i had a bit of a special person moment, i was placing the .xob instead of creating it as a prefab. it does work now. thanks lads
 tepid cloak
new wip after the buggy


 turbid moss
night sage
pls can enfusion eat this model with n-gons?
turbid moss
night sage
pls can enfusion eat this model with n-gons?
Engine will triangulate it when you import it to enfusion, if want better control, triangulate by yourself.

 night sage
crazy !!!
can you pls show me wireframe? i need some clues how detailed can it be. Thx
maybe later i have also question about texture density. Like how big is the one side of the building? or whole texture for building? Details has separete textures?
 haughty oasis
For structures and large objects in general, in any engine it’s best to use tillable materials or trim sheets
tepid cloak
haughty oasis
For structures and large objects in general, in any engine it’s best to use till...
this LOD0 for eg for a veh
 haughty oasis
For a vehicle you’d most likely use a few baked down materials using the hp to lp workflow
You can use midpoly and then use tillable and trim sheet materials too like seen in star citizen
Not sure if reforger has anything like that for vehicles though
night sage
i need reforger 😄
anybody know if the enfusion editor can run standalone, without the main game?
 wicked dirge
no
 hazy vault
turbid moss
hazy vault
turbid moss
that building is super sick, what was it used for?
turbid moss
hazy vault
that building is super sick, what was it used for?
A manor house means a large estate or its large main building. A manor house is usually a large estate that is prosperous and has a lot of forest and land attached to its ownership. A manor house often has a garden attached to it.
hazy vault
turbid moss
A manor house means a large estate or its large main building. A manor house is ...
Did you model it, reminds me of RDR2
turbid moss
hazy vault
Did you model it, reminds me of RDR2
Yes, im learning to model, i keep taking harder and harder projects 😄
 rotund maple
Hello everyone, iam dayz modder, but want to feal it how to work with good tools. So question, I imported p3d model from dayz in blender with enfusion addon. Structure looks good, but i can't find roadway in it. Is it even a thing in reforger?
sly bridge
rotund maple
Hello everyone, iam dayz modder, but want to feal it how to work with good tools...
first things first - you imported a model from dayz, or a model you own from a mod for dayz?
rotund maple
sly bridge
first things first - you imported a model from dayz, or a model you own from a m...
my own, it has lod, geometries and roadway
sly bridge
rotund maple
my own, it has lod, geometries and roadway
there are some changes to the lods
brisk grotto
rotund maple
Hello everyone, iam dayz modder, but want to feal it how to work with good tools...
TLDR: roadways doesn’t exist anymore for building models, geometry is now collider and as long as you set it right the engine uses it to figure out the rest
rotund maple
brisk grotto
TLDR: roadways doesn’t exist anymore for building models, geometry is now collid...
Alright, thanks
sage lance
Does anyone know if there is a max number of boxvols per probe? Dont worry about the reason why. I would think there would be no limit (just a perforamce tradeoff), but when I added a 7th, the probe recognizes it but does not add any shading within its area
Nvm. Restarting the workbench fixed it
 tranquil gyro
I am sorry, how can create animation or modification for fight with knuckles?
And i am create raincoat


 remote palm
tranquil gyro
I am sorry, how can create animation or modification for fight with knuckles?
main ravine
remote palm
tranquil gyro
I am sorry, how can create animation or modification for fight with knuckles?
main ravine
Does a vehicles visual mesh need to be parented to the rig? If so what bone?
 ancient walrus
Check the sample I think it’s v_body
But only parts of it not all of it iirc things like suspensions at the front and doors etc maybe don’t the sample will show ya
main ravine
Ok ty
turbid moss
Now 73500 triangles. Double stairs from 1st to 2nd floor and one stair to 3rd floor. And testing outside color.

 midnight path
turbid moss
Now 73500 triangles. Double stairs from 1st to 2nd floor and one stair to 3rd fl...
midnight path
turbid moss
Now 73500 triangles. Double stairs from 1st to 2nd floor and one stair to 3rd fl...
is that the house from Django?
turbid moss
midnight path
is that the house from Django?
? My own model
midnight path
turbid moss
? My own model
looks like one of the old slave owners houses from Django unchained
 merry rivet
turbid moss
Now 73500 triangles. Double stairs from 1st to 2nd floor and one stair to 3rd fl...
merry rivet
turbid moss
Now 73500 triangles. Double stairs from 1st to 2nd floor and one stair to 3rd fl...
Looks, good, but I thought I read somewhere that the maximum amount of triangles per object was 60.000 in Enfusion.
I could be wrong. However, even if I'm wrong, you could just split up the house into two objects.
brisk grotto
merry rivet
Looks, good, but I thought I read somewhere that the maximum amount of triangles...
Naaa it's not correct
 leaden trench
turbid moss
Now 73500 triangles. Double stairs from 1st to 2nd floor and one stair to 3rd fl...
leaden trench
turbid moss
Now 73500 triangles. Double stairs from 1st to 2nd floor and one stair to 3rd fl...
That staircase looks pretty fun. More angles for firefights than regular staircase
brisk grotto
Physical limits are pretty high but always better to keep things low & optimise. 60k can be fine as long as its been reviewed and doesn't have a million textures
leaden trench
merry rivet
Looks, good, but I thought I read somewhere that the maximum amount of triangles...
That is War Thunder engine you thinking of lol.
brisk grotto
Even on arma 3 you could go higher than 60k I had a building that I couldn't view in Oxygen/Bulldozer but it worked in-game
fallow pond
why like this? and not have the floor as a separate mesh

 median current
Is it just me, or is there a bug with this model? There have been quite a few updates already, and I thought it would be fixed quickly. Do you know where I can report it?
It's a shame, I tried modifying the prefob and it's on the model itself. So I can't even fix the problem.

 hazy vault
midnight path
looks like one of the old slave owners houses from Django unchained
hazy vault
midnight path
looks like one of the old slave owners houses from Django unchained
Exactly what I thought lol
mighty bronze
median current
Is it just me, or is there a bug with this model? There have been quite a few up...
If there's two models like that
Its probably by design.
median current
mighty bronze
If there's two models like that
Its probably by design.
I don't think so otherwise the floor lamp is really weird 
fallow pond
what wrong here?
leaden trench
fallow pond
why like this? and not have the floor as a separate mesh
Can you avoid posting dumb troll questions here? feel it discourages others from posting.
haughty oasis
Don’t think it’s a troll question. It’s an inefficient way to model that element. It’s better to have them be separate
burnt surge
haughty oasis
Don’t think it’s a troll question. It’s an inefficient way to model that element...
Its easier for unwrap and doing collisions yes but a quality model should be wellded
So for basic hull i mean.. additions being seperated ofcourse
mighty bronze
median current
I don't think so otherwise the floor lamp is really weird <:thonk:10986128535792...
Maybe I don't understand what's wrong with the lamp post?
astral hull
leaden trench
Can you avoid posting dumb troll questions here? feel it discourages others from...
Lol what. He asked a genuine question and you shit on him for it
I’m pretty sure THAT’s what discourages people from posting
 dark geyser
Anyone know what the issue here is?

 wicked dirge
the face is flipped? Turn on Face Orientation in Blender and if its red flip it. If you dont know what any of that means look it up on youtube
astral hull
leaden trench
Can you avoid posting dumb troll questions here? feel it discourages others from...
Not everyone has experience making models or knows good topology, he asked a legitimate question regarding it and you had to be as arrogant as possible, yeah react this one with an X ya know it all

 forest meadow
Hi, is there anyway to scale up the bones for a model, I seem to be having some difficulty trying to lengthen the arms and spine for my model,


 woeful hollow
dark geyser
Anyone know what the issue here is?
woeful hollow
dark geyser
Anyone know what the issue here is?
try use modifier "triangulate"
 delicate condor
forest meadow
Hi, is there anyway to scale up the bones for a model, I seem to be having some ...
delicate condor
forest meadow
Hi, is there anyway to scale up the bones for a model, I seem to be having some ...
Hello. Can you DM me the origins of this model. I would like to make sure its not from the game "SCP – Containment Breach"
sly bridge
forest meadow
Hi, is there anyway to scale up the bones for a model, I seem to be having some ...
nope. You will need to create your own skeleton for that one (and animations)
shell hedge
Bones in Reforger do not support scale, you would have to offset their position in the animations or through script depending on what you're doing
forest meadow
Ah okay, thanks
 ember eagle
forest meadow
Hi, is there anyway to scale up the bones for a model, I seem to be having some ...
ember eagle
forest meadow
Hi, is there anyway to scale up the bones for a model, I seem to be having some ...
 forest meadow
literally
dark geyser
Any where i can finde the bones for vehicle like the M1025?
I found out that i need to add bone to the moddel i have or everything gets fucked?
 faint viper
forest meadow
Hi, is there anyway to scale up the bones for a model, I seem to be having some ...
faint viper
forest meadow
Hi, is there anyway to scale up the bones for a model, I seem to be having some ...
scale the model in blender with the bones, and simply scale the character itself ingame, the bones adapt perfectly to it and have 0 issues
forest meadow
Couldn’t figure it out so I simply ✨gave up✨
 real solar
hi first post here and new to modding trying to make my first placeable mod.
 mighty bronze
real solar
hi first post here and new to modding trying to make my first placeable mod.
mighty bronze
real solar
hi first post here and new to modding trying to make my first placeable mod.
https://community.bistudio.com/wiki/Arma_Reforger:Prop_Creation this tutorial might help, you'll one to make each object a separate blend file usually.
real solar
That’s the plan use every model as single but i need to separate floor, stairs and bring them together in enfusion
 celest summit
hey hello, i made a 40mm smoke mod and to do it i copied the base game m433 prefab. i wanna change the xob file now but it seems like i cant copy it into my local mod directory, the option just isnt there. i tried using the blender plugin too but that doesnt work on read only files, what can i do?

im very new to mod making so any advice would be appreciated 😅😅
brisk grotto
celest summit
im very new to mod making so any advice would be appreciated 😅😅
You can’t change/edit base game xob. You need to model your own, import it as an xob into your mod then overwrite while xob your prefab used
celest summit
brisk grotto
You can’t change/edit base game xob. You need to model your own, import it as an...
thanks! i accepted my fate and found another fbx file to use 😭
now im trying to figure out how to scale it so its the same size as the vanilla 40mm
brisk grotto
celest summit
now im trying to figure out how to scale it so its the same size as the vanilla ...
Thy will have matched real life scale probably so google that
 real solar

Arma Reforger
Modulares Baugerüst-System für realistische Szenarien in Arma Reforger.
 eager warren
real solar
done https://reforger.armaplatform.com/workshop/D1D19872A6A954EA-GTG_modular_Ger...
eager warren
real solar
done https://reforger.armaplatform.com/workshop/D1D19872A6A954EA-GTG_modular_Ger...
should push a english description up on that. i wouldn't know what it is without the picture. gj!
 stray bridge
you cant pay for work thats related to/ work inside ar workbench
pulsar sandal
stray bridge
you cant pay for work thats related to/ work inside ar workbench
rip, thanks for the info
stray bridge
in theory you can pay solely for blender work and people sharing knowledge but once BI tools are touched you cant
pulsar sandal
heard
sly bridge
@pulsar sandal #creators_recruiting only
real solar
eager warren
should push a english description up on that. i wouldn't know what it is without...
just published with extra english text part. Didn´t want Layher name in it because of copyrights 😅
real solar
next Mod i try

 iron galleon
what was the way to fix broken lods? for some reason they turn full black instead of what they should use
stray bridge
iron galleon
what was the way to fix broken lods? for some reason they turn full black instea...
classic
astral hull
iron galleon
what was the way to fix broken lods? for some reason they turn full black instea...
Clear vertex paint
stray bridge
astral hull
Clear vertex paint
na thats smth else

 sly bridge
@neat ocean #creators_recruiting only
noble ravine
real solar
next Mod i try
If you want i have this model done


its a old asset i have here getting digital dust 😆
real solar
That would be awesome
 onyx copper
shell hedge
Bones in Reforger do not support scale, you would have to offset their position ...
onyx copper
shell hedge
Bones in Reforger do not support scale, you would have to offset their position ...
hey example, I'm doing b1 adroid and I put it in T-pose and put the bones in it but when I want to put it in the game it disappears

 worn plover
onyx copper
hey example, I'm doing b1 adroid and I put it in T-pose and put the bones in it ...
worn plover
onyx copper
hey example, I'm doing b1 adroid and I put it in T-pose and put the bones in it ...
 worn plover
onyx copper
hey example, I'm doing b1 adroid and I put it in T-pose and put the bones in it ...
worn plover
onyx copper
hey example, I'm doing b1 adroid and I put it in T-pose and put the bones in it ...
you are going to get jumped by green and orange names any moment asking about where you got the model. and telling about copyright stuff isnt allowed.
onyx copper
worn plover
you are going to get jumped by green and orange names any moment asking about wh...
well, it's made by me, but I would like to know if I can include it as a pve character
I really like Star Wars
I can pass it on to you if you want
 worn plover
i mean yea you can add it as a pve character. bacon is really good at this stuff just keep pestering him till he responds
onyx copper
worn plover
i mean yea you can add it as a pve character. bacon is really good at this stuff...
my intention is not to bother you, just to know how to put it so that it works to have the base and be able to do more
worn plover
onyx copper
my intention is not to bother you, just to know how to put it so that it works t...
nono im just hesitant to put time into this when it will most likely get removed.
onyx copper
worn plover
nono im just hesitant to put time into this when it will most likely get removed...

well, but if I learn, I'll upload it again xd
surreal ore
onyx copper
well, but if I learn, I'll upload it again xd
Can't reupload if you're banned.
onyx copper
surreal ore
Can't reupload if you're banned.
so those who upload Warhammer things?
surreal ore
onyx copper
so those who upload Warhammer things?
Are legally allowed to do so. You're not.
onyx copper
surreal ore
Are legally allowed to do so. You're not.
hooo I mean that's allowed ? I didn't know then how to make Star Wars structures, so you can make their architecture?
ember eagle
surreal ore
Are legally allowed to do so. You're not.
Y’all let my cook 👨🍳🔥
surreal ore
ember eagle
Y’all let my cook 👨🍳🔥
So he can get banned for IP violation?
Cooking up a big ole pot that's gonna explode in his face. That's all that's happening.
ember eagle
He make it his own let him cook🔥👨🍳
surreal ore
That's still not really how that works. Perhaps you guys should go to https://discord.com/channels/105462288051380224/105792634995388416 and ask about it.
ember eagle
surreal ore
That's still not really how that works. Perhaps you guys should go to https://di...
Bruh
mighty bronze
There is a reason squad stars wars mod isn't called star wars mod officially
sage lance
onyx copper
hey example, I'm doing b1 adroid and I put it in T-pose and put the bones in it ...
Yea, love the model and would love a Star Wars mod, but your not first; there have been others. Unlike its prior games, BI maintains the mod workshop. Subsequently, it doesn’t want to deal with any potential legal consequences of a mod on its platform infringing on another company’s copyright, which is why it’s got a massive stick up its butt about this sort of stuff in modded content. We all miss the days of the Steam workshop and Valve not giving a shit about monitoring it (b/c companies typically tolerated mods based on their work unless you monetized it or created a full on remake)
sage lance
onyx copper
hey example, I'm doing b1 adroid and I put it in T-pose and put the bones in it ...
Though if you gave the battle droid some big ol’ ta-tas and a bikini, technically would fall under parody content
 mighty bronze
sage lance
Though if you gave the battle droid some big ol’ ta-tas and a bikini, technicall...
mighty bronze
sage lance
Though if you gave the battle droid some big ol’ ta-tas and a bikini, technicall...
dafuq
sage lance
mighty bronze
dafuq
It’s just from a meme
burnt surge
ember eagle
Bruh
Not bruh.. Disney is strict with their IP, and BI doesnt want trouble with other like Disney so they got to be strict aswell to protect themself.. just follow IP stuff, or get approval by Disney and all would be good.. but Disney wont give approval so @worn plover and @surreal ore are correct.. that can explode to a ban for people with no clue about IP stuff just cause they want stuff
sly bridge
onyx copper
hey example, I'm doing b1 adroid and I put it in T-pose and put the bones in it ...
100% not allowed
sly bridge
ember eagle
He make it his own let him cook🔥👨🍳
mind yourself bruh
urban palm
burnt surge
Not bruh.. Disney is strict with their IP, and BI doesnt want trouble with other...
Can hardly fault folks for being confused on it or pushing back, the universal status quo outside BI Workshop throughout time has been tolerance. This is not me insinuating BI should change, it’s their to do with what they want.
sly bridge
urban palm
Can hardly fault folks for being confused on it or pushing back, the universal s...
actually false. BI has taken down multiple star wars related mods from steam workshop
The fact that various other moddable games are not curated is another thing altogether
urban palm
sly bridge
actually false. BI has taken down multiple star wars related mods from steam wor...
Where did I say that they didn’t? Maintenance of a status quo does not imply absolute adherence to state. Regardless, perception is reality. The largest ones, and many others, still stood or stand to this day. Curation is not the word, or the issue. As stated, many projects have stood before the mouse and survived, even with blatant rips. It has been generally tolerated throughout time. That does NOT make it right, but yet it remains reality.
I have no issue with BI’s stance, or I wouldn’t bother with the game. It is their workshop to do as they please. Jumping down every persons throat, when IP stuff really isn’t known or cared about outside this workshop isn’t exactly cool. IP law is a heavily nuanced area, most people aren’t going to have any ideas.
sly bridge
urban palm
Where did I say that they didn’t? Maintenance of a status quo does not imply abs...
if reports are made, these will be taken down. If no report is made, BI will not actively take down anything. IP law is not as nuanced as you make it out to be, especially when TOS also clearly states that you need to own yourself the IP or by the copyrioght holder in order to upload it to the workshop (both BI's and Valve's)
urban palm
sly bridge
if reports are made, these will be taken down. If no report is made, BI will not...
I have never once disputed that.
It is extremely nuanced, you have a plethora of subuses, legal protections to the non-owner, contradictory case law and massive financial consideration. The reason it is almost never is pursued, is because it is tumultuous, and most uses are at very least considered a net neutral and provides uncertain financial gain.
But I digress, that’s not the point I was getting at.
haughty oasis
From memory, in relation to Star Wars, wasn’t all of this blanket no business based on Disney getting involved years ago with arma 3 mods and basically told BI that they didn’t want mods using their IP to be allowed so BI have just stuck to that
I get that it seems super weird to newcomers as to why SW isn’t allowed but Halo or Warhammer is
urban palm
haughty oasis
From memory, in relation to Star Wars, wasn’t all of this blanket no business ba...
The largest Star Wars mods never went down from the steam workshop that I recall
Nor did any of the ton of other SW-related content hosted by steam
haughty oasis
Memory is a little hazy but I think it mainly stemmed from some mods ripping battlefront 2 content, so likely the original reported offenders were removed but the custom made stuff was pushed off to the side/ tolerated
sly bridge
urban palm
The largest Star Wars mods never went down from the steam workshop that I recall
send me a link, we'll change that
eager warren
i thought the StarWars universe was free to use if you made your own assets? or was that prior to Disney acquisition? oh yes im just old and my old brain is remembering old things. oh wow "Droid" is even trademarked
urban palm
eager warren
~~i thought the StarWars universe was free to use if you made your own assets?~~...
No, I don’t think it was under LA either. They’ve always existed under the tolerance policy for non revenue generating uses
Yeah, I think they have Jedi, Lightsaber and a ton of other trademarked terminology
brisk grotto
eager warren
~~i thought the StarWars universe was free to use if you made your own assets?~~...
Trademark is the wrong term, trade implies give and take, Disney just make ya take it nothing back
🤣
burnt surge
eager warren
~~i thought the StarWars universe was free to use if you made your own assets?~~...
It doesnt mind if its ripped or own made from scratch. Their IP goes also worth recognition and also if same names get in use.. Like as example if your art is made from scratch and it does look like a classic Stormtrooper its already a worth recognition.. and if you also name it Stormtrooper then too.. but if your art looks completly different to their Stormtrooper and you call it Stormtrooper nothing will happen
Also this should be moved to #ip_rights_violations
mighty bronze
Game ready asset.
 sage lance
mighty bronze
Game ready asset.
sage lance
mighty bronze
Game ready asset.
Holy fuck... what is that, a Picatinny rail?
mighty bronze
sage lance
Holy fuck... what is that, a Picatinny rail?
No its a stanag 4694 rail for the m2hb
sage lance
mighty bronze
No its a stanag 4694 rail for the m2hb
Well, pretty sure the artist who made it is special needs
mighty bronze
Turns out magnetic levitation for your scopes is very expensive
mighty bronze
sage lance
Well, pretty sure the artist who made it is special needs
Its artistic get it right

Get the topology board I use in my videos:
https://www.onmars3d.com/topology-board
This is the exact Miro board I reference when explaining clean edge flow, topology, and production-ready modeling decisions.
In this video, we’re diving into two powerful Blender workflows: Sub-D (Subdivision Modeling) and the Remesh Workflow. Both methods hav...
calm rune
sage lance
Well, pretty sure the artist who made it is special needs
Looks like a highpoly using subD workflow so no they are not special needs. It’s quite normal..
mighty bronze
calm rune
Looks like a highpoly using subD workflow so no they are not special needs. It’s...
Actually no
i'm being lazy and cooking my laptop with remesh one in thevideo above
sage lance
calm rune
Looks like a highpoly using subD workflow so no they are not special needs. It’s...
If its being marketed as a "game-ready asset", then they are def spec or are scamming
Unless the artist specifically mentions that the model is a high poly
mighty bronze
I am
however
being punished for keeping my N-Gons into the later stages of baking
thank you quick J for making my life easier tho (ngl great addon)
mighty bronze
sage lance
If its being marketed as a "game-ready asset", then they are def spec or are sca...
its my model lel
sage lance
ah got it
 cosmic wren
how do i resize this car to make the new car on blender
forest meadow
So i have a model in enfusion, and ive duplicated a character model from the arma reforger file for the prefab but i just cant get it to work, any tips?
 manic current
Any Cinema4d modelers here?
brisk grotto
forest meadow
So i have a model in enfusion, and ive duplicated a character model from the arm...
What are you trying to make/import?
brisk grotto
manic current
Any Cinema4d modelers here?
Unlikely, most people here tend to use Blender, 3ds Max or Maya
forest meadow
brisk grotto
What are you trying to make/import?
A Character model, I exported a model from gmod, used VTFedit to get the texture folder, got all working but the prefab models wont let me save
brisk grotto
forest meadow
A Character model, I exported a model from gmod, used VTFedit to get the texture...
Do you have permission to use the gmod model? 🤣
forest meadow
its just a russian model with random assortments of clothes from sketchfab
this is as far as i can get, im tryna use the base character model in the arma reforger files as a prefab after dublicating it

but it crashes everytime i try to put the newly saved et file onto the model
mighty bronze
forest meadow
its just a russian model with random assortments of clothes from sketchfab
if you're messing around that's cool and all
But if you publish this without permissions your mod could get removed
forest meadow
mighty bronze
if you're messing around that's cool and all
But if you publish this without per...
I got permission from the origional creator
calm rune
forest meadow
I got permission from the origional creator
You’ll need to provide that proof to @delicate condor
delicate condor
forest meadow
I got permission from the origional creator
is the "original creator" the actual original creator 
if its from some game then its a no go.
delicate condor
forest meadow
A Character model, I exported a model from gmod, used VTFedit to get the texture...
Ah I see here
so unless you can prove to me its not from some game, then this isnt appropriate model
forest meadow
The person who gave me the permission is the one who created the models, they arent from some game
they were modelled by him in blender and i asked for permission and he said "go for it"
delicate condor
The models were found to be from COD. in combination of other model bits. Author having pretty much all his stuff rips is a big red flag. Gmod being another.
forest meadow
How does one add collision to an object
ive got all the components to open it as a storage/inventory system but i can walk through it, anyway to add a collision component?
mighty bronze
forest meadow
ive got all the components to open it as a storage/inventory system but i can wa...
You needs a collider in the FBX https://community.bistudio.com/wiki/Arma_Reforger:FBX_Import?useskin=darkvector#Collider_shape
sage lance
I am curious, which is better for performance. A 4k texture atlas designed for two meshes, or one 2k texture for each mesh. I understand that a 4k texture is 4x the data relative to a 2k texture; file size isn't my concern. Its a matter of whether having fewer texture samplers from one 4k image offsets the higher VRAM footprint associated with more draw calls from using two 2k images
surreal ore
sage lance
I am curious, which is better for *performance*. A 4k texture atlas designed for...
What is the thing? Why not a multi-material?
sage lance
surreal ore
What is the thing? Why not a multi-material?
Its an oriental rug model. Even BI's oriental rug models are 2048*1024
surreal ore
Depending on what it is, you may not even need a 2k texture.
Oh, I definitely wouldn't go with 2k for a rug.
sage lance
But b/c these models have a front and back, plus some string on the ends, it needs more space on the UV map
 surreal ore
I personally think 2k is overkill for what that is.
No one is probably ever gonna get close enough to it for 2k to be needed.
sage lance
Its a rug. You stand on top of it
surreal ore
Yeah, i'm well aware
sage lance
But I get ur point
surreal ore
Save resources for the end user as much as you can.
sage lance
surreal ore
Save resources for the end user as much as you can.
What is the performance cost of 1k vs 2k as it relates to VRAM usage, generally speaking?
burnt surge
What you coooould do (not sure if perfomance still impacts), make LOD 0 as 4K texture and all other Resolution LODs 1K or 2K
burnt surge
Ok 
burnt surge
Nvm then
sage lance
surreal ore
Absolutely not
Can you explain why not
Only issue becomes file size at that point. I have a lot of props for a mod im working on and that would add up quick. But Ive thought of it
burnt surge
Because it will laod both for nonsense i think
surreal ore
2k roughly quadruples VRAM usage for a texture.
sage lance
Its the same principal behind the MLOD. Is there another reason not to have differing texture qualities at various lods
surreal ore
roughly 1 million pixels vs 4 million pixels
sage lance
Other than file size
surreal ore
Mips are generated.
sage lance
surreal ore
roughly 1 million pixels vs 4 million pixels
I understand that part about it
surreal ore
You don't need multiple textures of different qualities.
sage lance
surreal ore
Mips are generated.
Got it. Texture LODs are automatically generated
mighty bronze
surreal ore
Mips are generated.
The reticle's debbil
also probably should've lead with that instead of saying "no bad!"
mighty bronze
If you don't turn off mipmaps in .edds settings
then run low texture setting
your reticle (in optics) will be blurry
surreal ore
This is for a rug.
sage lance
I think he mean when looking at the rug through a scope but im honestly not sure. Can u clarify?
I dont even know how that would be possible tho
surreal ore
He means the reticle of the optic will have it's mips used when aiming.
mighty bronze
yes
surreal ore
So instead of nice crisp image, it will be a grainy mip
sage lance
Got it
sage lance
surreal ore
So instead of nice crisp image, it will be a grainy mip
Im keeping the 2k lamp tho. I cant part with it. Its too pretty (in a soviet post apocalyptic kind of way)


Xbox users be damned. They can play at 4 frames
surreal ore
sage lance
Im keeping the 2k lamp tho. I cant part with it. Its too pretty (in a soviet pos...
Why no holes?
sage lance
surreal ore
Why no holes?
TONS OF HOLES! WHAT?

I fucking worked forever getting the opacity map right
I think its just discord compressing the image
 surreal ore
Tri count?
sage lance
Faces are 3538, so 7,076 (in engine)
But its small, so the LODs kick in quick
Plus, I can adjust the LOD factors if need be
mighty bronze
sage lance
Xbox users be damned. They can play at 4 frames
imma make 5090 players play at 4 frames
 sage lance
Ive got one. Want to put it to the test?
surreal ore
mighty bronze
imma make 5090 players play at 4 frames
Disgusting
surreal ore
Which should be a good indication.
sage lance
Though, if you rly wanted to break a console. Put whatever that remeshed model is in a particle effect that shoots dozens of them out a sec
They wont even know what hit them. Wouldnt even generate a frame before the thing crashed
mighty bronze
ngl probably just going to have to subd workflow it instead just because remesh is giving me and my laptop headaches
sage lance
Now I feel like I actually need to add more holes in the lamp. I was more focused on getting it closer to how the artist had it rather than making it look more weathered
Is that better? Strings are a bit thinner now as a result, but the holes are bigger

 mighty bronze
sage lance
Is that better? Strings are a bit thinner now as a result, but the holes are big...
mighty bronze
sage lance
Is that better? Strings are a bit thinner now as a result, but the holes are big...
lamp
sage lance
O' ye
burnt surge
sage lance
Is that better? Strings are a bit thinner now as a result, but the holes are big...
Looking good yeah 
delicate condor
sage lance
Is that better? Strings are a bit thinner now as a result, but the holes are big...
I would not necessarily add holes. I mean what would have caused them?
animals might have hard time reaching it to chew on
oh but you mean the tiny ones right?
sage lance
delicate condor
oh but you mean the tiny ones right?
Yes. Not big ones. It’s just a weathering of the fabric from the windows being broken open and exposure taking its toll
Fabric may have loosened or started to break down
delicate condor
That does need the resolution. It's very cool looking detail. If you otherwise manage scene complexity it's probably not going to have much performance impact.
merry rivet
sage lance
Is that better? Strings are a bit thinner now as a result, but the holes are big...
Very nice lamp
 strange geyser
Hey I have a question regarding p3d to obj (hope this is the correct channel).
I’ve looked everywhere from trying to put p3d into addon builder downloading even oxygen 2 model
I’m trying to port over some ArmA 2 weapon assets to Reforger. But I can seem to covert it to obj.
plush torrent
strange geyser
Hey I have a question regarding p3d to obj (hope this is the correct channel).
...
if you have enfusion tools addon for blender you can import p3d models and then export as obj
strange geyser
plush torrent
if you have enfusion tools addon for blender you can import p3d models and then ...
Hey, I actually tried this out, but this is the problem I get

Tried to port Mk48

Appearntly this P3D I was using wasn't MLOD format, I don't know what that means :/
remote palm
It is encrypted. You need the root model to me able to edit it. If it isnt your model, there is probably no way to get it.
brisk grotto
@strange geyser are you looking at base game weapons or someones mod?
strange geyser
brisk grotto
<@236844419779657728> are you looking at base game weapons or someones mod?
Looking at ArmA 2 Base game, specifically
ALDP_A2_PBOs_APL_part3.zip
https://community.bistudio.com/wiki/Arma_Licensed_Data_Pack
Which contains the weapons
Seems like it's not possible I guess since it's appearntly encrypted :/
brisk grotto
strange geyser
Looking at ArmA 2 Base game, specifically
ALDP_A2_PBOs_APL_part3.zip
https://co...
Theres another wiki page licensed source Im using let me find it again hold on
Its not everything but its the buildings, cars, guns etc CUP used for a3
strange geyser
brisk grotto
Its not everything but its the buildings, cars, guns etc CUP used for a3
As long as it contains the guns that's fine. It's appricated!
if it's not all, it is what it is 
strange geyser
brisk grotto
A2SM_Data_DPL_APL.zip will have weapons
Okay I'll give this a shot!
Hopefully it works
strange geyser
brisk grotto
https://community.bistudio.com/wiki/Category:Public_Data
It works! Thanks Casey!
strange geyser
Hey, I'm curious atm, trying to model Lee enfield from ArmA 2 to reforger.
Tried with the MK-48 earlier but I think I made a mistake by not using all the LOD's.
My question is, should I keep all LOD's in the Lee enfield sample and also memory pointers?
Or have specific LOD's and scrapping memory pointers and obviously using an existing model's memory pointer?
 brisk grotto
LOD should be kept it’s usually just checking if there’s enough of them or if they could be tweaked for the better engine.
Mem points would need updating to empties and you’d have to check through which ones are still used for reforger, some will probably be missing too
And proxies would have to be replaced for an empty as well
@strange geyser
strange geyser
brisk grotto
<@236844419779657728>
Hey ty,
I managed to get a working model I believe, however I noticed that the armature however hasn't really worked out well.
I sadly only kept LOD0 only, not the rest 
But it looks good so far, however the second I implimented armature, the bolt was way infront of the gun, trigger too and everything, I'm not sure what I did wrong.
I used m21 as base (I however belive I will have a problem reloading because it's not feed through magazine), most of the stuff seemed fine, until armature. I must've done something wrong somewhere but I can't pinpoint


 surreal ore
strange geyser
Hey ty,
I managed to get a working model I believe, however I noticed that the ...
surreal ore
strange geyser
Hey ty,
I managed to get a working model I believe, however I noticed that the ...
Your armature if using the m21 animations has to be exactly as the m21.
Otherwise the animation will be at an offset
strange geyser
surreal ore
Otherwise the animation will be at an offset
I put it as close to root as possible, is there a better way? I was following a video tutorial that might be dated
Wait I'm mixing things up sorry
The armature I need to pose it exactly like this?

like the actual grids or whatever? because I posed it roughly how the lee enfield is, but I suppose my mistake was that

hmm might be the root you know
now that I think about it
surreal ore
strange geyser
The armature I need to pose it exactly like this?
Animations are made for a specific armature. If your armature isn't exactly the same as the one the animations were made for it will not work correctly.
You need to either
A) Recreate the EXACT armature
B) Make a completely new armature and all animations needed for it.
strange geyser
surreal ore
You need to either
A) Recreate the EXACT armature
B) Make a completely new arma...
Hmm okay, I'll try doing A then.
though idk how to do it exactly or do you mean as close as possible terms of exact?
 surreal ore
No
strange geyser
terms of how to do it exactly?
surreal ore
They didn't plan for us to reskin weapons
They planned for us to make our own completely from scratch.
Meaning custom armatures and animations
strange geyser
Okay, gonna be difficult then terms of porting over some guns from ArmA 2 
I'll see what I can do cheers!
strange geyser
Okay!
surreal ore
You may get by with them being "very close"
But that depends on the animations that move that bone and weather or not the offset is accurate enough to look good
The best advice I can give you.
Open your weapon prefab.
Open Blender with your model
Make a change to bone location and export directly into your mod.
This will auto reimport the model and you'll see the changes in your weapon prefab when the reimport is complete.
strange geyser
surreal ore
This will auto reimport the model and you'll see the changes in your weapon pref...
Ahead of you there, already started to do it 🙂
Thanks for the help, hoping I can get very clsoe on this
 woven thistle
Hello, Im trying to make some custom plants for a map im making and i'm having an issue of the plants disappearing after a certain distance away and im not sure how to fix it. I have lods set up. Just hoping someone in here can help me. TIA
 steel hare
woven thistle
Hello, Im trying to make some custom plants for a map im making and i'm having a...
steel hare
woven thistle
Hello, Im trying to make some custom plants for a map im making and i'm having a...
How many LODs you have for this model? (https://en.wikipedia.org/wiki/Level_of_detail_(computer_graphics))
In computer graphics, level of detail (LOD) refers to the complexity of a 3D model representation. LOD can be decreased as the model moves away from the viewer or according to other metrics such as object importance, viewpoint-relative speed or position.
LOD techniques increase the efficiency of rendering by decreasing the workload on graphics p...
mighty bronze
woven thistle
Hello, Im trying to make some custom plants for a map im making and i'm having a...
really stupid question
You may have setup lods
but is this a prefab? or did you just place the model down? because I don't think models use the LOD system, only prefabs
Nvm .xobs do have a mesh object component which does use LOD
Only thing I can think is to make sure it does indeed have LODs imported through resource browser.
sage lance
If anyone is looking for a new project, Ryzhkov just dropped an incredible new MH-6J little bird model on CG https://www.youtube.com/watch?v=lWCR3E28DBU
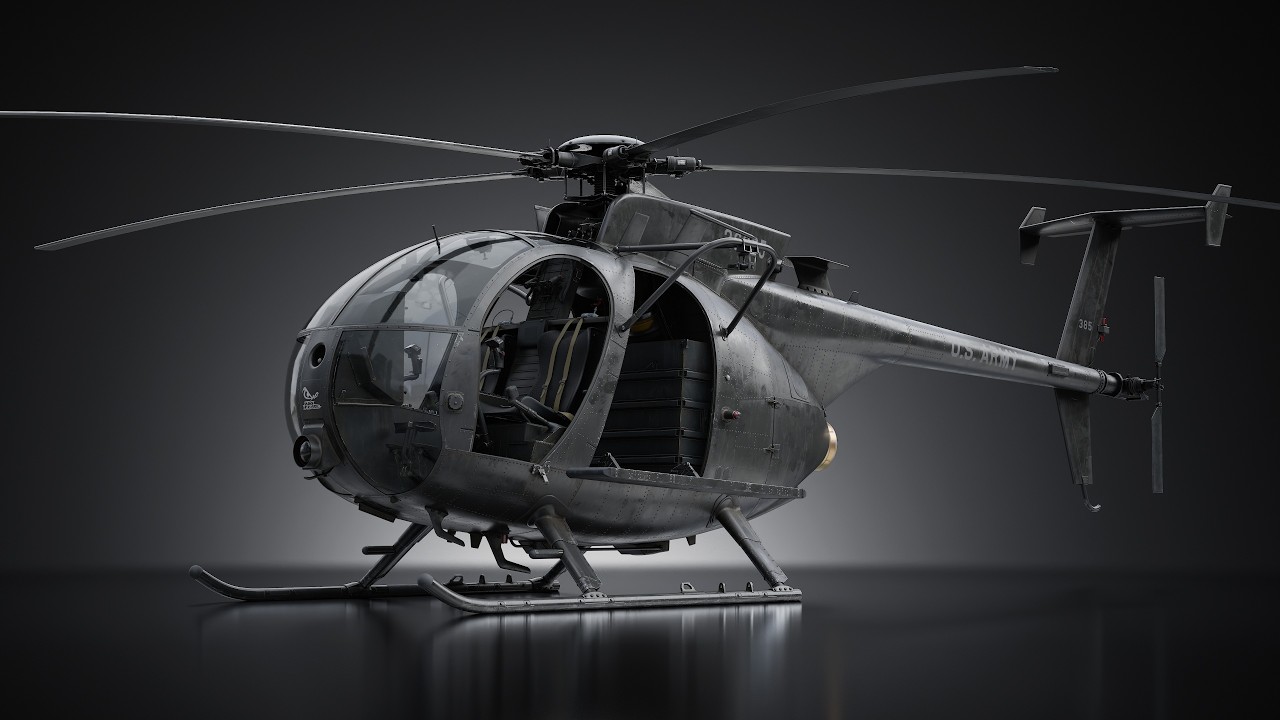
The 3d-model is available for sale on CGTrader: https://www.cgtrader.com/3d-models/aircraft/helicopter/mh-6j-little-bird-with-interior-game-ready?referral_id=3578599
My Discord server: https://discord.gg/UWUuq34FrV
Instagram: https://www.instagram.com/ryzhkov_3dmodels/
Facebook: https://www.facebook.com/ryzhkov3dmodels
 worldly narwhal
sage lance
If anyone is looking for a new project, Ryzhkov just dropped an incredible new M...
worldly narwhal
sage lance
If anyone is looking for a new project, Ryzhkov just dropped an incredible new M...
@shy nexus
that's pretty insane work https://www.cgtrader.com/3d-models/aircraft/aircraft-part/ah-6-little-bird-front-instrument-panel

CGTrader
Model available for download in Autodesk FBX format. Visit CGTrader and browse more than 1 million 3D models, including 3D print and real-time assets
very good, with i knew how to model stuff like that
 shy nexus
hoping he gon do an armed variant
sly bridge
worldly narwhal
that's pretty insane work https://www.cgtrader.com/3d-models/aircraft/aircraft-p...
that is actually really easy to model especially with references available (i think i have someplace the manual fror the AH/MH LBs)
worldly narwhal
shy nexus
hoping he gon do an armed variant
hell yeah
worldly narwhal
sly bridge
that is actually really easy to model especially with references available (i th...
i mean learning blender and things
I use blender but i've only achieved basic shapes
odd goblet
woven thistle
Hello, Im trying to make some custom plants for a map im making and i'm having a...
have you tried increasing Pixel Size Scale in the MeshObject component?
plush torrent
sly bridge
that is actually really easy to model especially with references available (i th...
Did you see his website page? He does angled pointed reference image shit
It’s nuts
I needa find it
Looked pretty cool
He did he trace a photo scan as well which prolly made it easier
Still nuts quality of the model
sly bridge
yeah the model is very nice. i was talking directly about teh separate model that is the front instrument panel for the AH-6 - #enfusion_model message that is pretty easy to model even for someone who is a begginer / intermediate due to the fact that most of everything is perpendicular and boxy, unlike more complicated models such as intersection of mechanical meshes or routed pieces
sly bridge
plush torrent
I needa find it
plush torrent
sly bridge
https://www.ryzhkov-3d-models.com/2025/11/09/mh-6j-3d-model-devblog-p-7/
https:/...
No it wasn’t that one
It was from a while ago
Oooh
He’s got a texture breakdown
I need to check that out
 coarse dust
hey guys is there a way to get opscore helmet model from RHS via enfusion tools? Im new to modding in the enfusion engine and basically want to add custom NVGs that fit RHS helmets- so i assume i need dependences NVS + RHS but first of all i want to make sure it fits correctly- hence the desire for a sample model/way to export the model from enfusion tools?
sly bridge
coarse dust
hey guys is there a way to get opscore helmet model from RHS via enfusion tools?...
fortunatelly there is no way to export from workbench, no
can you be more specific about what you want to add?
coarse dust
sly bridge
fortunatelly there is no way to export from workbench, no
I made futuristic NVGs years back and basically i want to rig it and implement it into reforger with RHS/Night vision system.
i know how to rig/animate use blender very well but i really know very little about implementation in enfusion- my instinct was to simply get the samples from BI github- which I did- but theyre obviously all cold war helmets with no NVG mount

so thats why i wanted the RHS helmets as a sample so i can fit the thing on correctly before i start making the game-ready model and finishing the highpoly
sly bridge
coarse dust
so thats why i wanted the RHS helmets as a sample so i can fit the thing on corr...
yeah we do not provided game meshes like that. how does that facemask fit to the helmet? in general, you would only need to position / size of the rhino mount
i'm trying to help you out, but i need more info. if you find it easier, you can DM me
coarse dust
sly bridge
yeah we do not provided game meshes like that. how does that facemask fit to the...
sorry the entire Arma discord went down for me.
thats the issue im having is i only have my helmet as reference for the size fit- do you guys at RHS provide anything at all for me to get my sizing right?
let me know what information you need im trying to explain to the best of my limited abilities here haha
i was thinking maybe it wouldve been easy to get an OPSCORE helmet from RHS and just model out the rhino mount after having that as scale reference
but since its not provided possible im unsure how id get the scale correct other than just trial and error ingame which seems tedious
just need a way to match the rhino mount is all
 short marsh
coarse dust
I made futuristic NVGs years back and basically i want to rig it and implement i...
short marsh
coarse dust
I made futuristic NVGs years back and basically i want to rig it and implement i...
am i tripping or is that the viper helmet?
coarse dust
short marsh
am i tripping or is that the viper helmet?
galvion viper helmet? or are you referring to the scifi part?
the helmet isnt a galion its just an opscore helmet i did
short marsh

 short marsh
at first glance felt pretty similar
coarse dust
its funny actually, because this exists in arma 3
but not those helmets

without the mouthguard
they blended the two together A and B
 short marsh
would fit right in with some arma 3 dlc ngl
short marsh
rate the polycount (not everything merged yet)
 worn plover
short marsh
rate the polycount (not everything merged yet)
worn plover
short marsh
rate the polycount (not everything merged yet)
heil-rise
short marsh
worn plover
heil-rise
bring it up to the soviet architect, i have nothing to do with the weird ass shape 
worn plover
ive been trying to come up with a clever name since i first saw it lmao
short marsh
i cant even be mad, you fucked me with that one... its pretty accurate
fallow pond
its a meatlover cross
worn plover
short marsh
i cant even be mad, you fucked me with that one... *its pretty accurate*
dont be deterred its a good building model. and we desparatly need more of those in game
short marsh
worn plover
dont be deterred its a good building model. and we desparatly need more of those...
my ass is determined to make a soviet building pack 
gonna have anything from 5 story ones to 15 stories i think is the tallest one on my list
sage lance
short marsh
rate the polycount (not everything merged yet)
Tri count seems appropriate, tho I haven’t checked the base game apartment models for comparison; it will increase by about a third when imported to the engine. That said, the vertex count at this level isn’t nearly as big a concern as the number of materials you use to texture it, esp. if your LODs and colliders are well done
Tho I’m a little confused on what the 698 unselected objects are
coarse dust
mk i think im relatively close to getting the basics in game however im noticing the object origin isnt represented in space correctly- for NVGs (rhs) does the mesh itself have to be at (0,0) insead of in position on the rig

because in game its doubled in height xd
 remote palm
coarse dust
mk i think im relatively close to getting the basics in game however im noticing...
remote palm
coarse dust
mk i think im relatively close to getting the basics in game however im noticing...
Have you applied transforms for your model?
And if i am correct the root of the object should be at world center
short marsh
sage lance
Tho I’m a little confused on what the 698 unselected objects are
my other unused models in the scene lol
burnt surge
coarse dust
mk i think im relatively close to getting the basics in game however im noticing...
You could learn the basics from this here:
https://youtu.be/dUNN_KeyjkQ?is=hqA9p1HcN5nM5o_E
Worked pretty well. I think NVG needs also the bone Head and while apply it you need to select in the WorkBench the checkbox its use the anims (cant remind exact name).
Also important when you export in Blender your helmet & nvg to .fbx, make sure you selected checkbox "Selected Objects" and in Animation deselect checkbox "Add leaf bones"
When you have imported your helmet into the WorkBench (the .fbx file) into .xob file, go to import and select the Checkbox "Export Skinning" and reimport it

Follow along with our guide here: https://reforger.armaplatform.com/news/modding-boot-camp-3-modeling
Bohemia Interactive Community Wiki (BIKI) Tutorial: https://community.bistudio.com/wiki/Arma_Reforger:Character_Gear_Creation/Headgear
This Modding Boot Camp seminar was originally held on the Arma Discord Server on December 18th, 2024.
Artis...
 mortal abyss
Quick question - If I want to buy a model from i.e. "CGTrader", is it the royalty free license I want to be looking for, generally speaking? I'd really like to get my rocket pods finished, but I'm terrible with blender it took me about 3 weeks to get basically a cylinder with holes in 😐 don't really plan on going into model stuff more than one or two mods!
lethal frigate
sage lance
Tri count seems appropriate, tho I haven’t checked the base game apartment model...
That biggest building in game has like 120k poly on lod0 but on last lod has like 300-400 since its just a shape of building with baked in windows
So i think this building is good , with good lods will be even better
short marsh
mortal abyss
Quick question - If I want to buy a model from i.e. "CGTrader", is it the royalt...
i mean best advice, read through the diffrent licenses (it will not be quick), alternative put your cards on blender and improve slowly and you can even sell them yourself
if youre not careful you might end up with a 300 dollar model that you cannot use lol
not like its the first time it happened to a modder
mortal abyss
Ya I been reading through things this morning, still sort of confused on some parts maybe I could reach out to them directly and ask questions? It was actually quite fun doing the blender things for the first few days...
Also read that you can get people selling models under XYZthecorrectlicenseforme, but they themselves have got it in a dodgy way, any advice on avoiding that?
Sorry for all the question!
short marsh
mortal abyss
Ya I been reading through things this morning, still sort of confused on some pa...
i mean depends on the size of the seller they may answer questions (or not) and not quite sure what you mean with the second one
sly bridge
mortal abyss
Sorry for all the question!
post around here a link before buying a model would be my advive
mortal abyss
I read a message that was going on about people getting dodgy models, selling them to people who then upload them as mods etc., and issues relating to this but I guess just find a reputable person? I'll have to do more research, specially with money involved 😄
short marsh
i think that was in regards to people ripping models and then selling them on cgtrader i think...?
sly bridge
all the places you can acquire models from are plagued with ripped models. the cheaper the model the higher the chances are it is ripped from somewhere
short marsh
i know it wouldnt be the first time someone bought a ripped moddel, iirc there was a ZTZ tank that got ripped and sold
mortal abyss
Thanks to you both - I will read up on this further, probably return with questions some day 🙂
strange geyser
Hey, so a while ago i was portig Lee enfield from ArmA 2 to ArmA reforger, on M21 as a base, but I'm curious can I just make my own base for the Lee enfield? And make animations for it instead of using the base?
Also I saw a video a while ago where they hade a rigged ArmA Refoger charachter and did the idle animations etc, is there a way to get that or do I have to rigged it myself?
urban palm
strange geyser
Hey, so a while ago i was portig Lee enfield from ArmA 2 to ArmA reforger, on M2...
GitHub
Modding Samples. Contribute to BohemiaInteractive/Arma-Reforger-Samples development by creating an account on GitHub.
strange geyser
Thank you 🙏
strange geyser
I tried some of my bones, however I noitced that all of them get smaller more I rotate them?
Even the trigger.
Any idea how I can fix this? 

 wicked dirge
the bone size doesnt matter, their position does
coarse dust
unless you set their scale and bake them in animation
storm copper
Got question made model, and when i shoot at it. it has no hit marker. What could be wrong ?
 brisk grotto
storm copper
Got question made model, and when i shoot at it. it has no hit marker. What coul...
brisk grotto
storm copper
Got question made model, and when i shoot at it. it has no hit marker. What coul...
In your prefab do you have rigidbody?
storm copper
brisk grotto
In your prefab do you have rigidbody?
I do
 brisk grotto
Most likely something in your model itself thats not importing the collider setup properly then. Those settings look right
Did you export from blender with their plugin?
storm copper
brisk grotto
Did you export from blender with their plugin?
No
brisk grotto
Manually imported direct to workbench?
If so you probably missed something
Blender exports easier it handles a lot of the steps for you
storm copper
ALright will try again
storm copper
Yea im on 5.1
brisk grotto
You'll have to go to 4.5
 grim dust
Guys,I’ve finished making my grenade model, but I don’t know how to rig the grenade skeleton.
Can I follow the steps for adding bones to a rifle model, and then name the bones of my grenade model using the bone names of the original grenade?
mighty bronze
grim dust
Can I follow the steps for adding bones to a rifle model, and then name the bone...
I mean its the simplest way, and avoids having to make custom export profiles
odd goblet
storm copper
Got question made model, and when i shoot at it. it has no hit marker. What coul...
the layer preset you picked (Prop) for your collider doesn't cover projectiles. you probably want to use something like PropFireView instead. you can read more about all the different collision layers and presets here: https://community.bistudio.com/wiki/Arma_Reforger:Collision_Layer
burnt surge
storm copper
Got question made model, and when i shoot at it. it has no hit marker. What coul...
Change Prop to BuildingFireView and it will work or like above PropFireView (didnt know about that PropFireView)
Prop/Building = Collision
Fire = FireGeometry (where you hit)
View = ViewGeometry (what can see trough/or not)
remote palm
grim dust
Can I follow the steps for adding bones to a rifle model, and then name the bone...
Just take a look at vanilla grenades?
storm copper
burnt surge
Change Prop to BuildingFireView and it will work or like above PropFireView (did...
That worked like a charm thanks
grim dust
remote palm
Just take a look at vanilla grenades?
This is my first time making a grenade mod, and I’ve been unsure how to handle the bone rigging.
remote palm
The vanilla models are your best friend - you can usually “copy” their setup
grim dust
I referenced the bone positions of the original grenade model afterward. I’ve finished the rigging now, but I’m still not sure if I did it correctly.
okay
remote palm
Well its always trail and error 🙂
grim dust
You're right. That's exactly the case.
I think the bone rigging should be alright. All the bones seem to be in the correct positions......
 glass bison
grim dust
I think the bone rigging should be alright. All the bones seem to be in the corr...
glass bison
grim dust
I think the bone rigging should be alright. All the bones seem to be in the corr...
This looks amazing!!!
 oak shard
Hello, I took a 3D model of Sketch Fab and I made a transparent Vanilla vehicle and I wanted to assemble my .xob in superposition but I do not know how to attach it when I get into the vehicle the transparent vehicle moves well but the xob remains stuck even after adding it to the child of the transparent vanilla prefab. Does anyone have the solution?
grim dust
glass bison
This looks amazing!!!
Thanks for your compliment.
grim dust
oak shard
Hello, I took a 3D model of Sketch Fab and I made a transparent Vanilla vehicle ...
https://community.bistudio.com/wiki/Category:Arma_Reforger/Modding
This is the homepage of the AA3.5 mod tutorial website. I hope it can provide you with some help or inspiration to solve problems.
oak shard
grim dust
https://community.bistudio.com/wiki/Category:Arma_Reforger/Modding
This is the h...
Thx for help
surreal ore
oak shard
Hello, I took a 3D model of Sketch Fab and I made a transparent Vanilla vehicle ...
I'm consfused as to what most of that even means.
grim dust
@mighty bronze@remote palmThanks to both of you for answering my questions. After I finish my grenade mod, may I put both of your Discord names in the credits list?
mighty bronze
idc
remote palm
Not needed. Thats why these channels exist 😉
grim dust
Alright, sure! 😊
 primal zealot
I'm having some troubles understanding the whole BSP, portals and volumes.
I think my portals are placed correctly on the windows/doors, face facing inwards.
The Boxvol is just a basic shape of the building, which i have made it little bit bigger by around 1cm.
The BSP geometry, i created one for now to test. Made a plane facing outwards around the whole building, started making planes inwards in each room against the walls, floors and ceilings.
When exporting, log console goes crazy about portals leaking ect.
I tried to find guides, followed the BI wiki but its not clear for me, Found one video about the BSP's ect but its just for a basic cube. Dont know how to approach this building and i have more similar buildings like this.
Anyone here willing to help or explain how i should approach this?


 short marsh
primal zealot
I'm having some troubles understanding the whole BSP, portals and volumes.
I thi...
short marsh
primal zealot
I'm having some troubles understanding the whole BSP, portals and volumes.
I thi...
off-topic but this lowkey feels like one of the buildings in chernobyl
lethal frigate
Its not like they all the same almost
primal zealot
short marsh
off-topic but this lowkey feels like one of the buildings in chernobyl
Haha dude, spot on!
I have been creating a chernobyl map for the past couple months, it is pretty much finished and ready to play. Now just adding the finishing touches by retexturing my assets and "trying" to create the correct interior lighting.

 short marsh
lethal frigate
Its not like they all the same almost
short marsh
lethal frigate
Its not like they all the same almost
youd be suprised, pripyat had a bunch new building ideas at the time
short marsh
primal zealot
Haha dude, spot on!
I have been creating a chernobyl map for the past couple mon...
youre not gonna believe this, but look at what im working on 
 mighty bronze
short marsh
mighty bronze
short marsh
Is this thst one funny building that kind of looks like u know what
short marsh
mighty bronze
Is this thst one funny building that kind of looks like u know what
that they spammed 47 of in pripyat? yes
mighty bronze
primal zealot
Haha dude, spot on!
I have been creating a chernobyl map for the past couple mon...
Is this more modern day?
I see an aircraft hangar, I assume over the cnpp
primal zealot
short marsh
Nice im loving it. Forgot the actual name of the building though. Tell me when you do the BSP's, Portals and probes for this building 😄 i'm willing to watch
short marsh
primal zealot
Nice im loving it. Forgot the actual name of the building though. Tell me when y...
121-60-25, also nicknamed the candle
primal zealot
mighty bronze
Is this more modern day?
I see an aircraft hangar, I assume over the cnpp
Yes, its modern day with the current sarcophagus layout.

 short marsh
btw if you ever need a good look at the interior of like the stairs and whatnot, i recommend looking up the building type on youtube you will find a lot of videos of people that love riding the elevators lmfao
without them i would have been lost on the interior since theres like no data out there
primal zealot
short marsh
btw if you ever need a good look at the interior of like the stairs and whatnot,...
I've been trying to do it for most buildings although i improvise sometimes aswell
 primal zealot
short marsh
i use a mix of like single frames in random videos, blueprints, and improv
primal zealot
short marsh
i use a mix of like single frames in random videos, blueprints, and improv
Looks great dude! You working on the buildings only or are you creating a map aswell?
short marsh
im creating a map, but not pripyat themed thats what a friend of mine works on and he asked me to help him out
but my pc is busted so for now im 3d modeling on a laptop and gonna try to make a overarching building pack
strange geyser
So I'm in the animation process atm, gun is setup an all, but I've ran int oa problem ish?
I'm trying to create my own animations for my gun but I'm confused confused, I want to create animations from scratch but the guide in the wiki wasn't clear for me.
I just need to get it to blender and welp rest is history I can managed most ish
On this part https://community.bistudio.com/wiki/Arma_Reforger:Weapon_Animation/Setup
 coarse dust
how do you add items to arsenal after setting up model in game?
sage lance
coarse dust
how do you add items to arsenal after setting up model in game?
Each arsenal has a config file associated with it (e.g., InventoryItems_EntityCatalog_USSR.conf), which contains a list of everything in that arsenal. Depending on which arsenal you want to add your item to, you need to right click the config file, override it, and then add your item to the list
mighty bronze
strange geyser
So I'm in the animation process atm, gun is setup an all, but I've ran int oa pr...
Forgive me, you linked the entire page, I guess first of all, did you get a new workspace setup in the animation editor?
Also wait why you asking in models channek
strange geyser
mighty bronze
Also wait why you asking in models channek
Whoops I made a mistake, I forgot there was a specific channel there my bad
strange geyser
mighty bronze
Forgive me, you linked the entire page, I guess first of all, did you get a new ...
Hmm I'm not quite sure if I'm being honest.
The things I did was I downloaded the github samples for animations.
But I'm not sure if that's what you mean
 woeful kraken
Anyone here know how to put in clothing? IDK how to do it lol. I really want this asset in there tho to complete the army "cold weather" uniform witha fleece. I will buy the asset. Just need someone to put it in
https://www.cgtrader.com/3d-models/various/various-models/military-tactical-olive-green-fleece-jacket-sweatshirt

CGTrader
Model available for download in Autodesk FBX format. Visit CGTrader and browse more than 1 million 3D models, including 3D print and real-time assets

CGTrader
Model available for download in Autodesk FBX format. Visit CGTrader and browse more than 1 million 3D models, including 3D print and real-time assets
calm rune
woeful kraken
https://www.cgtrader.com/3d-models/character/clothing/military-tactical-olive-gr...
You know those are just folded models right?
meaning your character can not wear these
woeful kraken
calm rune
You know those are just folded models right?
I was wondering about that
woeful kraken
calm rune
meaning your character can not wear these
Can you make an army fleece? I was always wearing it when I was in lol
 violet tangle
Is there anyone that is willing to help/teach me how to take a 3d model and turn it into a functional working vehicle for reforger? Im willing to pay after good progress and completion.
grim dust
I'm a bit confused. I already set up all the materials and textures during the modeling phase, so why aren't they being recognized when I import the model into Enfusion Workbench?

 plush torrent
violet tangle
Is there anyone that is willing to help/teach me how to take a 3d model and turn...
plush torrent
violet tangle
Is there anyone that is willing to help/teach me how to take a 3d model and turn...
Just out of curiosity what vehicle is it?
grim dust
I’ve been figuring this out for half the afternoon, and here’s what I’ve found:
when modeling, you can choose exactly where each texture is applied, but there seems to be no way to do that inside Enfusion Workbench.
I suspect I have to make BCR and NMO texture maps to get this working properly.
If I just apply the texture directly, my grenade turns completely black.
 mighty bronze
grim dust
If I just apply the texture directly, my grenade turns completely black.
mighty bronze
grim dust
If I just apply the texture directly, my grenade turns completely black.
BI github as some Substance Painter export profiles for AR's BCR + NMO maps
the textures will need their suffix _BCR and _NMO to get imported properly though.
You'll also need to assign these _BCR and _NMO .edds textures to .emat materials (usually generated from materials you setup in blender)
mighty bronze
grim dust
I'm a bit confused. I already set up all the materials and textures during the m...
Incase you have some confusion, every ingame model usually contains three things
the .FBX (Enfusion its .XOB) model, which is the triangles and faces that make up the model.
the materials (Enfusion its .emat) which controls how the texture is displayed, and where its displayed (material on the body, and the material on the fuze)
the textures (Enfusion its .edds) which is the funny pictures based off UV Maps on the model, that are put into the material, which then displays on the model.
so when you export the model, you're only exporting just the triangles and faces (plus materials usually generated by WB)
Then you need to export textures, there is someway to do it with blender but I'm not sure where
violet tangle
plush torrent
Just out of curiosity what vehicle is it?
 brisk grotto
violet tangle
brisk grotto
violet tangle
Most bought vehicle models have either no/shitty interior or way too many verts
umbral tartan
does anyone has a good rig for this ghillie? Cuz thats fucking impossible to make it without getting leaves from one part of the model sticking to another
 mighty bronze
umbral tartan
does anyone has a good rig for this ghillie? Cuz thats fucking impossible to mak...
mighty bronze
umbral tartan
does anyone has a good rig for this ghillie? Cuz thats fucking impossible to mak...
You're probably doomed to manually editing the vertex weight of said leafs
umbral tartan
mighty bronze
You're probably doomed to manually editing the vertex weight of said leafs
🥀

Those two shows all my emotions
mighty bronze
umbral tartan
<:ropemaxx:1238124633295949874>
Maybe we can hangout together
Honestly you could probably put thr legs in an A pose animation and just do some weight painting shenanigans.
Did that alot with a plug in called cats for another game
-# I doubt that plugin would work here tho
umbral tartan
mighty bronze
Honestly you could probably put thr legs in an A pose animation and just do some...
I stretched the legs as fuck just to see exactely each one that connected to other leg
Helped, but not really
0/10
That guy who did unn ghillie is a goddamn boss of free will and job application evasion
mighty bronze
umbral tartan
I stretched the legs as fuck just to see exactely each one that connected to oth...
Time to assign weight painting via edit mode then
umbral tartan
mighty bronze
Time to assign weight painting via edit mode then
I'll definitively kill myself while doing it
Well
I dont really have a choice
mighty bronze
And then when youre done
Save a backup of the blend file incase you have to go back
mighty bronze
umbral tartan
I dont really have a choice
L for island/mesh select
Idk if the blend file has seams on each leaf but if it does
Or you can select the uvmaps edged, shift F and apply seams that way.
Then L select based off seams might help select entire leafs
calm rune
umbral tartan
does anyone has a good rig for this ghillie? Cuz thats fucking impossible to mak...
Transfer weights as you normally would. Then bring it into the weapon poses blend file and select different poses and start weight painting to fine tune it.
grim dust
mighty bronze
so when you export the model, you're only exporting just the triangles and faces...
I did some research yesterday. If you set Path Mode to Copy in the Blender export options, it will export the model along with its .emat materials.

 burnt surge
Not sure if its the right place here, maybe configuration would work aswell.. I ran into a issue (optical wise), the system itself works so far.
I know of Arma 3 and OP's people like to customize stuff, mostly infantry gear so i did for the Armor all pieces seperatly and modular to use + added for the Armor itself a seperate loadout window (so you wont lose space for mags and other items).
My issue is when i put stuff on surface the parts getting to hover above surface, looks like it just takes the Armature positions. Also when i swap the Armor with a other Armor it looks like a bug which has lost his hull while grown..
Ive played already around in the InventoryItemComponent with Resting UP and the Resting Additive Offset LS values but somehow its very bugged and sometimes when i change the values nothing happens or completly disappears somewhere else. First pic is the loadout, second pic how everything is floating, third pic the bug hull and fourth pic when i was trying to fix offsets with Rest UP.
Anyone already has some experience in this? (Main Armor part can be done with Item model i know with the BaseLoadoutComponent, but somehow when i add this Component to the pieces it makes the pieces not working anymore on the character, all glitching on surface)


 sonic tree
I'm not sure if that's what you mean, but I know that clothes have a separate model when it comes to items on the ground
grim dust
Is my normal map flipped?

 simple locust
umbral tartan
does anyone has a good rig for this ghillie? Cuz thats fucking impossible to mak...
simple locust
umbral tartan
does anyone has a good rig for this ghillie? Cuz thats fucking impossible to mak...
Yes I do
umbral tartan
grim dust
Is my normal map flipped?
yeah
umbral tartan
simple locust
Yes I do
can you share with it please? 
brisk grotto
grim dust
I did some research yesterday. If you set Path Mode to Copy in the Blender expor...
If you use the official blender enfusion plugin (on blender 4.5 LTS) export is a lot easier
brisk grotto
burnt surge
Not sure if its the right place here, maybe configuration would work aswell.. I ...
RHS does a lot with extra slots and modular inventory may be worth asking them or checking their set up out
 devout dune
burnt surge
Not sure if its the right place here, maybe configuration would work aswell.. I ...
devout dune
burnt surge
Not sure if its the right place here, maybe configuration would work aswell.. I ...
U need to have a model for when it’s on the ground (deflated model?)
wicked dirge
grim dust
Is my normal map flipped?
your faces are flipped. check tutorials on flipping face normals in blender
grim dust
I've reworked it, and it's working properly now.
But there's a new issue. I'm making the grenade textures, yet the AO map never exports properly. I looked up online tutorials, and they say I need to set up a high-poly model during the model baking stage. I'm still figuring it out...
grim dust
grim dust
But there's a new issue. I'm making the grenade textures, yet the AO map never e...
The software I'm using is Substance 3D Painter.
brisk grotto
Theres tutorials online for baking AO with substance, then as long as you use the enfusion export presets your AO will go into your NMO map
burnt surge
sonic tree
I'm not sure if that's what you mean, but I know that clothes have a separate mo...
Yeah i know you got the item model there but somehow this is only available in the BaseLoadoutClothComponent and when i add this to the Armor pieces they get broken and are only on the surface instead on the soldier (worn or deflated)
burnt surge
brisk grotto
RHS does a lot with extra slots and modular inventory may be worth asking them o...
Cant post in their showcase thread, maybe will take a look
burnt surge
devout dune
U need to have a model for when it’s on the ground (deflated model?)
This works with the main equipment yes but somehow not for the pieces


 brisk grotto
 muted narwhal
been looking at some 40K mods for reforger so minus well
muted narwhal
been looking at some 40K mods for reforger so minus well
You'll be shot if your mods infringe upon other game/film etc rights
 shadow karma
muted narwhal
shadow karma
muted narwhal
I once had a path of adventure, but then I got shot in the knee by an arrow...
 fierce kraken
Does the model thickness in blender translate to armor thickness in engine? Like if I made the collider thinner would that translate to a thinner armor value in game?
brisk grotto
fierce kraken
Does the model thickness in blender translate to armor thickness in engine? Like...
No, it’s purely based off the collision material assigned I believe
pulsar sandal
collisions work properly on foot but in vehicles cars can drive through them.. anyone know what may cuase this? thickness of the collision??
pulsar sandal
