#Ender 5 Plus - Mercury 1 (Classic) with Stealth Burner and New Enclosure Project
14000 messages · Page 14 of 14 (latest)

@naive swan you have the beacon installed ?
Yes I do
@naive swan I have it installed but klipper is giving me a error about control pin in bltouch section for which i deleted
Ok check my GitHub for my config under usermods section

GitHub
This mod is an amalgamation of parts from the ZeroG (Mercury1) and Voron (Trident,V1.8,StealthBurner) for the Ender 5 Plus. - ZANDVE/printer.cfg at main · Vprince099/ZANDVE
You can copy my beacon section
No bl touch or probe section
Oh that’s a problem
@naive swan for the beacon
Might not have enough power
pi 4
Like 5v power coming from the pi
Yeah
But these pi’s are noctorius for not having enough power on the USB rail
How many other things are connected?
@naive swan No klipper is telling me Now Beacon Model loaded ?
I did
There is a load command right?
Looks like you need to follow the quick start guide
Not sure what part is missing or broken
@naive swan Got the beacon going a bit warm 70c give or take while running
yeah its its biggest weakness
I like it though hope full it doesn't fail to quickly
it should be fine
boy benchies are looking so bad on the front
It’s alive again

My overhangs look great in the front but rear is crap
If I turn the benchy the bow looks like crap

Guess my slicer profile is bad for over hangs
lets see if I can get a voron cube to print
done wasting filament on benchies
Might need some more fan power
turned fan up to 50%

how well does that work with larger beds?
he has hydra installed so it should fit, unlike the original E5+ Z system where the lead screws are in the way
Side fan ?
Anybody have a led light holder for ender 5 plus mine are 220mm by 15mm wide
I May be able to install today but test fit shows it will clear and lines up well @twilit edge

nice! I'm mostly just wondering how well it works for large beds. I've only seen it used for small form factors.
It’s more like bed fans
how much air reaches the center of the bed, I guess
those fans ..yep
It’s good for pla and or circulation
I am hoping my overhangs clean up with this
On ABS
Like daylight on a stick?

Add some awesome lighting to your 3D printer with our EZNeo kit! Uses NeoPixel compatible LEDs on them that are all individually addressable. Includes cable, cable covers, mounting hardware, and the strip itself.
Just use the mounts for the daylight on a stick
found some that should work
@naive swan does the new cad for the skirts have the keeper tabs for the top hydra cover?
Um sorry im scatter brained. Its like the tabs that hold the side panels? But they hold the. Above

Above 👆🏽
Im hating macros atm
Trying to get a print start macro with all the crap im tossing at the printer
KAMP, SFS and heat soak configs.
oh the cable management/ panel support

@dawn vapor https://github.com/VoronDesign/Voron-Trident/blob/main/STLs/ElectronicsBay/deck_support_4mm_optional_x6.stl

GitHub
Voron Trident CoreXY 3D Printer design. Contribute to VoronDesign/Voron-Trident development by creating an account on GitHub.
@dawn vapor https://github.com/VoronDesign/Voron-Trident/blob/main/STLs/ElectronicsBay/deck_support_3mm_optional_x6.stl
GitHub
Voron Trident CoreXY 3D Printer design. Contribute to VoronDesign/Voron-Trident development by creating an account on GitHub.
Since that is acrylic, i would go with the 3mm option


@naive swan im now going through what you went through with under extrusion, i bought POLISH3D Gear because they had good reviews but they have point where they go slack and loose
did you end up buying the BMG set?
i actually buaght the polis3d to solve the issue for me
ohh really
i had to reduce the anti squish thingy
the new fans are looking good by the way
when are you starting the type V?
Out of curiosity, what are the parts outside the stepper Hydra mounts for?
@deep vine i was looking at these US $21.04 15% Off | Newest Mellow Hardened steel Dual Helical Drive Gear Double Drivegear Kit For Libra mini Extruder
https://a.aliexpress.com/_mPvv5k8

aliexpress.com
Smarter Shopping, Better Living! Aliexpress.com
It uses the trident standoffs for the deck panel so i think its to clamp the deck panel?
Im behind schedule, technically its done but i am not seeing good reason for creating trident z
Oh why is that, surly it offers benefits over the original z system
So you thinking of second hydra?
Hmmm 🧐
better than the original but leagues below Hydra
and yes Type V will move to Hydra
Honestly it is just easier to implement for the E5
since the bed sits forward the geometry on the trident changes
it can be done but it would be a downgrade over hydra
yeah i see what you mean, there also isnt any room at the front or back of the bed to install things like purge bucket because of lack of travel, are you still using z endstop?
Also going to trying and redesigning these for the ZANDVE

GitHub
Mods for my Voron 3D printers. Contribute to falcon14141/Voron_Mods development by creating an account on GitHub.
Because I print a fair amount of things in pla, and to much heat means melty melt
there is space but its a tight squeeze. I am on beacon so i am on a virtual z endstop
can you send a picture of how much over the back of your bed your nozzle can go
back with the ratios??? 😄
my belt tension is good i just did it yesterday with the sound spectrum analysis app
u can tell isn't prob cause the fact that the thing moves in x when u move y way
unless u pushed to side
klipper has a thing to test with accelerometer
no it went to the side a little because i pushed it that way
oh lol
do you mean the resonance tester
shaper_calibrate?
aka the tensioning
no
TEST_RESONANCES AXIS=1,1 OUTPUT=raw_data
TEST_RESONANCES AXIS=1,-1 OUTPUT=raw_data
oh i didnt realise there is a seperate thing for this
~/klipper/scripts/graph_accelerometer.py -c /tmp/raw_data_axis*.csv -o /tmp/resonances.png
will this pull a graph for the results?
yes
so i can test both axis then at the end it will show both results on one graph?
yes.
this check urs XY belt tension
honestly who ever build klipper is genius
pretty suyre multiple people make stuff for it
alot of stuff happens cause someone wants it so makes it work.
i wish i could code like these peop;e
yes, and its so cool they let us use it for free
it wouldn't have these features without other people.
like all of the industry softwares cost a metric F tonne
yeah the 3D printing comunity is so cool i think
lots of brainy and interesting people with the same interests
I like the beacon very fast. I learn alot from all the good ppl here

testing now

@naive swan when your designing built in supports. How much gap are you leaving in them?
0.2mm
Hey @naive swan I can’t seem to find this file could you help point me in the right direction please sir.

It should be under panels/gantry
@polar wasp https://github.com/Vprince099/ZANDVE/blob/main/Type-Z/STLs/Panels/Gantry/Right/R_Plate_11mm_Logo.stl
GitHub
This mod is an amalgamation of parts from the ZeroG (Mercury1) and Voron (Trident,V1.8,StealthBurner) for the Ender 5 Plus. - ZANDVE/R_Plate_11mm_Logo.stl at main · Vprince099/ZANDVE
Thank you, that might be the one place I hadn’t looked lol.

Scott / Edge Of 3D: https://www.youtube.com/@EDGEOF3D
https://docs.zerog.one/
Discord: https://discord.io/zerog
Twitter: https://twitter.com/ZeroG3D
Facebook: https://www.facebook.com/groups/zerog3d
Music:
Artist: tubebackr & Tetuano
Track: Loser
@tubebackr & @Tetuano
links.fanlink.to/tubebackr
Creative Commons License. Attribution-NoDerivs 3....
also
@naive swan
check

E3D
High-flow 3D printing is just a 30-second nozzle change away! Achieve high-flow results in the same form factor as a standard E3D Revo™ thanks to optimised internal nozzle geometry. Upgrade your 3D printer today, upgrade to High Flow!
they just released today

flow rate looks better
almost double the flow rate
im interested
for a nozzle its abit pricey
like 50 dollars for a nozzle

E3D Rapidchange Revo sees its first high speed nozzle today with Revo HF, a high flow variant that uses new performance increasing internal nozzle geometry to increase surface area but how much faster is it?
Affiliate Links:
Revo HF Nozzles: https://vector3d.co.uk/revo-hf-nozzles
Revo Hotsides: https://vector3d.co.uk/revo-hf-hotside
Revo 60W he...
watch this
Worth extra performance tho…
Did you get the atp5 bed or mic6 @naive swan
I only have the mic6
But it leaves you the option to use stock z
But I hear atp5 has that as well
look at fysetc bed
Yeah fabreko just got them back in stock. Says it also has stock patern
Mic6 is a little thicker
see what the systec at
Roborock

Sorry i have been offline for awhile, just getting my office on the 1st floor up to working order. Since I keep on having flare ups
Sorry you're not feeling well, dude. 😕 I checked your release log a few days ago. You're slaying it, illness or no.
Thanks!
Vengeful, whats your bed mesh look like?
Uggg both printers down
voron cant see the cantool
broken tower on the Zero G
Any suggestions ?
for the voron
wdym
what does it say?
also do u have visible canbus stufF?
like the light on it
yes have blue lights
which board?
sb2040
no like I mean the 2 places
not sure what you mean
send octopus photo of wires
I mean't like do u have high coming from left or rigt
right
u tried flipping em?
yes
my high for RJ12 is on the Left of port.

ok what about klipper does it think
is ur can0 up
Bus 001 Device 003: ID 1d50:606f OpenMoko, Inc. Geschwister Schneider CAN adapter
klipper says it cant connect
oh it was working
u checked ur wires didn't break?
tried another whole harness outside of the printere
ur board have visible dmg?
no
what does the can0 inquiry look like?
python3 ~/CanBoot/scripts/flash_can.py -i can0 -q
sry wrong
wait nvm right for canboot

~/klippy-env/bin/python ~/klipper/scripts/canbus_query.py can0
says failed to trasmit
can u get it into dfu with canboot?
haven't tried
do then
mcu 'mcu': Unable to connect
Once the underlying issue is corrected, use the
"FIRMWARE_RESTART" command to reset the firmware, reload the
config, and restart the host software.
Error configuring printer
honestly voron canbus depot best
just aks them
Will another day ...have stuff to clean up
@naive swan witch from mercury banger
@naive swan is there a way to pull the size of the panels from the cad file? All i seem to be able to do with my app is get mass lol
I want to see about getting them cut
I did the back panels the other day and i cant cut straight worth a shit
Ive been on a hells paradise kick. That shows sick. Got me reading the manga
I didn't they full into it to read manga lol
I skipped last weeks episode lol maybe will watch tonight
Upside down taco
Yeah 3 ways 1-load to dxf or 2-drop a sketch on it and trace the edges and add measurements, 3- do it manually with the measure tool
- Shit ur pants rn
Fix ur fucking safety hazard
No
Omg is it fucking ghrdwb lagaan
I didn't recognize rap is a man's soul for a while
Im still fixing the speed
It is a bit slow
Orchestra makes it 10x better
If I cared for beeper I'd just not. Then do a speaker setup to violently shake my machine
Why is ur u2c got a heatsink on it.....
3.5mm audio jack
Just upload .mp3s and it's prob superrr easy
U should be using canbus from octopus lolll
It doest* it has a case which i thought did a good job of keeping my fingers from fucking it and holding the can wire down with zipties
Also if u ever wanna buy a sb2240 any u guys I have 3 hebhehe

U deserve death for this.
Im still slowly printing shit on my ender 3 :/
Those wires are too small
Which ones?
So wtf are ur wagod
Im using right gauge
All of the ones for that molex head
The white isn't meant for that gauge
Also ur u2c is bad connected
Meh its what came with the sb2240
I have 1 pi usb to octo and 1 pi usb to u2c. I didnt want to spend cash to get the phone cord crap setup for octo can lines
It's cheaper than u2c
Your saying itll work the same having pi to u2c and then u2c to octo?
No don't do that it's worse just didn't realize cause ur stuff so close

Rat bitch
My wire management is shit atm but itll look actually finished once i have all the shitni neednin it
U can print stuff for that too
Annex has files
Got some

I designed My vzbor frame
The annex ones?

Those don't look like annex 1s they look too weak
Those wireducts aren't annex right
Yes...
Theyr from voron hub

GitHub
Fully Enclosed, Medium Format, Moving Gantry, FDM 3D Printer with Direct Drive Extrusion System - Annex-Engineering/Masherbrum-K1
Get from release
10/10 recommend not clicking on the ending song for 86 now me wanna cry
Added to Printing queue
Say less
Lol i still haven’t figured out the beeper on mine
@naive swan what handles did you use on the type z?
vzb0t
those are good just do em
Beepers pretty easy ill post my config when i get home
Oh yeah those look sweet. @vocal terrace i hd printed some voron ones but my hands barely fit on them lol
it @ people when u reply to msgs lol
The ones from Voron Mods
my bed is here and looks good
@naive swan remember my og Vz235 bed idea.... it works that what maze did
Finally got Utoc working now I just need a crimp tool to recrimp the USB 3do Nozzle camera ...ugg one wire broke
those a re some tiny pins
mx1.25mm?

GitHub
Contribute to 3DO-EU/nozzle-camera development by creating an account on GitHub.
I know they use a 5p 1.0mm pitch
Ok cool
Get a pre crimped kit and solder it
@mild hinge Keszoox Jst SH1.0mm Connector Kit... https://www.amazon.com/dp/B09F3TMG52?ref=ppx_pop_mob_ap_share

Keszoox Jst SH1.0mm Connector Kit and Premium Pre-Crimped Cables,for SPRacing F3 Omnibus F4 Pro F7 Racing Drone Wire Kit,Total 140pcs sh1.0 Connectors and 10 Colors 250pcs 28AWG Cable 150mm Wire
This is the kit I got
Damn jst sh…. The only time I have ever needed a pre crimp kit
yea those 3do cam wires pretty dang small
Absolute pain in the rear
ordered
That pin out would have been a micro usb port…. But that would have been worse
yea

Old standard from the old days when phones needed a signal to know they needed to power the usb device
Yep I am noping out of crimping that
yea
might be worth just buying another cable
I just hate undoing chains to ru nthe cable
Picssss
@vocal terrace oh
😂
Which lead screws should I order for hydra, can find the correct ones in stock, I already have motors
Tr8x2 pretty sure
@naive swan

Watch Oshi No Ko online in HD for free. Download episode 7 of Oshi No Ko here.
Now u can watch ep 1 in english
@naive swan This belt system look familiar to you? 250C actively heated chamber. It's basically the Stratasys patent implemented with dual extruders. https://www.3dxtech.com/3d-printer-gearbox/


3DXTECH
Gearbox™ HT2 prints a broad array of materials including PEEK, PEKK, Ultem PEI.
@twilit edge that looks really good
I'm drooling a bit, ngl
Also kinda easy to implement
Want to do it?
I can close out zandve in a weekend
Since I am canceling trident
You're cancelling trident?
Also, I'd love to do it, but I've got too many other obligations. OmniBox in beta, an article to finish...
I like the red gears
Damn, you're right. Those do look good.
Yeah hydra is better trident is not worth working on as an e5 conversion
Nice. That's a mountain of work and service issues saved.
True
I think the bigger problem I was having with it was the e5 pro was going to need another round of modifications if I made a trident version
Whereas hydra could just be implemented using the same parts
You're making a lot of sense. Sounds like more effort than it's worth.
Might have to look into order some of those red gears
Now if I can get the SB2040 Leds/case leds to synch that would be awesome
1st print on the Voron
see what happens
Want a sb2240 I'll sell u one lmao
Knomi
No, I agree with you, it looks like for the extra work it won’t be worth redesigning the system for.
I think it's cute and may have uses as a remote display for info on the enclosure. Replace the Mini12864 display completely.
Don't need extra weight on the toolhead, though.
Another witch from mercury banger
i have one here, maybe i’ll install it today
For toolhead or somewhere else?
probably gonna go on the SB
Have to wire the sb2240 tho
that’s the reason it’s not on already
Lol
where can i find the zero g logo
@naive swan what temp can ebb36 go upto?
mine went upto 77 lmao

holy thats sick
I used someone else’s design tho

GitHub
Mods for my Voron 3D printers. Contribute to falcon14141/Voron_Mods development by creating an account on GitHub.


@dawn vapor where ur pillow bearing files?
Also the doors don’t need to be glued on, they have bolts
Are the not in the user mods section
ty
and nope lmao
not for z
I want Z
they should be on the github
also these are sick
these are the one you printed?
No these what I have redesigned to work with the merc 1
if you plan to post them im totally using them
I havnt fully finished them yet, hopefully I can get them printed of tomorrow in abs to test
Then I’ll give you the files
@deep vine they look good
How are you finding your oldhams?
WobbleX files are almost done hehehhee.
Ws8
okay mabey illl order them then
Did u get return for others?
nah just printed them for E3
okay i should have everthing else ordered now to build hydra
Don't print back motor mount lmao if doing ws8
They seem fine, just make sure they installed properly
whats up with it?
What are you fixing?
So it seems to be a shim off, is this something I can sand to fit it or am I gonna need to reprint ?

Idk if vengeful designed for middle shims
I dont think so.
There’s no shins on mine
Ohhh ok that makes since, it fits two in there no problem but no room for the third lol.
Thanks, I was really dreading reprinting them.

I just printed this again lmao
Also I melted my nevermore lmao
110C a little too toasty
Yeah just check and only has two outer shims
What is it??
Xol2
yeah seems breaking and reprinting is just a part of it lol
How many xol’s???
I swapped extruder lmao
Lols

Oh with hexvort
Yeah I remember when you first got it
Anything but CW2
Trying to shame my orbiter lol
No tryna shame clock shat 2
Can’t wait for Galileo 2
Ah you are using a center shim, that came after the mercury 1. You can lose the center shim or just shave down the part Tom make up the 1mm. I can add the center shim clearance on the hydra release
All it requires is for me to shave .5mm on each side
i believe this enclosure is setup for mercury 1.0 1.13 or 1.14 but 1.15 uses 3 shims instead of 2 shims.
Yeah I just took em out. Everything else is fitting fine now. Hopefully I’ll be printing with it by the weekend.
Yeah that’s what I’m discovering
@naive swan i think we should do some sharing on your design to get more people interest and building it
im in proccess. half way through printing.
Im I’m the process too, mostly put together
I'm printing the omnibox for the zero g right now
I dislike the case for the ender 5 plus

Printables.com
Here is an optional 3D File for the PrusaSlicer in form of the Ender 5 Plus (Mercury One Hydra Mod) | Download free 3D printable STL models
slicer build plate
@wraith oxide
yes?
these are the Magdoor hinges, you can just mirror for the other side
oh beautiful thank you.
also are you doing hydra?
nope sticking stock bed motion system. i have though about doing belted Z but see no reason to with how my Z looks. i have a fabreko bed for it to put on.
are you printing abs on it?
this is for stock bed to mounts a nevermore filter


Actually, I just realised
im enclosed with y own design, just like @naive swan a lot more. and i was looking for something like this.
You can’t flip the latch door pieces, I’ll have to creat the left ones

I need to redo the one for the left side
got you
will be doing this. i wass thinking about just leaving it in the bottom of the enclosure.
Yeah, he’s done a good job with his design
i have designed an exhaust and also bed blowers for circulating the air in thge chamber. idk if you would be interested. also changed the z endstop so you can remove the blocks to raise the bed but im also running a vzbot print head so it might be different for you.
Oh yeah, I’m interested in the exhaust
Can you send that over please
check dm
Where do I find the other end pieces… or would I be better off just modifying the part.

What were you thinking? Thingiverse, Reddit, Printables?
Sorry for the silence this weekend, I was deep into the D4 release
Yeah, it would good to see it posted else where and more people building it.
Also did this

I definitely think to start with printable and thingeverse because that’s quite easy, you could even just use it as a link to your GitHub. And for redit, I havnt really used that so I don’t know.
I have Printables with a token STL and a prominent GitHub link. Works okay.
Try r/Ender5 for a decent-sized forum.
Yea no reprint. What the strat for e5+ get 16mm dealers lmao
Okay so that sounds like it’ll work well then
Is this for Reddit?
Yep
What do you mean?
There's a sub for the Ender 5 Plus, but it's much smaller. r/3dprinting is too big and kind of a joke. They get excited about dumb stuff and ignore the interesting things (too many people interested in shiny stuff and new to printing).
The ones that go on top of kossel balls
How comes?
Space to mount top leadscrew.
Ohh I see
@wraith oxide
okay so these are the left door holders and the backs of the door mounts
youll need 6x3 magnets and m3x4.5 brass inserts
So with the beep. I 100% dont recommend setting it up for print failures. Im trouble shooting my m600/pause resume macros and its getting really old hearing the mario death tune on print fails lol
loading into Orca slicer and put in the queue

Nice setup
I gotta look when i get home hut thought i made a mod for that part
Also
GitHub
Configuration for my Mercury Type Z. Contribute to LTSpenny/MercHydraTZ development by creating an account on GitHub.
If you want your printer to mock you
Install these lol
Rage inducing really
Oh that’d be great, I think I could struggle my way through redesigning it but I’m definitely not great at 3D design lol
<- tinkercad survivor
Printintg a re-spooler now tired of the bad spools
I shamelessly use tinkercad, I know the others can do way more… but they’re no where near as easy lol
It’s time to move to fusion 360 😉
I dis agree
I would say fusion360 is really easy
UR ALIVE
@dawn vapor welcome back
more intuitive as well
they better not take away hobby licenses though
Ive been depressed hearing the mario fail song

It looks fast as hell too!
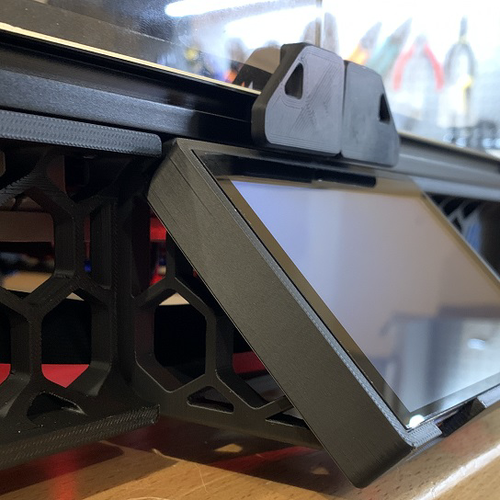
It looks like you tried taking a pic of the flash
I just did the middle shim on mine. Havent had issues yet.
Also sorry apparently i deleted my download folder where i had the part im still digging through tinkercad files. If i cant find it by the afternoon ill redo the part for ya.
Thanks much appreciated.
Did you get booted or something?
For your viewpoints on Tap….
Wdym?
he probably did, for going to ram ranch
I'm in both servers lmao
😅
Yea think they just muted me
Can't see alot of channels rn
Handy to know

Been doing too much house/home maintenance is reason ive been mia. Going to be mia next few days have to do a water pump on my car today. Have a bunch of prints waiting to be put together. Ended up going with the atp5 fabreko bed instead of the 410x410 i sourced. If anyone wants that catch me in the dms.


The plus size @deep vine ?
oooo fancy. i did just get a fabreeko one so im good for now but that looks good.
Yeah it’s the plus size plate, waiting for some other parts to instal then can test everything
hey @naive swan could i get pic of where you put your x endstop, i may have to reprint my rear steppers to the right ones for the y to work as well lol.


Hey it works thats all that matters.
are you on 220v? I think you are but just make sure you dont hook that up if you are not
Yeah, technically I’m 230-240v but I think it will be okay
Got a link?
only wanted the metalic thingy… shipping 53 eur… item costs 26eur 😂


@naive swan have you got any pictures of how you did your electronics bay wiring


@naive swan you’ve done your electronics in the hydra the everything pointing down, that’s interesting.
I have seen how Dutch has done it first, so I have decided to make somthing like that but the panel will be like a car bonnet
Yeah I have a bottom lid with hinges, like what is used on the trident
If you want I can come up with something that will add a door on the deck lid
It will require a lot of plastic and will only work with hydra but it can be done
Would be good if we could design something
I have a sheet of acrylic I would like to re-use

I would like it to hinge from the back
So that mean to need to roll your printer over to work on electronics, I’m hoping to find away to not have to move the printer
Correct, I dont like it either since the printer is massive. With the XL top hat it is almost clocking in at a Meter
That can be done using regular hinges
Yep, he’s a big boy, and you know these frames have a poor name for being ridged, I would prefer to get it all set and then leave it
Yep, it’s going to have plastic plates all around but it can be done, not sure if it should hinge or just be an easy to remove panel though…. Since hinge doors will reduce the opening
And a gas strut 🙂
Honestly I have been considering that for the top hat as well
Yeah I see what you mean,
I guess having a lift out panel would be far easier
That actually makes perfect sense, why have we not done something like that already
For a gas strut, it would have to be low enough pressure for the weight of the lid
A car boot lid strut would be to strong
Original designs had it but it seemed to expensive to make it a baseline requirement . So I put it in the parking lot for a future mod
Which struts did you source?
Yeah part of the problem was buying a bunch of versions for testing and then returning what didn’t work
I watched a video where someone made one with a syringe but it seemed to Frankenstein for my liking
Haha
I seen something similar
There was also a hinge version that used a locking rod that almost made it to final release

JLCPCB 3D Printing Service for $1 & Get $30 Coupons for New Users Here: https://bit.ly/3vhYyix
Extra $5 Off by Promo Code: JLC3D
JLC3D Group: https://www.facebook.com/groups/3dprintinglover/
Thanks for watching! Put any suggestions for future projects in the comments below.
CAD Files:
https://drive.google.com/drive/folders/1Dt8xhLUu4fSNFPPp...
Automatic opener
How lol
We could probably run it from our main boards
I don’t think it’s a bad idea

Nice
It’s good to use the space in the parts to, because there’s a lot of material and they don’t need to be that strong

Today I was just thinking about installing some contact terminals in these for the daylight on a stick
Yep same idea here
Great minds think alike
But I was just going to use a limit switch
At less than fifty cent it just talks to the control board and the lights can be turned on by klipper
Also a button as well
Using a limit switch
Would it also need a macro?
How would you program this in
May need some customization but it shouldn’t be hard
If the function is not baseline
Basically when limit is triggered then turn on 24v on pin whatever
This could allow you to trigger it on the machine or in mainsail/fluidd
yeah, it’s also a good idea
This also means when certain conditions are met it can be shut off
Oh and for the temp controller, that’s important
Might need a mosfet depending on how many sticks you are using
I only have one stick
Yeah I don’t think most daylight on stick setups would have a problem since most 24v pins on the board can handle that draw, it’s disco that might have issues and may need to get direct 24v from the psu via a mosfet
Again depends on how many
Well for those temp controls they are standalone, they are basically a closed loop system
What psu are you using?
Rsp-500
Would be good to have some control
I was happy to get the mains bed so I’m downsizing to a lrs200
Agree so to a degree with a higher end board they are almost redundant
Careful with that since it could limit you
I have octopus so it has enough ports to do everything
All my steppers are on 48v psu
Apart from sb2240
Exactly, basically these were created to drive a inline filament heater and a chamber heater using thermocouples
Where is the fillament dryer?
It’s like one of these
They created a custom one that uses a heater block and 2 extruder heatsinks to purge moisture out of the filament
I’ve never seen one of those before, I wonder if they work well
What temp are they running at
The one one lethal is making is open source and way cheaper than what Thorsen is selling
100c
On abs and up
It’s a good idea and some videos have been posted on similar concepts that seem promising
Yeh that’s interesting, I don’t see the need for myself at the moment tho
Pla would use a way lower temp
Well you say that but moisture is a problem for almost everyone unless you bake your filament before every print
Like nylon would need something like this hands down
Yeah I agree tbh
Could use a cabinet door shock, they have a lot less power.
Disco on a Stick uses WS2812B, so it's actually 5V. The Daylight pulls a surprising amount of power.
Really so it’s other way around, but I guess the problem is that they all need plenty of power to make it across the entire length of the run
Exactly. The Disco stick may have more LEDs, but my memory is fuzzy on that.
Adding two daylight matchsticks finally pulled my LRS-350 down. I didn't know I had it overloaded, but they definitely finished it.
You guys really need the beeper to mock you as you fail calibration tests.
i do and it does
I Guess i will need to live with the rsp-500 then
Alright I am finally back from my travels… hopefully I can make some updates this weekend
You can get an LRS-600 or LRS-450
Also, welcome back
It would be nice to get rid of the Fan
Ohhh yeah that whiny thing
Also I need to get the bed fans wired this weekend
Wait, you have Hydra. That's a huge amount of wattage freed up.
You could easily do an LRS-350
Where have you been travelling vengie?
You can do the noctua 80mm silent fan upgrade for RSP500
Mexico/Cuba/Puerto Rico/Colombia
I will look into that, it is loud but not that annoying
Very adventurous, how did it go
Good, just needed to use up my vacation time before July so it was worth it, cheaper than I thought too
😃 more money saved for printers then 😃
Is this where the z endstop is intended to be mounted ?

I think it needs to be rotated 90 degrees
Yes
Sorry yes rotate
Oh ok, I tried that but it didn’t seem to fit. I dropped it down from the top, seems like I should have brought it from the bottom instead

Don't mind the wiring.
Thank you, I finally got lol, i kept thinking the other part went through it and it was messing me up.
I replaced my stock meanwell fan with a sunon one, so much quieter.


@naive swan did you earth your bed?
Oh yes, it’s a must
Did you just run a separate yellow and green earth wire up
Have you got any pics of your connection
Yep and a m3 with connector


Yep
Is your thermal fuse on the other side?
Yeah, I did
Either works
So far I’m really happy with how this is looking
Need my screws to arrive and finish the wiring
Yep It’s probably one of the more complicated things I have done… hobby wise


Definitely not the easiest!
Sometimes I felt like Charlie
Yes honestly, it’s been at times such a headache
So many videos, pdfs from Voron, discord, Reddit, GitHub’s, voice chats
Very rewarding
I’m still thinking about designing the AWD system for this, since I seen how the V0 tensioner their motor
Almost addictive
Yes I agree
It’s very doable
I want to get my printer sort first before I start or this project
Yep I recommend 1 project at a time for sure
Blasphemy! I might complete something that way!
Lol yeah, I am very tempted to start an in-line filament dryer right now
And switchwire
I've got a slightly different project on my mind, but same issue. Very tempted.
And cpap cooling
Ooh CPAP
Too many parts ready to go
Switch wire from your E3


Hmm
I can pull it later tonight
I think I need to load my config again
yeah i noticed thata your config on git is your old version
Raise your hand if your config os huge and bloated!

@deep vine i like what you did with the filament into case with that swivel
Hey, thanks, I found this in the Voron mods page 🙂
Happy 4th for all freedom peeps in here.
i was curious how everyone figured out where all the hardware went.
Using the CAD for the most part
In some cases folks reach out to me when it’s not super clear
I'll try my best and if I can't figure it out I'll ask
when i measure parts to figure out fastener lengths is it bottom of heatset hole to underside of fastener location?
i havent been able to find it but what steppers are you running with the max power towers? i plan to build your enclosure in the next 2 weeks and have everything setup but would like to do the stronger rear steppers but cant find what steppers to get.
do you have the CAD for the XL tophat? Looking for a different one than I already have.
Yeah it’s on the GitHub, the file has both versions in it

GitHub
This mod is an amalgamation of parts from the ZeroG (Mercury1) and Voron (Trident,V1.8,StealthBurner) for the Ender 5 Plus. - GitHub - Vprince099/ZANDVE: This mod is an amalgamation of parts from t...
Just have to finish up my doors. Came out great with my own twist with features. Using the xl tophat.

@dawn vapor here you go
@naive swan Is it possible to use different screens with your skirts? I found the STL files for the mini12864 but no other options. I have a BTT HDMI5 screen that I would like to use.
Look for trident screen alternatives they should be close if not direct replacements
Comprehensive index of all the mods listed in the VoronUsers repo, searchable by keyword, sortable by download count and more. See pictures, read the docs, and download the files all from one place.
This one should be a straight replacement https://mods.vorondesign.com/details/mn2APihm7NkJZhoskam1CQ
Mount that puts the screen at a 45-degree angle for more vertical clearance
Awesome! Thank you!
For the Hydra motion system, am I able to use the ZeroG parts or are there different prints to make everything fit with the enclosure?
There are some parts that need to omitted, basically the rear backpack needs to go. And the rear panel is just a solid coroplast panel vs having a door.
Looking at the CAD file, it looks like the towers and tensioners are a little different too. Will I be able to reuse the same belt?
This is mercury 1 classic, so all the xy parts are exclusive to this design, it works with hydra
Not sure if I understand what "classic" refers to.😕
Does classic mean the original release before 1.1, 1.1.5, etc.?
I am just starting my build, so all my printed parts for both the mercury 1 and hydra are the most recent as of a month ago.
None of the stuff you see on the mercury parts list applies to this build
The hydra parts are drop in
This issue happened awhile back, you have to pull the parts from the zandve GitHub if you want to ensure fitment
I see. So to do the full enclosure, I'd need to redo the whole XY setup. Assuming I was to do that, is there a functional difference between your XY and the 1.1.5, or is it just cosmetic?
Oh for sure, for you this would be a complete redo
The xy motion is integrated to the enclosure
So from that point of view, anyone with an existing merc1 (any version) would need to reprint everything
It looks like the most complete solution I have seen to date. So as long as I do not lose anything (other than some time, the odd part, and a little filament), I may just give it go somwhere down the line.
Aside from an expanded BOM your existing hardware carries over
this is a great enclosure the tension towers need to be replaced since they are integrated into the enclosure. the rear towers are the legacy Zero G ones but basically the same belt path as the regular ones. look at the pillow ball mount also. have been running this enclosure for over a year now and its awesome. i have been tempted to convert the newer stepper towers but just havent yet.
It looks like a great option. I wish I had stumbled across it earlier. Right now I am too far into my M1 conversion to change now, but I definitely see myself going back and reprinting the parts and rebuilding the motion system to accommodate this enclosure. I have looked at a few options, and all of them are going to require at least as much work, and not all of them have the same appealing final product.
Which are the "newer stepper towers"?
the 1.15 i think i dont remember. the new style that the zero g uses
question, i just printed the rear stepper towers from the ZANDVE github and am printing the tension towers next, but i have left the x joints as the merc ones. is it worth switching those to the ZANDVE as well? I'm not sure if the merc ones will fit inside the enclosure
I am not sure if the belt path is exactly the same but it could work
Alright I’ll give it a go and see if I have any issues
Please post your results. I am in a similar situation if I go this route and would like to know if I will be able to keep my x-ganrty intact.
It prints fine and when I compared the parts in a slicer, they’re the same size so the Mercury x gantry should fit in the zandve enclosure
i run the regular x jouints
keep your x gantry shouldnt require changes. i didnt have to.
@elder swallow @wraith oxide Awesome! So it was just the stepper and tension towers that needed to be redone? Were there any parts needed to facilitate the swap, or were you able to reuse the same hardware (pulleys, idlers, etc.)?
Screw are different for the stepper towers and I haven’t swapped the tension towers yet but I know there’s new screws you need there too. I just bought anything from the ZANDVE BOM that I didn’t have already but stuff like pulleys and idlers and rods should be the same
Just screws are different and for the top hat you will need more extrusions
Thank you!
i believe there are some to add obviously for attaching the towers but i believe you can resuse some. i did a big order from mcmaster carr for the hardware for the enclosure. bearings and pulleys work. also look in the mods there are some nice things to add also. lmk if you need anything. i also have more mods for the enclosure if you are interested, lmk what you may be looking for.
I would love to see what you have for the enclosure. I have browsed the user mods on github.com, and plan to do several of those already.😆
I’d also like to see the mods you have
lmk what you are looking for
Any general modifications that give any convenient improvements, or are ur mods more specific like component related? I’m not looking for anything but sometimes I come across something I wish I had seen before so I’m hoping u may have something like that if it makes sense
My belts don’t seem long enough when I tried to install the new tension tower block. Are there any mods that help with this or do I just need to buy a new longer belt…
the older style towers add a little belt length so thats why they seem short. since the bearings are on the back vs the sidde.
That makes sense. Are there other towers that work with the enclosure? I’m upgrading my xol toolhead to the new one which I think will give me some extra belt length but if I can swap the towers then that would be good too
this enclosure only has those towers. you would have to mod the current ones to fit this enclosure.
I see, I’m not good at cad so I’ll just pray the new toolhead does the job
i have wanted to implement the newer towers just havent gotten around to it. it requires basically a rework of the stepper tower for this enclosure.
okay after reviewing the cad a bunch the rear towers need a little adjustment (need to completely remake them due to stuff not being parrallel (i think i spelled that right)) but i will probably have new towers by this weekend if you want to hold off on install. these wiill use all 4 mounting holes for the stepper and also change the belt path a little (manly just shorten it) and also will include the newest shim stack setup. ill probably do a minor adjust on the tension tower to also accept the new bearing stack. (shim bearing shim bearing shim)
I have the towers installed but even with the belts as loose as I could possibly have them, they are still too tight, so I’m looking forward to what u cook up. Also I did notice the bearing stack being different in the tension towers and idk what the difference is but I’ll update that too when u finish ur modifications
ill send you the tension towers today. its just a small adjustment to accept the newer bearing stack basically.
Sounds good, and did you modify the whole tower or just the part that moves inside? I’d rather avoid reprinting that entire tower if I can
the front towers its just the smaller part thats all. the rears will be more intesive.
Gotcha gotcha, looking forward to printing what u come up with
tensioners done. just makes room for 3 shims. and used the step file of the zero g to make this so the belt path is right.
Ill try to check them out and print them when I’m home from school and done with my schoolwork
small revisions to the holes for the stepper tower and how it mounts.
my revision will require you to remove the corner bolt in the frame to attach the stepper tower and if you have a long enough bolt can run it though to connect the frame again. one side done.

Is this all of the models for the enclosure or do I need to print some different ones if I want to do this mkd but keep the belts? @wraith oxide
if you want to run this enclosure you may need longer belts but im unsure. check out the github for all files. im not the creator of the enclosure just a user. https://github.com/Vprince099/ZANDVE/tree/main/Type-Z
GitHub
This mod is an amalgamation of parts from the ZeroG (Mercury1) and Voron (Trident,V1.8,StealthBurner) for the Ender 5 Plus. - Vprince099/ZANDVE
updated pillow mount also. adds a bearing (https://www.amazon.com/gp/product/B0BRQP2QG7/ref=ppx_yo_dt_b_search_asin_title?ie=UTF8&th=1) on the stepper shaft to help prevent shaft flex.

[12 Pack]625-2RS Ball Bearings – Bearing Steel and Double Rubber Sealed Miniature Deep Groove Ball Bearings for VORON Mobius 2/3 3D Printer (5 x 16 x 5mm)
difference in belt path, belt is stock belt path, this enclosure is slightly different.

What’s this slit on the bottom rear right tower for? My obvious guess is for the belts but won’t that rub too much against the plastic?

that seems to be to thin a wall.
before after


should fix it.
will test them out and let you know
ill be printing them probably beginning of the week. gotta get other stuff donde.
So I put it all together and it actually made the belts tighter instead of looser. Is this the correct belt path? It doesn’t match the picture you sent but I don’t think the picture is possible


The belts were so tight that they snapped my printed belt clip, so I gotta diy some temporary fix to print a new one
looks to be correct. idk if it would make it shorter. the picture i sent was the belt path of the original design vs this tower design.
Oh I see, my issue is that the enclosures belt path is longer than the standard mercury belt path and so my belt isn’t long enough
I’d rather not have to buy a new belt if I can avoid it
would you be able to design a tower with a shorter belt path?
It would involve so much redesign for not a whole lot of gain besides you not having to buy belts
I see, alright I’ll just have to find belts and order then
Would Involve everything in the back of the enclosure to be changed for what your asking.
What does the mod that u just made do if not shorten the belt path?
Redoes the entire rear steppes to fix some non squareness to them and incorporate the new shim stack as well, maybe I can change some stuff around to shorten it like maybe 2mm but idk overall.
Gotcha, so it’s good I printed them anyways I suppose. I’ll probdbly just buy new belts and cut them longer, hopefully they aren’t pricey because I haven’t looked

Fabreeko
what it isReinforced Genuine Gates belts sold by the meter (1 meter) available in 6mm 9mm and 12mm these are sold in one continuous meter x the quantity ordred 10 = 10 Meters in one piece
I bought 6 meters off ali express for 27 but the high temp ones so should be even better hopefully
Where are the voron skirts with the zero G logo from?
I posted them on the GitHub https://github.com/Vprince099/ZANDVE

GitHub
This mod is an amalgamation of parts from the ZeroG (Mercury1) and Voron (Trident,V1.8,StealthBurner) for the Ender 5 Plus. - Vprince099/ZANDVE
Does anybody have the dxf files (or measurements) for an E5+ w/XL Top Hat?
Dxf is for the panels right? I’m hoping to find those as well
Do you have an updated CAD that incorporates your changes to the stepper and tension towers?
not of the full enclosure just the mercury with the new towers. idk if it will let me upload without nitro.
well i guess the file is small enough for just the towers but not the full enclosure.
How are the rear panels for the top hat held in place? I am not seeing any hardware in the CAD file for the gantry cover or top hat sections. 😕

Standard are the motors that come with the merc kit if u bought from fabreeko, max power is just bigger motors
Like different size nema?
Yep
its actually for a nema 17 still but uses a longer shaft to support the shaft to prevent deflection in the motor shaft. you could go from a 42x48 to a 42x60 if you wanted.
Oh
bearings can be inserted into the stapper tower to add support. there is a mod for the zero g steppers to add a single bearing on one side as support.
Most of the enclosure is put together, I think I’m just missing pannel attachments which I’ll print once I have panels. I couldn’t get the top hat lock to work, so I took out those allignment screws for now and I’ll figure something out later because it was a pain to open and close.
i had to sand my pins to fit really nice and added some grease to them to slide easy
I also sanded them a bit and they work fine on their own, but as soon as that M5 screw goes in, it doesn’t want to work
I tested by taking the lock off and testing with a screw and it works
Only has trouble when on the frame, so I’m assuming bad alignment so I might have to reprint the tension towers or just use a soldering iron and melt things till they fit
what kinda fastener are you using for the lock? i used button heads. i know the height needs to be pretty close to get it to lock.
I only have socket head on hand, but I sanded the inside of the lock pins so that it fits inside smoothly


is the redesign just the movement or are you changing the frame as well? and what is the benifit of the rails mounted on the side?
No extra build out on the sides, the panels are flush now
ah ok, i just finished printing all the parts to the enclosure but i might reprint whenever you finish the redesign

are the panel dimensions going to stay the same im guessing?
magnetic top hat sounds very convenient
yes but the top hat front panel will be 12mm shorter
thats good to know, i havent cut panels yet but i guess I'll wait to do so, at least for the top hat front one
@naive swan if you want i can send you step files of the metal steppers if you want to update. they should work with the enclosure.
Which Steppers?
i changed the metal plate to work with the enclosure. i did mod some parts but only to make them work.
oh i was not aware of this
if you decide to do your own lmk.
I really like this design to enclose the frame. I assume this design can also be applied to Ender 5 Pro, right?
With some modifications, yes. Especially if you are running hydra
Can you elaborate what components are needed to modify? Thanks
I do not have a Ender 5 Pro so i dont know what the changes would be
Would most of the BOM be the same?
It will mostly result in less screws since the gantry build out is gone now
oh ok cool, I was afraid I'd have to buy more materials
@naive swan I can't remember if you mentioned before, but what thickness are the panels for the enclosure?
the acrylic is 2-3mm and coroplast is ~4mm.
the coroplast is the back panel right? and im guessing plexiglass is the same as the acrylic
Anyone end up doing this for the 5-pro? Really liking the look of it
i believe there would need to be changes but the cad is on github for you to check if it will work.
I am in the process of adapting this design for E5Pro. Front tower and rear tower seem to be compatible. Skirts prebuild parts seem to be compatible too. Skirts postbuild parts are not compatible. But step file includes a shorter version side skirt (no visible by default). Top hat extensions are also too long. But the print parts of it should be fine.
Yeah the Top hat is specifically what I’m interested in! Let me know if you get it working. I don’t really have access to my PC for a month 😂
Oh wait I just read that again. Okay so the prints for the top hat should work fine. Obviously the extra extrusions I have to buy the proper size for the 5P
The distance between the front tower and the rear tower is not long enough for 330mm linear rail if they are installed on E5Pro. It's about 5 mm short.
Any update on the redesign? Also question for the future if you aren’t implementing it already, your enclosure has that middle section of acrylic between the door and the top hat that isn’t the biggest inconvenience but I’m wondering if there’s a way to make the door extend into that bit?
there is a mod done by o guy on here that does that. check @naive swan github for the project.
I think I've seen the mod ur talking about, but i don't know if that mod will apply to the revised version and i myself don't have the skills to mod it myself so i was wondering if there will be something like it implemented into the new design
oh got you
The revised version is just slimmer on the sides , the only problem will be the towers on that mod may need to have some updates. I will work on enhancing that portion as well to incorporate it natively
love the current setup. wonder what new things you got cooking.
Hi Vengeful, sorry to bother you
Is there any updates for the revised version?
can you share yours mount for drag chain ?
hey man. its lethxL, different account. i added you.. is the cad file for this posted somewhere, with the additional hydra parts? the step file on the github still has the old ender 5 plus z axis.
and i noticed some ppl modded some parts of the stepper towers.. are the 'more power' towers running without any issues just like they are in the files? like, no pin misalignment like some of the earlier towers or any other craziness.
I'm also curious, were any new files ever released? The last commit on Github was May 2023. I started printing this project today however would love to pivot and print the files that support the vertically mounted Y rails.
the DXF's to have the panels cut for the enclosure are where? i looked in the BOM but didnt see any details on the panels
@naive swan
Hey sorry, I have made those before using the cad file. Since all you need to do is go to each panel and create a sketch
@dusk wasp all files were released on the GitHub
@west crow the hydra version exist but I have not put it on the GitHub. I will get it to you later today.
How did you cut your coroplast panels so straight?
I use an exacto knife and follow the inner channels
Thanks for the awesome project! Did the redesigned version with the vertical linear rails ever get released?
Unofficially it did. It was completed but the cad was not posted since there are a lot of stls to post


Is there a .step or .f3d model of the vertical linear rails and simplified enclosure that I can use to export my own stls? I’ve been gearing up to make your enclosure and would love to pivot to the redesign.
I’m planning to leave my bed stock and not switch to hydra.
@dusk wasp when you say vertical rails do you mean the hydra rails or the original linear rods? I never made a version that uses linear rails for the Z motion without also using the hydra system.
Sorry I guess that wasn’t very clear. I was referring to the interior vertical rails on the gantry that minimizes how far the side walls have to stick out because now there’s no interference from the carriage rail.
I was trying to describe this one
lol. stop it man.. i was being lazy.. i thought you already had the DXF's made 😆
Is there a way I can get a copy of your latest step file that has the modifications to the X-gantry and top hat? I checked your Github and it still has the older version on it. Thank you!
Which version, the one with the hydra system or the untested slim version that has a side mounted x gantry?
I did not realize there were two different versions.
😳
In that case, any chance I can get a peak at both? I would be interested is testing out the side-mounted x-gantry.
For those curious there are 2 versions right now --- Slim vs Standard
The main reason all Ender 5s have required some sort of of build up on the frame is because we are using MGN12 rails for the X-gantry
Standard employs extra spacers to mount the enclosure.
Slim changed the mounting of the gantry to the inside of the frame.
Slim

Standard

This is Standard and has been operational for over a year

i am making one with the eva toolhead