#❓ask-a-question
1 messages · Page 148 of 1
I just need to figure out the wall peel stuff looking around in youtue
I made the text into a smart object and use perspective
I would suggest you to use Shapes in "Combine Shapes" mode to create the first page with tab, then make several copies of this shape layer and move the top tabs using "Path Selection Tool" (black Arrow)... Doing so you'll can design each tab page and organize them in the layer panel...
Thanks
But how can i combine everything without getting empty gaps like this
I want one open the rest closed also want no fill and only have stroke and export with no background

Gave +1 Creative Carma to @viral palm (current: #7 - 1030)
First you can change color fill from black to Transparent.
Then Merge Shape Components for the Main/Active tab (with no stroke in the gap)
Finaly add a guide and modifiy the other tabs deleting the existing big page shape and using the "Substract front shape" feature...
Sorry for the 3 steps videos (Discord video size limits)
sorry i forgot to add i also want to add outer glow to the whole connected piece like my previous design
and thanks again
Ummm🤔 Not sure to understand... do you have a reference image (an exemple) of the effect you're trying to make?
@steady gorge Something like this?

yes, something like this but im missing stroke on the right tab because i dont know how to add it properly

could you share your psd file here?

Ok The shared file is not the same than the previous screenshot and the white stroke is visible on all tabs...
If I understand well your goal, I would suggest you to make a selection of your whole design shape, create a new layer, fill the selection with any color and set the fill value to 0%. Then place this layer above your design and apply the layer Fx on it rather on your shape layer...
Note: I also applied the 80% opacity black ColorOverlay fill on the "Fx Layer" rather reducing fill of the shape layer to keep all the adjustable settings (but it's up to you...)... Let me know if I missunderstood your goal.
my goal is to have the stroke visible on all tabs like the file i just shared
but my issue was that i forgot how to recreate this design
for example if i combine this
my stroke disappears here


So the shared file is not your file but something you're trying to replicate?
its my previous file i created and yes im trying to replicate it because i want to be able to make future changes
i just completely forgot how to redo it
ok i just watched your video and i was able to get this
really close to what i wanted
i just want to have one tab/gap open

I'm still trying to find a way to replicate your original design in OneShape layer only...
i think i found the issue
If so could you share with us I would like to know how you did...
so i duplicated the Main tab 3 tabs but i want to move the tabs to space them evenly
but when i click on the mouse i go from exclude overlapping shapes to combine shapes

i can record a video so u can see what i mean
almost got it

please let me know if you find out what the issue is
I keep struggling but I'll let you know if I find
how can i use like photoshops idk how to say this but i wanna use this safe or i want to like get rid of the background maybe that makes sense

when i try becomes blurry tho
Are you using pen tool to select the vault and then adding layer mask? It should not make your photo blurry than what you already have.
Hi all, is there a place I can ask about scripting for photoshop?
I’m currently trying to make a simple script to draw a square path and put it onto a new path layer, but I’m having trouble with the second part of that. I’m on photoshop 2019
I think I got it... It's a bit tedious but give me the same result than your sample file...
Note : layers order matters for the final merge.
thank you i think i got it as well
this is the way i did it
and yes it is a bit tedious 😓
Gave +1 Creative Carma to @viral palm (current: #7 - 1031)
IMO, Drawing a flat vault icon and applying a layer effect would be faster and cleaner than trying to extract it from such a low-resolution image...

since you're asking, I assume you don't have skills to draw it yourself so I hare the png of the vault icon I made...
You also can find some interresting icons here: https://thenounproject.com/

This problem made my brain overheat.😉
I'm glad if I have been helpful.
Hi @lavish cliff
Do you have experience with scripts?
Adobe Extend Script?
(Photoshop) Action Manager code?
What do you mean by ‘put on a new path layer’? Maybe save as path with name?
Can you please show your previous code?
Do you mean you break the image up?
I have some experience with code, not with scripting specifically
Here is what I have so far, I am doing this mostly as an exercise to grasp the basics of scripting. It creates the square path just fine, but I cannot figure out what to do next. the desired outcome is to have it automatically create a new vector layer with the square path on it
function Point(x, y)
{
    this.x = x;
    this.y = y;
}


function addVertexCorner(lineArray, x, y)
{
    var p0Info = new PathPointInfo();
    lineArray.push(p0Info);
    p0Info.kind = PointKind.CORNERPOINT;
    p0Info.anchor = new Array(x, y);
    p0Info.leftDirection = p0Info.anchor;
    p0Info.rightDirection = p0Info.anchor;
}


function appendLine(p0, p1, lineSubPathArray)
{
    var lineArray = new Array();


    addVertexCorner(lineArray, p0.x, p0.y);
    addVertexCorner(lineArray, p1.x, p1.y);


    var pathInfo = new SubPathInfo();
    lineSubPathArray.push(pathInfo);
    pathInfo.operation = ShapeOperation.SHAPEADD;
    pathInfo.closed = false;
    pathInfo.entireSubPath = lineArray;
}


function createPathLayer(title, subPathArray)
{
    var docRef = app.activeDocument;


    var originalUnit = app.preferences.rulerUnits;


    app.preferences.rulerUnits = Units.PIXELS;


    var myPathItem = docRef.pathItems.add(title, subPathArray);


    app.preferences.rulerUnits = originalUnit;
}


var docRef = app.activeDocument;


var squareWidth = 100;
var squareHeight = 100;


var p00 = new Point(0, 0);
var p10 = new Point(squareWidth, 0);
var p01 = new Point(0, squareHeight);
var p11 = new Point(squareWidth, squareHeight);


var lineSubPathArray = new Array();

appendLine(p00, p10, lineSubPathArray);
appendLine(p10, p11, lineSubPathArray);
appendLine(p11, p01, lineSubPathArray);
appendLine(p01, p00, lineSubPathArray);

createPathLayer("Square Path", lineSubPathArray);```I need urgent help can anyone send a screen recording of these steps I have an exam tomorrow and I have to show these steps tomorrow and I can't seem to figure it out pls if someone could help u would be a life saver


I've understood these two so I don't really need but IF u can explain these two I would be very thankful cuz it'll ease my worries


@lavish cliff
The function for creating a path works perfectly.
However, as far as I know, it is not possible to create a vector shape using only Adobe Extend Script. The Action Manager code (AM code) must also be used for this.
Something like this
`var Pts= "10,10;300,10;300,400;10,400;10,10";
var ptsArr = Pts.split(";");
for (var i = 0; i < ptsArr.length; i++) {
ptsArr[i] = ptsArr[i].split(",");
};
DrawShape (ptsArr);
function DrawShape(Arr) {
var aDoc = app.activeDocument;
var y = Arr.length;
var i = 0;
var lineArray = [];
for (i = 0; i < y; i++) {
    lineArray[i] = new PathPointInfo;
    lineArray[i].kind = PointKind.CORNERPOINT;
    lineArray[i].anchor = [Number(Arr[i][0]), Number(Arr[i][1])];

    lineArray[i].leftDirection = lineArray[i].anchor;
    lineArray[i].rightDirection = lineArray[i].anchor;
}

var lineSubPathArray = new SubPathInfo();
lineSubPathArray.closed = true;
lineSubPathArray.operation = ShapeOperation.SHAPEADD;
lineSubPathArray.entireSubPath = lineArray;
var thePathItem = aDoc.pathItems.add("myPath", [lineSubPathArray]);

(ref1 = new ActionReference()).putClass(stringIDToTypeID("contentLayer"));
(desc1 = new ActionDescriptor()).putReference(charIDToTypeID("null"), ref1);

var desc2 = new ActionDescriptor();
var desc3 = new ActionDescriptor();
var desc4 = new ActionDescriptor();
desc4.putDouble(charIDToTypeID("Rd  "), 0 ); // R
desc4.putDouble(charIDToTypeID("Grn "), 0 ); // G
desc4.putDouble(charIDToTypeID("Bl  "), 255 ); // B
desc3.putObject(charIDToTypeID("Clr "), charIDToTypeID("RGBC"), desc4);
desc2.putObject(charIDToTypeID("Type"), stringIDToTypeID("solidColorLayer"), desc3);
desc1.putObject(charIDToTypeID("Usng"), stringIDToTypeID("contentLayer"), desc2);
executeAction(charIDToTypeID("Mk  "), desc1, DialogModes.NO);

thePathItem.remove();
}`
If that works for you
have fun
😉
thank you, it works perfectly!

Gave +1 Creative Carma to @tame cape (current: #14 - 255)
That makes me happy. You're welcome.
<@&548221840750018590>
Image spam
Idk why a lot of discord accounts share the same picture
it's a scam to get your personal info. I was hacked 4 days ago myself and it sent these images to a bunch of people in my DMs before discord caught on and logged me out
#2 How to change a photo to a pencil sketch...
I made few modifications 'cause IMO some steps are not optimal...
Tips: Try using smart objects so that your design remains editable later on, Level should be applied on the whole design...etc
These steps come from chat GPT? I hope so...
If not the teacher who gave you these exercice should review and update them...
that must happen for a reason maybe you shared info with someone
or you did download something sus
it was my carelessness clicking links
ohhh
thats it
be carerful guys
thank god they dont steal your account
I think I resolved it after a malewarebytes scan and some changed passwords, but I'll only really know for sure in the worst possible way
very helpful
thanks for sharing
#4 How to place images in a text (Clipping Mask)
I'm a bit confuzzled about the layer styles, Especially the shadow and glow, Can anyone show me some tutorial links, I hope I could learn these basic parameters from scratch, TIA!🙏

Layers styles are quite a mouthful to learn because there's a lot of settings. However you can get good tutorials on this: I will share a few...
First of all, don't forget you can access Photoshop own tutorials by just typing the nemae of the effect in the learning window in Photoshop (just click on the maginifying glass icon and type in the text field

Second, a good intro is always checking at the help files, just so you get the right terminology
https://helpx.adobe.com/uk/photoshop/desktop/create-manage-layers/apply-layer-effects/layer-style-effects-and-options-overview.html
An overview video
https://www.youtube.com/watch?v=MqNQ6EelrS0
and one to go further
https://www.youtube.com/watch?v=y3ylA7o0BfU
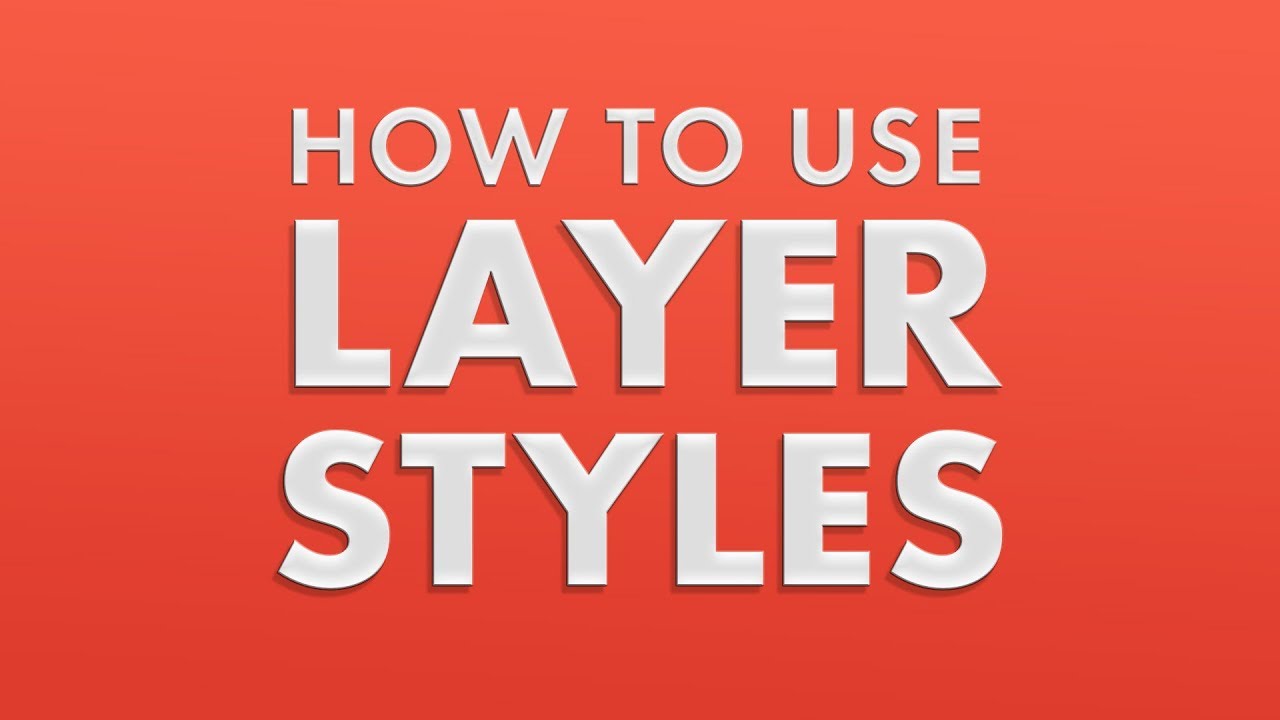
How to Use Layer Styles in Photoshop
In today's tutorial we're looking at styles in Photoshop. Chances are you've already got some experience with styles because you would have applied effects to text and to shapes in Photoshop.
Products used in this tutorial - Leather Layer Styles For Photoshop By Graphic Spirit: https://goo.gl/9X8gLQ
Find...

In this tutorial, we'll check out ten ways to elevate your standard Photoshop layer effects. We'll also take a look at a few common problems you might run into and how to solve them, plus a couple of bonus tips! Thanks for watching, I'm always happy to answer any questions or comments below!
CHECK OUT THE CHANNEL FOR MORE CONTENT:
https://www....
No i just move sliders a bit in each iteration
Thank you so much 🙏🏾 life saver
Gave +1 Creative Carma to @viral palm (current: #7 - 1032)
THANK YOU 🙏🏾🙏🏾🙏🏾🙏🏾🙏🏾
I thought so too 😔
hey yall, can someone please explain me how I can warp this that it curves around a circle, but not 100%? like on the reference?


Do you have access to Illustrator?
One of the best way would be to apply a spherise filter (I mean if you don't want to warp it by hand with the warp tool)
since the filter acts on a full layer, and you don't want it to become a full circle, make sure you extend the canvas to give it that little gap

The best way is tial and error to see how much canvas extention you need
Image> canvas size to extend the canvas
I use AD2 for vectors tbh
okay, let me try this, thanks
Gave +1 Creative Carma to @vapid flume (current: #6 - 1090)
This is possible in Illustrator

Is it also possible to make the path line be the inner edge and not the middle of the shape?
Of course if you got access to illustrator it's easier 🙂
But Since you ask in the Photoshop server 🙂
You got a specific tool in Illustrator called the width tool that lets you modify the thickness of a stroke (not fill)
Whenever you want
Yes, but with another method -> Artbrush in Illustrator

Would you be so kind to send me the right shape as a svg/eps? c:
I can do that, but I would have to convert the brush into a path. However, this means that you lose the ability to edit (radius, length, start/end point, width of the brush, etc.).
I am not familiar with AD. Can AD perhaps interpret native Ai files correctly?
Or ask in the AD forum or on the AD server (if available) whether there is a similar method.
It can interpret .ai files, but it's really a hit and miss
I don't think they have a discord server (Maybe they opened one recently?) but help can be found in their forums
Here you go
Thank you
I already suspected that.
Basically, and I don't really know with the new version, it will interpret it as an .eps, so not fully editable with "like for like" tools (they aren't really like for like so it's an added hurdle)
I'm still sticking with the Adobe apps. I'm very familiar with them. And I can do (almost) everything I need to do.
Me too 🙂
have same thing muscle memory just kicks in and everything is just painful to do 😅
Is there any way to deal with/remove banding in photographs? Not from bit depth, but caused by stupidly leaving an electronic shutter on and having poor sync with LED lighting
reference example

I would try with a simple "replace" method, using the patch tool
THere would be a bit of trial and error to find the right selection area. But you can still save that selection when it's correct and just move the selection to the right place one the previous one is taken care of.

Or if you're feelling confident, you can create multiple selections and just use it in one go
the stripes should be the same shape/size...
Been using a mixture of generative filling sections and healing, but I'll give patching a try!
The banding is consistent width and spacing, so I was hoping there might be a method to mask the entire image at once and crank and adjustment. Having said that, I'm terrible at photoshop haha
I would try with one stripe, and once I get a nice result, Just do the rest in one whole batch using the same selection and move
I couuld tell you toslect and use a curve adjustment layer with a stripped mask, but it may take a while to have the right setings and it will likely require an additional stamp retouching to blend the tones.
Follow up question if allowed, would feathering work on a striped mask so adjustments aren'ttoo linear in difference?
I would absoluetly feather, and maybe even create two simlar curves adjustment layers one with feathered fine strips, and one with larger ones. I can sense that the gradient that makes the darker stripe isn't a straight linesr black to transparent
hi, a hair texture i ripped came out pixelated. is there a way to smooth it out without losing quality? thanks!

If all fail, a fail safe option would be to do a frequequency separation and do a clone stamp tool retouch
There will be a loss at some point, but you could try blur filters that flatten out tones, like box blur or surface blur (and play with the settings since they are dependent on the dimensions)

and I suspect it'll be very low settings there (noise>median can be another option, you need to test)
thank you! ill try it out
Gave +1 Creative Carma to @vapid flume (current: #6 - 1091)
Sandrine you are the shining light in this crapsack world, thank you
Gave +1 Creative Carma to @vapid flume (current: #6 - 1092)
I am afraid I will not be able to live up to this kind of expectation 😁
why does the stroke look pixelated?

seems like the arrow's edge was uneven, that might be the reason.
what does that mean uneven
i don't know too much about photoshop
i used the wark tool on it i think
Is there a way to edit a text after moving it with your arrow keys other than clicking on it?
ctrl + t?
@balmy stag I mean the real arrow you have without the stroke wasn't in good shape. it might be because of quality of your arrow.

or dragging it manually if thats what you mean
That transforms, I just want to edit the text after I move the text with arrow keys
i see
Ctrl or cmd+Enter if you want to edit text without mouse click.
As @fierce hornet already said: If you used a brush for the outline, then it's probably due to the rough shape of the arrow and the excessive spacing settings of your brush.
Shapes offer a clean alternative in any case. Are you familiar with drawing vector shapes in Photoshop?
Each bump on the shape contour gives you a bump in the stroke...

If you want clean stroke you must use clean shapes... Uneven contour will give you bad result. There's no other solution than use/draw "clean" shape...
Note:This arrow is easy to draw with pen tool...
wow that is really clean, thanks appreciate you
Gave +1 Creative Carma to @viral palm (current: #7 - 1033)
i simply took it from the internet and downloaded it as a PNG, then added the stroke
😉
That's exactly why I asked you earlier: Are you familiar with drawing vector shapes?
And @viral palm showed you in his video that vector shapes produce the best results.
Thanks a million, Silly me, I totally forgot there is tutorials within, Frankly, That's exactly what I need now, Thanks!🙏
Gave +1 Creative Carma to @vapid flume (current: #6 - 1093)
Is there a hotkey to center object?
Try selecting the layer and press V, then Ctrl/Cmd+A to select the canvas and click Align horizontal centers and Align vertical centers in the Options bar.
Or you can assign your own shortcut via Edit > Keyboard Shortcuts to make it a single key.
Maybe you know the category in the menu?
you can set your own hotkey if you want it's pretty easy. press alt+shift+ctrl+k to open the Keyboard shotcut and menus. Then search for
- Horizontal Centers
- Vertical Centers
Select each and set your custom keyboard shortcut.

what do you mean by category in the menu?
File/edit/layer, etc
Keyboard shortcut and menus? it's on edit. alternative you can use this shortcut to open the menu (alt+shift+ctrl+k )
I guess edit
No, I mean where the centers, nevermind, I see it on your ss, thank you and yassir too
Gave +1 Creative Carma to @fierce hornet (current: #32 - 72)
You are very welcome
Anytime
👋
Can I create a mask that will affect all the layers below? If I want to delete some specific area on all layers at once for example
Like adjustment clip from davinci
Yes you can
group layers and you can mask it
use a layer mask on a Group
Put all the layers you want affected into one group (Ctrl/Cmd+G)
then add a mask to the group😊
Ty!
Very welcome 🤗
Does anyone know howw to remove the pen outline

i just want it to be white with no outline
np
You could also use pathfinder

But I recommend you go to Illustrator server for questions about Illustrator
You will find there more specialists


mine is overlapping like this, how do i get it to overlap like this


Please find a short video to show you how to edit the Gradient Overlay...
Set blending mode to Normal

make each wave its own Shape layer, then stack them in the Layers panel (top wave above the next)
lower the Opacity (or try Multiply/Overlay) so you can see the layer underneath
and if you want everything to stay inside the card, clip all wave layers to it (Alt/Option-click between layers).
Hope this helps you!
ok so im lowk not understanding
i need the shape brought forward

But im p sure its already above
Maybe the top shape is 100% opaque
i just moved it down
so you won’t see any overlap
I made another innter shadow, but everytime i change the bottom one it changes the top one

im trying to make 2 shadows 1 for the top and 1 for the bottom

anyone got any ideas
It's set to "Use Global Light" - Just uncheck that setting.
clutch tysm
i tried to get rid of the black background for this text had problems tho how can i do this properly without getting rid of the blood

its actually easy
go to select
and go to color range
chose black color
play with the settings while seeing the preview
let me show you

its not perfect because you need to play with the masking and stuff
but you got this

Dose any one know how I can resize an image to 4x6 need it for holiday car current image is a weird size if any one could help me that would be apriseaded
A lot depends on aspect ratio of your image
If asect ratio is same as 4x6 you can just resize image
If it’s different you will probably have to cut your image to fit this aspect ratio
is it okay to ask for opinions on edits in this channel ?
Either your end size is the same ratio (length x height) than 4x6 (called 2:3 in the crop tool presets) or you will need to add, or remove a bit on one of the measurements so it fits that ratio.
The best way to do that is two fold:
How would I make the F in silent hill f red

Im using a gradient clipping mask over the text
So I cant just like change just the F
Okay thats what I was gonna go but didnt know if there was an easier way
Duplicate the text layer, make one SILENT HILL and one F.
Clip the gradient to SILENT HILL only, then set the F layer color (or Color Overlay) to red.
I read your entire original message in 1 second trust
thats actually easier
i wanted to make sure i replied to your message
not just sending the message
@olive glade 1st: change the ratio using the crop tool (set the preset to 2:3) and crop accordingly. If you want to add, instead of remove of the area, resize the the cropping area so it emcompasses more than the image and choose either "content aware crop" or" generative fill" in the drop down menu.. (Generative will work for complex backgrounds and contant aware will work for simpler ones. Content aware doesn't use generative credits)
2nd: go to image> image size and set the right size in the text input.
Interpolation should be on and choose "automatic" for the method

THis is the simplified way. A lot of the optimisation will come about how different your initial size is from the end result (like if you have a 300 pixel wide image, the quality will be terrible)
Oh now that I actually tried it it wasnt as bad as I thought
I thought lining it up and keeping the text stay in the same spot would be weird but nope
thank you
just ducplicate the layer using ctrl + j
it will stay im the same position
but you will have a second layer
anytime !

I did not know this thank you
ctrl c + ctrl v usually like shifts it to another spot but wowwww
thank you x2
yes because you copy paste thats normal

Folks I need help (The app of the image is clip studio but I have PS too) what is the fastest way to export this selections as separate layers?, each region divided by a white frontier should be it's own PNG, I have more than 100 and I don't want to do it individually, the map is all on several layers but not divided by region, is there any way that I can batch export this?

There was was batch export for layers
File > Scripts > Export Layers to Files
Not sure it’s still there
Yeah I think it's there but I'll have to cut the map into sections, the thing is that the whole map is one layer, I'll try that if not
merge a visible copy, use Magic Wand), click a region → Ctrl/Cmd+J (Layer via Copy), repeat
Unfortunately you'll need to cutout each section to be able to batch export them and I'm pretty sure there's no way to auto do that in Photoshop.
once each region is on its own layer run File > Export > Layers to File, PNG + transparency
You can't really if it's not selected - at least - and on their own layer, at best, beforehand.
Photoshop doesn't know where you want to cut. You could still try to select the white outlines and use that as an aid for your selection, but it will still be a pain...
Yes absolutely
If you can isolate and delete the white outlines, there used to be a script that separated shapes into layers based on the amount of transparent pixels between shapes
Something boring that AI can't do yet 😉
It doesn't work anymore in newer versions of PS, but maybe someone else have coded one? maybe you can code one if you know Javascript?
That's typically something that could be scripted (if you know how to do it, I don't)
Okay don't worry I think I'll make an automated action for export selection
Thank you so much!
The tricky bit is the selection. Once you got it, all you have to do is CTRL+J to paste the selection into its own layer
I think wehat you are looking to do is automate those selections based on shapes, because selection is what takes you the most time here.
Selecting each one is easy as I have a solid invisible layer for that
The rest is scacessible automatically with export layers as file as righfully stated by my colleagues
And the wand just works
so it's a case of select -> CTRL+J, rinse and repeat
Yeah, the thing is that I don't want to cut it as I'll have to modify and reexport the map on the future, probably multiple ocasions
do it on a copy?
So I'm searching for the quickest way to do it "by hand"
You cut the copy and you still got the original layer ?
I tried for something small scale and it went well
Copy your main layers, separate them into chunks, collect all those chunks into a smart layer, you have a full solid layer that can be altered if needed when you open the embedded layers
I might do it if ctrl+j works well thanks
I'll do a copy of the whole document and then merge all
Because it's quite heavy and it runs slow
You got this man
Thanks!!
Let us know how you get on!
You have white borders maybe use those as temporary mask to ease selection of regions
I used them to make fills for each region that work perfectly for selecting
I'm going to make the cuts now with it and then export, I just have to select the fill layer, select region with the wand, go to the map layer, ctrl j and repeat
All cut! I don't know how to export them properly, y want them as single pngs
Divided like in "puzzle pieces"
I'll search for the script
No okay sorry I think I can!!!!
Hi! File > Scripts > Export Layers to Files.
Didn't work!! thanks, i used quick export when right clicking a selection of layers
It's working quite well
Export layers to files did weird things
The mnemonic is to « Jump it to its own layer ». Add alt to cut&Jump
Hi all
So these are scans of large engineering drawings that have inexplicably put on standard-size paper
(So one image has been divided across like 8 different pages)
I can extract each page from the PDF without issue, but what’s the quickest way to reassemble them?
Do note the actual drawing does not occupy a full page

Okay now I have a completely different problem
I would like to reduce the weight of my exported images, reducing a bit the resolution, not much, but the weight should be around 1/3 or 1/4
My file is converted from clipstudio format 1.5 gb in total aprox, to PSB 2.5 gb aprox
It's quite a big file but the weight per resolution can be reduced
The only thing I can do is export on 8bits and make the colour quite a bit worse
anyone know how to turn opacity down in the shape but not in the stroke?

It depends, if it's a vector shape with a stroke you can simply reduce the fill value...

i tried this, still didnt work
Is it the "Rectangle 3" layer in your screenshot?
yea
Can you share or look your "Color Overlay" window... The fx in the Layer style panel "Override" Layer's Fill settings...
idk what this means
For exemple here: Black shape with a Red color overlay fill...
Hope the video will help you understand what I meant.
got it, thanks
Gave +1 Creative Carma to @viral palm (current: #7 - 1034)
Unfortunately, Since your document has been divided in several rows and columns, Photomerge won't work...
Also the scan is really bad (lot of optical distortion+tilted images)... I don't think you can do something good and clean enough with that.
For exemple I tried to re-link and align by and Page 14 with page 15 and texts don't match at all.
Perhaps someone will have a fix for that but sorry I am running out of idea...

wow, that is awful scan quality
thanks for trying though. It's appreciated
In the export layers as files, you have a PNG option (either 8 bits or 24 bits
With the possibility of keeping the transparency (which I assume you will want to do) and "trim layers" which will remove excess transparent pixels and keep the shape closely contained in the canvas


So define "weird things" 🙂
Okay I'll try that thanks a lot! I'll see if that reduces the weight
Gave +1 Creative Carma to @vapid flume (current: #6 - 1094)
super merci
Didn't work, but thanks anyway!! I'm trying to optimize the pngs for a game engine that is not very known so don't worry about that, the problem is probably on other end
Gave +1 Creative Carma to @vapid flume (current: #6 - 1095)
Anyone know how I could replicate this effect? I’ve got 0 clue

Looks like a circle pattern layer placed over the design with a special blending mode like Multiply, Screen or something else ( it depends the properties of the pattern layer)
Thanks do you recommended any tutorials that I could use?
Gave +1 Creative Carma to @viral palm (current: #7 - 1035)
I really wanna improve with this app but idk how
I can't find any tutorial for this exact effect but it could be something like that...
That looks perfect tbh I’m gonna give it a try when I wake up tomorrow
I’ll tell u how it goes thanks
So I have this partial image of a drink can. Is it possible to transform the image so it's unwrapped to a flat image right side up in photoshop? Obviously only the part that's visible

what to do if save as pdf option isnt available?
is it not available after pressing Ctrl+Shift+S ?

i want to distort this map so europe is taking up the biggest part of the image and the rest is just small compared to it. (for non political reasons.) Is there a clean way to do this?

i just re-downloaded photoshop and now with the brush tool when I use alt and right click it doesnt resize my brush anymore but brings up the color pick tool
Hi, that map was s already distorted vs the reality. Try the warp transforms: https://helpx.adobe.com/ca/photoshop/using/warp-images-shapes-paths.html
Hi, the shortcut for the HUD color picker is Alt Shift Right-Click (Windows) or Ctrl Option Command Click (macOS). Is caps lock on? Or your shift key held down? Did you check in edit>keyboard shortcuts?
Hi, what is your goal, exactly? To read what’s on it?
It looks like there’s something else going on under the circles, some form of crystallize?
Hi, did you start with the built in tuts? Hit Ctrl+F. Then there are myriad of free video tutorials, lots of books…
think it was caps lock
its actually a dot/circles layer, with fill set to zero, and drop shadow added, and then a curves adjustment layer clipped to the dot layer, most likely
You can also resize the brush with the square brackets: [ and ]
tried to recreate it with a different image and a different dot pattern

Thank u so much for sharing I’ve watched the full episode and I really got what asked and more advance information
Gave +1 Creative Carma to @hushed niche (current: #12 - 341)
I'm struggling to get a clean selection of the sky without any of the railing included. Any suggestions? Thanks.

go to channels - blue and copy it
use sliders to get as high contrast as you can
and ctrl + lmb on this channel
Thanks. That's one avenue I tried. I just need to spend more time finessing the selction I think. What does this mean? ctrl + lmb? Is that LMB? That's not a command I've seen before. Maybe I'm just brain farting.
Gave +1 Creative Carma to @ivory rampart (current: #27 - 88)
left mouse button
I knew I was going to feel stupid. 😂


I'm trying to get a bit of text to shrink so that it has multiple lines and the text fits within the vertical dimensions of the box (Think like shrinking a text box in Google Slides), how do I do it?
What you have done is called "line text", you clicked on the canvas with the text tool.
What you need is "box text" (called paragraph text), click and drag to create a box that you can resize so it affects the content, your text...

However, you can change it
Make sure the text layer is selected (do not highlight the text with the text tool, just select the layer)
and choose type>convert to paragraph text

I’m sure even seasoned users would learn something out of it…
It worked, but when I try to use enter to make a new line or type a word too long, this happens.
Because your box is too small, you need to resize the box (see that + sign at the lower right size of the box? it tells you that there's more text hidden)
Okay thanks
Gave +1 Creative Carma to @vapid flume (current: #6 - 1096)
drag the middle handle at the bottom so it fits the whole of your text
If you happen to have a paragraph text and want to change it to point type,
Just select the layer, and the menu option will change accordingly

You might want to do that for titles etc, where placement is important, since when you align a paragraph text, the anchor point is in the box, and not the text within the box
How do I select all of one color? Like everything that's green in an image?
Go to Select > Color Range and play with the settings there!
Thx
Gave +1 Creative Carma to @next surge (current: #389 - 4)
anytime
Does anyone know how I can make the shines less cloudy?

More towards this image

See how the reflections are more suttle and solid
Are the shines coming from a layer style or are they painted on a separate layer?
The shines are coming from a seperate layer with a clipping mask
In that case try sharpen the shine layer rather than blurring it by reducing/undoing any Gaussian Blur, and apply Levels and Curves to increase contrast, then mask the edges with a soft brush to control falloff.
Okay ill try tthat
@tame cape hey, you helped me out with a bit of scripting a few days ago, I'm working on something now and I just cannot wrap my head around the action manager. how do I change the shape to have no fill and a stroke for example? and where can I find out how it works for myself so I don't have to bother you in the future?
Have you heard before about UXP or ExtendScript ?
no, not at all
UXP and ExtendScript are simply two ways to script photoshop
ExtendScript is the older “.jsx” scripting still widely use, and UXP is the newer javascript system used for modern plugins
There are bunch of YouTube tutorial videos about em
Extend script can’t do what I want to according to @tame cape, namely create a vector layer
Have you tried capturing the exact command using batchplay ?
I do not know what that means
Install UXP Developer Tool (Adobe’s app) and open it
https://developer.adobe.com/photoshop/uxp/2022/guides/devtool/installation/
Download Alchemist,
https://github.com/jardicc/alchemist
then in UXP Developer Tool, choose Add Plugin… and select Alchemist’s folder to load it

Learn how to download and install the UXP Developer Tool.

GitHub
DevTool for plugin developers. Contribute to jardicc/alchemist development by creating an account on GitHub.
back in photoshop, open it by going to plugins > Alchemist
in Alchemist, start **Record **or **Listen **button
Select your shape layer in Layers
Change it manually, set Fill = None and set Stroke in the options bar
Stop recording in Alchemist, then copy the captured batchplay descriptor
Create your own UXP plugin by > Create Plugin template,
then in your plugin’s index.js run the captured code like this:
const { action, core } = require("photoshop");

async function setNoFillStroke() {
  await core.executeAsModal(async () => {
    await action.batchPlay(
      [
        /* paste the Alchemist captured descriptor here */
      ],
      { synchronousExecution: false, modalBehavior: "execute" }
    );
  }, { commandName: "No Fill + Stroke" });
}
if you didnt manage to do it, or understand the concept here, i suggest you follow this tutorial by Davide Barranca
@lavish cliff https://www.youtube.com/watch?v=aZn_6X6nvUM

In this episode I explore BatchPlay with the Alchemist plugin as a UXP Script Listener. BatchPlay is the subject of a three-parts mini-series.
Check out my "Adobe UXP plugins development with React JS" 📕 + 🖥 course here: https://bit.ly/3BbAGfW
00:00 – Introduction
01:11 – The Alchemist plugin
01:56 – Listening for Events: Duplicat...
Is there an advantage to doing this over using the action manager?
The advantage is easier capture with Alchemist plus modern JavaScript debugging UI and async
Results and performance are basically the same if your action manager code already works
==
question:
what is the effect to achieve the dark shade?
i tinted my own image to orange, but idk how to.achieve that kind of shade/shadow(?) like in the image below

==
just knowing the effect name is enough 😔
i guess you should use levels or curves to push blacks deeper and add posterize or threshold if you want that graphic cutout look
there may be other ways to do so, i would love to hear my team mates opinions

TUTORIAL: How to make a THRESHOLD effect in Photoshop👇
Step 1: Add a threshold effect
Step 2: Fix with Dodge and Burn tool
Step 3: Add a Gradient Map and some texture
Step 4: Follow me if you liked the tutorial
•Hope you like the video a lot.
•Link in bio to buy my posters🍿🎬
•Design made by Photoshop, video made by Premier...

#shorts #shortvideo #adobe #photoshop #shortsyoutube
Hello, I have a question. I would like to have the same sky as in the photo. How can I do this in Photoshop with the lighting, reflections, gradients, etc.?

it depends a lot on your picture
your example was done in 3d app probably in Maya/3DS
basically starting from a clear blue sky
I just want to create a sky with the same gradients
But I don't know how to get that result.
probably some orange to transparent gradient
And where the sun is, there are very bright patches of light, how do I realize that?
as i said this particular image was done in 3d app so they had it bit easier as you have full control
but you probably can recreate it by painting over some sun rays
Okay okay , Thank you
Anybody know of any graphics tablet drawing tutorials? I'm looking more for a Donut tutorial but for drawing in Photoshop. So far, I've had DrawABox recommended to me.
I have a problem with my current design: I'm trying to change it from 10,000 pixels by 10,000 pixels to a 800 x 800 pixel workspace, but it changes/ distorted when I reduce it to the 800 x 800 design. Do you have any ideas? For certain shapes, such as a square with rounded sides (the sides of the square become very rounded when reduced to 800 x 800), do you have a parameter that keeps the selection in place regardless of whether it is reduced (all my vector shapes) or otherwise a setting that would allow me to directly switch the artboard by reducing everything in it from 10,000 pixels to 800 by 800 pixels?
tried shift + alt
I select all the shapes from the 10 000 x 10 000 working place and copy to the 800 x 800 one, nothing change for the design but when i selected all the calcs / designs / shapes and reduce them on the new little one, the shapes change (angles change from some shape), some mooving from some pixels too
i presume you already work with vector shapes, cause raster will loose a bit of info as there's less pixels available in image
yes all vector shapes
to keep the quality of the shapes
the first problem to this was the saving on the 10 000 pixels x 10 000 pixels taking too long (around 20min) to save as pdf so i gave up and tried (right now) to copy the design to a lower design one (800 x 800)
Best method is to change document size with resampling off
Are you looking for a tablet tutorial that focuses on drawing fundamentals or specifically on Photoshop workflow and brushes ?
Is tehre anyway I can erase the selections in the middle on the man/lion without erasing hte other ones Im using color range selector and only want to remove the white pixels around the leaves/bottom

Hi @lavish cliff
sorry, it's Christmas time.
But in short, here is the pure unprocessed AM code for creating a rectangle without fill and with a red stroke with a stroke width of 2.5 px (The length of the code exceeds the maximum number of characters allowed here on the server and I don't have Nitro - hence as an attached TXT file.)
Perhaps this will help you a little.
Merry Christmas
thank you, and merry christmas!
Gave +1 Creative Carma to @tame cape (current: #14 - 256)
Hi @grave lotus
Try using the magic wand tool instead (with a tolerance of max. 4 and the ‘neighbouring’ option unchecked).
A quick counter-question:
Illustrator is not an option for you?
can anyone suggest me a way to remove the big shadows in the right of my photo?

Add a Curves adjustment, brighten it, invert the mask, then paint the lightening only on the shadow with a soft brush.
If it looks off color, add a Hue/Sat adjustment on the same mask.
it looks like screenshot from a game, can't you change position of the sun in game?
i tried to work it out for you

Anyone know how I could add the highlight effect from this image onto any shape when I do it with pen tool its wobbly

maybe duplicate the layer, make the bottom layer white/highlight color, and move the top layer by a few pixels?
Oh wysm
path i made from pen tool
how do i delete certain parts of this path?

Use the Direct Selection tool to click the path, then click the anchor points you want to remove or change their position
@spiral pagoda have you tried the path selection tool? you can also hold ctrl while in pen tool to temporirily equip the path selection tool
yes this is much better, just tried
Every way is appreciated
Thanks for your contribution
no like i meant how can i remove just these two lines from my path

is there anything like the marquee tool but for paths
okay that is a bit complex in PS, it would be rather easy in Illustrator, but in PS, you can always rasterize the path and then erase/mask out the unwanted part
add anchor point on place of crossing those line and delete part between 🤔
and yeah i would use illustrator as it's more suited for job
ouu okay, thats actually smart, thank you
Gave +1 Creative Carma to @ivory rampart (current: #27 - 89)
np
Yeah its better to do it in illustrator, if its not an option for you
how to sticker?

you mean discrod sticker?
Don't bother: it's our favourite "how to" troll again 🫠
They're like Krampus, but less cute 🤪
😏

Some people have just simple pleasures in life!
yup well not gonna bother with them anymore
Hi @spiral pagoda
Unfortunately, you have only shown a small section without the Path Panel open.
As always, there are several (good or less good) options.
- Optimal: Use Illustrator if available.
- Second best - but only if the paths are closed: Merge both paths into a new path and use the pathfinder option Add/Combine and Merge Components
- Manually (as already written): Delete the partial paths by hand and then merge them again by hand
Yes that but mostly I wanted to do it just to learn how to do it.
Is it possible In photoshop or would I need to create a 3d object and project it on using something like blender?
I'll take anything really
Hello everyone, I just need a little help — I need to put a white background on a photo, but I can’t manage it
so dropshader and outer glow is enabled at the same time, is thnere a way to make outerglow go behind drop shadow? as its overlapping the shadow

i mean ig i can use another dropshjadow as an outerglow
Hey everyone
I’m stuck… I can’t for the life of me get a white background on a photo. If anyone has some magic skills or a trick up their sleeve, I’d be forever grateful 🙏.
There’s a potential reward for whoever manages to pull it off perfectly, depending on the result . Seriously, even a little help would save me right now.
My DMs are open, so feel free to hit me up! Thanks a ton in advance, you guys are the best
whats the fastest way to add a electric outline to objects?

lmao its a miniature photography
thankyou so much can you send the file?
don't have it anymore
basically i selected shadow part and used curves
added new layer and used inpaint tool to work with layers below
How can I delete the line between 2 points on a path without deleting the points?

Add an anchor point with the « Add anchor point pen tool » (The pen tool with a little + ) on the line. Select the Direct Selection Tool (The white Arrow icon in the tool bar). With this tool active click on the anchor point you’ve just created and hit Delete key.
not cause the design is already done on psd
yes thats also what i had in idea but dont know on how to do that
can you tell me how you selected the shadow smoothly?
object selection but i changed method to lasso

still need help
this is my attempt
i created new layer and used inpaint tool to work on below layers
@hushed flame


it's not perfect
Here, you are trying to un wrap a texture. I would not look in Photoshop, but rather in a dedicated software like blender or substance : https://www.youtube.com/watch?v=uiBGLPVkfnU

In this video I take a look at the auto UV Unwrap feature in Substance Painter and see if it's any good in the latest version of Substance Painter.
Check out my courses on Udemy and my Patreon page for more tutorials creating art for video games...
PATREON:
If you want to see more tutorials like this in detail, or some personal projects I'm w...
Hi, you can recorder some of the layer styles: https://share.google/Cb6J50XrXucPf40gf

Along with the ability to add multiple layer effects, you can now organize them by rearranging them in the Layers Panel and the Layer Style window. This is a...
I would probably add a second drop shadow, adjusting the colour and blend mode. Done.
does anyone have a white line like this? ive looked on google and at thumbnail packs, but i cant find one that'll work

you can draw white rectangular with black outline and drop shadows in layer styles
That looks to me like a normal white rectangle with a drop shadow.

I've exaggerated shadow just to show how you can do it
check my dm
i have blocked dms
not really
u want a tip?
thank you btw
Gave +1 Creative Carma to @ivory rampart (current: #27 - 90)
np
if you will stuck at something you can always ask for help
that's the point of this server
😉
how can i create this effect. I keep getting told like glitch effects mess around with rgb values and its just not the same

Hey! Had a question. I was tasked with a job where I need to reverse these images around, only issue is when doing that, some of the logos are also flipped. Could anyone guide me on how to flip the image but keep certain parts the same? Here is an example image

masking and coping logos from original image


oh wow
copy your layer
mirror it
back to original layer copy logo
and paste it
transform tool to place it correctly
and that's it
at least in this case
What was the besy way select the logo?
i used polygonal lasso
but it depends on logo
but i made a mistake with my edit
it's mirror
so logo should be on the other side 🤣
Also, when I go to rotate the inmage, both layers get rotated
Lol I caught that. I was gonna fix it on my end when I replicated it
hmm it works normally on my end
make sure you use transform tool on layer you want to invert
ctrl+T
Ah I used the image tab lol
@ivory rampart One more thing, could you show me a good way of removing the old logo, or would you just let AI do it?
on small areas you can use remove as it's using AI and it's free 😉
AI has a hard time getting the grill right, could it be the way im selecting the area to fix?
Im selecting just the logo


Its not lining up very well for me
Okay I think I got it

Could you tell there was something there?

Or could you tell the image was rversed?
Alright, I think it will get compressed more anyways, so it should hide it better
Thank you! @ivory rampart
Gave +1 Creative Carma to @ivory rampart (current: #27 - 91)
np

Hello! Sorry for bad english. I have a question. How can i change line color if i already draw a line without a correcting mask? I can't just draw it second time, because i have full drawen art, and draw it twice will get many time
you could try hue/sat adjustements and mask selection to area you need to change color 🤔
Hi @dull kiln
In addition to the good tips from @ivory rampart: Shouldn't the windscreen wipers and the other marked areas also be ‘mirrored back’?

does your problem solved?
Hey, how to export a PNG and keeping the vectorised shapes, is it possible, because saving the file in pdf keep the vectorised shapes but png not
PNG is a pure pixel format. It does not ‘recognise’ vectors.
ok thanks
Gave +1 Creative Carma to @tame cape (current: #14 - 257)
If you need vector information stored in file you need to use pdf, svg or eps
Oh and AI from illustrator
send me your photos, i can export them in vector for you
Normally, yes. 😉
But no (see the previous post)

Theres a few things to also add, the steering wheel should be swapped over too lol
Does anyone know how I get this lightning outline thats arond the 4 icons

I got this from another psd I saw
Anyone know how to make the gradient clipping mask?
Hi @orchid panther
You don't need a clipping mask for this (By the way: Your second screenshot shows a layer mask, not a clipping mask.).
Use a rectangle shape with a gradient fill (NOT gradient overlay) and set the gradient. This gives you greater flexibility and allows you to make subsequent changes easily and non-destructively.

Hi, I’d like to place this dragon as if it were a painting on this stone, but I’m not really sure how to blend it properly. When I use the overlay mode, it gives me a decent result, but I feel it’s not good enough. Does anyone have a technique or any tips to properly integrate this dragon with the shape and texture of the stone?


Hi! Is someone able to help me dehaze a image and fix coloring of sky? Thank you!
Combining blending mode with "blen if" might help.

🚀 Join PiXimperfect Pro - The Ultimate Photoshop Training Course: https://pix.live/pro
Discover the Magic of Blend If in Photoshop! Learn how "Blend If" works and explore the amazing effects you can create with it. In this video, we'll dive deep into the mechanics of what "Blend If" controls and go through real-world applications, from maskin...
I'm attempting to make the text cut through the image but i have no idea how to do it.


Will that make it so the text is like a hole through the image? Where you can only read it based on shape.
Ive been trying to make it like the background where it's just transparent cut.
but It feels impossible.
showing the background.

I’m on iPad it’s bit trickier
But on desktop you can refine selection
And just use eraser
thank you
but
slight issue
I have like no idea how to do that.
im on eraser tool right now
have the layer selected.
then what?
and will it just automatically remove it? or will I have to trace perfectly over it.

When I use the eraser on grandtrack it erases it, and when I use it on layer one my tracing isn't well fantastic.
nevermind its done
thanks
Hi! Can someone please help me wit this! thank u
I have dmed u
how do i export my file in svg or save it in svg
i dont see the option in my savings option
You can use camera raw inside Photoshop. and for the sky it depends what kind of issue you have but you can use hue/saturation with layer mask if you want to change the color.
https://youtu.be/4rDqUlImWuw?si=kYUTZ9zLih6qYSlX

In this short video, I demonstrate how to properly dehaze a photo in Lightroom.
Please subscribe to my newsletter!
https://anthonymorganti.substack.com/subscribe
Check out one of my newer websites – The Best in Photography:
https://bestinphotography.com/
Please help support my YouTube channel – consider purchasing my Lightroom Presets:...
File > Export > Export As

Do you try to export layer with vector graphic?
image is like rlly hazy + bad sky
like i wanna make it look less smoggy
yes
cause its small details and it needs to be used for laser engravering
That’s weird
wdym
can't really say anything without seeing. bad sky mean over exposed?
It should be under export tab
check your dm
I have blocked dms
i mean send me a message
I dont do dms
ok
I will see if i cant find where the problem from
thanks anyway
i will search how i can save in svg
SVG keep the quality frome the shapes ?
like in vectorised quality ?
ok thanks
Gave +1 Creative Carma to @ivory rampart (current: #26 - 93)
i will why there is no option availible on mine
thanks a lot for the help ! @ivory rampart
you have to check the Use legacy "Export As" box to see the SVG option.

ok let me see
that's it, thanks a lot !
Gave +1 Creative Carma to @fierce hornet (current: #29 - 79)
yeah totally forgot you have to check this option

Titbit of the day: SVG means "scalable vector graphics" 😉
I think so?
can i send a pic

So this video works in this case. You can give it a try. You can use masking tab to apply it to specific areas. Also u can try topaz ai.

is this for me?
yes
would u be able to help me try it? idk if thats not allowed to ask if its not ill delete it lOL i cant get to photoshop rn
use this psd if you want this kind of result.


whats a PSD?
can u send me that image
sorry im rlly new to this
OH GOT IT
TYSM
ILY
you got it?
hold ctrl shift alt and w. then choose the format
wait i think my things frozen LOL
I think they said they can’t get Photoshop to work?
Are you using the desktop version? Are you connected to creative cloud?
PhotoShop Document
maybe? i just opened that file
im on desktop
everythings frozen
wait sorry mac lol
macbook

Is it a school account?
YES
I guess they need to renew the licensing. I do not remember if ps web is available without a license. You could then save it to the format you want. Maybe in Bridge, then quick export?
Here you go.

Thank u so much! Do u know how to remove ppl too
Gave +1 Creative Carma to @fierce hornet (current: #29 - 80)
If it's a school account then it may come from your school admins. We don't have access to your accounts here, but you can have confirmation by contacting the customer service @dusk river
Be sure to be connected with your school account email (not another one, as it will likely mess things up)
No I meant remove from the image LOL
I'm seeing that your licence has expired, I offer to help you sort it out LOL
tyy
Im gonna look into it later
Rn I’m trying to find any way to remove the ppp though
Ppl
Using the clone tool might work, but not with an expired licence. You might want to try with an AI tool, although I can't really offer any real advice here.
The only free app you might want to try is adobe express which have a genAI module, but I don't think it will do a great job, that's not really what's it's for...

@dusk river
quick & dirty ((but I've never been there)


Oops. I forgot about the reflections in the water...
@tame cape last one I swear. I have the following AM code, it works great the only thing I still can't figure out is how to name the layer what I want it to be named. (I did look through the example you sent earlier, that's how I got the stroke working)
    (ref1 = new ActionReference()).putClass(stringIDToTypeID("contentLayer"));
    (desc1 = new ActionDescriptor()).putReference(charIDToTypeID("null"), ref1);

    var desc2 = new ActionDescriptor();
    var desc3 = new ActionDescriptor();
    var desc4 = new ActionDescriptor();
    desc4.putDouble(charIDToTypeID("Rd  "), 0 ); // R
    desc4.putDouble(charIDToTypeID("Grn "), 0 ); // G
    desc4.putDouble(charIDToTypeID("Bl  "), 0 ); // B
    desc3.putObject(charIDToTypeID("Clr "), charIDToTypeID("RGBC"), desc4);
    desc2.putObject(charIDToTypeID("Type"), stringIDToTypeID("solidColorLayer"), desc3);
    var desc5 = new ActionDescriptor();
    desc5.putInteger(stringIDToTypeID("strokeStyleVersion"), 2);
    desc5.putBoolean(stringIDToTypeID("strokeEnabled"), true);
    desc5.putBoolean(stringIDToTypeID("fillEnabled"), false);
    desc5.putUnitDouble(stringIDToTypeID("strokeStyleLineWidth"), charIDToTypeID("#Pxl"), 1);
    var desc6 = new ActionDescriptor();
    desc6.putObject(charIDToTypeID("Clr "), charIDToTypeID("RGBC"), desc4);
    desc5.putObject(stringIDToTypeID("strokeStyleContent"), stringIDToTypeID("solidColorLayer"), desc6);
    desc2.putObject(stringIDToTypeID("strokeStyle"), stringIDToTypeID("strokeStyle"), desc5);
    desc1.putObject(charIDToTypeID("Usng"), stringIDToTypeID("contentLayer"), desc2);
    executeAction(charIDToTypeID("Mk  "), desc1, DialogModes.NO);
Hi @lavish cliff
Just out of curiosity: what tool did you use to simplify the AM code? Your code looks very clearly structured.
Regarding your question: You could also use AM code for this, but since the previously created layer usually becomes the active layer automatically, a simple Adobe Extend Script (JavaScript) one-liner after your function should suffice.
Try:
app.activeDocument.activeLayer.name = "My new layer name";
I used Cursor AI
Never heard of it or used it. But it seems to work well.
👍
ehhh, if you're really careful with it it can work well, but with AM code it's just as liable to break everything
It doesn't matter what you use. With AM code, even a single missing or superfluous space can ruin the code...
😅
what I mean is that it will very confidently tell me it wrote correct code and fixed all my problems while breaking everything instead unless I provide it examples and watch it very closely. but I guess the same can be said about most AI
That's right. AI thinks in terms of probabilities. But a high probability does not mean that it is actually correct.
Question:
Does the one-liner for renaming the layer work for you?
🤔
yes it worked
Very good.
Have fun scripting in the future. You're on the right track.
I don't know how much more scripting I'm going to be doing tbh, I did all of this to generate the following because I couldn't find an easy way to do it with the tools photoshop gave me

@lavish cliff
Unfortunately, you swore beforehand that it would be your last question.
🤣
But here you will find basic information about Archimedean spirals. I'm also pretty sure that there is already (at least) one script for this. But unfortunately, I can't remember where I saw it or whether it was written for Photoshop or Illustrator.

The Archimedean spiral (also known as Archimedes' spiral, the arithmetic spiral) is a spiral named after the 3rd-century BC Greek mathematician Archimedes. The term Archimedean spiral is sometimes used to refer to the more general class of spirals of this type (see below), in contrast to Archimedes' spiral (the specific arithmetic spiral of Arch...
Yes, there is a script by Hiroyuki Sato, but it was written for Illustrator. Maybe it will still help you a little.
https://shanfan.github.io/Illustrator-Scripts-Archive/
Have fun
😉
I already wrote all the code, the math and code for the spiral was not the hard part for me, it was figuring out Extendscript and the AM
Your result seems to need some optimisation. The script appears to create the spiral from dozens of separate pieces that are not connected to each other. Is this intentional?
If I remember correctly, the Illustrator script creates exactly one path. (But I haven't tested it at the moment.)
that is intentional
I wanted a bunch of rectangular arcs that fit into a spiral
Hi, Clothing is quite a cast field, but did you explore the Adobe stock templates?
But if you have illustrator, it comes with a dedicated mockup tool with free templates: https://helpx.adobe.com/illustrator/desktop/manage-objects/traces-mockups-symbols/create-mockups-for-images.html
hi guys, so i recently got a drawing tablet and so i started using photoshop. i really want my brush to be super sharp, and ive looked for tutorials but for some reason none of them have worked. 😔
i want a lineart brush that's sharp 🥹
Hey im facing problems about changing a lot of shapes color (vectorised) on psd at one time not one by one
like 200 shapes
is there any tips
Sorry if I'm repeating myself. But unfortunately, Photoshop really isn't the most suitable tool for vector editing.
What works – or what doesn't – always depends on the actual structure and content of the file in question. Could you please show us a screenshot of your file? Or upload a simplified version of your file? Anything else is and remains pure guesswork.
i also found a solution to my problem
it was not selected a lot of shapes as the same time, and avoid two different colors in the package and then was availible to correctly change the color of all the shapes 👍
Hey I have two separate but related questions would be great if anyone knows the answer please:
When changing the duration for frames in a an animated gif image do the frames get re-encoded when the file is saved again?
When adding new frames and saving out the gif do just the new frames get encoded or do all frames get re-encoded?
im making a turntable in PS right now but im really struggling with the tonearm, how would you guys go about creating a simplistic but not silly looking tonearm?

Hey, what's the best way to brighten or darken parts of a image?
Several ways to do... Difficult to give the best... It depends you... Levels or curves adjustment layer are often used for that.
If you want to affect only some parts of the image, simply make a selection of the part you want to affect before adding the adjustment layer.
You could suggest the module holding the "needle" by adding a fatter rectangle at the end, touching the record. You don't need to be precise as to draw the needle, but just the same shape, that becomes a tad bigger at the end would be enough I think.

does anyone know of an action or video tutorial that lets you make 3d characters look like 2d handrawn, preferably anime style?

is there like a place where i can download free actions?
Iirc, you select them in the layers panel, then you shift+click the color well in the option bar/properties panel.
There used to be atncentral: https://web.archive.org/web/20250000000000*/Atncentral.com
I love to use camera raw as a filter.
so any idea on how i can make 3d figures look like this artstyle?

as a post process effect
Look for cartoon, or manga tutorials.
i mean not like handdrawn but as a filter that can you can quickly aply to the image and make it look like a similar style. So far i looked at photoshop filters and i only found pencil drawn filters
You can simplify with threshold and vectorize like this old tut of mine: https://mos.computerarts.co.uk/pdf/arts83_pshop.pdf
any other method or maybe a video tutorial?
Here’s what I found from a cursory web search: https://www.youtube.com/watch?v=23fLFEIqGrI
🧰 My Full Shop. One Bundle. 90% Off - https://shop.spoongraphics.co.uk/products/whole-shop-bundle
In today’s Photoshop tutorial I’ll show you a cocktail of adjustments that mimic the outlines, colours, and shading of a digitally painted image automatically, without the need to trace, paint or draw by hand. This effect can be applied to an...
I used “Photoshop cartoonify tutorial”

Join Maker Studios partnering program!
http://awe.sm/dJXO3
PART 2 IS HERE!!! - http://www.youtube.com/watch?v=D46sTBPJVV0&feature=youtu.be
Check out my Tumblr!
http://www.stebradburydesign.co.uk
In this video i will be showing you how to cartoon yourself using adobe photoshop. I hope this helps everyone else as well as Tyler.
If there are a...
But you can modify a tutorial: use less levels, add an outline/stroke
This would be a good application of a neural network, depending on how much you value consistency and time.
what do you mean by neural network?
thanks
Gave +1 Creative Carma to @hushed niche (current: #12 - 342)
colloquially, AI.
https://openmodeldb.info/ might have something, but they mostly host upscale and deinterlacing models.

OpenModelDB
OpenModelDB is a community driven database of AI Upscaling models. We aim to provide a better way to find and compare models than existing sources.
that looks amazing how would i make the dots random sizes though?
how do i fix my eraser so its smoother and doesnt leave bumps?

Hi, lower the spacing of the brush to 1%
in the brushes settings


Good evening, I would like to save a file in targa format but it does not offer it to me in the folder I want to save
Do you mean you can't save it to a folder? or you did not found the targa format?
Hey, im trying to take this image and make it a "seamless panoramic image" in order for it to do a single image slide show (I hope this makes sense) I have been trying for hours only to realize im incompetent.. Can someone help walk me thru it? ive been copying and pasting edges then importing to Premeire for hours and referencing youtube videos/Chat gpt to no luck


Does anyone know how i can recreate this in photoshop?

would i start with the pen tool? or is there an easier way
Hello,
I'm trying to repaint the blue sandals in orange, but with the eyedropper tool, I can't get the right shade of orange. How could I do it then?


Hi @quiet sundial Although it is possible in Photoshop, I would personally draw the two vector shapes in Illustrator and then continue working with the paths/shapes in Photoshop.
That would be the easiest way for me. Do you have Illustrator available?
The issue is that if you paint over, you won't keep the slight shading they have (shades of blue denoting the shadows and hights)
So you have two solutions:
Either you change the colour instead of painting over (typically using a masked Hue/Saturation adjustement layer) which will keep the original shades but change the colour. You can also paint over in the colour of your choice on a new layer, set in either Hue, or colour blending mode after having turned that particular area as a black and wite, but that would be really making things difficult for no reason (But is still used sometimes for targetted colour changes that are a bit difficult)
Or you can redraw using the shade of oranges you need, like a painter would.
For using the colour picker, why it doesn't work as intended? Possibly because your brush isn't set with the right settings. It should 100% pick the colour you're trying to pick, unless you've set the tolerance insanely high... But then when you paint with that colour, your brush may contain additional features like texture, mixed colour, flow, etc that might change the way the colour looks when applied.
As usual, a full screenshot with all the info helps a lot. For example showing your brush settings and/or the colour picker settings
https://www.youtube.com/watch?v=cuy12EOEztg

–
In day 7 of 30 Days of Photoshop, Aaron shows you how to change the color of anything in a photo with Hue/Saturation Adjustment Layers! Learn about hue, lightness, and saturation, and how to target specific colors in a photograph.
Download the Sample Image:
https://phlearn.com/30-days-day-7-hue-saturation-yt00-desc
Sign Up for 30 Days of ...

PRO EDU
Clone Stamp Tool in Photoshop: Replicate textures and correct imperfections for flawless images.
I'm trying to play with the hue/saturation, but it's hard to get close to the right shade of orange


Yes it can be tricky, it may need additional "proper" painting. Unfortunately, one click solutions are rare when you need precise work.
I work mainly in retouching, and I more often than not rely on drawing skills, when I'm faced with difficult retouching (and that include colour changes)
Hue satauration will give you the base, but depending on the base colour, it can give sort of "ink" results (like liquid ink over a pencil drawing, instead of a proper, opaque kind of colour that painting with the brush tool gives)
If you are super nitpicking about the kind of colour you need, it's worth creating swatches and not relying on the colour picker (again, the colour it gives really depends on the settings)
Fopr example, here you have 3X3 meaning that it takes an average of the 3 pixels surrounding the actual pixel on the sides and top and bottom, you click on (so an average value of 9 pixels). If you want an exact value, then 1 pixel is the way to go
Same about the colour indicated in the hue/saturation. The resulting colour is a mix between the one you choose to recolour in and the one that is in the original. So you can't really type in numbers (like RGB, or Lab* numbers) unless you're a colour wizard. It's pretty much an eyeballing exercise
Another route you can take is the "replace colour" adjustment
Image -> adjustment -> replace color
Same with match colour. You need to try them all

If you're looking for specific tutorials on terms and workflows, you can easily find them right in the Phtoshop interface, just by clicking on the magnifying glass icon on the top right
A new panel will open, and just type what you need in there...
I used photoshop too texture this mesh. I was wondering how I could add some color variation to make this not so Samey? Im a complete noob basically lol, I used a 2d Texture over the meshes UVs to export it ingame but the texture looks like samey. Id also like to make the nails shiny rather than just bots of metal.


Well as youre modding fallout you will have to create variation by hand
Easiest would be to add some dirt in middle of texture so you won’t have to worry about tilling
@quiet sundial
In Illustrator, you could create the paths very easily in this way. It works similarly in Photoshop, but is much more complicated.
FYI: You can then copy the paths to Photoshop and continue working there.
Do you know of any good ways to this? As I said ik a complete noon lol.
Have no idea how materials are done in fallout
If it’s just diffuse map
Or you have to create normal, roughness, ao etc
Just for color info you can just add some color or plates on top
Bethesda usually provide info on how to retexture as it’s easiest way to mod
So you have to create few maps https://youtu.be/M2oPuTOIABk?si=bFCdqs_iG5lymsQY

Quick tutorial to get you started making custom textures for your game!
B.A.E. - Bethesda Archive Extractor by jonwd7
http://www.nexusmods.com/fallout4/mods/78/?
Visual C++ Redistributable Packages for Visual Studio 2013
https://www.microsoft.com/en-us/download/details.aspx?id=40784
NVIDIA Texture Tools for Adobe Photoshop
https://developer....
just Diffuses and Normals.
So you will have to create your new texture and bake normal from it
To match your texture
Yea I have the Texture, and the normal already.
Wpuld I add the details to the texture itself or the normal?
Both
If you will change diffuse without normals they will look weird
Unless you will just paint over wood without adding details like plates etc
i’ll download illustrator now, thank you!
Gave +1 Creative Carma to @tame cape (current: #14 - 259)

Good Day,
I’m having a really frustrating issue with Photoshop on my iPad.
The left toolbar is glitching out and leaving ghost trails, like the screen isn’t refreshing properly. It makes the app hard to use.
I’m on an iPad 9th gen (A13).
Photoshop is fully updated.
I’ve tried restarting the iPad, offloading and reinstalling the app, fully deleting and reinstalling it, turning off Stage Manager and multitasking, locking rotation, and turning on Reduce Motion. Nothing helped.
What’s weird is that Illustrator works completely fine on the same iPad, so this seems specific to Photoshop.
Is anyone else with an A13 iPad having this problem?
Is this a known bug, or is Photoshop just broken on non-M-series iPads now?
Any help would be appreciated because right now it’s basically unusable.
I have a senior capstone project due in February, and I need to have this fixed.
This all started in November of 2025
sadly can't help with checking on my Ipad as i'm using ipad pro with m4 chip, but you might have quicker answer from adobe support
does your toolbar have issues?


This was how my photoshop was before. I really hope I don’t have to upgrade my iPad
yeah sadly there's no way to revert to older version on appstore
but i would still try to contact adobe support
I am convinced that this is the right decision.
If questions arise — and they will — there is also an Illustrator Discord server.
https://www.discord.gg/adobeillustrator
Have fun
😉
Did you see my dm?
thank you again
Gave +1 Creative Carma to @tame cape (current: #14 - 260)
The chatbot said to go to the discord server for help
I've seen you created bug report on forums
just now because the bot is useless
Yes, I just saw your direct message. However, I don't answer questions via direct messages as my personal rule. If I have time, I might create one or two additional videos. Unfortunately, the topic is divided into two parts. Questions about path creation belong on the Illustrator server.
The finish (the relief effect) is much easier to create in Photoshop.
How to do this? In photopea filter tab - 3d, there's a texture dilation thing, it's kinda extrude image edges


<@&548221840750018590> Image spam
How do i help try to make content on roblox without it being dirty or not clean in a way
I don't think that xNormal plugin work anymore so you can do it manually https://www.youtube.com/watch?v=sjByo6A0uu4

Infinite dilation is one of the most essential things when exporting textures for a different engine.
just checked and it's working

Thanks, you can ping me btw
Gave +1 Creative Carma to @ivory rampart (current: #24 - 94)
ping?
@
@neon crane
Where can I find it tho? Github?
xNormal is a free app to bake texture maps
it will be in folder of app
and you have to copy plugins to: \Program Files\Common Files\Adobe\Plug-Ins\CC
Might be able to help u if u specify more, ive been devving there for years
Mainly user interfaces etc
<@&548221840750018590> the images sent by chris is a way of hacking accounts, if sm1 clicks them they can get token logged
Whatchu doing tho?
playing minecraft mostly these days
I mean about what u asked
What do you do in roblox
What are you referring to?
@zinc scroll - We don’t support apps from other manufacturers. Sorry. Check the documentation for the app(s) you’re using.
It was deleted, however an user sent an image from fake transactions of famous people
Its a scam where if you either click the image or the links sent it token logs u, with a discord token you can enter the account binded to it without passwords neither 2af
Then they repeat the process by sending the scam
What user are you referring to?
@peak berry i believe
Probably not. The server admin removed someone earlier so it seems like its been handled.
I mean the name was chris with his same pfp but sure, ty
Gave +1 Creative Carma to @ripe quest (current: #2 - 3204)
Hey, How to lengthen a vectorized shape in Photoshop without enlarging the entire shape, only its length
without changing thickness and position
It depends on how it's built, but generally you will need to select only specific points (say, the end point) and move them with the direct selection tool commonly named "the white arrow"
yes thanks
You really need to show the shape if you want more detailed answers
i expected some easiest way but thanks i thinks it's the only way
Even making coffee is more complicated than that! 😁
cause its weird to use the tool
like moove each side correctly without changing the orientation of the shape and all and its point by point
i expected something as used for images
shapes are different to change
Yes, so I wouldn't say complicated, I would say precise... Particularly with a mouse. You can use the arrow keys as well if that helps
a bit difficult than image
But the key is to play with the handles
In that case, maybe Photoshop wasn't the right software for it. Vector capabilities are limited in Photoshop
One way, but it's really niche as a skill, is to learn how to handle SVGs as code. You can code (or have someone do it for you) a program that runs a transformation on nodes/paths without opening a design software at all
damn
that's a really good idea
but diffuclt i guess or chatgpt can help too for those things
as it code too
W3Schools offers free online tutorials, references and exercises in all the major languages of the web. Covering popular subjects like HTML, CSS, JavaScript, Python, SQL, Java, and many, many more.

MDN Web Docs
This tutorial aims to explain the internals of SVG and is packed with technical details. If you just want to draw beautiful images, you might find more useful resources at Inkscape's documentation page. Another good introduction to SVG is provided by the W3C's SVG Primer. Also check out this advent calendar-themed SVG Tutorial that walks you thr...
ok thanks ! 👍
You can export your artwork (as long as it's paths) from Photoshop to SVG, but you need a little workaround for that (Enable legacy "save for web" in the preferences)
https://www.youtube.com/watch?v=eYPaf1-ExVw
https://www.adobe.com/creativecloud/file-types/image/vector/svg-file.html

Get My FREE Ebook To Help You Master Photoshop: https://learn.bwillcreative.com/the-photoshop-blueprint-ebook
How To Change The Color Of Your Logos:
https://www.youtube.com/watch?v=vf2w3jFtfOA
How To Remove The White Background From A Logo: https://www.youtube.com/watch?v=uyhCbE4TC3I
---------------------...

SVG files can be resized without losing their resolution, making them ideal for online graphics. Learn more about their features, as well as their pros and cons.
I wouldn't tell as I don't do ChatGPT. I guess it would need to be double chacked. Noone is infaillible, least of all ChatGPT 🙂
yes, also chatgpt in programming make a lot of errors as it is not perfectly developped to now
thanks a lot for the help anyway ! 👌
You're welcome
<@&548221840750018590>
Stupid question. I just signed up for Photoshop plan but didn't realize it was WEB only. How can I convert it to the desktop version (I know its a few more bucks a month)
Does this include DESKTOP Photoshop?

yes.
@fierce hornet thank you
Gave +1 Creative Carma to @fierce hornet (current: #29 - 81)
any1 online now that can help really quick i would really appreiciate that!
what do you need help with just share your questions here
i have a text with an certain style but i want to change the width between the letters and the lentgh
To change space between letters: Window > Character → adjust Tracking.
If you used layer styles keep the text editable and avoid rasterizing so the style stays consistent
Are you talking about text in a text layer?
Or are you talking about rasterized text?
Is your text/“text” on its own layer?
hi in after effects and premiere pro, there is an option to created nested and precomposed compostions. How do I do the same in photoshop? Is it just smart object?
Smart Objects are the closest thing. They are "self-contained" entities. A doc within a doc.
so this is a lot better rather then creating multiple photoshop project files?
Not necessarily but maybe depending on your goals. SO's can also be useful for non-destructive editing of objects.
Well that was what I was trying to do I have trying to have multiple images with multiple tabs all in one project. Rather then creating multiple projects.
currently making a poster for my schools varsity soccer senior night. anything you would add/change/remove? all critiques welcome

Hey guys i was wondering if anyone has suggestions for a logo im tryna make. Its a videogame company called "Below Average Development" (shortened as BAD) but i really have no ideas, prolly something simple using geometry
You can post feedback requests in #📝project-feedback
(To me at least the outline text is not very legible - a combination of fat stroke/thin letters
To be honest the rest is also a bit difficult to read unless you got 20/20 vision, which not everybody have)
I know that ypou're asking for something a bit different, but just to put things straight, logos are generally done with Illustrator because logos are in the vast majority of cases vector (because it can scale to anything from outdoor banners down to icon without losing their quality)
I know a lot of people work on logos with whatever they have, but really a pure vector, well built logo is 100% vector, which Photoshop isn't necessarily the best tool for.
Of course a logo is way more than the software it's built in (otherwise there wouldn't have been any logos before the advent of the computer) but This is always a good start.
That's because you're asking in the Photoshop server.
Damn there is an illustrator one? 💀
Building a logo is more about the ideas, and really a skill in itself (a skill that I do not possess)
Yes, there is! Bear with me, I'll share the link
Ty
Gave +1 Creative Carma to @vapid flume (current: #6 - 1103)
It's already well cluttered with just one sofatwre pers erver
There are also servers for Video/animation, Adobe Express, 3D, and many others
I mean imo it would be great to have the entire adobe community in one server, would give a lot of benefits. Thats just a suggestion tho
and one specifically dedicated with Creative careers, where you can have help concerning studies, workflows, portfolio reviews etc
The adobe forum website gathers all the software in one link: Reddit and Discord servers work a bit differently, mainly for questions of moderation etc.
When there's too many cooks in the kitchen, it doesn't help
If you want to have a look
https://community.adobe.com/?r=forums&cgen=KH8NV5Z1&mv=other
https://community.adobe.com
Come for help, be inspired. The Adobe Product Community is the place to ask questions, find answers, learn from experts and share your knowledge. We have everything to help you get started, learn how to's, tips and tricks, and unlock your creativity.
It's still divided by software though
If you want the direct links to all (or most) of the Discord servers, you can find them here
https://helpx.adobe.com/uk/creative-cloud/apps/manage-apps/creative-cloud-apps/adobe-discord-servers.html
hello
How to thicken the line drawn with the pen tool
Assuming you're talking aboutits visualisaton, you can access the settings under the cogwheel icon

Mine is at 1 pixel here, but you can change it as well as the colour
If you're talking about the stroke of a shape, you need to make sure you got a shape (and not a path) first, and set the stroke width will change the thickness


Does anyone know how this effect is called and how it can be replicated?


quick example
Gave +1 Creative Carma to @ivory rampart (current: #24 - 95)
np
Is there a channel in this server that shows me where to learn more or to get more knowledge for Photoshop with videos (YT preferably)
Have you tried the basic tutorials in Photoshop yet? That's always a good place to start.
😉

No but i'm really advanced, and I know almost everything there is essential in Photoshop
I'm just trying to learn more
but not necessarily the bsaic tutorials since its mainly for people starting out, though I am someone who has been using it for about one year
The server does have a resources channel though it doesn't get updated frequently enough
where I finish almost all of the recent ones from this year
Maybe you should take a look at the tutorials anyway. There are good tips for everyone — whether you're a beginner, advanced learner, or expert.
But first, there's the New Year's Eve dinner. I wish you a happy New Year and a healthy 2026.
🎆 🎉
You too, I'm located in Oceania so already finished New Year but wish you a amazing New Year! Thanks for the recomendation will take a look into it.
Gave +1 Creative Carma to @tame cape (current: #14 - 263)
I already finished half of it 😅 , It was really easy and I learned maybe a couple of things that could be slightly helpful.

As an advanced user, I found those tuts amazing: #❓ask-a-question message
Me too, they helped my workflow smoother
They keep it minimal, but they teach you actually everything almost
how do i remove this background without losing any quality ?

try the color range feature in select
what does this tool called

It's called warp. You can select a photo (CTRL+T), then right click on your mouse, and you'll see the the warp option.

I already figured it out 5 hours earlier
To add rougness to a Texture would I just grayscale the orginal image I want to be the roughness? Or grayscale my normal too? then Ctr+A Ctr+C then Ctr+I and Make a new channel under the rougness map and then paste it the channel I just made?
Do not hesitate to answer your own question, then, it might help others. Remember the date, most users celebrate with family and friends…
Is it for 3D? You might have more control with the nodal modifiers of the substance tools.
Play with blend modes too.
Its a 3d Model im appling my 2d texture to the Uvs.
Just wanna make sure im doing it righ.