#❓ask-a-question
1 messages · Page 106 of 1
If you are on a Mac, do you have time machine?
And I was like nah no way this could happen, and it indeed, did happen.
Windows
It might be a terribly expensive lessons learned.
Yeah, very expensive actually.
And you are not using windows backup and restore? https://support.microsoft.com/en-us/windows/back-up-and-restore-with-windows-backup-87a81f8a-78fa-456e-b521-ac0560e32338
Learn how to back up and restore apps, settings, files, photos, and Microsoft Edge favorites and preferences on your Windows PC using Windows Backup.
Did not export any jpegs of the progress?
A way to save your… back… but it needs to be setup.
Looks like it is actually. Although the backup will take me to 11th January.
On windows it seems it only works with online space, on a Mac, you use a local drive.
thank you!
Gave +1 Creative Carma to @ripe quest (current: #3 - 2636)
Might be able to use them for reconstruction
sure let me find it
Does anyone know if the 20gb photography plan from Amazon is legit or not (it's around £120 for a year license)
@hushed niche that one closely resembles what i'm looking for. Far from the finished product tho

the fire pops out from the rest of the image, it feels like a sticker if that makes sense
I think there are reseller agreements with certain online stores like Amazon. However, I would probably go directly to Adobe unless you have some compelling reason to use Aamazon.
Well it seems to be around half the price of buying it directly from adobe
Who is the "Seller"?
Or show me the link you're looking at.
https://www.amazon.co.uk/Adobe-Creative-Cloud-Photography-plan/dp/B00LSU8PYO by Amazon Media EU S.à r.l.

The Adobe Creative Cloud Photography Plan is a comprehensive software package designed to meet the needs of both amateur and professional photographers. It includes full versions of Lightroom (desktop, mobile, and web), Photoshop (desktop and iPad), and Lightroom Classic (desktop) plus 20GB or 1T...
okay this might work, as long as it can learn suffixes from consistent naming conventions then it should be fine!
If Amazon Media EU is a legit Amazon Subsidiary, then I suppose it's real. Do you recognize that name? You can contact Adobe Customer Care and ask them about this.
One other thing: this is a one-time deal for new subscribers only so if you've already had an account and are trying to renew, this wouldn't apply.
Also, that’s about the price Adobe sold it for when it offered the 20GB plan (US$120/per year is about 114 EUR). But at least in the US, that plan is no longer available. Adobe only has the 1TB Photographers Plan for UD$180/year so just a heads up that you may not be comparing apples to apples.
I've made an Adobe account but have never purchased a plan or used a trial, should be fine then all things considered?
Should be. However, if you have questions about this being legitimate or if there are any strings attached, you should contact Adobe Customer Care first. Just to make sure. I'm not an expert on the plans or any deals that Adobe offers. No one here is. Only the Customer Support Team can provide up-to-date information on plans and pricing.
I'm not familiar with Amazon Media EU or software sales/regulations in the EU. I live in the United States.
I don't want to give you incorrect information.
Well I spoke to an "agent" briefly and they said it would be safe to use
Edit: misunderstood your goal your other question thread is more explanatory.
It seems to be Amazon Luxembourg: https://annuaire-entreprises.data.gouv.fr/entreprise/amazon-eu-sarl-487773327
Anyone know why when I try and use the play button selection it keeps showing this? Any help would be appreciated 🙏🏽

Is it possible for you to display what's below "Set current layer" In action panel.
You also could try to double click on background layer (in layer panel) to unlock it... It could be the root cause of your problem.
Or just click on the lock icon to unlock your layer...Before using your action
So as you can see the bike has a design on it and logos which i want to remove. I have tried to use the color replacement tool but as you can see in the photo it wont work on the white areas. Anyone can help?

I have to make the bike one colour so that i can put another livery onto it.(white preferably)
Make a quick selection and then mask on it and then fill the color
How do i mask?
There's probably smarter ways these days, but this is one possible method....
@grizzled spade - I saw the skull 🙂
istg these are so close 😭 quick reaction i misclicked
(The last 30 seconds just shows that it has been successfully 'selected' since the hair changes colour, but the skin directly next to it is untouched.
Sorry i know im a pain, but once i have masked it an filled the color, what do i do then?
well ig refine the edges and stuff idk where u at
I meant like how do i unmask it?
or u could make the slection, press ctrl+ J
`then use hue/saturation colorise on it

Yes that would be great
I just woke up!!!!
is there a way to do what i did on the right on the left without having two serperate layers. all good if no solution, just want to confirm tho

discord compression makes it look worse, but there is a gradient overlay

Good question.
I think you can apply independant gradients in Adobe Illustrator.
Technically you could add a manual gradient that 'repeats' e.g. red > orange > Red > Orange
Why'd u deeletee old, and why u not in bed 🧙♂️
I don't want everyone thinking I'll call them if they have problems
Valid, but u did take consent so it's fine :)
💀 consent sounds so sus
What did u guyz do on the call 💀 with consent

all those sound like too much work so i think ill just do two layers
Agreed. - You can always combine them into a smart object anyway
This means that they can be still fully editable, but whilst ALSO combined into one layer
Ty!
Gave +1 Creative Carma to @sly hawk (current: #5 - 1090)
Hello! Is there any way to fix the focus onto the flowers and hands in this image? I plan to blur the background as well but the flowers came out a little blurry:

You can sharpen the whole image with High pass technique and mask to sharpen the parts you want only. Here is a short video to explain what I mean.
You're amazing! It worked perfectly...Now I need to figure out the best way to make a blur in the background look realistic if you could help with that too. Smart blur isn't cutting it for me
is there a way i can adjust each line within the lasso content individually for this not to happen
i just bought photoshop, but nothing on their website works, i can't download apps

should i just wait or is something wrong?
Th error suggest that it's an issue with the syncing of CC
Checking Adobe status
https://status.adobe.com/
Adobe Status provides service availability and performance impact information for all Adobe products and services. It includes incidents and maintenances that are ongoing or in the past that affect Adobe products.
I can see that there was a maintenace sheduled that is now complete. Maybe that was it.
That's illustrator's work on vector, also i don't think u can do so for each line if it is in an single layer, which u being so smart didn't show
I mean idk why ppl hide the layers 😒
Also I forgot
Any issues with payments and accounts you either need to go to Customer service for an immediate help, or to the Community forum if you don't mind waiting. That's because we aren't Adobe employees here and we cannot (Obviously!) access your account.
As a double check, be sure you are logged in to your account and that your method of payment is valid (either Debit/Credit card or Paypal if it's available where you are)
For the Customer service either here
https://helpx.adobe.com/contact.html?rghtup=autoOpen
Alternatively @-adobecare on X (remove the hyphen there) or contact https://www.instagram.com/adobecustomercare/ for help through DMs

305 Followers, 20 Following, 6 Posts - See Instagram photos and videos from AdobeCare (@adobecustomercare)
Hi, you might try https://helpx.adobe.com/camera-raw/using/lens-blur.html but I am not sure if it works as a filter, you might have to open a flat jpeg in camera raw from Bridge, if the function has been extended to jpegs (it was raw files only before)
Add blur effects to your photos with Lens Blur.
Hi, did you try edit>puppet warp?
Hi, if I may suggest something else in addition of the excellent info from Sandrine, is it Opera? If yes, Try chrome.
What's the best place to get free, no watermark, hd pics?
Hi! You have quite a few with your subscription on Adobe stock… a quick online search gives unsplash, pixabay…
There is also Creative Commons: https://search.creativecommons.org and plenty of musea:
https://www.nga.gov/open-access-images.html
most of the US government work is public domain: https://images.nasa.gov or https://dvidshub.net for military images
National Gallery of Art

Smithsonian Institution
Learn more about Smithsonian Open Access
NASA Image and Video Library
NASA Image and Video Library, serving up consolidated imagery and videos in one searchable location. Users can download content in multiple sizes and resolutions and see the metadata associated with images, including EXIF/camera data on many images.
DVIDS
Providing news, images, audio, video, and publications from military operations around the world. Browse current as well as archived content.
Excuse me everyone My all brush preset lost how to get back .

Help me pls.
@grizzled spade Is gone T_T
Workin on the photo. I want to add some extra debris where the dude getting impacted from the explosion from. How can I do that?

Hi go to the hamburger menu on top right of your capture, and select import brushes. https://www.adobe.com/be_en/products/photoshop/photoshop-brushes.html navigate to where you saved the brush sets on your hard drive. Once everything is imported, you can backup the brushes.psp preferences file to reinstall them in one go if the problem occurs again: https://helpx.adobe.com/photoshop/kb/preference-file-names-locations-photoshop.html

Find the exact brush you need to elevate your digital art with customised drawing brushes or preset Photoshop brushes. Let your creativity flow today.
Preference file functions, names, locations | Photoshop
Hi, there are dedicated brushes: https://www.brusheezy.com/free/dust-debris here are some tips: https://www.youtube.com/watch?v=RBLqaO8_SfA you could also copy/paste some parts of the walled, add shading…
There are also elements on Adobe stock: https://stock.adobe.com/search?k=debris explosion


In this video I show you how to create drama and excitement in your 'action' pictures by adding Dust, Debris and Explosions just like you see in a lot of Hollywood Style Movie Posters, all by the simple uses of brushes.
Each week I also produce a Photography, Photoshop and Lightroom Video Show; a weekly video that goes 'Live' each and every Thu...
Awesome thanks
Make a copy of the Background image> Make it a smart object> Filter/Filter Gallery/Field Bur (5px).
Load the Arms+Flowers selection by Ctrl+Click on the layer mask.
With the selection active, click on the smart object thumbnail in layers panel> Alt+Click on the "make a layer mask icon" to create a layer mask that reveal only the background image.
Click on the new layer mask created and apply Filter/Other/Minimum (3px) to soften the transition.
Finally you can apply a curve effect to darken a bit the background and add focus on Arms+Flowers.
yes, it is a single layer, i'll now make different layers for each body part, thanks for the compliment btw, i do value that in myself
Gave +1 Creative Carma to @grizzled spade (current: #98 - 18)
i didn't, that'll be useful, thank ya
I'm being a bit simple can someone link me to the Illustrator discord?
Adobe Illustrator - https://www.discord.gg/adobeillustrator
ty!
anyone know how to duplicate multiple smart filters onto a new image?
- Convert the new layer into a Smart Object (Right-click > Convert to Smart Object).
- Hold Alt (Windows) or Option (Mac) and drag the Smart Filters from the old Smart Object to the new one.
• This duplicates the filters without affecting the original.
Or Right-click the “Smart Filters” section under the layer.
Choose “Copy Smart Filters”.
or Drag that Smart Object Layer onto the new image’s tab, then drop it onto the canvas.
To add what @grizzled spade said, if you want to apply on a new image in an different file> With the move tool (V) drag the smart object with filters from its own canvas to the new file then use the technique explained by Devansh to duplicate the filters...
Unfortunately there's no "Copy Smart Filters" function in photoshop.
Last thing some filters (like liquify) are resolution dependants so your second image should have the same pixel dimansion if you want to avoid weird result.
can someone resize my pic for me dm for the pic
Hi, I can't get PSE12 to log in on my new computer
Can someone help me? I log in but it just asks me to sign in again
You can post a brief description of the project in the #💬chat-general channel. If anyone is interested in working on it, someone might reach out.
PSE12? As in Photoshop Elements?
yeah, I can't afford a newer version
Sorry. I don't really know anything about that app. We mostly support Photoshop here. You might have better luck searching this topic on the Ps Elements Community Forum on the web. https://community.adobe.com/t5/photoshop-elements/ct-p/ct-photoshop-elements?page=1&sort=latest_replies&lang=all&tabid=all
You can also post questions there.
ok, thanks
I'll try that, thanks
Gave +1 Creative Carma to @ripe quest (current: #3 - 2637)
well, I guess I'm going to have to buy a new license. The offline sign in doesn't work
Ah. Sorry to hear that. Not sure what else to recommend.
I guess its okay, I didn't realize that Adobe still had an Elements version, that's still a bit cheaper then the full version, and since I still had a license for 12, I got $20 off Elements 2025
I wish I could afford the full version, I'd love to try out the AI stuff
Honestly, I always forget they have Photoshop Elements.
So im trying to put a livery onto the bike. Can someone tell me how i can efficiently add the livery onto the bike?

Its going to be challenging at these weird angles. Can you take new photos? heh
I cant sadly, thats the only good photo i have of this bike, which i have to use.
I also have this.

I'm new to photoshop
I need help. I can't get rid of the inside with magic eraser or magic wand because it's too similar in color that it deletes the entire thing. What should I do?

You can try painting over the text with the Remove Tool. It might take a couple attempts for each one.

I did that really fast but I think it shows that the Remove Tool will work if you take your time.
 💯
💯I'm the realest. heh
So I basically have to erase manually
Well, you have to paint over them manually. But with the Remove Tool.
You will probably have to repaint certain spots if the Remove Tool is too aggressive.

honestly I'm just trying to get the outline atp
So I can recreate the image myself
But... yeah I don't know if there's any tools for that
If I were trying to do that, I would recreate them as vector shapes. Meaning: redraw them with the Pen Tool.
Honestly, if they had to be "perfect" shapes, I'd just recreate all of these as vector objects.
Then they could be rescaled to any size without losing quality.
Yess that's what I want
Also, they appear to be symmetrical. Thus, you really only have to draw half of it. Then mirror it to get the other side.
It entails a considerable amount of work but its worth it if you want perfect, pristine, resolution independent shapes that are reusable.
😵💫 My bad
Hi bros is there anyone who makes posters and has some interesting ways to texture their work i am rujnning out of ideas
Not if they're asking for help on how to do it. They post here.
You're looking for techniques or image overlays or what sort of texturing are you trying to do?
😭 They asked for ideas not for help right
sorry mb
😵💫

The edge is too crisp. There needs to be a bit of shadow and a soft transition between the sneakers and the floor.

You'll probably have to bend it or scale it with a Warp transform. Possibly paint/mask the edges to make the it seamless.
Probably going to take quite a bit of tweaking.

I was thinking maybe there are some cheeky filters the ones that i sometimes use are the colour halftone and crystallise for now
Yeah. I understand. It would just be really difficult to explain it.
This why i gave up on photoshop too many sweats 😭 💔 nah im just joking bro you are crazy good at this thank you for real
Gave +1 Creative Carma to @ripe quest (current: #3 - 2639)
Just takes practice. Gotta do it everyday. Get a little better. Push yourself. Repeat.
There are all kinds of Filters and Blend Modes that can be applied.
hello
is is it possible to recrate the paper like texture and the backgrounds on these artworks? im new to ps and wanted to draw a poster in this style...


Any combination of filters can bring nice results. Noise plus wind can give a brushed metal effect. You can use save for web or the indexed mode for dithered gradients: https://drububu.com/tutorial/pixel-art-and-dithering.html
It might be way easier to find a paper scan texture and play with blend modes or blending options to merge it on your design. Remember that you have some free downloads on Adobe stock with your subscription: https://stock.adobe.com/search?k=paper+texture
can someone photoshop something for me cause i really need it, it is SUPER easy
Please ask in #💬chat-general as it's the right place

what tools would be best to make the bow tie look like it's blended into the image? now it looks like a PNG from a different image (which it is..)

I would suggest that you create a mask on the bow layer, and then either paint around (in black) with a very soft, low opacity brush to remove those sharp edges
or paint a sharp mask, and apply a feather (in the properties panel) to that mask

Basically you want the edges to be soft
thanks for the quick answer! i'll try that right away, i'll send a before/after image here shortly
No worries, if you got any issues, feel free to send a screenshot of the layers panels, sometimes it's easier to explain with the layers visible
i'll let u know!
I reckon you just need to brighten lower the dark areas only 🙂
good point! i added that as well
@vapid flume thanks for the help! what do you think? (i removed the weirdly AI generated part behind the bow, smudged the sharp edges inside the bow, fixed the edges around the bow as you said, and changed the contrast/brightness of the bow as @sly hawk said

Gave +1 Creative Carma to @vapid flume (current: #8 - 865)
Looks legit/good to me! - Maybe add a slight subtle contact shadow?
oh you mean in front of the bow?
yeah

Looks good!
How do I link all of my Adobe together under one hood?
What do you mean by that?
I mean, you should have one account and everything under that Adobe account
So it it's already linked together? Sorry for my ignorance I'm very new to using Adobe.
well there isnt a lightroom server so ill ask it here
i have PURPLE in my photo
i want to make it RED
but lightroom only lets me change it to pink or blue
what do i dooooooooooo
need to make that lightish purple in the wall red

Not sure Lightroom is the ight software there, but this is not where you need to change the colours, you need to go to colour

why is my transform tool not working when i hit ctrl + T? even when I'm in the right layer
and move the sliders of Temperature and tint, which apply to the whole colours
im pretty sure thats where i a in the bottom right of my picture, right?
and you're saying lightroom might not be the right software, what do you suggest?
You're in the colour mixer, not the colour segment
Don't want to try Photoshop for that? if you have it installed? You're making your life harder than it should be there
here?

sure
CTRL+H in lightroom will open the file in PS
i mean im not sure where in photoshop ill be able to change the colors but ill try
In the hue and saturation adjustment layers
perefect ill take a look, thanks
Gave +1 Creative Carma to @vapid flume (current: #8 - 866)
Do you want to transform the selection content?
yep
PS was doing it just right, now it doesnt, as you can see the selection keeps twitching when i hit ctrl T
Yes it looks weird, have you tried closing PS and opening it again? It might be a glitch
If it doesn't work, resetting the preferences might be in order
The background sound is that of Guy Garvey on the radio (just so you know) I forgot to mute
perfect thanks
Gave +1 Creative Carma to @vapid flume (current: #8 - 867)
for me for some reason no combination i put makes the purple red but whatever
How do I aquire from coins for firefly
You mean credits?
Yes sorry
yeah, it's still not working
the transform selection works
but not the free transform path
the layer is not a smart object btw
Are you on the latest version?
yeah
have you tried on another version? (You can download older versions from the CC app)
nope, i'll see
It's difficult to know what's happening there.
I will share the trouble shooting link from the help files, so not sure it will help, but worth a read anyway
https://helpx.adobe.com/uk/photoshop/kb/basic-troubleshooting.html
how can i select 1 colour in a full image. I was sent this image from someone in a discord channel and asked if i could swap the black text, leaves and shield to white and the white shield part to black

You can but if you swap text and leaves since the background is white they won't be visible...?
he wants that removed. sorry forgot to say
The red must still red?
sadly ye
You can but honestly it looks weird....

And there is so many anti-aliasing on the original logo that it's impossible to get clean and smooth edges....
hi'
does anybody knows how can i blend the forest in here with the image beneath the layer?

First of all you'll need to match contrast and colors of the two images... Hard to show with image so I made a rectangular selection of the layer below.
Once the two forest match you<ll just have to mask with a soft brush the layer of the castle to get a smooth transition.
thank you!
Gave +1 Creative Carma to @viral palm (current: #9 - 684)
got it fixed, my layer was locked and i didnt notice, thanks
Gave +1 Creative Carma to @vapid flume (current: #8 - 868)
Please don't post the same thing multiple times. You've already posted this twice. @quasi finch
Which is why i keep insisting ppl to show their whole windows while asking for help so that the other person knows and has a bit more info 😭
Since Sandrine couldn't see the layers on the screen recordin she couldn't help too other than guiding u too troubleshootin
Which was in-fact the best way 
Hellooo I'm new to photoshop and I don't know so many things about it, I'm trying to do art in it yet I don't know how to create / modify my brushes, can anyone help me?
Adobe Getting Started Photoshop Brushes
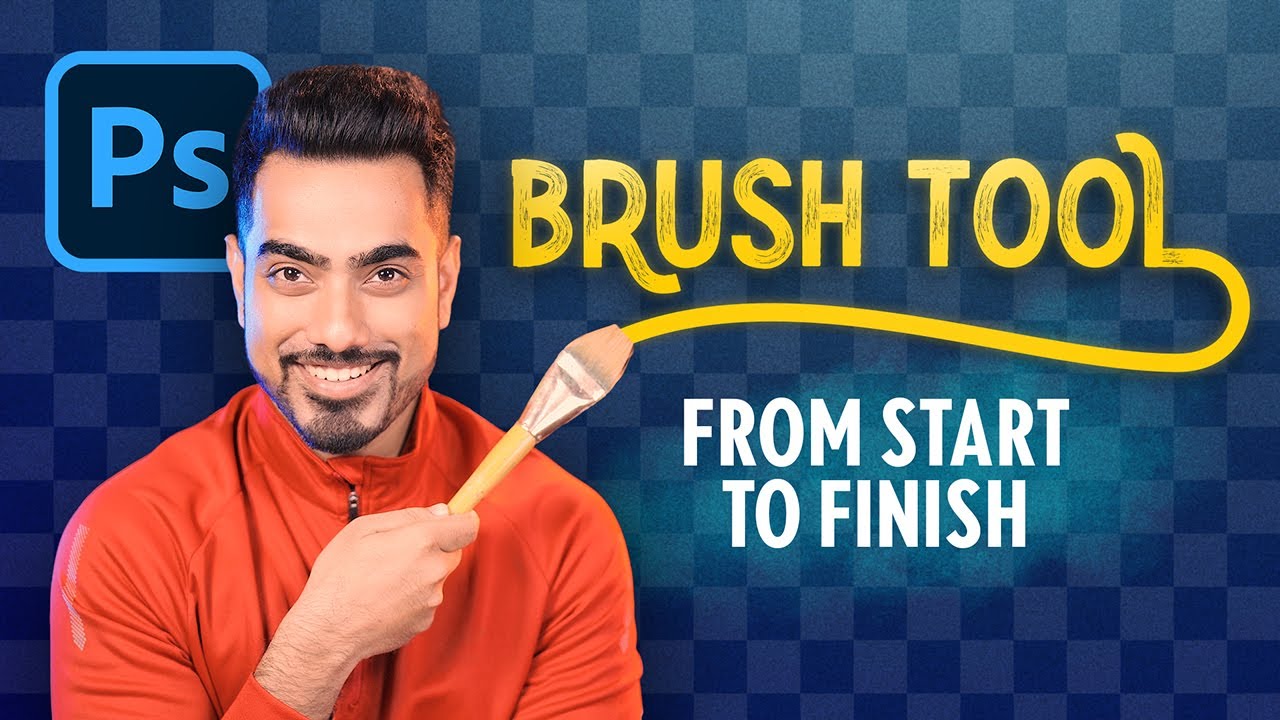
[Master Brush Tool from Start to Finish - Photoshop for Beginner By PiXimperfect](Master Brush Tool from Start to Finish - Photoshop for Beginners)

Find the exact brush you need to elevate your digital art with customised drawing brushes or preset Photoshop brushes. Let your creativity flow today.
► Join PiXimperfect Pro - The Ultimate Photoshop Training Course: https://pix.live/pro
The Ultimate Guide to Unlock the Power of Brush Tool in Photoshop! From mastering the fundamental properties to essential tricks, shortcuts, and practical applications, this lesson covers it all. Explore the inner workings of the brush tool, learn to create a...
U can either go through the tutorial for all the basics or read through the web, but if u want to ask anything specific on the brush tool we are still here to help :)
thank you so much!! I'll watch the full tutorial since it's gonna help me :DDD
so this is happening, it's not letting me click on the button the left of it either..
its supposed to do this, it used to work for me a while ago but as you can see it's having issues now. Any type of help would be very much appreciated!
So im trying to change the blue to plain white, but i dont know a good way to do it.

Try to rename your layer "Layer 1" rather than Layer 0 then run the action to see if it works better.
Ye I've shown him my best attempt
Try Hue and Saturation Adjusment layer.
woww it worked thank you so much brother, God bless
Gave +1 Creative Carma to @viral palm (current: #9 - 685)
But then when i want to put a livery ontop of it, it wont work because of the Hue/saturation

The color of the livery is green and white
Stick the livery on the top layer, ABOVE the adjustment layer

Thanks!
Gave +1 Creative Carma to @sly hawk (current: #5 - 1091)
Hi, check also this video by the Artist that created most of the built in brushes: https://www.youtube.com/live/V6BgnRoURwI?si=pHux2YOAcHVG50rZ

New to Photoshop? No problem! In the third episode of this multi-part series on Photoshop basics for artists - follow along with Kyle as he gives an overview...
uh so basically my pen pressure keeps going to 0 even tho i put it to 100 and idk why its doing that
Hi, which tablet? Is the driver up to date? Which Photoshop version?
Does it work in other software?
Did you check https://helpx.adobe.com/photoshop/kb/tablet-support-faq-photoshop.html
Learn about recommended settings for using Wacom tablets with Photoshop.
A screenshot of your brushes setting panel?
bruh i dont have a tablet i have this like wacom thingy and i plug it into my computer and ii draw on it idk what version can u tell me how to check that and io will send u a screenie

Mac or pc?
A graphic tablet is a Wacom like interface to work with a pen. Or you have a hybrid computer semi laptop semi tablet?
Do you draw on the screen of your computer or on a separate device?
a seperaate devic
Turn it upside down, there must be a panel with the brand, model, etc.
For the driver, in the control panel you should have devices and printers.
Does anyone have the adobe after affects server?
Adobe Video - https://discord.gg/adobepremiere
How do I specifically crop this one image?

Hello, is there a way to crop a jpg without compressing it?
Try the Crop Tool. Draw a box. Hit the Enter Key.
Yeah. Save it as an uncompressed file type or a file type with lossless compression, like PNG.
I meant while keeping it as a jpg
The site I'm coding for requires us to upload pictures as jpgs
I know that png is better 😊
I don't think it's possible but just checking
No. When you decompress and recompress JPEGs you have the capacity for quality loss. You should always work from a high quality source image and export that to JPEG to ensure the best quality.
So no way at all?
I saw this onine:
https://betterjpeg.com/
Avoid quality degradation when editing photos. Better JPEG allows for editing JPEG images without recompression. Accurate JPEG decoding, no more artifacts.
JPEG by its very nature is "compressed" so I'm not sure what you're asking.
Just asking since, like the link above, there's been sites promoting loseless jpgs
You can save at 100% quality but its still being decompressed/recompressed every time you open, edit and then save it.
Every time you save the JPEG, there is a possibility that you introduce compression artifacts, as its trying to combine blocks of like color. This manifests as that "blotchiness" in the image that you see from heavily compressed JPEGs. Perhaps you won't notice anything. The possibility is always there when you're editing JPEGs and opening/saving, etc.
Work from a high quality source file and export to JPEG or take your chances with quality loss.
So is this a complete ripoff?
They have a photoshop plugin
Okay thank you so much : )
That crops the whole canva, not the image
Is there anyway I can bring a layer to canvas and crop there and then reimport?
Select the Rect Marquee Tool. Draw a selection around the thing. Then add a Layer Mask.
U can use the maruqee tool and then once the slection is made just press Ctrl+J to make a new layer of that selection
Negative. Use a Layer Mask. Then if you make a mistake, you can adjust the mask.
Also, it depends on if you're using the term "crop" correctly. Are you talking about trimming the edges or removing the background pixels? I often hear newbies saying "crop" for both of those.
Trimming the edges? The background is white and removing the background also removes some pixels that I don't want removed.

And you want to keep the rest of the canvas intact. Correct?
yes
🤔 but they said they want to make another layer and many, layer mask?
Then u can just use magic erase tool?
I was saying that in response to the crop tool being suggested
Draw guides (if you want to help make a selection). Draw a selection. Add Layer Mask.
If you are fine with the area that was removed, you could always Apply the Mask. If not, just leave the mask. You can always revert back later if you need to.
That's the point of the Layer Mask.
Thanks, that seems to be what I'm looking for, sorry for any confusion I've caused 😅
Don't sweat it. There are like 6 ways to crop something in Photoshop. :)
tell me all of em
Your assignment is to list all the 6ways to crop smth in photoshop..
If I wanted to make it so that the character art is only inside of each rectangle, how would I go about doing that? I've been messing around with masks and I have no idea what I'm doing 😅

Essentially, I want to crop them to the shapes
do you want them to only be displayed inside the red square?
I ended up figuring it out! I used clipping masks to achieve this:

ah awesome, was going to suggest the layer mask technique
where you just group your line art and whatever, and make a mask for that groyup

I'll keep that in mind for next time. Thanks!
e.g.

Also anyone know how i can make sure my line work is all connected so when i use the magic wand tool it doesn't go everywhere?
i can always fill them in by drawing them but there are small holes sometimes where its really hard to find

No, I think that this is a point that should be enhanced in Photoshop, we’d need a “gap” tolerance for the wand/selection tools.
damn thanks, was trying out using some actions from Kyle action set, but my lines are too thin for it to work.
Right now i guess the most decent solution is: increasing your line weight.
making the magic wand selection, and then decrease the selection by 1px or so (until it reach the orginal line work) and then colour as needed. fixing the gaps
Gave +1 Creative Carma to @hushed niche (current: #16 - 144)
Hello i am jobair. New at this server. I want to learn adobe photoshop from zero to advance free. I searched many youtube channel to start my work. But can't choose which channel or google resources are actually suitable for me. plz hlp.
Select the Learn option in PhotoShop, it has tutorials for beginners through to experts
💀 delete this before u get serious actions against u
and Sandrine is here 😭
I'm scared I'mma run good luck if u survive the wrath of sandrine
Just for your info, you are writing in the OFFICIAL Photoshop server, the one maintained by Adobe. I will have to delete your question.
Know that you can get Photoshop for cheap by choosing a Photography plan (£10 per month when taken for a year)
Cheaper than Nitro!
Am I THAT scary? I failed my mission then 😅
Hello do you have a similar filter/effect applied to the image ?

sounds like a vhs tv
you can try smth like this

I think you'll have to use " Overlay " blending mode but you can try other modes and see if they look better
Thank you
@quartz nebula enviar aquí

que puede deberse a:
1. Archivo dañado o formato no compatible – El documento podría estar corrupto o en un formato no admitido.
2. Problemas de sincronización en la nube – Si el archivo está en Adobe Creative Cloud, podría haber un problema de sincronización.
3. Problemas de permisos – Si el archivo está en una ubicación restringida (por ejemplo, un disco en red), la aplicación podría no tener acceso.
4. Error del software o versión desactualizada – Actualizar las aplicaciones de Adobe podría solucionar el problema.
5. Fallo temporal – Reiniciar la aplicación o el equipo a veces lo resuelve.
Soluciones posibles:
• Haz clic en “Volver a cargar” para intentarlo de nuevo.
• Comprueba si el archivo se puede abrir fuera de la aplicación de Adobe.
• Intenta abrir el archivo en otro programa de Adobe o un visor diferente.
• Si es un PDF, prueba abrirlo con otro lector como Chrome o Foxit Reader.
• Si está en la nube, descárgalo y prueba abrirlo localmente.
• Asegúrate de que Adobe está actualizado a la última versión.
¿Puedes enviar el archivo que estás intentando abrir?
Para poder intentar abrirlo en mi Photoshop.
gracias
no mepermite descargarlo
debe ser un problema de la nube...
gracias por tu tiempo!
how to make this kind a glow?

Make a rectangle (red for exemple) then click on the fx icon at the bottom of the layer panel then select « outer glow » >choose red color then play with size and blend mode (screen one is OK if you work on a Black background) to get the effect you want.
how do I get an effect similliar to this?

like frank said or if you want a brighter glow you could make a solid color layer of the color glow you want, sent the blend mode to linear dodge then lightly paint with a brush on 10-20 flow
You want that specific "brush shape" or you want a Brush that you can paint with like that?
Because there are painterly type of brushes that can do that.
How long have u been on Photoshop
How do u know everythin'
Experience
😒 Nerd 🤣
any thing that would get a similiar effect
I will check that website, thanks for the help
Gave +1 Creative Carma to @ripe quest (current: #3 - 2642)
Do 20,000+ projects with Photoshop and then you'll understand.
no thnx Sire 😭
Lemme live
lol
Then don't ask questions that you don't want the answers to.
I'm assuming you mean the Kyle Webster Brushes at Adobe? Yeah. There a lot of brushes there that might help.
Chill 😭 why u get so serious so soon
Window > Contextual Task Bar... to toggle it on/off ...or...

i am blind!!!
Is there any way to create a brush with a patern of some numbers to paint with that and be able to recreate some letters?


Filter/Noise
Add noise
thank you mate
If you want to apply it over a multi layers design I would suggest you to create a 50% Gray layer on top set to Overlay, turn it into a smart object then apply the Noise filter to it.
alr man , I appreciate it so much.
Any ideas on how to apply that numbers styles to those letters?

So you're trying to copy credit cards for some reason?
It's just not for me 😅 what would I be able to by just doing so?
I don't know.
What is this for?
Fiverr
Hope this is not against this server rules 😅
But, could you help me with it?
We generally don't help people commit crimes or with unethical or nefarious tasks. This seems "questionable."
So I ask again... what is this? Not "Fiverr." What are you doing here?
HEY , if i want to use a displacement map for a text and my source or texture isnt black and white , is it ok? ( like a paper teexture)
I'm following my buyer's instructions... I'm just scanning a photo of his credit card digitally...
usually displacement map are grayscale and must be in a PSD format.
Perhaps it could work with a colored one but will only take in count brightness values of the colors…
50% color value doesn’t ove pixels, 0% moves left or down, 100% moves right or up…
How do I add damage to the covering of this outlet, exposing metal bits inside of it? This is for a personal fork/remaster of a mod for Half-Life 2.

When I render this Video with a Transparent Background the background afterwards turns Black


🤔
trying opening it on different application
it appears so because of ur windows preference
can u show ur export setting with layers
This is photoshop yeah
.

video?
i thought u said it's photoshop
It is
is it animated?

MP4 doesn't support alpha transparency. You'd have to use a different format.
🥲
exactly what came next to my mind
lol
i was like video and transparent background 💀
QuickTime and Apple pro Res 4444 support tranparency, I believe. Ask the pros in the Adobe Video server what they suggest.
it does :)
@proven shard https://discord.gg/adobepremiere
@proven shard
Best Video Formats for Transparency
1. WebM (VP9 / VP8) – Best for web use, widely supported.
2. MOV (Apple ProRes 4444 / Animation Codec) – High-quality, great for professional editing.
3. PNG Sequence – Individual images with alpha, useful for compositing.
4. AVI (RGBA with codecs like Ut Video, CineForm, or HuffYUV) – Windows-friendly.
5. EXR Sequence – Best for ultra-high-quality VFX workflows.
I've tried QuickTime rn but it didnt work either
The problem is I only have 3 Formats
QuickTime, H.264 and DPX whatever that is
Oh well I have PNG sequence too
but are those single images
yes, which then have to be converted to a video
u will get an image for each frame which u combine to make a video
Is this easy to make
U could send me the file i could try quicktime
To convert a PNG sequence to a video with transparency, you can use FFmpeg, Adobe Premiere Pro, After Effects, or DaVinci Resolve.
Adobe Premiere Pro / After Effects
1. Import PNG Sequence
• Go to File > Import, select the first PNG → Check Image Sequence.
2. Drag to Timeline → Adjust frame rate if needed.
3. Export as Transparent Video
• Format: QuickTime (.mov) or WebM
• Codec: ProRes 4444 (for MOV) or VP9 (for WebM)
• Enable Alpha Channel in export settings.
DaVinci Resolve
1. Import PNG Sequence → Drag into the timeline.
2. Set Alpha Mode → In Clip Attributes, set “Alpha Mode” to Premultiplied.
3. Export → Select QuickTime (MOV, ProRes 4444) or WebM (VP9).
FFmpeg (Free & Fast)
If you have a folder with image_0001.png, image_0002.png, …, use this command:
ffmpeg -framerate 30 -i image_%04d.png -c:v libvpx-vp9 -pix_fmt yuva420p output.webm
•    -framerate 30 → Sets frame rate to 30 FPS (adjust as needed).
•    -i image_%04d.png → Loads images in sequence (0001, 0002, ...).
•    -c:v libvpx-vp9 → Encodes in WebM VP9 (supports transparency).
•    -pix_fmt yuva420p → Enables alpha channel (transparency).
•    output.webm → Saves as transparent WebM video.
For Apple ProRes 4444 (MOV):
ffmpeg -framerate 30 -i image_%04d.png -c:v prores_ks -profile:v 4444 output.mov
I will just make the backgrounds for the video first and then export the video with a background
gotta do that 2 times tho for 2 different sizes
send me the file I'll have a look if that is fine?
is there a way i can use image mode -> index color while preserving transparency?
i want to apply a custom color palette to a tileset, but it flattens the image and turns the background white, which then conflates it with the lighter portions of the image.
@grizzled spade - We appreciate your willingness to help here but please don't post GPT-generated responses to questions in the server.
i did some research and it seems that .ACO files might be able to contain transparent as a color, it still won't skip the step of flattening with a white background
You can choose transparency if you're converting to Indexed Color. Any transparent layers should retain their transparency. However, the transparency is binary, either on or off. There is not variable opacity.

well my issue is that before i can even get to that screen, it flattens my image and applies the background
then also, if you instead choose a custom palette rather then local perceptual, the transparency option is not selectable

how could i create a brush with this shape keeping colours and making that the pattern is always straight?

I wanna be able to paint with that
Brushes are made with Black to White image.... Black areas will give you 100% opacity, White areas 0% opacity and shades of gray different level of opacity depending % of black... Not sure you can achieve what you want to do with a brush.
and what would you do to apply that shape to some letters?

Are you talking about the Emboss effect on the text?...Are you trying to forge a credit card image?
Does anyone know why my Photoshop hasn't detected my graphics card for a while now and I can't select "use graphics processor" in Preferences > Performance? I've tried everything...
im using a png for my logo and it has rough edges to everything i do with it kinda comes out bad, does anyone know how i can fix this?

Logo are usually worked on vecotr based program like illustrator so that they don't pixalte and stuff
but u could try filter>sharpen
Hello guys, how would you reccomend I change the colors of this jersey completely without killing the sharpness from the paint bucket?. The colors are black shirt, grey/black jersey, yellow numbers/collar color. This is really tricky for me but if you could help I’d appreciate it

AI did not work for this one either, i told it just to make the color of the jersey black and the shirt black as well and it turned into a suit somehow 😭😂
press command + shift +3 for full screen screenshot or command + shift + 4 for speicifc area screenshot
school mac 😞
too lazy to edit on my pc
actually i could probably send a screenshot give me a minute though
make a qucik selection of the jersey and mask it or command + j to make a new layer
then u can add Hue/saturation to change it's color to black
then do the same for number and collor
Oh my god you’re so smart br
I just got an insane amount of dopamine off of that message @grizzled spade I love you
since u want it to be yellow, don't forgot to check the colorize button in the hue/saturation botttom section
Okay so I also need to get rid of the “Hawks” and replace it with “Pratt”
then do that first
how would you reccomend that because I’d have to tilt it and transform it to look realistic
cause I cant just put a text “pratt” there ykwim, and do i just ai the box to generative fill it there
use a remove tool to get rid of the old one
and then add ur text
Make ur text in desired color and outline which i am expection u know
after than u can wrap it or use wave to tilt it
u can do it manually
I'll send a video for the text if u are clear upto the section of the other? @lapis mulch
I lowkey just lasso tooled and it worked well
Yea I’d appreciate if a video of placing the pratt on and then recoloring it
like the wave stuff you said and the changing colors stuff
Devansh bro I appreciate you so much for this like you don’t understand
I’m like intermediate/master to lightroom classic mastery and then i just started photoshop its a whole new level from lightroom
dw we all are learning together
Also I'll just send u how to do it, u can make ur own adjustments, i won't work on detailing and making it perfect since it is useless anyways
(Text tilt) https://we.tl/t-AFU4BZw5PV
1 file sent via WeTransfer, the simplest way to send your files around the world
I hate macbook for having so high files even for 30seconds 💀
@lapis mulch Also if u can't make a good result with that just convert ur text layer to smart object after making outline stroke and color
okay okay
once it's is a smart object u can then go to edit<transform<wrap
Which should be easier
so I kind of messed up the jersey team name color is NOT yellow

black with white outline
so no problem just right click on the text go to Blending option
and then stroke
set it to white color
change the fill to 0% @lapis mulch

Write ur text change the fill to 0%

no right click on the text layer section


Yea so after I set the stroke fill color to white where do i set the fill?
in the layers click on the text layer
and below opacity
Ohh got it
yes i see it
thay works nd so the inside is just invisible now right so when i set it to black

it’ll just be white outline then right
no u need to change the stroke color to white for that

yes if u have no fill and the stroke color is white
yes now it will be
okay so next it number 20
Find a font for it too
they have the same designs as the pratt name
but i dont wanna get rid of the original 20….
This font doesn't look good
yes
bruh if i was on lightroom right now
this would be free game for masking
how do i create a mask here
and just draw
it's easy here and u have many more option
or can i just use object select
no u make a selection
u could try that
i would suggest quick selection tool
😭 I gtg please watch a tutorial which give u basic idea of what each tool in ps is for if u have time
okay okay thanks bro
can someone help me
i took a pic with our new car and it was windy so my shirt made me look fat
how to reduce fat
This link is not working for me
https://www.behance.net/challenge/photoshop

Weekly Creative Challenge
You will not specifically reduce fat per se, but if you go to "filter > liquify" you will be able to reshape the image, so in the case, your shirt.
It takes a bit of trial and error because you need to be somewhat precise and only reshape the shirt and not touch so much the surroundings. so best done on a duplicate layer, later masked.

–
It's day 12 of 30 Days of Photoshop, and today Aaron is showing us how to use the Liquify Tool to drastically improve your photos! Learn how to reshape clothing and add volume to your subject's hair in a non-destructive way, allowing you to make changes to your photo at any time.
Download the Sample Image:
https://phlearn.com/30-days-day-12-l...
That will help
As always, for these kind of things, subtle is best!
Hi, are you targeting the correct layer?
how to make this shape?

Hey guys, does anyone know to create this effect? Maybe you know some tutorials.

This is basically the same shape copied and scaled multiple times. This effect is much easier to achieve in Illustrator and the blend tool
This is a rectangle with subtracted circles on the edges
how to do it? do I just edit it in the same layer?
there's the option with subract layers or new layer
that one right?
You'll have to use pathfinder functions on a rectangle shape ( ) to subtract circles on each of the rectangle shape's corners
ok I will try

Learn how to merge and combine shapes in Photoshop! In this short tutorial, we will explore two simple techniques to merge and modify multiple shape layers, maintaining the vector state of the same.
I hope this video helps you. Thank you so much for watching :)
► TIMESTAMPS:
00:00 What Problem Are We Solving?
01:17 Technique #1 - Combine by Me...
this will help out tremendiously with what I am doing thank you so much
Gave +1 Creative Carma to @serene coral (current: #6 - 924)
why is it that when im resizing an image it looks perfectly clear but when i stop resizing it looks very blurry?

You're upscaling with Auto or Bilinear etc , but the preview isn't showing you the result of the antialiasing algorithm,
l
Set that to Nearest Neighbour and see how you go.
Thank you, this worked!
Gave +1 Creative Carma to @stiff trail (current: #124 - 14)
after I have rendered a flame i'm unable to move or adjust said flame, I can only do this for the path I created

am i missing something or is that not possible ?
Is there a way i can move the Options UI so it goes into the middle of my screen?

i kinda want it in the middle of my screen so i dont have to keep moving my pen/mouse up to the top

yeah i get that those are multimple shapes, but when i try something like this its not scaling how i would want it to scale.

da you guys know how i could make that effect? or scale this outline like in the image above this one
Hello guys, I'm back
In this video, I'll show you how to use Actions in Adobe Illustrator to create a cool OFFSET Effect in one click.
So, I hope you learn something new and stay creative.
Font :
MatchColors Script By @SergOsokinArt
https://github....
hello anyone know how to make the text lean back a little? (i'm a beginner)

oh thank you so much
Gave +1 Creative Carma to @serene coral (current: #6 - 925)
you can grab it by the handle and move around

ah very nice very good thank you
Gave +1 Creative Carma to @serene coral (current: #6 - 926)

Modify, Distort, or Add Filters to Text without Rasterizing it in Photoshop! Learn how to use smart objects to keep the text completely customizable.
🚀 Join PiXimperfect Pro - The Ultimate Photoshop Training Course: https://pix.live/pro
Hope this tutorial helps. Thank you!
► SHARE: https://goo.gl/IUhnUl
►LET'S CONNECT:
Facebook: http://facebo...
You rendered the flame. If you adjust the path, you need to run the filter again. More info about that filter: https://jkost.com/blog/2014/10/flame-generation-comes-to-photoshop-cc.html Not sure how it behaves if run on a smart object.

If you've ever needed to create flames, be sure to check out the new Flame Generator filter in Photoshop CC. This new feature is designed to render realistic flames on user-defined paths. You need to create your path first (using the pen tool or any of the shape tools), then choose Filter > Render > Flames.
thx bro
Gave +1 Creative Carma to @serene coral (current: #6 - 927)
fortnite? more like NickEh30
Yeah thats a fortnite map
hello can someone help beginner
I want to make poster that is scalable. How i can make this?
What do you mean by scalable?
I want to make poster that is 150x80mm and also 220mmx115mm. Printing company says that it wont have enouh resolution for 220mm
and how i can make poster that isnt blurry? size 150x80mm 330ddpi. text is still blurry, whats wrong?

maybe i should hire proper designer lol. feeling stupid not able to make one poster that has only normal texts. lol
hey completely new to ps
how do i make images like this

and this

like distorted (almost) beyond recognition
and if there's a better-suited software or technique for this kind of thing, please do tell me
u can do so in photoshop
But there are many ways of doing this

In this photoshop photography photo editing tutorial, I'll show you how to create amazing and incredible abstract painting effect easily using patterns in photoshop. #photoshop #painting #photoeffects
►Download Image: https://shorturl.at/fJNZ4
►Download patterns: https://shorturl.at/p0139
CHAPTERS:
00:25 Remove background from the photo
01:15...
This is one way in this they are not using the brush tool
But as u said u area complete beginner this should help
oh hey, thx for the link. Sad thing we can't see the ajustements in real time but i guess that would be too demanding for the average cpu
Gave +1 Creative Carma to @hushed niche (current: #16 - 145)
Hi @faint swallow
Use a blend in Illustrator:


ty
Gave +1 Creative Carma to @grizzled spade (current: #91 - 20)
all fonts from adobe fonts are free to use for commercial use right?im 99% sure but i seen some bs people be talking abt
Yes, check for yourself: https://helpx.adobe.com/fonts/using/font-licensing.html
Hi, fonts can have different aliasing methods, which one did you pick?
Hi, It’s almost the same ratio; if you print at a bigger size, that’s the size you need to design to, indeed scaling a smaller design is not the best. The fonts would scale if not rasterized, but the images should be at the correct resolution.
Hi, you could search for distort>displace tutorials, or data moshing ones.
Hello everyone, It's my first time here and I'm a complete noobie when it comes to Photoshop. I was trying to figure out if it was possible to put a product image into a ai generated background. For example the following 2 images. I've already figured out a way to remove the black sunglasses in the AI generated image. But when selecting the sunglasses from the other image (and removing all the background) it still looks weird. I'm sure that this is a pretty dumb question but I'm just wondering if there is any resource/video that explains this.


As @hushed niche said anti-aliasing mode can be changed as shown in this short video.
If you compare the two images you'll see that:
There is a perpective and shadows on the first one.
Ok I see, adding a shadow will indeed change a lot. But does the perspective matter that much?
It's a very light perspective you can try without... Your brain will say you if it's correct or not but you definitevly need to add cast shadow.

WHY IS IT LIKE THIS
Its only going to trim off completely transparent pixels. Your image has some sort of glow or drop shadow applied. It's faint but you can see it pushing out toward the edges. Trim won't "trim" that off.

oh thx
Can someone tell me what is this font?

ITC Ronda

It seems that the font is the same for all the text in your image.

Thanks
Check that post for all the methods to find fonts in an image
https://www.instagram.com/p/CqughxJstif/
What do you do when you find a font you like, but then have no idea what it is: You use a font identifier!
Whether it's in an app like Photoshop or Adobe Capture, or using online resources online: I got you covered!
See the links below:
https://fonts.adobe.com/
https://www.whatfontis.com/
http://www.identifont.com/
https://new.myfonts.com/WhatT...

You can even identify fonts within Photoshop!
sorry bad english why my photoshop laggy/cursor choking or brush delay maybe shuttering im use laptop rtx4060 i9-13900hx ram32. i render architect plan with 300ppi resolution it still laggy when zoom in/out or pan so my laptop spec ist enough?

You can tick off 30 bit display (unless you got one of course, if you do, lucky you!)
What you don't say is how big (in pixels) your document is
it 11703 x 8278 px
In any case, here is something you may want to read
https://helpx.adobe.com/uk/photoshop/kb/optimize-photoshop-cc-performance.html
Tweak your operating system, hardware, and application settings to help your computer run Photoshop stably at the optimum speed. If Photoshop is running slower than expected on your computer, or if you're experiencing system freezes, lags, or delays while using Photoshop, try the tips and techniques outlined in this document.
That's quite big
you may need more scratch disk as well
What is your prefered language?
my language is THAI
OK< I was trying to give you that help webpage in Thai, but it seems it's only available in a small amounts of translations
You can still use either Google translate or DeepL
owh ok thank you very much
There is a Thailand based page, but it's still in English 🙂
Thanks for the reminder! And there is also a dedicated Reddit: /r/identifythisfont
Gave +1 Creative Carma to @vapid flume (current: #8 - 875)
Hi, is there a way to upgrade the installed RAM amount on the laptop? I guess it uses an SSD, not a hard drive.
Hello. Is there a way to disable the colored border surrounding a selected layer ?
It's in Photoshop 2024
Try Ctrl+H
With the move tool active (V) you can uncheck « Show transform controls » too.
And-Or go to view/show/ and be sure « Layer Edges » is unchecked.
OK. Thank you
There are also these settings... Move Tool > Options Bar > Gear Icon

How do i round the black edges up, so its more smooth, like the corteiz logo.


If you're using a Layer Style > Stroke effect then you'll need to adjust the original shape.
I used the expansion on the modify pannel for the black outline
If its a vector shape, then you can work on the anchor points.
Its not a vector shape
There is no "Modify" Panel so describe how you can created the stroke.
select > modify > expand
And? You selected the text layer. Expanded the selection and used Edit > Fill? Made a shape and added a Color Fill Layer? How was it created? Feel free to share a screen shot of the document with the Layers Panel visible.

It appears you just made a selection and filled it with black. You'll either have to paint on that layer to smooth out the edges. ..or.. you could also make a selection and convert it to vector path and then adjust the anchor points.
How do i make a selection and convert it to vector path?
One moment
You can do it this way but its going to require learning to use some of the vector tools, e.g. Direct Select and Pen functions.
If you have the original shape as font or vector art, there might another way.
You could convert the original font to shape and work on it that way as well. "If" that is an option...
alright thx ill try
You could also try to do the same technique on the just the "Alpe" layer. Convert it to a vector path and then apply a stroke to that.
Hi, could someone please give me advice on how to create interesting splatter textures like this? When I try to do it, it just looks like a flatly coloured blob. I'd really like to make 'homemade' ones, not use premade textures

You might be able to simply find (or make) a custom Brush to do that.
Thank you!
Do you want that exact shape?
It would be nice, if you have advice for that
hey
i got a PSD graphics pack and i was wondering if i can export its all layers at once
without just doing it layer by layer
Here you go. If you like, you can drag and drop the ABR file into your Brushes panel and you can paint with it. If you just want the shape, just tap once with it. If you want to paint strokes with it, you might want to adjust it in Brush Settings....
It's impossible to know that. It really depends on what files are in this "graphics pack."
Hi, if the excellent and precise method by DHumann is too tedious, you could try one of the oldest Photoshop tips: blur and tighten. Make a copy of the black layer, hide it, then on the other one, run a Gaussian blur, then use levels and bring the two triangles together; you might want to convert the layer to a smart object first, to be able to find the best settings: http://www.sai.msu.su/~megera/gimp/KPT/KPT4/KPT4.html
textures/effects/etc
Hi, there is a way to export several layers, if you use Generator: https://helpx.adobe.com/photoshop/using/export-artboards-layers.html but the best format will depend on what is in each layer
Learn how to export your documents, artboards, and layers in different formats and sizes.
I still have no idea what that means.
There are many PSDs with many layers in each or?
You know that PSD got layers right
I got a PSD file that got many layers
I want to save each layer(alone)
Without doing it one by one because it will take ages
I guess i figured it out
Open the PSD. Go to: File > Export > Layers to Files...
Sorry. When someone says "graphics pack" it can mean 100 different things. :)
Hahahahha yeah sorry i didn't know how to say the information correctly
That's amazing!! Thank you. Did you make this manually?
Gave +1 Creative Carma to @ripe quest (current: #3 - 2643)
Yes. I made the Brush for you. You're welcome. :)
I’m really struggling how to remove text from a image can someone do it for me please
Could you share your image to let us see how we can help you?
I wanna get rid of the writing

A simple selection and generative fill works…

Wassup guys!!!
If you have a question about Photoshop you can post it here. If you just want to chat with people please use the #💬chat-general channel.
Oh sure, thank you.
Gave +1 Creative Carma to @viral palm (current: #9 - 686)
Tysm
Uhmm is it possible for someone to make me a pfp
I got it half edited by sumone else
website down?
I just subscribed to adobe
and it wont let me download creative cloud neither photoshop or other app
https://adobe.com works for me

Which browser are you using?
Chrome
yeah neither
it stops at 2%
saying for network error
while its fine
Not sure. I just downloaded the CC installer. Worked fine.
what is wrong with me then..
I don't know. Is your internet connection flaking out? Can you stream a YouTube video or something without problems?
yeah my network is good
Weird. Creative Cloud looks good according to Adobe. Status is green: https://status.adobe.com/
Adobe Status provides service availability and performance impact information for all Adobe products and services. It includes incidents and maintenances that are ongoing or in the past that affect Adobe products.
I even tried from opera browser
and still the same
Opera won't work though. That's an unsupported browser. Even if it did allow you to download, it might redirect you to the wrong installer.
Any VPN or anything like that?
No I dont have
Not sure. Seems to be working.
I press on download

And it just changes the link
without something downloading

are you sure everything is good?
how would i make this images outline/gray color black

I really need a fast response to this one
On pc, if you double click a mockup template it opens as a smart object so I can import stuff- how do I do that action on iPad?
Any site or whatever where i can easily make my png logo to a 3d logo like this, its spinning.


Not sure to understand ... Something like this?

i need to make the color of the "border" black, just change the grey to black
just darken that color ig
Try to press F or Tab
OK... Try this...
Note: to split the blend if cursor at the end of the video Hold alt+click on the cursor.

tysm ❤️
why does this happen, and how do I fix it

the file in question ↓

can someone PLEASE try to import it
Open it in Photos (in Windows) and save it as a PNG.

Is your internet connection slow? Or your computer?
Are you downloading from the CC app or the web?
& how much RAM memory does your computer have?
Web
64gb
There you go. I recommend downloading from the CC app. It tends to work better
the thing is this is not getting downloaded either 😦

Interesting. Maybe refresh the page or restart your computer.
Both tried
You have to download the Creative Cloud app. Install that. Then install Photoshop using the Creative Cloud app.
the download for the cc doesnt start either
Did you register for a 7 day trial or something?
You said, "I'm glad I'm not paying." Photoshop isn't free.
yeah the student one
ik dont worry
but since the free trial is there, it told me to pay from 6th feb
The free trial ends of 6 Feb?
You'll have to contact Adobe Customer Care. There must be something up with your Adobe Account. The site and downloads are both working.
Same for me.
alright thank you
Gave +1 Creative Carma to @ripe quest (current: #3 - 2644)
Or if you're getting this as part of a Teams Plan through your school, you might have to contact the plan admin at your school
But I would start by contacting Adobe Customer Care. They can tell you pretty quick based on your account info.
k thank you once again
I agree.
I wish I could I help but mods don't have access to people's accounts on the Discord.
@green crescent - You can't advertise here.
Where?
You posted several times for some gumroad site
You just said "you can"
Sorry. Typo. "can't"
Doesn't matter. We can't verify everything every person wants to post here.
how do i make a new layer with stuff not shown in the clipping mask
What?
Not sure what this means.

You want to make a new layer and hide something on that layer?
theres more to the black stuff
Is this a a Photoshop document that you've gotten from someone?
no
Please share a screen shot of Photoshop with the Layers Panel open so I can see what layers are in the doc.

That looks like Photopea. Not Photoshop.
works the same
Well, I don't use or know Photopea.
what would you do in photoshop
Right-click on it and choose "Release clipping mask"
You should read the Photopea user guide. I'm pretty sure its in that app somewhere or on their website.
ok

hey yall, im ending up with a weird problem with exporting to png where theres a weird border as displayed below

i tried using inverse selects to clear it out, but it seems immune
any solutions?
never mind
apparently just cropping it works
Okay.
Would anybody be able to help me make an outline/stencil of a photo
Can you be more specific?

Like an outline of flight for painting
So if I were to say spray paint through the stencil it would leave an outline of him behind
No just to where he would be a stencil of like black and white
If I were to print a photo of him
You can adjust the image and turn saturation and brightness all the way down. That will make him completely black.
Ok lemme try that
Image > Adjustments > Hue/Saturation (Ctrl/Command+U).
&
Image > Adjustments > Brightness/Contrast.
I hate to ask but do you think you would be able to do it for me as I don’t have access to a computer rn
I saw a thing saying to use this Image>Adjustments>Posterize
I am not currently on my computer. It is 11pm for me. Please send me a message request and remind me tomorrow.
Hello! I’m a developer working on my first Photoshop plugin using UXP Dev Tools. I was wondering if I need to pay for a license to develop plugins. Is there any way to do this without paying for a full Photoshop license?
I don't exactly know the answer althought I might think you'll need a creative cloud licence, can you get away with a free licence? I don't know. I am just concerned that you won't be able to test your plugin on a Photoshop licence, including having a way to check if it's compatible with newer versions
I certainly had my share of plugins that ceased to work after a ceratin update
In any case you'll probably have better luck in the community forum, set up specifically for extentions developpers
But you can obviously check other related hubs
Awesome! Thanks @vapid flume !
Gave +1 Creative Carma to @vapid flume (current: #8 - 879)
You're welcome!
Hi, could someone advise me with how to make a red background like the one in this image. I really like how it's kind of scruffy and the spray effect at the edges, alone with the scratches of black in it. I've tried a spray brush I have already in Photoshop but it doesn't look as good.

anyone can help me please
This is the one I tried

Same solution as yesterday. Try a custom brush. There are a ton of great brushes here: https://www.adobe.com/products/photoshop/brushes.html
Check the "Spatter" set.

When i add a 2nd drop shadow on blending effects and i change the angle of it ,it changes every single drop shadow on the project
and yeah i use different layers
Uncheck "Use Global Light" for that effect.

appreciate it
Thanks again - I think it's all about finding the right brush
Gave +1 Creative Carma to @ripe quest (current: #3 - 2645)
Yep. Sometimes. You can also create your own brushes too. But that page I shared has a lot of great sets to start with.
Is there is some reason you've shared a link to Google?
How do I imitate this shot?

You need to source the images you want and simply mask the figure (with a graduation at lower part)
quick question. i want to make changes to the selection i already made at the center of my image. i hit ctrl on the mask and make my adjustments, but how do i actually finalize the selection and make the changes?

Hi, I would ask also there: https://forums.creativeclouddeveloper.com

Adobe Creative Cloud Developer Forums
Community discussion and support for Creative Cloud plugin and integration development
Hi, you can click on the mask you want to change and fill the selection with black. You might convert the selection to a mask, by adding a new adjustment layer, then using this mask to replace another one.
thanks for the help!
How do i get rid of the transparent pixels around the edges, i have all ready done, mask from transparency and threshold

I do have one more question. I was trying to select multiple shapes with the pen tool to make 4 distinct selections at once, then creating a separate layers for those selections so that I could hide text behind the new layer.
I did not actually want to make a mask, just a selection I could hide text behind.
I could not figure out how to do this. The only thing I could do was mask the selection. Not actually create a new layer.
Additionally a lot of the pixels disappeared around and in between my penned shapes.
This is all probably the pen tool’s fault, if I had just done one selection at a time it would be fine.
For future reference, is there a way to make multiple selections with the pen tool at once?
https://discord.com/channels/547473772727238676/1334563942164332666 can anybody check this when they're available? 🙏 thanks
Hello,
How do you reproduce white rays?

you would use a radial blur on the areas like this tutorial uses; https://www.youtube.com/watch?v=-VrzSQLjYtk&pp=ygUgaG93IHRvIGRvIHdpbmRvdyBsaWdodCBwaG90b3Nob3A%3D

How to make artificial lighting in Adobe Photoshop CC 2021-Photoshop tutorial
SUBSCRIBE for more content👉 http://bit.ly/wabloby
Tutorial Facebook group: https://www.facebook.com/groups/2556864804580015/?ref=share
If you liked this type of content you can take a tour of the channel because we have more content like this and do not forget to le...
I tried to do the same thing on a single color background but it didn't do anything
I would just draw some shapes with the Pen. Convert to a Smart Object and apply a Blur Filter. Probably reduce the Opacity. Something like this...
There are probably other things you can do but I would start there.
Continue drawing your light rays, add a an Outer Glow Layer Style to the character and you should be well on your way to recreating that same effect.

Once that's done, I use that software to animate it gradually?
As on the sequence
I mean, you'll have to decide how to animate it and which tool(s) to use. I might choose to do it with Adobe After Effects. Not sure what would be the most feasible for you.
are you sure you're selecting the right layers?
it worked well when i tried to do glowing rays
yet yes
what type of brush was used to paint this sand

How can i remove the background effectively?

I don't think there is an effective way. - The background is SO busy that photoshop can't tell the difference between bike and background
I think you'd need to manually path it the old fashioned way.
Using the lasso tool?
The **pen **tool.
But set it to PATH not SHAPE before you start
I'd LOVE someone to prove me wrong btw :)
Hi @final cove
Thanks again - I think it's all about finding the right brush
... and of course a good example photo to test and try out ... like this one:
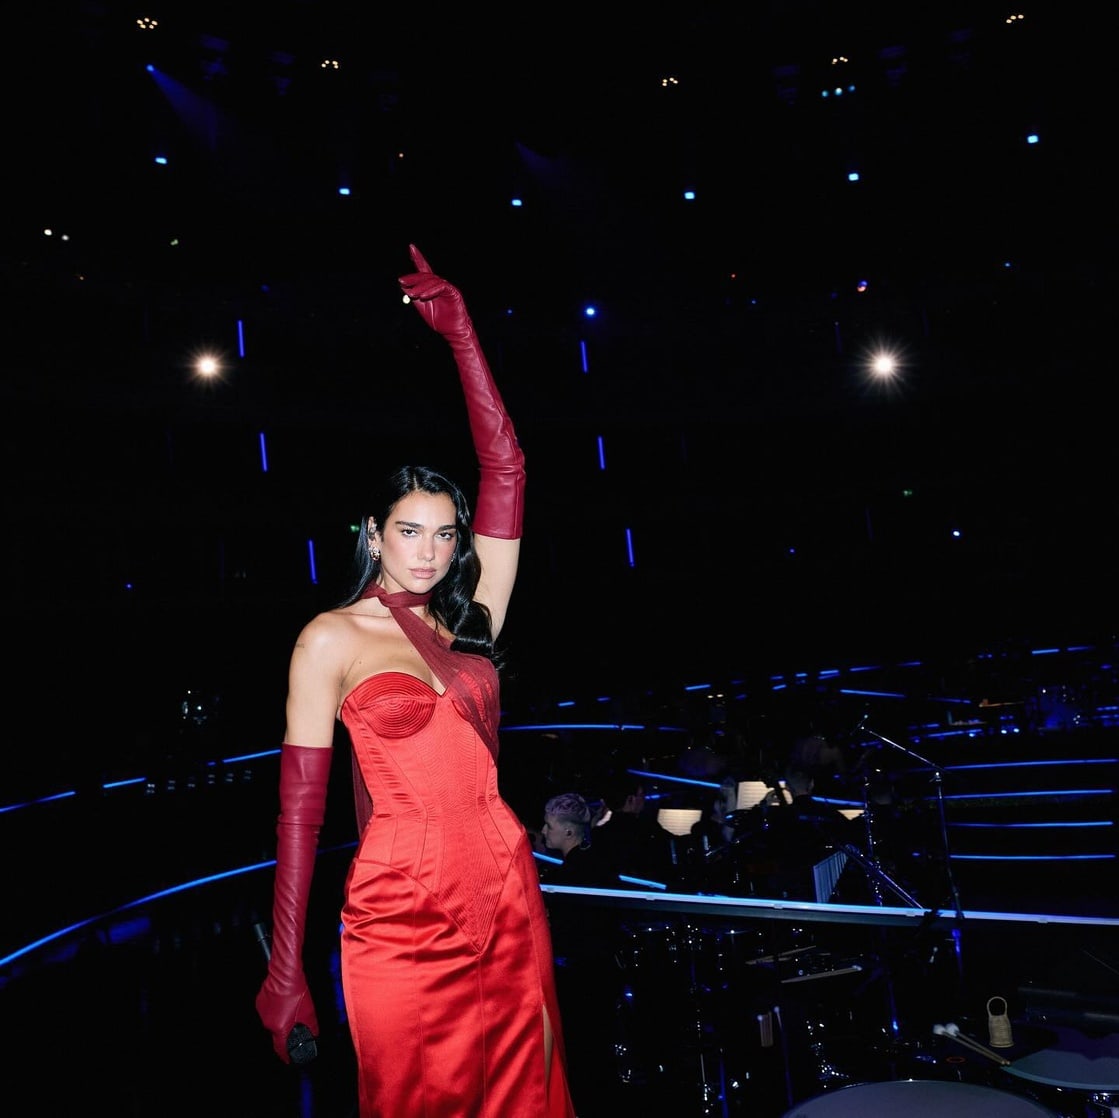
https://ilarge.lisimg.com/image/30497548/1118full-dua-lipa.jpg

Gave +1 Creative Carma to @final cove (current: #966 - 1)
Technically you could get an auto-path applied as a starter, and then modify it, but I think the result would be so bad, you'd be better manually doing it anyway...
Thank you for the help.
Gave +1 Creative Carma to @sly hawk (current: #5 - 1092)
is there an easy way to change the texture/pattern of my text outline ?
so the thing in blue

i can easily do it for the inner part but not for the outer part
Change it, how exactly?
Hi
My image looks like the top image, but when I put it into Photoshop or Aftereffects it loses the bloom


Its a .tiff image
ASAP help would be appreciated
Well like this for example. Only there would be no background and no filling (burgundy color)

Just to add a bit of visual over what @stark wharf has said.
Select > Color Range... maybe. With the selection active, add a Solid Color Fill perhaps. Then modify that. Your original image isn't impacted at all.
Seems like Photoshop isn't properly reading the alpha channel for some reason. Use Windows Photos to save out a PNG and try loading that into Photoshop.
(Also, please don't post the same questions in multiple channels. This is the correct place for questions.)
Problem is I have over 175 of those images
Rendered it through maya as a sequence for a animation
Well, it seems like whatever format options you selected in Maya, Adobe doesn't know what to do with it.
I am trying to create a background like this.

For this bike. Anyone has any tips on how to do it?

Oof, can only render it with .tiff since I need a transparent background
Anyways thanks for trying to help

Hi I need some help... this is a formal and is supposed to be the first to market "pre-sale"
- How could I segregate "City Hall" and the date under yet it still being relevant, like in other words what do I do with it....
- Is everything else okay looking lol.
Blank space at bottom will be for logo but for privacy its not there
I get it but there are a lot of different options for TIFF. Pyramid, Pixel Order, etc. Perhaps one or the other apps either isn't writing or reading the TIFF correctly. Maya won't render an RGBA PNG?

It can render PNG but transparency only available with tiff
Come on, Autodesk! heh
TIFF is so 1997. :)
You can try rendering out 1 file with the various options and see any of them change when you import to Photoshop. Other than that, I dunno.
Just going to use the glow preset in aftereffects tbh
I think "somebody" isn't writing or reading your alpha channel properly.